
One-Pot Anti-Inflammatory Turmeric Chicken Soup for Immunity
Warm Up with My Anti-Inflammatory Turmeric Chicken Soup
Hey there, my fellow food lovers! Welcome back to Feastical, where we’re all about feel-good eats that not only taste amazing but also nourish your body and soul.
Today, I’m thrilled to share one of my all-time favorites: Anti-Inflammatory Turmeric Chicken Soup! It’s the kind of dish that warms you from the inside out, especially on those chilly evenings when all you want is something cozy and satisfying. This soup is packed with nutrients thanks to turmeric, a golden-spiced superstar known for its anti-inflammatory properties. Plus, it’s loaded with fresh vegetables and tender chicken that make it a perfect meal for any day of the week.
Now, this recipe isn’t just about filling your belly; it’s a heartfelt reminder of the importance of delicious comfort food in our lives. So, grab your favorite mug or a trendy bowl, and let’s dive into the details of this delightful dish!
A Taste of Nostalgia
Growing up, my childhood home always smelled of savory stews and bubbling broths. My mom had this magical recipe book she would lug around, filled with notes, spills, and happy memories. But her chicken soup? It was legendary.
I remember cool autumn days when I’d return from school, my fingers cold from the brisk air, and there it was—a pot of steaming soup waiting for me on the stove. The aroma was intoxicating, a fragrant symphony of spices that promised deliciousness.
As I grew older, I started experimenting with my own versions of chicken soup, discovering spices that enhanced flavor and boosted nutrition. Turmeric quickly became a staple in my cooking after hearing about its health benefits and vibrant hue. It’s funny how memories attached to food can make each bite taste even better. Now, this Turmeric Chicken Soup warms my heart, just as my mom’s did, while also fitting perfectly in my kitchen today!
Ingredients
Here’s what you’ll need to create this goodness:
-
1/4 cup olive oil
Great for sautéing and adds healthy fats. You could substitute with avocado oil for a higher smoke point or melted coconut oil for a slight sweetness. -
1 medium onion, diced
Offers a beautiful base for the soup. If you’re not a fan of onions, shallots can be a milder, sweeter option. -
1 large leek, white and light green parts only, halved lengthwise, and thinly sliced
Leeks add a delicate flavor. If unavailable, use extra onion or a couple of green onions in a pinch. -
3 large carrots, thinly sliced
Carrots provide sweetness and color. Feel free to swap with parsnips for an earthier sweetness. -
3 stalks celery, thinly sliced
Adds crunch and depth. If you’re not keen on celery, bell peppers could work, too. -
1 teaspoon kosher salt
Enhances flavor. Adjust according to your taste; sea salt or Himalayan pink salt are great alternatives. -
3 cloves garlic, chopped
Because who doesn’t love garlic? It boosts immunity, so feel free to throw in a few extra cloves if you’re feeling bold! -
1 teaspoon turmeric
The star of our show! Known for its golden hue and health benefits, if you can’t find fresh turmeric, ground will do just fine. -
1 teaspoon poultry seasoning
A blend of thyme, sage, and rosemary that elevates any chicken dish. If you’re feeling adventurous, try making your own blend with your favorite herbs! -
6 cups chicken broth
Provides the soup base. Use homemade for the best flavor, or low-sodium store-bought. Vegetable broth can work for a lighter version too! -
1 (13.5 ounce) can coconut milk
Adds creaminess and a hint of sweetness. Swap with heavy cream or evaporated milk for a richer flavor, or omit for a lighter taste. -
1 1/4 pounds boneless skinless thighs or breasts
Both are great options—thighs are juicier, while breasts are leaner. Use rotisserie chicken for a faster meal. -
1 (10 ounce) bag frozen peas (optional)
A pop of color and sweetness! Feel free to skip or replace with green beans or chopped broccoli. -
1/4 cup chopped fresh parsley
Fresh herbs brighten flavors! Basil or cilantro could also work well, depending on your tastes. -
1 teaspoon kosher salt, or to taste
Seasoning is key! Just keep in mind to adjust based on your broth. -
1/2 teaspoon black pepper
A dash of spice that elevates the entire dish!
Step-by-Step Instructions
Alright, let’s get cooking! Here’s how to whip up this delightful soup:
-
Heat the Olive Oil:
In a large pot over medium heat, add the olive oil. Let it warm up for about a minute. This step is crucial because it helps bloom the flavors of the vegetables we’ll add next. -
Sauté the Veggies:
Toss in your diced onion and sliced leek. Sauté for about 5-7 minutes until they’re translucent and fragrant. Keep stirring occasionally to prevent any sticking at the bottom. The aroma will start filling your kitchen, and let me tell you, it’s one of the best parts! -
Carrots and Celery Next:
Add the sliced carrots and celery. Stir them in and let them soften for another 5 minutes. These veggies add so much texture and flavor to the soup. -
Season with Salt and Garlic:
Sprinkle in the kosher salt and add the chopped garlic. Stir it well and let them cook for an additional minute. Garlic loves a short cook time; it can get bitter if overcooked. -
Spices, Baby:
Make the pot aromatic by adding the ground turmeric and poultry seasoning. Don’t be shy—stir for about 30 seconds to a minute to let those spices toast up beautifully! -
The Broth Comes in:
Pour in the 6 cups of chicken broth. Give it a good stir to combine everything. Bring this to a gentle simmer, and let the flavors meld together. -
Coconut Milk Love:
Pour in the can of coconut milk! Not only does this make the soup creamy, but it also adds that tropical flair. Stir well! -
Add the Chicken:
Now it’s time to add your chicken—thighs or breasts, you decide. Allow the chicken to poach gently in that bubbling broth. This should take about 15-20 minutes. You’ll know it’s done when it’s cooked through and juicy. -
Shred It Up:
Once the chicken is cooked, remove it from the pot and let it cool slightly. Then shred it using two forks (or your fingers if you’re feeling adventurous!). Toss the shredded chicken back into the pot. -
Frozen Peas (If Using):
If you’re using frozen peas, stir them in now and let the soup cook for another 5 minutes. They’ll warm up quickly and add a lovely pop of color! -
Garnish and Serve:
Finish with fresh parsley and adjust the taste with more salt and pepper as needed. Serve the soup hot, optionally with some crusty bread for dunking!
Serving Suggestions
Plating soup can be an artform, so let’s make it count! Use a large, deep bowl that allows for easy sipping. Ladle the steaming soup into your bowls, ensuring a good mix of chicken, veggies, and broth in each serving.
For that extra wow-factor, sprinkle with more fresh parsley or even a dollop of Greek yogurt or sour cream for creaminess! Consider serving with a few slices of freshly toasted bread or a light salad on the side for a complete meal.
Recipe Variations
Ready to mix things up a bit? Here are some fun variations you can try:
-
Spicy Addition: Add a pinch of cayenne pepper or red pepper flakes for a warming kick. Just be careful—start small and taste as you go!
-
Herb Swap: Experiment with different herbs like thyme or cilantro to switch up the flavor profile. Fresh dill can also add a delightful zing!
-
Vegetarian Version: Replace chicken with hearty chickpeas or lentils and use vegetable broth alongside the coconut milk for a satisfying plant-based meal.
-
Thai Twist: Add a tablespoon of lime juice and some fish sauce for an Asian-inspired version. Serve it topped with cilantro and a squeeze of lime!
-
Noodle Nice: Incorporate your favorite noodles (like rice noodles or whole-grain pasta) to give the soup an extra hearty feel. Cook them separately and add them just before serving for perfect texture.
Chef’s Notes
You know what they say: cooking is all about improvisation! This soup has evolved through trial and error over the years. There was a time when I overcooked the chicken until it turned into something resembling rubber. Lesson learned: poaching gently is key!
And about the turmeric—it can stain! So, make sure to wear an apron (never a bad idea anyway) and use a non-reactive pot if you can. But hey, a little color on your counter can add to the homey vibe, right?
FAQs and Troubleshooting
Q: What if my soup is too salty?
A: If you find it too salty, try adding a peeled potato to the soup while it simmers. The potato absorbs excess salt. Just remember to remove it before serving!
Q: How can I make the soup thicker?
A: For a thicker soup, you can either puree part of it using an immersion blender or mix 1 tablespoon of cornstarch with water to create a slurry, then stir it in until the desired thickness is achieved.
Q: Can I make this soup ahead of time?
A: Absolutely! This soup tastes even better after sitting in the fridge for a day. Just keep the chicken separate if you’re going to store it for more than a day to avoid overcooking.
Q: What should I do if it’s too spicy?
A: If your soup turned out too spicy, stir in some more coconut milk to mellow the flavors or add sugar to balance out the heat.
Nutritional Info
This Anti-Inflammatory Turmeric Chicken Soup is not just comforting; it’s also packed with nutrients:
- Calories: Approximately 350 per serving
- Protein: 25g (great for muscle recovery)
- Fiber: 5g (from all those wholesome veggies)
- Fat: 20g (from the olive oil and coconut milk, which are heart-healthy!)
- Vitamins: Rich in vitamin A, C, and K thanks to carrots and parsley.
Best of all, turmeric has been shown to fight inflammation and was even hailed as an immune booster during cold and flu season — making this soup a perfect addition to your winter meal plan.
Final Thoughts
There’s something utterly nourishing about a bowl of Anti-Inflammatory Turmeric Chicken Soup. It’s more than just a recipe; it’s comfort food that connects us to memories, family, and, ultimately, each other.
Whether you’re enjoying it on a chilly evening, sharing it with friends, or savoring it solo while catching up on your favorite show, this soup makes every moment a little brighter.
Thank you for joining me today! I hope you’re inspired to whip up this recipe and share your own stories of comfort food. Don’t forget to leave a comment below if you have questions or simply want to share how it turned out. Grab your spatula, and let’s keep spreading that love through food. Happy cooking!
Print
Anti-Inflammatory Turmeric Chicken Soup
- Total Time: 45 minutes
- Yield: 6 servings 1x
- Diet: Gluten-Free
Description
Warm and nourishing chicken soup infused with anti-inflammatory turmeric and loaded with fresh vegetables.
Ingredients
- 1/4 cup olive oil
- 1 medium onion, diced
- 1 large leek, white and light green parts only, halved lengthwise and thinly sliced
- 3 large carrots, thinly sliced
- 3 stalks celery, thinly sliced
- 1 teaspoon kosher salt
- 3 cloves garlic, chopped
- 1 teaspoon turmeric
- 1 teaspoon poultry seasoning
- 6 cups chicken broth
- 1 (13.5 ounce) can coconut milk
- 1 1/4 pounds boneless skinless thighs or breasts
- 1 (10 ounce) bag frozen peas (optional)
- 1/4 cup chopped fresh parsley
- 1 teaspoon kosher salt, or to taste
- 1/2 teaspoon black pepper
Instructions
- Heat the olive oil in a large pot over medium heat for about a minute.
- Toss in your diced onion and sliced leek, sautéing for about 5-7 minutes until translucent.
- Add the sliced carrots and celery, stirring them in for another 5 minutes.
- Sprinkle in the kosher salt and garlic, stirring and cooking for an additional minute.
- Make the pot aromatic by adding turmeric and poultry seasoning, stirring for about 30 seconds.
- Pour in the chicken broth, stirring to combine, and bring to a gentle simmer.
- Add the coconut milk, stirring well to incorporate.
- Add your chicken and poach gently in the bubbling broth for about 15-20 minutes.
- Remove the chicken to cool slightly, then shred it and return it to the pot.
- If using frozen peas, stir them in and let cook for another 5 minutes.
- Finish with fresh parsley and adjust seasoning before serving.
Notes
Serve hot with crusty bread for dunking. Can be made ahead and tastes even better the next day.
- Prep Time: 15 minutes
- Cook Time: 30 minutes
- Category: Soup
- Method: Stovetop
- Cuisine: American
Nutrition
- Serving Size: 1 serving
- Calories: 350
- Sugar: 5g
- Sodium: 800mg
- Fat: 20g
- Saturated Fat: 10g
- Unsaturated Fat: 8g
- Trans Fat: 0g
- Carbohydrates: 30g
- Fiber: 5g
- Protein: 25g
- Cholesterol: 70mg
Keywords: turmeric, chicken soup, anti-inflammatory, healthy recipe, comfort food

Crispy Apple Fritter Bites: 5-Ingredient Snackable Treat
The Delightful Journey of Apple Fritter Bites: A Sweet Indulgence
Hey there, food lovers! I’m Beau Collier, your trusty sidekick in the kitchen, and today we’re diving into a recipe that’s bound to tickle your taste buds and send warm, cozy vibes straight to your soul: Apple Fritter Bites! If you’ve ever had a craving for something sweet and satisfying, you know exactly what I’m talking about. These little bites of bliss blend tender apples, sweet cinnamon, and just enough glaze to make your heart do a happy dance.
Now, you might be asking, “Beau, what exactly are apple fritter bites?” Well, my friends, think of them as little nuggets of comfort that pack all the nostalgic flavors of a traditional apple fritter into a portable, bite-sized treat. Perfect for breakfast, dessert, or even a snack while binge-watching your favorite show—these apple fritter bites will have you returning to the kitchen for seconds.
The beauty of these treats lies not just in their flavor but in the joy of making them. I’m here to guide you every step of the way, sharing tips, tricks, and even a few stories that will make you feel like you’re cooking alongside a friend. So, grab your apron, preheat that oven, and let’s get rolling!
A Slice of Nostalgia
Let me take you on a journey back to my grandma’s kitchen—oh, the memories! Every fall, the comforting smell of cinnamon and freshly baked goods filled her home, and I couldn’t resist sneaking bites of her famous apple fritters. She had this magical touch; every recipe seemed to ooze love, laughter, and warm hugs, and her apple fritters were no exception.
I remember the first time she let me help out. My little hands were covered in dough, and I was tasked with mixing the spices, a job I took on with sheer delight. We’d peel apples together, and she’d tell me stories about her childhood and how her mother used to make these fritters.
Those moments became a tradition, and each batch was met with great anticipation. Even today, when I make apple fritter bites, I can almost hear her humming in the background. It’s a comforting reminder that food is not only about flavor but about connection, love, and remembrance. And today, I want you to create your own memories—let’s dive into the recipe!
Ingredients
To whip up these delightful apple fritter bites, you’ll need the following ingredients:
-
1 1/2 cups all-purpose flour
The backbone of our bites! All-purpose flour provides the perfect base. If you need a gluten-free option, try using a 1:1 gluten-free flour blend! -
2 tsp baking powder
This little gem provides lift and fluffiness. Make sure it’s fresh for the best results! -
1/2 tsp kosher salt
Salt enhances all the sweet flavors. If you’re using table salt, reduce the amount slightly, as it’s more potent. -
2 tsp ground cinnamon
Cinnamon is the soul of the apple fritter! If you want to spice things up, consider trying apple pie spice! -
1/4 cup unsalted butter (melted)
For richness! You can substitute with coconut oil if you’re looking for a dairy-free option. -
1/4 cup granulated sugar
Adds sweetness. Coconut sugar can be a nice alternative for a more caramel-like flavor. -
1 large egg
The binder! If you’re vegan, you can use a flax egg instead (1 tbsp flaxseed meal mixed with 2.5 tbsp water). -
1/2 tsp vanilla extract
For that lovely aromatic touch. Using homemade vanilla extract makes it even better! -
1/2 cup unsweetened applesauce
This adds moisture and flavor. You can also swap this with mashed bananas if you’re feeling adventurous! -
1 1/2 cups finely diced apples (Honeycrisp or Gala)
Fresh apple goodness! Honeycrisp is my favorite for sweetness and crunch, but any firm apple will do.
Glaze Ingredients
-
2 cups powdered sugar
For the sweet, glossy finish. If you’re looking for a healthier option, you could try a powdered erythritol or monk fruit sweetener. -
1/3 cup + 2 tbsp apple cider or juice
This keeps your glaze flavorful! If you’re in a pinch, clear soda works too for a fun twist!
Step-by-Step Instructions
Now it’s time to let the magic happen. Here’s how to make your apple fritter bites:
-
Preheat Your Oven: Start by preheating your oven to 375°F (190°C). This ensures they bake evenly and develop that delightful golden color.
-
Mix the Dry Ingredients: In a large bowl, whisk together the flour, baking powder, salt, cinnamon, and sugar. Make sure there are no lumps. This is where the flavors start to blend, so give it a good whisk!
-
Combine Wet Ingredients: In a separate bowl, melt the butter (you can use your microwave or a small saucepan) and let it cool slightly. Then add in the egg, vanilla extract, and applesauce, whisking until everything is well combined and smooth.
-
Combine Wet and Dry Mixtures: Pour the wet ingredients into the dry ingredients. Gently fold them together until just mixed; be careful not to overmix! The batter should be slightly lumpy—just how we like it.
-
Add Apples: Fold in the finely diced apples, ensuring they’re evenly distributed throughout the mixture. This step adds a lovely texture as well as flavor.
-
Prepare the Baking Sheet: Line a baking sheet with parchment paper or grease it to prevent sticking. Using a cookie scoop or a spoon, dollop small amounts of batter onto the baking sheet, spacing them about 2 inches apart.
-
Bake: Pop those beauties into the oven and bake for about 12-15 minutes or until they’re golden brown. You might notice a heavenly aroma filling your kitchen—just wait!
-
Make the Glaze: While your fritters are cooling, whip up the glaze. In a bowl, combine the powdered sugar with the apple cider or juice. Mix until it’s smooth and drizzle-ready.
-
Glaze the Fritters: Once the fritters are cool enough to handle, drizzle or dunk them into the glaze. Allow them to cool slightly before enjoying. Your kitchen will smell like heaven!
Serving Suggestions
Presentation is everything, folks! For a delightful serving experience, place your apple fritter bites on a rustic platter or a simple white plate to make those golden shapes pop. A sprinkle of extra cinnamon on top adds a beautiful touch and reminds everyone of the deliciousness waiting for them.
Pair these bites with a piping hot cup of coffee or a warm mug of spiced apple cider, which enhances that cozy fall feeling. For a fun twist, serve them alongside a scoop of vanilla or cinnamon ice cream for dessert; trust me, it’s an absolute game changer!
Recipe Variations
Feeling adventurous? Here are some creative ideas to mix things up with your apple fritter bites:
-
Caramel Apple Fritter Bites: Drizzle a touch of caramel sauce over your fritters after glazing for a decadent twist.
-
Chocolate Chip Add-In: Add 1/2 cup of mini chocolate chips to the batter for a delicious chocolatey surprise!
-
Nutty Fritters: Toss in 1/2 cup of chopped walnuts or pecans for some added crunch and flavor.
-
Cranberry Twist: Substitute some of the apples with dried cranberries or raisins for a chewy texture and a touch of tartness.
-
Pumpkin Spice: Embrace fall by adding 1/2 cup of pumpkin puree instead of applesauce and a bit more cinnamon and nutmeg to the batter.
Chef’s Notes
When I make these fritter bites, I often reminisce about those sweet days in my grandma’s kitchen. I’ve experimented with various recipes over the years, tweaking ingredients and techniques until I found the perfect balance between fluffiness and flavor. The trick is really in the mixing—don’t be afraid to get a bit messy, folks!
Remember, kitchen experiments can lead to the tastiest surprises, so let your creativity flow! There might be some funny mishaps along the way, but isn’t that part of the charm? Just keep a towel handy!
FAQs and Troubleshooting
Q: My fritters turned out dense. What did I do wrong?
A: Overmixing the batter is a common culprit! Mix until just combined and don’t be afraid of those lumps.
Q: Can I freeze these fritters?
A: Absolutely! Once they’ve cooled, place them in an airtight container or freezer bag. Just pop them in the toaster oven or microwave to reheat!
Q: What can I substitute for apples?
A: Feel free to experiment! Pears or peaches work exceptionally well if you’re looking for an alternative. Just keep in mind the moisture content.
Q: Can I make these gluten-free?
A: Yup! Use a gluten-free flour blend in place of all-purpose flour and ensure your baking powder is gluten-free as well.
Nutritional Info
Here’s a rough estimate of the nutritional info per apple fritter bite (assuming yields of around 24 bites):
- Calories: 120
- Total Fat: 4g
- Saturated Fat: 2g
- Carbohydrates: 19g
- Dietary Fiber: 1g
- Sugars: 5g
- Protein: 1g
Keep in mind that nutritional values can vary based on exact ingredient brands and variations you make.
Final Thoughts
There you have it, my friends! Your very own journey through the delicious world of apple fritter bites. Whether it’s a cozy afternoon treat or a fun project to whip up with family and friends, these little bites of bliss are sure to bring smiles to the table.
So, roll up your sleeves, embrace the joy of cooking, and create lasting memories with your loved ones. I can’t wait to hear all about your apple fritter adventures! Don’t forget to share your creations or any fun variations you try. Until next time, keep cooking with love and enthusiasm! Happy baking! 🍏❤️
Print
Apple Fritter Bites
- Total Time: 30 minutes
- Yield: 24 bites 1x
- Diet: Vegetarian
Description
These delightful apple fritter bites blend tender apples, sweet cinnamon, and just enough glaze for a sweet indulgence.
Ingredients
- 1 1/2 cups all-purpose flour
- 2 tsp baking powder
- 1/2 tsp kosher salt
- 2 tsp ground cinnamon
- 1/4 cup unsalted butter (melted)
- 1/4 cup granulated sugar
- 1 large egg
- 1/2 tsp vanilla extract
- 1/2 cup unsweetened applesauce
- 1 1/2 cups finely diced apples (Honeycrisp or Gala)
- 2 cups powdered sugar (for glaze)
- 1/3 cup + 2 tbsp apple cider or juice (for glaze)
Instructions
- Preheat your oven to 375°F (190°C).
- Mix the dry ingredients: In a large bowl, whisk together the flour, baking powder, salt, cinnamon, and sugar.
- Combine wet ingredients: In a separate bowl, melt the butter and let it cool slightly, then add the egg, vanilla extract, and applesauce.
- Combine wet and dry mixtures: Pour the wet ingredients into the dry ingredients and gently fold them together until just mixed.
- Add the finely diced apples, ensuring they’re evenly distributed.
- Prepare the baking sheet: Line it with parchment paper or grease it. Dollop small amounts of batter onto the sheet, spacing them about 2 inches apart.
- Bake for about 12-15 minutes until golden brown.
- Make the glaze by combining powdered sugar with apple cider or juice.
- Glaze the fritters once they are cool enough to handle.
Notes
For a fun twist, serve with vanilla ice cream or a sprinkle of cinnamon on top.
- Prep Time: 15 minutes
- Cook Time: 15 minutes
- Category: Dessert
- Method: Baking
- Cuisine: American
Nutrition
- Serving Size: 1 bite
- Calories: 120
- Sugar: 5g
- Sodium: 200mg
- Fat: 4g
- Saturated Fat: 2g
- Unsaturated Fat: 1g
- Trans Fat: 0g
- Carbohydrates: 19g
- Fiber: 1g
- Protein: 1g
- Cholesterol: 30mg
Keywords: apple fritter bites, dessert, baking, cozy treats, fall recipes
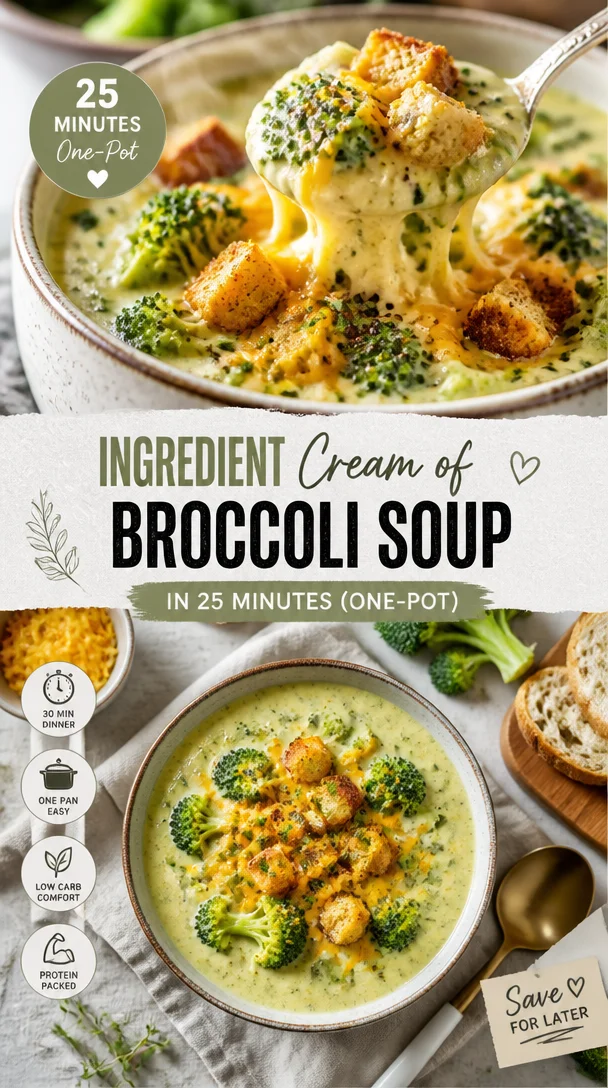
Ingredient Cream of Broccoli Soup in 25 Minutes (One-Pot)
Cream of Broccoli Soup: A Warm Hug in a Bowl
Hey there, food lovers! Welcome to Feastical, where we whip up dishes that feel just as good to eat as they do to create. Today, we’re diving into a timeless classic—Cream of Broccoli Soup. Trust me, once you get a taste of this velvety goodness, it’ll become your go-to for cozy nights in or when you need a little pick-me-up. But before we jump into the kitchen, let me share a little story about why this soup holds such a special place in my heart.
A Trip Down Memory Lane
When I think of broccoli soup, I can’t help but remember chilly winter evenings spent at my grandmother’s house. She had this old, well-loved cookbook that was filled to the brim with handwritten notes and splatters from years of cooking. One particularly frosty night, I walked in to find her humming softly as she stirred a bubbling pot on the stove. The aroma of garlic and fresh broccoli filled the air, a warm welcome that made all my worries fade away.
As a kid, I wasn’t the biggest fan of vegetables—you know, the usual broccoli rebellion most kids go through. But my grandma had a way of transforming them into something magical. She’d ladle that creamy soup into mismatched bowls, and just like that, I forgot about any veggie drama. Instead, I was savoring each rich spoonful and feeling warmth spread through my belly. That experience, bursting with love and flavor, became a cherished memory, a thread woven into my culinary fabric. Now, I replicate her recipe with a twist, sharing my version of this meal that hugs you from the inside out.
Ingredients
Let’s get down to business, shall we? Here are the key players in our Cream of Broccoli Soup. You might already have some of these in your pantry!
-
2 tablespoons unsalted butter
This will add a rich flavor and help sauté our aromatics. If you’re looking for a dairy-free alternative, you can use olive oil or a plant-based butter. -
1 medium yellow onion, diced
A staple in many soups, the onion brings sweetness and depth. If you’re sensitive to onion, feel free to substitute with leeks or shallots for a milder taste. -
2 cloves garlic, minced
Garlic is the superstar ingredient that elevates the flavor profile. For garlic lovers, you can definitely add more! For a milder flavor, consider using roasted garlic instead. -
1 pound fresh broccoli florets, chopped
Fresh is ideal, but frozen broccoli will also work in a pinch. Just make sure to thaw and drain any excess moisture to prevent a watery soup. -
3 cups vegetable stock
This is the base of your soup. If you don’t have vegetable stock, chicken stock is a great option for added flavor. You can also make your own stock to control ingredients, especially salt. -
1 cup heavy cream
Cream gives the soup its signature richness. If you’re looking for a lighter option or a vegan substitute, try coconut cream or cashew cream. -
0.5 teaspoon kosher salt
Always essential but see my notes on seasoning later—taste as you go! -
0.25 teaspoon ground black pepper
This adds a dash of spice. If you want to kick it up a notch, swap with red pepper flakes! -
0.25 teaspoon ground nutmeg
Nutmeg can enhance the earthiness of the broccoli and adds a lovely warmth; however, you can leave it out if you’re not a fan.
Step-by-Step Instructions
Let’s get cooking! Follow these steps, and I promise you’ll have a bowl of deliciousness ready in no time.
-
Prepare Your Ingredients:
Ensure all your ingredients are at hand! This makes for a smoother cooking process. Chop that onion, mince those garlic cloves, and get your broccoli ready! -
Sauté the Aromatics:
In a large pot, melt the unsalted butter over medium heat. Once it’s melted, add in the diced onion. Sauté for about 5 minutes until they soften and turn translucent. Don’t rush this step—this is where the flavor starts to bloom! Toss in the minced garlic and sauté for another minute. The smell will surely tempt your taste buds! -
Add the Broccoli:
Now, it’s time for the star of the show! Add the chopped broccoli florets into the pot. Sauté for about 3-4 minutes. You want the broccoli to retain its vibrant green color but start to soften just a bit. It’s all about layering that flavor! -
Pour in the Vegetable Stock:
Time to add the depth! Pour in the vegetable stock. Bring this concoction to a gentle boil. Then lower the heat and let it simmer for about 10-15 minutes until the broccoli is tender. If you’re feeling bold, give it a taste and adjust that salt and pepper! -
Blend It Up:
Here’s where the magic happens! Using an immersion blender, blend the soup until it’s creamy and smooth. If you don’t have an immersion blender, carefully transfer the soup to a regular blender in batches and blend until smooth. Just be cautious—hot soup can splatter! -
Add the Cream:
Now, back to the pot! Stir in that delicious heavy cream to give it the richness it deserves. Keep it on low heat for just a few more minutes—don’t let it boil! -
Taste and Adjust:
The final step! Taste your soup and adjust with salt, pepper, or a dash more nutmeg. This is your masterpiece—make it sing!
Serving Suggestions
Ah, the best part—serving your creation! Cream of Broccoli Soup always deserves a little love on presentation. Here are some ideas to make it visually stunning:
-
Classic Bowl: Ladle the soup into a rustic bowl (because who doesn’t love a bit of charm?) and garnish with a drizzle of cream. Maybe a few toasted croutons on top for that extra crunch!
-
Herb Garnish: A sprinkle of fresh herbs like chives or parsley can elevate the dish. They add a lovely color and fresh flavor that pairs perfectly with the creamy soup.
-
Bread Sidekick: Serve with a crusty slice of hearty bread or a warm baguette for dunking. Trust me; nothing is better than a good dunk!
Recipe Variations
Now that you have the basics down, let’s add some fun twists! Here are some creative variations you can try:
-
Cheesy Goodness: Stir in a cup of sharp cheddar cheese just after blending. This makes for a creamy, cheesy broccoli soup that’s absolutely scrumptious!
-
Spicy Kick: Add a teaspoon of red pepper flakes or a dash of hot sauce during the sautéing phase for those who like a little heat.
-
Different Greens: Swap out half of the broccoli with spinach or kale for a nutrient boost. They blend beautifully and give your soup a vibrant green!
-
Nutty Flavor: Before serving, sprinkle toasted sunflower seeds or chopped walnuts on top for added texture and a nutty flavor.
-
Vegan Delight: Stick with the vegetable stock, swap the cream for coconut cream or nut milk, and you have a delightful vegan broccoli soup!
Chef’s Notes
This recipe has come a long way since Grandma’s original. I remember her adding whatever was leftover in her fridge to replicate flavors. Over the years, I’ve experimented, and today’s version reflects my love for creaminess with a touch of decadence! Funny story: one time, I realized halfway through that I was out of cream, so I used soy milk instead and added more garlic for flavor. Let’s just say it was a surprise and didn’t turn out half bad!
FAQs and Troubleshooting
-
Why is my soup too thick? If your soup turns out thicker than you want, simply add more vegetable stock or water until it reaches your desired consistency.
-
My soup is too salty! What can I do? If you over-salted your soup, adding a few cubes of potato while it simmers can help absorb some of the salt. You can also add more vegetable stock to balance the flavors.
-
Can I freeze this soup? Absolutely! Just let it cool completely before transferring it to freezer-friendly containers. It can be stored for up to three months. Just thaw in the fridge before reheating.
-
Why is my soup not smooth? If you don’t have an immersion blender, ensure to blend in small batches if using a regular blender. Make sure the lid is secure and don’t overfill to prevent splatter!
Nutritional Info
When calculating the nutritional content for Cream of Broccoli Soup, here’s a rough breakdown per serving (about 1 cup):
- Calories: 280-320
- Fat: 23g (primarily from cream)
- Carbohydrates: 16g
- Protein: 6g
- Fiber: 6g
Keep in mind that variations in ingredients can affect these numbers, especially if you’re adding cheese or cream. Overall, though it’s indulgent, it’s packed with nutrients and can definitely fit into a balanced diet!
Final Thoughts
There you have it—the heartwarming and inviting Cream of Broccoli Soup! Every spoonful is an invitation to slow down, savor, and enjoy life’s simple pleasures. Whether it’s a chilly evening or a cozy lunch at home, this soup makes everything better. So, what are you waiting for? Grab those ingredients, get cooking, and relish the comfort that comes with making something delicious.
Thank you for joining me in my kitchen today! I can’t wait to hear how your version turns out. Feel free to drop a comment or share your thoughts. Until next time, happy cooking, and remember—food is all about love and connection!
Print
Cream of Broccoli Soup
- Total Time: 40 minutes
- Yield: 4 servings 1x
- Diet: Vegetarian
Description
A cozy and creamy broccoli soup that brings warmth and comfort with every spoonful.
Ingredients
- 2 tablespoons unsalted butter
- 1 medium yellow onion, diced
- 2 cloves garlic, minced
- 1 pound fresh broccoli florets, chopped
- 3 cups vegetable stock
- 1 cup heavy cream
- 0.5 teaspoon kosher salt
- 0.25 teaspoon ground black pepper
- 0.25 teaspoon ground nutmeg
Instructions
- Prepare your ingredients: Ensure all your ingredients are at hand.
- Sauté the aromatics: In a large pot, melt the butter over medium heat.
- Add the broccoli: Add the chopped broccoli florets into the pot.
- Pour in the vegetable stock: Bring to a gentle boil and let it simmer.
- Blend it up: Using an immersion blender, blend the soup until creamy.
- Add the cream: Stir in the heavy cream and keep it on low heat for a few more minutes.
- Taste and adjust: Taste your soup and adjust seasonings as needed.
Notes
For a vegan option, substitute heavy cream with coconut cream. Serve with crusty bread or garnished with fresh herbs.
- Prep Time: 10 minutes
- Cook Time: 30 minutes
- Category: Soup
- Method: Blending
- Cuisine: American
Nutrition
- Serving Size: 1 cup
- Calories: 300
- Sugar: 3g
- Sodium: 700mg
- Fat: 23g
- Saturated Fat: 13g
- Unsaturated Fat: 6g
- Trans Fat: 0g
- Carbohydrates: 16g
- Fiber: 6g
- Protein: 6g
- Cholesterol: 70mg
Keywords: broccoli soup, comfort food, vegetarian soup, creamy soup
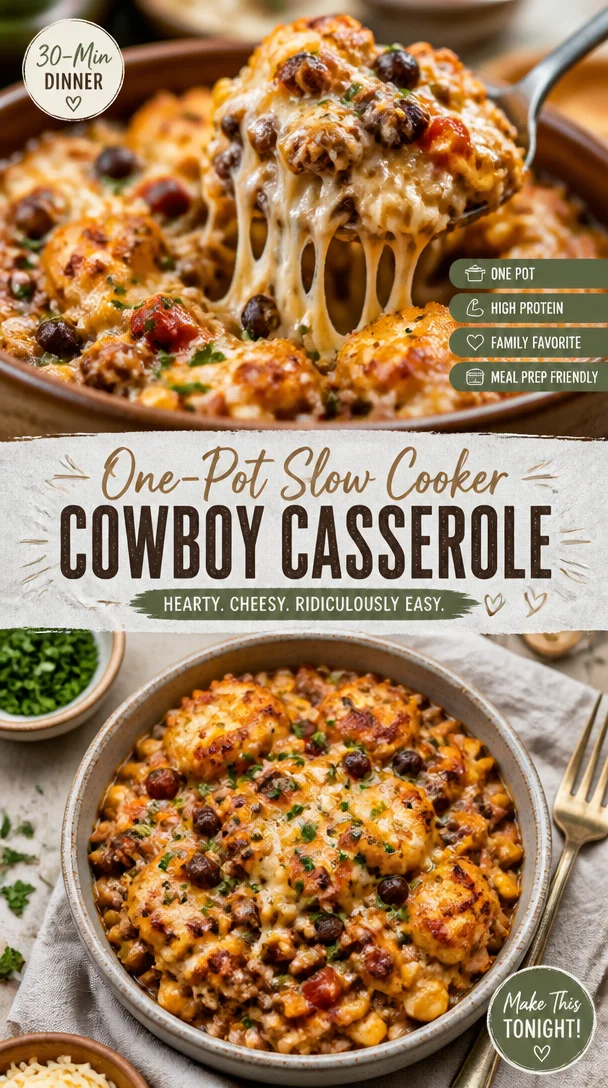
One-Pot Slow Cooker Cowboy Casserole for Busy Weeknights
Slow Cooker Cowboy Casserole: A Comfort Food Classic
Hey there, fellow food lovers! Beau Collier here, and welcome back to Feastical! Today, I’m ready to share with you a dish that’s not just easy to make but also packed with flavor and warmth—the Slow Cooker Cowboy Casserole. If you’re looking for a recipe that wraps you in a cozy embrace while filling your kitchen with mouthwatering aromas, you’ve stumbled onto the right page!
Introduction
Picture this: It’s a chilly evening, and you want nothing more than something hearty that brings everyone together. The kind of meal that feels like a warm hug while making your taste buds do a happy dance. The Cowboy Casserole is one of those dishes that not only satisfies your hunger but also sparks joy at the dining table. It’s vibrant, loaded with goodies, and—wait for it—couldn’t be simpler to whip up!
With just a handful of ingredients and your trusty slow cooker, this casserole is your go-to for busy nights, family gatherings, or when you’re simply craving some good old comfort food. Just toss everything into the pot, set it, and forget it—let the magic happen!
And here’s a little secret: it’s versatile too! You can switch things up based on what you have on hand or your family’s preferences. Want to make it vegetarian? Go right ahead! Or maybe you’d prefer a spicy kick? I got you! We’ll explore all those avenues in this post because I’m all about cooking in a way that suits you.
Are you ready to get the spatula moving and the slow cooker buzzing? Let’s dive into the cowboy spirit and rustle up a delicious meal that will make you the star of your kitchen!
Personal Story
Now, let me take you back to a golden memory in my childhood. Many weekends, my family would gather at my grandma’s farm, buzzing with excitement over our favorite cozy projects. One of my fondest memories revolves around her cooking hearty meals that had us all running to the dining room at the first whiff. It was her Cowboy Casserole that stole the show every time.
I remember how it bubbled away in her ancient slow cooker, its rich aroma wafting through the farmhouse. We’d pile into the kitchen, wide-eyed and hungry, the anticipation palpable. Each spoonful was like a time capsule, transporting us back to family gatherings, laughter, and stories shared around the table. What I love about food is its incredible power to create memories; it’s so much more than just eating. For me, making this casserole isn’t just about satisfying hunger; it’s about recreating those cherished moments with each bite.
Ingredients
Here’s what you’ll need to make this delicious Slow Cooker Cowboy Casserole:
-
1 pound lean ground beef: Try using ground turkey or chicken for a leaner option or plant-based crumbles for a vegetarian version.
-
1 cup finely diced sweet yellow onions: These add a lovely sweetness; if you’re not an onion fan, you can skip them or switch to shallots for a milder flavor.
-
1 tablespoon minced garlic: Because garlic makes everything better! Fresh is preferred, but garlic powder works in a pinch.
-
1 (16-ounce) can dark red kidney beans, undrained: Packed with protein and fiber! You could swap these for black beans or pinto beans if you like.
-
1 (14.5-ounce) can petite diced tomatoes with juice: These provide acidity and sweetness. Feel free to use crushed tomatoes if you prefer fewer chunks.
-
1 (10-ounce) can diced tomatoes with fire roasted hatch chilies, with juice: The hatch chiles bring a loving hug of heat. If you’re a spice whiz, throw in some jalapeños for extra zing.
-
1 cup frozen corn: Adds sweetness and texture. If fresh corn is in season, use it! Just remove the kernels from the cob.
-
1 teaspoon kosher salt: Essential for flavor. Use sea salt or table salt if that’s what you have.
-
½ teaspoon freshly cracked black pepper: For that subtle kick! You could also experiment with a blend of spices if you’re feeling adventurous.
-
¼ teaspoon chipotle powder: If you love smokiness, this will be your best friend. Otherwise, you can skip it for a milder version.
-
1½ pounds Yukon Gold potatoes, sliced about ⅛ inch thick: These creamy potatoes hold their shape well and add body to the casserole. Russets work too, but they may break down a bit more.
-
1¼ cups Colby and Monterey Jack cheese, freshly shredded: The gooey goodness! You can use cheddar, pepper jack, or a dairy-free cheese alternative if you’re avoiding dairy.
Step-by-Step Instructions
-
Prep the Ingredients:
Begin by gathering all your ingredients on the counter. Simple, right? Dice your onions, mince your garlic, and slice those potatoes. This step not only makes cooking easier but also makes you feel like a pro in the kitchen. Fun fact? If you soak sliced potatoes in cold water for about 15 minutes, it helps remove some of the starch—making them even creamier! -
Brown the Ground Beef:
In a skillet over medium heat, brown your ground beef until it’s fully cooked, about 5–7 minutes. Drain excess fat if needed, and stir in the diced onion and minced garlic. Sauté this mixture until the onions are translucent, about 3 minutes. This step adds depth of flavor and will make your kitchen smell heavenly! -
Layer in the Slow Cooker:
Now it’s time to dump all that goodness into your slow cooker! Start with your ground beef mixture, then add the undrained kidney beans, both cans of diced tomatoes along with their juices, and corn. -
Season it Up:
When everything is in the slow cooker, sprinkle in the kosher salt, black pepper, and chipotle powder. Give it a good stir to combine. Remember to taste as you go—seasoning is all about personal preference! -
Add the Potatoes:
Firmly layer the sliced Yukon Gold potatoes on top. You don’t need to mix them in; just let them nestle on top of your flavorful mixture. -
Cover and Cook:
Place the lid on your slow cooker and set it to low for 6–8 hours or high for 3–4 hours. Let it work its magic! If you’re working from home, give it a quick peek halfway through and stir gently to integrate those flavors. -
Time to Cheese it Up:
About 15–20 minutes before serving, sprinkle the shredded cheese over the top and allow it to melt. This is when the magic happens! The ooey-gooey cheesiness mixed with the hearty mixture is pure bliss. -
Serve It Up:
When you’re ready to feast, use a ladle to serve up generous portions. This dish is best enjoyed hot, so gather your loved ones around.
Serving Suggestions
For plating your Slow Cooker Cowboy Casserole, I recommend serving it in deep bowls so everyone can appreciate the layers. You can top it off with a dollop of sour cream or Greek yogurt, which adds creaminess and balances the spices. A sprinkle of fresh cilantro or green onions can brighten it up visually and taste-wise!
For extra heartiness, consider serving this casserole with a slice of warm cornbread or crusty bread to soak up all those delightful juices. And if you’re feeling fancy, whip up a simple side salad with mixed greens, avocado, and a light vinaigrette; this will cut through the richness of the casserole beautifully.
Recipe Variations
-
Veggie Lover’s Casserole: Substitute ground beef with black beans or lentils and double up on the veggies. Add diced bell peppers, zucchini, or mushrooms for more color and nutrients.
-
Southwestern Twist: Stir in some taco seasoning with your meat, and add jalapeños for that extra kick.
-
Cheesy Broccoli Version: Layer fresh or frozen broccoli on top with the cheese for an added crunch and nutrition boost.
-
Spicy Cowboy Delight: If you love spice, increase the amount of chipotle powder, or add some hot sauce directly into the mixture for an extra punch.
-
Breakfast Casserole: Use shredded hash browns instead of sliced potatoes and sprinkle in some scrambled eggs at the end for a delightful brunch variation.
Chef’s Notes
This Slow Cooker Cowboy Casserole has evolved over the years in my kitchen! Initially, I started with just a classic recipe, but as I embraced cooking more creatively, I found myself adding twists that reflected my flavor preferences and seasonal ingredients. One memorable change was using roasted tomatoes in the summer, lending a beautiful sweetness to the dish.
Every time I make this casserole, it surprises me how it can both impress guests and be a no-fuss meal for just me on a busy weeknight. It’s amazing how food can adapt over time, just as we do!
FAQs and Troubleshooting
-
Can I leave it on low all day?
Yes! It’s a great set-it-and-forget-it meal. Just make sure you have a good, reliable slow cooker. -
What if my potatoes are still hard?
If you find them undercooked at the end, just give it a little more time. You can cook it an additional 30 minutes on high to soften them up. -
Can I freeze leftovers?
Absolutely! This casserole freezes beautifully. Just cool it completely, store in an airtight container, and enjoy up to 3 months later. -
Is it supposed to be soupy?
It should have some liquid, but if it’s too soupy, you can reduce the amount of liquid next time or leave the lid off for the last hour of cooking to let steam escape.
Nutritional Info
This hearty casserole offers a balanced meal packed with protein, fiber, and complex carbohydrates. One serving contains approximately:
- Calories: 420
- Protein: 25g
- Carbohydrates: 50g
- Dietary Fiber: 10g
- Total Fat: 15g
Don’t forget, these values may vary based on your specific ingredients and portion sizes, so adjust and enjoy according to your dietary needs!
Final Thoughts
And there you have it—your new go-to recipe for an easy, delicious, and heartwarming meal that’ll keep your stomach full and your spirit high. This Slow Cooker Cowboy Casserole is not just a dish; it’s a celebration of flavors and a vessel for memories.
Every time you stir up this recipe, remember you’re carrying on a tradition of warmth and togetherness. So, throw on your apron, round up the family (or make it just for you!), and let this casserole work its magic.
Thanks for joining me today! I hope you enjoy making and sharing this Cowboy Casserole as much as I do. Until next time—happy cooking, friends! Keep those forks ready!
Print
Slow Cooker Cowboy Casserole
- Total Time: 375 minutes
- Yield: 6 servings 1x
- Diet: Beef
Description
A hearty and flavorful slow cooker casserole perfect for busy nights and family gatherings.
Ingredients
- 1 pound lean ground beef
- 1 cup finely diced sweet yellow onions
- 1 tablespoon minced garlic
- 1 (16-ounce) can dark red kidney beans, undrained
- 1 (14.5-ounce) can petite diced tomatoes with juice
- 1 (10-ounce) can diced tomatoes with fire roasted hatch chilies, with juice
- 1 cup frozen corn
- 1 teaspoon kosher salt
- ½ teaspoon freshly cracked black pepper
- ¼ teaspoon chipotle powder
- 1½ pounds Yukon Gold potatoes, sliced about ⅛ inch thick
- 1¼ cups Colby and Monterey Jack cheese, freshly shredded
Instructions
- Gather all your ingredients on the counter. Dice your onions, mince your garlic, and slice the potatoes.
- Brown the ground beef in a skillet over medium heat for 5–7 minutes. Drain excess fat and stir in the diced onion and garlic.
- Dump the ground beef mixture into the slow cooker along with the kidney beans, both cans of tomatoes, and corn.
- Sprinkle in the kosher salt, black pepper, and chipotle powder, then stir to combine.
- Add the sliced Yukon Gold potatoes on top without mixing.
- Cover and cook on low for 6–8 hours or high for 3–4 hours.
- Sprinkle the shredded cheese over the top 15–20 minutes before serving.
- Serve hot in deep bowls, possibly topped with sour cream and fresh herbs.
Notes
You can modify this recipe by using ground turkey or chicken for a leaner option, or substitute beans for a vegetarian version.
- Prep Time: 15 minutes
- Cook Time: 360 minutes
- Category: Main Course
- Method: Slow Cooking
- Cuisine: American
Nutrition
- Serving Size: 1 serving
- Calories: 420
- Sugar: 5g
- Sodium: 800mg
- Fat: 15g
- Saturated Fat: 6g
- Unsaturated Fat: 6g
- Trans Fat: 0g
- Carbohydrates: 50g
- Fiber: 10g
- Protein: 25g
- Cholesterol: 70mg
Keywords: cowboy casserole, slow cooker, comfort food, hearty meal, family recipe

Minute Pumpkin Pie Crescent Rolls: A Cozy Fall Treat
The Cozy Comfort of Pumpkin Pie Crescent Rolls
Hey there, food lovers! If there’s one thing that warms my heart and fills my kitchen with joy, it’s the delicious aroma of freshly baked goods. Today, we’re diving deep into the world of comfort food with a twist—Pumpkin Pie Crescent Rolls! These delightful little treats combine all the flavors of classic pumpkin pie with the easy-to-handle charm of crescent rolls. Perfect for cozy gatherings, holiday celebrations, or an indulgent snack any day of the week!
Let’s face it, pumpkin pie is already a beloved dish, but who says we can’t spice things up a bit? By wrapping creamy pumpkin filling in flaky crescent dough, you’ll get that same beloved flavor in a fun and inviting form. Plus, these rolls are so simple to whip up that even beginner bakers will feel like kitchen rockstars!
So, grab your favorite apron, and let’s get started on a journey that will fill your home with the irresistible scent of warming spices and sweet goodness. Trust me, your friends and family will be lining up for seconds—and maybe even thirds!
A Bite of Nostalgia
Growing up, my fondest memories are entwined with the simple act of baking. My grandmother had a magical kitchen filled with treats that were as delightful to see as they were to taste. One of my all-time favorites was her pumpkin pie, rich and comforting, always baked to perfection right before Thanksgiving. It was the dish that brought our family together, a holiday staple that signaled it was time to gather around the table and share laughter and love.
But there was a twist! One year during our holiday prep, my grandmother, clutching a can of crescent rolls, boldly declared that she would create a new dessert. Boy, were we all curious! She spread that silky pumpkin filling onto the crescent dough and rolled them up into little bundles of joy. The result? A mix of our beloved pie and a fun, flaky roll that made me feel like it was the ultimate party food.
I’m excited to bring this gem back into your kitchen with my own take on Grandma’s creation. Trust me, once you taste these Pumpkin Pie Crescent Rolls, you’ll have a new family favorite to cherish!
Ingredients Overview
Here’s what you’ll need for these incredible rolls:
-
8-ounce container Pillsbury Crescent Rolls
- These ready-to-roll beauties make the process so simple. If you’re feeling adventurous, homemade crescent dough works too—though we won’t judge you for using store-bought!
-
½ cup canned pumpkin puree
- A must-have for that rich pumpkin flavor. You could also use fresh pumpkin puree if you’ve got some already roasted. Just make sure it’s not the spiced kind!
-
2 tablespoons sugar
- This adds the right amount of sweetness. For a healthier alternative, you can sub with coconut sugar or a sugar alternative like stevia.
-
1 whole egg (divided)
- We’ll use this for binding the filling and a wash for that golden crust! If you’re looking for an egg substitute, try a flax egg (1 tablespoon ground flaxseed mixed with 2.5 tablespoons water).
-
½ teaspoon pumpkin pie spice
- A crafter’s blend of cinnamon, nutmeg, ginger, and allspice to remind you of fall flavors. Feel free to make your own blend, or simply use cinnamon if that’s what you have!
-
½ cup powdered sugar
- This will create a lovely glaze for drizzling. If you need a healthier option, you can blend coconut sugar into a fine powder.
-
1 tablespoon milk
- Adds creaminess to the glaze. Any milk works—dairy or plant-based!
-
1 tablespoon pure maple syrup
- Sweetens our glaze with natural flavor. Honey or agave syrup are great substitutes!
Now that you have your ingredients lined up, let’s get cooking!
Step-by-Step Instructions
-
Preheat the Oven
Preheat your oven to 375°F (190°C). This is crucial for getting those rolls beautifully golden and perfectly cooked. A well-preheated oven can make all the difference in texture! -
Prepare the Filling
In a medium bowl, mix the canned pumpkin puree, sugar, and half of the egg (reserve the other half for later). Add in the pumpkin pie spice as well. Stir until well combined. Here’s my little chef hack: use a whisk to incorporate everything smoothly; it creates a creamy texture that will fill those rolls beautifully! -
Roll Out the Dough
Open your container of crescent rolls. Carefully unroll the dough on a lightly floured surface. You’ll want to keep the triangles intact, so try to avoid tearing them if possible. The flaky layers are what makes this dish special! -
Fill and Roll
Spoon a generous amount of the pumpkin filling onto the wider end of each triangle. Don’t be afraid to load it up—more filling means more flavor! Then roll each triangle from the wide end to the point. Place them seam-side down on a greased baking sheet. This helps keep them from unrolling during baking. -
Egg Wash
Brush the tops of the crescent rolls with the remaining egg. This step ensures a shiny, golden crust. If you want something a little healthier, you can skip this step, but I love that crunchy texture it adds! -
Bake Time
Bake in your preheated oven for about 12-15 minutes, or until they are golden brown. The scent? Absolutely heavenly! Make sure to keep an eye on them from the 10-minute mark onward—it’s easy to go from golden to burnt if you’re not careful. -
Prepare the Glaze
While your rolls are baking, whisk together powdered sugar, milk, and maple syrup in a separate bowl until smooth. This will make our delightful drizzle that completes the dish perfectly. -
Cool and Drizzle
Allow the rolls to cool for about 5 minutes after baking. Then, drizzle your glaze over the top—that sweet, creamy burst takes these rolls to a whole new level!
Serving Suggestions
When serving your Pumpkin Pie Crescent Rolls, think charming and rustic! Arrange them on a welcoming platter and sprinkle some extra powdered sugar on top for an elegant touch. You could also serve them alongside a small dollop of whipped cream or a scoop of vanilla ice cream, making it feel like a cozy dessert experience.
For a little extra flair, consider garnishing with a sprinkle of extra pumpkin pie spice or finely chopped pecans on top. Tie it all together with a steaming cup of coffee or spiced cider, and you’ll have a delightful autumn-themed gathering ready to impress!
Recipe Variations
Now that you’ve mastered the original recipe, why not explore some fun twists? Here are a few ideas:
-
Chocolate Chip Pumpkin Rolls: Add some mini chocolate chips to the filling before rolling them up. The creamy pumpkin paired with chocolate is a match made in heaven!
-
Nutty Crunch: Incorporate chopped walnuts or pecans into your pumpkin filling for a delightful crunch. It adds texture and a lovely nutty flavor!
-
Spiced Up: Experiment with different spices! Add a pinch of cardamom or swap out the pumpkin pie spice with your favorite chai blend for a different flavor profile.
-
Vegan Options: Substitute the egg with a flax egg, use almond milk in the glaze, and swap the butter in the crescent rolls for a plant-based version.
-
Cinnamon Roll Twist: After spreading the pumpkin filling, sprinkle a swirl of cinnamon and brown sugar before rolling them up for an even sweeter treat!
Chef’s Notes
This recipe holds a warm place in my heart, not only because of the memories tied to it but also how it has evolved over the years. Initially, I started with a basic filling, but I’ve experimented with flavor profiles and textures endlessly! My favorite variation so far is definitely the chocolate chip twist—it has been a hit at gatherings!
One of my fondest kitchen mishaps happened when I accidentally grabbed baking powder instead of baking soda for the filling. The rolls puffed up incredibly high but tasted amazing. That’s the beauty of cooking; even mistakes can lead to delicious discoveries!
FAQs and Troubleshooting
-
Why are my crescent rolls not rising?
Ensure your oven is preheated properly. Premade crescent rolls rely heavily on the heat to puff up. If they don’t feel flaky and rising, the dough may have lost its freshness—check your expiration dates! -
Can I make this ahead of time?
Absolutely! You can prepare the rolls a few hours ahead, just keep them covered in the fridge until you’re ready to bake. They may require an extra minute or two in the oven due to the chill. -
What if the filling leaks out?
If this happens, don’t fret! Make sure you’re rolling them tightly. If you do experience leakage, you can always serve them with a scoop of ice cream to help soothe the flavor mishap! -
How do I store leftovers?
Store any leftover rolls in an airtight container at room temperature for up to two days. If you want to keep them longer, you can refrigerate them and reheat in the oven for a minute or two to retain their flaky crust.
Nutritional Info
Each Pumpkin Pie Crescent Roll (estimated based on recipe with no additional toppings) contains approximately:
- Calories: 150
- Total Fat: 7g
- Saturated Fat: 1.5g
- Carbohydrates: 20g
- Fiber: 1g
- Sugars: 5g
- Protein: 2g
Note: Nutritional info may vary based on specific brand ingredients or substitutions used.
Final Thoughts
These Pumpkin Pie Crescent Rolls are not just a dessert; they’re a gateway to memories, comfort, and shared moments with the people you love. Whether it’s for a cozy fall gathering or just because you deserve a treat, these rolls will undoubtedly bring joy to your kitchen and your taste buds. The best part? They’re so easy to prepare that you’ll be whipping these up to impress anyone who steps foot into your kitchen!
So, roll up your sleeves, dive into this recipe, and share your creations with friends and family. Remember, cooking is all about joy, laughter, and creating unforgettable experiences—one flaky roll at a time. Happy baking, my fellow foodies! Let’s keep celebrating the magic of good food, and I can’t wait to see how you make this recipe your own!
Print
Pumpkin Pie Crescent Rolls
- Total Time: 30 minutes
- Yield: 8 servings 1x
- Diet: Vegetarian
Description
Delicious crescent rolls filled with creamy pumpkin filling, offering the perfect blend of classic pumpkin pie flavors in a fun, flaky form.
Ingredients
- 1 (8-ounce) container Pillsbury Crescent Rolls
- ½ cup canned pumpkin puree
- 2 tablespoons sugar
- 1 whole egg (divided)
- ½ teaspoon pumpkin pie spice
- ½ cup powdered sugar
- 1 tablespoon milk
- 1 tablespoon pure maple syrup
Instructions
- Preheat your oven to 375°F (190°C).
- Mix the canned pumpkin puree, sugar, and half of the egg in a medium bowl.
- Open the container of crescent rolls and unroll the dough on a floured surface.
- Spoon a generous amount of the pumpkin filling onto the wider end of each triangle.
- Roll each triangle from the wide end to the point and place seam-side down on a greased baking sheet.
- Brush the tops of the rolls with the remaining egg.
- Bake for about 12-15 minutes, or until golden brown.
- Whisk together powdered sugar, milk, and maple syrup for the glaze.
- Cool the rolls for about 5 minutes, then drizzle with glaze.
Notes
Serve warm with a sprinkle of powdered sugar or a dollop of whipped cream for an extra treat!
- Prep Time: 15 minutes
- Cook Time: 15 minutes
- Category: Dessert
- Method: Baking
- Cuisine: American
Nutrition
- Serving Size: 1 roll
- Calories: 150
- Sugar: 5g
- Sodium: 250mg
- Fat: 7g
- Saturated Fat: 1.5g
- Unsaturated Fat: 4g
- Trans Fat: 0g
- Carbohydrates: 20g
- Fiber: 1g
- Protein: 2g
- Cholesterol: 30mg
Keywords: pumpkin, crescent rolls, dessert, Thanksgiving, fall treats

Minute One-Pot Hungarian Mushroom Soup: Rustic Comfort
To-Die-For Rustic Hungarian Mushroom Soup
Hey there, soup lovers! Today, I’m thrilled to take you on a flavorful journey to Hungary with a cozy bowl of Rustic Hungarian Mushroom Soup. This dish is special to me—not only because it’s incredibly delicious, but because it embodies the essence of comfort and warmth that comes from a home-cooked meal. So, grab your apron and your favorite spoon, and let’s dive into this delightful recipe together!
Introduction
There’s just something magical about a steaming bowl of soup on a chilly day, isn’t there? The feeling of warmth enveloping you as you take that first spoonful is simply unparalleled. This Rustic Hungarian Mushroom Soup is not just another soup; it’s a celebration of earthy flavors and comforting aromas, steeped in rich Hungarian culinary tradition.
Growing up, I was lucky to have family members who mastered the art of soup-making. I remember being mesmerized by my grandmother as she stirred her giant pot on the stove, releasing a bouquet of scents that would fill the entire house. It was her love for mushrooms that inspired this cozy recipe. She would often say, "Mushrooms are nature’s little flavor bombs," and boy, was she right!
This soup revolves around humble ingredients but packs a punch with its layers of flavor, thanks to a personality of paprika, a hint of dill, and a touch of lemon. Whether you’re hosting a cozy dinner party or just craving a bowl of goodness after a long day, this recipe has got you covered.
In our modern fast-paced lives, let’s not forget to slow down and enjoy the process of cooking. Each ingredient has a purpose, and as we navigate through the steps together, I encourage you to imbue your cooking with love. Let’s make this soup not just a meal but a memory!
Personal Story
I’ll never forget the time I decided to host my first dinner party. Eager to impress, I chose to make a variety of dishes, but deep down, I knew this Rustic Hungarian Mushroom Soup had to be the star of the show. The morning of the party, I adventurously scoured the local farmers’ market, gathering the freshest produce I could find. The sight of those vibrant mushrooms, their earthy aroma calling to me, made my heart sing.
Later that evening, as friends gathered around the table, I served the soup as the first course, and the reaction was priceless. Their eyes lit up with delight, and as they savored each spoonful, I could feel nostalgia flooding the room—everyone had their own soup stories. A simple bowl of soup had sparked laughter, memories, and conversations that filled our home with joy.
Ingredients
Here’s what you’ll need to get started on this delectable soup:
-
3 tablespoons butter
The base for our soup, butter adds richness. You can swap it with olive oil for a lighter option. -
2 cups chopped onions
Onions provide a sweet, aromatic foundation. Shallots can also be a wonderful substitute if you want a more delicate flavor. -
1 pound fresh mushrooms, sliced (any kind – a mix is best)
Feel free to get creative! Button, cremini, portobello, or shiitake all work beautifully. A mix of mushrooms deepens flavor and adds character. -
2 teaspoons dried dill weed
Dill brings a light herby taste that balances the rich mushrooms. Fresh dill can enhance the flavor even further. -
1 tablespoon Hungarian paprika
This is the star spice here! It adds warmth and depth. If you can’t find Hungarian paprika, regular paprika will also work, but it won’t have the same complexity. -
1 tablespoon soy sauce or liquid aminos
A dash of umami brings everything together. Tamari is a great gluten-free alternative if needed. -
2 cups chicken or vegetable broth
Homemade broth is best, but store-bought works too. If you prefer a vegetarian version, stick with vegetable broth. -
1 cup milk or plain almond milk
For creaminess! You can use whole milk, skim milk, or any plant-based milk you prefer—just ensure it’s unsweetened. -
3 tablespoons all-purpose flour
This helps thicken our soup. If you’re gluten-free, cornstarch or a gluten-free flour blend could work. -
Ground black pepper to taste
A little fresh pepper enhances flavors—don’t skip this step! -
2 teaspoons lemon juice
Here’s where we brighten things up! Adjust the amount based on your taste—more lemon, more zing! -
1/2 cup sour cream or Greek yogurt
This adds creaminess and tang. A dollop of crème fraîche would work beautifully too! -
2 tablespoons chopped fresh parsley
Fresh parsley finishes the dish with a pop of color and freshness. You can also use chives or thyme if you prefer.
Step-by-Step Instructions
Now that we have our ingredients ready, let’s get cooking! Follow these steps for your delicious Rustic Hungarian Mushroom Soup.
-
Sauté the Aromatics
In a large pot, melt the butter over medium heat. Once it’s melted and bubbling, add the chopped onions. Sauté for about 5-7 minutes until they’re soft and translucent. Pro tip: Add a pinch of salt to help extract moisture from the onions, boosting their flavor. -
Add the Mushrooms
Once the onions are starting to glisten, throw in the sliced mushrooms. Stir well, coating them in that buttery goodness. Allow them to sauté for about 8-10 minutes until they’re soft and slightly browned, releasing their wonderful moisture. If your pot gets dry, add a splash of broth! -
Season the Soup
Sprinkle in the dried dill and paprika, stirring to coat the mushrooms evenly. The paprika will give the soup its striking color! Don’t be shy—this step is essential for flavor. -
Incorporate Liquid Ingredients
Drench the mushroom mixture with soy sauce and stir for about a minute to let the flavors meld. Next, pour in the broth and bring everything to a gentle simmer. Allow it to bubble away for about 10 minutes, letting those flavors develop. -
Thicken the Soup
In a small bowl, mix the flour with a bit of the milk (about 1/4 cup) to create a slurry. Whisk it together until smooth and then slowly add it to the soup while stirring. This avoids clumps. Let it simmer for about 5 minutes until it thickens—you want it to coat the back of a spoon! -
Add Creaminess
Pour in the remaining milk and stir in the lemon juice. This is when things get creamy and dreamy! Keep stirring and simmering for another 5-7 minutes. If you prefer a lighter version, you can use more stock and less milk. -
Season to Taste
At this stage, give your soup a taste test. Add black pepper and additional lemon juice if you like—it should have a balanced flavor profile that sings with comfort. -
Finish with Sour Cream and Parsley
Turn off the heat and stir in the sour cream (or Greek yogurt) until fully blended. This adds a luxurious finish. When serving, garnish each bowl with a sprinkle of fresh parsley for a vibrant touch.
Serving Suggestions
When it comes to serving this delightful soup, presentation matters! Ladle the warm soup into bowls and don’t hold back on garnishing—drizzle a bit of extra sour cream on top and sprinkle with chopped parsley for that inviting look. Serve with crusty bread or a warm baguette on the side, making it perfect for dipping.
For a restaurant-style touch, you can drizzle a swirl of olive oil on top and maybe even add a sprinkle of smoked paprika—it adds a nice smoky flavor and a lovely visual appeal.
Recipe Variations
Looking to switch things up? Here are a few fun variations you can try:
-
Add Protein
Stir in some shredded cooked chicken or chickpeas for added protein. It transforms this soup into a hearty main dish! -
Spicy Kick
If you love heat, add a pinch of red pepper flakes or cayenne pepper while sautéing your onions. -
Herb Infusion
Fresh herbs can brighten the soup even more. Try adding tarragon or thyme for an aromatic twist. -
Mushroom Variety
Experiment with different types of mushrooms—try adding wild mushrooms for a more gourmet flavor or incorporate some dried mushrooms by soaking them first! -
Vegan Version
Easily adapt this recipe by using plant-based butter, almond milk, and omitting the sour cream or substituting with a vegan yogurt.
Chef’s Notes
This Rustic Hungarian Mushroom Soup has evolved over the years into a dish I can whip up effortlessly, trying to capture the flavors of my grandmother’s kitchen. I remember one time I was rushing to prepare this dish for a gathering and accidentally added double the paprika. To my surprise, everyone loved it! It turned into a spicy favorite amongst my friends.
Now, I always advise you to follow the recipe but allow your own experiences and preferences to personalize it. Cooking is about freedom and experimentation—don’t be afraid to make it your own!
FAQs and Troubleshooting
1. What if my soup is too thick?
Add more broth or milk gradually until you reach your desired consistency.
2. How do I store leftovers?
Let your soup cool and store it in an airtight container in the fridge for up to 3-4 days. Reheat gently on the stovetop.
3. Can I freeze this soup?
Absolutely! It freezes well. Just let it cool, store it in freezer-safe containers, and it can be frozen for up to 3 months.
4. What can I do if the flavor isn’t balanced?
If your soup feels flat, a little extra lemon juice or soy sauce can enhance flavors. Adjust seasonings to your taste!
Nutritional Info
While every bowl of this soup is packed with flavor, it also contains a range of nutrients. Mushrooms are low in calories yet high in vitamins D and B, while the onions add antioxidants. The addition of sour cream or Greek yogurt contributes protein and probiotics, making it a nourishing meal!
One serving of Rustic Hungarian Mushroom Soup (approx. 1 cup) contains about:
- Calories: 220
- Protein: 7g
- Fat: 12g
- Carbohydrates: 25g
- Fiber: 3g
Remember, values may vary based on ingredients and portion sizes, so feel free to adjust accordingly to your dietary needs!
Final Thoughts
Cooking is all about sharing love poured into a pot, and this Rustic Hungarian Mushroom Soup embodies that spirit perfectly. It’s a dish meant to be enjoyed with friends, family, or even a cozy night in. So, whether you’re making it for a special occasion or just because it’s Tuesday, know that you’re creating more than just a meal—you’re crafting memories.
Remember, it all starts in the kitchen, where the simplest of ingredients can turn into something wonderful. I hope this soup becomes a staple in your home, just as it has in mine. Thanks for sharing this culinary journey with me—happy cooking, and I can’t wait to hear how your Rustic Hungarian Mushroom Soup turns out! Let’s stay connected; I’d love to hear your stories and variations. Forks at the ready, my friends—bon appétit!
Print
To-Die-For Rustic Hungarian Mushroom Soup
- Total Time: 45 minutes
- Yield: 4 servings 1x
- Diet: Vegetarian
Description
A cozy bowl of Rustic Hungarian Mushroom Soup that embodies comfort and warmth, rich with earthy flavors and a touch of paprika.
Ingredients
- 3 tablespoons butter
- 2 cups chopped onions
- 1 pound fresh mushrooms, sliced
- 2 teaspoons dried dill weed
- 1 tablespoon Hungarian paprika
- 1 tablespoon soy sauce or liquid aminos
- 2 cups chicken or vegetable broth
- 1 cup milk or plain almond milk
- 3 tablespoons all-purpose flour
- Ground black pepper to taste
- 2 teaspoons lemon juice
- 1/2 cup sour cream or Greek yogurt
- 2 tablespoons chopped fresh parsley
Instructions
- Sauté the aromatics: In a large pot, melt the butter over medium heat. Once it’s melted and bubbling, add the chopped onions. Sauté for about 5-7 minutes until they’re soft and translucent.
- Add the mushrooms: Once the onions are starting to glisten, throw in the sliced mushrooms. Stir well and allow them to sauté for about 8-10 minutes until they’re soft and slightly browned.
- Season the soup: Sprinkle in the dried dill and paprika, stirring to coat the mushrooms evenly.
- Incorporate liquid ingredients: Drench the mushroom mixture with soy sauce, stir for about a minute, then pour in the broth and bring to a gentle simmer. Let it bubble for about 10 minutes.
- Thicken the soup: In a small bowl, mix the flour with a bit of milk to create a slurry. Slowly add it to the soup while stirring. Let it simmer for about 5 minutes until it thickens.
- Add creaminess: Pour in the remaining milk and stir in the lemon juice. Continue stirring and simmering for another 5-7 minutes.
- Season to taste: At this stage, taste your soup and add black pepper and additional lemon juice as needed.
- Finish with sour cream and parsley: Turn off the heat, stir in the sour cream until blended, and garnish with fresh parsley before serving.
Notes
Serve with crusty bread or a warm baguette. For added flavor, drizzle with olive oil and sprinkle smoked paprika on top.
- Prep Time: 15 minutes
- Cook Time: 30 minutes
- Category: Soup
- Method: Stovetop
- Cuisine: Hungarian
Nutrition
- Serving Size: 1 cup
- Calories: 220
- Sugar: 3g
- Sodium: 800mg
- Fat: 12g
- Saturated Fat: 7g
- Unsaturated Fat: 4g
- Trans Fat: 0g
- Carbohydrates: 25g
- Fiber: 3g
- Protein: 7g
- Cholesterol: 30mg
Keywords: soup, Hungarian mushroom soup, cozy recipes, comfort food, vegetarian soup

One-Pan Meatloaf with Cheesy Mashed Potatoes (30-Min)
Comforting Meatloaf with Mashed Potatoes and Cheese: A Heartwarming Feast
Hey there, fellow food lovers! I’m Beau Collier, and I believe that every great meal begins with a story. Today, we’re diving into an iconic dish that brings back fond memories for so many of us—meatloaf with mashed potatoes and cheese. When I think of meatloaf, I think of cozy family dinners, a warm kitchen filled with laughter, and the tantalizing aroma wafting through the air—it’s the epitome of comfort food, isn’t it?
There’s something so satisfying about meatloaf. It’s hearty, filling, and incredibly versatile. You can whip it up using whatever seasonal ingredients you have, and there’s a personal touch in every loaf that makes it special. Did you know that meatloaf has been a staple in many households since the Great Depression? It was a clever way to stretch ingredients and feed a crowd, and it has firmly cemented itself in the hearts of many as a beloved classic.
In this blog post, not only will I share my scrumptious recipe for meatloaf smothered in cheesy, buttery mashed potatoes, but I’ll also take you along on this delightful culinary journey filled with personal stories, cooking tips, and a sprinkle of nostalgic magic. So, take a seat, grab your apron, and let’s create something delicious that will have your family gathering around the table, smiles all around!
Personal Story
Growing up, Sunday dinners at my grandparents’ house were sacred. It was always a bite of comfort and tradition, and one dish that consistently made an appearance was Grandma’s famous meatloaf. Let me tell you, her secret involved using a touch of love, a dash of nostalgia, and sometimes, I’d like to think, a little bit of magic.
I remember the first time I helped her in the kitchen, my tiny hands mixing the meat and spices together, making a mess but also a masterpiece. The joy of molding that messy loaf felt like pure creativity, and when it slid into the oven, the transformation was almost mesmerizing. The buttery scent of meatloaf baking mingled with the earthy aroma of roasted potatoes created a symphony that echoed through the hallways of their home.
Grandma always topped her meatloaf with a generous layer of cheese—because let’s face it, cheese makes everything better! Those cheesy mashed potatoes became an essential side, eagerly piling high on our plates, reminding me of the love and warmth that only family meals can bring. With each bite, I felt history unfolding, and that’s exactly the flavor I want to bring to your kitchen today!
Ingredients
Now that we have our hearts warmed up with memories, let’s get cooking! Here’s what you’ll need for this classic meatloaf with mashed potatoes and cheese, plus some little tips to keep in mind.
For the Meatloaf Layer:
- 1 lb ground beef (85/15 preferred): This is the star of our dish! The 85/15 ratio gives you the perfect balance of flavor and juiciness. If you’re going leaner, consider adding a bit of olive oil to keep it moist.
- 1/2 cup plain breadcrumbs: They help bind everything together. You can also use crushed crackers or panko for a crunchier texture.
- 1/3 cup milk: This keeps the meatloaf moist and helps it hold together. Almond milk or any dairy-free version works well if you’re looking for alternatives.
- 1 egg: Acts as a binding agent. If you need a vegan substitute, try using flaxseed meal mixed with water (1 tablespoon flaxseed meal + 2.5 tablespoons water = 1 egg).
- 1/4 cup ketchup: An essential for flavor and moisture! Feel free to use BBQ sauce or even salsa for a zesty kick.
- 1 tsp garlic powder: A must for flavor. Fresh minced garlic works too—just adjust the quantity to your taste!
- 1 tsp onion powder: A nice depth of flavor. If you prefer freshness, sauté finely chopped onions before mixing them in.
- 1/2 tsp salt and 1/2 tsp black pepper: Basic seasonings to elevate your dish. Always taste before final seasoning adjustments!
For the Mashed Potato Layer:
- 3 cups mashed potatoes (prepared or leftover): Whip up fresh or use leftovers for a quick meal. Creamy, buttery goodness is what we’re aiming for!
- 1/4 cup sour cream: This adds a delightful tang and creaminess. Plain Greek yogurt is a great substitute if you’re looking for something healthier.
- 2 tbsp butter: Adds richness and flavor. You can swap it with olive oil for a lighter version.
- Salt & pepper, to taste: Adjust according to your preferences!
Topping:
- 1 1/2 cups shredded cheddar cheese: The melty layer that takes this comfort food to the next level! Feel free to mix it up with mozzarella or pepper jack for some excitement.
- Fresh parsley (optional, for garnish): A pop of color and freshness; it makes everything look fancy!
Step-by-Step Instructions
Alright! Let’s roll up those sleeves and get down to the good stuff. Follow these steps to create a meatloaf that would make Grandma proud!
Step 1: Preheat Your Oven
Before we dive into mixing, preheat your oven to 350°F (175°C). This ensures your meatloaf gets that perfect sizzle!
Step 2: Mix the Meatloaf Ingredients
In a large mixing bowl, combine the ground beef, breadcrumbs, milk, egg, ketchup, garlic powder, onion powder, salt, and pepper. Get your hands in there—this is where the magic happens. I love using my hands for this; it just feels more personal, doesn’t it?
Tip: If the mixture feels a bit too wet, just add a touch more breadcrumbs. Conversely, if it feels too dry, a splash of milk can help transform it. You want a mixture that holds together well but isn’t too dense.
Step 3: Shape the Loaf
Transfer your meaty mixture to a lined or greased loaf pan. Shape it gently—remember, the more you handle it, the denser the meatloaf will be. We’re looking for a fluffy texture here!
Step 4: Bake the Meatloaf
Place your shaped meatloaf in the oven and bake for about 45-50 minutes. You can check doneness by inserting a meat thermometer into the center; it should read 160°F (70°C) for safe consumption.
Chef Hint: If you want a beautiful caramelized glaze, brush additional ketchup on top during the last 10 minutes of baking. It adds flavor and a lovely shine!
Step 5: Prepare the Mashed Potatoes
While the meatloaf is doing its thing, it’s the perfect time to whip up our creamy mashed potatoes. If you’re starting with fresh potatoes, peel and boil them until tender, then mash with sour cream, butter, salt, and pepper until creamy and dreamy.
Step 6: Layer It Up!
Once your meatloaf is cooked, take it out of the oven and slice the top gently to create a small "bowl" for your mashed potatoes. Spoon those mashed potatoes right on top, smoothing them out.
Step 7: Cheese It Up
Lastly, sprinkle the shredded cheddar over the mashed potatoes. Pop the entire loaf back into the oven for about 15 minutes or until the cheese is bubbly and golden brown.
Step 8: Garnish and Serve
Once bubbly and enticing, you’ll want to let it rest for about 10 minutes before slicing. Garnish with a sprinkle of fresh parsley for that pop of color and freshness!
Serving Suggestions
This meatloaf with cheesy mashed potatoes can be the star of the show! You can serve it with simple steamed veggies like broccoli or green beans for a colorful plate. A sprinkle of herbs adds sophistication, while a side salad lends a refreshing crunch.
For an ultimate comfort meal, you can even serve it with gravy drizzled over the top. Trust me; that’s a flavor combo that will have your family raving!
A fun way to serve this dish is in individual ramekins—layer up mini portions for an adorable presentation at dinner parties.
Recipe Variations
Now, let’s explore a few creative twists you can put on this classic dish:
-
Savory Bacon Meatloaf: Mix cooked, crumbled bacon into the meat mixture for a smoky flavor profile.
-
Vegetarian Version: Swap out the ground beef for lentils or black beans, and keep the spices and herbs for that familiar meaty taste.
-
Spicy Twist: Add in diced jalapeños or a few dashes of hot sauce for a spicy kick!
-
BBQ Meatloaf: Replace the ketchup with tangy barbecue sauce for a sweet and smoky flavor.
-
Herbed Mash: Stir in fresh herbs like chives or dill into your mashed potatoes for a fresh twist.
Chef’s Notes
Before we wrap things up, can I just say how much I adore meatloaf? Over time, I’ve made countless variations, but there’s nothing quite like the classic. I once tried to get fancy and added some unexpected ingredients—think chopped olives and gourmet cheeses. Let’s just say, my family had strong opinions that night. Sometimes, simplicity really is key!
And don’t worry if it doesn’t come out perfect! Cooking is about experimentation—embracing flavor, and having fun in the kitchen means making a few culinary memories, sweet or savory.
FAQs and Troubleshooting
Q: Can I prepare the meatloaf ahead of time?
Absolutely! You can mix everything, shape it, and refrigerate it until you’re ready to bake. Just be sure to add a few extra minutes of cooking time if it’s coming straight from the fridge.
Q: Why did my meatloaf turn out dry?
Oh no! Dry meatloaf could be the result of overcooking or using lean meat without enough fat. Consider using a little olive oil when using leaner options to keep things juicy.
Q: How can I tell when the meatloaf is done?
Using a meat thermometer is the best way to ensure it’s safe to eat. Aim for an internal temperature of 160°F (70°C). If you don’t have one, cut into the center—juices should run clear, not pink.
Q: Can I freeze meatloaf?
Yes! It freezes beautifully. Just make sure it cools completely, then wrap it tight in plastic wrap and foil before popping it in the freezer.
Nutritional Info
When it comes to a comfort food like meatloaf with cheesy mashed potatoes, it’s a bit of a hearty dish! On average, a serving may contain:
- Calories: ~450-500
- Protein: ~35g (thanks to that tasty beef!)
- Carbohydrates: ~40g (mostly from the potatoes)
- Fat: ~20g
- Fiber: 2g
It’s important to savor this dish in moderation if you’re looking out for your daily intake, but it’s also packed with vitamins and minerals from fresh ingredients!
Final Thoughts
And there you have it! A recipe that not only fills your belly but also warms your heart. Meatloaf with cheesy mashed potatoes is more than just a meal; it’s a celebration of togetherness, nostalgia, and the joy of cooking. I encourage you to make it your own! Add a couple of your favorite spices, share the process, and perhaps even recreate some cozy memories along the way.
Food tastes better when shared, so invite your loved ones over, serve it hot, and watch as they gather around the table, laughter filling the air. Remember, it’s all about those moments spent together, and I’m so grateful to have shared this recipe with you. Until next time, happy cooking and enjoy the feast!
Print
Comforting Meatloaf with Mashed Potatoes and Cheese
- Total Time: 65 minutes
- Yield: 4 servings 1x
- Diet: Omnivore
Description
A heartwarming feast of meatloaf topped with cheesy mashed potatoes, perfect for family gatherings.
Ingredients
- 1 lb ground beef (85/15 preferred)
- 1/2 cup plain breadcrumbs
- 1/3 cup milk
- 1 egg
- 1/4 cup ketchup
- 1 tsp garlic powder
- 1 tsp onion powder
- 1/2 tsp salt
- 1/2 tsp black pepper
- 3 cups mashed potatoes (prepared or leftover)
- 1/4 cup sour cream
- 2 tbsp butter
- 1 1/2 cups shredded cheddar cheese
- Fresh parsley (optional, for garnish)
Instructions
- Preheat your oven to 350°F (175°C).
- Mix the ground beef, breadcrumbs, milk, egg, ketchup, garlic powder, onion powder, salt, and pepper in a large mixing bowl.
- Shape the mixture into a loaf and transfer it to a lined or greased loaf pan.
- Bake for 45-50 minutes or until the internal temperature reaches 160°F (70°C).
- Prepare mashed potatoes by mashing potatoes with sour cream, butter, salt, and pepper until creamy.
- Layer the mashed potatoes over the cooked meatloaf.
- Sprinkle shredded cheddar cheese on top of the mashed potatoes.
- Bake for an additional 15 minutes or until cheese is bubbly and golden brown.
- Garnish with fresh parsley if desired and let it rest for 10 minutes before slicing.
Notes
For a beautiful glaze, brush additional ketchup on top during the last 10 minutes of baking. This dish goes well with steamed veggies or a side salad.
- Prep Time: 15 minutes
- Cook Time: 50 minutes
- Category: Main Course
- Method: Baking
- Cuisine: American
Nutrition
- Serving Size: 1 serving
- Calories: 450
- Sugar: 5g
- Sodium: 600mg
- Fat: 20g
- Saturated Fat: 8g
- Unsaturated Fat: 8g
- Trans Fat: 0g
- Carbohydrates: 40g
- Fiber: 2g
- Protein: 35g
- Cholesterol: 90mg
Keywords: meatloaf, comfort food, mashed potatoes, family dinner
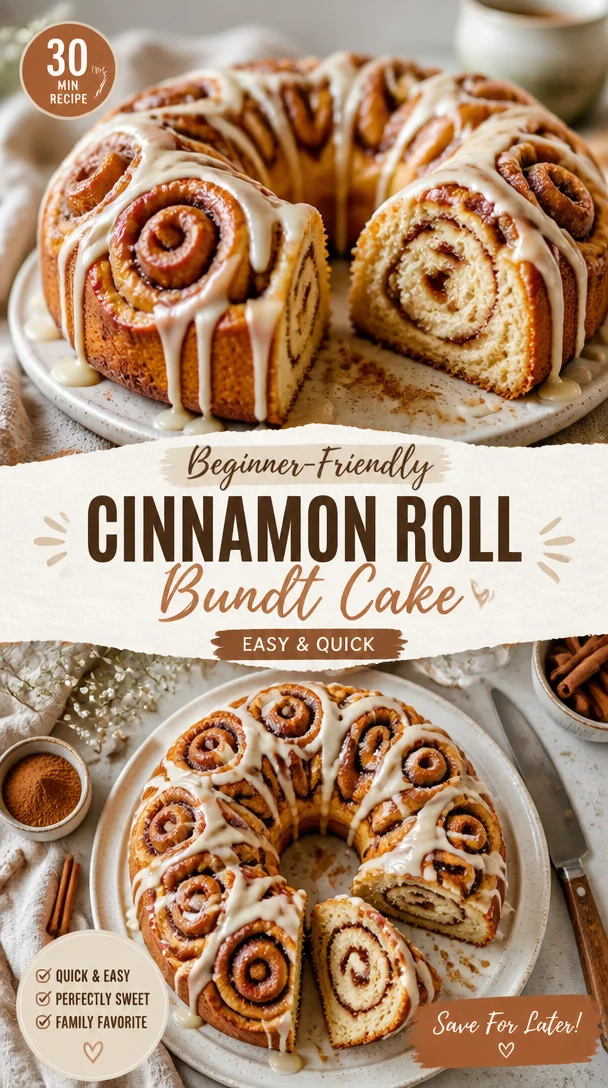
Beginner-Friendly Cinnamon Roll Bundt Cake (Easy & Quick)
Simple & Easy Homemade Cinnamon Roll Bundt Cake: A Cozy Recap of Home and Flavor
Hey there, friends! I’m so excited to share one of my absolute favorites with you today—a delightful dish that combines the classic comfort of cinnamon rolls with the fuss-free charm of a Bundt cake. You guessed it, it’s the Simple & Easy Homemade Cinnamon Roll Bundt Cake! This sweet treat brings a cozy aroma to your kitchen, elevating any day into a special occasion.
Now, picture this: a lazy Sunday morning, the sun peeking through the kitchen window, and the smell of cinnamon wafting through the air. That’s the magic of this cake! Each slice is a wonderful hybrid of soft cake and sticky cinnamon goodness, making it the perfect crowd-pleaser or indulgent treat for yourself. And what could be better than a dessert that not only looks stunning but tastes like a warm hug? I can practically hear the applause from family and friends as they cheer for another round of this delightful cake.
The beauty of this recipe lies in its simplicity. With just a handful of ingredients that you probably already have in your pantry, you can whip up this delightful cake in no time. Whether you’re serving brunch, looking for an afternoon pick-me-up, or simply treating yourself, this cake has your back!
Let’s dive into all the delicious details, and I’ll share my personal story behind this delightful creation, tips and tricks, and of course, how you can customize it to fit your own culinary style.
A Sweet Memory: The Birth of the Cinnamon Roll Bundt Cake
Growing up, Sundays at my grandma’s house were always a treat. She had this magical ability to turn ordinary mornings into festive brunches. The air would be thick with the scent of cinnamon and fresh coffee, and there would always be a batch of freshly baked cinnamon rolls, their gooey centers oozing precious, sweet goodness.
One Sunday, as I was helping her in the kitchen—my favorite place to be—we decided to try something a little different. Instead of rolling and slicing dough like usual, we poured the cinnamon roll mixture into a Bundt pan, a twist that was born from pure curiosity and a pinch of daring! The result? Pure magic! That cake cooked to golden perfection, and when we turned it out onto the serving platter, our hearts danced with delight. As we enjoyed that first slice, it became clear that we’d stumbled onto something special, igniting my love for creating simple yet comforting recipes.
From that day on, the Cinnamon Roll Bundt Cake became a Sunday tradition—a wonderful way to enjoy the comforting flavors of cinnamon rolls without the mess of rolling. I’m excited to share this recipe with you so you can create your own magical moments in the kitchen!
Delicious Ingredients
Before we get to the baking, let’s chat about the ingredients you’ll need to create this scrumptious cake. Here’s what’s on the list:
-
2 cups all-purpose flour: The backbone of the cake! For a gluten-free option, you can substitute with a 1:1 gluten-free flour blend.
-
1 cup granulated sugar: This sweetens the cake and helps achieve that lovely light texture. If you’re reducing sugar, try using a natural sweetener like maple syrup or honey, but adjust the wet ingredients accordingly.
-
1 teaspoon baking powder: This helps our Bundt cake rise beautifully. Make sure it’s fresh for the best results!
-
1/2 teaspoon baking soda: A little extra lift! If you’re out, you can replace it with more baking powder, but remember to adjust the amount.
-
1/2 teaspoon salt: A pure necessity! It enhances the flavors all around.
-
1 teaspoon ground cinnamon: The star of the show! For a twist, try using fresh grated nutmeg alongside the cinnamon.
-
1/2 cup unsalted butter, softened: Adds richness and flavor. If you prefer a dairy-free option, substituting with coconut oil works great!
-
1 cup sour cream: This adds moisture and softness to the cake. If you don’t have sour cream, plain yogurt is an excellent alternative.
-
2 large eggs: They bind everything together. Vegan? Flax eggs come to the rescue (1 tablespoon ground flaxseed mixed with 2.5 tablespoons water makes one egg)!
-
1 teaspoon vanilla extract: A touch of vanilla always elevates flavors. Make your own for an extra special homemade touch!
-
1/2 cup brown sugar: For that lovely, caramel-like sweetness with just a bit more depth. Coconut sugar is a good substitute if you’re looking for a healthier option.
-
1/2 cup chopped pecans or walnuts (optional): Add some crunch! You can swap these for sunflower seeds for a nut-free version.
-
Icing for drizzling (powdered sugar and milk): A sweet finish! You can customize the icing with flavors like almond or maple extract for an extra kick.
Step-by-Step Instructions
Now, roll up those sleeves; it’s time to bake up some joy! Here’s a step-by-step guide to ensuring your Cinnamon Roll Bundt Cake turns out just right.
Step 1: Preheat the Oven
First things first—preheat your oven to 350°F (175°C). A well-tempered oven makes all the difference in achieving that lovely, baked evenness.
Step 2: Prepare the Bundt Pan
Grease your Bundt pan generously with butter or spray oil. I like to use a mix of both to ensure it comes out perfectly. You can also dust it lightly with flour to prevent sticking—this way, we can avoid those sad, broken cake moments.
Step 3: Combine Dry Ingredients
In a large mixing bowl, whisk together your flour, granulated sugar, baking powder, baking soda, salt, cinnamon, and chopped nuts, if using. This helps ensure even distribution of your leavening agents and spices, which is crucial for a well-risen cake.
Step 4: Cream the Butter and Sugar
In a mixing bowl, cream the softened butter and brown sugar together using a hand mixer or stand mixer on medium speed until light and fluffy. This process usually takes about 2-3 minutes. The air you incorporate now will make your cake light and fluffy!
Step 5: Add the Wet Ingredients
Add in the eggs, sour cream, and vanilla extract to the creamed butter and sugar, mixing until combined. That’s right—let the mixer do the work while you daydream of all the delicious slices to come!
Step 6: Mix in the Dry Ingredients
Gently fold the dry mixture into the wet batter just until combined. Overmixing is a no-no! We want a tender crumb, so don’t be shy—leave a few lumps!
Step 7: Layering with Cinnamon Sugar
In a small bowl, combine any remaining cinnamon and granulated sugar—this is what we’ll use to create that beloved swirl throughout the cake!
Now, pour half of the batter into the prepared Bundt pan, spreading it out evenly. Sprinkle generously with the cinnamon-sugar mix, followed by the remaining batter on top. If you’re feeling adventurous, create a marbled effect by lightly swirling a knife through the batter.
Step 8: Bake
Time for the magic to happen! Bake the cake in your preheated oven for about 40-45 minutes or until a toothpick inserted into the center comes out clean. Your kitchen will smell heavenly—it’s like a warm embrace!
Step 9: Cool and Icing Time
Once baked to perfection, remove it from the oven and allow it to cool in the pan for about 10 minutes. Then, carefully invert it onto a wire rack to cool completely. While it cools, prepare your icing by mixing powdered sugar with a splash of milk. Drizzle that creamy icing all over the top for that WOW factor!
Serving Suggestions
Slice your Bundt cake into generous wedges and serve it warm or at room temperature. It’s equally delightful on its own or paired with a scoop of vanilla ice cream or a dollop of whipped cream. For an extra flair, garnish with a sprinkle of chopped nuts or a dusting of cinnamon powder.
If you really want to impress your guests, consider garnishing with fresh berries or serving alongside a piping hot cup of coffee or tea. The warm cake with a hot beverage creates a cozy experience that’s hard to beat!
Creative Recipe Variations
Now that you have the base recipe down, let’s mix things up a bit! Here are some fun variations to put your own twist on this delicious Bundt cake:
-
Apple Cinnamon Bundt: Fold in 1 cup of finely chopped apples for a delightful fruit twist. They’ll soften up during baking and add juicy bursts of flavor!
-
Chocolate Swirl Cinnamon Roll Cake: Add dollops of chocolate hazelnut spread to the batter and swirl it in for a decadent treat. You can never go wrong with chocolate!
-
Pumpkin Spice Cinnamon Roll Cake: Replace half of the sour cream with pumpkin puree, and add 1 teaspoon of pumpkin spice for a seasonal favorite that screams autumn.
-
Lavender Honey Glaze: Infuse your icing with a touch of culinary lavender and drizzle it over for a fragrant floral finish—this adds a touch of elegance to your sweet cake.
-
Bourbon Maple Icing: Elevate your drizzle with a splash of bourbon and maple syrup. It makes for a sophisticated dessert that offers a unique taste experience!
Chef’s Notes
This recipe has truly grown with me over the years! I love how many memories it holds, and every time I make it, I feel like I’m reaching back into those cozy Sunday mornings with my grandma. Plus, it’s become a bit of a conversation piece! Friends often ask how I get that perfect cinnamon swirl, and I tell them it’s as easy as enjoying the process and letting love be the secret ingredient.
Remember, the fun of cooking is to explore, create, and add your personal touch. Don’t shy away from experimenting; after all, every little exploration in the kitchen brings us one step closer to discovering our hidden culinary treasures.
FAQs and Troubleshooting
1. Why did my cake come out dense?
Ah, the dreaded dense cake! This usually happens due to overmixing the batter or too much flour. Make sure you’re measuring out flour accurately (spoon it into the measuring cup rather than scooping directly!) and folding the ingredients gently.
2. How can I tell when my Bundt cake is done?
Keep an eye on your cake during the last 10 minutes of baking. Insert a toothpick into the center—if it comes out clean or with just a few crumbs, it’s ready! A little underdone is better than overdone.
3. Can I make this ahead of time?
Absolutely! This cake tastes even better the next day. Just make sure to wrap it well in plastic wrap, or store it in an airtight container at room temperature. The cake lasts about 3 days—if it lasts that long!
4. What should I do if my cake sticks to the pan?
If it happens, don’t fret! Gently run a thin spatula around the edges to loosen it. If it still won’t budge, place the pan in a warm-water bath for a few minutes—sometimes a little heat helps it release.
Nutritional Info
While I always believe in enjoying food without counting every calorie, it’s good to know a bit about what we’re indulging in. A slice of this delightful Cinnamon Roll Bundt Cake (about 1/12th of the cake) typically has:
- Calories: 320
- Carbohydrates: 48g
- Protein: 4g
- Total Fat: 14g
- Saturated Fat: 8g
- Sugars: 22g
- Fiber: 1g
As always, feel free to adjust the recipe based on dietary preferences or restrictions!
Final Thoughts
So there you have it—my Simple & Easy Homemade Cinnamon Roll Bundt Cake! I hope it brings as much joy to your kitchen as it has to mine. Whether you’re baking for a special occasion or indulging in a cozy afternoon treat, this cake covers all the bases.
Remember, cooking is an adventure, and each dish tells a story. Share your own experiences with this recipe, and don’t be afraid to make it your own. Grab your favorite fork (or a spoon for that icing!) and dive into this delightful creation, because like any good recipe, it’s all about the moments we create around it.
Until next time, happy baking and enjoy every bite! 🍴💖
Print
Simple & Easy Homemade Cinnamon Roll Bundt Cake
- Total Time: 60 minutes
- Yield: 12 servings 1x
- Diet: Vegetarian
Description
A delightful dish combining the classic comfort of cinnamon rolls with the fuss-free charm of a Bundt cake, perfect for any special occasion.
Ingredients
- 2 cups all-purpose flour
- 1 cup granulated sugar
- 1 teaspoon baking powder
- 1/2 teaspoon baking soda
- 1/2 teaspoon salt
- 1 teaspoon ground cinnamon
- 1/2 cup unsalted butter, softened
- 1 cup sour cream
- 2 large eggs
- 1 teaspoon vanilla extract
- 1/2 cup brown sugar
- 1/2 cup chopped pecans or walnuts (optional)
- Icing for drizzling (powdered sugar and milk)
Instructions
- Preheat the oven to 350°F (175°C).
- Grease the Bundt pan generously with butter or spray oil.
- Combine the flour, granulated sugar, baking powder, baking soda, salt, cinnamon, and chopped nuts in a large mixing bowl.
- Cream the softened butter and brown sugar together until light and fluffy.
- Add the eggs, sour cream, and vanilla extract to the creamed mixture, mixing until combined.
- Fold the dry mixture into the wet batter just until combined.
- Layer half of the batter into the prepared Bundt pan, sprinkle with cinnamon-sugar mix, and top with remaining batter.
- Bake for about 40-45 minutes or until a toothpick inserted comes out clean.
- Cool in the pan for 10 minutes, then invert onto a wire rack to cool completely.
- Prepare icing by mixing powdered sugar with milk and drizzle over the cooled cake.
Notes
This cake tastes even better the next day. It can be wrapped and stored for up to 3 days.
- Prep Time: 15 minutes
- Cook Time: 45 minutes
- Category: Dessert
- Method: Baking
- Cuisine: American
Nutrition
- Serving Size: 1 slice
- Calories: 320
- Sugar: 22g
- Sodium: 400mg
- Fat: 14g
- Saturated Fat: 8g
- Unsaturated Fat: 2g
- Trans Fat: 0g
- Carbohydrates: 48g
- Fiber: 1g
- Protein: 4g
- Cholesterol: 30mg
Keywords: cinnamon roll, Bundt cake, dessert, easy baking, cozy recipe

Chewy Oatmeal Cream Pie Cookies in 25 Minutes (Copycat)
Oatmeal Cream Pie Cookies: A Sweet Nostalgic Delight
Hey there, fellow food lovers! I’m Beau Collier, and today we’re diving into a delightful treat that’s a true blast from the past: Oatmeal Cream Pie Cookies! These cookies are not just a dessert; they’re a warm hug that brings back memories of childhood snack time and good old-fashioned kitchens. So grab your apron, because we’re about to whip up some deliciousness!
Introduction: A Comforting Classic
Let’s set the scene. Picture this: it’s a chilly afternoon, the kind where you can feel the warmth radiating from the oven and the sweet aroma of baked treats filling your home. You pull a batch of oatmeal cookies from the oven, golden brown and slightly chewy, and you hear that addictive crunch as you take a bite.
Oatmeal cream pie cookies have long been a classic beloved by many. These scrumptious, chewy delights are not only comfort food, but they also double as a trip down memory lane when you sink your teeth into that gooey marshmallow fluff filling. They’re sweet enough to satisfy any craving but wholesome enough to make you feel like you’re treating yourself to something special.
The beauty of these cookies lies in their versatility. You can pack them full of goodness, or keep them simple and nostalgic—whatever mood strikes you! With just a few key ingredients and some basic techniques, you can bake up a storm that will impress your friends, family, or even just yourself on a quiet evening in. Ready to rekindle the joy of baking and indulge in some tasty nostalgia? Let’s roll up our sleeves and get started!
Personal Story: Memories in Every Bite
Growing up, my kitchen was always bustling with activity, especially on the weekends. My mom was a master baker, and every time I walked in after a long afternoon of playing outside, I was greeted by the warm, inviting smell of cookies in the oven. But there was one cookie that always held a special place in my heart: the oatmeal cream pie.
I remember helping her in the kitchen, where I stood on a stool to reach the counter, whisking the batter and sneaking bites of the marshmallow fluff whenever I thought she wasn’t looking. Those afternoons weren’t just about baking; they were about bonding. The thrill of watching the cookies puff up in the oven, only to cool them down with a dollop of cream filling, was pure magic. Even now, whenever I bake these cookies, I’m transported back to those sweet moments in my childhood, filled with laughter and love.
Ingredients
Here’s what you’ll need to create these delicious Oatmeal Cream Pie Cookies—let’s break it down:
-
1 cup unsalted butter, softened
The star of the show! Softened butter creates that rich, tender texture we all crave in cookies. If you don’t have unsalted, feel free to use salted butter and cut back on any added salt in the recipe for balance. -
1 cup brown sugar, packed
Brown sugar adds moisture and that coveted chewy texture to the cookies. If you’re in a pinch, you can substitute it with an equal amount of coconut sugar for a lovely hint of caramel flavor. -
1/2 cup granulated sugar
A little sugar goes a long way in giving our cookies that perfect sweetness and slight crispiness on the edges. -
2 large eggs
Eggs are essential for binding all our ingredients together while contributing to the cookie’s structure. You could swap them for ¼ cup of unsweetened applesauce for a healthier, egg-free option! -
1 teaspoon vanilla extract
The secret ingredient that elevates the flavor! If you want to explore, almond extract offers a unique twist. -
1 1/2 cups all-purpose flour
All-purpose flour gives our cookies the right amount of stability. For a gluten-free option, you can use a gluten-free flour blend—just make sure it contains xanthan gum to help with texture. -
1 teaspoon baking soda
This will give your cookies the nice rise we love! If you’re out, cream of tartar can also act as a leavening agent if paired with baking soda. -
1/2 teaspoon salt
A pinch of salt enhances all the flavors and balances the sweetness. -
1 teaspoon ground cinnamon
Cinnamon adds a lovely warmth to our oatmeal cookies that can’t be beaten! You can switch things up with pumpkin spice mix for a holiday twist! -
3 cups old-fashioned rolled oats
These add the chewy texture we’re looking for. Quick oats can be used in a pinch but may yield a slightly different texture. -
1 cup marshmallow fluff
This sweet, gooey filling is what elevates these cookies to cream pie status. If you’re looking for something with less sugar, consider homemade vanilla buttercream as a filling. -
1/2 cup powdered sugar
This gets mixed with the fluff for a smoother texture. If you want a more decadent flavor, replace it with chocolate icing.
Step-by-Step Instructions
Let’s get cooking! Follow these steps carefully, and you’ll have the most scrumptious Oatmeal Cream Pie Cookies ready in no time.
-
Preheat the oven: Start by preheating your oven to 350°F (175°C). Getting that little oven toasty is key for baking perfection!
-
Cream the butter and sugars: In a large mixing bowl, beat together the softened unsalted butter, brown sugar, and granulated sugar using a handheld mixer or stand mixer until light and fluffy. This step generally takes about 3-5 minutes! Not only does this create that fluffy texture we adore, but it also helps the sugar retain moisture.
-
Add eggs and vanilla: Next, mix in the eggs one at a time, making sure each is fully incorporated before the next. Then, add your vanilla extract. Let that smell wash over you—wonderful, right?
-
Combine dry ingredients: In another bowl, whisk together the flour, baking soda, salt, ground cinnamon, and rolled oats. This ensures an even distribution of the ingredients and makes for a consistent bake.
-
Combine wet and dry: Gradually add the dry mixture into the wet mixture. Be sure to mix until just combined—overmixing can lead to tough cookies!
-
Scoop the cookie dough: Use a cookie scoop or tablespoon to drop rounded tablespoons of dough onto lined baking sheets, spacing them about 2 inches apart. Each dollop should look like a lovely little mound of happiness!
-
Bake: Place the cookie sheets in your preheated oven and bake for 10-12 minutes until the edges are golden brown and the centers are still soft. They’ll firm up as they cool, so don’t worry if they seem a bit underbaked!
-
Cool: Remove from the oven and let the cookies cool on the sheets for about 5 minutes before transferring them to a cooling rack. This helps prevent them from falling apart; patience is key!
-
Prepare the filling: While the cookies cool, whip together the marshmallow fluff and powdered sugar in a mixing bowl until well combined. This creamy mixture will be the luxurious filling that brings it all together!
-
Assemble the cookies: Once the cookies are cool, slather on a generous dollop of fluff on the bottom of half the cookies and top with the remaining cookies to form a sandwich.
And voila! You’ve created magical Oatmeal Cream Pie Cookies that are begging to be devoured!
Serving Suggestions
Now that your Oatmeal Cream Pie Cookies are perfectly assembled, there are some delightful ways to serve them up! First of all, an inviting presentation creates all the difference. Set the cookies on a rustic wooden board, and sprinkle some cinnamon over them for that professional touch. You can even place a few cookies in a cute, seasonal tin for gifting or as party favors.
For an extra touch that enhances the experience, consider pairing these cookies with a tall glass of cold milk or a steaming cup of chamomile tea. The coolness of the milk beautifully complements the warmth of the cookies, while a cup of tea adds a soothing contrast.
Recipe Variations
There’s always room for creativity in the kitchen! Here are some fun twists to spice up your Oatmeal Cream Pie Cookies:
-
Add-ins Galore: Try incorporating chocolate chips, raisins, or dried cranberries for an extra burst of flavor and texture.
-
Nutty Goodness: Throw in some chopped walnuts or pecans for that crunch! Just be sure to chop them coarsely so they mix in nicely.
-
Flavor Boost: Swirl in a bit of peanut butter or Nutella into the marshmallow fluff! This tiny change can create a whole new dimension of flavor!
-
Spiced Variation: Experiment with different spices like nutmeg or allspice to give your cookies a seasonal kick. Think snickerdoodles but in oatmeal format!
-
Fruity Fun: Sliced bananas or pureed apples can bring that fun twist of flavor while keeping things moist and delicious.
Chef’s Notes
I always think of baking as a blend of science and love. Over the years, this recipe for Oatmeal Cream Pie Cookies has evolved so much. I’ve tried countless variations, from chunky to chewy, and even experimented with various types of fillings. Every version has its merits, but there’s a reason I keep coming back to this original recipe. It’s straightforward and comforting and allows for creativity, which is what cooking is all about!
Also, here’s a tip: if you find your cookie batter is a bit too wet or sticky, let it chill in the fridge for about 30 minutes. This little hack helps shape the cookies better and yields thicker tealicious treats.
FAQs and Troubleshooting
-
Why are my cookies flat?
Flat cookies can be a result of too much butter or not enough flour. Make sure to measure your ingredients accurately and consider chilling the dough before baking. -
How do I store the cookies?
Keep the cookies in an airtight container at room temperature for up to a week. They usually last about that much time because they get gobbled up quickly! -
Can I freeze these cookies?
Yes! They freeze beautifully. Just layer them between parchment paper in an airtight container, and they will stay delicious for up to three months. -
Can I make the filling ahead of time?
Absolutely! You can make the filling a day before. Just store it in the fridge, and when you’re ready to assemble the cookies, give it a quick stir.
Nutritional Info
While delicious things don’t always come with a health warning, I understand nutrition is important, too! Each Oatmeal Cream Pie Cookie (considering standard serving size) contains approximately:
- Calories: 210
- Total fat: 10g
- Saturated fat: 6g
- Cholesterol: 30mg
- Sodium: 100mg
- Carbohydrates: 28g
- Fiber: 1g
- Sugar: 12g
- Protein: 2g
While these cookies are a treat to enjoy, they can also form part of a balanced diet when enjoyed in moderation.
Final Thoughts
Baking is more than just following a recipe; it’s about creating connections and memories. These Oatmeal Cream Pie Cookies are perfect for sharing with friends or celebrating everyday moments. Whether you’re reminiscing about childhood or starting new traditions in your kitchen, this recipe is a reminder of the joys simple ingredients can bring.
So gather around the oven, invite friends over, and make these delicious cookies that promise a taste of home. Remember, every cookie has its story, and as you take that first heavenly bite, know that you too are creating your own kitchen narrative. Happy baking, and until next time, keep exploring and savoring those feel-good flavors! 🍪✨
Now, who’s ready for some cookies?
Print
Oatmeal Cream Pie Cookies
- Total Time: 32 minutes
- Yield: 24 cookies 1x
- Diet: Vegetarian
Description
Delicious oatmeal cream pie cookies with a gooey marshmallow filling that bring back childhood memories.
Ingredients
- 1 cup unsalted butter, softened
- 1 cup brown sugar, packed
- 1/2 cup granulated sugar
- 2 large eggs
- 1 teaspoon vanilla extract
- 1 1/2 cups all-purpose flour
- 1 teaspoon baking soda
- 1/2 teaspoon salt
- 1 teaspoon ground cinnamon
- 3 cups old-fashioned rolled oats
- 1 cup marshmallow fluff
- 1/2 cup powdered sugar
Instructions
- Preheat the oven: Start by preheating your oven to 350°F (175°C).
- Cream the butter and sugars: In a large mixing bowl, beat together the softened unsalted butter, brown sugar, and granulated sugar until light and fluffy.
- Add eggs and vanilla: Mix in the eggs one at a time, followed by the vanilla extract.
- Combine dry ingredients: In another bowl, whisk together flour, baking soda, salt, ground cinnamon, and rolled oats.
- Combine wet and dry: Gradually add dry mixture into the wet mixture and mix until just combined.
- Scoop the cookie dough: Drop rounded tablespoons of dough onto lined baking sheets, spacing them about 2 inches apart.
- Bake: Place the cookie sheets in the oven and bake for 10-12 minutes until golden brown.
- Cool: Let the cookies cool on the sheets for about 5 minutes before transferring them to a cooling rack.
- Prepare the filling: Whip together marshmallow fluff and powdered sugar until well combined.
- Assemble the cookies: Spread a dollop of fluff on the bottom of half the cookies and top with the remaining cookies to form a sandwich.
Notes
For a healthier option, you can substitute ¼ cup of unsweetened applesauce for the eggs.
- Prep Time: 20 minutes
- Cook Time: 12 minutes
- Category: Dessert
- Method: Baking
- Cuisine: American
Nutrition
- Serving Size: 1 cookie
- Calories: 210
- Sugar: 12g
- Sodium: 100mg
- Fat: 10g
- Saturated Fat: 6g
- Unsaturated Fat: 4g
- Trans Fat: 0g
- Carbohydrates: 28g
- Fiber: 1g
- Protein: 2g
- Cholesterol: 30mg
Keywords: oatmeal cookies, cream pie cookies, dessert, nostalgic treats
Ingredient Pumpkin Cake: Quick, Cozy Fall Dessert
The Ultimate Three-Ingredient Pumpkin Cake: Easy, Delicious, and Perfect for Fall!
Hey there, foodies! It’s Beau Collier, and I’m absolutely thrilled to be hanging out with you today. If you’re anything like me, fall is that magical time of year when everything seems to be drenched in warm spices, bursts of orange, and the comforting scents of baked goodies wafting through the air. There’s just something about pumpkin that makes me feel all warm and fuzzy inside.
That’s why I’m super excited to share my all-time favorite dessert with you: the Three-Ingredient Pumpkin Cake! Yes, you heard that right—just three simple ingredients come together to create a deliciously moist and wonderfully spiced cake that’ll have everyone begging for seconds. Trust me; this is the kind of recipe you’ll want to keep close to your heart (and your kitchen!) for many seasons to come.
Imagine this: It’s a crisp autumn afternoon, the leaves are turning, and you’re in your kitchen, dressed in your cozy sweater. You decide to whip up a cake that captures the essence of the season, and in under an hour, you’ve got a warm, pumpkiny delight ready to be devoured. No fussy steps, no long ingredient lists—just pure, unadulterated goodness. Got your spoons ready? Let’s dive in!
A Stroll Down Memory Lane
Every great dish has a story, and this pumpkin cake is no exception. I remember the first time I stumbled upon this recipe—back in college when I was trying to impress my friends with my culinary prowess (or lack thereof!). Armed with a bright orange can of pumpkin puree and a box of yellow cake mix, I thought, "How hard can it be?"
After all, I was notorious for burning toast and boiling spaghetti into a gooey mess. But I was determined! So, I mixed those ingredients with a generous splash of water and threw it in the oven. As the cake baked, the aroma of spices wafted through our tiny kitchen, tempting everyone to come closer.
When the timer buzzed and I took that first slice, I was astonished! The cake was fluffy, fragrant, and best of all—delicious! It was a huge hit at our little gathering, and that day changed my baking game forever. Who knew something so easy could spark joy and connection among friends? Ever since, I’ve been sharing this recipe with anyone who’ll listen, and it’s become a staple in my kitchen during the fall months.
Ingredients You’ll Need
Let’s get right into the ingredients. Here’s what you’ll need to whip up this scrumptious cake:
-
1 can of pumpkin puree
Not to be confused with pumpkin pie filling, pumpkin puree is the real deal! It’s packed with flavor and moisture, making your cake melt-in-your-mouth delicious. For a twist, try using roasted butternut squash puree or even sweet potato puree. -
1 box of cake mix (yellow or spice)
This is the beauty of the recipe—any brand will do! A yellow cake mix provides a lovely base while a spice cake mix adds an extra layer of warmth. Want something gluten-free? Substitute it with a gluten-free cake mix, and you’re all set! -
1 cup of water
Simple, right? This helps combine the ingredients and keeps your cake moist. If you want a richer flavor, you could swap this for milk or a non-dairy alternative like almond milk.
Step-by-Step Instructions
Now that you’ve gathered your ingredients, let’s get to the good stuff—the actual baking! Follow these easy steps, and let’s make magic happen in the kitchen:
-
Preheat the Oven
Start by preheating your oven to 350°F (175°C). This ensures that your cake will bake evenly and come out perfectly. Don’t forget this step—it’s as crucial as putting on your favorite apron! -
Mix It Up
In a large mixing bowl, combine the can of pumpkin puree and the box of cake mix. At this point, you might think it looks a little thick, and you’d be right! Don’t worry; that’s where the water comes in. -
Add Water
Gradually pour in the cup of water while mixing. I recommend using a spatula or a hand mixer. You’re aiming for a smooth, batter-like consistency, so don’t shy away from really mixing it well. Don’t be tempted to skip this step; that’s where the magic happens! -
Grease the Pan
Grab your favorite baking pan—9×13 inch works beautifully—and grease it generously with cooking spray or butter. You want to ensure that your cake lifts out effortlessly for that perfect presentation. -
Pour and Spread
Pour the batter into your greased pan. Use a spatula to spread it evenly. Pro tip: Try to make sure it’s all level; this will help it bake uniformly. -
Pop It in the Oven
Place the pan in the preheated oven and bake for about 30-35 minutes or until a toothpick comes out clean from the center. While it’s baking, the smell will make you impatient; don’t say I didn’t warn you! -
Cool Down
Once done, remove the cake from the oven and let it cool in the pan for about 10 minutes. Then transfer it to a wire rack to cool completely. Patience is key here—trust me, it’ll be worth it! -
Serve and Enjoy!
Once cooled, slice into squares and serve as is, or dress it up with a dusting of powdered sugar or a dollop of whipped cream. You could also grab a slice with a scoop of vanilla ice cream because, let’s be honest, everything’s better with ice cream!
Serving Suggestions
This Three-Ingredient Pumpkin Cake is super versatile when it comes to serving. You’ve got options! Here are some of my favorites:
-
Simple Slices
Serve the cake plain, straight out of the pan, for an easy grab-and-go snack. -
Add Whipped Cream
For a gourmet touch, top each slice with a dollop of freshly whipped cream. A sprinkle of cinnamon or nutmeg elevates it to a whole new level! -
A La Mode
Want to turn it into a fancy dessert? Serve a warm slice with a scoop of vanilla ice cream on top or on the side. The contrast of warm cake and cold ice cream is heavenly! -
Garnish with Nuts
For some added crunch and texture, sprinkle chopped pecans or walnuts on top before serving. They complement the pumpkin flavors nicely! -
Festive Flair
For fall gatherings, arrange the cake slices on a wooden board and decorate with mini pumpkins or autumn leaves for that festive touch. It’s all about creating warm, inviting vibes!
Recipe Variations
Feeling adventurous? Here are a few variations you can try to put your own spin on this classic recipe:
-
Chocolate Chip Pumpkin Cake
Add a cup of semi-sweet chocolate chips into the batter before transferring it to the pan. The combination of chocolate and pumpkin is a crowd-pleaser! -
Nutty Pumpkin Cake
Mix in ½ cup of chopped walnuts or pecans. They’re great for adding crunch and extra flavor. Plus, they make the cake feel more hearty! -
Gluten-Free Option
Substitute the cake mix with a gluten-free vanilla or spice cake mix. It’s just as tasty and perfect for any gluten-sensitive friends or family! -
Pumpkin Spice Cake
If you’re using yellow cake mix, add in a tablespoon of pumpkin pie spice to really amp up that fall flavor. -
Vegan Twist
Use a vegan cake mix and substitute the water with almond milk. You’ll still have that moist, flavorful cake without the eggs or dairy!
Chef’s Notes
Over the years, I’ve made this cake countless times, and every time I tweak it a little. It’s kind of like my go-to comfort food. I even remember one time I accidentally grabbed a spice cake mix that had been sitting in the back of the cupboard for ages. Guess what? It turned out to be one of the best versions I ever made!
The fun part about this recipe is its adaptability. It can become whatever you want it to be with just a few minor tweaks. Sometimes, I’ll even make two batches at once—one spiced and one with chocolate chips. Honestly, it’s hard to go wrong with this cake!
FAQs and Troubleshooting
1. What if my cake comes out too dense?
If your cake turns out dense, it might be because you didn’t mix it enough or overmixed it. Aim for a nice, smooth batter without any lumps, but don’t overdo it!
2. Can I use fresh pumpkin instead of canned?
Absolutely! Just make sure to roast and puree the pumpkin until smooth. You’ll want about a cup of pure pumpkin as a substitute.
3. How should I store leftovers?
This cake keeps beautifully at room temperature for a couple of days, or in the fridge for up to a week. Cover it in plastic wrap or store it in an airtight container to keep it fresh!
4. Can I freeze this cake?
You bet! To freeze, let it cool completely, then wrap slices in plastic before placing them in a freezer-safe container. It can last up to 3 months frozen!
Nutritional Info
While I always believe in enjoying treats, it’s good to be a little aware of what we’re putting in our bodies. Here’s a rough estimation for one slice (when serving 12):
- Calories: 160
- Total Fat: 3g
- Saturated Fat: 0.5g
- Sodium: 200mg
- Total Carbohydrates: 31g
- Dietary Fiber: 1g
- Sugars: 15g
- Protein: 2g
Keep in mind, these numbers can vary based on the cake mix brand and any additional ingredients you decide to add!
Final Thoughts
So there you have it, my fabulous food friends! The Three-Ingredient Pumpkin Cake is not just a dessert; it’s a morsel of happiness, bringing warmth and joy to every bite. It’s perfect for those spontaneous gatherings or cozy fall evenings, easy enough for a novice cook, and delightful enough to impress even the foodies among us.
I hope this recipe inspires you to embrace the magic of fall baking, to fill your kitchen with love and aromas that comfort the soul. So, what are you waiting for? Get in the kitchen, whip up that cake, and share it with your loved ones. Trust me, this will become a cherished recipe, just like it is in my heart.
Happy baking, and may your kitchens be filled with fragrant spices and laughter! 🍰✨
Print
Three-Ingredient Pumpkin Cake
- Total Time: 50 minutes
- Yield: 12 servings 1x
- Diet: Vegetarian
Description
A simple yet delightful pumpkin cake made with just three ingredients, capturing the essence of fall.
Ingredients
- 1 can of pumpkin puree
- 1 box of yellow or spice cake mix
- 1 cup of water
Instructions
- Preheat the oven to 350°F (175°C).
- Mix the pumpkin puree and cake mix in a large bowl.
- Add the water gradually while mixing until smooth.
- Grease a 9×13 inch baking pan with cooking spray or butter.
- Pour the batter into the prepared pan and level it out.
- Pop the pan in the oven and bake for 30-35 minutes.
- Cool the cake in the pan for about 10 minutes.
- Serve slices plain or topped with whipped cream or ice cream.
Notes
For variations, add chocolate chips, nuts, or use gluten-free cake mix for your dietary needs.
- Prep Time: 15 minutes
- Cook Time: 35 minutes
- Category: Dessert
- Method: Baking
- Cuisine: American
Nutrition
- Serving Size: 1 slice
- Calories: 160
- Sugar: 15g
- Sodium: 200mg
- Fat: 3g
- Saturated Fat: 0.5g
- Unsaturated Fat: 2g
- Trans Fat: 0g
- Carbohydrates: 31g
- Fiber: 1g
- Protein: 2g
- Cholesterol: 0mg
Keywords: pumpkin cake, fall dessert, easy recipe, three-ingredient cake, autumn baking