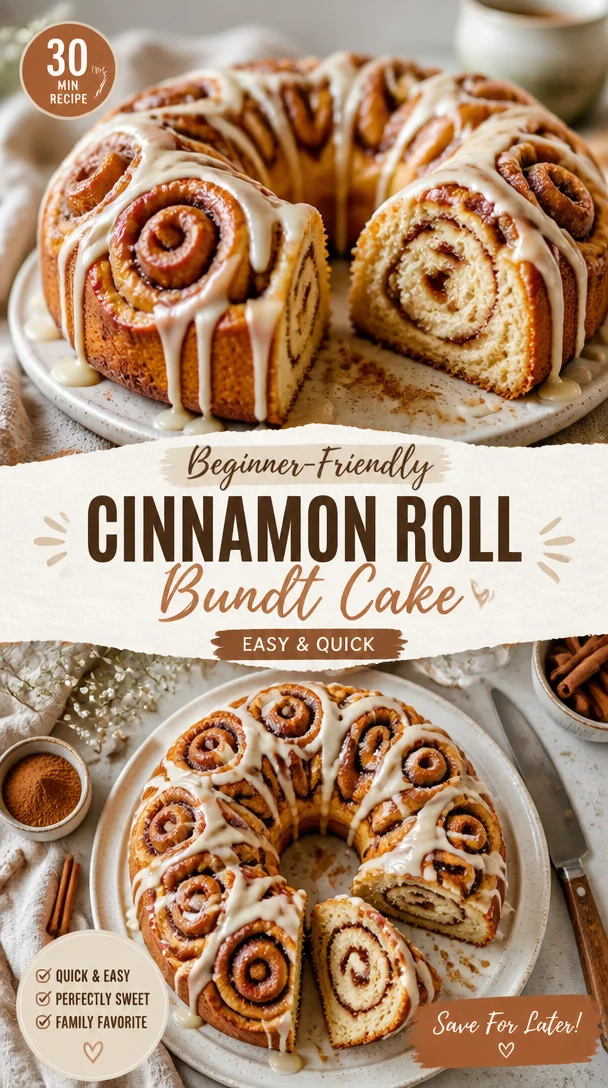
Beginner-Friendly Cinnamon Roll Bundt Cake (Easy & Quick)
Simple & Easy Homemade Cinnamon Roll Bundt Cake: A Cozy Recap of Home and Flavor
Hey there, friends! I’m so excited to share one of my absolute favorites with you today—a delightful dish that combines the classic comfort of cinnamon rolls with the fuss-free charm of a Bundt cake. You guessed it, it’s the Simple & Easy Homemade Cinnamon Roll Bundt Cake! This sweet treat brings a cozy aroma to your kitchen, elevating any day into a special occasion.
Now, picture this: a lazy Sunday morning, the sun peeking through the kitchen window, and the smell of cinnamon wafting through the air. That’s the magic of this cake! Each slice is a wonderful hybrid of soft cake and sticky cinnamon goodness, making it the perfect crowd-pleaser or indulgent treat for yourself. And what could be better than a dessert that not only looks stunning but tastes like a warm hug? I can practically hear the applause from family and friends as they cheer for another round of this delightful cake.
The beauty of this recipe lies in its simplicity. With just a handful of ingredients that you probably already have in your pantry, you can whip up this delightful cake in no time. Whether you’re serving brunch, looking for an afternoon pick-me-up, or simply treating yourself, this cake has your back!
Let’s dive into all the delicious details, and I’ll share my personal story behind this delightful creation, tips and tricks, and of course, how you can customize it to fit your own culinary style.
A Sweet Memory: The Birth of the Cinnamon Roll Bundt Cake
Growing up, Sundays at my grandma’s house were always a treat. She had this magical ability to turn ordinary mornings into festive brunches. The air would be thick with the scent of cinnamon and fresh coffee, and there would always be a batch of freshly baked cinnamon rolls, their gooey centers oozing precious, sweet goodness.
One Sunday, as I was helping her in the kitchen—my favorite place to be—we decided to try something a little different. Instead of rolling and slicing dough like usual, we poured the cinnamon roll mixture into a Bundt pan, a twist that was born from pure curiosity and a pinch of daring! The result? Pure magic! That cake cooked to golden perfection, and when we turned it out onto the serving platter, our hearts danced with delight. As we enjoyed that first slice, it became clear that we’d stumbled onto something special, igniting my love for creating simple yet comforting recipes.
From that day on, the Cinnamon Roll Bundt Cake became a Sunday tradition—a wonderful way to enjoy the comforting flavors of cinnamon rolls without the mess of rolling. I’m excited to share this recipe with you so you can create your own magical moments in the kitchen!
Delicious Ingredients
Before we get to the baking, let’s chat about the ingredients you’ll need to create this scrumptious cake. Here’s what’s on the list:
-
2 cups all-purpose flour: The backbone of the cake! For a gluten-free option, you can substitute with a 1:1 gluten-free flour blend.
-
1 cup granulated sugar: This sweetens the cake and helps achieve that lovely light texture. If you’re reducing sugar, try using a natural sweetener like maple syrup or honey, but adjust the wet ingredients accordingly.
-
1 teaspoon baking powder: This helps our Bundt cake rise beautifully. Make sure it’s fresh for the best results!
-
1/2 teaspoon baking soda: A little extra lift! If you’re out, you can replace it with more baking powder, but remember to adjust the amount.
-
1/2 teaspoon salt: A pure necessity! It enhances the flavors all around.
-
1 teaspoon ground cinnamon: The star of the show! For a twist, try using fresh grated nutmeg alongside the cinnamon.
-
1/2 cup unsalted butter, softened: Adds richness and flavor. If you prefer a dairy-free option, substituting with coconut oil works great!
-
1 cup sour cream: This adds moisture and softness to the cake. If you don’t have sour cream, plain yogurt is an excellent alternative.
-
2 large eggs: They bind everything together. Vegan? Flax eggs come to the rescue (1 tablespoon ground flaxseed mixed with 2.5 tablespoons water makes one egg)!
-
1 teaspoon vanilla extract: A touch of vanilla always elevates flavors. Make your own for an extra special homemade touch!
-
1/2 cup brown sugar: For that lovely, caramel-like sweetness with just a bit more depth. Coconut sugar is a good substitute if you’re looking for a healthier option.
-
1/2 cup chopped pecans or walnuts (optional): Add some crunch! You can swap these for sunflower seeds for a nut-free version.
-
Icing for drizzling (powdered sugar and milk): A sweet finish! You can customize the icing with flavors like almond or maple extract for an extra kick.
Step-by-Step Instructions
Now, roll up those sleeves; it’s time to bake up some joy! Here’s a step-by-step guide to ensuring your Cinnamon Roll Bundt Cake turns out just right.
Step 1: Preheat the Oven
First things first—preheat your oven to 350°F (175°C). A well-tempered oven makes all the difference in achieving that lovely, baked evenness.
Step 2: Prepare the Bundt Pan
Grease your Bundt pan generously with butter or spray oil. I like to use a mix of both to ensure it comes out perfectly. You can also dust it lightly with flour to prevent sticking—this way, we can avoid those sad, broken cake moments.
Step 3: Combine Dry Ingredients
In a large mixing bowl, whisk together your flour, granulated sugar, baking powder, baking soda, salt, cinnamon, and chopped nuts, if using. This helps ensure even distribution of your leavening agents and spices, which is crucial for a well-risen cake.
Step 4: Cream the Butter and Sugar
In a mixing bowl, cream the softened butter and brown sugar together using a hand mixer or stand mixer on medium speed until light and fluffy. This process usually takes about 2-3 minutes. The air you incorporate now will make your cake light and fluffy!
Step 5: Add the Wet Ingredients
Add in the eggs, sour cream, and vanilla extract to the creamed butter and sugar, mixing until combined. That’s right—let the mixer do the work while you daydream of all the delicious slices to come!
Step 6: Mix in the Dry Ingredients
Gently fold the dry mixture into the wet batter just until combined. Overmixing is a no-no! We want a tender crumb, so don’t be shy—leave a few lumps!
Step 7: Layering with Cinnamon Sugar
In a small bowl, combine any remaining cinnamon and granulated sugar—this is what we’ll use to create that beloved swirl throughout the cake!
Now, pour half of the batter into the prepared Bundt pan, spreading it out evenly. Sprinkle generously with the cinnamon-sugar mix, followed by the remaining batter on top. If you’re feeling adventurous, create a marbled effect by lightly swirling a knife through the batter.
Step 8: Bake
Time for the magic to happen! Bake the cake in your preheated oven for about 40-45 minutes or until a toothpick inserted into the center comes out clean. Your kitchen will smell heavenly—it’s like a warm embrace!
Step 9: Cool and Icing Time
Once baked to perfection, remove it from the oven and allow it to cool in the pan for about 10 minutes. Then, carefully invert it onto a wire rack to cool completely. While it cools, prepare your icing by mixing powdered sugar with a splash of milk. Drizzle that creamy icing all over the top for that WOW factor!
Serving Suggestions
Slice your Bundt cake into generous wedges and serve it warm or at room temperature. It’s equally delightful on its own or paired with a scoop of vanilla ice cream or a dollop of whipped cream. For an extra flair, garnish with a sprinkle of chopped nuts or a dusting of cinnamon powder.
If you really want to impress your guests, consider garnishing with fresh berries or serving alongside a piping hot cup of coffee or tea. The warm cake with a hot beverage creates a cozy experience that’s hard to beat!
Creative Recipe Variations
Now that you have the base recipe down, let’s mix things up a bit! Here are some fun variations to put your own twist on this delicious Bundt cake:
-
Apple Cinnamon Bundt: Fold in 1 cup of finely chopped apples for a delightful fruit twist. They’ll soften up during baking and add juicy bursts of flavor!
-
Chocolate Swirl Cinnamon Roll Cake: Add dollops of chocolate hazelnut spread to the batter and swirl it in for a decadent treat. You can never go wrong with chocolate!
-
Pumpkin Spice Cinnamon Roll Cake: Replace half of the sour cream with pumpkin puree, and add 1 teaspoon of pumpkin spice for a seasonal favorite that screams autumn.
-
Lavender Honey Glaze: Infuse your icing with a touch of culinary lavender and drizzle it over for a fragrant floral finish—this adds a touch of elegance to your sweet cake.
-
Bourbon Maple Icing: Elevate your drizzle with a splash of bourbon and maple syrup. It makes for a sophisticated dessert that offers a unique taste experience!
Chef’s Notes
This recipe has truly grown with me over the years! I love how many memories it holds, and every time I make it, I feel like I’m reaching back into those cozy Sunday mornings with my grandma. Plus, it’s become a bit of a conversation piece! Friends often ask how I get that perfect cinnamon swirl, and I tell them it’s as easy as enjoying the process and letting love be the secret ingredient.
Remember, the fun of cooking is to explore, create, and add your personal touch. Don’t shy away from experimenting; after all, every little exploration in the kitchen brings us one step closer to discovering our hidden culinary treasures.
FAQs and Troubleshooting
1. Why did my cake come out dense?
Ah, the dreaded dense cake! This usually happens due to overmixing the batter or too much flour. Make sure you’re measuring out flour accurately (spoon it into the measuring cup rather than scooping directly!) and folding the ingredients gently.
2. How can I tell when my Bundt cake is done?
Keep an eye on your cake during the last 10 minutes of baking. Insert a toothpick into the center—if it comes out clean or with just a few crumbs, it’s ready! A little underdone is better than overdone.
3. Can I make this ahead of time?
Absolutely! This cake tastes even better the next day. Just make sure to wrap it well in plastic wrap, or store it in an airtight container at room temperature. The cake lasts about 3 days—if it lasts that long!
4. What should I do if my cake sticks to the pan?
If it happens, don’t fret! Gently run a thin spatula around the edges to loosen it. If it still won’t budge, place the pan in a warm-water bath for a few minutes—sometimes a little heat helps it release.
Nutritional Info
While I always believe in enjoying food without counting every calorie, it’s good to know a bit about what we’re indulging in. A slice of this delightful Cinnamon Roll Bundt Cake (about 1/12th of the cake) typically has:
- Calories: 320
- Carbohydrates: 48g
- Protein: 4g
- Total Fat: 14g
- Saturated Fat: 8g
- Sugars: 22g
- Fiber: 1g
As always, feel free to adjust the recipe based on dietary preferences or restrictions!
Final Thoughts
So there you have it—my Simple & Easy Homemade Cinnamon Roll Bundt Cake! I hope it brings as much joy to your kitchen as it has to mine. Whether you’re baking for a special occasion or indulging in a cozy afternoon treat, this cake covers all the bases.
Remember, cooking is an adventure, and each dish tells a story. Share your own experiences with this recipe, and don’t be afraid to make it your own. Grab your favorite fork (or a spoon for that icing!) and dive into this delightful creation, because like any good recipe, it’s all about the moments we create around it.
Until next time, happy baking and enjoy every bite! 🍴💖
Print
Simple & Easy Homemade Cinnamon Roll Bundt Cake
- Total Time: 60 minutes
- Yield: 12 servings 1x
- Diet: Vegetarian
Description
A delightful dish combining the classic comfort of cinnamon rolls with the fuss-free charm of a Bundt cake, perfect for any special occasion.
Ingredients
- 2 cups all-purpose flour
- 1 cup granulated sugar
- 1 teaspoon baking powder
- 1/2 teaspoon baking soda
- 1/2 teaspoon salt
- 1 teaspoon ground cinnamon
- 1/2 cup unsalted butter, softened
- 1 cup sour cream
- 2 large eggs
- 1 teaspoon vanilla extract
- 1/2 cup brown sugar
- 1/2 cup chopped pecans or walnuts (optional)
- Icing for drizzling (powdered sugar and milk)
Instructions
- Preheat the oven to 350°F (175°C).
- Grease the Bundt pan generously with butter or spray oil.
- Combine the flour, granulated sugar, baking powder, baking soda, salt, cinnamon, and chopped nuts in a large mixing bowl.
- Cream the softened butter and brown sugar together until light and fluffy.
- Add the eggs, sour cream, and vanilla extract to the creamed mixture, mixing until combined.
- Fold the dry mixture into the wet batter just until combined.
- Layer half of the batter into the prepared Bundt pan, sprinkle with cinnamon-sugar mix, and top with remaining batter.
- Bake for about 40-45 minutes or until a toothpick inserted comes out clean.
- Cool in the pan for 10 minutes, then invert onto a wire rack to cool completely.
- Prepare icing by mixing powdered sugar with milk and drizzle over the cooled cake.
Notes
This cake tastes even better the next day. It can be wrapped and stored for up to 3 days.
- Prep Time: 15 minutes
- Cook Time: 45 minutes
- Category: Dessert
- Method: Baking
- Cuisine: American
Nutrition
- Serving Size: 1 slice
- Calories: 320
- Sugar: 22g
- Sodium: 400mg
- Fat: 14g
- Saturated Fat: 8g
- Unsaturated Fat: 2g
- Trans Fat: 0g
- Carbohydrates: 48g
- Fiber: 1g
- Protein: 4g
- Cholesterol: 30mg
Keywords: cinnamon roll, Bundt cake, dessert, easy baking, cozy recipe
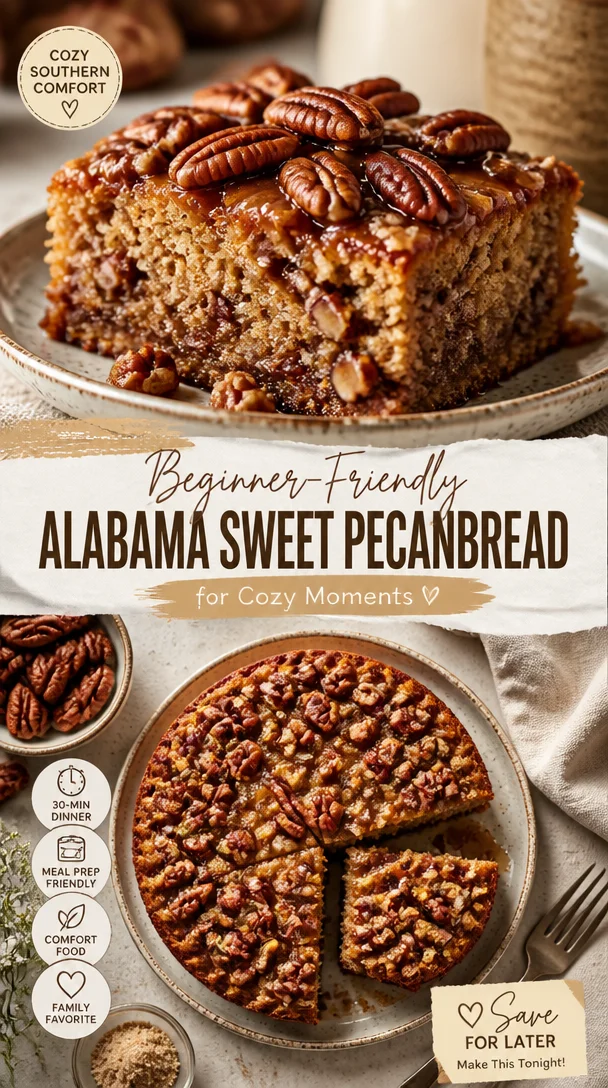
Beginner-Friendly Alabama Sweet Pecanbread for Cozy Moments
Irresistible Sweet Alabama Pecanbread for Cozy Moments
Hey there, fellow food lovers! I’m Beau Collier, and I’m thrilled to welcome you back to Feastical, your friendly space for all things delicious and comforting. Today, I’m about to take you on a cozy ride through a recipe that’s close to my heart and sure to warm your soul: Sweet Alabama Pecanbread. This delightful treat is perfect for those lazy Sunday mornings or any time you need a bit of comfort food that feels like a hug.
Introduction
Now, picture this: a chilly afternoon, the scent of something buttery and sweet wafting through the air, and a cozy kitchen filled with laughter and chatter. Sounds nice, right? That’s exactly the vibe I’m aiming for with Sweet Alabama Pecanbread! This recipe has become a staple in my kitchen, embodying everything I love about food—it’s simple to make, seriously delicious, and has the magical ability to bring people together.
Sweet Alabama Pecanbread is more than just your average quick bread; it’s a recipe packed with richness from sugars, nuttiness from pecans, and that all-important touch of love baked right in. Whether you’re enjoying a slice with your morning coffee, serving it as an afternoon snack, or bringing it to a gathering, this pecanbread will steal the spotlight.
And guess what? It’s incredibly easy to whip up! With just a handful of ingredients that you likely have on hand, you’ll be amazed at how quickly and effortlessly you can create this masterpiece. So don your apron, roll up your sleeves, and let’s get to baking!
Personal Story
Let me share a little story with you about how Sweet Alabama Pecanbread entered my life. I was visiting my beloved aunt in Alabama during the summer, the kind of sultry summer that makes you seek refuge in air conditioning while sipping on iced tea. She welcomed me with open arms and treated me to her renowned pecanbread—a recipe handed down through generations in her family.
The moment I took the first bite, I was transported to memories of my childhood, sitting on the porch, listening to the cicadas while enjoying a fresh slice of pecanbread slathered with butter. That first mouthful was pure magic! The moist, sweet bread combined with the crunchy pecans created a symphony of flavors and textures that I couldn’t resist.
From then on, every visit to Auntie’s house included a fresh batch of this delightful treat. So, in homage to those heartfelt moments, I had to adapt her beloved recipe, infusing my voice and flair, and now, I’m excited to share it with all of you!
Ingredients
Let’s dive into the deliciousness that is Sweet Alabama Pecanbread! Here’s what you’ll need:
-
1 cup Granulated Sugar
A classic sweetener that adds that irresistible sweetness. For a deeper flavor, you can swap this for brown sugar—trust me, it’s worth it! -
1/2 cup Brown Sugar
Optional but highly recommended! It brings out that rich, caramel-like flavor and adds moisture. Plus, who doesn’t love the richness of brown sugar? -
1/2 cup Vegetable Oil or Melted Butter
This is essential for adding that lovely moisture to your bread. If you’re feeling fancy, go for melted butter for a buttery taste! -
2 large Eggs
Make sure they’re at room temperature to help with a smooth batter. Fresh eggs equal a fluffier texture! -
2 cups All-Purpose Flour
Spoon and level this to avoid excess. This is the backbone of your bread; it soaks up all the goodness. -
2 teaspoons Baking Powder
This little powerhouse acts as a leavening agent, making your pecanbread nice and fluffy. -
1/2 teaspoon Salt
A tiny pinch goes a long way in balancing the flavors! Don’t skip it! -
1 teaspoon Vanilla Extract
This infuses warmth and depth. Go for pure vanilla extract if you can; it really makes a difference. -
1 cup Chopped Pecans
Toasting them beforehand unlocks even more flavor! You’ll love that crunch against the soft bread.
Step-by-Step Instructions
Alright, my kitchen friends, time to get down to business and make this pecanbread! Follow these easy steps, and I promise you’ll create something special.
-
Preheat the Oven
Begin by preheating your oven to 350°F (175°C). This is crucial; a well-preheated oven ensures your bread bakes evenly. -
Mix the Sugars and Wet Ingredients
In a large mixing bowl, combine the granulated sugar and brown sugar. Add in the vegetable oil (or melted butter) and whisk until combined. Make sure to mix well to incorporate air; this will help with fluffiness! -
Add the Eggs
Crack the eggs into the bowl and whisk them in thoroughly. The mixture should become a nice, smooth batter. Pro tip: if your eggs are cold from the fridge, you can place them in warm water for a few minutes to bring them to room temp! -
Combine the Dry Ingredients
In another bowl, whisk together the all-purpose flour, baking powder, and salt. This helps evenly distribute the baking powder throughout the flour, preventing lumps. Slowly add this to your wet ingredients, stirring gently until just combined. Don’t overmix; a few lumps are perfectly okay! -
Add the Vanilla and Pecans
Stir in the vanilla extract and chopped pecans until they’re distributed evenly in the batter. If you want an extra layer of flavor, toast your pecans in a dry skillet over medium heat for about 5 minutes before adding them in. Simply delightful! -
Prepare the Baking Pan
Grease a loaf pan (9 x 5 inches) or line it with parchment paper for easy removal. Pour the batter into the prepared pan and smooth the top with a spatula. -
Bake It Up
Place the pan in your preheated oven and bake for 55-65 minutes, or until a toothpick inserted into the center comes out clean. Keep an eye on it towards the last 15 minutes—if the top starts browning too much, just tent it with foil to prevent burning. -
Cool and Serve
Once baked, allow the pecanbread to cool in the pan for about 10 minutes before transferring it to a wire rack. Let it cool completely before slicing. I know this part is tough, but trust me, the texture is worth the wait!
Serving Suggestions
Now that your Sweet Alabama Pecanbread is ready, how do you plan to enjoy it? Slice it thick and serve it with a melting pat of butter on top, or maybe a drizzle of honey for some pizzazz. You can also pair it with a cup of coffee or tea—perfect for those slow, quiet mornings. Feeling a bit more adventurous? Toast the slices in a skillet or toaster for a crispy outside, and serve it with a side of cream cheese or whipped cream for a little indulgence!
Recipe Variations
Let’s get creative! Here are some fun variations you can try to give your Sweet Alabama Pecanbread a twist:
-
Chocolate Chip Pecanbread: Add a cup of semi-sweet chocolate chips for a rich, decadent treat. Chocolate and pecans are a match made in heaven!
-
Banana Pecanbread: Incorporate mashed bananas into the batter for a moist and fruity flavor. Just use one cup of ripe mashed bananas, and reduce the oil slightly.
-
Spiced Pecanbread: Add a teaspoon of cinnamon and a pinch of nutmeg to your dry ingredients for a warm, spicy kick. This is especially cozy in the fall!
-
Coconut Pecanbread: Toss in half a cup of shredded coconut for a tropical flair. Toasted coconut on top for garnish? Count me in!
-
Gluten-Free Option: Substitute the all-purpose flour with a 1:1 gluten-free baking mix to accommodate your gluten-free friends without sacrificing flavor.
Chef’s Notes
Let’s chat for a moment about the beauty of this recipe’s evolution. I’ve played around with different sugar combinations and really honed in on the perfect balance of moistness and flavor. You can say I’ve “set the bar” for the bread world—pun intended! Just the other day, I had a friend tell me they added a hint of maple syrup, and honestly, I can’t wait to try that next time!
A little secret? I love this pecanbread for breakfast, but I have also indulged in it as a late-night snack—that’s what makes it irresistible!
FAQs and Troubleshooting
Q: My pecanbread turned out dense; what did I do wrong?
A: Denseness often comes from overmixing the batter or using too much flour. Remember, gently fold the dry ingredients into the wet until just combined!
Q: Can I freeze the pecanbread?
A: Absolutely! Slice the bread and wrap it tightly in plastic wrap or aluminum foil, then place it in an airtight container. It can last for up to three months in the freezer.
Q: What if I don’t have pecans? Can I use other nuts?
A: Of course! Walnuts or hazelnuts are great substitutes. Just ensure you adjust the chopping size accordingly.
Q: How do I know when it’s done baking?
A: A toothpick inserted in the center should come out clean or with just a few moist crumbs. If you notice it browning too quickly, cover it with foil for the last few minutes!
Nutritional Info
Eating nourishing food doesn’t have to feel heavy, and this Sweet Alabama Pecanbread manages to strike that balance. Each slice (roughly 1 inch thick) contains approximately:
- Calories: 170
- Total Fat: 7g
- Saturated Fat: 1g
- Cholesterol: 30mg
- Sodium: 150mg
- Total Carbohydrates: 25g
- Dietary Fiber: 1g
- Sugars: 12g
- Protein: 3g
It’s a treat that’s indulgent yet satisfying, and it’s perfect for sharing or keeping all to yourself. Just remember, moderation is key!
Final Thoughts
I hope you loved this journey into the world of Sweet Alabama Pecanbread! It’s more than just a recipe; it’s a way to cherish the little moments in life, filled with flavor and warmth. The heart of a good dish lies not just in its ingredients, but the love and memories created around it.
So, gather your family and friends, and dig in together. Share a slice, tell a story, and make new memories. Whether it’s the charming aroma that fills your kitchen or the laughter shared over a sweet treat, may this pecanbread bring you as much joy as it has brought me. Until next time, keep cooking, keep creating, and always remember: good food is about good company! Happy baking!
Print
Sweet Alabama Pecanbread
- Total Time: 70 minutes
- Yield: 8 servings 1x
- Diet: Vegetarian
Description
A delightful quick bread packed with sweetness and nuttiness, perfect for cozy moments.
Ingredients
- 1 cup Granulated Sugar
- 1/2 cup Brown Sugar
- 1/2 cup Vegetable Oil or Melted Butter
- 2 large Eggs
- 2 cups All-Purpose Flour
- 2 teaspoons Baking Powder
- 1/2 teaspoon Salt
- 1 teaspoon Vanilla Extract
- 1 cup Chopped Pecans
Instructions
- Preheat the oven to 350°F (175°C).
- Mix the granulated sugar and brown sugar in a large mixing bowl. Add vegetable oil (or melted butter) and whisk until combined.
- Add the eggs into the bowl and whisk thoroughly to create a smooth batter.
- Combine the all-purpose flour, baking powder, and salt in another bowl. Gradually add to wet ingredients and stir gently until just combined.
- Add the vanilla extract and chopped pecans, stirring to distribute evenly.
- Prepare a greased loaf pan (9 x 5 inches) or line with parchment paper. Pour the batter into the pan and smooth the top.
- Bake for 55-65 minutes, or until a toothpick inserted into the center comes out clean.
- Cool in the pan for 10 minutes, then transfer to a wire rack to cool completely before slicing.
Notes
Serve with butter or honey, and try toasting slices for added texture.
- Prep Time: 10 minutes
- Cook Time: 60 minutes
- Category: Dessert
- Method: Baking
- Cuisine: American
Nutrition
- Serving Size: 1 slice
- Calories: 170
- Sugar: 12g
- Sodium: 150mg
- Fat: 7g
- Saturated Fat: 1g
- Unsaturated Fat: 4g
- Trans Fat: 0g
- Carbohydrates: 25g
- Fiber: 1g
- Protein: 3g
- Cholesterol: 30mg
Keywords: pecan bread, sweet bread, comfort food, baking, dessert
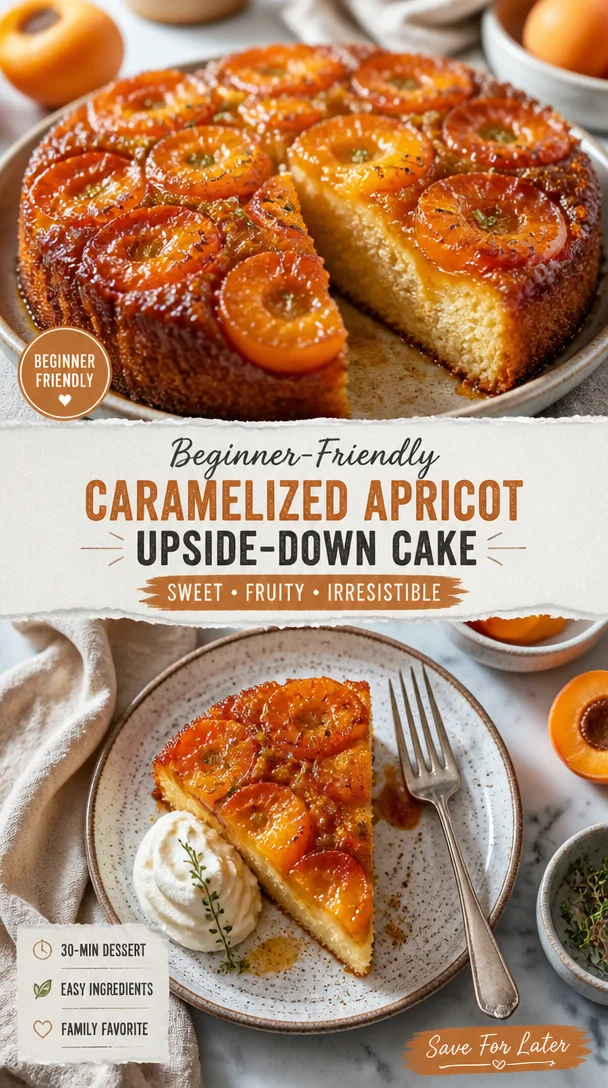
Beginner-Friendly Caramelized Apricot Upside-Down Cake
Caramelized Apricot Upside Down Cake: A Sweet Slice of Summer
Introduction
Hey there, fellow food lovers! I’m Beau Collier, and welcome back to Feastical, the cozy corner of the internet where food isn’t just about sustenance – it’s about connection, joy, and a sprinkle of love. Today, we’re going to whip up something that feels like summer on a plate: the delightful Caramelized Apricot Upside Down Cake. Picture this: a fluffy cake layered with golden, juicy apricots, all resting on a luscious caramel sauce. It’s a dessert that not only dazzles the eye but also warms the heart and soul.
What’s really awesome about this cake is the way it wraps you in nostalgia. I can just smell those sweet apricots roasting in the oven, their sugary scent wafting through the kitchen, wrapping around me like my grandmother’s comforting hug. She often made delicious treats with the season’s bounty, and apricots were always her favorite. I can still recall the sound of her mixing bowl as she whisked the ingredients together, the laughter and chatter of family in the background as we awaited our slice of heaven.
Whether you’re looking to impress guests at a summer dinner party or just need a slice of sweet nostalgia at home, this Caramelized Apricot Upside Down Cake will bring smiles all around. With a modest list of ingredients, it’s easy to make, and the end result is absolutely uplifting. So, preheat that oven, and let’s dive into the buttery, fruity world of upside-down cakes together!
Personal Story
Growing up, weekends in my house were always filled with the enticing aroma of baked goods. My mom would often gather us around the kitchen island, ingredients laid out like a painter’s palette. One of her signature desserts was an apricot tart that could make anyone weak in the knees. It was during one of those Saturday afternoons, with flour dusting the countertops and apricots spilling out of the basket like sunny jewels, that I learned the importance of creating something with love. We would work as a team, laughing, tasting, and occasionally sneaking pieces of fruit when we thought nobody was looking.
As I grew older and started to experiment in my own kitchen, I found myself drawn back to those moments. However, I wanted to put my twist on things. That’s when I first tried my hand at an upside-down cake. The idea of caramelizing apricots and watching them transform into a gooey, golden masterpiece was too tempting to resist. From that day forward, this cake became a staple in my kitchen, reminding me of those cherished moments with family. Each slice tastes like nostalgia, happiness, and a dash of sunshine.
Ingredients
Let’s gather the stars of our show! Here’s what you’ll need to create your Caramelized Apricot Upside Down Cake:
-
1 cup brown sugar
The secret to that rich caramel flavor! Brown sugar has molasses, which adds depth and moisture. If you’re in a pinch, you can substitute it with white sugar mixed with a little bit of molasses. -
1/2 cup unsalted butter
Butter adds richness and tenderness to the cake. Unsalted is preferred because it allows you to control the overall saltiness. If you’re looking for a dairy-free option, coconut oil works great here! -
6-8 fresh apricots, halved and pitted
Fresh apricots are the star of this cake, bursting with juicy flavor. If you can’t find fresh apricots, canned ones will do, but make sure they’re packed in juice, not syrup. -
1 1/2 cups all-purpose flour
This is the backbone of our cake. All-purpose keeps it wonderfully fluffy, but if you’d like a gluten-free option, almond flour can make an excellent substitute! -
1 cup granulated sugar
For sweetness and a light texture, granulated sugar helps our cake rise. You can use coconut sugar for a raw alternative, but be aware it might alter the taste slightly. -
1/2 cup milk
Milk adds moisture and enriches the cake. You can swap in almond milk or buttermilk if you prefer or need a lactose-free option. -
2 large eggs
Eggs help bind the ingredients together and act as a leavening agent. If you need a vegan option, try using 1/4 cup of unsweetened applesauce per egg. -
1 teaspoon vanilla extract
Vanilla adds a beautiful aromatic essence. If you’re feeling ambitious, homemade vanilla extract is divine but store-bought works just fine! -
1 teaspoon baking powder
This is our rising agent! Make sure it’s fresh for the best lift. If you’re out, you can mix 1/4 teaspoon baking soda with 1/2 teaspoon vinegar as a substitute. -
1/2 teaspoon baking soda
This works in tandem with baking powder for a beautifully risen cake. If you’re out, just use double the baking powder—easy peasy! -
1/4 teaspoon salt
A pinch of salt enhances all the flavors and balances the sweetness. If you’re on a low-sodium diet, you can reduce it a little, but don’t eliminate it completely.
Step-by-Step Instructions
Now, let’s get into the nitty-gritty of bringing our cake to life!
-
Preheat your oven to 350°F (175°C)
This is the first and most vital step! You want your oven nice and hot so that your cake bakes evenly. Meanwhile, grab your favorite mixing bowl. -
Prepare the caramel layer
In a medium-sized saucepan over medium heat, melt the 1/2 cup of unsalted butter and 1 cup of brown sugar together. Stir constantly until it’s bubbling and smooth—about 3-5 minutes. Don’t wander too far; it can turn from fab to burnt in an instant! Once it’s ready, pour it into the bottom of a greased 9-inch round cake pan. This will be the delicious base that our apricots sit on. -
Arrange the apricots
After pouring the caramel mix into the pan, arrange your halved apricots, cut side down, on top of the caramel. Be fancy about it! You want it to look beautiful because that’s the side your guests will see first once it’s flipped. Plus, the more apricots, the better! -
Mix the batter
In a large bowl, beat together the 2 large eggs, 1 cup of granulated sugar, and 1 teaspoon of vanilla extract until fluffy. This should take about 2 minutes with an electric mixer. Next, add the 1/2 cup of milk and mix until combined. -
Combine the dry ingredients
In a separate bowl, whisk together the 1 1/2 cups of all-purpose flour, 1 teaspoon of baking powder, 1/2 teaspoon of baking soda, and 1/4 teaspoon of salt. Gradually add these dry ingredients to your wet mixture. Mix until just combined – a few lumps are okay. -
Bake your cake
Pour the batter carefully over the apricots in your pan, smoothing it out gently. Bake for 35-40 minutes or until a toothpick inserted comes out clean. The aroma will start to envelop your home, and trust me, you’ll know it’s almost done when that sweet scent fills the air! -
Cool and flip
Once your cake is out of the oven, let it rest in the pan for about 10 minutes. Then, take a large plate and carefully flip it over to reveal the beautiful apricot caramelized layer. Be cautious—the caramel will be hot! -
Serve warm or at room temperature
Enjoy your cake warm, perhaps with a scoop of vanilla ice cream or a dollop of whipped cream. It’s a heavenly combination that takes this dessert to the next level!
Serving Suggestions
Now that your Caramelized Apricot Upside Down Cake is on display, how do we serve it up nicely? Consider drizzling honey or a little heavy cream over each slice for an extra splash of indulgence! A sprinkle of powdered sugar can also elevate the dessert’s presentation, giving it that bakery-fresh feel. If you want to bring in some contrast, serve a dollop of tart Greek yogurt on the side—it pairs wonderfully with the sweetness of the apricots.
For those summer backyard gatherings, you could even serve the cake on a wooden cutting board surrounded by fresh apricots and fragrant mint leaves for a beautiful touch. This not only looks stunning but also invites your guests to dig in and enjoy.
Recipe Variations
-
Berry Blast: Swap out some of the apricots for fresh berries like blueberries or raspberries. The tartness works beautifully with the sweet caramel.
-
Nutty Crunch: Add in 1/2 cup of chopped walnuts or pecans to the batter for some added texture. The nuttiness will enhance the flavor profile!
-
Zesty Twist: Add a tablespoon of lemon or orange zest in with your wet ingredients to brighten the flavor—a little zing goes a long way.
-
Spiced Up: Try stirring in a teaspoon of cinnamon or nutmeg for a warm, cozy flavor, especially perfect for fall gatherings.
-
Gluten-Free Delight: Substitute the all-purpose flour with a gluten-free blend and make sure that your baking powder is certified gluten-free.
Chef’s Notes
Every recipe tells a story, and this one is no exception. I’ve made this cake for countless family gatherings, and it’s never failed to impress. One time, I experimented by swapping apricots with peaches, and though it was delicious, nothing quite captures the spirit of summer for me like the apricot version. Life in the kitchen is all about learning and adapting, and there’s always room for improvisation. I encourage you to put your flair into this recipe! After all, cooking is about making it your own while savoring every moment.
FAQs and Troubleshooting
Q: My cake sank in the middle. What happened?
A: This usually happens due to overmixing the batter or opening the oven too early. Ensure that your ingredients are at room temperature, and don’t peek until it’s almost done!
Q: Can I use frozen apricots?
A: Yes! Just be sure to thaw and drain them properly beforehand. They may release some moisture, so you might want to reduce the milk slightly.
Q: How do I store leftovers?
A: Store leftovers in an airtight container in the refrigerator for up to 3 days. You can reheat individual slices in the microwave for a delicious warm dessert!
Q: Can I make this ahead of time?
A: Absolutely! You can prepare the caramel and arrange the apricots ahead of time, then mix the batter right before you’re ready to bake!
Nutritional Info
Each slice of this Caramelized Apricot Upside Down Cake is not just a treat for the taste buds but also packs a nutritional punch. With real fruits, healthy fats from butter, and quality sugars, it can be a delightful addition to a balanced diet. In moderation, enjoy all the goodness that comes with fresh apricots – full of vitamins A and C, as well as dietary fiber. Of course, since it is a dessert, it is best to enjoy it occasionally as part of a varied diet. The sweetness and fruitiness can satisfy any dessert craving without the guilt—just remember to share!
Final Thoughts
As we wrap up our time together today, I hope you feel inspired to grab those apricots and head to the kitchen. Making Caramelized Apricot Upside Down Cake isn’t just about the end result—it’s about the joy of baking, the love you put into it, and the stories you’ll share over each slice. So, whether you’re gathering with family, enjoying a quiet evening alone, or throwing an epic summer barbecue, remember that food is best shared.
Here’s to many delicious moments ahead, filled with laughter, love, and of course, wonderful food. Until next time, happy baking! Don’t forget to experiment, have fun, and let your kitchen be a haven of tasty exploration. Can’t wait to hear your own stories and see photos of your beautiful cakes! Dig in, my friends!
Print
Caramelized Apricot Upside Down Cake
- Total Time: 55 minutes
- Yield: 8 servings 1x
- Diet: Vegetarian
Description
A fluffy upside-down cake layered with golden apricots and luscious caramel sauce, perfect for summer gatherings.
Ingredients
- 1 cup brown sugar
- 1/2 cup unsalted butter
- 6–8 fresh apricots, halved and pitted
- 1 1/2 cups all-purpose flour
- 1 cup granulated sugar
- 1/2 cup milk
- 2 large eggs
- 1 teaspoon vanilla extract
- 1 teaspoon baking powder
- 1/2 teaspoon baking soda
- 1/4 teaspoon salt
Instructions
- Preheat your oven to 350°F (175°C).
- Prepare the caramel layer by melting butter and brown sugar in a saucepan.
- Pour the caramel mix into a greased pan and arrange the apricots cut side down.
- Mix the wet ingredients: eggs, granulated sugar, and vanilla extract until fluffy.
- Add milk to the wet mixture and combine.
- Combine the dry ingredients and add them to the wet mixture.
- Pour the batter over the apricots in the pan and smooth it out.
- Bake for 35-40 minutes until a toothpick comes out clean.
- Cool for 10 minutes before flipping onto a plate.
- Serve warm or at room temperature with ice cream or whipped cream.
Notes
Consider drizzling honey or heavy cream on top for an extra indulgence.
- Prep Time: 15 minutes
- Cook Time: 40 minutes
- Category: Dessert
- Method: Baking
- Cuisine: American
Nutrition
- Serving Size: 1 slice
- Calories: 350
- Sugar: 30g
- Sodium: 200mg
- Fat: 15g
- Saturated Fat: 8g
- Unsaturated Fat: 5g
- Trans Fat: 0g
- Carbohydrates: 50g
- Fiber: 2g
- Protein: 4g
- Cholesterol: 80mg
Keywords: apricot cake, upside down cake, summer dessert, caramel dessert, baking, family recipe
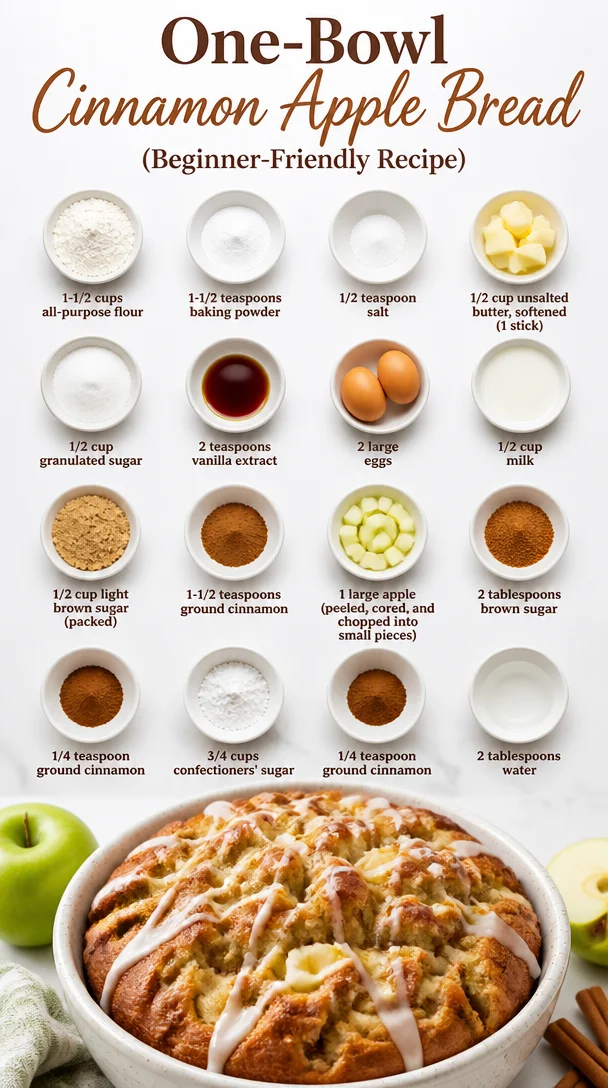
One-Bowl Cinnamon Apple Bread (Beginner-Friendly Recipe)
Hey there, fellow food enthusiasts! I’m Beau Collier, and today I’m thrilled to welcome you back to Feastical, where our kitchens turn into magical places full of flavor and heartwarming memories! If there’s one thing I love more than whipping up delicious meals, it’s sharing the stories behind those recipes. Today, I want to take you on a cozy journey with my all-time favorite comfort dish: Cinnamon Apple Bread.
Imagine this: a golden-brown loaf, warm and inviting, with sweet, juicy apples mingling with the rich aroma of cinnamon. The first slice reveals a soft, tender crumb that beckons you for more. Each bite tastes like a warm hug wrapped in nostalgia, whether you’re savoring it for breakfast, an afternoon snack, or dessert!
This recipe has roots in my childhood, where my grandmother would bake this delightful bread as we gathered around the kitchen table, sharing stories and laughter. She taught me that cooking is not just about the final product but about the love and joy infused into each step. As we mix ingredients and blend flavors, we weave memories that last a lifetime. So grab your apron, preheat that oven, and let’s dive into the world of cinnamon-sugar goodness! Get ready to impress everyone at your next gathering or just enjoy a quiet moment with a warm slice and a steaming cup of your favorite brew.
Personal Story
Growing up in the Midwest, fall was always a magical time. Leaves turned vibrant shades of gold and crimson, and the scent of apples wafted through the air as cider mills busy with people pressed fresh juice. My grandmother, the ultimate kitchen queen of the family, celebrated this season by baking her famous Cinnamon Apple Bread.
I remember the afternoons spent “helping” her in the kitchen—with more enthusiasm than skill, I assure you! She’d let me measure flour (which often ended up on my nose, much to her amusement), while she expertly peeled and cored apples. The moment the loaf came out of the oven wasn’t just about the delicious smell that filled the air; it was about the love shared as we gathered around the table to savor a slice.
Those afternoons were overflowing with laughter, stories of family, and yes—the occasional sprinkle fight with cinnamon! This cinnamon-infused loaf became more than food; it was a way to connect with loved ones, celebrate the season, and create cherished memories. I hope to bring that magic to your kitchen because every slice of this bread is an invitation to pause and enjoy life’s sweetest moments.
Ingredients
Here’s what you’ll need to create this glorious bread, plus some handy tips for each ingredient:
-
1-1/2 cups all-purpose flour
The backbone of our bread! For a gluten-free option, substitute with almond flour or a 1-to-1 gluten-free baking blend. -
1-1/2 teaspoons baking powder
This helps our bread rise beautifully. Make sure it’s fresh; an expired baking powder means flat bread! -
1/2 teaspoon salt
Don’t skip the salt; it enhances the flavors! You can also use sea salt for a more nuanced taste. -
1/2 cup unsalted butter, softened (1 stick)
Butter adds richness and moisture. If you’re in a pinch, coconut oil or applesauce can work as a substitute, though you’ll miss that buttery flavor. -
1/2 cup granulated sugar
Classic sugar sweetness! Consider using coconut sugar for a lower glycemic index alternative, or honey if you’d like a different flavor profile. -
2 teaspoons vanilla extract
Pure vanilla extract enhances all the sweet flavors. I recommend using real vanilla for the best taste, though artificial will work in a pinch. -
2 large eggs
They bind our ingredients and add moisture. If you’re vegan, flax eggs or applesauce can substitute. -
1/2 cup milk
For creaminess! Any milk (dairy or plant-based) will do; just watch for added sugars in non-dairy options. -
1/2 cup light brown sugar (packed)
This gives our bread that delicious caramel note. Dark brown sugar works too, just a bit more robust in flavor. -
1-1/2 teaspoons ground cinnamon
The star of our show! Freshly ground cinnamon amplifies the flavor exponentially, but store-bought works well too. -
1 large apple (peeled, cored, and chopped into small pieces)
For maximum sweetness, use Honeycrisp or Granny Smith apples—each gives a delightful contrast of sweet and tart. -
2 tablespoons brown sugar
Used for a sweet cinnamon topping, this brings a lovely crunch on top. If you want it healthier, consider coconut sugar! -
1/4 teaspoon ground cinnamon
A sprinkle of this on top enhances the flavor profile and looks beautiful. -
3/4 cups confectioners’ sugar
This is for our glaze to finish things off! Feel free to make a sugar-free glaze if you want a healthier option. -
1/4 teaspoon ground cinnamon
For adding to the glaze. A little spice always pairs well with sweetness! -
2 tablespoons water
To mix with our confectioners’ sugar for the glaze. You can also use milk for a creamier glaze.
Step-by-Step Instructions
Now, let’s bring everything together to create this mouthwatering Cinnamon Apple Bread! I promise that you’ll be amazed at how simple and rewarding this recipe is.
-
Preheat the Oven
First things first, preheat your oven to 350°F (175°C). This ensures that the bread cooks evenly. Don’t just throw it in while the oven is still warming up—trust me, you want that golden-brown crust! -
Prepare the Pan
Grease a 9×5-inch loaf pan with butter or cooking spray. You can also line it with parchment paper for easy removal. This little step is vital; nobody wants their lovely loaf stuck to the pan! -
Mix the Dry Ingredients
In a large bowl, whisk together the flour, baking powder, salt, and ground cinnamon—this ensures the baking powder is evenly dispersed & gives our bread a uniform rise. Set this aside. -
Cream the Butter and Sugars
In another mixing bowl, beat together the softened butter, granulated sugar, and light brown sugar using an electric mixer on medium speed until the mixture is light and fluffy. This usually takes about 2-3 minutes. This step is key for that rich texture! -
Add Vanilla and Eggs
Scrape down the sides of the bowl, and mix in the vanilla extract, then add the eggs one at a time. Beat until fully combined; you want those eggs to add some moisture magic! -
Pour in Milk
Gradually add the milk while mixing on low speed until everything is well combined. Don’t overdo it; just blend until you no longer see clumps of flour. -
Combine Wet and Dry Mixtures
Now, gently fold the dry ingredients into the wet mixture. Use a spatula or wooden spoon; we don’t want to overmix! Stop as soon as the flour disappears. -
Add Apples
Fold in the chopped apples until evenly distributed throughout the batter. This is where the apple flavor shines—lumps of cinnamon-sugar goodness await in each bite! -
Transfer to the Loaf Pan
Pour the batter into the prepared loaf pan, spreading it out evenly. Now’s the time to sprinkle the reserved 2 tablespoons of brown sugar and 1/4 teaspoon of cinnamon on top for a crunchy crust! -
Bake!
Place in the preheated oven and bake for 50-60 minutes. Check for doneness by inserting a toothpick into the center—the toothpick should come out clean with just a few crumbs attached. -
Cool and Glaze
Once baked, remove from the oven and let it cool in the pan for about 10 minutes. Carefully turn it out onto a wire rack to cool completely. Meanwhile, whisk together the confectioners’ sugar, additional ground cinnamon, and water to create a smooth glaze, adjusting the water as needed to achieve your desired consistency. -
Glaze the Bread
Once the bread is cool, drizzle the glaze over the top. Don’t be shy—let it cascade down the sides!
Believe me, the warm cinnamon apple scent will be irresistible, not just in your kitchen but throughout your home!
Serving Suggestions
When it comes to plating or serving your Cinnamon Apple Bread, keep it simple and inviting. Slice the bread into thick, lovely pieces and arrange them on a rustic wooden board or a cute cake stand.
For an even more delectable experience, serve it warm, maybe with a dollop of fresh whipped cream or a scoop of vanilla ice cream on the side. A dusting of extra cinnamon or a sprinkle of chopped nuts can add a nice finishing touch, too.
And don’t forget to pair your slices with a hot cup of coffee or tea—nothing beats the cozy combo of warm bread and your favorite brew! Gather your friends or family around, and don’t be surprised when they ask for a second slice!
Recipe Variations
Want to mix it up a bit? Here are some fun twists for your Cinnamon Apple Bread:
-
Nutty Delight: Stir in 1/2 cup of chopped walnuts or pecans into the batter for added crunch and flavor!
-
Dried Fruits: Add a handful of dried cranberries or raisins for a little sweetness and texture contrast to the fresh apples.
-
Pumpkin Spice: For an autumn-inspired version, swap out half the flour for pumpkin puree and adjust the spices, adding nutmeg and ginger for a cozy twist.
-
Chocolate Chip: Mix in 1/2 cup of mini chocolate chips for a decadent chocolate-cinnamon combo that will make your taste buds dance!
-
Sugar-Free Option: Substitute both sugars for your preferred low-calorie sweetener to make a guilt-free version without compromising flavor!
Feel free to get creative and adapt this recipe to suit your taste—there’s nothing quite like making a dish your own!
Chef’s Notes
As with any recipe passed down through generations, this Cinnamon Apple Bread has evolved over the years. I’ve tried incorporating different types of apples, experimenting with spices, and even testing out alternate glazes! One particularly funny memory I have is when I mistakenly used salt instead of sugar in one of my early attempts—it was a flat-out disaster! But those mishaps only made me appreciate the intentionality behind cooking even more.
I love that every time I make it, I’m taken back to those magical kitchen moments with my grandmother. This bread brings so much joy, and I encourage you to create your own memories in the process!
FAQs and Troubleshooting
-
Why is my bread too dense?
This usually happens if the batter is overmixed or if there’s too much flour. Make sure to mix just until combined and measure flour accurately. -
How do I know when my bread is done?
A toothpick inserted in the center should come out clean or with just a few crumbs. Remember to watch the baking time; every oven can vary! -
Can I freeze this bread?
Absolutely! Let it cool completely, then wrap it in plastic wrap and aluminum foil, or use a freezer-safe bag. It should last for up to 3 months. -
What if I don’t have apples?
You can substitute with bananas for a banana cinnamon bread or use canned apples (drained) if you’re in a pinch—just adjust the liquid in the recipe as necessary.
Nutritional Info
While I usually don’t focus too much on calories and macros (because we all deserve some deliciousness!), here’s a rough estimate per slice (assuming 12 slices):
- Calories: 180
- Total Fat: 7g
- Saturated Fat: 4g
- Cholesterol: 35mg
- Sodium: 150mg
- Total Carbohydrate: 25g
- Dietary Fiber: 1g
- Sugars: 10g
- Protein: 2g
Note: These numbers will vary based on exact ingredients and portion sizes, so feel free to adjust and suit your needs!
Final Thoughts
There you have it, folks—a full-hearted dive into the world of Cinnamon Apple Bread! Not only is it a comforting dish staunchly rooted in cherished memories, but it’s also an incredibly versatile recipe that welcomes all of your creative spins. I hope this recipe inspires you to share joyful moments in your kitchen and at your table, because cooking is as much about connection as it is about food.
Whether you craft your own memory or share a loaf with a friend just because, I can’t wait for you to discover the warmth of this delightful bread. And hey, if you give it a try, be sure to tag me or leave a comment—nothing makes my day quite like seeing your kitchen creations.
Now, go on, put on your apron and bake something wonderful. Remember, every loaf tells a story—let this one be yours. Happy baking, friends! 🍏🍞✨
Print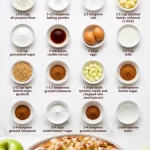
Cinnamon Apple Bread
- Total Time: 75 minutes
- Yield: 12 servings 1x
- Diet: Vegetarian
Description
A warm and inviting loaf with sweet apples and rich cinnamon—perfect for breakfast or dessert!
Ingredients
- 1–1/2 cups all-purpose flour
- 1–1/2 teaspoons baking powder
- 1/2 teaspoon salt
- 1/2 cup unsalted butter, softened (1 stick)
- 1/2 cup granulated sugar
- 2 teaspoons vanilla extract
- 2 large eggs
- 1/2 cup milk
- 1/2 cup light brown sugar (packed)
- 1–1/2 teaspoons ground cinnamon
- 1 large apple (peeled, cored, and chopped into small pieces)
- 2 tablespoons brown sugar
- 1/4 teaspoon ground cinnamon
- 3/4 cups confectioners’ sugar
- 1/4 teaspoon ground cinnamon
- 2 tablespoons water
Instructions
- Preheat the oven to 350°F (175°C).
- Grease a 9×5-inch loaf pan with butter or cooking spray.
- Mix the dry ingredients: flour, baking powder, salt, and ground cinnamon in a large bowl.
- Cream the butter and sugars in another bowl until light and fluffy.
- Add vanilla extract and eggs one at a time, mixing until fully combined.
- Pour in the milk gradually while mixing on low speed until combined.
- Combine the dry and wet mixtures gently with a spatula.
- Add the chopped apples and fold them into the batter.
- Transfer the batter to the prepared loaf pan and sprinkle brown sugar and cinnamon on top.
- Bake for 50-60 minutes, or until a toothpick comes out clean.
- Cool the bread in the pan for 10 minutes, then on a wire rack.
- Glaze by mixing confectioners’ sugar, additional cinnamon, and water; drizzle over the cooled bread.
Notes
Serve warm with whipped cream or ice cream. For variations, consider adding nuts or chocolate chips.
- Prep Time: 15 minutes
- Cook Time: 60 minutes
- Category: Dessert
- Method: Baking
- Cuisine: American
Nutrition
- Serving Size: 1 slice
- Calories: 180
- Sugar: 10g
- Sodium: 150mg
- Fat: 7g
- Saturated Fat: 4g
- Unsaturated Fat: 2g
- Trans Fat: 0g
- Carbohydrates: 25g
- Fiber: 1g
- Protein: 2g
- Cholesterol: 35mg
Keywords: cinnamon apple bread, dessert, baking, comfort food, quick bread