
One-Pan Meatloaf with Cheesy Mashed Potatoes (30-Min)
Comforting Meatloaf with Mashed Potatoes and Cheese: A Heartwarming Feast
Hey there, fellow food lovers! I’m Beau Collier, and I believe that every great meal begins with a story. Today, we’re diving into an iconic dish that brings back fond memories for so many of us—meatloaf with mashed potatoes and cheese. When I think of meatloaf, I think of cozy family dinners, a warm kitchen filled with laughter, and the tantalizing aroma wafting through the air—it’s the epitome of comfort food, isn’t it?
There’s something so satisfying about meatloaf. It’s hearty, filling, and incredibly versatile. You can whip it up using whatever seasonal ingredients you have, and there’s a personal touch in every loaf that makes it special. Did you know that meatloaf has been a staple in many households since the Great Depression? It was a clever way to stretch ingredients and feed a crowd, and it has firmly cemented itself in the hearts of many as a beloved classic.
In this blog post, not only will I share my scrumptious recipe for meatloaf smothered in cheesy, buttery mashed potatoes, but I’ll also take you along on this delightful culinary journey filled with personal stories, cooking tips, and a sprinkle of nostalgic magic. So, take a seat, grab your apron, and let’s create something delicious that will have your family gathering around the table, smiles all around!
Personal Story
Growing up, Sunday dinners at my grandparents’ house were sacred. It was always a bite of comfort and tradition, and one dish that consistently made an appearance was Grandma’s famous meatloaf. Let me tell you, her secret involved using a touch of love, a dash of nostalgia, and sometimes, I’d like to think, a little bit of magic.
I remember the first time I helped her in the kitchen, my tiny hands mixing the meat and spices together, making a mess but also a masterpiece. The joy of molding that messy loaf felt like pure creativity, and when it slid into the oven, the transformation was almost mesmerizing. The buttery scent of meatloaf baking mingled with the earthy aroma of roasted potatoes created a symphony that echoed through the hallways of their home.
Grandma always topped her meatloaf with a generous layer of cheese—because let’s face it, cheese makes everything better! Those cheesy mashed potatoes became an essential side, eagerly piling high on our plates, reminding me of the love and warmth that only family meals can bring. With each bite, I felt history unfolding, and that’s exactly the flavor I want to bring to your kitchen today!
Ingredients
Now that we have our hearts warmed up with memories, let’s get cooking! Here’s what you’ll need for this classic meatloaf with mashed potatoes and cheese, plus some little tips to keep in mind.
For the Meatloaf Layer:
- 1 lb ground beef (85/15 preferred): This is the star of our dish! The 85/15 ratio gives you the perfect balance of flavor and juiciness. If you’re going leaner, consider adding a bit of olive oil to keep it moist.
- 1/2 cup plain breadcrumbs: They help bind everything together. You can also use crushed crackers or panko for a crunchier texture.
- 1/3 cup milk: This keeps the meatloaf moist and helps it hold together. Almond milk or any dairy-free version works well if you’re looking for alternatives.
- 1 egg: Acts as a binding agent. If you need a vegan substitute, try using flaxseed meal mixed with water (1 tablespoon flaxseed meal + 2.5 tablespoons water = 1 egg).
- 1/4 cup ketchup: An essential for flavor and moisture! Feel free to use BBQ sauce or even salsa for a zesty kick.
- 1 tsp garlic powder: A must for flavor. Fresh minced garlic works too—just adjust the quantity to your taste!
- 1 tsp onion powder: A nice depth of flavor. If you prefer freshness, sauté finely chopped onions before mixing them in.
- 1/2 tsp salt and 1/2 tsp black pepper: Basic seasonings to elevate your dish. Always taste before final seasoning adjustments!
For the Mashed Potato Layer:
- 3 cups mashed potatoes (prepared or leftover): Whip up fresh or use leftovers for a quick meal. Creamy, buttery goodness is what we’re aiming for!
- 1/4 cup sour cream: This adds a delightful tang and creaminess. Plain Greek yogurt is a great substitute if you’re looking for something healthier.
- 2 tbsp butter: Adds richness and flavor. You can swap it with olive oil for a lighter version.
- Salt & pepper, to taste: Adjust according to your preferences!
Topping:
- 1 1/2 cups shredded cheddar cheese: The melty layer that takes this comfort food to the next level! Feel free to mix it up with mozzarella or pepper jack for some excitement.
- Fresh parsley (optional, for garnish): A pop of color and freshness; it makes everything look fancy!
Step-by-Step Instructions
Alright! Let’s roll up those sleeves and get down to the good stuff. Follow these steps to create a meatloaf that would make Grandma proud!
Step 1: Preheat Your Oven
Before we dive into mixing, preheat your oven to 350°F (175°C). This ensures your meatloaf gets that perfect sizzle!
Step 2: Mix the Meatloaf Ingredients
In a large mixing bowl, combine the ground beef, breadcrumbs, milk, egg, ketchup, garlic powder, onion powder, salt, and pepper. Get your hands in there—this is where the magic happens. I love using my hands for this; it just feels more personal, doesn’t it?
Tip: If the mixture feels a bit too wet, just add a touch more breadcrumbs. Conversely, if it feels too dry, a splash of milk can help transform it. You want a mixture that holds together well but isn’t too dense.
Step 3: Shape the Loaf
Transfer your meaty mixture to a lined or greased loaf pan. Shape it gently—remember, the more you handle it, the denser the meatloaf will be. We’re looking for a fluffy texture here!
Step 4: Bake the Meatloaf
Place your shaped meatloaf in the oven and bake for about 45-50 minutes. You can check doneness by inserting a meat thermometer into the center; it should read 160°F (70°C) for safe consumption.
Chef Hint: If you want a beautiful caramelized glaze, brush additional ketchup on top during the last 10 minutes of baking. It adds flavor and a lovely shine!
Step 5: Prepare the Mashed Potatoes
While the meatloaf is doing its thing, it’s the perfect time to whip up our creamy mashed potatoes. If you’re starting with fresh potatoes, peel and boil them until tender, then mash with sour cream, butter, salt, and pepper until creamy and dreamy.
Step 6: Layer It Up!
Once your meatloaf is cooked, take it out of the oven and slice the top gently to create a small "bowl" for your mashed potatoes. Spoon those mashed potatoes right on top, smoothing them out.
Step 7: Cheese It Up
Lastly, sprinkle the shredded cheddar over the mashed potatoes. Pop the entire loaf back into the oven for about 15 minutes or until the cheese is bubbly and golden brown.
Step 8: Garnish and Serve
Once bubbly and enticing, you’ll want to let it rest for about 10 minutes before slicing. Garnish with a sprinkle of fresh parsley for that pop of color and freshness!
Serving Suggestions
This meatloaf with cheesy mashed potatoes can be the star of the show! You can serve it with simple steamed veggies like broccoli or green beans for a colorful plate. A sprinkle of herbs adds sophistication, while a side salad lends a refreshing crunch.
For an ultimate comfort meal, you can even serve it with gravy drizzled over the top. Trust me; that’s a flavor combo that will have your family raving!
A fun way to serve this dish is in individual ramekins—layer up mini portions for an adorable presentation at dinner parties.
Recipe Variations
Now, let’s explore a few creative twists you can put on this classic dish:
-
Savory Bacon Meatloaf: Mix cooked, crumbled bacon into the meat mixture for a smoky flavor profile.
-
Vegetarian Version: Swap out the ground beef for lentils or black beans, and keep the spices and herbs for that familiar meaty taste.
-
Spicy Twist: Add in diced jalapeños or a few dashes of hot sauce for a spicy kick!
-
BBQ Meatloaf: Replace the ketchup with tangy barbecue sauce for a sweet and smoky flavor.
-
Herbed Mash: Stir in fresh herbs like chives or dill into your mashed potatoes for a fresh twist.
Chef’s Notes
Before we wrap things up, can I just say how much I adore meatloaf? Over time, I’ve made countless variations, but there’s nothing quite like the classic. I once tried to get fancy and added some unexpected ingredients—think chopped olives and gourmet cheeses. Let’s just say, my family had strong opinions that night. Sometimes, simplicity really is key!
And don’t worry if it doesn’t come out perfect! Cooking is about experimentation—embracing flavor, and having fun in the kitchen means making a few culinary memories, sweet or savory.
FAQs and Troubleshooting
Q: Can I prepare the meatloaf ahead of time?
Absolutely! You can mix everything, shape it, and refrigerate it until you’re ready to bake. Just be sure to add a few extra minutes of cooking time if it’s coming straight from the fridge.
Q: Why did my meatloaf turn out dry?
Oh no! Dry meatloaf could be the result of overcooking or using lean meat without enough fat. Consider using a little olive oil when using leaner options to keep things juicy.
Q: How can I tell when the meatloaf is done?
Using a meat thermometer is the best way to ensure it’s safe to eat. Aim for an internal temperature of 160°F (70°C). If you don’t have one, cut into the center—juices should run clear, not pink.
Q: Can I freeze meatloaf?
Yes! It freezes beautifully. Just make sure it cools completely, then wrap it tight in plastic wrap and foil before popping it in the freezer.
Nutritional Info
When it comes to a comfort food like meatloaf with cheesy mashed potatoes, it’s a bit of a hearty dish! On average, a serving may contain:
- Calories: ~450-500
- Protein: ~35g (thanks to that tasty beef!)
- Carbohydrates: ~40g (mostly from the potatoes)
- Fat: ~20g
- Fiber: 2g
It’s important to savor this dish in moderation if you’re looking out for your daily intake, but it’s also packed with vitamins and minerals from fresh ingredients!
Final Thoughts
And there you have it! A recipe that not only fills your belly but also warms your heart. Meatloaf with cheesy mashed potatoes is more than just a meal; it’s a celebration of togetherness, nostalgia, and the joy of cooking. I encourage you to make it your own! Add a couple of your favorite spices, share the process, and perhaps even recreate some cozy memories along the way.
Food tastes better when shared, so invite your loved ones over, serve it hot, and watch as they gather around the table, laughter filling the air. Remember, it’s all about those moments spent together, and I’m so grateful to have shared this recipe with you. Until next time, happy cooking and enjoy the feast!
Print
Comforting Meatloaf with Mashed Potatoes and Cheese
- Total Time: 65 minutes
- Yield: 4 servings 1x
- Diet: Omnivore
Description
A heartwarming feast of meatloaf topped with cheesy mashed potatoes, perfect for family gatherings.
Ingredients
- 1 lb ground beef (85/15 preferred)
- 1/2 cup plain breadcrumbs
- 1/3 cup milk
- 1 egg
- 1/4 cup ketchup
- 1 tsp garlic powder
- 1 tsp onion powder
- 1/2 tsp salt
- 1/2 tsp black pepper
- 3 cups mashed potatoes (prepared or leftover)
- 1/4 cup sour cream
- 2 tbsp butter
- 1 1/2 cups shredded cheddar cheese
- Fresh parsley (optional, for garnish)
Instructions
- Preheat your oven to 350°F (175°C).
- Mix the ground beef, breadcrumbs, milk, egg, ketchup, garlic powder, onion powder, salt, and pepper in a large mixing bowl.
- Shape the mixture into a loaf and transfer it to a lined or greased loaf pan.
- Bake for 45-50 minutes or until the internal temperature reaches 160°F (70°C).
- Prepare mashed potatoes by mashing potatoes with sour cream, butter, salt, and pepper until creamy.
- Layer the mashed potatoes over the cooked meatloaf.
- Sprinkle shredded cheddar cheese on top of the mashed potatoes.
- Bake for an additional 15 minutes or until cheese is bubbly and golden brown.
- Garnish with fresh parsley if desired and let it rest for 10 minutes before slicing.
Notes
For a beautiful glaze, brush additional ketchup on top during the last 10 minutes of baking. This dish goes well with steamed veggies or a side salad.
- Prep Time: 15 minutes
- Cook Time: 50 minutes
- Category: Main Course
- Method: Baking
- Cuisine: American
Nutrition
- Serving Size: 1 serving
- Calories: 450
- Sugar: 5g
- Sodium: 600mg
- Fat: 20g
- Saturated Fat: 8g
- Unsaturated Fat: 8g
- Trans Fat: 0g
- Carbohydrates: 40g
- Fiber: 2g
- Protein: 35g
- Cholesterol: 90mg
Keywords: meatloaf, comfort food, mashed potatoes, family dinner

One-Pan Bacon Onion Tomato Pie: Weeknight Comfort Dinner
Discovering Comfort: Bacon Onion Tomato Pie
Hey there, fellow foodies! Let me tell you, there’s nothing quite like the aroma of bacon sizzling in the pan as it mingles with sweet, caramelized onions under the warm glow of your kitchen lights. If you’ve never had the joy of creating—or indulging in—a Bacon Onion Tomato Pie, you’re in for a treat today. This dish, a delightful mix of savory and slightly sweet, embodies everything I love about comfort food; it’s a warm hug in pie form!
Imagine this: You arrive home after a long day, and the delightful smell of bacon fills every corner of your house. You can’t help but feel a sense of joy wash over you. That’s what this Bacon Onion Tomato Pie is all about. It’s comforting, it’s satisfying, and it’s downright delicious. That’s why I started Feastical: to help you find those little pockets of happiness through food. So wash your hands, grab your favorite apron, and let’s dive into making this flavor-packed treasure!
A Slice of Nostalgia: My Kitchen Memory
Let me take you back to a sun-drenched afternoon in my grandmother’s kitchen. The door was propped open with a wooden block, and the scent of freshly baked pies floated through the air. One of my grandmother’s signature dishes was a savory pie similar to what we’re making today—a Bacon Onion Tomato Pie that had everyone coming back for seconds.
She had a knack for turning simple ingredients into something extraordinary! I remember her expertly tossing together leafy greens, juicy tomatoes, and crispy bacon, laughing while she said, “Good food is like good friends; it only gets better as you share it.” Those moments ignited a passion in me that’s blossomed into my love for cooking and feeding others. And while I wish I could replicate her magic exactly, I’ve added my own flair to her original recipe, bringing it back to life while creating new memories in my cozy kitchen.
Ingredients You’ll Need
Now, let’s gather our ingredients to kick off this delicious journey! Here’s what you’ll need for our Bacon Onion Tomato Pie:
-
1 refrigerated pie crust (9-inch)
Perfect for saving time! But feel free to make a homemade crust if you’re up for it. It adds a personal touch. -
6 strips bacon (cooked and crumbled)
The star of the show! Use thick-cut bacon for extra flavor. Can’t have bacon? Try using smoked tempeh instead for a plant-based alternative. -
1 large sweet onion (thinly sliced)
Sweet onions like Vidalia or Walla Walla work wonders here. They sweeten nicely when caramelized. Yellow onions are a solid substitute if you need to use what you have. -
3 medium ripe tomatoes (sliced, about 2 cups)
Juicy and fresh! Don’t skimp on quality here. Heirloom tomatoes really bring that garden-fresh taste, but any good ripe tomato will do. -
1 cup shredded cheddar cheese
Sharp cheddar adds a nice bite. You can mix it up with aged gouda or go for a spicy pepper jack for some heat! -
½ cup shredded mozzarella cheese
This gives that melty goodness! You can substitute with provolone or fontina for an extra layer of flavor. -
½ cup mayonnaise
Sounds odd, but it creates a creamy base that holds the pie together. Greek yogurt can make for a delicious and healthier swap. -
2 tablespoons chopped fresh basil (or 1 tsp dried)
Fresh is always best for flavor. Dried basil can work in a pinch, just be sure to adjust the quantity since it’s more concentrated. -
½ teaspoon salt
Always essential! Adjust to taste based on your other ingredients. -
¼ teaspoon black pepper
A touch of heat; feel free to add more if you like!
Step-By-Step Instructions
Alright, let’s roll up our sleeves and get cooking! Here’s how to whip up this Bacon Onion Tomato Pie:
-
Preheat your oven to 375°F (190°C).
This step is crucial! You want your pie crust to crisp up perfectly, and preheating helps achieve that beautiful golden color. -
Prepare the Pie Crust:
Unroll your refrigerated pie crust and lay it gently into a 9-inch pie pan. Press it into the sides and trim any excess hanging over. If you’re feeling fancy, you can crimp the edges for a beautiful finish. Pre-bake your crust for about 10 minutes until it’s just lightly golden. This ensures it won’t get soggy later on. -
Cook the Bacon:
In a skillet over medium heat, cook the bacon until crispy. Once it’s done, transfer it to a paper towel-lined plate to drain, keeping that savory goodness! Don’t forget to reserve some drippings in the pan for the next step—yum! -
Caramelize the Onions:
In the same skillet with leftover bacon fat (don’t you love using every bit?), add the thinly sliced onions. Sauté them on low heat, stirring frequently, for about 10-15 minutes until they are a beautiful golden brown. Patience pays off here; the longer you cook them, the sweeter they become! -
Layer the Goodness:
In a mixing bowl, combine the cooked bacon, caramelized onions, sliced tomatoes, both cheeses, mayonnaise, basil, salt, and pepper. Mix until everything is coated and well combined. You’re combining layers of flavor here! -
Fill the Pie Crust:
Pour the mixture into your pre-baked pie crust, spreading it evenly. Don’t be shy—let the ingredients pile up a bit! -
Bake the Pie:
Place your pie in the preheated oven and bake for 30-35 minutes or until it’s bubbly and golden brown on top. The aroma will fill your kitchen, and trust me, you’ll have to resist the urge to dive in right away! -
Let It Cool:
Once you pull that beauty out, let it rest for about 10 minutes before slicing. This will help it set up just right.
Serving Suggestions
Now that your Bacon Onion Tomato Pie is ready, let’s talk about how to present it! Slice it into wedges and serve warm, perhaps with a side salad for a complete meal. A simple arugula salad with a drizzle of balsamic would be fantastic to cut through the richness of the pie. Garnish each slice with some extra basil or a sprinkle of parmesan for an elegant touch. And, of course, if you’re feeling extra fabulous, serve it with a glass of chilled white wine. Cheers to that!
Recipe Variations
The beauty of this dish is its versatility! Here are a few creative twists and variations to inspire you:
-
Spicy Kick: Add some diced jalapeños or a pinch of red pepper flakes for a kick that’ll tantalize your taste buds.
-
Vegetarian Delight: Replace the bacon with mushrooms or zucchini for a delicious vegetarian option that still keeps the pie hearty.
-
Southern Style: Add a dash of hot sauce or BBQ sauce to the filling for a smoky, tangy twist.
-
Herbaceous Kick: Swap out the basil for fresh rosemary or thyme. These herbs will elevate the flavor profile significantly.
-
Dairy-Free: Use vegan mayo and dairy-free cheese alternatives for a completely dairy-free version that still packs a flavor punch!
Chef’s Notes
As I’ve perfected this recipe over the years, I’ve realized that it’s not just about the ingredients but the love and laughter that goes along with it. I recall one time when I had friends over, and I decided to throw this pie together last minute. We had a blast, with one friend getting a bit too eager with the spices! Let’s just say there was fire in our eyes—quite literally, but we ended up creating one of our most memorable evenings.
FAQs and Troubleshooting
Q1: Why did my pie crust shrink?
A: This can happen if the dough isn’t chilled enough. Make sure to refrigerate your crust before rolling it out. If it happens, no worries; just crimp the edges again after baking!
Q2: My pie is watery—what did I do wrong?
A: Tomatoes can release a lot of juices. To prevent this, you can salt your tomato slices and let them sit for about 30 minutes before building your pie. This draws out excess moisture.
Q3: Can I make this pie ahead of time?
A: Absolutely! You can prep the filling and assemble the pie without baking. Cover and refrigerate, then bake it fresh just before serving.
Q4: What should I do with leftovers?
A: This pie keeps well in the fridge for 3-4 days. Simply reheat in the microwave or oven until warmed through.
Nutritional Info
While indulgent, this Bacon Onion Tomato Pie doesn’t have to be an enemy to your health goals if enjoyed in moderation! Each slice (based on 8 servings) contains approximately:
- Calories: 350
- Protein: 12g
- Fat: 26g
- Carbohydrates: 25g
- Fiber: 2g
- Sugar: 3g
As always, you can adjust the ingredients to fit your nutritional needs better.
Final Thoughts
So there you have it, folks! A scrumptiously comforting Bacon Onion Tomato Pie ready to be enjoyed with family and friends. Cooking is not just about feeding our bodies; it’s about nourishing our souls. Whether it’s a cozy evening in with a loved one or a cheerful gathering with friends, this pie is bound to add joy and flavor to every occasion. Remember, food is as much about the experiences we create around it—so gather your favorite people, dig in, and make some memories!
Until next time, happy cooking! Keep those spatulas flying and your heart full!
Print
Bacon Onion Tomato Pie
- Total Time: 50 minutes
- Yield: 8 servings 1x
- Diet: Omnivore
Description
A delightful blend of savory bacon, caramelized onions, and fresh tomatoes, all baked in a crispy pie crust for a comforting meal.
Ingredients
- 1 refrigerated pie crust (9-inch)
- 6 strips bacon (cooked and crumbled)
- 1 large sweet onion (thinly sliced)
- 3 medium ripe tomatoes (sliced, about 2 cups)
- 1 cup shredded cheddar cheese
- ½ cup shredded mozzarella cheese
- ½ cup mayonnaise
- 2 tablespoons chopped fresh basil (or 1 tsp dried)
- ½ teaspoon salt
- ¼ teaspoon black pepper
Instructions
- Preheat your oven to 375°F (190°C).
- Prepare the Pie Crust: Unroll your refrigerated pie crust and lay it gently into a 9-inch pie pan. Pre-bake for about 10 minutes.
- Cook the Bacon: In a skillet over medium heat, cook the bacon until crispy. Reserve some drippings.
- Caramelize the Onions: Sauté thinly sliced onions in the same skillet with bacon fat for about 10-15 minutes.
- Layer the Goodness: In a bowl, combine bacon, onions, tomatoes, cheeses, mayonnaise, basil, salt, and pepper. Mix well.
- Fill the Pie Crust: Pour the mixture into your pre-baked pie crust, spreading it evenly.
- Bake the Pie: Place in the oven and bake for 30-35 minutes until bubbly and golden brown.
- Let It Cool: Allow to rest for about 10 minutes before slicing.
Notes
Serve warm with a side salad or garnish with fresh basil and parmesan.
- Prep Time: 15 minutes
- Cook Time: 35 minutes
- Category: Main Course
- Method: Baking
- Cuisine: American
Nutrition
- Serving Size: 1 slice
- Calories: 350
- Sugar: 3g
- Sodium: 600mg
- Fat: 26g
- Saturated Fat: 9g
- Unsaturated Fat: 15g
- Trans Fat: 0g
- Carbohydrates: 25g
- Fiber: 2g
- Protein: 12g
- Cholesterol: 30mg
Keywords: bacon pie, tomato pie, comfort food, savory pie, easy recipe
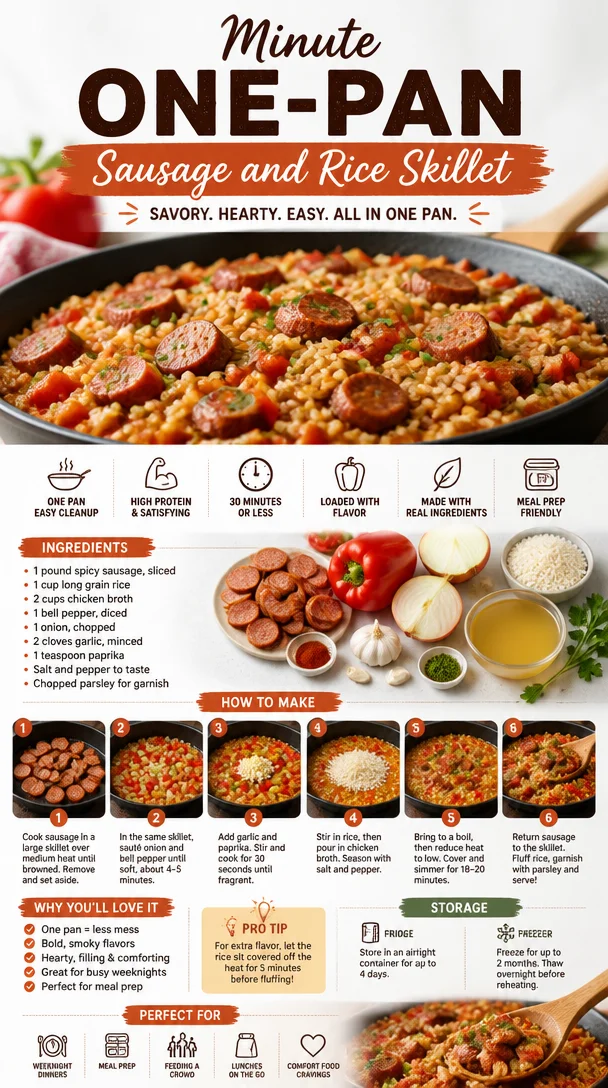
Minute One-Pan Sausage and Rice Skillet
Welcome to My Kitchen: A Flavorful Journey with Sausage and Rice Skillet!
Hey there, it’s Beau Collier! Today we’re diving into one of my absolute favorite comfort food dishes: the Sausage and Rice Skillet. This dish isn’t just about filling your belly; it’s about bringing warmth and family vibes right into your kitchen. There’s something about a skillet meal that feels cozy, right? It’s like a big hug with every bite!
When I think of the Sausage and Rice Skillet, I’m flooded with memories of cooking side by side with my family, always laughing, always dancing to some upbeat tunes while we chopped and sautéed. The aroma of spicy sausage sizzling in the pan mixed with the sweetness of the bell peppers and the savory garlic filled the air, creating anticipation that drew everyone into the kitchen. This dish embodies my philosophy that good food creates good times, whether it’s a weeknight meal or a weekend gathering with friends.
So, if you’re craving something hearty and delicious that’s packed with flavor yet simple enough for any cook, stick around! Let’s whip up this sensational Sausage and Rice Skillet that’ll leave you and your loved ones begging for seconds.
A Slice of My Kitchen Memory
Years ago, I decided to host friends for a cozy get-together at my place. I wanted to bring some warmth to what I thought would be a dreary night, so I made my beloved Sausage and Rice Skillet. I remember the laughter filling my tiny kitchen as we prepped the ingredients together. The banter was as hearty as the dish itself!
One of my friends was a vegetarian, so we had a little fun improvising with plant-based sausage, and somehow, it sparked an impromptu cooking class—with everyone’s knives clattering, bell peppers flying, and spices wafting in the air. By the end of the night, we not only relished our meal together but also created deeper connections. That night, amidst food and laughter, we forged beautiful memories and realizations: food is not just about eating; it’s about sharing, connecting, and simply celebrating life.
So let’s keep that spirit alive today and jump right into cooking our Sausage and Rice Skillet!
Ingredients
Before we sauté our hearts out, let’s gather the beautiful ingredients that will elevate our dish:
-
1 Pound Spicy Sausage, Sliced
Opt for your favorite sausage—Italian, Spanish, or any variant that tickles your taste buds! If you’re in the mood for lighter fare, turkey or chicken sausage works great too. -
1 Cup Long Grain Rice
This type of rice cooks up perfectly for skillet meals, but feel free to switch it up with brown rice for a nutty flavor and extra fiber—just adjust your cooking time accordingly! -
2 Cups Chicken Broth
The flavor enhancer! Use low-sodium broth to control the saltiness. For a vegetarian twist, opt for vegetable broth which will also lend a different depth to the dish. -
1 Bell Pepper, Diced
Any color works! Red, green, or yellow all offer their own unique sweetness and color pop. You could also substitute with other veggies like zucchini or even corn. -
1 Onion, Chopped
Onions are like the flavor base for almost any dish. I usually stick to yellow or white for their balance of sweetness and sharpness. Shallots can make a gourmet replacement if you’re feeling fancy! -
2 Cloves Garlic, Minced
Garlic provides that pungent kick that rounds everything out. If you’re a fellow garlic-lover, feel free to add more; it’s hard to go wrong here. -
1 Teaspoon Paprika
Paprika adds a smokiness and slight warmth to the dish. For an extra punch, consider using smoked paprika! -
Salt and Pepper to Taste
These classic add-ins will elevate your dish even further. Just remember to taste along the way so you can find that perfect seasoning balance. -
Chopped Parsley for Garnish
A sprinkle of fresh parsley not only adds color but a burst of freshness on top of the warm, hearty meal. If you like other herbs, cilantro or basil can bring unique flavors to the table too.
Step-by-Step Instructions
Alright, fellow food lovers, let’s get cooking! If you follow these steps, you’ll have a vibrant and flavor-packed Sausage and Rice Skillet in no time!
-
Sizzle the Sausage
In a large skillet, heat a drizzle of oil over medium heat. Add the sliced sausage and allow it to brown for about 5–7 minutes. You want it to get that nice crispy edge. This is the flavor foundation, folks! Pro tip: Don’t rush this process; a little caramelization can brighten the taste sky-high. -
Sauté the Veggies
Add the chopped onion and diced bell pepper to the skillet with the sausage. Sauté until they’re softened—about 3–4 minutes. This is where the aromas start to dance in your kitchen! -
Add Garlic
Toss in the minced garlic and paprika, cooking for an additional minute. Garlic burns quickly, so don’t stroll away—keep an eye on it! -
Stir in the Rice
Add the uncooked rice to the pan, stirring to coat it in all those juicy flavors. Allow it to toast for about 2 minutes. This step infuses the rice with lovely undertones right from the start. -
Pour in the Broth
Gradually add the chicken broth, stirring everything together. Bring it to a gentle boil. Once bubbling, reduce the heat to low, cover, and let it simmer. Cook until the rice is tender and has absorbed most of the liquid—about 15–20 minutes. Remember not to peek too often; we want that steam to work its magic! -
Season and Serve
Once the rice is fluffy and cooked through, taste and adjust seasoning with salt and pepper as necessary. Add chopped parsley for a fresh finish. Serve it warm straight from the skillet to your plates.
A little chef hack: You can keep the skillet warm on a low setting while you set the table!
Serving Suggestions
This Sausage and Rice Skillet is all about simplicity and flavor. For an inviting presentation, serve it straight from the skillet for that rustic charm. Here are a few serving ideas to elevate the experience:
- Garnish generously with extra parsley or even a sprinkle of red pepper flakes for an added kick.
- Pair it with a side salad—something fresh and crunchy, like a classic Caesar or a simple arugula salad with lemon vinaigrette will do wonders to balance the dish’s richness.
- You could also consider some warm, crusty bread on the side. It’s perfect for scooping up those last delicious bits of sausage and rice.
Recipe Variations
One of the beauties of this dish lies in its flexibility! Here are some fun variations you can play around with:
-
Vegetarian Twist
Swap out the sausage for plant-based options and use vegetable broth instead of chicken broth. -
Spicy Kick
Incorporate diced jalapeños or sprinkle in some cayenne pepper to take the heat up a notch! -
Cheesy Goodness
For the cheese lovers, stir in a generous handful of shredded cheese right before serving. Cheddar or pepper jack works wonders! -
Adding More Veggies
Mix in some spinach, kale, or even frozen peas during the last few minutes of cooking for added nutrition and color. -
Zesty Lemon Drizzle
A squeeze of fresh lemon juice over the finished dish will brighten it up beautifully.
Chef’s Notes
As with every recipe I share, the Sausage and Rice Skillet has evolved over time. I remember my early attempts at making it—so eager but perhaps a little too overzealous with spices! I learned that the balance of flavors is key. Now, I aim for simplicity and heartiness, which creates the perfect atmosphere most home cooks crave.
One warm memory I have of this dish is trying it out during my college years with a group of fellow aspiring chefs. Let’s just say there were some experimental results, but every mishap led to laughter and delicious conversations about what makes food memorable.
FAQs and Troubleshooting
Here are a few common questions you might have while whipping up this delight:
-
What if my rice is still crunchy?
If the rice isn’t tender yet after the recommended cooking time, add a splash more broth or water and cover the skillet to allow it to steam a bit longer. -
Can I use brown rice instead?
Absolutely! Just keep in mind that brown rice has a longer cooking time—about 40–45 minutes. -
How can I store leftovers?
Let the skillet cool completely, then transfer it into an airtight container. It’ll keep nicely in the fridge for about 3–4 days. -
Can I freeze this dish?
Yes! This meal freezes well for up to 3 months. To reheat, you can simply warm it on the stove with a splash of broth.
Nutritional Info
If you’re interested in the nutritional aspect, here’s a rough estimate per serving (includes 4 servings total):
- Calories: Approx. 450
- Protein: 22g
- Fat: 22g
- Carbohydrates: 46g
- Fiber: 2g
- Sodium: 600mg (depending on broth content)
For more specific dietary needs, feel free to adjust ingredients—switch to low-fat sausage, reduce sodium in broth, or increase veggies for a fiber boost!
Final Thoughts
And there you have it—the delectable Sausage and Rice Skillet! This is more than just a recipe; it’s a journey filled with memories, flavors, and fellowship. Each time I make it, I’m reminded of those cherished moments in my kitchen with family and friends. You can make this dish as simple or as adventurous as you like, yet it’s bound to please at any table.
So, what are you waiting for? Gather your ingredients, tie on that apron, and let’s create some delicious memories together! Bon appétit!
PrintSausage and Rice Skillet
- Total Time: 35 minutes
- Yield: 4 servings 1x
- Diet: Paleo
Description
A hearty Sausage and Rice Skillet packed with flavor, perfect for weeknight meals or gatherings with friends.
Ingredients
- 1 Pound Spicy Sausage, Sliced
- 1 Cup Long Grain Rice
- 2 Cups Chicken Broth
- 1 Bell Pepper, Diced
- 1 Onion, Chopped
- 2 Cloves Garlic, Minced
- 1 Teaspoon Paprika
- Salt and Pepper to Taste
- Chopped Parsley for Garnish
Instructions
- Sizzle the sausage in a large skillet over medium heat until browned, about 5–7 minutes.
- Sauté the onion and bell pepper until softened, about 3–4 minutes.
- Add minced garlic and paprika, cooking for 1 minute.
- Stir in uncooked rice and toast for 2 minutes.
- Pour in broth, bring to a boil, then cover and simmer until rice is tender, about 15–20 minutes.
- Season with salt and pepper, then add chopped parsley before serving.
Notes
For a vegetarian option, use plant-based sausage and vegetable broth. Adjust cooking times for brown rice.
- Prep Time: 10 minutes
- Cook Time: 25 minutes
- Category: Main Course
- Method: Sautéing
- Cuisine: American
Nutrition
- Serving Size: 1 serving
- Calories: 450
- Sugar: 3g
- Sodium: 600mg
- Fat: 22g
- Saturated Fat: 8g
- Unsaturated Fat: 10g
- Trans Fat: 0g
- Carbohydrates: 46g
- Fiber: 2g
- Protein: 22g
- Cholesterol: 60mg
Keywords: sausage, rice, skillet, comfort food, easy dinner

Minute Apricot Chicken Thighs: One-Pan Weeknight Dinner
Apricot Chicken Thighs: A Heartwarming Delight
Hey there, friends! Today, we’re diving into the vibrant world of flavors with a delightful dish that’s been making its rounds in kitchens for generations—Apricot Chicken Thighs! If you’re looking for a recipe that blends sweet, savory, and just a hint of tang, you’ve hit the jackpot. This dish is not only scrumptious but also incredibly easy to whip up, making it perfect for families or a cozy dinner with friends.
When it comes to food, I’ve always believed it bears the essence of love, tradition, and memories. Food is our connection, our celebration, and sometimes even a little nostalgia. I can’t tell you how many times I’ve gathered around the dinner table with family and friends, sharing laughter and stories over a wonderful meal. Apricot Chicken Thighs is one of those dishes that brings back some of my fondest memories in the kitchen.
A Journey Back in Time
Growing up, Sundays were sacred in my household. It was the day my mom would experiment with various recipes, but there was one dish she always returned to: Apricot Chicken Thighs. I remember coming home from school, the warm, sweet aroma of apricot mingling with savory chicken drifting through the front door, greeting me like an old friend. My sisters and I would rush to the kitchen, giddy with anticipation. It was never just about the food; it was about the love and care put into every bite.
After dinner, we would inevitably end up on the couch, laughter filling the room as my mom scrolled through her recipe box, planning the next week’s meals. This dish not only fed our bellies; it nurtured our hearts and brought us closer together. Now, I’m thrilled to share this cherished recipe with you, hoping it will bring the same joy and connection to your home.
Ingredient List
To prepare these heavenly Apricot Chicken Thighs, here’s what you’ll need:
-
1 cup apricot jam
A must-have for that luscious sweetness! If you’re looking for a lower sugar option, consider using fruit preserves or a homemade jam without added sugars. -
¼ cup finely diced onions
Onions add a nice layer of flavor. You can swap them for shallots or even green onions for a milder taste if preferred. -
2 tablespoons soy sauce
This salty ingredient brings depth to the dish. Tamari works as a gluten-free alternative if needed. -
1 tablespoon honey
Adds complexity! You can replace it with maple syrup for a vegan version or agave for a lighter alternative. -
1 tablespoon Dijon mustard
This gives a nice zing! If you’re out, regular yellow mustard works in a pinch, though it’s milder in flavor. -
1 tablespoon apple cider vinegar
This ingredient brightens the dish with acidity. Substitute with lemon juice if you prefer a fresh citrus twist. -
1 teaspoon minced garlic
Garlic is the MVP of flavor—adds a savory punch! You can use garlic powder (1/4 tsp) if you’re in a rush. -
1 teaspoon ground ginger
A warm spice that marries beautifully with chicken. Fresh ginger is a fantastic substitute if you have it on hand. -
⅛ teaspoon red pepper flakes (optional)
A touch of heat if you’re feeling adventurous! You can leave it out entirely for a milder flavor. -
6 chicken thighs
Juicy and flavorful, chicken thighs are perfect for this dish! Bone-in, skin-on adds more flavor, but boneless and skinless work too. -
Fresh parsley for garnish (optional)
Don’t underestimate the power of fresh herbs! They elevate the dish visually and add a fresh taste.
Step-by-Step Instructions
Now, let’s dig into the cooking process! Grab your apron and let’s get cooking!
Step 1: Preheat and Prepare
Preheat your oven to 375°F (190°C). While it’s heating up, grab a large mixing bowl to combine your sauce ingredients. This bowl will ensure that each chicken thigh gets the attention it deserves!
Step 2: Whisk That Sauce
In the bowl, combine the 1 cup of apricot jam, ¼ cup of finely diced onions, 2 tablespoons of soy sauce, 1 tablespoon of honey, 1 tablespoon of Dijon mustard, 1 tablespoon of apple cider vinegar, 1 teaspoon of minced garlic, and 1 teaspoon of ground ginger. If you’re adding heat, toss in ⅛ teaspoon of red pepper flakes too.
Use a whisk to blend everything together until it’s smooth and well-combined. This is where the magic begins, as the flavors will meld beautifully during cooking!
Step 3: Marinate the Chicken
Grab your chicken thighs and add them to your mixing bowl. Make sure they’re nicely coated in the sauce. If you have time, let them marinate for at least 30 minutes. This allows the meat to absorb all those incredible flavors. But if you’re in a hurry, you can skip this—just be sure to thoroughly coat them before cooking!
Step 4: Sear for Flavor
In a large oven-safe skillet (cast iron works great!), heat a tablespoon of olive oil over medium-high heat. Once it’s hot, carefully place the chicken thighs skin-side down. Sear them for about 5 minutes until they’re beautifully browned. This step adds a lovely crispy texture. Don’t be afraid to peek under them; you want a nice golden brown color!
Step 5: Saucy Transition
After searing both sides for about 5 minutes each, pour the leftover apricot sauce over the chicken in the skillet. For the ultimate flavor infusion, let it sizzle for a minute.
Step 6: Bake to Perfection
Transfer the skillet to your preheated oven. Bake for 30 to 35 minutes, or until the chicken reaches an internal temperature of 165°F (74°C). Your kitchen will fill with the heavenly aroma of sweet and savory goodness—seriously, your neighbors will be intrigued!
Step 7: Rest and Garnish
Once done, pull the skillet from the oven and allow the chicken to rest for about 5 minutes. This resting period is crucial as it allows the juices to settle. Sprinkle with fresh parsley for that added touch of vibrancy just before serving.
Serving Suggestions
Plate your Apricot Chicken Thighs by serving them on a bed of fluffy rice or with roasted vegetables on the side. Drizzling some of that luscious apricot sauce from the skillet on top? Oh yes, absolutely! For a fresh touch, consider adding a squeeze of lemon or a sprinkle of sesame seeds for added texture and flavor.
Pair this dish with a refreshing salad or even some crusty bread to soak up every last bit of sauce. Gather your friends or family around the table, pour a glass of wine, and enjoy the warmth of good food and company!
Recipe Variations
Feeling adventurous? Here are some variations to keep things exciting:
-
Tropical Twist: Add chunks of pineapple or mango to the apricot mixture for a fruity flavor explosion!
-
Herbed Delight: Experiment with fresh herbs like rosemary or thyme in the sauce for a fresh, fragrant take.
-
Spicy Kick: Increase the red pepper flakes for a hotter version or toss in some jalapeños.
-
Citrus Infusion: Mix in the zest of an orange or lemon to brighten the dish even further.
-
Sweet and Savory: Replace half the apricot jam with orange marmalade for a citrusy sweet delight.
Chef’s Notes
My journey with Apricot Chicken Thighs has been a delightful one. What started as my mom’s signature dish has evolved into my own creation, with a few personal touches along the way. One time, I decided to add a splash of bourbon to the sauce, thinking it might bring a new depth. Let’s just say… it didn’t last long! Not every kitchen experiment goes perfectly, but those mishaps often lead to the best laughter!
Over the years, I’ve found that using quality ingredients makes a huge difference. So, if you can find local apricot jam or organic chicken, grab them! They elevate this simple dish into a culinary masterpiece.
FAQs and Troubleshooting
-
What can I use if I don’t have apricot jam?
A fruit preserves or a homemade fruit spread can be substituted, but keep an eye on the sweetness level. -
Can I make this dish ahead of time?
Absolutely! You can marinate the chicken up to 24 hours in advance and then proceed with the recipe. -
What if my chicken is dry?
Ensure you’re cooking it at the right temperature and avoid overcooking. If dry, you can create a quick pan sauce by deglazing with chicken broth after cooking. -
Can I use chicken breasts instead?
Sure! Just keep an eye on the cooking time, as breasts will cook faster and can dry out if overdone.
Nutritional Info
Each serving of Apricot Chicken Thighs is packed with flavor and nutrition. Here’s a quick rundown of the approximate nutritional content (per serving):
- Calories: 350
- Protein: 27g
- Carbohydrates: 29g
- Fat: 15g
- Fiber: 1g
- Sugar: 18g
This dish is a great source of protein and balanced with a sweet touch from the apricot jam, making it a hearty and satisfying choice for any meal.
Final Thoughts
And there you have it, my lovely foodies! Apricot Chicken Thighs—a dish steeped in nostalgia, love, and deliciousness. I hope this recipe brings warmth to your kitchen and joy to your dinner table, just as it did for me growing up. Remember, the best meals are made with heart and shared with loved ones. So, gather around the table, enjoy, and make your own memories that will last a lifetime.
Thanks for joining me today in the kitchen! Until next time, keep cooking, keep sharing, and never stop experimenting—because every great dish begins with a pinch of courage and a spoonful of love. Happy cooking!
Print
Apricot Chicken Thighs
- Total Time: 50 minutes
- Yield: 4 servings 1x
- Diet: None
Description
A delightful dish that blends sweet, savory, and just a hint of tang, perfect for family gatherings and cozy dinners.
Ingredients
- 1 cup apricot jam
- ¼ cup finely diced onions
- 2 tablespoons soy sauce
- 1 tablespoon honey
- 1 tablespoon Dijon mustard
- 1 tablespoon apple cider vinegar
- 1 teaspoon minced garlic
- 1 teaspoon ground ginger
- ⅛ teaspoon red pepper flakes (optional)
- 6 chicken thighs
- Fresh parsley for garnish (optional)
Instructions
- Preheat your oven to 375°F (190°C). Grab a large mixing bowl to combine your sauce ingredients.
- Whisk together 1 cup of apricot jam, ¼ cup of finely diced onions, 2 tablespoons of soy sauce, 1 tablespoon of honey, 1 tablespoon of Dijon mustard, 1 tablespoon of apple cider vinegar, 1 teaspoon of minced garlic, and 1 teaspoon of ground ginger.
- Marinate the chicken thighs in the sauce, letting them soak for at least 30 minutes if possible.
- Sear the chicken thighs skin-side down in a hot skillet with olive oil for about 5 minutes until browned.
- Pour the leftover apricot sauce over the chicken in the skillet.
- Bake in the oven for 30 to 35 minutes, until the chicken reaches an internal temperature of 165°F (74°C).
- Rest the chicken for 5 minutes, then sprinkle with fresh parsley before serving.
Notes
Serve on a bed of rice or with roasted vegetables. Drizzle extra apricot sauce on top for added flavor.
- Prep Time: 15 minutes
- Cook Time: 35 minutes
- Category: Main Course
- Method: Baking
- Cuisine: American
Nutrition
- Serving Size: 1 serving
- Calories: 350
- Sugar: 18g
- Sodium: 500mg
- Fat: 15g
- Saturated Fat: 4g
- Unsaturated Fat: 8g
- Trans Fat: 0g
- Carbohydrates: 29g
- Fiber: 1g
- Protein: 27g
- Cholesterol: 70mg
Keywords: Apricot Chicken, Chicken Thighs, Easy Dinner Recipe, Family Recipe, Sweet and Savory Chicken

One-Pan Curried Apricot Chicken for Weeknight Dinners
Curried Apricot Chicken: A Flavorful Journey to Your Kitchen
Hey there, food lovers! It’s Beau Collier from Feastical, where good food and warm vibes come together in perfect harmony. Today, I’m thrilled to share a delightful dish that’s not only pleasing to the palate but also takes you on a journey filled with nostalgia and comfort: Curried Apricot Chicken. This dish is a celebration of flavors, combining the sweetness of apricots with the warm spices of curry, making a meal that’s both vibrant and scrumptious.
Introduction
Picture this: the sun is setting, casting a warm glow in your kitchen, and the air is filled with the mouth-watering aroma of spices simmering on the stove. That’s the essence of making Curried Apricot Chicken! There’s something absolutely magical about cooking with spices — they transport you to faraway lands and create memories that linger long after the last bite. From the first sprinkle of curry powder to that first taste of succulent chicken with a sweet apricot glaze, it’s a culinary adventure that can turn a regular weeknight into a special occasion.
When I first stumbled upon the combination of curried spices and apricots, it was love at first bite! I remember enjoying this dish at a friend’s dinner party, standing around the table filled with laughter and delicious food. The flavors danced on my tongue, and I knew I had to recreate it in my own kitchen. It felt like a warm hug on a plate—comforting, satisfying, and oh-so-delicious.
So, gather your ingredients, put on your favorite tunes, and let’s dive into the world of Curried Apricot Chicken. Whether you’re cooking for a cozy family dinner or impressing guests at a gathering, this dish is sure to be a hit! Trust me, you’ll want to remember this recipe because it’s one you’ll come back to time and time again.
Personal Story
I can still vividly recall the first time I made Curried Apricot Chicken. It was one of those chilly fall evenings when the leaves were changing colors, and I craved something warming and flavorful. My best friend, Sarah, was coming over for dinner, and I wanted to impress her with a dish that spoke of home and comfort.
I decided to take the plunge and try making Curried Apricot Chicken—having experienced it once before, in a charming little café that served world cuisine. With a few notes jotted down and sheer determination, I started chopping and stirring. As I poured the apricot preserves into the pan, I couldn’t help but feel excited about the flavors that were about to unfold. When Sarah arrived, the rich aroma filled my kitchen, making her eyes widen with anticipation.
That evening became a cherished memory, filled with laughter, moments around the table, and the satisfaction of sharing a homemade meal. Every forkful was met with delighted smiles, and we spent hours discussing our favorite recipes and reminiscing about childhood meals. That dish marked the beginning of many cooking adventures we would share, solidifying our bond over the love of delicious food.
Ingredients
Here’s what you’ll need to whip up this amazing Curried Apricot Chicken:
-
2 lbs chicken thighs, boneless and skinless: I prefer chicken thighs for their juiciness and rich flavor, but you can also use chicken breasts if you like. Just keep an eye on the cooking time as they may dry out more quickly.
-
1 cup apricot preserves: The star of this dish, apricot preserves give that sweet, flavorful kick. If you’re feeling adventurous, you might try peach or mango preserves as an alternative!
-
2 tablespoons curry powder: This adds warmth and depth to our dish; feel free to experiment with different curry blends—Madras for heat or a mild blend for something soothing.
-
1 medium onion, chopped: Onions are essential for building flavor. Make sure to chop them finely for a great base; shallots also work if you prefer a milder onion flavor.
-
3 cloves garlic, minced: Fresh garlic adds a fantastic aroma and taste! If you’re in a pinch, garlic powder can work as a substitute, but fresh is always best.
-
1 tablespoon fresh ginger, grated: Ginger adds a beautiful zing! You can use ground ginger in a hurry, but fresh will give the dish a much brighter flavor.
-
1 cup chicken broth: This brings everything together and adds lovely moisture. You can use low-sodium broth to control the saltiness, or try vegetable broth for a vegetarian-friendly version.
-
2 tablespoons olive oil: Perfect for sautéing your onions and garlic. If you like a different flavor, coconut oil can give a tropical twist!
-
Salt and pepper to taste: Always an essential seasoning duo—use as needed to enhance the flavors.
-
Chopped cilantro for garnish: This fresh herb brings a burst of color and flavor. If you’re not a fan, parsley works well too, or feel free to omit it altogether.
Step-by-Step Instructions
Let’s get cooking! Here’s how to create your Curried Apricot Chicken:
-
Prepare the Ingredients: Start by gathering all your ingredients. Make sure everything is chopped, minced, and ready to go—this makes cooking a breeze! It’s always a good idea to be organized; this way, you won’t find yourself scrambling halfway through the recipe.
-
Heat the Olive Oil: In a large skillet over medium heat, add the olive oil. You want to reach a point where it shimmers but doesn’t smoke. This will create a lovely sautéing environment for your onions and garlic.
-
Sauté the Onions: Toss in your chopped onions and cook for about 5-7 minutes, stirring occasionally until they become soft and translucent. This step is crucial for building the base flavor of the dish—don’t rush it!
-
Add Garlic and Ginger: Next, stir in the minced garlic and grated ginger, cooking for an additional 2-3 minutes. The aroma will be heavenly! Make sure not to let the garlic burn; it can get bitter if overcooked.
-
Introduce the Chicken: Now, add the chicken thighs to the skillet. Season them with salt and pepper and cook for about 5 minutes, browned on all sides. Don’t worry if they’re not fully cooked yet—they’ll finish cooking in the sauce!
-
Mix the Curry Powder: Sprinkle in the curry powder and stir well to coat the chicken and onions evenly. This step brings the aromatic spices forward, filling your kitchen with mouth-watering scents.
-
Incorporate the Apricot Preserves: Pour in the apricot preserves along with the chicken broth. Stir everything together—this is where the magic happens! The preserves will melt into the sauce, creating a luscious glaze.
-
Simmer and Cook: Bring the mixture to a gentle simmer and cover the skillet. Reduce the heat to low and let it cook for about 20-25 minutes, or until the chicken is fully cooked and tender. This is the time when all those lovely flavors get to know each other, transforming your dish into a comforting delight.
-
Taste and Adjust: Once the chicken is cooked, taste the sauce and adjust seasoning with salt and pepper if needed. If it’s too sweet for your liking, a squeeze of fresh lemon juice can help balance it out!
-
Serve It Up: Once you’re satisfied with the flavors, it’s time to plate it up! Remove the skillet from heat and get your plates ready for this feast.
Serving Suggestions
Now that your Curried Apricot Chicken is ready, let’s talk about how to serve it up for maximum impact. I recommend serving it over fluffy jasmine rice, which absorbs all that delicious sauce beautifully! You can also add a side of steamed veggies—think broccoli or sugar snap peas for a pop of color and crunch.
To plate, place a generous scoop of rice on your dish, top it with pieces of the chicken and spoon a good glug of the velvety apricot curry sauce over it. A sprinkle of fresh chopped cilantro on top adds a lovely contrast, making the dish look as good as it tastes. And don’t forget, serving this dish with warm naan or crusty bread is a hit for scooping up every last bit!
Recipe Variations
Looking to switch things up? Here are a few variations to consider for your Curried Apricot Chicken:
-
Add Veggies: Toss in some bell peppers, carrots, or snap peas for added color and nutrients. Just sauté them along with the onions for extra flavor!
-
Make it Spicy: If you love a kick, add some diced jalapeños or a dash of cayenne pepper when you add the curry powder. Trust me, it elevates the dish!
-
Go Coconut: Stir in half a can of coconut milk with the chicken broth for a richer, creamier sauce. This also adds a touch of richness that pairs beautifully with the apricot.
-
Dairy-Free: If you’d like to make a dairy-free version, simply omit any dairy and stick with the chicken broth or coconut milk!
-
Meal Prep: This dish is fantastic for meal prep! Just make a big batch and store leftovers in the fridge for quick lunches throughout the week.
Chef’s Notes
What I love most about cooking is how recipes evolve over time. When I first started making Curried Apricot Chicken, I was nervous about using curry powder—it seemed so foreign to me. I quickly learned, though, that it’s a warm hug of spices that can transport you to different culinary experiences.
As I’ve perfected this dish, I’ve made adjustments here and there based on what I had in my pantry or what was in season. The charm of this recipe is its flexibility. Want a little more tang? Add a splash of vinegar or lemon juice. Need it sweeter? Toss in extra apricot preserves or some honey. The options are endless!
And let’s not forget about the moments that happen in the kitchen—the little disasters, the triumphs, and the laughter shared with loved ones. Those are what make cooking so worthwhile.
FAQs and Troubleshooting
1. My sauce is too thick! What can I do?
If your sauce is thicker than you’d like, add a little more chicken broth or water to loosen it up. Let it simmer just a bit longer to let the flavors meld.
2. Can I use frozen chicken?
Yes, but make sure to thaw the frozen chicken before you start. Cooking it straight from frozen will take longer and may result in uneven cooking.
3. What if I can’t find apricot preserves?
No problem! You can try other fruit preserves like peach, mango, or even raspberry. Just adjust the sweetness to your taste.
4. I don’t like ginger. What can I substitute?
If ginger isn’t your friend, you can simply leave it out. The dish will still taste delicious with just garlic and onion!
Nutritional Info
Curried Apricot Chicken is not only tasty but also packed with nutrition. Here’s a quick breakdown of what you can expect per serving (based on serving about 4 people):
- Calories: Approximately 380
- Protein: 30g (from chicken)
- Carbohydrates: 35g (mostly from apricot preserves and any rice)
- Fat: 15g (depending on the oil)
- Fiber: 2g (from onions and chicken)
It’s a well-rounded meal, full of protein, and can be made lighter if served with veggies instead of rice. Adjusting ingredients also allows for flexibility to meet dietary needs!
Final Thoughts
And there you have it—Curried Apricot Chicken! A dish that brings warmth, comfort, and delightful flavors right into your kitchen. Whether you’re cooking for yourself or gathering around the table with loved ones, this recipe is sure to create memories and a scrumptious experience.
So go ahead, embrace your inner chef, and give this recipe a try! Personalize it with your favorite ingredients, share it with friends, and let the aromas fill your kitchen with love. As always, I’d love to hear about your cooking adventures, so feel free to drop your comments or share your photos. Happy cooking! Let’s make mealtime a joyous and flavorful occasion—because, at Feastical, food is meant to be celebrated!
Print
Curried Apricot Chicken
- Total Time: 45 minutes
- Yield: 4 servings 1x
- Diet: Gluten-Free
Description
A delightful combination of juicy chicken thighs and sweet apricot preserves, spiced with curry for a vibrant and comforting dish.
Ingredients
- 2 lbs chicken thighs, boneless and skinless
- 1 cup apricot preserves
- 2 tablespoons curry powder
- 1 medium onion, chopped
- 3 cloves garlic, minced
- 1 tablespoon fresh ginger, grated
- 1 cup chicken broth
- 2 tablespoons olive oil
- Salt and pepper to taste
- Chopped cilantro for garnish
Instructions
- Prepare the Ingredients: Gather all ingredients, chopping and mincing as needed.
- Heat the Olive Oil: In a large skillet over medium heat, add olive oil until it shimmers.
- Sauté the Onions: Cook chopped onions for 5-7 minutes until soft and translucent.
- Add Garlic and Ginger: Stir in minced garlic and grated ginger, cooking for an additional 2-3 minutes.
- Introduce the Chicken: Add chicken thighs, seasoning with salt and pepper; brown for about 5 minutes.
- Mix the Curry Powder: Sprinkle curry powder and stir to coat the chicken and onions.
- Incorporate the Apricot Preserves: Pour in apricot preserves and chicken broth; stir until mixed.
- Simmer and Cook: Bring to a simmer, cover, and cook on low for 20-25 minutes until chicken is cooked through.
- Taste and Adjust: Adjust seasoning with salt and pepper, and add lemon juice if needed.
- Serve It Up: Plate the dish with rice, chicken, sauce, and garnish with cilantro.
Notes
Serve over jasmine rice with a side of steamed vegetables. Variations include adding bell peppers or coconut milk for creaminess.
- Prep Time: 15 minutes
- Cook Time: 30 minutes
- Category: Main Course
- Method: Sautéing
- Cuisine: International
Nutrition
- Serving Size: 1 serving
- Calories: 380
- Sugar: 25g
- Sodium: 600mg
- Fat: 15g
- Saturated Fat: 2g
- Unsaturated Fat: 10g
- Trans Fat: 0g
- Carbohydrates: 35g
- Fiber: 2g
- Protein: 30g
- Cholesterol: 80mg
Keywords: curried chicken, apricot chicken, comfort food, easy dinner, spices
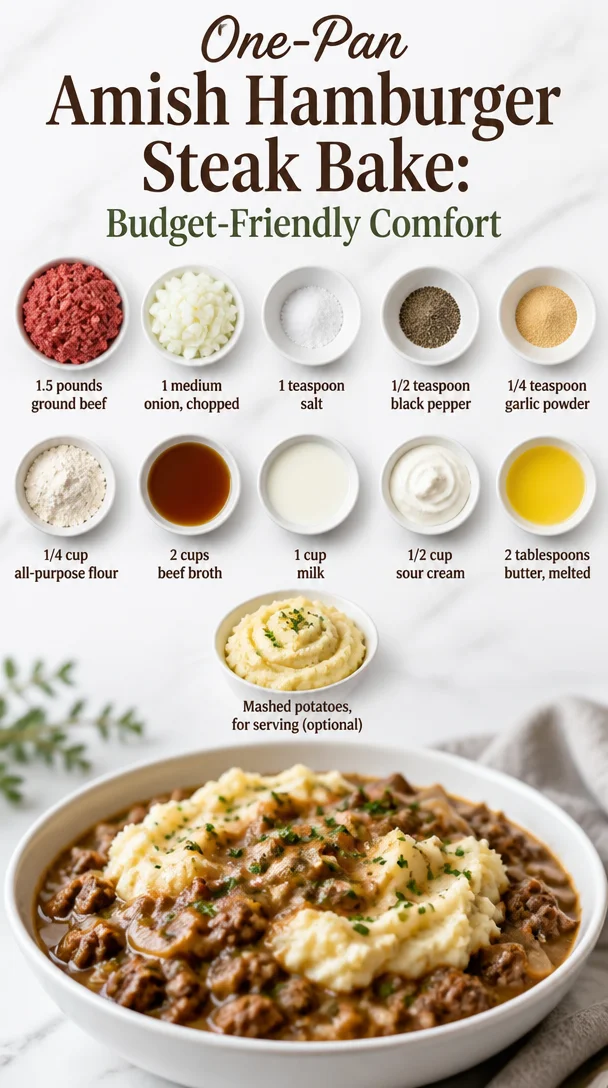
One-Pan Amish Hamburger Steak Bake: Budget-Friendly Comfort
The Ultimate Comfort Food: Amish Hamburger Steak Bake
Hey there, food lovers! I’m thrilled to have you here at Feastical, where we embark on a flavorful journey filled with warmth, nostalgia, and the joy of cooking. Today, we’re diving into a dish that promises to wrap you up in a cozy embrace—Amish Hamburger Steak Bake. Trust me; this dish is like a hug from the inside out!
As we approach dinner time, the smell of sizzling beef and onions fills the kitchen, evoking memories and stories that make every meal special. The Amish Hamburger Steak Bake is not just food; it’s an experience that brings families and friends together. So, let’s roll up our sleeves, grab our spatulas, and get into the heart of this delectable dish!
A Taste of Nostalgia
Growing up, meals were the highlight of the day. My grandmother would host weekly family dinners, where everyone would gather around a well-worn oak table with mismatched chairs, each one carrying its own unique story. One Sunday afternoon, I remember the tantalizing aroma wafting through the house, leading us to the kitchen. There, my grandma had prepared her famous Hamburger Steak Bake.
With each bite, the flavors danced on my palate. The tender beef kissed with savory herbs, the creamy sauce, and the comforting mashed potatoes on the side created pure magic. It was more than just food; it was the laughter, shared stories, and love that made those moments unforgettable. Even now, that recipe is a staple in my kitchen, reminding me of those cherished family gatherings. So, let’s make some memories of our own with this Amish Hamburger Steak Bake!
Ingredients That Bring It All Together
Here’s what you’ll need to make this comforting dish:
-
1.5 pounds ground beef
- This forms the base of our dish, providing that hearty flavor. You can swap it out for ground turkey or chicken if you’re looking for a leaner option.
-
1 medium onion, chopped
- Onions add a beautiful sweetness and depth to the dish. If you’re not an onion fan, try shallots or leeks for a milder flavor.
-
1 teaspoon salt
- A crucial seasoning that enhances every other flavor. If you’re watching sodium intake, feel free to reduce the amount or use a salt substitute.
-
1/2 teaspoon black pepper
- This adds a nice kick without overwhelming the palate. Consider using white pepper if you prefer a subtler flavor.
-
1/4 teaspoon garlic powder
- Garlic is the unsung hero of many dishes! If you have fresh garlic, feel free to use about a clove or two for a bolder flavor.
-
1/4 cup all-purpose flour
- We’ll use this to help thicken our sauce. For a gluten-free version, substitute with cornstarch or a gluten-free flour blend.
-
2 cups beef broth
- This adds tons of flavor and moisture. Vegetable broth can work well too if you prefer a lighter option.
-
1 cup milk
- The creaminess of the milk contributes to that dreamy sauce. You can substitute with almond or oat milk if you’re dairy-free.
-
1/2 cup sour cream
- This gives the dish a delicious tang. Greek yogurt is a great substitute if you’re looking for a healthier option.
-
2 tablespoons butter, melted
- Used to enrich the sauce with a luscious texture. If you’re vegan, you can opt for a plant-based butter or olive oil.
-
Mashed potatoes (for serving, optional)
- Because really, what is comfort food without mashed potatoes on the side? You can also use cauliflower mash for a low-carb option.
Step-by-Step Instructions to Create the Magic
Ready to bring this dish to life? Let’s get cooking!
-
Preheat your oven to 350°F (175°C). This ensures that your bake cooks evenly, developing that perfect golden crust.
-
Brown the beef: In a large skillet over medium heat, add your ground beef. Use a spatula to break it apart as it cooks. Stir occasionally for about 6-8 minutes until it’s browned and no longer pink. This step is crucial as it builds the foundation of flavor for our dish.
-
Sauté the onions: Add the chopped onion to the skillet during the last couple of minutes of cooking the beef. Let them soften and become translucent—about 3-4 minutes. Their sweetness pairs perfectly with the beef!
-
Season it up: Stir in the salt, black pepper, and garlic powder. This is when your kitchen will start smelling incredible.
-
Make the sauce: Sprinkle the flour over the beef mixture and stir well to coat. Cook for an additional minute to eliminate raw flour taste. Gradually whisk in the beef broth and milk, ensuring there are no lumps. Continue stirring as the mixture comes to a gentle simmer. As it heats, you’ll see it start to thicken—voilà!
-
Incorporate the sour cream: Once the sauce is nice and thick, remove the skillet from the heat and stir in the melted butter and sour cream. This will make your sauce ultra-creamy and comforting.
-
Bake it up: Pour the beef mixture into a greased 9×13-inch baking dish. It’s time for the oven magic! Bake uncovered for about 30-35 minutes, until the top is bubbly and golden brown.
-
Serve it hot: Once out of the oven, let it rest for about 5 minutes. This allows the sauce to settle and makes for easier serving.
Serving Suggestions
Now that your Amish Hamburger Steak Bake is ready, it’s time to dish it up!
-
Plating: Use a large spoon to serve a generous scoop onto plates. The creamy, savory sauce will create delightful rivulets over the dish.
-
Sides: Serve it over a mound of mashed potatoes to soak up all that sauce. Or, for a fresh spin, pair it with steamed green beans or a crisp side salad for a pop of color and crunch.
-
Garnishing: Sprinkle a bit of chopped parsley on top to add a vibrant touch. It’s all about those presentation points!
Recipe Variations to Try
Once you’ve mastered this Amish Hamburger Steak Bake, why not make it your own? Here are a few delightful variations:
-
Mushroom Madness: Sauté sliced mushrooms along with the onions for an earthy depth to your dish.
-
Spicy Kick: Add a dash of hot sauce or some jalapeños for a spicy twist.
-
Veggie Delight: Mix in some peas or corn near the end of the beef browning for added nutrition and taste.
-
Cheesy Goodness: Sprinkle shredded cheddar cheese on top during the last 5 minutes of baking for a delightful cheesy crust.
-
Herbed Infusion: Toss in dried herbs like thyme or rosemary during the cooking for a flavorful herbal note.
Chef’s Notes
Every recipe tells a story, and this one has evolved quite a bit in my kitchen. Originally a dish from my grandmother’s collection, I’ve added my own flair, swapping in ingredients that suit my family’s tastes and dietary needs over the years.
One time, I tried to make this dish for a friends’ potluck. In my hurry, I accidentally grabbed the baking soda instead of the flour! Let’s just say it was an interesting experience, but it taught me the importance of mise en place—everything in its place!
FAQs and Troubleshooting
Here are some common questions that might pop up while making your Amish Hamburger Steak Bake:
-
Why is my sauce too thin?
- If your sauce is runny, try whisking in a little cornstarch slurry (cornstarch mixed with water) while it’s simmering. This can help thicken it up.
-
Can I make this ahead of time?
- Absolutely! You can assemble the dish beforehand and store it in the fridge. Adjust baking time slightly if cooking from cold.
-
What can I serve instead of mashed potatoes?
- Besides cauliflower mash, you can serve it over rice or quinoa for a different texture and taste!
-
My beef is too greasy; how do I fix it?
- Always drain excess fat after browning the beef. If you find it greasy after baking, simply skim the fat off the top before serving.
Nutritional Info
Here’s a quick look at the nutritional info for the Amish Hamburger Steak Bake (per serving, not including mashed potatoes):
- Calories: 350
- Protein: 22g
- Carbohydrates: 20g
- Fat: 22g
- Fiber: 2g
Feel free to adjust serving sizes and ingredients according to your dietary needs!
Final Thoughts
There you have it—my take on the ultimate comfort food, the Amish Hamburger Steak Bake! Cooking is about sharing experiences and creating a connection over a warm meal. This dish is a beautiful reminder of those cozy, heartfelt memories and the delight of bringing family and friends around the table.
Remember, there’s no right or wrong way to cook; just get in that kitchen, have some fun, and don’t forget to enjoy the process. I hope you’ve enjoyed this recipe as much as I love sharing it with you! Let’s keep the love for food going—what’s your favorite comfort dish that warms your heart? Share your stories with me, and until next time, happy cooking from Feastical! 🍽️✨
Print
Amish Hamburger Steak Bake
- Total Time: 55 minutes
- Yield: 4 servings 1x
- Diet: Comfort Food
Description
A comforting dish that combines ground beef with savory spices and a creamy sauce, perfect for family gatherings.
Ingredients
- 1.5 pounds ground beef
- 1 medium onion, chopped
- 1 teaspoon salt
- 1/2 teaspoon black pepper
- 1/4 teaspoon garlic powder
- 1/4 cup all-purpose flour
- 2 cups beef broth
- 1 cup milk
- 1/2 cup sour cream
- 2 tablespoons butter, melted
- Mashed potatoes (for serving, optional)
Instructions
- Preheat your oven to 350°F (175°C).
- Brown the beef: In a large skillet over medium heat, add your ground beef. Use a spatula to break it apart as it cooks. Stir occasionally for about 6-8 minutes.
- Sauté the onions: Add the chopped onion to the skillet during the last couple of minutes of cooking the beef. Let them soften and become translucent—about 3-4 minutes.
- Season it up: Stir in the salt, black pepper, and garlic powder.
- Make the sauce: Sprinkle the flour over the beef mixture and stir well. Gradually whisk in the beef broth and milk, ensuring there are no lumps.
- Incorporate the sour cream: Once the sauce is nice and thick, remove the skillet from the heat and stir in the melted butter and sour cream.
- Bake it up: Pour the beef mixture into a greased 9×13-inch baking dish. Bake uncovered for about 30-35 minutes.
- Serve it hot: Once out of the oven, let it rest for about 5 minutes before serving.
Notes
For a lighter option, substitute ground beef with ground turkey or chicken. You can also mix in vegetables like peas or corn for added nutrition.
- Prep Time: 15 minutes
- Cook Time: 40 minutes
- Category: Main Course
- Method: Baking
- Cuisine: American
Nutrition
- Serving Size: 1 serving
- Calories: 350
- Sugar: 5g
- Sodium: 400mg
- Fat: 22g
- Saturated Fat: 10g
- Unsaturated Fat: 10g
- Trans Fat: 0g
- Carbohydrates: 20g
- Fiber: 2g
- Protein: 22g
- Cholesterol: 60mg
Keywords: comfort food, casserole, family dinner, hamburger steak, Amish recipe
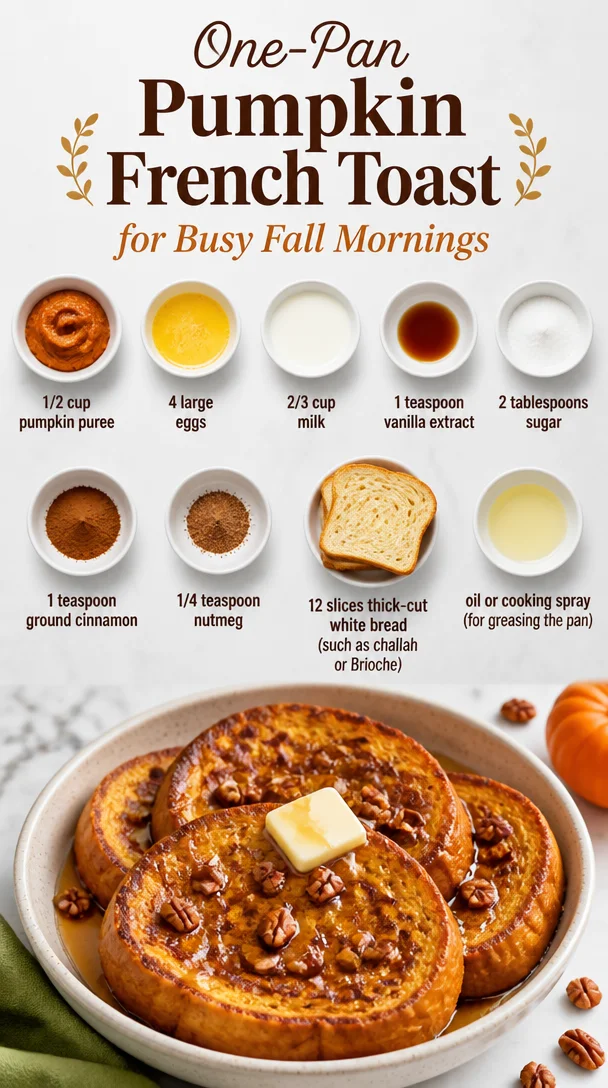
One-Pan Pumpkin French Toast for Busy Fall Mornings
Pumpkin French Toast: A Delicious Fall Classic
Hey there, food lovers! 🌟 Are you ready to whisk up a delightful breakfast that screams cozy vibes and autumn charm? Today, we’re diving into a recipe that’s as close to my heart as a hot cup of cider on a chilly day—Pumpkin French Toast! You know, the kind that wraps you in a warm hug with every bite, making you feel like you’re snuggled up in your favorite sweater.
As the leaves begin to turn and the air gets crisp, there’s nothing quite like the aroma of sweet pumpkin and spices wafting through the kitchen. This dish is not just a feast for the taste buds; it’s also a cherished tradition in my home. Imagine the laughter, the chatter, and the family gathered around the table, all relishing this flavorful delight. If you’re ready to turn your kitchen into a cozy café and impress your loved ones, grab your spatula, and let’s get cooking!
A Personal Story
Let me take you back to a memory that’s etched in my mind. It was a beautiful autumn morning, and the sun was just beginning to rise, casting a warm golden hue over our kitchen. My grandma, with her soft chuckle and gentle hands, was whipping up her famous Pumpkin French Toast. The kitchen was filled with warmth, not only from the oven but from the love and laughter that surrounded us.
I was just a kid, but something about that moment felt extraordinary. As I watched her skillfully dip the bread into the pumpkin mixture, I realized this wasn’t just breakfast; it was a way to celebrate the season. The anticipation of that first bite—crispy on the outside, soft and spiced on the inside—made the wait unbearable. It was like a slice of autumn served right on my plate!
Fast forward to today, and I’ve carried that memory forward by creating my own version of her recipe. Now, I want to share this lovely dish with you, so you can create your own delicious memories. So, let’s roll up our sleeves and get started on this seasonal favorite!
Ingredients
Here’s what you’ll need to make this scrumptious Pumpkin French Toast:
-
1/2 cup pumpkin puree
Canned pure pumpkin works wonderfully here. Make sure it’s 100% pumpkin and not pumpkin pie filling! You can swap this for butternut squash puree for a similar flavor. -
4 large eggs (whisked)
The eggs create a lovely custard-like base. If you’re looking to make it vegan, feel free to substitute with flax eggs (1 tablespoon of ground flaxseed mixed with 2.5 tablespoons of water per egg). -
2/3 cup milk
Use any milk type you love (dairy, almond, or oat milk are all great). For creamier French toast, go with whole milk or cream. -
1 teaspoon vanilla extract
This adds a lovely depth of flavor. If you’re out, you can also use maple syrup for a sweet twist! -
2 tablespoons sugar
A little sweetness to balance the spices. Feel free to use brown sugar for a deeper flavor or coconut sugar for a healthier alternative. -
1 teaspoon ground cinnamon
A warm hug in spice form! You can adjust this to your preference or try mixing in some pumpkin pie spice for an extra kick. -
1/4 teaspoon nutmeg
Just a pinch of this spice elevates the pumpkin flavor. You can replace it with a dash of allspice if that’s what you have on hand. -
12 slices thick-cut white bread (such as challah or Brioche)
The thicker the slice, the better! You can also use whole grain or gluten-free bread if you want to tweak things a bit. -
Oil or cooking spray (for greasing the pan)
This keeps everything from sticking! Butter works too for that extra richness.
Step-by-Step Instructions
Let’s whip up this delicious dish, step by step. Grab your whisk, and let’s do this!
-
Prep Your Ingredients:
Start by gathering your ingredients. The key to smooth sailing in the kitchen is organization! -
Whisk It Up:
In a large bowl, whisk together the pumpkin puree, whisked eggs, milk, vanilla extract, sugar, cinnamon, and nutmeg until you achieve a lovely, smooth mixture. A whisk works wonders here, but a fork will do in a pinch! -
Soak the Bread:
Dip each slice of thick-cut bread into the pumpkin custard, allowing it to soak for about 20-30 seconds per side. You want it to absorb the mixture without falling apart, so don’t rush it! Imagine you’re giving the bread a delightful pumpkin spa treatment. -
Heat the Pan:
Heat a non-stick skillet or griddle over medium heat, and add a drizzle of oil or a pat of butter. You want that sizzle to say, “I’m ready!” If you notice it smoking, lower the heat a little. -
Cook It Up:
Place the soaked bread slices onto the skillet (don’t crowd the pan; work in batches if necessary). Cook for about 3-4 minutes on each side, or until golden brown. Here’s a fun tip: If you want those iconic grill marks, gently press down on the bread with a spatula for a second or two. -
Keep Warm:
If you’re making multiple batches, keep the cooked French toast warm in a preheated oven at 200°F (93°C) while you finish cooking the rest. This way, it all stays perfectly toasty until it’s time to serve! -
Serve and Enjoy:
Once all the slices are cooked, serve them on a beautiful plate, maybe with a dusting of powdered sugar, and don’t forget the maple syrup, whipped cream, or even a dollop of yogurt for that extra taste!
Serving Suggestions
Now that you’ve got your delicious Pumpkin French Toast ready, let’s talk presentation! Stack the slices on a large platter, and drizzle them with maple syrup. A sprinkle of powdered sugar adds a touch of elegance and sweetness. For those who love a little crunch, a sprinkle of chopped pecans or walnuts on top brings a wonderful texture.
You can also serve a side of crispy bacon or sausages for a savory contrast. Fresh fruit like sliced bananas, apples, or even pomegranate seeds adds a pop of color! And let’s not forget a hot cup of coffee or spiced chai to wash it all down. Now that’s what I call a delightful breakfast spread!
Recipe Variations
Boost your breakfast game by getting creative with these variations:
-
Chocolate Chip Pumpkin French Toast:
Add a handful of chocolate chips into the custard for a rich, sweet twist. The chocolate melts into the bread and creates a heavenly experience! -
Pumpkin Spice Latte French Toast:
Mix in a tablespoon of espresso powder for a caffeinated kick. A sprinkle of cocoa powder brings a lovely chocolate undertone. -
Nutty Banana Pumpkin French Toast:
Top with banana slices and a sprinkle of toasted almonds or pecans for a crunchy finish. -
Savory Pumpkin French Toast:
Eliminate sugar, and add some herbs like thyme or rosemary into the mix for a savory brunch option. Top with poached eggs for an elevated experience! -
Vegan Version:
Use almond or oat milk, flax eggs, and your favorite vegan bread, and watch this classic delight become a plant-based hit!
Chef’s Notes
As I perfect my Pumpkin French Toast over the years, the most heartwarming aspect has always been sharing it with family and friends. I still remember the time I tried adding a pinch of cayenne pepper—what a mistake! My brother took a giant bite and made the funniest face. Lesson learned: stick to the spices you love, and always taste your batter.
I’ve adapted this recipe many times, adjusting it for different seasons, but the essence remains the same—it’s all about bringing people together around a table and spreading joy through food. Celebrate the moments that make life special with this sweet dish!
FAQs and Troubleshooting
Q: My French toast ended up soggy. What went wrong?
A: If your bread is too soft, it may absorb too much of the custard mixture. Try using thicker bread, and ensure you’re soaking each slice for the right amount of time!
Q: Can I make this ahead of time?
A: Absolutely! Prepare the custard mixture in advance and store it in the fridge. You can soak the bread the night before and just cook in the morning.
Q: What can I do if I don’t have cinnamon?
A: No cinnamon? No problem! You can substitute with pumpkin pie spice, or simply leave it out and enhance the vanilla flavor.
Q: Can I freeze leftovers?
A: Yes! Cooked pumpkin French toast can be frozen. Just place them in a zip-top bag with parchment paper in between slices, and thaw in the fridge before reheating.
Nutritional Info
While enjoying our Pumpkin French Toast, it’s always good to know what’s going into your body. This dish is packed with nutrients such as vitamins A and C from the pumpkin, protein from the eggs, and carbohydrates from the bread—providing a balanced breakfast that gives you energy to start your day!
A single serving (one slice) contains approximately:
- Calories: 250
- Protein: 8g
- Total Fat: 8g
- Carbohydrates: 38g
- Fiber: 2g
Feel free to tweak your ingredients to meet your dietary needs!
Final Thoughts
Pumpkin French Toast is more than just a recipe; it’s a warm embrace that brings loved ones together, igniting joy and laughter at the breakfast table. It’s about embracing the little moments—those fleeting breaths of joy that we can capture in food. So, whether you’re trying it for the first time or reliving memories through each bite, I’m here to encourage you to get creative, have fun, and certainly make-ahead for those busy mornings!
Let this be your go-to recipe for fall breakfast gatherings or lazy Sunday brunches. Share your pumpkin toast creations with me—tag @Feastical and let’s keep the love for food alive. Until next time, happy cooking! 🍂🥞
Print
Pumpkin French Toast
- Total Time: 35 minutes
- Yield: 4 servings 1x
- Diet: Vegetarian
Description
A delightful breakfast recipe that captures the essence of autumn with sweet pumpkin and warm spices. Perfect for cozy family gatherings.
Ingredients
- 1/2 cup pumpkin puree
- 4 large eggs (whisked)
- 2/3 cup milk
- 1 teaspoon vanilla extract
- 2 tablespoons sugar
- 1 teaspoon ground cinnamon
- 1/4 teaspoon nutmeg
- 12 slices thick-cut white bread (such as challah or Brioche)
- Oil or cooking spray (for greasing the pan)
Instructions
- Start by gathering your ingredients.
- Whisk together the pumpkin puree, whisked eggs, milk, vanilla extract, sugar, cinnamon, and nutmeg until smooth.
- Dip each slice of bread into the pumpkin custard, soaking for about 20-30 seconds per side.
- Heat a non-stick skillet or griddle over medium heat with oil or butter.
- Place the soaked bread slices onto the skillet and cook for about 3-4 minutes on each side until golden brown.
- Keep cooked French toast warm in a preheated oven at 200°F (93°C) if needed.
- Serve on a plate with powdered sugar and toppings like maple syrup, whipped cream, or yogurt.
Notes
Feel free to experiment with variations like adding chocolate chips or making it vegan with flax eggs.
- Prep Time: 15 minutes
- Cook Time: 20 minutes
- Category: Breakfast
- Method: Cooking
- Cuisine: American
Nutrition
- Serving Size: 1 slice
- Calories: 250
- Sugar: 8g
- Sodium: 200mg
- Fat: 8g
- Saturated Fat: 2g
- Unsaturated Fat: 5g
- Trans Fat: 0g
- Carbohydrates: 38g
- Fiber: 2g
- Protein: 8g
- Cholesterol: 180mg
Keywords: pumpkin, French toast, breakfast, fall recipe, cozy breakfast
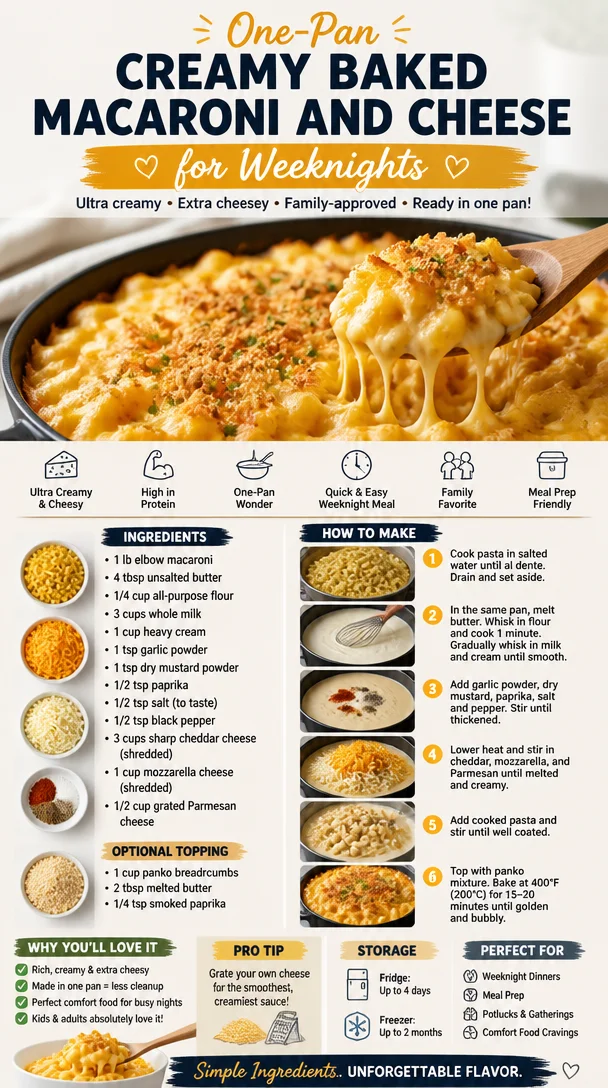
One-Pan Creamy Baked Macaroni and Cheese for Weeknights
Creamy Baked Macaroni and Cheese: A Warm Hug in a Dish
Hey there, fellow food lovers! Welcome to my cozy corner of the culinary universe, where we celebrate all things delicious and comforting. Today, we’re diving into a dish that’s as classic as it is creamy—Baked Macaroni and Cheese! There’s something magical about combining pasta with a rich, cheesy sauce and then baking it to golden, bubbling perfection. I promise, it’s going to be a treat for your taste buds and your soul.
Now, macaroni and cheese has probably crossed paths with you at a dinner table, a potluck, or even at the end of a long day when you just want to curl up with something that feels like home. For me, this dish stirs up nostalgia for childhood dinners at my grandmother’s house, where the aroma of her homemade mac and cheese would waft through the air, inviting us all to gather around the table. Oh, the joy of anticipation, waiting for that first creamy bite!
So grab your spatula, and let’s get cooking! We’re going to transform simple pantry staples into a dish that brings people together, invokes laughter, and sparks joyful memories.
A Walk Down Memory Lane
Growing up, I was lucky enough to have a grandmother who was a passionate cook. I still remember the sound of her stirring a bubbling pot of cheese sauce on the stove, the rhythmic clink of the whisk echoing through the kitchen. One of my favorite kitchen adventures with her was making macaroni and cheese from scratch. She taught me that the secret to a fabulous mac and cheese lies in the cheese sauce. She would always say, “Don’t skimp on the cheese, Beau!”
We’d laugh as cheese would inevitably find its way onto our hands and clothes, a badge of honor in our cheesy creation. We’d almost always sneak a spoonful of the gooey, cheesy goodness before adding the pasta, and I swear, those little tastes were as magical as the finished dish.
Every family gathering, without fail, her baked macaroni and cheese stole the show. A quick turnaround on a classic—but with a personal twist. Today, I’m sharing that same spirit of joy and creativity with you. So get ready to make some memories of your own!
Ingredients
For our creamy, baked macaroni and cheese, you’ll need the following ingredients:
- 1 lb elbow macaroni: This is a classic choice for mac and cheese, but feel free to swap for cavatappi or shells for added fun!
- Water for boiling: Enough to cover your pasta—you want it nice and salty for flavor!
- Salt for pasta water: A good rule of thumb is to use about 1 tablespoon per gallon of water.
For the cheese sauce:
- 4 tablespoons unsalted butter: This adds richness. You can use salted butter, but then adjust your salt later.
- 1/4 cup all-purpose flour: This is our thickening agent. If you’re gluten-free, substitute with a gluten-free flour blend.
- 3 cups whole milk: Creamy and rich! You can use 2% milk, but whole milk gives a better texture.
- 1 cup heavy cream: For that velvety richness that dreams are made of. If you’re cutting calories, you can substitute half-and-half.
- 1 teaspoon garlic powder: A hidden hero that enhances flavors without overpowering them.
- 1 teaspoon dry mustard powder: This brings a tangy depth to the dish.
- 1/2 teaspoon paprika: Adds warmth and color. Feel free to use smoked paprika for a twist!
- 1/2 teaspoon salt (adjust to taste): Always taste as you go!
- 1/2 teaspoon black pepper: For a little kick. Add more if you love heat!
- 3 cups sharp cheddar cheese, shredded: A classic choice for mac and cheese—sharp cheddar offers more flavor.
- 1 cup mozzarella cheese, shredded: This lends a stretchy, gooey quality.
- 1/2 cup grated Parmesan cheese: This gives a salty finish that boosts the flavor profile!
Optional topping:
- 1 cup panko breadcrumbs: For that glorious crunch on top.
- 2 tablespoons melted butter: To make those breadcrumbs even more delicious.
- 1/4 teaspoon smoked paprika: To season your topping for a bit of depth.
Step-by-Step Instructions
Now that we have our ingredient lineup, let’s dive into the cooking process! Follow these detailed steps for a fail-proof mac and cheese journey:
-
Cook the Macaroni:
- Bring a large pot of salted water to a boil. Once boiling, add the elbow macaroni. Cook until al dente according to package instructions (usually about 7-8 minutes). Remember: the pasta will continue cooking in the oven, so you want it slightly underdone.
- Chef’s Tip: Reserve about a cup of pasta cooking water before draining. This starchy water can help adjust the cheese sauce’s consistency later.
-
Make the Cheese Sauce:
- In a large saucepan, melt the butter over medium heat. Once melted and bubbling, whisk in the flour. Keep whisking for about 2-3 minutes until it turns slightly golden—this is your roux.
- Gradually whisk in the whole milk and heavy cream, ensuring there are no lumps. Bring to a simmer and keep stirring until it thickens, about 5-7 minutes.
- Stir in the garlic powder, dry mustard powder, paprika, salt, and pepper. Taste and adjust seasoning as desired.
- Remove from heat, and slowly fold in the cheddar and mozzarella cheese until melted and smooth. For added creaminess, mix in a splash of reserved pasta water if needed.
-
Combine Pasta and Sauce:
- In a large mixing bowl (or in the pot if you’re feeling bold!), combine the drained macaroni with the cheese sauce. Stir well until every elbow is coated in that glorious cheese goodness.
- If you want to go extra, throw in the Parmesan cheese at this step for an extra cheesy bite!
-
Prepare for Baking:
- Preheat your oven to 350°F (175°C).
- Transfer the macaroni and cheese mixture to a greased 3-quart baking dish, spreading it out evenly.
-
Make the Topping (Optional):
- In a small bowl, mix panko breadcrumbs with melted butter and smoked paprika until the breadcrumbs are well-coated. Sprinkle the breadcrumb mixture evenly over the mac and cheese.
-
Bake:
- Bake in the preheated oven for about 25-30 minutes, or until the top is golden and crisp. Enjoy the heavenly aroma filling your kitchen as it bakes!
Serving Suggestions
Once your creamy baked macaroni and cheese emerges from the oven bubbling and golden brown, it’s time to plate up!
- Serve it family-style: Just scoop it into a large serving bowl or leave it in the baking dish and let everyone dive in.
- Add a garnish: A sprinkle of fresh parsley or chives on top adds a splash of color.
- Pair it right: Mac and cheese pairs wonderfully with a side salad dressed lightly to balance the richness, or serve it as a fulfilling side to fried chicken or BBQ ribs for a meal that will knock everyone’s socks off!
Recipe Variations
Let’s mix things up a bit, shall we? Here are some creative twists to put your mark on this classic dish:
-
Veggie Delight: Stir in some steamed broccoli, sautéed spinach, or roasted bell peppers before baking for added nutrition and flavor.
-
Bacon Lovers: Add cooked, crumbled bacon into the cheese sauce or as a topping for a savory smoky kick.
-
Spicy Mac: Kick it up a notch by mixing in diced jalapeños or switching up the cheese to pepper jack for a flavorful punch.
-
Truffle Mac and Cheese: Drizzle a bit of truffle oil over the top just before serving for an upscale touch.
-
Nutty Mac: Sprinkle chopped toasted walnuts or pecans over the top before serving for added crunch and flavor.
Chef’s Notes
Macaroni and cheese has evolved over the years, and each family seems to have their own beloved version. My grandmother’s recipe inspired my love for cooking and experimentation in the kitchen. Occasionally, I’ve tried using different cheeses—Gruyère, Gouda— and with them, I realized that the fun in cooking happens when you push boundaries! So don’t be afraid to get adventurous; let your creativity shine!
Oh, and if you find yourself with leftover mac and cheese, you can always repurpose it! Form it into patties and pan-fry for crispy mac and cheese cakes, or use it as filling for stuffed bell peppers.
FAQs and Troubleshooting
-
How do I make my mac and cheese less dry?: The key to creamy mac and cheese is adequate sauce. If it looks too thick after baking, you can add a splash of milk or reserved pasta water to the mixture before baking to maintain creaminess.
-
How can I store leftovers?: Store leftover mac and cheese in an airtight container in the fridge for up to 3-4 days. For freezing, freeze in a foil-lined dish or individual servings.
-
What can I do if my sauce is lumpy?: If your cheese sauce becomes lumpy, consider straining it through a fine mesh sieve. Alternatively, you can whisk it vigorously or use an immersion blender to smooth it out.
-
Why did my cheese sauce separate?: This can happen if the cheese is heated too quickly or at too high a temperature. Make sure you’re melting cheese on low heat, and that the milk is not boiling when you add the cheese.
Nutritional Info
Now, let’s talk nutrition. While creamy baked macaroni and cheese is undeniably a comfort food favorite, it’s worth noting that moderation is key. Here’s a quick breakdown per serving (approx. 1 cup):
- Calories: 500-600
- Carbohydrates: 50g
- Protein: 20g
- Fat: 30g
- Saturated Fat: 15g
- Cholesterol: 80mg
- Fiber: 2g
- Sodium: 700mg
You can make this dish a bit lighter by using low-fat dairy, whole-grain pasta, and loading up on veggies as mentioned above.
Final Thoughts
And there you have it! A creamy, rich baked macaroni and cheese sure to satisfy your cravings and bring warmth and joy to your table. Remember, cooking is all about experimenting and finding what brings you happiness, so don’t hesitate to add your special touches along the way.
Next time you serve up a bowl of this mac and cheese, I hope it brings you as many warm memories as it does delicious satisfaction! Enjoy every spoonful as you create your own kitchen tales. Until next recipe, keep that kitchen lively, and as always, let’s dig in!
Print
Creamy Baked Macaroni and Cheese
- Total Time: 45 minutes
- Yield: 4 servings 1x
- Diet: Vegetarian
Description
A classic and comforting baked macaroni and cheese dish that combines pasta with a rich, cheesy sauce baked to golden perfection.
Ingredients
- 1 lb elbow macaroni
- Water for boiling
- 1 tablespoon salt (for pasta water)
- 4 tablespoons unsalted butter
- 1/4 cup all-purpose flour
- 3 cups whole milk
- 1 cup heavy cream
- 1 teaspoon garlic powder
- 1 teaspoon dry mustard powder
- 1/2 teaspoon paprika
- 1/2 teaspoon salt (adjust to taste)
- 1/2 teaspoon black pepper
- 3 cups sharp cheddar cheese, shredded
- 1 cup mozzarella cheese, shredded
- 1/2 cup grated Parmesan cheese
- 1 cup panko breadcrumbs (optional)
- 2 tablespoons melted butter (optional)
- 1/4 teaspoon smoked paprika (optional)
Instructions
- Bring a large pot of salted water to a boil. Once boiling, add the elbow macaroni. Cook until al dente according to package instructions (about 7-8 minutes). Reserve about a cup of pasta cooking water before draining.
- In a large saucepan, melt the butter over medium heat. Whisk in the flour and cook until slightly golden (about 2-3 minutes).
- Gradually whisk in the whole milk and heavy cream. Bring to a simmer and stir until it thickens (about 5-7 minutes).
- Stir in the garlic powder, dry mustard, paprika, salt, and pepper. Adjust seasoning as needed.
- Remove from heat and fold in the cheddar and mozzarella cheese until melted and smooth.
- Combine the drained macaroni with the cheese sauce. Mix well to coat every elbow.
- Preheat your oven to 350°F (175°C).
- Transfer the macaroni and cheese mixture to a greased 3-quart baking dish.
- In a small bowl, mix panko breadcrumbs with melted butter and smoked paprika, and sprinkle over the mac and cheese.
- Bake for about 25-30 minutes, or until the top is golden and crisp.
Notes
For extra flavor, consider adding vegetables or bacon. Leftovers can be stored in an airtight container for 3-4 days.
- Prep Time: 15 minutes
- Cook Time: 30 minutes
- Category: Main Course
- Method: Baking
- Cuisine: American
Nutrition
- Serving Size: 1 serving
- Calories: 550
- Sugar: 6g
- Sodium: 700mg
- Fat: 30g
- Saturated Fat: 15g
- Unsaturated Fat: 10g
- Trans Fat: 0g
- Carbohydrates: 50g
- Fiber: 2g
- Protein: 20g
- Cholesterol: 80mg
Keywords: mac and cheese, comfort food, baked pasta, cheesy dish

One-Pan 15-Minute Pasta with Zucchini for Weeknights
Discover the Joy of Pasta with Zucchini: A Wholesome Recipe for Everyone
Hey food lovers! It’s Beau here, and today we’re diving into a dish that’s not only incredibly tasty but also brings back warm memories of summer evenings spent in my grandmother’s kitchen. If you’re looking for a vibrant, feel-good meal that celebrates fresh ingredients, you’ve hit the jackpot with this Pasta with Zucchini recipe!
Pasta holds a special place in my heart. It’s more than just a dish; it’s a canvas for flavors and textures, a way to create connection, and a reason to gather around the table. Zucchini, on the other hand, is that underrated hero of the vegetable world—light, refreshing, and a fantastic way to sneak a bit more nutrition into your meals without compromising on taste. As we sew the two together, you’ll find that this dish is not just about eating but embracing the stories and the love we embed into our cooking.
You might even say this dish is like a hug from grandma, warm and inviting, reminding me of all the meals we shared while she spun stories of her youth. My favorite memory involves a late summer afternoon, the aroma of sautéing garlic filling the air, combined with laughter. With a sprinkle of her secret spices, she transformed simple ingredients into something extraordinary. It’s moments like these that inspired me to create this easy yet delightful Pasta with Zucchini recipe so you can craft your own memories in the kitchen!
Enough of the nostalgia, let’s get into the nitty-gritty of this dish. Grab your apron, and let’s make some magic!
Ingredients
Here’s what you’ll need to whip up this delicious Pasta with Zucchini recipe:
-
8 oz (220 grams) Pasta: I love using fusilli, penne, or rigatoni for this recipe. These pasta shapes hold onto the sauce beautifully, making every bite heavenly.
- Substitution Tip: Gluten-free pasta works great too!
-
1 tablespoon extra virgin olive oil: This adds a rich flavor and a touch of healthy fat.
- Chef Insight: Don’t skimp on the quality here; good olive oil makes a difference!
-
1 lb (450 grams) zucchini (about 3 medium-sized): Fresh, vibrant zucchinis add both color and a lovely mild taste.
- Substitution Tip: You can swap zucchini for summer squash or even eggplant if you’re feeling adventurous!
-
Salt & pepper, to taste: Basics, but essential for enhancing all those flavors.
-
2 garlic cloves, grated or minced: Because what’s pasta without garlic? It gives the dish depth and a delightful aroma.
- Chef Insight: Fresh garlic is best, but powdered can work in a pinch.
-
½ cup (40 grams) freshly grated parmesan: This brings a savory, nutty flavor that’s a must-have.
- Substitution Tip: Pecorino Romano or nutritional yeast for a vegan version can be used instead.
-
⅓ cup (80-90 grams) full-fat cream cheese or ricotta: For that creamy, dreamy texture that hugs the pasta just right.
- Substitution Tip: Use silken tofu or cashew cream for a dairy-free variant.
Step-by-Step Instructions
Ready to bring this dish to life? Let’s go, step by step! Here’s how you cook up this masterpiece:
-
Boil the Pasta: Start by bringing a large pot of salted water to a boil. Add your pasta and cook according to package instructions until al dente. Remember, you want that perfect bite!
- Tip: Reserve a cup of pasta water before draining. It’s liquid gold for adjusting the sauce later!
-
Prep the Zucchini: While the pasta is cooking, slice or chop your zucchini. Aim for bite-sized pieces, so they cook evenly.
- Chef Hack: A mandoline slicer can make this super easy and ensure even cooking.
-
Sauté the Garlic: In a large skillet, heat the olive oil over medium heat. Once it’s shimmering, add in the minced garlic. Sauté for about 30 seconds—just until fragrant. Don’t let it burn; you want that golden flavor!
- Tip: Keep moving it around to prevent burning.
-
Add the Zucchini: Toss in the chopped zucchini along with a pinch of salt and pepper. Stir-fry for about 5-7 minutes until the zucchini is tender but still has a bit of crunch.
- Chef Insight: If you want some caramelized bits, let the zucchini cook undisturbed for a few minutes.
-
Combine Pasta and Sauce: Once the zucchini is cooked to perfection, add your drained pasta directly into the skillet. Mix it all up, and then add the cream cheese (or ricotta).
- Tip: If it seems dry, drizzle in some of that reserved pasta water until it reaches your desired consistency.
-
Finish with Cheese: Stir in the freshly grated parmesan and season with more salt and pepper if needed. Give it a good toss until everything is evenly coated.
- Final Touch: A squeeze of lemon juice brightens up the flavors beautifully!
Serving Suggestions
Now that your dish is ready, it’s time to serve up this delightful Pasta with Zucchini! Here are a few serving tips to make it truly Instagram-worthy:
-
Plate it Nicely: Twirl the pasta into nests on warm plates for a fancy touch. Top with additional parmesan and some cracked black pepper for that restaurant feel.
-
Garnish: Fresh basil, a sprinkle of red pepper flakes, or even a zest of lemon can complement the dish wonderfully!
-
Pair it Up: This pasta shines next to a simple green salad or some crusty garlic bread. And don’t forget—your favorite wine is a great addition too!
Recipe Variations
Get creative with this dish! Here are a few fun twists you can try:
-
Protein Boost: Add cooked chicken, shrimp, or sautéed chickpeas to make it more filling.
-
Herb Infusion: Throw in some fresh thyme, oregano, or even a handful of spinach for added flavor and nutrients.
-
Spice it Up: For a kick, introduce red pepper flakes or even a splash of hot sauce while cooking the zucchini.
-
Seasonal Changes: Swap zucchini for seasonal veggies like asparagus or bell peppers depending on what you can find fresh at your market.
-
Dairy-Free Delight: Use cashew cream or a homemade nut cheese for a healthy, dairy-free alternative.
Chef’s Notes
This Pasta with Zucchini recipe has evolved over time—a little dash of this, a sprinkle of that, seasoned with love. It’s become clearer to me that recipes are guidelines; the real magic happens when you adapt them to your taste. I remember the first time I served a version of this dish at a family gathering. Everyone loved it, and suddenly, pasta became a staple at our dinners! Now, it’s a go-to for my friends and family, evolving with their favorite seasonal ingredients.
FAQs and Troubleshooting
Let’s tackle a few common questions and potential kitchen hiccups you might face:
-
What if my zucchini is too watery?
- No worries! Simply sauté it a bit longer until excess moisture evaporates. Adding a sprinkle of salt while cooking can help draw out excess water.
-
How do I avoid overcooked pasta?
- Always set a timer for a minute or two earlier than the package instructions for that perfect al dente texture.
-
Can I freeze leftovers?
- Absolutely! Just make sure to store it in an airtight container. However, keep in mind that the texture may change slightly.
-
How do I make this vegan?
- Substituting the cream cheese for silken tofu and omitting the cheese makes this meal a hit for your vegan pals without sacrificing flavor!
Nutritional Info
This Pasta with Zucchini is more than just delicious; it’s good for you too! Here’s a breakdown of some of the nutritional benefits:
- Pasta: A great source of carbohydrates for energy. Using whole grain versions can up the fiber content.
- Zucchini: Low in calories but high in vitamins A and C, plus a good dose of potassium.
- Olive Oil: Heart-healthy fat that can help lower bad cholesterol.
- Parmesan: Adds calcium and protein which are essential for bone health.
Keep an eye on portion sizes if you’re watching calorie intake, but feel free to enjoy this nutritious dish guilt-free!
Final Thoughts
So, there you have it—an easy yet flavorful Pasta with Zucchini recipe that you can whip up any night of the week! Remember, cooking is all about having fun, experimenting, and sharing love through food. Whether you’re cooking for yourself, a special someone, or a big gathering, this dish is a winner.
I hope you enjoy making this dish as much as I do! Don’t forget to share your creations on social media and tag me—I love seeing your kitchen adventures! Now, let’s get cooking and embrace the joy of good food together! Bon appétit!
Print
Pasta with Zucchini
- Total Time: 35 minutes
- Yield: 4 servings 1x
- Diet: Vegetarian
Description
A vibrant and wholesome Pasta with Zucchini recipe that brings together fresh ingredients for a delightful meal.
Ingredients
- 8 oz (220 grams) Fusilli, Penne, or Rigatoni
- 1 tablespoon extra virgin olive oil
- 1 lb (450 grams) zucchini (about 3 medium-sized)
- Salt & pepper, to taste
- 2 garlic cloves, grated or minced
- ½ cup (40 grams) freshly grated parmesan
- ⅓ cup (80–90 grams) full-fat cream cheese or ricotta
Instructions
- Boil the pasta by bringing a large pot of salted water to a boil. Add your pasta and cook according to package instructions until al dente.
- Prep the zucchini by slicing or chopping it into bite-sized pieces.
- Sauté the garlic in a large skillet with olive oil over medium heat for about 30 seconds until fragrant.
- Add the chopped zucchini along with a pinch of salt and pepper. Stir-fry for about 5-7 minutes until tender.
- Combine the drained pasta with the zucchini and mix well. Stir in the cream cheese (or ricotta).
- Finish by adding freshly grated parmesan and season with more salt and pepper if needed.
Notes
For a vegan version, substitute cream cheese with silken tofu and omit cheese. Use seasonal veggies as alternatives to zucchini.
- Prep Time: 15 minutes
- Cook Time: 20 minutes
- Category: Main Course
- Method: Sautéing
- Cuisine: Italian
Nutrition
- Serving Size: 1 serving
- Calories: 320
- Sugar: 3g
- Sodium: 350mg
- Fat: 15g
- Saturated Fat: 5g
- Unsaturated Fat: 8g
- Trans Fat: 0g
- Carbohydrates: 37g
- Fiber: 4g
- Protein: 12g
- Cholesterol: 25mg
Keywords: pasta, zucchini, vegetarian, summer recipe, easy dinner

Crispy Parmesan Crust Zucchini-Corn-Tomato Bake (One-Pan)
Irresistibly Cheesy Zucchini Corn Tomato Bake with Parmesan Crust
Introduction
Hey there, food lovers! Today, we’re diving into a dish that embodies everything cozy and comforting—my Irresistibly Cheesy Zucchini Corn Tomato Bake with a dreamy Parmesan crust. Imagine slicing into a golden, bubbly bake as warm, savory flavors embrace you like a cozy blanket on a chilly evening. This recipe is not just about filling your belly; it’s about filling your heart with joy and bringing loved ones together around the table.
If you’ve ever felt like you needed a hug after a long day, this dish is like that hug on a plate. Think about the sunny days of summer where vegetables are at their peak. Zucchini and tomatoes bursting with flavor meet sweet corn, all enriched by gooey mozzarella and a crisp layer of Parmesan. With a sprinkle of herbs and some aromatic garlic, it transforms simple ingredients into a comforting feast fit for any occasion.
This bake is incredibly versatile, too! Whether you need a side dish for that backyard BBQ, a stunning centerpiece for your potluck, or a hearty main course, this dish fits the bill. What’s even better? It relies on easily accessible ingredients, making it a fantastic dish no matter the season. So, roll up your sleeves, grab your apron, and let’s whip up something delicious that will surely impress and satisfy!
Personal Story
Let me take you back to a sun-soaked summer afternoon. I was around eight years old, eager to help in my grandmother’s bustling kitchen. The scent of fried garlic lingered in the air as I stood on my tiptoes, trying to see what magic she was creating. That day, we were making a fresh summer casserole, and she handed me a zucchini from her garden—its skin gleaming in the sunlight. “This is what makes it special,” she said as she chopped it, inviting me to join in as she seasoned it with herbs.
We tossed in corn, sweet and bright, and ripe cherry tomatoes, carefully placing them in a dish that was soon smeared with cheese—who could resist that? Her laughter filled the room as I accidentally dropped a few tomatoes into the bowl, and we ended up creating a delicious mess. Fast forward a few decades, and here I am, still channeling that joyful spirit through my cooking. This Cheesy Zucchini Corn Tomato Bake is an homage to her legacy—a dish that continues to bring warmth to our family table, and I’m thrilled to share it with you!
Ingredients
Here’s what you need to create this cheesy delight:
-
3 Medium Zucchini: These beauties add a tender texture and soak up all the delicious flavors. If you’re in a pinch, yellow squash can work too!
-
1 Cup Corn Kernels: Fresh is always ideal, but if you can’t find it, canned or frozen corn is just as tasty. Look for organic options if you can!
-
1.5 Cups Cherry Tomatoes: Halved, they balance sweetness and acidity. If cherry tomatoes aren’t available, diced regular tomatoes will do just fine.
-
2 Cups Mozzarella Cheese: Low-moisture mozzarella is preferable to prevent sogginess. You can also use provolone or a cheese blend for an interesting twist!
-
0.5 Cup Parmesan Cheese: Freshly grated is best for that rich, nutty flavor! You could substitute with Pecorino Romano if you prefer a sharper taste.
-
1 Cup Breadcrumbs (Panko): Panko breadcrumbs add a delightful crunch. If you need a gluten-free option, substitute with gluten-free breadcrumbs.
-
3 Cloves Garlic: Sautéed until soft, garlic adds depth of flavor. Adjust the amount to suit your love for garlic!
-
1 Medium Onion: Sautéed until fragrant, it builds the base flavor. Sweet onions add a lovely touch.
-
3 Tablespoons Olive Oil: Used for sautéing and drizzling, extra virgin olive oil elevates the flavor. Don’t skip this step!
-
1 Teaspoon Dried Oregano: This adds herbal notes that enrich the overall taste. You can also experiment with thyme or Italian seasoning.
-
1 Teaspoon Salt: Essential for seasoning, adjust according to your preference and dietary needs.
-
0.5 Teaspoon Black Pepper: A must for seasoning, it enhances the flavors beautifully.
-
0.25 Cup Fresh Basil or Parsley: A bright finishing touch right before serving; it adds freshness and color!
Step-by-Step Instructions
Let’s get cookin’! Follow these steps to whip up your Cheesy Zucchini Corn Tomato Bake.
-
Preheat Your Oven: Set your oven to 375°F (190°C) to make sure it’s hot and ready for your delicious creation.
-
Prep the Veggies: Start by washing and slicing the zucchini into half-moons. I love that varying the thickness (around 1/4 inch) keeps some pieces tender while providing a bite. Dice your onion and mince the garlic, letting those fragrant aromas fill the kitchen.
-
Sauté the Aromatics: In a large skillet, heat 2 tablespoons of olive oil over medium heat. Add the onion, first, cooking until it becomes translucent. Add the garlic and sauté for another minute until fragrant. This combo is the heart of the dish, creating that all-important flavor base.
-
Add Zucchini and Corn: Toss in the sliced zucchini and corn kernels. Sauté for about 5–7 minutes until the zucchini begins to soften. Be sure to stir occasionally, making sure everything is evenly cooked.
-
Mix in Tomatoes and Seasoning: Once the zucchini is tender, throw in the halved cherry tomatoes, drying oregano, salt, and pepper. Cook for an additional 2–3 minutes until the tomatoes begin to release their juices.
-
Combine with Cheeses and Breadcrumbs: In a large mixing bowl, combine the sautéed mixture with mozzarella cheese and half of the Parmesan. Stir in the panko breadcrumbs, ensuring everything is evenly coated. This is where the magic starts!
-
Transfer to Baking Dish: Lightly grease a 9×13 inch baking dish or any shallow casserole dish with the remaining olive oil. Pour your cheesy mixture into the dish, spreading it evenly.
-
Top It Off: Sprinkle the remaining Parmesan cheese evenly across the top. This is where that golden, crispy crust comes in, so don’t be shy!
-
Bake: Place the dish in the preheated oven and bake for about 25–30 minutes, or until the top is golden and bubbly. The kitchen will smell incredible by this time—you might even gather some hungry friends and family!
-
Garnish and Serve: Once it’s out of the oven, allow it to cool for a few minutes. Top with fresh basil or parsley for that wonderful pop of color and flavor before serving.
Serving Suggestions
Let’s talk presentation! Serving this dish is just as important as cooking it. When it’s out of the oven, the cheesy top is golden, and the colors of zucchini and tomatoes pop, making it visually appealing. You can serve it as a side dish family-style right from the baking dish—encouraging guests to help themselves.
For an elegant touch, use a large spoon to scoop portions onto individual plates. A drizzle of balsamic glaze adds an impressive flair, balancing the richness of the cheese beautifully. Pair it with a crisp salad or warm garlic bread for a complete meal that’s sure to please!
Recipe Variations
Here are some creative twists you can try on this classic recipe:
-
Add Protein: Upgrade this bake by adding cooked ground turkey or chicken for a heartier version. You can also mix in some cooked and crumbled sausage for extra flavor.
-
Herbed Variation: Try swapping out the oregano for fresh thyme or basil—experiment with your favorite herb blend for a personalized touch.
-
Gluten-Free Crust: To make it gluten-free, use gluten-free breadcrumbs and serve alongside a gluten-free grain salad.
-
Spicy Kick: Add a sprinkle of red pepper flakes for a hint of heat or toss in some diced jalapeños for bold flavor.
-
Veggie Swap: Swap in other seasonal veggies like bell peppers or spinach for varied textures and flavors.
Chef’s Notes
This recipe has truly evolved with me over the years—sometimes it’s a comforting throwback to those summers in my grandmother’s kitchen, while at other times, it’s a creative outlet for whatever veggies are sitting in my fridge. Every version tells a story, whether it’s using freshly picked summer produce or a last-minute mix of what’s available. Whatever you choose, this dish is perfect for sharing, laughter, and eating well.
FAQs and Troubleshooting
-
What if my bake is too watery?
- This can happen if the zucchini contains excess moisture. Pre-salting the zucchini before cooking and letting it sit for a few minutes will help. Then, make sure to drain any liquid before adding it to the mixture.
-
Can I make it ahead of time?
- Absolutely! You can prepare the dish a day in advance, cover it, and store it in the fridge. Just pop it in the oven when ready to bake; you may need to extend the cooking time slightly.
-
How do I know it’s done?
- Look for a golden brown top and bubbling edges. A toothpick should slide easily through the veggies when cooked!
-
What if I don’t have panko?
- Regular breadcrumbs will work, but panko gives a better texture. If you’re short on breadcrumbs, crushed crackers can also work as a substitute.
Nutritional Info
Here’s a quick glance at what you can expect nutritionally from one serving of this Cheesy Zucchini Corn Tomato Bake. Each serving is rich in vitamins A and C, and the fiber from the zucchini and corn supports healthy digestion. It also provides a good source of protein from the cheese, making it a deliciously balanced dish!
Estimated Nutritional Breakdown per Serving:
- Calories: 320
- Total Fat: 18g
- Saturated Fat: 9g
- Carbohydrates: 28g
- Fiber: 3g
- Protein: 15g
Final Thoughts
Well, there you have it! My Irresistibly Cheesy Zucchini Corn Tomato Bake with a Parmesan crust is not just a dish; it’s an experience filled with nostalgia, comfort, and creativity. As you sit down to enjoy this delightful bake, remember that cooking is all about love and connection—the connection to ingredients, the memories we create, and the joy of sharing it all with others.
So, roll up your sleeves and get to work on this scrumptious dish! I can’t wait to hear how it turns out for you. Whether you twist it with your own love, share it with friends, or enjoy it alone with a good book, know that each bite is a reminder of the joy that comes from cooking and sharing good food. Happy cooking, my friend—let’s dig in!
Print
Irresistibly Cheesy Zucchini Corn Tomato Bake with Parmesan Crust
- Total Time: 45 minutes
- Yield: 4 servings 1x
- Diet: Vegetarian
Description
A cozy and comforting bake featuring zucchini, corn, and tomatoes topped with a golden Parmesan crust.
Ingredients
- 3 Medium Zucchini
- 1 Cup Corn Kernels
- 1.5 Cups Cherry Tomatoes, halved
- 2 Cups Mozzarella Cheese
- 0.5 Cup Parmesan Cheese
- 1 Cup Breadcrumbs (Panko)
- 3 Cloves Garlic, minced
- 1 Medium Onion, diced
- 3 Tablespoons Olive Oil
- 1 Teaspoon Dried Oregano
- 1 Teaspoon Salt
- 0.5 Teaspoon Black Pepper
- 0.25 Cup Fresh Basil or Parsley
Instructions
- Preheat your oven to 375°F (190°C).
- Prep the zucchini by washing and slicing them into half-moons.
- Sauté the onion in a skillet with 2 tablespoons of olive oil until translucent.
- Add the garlic and sauté for another minute.
- Toss in the sliced zucchini and corn, sauté for 5–7 minutes.
- Mix in the halved cherry tomatoes, oregano, salt, and pepper. Cook for an additional 2–3 minutes.
- Combine the mixture with mozzarella cheese and half of the Parmesan in a bowl.
- Transfer the mixture to a greased 9×13 inch baking dish.
- Top with the remaining Parmesan cheese.
- Bake for about 25–30 minutes until golden and bubbly.
- Garnish with fresh basil or parsley before serving.
Notes
For a gluten-free option, use gluten-free breadcrumbs. You can also add cooked protein or swap veggies based on what’s available.
- Prep Time: 15 minutes
- Cook Time: 30 minutes
- Category: Main Course
- Method: Baking
- Cuisine: Italian
Nutrition
- Serving Size: 1 serving
- Calories: 320
- Sugar: 5g
- Sodium: 600mg
- Fat: 18g
- Saturated Fat: 9g
- Unsaturated Fat: 7g
- Trans Fat: 0g
- Carbohydrates: 28g
- Fiber: 3g
- Protein: 15g
- Cholesterol: 30mg
Keywords: zucchini bake, cheesy bake, vegetarian recipes, comfort food, easy casserole