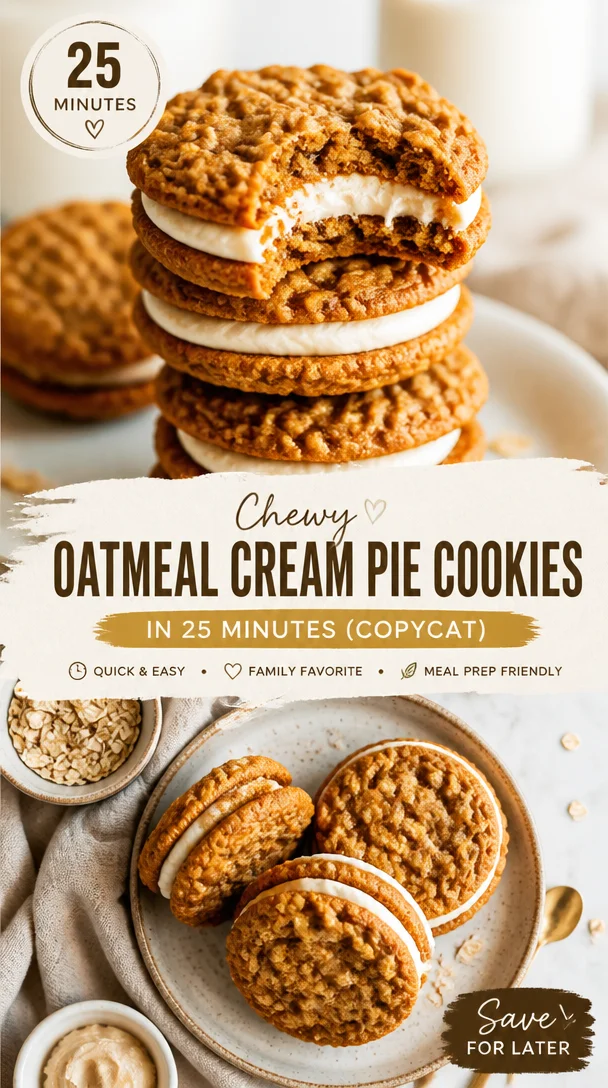
Chewy Oatmeal Cream Pie Cookies in 25 Minutes (Copycat)
Oatmeal Cream Pie Cookies: A Sweet Nostalgic Delight
Hey there, fellow food lovers! I’m Beau Collier, and today we’re diving into a delightful treat that’s a true blast from the past: Oatmeal Cream Pie Cookies! These cookies are not just a dessert; they’re a warm hug that brings back memories of childhood snack time and good old-fashioned kitchens. So grab your apron, because we’re about to whip up some deliciousness!
Introduction: A Comforting Classic
Let’s set the scene. Picture this: it’s a chilly afternoon, the kind where you can feel the warmth radiating from the oven and the sweet aroma of baked treats filling your home. You pull a batch of oatmeal cookies from the oven, golden brown and slightly chewy, and you hear that addictive crunch as you take a bite.
Oatmeal cream pie cookies have long been a classic beloved by many. These scrumptious, chewy delights are not only comfort food, but they also double as a trip down memory lane when you sink your teeth into that gooey marshmallow fluff filling. They’re sweet enough to satisfy any craving but wholesome enough to make you feel like you’re treating yourself to something special.
The beauty of these cookies lies in their versatility. You can pack them full of goodness, or keep them simple and nostalgic—whatever mood strikes you! With just a few key ingredients and some basic techniques, you can bake up a storm that will impress your friends, family, or even just yourself on a quiet evening in. Ready to rekindle the joy of baking and indulge in some tasty nostalgia? Let’s roll up our sleeves and get started!
Personal Story: Memories in Every Bite
Growing up, my kitchen was always bustling with activity, especially on the weekends. My mom was a master baker, and every time I walked in after a long afternoon of playing outside, I was greeted by the warm, inviting smell of cookies in the oven. But there was one cookie that always held a special place in my heart: the oatmeal cream pie.
I remember helping her in the kitchen, where I stood on a stool to reach the counter, whisking the batter and sneaking bites of the marshmallow fluff whenever I thought she wasn’t looking. Those afternoons weren’t just about baking; they were about bonding. The thrill of watching the cookies puff up in the oven, only to cool them down with a dollop of cream filling, was pure magic. Even now, whenever I bake these cookies, I’m transported back to those sweet moments in my childhood, filled with laughter and love.
Ingredients
Here’s what you’ll need to create these delicious Oatmeal Cream Pie Cookies—let’s break it down:
-
1 cup unsalted butter, softened
The star of the show! Softened butter creates that rich, tender texture we all crave in cookies. If you don’t have unsalted, feel free to use salted butter and cut back on any added salt in the recipe for balance. -
1 cup brown sugar, packed
Brown sugar adds moisture and that coveted chewy texture to the cookies. If you’re in a pinch, you can substitute it with an equal amount of coconut sugar for a lovely hint of caramel flavor. -
1/2 cup granulated sugar
A little sugar goes a long way in giving our cookies that perfect sweetness and slight crispiness on the edges. -
2 large eggs
Eggs are essential for binding all our ingredients together while contributing to the cookie’s structure. You could swap them for ¼ cup of unsweetened applesauce for a healthier, egg-free option! -
1 teaspoon vanilla extract
The secret ingredient that elevates the flavor! If you want to explore, almond extract offers a unique twist. -
1 1/2 cups all-purpose flour
All-purpose flour gives our cookies the right amount of stability. For a gluten-free option, you can use a gluten-free flour blend—just make sure it contains xanthan gum to help with texture. -
1 teaspoon baking soda
This will give your cookies the nice rise we love! If you’re out, cream of tartar can also act as a leavening agent if paired with baking soda. -
1/2 teaspoon salt
A pinch of salt enhances all the flavors and balances the sweetness. -
1 teaspoon ground cinnamon
Cinnamon adds a lovely warmth to our oatmeal cookies that can’t be beaten! You can switch things up with pumpkin spice mix for a holiday twist! -
3 cups old-fashioned rolled oats
These add the chewy texture we’re looking for. Quick oats can be used in a pinch but may yield a slightly different texture. -
1 cup marshmallow fluff
This sweet, gooey filling is what elevates these cookies to cream pie status. If you’re looking for something with less sugar, consider homemade vanilla buttercream as a filling. -
1/2 cup powdered sugar
This gets mixed with the fluff for a smoother texture. If you want a more decadent flavor, replace it with chocolate icing.
Step-by-Step Instructions
Let’s get cooking! Follow these steps carefully, and you’ll have the most scrumptious Oatmeal Cream Pie Cookies ready in no time.
-
Preheat the oven: Start by preheating your oven to 350°F (175°C). Getting that little oven toasty is key for baking perfection!
-
Cream the butter and sugars: In a large mixing bowl, beat together the softened unsalted butter, brown sugar, and granulated sugar using a handheld mixer or stand mixer until light and fluffy. This step generally takes about 3-5 minutes! Not only does this create that fluffy texture we adore, but it also helps the sugar retain moisture.
-
Add eggs and vanilla: Next, mix in the eggs one at a time, making sure each is fully incorporated before the next. Then, add your vanilla extract. Let that smell wash over you—wonderful, right?
-
Combine dry ingredients: In another bowl, whisk together the flour, baking soda, salt, ground cinnamon, and rolled oats. This ensures an even distribution of the ingredients and makes for a consistent bake.
-
Combine wet and dry: Gradually add the dry mixture into the wet mixture. Be sure to mix until just combined—overmixing can lead to tough cookies!
-
Scoop the cookie dough: Use a cookie scoop or tablespoon to drop rounded tablespoons of dough onto lined baking sheets, spacing them about 2 inches apart. Each dollop should look like a lovely little mound of happiness!
-
Bake: Place the cookie sheets in your preheated oven and bake for 10-12 minutes until the edges are golden brown and the centers are still soft. They’ll firm up as they cool, so don’t worry if they seem a bit underbaked!
-
Cool: Remove from the oven and let the cookies cool on the sheets for about 5 minutes before transferring them to a cooling rack. This helps prevent them from falling apart; patience is key!
-
Prepare the filling: While the cookies cool, whip together the marshmallow fluff and powdered sugar in a mixing bowl until well combined. This creamy mixture will be the luxurious filling that brings it all together!
-
Assemble the cookies: Once the cookies are cool, slather on a generous dollop of fluff on the bottom of half the cookies and top with the remaining cookies to form a sandwich.
And voila! You’ve created magical Oatmeal Cream Pie Cookies that are begging to be devoured!
Serving Suggestions
Now that your Oatmeal Cream Pie Cookies are perfectly assembled, there are some delightful ways to serve them up! First of all, an inviting presentation creates all the difference. Set the cookies on a rustic wooden board, and sprinkle some cinnamon over them for that professional touch. You can even place a few cookies in a cute, seasonal tin for gifting or as party favors.
For an extra touch that enhances the experience, consider pairing these cookies with a tall glass of cold milk or a steaming cup of chamomile tea. The coolness of the milk beautifully complements the warmth of the cookies, while a cup of tea adds a soothing contrast.
Recipe Variations
There’s always room for creativity in the kitchen! Here are some fun twists to spice up your Oatmeal Cream Pie Cookies:
-
Add-ins Galore: Try incorporating chocolate chips, raisins, or dried cranberries for an extra burst of flavor and texture.
-
Nutty Goodness: Throw in some chopped walnuts or pecans for that crunch! Just be sure to chop them coarsely so they mix in nicely.
-
Flavor Boost: Swirl in a bit of peanut butter or Nutella into the marshmallow fluff! This tiny change can create a whole new dimension of flavor!
-
Spiced Variation: Experiment with different spices like nutmeg or allspice to give your cookies a seasonal kick. Think snickerdoodles but in oatmeal format!
-
Fruity Fun: Sliced bananas or pureed apples can bring that fun twist of flavor while keeping things moist and delicious.
Chef’s Notes
I always think of baking as a blend of science and love. Over the years, this recipe for Oatmeal Cream Pie Cookies has evolved so much. I’ve tried countless variations, from chunky to chewy, and even experimented with various types of fillings. Every version has its merits, but there’s a reason I keep coming back to this original recipe. It’s straightforward and comforting and allows for creativity, which is what cooking is all about!
Also, here’s a tip: if you find your cookie batter is a bit too wet or sticky, let it chill in the fridge for about 30 minutes. This little hack helps shape the cookies better and yields thicker tealicious treats.
FAQs and Troubleshooting
-
Why are my cookies flat?
Flat cookies can be a result of too much butter or not enough flour. Make sure to measure your ingredients accurately and consider chilling the dough before baking. -
How do I store the cookies?
Keep the cookies in an airtight container at room temperature for up to a week. They usually last about that much time because they get gobbled up quickly! -
Can I freeze these cookies?
Yes! They freeze beautifully. Just layer them between parchment paper in an airtight container, and they will stay delicious for up to three months. -
Can I make the filling ahead of time?
Absolutely! You can make the filling a day before. Just store it in the fridge, and when you’re ready to assemble the cookies, give it a quick stir.
Nutritional Info
While delicious things don’t always come with a health warning, I understand nutrition is important, too! Each Oatmeal Cream Pie Cookie (considering standard serving size) contains approximately:
- Calories: 210
- Total fat: 10g
- Saturated fat: 6g
- Cholesterol: 30mg
- Sodium: 100mg
- Carbohydrates: 28g
- Fiber: 1g
- Sugar: 12g
- Protein: 2g
While these cookies are a treat to enjoy, they can also form part of a balanced diet when enjoyed in moderation.
Final Thoughts
Baking is more than just following a recipe; it’s about creating connections and memories. These Oatmeal Cream Pie Cookies are perfect for sharing with friends or celebrating everyday moments. Whether you’re reminiscing about childhood or starting new traditions in your kitchen, this recipe is a reminder of the joys simple ingredients can bring.
So gather around the oven, invite friends over, and make these delicious cookies that promise a taste of home. Remember, every cookie has its story, and as you take that first heavenly bite, know that you too are creating your own kitchen narrative. Happy baking, and until next time, keep exploring and savoring those feel-good flavors! 🍪✨
Now, who’s ready for some cookies?
Print
Oatmeal Cream Pie Cookies
- Total Time: 32 minutes
- Yield: 24 cookies 1x
- Diet: Vegetarian
Description
Delicious oatmeal cream pie cookies with a gooey marshmallow filling that bring back childhood memories.
Ingredients
- 1 cup unsalted butter, softened
- 1 cup brown sugar, packed
- 1/2 cup granulated sugar
- 2 large eggs
- 1 teaspoon vanilla extract
- 1 1/2 cups all-purpose flour
- 1 teaspoon baking soda
- 1/2 teaspoon salt
- 1 teaspoon ground cinnamon
- 3 cups old-fashioned rolled oats
- 1 cup marshmallow fluff
- 1/2 cup powdered sugar
Instructions
- Preheat the oven: Start by preheating your oven to 350°F (175°C).
- Cream the butter and sugars: In a large mixing bowl, beat together the softened unsalted butter, brown sugar, and granulated sugar until light and fluffy.
- Add eggs and vanilla: Mix in the eggs one at a time, followed by the vanilla extract.
- Combine dry ingredients: In another bowl, whisk together flour, baking soda, salt, ground cinnamon, and rolled oats.
- Combine wet and dry: Gradually add dry mixture into the wet mixture and mix until just combined.
- Scoop the cookie dough: Drop rounded tablespoons of dough onto lined baking sheets, spacing them about 2 inches apart.
- Bake: Place the cookie sheets in the oven and bake for 10-12 minutes until golden brown.
- Cool: Let the cookies cool on the sheets for about 5 minutes before transferring them to a cooling rack.
- Prepare the filling: Whip together marshmallow fluff and powdered sugar until well combined.
- Assemble the cookies: Spread a dollop of fluff on the bottom of half the cookies and top with the remaining cookies to form a sandwich.
Notes
For a healthier option, you can substitute ¼ cup of unsweetened applesauce for the eggs.
- Prep Time: 20 minutes
- Cook Time: 12 minutes
- Category: Dessert
- Method: Baking
- Cuisine: American
Nutrition
- Serving Size: 1 cookie
- Calories: 210
- Sugar: 12g
- Sodium: 100mg
- Fat: 10g
- Saturated Fat: 6g
- Unsaturated Fat: 4g
- Trans Fat: 0g
- Carbohydrates: 28g
- Fiber: 1g
- Protein: 2g
- Cholesterol: 30mg
Keywords: oatmeal cookies, cream pie cookies, dessert, nostalgic treats
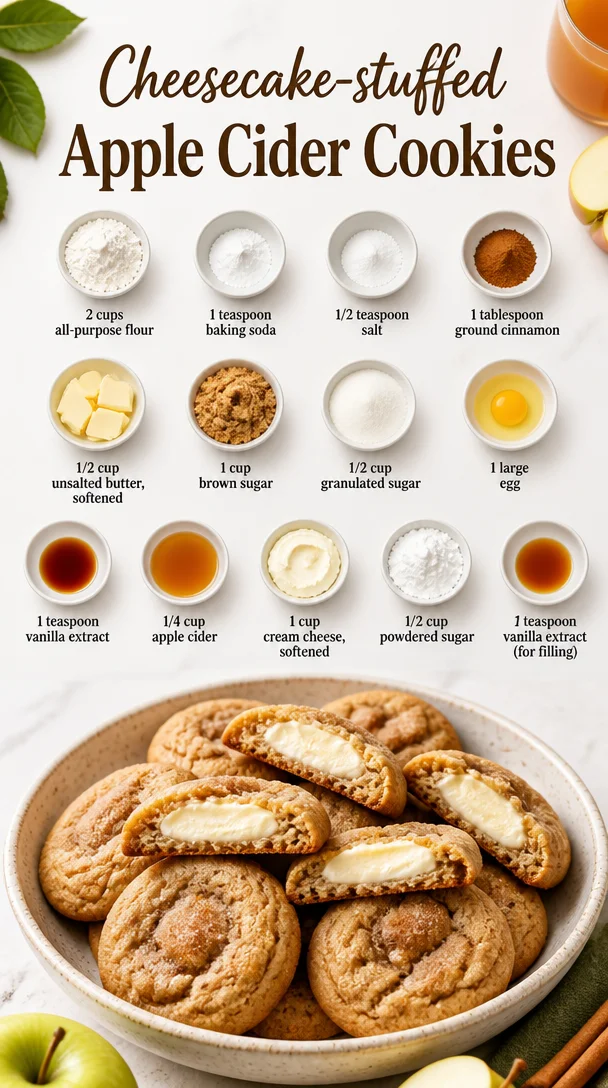
Cheesecake-stuffed Apple Cider Cookies
Cheesecake-Stuffed Apple Cider Cookies: A Warm Hug from the Oven
Hey there, food lovers! If you’re on the hunt for a cozy, feel-good treat that wraps the essence of autumn in every bite, you’ve just stumbled upon a little slice of heaven: Cheesecake-Stuffed Apple Cider Cookies. Think of these delightful cookies as your seasonal best friend—a comforting companion for chilly days, perfect for sharing, or simply indulging in while you binge-watch your favorite shows.
These cookies are more than just a treat; they’re an experience, full of warm spices, sweet apple cider, and that oh-so-luscious cream cheese filling. You might be asking yourself, "What’s so special about a cookie?" Well, my friend, these aren’t just any cookies. These are soft, chewy pillows of happiness that directly channel the flavors of fall. We’re talking about cozying up on a crisp evening with a plate of these cookies next to a warm cup of cider or a rich cup of coffee.
The beauty of these cookies doesn’t just lie in their taste. They each carry a story—happy memories of sharing dessert with loved ones, celebrations around the holidays, and the simple joy of baking something amazing from scratch. So lace up those baking shoes, and let’s get started on this delectable journey together!
A Sweet Memory to Share
Growing up, my family had a special tradition during the fall season. Every year, we would visit a quaint little apple orchard on the outskirts of town. The air was filled with the sweet scent of apples mingling with autumn leaves, and of course, the promise of fresh cider! There was this one day I remember vividly; I must have been about eight years old.
We ran around the orchard, laughter echoing as we picked the largest apples we could find. Once we filled our baskets, we’d head back to my grandma’s kitchen, where the magic happened. The moment we stepped through the door, the warm scent of cinnamon and baked goodies greeted us, wrapping around us like a big, fuzzy blanket. Grandma had this incredible knack for combining flavors, and she often made the most amazing apple cider cookies.
After countless attempts to recreate those cookies, I had an epiphany one rainy afternoon: why not stuff them with cheesecake? And let me tell you, that little idea transformed my cookie game! These Cheesecake-Stuffed Apple Cider Cookies are here to honor those memories while bringing in new ones. So, without further ado, let’s whip up a batch and share some warmth!
Ingredients
Here’s what you’ll need to create these heavenly cookies, along with a few tips to help you out:
-
2 cups all-purpose flour
The base of our cookies. You can substitute with whole wheat flour for a nuttier flavor or gluten-free flour if you’re avoiding gluten—just make sure it’s a 1:1 blend for best results! -
1 teaspoon baking soda
This helps the cookies rise and gives them that lovely chewy texture. Don’t skip this one! -
1/2 teaspoon salt
A pinch of salt balances the sweetness and enhances the flavor of all other ingredients. -
1 tablespoon ground cinnamon
Ah, the sweet aroma of cinnamon! It’s what makes these cookies scream “fall.” If you want to add a little twist, try mixing in some nutmeg or ginger for a spicier flavor profile. -
1/2 cup unsalted butter, softened
You want your butter soft enough to cream with the sugars, but not melted. Feel free to swap it for coconut oil if you’re looking for a dairy-free option! -
1 cup brown sugar
The molasses in brown sugar adds depth and moisture to our cookies. Light or dark brown sugar works here; it’s all about personal preference. -
1/2 cup granulated sugar
This sugar balances out the deeper notes of brown sugar. If you’re aiming for a healthier swap, coconut sugar can be a good alternative! -
1 large egg
This adds moisture and binds our ingredients together. If you want to make these vegan, you can replace it with a flax egg (1 tablespoon flaxseed meal + 2.5 tablespoons water, mixed and set for 5 minutes). -
1 teaspoon vanilla extract
Pure vanilla is your best friend in baking! It adds a warmth to the flavor that can’t be matched by imitation vanilla. -
1/4 cup apple cider
The star of the show! This adds that burst of authentic apple flavor. In a pinch, you can use apple juice, but trust me, the cider makes all the difference. -
1 cup cream cheese, softened
The creamy filling that takes these cookies to the next level! For a lighter option, you could try Greek yogurt or reduced-fat cream cheese. -
1/2 cup powdered sugar
This sweetens up the filling. You can adjust the amount based on how sweet you want your cheesecake filling. -
1 teaspoon vanilla extract (for filling)
Yep, a little more vanilla in the filling means endless flavor harmony in these cookies!
Step-by-Step Instructions
Alright, let’s dive into making these scrumptious cookies! Follow along, and don’t hesitate to sprinkle in some of your soul into the process.
-
Preheat Your Oven
- Preheat your oven to 350°F (175°C). If you don’t have a thermometer, trust your nose! When that warm scent starts wafting, you know it’s ready.
-
Mix the Dry Ingredients
- In a large bowl, whisk together the all-purpose flour, baking soda, salt, and ground cinnamon. This step is essential as it ensures your leavening agents are evenly distributed.
-
Cream the Butter and Sugars
- In a separate bowl, beat together the softened butter, brown sugar, and granulated sugar until it’s light and fluffy. This should take about 2-3 minutes. It’s kind of like a workout for your mixer, but worth it for that perfect texture!
-
Add the Egg and Vanilla
- Crack in the egg and add the vanilla extract. Beat until well combined. You want everything to come together cohesively—it should look buttery and delicious!
-
Incorporate the Apple Cider
- Now, stir in the apple cider. It’s going to feel a bit more liquidy now, and that’s totally fine—time for fun in the next step!
-
Combine Wet and Dry
- Slowly add the dry mixture to the wet ingredients, stirring until just combined. Overmixing can lead to tough cookies, and we definitely want soft, tender bites here!
-
Prepare the Cheesecake Filling
- While the cookie dough is resting, let’s whip up our flavorful cream cheese filling. In a medium bowl, combine the softened cream cheese, powdered sugar, and vanilla extract. Beat until smooth and creamy. You should be able to resist the urge to eat it all straight from the bowl!
-
Scoop the Dough
- Using a cookie scoop or two spoons, scoop a tablespoon of dough, flatten it slightly in your palm, and place a teaspoon of cheesecake filling in the center. Carefully wrap the dough around the filling, sealing it completely. Repeat with the remaining dough.
-
Bake the Cookies
- Place the stuffed cookies on a parchment-lined baking sheet, giving them some space to spread—about 2-inches apart. Bake for 12-15 minutes, or until the edges are lightly golden. Trust your nose; if it smells like cookies, you’re probably on the right track!
-
Cool and Enjoy
- Once baked, let them cool on the sheet for about 5 minutes before transferring them to a wire rack. This cooling time helps them maintain their shape and keeps that creamy filling intact.
Serving Suggestions
Oh boy, when it comes to serving these delightful cookies, you can really flex your creativity! Here are a few ideas:
-
Classic Presentation: Serve them warm, dusted with a little extra powdered sugar on top for that cafe-style look. You could even drizzle a little caramel sauce for an extra touch of sweetness!
-
Cookie Sandwich: Pair two cookies with your favorite scoop of ice cream in between for an indulgent ice cream sandwich that everyone will love.
-
Coffee Companion: These cookies make the perfect sidekick to a warm cup of chai or spiced coffee, enhancing the cozy experience.
-
Share the Love: Arrange them on a pretty platter with some fresh apple slices and a small bowl of warm caramel for a delightful dessert spread, perfect for gatherings.
Recipe Variations
Want to mix things up? Here are some fun variations you could try:
-
Chocolate Drizzle: Melt some chocolate and drizzle it over the cooled cookies for a sweet twist that everyone will adore.
-
Nutty Add-In: Toss some chopped walnuts or pecans into the cookie dough for an added crunch and depth of flavor.
-
Dried Fruits: Mix in some dried cranberries or raisins for a pop of color and tartness that’ll pair beautifully with the sweetness.
-
Spiced Up: Add a pinch of cardamom or allspice to the cookie mix for a unique, aromatic twist that will have everyone guessing your secret ingredient.
-
Vegan Version: Substitute the cream cheese with a cashew cream or a vegan cream cheese for a plant-based treat that’s still rich and creamy.
Chef’s Notes
As with any beloved recipe, Cheesecake-Stuffed Apple Cider Cookies have a story of evolution. Initially, I’d simply make regular apple cider cookies until I had that lightbulb moment about the cream cheese filling. Since then, I’ve seen friends and family whip it up in their own kitchens with different flavors and adaptations. It’s incredible how food can bring people together, carrying the essence of shared moments and creativity.
And speaking of creativity, I once had a baking mishap when a friend asked for gluten-free cookies on short notice. Let’s just say they turned out more like little rock-hard hockey pucks rather than the delightful treats I envisaged. Lesson learned: always double-check your flours!
FAQs and Troubleshooting
1. Why are my cookies spreading too much?
If your cookies are spreading too thin, your butter might have been too warm or you could be missing some flour. Also, make sure not to overmix your dough after adding the flour.
2. Can I make the dough ahead of time?
Absolutely! You can prepare the cookie dough and store it in the fridge for up to 24 hours. Just remember—let it soften a bit at room temperature before scooping and baking.
3. How can I store the cookies?
Store these cookies in an airtight container at room temperature for 3-5 days. If you want to keep them longer (like that’ll ever happen!), pop them in the fridge for about a week.
4. What should I do if my filling is too runny?
If your cream cheese filling is too runny, try chilling it in the fridge for 30 minutes to help firm it up before using it in the cookies.
Nutritional Info (if applicable)
Each cookie is an indulgent balance of sweet and savory with warm spices, but they also pack a nutritious punch. Here’s a rough estimate per cookie (assuming 24 cookies):
- Calories: 180
- Fat: 9g
- Carbohydrates: 24g
- Protein: 2g
- Sugar: 10g
Of course, these numbers can vary depending on how you tweak the recipe, so feel free to experiment while keeping an eye on healthfulness!
Final Thoughts
There you have it, fellow food lovers! Your cozy evening awaits with a batch of these Cheesecake-Stuffed Apple Cider Cookies, ready to be shared (or devoured solo, no judgment here!). Cooking is all about connection, creativity, and a sprinkling of fun—so dig into these cookies, relive your own treasured memories, and create new ones that you’re going to cherish forever.
Remember, whether you’re baking for yourself, friends, or perhaps just to fill your home with the smells of fall, these cookies are bound to be a hit. So, don that apron and let’s get to baking! Happy cooking, and enjoy every scrumptious bite!
Print
Cheesecake-Stuffed Apple Cider Cookies
- Total Time: 30 minutes
- Yield: 24 cookies 1x
- Diet: Vegetarian
Description
These cozy, indulgent cookies combine warm spices and sweet apple cider with a creamy cheesecake filling, perfect for autumn treats.
Ingredients
- 2 cups all-purpose flour
- 1 teaspoon baking soda
- 1/2 teaspoon salt
- 1 tablespoon ground cinnamon
- 1/2 cup unsalted butter, softened
- 1 cup brown sugar
- 1/2 cup granulated sugar
- 1 large egg
- 1 teaspoon vanilla extract
- 1/4 cup apple cider
- 1 cup cream cheese, softened
- 1/2 cup powdered sugar
- 1 teaspoon vanilla extract (for filling)
Instructions
- Preheat your oven to 350°F (175°C).
- Mix the dry ingredients: In a large bowl, whisk together the all-purpose flour, baking soda, salt, and ground cinnamon.
- Cream the butter and sugars: In a separate bowl, beat together the softened butter, brown sugar, and granulated sugar until light and fluffy.
- Add the egg and vanilla: Crack in the egg and add the vanilla extract. Beat until well combined.
- Incorporate the apple cider into the mixture.
- Combine wet and dry ingredients, stirring until just combined.
- Prepare the cheesecake filling by mixing softened cream cheese, powdered sugar, and vanilla extract until smooth.
- Scoop the dough, flatten it, and place a teaspoon of cheesecake filling in the center, then wrap the dough around the filling.
- Bake the cookies on a parchment-lined baking sheet for 12-15 minutes.
- Cool on a wire rack for about 5 minutes before serving.
Notes
For added flavor, consider drizzling melted chocolate on top or incorporating nuts into the dough.
- Prep Time: 15 minutes
- Cook Time: 15 minutes
- Category: Dessert
- Method: Baking
- Cuisine: American
Nutrition
- Serving Size: 1 cookie
- Calories: 180
- Sugar: 10g
- Sodium: 50mg
- Fat: 9g
- Saturated Fat: 5g
- Unsaturated Fat: 3g
- Trans Fat: 0g
- Carbohydrates: 24g
- Fiber: 0g
- Protein: 2g
- Cholesterol: 30mg
Keywords: cookies, dessert, cheesecake, apple cider, autumn treats, fall flavors

Gourmet Brownie Cookies
Indulge in Gourmet Brownie Cookies: A Delight for Every Sweet Tooth!
Hey there, fellow food lovers! Beau Collier here, and I can’t wait to dive into the sweet, decadent world of gourmet brownie cookies with you. If there’s one thing we can all agree on, it’s that cookies have their own special place in our hearts (and stomachs!). So, get ready because we’re about to embark on a delicious journey that combines the fudginess of brownies with the classic crispiness of cookies. What’s not to love, right?
Ah, the aroma of freshly baked cookies wafting through the kitchen! It’s like a cozy hug that creeps under your skin and warms your soul. For me, cookie season is year-round, but there’s something intrinsically special about gourmet brownie cookies. They bring together the best of both worlds: the gooey richness of brownies and the finger-licking joy of cookies. Imagine biting into a soft, chocolatey treat that promises both chewiness and a crumbly texture. That, my friend, is pure bliss!
So, here’s the lowdown: one bite of these gourmet brownie cookies, and they will transport you straight to chocolate heaven! Whether you’re whipping them up for a last-minute gathering, a cozy night in with loved ones, or simply because it’s Tuesday (and that’s reason enough!), these cookies will never let you down.
In today’s post, I’ll take you through every step of my favorite brownie cookie recipe, share stories from my kitchen adventures, and sprinkle in a few of my secret baking tips along the way. So grab your apron, fire up that oven, and let’s create something magical together!
Personal Story
Growing up, my grandmother was the reigning queen of the cookie jar. Whether it was soft and chewy chocolate chip cookies or her legendary oatmeal raisin delights, she had an unwavering knack for sweet treats. But one memory that stands out is when she introduced me to her "special" brownie cookies. I still remember the day she pulled them out of the oven—puffy, gooey, and topped with a sprinkle of sea salt. As soon as I took a bite, I was instantly transported to euphoria. The chocolate melted in my mouth, and I could hardly believe that such a simple recipe could produce such rich flavors.
It was one of those moments that planted the seed of my passion for cooking. And can you believe it? I still use her recipe today! Over the years, I’ve played with it, adding my own twists and turns while keeping that original flavor intact. Just like grandma taught me, sharing freshly baked goodness with others is one of life’s simplest joys.
Ingredients
Let’s gather our ingredients! Each component plays a key role in crafting the perfect brownie cookies. Here’s what you’ll need:
-
1 cup butter, melted: This adds richness and helps achieve that gooey texture. You can use unsalted or salted butter based on your taste preference.
-
1 cup granulated sugar: This sweetens the cookies and helps with that lovely crispy exterior. For a healthier option, consider coconut sugar.
-
1 cup brown sugar: Adding depth and moisture, brown sugar gives these cookies that signature caramel flavor. If you’re out of brown sugar, you can mix granulated sugar with a dash of molasses as a substitute.
-
2 large eggs: The binding agents that create structure and stability. For a vegan alternative, you can use flaxseed meal mixed with water.
-
1 teaspoon vanilla extract: Adds warmth and enhances the overall flavor profile. Feel free to use almond extract for a fun twist.
-
1 cup all-purpose flour: The backbone of our cookies. For a gluten-free option, almond flour or a gluten-free blend works well.
-
1/2 cup cocoa powder: This is where the chocolate magic happens! Use unsweetened cocoa for the best results.
-
1/2 teaspoon baking powder: This gives the cookies a slight lift, helping them puff up nicely.
-
1/4 teaspoon salt: A touch of salt elevates the flavors and balances the sweetness. Sea salt is my favorite!
-
1 cup chocolate chips: Because one can never have too much chocolate! Go for semi-sweet or dark chocolate for a richer flavor.
Step-by-Step Instructions
Ready to make some magic in the kitchen? Let’s get rolling! Here’s how to whip up these gourmet brownie cookies step by step.
-
Preheat your oven to 350°F (175°C). This is crucial for ensuring your cookies bake evenly. While the oven heats up, it’s the perfect time to gather your ingredients and tools!
-
Melt the butter: In a medium-sized bowl, combine your melted butter with the granulated sugar and brown sugar. Give it a good mix until it’s smooth and well combined. The heat from the melted butter helps dissolve the sugar, leading to super chewy cookies!
-
Add the eggs and vanilla: One by one, crack in those eggs, mixing well after each addition. Then, stir in the vanilla extract. This will create a beautiful, glossy batter that’s rich in flavor.
-
Combine the dry ingredients: In a separate bowl, whisk together the all-purpose flour, cocoa powder, baking powder, and salt. This step helps ensure everything is well-distributed and prevents any clumps.
-
Combine wet and dry: Gradually fold the dry ingredients into the wet mixture, being careful not to overmix. It’s totally OK to have a few lumps; we want that fudgy texture!
-
Chocolate chips magic: Stir in the chocolate chips (or chunks, if you’re feeling wild!). Now’s the perfect time to add in any extras you love—walnuts, hazelnuts, or even a sprinkle of espresso powder for an added flavor punch!
-
Scoop and bake: Use a cookie scoop to portion the dough onto a lined baking sheet, leaving space between each scoop. These beauties will spread a bit during baking, so don’t cramp their style! Bake for about 10-12 minutes or until the edges are slightly firm but the center still looks soft.
-
Cool down: Once out of the oven, let the cookies cool on the baking sheet for about 5 minutes before transferring them to a wire rack. This helps them finish setting up while still keeping that soft, chewy center.
Serving Suggestions
Now for the fun part—serving your gourmet brownie cookies! Here’s how to impress your friends and family:
-
Plate with style: Use a rustic wooden board or a chic white platter to display your cookies. Stack them high for a dramatic effect, or line them up for a more casual vibe.
-
Add a scoop of ice cream: Nothing pairs better with warm cookies than a scoop of vanilla or salted caramel ice cream. Place the cookies in a bowl and top them off with a generous scoop. Heaven in a dish!
-
Dust with powdered sugar: For a fancy touch, dust some powdered sugar over the top right before serving. It adds a little elegance and makes everything just a bit sweeter!
-
Drizzle with chocolate: Melt some chocolate and drizzle it artfully over your cookies for an Instagram-worthy creation. You can even sprinkle some sea salt on top to elevate the flavor even more.
Recipe Variations
Now, let’s get creative! Here are a few fun variations to shake things up:
-
Mint Chocolate Brownie Cookies: Add a few drops of mint extract to impart a refreshing minty flavor. You can also toss in some Andes mints or chocolate chips with a hint of mint.
-
Nutty Delight: Fold in some chopped nuts, like pecans or hazelnuts, for added texture and a nutty flavor. Toasting the nuts beforehand enhances their taste!
-
Spicy Kick: Want to take your cookies to the next level? Add a pinch of cayenne pepper or chili powder for an unexpected heat that balances the sweetness. Trust me!
-
Dark Chocolate Chunk: Swap regular chocolate chips for dark chocolate chunks for an intense chocolate experience. The extra bits of chocolate create surprises in every bite!
-
Gluten-Free Option: Substitute all-purpose flour with a gluten-free flour blend to make it suitable for those with gluten sensitivities. They’ll be just as delicious!
Chef’s Notes
Ah, the kitchen! It’s where all the best stories happen, and oh, do I have a few! I’ll let you in on a little secret: recipe testing often goes awry, leading to some hilarious moments. At one point, I misread a measuring cup and added a full cup of salt instead of a quarter teaspoon. 🤦♂️ Let’s just say, those cookies went straight to the trash and not a single friend would take them!
Each time I make these brownie cookies, I make sure to tweak the recipe slightly—trying different flavor combinations or using organic ingredients. Revisiting the same base recipe has led to numerous delicious outcomes, proving that there’s always room for creativity in the kitchen!
FAQs and Troubleshooting
As with any recipe, it’s completely normal to run into some hiccups. Here are a few common questions and solutions to ensure your brownie cookies turn out perfectly.
Q1: Why are my cookies too chewy?
Chewy cookies need moisture, but if they’re too chewy, you might have added too much flour or not baked them long enough. Make sure to measure your flour accurately and stick to the baking time!
Q2: My cookies spread too much while baking. What happened?
If your cookies spread excessively, try chilling the dough for about 30 minutes before baking. This will help solidify the butter and prevent excessive spreading.
Q3: Can I freeze these brownie cookies?
Absolutely! These cookies freeze really well. Just place them in an airtight container or zip-top bag, and they’ll keep their freshness for a few months. Thaw at room temperature before enjoying!
Q4: How do I store leftover cookies?
Keep them in an airtight container at room temperature for about a week, or in the fridge if you want to prolong their freshness. Just remember to let them come to room temperature before serving for the ultimate chewy experience!
Nutritional Info
While I believe that life’s too short not to indulge every once in a while, it’s still good to have an idea of what’s going into our favorite treats! Here’s a basic rundown of the nutritional info per cookie (assuming about 24 cookies in one batch):
- Calories: Approximately 200
- Total Fat: 10g (Saturated fat: 6g)
- Cholesterol: 40mg
- Sodium: 50mg
- Total Carbohydrates: 28g (Dietary fiber: 1g, Sugars: 18g)
- Protein: 2g
Remember, moderation is key; balance those calories with plenty of veggies and healthy meals throughout the week!
Aside from satisfying your sweet tooth, these cookies provide a host of enjoyable flavors and delightful moments around the table with loved ones.
Final Thoughts
There you have it! Gourmet brownie cookies that are sure to win over hearts and tantalize taste buds. This recipe is not just a combination of ingredients; it’s about creating lasting memories, sharing joy, and perhaps, a little bit of chocolate-induced happiness!
So here’s my challenge to you: try these out for your next gathering or cozy night in, and I guarantee people will be asking for your secret recipe. And who knows? You might even find some kitchen inspiration for your own variations down the line.
Thank you for joining me on this delicious adventure. I can’t wait to hear how your gourmet brownie cookies turn out! Spread the love (and cookie crumbs), and remember: the heart of every home is the kitchen. Now go forth and bake with joy!
Happy cooking! 🍪✨
Print
Gourmet Brownie Cookies
- Total Time: 27 minutes
- Yield: 24 cookies 1x
- Diet: Vegetarian
Description
Decadent cookies combining the fudginess of brownies with classic cookie crispiness.
Ingredients
- 1 cup butter, melted
- 1 cup granulated sugar
- 1 cup brown sugar
- 2 large eggs
- 1 teaspoon vanilla extract
- 1 cup all-purpose flour
- 1/2 cup cocoa powder
- 1/2 teaspoon baking powder
- 1/4 teaspoon salt
- 1 cup chocolate chips
Instructions
- Preheat your oven to 350°F (175°C).
- Melt the butter and mix it with the granulated and brown sugar until smooth.
- Add the eggs one at a time, mixing well after each addition, then stir in vanilla.
- Combine the flour, cocoa powder, baking powder, and salt in a separate bowl.
- Combine the dry ingredients into the wet mixture, folding gently.
- Stir in the chocolate chips or other additions if desired.
- Scoop the dough onto a lined baking sheet and bake for about 10-12 minutes.
- Cool the cookies on the baking sheet for 5 minutes before transferring to a wire rack.
Notes
Adjust baking time for preferred cookie texture; if too chewy, consider measuring flour more accurately.
- Prep Time: 15 minutes
- Cook Time: 12 minutes
- Category: Dessert
- Method: Baking
- Cuisine: American
Nutrition
- Serving Size: 1 cookie
- Calories: 200
- Sugar: 18g
- Sodium: 50mg
- Fat: 10g
- Saturated Fat: 6g
- Unsaturated Fat: 4g
- Trans Fat: 0g
- Carbohydrates: 28g
- Fiber: 1g
- Protein: 2g
- Cholesterol: 40mg
Keywords: cookies, brownie cookies, chocolate cookies, dessert, sweet treats
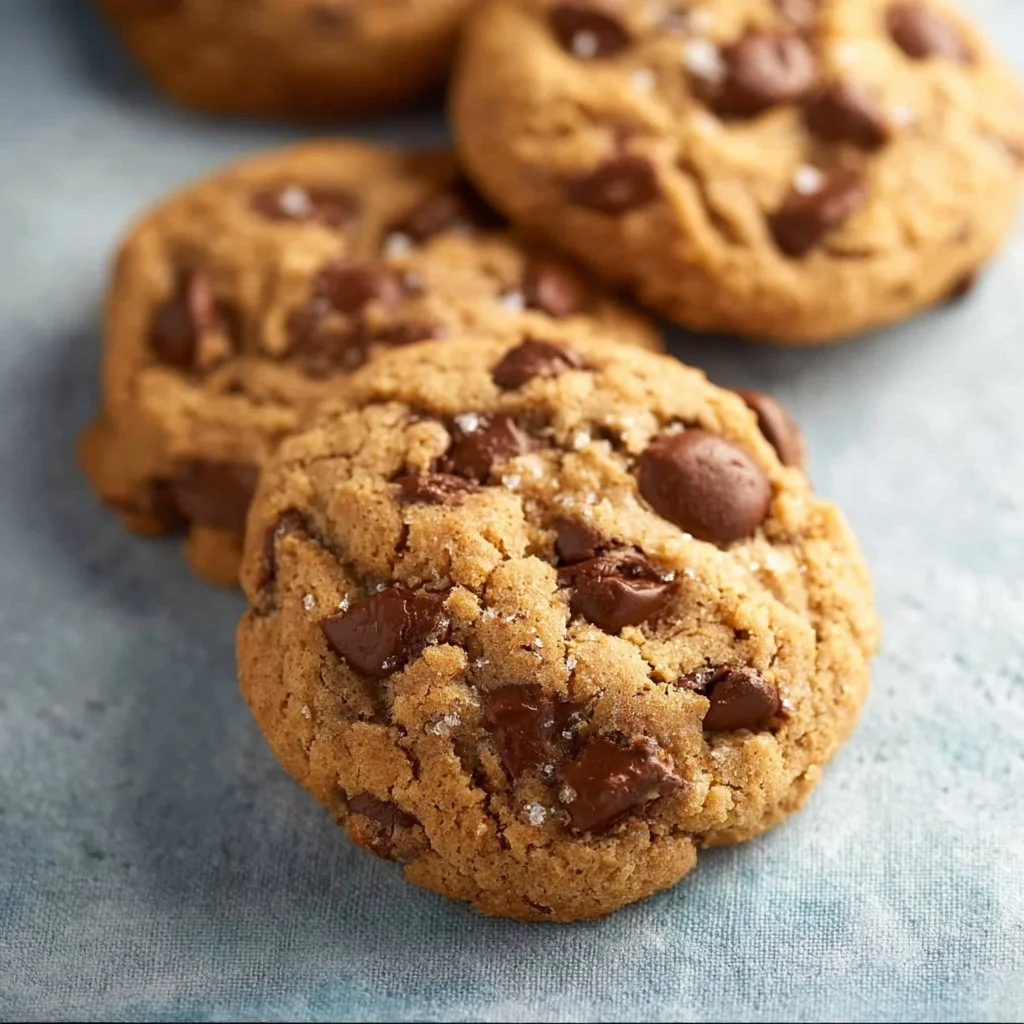
Low Calorie Chocolate Chip Cookies
Low-Calorie Chocolate Chip Cookies That’ll Make You Feel Good
Hey there, fellow food lovers! It’s Beau Collier from Feastical, bringing you another delightful recipe that combines comfort and health in the most delicious way possible. Today, we’re diving into the world of sweets, but with a twist that keeps you feeling fabulous—Low-Calorie Chocolate Chip Cookies! Yes, you heard that right! These little gems are packed with flavor but won’t break the calorie bank.
Cookies aren’t just a treat; they’re a hug in bite-sized form. I remember the first time I baked cookies with my grandma in her cozy kitchen. The aroma of vanilla and chocolate swirling around us was pure magic. I still recall how we’d sneak bites of the dough when we thought no one was looking. This nostalgia is what fuels my kitchen creativity today, and I love to reinterpret classic recipes into healthier versions. After all, you shouldn’t have to sacrifice flavor for health.
Get ready to whip up a batch of these delightful Low-Calorie Chocolate Chip Cookies that are perfect for snacking, sharing, or even sneaking into your lunchbox. Let’s get started!
Personal Story: A Grandma’s Love
Believe me, no cookie can ever compare to those made with love by my grandma! She’d always have a batch of freshly baked cookies waiting for us after school. I remember racing home, dropping my backpack at the door, and heading straight to the kitchen. Seeing the flour dusting her apron and the warm, golden cookies on the cooling rack was sheer bliss.
As time went on, I learned to cherish those moments, and I made it my mission to perfect her recipes. But I’ve also come to realize that with changing lifestyles and health trends, there’s room to infuse those cherished memories with a little bit of modern flair. That’s where this Low-Calorie Chocolate Chip Cookie recipe comes into play. It turns out that cookies can be both nostalgic and healthy, and I’m here to show you how to enjoy them without the guilt—because who says we can’t have our cookies and eat them too?
Ingredients
Here’s what you’ll need for these cookies—simple, wholesome, and totally guilt-free!
-
1 cup oats
Oats are not just for breakfast! They add chewy texture and are great for heart health. You can use rolled oats or quick oats—just avoid instant, as they can be overly processed. -
1 ripe banana
This banana is your natural sweetener! Mashed bananas give moisture and a lovely, subtle sweetness. No ripe bananas? No problem! Applesauce can work as a substitute. -
1/2 cup unsweetened applesauce
Another fantastic source of moisture, applesauce keeps these cookies soft. It’s also a great substitute for oil or butter in baking. If you want some extra flavor, try using cinnamon-flavored applesauce! -
1/2 cup chocolate chips
Of course, we need the star of the show! Using dark or semi-sweet chocolate chips can amp up the antioxidant factor while keeping the cookies rich. Go for dairy-free if you’re keeping it vegan! -
1/2 teaspoon vanilla extract
A splash of vanilla enhances the sweetness and rounds out all those flavors beautifully. Never skip this step! -
1/2 teaspoon baking powder
This little magic ingredient helps your cookies rise and achieve that fluffy texture. -
Pinch of salt
A tiny bit of salt elevates the sweetness and balances the flavors, making everything taste even better!
Step-by-Step Instructions
Let’s make these cookies irresistibly chewy and chocolaty! Follow these steps, and I promise you’ll have cookies to enjoy in no time.
-
Preheat Your Oven
Preheat that oven to 350°F (175°C). A well-heated oven is crucial for that perfect bake. -
Mash That Banana
In a mixing bowl, grab your ripe banana and mash it with a fork until it’s smooth and creamy. Fun tip: The riper the banana, the sweeter it will be! -
Mix the Wet Ingredients
Add the applesauce and vanilla extract to the mashed banana. Stir until everything is well combined. This mixture will be the foundation of your cookie dough! -
Combine the Dry Ingredients
In another bowl, mix your oats, baking powder, and a pinch of salt. It’s crucial to mix these together before combining with the wet ingredients to ensure even baking. -
Bring It All Together
Slowly fold the dry ingredients into the wet mixture. This is where the magic happens! Use a spatula and stir gently until fully incorporated—don’t over mix, or you’ll end up with tough cookies! -
Add Chocolate
Gently fold in the chocolate chips. Yes, this is the best part! -
Scoop and Drop
Using a spoon or cookie scoop, drop dollops of the dough onto a parchment-lined baking tray. Leave some space between the cookies, as they will spread slightly. -
Bake
Slide the tray into the oven and bake for about 12-15 minutes or until the edges are lightly golden. Keep an eye on them; overbaking can lead to dry cookies! -
Cool Down
Once baked, take them out and let them cool on the tray for about 5 minutes before transferring them to a wire rack. This helps them set and firm up!
Serving Suggestions
Now that you have your cookies all baked and cooled, how do you serve them? I love to plate them in a nice stack on a rustic wooden board, perhaps with a glass of your favorite almond milk or dairy-free beverage on the side. If you’re feeling really indulgent, serve them warm with a scoop of low-calorie ice cream on top. Yes, please! A sprinkle of sea salt or a drizzle of honey can take it over the top—seriously, it’s the gourmet touch they deserve.
Recipe Variations
Want to mix things up? Here are a few variations that you can try with this base recipe:
-
Nutty Add-in: Toss in a handful of chopped nuts like walnuts or almonds for added crunch and protein.
-
Spiced Up: Add a teaspoon of cinnamon or pumpkin spice to the dry ingredients for a warm, cozy flavor twist.
-
Fruity Treat: Throw in some dried cranberries or raisins for a fruity burst that complements the chocolate.
-
Coconut Delight: Add unsweetened shredded coconut for a tropical flair—who doesn’t love a cookie that feels like a mini-vacation?
-
Peanut Butter Swirl: Fold in a couple of tablespoons of natural peanut butter for a nutty and creamy version. Just keep in mind, this will change the calorie count!
Chef’s Notes
Here’s a little secret—these cookies can be a customizable base! You can easily adapt them based on what you have at home. I once whipped up a batch using leftover pumpkin puree and spices, and they turned out heavenly! Baking is all about creativity; don’t be afraid to experiment and make these cookies your own.
I’ve also had plenty of funny moments in the kitchen. Like that time I accidentally mistook salt for sugar and ended up with a batch of cookies that were… well, to put it lightly, a bit too seasoned! Lesson learned: always double-check your ingredients before diving in!
FAQs and Troubleshooting
-
Why are my cookies spreading too much?
If your cookies are spreading too thin, try chilling the dough for 30 minutes before baking. This helps the fats solidify and keeps your cookies fluffy! -
Can I make these vegan?
Absolutely! These cookies are naturally vegan as long as you use dairy-free chocolate chips and make sure your applesauce is free from any added sugars. -
What if my dough is too dry?
If your dough seems too dry, feel free to add a splash of almond milk or more applesauce to moisten it up. -
How do I store the cookies?
Keep your cookies in an airtight container at room temperature for about a week. They also freeze well! Just be sure to separate layers with parchment paper.
Nutritional Info
These cookies may be low-calorie, but they’re not low in satisfaction! Here’s a rough breakdown of the nutrition per cookie (based on 12 servings):
- Calories: ~80 per cookie
- Fat: 2.5g
- Carbohydrates: 14g
- Fiber: 2g
- Sugar: 3g (naturally from banana and applesauce)
- Protein: 1g
Not too shabby for a sweet treat, right?
Final Thoughts
So there you have it—my Low-Calorie Chocolate Chip Cookie recipe that’s bursting with flavor but keeps things light! I hope you find joy in every bite and that these cookies bring a wave of nostalgia and happiness to your kitchen, just like they do for me. Whether you’re sharing them with friends or enjoying them alone with a good book, these cookies are meant to make you feel good inside and out.
Feel free to share your thoughts and any variations you try. And remember, baking should always be fun! So grab that spatula and get ready to create some cookie magic. Until next time, my foodie friends—keep cooking, keep exploring, and always celebrate the magic of food! 🍪
Print
Low-Calorie Chocolate Chip Cookies
- Total Time: 25 minutes
- Yield: 12 cookies 1x
- Diet: Vegan
Description
Delicious low-calorie chocolate chip cookies that are guilt-free and packed with flavor!
Ingredients
- 1 cup oats
- 1 ripe banana
- 1/2 cup unsweetened applesauce
- 1/2 cup chocolate chips
- 1/2 teaspoon vanilla extract
- 1/2 teaspoon baking powder
- Pinch of salt
Instructions
- Preheat your oven to 350°F (175°C).
- Mash the banana in a mixing bowl until smooth and creamy.
- Add the applesauce and vanilla extract to the mashed banana; stir until combined.
- Combine oats, baking powder, and a pinch of salt in another bowl.
- Bring the dry ingredients into the wet mixture, stirring gently until incorporated.
- Add the chocolate chips and fold gently into the dough.
- Scoop dollops of dough onto a parchment-lined baking tray.
- Bake for 12-15 minutes until edges are golden.
- Cool on the tray for 5 minutes before transferring to a wire rack.
Notes
These cookies can be customized with nuts, spices, or other mix-ins to suit your taste!
- Prep Time: 10 minutes
- Cook Time: 15 minutes
- Category: Dessert
- Method: Baking
- Cuisine: American
Nutrition
- Serving Size: 1 cookie
- Calories: 80
- Sugar: 3g
- Sodium: 50mg
- Fat: 2.5g
- Saturated Fat: 0.5g
- Unsaturated Fat: 2g
- Trans Fat: 0g
- Carbohydrates: 14g
- Fiber: 2g
- Protein: 1g
- Cholesterol: 0mg
Keywords: low-calorie, chocolate chip cookies, healthy dessert