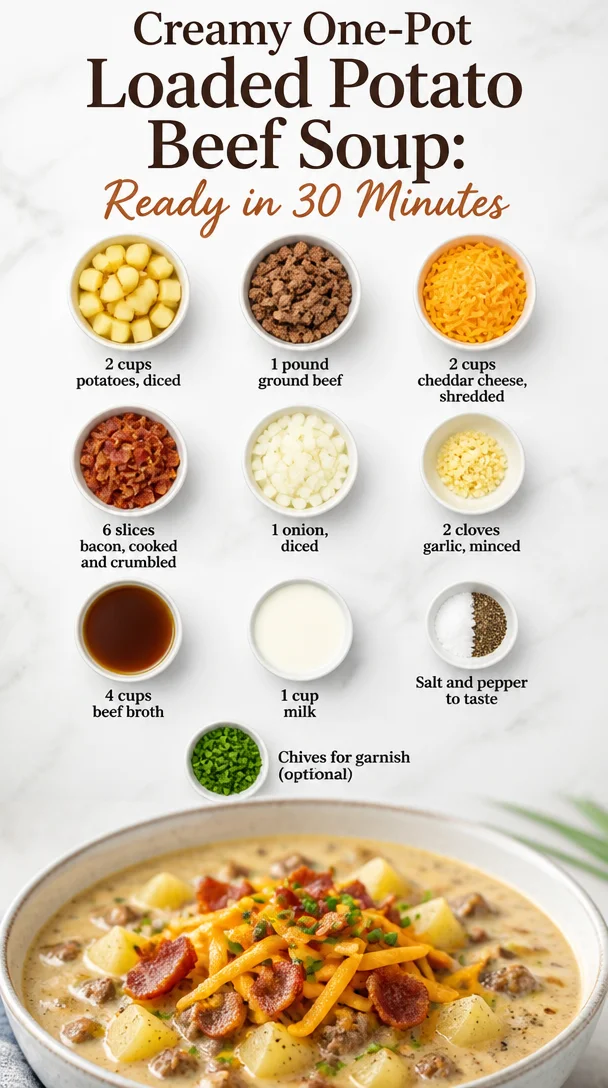
Creamy One-Pot Loaded Potato Beef Soup: Ready in 30 Minutes
Loaded Potato Beef Soup: A Deliciously Cozy Comfort Food
Hey there, foodie friends! Welcome back to Feastical! Today, I’m excited to share a hearty dish that’ll keep you cozy, satisfied, and coming back for seconds—Loaded Potato Beef Soup. Picture this: a steaming bowl of creamy, savory soup brimming with tender potatoes, savory ground beef, and a cheesy finish that warms both the belly and the heart. This recipe is like a warm hug in a bowl, perfect for those chilly evenings or when you need a little extra comfort after a long day. Let’s dig in!
A Nostalgic Memory
I’ll never forget the first time I made Loaded Potato Beef Soup. I was in my early twenties, living in a cozy apartment with some friends who had just moved away from home. We were all working hard and feeling a little homesick, and I decided it was time to recreate one of my childhood favorites that my mom used to make. There was something about her Loaded Potato Soup—the way it simmered on the stove, filling our small kitchen with mouthwatering aromas, and the laughter we shared over dinner.
The dish combined my two favorites at the time: potatoes and cheese! So, I called up my mom for her “secret” recipe, which she shared with me in a hushed tone (mostly the bacon part!). With a few adjustments, given what I had in my pantry, I whipped it up and invited my friends over. When the soup was finally ready to ladle into bowls, we gathered around the dining table, indulged in laughter, and shared our own stories. It marked the beginning of a tradition—soup nights! Each month, we’d try a different soup recipe, but this one remained our ultimate favorite.
As I ladle up this creamy concoction today, all those sweet memories flood back. So let’s get cooking—you’re in for a treat!
Ingredients
Here’s what you’ll need:
-
2 cups potatoes, diced
Use your favorite variety—Russets are great for creaminess, while Yukon Golds add a buttery touch. If you’re in a pinch, frozen diced potatoes work too! -
1 pound ground beef
I like to use lean beef for a healthier soup, but feel free to substitute with ground turkey or even a plant-based alternative for a meatless option. -
2 cups cheddar cheese, shredded
Sharp cheddar is my go-to for that rich flavor, but feel free to mix it up with Monterey Jack or even a spicy pepper jack for an extra kick. -
6 slices bacon, cooked and crumbled
Bacon adds a wonderful smoky flavor. If you’re avoiding pork, turkey bacon works just as well, or you can skip it entirely (but let’s be honest, why would you want to?). -
1 onion, diced
Onions bring a sweet depth to the flavor. Shallots are a great substitute if you prefer a milder taste. -
2 cloves garlic, minced
Fresh garlic is key for that aromatic base. If you’re out, garlic powder works in a pinch, but fresh is always best! -
4 cups beef broth
Use low-sodium if you’re watching your salt intake. Homemade broth elevates the flavor even further, but store-bought works great too. -
1 cup milk
For creaminess! You can swap this for heavy cream for a richer soup or a plant-based milk if you’re going dairy-free. -
Salt and pepper to taste
Essential for balancing flavors. Always season to your preference! -
Chives for garnish (optional)
Finely chopped chives add a fresh pop of flavor and color, but you can skip them if you don’t have any on hand.
Step-by-Step Instructions
Let’s get to the good part—cooking! Follow these steps to create your very own Loaded Potato Beef Soup:
-
Cook the bacon: In a large pot or Dutch oven, cook the bacon over medium heat until it’s crispy. This will take about 6-8 minutes. Once done, remove the bacon, crumble it, and set it aside. Don’t throw out that bacon grease yet—oh no! We’ll use it for flavor!
-
Cook the ground beef: In the same pot with the leftover bacon grease, add your ground beef. Break it up with a spoon, and cook until browned (about 5-7 minutes). Drain excess fat if necessary. A little grease adds flavor, but we don’t want a pool of it.
-
Add onions and garlic: Toss in the diced onion and minced garlic, and sauté until they’re soft and fragrant—about 3-4 minutes. Your kitchen will smell fantastic right about now!
-
Throw in the potatoes: Add the diced potatoes to the pot, followed by the beef broth. Bring everything to a boil, then reduce the heat to low. Let it simmer uncovered for about 15-20 minutes until the potatoes are tender. Stir occasionally to keep anything from sticking to the bottom.
-
Make it creamy: Once the potatoes are perfectly tender, stir in the milk. This creates that creamy texture we’re looking for. Feel free to add more milk if you like your soup a bit thinner!
-
Add the cheese: Gradually stir in the shredded cheddar cheese until it melts and blends into the soup. Look at that gooey goodness come to life!
-
Season it up: Give it a taste and add salt and pepper to your liking. The bacon, broth, and cheese will add some saltiness, so don’t overdo it at first!
-
Finish with toppings: Ladle the soup into bowls, top with crumbled bacon, and sprinkle with fresh chives for a vibrant finish.
And there you have it! A delightful bowl of Loaded Potato Beef Soup that is as comforting as your favorite childhood memories!
Serving Suggestions
To take your soup experience to the next level, serve it alongside some warm, crusty bread or buttery biscuits for dipping—trust me; that’s where the magic happens! You can even drizzle a little extra cheese over the top or add a dollop of sour cream for tanginess.
For a more gourmet touch, consider pairing your soup with a fresh green salad drizzled with a simple vinaigrette. The crispness will give a nice contrast to the creamy warmth of the soup. And don’t forget a glass of your favorite wine or a cozy hot drink to cozy up with afterward!
Recipe Variations
Keep this recipe fresh and exciting every time you make it by trying these creative twists:
-
Spicy Loaded Potato Beef Soup: Add diced jalapeños, crushed red pepper, or hot sauce during cooking for a spicy kick.
-
Veggie-Loaded Version: Toss in some carrots and celery with your onions for a more veggie-packed soup, or even throw in some frozen corn.
-
Dairy-Free Delight: Use coconut milk or an unsweetened almond milk instead of regular milk, and swap the cheese for a vegan alternative.
-
One-Pot Wonder: Cook the meat and vegetables in a pressure cooker to save time, then add broth and pressure cook again for a quick meal!
Chef’s Notes
One of the great things about this Loaded Potato Beef Soup is its versatility. Over the years, I’ve seen it evolve based on what’s in season or what I have on hand. It’s become a staple in my kitchen, evolving from a homesick comfort food to a go-to recipe for gatherings and family dinners. Who knew soup could bring so many people together?
FAQs and Troubleshooting
-
Why is my soup too thick?
If your soup turns out thicker than you like, simply add more broth or milk to reach your desired consistency. -
Can I freeze this soup?
Absolutely! This soup freezes well. Just be sure to let it cool completely before transferring it to an airtight container. Reheat it gently on the stove. -
What if I don’t have beef broth?
Chicken broth or vegetable broth can work in a pinch. It might alter the flavor slightly but will still deliver a hearty soup. -
What can I do if I over-salted my soup?
Add a little more milk or broth to dilute the saltiness. You can also toss in a peeled, raw potato and let it simmer for about 10 minutes; it can absorb some excess salt.
Nutritional Info
This Loaded Potato Beef Soup is not just delicious—it’s also packed with nutrition! Here’s a rough breakdown per serving (assuming about 6 servings per recipe):
- Calories: Approximately 450-500
- Protein: 24g
- Carbohydrates: 35g
- Fat: 25g
- Fiber: 3g
- Sodium: Varies (based on broth and added salt)
Of course, your actual nutritional values may vary based on the specific ingredients you use and any tweaks you make to this recipe.
Final Thoughts
There you have it, my friends! A recipe that brings nostalgia and warmth to your kitchen. The joy of cooking this Loaded Potato Beef Soup is not just in the delightful dish itself, but in the memories you’ll create around it. Whether reliving moments from your childhood or crafting new traditions with loved ones, this soup is perfect for every occasion.
So grab your pot, throw on your apron, and let’s make some memories together! Don’t forget to share your own kitchen stories and variations with me. Happy cooking, and may your soup always be loaded with love!
Print
Loaded Potato Beef Soup
- Total Time: 45 minutes
- Yield: 6 servings 1x
- Diet: Omnivore
Description
A hearty and creamy soup filled with tender potatoes, savory ground beef, and topped with cheese and bacon. Perfect for warming up on chilly evenings.
Ingredients
- 2 cups potatoes, diced
- 1 pound ground beef
- 2 cups cheddar cheese, shredded
- 6 slices bacon, cooked and crumbled
- 1 onion, diced
- 2 cloves garlic, minced
- 4 cups beef broth
- 1 cup milk
- Salt and pepper to taste
- Chives for garnish (optional)
Instructions
- Cook the bacon: In a large pot or Dutch oven, cook the bacon over medium heat until it’s crispy. This will take about 6-8 minutes. Once done, remove it, crumble it, and set it aside.
- Add the ground beef: In the same pot with the leftover bacon grease, add your ground beef. Break it up with a spoon, and cook until browned (about 5-7 minutes). Drain excess fat if necessary.
- Toss in the onions and garlic: Sauté until they’re soft and fragrant—about 3-4 minutes.
- Add the potatoes: Toss in the diced potatoes along with the beef broth. Bring everything to a boil, then reduce the heat to low and let it simmer uncovered for about 15-20 minutes until the potatoes are tender.
- Stir in the milk: Once the potatoes are tender, add the milk for creaminess.
- Gradually add the cheese: Stir in the shredded cheddar cheese until it melts.
- Season it up: Taste and add salt and pepper to your liking.
- Finish with toppings: Ladle soup into bowls, topping with crumbled bacon and chives.
Notes
Serve with warm crusty bread or biscuits for dipping. This soup is versatile; feel free to add vegetables or adjust the seasoning to your preference.
- Prep Time: 15 minutes
- Cook Time: 30 minutes
- Category: Soup
- Method: Stovetop
- Cuisine: American
Nutrition
- Serving Size: 1 serving
- Calories: 450
- Sugar: 4g
- Sodium: 800mg
- Fat: 25g
- Saturated Fat: 10g
- Unsaturated Fat: 8g
- Trans Fat: 0g
- Carbohydrates: 35g
- Fiber: 3g
- Protein: 24g
- Cholesterol: 70mg
Keywords: soup, comfort food, loaded potato, beef, cheese, bacon

One-Pot Creamy Green Chicken Enchilada Soup (Weeknight)
Green Chicken Enchilada Soup – Creamy and Cheesy!
Hey there, foodies! If you’re looking for a dish that blends comfort with a punch of flavor, you’ve landed in the right place. Today, I’m excited to share my beloved Green Chicken Enchilada Soup recipe. It’s creamy, cheesy, and oh-so-satisfying—perfect for cozy nights with loved ones or when you need a pick-me-up after a long day. Let’s dive right in!
Introduction
Imagine this: It’s a chilly evening, and the faint sound of rain taps against your window. You stroll into the kitchen, and the delightful smell of something simmering fills the air. Nothing quite compares to the comforting embrace of a warm, hearty bowl of soup. And that, my friends, is exactly what this Green Chicken Enchilada Soup delivers. This dish is like a warm hug in a bowl, bringing together tender chicken, rich creaminess, and a zesty twist that will make your taste buds dance.
As someone who loves to whip up meals that are both delicious and easy, I wanted to create a recipe that anyone—from busy parents to kitchen newbies—could tackle without breaking a sweat. Green Chicken Enchilada Soup is just the ticket! It’s packed with flavor, and the ingredients come together in pure harmony. Plus, it’s the kind of dish that can adapt to your pantry, so grab what you’ve got, and let’s make some magic happen!
Not only is this soup oh-so-tasty, but it also makes for great leftovers, if you can resist eating it all in one sitting! You can enjoy it with crunchy tortilla chips, pair it with fresh bread, or serve it alongside a vibrant salad for a truly fulfilling meal. So without further ado, let’s get cooking!
Personal Story
I’ll never forget the first time I made this Green Chicken Enchilada Soup. I had just gotten home from a long week of work, and it was one of those days where I felt like I could sleep through the weekend. My friends decided to drop by unexpectedly, and I panicked—I wanted to serve them something comforting, yet I didn’t want to spend hours in the kitchen.
With a few basics from my fridge and an adventurous spirit, I whipped up this creamy concoction. As the soup simmered, my kitchen filled with a mouthwatering aroma that drew my friends in like moths to a flame. The laughter, chatter, and joy around the dinner table that night were priceless. Everyone couldn’t stop asking for seconds, and by the end of the meal, we were cozy and content, wrapped in the warmth of good food and good company. That night, I realized how food connects us all and how a simple recipe can create lasting memories. Ever since, Green Chicken Enchilada Soup has held a special place in my heart (and my recipe collection!).
Ingredients
Let’s gather all the delicious ingredients you’ll need to make this comforting soup:
-
2.5 pounds boneless skinless chicken breasts or thighs
Use chicken thighs for richer flavor, or go for breasts if you prefer lean meat. Both will shred beautifully in the soup! -
1 recipe green enchilada sauce (or a 28-ounce can store-bought sauce)
If you’re off to make your own, it’s simple! But store-bought works great too—it saves time without sacrificing flavor! -
24 ounces chicken broth
Homemade broth adds extra depth, but feel free to use store-bought—just be mindful of the sodium levels. -
1 cup half and half or heavy cream
Half and half adds creaminess without being too heavy. If you’re feeling indulgent, go for the heavy cream! -
2 cups shredded Monterey Jack cheese
This cheese melts beautifully and gives that gooey texture we’re all craving. If you love a bit of zing, try Pepper Jack for a kick. -
4 ounces cream cheese (cubed and softened)
This is our secret weapon for creaminess! Just soften it in the microwave for easier mixing. -
4 ounces green salsa (salsa verde)
This adds a tangy twist to our soup! If you like things spicy, opt for hot salsa instead of mild. -
Salt and pepper to taste
Always taste as you go! These simple seasonings make all the difference.
Step-by-Step Instructions
Ready to make some magic happen? Let’s get started with these simple steps for a bowl of Green Chicken Enchilada Soup:
-
Prep the Chicken
Start by placing the chicken in a large pot or slow cooker. If you prefer your chicken shredded, you can also cut it into smaller pieces for even cooking. -
Add the Flavor
Pour the green enchilada sauce and chicken broth over the chicken. These two ingredients create the luscious base of our soup. Stir them together gently, allowing the chicken to absorb the flavors as it cooks. -
Cook the Chicken
If you’re using a pot on the stove, bring the mixture to a simmer over medium heat, then reduce to low and cover for about 20-30 minutes. If you’re using a slow cooker, set it on low for about 6-8 hours or high for 3-4 hours. Your kitchen will start to smell heavenly! -
Shred the Chicken
Once the chicken is cooked through, remove it from the pot and shred it using two forks. Don’t skip this step—shredded chicken soaks up more flavor as it blends back into the soup. -
Get Creamy!
Return the shredded chicken to the pot. Stir in the cream cheese, half and half, and shredded Monterey Jack cheese. This is where the magic happens—watch as it all melts together into a creamy dream! Keep cooking on low heat until everything is combined and cheesy—I recommend whisking a bit to ensure it’s all mixed seamlessly. -
Add Salsa
Stir in the green salsa, which adds that vibrant zing we’re looking for. The soup will be visually stunning—a beautiful green that promises deliciousness! -
Season It Up
Taste the soup and season with salt and pepper according to your liking. Remember, you can always add, but you can’t take away! -
Serve Warm
Ladle your Green Chicken Enchilada Soup into bowls, and watch your friends’ eyes light up with excitement.
Serving Suggestions
Now that our creamy and cheesy goodness is ready, let’s talk about how to serve this delightful dish! Picture this: a steaming bowl of Green Chicken Enchilada Soup topped with a sprinkle of fresh cilantro or sliced green onions for that fresh pop of color. A squeeze of lime juice adds a little zesty brightness, elevating the dish even further.
Serve it with warm tortilla chips for dipping—because who doesn’t love a little crunch? You could also accompany it with sliced avocado or a dollop of sour cream to balance the flavors. If you want to take it up a notch, pair your soup with a simple side salad dressed in a light vinaigrette. The freshness of the salad beautifully complements the richness of the soup.
Recipe Variations
Let’s get creative! Here are a few variations you can try:
-
Spicy Twist: Want to turn up the heat? Add diced jalapeños or red pepper flakes when cooking for a spicy kick.
-
Vegetarian Version: Swap the chicken for hearty vegetables like zucchini, bell peppers, or even chickpeas. Using vegetable broth instead of chicken broth will keep it veggie-friendly.
-
Cheesy Delight: Craving more cheese? Mix in some sharp cheddar or gouda to create layers of flavor and melted goodness.
-
Coconut Cream: For a dairy-free alternative, use coconut cream instead of cream cheese and half and half for a rich, tropical flavor.
-
Add Beans: Throw in some black beans or white beans for added protein and fiber. They also make the soup heartier and even more satisfying!
Chef’s Notes
I love how this Green Chicken Enchilada Soup has evolved over time. Initially, it was a thrown-together kind of meal, but over the years, I’ve perfected the balance of creaminess and zest. I often find myself playing with different spices—sometimes I add garlic powder, sometimes cumin, depending on my mood! And if you happen to have leftover soup (which is rare, but it happens!), it reheats beautifully, making for an effortless lunch the next day.
And here’s a little secret: if you ever need to impress guests, this soup is your go-to! The way the cheese melts and the aroma wafts through the air creates an atmosphere of warmth and festivity.
FAQs and Troubleshooting
Q1: Can I make this soup ahead of time?
Absolutely! In fact, the flavors deepen and meld together beautifully when made ahead. Just store it in the fridge in an airtight container for up to 3 days.
Q2: My soup turned out too thick. What can I do?
No worries! If your soup thickens too much in the fridge, simply stir in a little more chicken broth or water when you reheat it until you reach your desired consistency.
Q3: Can I freeze Green Chicken Enchilada Soup?
Yes, this soup freezes great! Allow it to cool completely, ladle into freezer-safe containers, and store for up to three months. Just thaw in the fridge overnight before reheating.
Q4: What can I do if it’s too spicy?
If the heat level is higher than you prefer, add a bit of cream or half and half to tone it down, or a spoonful of sour cream when serving.
Nutritional Info (if applicable)
While deliciousness reigns supreme, let’s talk nutrition! Each serving of this Green Chicken Enchilada Soup is packed with protein thanks to the chicken, while the creamy base provides a satisfying richness. With the veggies in the green salsa and any beans you choose to add, it’s also a great source of fiber.
Considering the ingredients I discussed, here’s a rough breakdown per serving (based on a total of 6 servings):
- Calories: Approximately 360 kcal
- Protein: 30g
- Fat: 24g
- Carbohydrates: 12g
- Fiber: 2g
Note: Depending on your specific ingredients and servings, these numbers may vary, so always check your own ingredient labels for precise values.
Final Thoughts
And there you have it—a cozy bowl of Green Chicken Enchilada Soup that is not only a crowd-pleaser but also incredibly easy to whip up. Whether you’re serving it to a group or treating yourself, this creamy and cheesy soup is bound to make everyone feel right at home.
So next time you’re in need of a quick, satisfying meal, remember this recipe. Oh, and don’t forget to share the love—invite a friend over, share a laugh, and enjoy the simple pleasure of good food together. Happy cooking, everyone!
Print
Green Chicken Enchilada Soup
- Total Time: 45 minutes
- Yield: 6 servings 1x
- Diet: Gluten-Free
Description
A creamy, cheesy soup that blends comfort with flavor, perfect for cozy nights.
Ingredients
- 2.5 pounds boneless skinless chicken breasts or thighs
- 1 recipe green enchilada sauce (or a 28-ounce can store-bought sauce)
- 24 ounces chicken broth
- 1 cup half and half or heavy cream
- 2 cups shredded Monterey Jack cheese
- 4 ounces cream cheese (cubed and softened)
- 4 ounces green salsa (salsa verde)
- Salt and pepper to taste
Instructions
- Prep the chicken by placing it in a large pot or slow cooker.
- Add the green enchilada sauce and chicken broth over the chicken.
- Cook the chicken, bring to a simmer and cover for about 20-30 minutes or set on low for 6-8 hours.
- Shred the chicken using two forks.
- Get creamy by returning the shredded chicken to the pot and stirring in cream cheese, half and half, and Monterey Jack cheese.
- Add the green salsa to the mixture.
- Season with salt and pepper to taste.
- Serve warm in bowls, topped with optional cilantro or lime juice.
Notes
This soup stores well and can be frozen for up to three months. It also reheats beautifully, making for an effortless lunch.
- Prep Time: 15 minutes
- Cook Time: 30 minutes
- Category: Soup
- Method: Stovetop
- Cuisine: Mexican
Nutrition
- Serving Size: 1 serving
- Calories: 360
- Sugar: 3g
- Sodium: 800mg
- Fat: 24g
- Saturated Fat: 12g
- Unsaturated Fat: 8g
- Trans Fat: 0g
- Carbohydrates: 12g
- Fiber: 2g
- Protein: 30g
- Cholesterol: 90mg
Keywords: soup, chicken, enchilada, creamy, comfort food
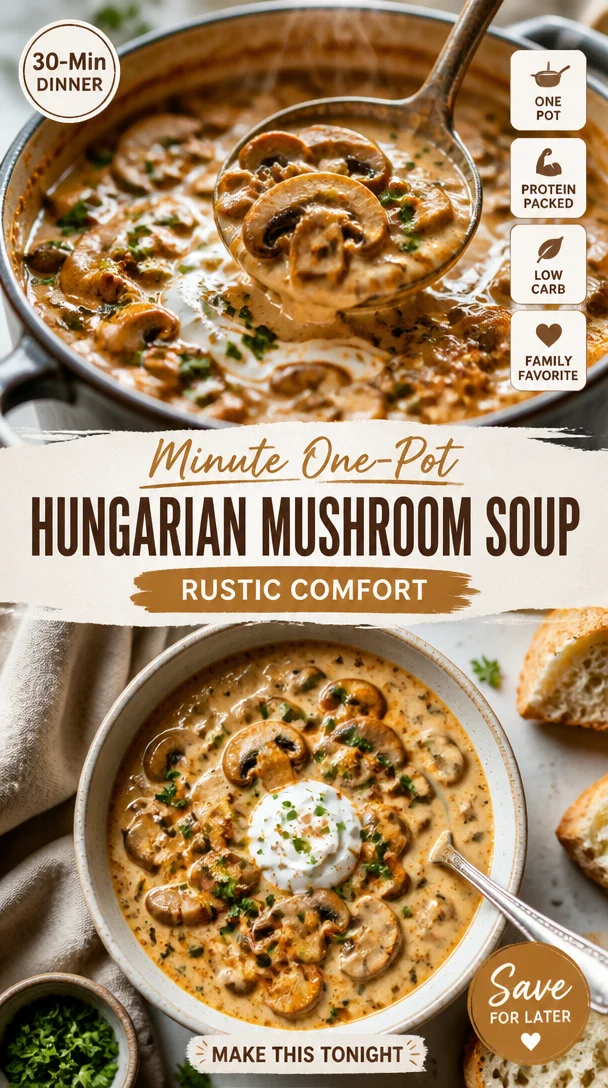
Minute One-Pot Hungarian Mushroom Soup: Rustic Comfort
To-Die-For Rustic Hungarian Mushroom Soup
Hey there, soup lovers! Today, I’m thrilled to take you on a flavorful journey to Hungary with a cozy bowl of Rustic Hungarian Mushroom Soup. This dish is special to me—not only because it’s incredibly delicious, but because it embodies the essence of comfort and warmth that comes from a home-cooked meal. So, grab your apron and your favorite spoon, and let’s dive into this delightful recipe together!
Introduction
There’s just something magical about a steaming bowl of soup on a chilly day, isn’t there? The feeling of warmth enveloping you as you take that first spoonful is simply unparalleled. This Rustic Hungarian Mushroom Soup is not just another soup; it’s a celebration of earthy flavors and comforting aromas, steeped in rich Hungarian culinary tradition.
Growing up, I was lucky to have family members who mastered the art of soup-making. I remember being mesmerized by my grandmother as she stirred her giant pot on the stove, releasing a bouquet of scents that would fill the entire house. It was her love for mushrooms that inspired this cozy recipe. She would often say, "Mushrooms are nature’s little flavor bombs," and boy, was she right!
This soup revolves around humble ingredients but packs a punch with its layers of flavor, thanks to a personality of paprika, a hint of dill, and a touch of lemon. Whether you’re hosting a cozy dinner party or just craving a bowl of goodness after a long day, this recipe has got you covered.
In our modern fast-paced lives, let’s not forget to slow down and enjoy the process of cooking. Each ingredient has a purpose, and as we navigate through the steps together, I encourage you to imbue your cooking with love. Let’s make this soup not just a meal but a memory!
Personal Story
I’ll never forget the time I decided to host my first dinner party. Eager to impress, I chose to make a variety of dishes, but deep down, I knew this Rustic Hungarian Mushroom Soup had to be the star of the show. The morning of the party, I adventurously scoured the local farmers’ market, gathering the freshest produce I could find. The sight of those vibrant mushrooms, their earthy aroma calling to me, made my heart sing.
Later that evening, as friends gathered around the table, I served the soup as the first course, and the reaction was priceless. Their eyes lit up with delight, and as they savored each spoonful, I could feel nostalgia flooding the room—everyone had their own soup stories. A simple bowl of soup had sparked laughter, memories, and conversations that filled our home with joy.
Ingredients
Here’s what you’ll need to get started on this delectable soup:
-
3 tablespoons butter
The base for our soup, butter adds richness. You can swap it with olive oil for a lighter option. -
2 cups chopped onions
Onions provide a sweet, aromatic foundation. Shallots can also be a wonderful substitute if you want a more delicate flavor. -
1 pound fresh mushrooms, sliced (any kind – a mix is best)
Feel free to get creative! Button, cremini, portobello, or shiitake all work beautifully. A mix of mushrooms deepens flavor and adds character. -
2 teaspoons dried dill weed
Dill brings a light herby taste that balances the rich mushrooms. Fresh dill can enhance the flavor even further. -
1 tablespoon Hungarian paprika
This is the star spice here! It adds warmth and depth. If you can’t find Hungarian paprika, regular paprika will also work, but it won’t have the same complexity. -
1 tablespoon soy sauce or liquid aminos
A dash of umami brings everything together. Tamari is a great gluten-free alternative if needed. -
2 cups chicken or vegetable broth
Homemade broth is best, but store-bought works too. If you prefer a vegetarian version, stick with vegetable broth. -
1 cup milk or plain almond milk
For creaminess! You can use whole milk, skim milk, or any plant-based milk you prefer—just ensure it’s unsweetened. -
3 tablespoons all-purpose flour
This helps thicken our soup. If you’re gluten-free, cornstarch or a gluten-free flour blend could work. -
Ground black pepper to taste
A little fresh pepper enhances flavors—don’t skip this step! -
2 teaspoons lemon juice
Here’s where we brighten things up! Adjust the amount based on your taste—more lemon, more zing! -
1/2 cup sour cream or Greek yogurt
This adds creaminess and tang. A dollop of crème fraîche would work beautifully too! -
2 tablespoons chopped fresh parsley
Fresh parsley finishes the dish with a pop of color and freshness. You can also use chives or thyme if you prefer.
Step-by-Step Instructions
Now that we have our ingredients ready, let’s get cooking! Follow these steps for your delicious Rustic Hungarian Mushroom Soup.
-
Sauté the Aromatics
In a large pot, melt the butter over medium heat. Once it’s melted and bubbling, add the chopped onions. Sauté for about 5-7 minutes until they’re soft and translucent. Pro tip: Add a pinch of salt to help extract moisture from the onions, boosting their flavor. -
Add the Mushrooms
Once the onions are starting to glisten, throw in the sliced mushrooms. Stir well, coating them in that buttery goodness. Allow them to sauté for about 8-10 minutes until they’re soft and slightly browned, releasing their wonderful moisture. If your pot gets dry, add a splash of broth! -
Season the Soup
Sprinkle in the dried dill and paprika, stirring to coat the mushrooms evenly. The paprika will give the soup its striking color! Don’t be shy—this step is essential for flavor. -
Incorporate Liquid Ingredients
Drench the mushroom mixture with soy sauce and stir for about a minute to let the flavors meld. Next, pour in the broth and bring everything to a gentle simmer. Allow it to bubble away for about 10 minutes, letting those flavors develop. -
Thicken the Soup
In a small bowl, mix the flour with a bit of the milk (about 1/4 cup) to create a slurry. Whisk it together until smooth and then slowly add it to the soup while stirring. This avoids clumps. Let it simmer for about 5 minutes until it thickens—you want it to coat the back of a spoon! -
Add Creaminess
Pour in the remaining milk and stir in the lemon juice. This is when things get creamy and dreamy! Keep stirring and simmering for another 5-7 minutes. If you prefer a lighter version, you can use more stock and less milk. -
Season to Taste
At this stage, give your soup a taste test. Add black pepper and additional lemon juice if you like—it should have a balanced flavor profile that sings with comfort. -
Finish with Sour Cream and Parsley
Turn off the heat and stir in the sour cream (or Greek yogurt) until fully blended. This adds a luxurious finish. When serving, garnish each bowl with a sprinkle of fresh parsley for a vibrant touch.
Serving Suggestions
When it comes to serving this delightful soup, presentation matters! Ladle the warm soup into bowls and don’t hold back on garnishing—drizzle a bit of extra sour cream on top and sprinkle with chopped parsley for that inviting look. Serve with crusty bread or a warm baguette on the side, making it perfect for dipping.
For a restaurant-style touch, you can drizzle a swirl of olive oil on top and maybe even add a sprinkle of smoked paprika—it adds a nice smoky flavor and a lovely visual appeal.
Recipe Variations
Looking to switch things up? Here are a few fun variations you can try:
-
Add Protein
Stir in some shredded cooked chicken or chickpeas for added protein. It transforms this soup into a hearty main dish! -
Spicy Kick
If you love heat, add a pinch of red pepper flakes or cayenne pepper while sautéing your onions. -
Herb Infusion
Fresh herbs can brighten the soup even more. Try adding tarragon or thyme for an aromatic twist. -
Mushroom Variety
Experiment with different types of mushrooms—try adding wild mushrooms for a more gourmet flavor or incorporate some dried mushrooms by soaking them first! -
Vegan Version
Easily adapt this recipe by using plant-based butter, almond milk, and omitting the sour cream or substituting with a vegan yogurt.
Chef’s Notes
This Rustic Hungarian Mushroom Soup has evolved over the years into a dish I can whip up effortlessly, trying to capture the flavors of my grandmother’s kitchen. I remember one time I was rushing to prepare this dish for a gathering and accidentally added double the paprika. To my surprise, everyone loved it! It turned into a spicy favorite amongst my friends.
Now, I always advise you to follow the recipe but allow your own experiences and preferences to personalize it. Cooking is about freedom and experimentation—don’t be afraid to make it your own!
FAQs and Troubleshooting
1. What if my soup is too thick?
Add more broth or milk gradually until you reach your desired consistency.
2. How do I store leftovers?
Let your soup cool and store it in an airtight container in the fridge for up to 3-4 days. Reheat gently on the stovetop.
3. Can I freeze this soup?
Absolutely! It freezes well. Just let it cool, store it in freezer-safe containers, and it can be frozen for up to 3 months.
4. What can I do if the flavor isn’t balanced?
If your soup feels flat, a little extra lemon juice or soy sauce can enhance flavors. Adjust seasonings to your taste!
Nutritional Info
While every bowl of this soup is packed with flavor, it also contains a range of nutrients. Mushrooms are low in calories yet high in vitamins D and B, while the onions add antioxidants. The addition of sour cream or Greek yogurt contributes protein and probiotics, making it a nourishing meal!
One serving of Rustic Hungarian Mushroom Soup (approx. 1 cup) contains about:
- Calories: 220
- Protein: 7g
- Fat: 12g
- Carbohydrates: 25g
- Fiber: 3g
Remember, values may vary based on ingredients and portion sizes, so feel free to adjust accordingly to your dietary needs!
Final Thoughts
Cooking is all about sharing love poured into a pot, and this Rustic Hungarian Mushroom Soup embodies that spirit perfectly. It’s a dish meant to be enjoyed with friends, family, or even a cozy night in. So, whether you’re making it for a special occasion or just because it’s Tuesday, know that you’re creating more than just a meal—you’re crafting memories.
Remember, it all starts in the kitchen, where the simplest of ingredients can turn into something wonderful. I hope this soup becomes a staple in your home, just as it has in mine. Thanks for sharing this culinary journey with me—happy cooking, and I can’t wait to hear how your Rustic Hungarian Mushroom Soup turns out! Let’s stay connected; I’d love to hear your stories and variations. Forks at the ready, my friends—bon appétit!
Print
To-Die-For Rustic Hungarian Mushroom Soup
- Total Time: 45 minutes
- Yield: 4 servings 1x
- Diet: Vegetarian
Description
A cozy bowl of Rustic Hungarian Mushroom Soup that embodies comfort and warmth, rich with earthy flavors and a touch of paprika.
Ingredients
- 3 tablespoons butter
- 2 cups chopped onions
- 1 pound fresh mushrooms, sliced
- 2 teaspoons dried dill weed
- 1 tablespoon Hungarian paprika
- 1 tablespoon soy sauce or liquid aminos
- 2 cups chicken or vegetable broth
- 1 cup milk or plain almond milk
- 3 tablespoons all-purpose flour
- Ground black pepper to taste
- 2 teaspoons lemon juice
- 1/2 cup sour cream or Greek yogurt
- 2 tablespoons chopped fresh parsley
Instructions
- Sauté the aromatics: In a large pot, melt the butter over medium heat. Once it’s melted and bubbling, add the chopped onions. Sauté for about 5-7 minutes until they’re soft and translucent.
- Add the mushrooms: Once the onions are starting to glisten, throw in the sliced mushrooms. Stir well and allow them to sauté for about 8-10 minutes until they’re soft and slightly browned.
- Season the soup: Sprinkle in the dried dill and paprika, stirring to coat the mushrooms evenly.
- Incorporate liquid ingredients: Drench the mushroom mixture with soy sauce, stir for about a minute, then pour in the broth and bring to a gentle simmer. Let it bubble for about 10 minutes.
- Thicken the soup: In a small bowl, mix the flour with a bit of milk to create a slurry. Slowly add it to the soup while stirring. Let it simmer for about 5 minutes until it thickens.
- Add creaminess: Pour in the remaining milk and stir in the lemon juice. Continue stirring and simmering for another 5-7 minutes.
- Season to taste: At this stage, taste your soup and add black pepper and additional lemon juice as needed.
- Finish with sour cream and parsley: Turn off the heat, stir in the sour cream until blended, and garnish with fresh parsley before serving.
Notes
Serve with crusty bread or a warm baguette. For added flavor, drizzle with olive oil and sprinkle smoked paprika on top.
- Prep Time: 15 minutes
- Cook Time: 30 minutes
- Category: Soup
- Method: Stovetop
- Cuisine: Hungarian
Nutrition
- Serving Size: 1 cup
- Calories: 220
- Sugar: 3g
- Sodium: 800mg
- Fat: 12g
- Saturated Fat: 7g
- Unsaturated Fat: 4g
- Trans Fat: 0g
- Carbohydrates: 25g
- Fiber: 3g
- Protein: 7g
- Cholesterol: 30mg
Keywords: soup, Hungarian mushroom soup, cozy recipes, comfort food, vegetarian soup
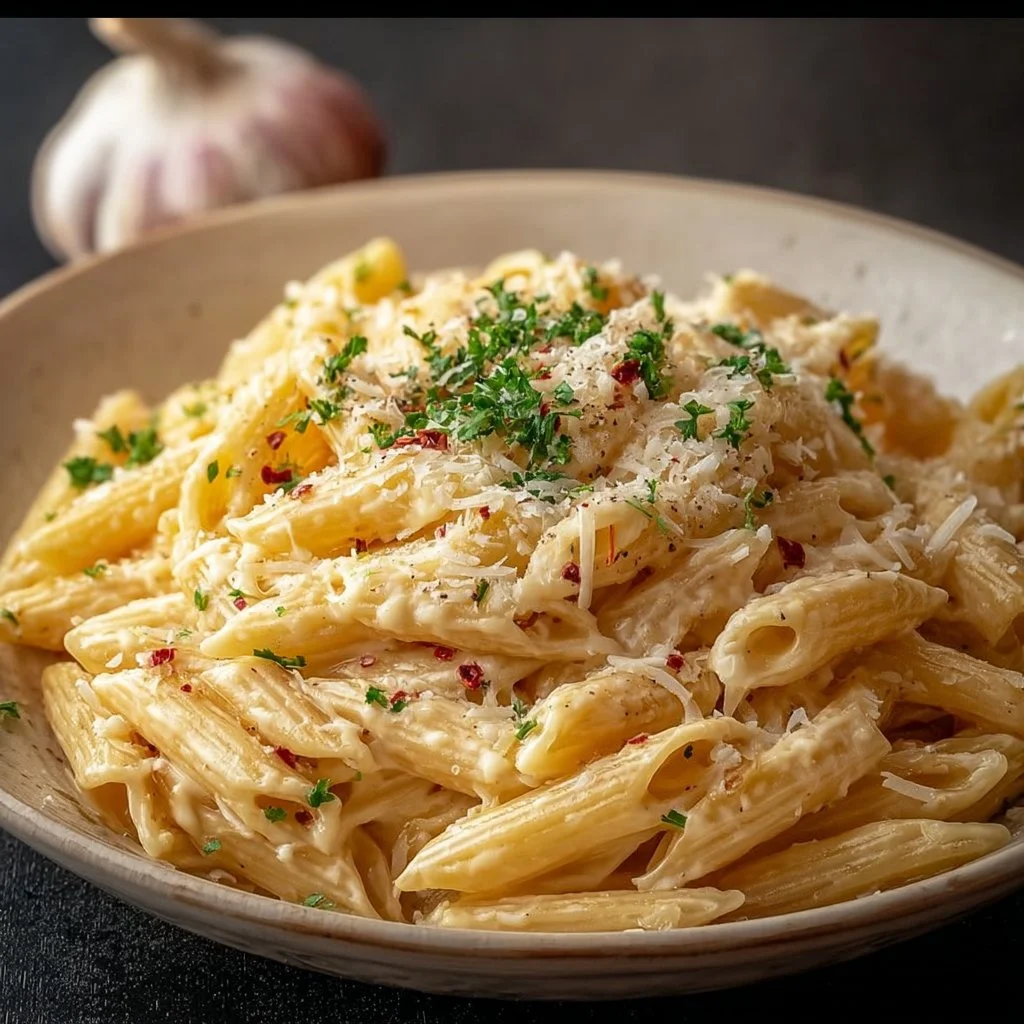
One Pot Creamy Garlic Pasta
One Pot Creamy Garlic Pasta: A Simple, Soulful Delight
Hey there, fellow food lovers! Welcome back to Feastical! Today, I’m thrilled to share one of my absolute favorite recipes that’s been a staple in my kitchen for years: One Pot Creamy Garlic Pasta. This dish isn’t just easy to make; it’s like wrapping yourself in a cozy blanket after a long day! There’s something incredibly satisfying about cooking a whole meal in one pot, and that’s exactly what we’re diving into today.
Pasta, oh glorious pasta! It has this magical ability to bring people together, whether it’s a quiet dinner for one or a lively gathering with family and friends. And when you add creamy garlic sauce to the mix? Well, it’s game over—pure comfort food bliss! Today, we’re keeping it simple and soulful, letting the simple ingredients speak for themselves while delivering a punch of flavor that’ll have you coming back for seconds.
Why is this dish such a crowd-pleaser? For starters, it takes minimal time and effort. I mean, who doesn’t love a recipe that allows you to spend less time in the kitchen and more time enjoying your meal? And with just one pot to clean, it’s a win-win situation. This pasta is perfect for busy weeknights, lazy weekends, or whenever you find yourself craving something creamy and delicious but don’t want to deal with a mess.
So grab your favorite spatula, and let’s make some delicious memories together in the kitchen! Trust me, your taste buds are in for a treat!
Personal Story
Let me take you back to a cozy winter night a few years ago—one that still brings a smile to my face whenever I think about it. I had recently moved into my own apartment, and let me tell you, I was excited to try my hand at cooking; it felt like I had finally stepped into my own kitchen sanctuary. One chilly evening, I invited a few friends over for a movie night. Of course, I wanted to impress them with a delicious meal.
With little kitchen experience and a pantry full of barely-used ingredients, I remembered a creamy garlic pasta dish that my mom used to whip up when I was a kid. So I rolled up my sleeves, grabbed what I had, and started experimenting. The aroma of garlic filled the air, making my apartment feel warm and inviting. My friends arrived to find a bubbling pot of pasta on the stove, and after just one bite, they were hooked! We ended up laughing, sharing stories, and devouring every last drop of that creamy goodness. It was one of those nights where everything just felt right—a perfect blend of good food and great company. Since then, this One Pot Creamy Garlic Pasta has held a special place in my heart and my recipe rotation. And I can’t wait for you to create your own memories with it!
Ingredients
Before we jump into the cooking, let’s gather our ingredients! Here’s what you’ll need for this delicious One Pot Creamy Garlic Pasta:
-
8 oz pasta: Choose any shape you like—spaghetti, penne, or even bowties are great options! The rule of thumb is to pick something that will hold onto the sauce well. For a whole grain option, consider whole wheat or chickpea pasta for added fiber and protein.
-
4 cloves garlic, minced: Garlic is the star of the show here! It adds depth and flavor. If you prefer a milder taste, roasting the garlic first will give it a sweet, caramelized flavor that’s to die for.
-
2 cups milk: I recommend whole milk or 2% for a creamier texture. If you’d like to go dairy-free, oat or coconut milk can work well too—just avoid sweetened varieties!
-
1 cup grated Parmesan cheese: This is where the creaminess gets real! Freshly grated cheese melts better and has a richer flavor than pre-packaged. If you’re feeling adventurous, swap in Pecorino Romano for a sharper kick.
-
Salt and pepper, to taste: Essential for bringing those flavors to life! Remember, seasoning is key—taste as you go!
-
Fresh parsley, chopped (for garnish): Not only does it add a pop of color to your dish, but the freshness of parsley balances the richness of the pasta beautifully. Feel free to swap it out for fresh basil or even a sprinkle of red pepper flakes for a kick!
Step-by-Step Instructions
Alright, my culinary companions, let’s get cooking! Here’s how to whip up this One Pot Creamy Garlic Pasta in no time:
-
Boil the Pasta: In a large pot or skillet, add enough water to cover the pasta (about 4-5 cups) and season it generously with salt. Bring it to a rolling boil. Once boiling, add the pasta. Cook according to the package directions until al dente, usually around 8-10 minutes. Chef’s Tip: Stir occasionally to prevent sticking and to ensure even cooking!
-
Sauté the Garlic: While the pasta is cooking, grab your minced garlic. Once the pasta is cooked, let’s make it even more delicious! Before draining, reserve about 1 cup of pasta water, then drain the pasta in a colander. In the same pot, add a splash of olive oil, and return to medium heat. Toss in the minced garlic, sautéing for about 30 seconds until fragrant. Watch closely, friends! Garlic can burn quickly, and burnt garlic is bitter!
-
Create the Creamy Sauce: Pour in the milk gradually, stirring it into the sautéed garlic. Add in the reserved pasta water gradually (a little at a time) and start to mix everything together. You’ll see it begin to combine and thicken up! Hint: This is a perfect time to taste and adjust your seasoning with salt and pepper.
-
Add the Cheese: Now, sprinkle in that glorious grated Parmesan cheese. Stir it in until the cheese is melted and the sauce has become creamy. This is where the magic happens! If you find the sauce too thick, you can add a splash more of milk or pasta water until it reaches your desired consistency.
-
Combine with Pasta: Toss the pasta back into the pot, mixing it with the creamy sauce until each strand is coated in that deliciousness. There you have it—one pot of creamy garlic bliss!
-
Garnish and Serve: Remove from the heat and sprinkle freshly chopped parsley on top for that burst of freshness! Now it’s time to serve! Chef’s Hack: Drizzle with a little extra virgin olive oil or a squeeze of lemon juice right before serving for an added flavor boost!
Serving Suggestions
When it comes to serving this One Pot Creamy Garlic Pasta, let your creativity flow! Here are a few fun ideas to get you started:
-
Plating: Use shallow bowls or pasta plates. Twirl your pasta in the center and create a little nest of glory. The creamy sauce will pool around it, making it look inviting!
-
Garnishes: Top with a sprinkle of extra Parmesan for that cheesy satisfaction (because you can never have too much cheese!) and a few extra parsley leaves for visual flair.
-
Pairings: This pasta pairs beautifully with a light green salad tossed in vinaigrette to balance out the richness. Add some crusty garlic bread on the side to soak up that creamy sauce—it’s a match made in heaven!
-
Wine: Enjoy a glass of white wine, like Pinot Grigio or Sauvignon Blanc, to complement the garlic flavors.
Recipe Variations
Feeling creative? Here are some delicious variations on the One Pot Creamy Garlic Pasta:
-
Veggie Delight: Toss in some sautéed spinach, cherry tomatoes, or zucchini for added color and nutrition. You can also add roasted veggies for a hint of smokiness.
-
Protein-Packed: Add grilled chicken, shrimp, or even crispy bacon for a heartier meal. Simply cook your protein of choice separately, and toss it in right before serving.
-
Herb Infusion: Experiment with different herbs! Besides parsley, you could use thyme, basil, or even a pinch of Italian seasoning for depth.
-
Spicy Kick: Enhance your dish by adding a pinch of red pepper flakes or a drizzle of sriracha for a bit of heat.
-
Mushroom Magic: Sauté sliced mushrooms along with your garlic for an earthy flavor that pairs beautifully with creamy pasta!
Chef’s Notes
This One Pot Creamy Garlic Pasta recipe has evolved over time as I’ve made it countless times and shared it with friends. It started as a simple dish, but every time I made it, I found ways to enhance the flavors or add different ingredients. I remember one time, on a chilly evening, I had some leftover roasted vegetables that I tossed in, and it turned out to be a crowd favorite! Whether you stick to the classic version or get creative with variations, remember that cooking should always be fun and a little adventurous.
And let’s be real—nothing makes you feel like a culinary rock star quite like whipping up a delicious meal with minimal effort!
FAQs and Troubleshooting
-
Can I use a different type of pasta?
Absolutely! This recipe works with any pasta shape you love. Just keep an eye on the cooking time, as it can vary depending on the pasta. -
What if my sauce is too thick?
If your sauce is too thick, simply stir in a little more milk or reserved pasta water, a tablespoon at a time, until it reaches your desired creaminess. -
How can I make this dish vegan?
To make this dish vegan, use whole-grain or gluten-free pasta, substitute the milk with a plant-based option like almond or oat milk, and swap the Parmesan for nutritional yeast or vegan cheese. -
Can I make this ahead of time?
You can definitely prep the components in advance! Just cook the pasta and sauce separately and combine them before serving. You may need to add a splash of milk to revitalize the sauce when reheating!
Nutritional Info
Let’s talk nutrition! This One Pot Creamy Garlic Pasta is not just satisfying; it’s also packed with some great nutrients. Here’s a quick breakdown (per serving, without added protein):
- Calories: Approximately 400
- Protein: 12g
- Fat: 15g
- Carbohydrates: 51g
- Fiber: 2g
- Sodium: Varies based on added salt
Keep in mind, adding grilled chicken, veggies, or adjustments to the cheese can change the nutritional content, so feel free to experiment based on your dietary needs!
Final Thoughts
And there you have it—my beloved One Pot Creamy Garlic Pasta recipe! I truly hope you give this a try because, trust me, it’s about to become your new go-to dish. Cooking doesn’t have to be complicated to be delicious, and this creamy garlic pasta perfectly encapsulates that philosophy. Remember, food is about sharing, fun, and love, so don’t be afraid to get your hands dirty in the kitchen!
Make it for yourself, your family, or friends; I promise it’ll bring smiles and warm bellies all around. I can’t wait to hear how yours turns out! Don’t forget to share your photos and stories with me, and happy cooking, my foodie friends! Let’s dig in! 🍝✨
Print
One Pot Creamy Garlic Pasta
- Total Time: 25 minutes
- Yield: 4 servings 1x
- Diet: Vegetarian
Description
A simple, soulful delight that combines pasta with a creamy garlic sauce, all cooked in one pot for easy clean-up.
Ingredients
- 8 oz pasta (spaghetti, penne, or bowties)
- 4 cloves garlic, minced
- 2 cups milk (whole or 2%)
- 1 cup grated Parmesan cheese
- Salt and pepper, to taste
- Fresh parsley, chopped (for garnish)
Instructions
- Boil the pasta in a large pot with enough salted water until al dente, about 8-10 minutes.
- Sauté the minced garlic in olive oil in the same pot for 30 seconds until fragrant.
- Create the creamy sauce by adding milk and reserved pasta water gradually.
- Add the grated Parmesan cheese and stir until melted and creamy.
- Combine the pasta back into the pot and mix well with the sauce.
- Garnish with freshly chopped parsley and serve hot.
Notes
For added flavor, drizzle with extra virgin olive oil or a squeeze of lemon juice before serving.
- Prep Time: 10 minutes
- Cook Time: 15 minutes
- Category: Main Course
- Method: Baking
- Cuisine: Italian
Nutrition
- Serving Size: 1 serving
- Calories: 400
- Sugar: 5g
- Sodium: 600mg
- Fat: 15g
- Saturated Fat: 8g
- Unsaturated Fat: 7g
- Trans Fat: 0g
- Carbohydrates: 51g
- Fiber: 2g
- Protein: 12g
- Cholesterol: 30mg
Keywords: creamy pasta, garlic pasta, one pot meals