
One-Pot Slow Cooker Cowboy Casserole for Busy Weeknights
Slow Cooker Cowboy Casserole: A Comfort Food Classic
Hey there, fellow food lovers! Beau Collier here, and welcome back to Feastical! Today, I’m ready to share with you a dish that’s not just easy to make but also packed with flavor and warmth—the Slow Cooker Cowboy Casserole. If you’re looking for a recipe that wraps you in a cozy embrace while filling your kitchen with mouthwatering aromas, you’ve stumbled onto the right page!
Introduction
Picture this: It’s a chilly evening, and you want nothing more than something hearty that brings everyone together. The kind of meal that feels like a warm hug while making your taste buds do a happy dance. The Cowboy Casserole is one of those dishes that not only satisfies your hunger but also sparks joy at the dining table. It’s vibrant, loaded with goodies, and—wait for it—couldn’t be simpler to whip up!
With just a handful of ingredients and your trusty slow cooker, this casserole is your go-to for busy nights, family gatherings, or when you’re simply craving some good old comfort food. Just toss everything into the pot, set it, and forget it—let the magic happen!
And here’s a little secret: it’s versatile too! You can switch things up based on what you have on hand or your family’s preferences. Want to make it vegetarian? Go right ahead! Or maybe you’d prefer a spicy kick? I got you! We’ll explore all those avenues in this post because I’m all about cooking in a way that suits you.
Are you ready to get the spatula moving and the slow cooker buzzing? Let’s dive into the cowboy spirit and rustle up a delicious meal that will make you the star of your kitchen!
Personal Story
Now, let me take you back to a golden memory in my childhood. Many weekends, my family would gather at my grandma’s farm, buzzing with excitement over our favorite cozy projects. One of my fondest memories revolves around her cooking hearty meals that had us all running to the dining room at the first whiff. It was her Cowboy Casserole that stole the show every time.
I remember how it bubbled away in her ancient slow cooker, its rich aroma wafting through the farmhouse. We’d pile into the kitchen, wide-eyed and hungry, the anticipation palpable. Each spoonful was like a time capsule, transporting us back to family gatherings, laughter, and stories shared around the table. What I love about food is its incredible power to create memories; it’s so much more than just eating. For me, making this casserole isn’t just about satisfying hunger; it’s about recreating those cherished moments with each bite.
Ingredients
Here’s what you’ll need to make this delicious Slow Cooker Cowboy Casserole:
-
1 pound lean ground beef: Try using ground turkey or chicken for a leaner option or plant-based crumbles for a vegetarian version.
-
1 cup finely diced sweet yellow onions: These add a lovely sweetness; if you’re not an onion fan, you can skip them or switch to shallots for a milder flavor.
-
1 tablespoon minced garlic: Because garlic makes everything better! Fresh is preferred, but garlic powder works in a pinch.
-
1 (16-ounce) can dark red kidney beans, undrained: Packed with protein and fiber! You could swap these for black beans or pinto beans if you like.
-
1 (14.5-ounce) can petite diced tomatoes with juice: These provide acidity and sweetness. Feel free to use crushed tomatoes if you prefer fewer chunks.
-
1 (10-ounce) can diced tomatoes with fire roasted hatch chilies, with juice: The hatch chiles bring a loving hug of heat. If you’re a spice whiz, throw in some jalapeños for extra zing.
-
1 cup frozen corn: Adds sweetness and texture. If fresh corn is in season, use it! Just remove the kernels from the cob.
-
1 teaspoon kosher salt: Essential for flavor. Use sea salt or table salt if that’s what you have.
-
½ teaspoon freshly cracked black pepper: For that subtle kick! You could also experiment with a blend of spices if you’re feeling adventurous.
-
¼ teaspoon chipotle powder: If you love smokiness, this will be your best friend. Otherwise, you can skip it for a milder version.
-
1½ pounds Yukon Gold potatoes, sliced about ⅛ inch thick: These creamy potatoes hold their shape well and add body to the casserole. Russets work too, but they may break down a bit more.
-
1¼ cups Colby and Monterey Jack cheese, freshly shredded: The gooey goodness! You can use cheddar, pepper jack, or a dairy-free cheese alternative if you’re avoiding dairy.
Step-by-Step Instructions
-
Prep the Ingredients:
Begin by gathering all your ingredients on the counter. Simple, right? Dice your onions, mince your garlic, and slice those potatoes. This step not only makes cooking easier but also makes you feel like a pro in the kitchen. Fun fact? If you soak sliced potatoes in cold water for about 15 minutes, it helps remove some of the starch—making them even creamier! -
Brown the Ground Beef:
In a skillet over medium heat, brown your ground beef until it’s fully cooked, about 5–7 minutes. Drain excess fat if needed, and stir in the diced onion and minced garlic. Sauté this mixture until the onions are translucent, about 3 minutes. This step adds depth of flavor and will make your kitchen smell heavenly! -
Layer in the Slow Cooker:
Now it’s time to dump all that goodness into your slow cooker! Start with your ground beef mixture, then add the undrained kidney beans, both cans of diced tomatoes along with their juices, and corn. -
Season it Up:
When everything is in the slow cooker, sprinkle in the kosher salt, black pepper, and chipotle powder. Give it a good stir to combine. Remember to taste as you go—seasoning is all about personal preference! -
Add the Potatoes:
Firmly layer the sliced Yukon Gold potatoes on top. You don’t need to mix them in; just let them nestle on top of your flavorful mixture. -
Cover and Cook:
Place the lid on your slow cooker and set it to low for 6–8 hours or high for 3–4 hours. Let it work its magic! If you’re working from home, give it a quick peek halfway through and stir gently to integrate those flavors. -
Time to Cheese it Up:
About 15–20 minutes before serving, sprinkle the shredded cheese over the top and allow it to melt. This is when the magic happens! The ooey-gooey cheesiness mixed with the hearty mixture is pure bliss. -
Serve It Up:
When you’re ready to feast, use a ladle to serve up generous portions. This dish is best enjoyed hot, so gather your loved ones around.
Serving Suggestions
For plating your Slow Cooker Cowboy Casserole, I recommend serving it in deep bowls so everyone can appreciate the layers. You can top it off with a dollop of sour cream or Greek yogurt, which adds creaminess and balances the spices. A sprinkle of fresh cilantro or green onions can brighten it up visually and taste-wise!
For extra heartiness, consider serving this casserole with a slice of warm cornbread or crusty bread to soak up all those delightful juices. And if you’re feeling fancy, whip up a simple side salad with mixed greens, avocado, and a light vinaigrette; this will cut through the richness of the casserole beautifully.
Recipe Variations
-
Veggie Lover’s Casserole: Substitute ground beef with black beans or lentils and double up on the veggies. Add diced bell peppers, zucchini, or mushrooms for more color and nutrients.
-
Southwestern Twist: Stir in some taco seasoning with your meat, and add jalapeños for that extra kick.
-
Cheesy Broccoli Version: Layer fresh or frozen broccoli on top with the cheese for an added crunch and nutrition boost.
-
Spicy Cowboy Delight: If you love spice, increase the amount of chipotle powder, or add some hot sauce directly into the mixture for an extra punch.
-
Breakfast Casserole: Use shredded hash browns instead of sliced potatoes and sprinkle in some scrambled eggs at the end for a delightful brunch variation.
Chef’s Notes
This Slow Cooker Cowboy Casserole has evolved over the years in my kitchen! Initially, I started with just a classic recipe, but as I embraced cooking more creatively, I found myself adding twists that reflected my flavor preferences and seasonal ingredients. One memorable change was using roasted tomatoes in the summer, lending a beautiful sweetness to the dish.
Every time I make this casserole, it surprises me how it can both impress guests and be a no-fuss meal for just me on a busy weeknight. It’s amazing how food can adapt over time, just as we do!
FAQs and Troubleshooting
-
Can I leave it on low all day?
Yes! It’s a great set-it-and-forget-it meal. Just make sure you have a good, reliable slow cooker. -
What if my potatoes are still hard?
If you find them undercooked at the end, just give it a little more time. You can cook it an additional 30 minutes on high to soften them up. -
Can I freeze leftovers?
Absolutely! This casserole freezes beautifully. Just cool it completely, store in an airtight container, and enjoy up to 3 months later. -
Is it supposed to be soupy?
It should have some liquid, but if it’s too soupy, you can reduce the amount of liquid next time or leave the lid off for the last hour of cooking to let steam escape.
Nutritional Info
This hearty casserole offers a balanced meal packed with protein, fiber, and complex carbohydrates. One serving contains approximately:
- Calories: 420
- Protein: 25g
- Carbohydrates: 50g
- Dietary Fiber: 10g
- Total Fat: 15g
Don’t forget, these values may vary based on your specific ingredients and portion sizes, so adjust and enjoy according to your dietary needs!
Final Thoughts
And there you have it—your new go-to recipe for an easy, delicious, and heartwarming meal that’ll keep your stomach full and your spirit high. This Slow Cooker Cowboy Casserole is not just a dish; it’s a celebration of flavors and a vessel for memories.
Every time you stir up this recipe, remember you’re carrying on a tradition of warmth and togetherness. So, throw on your apron, round up the family (or make it just for you!), and let this casserole work its magic.
Thanks for joining me today! I hope you enjoy making and sharing this Cowboy Casserole as much as I do. Until next time—happy cooking, friends! Keep those forks ready!
Print
Slow Cooker Cowboy Casserole
- Total Time: 375 minutes
- Yield: 6 servings 1x
- Diet: Beef
Description
A hearty and flavorful slow cooker casserole perfect for busy nights and family gatherings.
Ingredients
- 1 pound lean ground beef
- 1 cup finely diced sweet yellow onions
- 1 tablespoon minced garlic
- 1 (16-ounce) can dark red kidney beans, undrained
- 1 (14.5-ounce) can petite diced tomatoes with juice
- 1 (10-ounce) can diced tomatoes with fire roasted hatch chilies, with juice
- 1 cup frozen corn
- 1 teaspoon kosher salt
- ½ teaspoon freshly cracked black pepper
- ¼ teaspoon chipotle powder
- 1½ pounds Yukon Gold potatoes, sliced about ⅛ inch thick
- 1¼ cups Colby and Monterey Jack cheese, freshly shredded
Instructions
- Gather all your ingredients on the counter. Dice your onions, mince your garlic, and slice the potatoes.
- Brown the ground beef in a skillet over medium heat for 5–7 minutes. Drain excess fat and stir in the diced onion and garlic.
- Dump the ground beef mixture into the slow cooker along with the kidney beans, both cans of tomatoes, and corn.
- Sprinkle in the kosher salt, black pepper, and chipotle powder, then stir to combine.
- Add the sliced Yukon Gold potatoes on top without mixing.
- Cover and cook on low for 6–8 hours or high for 3–4 hours.
- Sprinkle the shredded cheese over the top 15–20 minutes before serving.
- Serve hot in deep bowls, possibly topped with sour cream and fresh herbs.
Notes
You can modify this recipe by using ground turkey or chicken for a leaner option, or substitute beans for a vegetarian version.
- Prep Time: 15 minutes
- Cook Time: 360 minutes
- Category: Main Course
- Method: Slow Cooking
- Cuisine: American
Nutrition
- Serving Size: 1 serving
- Calories: 420
- Sugar: 5g
- Sodium: 800mg
- Fat: 15g
- Saturated Fat: 6g
- Unsaturated Fat: 6g
- Trans Fat: 0g
- Carbohydrates: 50g
- Fiber: 10g
- Protein: 25g
- Cholesterol: 70mg
Keywords: cowboy casserole, slow cooker, comfort food, hearty meal, family recipe
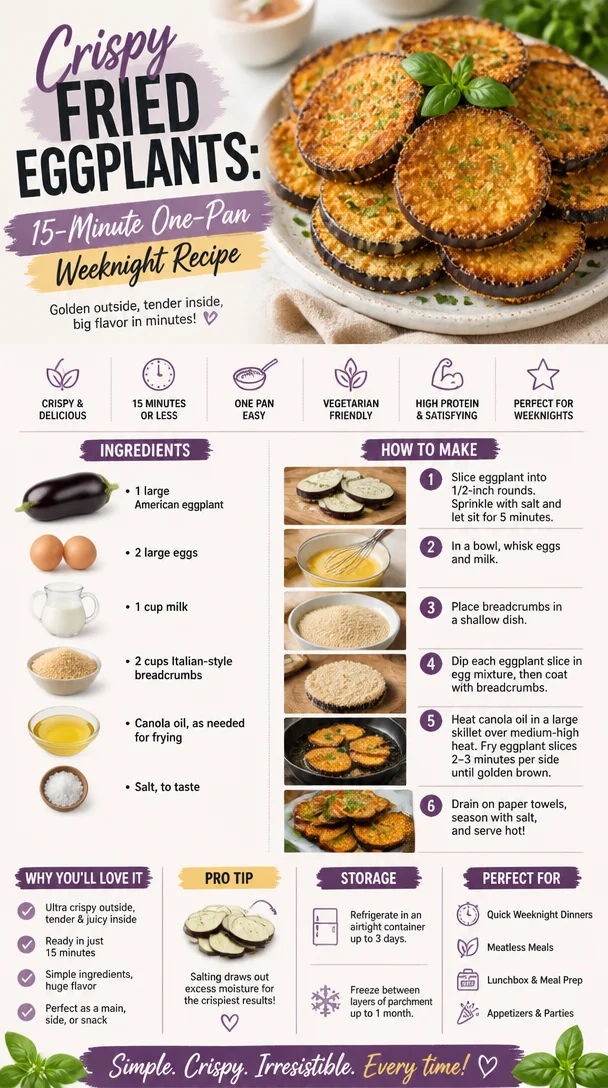
Crispy Fried Eggplants: 15-Minute One-Pan Weeknight Recipe
The Ultimate Fried Eggplant Recipe: A Comforting Bite of Nostalgia
Hey there, fellow food lovers! Welcome to Feastical! If you’re anything like me—obsessed with all things delicious and just a little nostalgic—you’re going to love diving into today’s recipe. We’re about to take a culinary journey back to the cozy kitchens of our past. Today, we’re frying up some beautiful eggplants, and let me tell you, they’re absolutely divine.
Eggplants, or aubergines as some of you may know them, have always held a special place in my heart. It’s one of those ingredients that transforms from humble to extraordinary with just a little love and care. So grab your apron and let’s roll up those sleeves—because we’re going to create some mouthwatering Fried Eggplants that will leave you reminiscing about those cozy family dinners.
A Taste of Nostalgia
Let me take you back to my childhood. I remember the fragrant aroma wafting through my grandmother’s kitchen on Sunday afternoons. There she was—my beloved Nonna, frying up eggplants like it was an Olympic event. She was a master at turning simple ingredients into magical meals, and her fried eggplant was legend—crispy on the outside and tender on the inside, with just the right touch of seasoning.
I can still picture her swirling the eggplants in the air with that signature Italian flair, her laughter intertwining with the sizzle of the frying pan. Each slice of eggplant was treated like a work of art, and she always reminded me to taste as we went along. That’s where my love for cooking started—surrounded by good food, great stories, and the warmth of family.
Now, let’s channel that same energy into our own kitchens and create a dish that’s as soul-soothing as those old memories!
Ingredients
Let’s gather what we need before we dive into the kitchen. Here’s the list of ingredients for Fried Eggplants:
-
1 large American eggplant: Choose one that feels heavy for its size, with smooth, glossy skin. If you can’t find American eggplants, Japanese or Italian varieties work well too!
-
2 large eggs: Fresh eggs will give you the best flavor and structure, but you can substitute with flax eggs (1 tablespoon flaxseed meal + 2.5 tablespoons water) for a vegan twist.
-
1 cup milk: Whole milk is great for richness, but feel free to use almond milk or any non-dairy milk to keep things plant-based.
-
2 cups Italian-style breadcrumbs: This is where the magic happens! You can make your own breadcrumbs from stale bread for a fresher taste or use gluten-free breadcrumbs for dietary needs.
-
Canola oil: Perfect for frying due to its high smoke point. Vegetable or grapeseed oil will work too, but steer clear of olive oil for frying as it burns easily.
-
Salt, to taste: Don’t skip this! A good pinch will elevate those flavors and bring everything together.
Step-by-Step Instructions
Now that we’re all set with our ingredients, let’s dive into the cooking process! Ready, set, fry!
-
Prepare the Eggplant: Start by washing your eggplant and slicing it into rounds about ½ inch thick. Sprinkle some salt on both sides of the slices and let them sit in a colander for about 30 minutes. Why? This little trick draws out excess moisture and helps reduce that sometimes-bitterness that eggplants can carry. Rinse and pat dry afterward—this is your secret weapon!
-
Egg Wash Setup: While your eggplant sweats it out, grab two bowls. In one, crack the two eggs and beat them with the cup of milk until it’s thoroughly mixed. This creamy concoction is going to help your breadcrumbs adhere beautifully to the eggplant. In the other bowl, pour in your Italian-style breadcrumbs. This is where it gets crispy!
-
Coat the Eggplant Slices: Dip each eggplant slice first into the egg-milk mixture, then dredge it in the breadcrumbs until well coated. Don’t be shy with that breadcrumb coating—this is what gives you that delightful crunch!
-
Heat the Oil: In a large skillet, pour in enough canola oil to cover the bottom by about ¼ inch. Heat it over medium-high heat until hot (you can test it by dropping a breadcrumb in—if it sizzles, you’re good to go!).
-
Fry the Eggplants: Carefully place a few breaded eggplant slices in the hot oil, being careful not to crowd the pan. Fry until they’re golden brown and crispy, about 3-4 minutes on each side. Adjust the heat as needed to prevent burning—this is where cooking with love comes in, folks!
-
Drain and Season: Once fried to perfection, transfer the eggplants to a paper towel-lined plate to drain any excess oil. A sprinkle of salt while they’re still hot will enhance the flavors even more!
-
Repeat: Keep frying in batches until all your eggplant slices are golden and delicious. Remember, patience is key!
Serving Suggestions
Once you’ve got a beautiful platter of fried eggplants, it’s time to serve them up! I love to arrange them on a bold-colored plate, topped with a sprinkle of grated Parmesan cheese or nutritional yeast if you’re keeping it vegan. You can also serve them with a side of marinara sauce for dipping—classic and oh-so-satisfying!
For a refreshing touch, consider garnishing with chopped fresh basil or parsley. A drizzle of balsamic reduction or a squeeze of lemon juice adds an extra zing and fancy flair. The presentation is just as important as the taste; after all, we eat with our eyes first, right?
Recipe Variations
Feeling adventurous? Here are a few ways to shake things up with this basic fried eggplant recipe:
-
Spicy Twist: Add red pepper flakes to the breadcrumbs for a spicy kick—you’ll love the heat!
-
Herbed Breadcrumbs: Mix dried Italian herbs like oregano and thyme into your breadcrumbs for an aromatic, herbaceous flavor.
-
Cheesy Eggplant: Layer fried eggplant slices with marinara sauce and mozzarella cheese, then bake for a delicious eggplant Parmesan.
-
Zesty Lemon Dill: Try serving the fried eggplants with a yogurt sauce mixed with dill and lemon for a fresh and tangy contrast.
-
Smoky Flavor: Add smoked paprika to the breadcrumbs for a subtle smokiness that pairs surprisingly well with the eggplant!
Chef’s Notes
As with any recipe, feel free to call this dish your own. Got a family secret? Share it! Over the years, this recipe has transformed in my kitchen—sometimes I toss in garlic powder, or swap the eggplant for zucchini, depending on what’s in season. Cooking should be fun, not a chore—allow yourself the freedom to explore and experiment!
And don’t get me started on the frying! Ah, the magic of frying—just make sure to keep an eye on your oil’s temperature as it drops when you add the eggplant. Cooking is a practice, and I’ve had my share of crispy, over-fried mishaps (don’t worry, they still tasted great).
FAQs and Troubleshooting
-
Why did my eggplants turn out soggy?
If your eggplants are soggy, they probably weren’t salted long enough to draw out moisture. Let them sit longer next time; trust me, it’s worth the wait! -
Can I bake instead of fry?
Absolutely! Preheat your oven to 400°F (200°C), place the breaded eggplant slices on a lined baking sheet, and bake for about 20-25 minutes, flipping halfway through. They won’t be quite as crispy, but still delicious. -
How do I store leftovers?
Store any leftovers in an airtight container in the fridge for up to 3 days. You can reheat them in the oven for that lovely crispiness. -
Why is my coating falling off?
If your breadcrumb coating is falling off, make sure the egg-milk mixture is thick enough to adequately adhere to the slices. You might also want to press the breadcrumbs onto the eggplant slices more firmly.
Nutritional Info
While fried eggplants are undeniably delicious, they do carry some nutritional considerations. A serving typically includes about 180 calories, with 8 grams of carbs, 12 grams of fat, and 4 grams of protein. While I always encourage indulging in comfort food, remember to enjoy these fried delights in moderation, especially if you’re keeping an eye on calories. Pair with a fresh side salad to lighten things up!
Final Thoughts
There you have it, my friends! A warm, crispy dish of Fried Eggplants filled with love, nostalgia, and flavors that can transport you back to any comforting kitchen. These delightful bites make for an excellent appetizer, side dish, or even a hearty main course paired with a salad.
So go ahead, give it a try! And share the love with friends and family—after all, food is meant to bring us together. I can’t wait to see your creations and hear your stories, so don’t forget to leave a comment below or tag me on social media. Until next time, happy cooking, and as always, let’s dig in!
PrintUltimate Fried Eggplant
- Total Time: 50 minutes
- Yield: 4 servings 1x
- Diet: Vegetarian
Description
A nostalgic recipe for crispy and delicious fried eggplants, perfect for a comforting meal.
Ingredients
- 1 large American eggplant
- 2 large eggs
- 1 cup whole milk
- 2 cups Italian-style breadcrumbs
- Canola oil for frying
- Salt, to taste
Instructions
- Prepare the Eggplant: Wash the eggplant and slice into ½ inch thick rounds. Sprinkle salt and let sit for 30 minutes in a colander, then rinse and pat dry.
- Egg Wash Setup: In one bowl, beat the eggs with the milk. In another bowl, place the breadcrumbs.
- Coat the Eggplant Slices: Dip each slice in the egg-milk mixture, then dredge in breadcrumbs until fully coated.
- Heat the Oil: Pour canola oil into a large skillet to cover the bottom by about ¼ inch and heat over medium-high.
- Fry the Eggplants: Place breaded slices in hot oil, frying until golden brown and crispy, about 3-4 minutes per side.
- Drain and Season: Transfer fried eggplants to a paper towel-lined plate and sprinkle with salt.
- Repeat until all eggplant slices are cooked.
Notes
Serve with grated Parmesan cheese or nutritional yeast, marinara sauce for dipping, or garnished with fresh herbs.
- Prep Time: 30 minutes
- Cook Time: 20 minutes
- Category: Side Dish
- Method: Frying
- Cuisine: Italian
Nutrition
- Serving Size: 1 serving
- Calories: 350
- Sugar: 4g
- Sodium: 400mg
- Fat: 15g
- Saturated Fat: 3g
- Unsaturated Fat: 9g
- Trans Fat: 0g
- Carbohydrates: 30g
- Fiber: 5g
- Protein: 10g
- Cholesterol: 80mg
Keywords: fried eggplant, comfort food, vegetarian recipes, Italian recipes, eggplant dishes
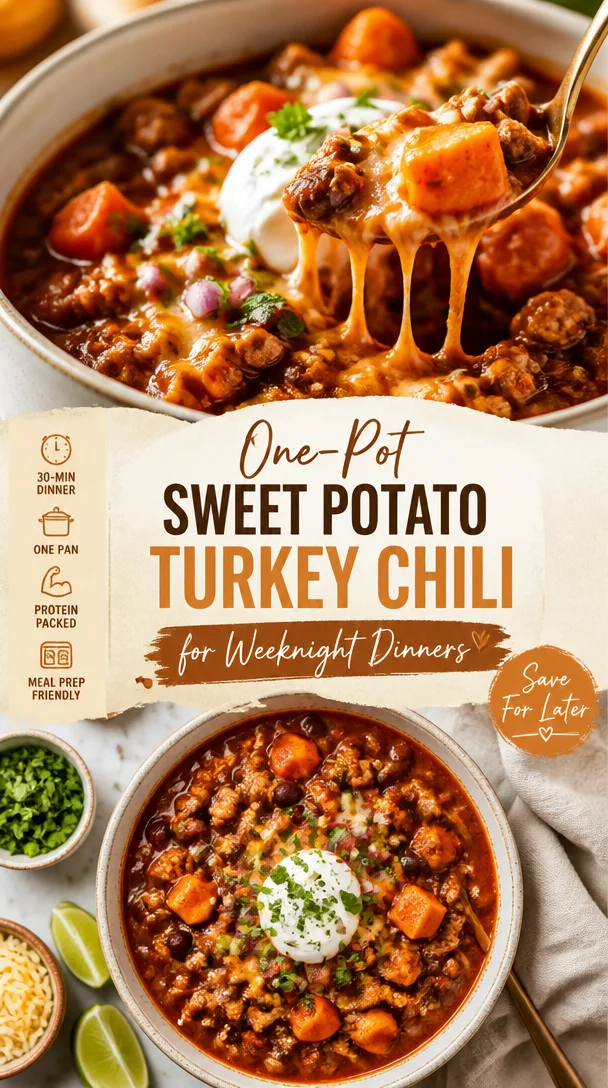
One-Pot Sweet Potato Turkey Chili for Weeknight Dinners
Sweet Potato Turkey Chili: A Heartwarming Comfort Food
Hey there, foodies! Welcome back to Feastical! Today, I’ve got something truly comforting for you: Sweet Potato Turkey Chili. This dish is like a warm hug on a chilly evening, and it’s packed full of flavor. Perfect for cozy nights in or when you want to impress your friends at dinner! And the best part? It’s easy to make and guarantees seconds—or maybe thirds!
A Bowl Full of Memories
Let me take you back to a crystal-clear autumn evening a few years ago. Picture this: I was in my kitchen, the aroma of chili bubbling away on the stovetop, while the leaves outside danced to the ground in shades of orange and gold. My roommate at the time, Sam, was prepping cornbread, adding just a touch of honey to the batter because, well, why not?
We had invited a bunch of friends over, and it was one of those laid-back gatherings where everyone felt at home. As the sun dipped below the horizon, we all gathered around the kitchen counter—my favorite place, where food and laughter flow.
When we finally dug into that Sweet Potato Turkey Chili, it was one of those magical moments where every bite felt like a celebration. The chili was filling, the sweet potato brought a lovely sweetness that balanced the spices perfectly, and the turkey gave it a heartiness that was just right. We topped it off with crispy tortilla chips, a dollop of sour cream, and a sprinkle of fresh cilantro. Can you say heaven on a plate?
That evening taught me something special: food isn’t just about nutrition; it’s about connection. It’s about gathering the people you love around a table and sharing stories, flavors, and laughter. And that’s exactly what this chili embodies!
Ingredients
Let’s dive into the ingredients that will transform your kitchen into flavor town while ensuring your sweet potato turkey chili is full of deliciousness.
-
1 lb ground turkey: A lean protein that’s perfect for keeping things light. If you’re not into turkey, feel free to swap in ground chicken or even plant-based crumbles for a vegetarian option!
-
2 large sweet potatoes, diced: These little beauties add sweetness and a creamy texture. Not a fan of sweet potatoes? Try using butternut squash or regular potatoes instead for that hearty base.
-
1 can diced tomatoes: The foundation of our chili. You can use fire-roasted diced tomatoes for an extra smokey flavor, or even crushed tomatoes if you’re after a thicker consistency.
-
1 cup corn (frozen or canned): Adds sweetness and texture. I love using frozen corn in the winter months; it tastes fresh and is super easy to grab from the freezer.
-
1 onion, chopped: Creates depth and sweetness. Sweet onions or red onions work wonderfully here.
-
2 cloves garlic, minced: Garlic is essential for flavor! If fresh garlic isn’t around, 1/2 tsp of garlic powder can work in a pinch.
-
2 cups chicken broth: This is the soul of the chili! Vegetable broth works too, and for a richer flavor, consider homemade broth or low-sodium styles.
-
1 tablespoon chili powder: This is where the magic happens! Add more for extra heat or use mild paprika if you’re sensitive to spice.
-
1 teaspoon cumin: Adds that warm, earthy flavor. Ground coriander could be a nice alternative for a different twist.
-
Salt and pepper to taste: Essential for flavor! Always season toward the end to adjust according to your liking.
-
Olive oil for cooking: A splash to get things sizzling! You could use avocado oil or even butter for a richer taste.
With these ingredients, you’re on your way to producing an aromatic pot of sweet potato turkey chili that will make your kitchen smell divine!
Step-by-Step Instructions
Now that we have our ingredients ready, let’s get down to cooking this delicious dish.
-
Prep Your Ingredients: Imagine you’re at a beautiful farmer’s market—take your time to chop your sweet potatoes and onions. Mindfulness in cooking is important!
-
Heat the Olive Oil: In a large pot or Dutch oven, pour in a tablespoon of olive oil over medium heat. Let it warm for a couple of minutes; you want it glistening, not smoking.
-
Sauté the Veggies: Toss the chopped onion into the pot and sauté for about 3-4 minutes until they’re translucent. Don’t rush this step! Let that sweetness develop! Add in the minced garlic and keep stirring for another minute—trust me, you want to smell that garlicky goodness wafting through your kitchen!
-
Brown the Turkey: Now, add in the ground turkey. Break it apart with your spoon and sauté until it’s fully cooked and browned, which takes about 5-7 minutes. Keep stirring to ensure even browning and that you don’t have any pink left.
-
Add the Sweet Potatoes: Stir in your diced sweet potatoes and cook for an additional 3 minutes. This pre-cooking step helps to slightly soften them before adding the liquids.
-
Pour in the Goodness: Now, it’s time for the chicken broth and diced tomatoes. Stir everything well, scraping up any bits that may have stuck to the bottom of the pot.
-
Spice it Up: Sprinkle in the chili powder, cumin, salt, and pepper. Stir and let it simmer for about 30 minutes. If it looks too thick, add a touch more broth; if it’s too soupy, let it simmer uncovered. You’re in charge of the consistency here!
-
Add the Corn: About 5 minutes before serving, toss in the corn. Stir it in and let it warm through for a wonderful pop of sweetness!
-
Final Taste Check: Give it a taste and adjust the seasoning if needed. Sometimes, adding a dash of lime juice or a pinch of cayenne can take it to the next level!
-
Serve: Once everything is perfectly cooked and flavorful, remove from heat and allow to cool slightly before serving.
With each step, take a moment to enjoy the aromas, maybe sip on a glass of something refreshing—this part is as crucial as the cooking itself!
Serving Suggestions
I love to serve this Sweet Potato Turkey Chili in hearty bowls! Top it with some crushed tortilla chips for that crunch, a dollop of sour cream or Greek yogurt for creaminess, and a sprinkle of fresh cilantro for a burst of freshness. If you’re feeling extra cheesy (who isn’t?), a handful of shredded cheese on top can make everything even more delightful.
Pair it with some warm cornbread or a side salad, and you’ve got yourself a fantastic meal. And let’s be honest—this dish is perfect for meal prep too! It tastes even better after a day in the fridge, and reheating it yields a comforting dinner in a snap.
Recipe Variations
Now, if you’re anything like me, you love to switch things up! Here are some fun variations to keep your chili game fresh:
-
Spicy Kick: Add in a diced jalapeño for a fiery twist. If you love heat, toss in some cayenne pepper or crushed red pepper flakes!
-
Beans Galore: Throw in a can of black beans or kidney beans to up the protein and fiber.
-
Vegan Delight: Swap the ground turkey for plant-based crumbles and use vegetable broth. I promise you won’t miss the meat!
-
Extra Veggies: Add in chopped bell peppers, zucchini, or any leftover veggies lurking in your fridge for more taste and nutrition.
-
Sweet & Savory: Drizzle a bit of maple syrup for a sweet contrast to the heat. It’s not expected, but it’s oh-so-good!
With all these variations, it’s like having a whole new dish every time you cook it! Love that versatility!
Chef’s Notes
I’ve been making this chili for a few years now, and it’s evolved beautifully over time. The first version was far too spicy—my friends still tease me about it! With every batch, I learned something new about balance and flavor.
Honestly, I just love the way this recipe brings people together. It’s perfect for casual dinners, game days, or even cozy nights on the couch. Plus, it’s a total crowd-pleaser. I once had a guest declare it the best chili they’d ever had, and that seriously made my day!
FAQs and Troubleshooting
1. Why is my chili too watery?
If your chili turns out too runny, let it simmer an additional 10-15 minutes uncovered to allow some of that liquid to evaporate. Alternatively, if you prefer it thicker, mash or blend a small portion of the sweet potatoes into the pot.
2. Can I freeze this chili?
Absolutely! Once cooled, transfer it to an airtight container or zip-top bag and freeze for up to 3 months. Just thaw it overnight in the fridge before reheating!
3. How can I make it spicier?
If you’re ready to bring the heat, add more chili powder or diced jalapeños. A dash of hot sauce can also work wonders. Just remember to taste as you go!
4. What do I do if I don’t have chicken broth?
No worries, my friend! You can use vegetable broth, water with a splash of soy or Worcestershire sauce, or even tomato juice for a unique twist.
Nutritional Info
Now let’s chat about nutrition! This Sweet Potato Turkey Chili is not just tasty but also nutrient-packed. Each serving offers an excellent balance of protein, fiber, and a variety of vitamins from the sweet potatoes and corn. Here’s a quick rundown for one serving:
- Calories: Approximately 350
- Protein: 25g
- Fat: 10g
- Carbohydrates: 40g
- Fiber: 8g
With all those immune-boosting ingredients, you can enjoy every spoonful knowing you’re nourishing your body as you feast!
Final Thoughts
There you have it, dear friends! A big ol’ pot of Sweet Potato Turkey Chili just waiting to find its way into your hearts and homes. Cooking is not just a task; it’s an experience, a chance to connect and share love through food. Each bowl tells a story, and I can’t wait to hear yours!
So gather your ingredients, roll up those sleeves, and let this recipe inspire you to create something wonderful. And remember, cooking doesn’t always look pretty, but it sure tastes divine. Don’t forget to tag me on social media when you whip up your own chili masterpiece. Happy cooking, and until next time—let the flavors shine!
Print
Sweet Potato Turkey Chili
- Total Time: 60 minutes
- Yield: 4 servings 1x
- Diet: Gluten-Free
Description
A heartwarming sweet potato turkey chili that’s perfect for cozy nights in or gatherings with friends, packed with flavor and nutritious ingredients.
Ingredients
- 1 lb ground turkey
- 2 large sweet potatoes, diced
- 1 can diced tomatoes
- 1 cup corn (frozen or canned)
- 1 onion, chopped
- 2 cloves garlic, minced
- 2 cups chicken broth
- 1 tablespoon chili powder
- 1 teaspoon cumin
- Salt and pepper to taste
- Olive oil for cooking
Instructions
- Prep your ingredients: chop your sweet potatoes and onions.
- Heat the olive oil in a large pot over medium heat.
- Sauté the chopped onion for 3-4 minutes until translucent, then add garlic and stir for another minute.
- Brown the ground turkey for 5-7 minutes until fully cooked.
- Add the sweet potatoes and cook for 3 minutes.
- Pour in the chicken broth and diced tomatoes, scraping up any bits stuck to the pot.
- Spice it up with chili powder, cumin, salt, and pepper, and let it simmer for 30 minutes.
- Add the corn 5 minutes before serving.
- Final taste check and adjust seasoning.
- Serve in bowls with toppings of choice.
Notes
Perfect for meal prepping; tastes even better the next day!
- Prep Time: 15 minutes
- Cook Time: 45 minutes
- Category: Main Course
- Method: Stovetop
- Cuisine: American
Nutrition
- Serving Size: 1 serving
- Calories: 350
- Sugar: 6g
- Sodium: 500mg
- Fat: 10g
- Saturated Fat: 2g
- Unsaturated Fat: 8g
- Trans Fat: 0g
- Carbohydrates: 40g
- Fiber: 8g
- Protein: 25g
- Cholesterol: 75mg
Keywords: chili, turkey, sweet potato, comfort food, easy recipes

Minute Cheesy Bacon Ranch Wraps for Busy Weeknights
Cheesy Bacon Ranch Wraps: The Ultimate Comfort Food
Hey there, food lovers! Today we’re diving into the scrumptious world of Cheesy Bacon Ranch Wraps. If you’re in the mood for a dish that brings together creamy goodness, crispy bacon, and all the fresh flavors that make your taste buds sing, you’re in the right spot. These wraps are the quintessential feel-good food, perfect for everything from a casual lunch to a festive gathering with friends. Let’s get started on a culinary adventure that’ll leave everyone asking for seconds!
A Flavorful Journey
This recipe isn’t just a delightful meal; it’s a nostalgia trip down memory lane. I still vividly remember the first time I whipped up these cheesy bacon ranch wraps for a family gathering. I was just a young chef in training, excited to impress my parents with something quick and delicious. We had just built this fantastic outdoor grill in our backyard, and the scent of cooking food mingled with laughter and the sound of my siblings playing nearby. I can still see my dad grabbing a wrap, stuffing it full, and giving me a thumbs up. That moment sparked my love for cooking, and it also made me realize how food has this magical ability to bring people together.
Fast forward a few years, and I’ve made countless variations of the wraps, each time adding a little personal flair and love. From backyard BBQs to cozy movie nights, these wraps have never failed to evoke feelings of warmth and comfort. You can’t go wrong with this recipe—trust me on that!
Ingredients
Here’s what you’ll need to whip up these amazing wraps:
-
4 large flour tortillas
The base of your wrap; feel free to substitute with whole wheat or gluten-free tortillas for a healthier twist! -
8 ounces cream cheese, softened
This adds a rich, creamy layer. You can swap it with Neufchâtel cheese for a lighter version or even Greek yogurt for a tangy kick. -
1/2 cup ranch dressing
The star of the show! Use homemade ranch for a fresh taste or a low-fat alternative if you’re watching calories. -
1 cup shredded cheddar cheese
Cheddar is classic, but you can also use pepper jack for a spicier version. -
1 cup cooked bacon, chopped
Who doesn’t love bacon? Alternatively, you could use turkey bacon or even crispy chickpeas for a vegetarian option. -
1/2 cup green onions, chopped
These add a refreshing crunch; chives can also do the trick if green onions aren’t available. -
1 cup lettuce, shredded
Iceberg for that crunch or spinach for a nutrient boost—no wrong choices here. -
1 cup diced tomatoes (optional)
They add a nice burst of flavor and color. Leave them out if you’re not a fan. -
Salt and pepper to taste
Always essential to crank up those flavors!
Step-by-Step Instructions
Cooking these wraps is as easy as pie! Let’s break it down step by step:
-
Prep Your Ingredients:
Start by gathering and prepping all your ingredients. Chop your bacon, green onions, and tomatoes (if using), and shred your lettuce. Having everything ready makes the assembly process smoother. Trust me, the less frantic you are, the more fun you’ll have! -
Mix the Cream Cheese Mixture:
In a medium bowl, combine your softened cream cheese and ranch dressing using a spatula or hand mixer until it becomes smooth and creamy. This mixture serves as the glue that holds everything together, so don’t rush this step! -
Assemble the Wraps:
Place a tortilla on a clean, flat surface. Spread a generous layer of the cream cheese mixture on the tortilla, leaving about an inch around the edges. Feel free to spread it to the ends—you want that creamy goodness in every bite! -
Layer Your Ingredients:
Now it’s time to add some fun! Sprinkle a handful of shredded cheese over the cream cheese layer. Then, add chopped bacon, a sprinkle of green onions, and a nice handful of lettuce. If you’re using tomatoes, toss those on too. Remember, don’t go overboard—if you pack them too tight, the wraps will be hard to roll and may explode like confetti! -
Roll It Up:
Here comes the fun part! Starting from one edge, gently roll the tortilla tightly but not too tight (you want the fillings to stay inside). Once you’ve reached the end, press the seam to secure your wrap. If it doesn’t stick, a little smear of cream cheese will do the trick. -
Slice and Serve:
Take a sharp knife and slice the wrap in half diagonally. This not only makes it easier to eat but also showcases the colorful fillings inside. You can serve them as they are or pop them in the fridge for 30 minutes for a cooler snack.
Serving Suggestions
While these wraps are delicious on their own, there are plenty of ways to elevate the experience! Serve them alongside some crunchy veggie sticks or a fresh garden salad for added texture. A side of extra ranch or even a spicy dipping sauce can add a fun twist. Arrange your wraps on a platter, cut side up for a beautiful presentation, and voilà! Your guests will be in for a treat, and they’ll love munching on these tasty delights.
Recipe Variations
Get ready to get creative in the kitchen! Here are a few fun twists on the classic wrap that’ll keep things fresh:
-
Buffalo Cheesy Bacon Ranch Wrap: Substitute half of the ranch with buffalo sauce for a spicy kick. Add sliced grilled chicken to the mix for a hearty meal.
-
Mediterranean Twist: Swap the ranch dressing for tzatziki, add feta cheese, and substitute olives for bacon. It’s a deliciously zesty change of pace.
-
Veggie Lovers’ Wrap: Skip the bacon and pile on more veggies like bell peppers, cucumbers, and shredded carrots for a refreshing vegetarian option.
-
BBQ Bacon Ranch Wrap: Use BBQ sauce instead of ranch for a tangy, sweet flavor. Pair it with pulled pork or chicken for a satisfying meal that feels like summer all year round.
-
Breakfast Breakfast Wrap: Add scrambled eggs, avocado, and some salsa for a morning twist that’ll get your day started on a delicious note!
Chef’s Notes
Oh, how these wraps have evolved! I still remember the very first batch I made; they were a bit of a mess, honestly. The ingredients spilled out everywhere, but boy, did we have fun digging in! Over time, I’ve learned to be more strategic with the filling amounts and to have a few napkins handy (because let’s face it—wraps can be a bit gooey!). The versatility is what holds a special place in my heart; they’ve adapted to every party, mood, and dietary whim.
FAQs and Troubleshooting
Q: Can I make these in advance?
Absolutely! You can make them a few hours ahead of time. Just wrap them tightly in foil or plastic wrap and store them in the fridge to keep everything fresh.
Q: What if I don’t have ranch dressing?
No problem! You can whip up a quick homemade ranch using buttermilk, mayo, and your favorite herbs. Or, try a store-bought alternative like Caesar dressing or a creamy vinaigrette.
Q: Can I freeze these wraps?
While you can freeze them, I recommend enjoying them fresh to retain that delightful texture. If you must, wrap them tightly in foil or plastic and consume within a month.
Q: How can I add more protein?
Feel free to toss in some cooked chicken, turkey, or even black beans for an extra protein punch!
Nutritional Info
Each Cheesy Bacon Ranch Wrap (without additional ingredients) typically contains:
- Calories: Approximately 300-400 (varies based on specific ingredients)
- Protein: 15g
- Fats: 20g
- Carbohydrates: 30g
- Fiber: 2g
- Sodium: 700mg
(Note: For a healthier balance, adjust ingredients like bacon and cheese according to personal dietary preferences.)
Final Thoughts
These Cheesy Bacon Ranch Wraps are a simple, delicious way to bring a dose of happiness to your day. Whether as a quick lunch, a party platter, or a fun snack for movie night, they’re a hit everywhere. So roll up those tortillas and dig into a dish that’s not only satisfying but also packed with flavor and love. Remember, the kitchen is about creating memories—now get out there, put on your apron, and start wrapping!
Thanks for joining me today in the kitchen. Keep cooking, keep sharing, and above all, keep enjoying those feel-good moments that food brings into our lives. Happy feasting!
Print
Cheesy Bacon Ranch Wraps
- Total Time: 15 minutes
- Yield: 4 servings 1x
- Diet: Omnivore
Description
Delicious and creamy wraps filled with bacon, cheese, fresh vegetables, and ranch dressing, perfect for any occasion.
Ingredients
- 4 large flour tortillas
- 8 ounces cream cheese, softened
- 1/2 cup ranch dressing
- 1 cup shredded cheddar cheese
- 1 cup cooked bacon, chopped
- 1/2 cup green onions, chopped
- 1 cup lettuce, shredded
- 1 cup diced tomatoes (optional)
- Salt and pepper to taste
Instructions
- Prep your ingredients: Start by gathering and prepping all your ingredients. Chop your bacon, green onions, and tomatoes (if using), and shred your lettuce.
- Mix the cream cheese mixture: In a medium bowl, combine your softened cream cheese and ranch dressing using a spatula or hand mixer until smooth.
- Assemble the wraps: Place a tortilla on a clean, flat surface and spread a generous layer of the cream cheese mixture on the tortilla.
- Layer your ingredients: Sprinkle shredded cheese, chopped bacon, green onions, and lettuce over the cream cheese layer. Add tomatoes if using.
- Roll it up: Starting from one edge, gently roll the tortilla tightly. Press the seam to secure your wrap.
- Slice and serve: Slice the wrap in half diagonally. You can serve them immediately or refrigerate for 30 minutes.
Notes
Feel free to customize the ingredients based on your preferences and dietary needs.
- Prep Time: 15 minutes
- Cook Time: 0 minutes
- Category: Appetizer
- Method: No-Cook
- Cuisine: American
Nutrition
- Serving Size: 1 wrap
- Calories: 350
- Sugar: 3g
- Sodium: 700mg
- Fat: 26g
- Saturated Fat: 10g
- Unsaturated Fat: 12g
- Trans Fat: 0g
- Carbohydrates: 30g
- Fiber: 2g
- Protein: 15g
- Cholesterol: 40mg
Keywords: cheesy wraps, bacon ranch, comfort food, quick lunch, party food