
Cheesy Ground Beef and Shells : One-Pot Pasta Comfort the Whole Family Will Love
Cheesy Ground Beef and Shells – One-Pot Pasta Comfort the Whole Family Will Love
Your New Weeknight Best Friend is Here
Hey friends, Beau here! Let’s get real for a second. Some nights, you just need a dinner that feels like a warm hug. You know the ones—those evenings when you’re running on fumes, the kids are hangry (or maybe that’s just you), and the last thing you want to do is create a mountain of dishes with a complicated recipe. You need something that’s all about maximum flavor with minimum fuss.
Well, pull up a chair, because I’m about to introduce you to your new kitchen superhero: my One-Pot Cheesy Ground Beef and Shells. This isn’t just a meal; it’s a creamy, beefy, cheesy lifesaver that cooks in a single pot. I’m talking tender pasta shells and savory ground beef simmered together in a rich, seasoned broth, then brought home with a glorious, velvety blanket of cheddar cheese. It’s the culinary equivalent of your favorite cozy sweater.
The magic here is in the method. By cooking the pasta right in the same pot as the beef and aromatics, the starches from the shells work their magic, thickening the sauce and ensuring every single bite is packed with flavor. No more boiling pasta in a separate pot! This is one-and-done cooking at its finest. So, grab your favorite deep skillet or Dutch oven, and let’s make a memory—and more importantly, a seriously delicious dinner.
The Story Behind the Supper
This recipe takes me right back to my first apartment after culinary school. I had all these grand, fancy ideas, but my budget was… well, let’s call it “humble.” My go-to was a box of pasta and whatever protein I could find on sale. One particularly tired Tuesday, I decided to break all the “rules” I’d just spent years learning. I threw everything—uncooked pasta, ground beef, broth—into my one decent pot, crossed my fingers, and hoped for the best.
What emerged was a revelation. It was creamy, comforting, and somehow felt greater than the sum of its simple parts. My roommates, who were usually surviving on instant noodles, declared it the best thing they’d ever eaten. It became our weekly ritual, the dish we’d make when we needed to reconnect over a steaming, shared bowl. It taught me that the best food isn’t always the most complicated; it’s the food that feeds your soul and brings people together. That’s the spirit I’ve baked into every recipe here at Feastical.
Gathering Your Kitchen Crew (Aka The Ingredients)
One of the best things about this dish is the simple, pantry-friendly ingredient list. Here’s everything you’ll need, along with a few of my chef-y insights to help you understand the “why” behind the “what.”
- 1 lb Ground Beef (preferably 85/15): This fat-to-lean ratio gives you the perfect amount of flavor and juiciness without being overly greasy. Chef’s Tip: For a lighter twist, ground turkey or chicken works beautifully, but you might want to add an extra tablespoon of olive oil to the pot for sautéing.
- 1 Small Onion, finely chopped & 2 Cloves Garlic, minced: This is the flavor foundation! The onion adds a subtle sweetness, and the garlic brings that unmistakable aromatic punch. Don’t rush this step—letting them soften properly builds a deep flavor base.
- 2 cups Uncooked Medium Pasta Shells: I love shells because their little cups trap the cheesy sauce in every bite. Substitution: Elbow macaroni, orecchiette, or even rotini will work in a pinch.
- 2½ cups Beef Broth: This is our cooking liquid and a major flavor booster. Using a good-quality broth makes a real difference here. Vegetarian? Swap it for vegetable broth!
- 1 cup Milk or Cream: This is where the creaminess comes to life! Milk gives you a lighter sauce, while heavy cream or half-and-half will make it extra rich and decadent. Your call based on what kind of hug you need today.
- 1½ cups Shredded Cheddar Cheese: The star of the show! I recommend shredding your own cheese from a block, as the pre-shredded stuff often has anti-caking agents that can make the sauce a little grainy.
- ½ tsp Smoked Paprika & 1 tsp Italian Seasoning: The smoked paprika adds a whisper of warmth and depth, while the Italian seasoning brings in those classic herbal notes. It’s a simple but powerful combo.
- Salt and Black Pepper, to taste: Season as you go! I always add a pinch with the beef and then again at the end.
- Optional Garnishes: A sprinkle of fresh parsley for color, a dash of hot sauce for a kick, or a splash of Worcestershire sauce for a savory, umami boost.
Let’s Get Cooking! Your Step-by-Step Guide
Okay, team, it’s go time. This is where the magic happens. Follow these steps, and you’ll have a perfect, one-pot wonder in about 20 minutes.
- Brown the Beef: Grab your largest skillet or a Dutch oven and place it over medium heat. Add the ground beef and break it up with a wooden spoon. Cook it until it’s nicely browned and no longer pink. Chef’s Hack: Once the beef is cooked, take a minute to drain off the excess fat. This keeps the final dish from being greasy and lets the other flavors shine.
- Sauté the Aromatics: Now, add your finely chopped onion and minced garlic right into the pot with the beef. The residual heat and fat are perfect for cooking them. Sauté for 2-3 minutes, stirring constantly, until the onions have softened and the whole kitchen smells incredible. You’ll know it’s ready when you can smell that gorgeous garlic.
- Simmer the Pasta: Here’s the one-pot trick! Pour in the uncooked pasta shells, beef broth, Italian seasoning, and smoked paprika. Give everything a really good stir, making sure the pasta is submerged in the liquid. Crank the heat up to high and bring it to a lively boil. Once it’s bubbling, immediately reduce the heat to a gentle simmer. Let it cook uncovered for 10-12 minutes, stirring occasionally to prevent sticking. You’re looking for the pasta to be al dente (cooked but with a slight bite) and for the liquid to have reduced and thickened significantly.
- Create the Creamy Cheese Sauce: Turn the heat down to low. Now, pour in your milk or cream and add all that glorious shredded cheddar cheese. Stir gently but continuously. You’ll see the sauce transform before your eyes, becoming smooth, creamy, and oh-so-inviting. Pro Tip: Adding the dairy off the heat prevents it from curdling and ensures a silky-smooth sauce.
- The Final Taste Test: This is the most important step! Grab a spoon and taste your creation. Does it need a bit more salt? A few cracks of black pepper? Maybe a splash of hot sauce? This is your moment to make the dish perfectly yours. Adjust the seasoning until it sings.
How to Serve It Up with Style
You’ve done it! Now, let’s get this masterpiece from the pot to the plate. This dish is a complete meal in a bowl, but a little flair never hurt anybody.
I love serving this family-style, right from the pot in the middle of the table. It encourages everyone to dig in and share the experience. Ladle generous portions into shallow bowls. For that final “chef’s kiss,” sprinkle a little extra shredded cheese on top and a vibrant shower of freshly chopped parsley. The green pop of color makes it look as good as it tastes.
While it stands proudly on its own, a simple, crisp side salad with a zesty vinaigrette is the perfect partner. It cuts through the richness of the pasta beautifully. If you’re feeding a crowd with bigger appetites, a side of buttery, toasted garlic bread is non-negotiable for mopping up every last bit of that cheesy sauce. Trust me on this one.
Make It Your Own: Delicious Recipe Variations
The beauty of this recipe is its flexibility. Think of it as a template for deliciousness! Here are a few of my favorite ways to mix it up.
- The “Kitchen Sink” Twist: Clean out your veggie drawer! Add a cup of diced bell peppers or mushrooms when you sauté the onions. A handful of fresh spinach stirred in at the very end with the cheese is also a fantastic way to add color and nutrients.
- Tex-Mex Fiesta: Swap the Italian seasoning for a packet of taco seasoning. Use a blend of Monterey Jack and cheddar cheese, and stir in a can of drained Rotel tomatoes (diced tomatoes with green chilies) with the broth. Serve with a dollop of sour cream and sliced jalapeños.
- Cheeseburger Pasta: Channel your inner burger joint! Stir in a tablespoon of yellow mustard and a big squirt of ketchup when you add the cheese. For the full effect, top with diced dill pickles and crispy, crumbled bacon.
- Creamy Tomato Version: Love a red sauce? Add a 15-ounce can of crushed tomatoes or tomato sauce along with the beef broth. You might need to reduce the broth by about ½ cup. Finish with fresh basil instead of parsley.
Beau’s Chef’s Notes & Kitchen Confessions
This recipe has been with me for years, and it’s evolved in the best ways. I’ve learned that the type of pot you use matters—a heavy-bottomed Dutch oven distributes heat evenly and prevents any scorching. I also used to be impatient and add the cheese while the pot was still too hot, which sometimes led to a slightly broken sauce. Learning to take it off the heat was a game-changer!
One of my favorite kitchen memories is of my dog, Biscuit, sitting like a perfect statue the entire time this is cooking, hoping against hope that a piece of beef might magically fall from the sky. It hasn’t happened yet, buddy, but I admire your optimism. The point is, this recipe creates memories, both at the table and in the process of making it.
Your Questions, Answered!
I’ve made this dish a zillion times, and I’ve heard all your brilliant questions. Here are the answers to the most common ones.
- Q: My sauce turned out a bit grainy. What happened?
A: This is almost always a heat issue. Cheese can “break” and become grainy if it’s heated too quickly or at too high a temperature. The key is to take the pot completely off the heat before stirring in the cheese. The residual heat is more than enough to melt it smoothly.
- Q: Can I make this ahead of time?
A: Absolutely! It stores and reheats like a dream. Let it cool completely, then store it in an airtight container in the fridge for up to 3 days. When reheating, add a splash of milk or broth to loosen it up, and warm it gently on the stovetop over low heat, stirring frequently.
- Q: The pasta absorbed all the liquid but is still hard. Help!
A: No worries! This can happen if your heat was too high or your pot was too wide, causing rapid evaporation. Simply add another ½ cup of warm broth or water, stir, and continue to simmer for a few more minutes until the pasta is tender.
- Q: Can I freeze this cheesy ground beef and shells?
A: You can, but with a small caveat. Cream-based pasta sauces can sometimes separate and become a bit watery upon thawing. For best results, freeze it in a sealed container for up to 2 months. Thaw in the fridge overnight and reheat slowly on the stovetop with an extra splash of milk, stirring well to recombine.

Cheesy Ground Beef and Shells : One-Pot Pasta Comfort the Whole Family Will Love
Description
A creamy, beefy, cheesy pasta that cooks entirely in one pot—perfect for busy weeknights and hungry families.
Ingredients
-
1 lb ground beef (85/15 recommended; ground turkey or chicken also works, add 1 tbsp olive oil if using leaner meat)
-
1 small onion, finely chopped
-
2 cloves garlic, minced
-
2 cups uncooked medium pasta shells (or elbow macaroni, orecchiette, rotini)
-
2½ cups beef broth (vegetable broth for vegetarian version)
-
1 cup milk or cream
-
1½ cups shredded cheddar cheese (freshly shredded preferred)
-
½ tsp smoked paprika
-
1 tsp Italian seasoning
-
Salt and black pepper, to taste
-
Optional garnishes: fresh parsley, hot sauce, Worcestershire sauce
Optional Variations:
-
Veggie-packed: Add diced bell peppers, mushrooms, or spinach.
-
Tex-Mex: Use taco seasoning, Monterrey Jack + cheddar, diced Rotel, top with sour cream & jalapeños.
-
Cheeseburger Pasta: Add 1 tbsp mustard, 1 tbsp ketchup, top with pickles and crispy bacon.
-
Creamy Tomato: Add 15 oz crushed tomatoes or tomato sauce, reduce broth by ½ cup, garnish with basil.
Instructions
1. Brown the Beef
-
In a large skillet or Dutch oven, cook ground beef over medium heat until browned, breaking it apart.
-
Drain excess fat if needed.
2. Sauté Aromatics
-
Add onion and garlic to the pot. Sauté 2–3 min until onions are softened and fragrant.
3. Cook the Pasta
-
Stir in uncooked pasta, beef broth, smoked paprika, and Italian seasoning.
-
Bring to a boil, then reduce heat to a simmer.
-
Cook uncovered for 10–12 min, stirring occasionally, until pasta is al dente and liquid has reduced.
4. Make it Cheesy
-
Remove the pot from heat.
-
Stir in milk/cream and shredded cheddar until smooth and creamy.
5. Final Seasoning
-
Taste and adjust with salt, pepper, hot sauce, or Worcestershire sauce as desired.
6. Serve
-
Serve family-style from the pot or in bowls.
-
Garnish with parsley or extra cheese.
Notes
-
Grainy sauce? Cheese was overheated. Add off-heat next time.
-
Make ahead: Refrigerate up to 3 days; reheat gently with milk/broth.
-
Pasta absorbed liquid but still firm: Add ½ cup warm broth or water, simmer until tender.
-
Freezing: Freeze in airtight container up to 2 months; thaw overnight, reheat gently with milk.
Let’s Talk Nutrition & Prep
I believe in being transparent about what we’re eating, so we can enjoy our comfort food fully and mindfully. Here’s a general breakdown for one serving (assuming this recipe serves 4). Remember, these are estimates and can vary based on your specific ingredients (like the leanness of your beef or the type of milk you use).
Servings: 4 | Prep Time: 10 mins | Cook Time: 20 mins
- Calories: ~720
- Protein: ~38g (Fantastic for keeping you full and satisfied!)
- Carbohydrates: ~48g (The main energy source from those comforting pasta shells.)
- Fat: ~42g (This includes the fat from the beef and cheese, which carries all that incredible flavor.)
To lighten it up, use lean ground beef (93/7), low-fat milk, and reduced-fat cheese. And don’t forget my veggie-packed variations—adding spinach, peppers, or mushrooms is a great way to boost the vitamin and fiber content!
Final Thoughts from My Kitchen to Yours
And there you have it, friends—my go-to recipe for when life gets busy, but dinnertime still needs to be special. This Cheesy Ground Beef and Shells is more than just a meal; it’s a reminder that the most satisfying dishes are often the simplest ones. They’re the ones that bring everyone to the table with a smile, that fill your home with an irresistible aroma, and that leave you with just one pot to wash.
I hope this recipe becomes a trusted favorite in your home, just like it is in mine. Give it a try, make it your own, and most importantly, enjoy the process. Cooking is about love, connection, and a whole lot of flavor. Now, go dig in!
With a full heart and an even fuller plate,
Beau
P.S. Did you make this? I’d love to see your creation! Tag me @FeasticalBeau on social media or share a photo in the comments on the blog!
Sourdough Discard Dumpling Wrappers : Flavorful, Elastic, and Made from Scratch
Sourdough Discard Dumpling Wrappers – Tangy, Stretchy Dough for Homemade Dumplings
Turn Your Discard Into Dumpling Magic
Hey friends, Beau here from Feastical! Let’s talk about a beautiful little problem many of us share: that jar of sourdough discard sitting in your fridge, staring you down with a mix of guilt and potential. We hate wasting it, but feeding it can feel like a chore. What if I told you that this “waste” product is actually a secret weapon for creating the most flavorful, chewy, and downright satisfying dumpling wrappers you’ve ever made at home?
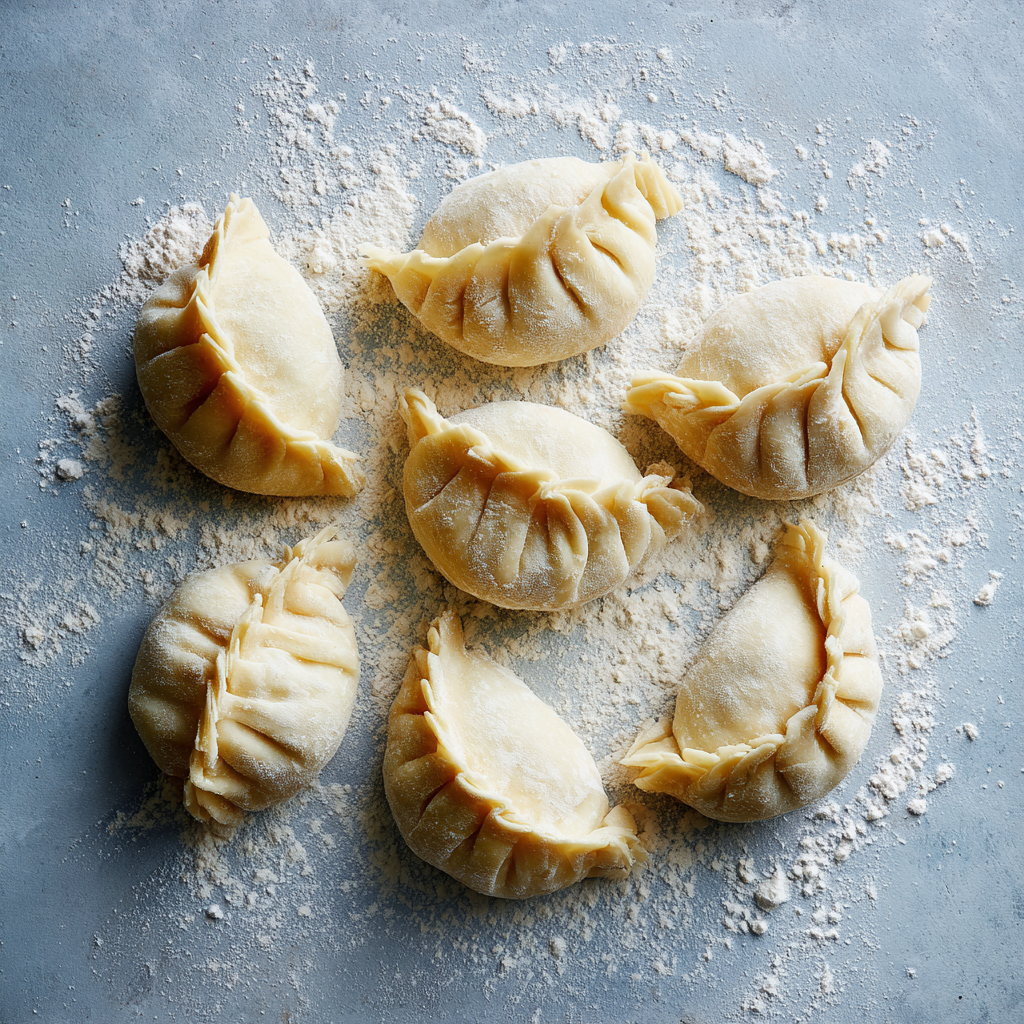
That’s right, we’re taking that tangy, unfed starter and transforming it into the foundation for incredible homemade dumplings. These aren’t your average, store-bought wrappers. These Sourdough Discard Dumpling Wrappers have a subtle complexity, a beautiful elasticity that makes pleating a dream, and a satisfying chew that elevates every single bite. Whether you’re crafting potstickers for a festive gathering, delicate steamed dumplings for a cozy night in, or just exploring the wonderful world of dough from your own kitchen, this recipe is your new best friend.
I know the idea of making dough from scratch can feel a little intimidating, but I promise you, this is one of the most forgiving and rewarding projects you can tackle. It’s a tactile, fun process that connects you to the food in a way no plastic-wrapped package ever could. So, let’s roll up our sleeves, dust the counter with a little flour, and turn that discard into something truly spectacular. Your next favorite kitchen hack is waiting!
A Dumpling Revelation
This recipe was born out of a happy accident, as the best ones often are. A few years back, during a particularly ambitious sourdough phase, I found myself with an almost comical amount of discard. At the same time, I was prepping for a big family dumpling night—a tradition we hold dear. I was just about to send my partner out for store-bought wrappers when I glanced at that jar of discard. A little voice in my head (probably fueled by caffeine and a stubborn refusal to go to the store) said, “What if…?”
I threw some flour, salt, and that tangy discard into a bowl and started kneading. What emerged was this incredibly silky, pliable dough that felt alive in my hands. When we rolled it out and started folding our pork and chive fillings inside, the difference was immediate. The dough didn’t tear, it stretched. It held every pleat with grace. And when we took that first bite? Magic. The slight tang cut through the richness of the filling perfectly, adding a whole new dimension of flavor we never knew we were missing. That “accident” is now a non-negotiable part of our dumpling nights, and I’m so thrilled to share it with you.
Gathering Your Dumpling Toolkit
One of the best things about this recipe is its beautiful simplicity. You likely have everything you need already in your pantry. Here’s the lowdown on what we’re using and why each ingredient matters.
- 1 cup All-Purpose Flour: This is our sturdy, reliable base. It provides the perfect protein structure for a wrapper that’s strong enough to hold a filling but tender enough to enjoy. Chef’s Insight: If you want a slightly more delicate wrapper, you can swap in ¼ cup of cake flour, but all-purpose works wonderfully.
- ½ cup Sourdough Discard (unfed): The star of the show! Your discard can be thick or thin, straight from the fridge or at room temperature—it’s all good. Substitution Tip: There is no true 1:1 substitute for the unique flavor and elasticity the discard provides, but in a pinch, you could mix ¼ cup Greek yogurt with ¼ cup water. You’ll lose the tang, but gain some tenderness.
- 2–4 tablespoons Water: We add this gradually because the hydration of your discard can vary wildly. We’re looking for a specific dough texture, not a fixed water measurement. Chef’s Insight: Using warm (not hot) water can help the gluten relax a bit faster, making the dough easier to work with.
- ¼ teaspoon Salt: Don’t skip this! Salt tightens the gluten structure, giving our wrappers strength, and it also enhances the overall flavor, balancing the tang of the sourdough.
- Cornstarch or Flour, for dusting: This is your non-stick insurance policy. Pro-Tip: I highly recommend using cornstarch for dusting your work surface when rolling out the wrappers. It creates a less sticky environment than flour and results in a beautifully smooth, non-gummy finish on your cooked dumplings.
Let’s Make Some Dough: A Step-by-Step Guide
Ready to get your hands dirty? This process is as much about feel as it is about following a recipe. Trust your instincts—you’ve got this!
- Combine the Dry Ingredients: In a medium-sized mixing bowl, whisk together your 1 cup of all-purpose flour and ¼ teaspoon of salt. This isn’t just about mixing; aerating the flour a little bit helps create a lighter dough. Give it a good whisk for about 30 seconds.
- Introduce the Discard: Make a well in the center of your flour mixture and plop in your ½ cup of sourdough discard. Pour in 2 tablespoons of water to start. Using a fork or your hands, start mixing everything together. It will look shaggy and a bit dry at first—this is perfectly normal! Chef’s Hack: If you’re using particularly thick discard, you might need to use your fingers to break it up and incorporate it fully into the flour.
- Knead to Perfection: Turn the shaggy mass out onto a lightly floured surface. Now, the fun begins! Knead the dough for a solid 8-10 minutes. Push it away from you with the heel of your hand, fold it back over, give it a quarter turn, and repeat. If the dough feels too dry and isn’t coming together, add more water, just one teaspoon at a time. You’re looking for a smooth, supple, and elastic ball of dough that springs back slowly when you poke it. Chef’s Insight: This kneading time is non-negotiable—it’s what develops the gluten network that gives our wrappers that incredible stretch.
- The All-Important Rest: Form the dough into a smooth ball, wrap it tightly in plastic wrap, or place it in a sealed container. Let it rest at room temperature for at least 30 minutes. This rest period allows the gluten to relax, making the dough infinitely easier to roll out thinly without it snapping back like a rubber band. Don’t rush this step!
- Divide and Conquer: After the rest, your dough should feel calm and pliable. Unwrap it and, on a surface dusted with cornstarch, shape it into a log. Using a sharp knife or a bench scraper, divide the log into 18-20 small, even pieces (about 1 tablespoon each). Roll each piece into a little ball and keep them covered with a damp cloth to prevent drying out.
- Rolling Out Your Wrappers: Take one dough ball and, using a small rolling pin (or even a narrow glass bottle!), roll it out into a thin circle, about 3-4 inches in diameter. Pro-Tip: For perfectly thin edges and a slightly thicker center (which helps prevent bursting when filled), roll from the edge towards the center, rotating the wrapper as you go. Keep your work surface and rolling pin lightly dusted with cornstarch. You are now holding a beautiful, homemade sourdough dumpling wrapper!
Filling, Folding, and Feasting
You’ve done the hard part! Now for the creative fun. Place about a teaspoon of your favorite filling (a classic pork and cabbage, a savory mushroom, or a spicy chicken are all fantastic) in the center of your wrapper.
Fold and pleat to your heart’s content! You can go for a simple half-moon shape, press with a fork for a rustic look, or practice the beautiful pleats of a classic potsticker. The elasticity of this sourdough dough makes pleating surprisingly easy—it wants to hold its shape.
Now, cook them your way! Pan-fry them for golden-brown potstickers with a crispy lace skirt, steam them for soft and delicate bites, or boil them for a comforting soup dumpling. However you choose to cook them, serve them immediately with a dipping sauce of soy sauce, rice vinegar, a dash of chili oil, and a sprinkle of green onions. Gather everyone around the table and dig in!
Shake Things Up: Creative Twists
Once you’ve mastered the basic wrapper, the world is your dumpling! Here are a few fun ways to play with the recipe:
- Herb-Infused Wrappers: Add a tablespoon of finely chopped fresh chives, cilantro, or Thai basil to the dry ingredients for a beautiful speckled look and a burst of fresh flavor.
- Vibrant Veggie Wrappers: Replace the water with pureed spinach (for green), beet juice (for pink), or turmeric-infused water (for yellow) to create stunning, colorful dumplings that are perfect for a party.
- Whole Wheat Version: Substitute half of the all-purpose flour with whole wheat flour for a nuttier, heartier wrapper with extra fiber. You may need a touch more water to compensate.
- Gluten-Free Adaptation: While trickier, you can try a 1:1 gluten-free all-purpose flour blend. The texture will be more tender and less chewy, and you may need to handle them more gently when folding.
- Spiced Dough: Whisk a teaspoon of Chinese five-spice powder or a pinch of smoked paprika into the flour for a subtly spiced wrapper that adds depth to simple fillings.
Beau’s Kitchen Chronicles
This recipe has become such a staple in my kitchen that I now plan my sourdough feedings around dumpling cravings. It’s evolved from that first happy accident into a truly reliable method. I’ve learned that a slightly older, more acidic discard gives an even more pronounced tang, which I absolutely love with rich, meaty fillings.
One of my favorite kitchen memories is teaching my niece how to pleat these. She was about six, and her little fingers struggled at first, but the forgiving nature of this dough meant her lopsided, creative dumplings still held together and cooked perfectly. The pride on her face was worth more than any perfectly pleated dumpling I’ve ever made. That’s what Feastical is all about—food that brings us together, no matter our skill level.
Your Dumpling Questions, Answered!
Q: My dough is too sticky! What did I do wrong?
A: Don’t panic! This usually means your sourdough discard was very hydrating. Just sprinkle a little more flour onto your work surface and knead it in, a tablespoon at a time, until the dough becomes smooth and no longer sticks to your hands.
Q: Can I make this dough ahead of time?
A: Absolutely! You can keep the wrapped dough ball in the fridge for up to 24 hours. Let it come back to room temperature for about an hour before rolling it out. This slow, cold ferment can actually develop even more flavor!
Q: My wrappers are tearing when I try to pleat them. Help!
A: This is almost always a sign that the dough needs more kneading or more rest. Next time, make sure you knead for the full 8-10 minutes and let it rest for the full 30. If it’s happening now, just re-roll that specific wrapper a little thicker—it will still taste delicious!
Q: Can I freeze the wrappers?
A> You bet! Roll them out, dust them generously with cornstarch, and stack them with a small piece of parchment paper between each one. Pop the stack into a freezer bag. They’ll keep for about 3 months. Thaw in the refrigerator before using.

Sourdough Discard Dumpling Wrappers : Flavorful, Elastic, and Made from Scratch
Description
Turn sourdough discard into soft, elastic dumpling wrappers that hold fillings beautifully—ideal for pan-fried potstickers, steamed dumplings, or boiled soup dumplings.
Ingredients
-
1 cup all-purpose flour (substitute ¼ cup cake flour for a slightly more delicate wrapper)
-
½ cup sourdough discard (unfed)
-
2–4 tbsp water, warm (add gradually)
-
¼ tsp salt
-
Cornstarch or flour, for dusting
Optional Twists:
-
Fresh herbs (chives, cilantro, basil) in dough
-
Pureed vegetables (spinach, beet, turmeric) for color
-
Whole wheat substitution for nuttier flavor
-
Spices: Chinese five-spice, smoked paprika
Instructions
1. Make the Dough
-
Whisk flour and salt in a bowl.
-
Make a well in the center and add sourdough discard + 2 tbsp water. Mix with fork or hands until shaggy. Add water gradually if needed.
2. Knead
-
Turn dough onto a floured surface. Knead 8–10 minutes until smooth, elastic, and slightly springy.
-
Add small amounts of water if dough is dry, or flour if sticky.
3. Rest
-
Form a ball, cover tightly with plastic wrap, and rest at room temperature for 30 minutes.
4. Divide & Shape
-
Roll dough into a log. Slice into 18–20 equal pieces (~1 tbsp each).
-
Roll each piece into a ball; keep covered with a damp cloth.
5. Roll Out Wrappers
-
Dust surface and rolling pin with cornstarch.
-
Roll each ball into a 3–4 inch circle, slightly thicker in the center. Rotate as you go.
Filling & Cooking
-
Add ~1 tsp of filling (pork & cabbage, chicken, mushroom, etc.) to center.
-
Fold & pleat: half-moon, fork-pressed, or classic potsticker pleats.
-
Cook options:
-
Pan-fry: Crispy potstickers with lace skirt
-
Steam: Soft, tender dumplings
-
Boil: Soup dumplings
-
Notes
-
Sticky dough: Add more flour gradually; knead until smooth.
-
Wrappers tearing: Knead longer, rest full 30 min, roll slightly thicker if needed.
-
Make ahead: Dough can rest in fridge up to 24 hrs; bring to room temp before rolling.
-
Freeze wrappers: Roll, dust with cornstarch, layer with parchment, freeze up to 3 months. Thaw before use.
A Quick Bite on Nutrition
Let’s be real—we’re here for the joy of homemade food, but it’s always nice to know what’s going into our bodies. These wrappers are a simple, whole-ingredient alternative to store-bought versions that can contain preservatives.
Each wrapper is primarily carbohydrates from the flour, providing energy. The sourdough discard introduces wild yeasts and bacteria, and while the discard itself isn’t a significant source of probiotics, the fermentation process can make the nutrients in the flour slightly more bioavailable and easier to digest for some people. It’s a low-fat, low-sugar option that becomes a complete meal when packed with your favorite protein and veggie fillings. Remember, the real nutritional story is in your filling—load it up with lean proteins and colorful vegetables for a truly balanced and satisfying feast!
Final Thoughts
And there you have it, friends! You’re now equipped with the knowledge to transform that humble jar of sourdough discard into something truly magical. This recipe is more than just a way to avoid waste; it’s a gateway to creating unforgettable, restaurant-quality dumplings in the comfort of your own kitchen.
The process of making dough from scratch, feeling it come alive under your hands, and crafting something beautiful and delicious is one of the most rewarding experiences a home cook can have. So, the next time you look at that discard, don’t see a chore—see potential. See a future filled with crispy, chewy, tangy, and utterly delicious dumplings shared with people you love.
I can’t wait to hear about your dumpling adventures! Tag me on social @Feastical with your creations. Now, go forth and fold!
With a full heart and a happy stomach,
Beau

Hot Honey Sourdough Flatbread : Crispy, Spicy, and Totally Snackable
Your New Spicy-Carb Obsession is Here
Hey friends, Beau here! Let’s talk about one of life’s greatest simple pleasures: bread. But not just any bread. I’m talking about a crispy, chewy, blistery flatbread that comes together in a flash and gets absolutely drizzled in a magical, sweet, and spicy elixir. Welcome to the glorious world of my Hot Honey Sourdough Flatbread.
If you’ve ever stared at your jar of sourdough discard and wondered if it could do more than just make another pancake, I’m here to tell you it can. This recipe is that perfect bridge between a lazy pizza night and a sophisticated snack board. It’s the hero your game day spread deserves, the star of your cozy movie night, and the answer to that 3 p.m. craving that demands something crunchy, spicy, and deeply satisfying.
We’re taking that tangy sourdough starter, mixing it with a few pantry staples, and pan-searing it until it’s got those gorgeous, charred bubbles and a tender-crisp texture. Then, we’re taking it to flavor town with a simple hot honey that will literally make you pause mid-chew and say, “Wow.” This isn’t just a recipe; it’s a experience. It’s the kind of food that makes you feel like a rockstar in the kitchen with minimal effort. So, let’s grab that discard and get ready to create some magic.
The Happy Accident That Started It All
This recipe was born from a classic “clean-out-the-fridge” moment. It was a lazy Sunday, and my sourdough starter, Brenda, was looking a little peckish. I had about a cup of discard sitting there, and I couldn’t bear to toss it. I also had a half-eaten tub of yogurt and a serious craving for something bread-adjacent. Pizza felt like too much work, and plain flatbread felt… well, plain.
I started mixing things together, and as the dough came to life, I remembered this incredible hot honey I’d had at a pizza place in Brooklyn years ago. That sweet heat had stuck with me. I quickly warmed some honey, threw in a hefty pinch of chili flakes, and let it infuse while I cooked the flatbreads. The moment I drizzled that golden, spicy honey over the first crispy, bubbly piece and took a bite, I knew I had stumbled onto something special. It was a perfect, serendipitous collision of thriftiness and flavor. Now, it’s one of the most-requested snacks in my house, and I’m so excited to share that happy accident with you.
Gathering Your Flavor Arsenal
Here’s the beautiful part: you probably have most of this in your kitchen right now. This is a no-fuss, maximum-flavor situation.
- 1 cup sourdough discard (unfed): This is our flavor secret weapon! The discard gives the flatbread a subtle tang and incredible depth of flavor that you just can’t get with commercial yeast. Don’t have discard? No worries! A quick substitute is ¾ cup warm water mixed with ½ cup all-purpose flour and a tablespoon of plain yogurt or lemon juice. Let it sit for 30 minutes to develop a bit of tang.
- ¾ cup all-purpose flour (more if needed): The trusty backbone of our dough. I like all-purpose for its reliable texture, but you can swap in up to half whole wheat flour for a nuttier, heartier flatbread. The key is to add it gradually, as the hydration of your discard can vary.
- ¼ cup plain yogurt: This is our little miracle worker! The yogurt adds a touch of fat and acidity, making the dough incredibly tender and soft. For a dairy-free version, unsweetened almond or coconut yogurt works beautifully.
- 1 tsp baking powder: This is what gives us those instant, beautiful bubbles and a light texture without any yeast-fermenting time. It’s the quick-rise hero of this recipe.
- ½ tsp salt: Never, ever skip the salt in your dough. It’s not just for seasoning; it tightens the gluten structure, giving our flatbread the perfect chew. I use fine sea salt.
- Olive oil, for cooking: A good glug for the skillet. It creates a gorgeous, crisp exterior and those lovely golden-brown spots. Don’t be shy with it!
- 2 tbsp honey: The sweet half of our dynamic duo. Use a good, flavorful honey—the better the honey, the better the final drizzle.
- ½ tsp chili flakes (or to taste): The spicy half! I love using classic red pepper flakes, but this is where you can get creative. A smoked chili flake like Aleppo pepper would be incredible, or a tiny pinch of cayenne for pure heat.
Let’s Get Cooking: Your Path to Flatbread Bliss
Ready to see some kitchen magic happen? Follow these steps, and you’ll be a flatbread master in no time.
- Make the Dough: In a medium bowl, combine the sourdough discard, all-purpose flour, yogurt, baking powder, and salt. Use a fork or your hands to mix until a shaggy dough forms. Chef’s Hack: If the dough feels too sticky, add a tablespoon of flour at a time until it’s manageable. It should be soft and slightly tacky, but not sticking to your fingers like glue.
- Knead and Rest: Turn the dough out onto a lightly floured surface and knead for just 2-3 minutes. We’re not looking for windowpane perfection here, just a smooth, cohesive ball. Place the dough ball back in the bowl, cover it with a damp kitchen towel or plastic wrap, and let it rest for 20-30 minutes. Chef’s Insight: This rest period allows the gluten to relax, making the dough much easier to roll out later. It’s a small step with a big payoff!
- Infuse the Honey: While the dough rests, let’s make the hot honey. In a small saucepan, combine the honey and chili flakes. Warm it over the lowest possible heat for 3-5 minutes. You don’t want it to bubble or boil, just get warm enough to let the chili oils infuse the honey. Take it off the heat and let it steep. Chef’s Tip: Smash a garlic clove and throw it in the pot with the honey for an extra savory kick. You can fish it out before drizzling!
- Divide and Conquer: After the dough has rested, divide it into 2 or 3 equal pieces. On a floured surface, roll each piece into a thin round or oval shape. Don’t stress about perfection—rustic is beautiful! Chef’s Hack: If the dough is springing back, let it rest for another 5 minutes. It’s telling you the gluten is still too tight.
- Get That Skillet Sizzling: Place a cast-iron or heavy-bottomed non-stick skillet over medium-high heat. Add enough olive oil to lightly coat the bottom. You’ll know it’s ready when a flick of water sizzles and dances on the surface.
- Cook to Perfection: Carefully place one rolled-out flatbread into the hot skillet. Cook for 2-3 minutes, until the bottom is golden brown and you see beautiful large bubbles forming on the top. Flip it over and cook for another 1-2 minutes on the other side until it’s golden and crisp. Chef’s Pro-Move: Press down gently with your spatula after flipping to ensure even contact and browning. You can even add a tiny bit more oil around the edges for extra crispiness.
- The Grand Finale: As soon as each flatbread comes out of the skillet, place it on a cutting board and drizzle it generously with that beautiful hot honey. The warmth of the bread will make the honey spread like a dream. Slice it into strips or wedges and serve immediately while it’s hot and crispy!
How to Serve This Masterpiece
This hot honey sourdough flatbread is a star all on its own, but why stop there? Let’s build a moment around it.
For the ultimate snack board, pile the sliced flatbread high alongside a bowl of cool, creamy ricotta or burrata for dipping. The contrast of hot/spicy and cool/creamy is absolutely divine. Add some salty prosciutto or spicy soppressata, a handful of marinated olives, and a few handfuls of arugula tossed in lemon juice. You’ve just created a TikTok-worthy spread that’s as delicious as it is beautiful.
It also makes a phenomenal side dish. Serve it alongside a big, hearty salad for a light lunch, or with a bowl of tomato soup for the coziest dinner imaginable. Tear off a piece and dunk it right in—you won’t regret it.
Mix It Up! Creative Twists on the Classic
Once you’ve mastered the basic recipe, the flavor world is your oyster! Here are a few of my favorite ways to switch it up:
- Everything Bagel Style: Right after you drizzle with hot honey, sprinkle generously with everything bagel seasoning. The sesame, poppy, garlic, and onion add an incredible savory crunch.
- Herb & Garlic Infusion: Mix a tablespoon of finely chopped fresh rosemary or thyme and a minced garlic clove right into the dough before the rest period. The aroma while it cooks is insane.
- Cheesy Pull: After the first flip, sprinkle the cooked side with a handful of mozzarella or fontina cheese. Let it melt while the second side cooks, then drizzle with honey. You’ve just made a killer cheese flatbread.
- Smoky & Spicy: Use smoked chili flakes or a dash of chipotle powder in the hot honey. This adds a deep, smoky dimension that plays so well with the sourdough tang.
- Dairy-Free & Vegan: Swap the yogurt for a plant-based alternative and use maple syrup or agave instead of honey. The texture might be slightly different, but the flavor will still be fantastic.
Beau’s Kitchen Chronicles
This recipe has become a living, evolving thing in my kitchen. I’ve made it for hungry friends after a long hike, as a last-minute appetizer that stole the show at a dinner party, and on more than one Tuesday night just for me. It’s foolproof. One time, I accidentally used Greek yogurt instead of plain, and you know what? It was even richer and more tender. Another time, I was out of honey and used a peach jam thinned with a little hot sauce—desperation breeds innovation, and it was delicious! The point is, don’t be afraid to make it your own. This flatbread is a canvas for your cravings. Listen to it, and listen to your stomach. They usually know what they’re talking about.
Your Questions, Answered!
Q: My dough is super sticky and I can’t roll it out. What did I do wrong?
A: No worries, this is common! Sourdough discard hydration levels can be a wild card. Just add more flour, a tablespoon at a time, until the dough is soft and only slightly tacky. Also, ensure you let it rest—that makes it much easier to handle.
Q: Can I make this ahead of time?
A: You can make the dough ahead and let it rest, covered, in the fridge for up to 24 hours. Let it come to room temperature for 30 minutes before rolling and cooking. The cooked flatbread is best served immediately, but you can re-crisp it in a 375°F (190°C) oven for a few minutes.
Q: My flatbread didn’t puff up. Why?
A> Two likely culprits: 1) Your skillet wasn’t hot enough. Make sure it’s properly preheated before adding the dough. 2) Your baking powder might be old. Baking powder loses its potency over time. Test it by mixing a half teaspoon with hot water—if it doesn’t fizz vigorously, it’s time for a new can.
Q: Can I bake this instead of pan-frying?
A> Absolutely! For a slightly less oily version, preheat your oven to 475°F (245°C) with a pizza stone or baking sheet inside. Roll out the dough, place it on the hot surface, and bake for 5-7 minutes until puffed and golden. You won’t get *quite* the same blistery crust, but it’s still delicious.

Hot Honey Sourdough Flatbread : Crispy, Spicy, and Totally Snackable
Description
Turn your sourdough discard into a quick, blistery flatbread with a golden drizzle of hot honey. Perfect for snacks, game day, or a cozy dinner side.
Ingredients
-
1 cup sourdough discard (unfed)
-
¾ cup all-purpose flour (more if needed)
-
¼ cup plain yogurt (dairy or plant-based)
-
1 tsp baking powder
-
½ tsp salt
-
Olive oil, for cooking
-
2 tbsp honey
-
½ tsp chili flakes (or to taste)
Optional Twists:
-
Garlic clove in honey infusion
-
Everything bagel seasoning
-
Fresh herbs or cheese for topping
-
Smoked chili flakes for deeper spice
Instructions
-
Make the Dough: In a bowl, combine sourdough discard, flour, yogurt, baking powder, and salt. Mix until a shaggy dough forms. Add extra flour if too sticky.
-
Knead & Rest: Knead 2-3 minutes on a floured surface. Return to bowl, cover, and let rest 20-30 minutes.
-
Infuse Honey: Warm honey with chili flakes over low heat 3-5 minutes. Optional: add garlic clove. Remove from heat.
-
Divide & Roll: Divide dough into 2–3 pieces. Roll each piece into thin rounds or ovals. Let rest 5 minutes if it springs back.
-
Cook Flatbread: Heat skillet over medium-high, lightly coat with olive oil. Cook flatbread 2-3 minutes per side until golden, bubbly, and crisp. Press gently after flipping for even browning.
-
Serve: Drizzle each flatbread with hot honey immediately. Slice and serve warm.
Notes
-
Sticky Dough: Add flour 1 tbsp at a time; let it rest.
-
Flatbread Doesn’t Puff: Ensure skillet is hot; check baking powder potency.
-
Make Ahead: Dough can rest in fridge up to 24 hrs; reheat cooked flatbread in oven at 375°F (190°C) for crispness.
-
Oven Option: Bake at 475°F (245°C) on hot pizza stone or baking sheet, 5–7 minutes.
The Nutritional Lowdown (Approximate)
Let’s be real, we’re not eating this flatbread for its kale-like qualities, but it’s always good to know what you’re enjoying! This breakdown is for one flatbread (assuming the recipe makes three).
Calories: ~220
Carbohydrates: ~33g
Protein: ~5g
Fat: ~6g
Sugar: ~8g
Remember, these are estimates and can vary based on the exact ingredients you use and how much oil you cook with. The sourdough discard offers the benefit of pre-digested grains, which can make it easier on the stomach for some people. So, enjoy that delicious, tangy, spicy goodness without any guilt!
Final Thoughts
And there you have it, friends—my go-to recipe for turning a cup of sourdough discard into a snack that’s crispy, spicy, sweet, and totally irresistible. This Hot Honey Sourdough Flatbread is proof that the most satisfying food doesn’t have to be complicated. It’s about simple ingredients, a little bit of kitchen confidence, and a whole lot of flavor.
I hope this recipe becomes a regular in your kitchen, bringing as much joy and deliciousness to your table as it has to mine. If you make it (and you totally should), I’d love to see your creation! Tag me @feastical on social media so I can cheer you on.
Now, go grab that discard, fire up that skillet, and get ready for your new favorite snack. Happy cooking!
– Beau
***
Save This Recipe For Later!

Sourdough Discard Fudge Brownies : Ultra-Rich with a Tangy Twist
Sourdough Discard Fudge Brownies – Rich Chocolate Brownies with a Tangy Edge
Your New Favorite Brownie Just Walked Into the Kitchen
Hey friends, Beau here from Feastical! Let’s talk about a beautiful thing: that jar of sourdough discard sitting in your fridge. You know the one. It’s the byproduct of your bubbly, active starter, and every time you pour some down the drain, a little part of your baker’s soul winces. Well, my friend, those days are over. We’re about to transform that tangy, unfed starter into the most incredibly rich, fudgy, and sophisticated brownie you’ve ever sunk your teeth into.
These aren’t just any brownies. These are Sourdough Discard Fudge Brownies, and they are everything a brownie should be. We’re talking a paper-thin, crackly top that gives way to a dense, intensely chocolatey center. They’re the kind of brownie that makes you close your eyes for a second after the first bite. And the secret weapon? That sourdough discard. It works a kind of kitchen magic, adding a subtle, intriguing tang that cuts through the sweetness and gives the crumb an unforgettable, chewy texture. It’s a flavor that makes people say, “Wow, what is that?” in the best way possible.
Whether you’re a sourdough pro with a perpetually hungry starter or a newbie just figuring it all out, this recipe is your golden ticket. It’s simple, soulful, and so satisfying. We’re turning what some see as “waste” into a masterpiece. So, grab your favorite mixing bowl and that jar of discard. It’s time to bake something truly special.
The Happy Accident That Started It All
I have to confess, my love for these brownies started with a classic “kitchen sink” moment. It was a lazy Sunday afternoon, and my starter, “Bubbles,” was looking a little lonely. I had a serious chocolate craving and was halfway through my standard brownie recipe when I spotted Bubbles’ discard jar on the counter. In a moment of pure, unscripted inspiration, I looked at the thick, tangy paste, looked at my brownie batter, and thought, “Why not?”
I folded a big spoonful in, crossed my fingers, and slid the pan into the oven. The smell that filled my kitchen was already deeper, more complex. When I finally pulled them out and let them cool (the hardest part!), I took a bite. My eyes went wide. The texture was denser, chewier, and the flavor had this incredible depth that regular brownies just can’t achieve. The chocolate was front and center, but it was followed by this subtle, almost grown-up tang that made you immediately want another bite. I knew right then I’d stumbled onto something magical. Now, I almost feel guilty when I don’t have discard on hand for brownies. They’re just that good.
Gathering Your Brownie Brigade
Here’s the dream team of ingredients that’s going to make this magic happen. I’ve included a few chef insights and swaps so you can make this recipe your own.
- ½ cup unsalted butter – This is our rich, creamy base. Using unsalted lets you control the salt level. If you only have salted, just reduce the added salt in the recipe by half.
- 1 cup semi-sweet chocolate chips or chopped chocolate – The star of the show! I love using a good-quality chocolate bar chopped up for ultimate meltiness, but chocolate chips work perfectly in a pinch.
- ¾ cup granulated sugar – This gives us that classic sweetness and helps create that beautiful, shiny, crackly top we all crave.
- ¼ cup brown sugar – The molasses in brown sugar brings a lovely moisture and a hint of caramel depth that plays so nicely with the chocolate.
- 2 large eggs – They’re the binding agents that give the brownie its structure. Make sure they’re at room temperature for a smoother, easier-to-mix batter.
- 1 teaspoon vanilla extract – The wingman for chocolate. It enhances and rounds out all the other flavors. Don’t skip it!
- ½ cup sourdough discard (unfed) – Our secret weapon! It can be straight from the fridge or at room temperature. The thickness can vary, but don’t stress—it all works. This adds that tangy twist and incredible chew.
- ½ cup all-purpose flour – The structural backbone. We’re not using much, and that’s what keeps these brownies fudgy instead of cakey.
- ¼ cup unsweetened cocoa powder – This doubles down on the chocolate flavor, giving it that deep, dark intensity. Use the best you have!
- ¼ teaspoon salt – A must! Salt makes the chocolate flavor pop and balances the sweetness. It’s the difference between a flat brownie and a fantastic one.
Let’s Bake: The Step-by-Step Magic
Alright, team, let’s get our hands dirty (figuratively, of course). Follow these steps, and you’ll be a brownie hero in no time.
- Preheat and Prep: Fire up your oven to 350°F (175°C). This is crucial for an even bake. While it’s warming up, line an 8×8-inch baking pan with parchment paper, leaving some overhang on two sides. This little hack is a game-changer—it creates a sling that lets you lift the entire brownie slab out for effortless, crumb-free cutting. Lightly grease the paper if you’re feeling extra cautious.
- Melt the Butter & Chocolate: In a medium saucepan over low heat, combine the butter and chocolate. We’re melting them gently together, stirring constantly until you have a smooth, gloriously glossy pool. Chef’s Hack: Low and slow is the way to go here. You don’t want to scorch the chocolate! As soon as it’s mostly melted, take it off the heat—the residual heat will finish the job.
- Whisk in the Sugars: Remove the pan from the heat. Immediately add both the granulated and brown sugars and whisk them in like you mean it. You’ll see the mixture go from glossy to a bit grainy—that’s totally normal and exactly what we want.
- Incorporate Eggs and Vanilla: Now, crack in those two eggs and add the vanilla. Whisk vigorously for a good minute or two until the batter becomes thick, shiny, and smooth. This step is key for that signature crackly top! Don’t be shy with the whisk.
- Fold in the Secret Weapon: Switch to a spatula for this part. Plop in your sourdough discard and gently fold it in until it’s fully incorporated. The batter might look a little split or strange, but trust the process. It will all come together beautifully.
- Add the Dry Ingredients: Place a fine-mesh sieve over your bowl and sift in the flour, cocoa powder, and salt directly onto the batter. Sifting is a small step that makes a big difference—it prevents lumps and ensures a perfectly smooth texture. Now, fold everything together with your spatula. Chef’s Tip: Stop mixing the very moment you no longer see streaks of flour. Overmixing is the enemy of a fudgy brownie!
- Bake to Perfection: Pour your thick, luxurious batter into your prepared pan and smooth the top with your spatula. Slide it into the preheated oven and bake for 25-30 minutes. You’re looking for set edges and a center that’s still a little soft and fudgy. A toothpick inserted about an inch from the edge should come out with a few moist crumbs, not wet batter. Remember, they continue to cook as they cool!
- The Hardest Part: Let Them Cool! I know, I know. The smell is intoxicating. But you must let the brownies cool completely in the pan on a wire rack. This is non-negotiable for that perfect fudgy texture and clean cuts. For super-neat slices or fun shapes (like hearts for Valentine’s Day!), I even recommend popping the fully cooled slab into the fridge for an hour before cutting.
How to Serve These Chocolate Wonders
Okay, the brownies are cooled, cut, and ready for their grand debut. How you serve them can take them from amazing to absolutely legendary.
For a simple, classic treat, just grab a square and a glass of cold milk. The pure, unadulterated flavor is a thing of beauty. Want to dress them up? Warm a brownie slightly and top it with a scoop of high-quality vanilla ice cream. The contrast of warm, fudgy brownie and cold, creamy ice cream is a classic for a reason—it’s pure bliss.
For a special occasion like Valentine’s Day, use a heart-shaped cookie cutter to create adorable, romantic portions. Arrange them on a beautiful wooden board with some fresh berries, a dusting of powdered sugar, and maybe even a little bowl of warm chocolate sauce for dipping. They’re the star of any dessert tray, guaranteed.
Get Creative: Fun Twists on the Classic
Once you’ve mastered the base recipe, the fun really begins. Here are a few of my favorite ways to mix things up:
- Sea Salt & Caramel Swirl: Right before baking, drizzle the top with ¼ cup of thick caramel sauce. Then, generously sprinkle with flaky sea salt. The sweet-salty combo is a knockout.
- Peanut Butter Pocket: Drop small spoonfuls of creamy peanut butter onto the batter once it’s in the pan. Use a knife or skewer to gently swirl it through the chocolate for marbled perfection.
- Mint Chocolate Chip: Add ½ teaspoon of peppermint extract along with the vanilla. Fold in ½ cup of dark chocolate chips at the end for a cool, refreshing twist.
- Espresso Infusion: For the ultimate deep chocolate flavor, dissolve 1-2 teaspoons of instant espresso powder into the melted butter and chocolate mixture. It won’t taste like coffee, just richer, more intense chocolate.
- Gluten-Free Swap: Easily make these gluten-free by using a 1:1 gluten-free all-purpose flour blend in place of the regular flour. The sourdough discard is naturally gluten-free once baked, so you’re good to go!
Beau’s Kitchen Notes & Stories
This recipe has become a staple in my kitchen, and it’s evolved in the best ways. I’ve learned that the thickness of your discard can change the batter’s consistency—a super thick, pasty discard might make it a bit stiffer, while a thinner, more hydrated one blends in seamlessly. Both work! Don’t get hung up on it.
One time, I was filming a quick video for Feastical and I was so busy chatting to the camera that I completely forgot to add the sugar. I baked them, took a bite, and my face must have been a picture of pure confusion. They were… deeply bitter and tragic. It was a hilarious (and deliciously humbling) reminder that even the “pros” make silly mistakes. So, if you ever have a baking flop, just laugh it off. It happens to all of us! The beauty of this recipe is its forgiving nature and incredible payoff.
Your Brownie Questions, Answered!
I get a lot of questions about these brownies. Here are the answers to the most common ones.
Q: My brownies didn’t get a crackly top. What did I do wrong?
A: The crackly top comes from properly dissolving the sugar in the warm butter-chocolate mixture and then whisking the eggs in really well. Make sure you whisk for a full 1-2 minutes until the batter is thick and glossy. Don’t rush this step!
Q: Can I taste the sourdough?
A: You don’t taste a strong “sourdough” flavor like in a loaf of bread. Instead, you get a subtle, complex tang that enhances the chocolate and adds incredible depth. It’s more of a “What is that amazing flavor?” than an “Oh, this is a sourdough brownie.”
Q: My brownies are too cakey! How can I make them fudgier?
A: A cakey texture usually means you either overmixed the batter after adding the flour, or you baked them for a tad too long. Next time, mix just until combined and be sure to pull them from the oven when the center is still a bit soft and jiggly.
Q: Can I use dutch-processed cocoa powder?
A> You can, but it might make the texture a bit more cake-like. For the fudgiest result, stick with natural unsweetened cocoa powder. But in a pinch, Dutch-process will still make a delicious brownie!

Sourdough Discard Fudge Brownies : Ultra-Rich with a Tangy Twist
Description
Transform your sourdough discard into fudgy, intensely chocolatey brownies with a subtle tang and crackly top. Perfect for a treat or special occasion.
Ingredients
-
½ cup unsalted butter
-
1 cup semi-sweet chocolate chips or chopped chocolate
-
¾ cup granulated sugar
-
¼ cup brown sugar
-
2 large eggs, room temperature
-
1 tsp vanilla extract
-
½ cup sourdough discard (unfed)
-
½ cup all-purpose flour
-
¼ cup unsweetened cocoa powder
-
¼ tsp salt
Optional Add-Ins / Twists:
-
¼ cup caramel sauce + flaky sea salt
-
½ cup peanut butter for swirls
-
½ tsp peppermint extract + ½ cup dark chocolate chips
-
1–2 tsp instant espresso powder
Instructions
-
Preheat Oven: 350°F (175°C). Line an 8×8-inch pan with parchment paper, leaving overhang for easy lifting. Lightly grease if desired.
-
Melt Butter & Chocolate: In a medium saucepan over low heat, melt butter and chocolate together until smooth. Remove from heat.
-
Add Sugars: Whisk in granulated and brown sugar until slightly grainy.
-
Incorporate Eggs & Vanilla: Add eggs and vanilla, whisk 1–2 minutes until thick, shiny, and smooth.
-
Fold in Sourdough Discard: Gently fold in the discard until fully incorporated. Batter may look slightly split—this is normal.
-
Add Dry Ingredients: Sift in flour, cocoa powder, and salt. Fold gently until just combined—do not overmix.
-
Bake: Pour batter into prepared pan, smooth top, and bake 25–30 minutes. Edges should be set; center still slightly soft. Toothpick should come out with a few moist crumbs.
-
Cool Completely: Let brownies cool in pan on a wire rack before cutting for clean, fudgy slices. Chill if you want extra-firm slices or to cut fun shapes.
Notes
-
Crackly Top: Whisk eggs thoroughly into warm chocolate-sugar mixture.
-
Fudgy Texture: Don’t overmix after adding flour and pull from oven while center is still slightly soft.
-
Substitutions: Use 1:1 gluten-free flour for a gluten-free version; Dutch-process cocoa may make it slightly more cake-like.
Let’s Talk Nutrition (The Fun Part)
Now, I’m all about balance. Life is too short not to enjoy a fantastic brownie. But I also believe in knowing what you’re eating. Here’s a general breakdown per brownie (based on cutting the pan into 12 generous squares). Remember, these are estimates, and your exact numbers will vary based on the specific ingredients you use.
Each glorious brownie comes in at approximately 210 calories, with 12g of fat, 24g of carbohydrates, and 3g of protein. They contain about 16g of sugar. These are a treat, through and through. The key is to savor them! Enjoy one with a cup of coffee in the afternoon or as a well-deserved dessert after dinner. It’s about the quality of the indulgence, not the quantity. Bake them, share them with people you love, and enjoy every single bite without an ounce of guilt.
Final Thoughts from My Kitchen to Yours
Well, there you have it, my friends. The humble sourdough discard, once destined for the compost, is now the key to the most unforgettable, fudgy, and flavor-packed brownie of your life. This recipe is a celebration of resourcefulness, flavor, and the simple joy of a homemade treat.
I love this recipe because it perfectly embodies what Feastical is all about: turning simple ingredients into something extraordinary that brings people together. It’s feel-good food with a real-life flavor, and I hope it becomes a new favorite in your home, just like it is in mine.
So, give it a try! I’d love to see your creations. Tag me @Feastical on social media so I can share in your brownie joy. Now, go preheat that oven and let’s get baking!
With a full heart and an even fuller plate,
Beau

Sourdough Strawberry Cake Bars : Tangy, Pretty-in-Pink Dessert Squares
Sourdough Strawberry Cake Bars – Tangy Pink Dessert with Discard and Berries
Your New Favorite Way to Use Sourdough Discard
Hey friends, Beau here! Let’s be real for a second. Is there anything more magical than the moment a humble ingredient transforms into something truly spectacular? I live for those kitchen moments, and today, we’re turning your sourdough discard—that tangy, often-overlooked hero in the back of your fridge—into the most delightful, pretty-in-pink dessert you’ve ever tasted.
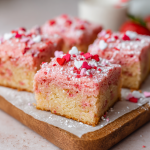
These Sourdough Strawberry Cake Bars are my latest obsession. Imagine a soft, tender cake bar, blushed a gorgeous pink from real strawberries, with a subtle tang that makes you go, “Hmm, what is that wonderful flavor?” They’re not too sweet, incredibly easy to make, and they look like they just waltzed out of a fancy bakery. Whether you’re prepping for a Galentine’s party, need a show-stopping treat for your Valentine’s dessert tray, or just want to brighten up a regular Tuesday afternoon, these bars are your answer. They’re the edible equivalent of a warm, happy hug.
So, if you’ve been staring at your jar of discard wondering if it’s destined for anything more than the compost bin, I’m here to tell you it’s time for a celebration. Grab your favorite mixing bowl, and let’s create some sweet, tangy magic together. This is feel-good food at its finest, and I can’t wait for you to try it.
A Strawberry Field Memory
This recipe takes me right back to the sprawling strawberry fields just outside the town where I grew up. Every June, my family would wake up at the crack of dawn, pull on our rattiest clothes, and spend the morning hunched over, searching for the perfect, sun-warmed berries. The air smelled like sweet earth and promise. My sister and I would have a contest to see who could find the most giant, misshapen berry—the kind that looks like it’s giving you a thumbs-up. We’d eat almost as many as we put in our baskets, our hands and faces stained sticky-red.
My mom would always make a simple strawberry shortcake that night, but the memory of that pure, concentrated strawberry flavor stuck with me. That’s the magic I wanted to capture in a bake that wasn’t dependent on the short summer season. Using freeze-dried strawberries gives us that intense, nostalgic berry punch year-round, and when you pair it with the tangy depth of sourdough, it creates a flavor story that’s both new and wonderfully familiar. It’s a little taste of my childhood, with a fun, fermented twist.
Gathering Your Ingredients
This is where the fun begins! The ingredient list is beautifully simple, and each one plays a starring role. Here’s what you’ll need and why it matters:
- ½ cup unsalted butter, softened – This is the base of our rich, tender crumb. Using unsalted lets you control the salt level. Chef’s Tip: True “softened” butter should leave a slight indent when you press it, but shouldn’t be greasy or melted. If you forget to take it out, you can gently warm it for a few seconds in the microwave, but be careful! We want cream-able butter, not a puddle.
- ¾ cup granulated sugar – The perfect amount of sweetness to balance the tang from the sourdough and the tartness of the strawberries.
- 1 large egg – Our binding agent, bringing everything together and adding structure.
- 1 teaspoon vanilla extract – The classic flavor enhancer. It rounds out the flavors and makes everything taste more, well, like itself.
- ½ cup sourdough discard (unfed) – The star of the show! This adds a wonderful, subtle tang and makes the bars incredibly moist. Don’t worry about it being “old”—as long as it doesn’t have mold, it’s perfect for baking. The acidity also tenderizes the gluten, giving us a super-soft texture.
- 1 cup all-purpose flour – The foundation. I use regular all-purpose here for a reliable, light structure.
- ½ teaspoon baking powder – Our leavening agent, giving these bars a gentle lift so they’re cakey, not dense.
- ¼ teaspoon salt – Never, ever skip the salt! It’s the flavor amplifier that makes the strawberry and sweetness pop.
- ½ cup crushed freeze-dried strawberries – This is our secret weapon for that vibrant pink color and intense, natural strawberry flavor without adding extra moisture. You can find these in the snack or dried fruit aisle. Substitution Tip: In a pinch, you can use a quality strawberry powder.
- Optional: powdered sugar or Valentine sprinkles for topping – This is the finishing touch! A dusting of powdered sugar is elegantly simple, while fun sprinkles make them a party.
Let’s Bake! Your Step-by-Step Guide
Ready to see some magic happen? Follow these steps, and you’ll be a sourdough dessert pro in no time. I’ve sprinkled in my favorite chef hacks to make sure your bars turn out perfectly.
- Preheat and Prep: Fire up your oven to 350°F (175°C). This gives it time to reach the perfect, steady temperature. Then, line an 8×8-inch baking pan with parchment paper, leaving a little overhang on two sides. Chef’s Hack: This creates a “sling” that makes it a breeze to lift the entire baked square out of the pan for clean, easy cutting. No more wrestling with your dessert!
- Creaming is Key: In a medium mixing bowl, cream together the softened butter and granulated sugar. Now, don’t rush this! Beat it with a hand mixer or stand mixer for a good 2-3 minutes, until it becomes pale, fluffy, and light. This step incorporates air into the batter, which is crucial for that soft, cakey texture we’re after.
- Combine the Wet Team: Beat in the egg and vanilla extract until everything is smooth and well-incorporated. Now, for the main event: add your sourdough discard. It might look a little curdled or separated at first—don’t panic! Just keep mixing until it all comes together into a smooth, if slightly thick, batter.
- Whisk the Dry Crew: In a separate bowl, whisk together the flour, baking powder, salt, and your crushed freeze-dried strawberries. Chef’s Hack: Whisking the dried strawberries with the flour helps coat them, which prevents them from sinking to the bottom of the bars during baking. We want that beautiful color and flavor distributed throughout!
- The Grand Union: Add the dry ingredients to the wet ingredients. Now, use a spatula and mix gently, just until the last streaks of flour disappear. Do not overmix! Overworking the batter develops gluten and can lead to tough bars. A few tiny lumps are totally fine.
- Pan and Spread: Pour the beautiful pink batter into your prepared pan. Use your spatula to spread it into an even layer, making sure to get it into all the corners. The batter will be thick, which is exactly what we want.
- Bake to Perfection: Slide the pan into your preheated oven and bake for 25-28 minutes. You’ll know they’re done when the edges are just barely starting to pull away from the pan and a toothpick inserted into the center comes out clean or with a few moist crumbs—not wet batter.
- The Most Important Step: Cool! I know it’s tempting, but you must let the bars cool completely in the pan on a wire rack. This allows the structure to set. If you try to cut them warm, they’ll be gummy. Once cool, use your parchment sling to lift them out, dust with powdered sugar or sprinkles, and cut into squares.
How to Serve These Beauties
Presentation is part of the joy! These bars are stunning all on their own, but a little flair never hurt. For a casual family treat, I love cutting them into generous squares and piling them high on a rustic wooden board. The pink against the wood is just gorgeous.
If you’re serving them for a special occasion, like a Valentine’s Day dinner or a bridal shower, get a little fancy. Use a small heart-shaped cookie cutter to press a shape into the top of each bar before dusting with powdered sugar. When you lift the cutter, you’ll have a perfect, pink heart revealed on a snowy white background. It’s a total showstopper with almost zero effort.
And let’s talk pairings! A cup of hot coffee or a glass of cold milk is the classic choice. But for the adults, a glass of prosecco or a rosé champagne turns this into a truly decadent dessert. The bubbles cut through the sweetness and tang beautifully.
Get Creative! Fun Recipe Twists
Once you’ve mastered the base recipe, the world is your oyster! Here are a few of my favorite ways to mix it up:
- Lemon-Berry Bliss: Add the zest of one lemon to the wet ingredients. The bright, zesty lemon paired with the strawberry and sourdough tang is an absolute flavor explosion.
- Chocolate-Dipped Delight: Melt some white or dark chocolate and dip one half of each cooled bar. Let them set on parchment paper for a bakery-style finish that’s both pretty and delicious.
- “Neapolitan” Style: Love all the flavors? Swirl 2 tablespoons of chocolate chips into the batter right before pouring it into the pan. You’ll get hints of chocolate, strawberry, and vanilla all in one bar.
- Gluten-Free Friendly: You can easily swap the all-purpose flour for a 1:1 gluten-free baking blend. The texture might be a touch more crumbly, but it’s just as delicious.
- Mixed Berry Bonanza: Out of strawberry powder? Use freeze-dried raspberries or a mix of berries for a different, but equally vibrant, flavor and color profile.
A Few More Thoughts from My Kitchen
This recipe has become a real workhorse in my kitchen. It started as a simple “what if?” experiment one Saturday morning when I had a particularly hungry-looking jar of discard. The first batch was good, but a bit dense. I realized I was overmixing! The moment I started folding the dry ingredients in gently, the texture transformed into this cloud-soft, perfect cake bar.
It’s also a recipe that loves a good story. I once brought these to a neighborhood potluck, and no one could guess the “secret ingredient.” The look of surprise when I told them it was sourdough was priceless. It’s a fantastic conversation starter and a brilliant way to introduce skeptical friends to the wonders of baking with discard. Remember, cooking is about joy and a little bit of friendly mischief!
Your Questions, Answered
I know baking can come with questions, so let’s tackle a few common ones head-on.
- My batter is really thick. Is that normal? Absolutely! This is a thick, scoopable batter, not a pourable cake batter. The thickness is what gives us those dense, soft, and cakey bars. If you’re struggling to spread it, just wet your spatula or fingertips with a little water to prevent sticking.
- Can I use fresh or frozen strawberries instead? I don’t recommend it for this specific recipe. Fresh or frozen berries add a lot of extra water, which can make the bars soggy and prevent them from baking through properly. The intense, dry powder from the freeze-dried fruit is key for both flavor and texture.
- My bars are gummy in the middle. What happened? This usually points to two things: either the bars needed a few more minutes in the oven (the toothpick test is your best friend!), or they were cut before they were completely cool. Patience is a virtue in baking!
- How should I store these? Keep them in an airtight container at room temperature for up to 3 days. For longer storage, they freeze beautifully! Just wrap individual bars in plastic wrap and pop them in a freezer bag for up to 2 months. Thaw at room temperature.
Sourdough Strawberry Cake Bars : Tangy, Pretty-in-Pink Dessert Squares
Description
Turn your sourdough discard into a soft, tangy, and gorgeous pink dessert! These cake bars are tender, lightly sweet, and perfect for a snack, party, or dessert tray.
Ingredients
-
½ cup unsalted butter, softened
-
¾ cup granulated sugar
-
1 large egg
-
1 tsp vanilla extract
-
½ cup sourdough discard (unfed)
-
1 cup all-purpose flour
-
½ tsp baking powder
-
¼ tsp salt
-
½ cup crushed freeze-dried strawberries
-
Optional: powdered sugar or sprinkles for topping
Instructions
-
Preheat Oven: 350°F (175°C). Line an 8×8-inch pan with parchment paper, leaving a bit of overhang for easy lifting.
-
Cream Butter & Sugar: Beat butter and sugar for 2–3 minutes until pale and fluffy.
-
Add Wet Ingredients: Mix in egg and vanilla, then fold in sourdough discard until smooth.
-
Mix Dry Ingredients: Whisk flour, baking powder, salt, and crushed freeze-dried strawberries in a separate bowl.
-
Combine: Gently fold dry ingredients into wet ingredients until just incorporated. Do not overmix.
-
Bake: Spread batter evenly in prepared pan. Bake 25–28 minutes, until a toothpick comes out clean or with a few moist crumbs.
-
Cool & Serve: Let bars cool completely before lifting from pan and cutting. Dust with powdered sugar or sprinkles if desired.
Notes
-
Batter Thickness: Thick batter is normal; wet your spatula to help spread.
-
Freeze-Dried Strawberries: Key for color and flavor; fresh/frozen berries add too much moisture.
-
Cut After Cooling: Cutting too early can make bars gummy.
-
Storage: Airtight at room temp up to 3 days, or freeze for up to 2 months.
Nutritional Information (Because We’re Curious!)
While I’m all about indulgence, I also believe in knowing what you’re eating. Here’s a rough nutritional breakdown per bar (based on 12 bars, without optional toppings). Remember, this is an estimate and can vary based on your specific ingredients.
- Calories: ~150
- Fat: 7g
- Carbohydrates: 19g
- Protein: 2g
- Sugar: 10g
These bars are a lovely treat because they’re satisfying without being overly heavy. The use of real fruit and the tang from the sourdough means you can enjoy a delicious dessert that feels a little more thoughtful and a little less like a sugar bomb.
Final Thoughts from My Kitchen to Yours
Well, there you have it! My go-to recipe for turning a simple jar of sourdough discard into a stunning, delicious, and conversation-starting dessert. This recipe embodies everything I love about Feastical: it’s approachable, soulful, and brings a little bit of special into the everyday.
Baking, for me, has always been about connection. It’s about sharing a story, a memory, and a plate of something made with love. I hope these Sourdough Strawberry Cake Bars find a place in your kitchen, your recipe box, and your heart. They’re a reminder that the most wonderful creations often come from the most unexpected places.
So, give them a try! And if you do, I’d love to hear about it. Tag me on social @Feastical or @BeauCollier so I can see your beautiful bakes. Now, go preheat that oven—your next favorite dessert is waiting for you.
Happy Baking,
Beau

Sourdough Discard Garlic Naan : Tangy, Chewy Flatbread with Buttery Garlic Bliss
Turn Your Sourdough Scraps into Garlicky, Buttery Bliss
Hey friends, Beau here! Let’s have a little heart-to-heart. You know that jar of sourdough discard sitting in your fridge? The one that gives you a tiny pang of guilt every time you feed your starter? Yeah, I see it, too. For the longest time, I’d look at it and think, “What a waste.” But then, I had a revelation that changed my kitchen game forever: that tangy, bubbly discard isn’t a byproduct; it’s a secret weapon.
It’s the key to unlocking incredible flavor and texture in things you’d never expect—like this absolutely mind-blowing Sourdough Discard Garlic Naan. We’re not just making flatbread here, folks. We’re creating a chewy, tangy, char-kissed vehicle for garlic butter that’s about to become the star of your dinner table. Imagine tearing into a warm, pillowy piece of naan, its surface blistered from a hot skillet, glistening with golden, minced garlic and melted butter. It’s the perfect companion for dunking into a rich curry, sopping up a stew, or just eating on its own because you simply cannot resist.
This recipe is my love letter to zero-waste cooking and global flavor. It’s simple, soulful, and so satisfying. You don’t need a tandoor oven, and you certainly don’t need to be a sourdough expert. All you need is that jar of discard, a hot skillet, and about 20 minutes. Ready to turn your “discard” into the main event? Let’s get cooking!
The Night I Burned My Fingers (And It Was Totally Worth It)
This recipe was born out of a happy accident, like most of the best things in my kitchen. A few years back, I was hosting a last-minute “Curry & Confessions” night with a few close friends. The pressure cooker was hissing with a chickpea masala, the rice was steaming, but I realized I had completely forgotten to grab naan from the store. Panic set in! But then, my eyes landed on a particularly vigorous jar of sourdough discard on the counter.
I’d been experimenting with it in pancakes, but flatbread? I figured, why not? I threw together a quick dough, my friends sipping wine and laughing as I frantically rolled out uneven ovals. The first one went into the screaming-hot cast iron, and the magic happened. It puffed up like a proud little cloud, developing those gorgeous, charred leopard spots. The smell was intoxicating—yeasty, toasty, and warm. I brushed it with a reckless amount of garlic butter, sprinkled on some cilantro, and tore it into pieces. The silence that followed, broken only by happy chewing and murmurs of “Oh, wow,” told me everything. We burned our fingers tearing into the next one straight from the pan. It was messy, imperfect, and absolutely perfect. That’s the Feastical spirit right there.
Gathering Your Flavor All-Stars
Here’s the beautiful, simple lineup for your naan masterpiece. Don’t be afraid to play around with substitutions—cooking is all about making it work for you!
- 1 cup sourdough discard (unfed): This is our flavor MVP! The discard gives the naan a subtle tang and complex flavor that regular yeast can’t match. It doesn’t need to be peak-active, but try to use discard that’s been fed within the last 5-7 days for the best results. Thick or thin, it all works!
- 1 cup all-purpose flour: The trusty backbone of our dough. It creates a soft, pliable structure that’s easy to roll out. For a chewier texture, you can swap in ¼ cup of bread flour.
- ¼ cup plain yogurt: The secret to a tender, soft crumb. The acidity and fat in yogurt work wonders. Chef’s Insight: If you’re dairy-free, a thick plant-based yogurt like coconut or almond works beautifully. In a pinch, a little buttermilk or even thinned-out sour cream can step in.
- 1 tsp baking powder + ½ tsp baking soda: Our dynamic leavening duo! They create those irresistible air pockets and give the naan its signature puff in the hot pan. Make sure yours are fresh for maximum lift.
- ¼ tsp salt: Don’t you dare forget it! Salt is the conductor that makes all the other flavors sing in harmony.
- For the Garlic Butter Bliss:
- 2 tbsp melted butter or ghee: Ghee is traditional and has a gorgeous, nutty flavor, but good old salted butter is a dream. For a vegan version, extra-virgin olive oil or vegan butter is fantastic.
- 1 clove garlic, minced: Fresh is best here! The heat from the hot naan will gently cook the garlic, mellowing its bite and releasing its incredible aroma.
- Fresh parsley or cilantro, for garnish: A pop of green for freshness and color. Cilantro gives it an authentic vibe, while parsley is a little more mild. Use what you love!
Let’s Make Some Magic: The Step-by-Step
Alright, team, it’s go time. This process is fast, fun, and incredibly rewarding. Follow these steps, and you’ll be a naan master in no time.
- Create the Dough: In a medium-sized bowl, combine your sourdough discard, all-purpose flour, yogurt, baking powder, baking soda, and salt. I like to use a fork or a Danish dough whisk at first to bring it together. It will be a bit shaggy and sticky—that’s exactly what we want! Chef’s Hack: Resist the urge to add more flour. A sticky dough leads to a softer, more tender naan.
- Knead & Rest: Lightly flour your counter and turn the dough out. Knead it for just a minute or two, until it becomes relatively smooth. We’re not looking for bakery-level kneading here; just a quick, gentle workout to form a cohesive ball. Place the dough ball back in the bowl, cover it with a damp kitchen towel or plastic wrap, and let it rest at room temperature for 30-60 minutes. This rest period allows the gluten to relax, making the dough much easier to roll out later.
- Divide and Conquer: After the dough has rested, turn it out onto a floured surface. Divide it into 4 equal pieces. Roll each piece into a ball, then use a rolling pin to shape them into classic naan ovals, about ¼-inch thick. Don’t stress about perfection! Rustic, irregular shapes have way more character. Pro Tip: If the dough is springing back, let it rest for another 5 minutes—it’s telling you the gluten is still too tight.
- Get Your Skillet Screaming Hot: This is the most important step for that authentic char. Place your cast-iron or heavy-bottomed skillet over medium-high heat and let it get properly hot. You should see a faint wisp of smoke when it’s ready. A drop of water should skitter and evaporate instantly.
- Cook to Bubbly Perfection: Carefully place one rolled-out naan into the dry, hot skillet. Let it cook for 1-2 minutes. You’ll see magical bubbles start to form on the surface! Once the bottom is golden brown with some beautiful char spots, flip it. Cook for another 1-2 minutes on the second side until it’s also cooked through and puffed up. Chef’s Secret: For extra puff, you can gently press down on the naan with a spatula when the big bubbles form, encouraging them to expand.
- The Finishing Touch: While the naan is cooking, mix your melted butter (or ghee) with the minced garlic in a small bowl. As soon as a naan comes out of the skillet, immediately brush it generously with the garlic butter and sprinkle with your fresh herbs. The heat will wake up the garlic flavor in the most incredible way.
How to Serve This Garlicky Wonder
Okay, you’ve got a stack of warm, buttery, heavenly-smelling naan. Now what? The possibilities are endless, but here are my favorite ways to serve it up.
The Classic Curry Partner: This is its soulmate. Serve it alongside a big bowl of creamy butter chicken, a hearty chana masala, or a rich lamb rogan josh. There’s no better feeling than using a piece of naan to scoop up every last bit of sauce.
The Ultimate Appetizer Platter: Create a “DIY Naan Bar”! Pile the warm naan on a board alongside small bowls of hummus, baba ganoush, tzatziki, and a zesty olive tapenade. It’s a surefire hit for parties.
Next-Level Naan-wich: Use a larger piece as a wrap for your favorite grilled meats and veggies. Think spiced chicken, crunchy lettuce, and a cool yogurt sauce. It’s a flavor-packed lunch that beats sad desk sandwiches any day.
Simple & Solo: Honestly? Sometimes it’s best all on its own, maybe with a little extra sprinkle of flaky sea salt on that garlic butter. No judgment from me!
Make It Your Own: Fun Flavor Twists
Once you’ve mastered the basic recipe, the world is your naan-flavored oyster! Here are a few of my favorite ways to mix it up.
- Everything Bagel Naan: Mix everything bagel seasoning right into the garlic butter before brushing. It’s a savory, crunchy, addictive dream.
- Cheesy Pull-Apart: After you brush with garlic butter, sprinkle a generous handful of shredded mozzarella or cheddar cheese over the hot naan. Pop it under the broiler for a minute until bubbly and golden.
- Herb-Infused Dough: Add 2 tablespoons of finely chopped fresh herbs like cilantro, dill, or chives directly into the dough when you’re mixing it. It’s beautiful and flavorful all the way through.
- Spicy Chili Crisp Drizzle: Swap the garlic butter for a spicy, savory drizzle of chili crisp or sriracha mixed with a little melted butter. For the heat-seekers!
- 100% Whole Wheat: For a nuttier, heartier naan, you can substitute the all-purpose flour with whole wheat flour. The texture will be a bit denser, but the flavor is fantastic.
Beau’s Kitchen Chronicles
This recipe has truly evolved in my kitchen. I remember the first time I made it, I was so nervous about the sticky dough that I added way too much flour. The result was more like a tough cracker than a soft flatbread—a delicious, garlicky cracker, but a cracker nonetheless! I learned to embrace the stickiness, and the naan got infinitely better. Now, I always make a double batch because the first one never makes it to the table. My dog, Biscuit, has learned that the sound of the skillet means buttery crumbs might soon be falling from the sky. It’s our little kitchen ecosystem of joy.
Your Naan Questions, Answered!
Q: My naan didn’t puff up. What did I do wrong?
A: The most common culprit is a skillet that wasn’t hot enough. Make sure you give your pan plenty of time to preheat—a truly hot surface is key to creating that steam that puffs up the dough. Also, don’t roll the dough too thin; about ¼-inch is perfect.
Q: Can I make this dough ahead of time?
A: Absolutely! You can mix the dough, cover it tightly, and let it hang out in the fridge for up to 24 hours. Let it come to room temperature for about 30 minutes before you divide and roll it. The cold ferment will actually develop even more tangy flavor!
Q: I don’t have yogurt. What can I use instead?
A> No problem! You can use an equal amount of buttermilk, thinned-out sour cream, or even a plant-based milk with a teaspoon of lemon juice or vinegar added to it (to mimic the acidity). The goal is just to add tenderness and a touch of tang.
Q: Why is my naan tough?
A> This usually happens from over-kneading the dough or adding too much flour. Remember, we’re going for a soft, tender touch. A sticky dough is a good thing! A quick, gentle knead is all it needs.

Sourdough Discard Garlic Naan : Tangy, Chewy Flatbread with Buttery Garlic Bliss
Description
Turn your sourdough discard into garlicky, buttery bliss with this quick and easy flatbread! Soft, chewy, and full of flavor, these naans are perfect for dipping, stuffing, or just eating straight off the skillet.
Ingredients
For the Dough:
-
1 cup sourdough discard (unfed, 5–7 days old)
-
1 cup all-purpose flour (or ¾ cup flour + ¼ cup bread flour for extra chew)
-
¼ cup plain yogurt (or plant-based yogurt/buttermilk)
-
1 tsp baking powder
-
½ tsp baking soda
-
¼ tsp salt
For the Garlic Butter:
-
2 tbsp melted butter, ghee, or olive oil
-
1 clove garlic, minced
-
Fresh parsley or cilantro, for garnish
Instructions
-
Make the Dough:
-
In a bowl, mix sourdough discard, flour, yogurt, baking powder, baking soda, and salt.
-
Dough will be slightly sticky—perfect!
-
-
Knead & Rest:
-
Lightly flour your counter and knead the dough 1–2 minutes until smooth.
-
Cover and let rest 30–60 minutes.
-
-
Shape the Naans:
-
Divide dough into 4 pieces, roll each into a ball, then flatten into ¼-inch thick ovals.
-
-
Cook:
-
Heat a cast-iron or heavy skillet over medium-high heat until very hot.
-
Cook each naan 1–2 minutes per side until puffed and golden with charred spots.
-
-
Add Garlic Butter:
-
Mix melted butter with minced garlic. Brush generously over hot naan and sprinkle with herbs.
-
Notes
-
Don’t over-flour: Sticky dough = soft naan.
-
Skillet must be hot: This creates the signature puff and char.
-
Rest dough if it springs back: 5 extra minutes and it rolls easier.
-
Flavor twists: Add shredded cheese, herbs, or everything bagel seasoning for variation.
Nourishing Your Body & Soul
Let’s keep it real—this is a treat, a comfort food, a vehicle for joy (and garlic butter). But it’s also made with simple, whole ingredients. The sourdough discard offers the potential benefits of prebiotics, which are great for gut health. Using yogurt adds a bit of protein and probiotics. While it’s a carbohydrate-rich food, it’s a homemade one, free from the preservatives and additives found in many store-bought versions. Enjoy it as part of a balanced diet, savor every single bite, and know that you’re turning something that might have been wasted into a delicious, soul-satisfying creation. That’s a win in my book.
Approximate Nutritional Info (per naan): Calories: ~170, Fat: 5g, Carbohydrates: 27g, Protein: 4g, Sodium: 300mg
Your New Kitchen Staple Awaits
And there you have it, friends! Your guide to transforming that humble jar of sourdough discard into a family favorite. This Sourdough Discard Garlic Naan is more than just a recipe; it’s a reminder that the most delicious things often come from a place of resourcefulness and a little bit of kitchen courage.
I hope this recipe brings as much warmth, laughter, and garlicky goodness to your table as it has to mine. Remember, cooking is an adventure. So get that skillet hot, don’t fear the sticky dough, and brush on that garlic butter with a heavy, happy hand.
Final Thoughts: Your New Kitchen Staple Awaits
And there you have it, friends! Your guide to transforming that humble jar of sourdough discard from a guilt-inducing fixture into a celebrated family favorite. This Sourdough Discard Garlic Naan is more than just a recipe; it’s a reminder that the most delicious things often come from a place of resourcefulness and a little bit of kitchen courage.
It’s a testament to the magic that happens when we look at our “scraps” not as waste, but as potential. It’s about the joy of creating something with your own hands that is so profoundly good, it turns a simple weeknight meal into a small celebration.
I hope this recipe brings as much warmth, laughter, and garlicky goodness to your table as it has to mine. Remember, cooking is an adventure, not a perfect science. So get that skillet screaming hot, don’t fear the sticky dough, and brush on that garlic butter with a heavy, happy hand.
You’ve got this. Now, go forth and bake with abandon!
With a full heart and an even fuller plate,
Beau

Creamy Ground Beef Gnocchi Skillet
Creamy Ground Beef Gnocchi Skillet – One Pan, 30-Minute Meal
Your New Favorite Weeknight Hero is Here!
Hey friends, Beau here from Feastical! Let’s be real for a second. Some nights, you just need a dinner that feels like a warm, comforting hug without turning your kitchen into a war zone. You want something hearty, something cheesy, something that makes everyone at the table go quiet for a second because they’re too busy enjoying the first bite. But you also want to be in and out of the kitchen in, oh, about 30 minutes flat.
Sound like a dream? Well, pull up a chair and get ready to meet your new weeknight bestie: the Creamy Ground Beef Gnocchi Skillet.
This isn’t just another recipe; it’s your ticket to a stress-free, soul-satisfying meal. We’re talking plump, pillowy gnocchi, savory ground beef, and a rich, creamy tomato sauce that all come together in one single skillet. Yes, just one! That means flavor for days and cleanup in a flash. It’s the kind of meal that looks and tastes like you fussed for hours, but our little secret is that it’s practically effortless. So, if you’re ready to turn simple ingredients into pure dinnertime magic, grab your favorite skillet and let’s get cooking!
The Night This Skillet Saved My Sanity
I’ll never forget the first time I threw this dish together. It was a classic “What’s-in-the-pantry?” kind of night. You know the one. It had been a long day of recipe testing, the kitchen was a mess, and my stomach was growling louder than my blender. I had a pack of gnocchi, some ground beef from the freezer, and the usual tomato sauce suspects staring back at me. In a moment of “what’s the worst that could happen?” inspiration, I decided to just go for it—all in one pan.
The second that cream hit the tomato sauce and swirled into that gorgeous pinky-orange color, I knew I was onto something. The smell that filled my kitchen was pure, unadulterated comfort. I remember sitting down at my counter, eating straight from the skillet (no judgment here!), and thinking, “Wow. This is it.” It was the perfect balance of hearty and luxurious, all with minimal effort. It’s been a Feastical family favorite ever since, and I have a feeling it’s about to become one of yours, too.
Gathering Your Flavor Dream Team
Here’s the beautiful part: this recipe doesn’t require a special trip to the store. You probably have most of this hanging out in your kitchen right now! Let’s break down the all-star cast of characters.
- 1 lb Ground Beef: I like an 80/20 blend for the best flavor, but leaner beef works great, too. Chef’s Insight: For a lighter twist, ground turkey or Italian sausage are fantastic swaps!
- 1 package (16 oz) Store-Bought Potato Gnocchi: The humble hero! These soft potato dumplings are the ultimate shortcut to a satisfying meal. No need to boil them first—we cook them right in the sauce! Chef’s Insight: Look for them in the pasta aisle. You can also use shelf-stable or fresh refrigerated gnocchi.
- 1 tbsp Olive Oil: Just enough to get our aromas sizzling.
- 1 Small Onion, finely chopped: Our flavor foundation. It adds a subtle sweetness that balances the rich sauce.
- 3 Garlic Cloves, minced: Because is it even a cozy recipe without the beautiful scent of garlic hitting the pan? I think not.
- 1 can (14 oz) Crushed Tomatoes: This is the body of our sauce, giving it that classic, rich tomato base. Substitution Tip: If you have diced or pureed tomatoes on hand, those will work in a pinch, though the texture will be a bit different.
- ½ cup Heavy Cream: This is what transforms our sauce from a simple tomato base into a luxuriously creamy dream. Substitution Tip: For a lighter version, half-and-half will work, but the sauce won’t be quite as thick and rich.
- 1 tsp Italian Seasoning: A perfect little blend of herbs like oregano, basil, and thyme. It’s like a flavor shortcut in a jar!
- ½ tsp Red Pepper Flakes (optional): My little secret for a subtle kick of heat. It doesn’t make the dish spicy, just more interesting! Feel free to leave it out if you’re sensitive to heat.
- Salt and Black Pepper to taste: The dynamic duo of seasoning. Don’t be shy!
- ½ cup Shredded Mozzarella or Parmesan: The glorious, melty finish! I’m a mozzarella guy for that epic cheese pull, but Parmesan adds a wonderful salty, nutty flavor.
- Fresh Basil or Parsley, for garnish: A sprinkle of green at the end makes it pretty and adds a pop of fresh flavor.
Let’s Build Some Flavor, Step-by-Step
Alright, team, it’s go time! This is where the magic happens. I’ll walk you through every step, sharing my favorite little hacks to make this dish absolutely perfect.
- Heat the Oil & Sauté the Aromatics: Grab your largest, trustiest skillet (make sure it has a lid!) and place it over medium heat. Add that tablespoon of olive oil. Once it shimmers, toss in your chopped onion. We’re not looking for color here, just softness. Cook them for 3-4 minutes until they’ve turned translucent and sweet. Chef’s Hack: While the onion cooks, this is the perfect time to mince your garlic. Multitasking for the win!
- Wake Up the Garlic & Brown the Beef: Now, add your minced garlic to the pan. Ah, smell that? That’s the sound of deliciousness. Stir it around for just 30 seconds—we just want to fragrance the oil, not burn the garlic. Next, crumble in your ground beef. Use your spatula to break it up as it cooks until it’s beautifully browned and no pink remains. Chef’s Tip: If you’re using a higher-fat beef, you can drain off the excess grease now. A little bit adds flavor, but we don’t want a pool of it!
- Create the Sauce Base: Time for the main event! Pour in that entire can of crushed tomatoes. Add the Italian seasoning, red pepper flakes (if using), and a good pinch of salt and pepper. Give it all a big, hearty stir, scraping up any browned bits from the bottom of the pan. Those little bits are pure flavor gold! Bring the sauce to a gentle simmer.
- Cook the Gnocchi Right in the Sauce: Here’s the best part—no separate pot of boiling water needed! Simply pour the uncooked gnocchi directly into the simmering sauce and stir to coat them. Pop the lid on your skillet and let it simmer for 5-7 minutes. The gnocchi will cook by steaming in that flavorful sauce, absorbing all its goodness. Give it an occasional stir to make sure nothing sticks. You’ll know they’re done when they’re tender and floating to the top.
- The Creamy Transformation & Cheesy Finish: Turn the heat down to low. Pour in the heavy cream and stir until everything is combined into a smooth, creamy, rosy-colored sauce. Now, sprinkle that glorious cheese evenly over the top. Place the lid back on for just 1-2 minutes to let the cheese get all melty and fantastic.
- The Grand Finale: Take the skillet off the heat. Tear up some fresh basil or parsley and scatter it over the top. This adds a fresh, bright note that cuts through the richness perfectly. And there you have it—dinner is served, straight from the pan!
How to Serve This Cozy Masterpiece
Presentation is part of the fun, even on a busy weeknight! You’ve got a few awesome options here.
The Rustic Family-Style Approach: My personal favorite. Just plop the skillet right in the middle of the table (on a trivet, please!), with a big serving spoon. Let everyone dig in family-style. It’s inviting, it’s communal, and it screams, “Come and get it!”
The Plated Perfection Method: Use a large spoon or ladle to portion the gnocchi into shallow bowls. The bowls help cradle that incredible sauce. I love to add an extra little sprinkle of fresh herbs and maybe a dusting of Parmesan on top to make it extra pretty.
What to Serve on the Side: This dish is a full meal in one, but a simple side can round it out beautifully. A crisp, green salad with a sharp vinaigrette is the perfect contrast to the rich, creamy skillet. A few slices of crusty, warm garlic bread are also non-negotiable in my book—you’ll need them to sop up every last drop of that sauce!
Make It Your Own: 5 Delicious Twists
One of the best things about this recipe is how adaptable it is. Feel free to get creative and make it suit your mood or dietary needs!
- “Tuscan” Sun-Dried Tomato & Spinach: Stir in ½ cup of chopped sun-dried tomatoes and two large handfuls of fresh spinach right after you add the cream. The spinach will wilt beautifully into the sauce.
- Spicy Italian Sausage Swap: Replace the ground beef with a pound of Italian sausage (casings removed) for a deeper, fennel-spiced flavor. It’s a game-changer!
- Mushroom Lover’s Delight: Sauté 8 oz of sliced cremini mushrooms with the onions for an earthy, savory, and wonderfully hearty vegetarian version (just swap the beef for more mushrooms).
- Pumpkin Gnocchi Autumn Bake: In the fall, use pumpkin-shaped or sweet potato gnocchi and add a pinch of nutmeg to the sauce. It’s the coziest seasonal twist.
- Lighter & Leaner: Use ground turkey or chicken and swap the heavy cream for half-and-half or even full-fat coconut milk for a dairy-free option. The flavor profile will shift slightly, but it’ll still be delicious.
Beau’s Kitchen Notes & Stories
This recipe has truly evolved in my kitchen. The first time, I was so hungry I almost forgot the cream! Thank goodness I didn’t, because that’s what makes it special. Over time, I’ve learned that letting the sauce simmer for an extra minute or two after adding the cream helps it thicken up to the perfect coating consistency. I’ve also been known to throw in a splash of red wine when I add the tomatoes if I have a bottle open—it adds a wonderful depth of flavor. Honestly, don’t be afraid to play around. The best family recipes are the ones that become your own.
Your Questions, Answered!
I’ve made this dish countless times, and I’ve heard all your brilliant questions. Here are the answers to the most common ones.
Q: Can I use frozen gnocchi?
A: You can! There’s no need to thaw it first. Just add it directly to the skillet as you would with shelf-stable gnocchi. You may need to add a minute or two to the cooking time since it’s starting from frozen.
Q: My sauce is too thin! How can I thicken it?
A> No worries, this happens! The simplest fix is to let it simmer uncovered for a few more minutes after adding the cream. This will allow some of the liquid to evaporate and the sauce will naturally thicken. If you’re still in a rush, you can stir in a tablespoon of tomato paste.
Q: Can I make this creamy ground beef gnocchi ahead of time?
A> You can, but with a chef’s warning: the gnocchi will continue to absorb liquid as it sits, so it will be much thicker when reheated. I recommend making the sauce and browning the beef ahead of time, but cooking the gnocchi fresh when you’re ready to serve. If you do reheat leftovers, add a splash of broth or cream to loosen it up.
Q: What’s the best way to store leftovers?
A> Let the skillet cool completely, then transfer the leftovers to an airtight container. They’ll keep in the fridge for up to 3 days. Reheat gently in the microwave or in a saucepan on the stove over low heat, adding that splash of liquid I mentioned.

Creamy Ground Beef Gnocchi Skillet
Description
Creamy Ground Beef Gnocchi Skillet
One pan • 30 minutes • Cozy, creamy, and super filling
Ingredients
Base
-
1 lb ground beef
-
1 tbsp olive oil
-
1 small onion, finely chopped
-
3 garlic cloves, minced
-
1 can (14 oz) crushed tomatoes
-
½ cup heavy cream (or half-and-half)
-
1 package (16 oz) potato gnocchi (shelf-stable or refrigerated)
-
1 tsp Italian seasoning
-
½ tsp red pepper flakes (optional)
-
Salt and black pepper, to taste
Cheesy Finish
-
½ cup shredded mozzarella or Parmesan
Optional Garnish
-
Fresh basil or parsley
Instructions
1. Sauté aromatics
-
Heat olive oil in a large lidded skillet over medium heat.
-
Add the onion and sauté 3–4 minutes until soft.
-
Add garlic and cook 30 seconds.
2. Brown the beef
-
Add ground beef.
-
Cook until browned, breaking it up with a spatula.
-
Drain extra grease if needed.
3. Build the sauce
-
Stir in crushed tomatoes, Italian seasoning, optional red pepper flakes, salt, and pepper.
-
Bring to a gentle simmer.
4. Cook the gnocchi right in the sauce
-
Add the uncooked gnocchi straight to the skillet.
-
Stir well and cover.
-
Simmer 5–7 minutes, stirring occasionally, until tender.
5. Make it creamy + cheesy
-
Turn heat to low.
-
Stir in the heavy cream.
-
Sprinkle cheese on top.
-
Cover 1–2 minutes until melted.
6. Serve
Top with basil or parsley and serve right from the pan.
Notes
-
Sausage Version: Swap beef for Italian sausage.
-
Mushroom Style: Add mushrooms + omit meat.
-
Lighter Version: Use turkey + half-and-half.
Nutritional Info (For Your Peace of Mind)
I’m all about balance and knowing what’s going into your body. Here’s a general breakdown for one serving (about a quarter of this recipe). Remember, these are estimates and can vary based on the specific ingredients you use, like the fat content of your beef or the brand of gnocchi.
- Servings: 4
- Prep Time: 5 minutes
- Cook Time: 20 minutes
- Total Time: 25 minutes
- Calories per serving: ~520
- Fat: 30g
- Carbohydrates: 40g
- Protein: 25g
This dish is a fantastic source of protein to keep you full and satisfied. To lighten it up, you can use lean ground beef (90/10 or 93/7), opt for a lower-fat cheese, or use half-and-half instead of heavy cream.
Final Thoughts
And there you have it, my friend—everything you need to create a truly spectacular, comforting, and incredibly easy meal that’s sure to become a regular in your rotation. This Creamy Ground Beef Gnocchi Skillet is proof that you don’t need fancy techniques or a mountain of dishes to put something amazing on the table. It’s about simple, good food made with a whole lot of heart.
I’d love to hear how it turns out for you! Did you add your own twist? Did your family go crazy for it? Tag me on social @feastical or shoot me an email. Seeing your kitchen creations absolutely makes my day.
Now go forth, cook with confidence, and enjoy every single bite. Until next time, keep those spatulas handy and your hearts full.
– Beau

Banana Matcha Layer Cake
Moist Banana Matcha Layer Cake with Creamy Mascarpone Frosting
Indulge in a stunning Banana Matcha Cake! Moist banana layers meet earthy matcha mascarpone frosting. A show-stopping, flavor-balanced dessert.
When Banana Bread Met Its Match(a)
Hey friends, Beau here! Let me paint you a picture. You’re standing in your kitchen, looking at a trio of bananas that have gone from bright yellow to a beautifully speckled, almost-black brown. Your first thought might be, “Ah, perfect for banana bread.” And you’re not wrong! But today, I’m inviting you to level up that classic move. We’re turning those beautifully overripe bananas into something truly spectacular: a stunning, layered Banana Matcha Cake.
Now, I know what you might be thinking. “Matcha? In a cake? With banana?” Trust me, I had the same questions the first time I imagined it. But let me tell you, this isn’t just a cake; it’s an experience. The moist, intensely banana-flavored cake layers are a dream on their own, but when you pair them with a light, creamy, and ever-so-slightly earthy matcha mascarpone frosting, magic happens. The natural sweetness of the banana and the sophisticated, gentle bitterness of the matcha don’t just coexist—they sing in perfect harmony. It’s a dessert that feels both indulgent and somehow balanced, a show-stopper that’s as beautiful on your plate as it is in your mouth. So, if you’re ready to turn your kitchen into a bakery and impress everyone (including yourself!), grab your favorite mixing bowl. We’re about to create something unforgettable.
The Day I Ran Out of Chocolate Chips
This cake was born from a happy little kitchen accident. A few years back, I was determined to make my famous banana chocolate chip muffins for a last-minute potluck. I had my bananas mashed, my batter mixed, and I reached for the bag of chocolate chips… only to find a sad, empty void. Panic set in for a hot second. My eyes darted around the pantry, landing on a beautiful, vibrant green tin of ceremonial-grade matcha a friend had brought me back from Japan. In a moment of “what’s the worst that could happen?” inspiration, I whisked a spoonful into the mascarpone frosting I was also making for another project. I swiped a bit of banana bread with the green frosting, took a bite, and my jaw literally dropped. It was a revelation! The combo was so good, I immediately scrapped the muffin plan, poured the batter into cake pans, and the rest is Feastical history. Sometimes the best recipes come from running out of the thing you thought you needed most.
Gathering Your A-Team: The Ingredients
Here’s everything you’ll need to bring this masterpiece to life. Using high-quality ingredients here makes a world of difference, especially with the matcha!
For the Banana Cake Layers:
- 3 ripe bananas, mashed – The spottier, the better! These super-ripe guys are packed with natural sugar and moisture, giving our cake its incredible flavor and tender crumb.
- 2½ cups all-purpose flour – The trusty foundation of our cake layers. For a slightly denser, nuttier cake, you can swap 1 cup for whole wheat pastry flour.
- 1½ tsp baking soda – Our leavening agent. Make sure it’s fresh for a good rise!
- ½ tsp salt – The flavor enhancer. It balances the sweetness and makes everything pop.
- ¾ cup unsalted butter, softened – This creates a rich, tender texture. “Softened” means it should give easily when you press it. Don’t melt it!
- 1 cup granulated sugar – For straight-up sweetness and a lovely golden crust.
- ½ cup light brown sugar – This is the secret weapon for moisture and that deep, caramel-like flavor that pairs so well with banana.
- 2 large eggs – They bind the cake together and add structure. Let them come to room temperature for a smoother batter.
- 1 tsp vanilla extract – The classic flavor booster. A splash of almond extract is also a delicious friend here.
- 1 cup buttermilk – The tanginess cuts the richness and reacts with the baking soda for an incredibly light and fluffy cake. No buttermilk? No problem! Add 1 tbsp of lemon juice or white vinegar to a measuring cup, then fill with whole milk to the 1-cup line. Let it sit for 5 minutes until it curdles.
For the Matcha Mascarpone Frosting:
- 16 oz mascarpone cheese, chilled – This is like Italian cream cheese, but richer, creamier, and less tangy. Keep it cold until the very second you use it.
- 1½ cups heavy cream – Also very cold! We’re whipping this to give our frosting a light, airy, and pipeable consistency.
- ½ cup powdered sugar – Sweetens the frosting without any grittiness. You can adjust this to your taste.
- 1½ tsp matcha powder – Don’t skimp on quality! Use a ceremonial or culinary-grade matcha for the best color and flavor. A bitter, low-grade matcha will make a bitter frosting.
- 1 tsp vanilla extract – The perfect complement to both the matcha and the mascarpone.
Let’s Get Baking: The Step-by-Step Magic
Follow these steps, and you’ll have a flawless cake. I’ve packed in all my favorite chef hacks to ensure your success!
- Prep Like a Pro. Preheat your oven to 350°F (175°C). Now, grab three 8-inch round cake pans. Grease the bottoms and sides with butter or non-stick spray, then line the bottoms with a circle of parchment paper. This little trick is a total game-changer—it guarantees your cakes will release perfectly without a single crumb left behind. Chef’s Hack: If you only have two pans, that’s okay! Just set aside 1/3 of the batter while the first two layers bake, then wash and re-grease one pan for the final layer.
- Combine the Dry Goods. In a medium bowl, take your flour, baking soda, and salt. Grab a whisk and give them a good, thorough whisking. This does two things: it combines everything evenly, and it aerates the flour, leading to a lighter cake. Set this bowl aside.
- Creaming is Key. In a large bowl, use an electric mixer (hand or stand) to beat the softened butter with the granulated and brown sugars. We’re not just mixing; we’re “creaming.” Beat on medium-high speed for a good 2-3 minutes until the mixture is pale, fluffy, and beautiful. This incorporates air, which is essential for texture.
- Incorporate the Wet Ingredients. With the mixer on low, add the eggs one at a time, letting each one fully incorporate before adding the next. Scrape down the sides of the bowl. Now, mix in the mashed bananas and vanilla extract. Your kitchen should already be smelling incredible.
- The Final Mix. Here’s the secret to a tender cake: don’t overmix! Add about a third of your dry ingredients and mix on low until just combined. Follow with half of the buttermilk. Repeat with another third of the flour, the rest of the buttermilk, and finally the last of the flour. Stop mixing as soon as you no longer see streaks of flour. The batter might look a little lumpy—that’s perfect!
- Bake to Perfection. Divide the batter evenly between your three prepared pans. A kitchen scale is the best way to be precise, but if you don’t have one, just eyeball it. Smooth the tops. Bake for 22-26 minutes. You’ll know they’re done when the tops are springy to the touch and a toothpick inserted into the center comes out clean or with a few moist crumbs. Chef’s Hack: Rotate your pans halfway through baking for an even rise.
- The All-Important Cool Down. Let the cakes cool in their pans on a wire rack for 10 minutes. Then, run a knife around the edge, invert them onto the rack, and peel off the parchment paper. Let them cool completely. I mean it—completely! Frosting a warm cake is a recipe for a melted, slidey mess.
- Whip Up the Frosting. In a chilled bowl (I pop mine in the freezer for 10 minutes), combine the cold mascarpone, heavy cream, powdered sugar, matcha powder, and vanilla. Start your mixer on low to avoid a green cloud, then gradually increase the speed to medium-high. Whip until medium-stiff peaks form. It should be smooth, spreadable, and hold its shape. Don’t over-whip, or it can become grainy.
- Assemble Your Masterpiece. Place one cake layer on your serving plate or cake stand. Spread an even layer of frosting. Repeat with the second layer, more frosting, and then the third layer. Use the remaining frosting to cover the top and sides of the cake. You can go for a smooth “naked cake” look or playful swirls—it’s your creation!
Plating with Pizzazz: How to Serve This Beauty
This cake is a stunner all on its own, but a few little touches can take it to the next level. For a simple, elegant finish, I love a light dusting of matcha powder over the top right before serving. You can also sprinkle on some crushed pistachios for a lovely color contrast and a delightful crunch. If you’re feeling extra, a few edible gold flakes or fresh, delicate flowers make it feel truly celebratory.
When it’s time to slice, run your knife under hot water and wipe it dry between each cut. This gives you those pristine, clean slices that look like they came straight from a professional bakery. This cake pairs wonderfully with a cup of hot green tea to complement the matcha, or a strong cup of coffee to balance the sweetness. And honestly, a cold glass of milk is always a winning sidekick.
Make It Your Own: Delicious Twists & Swaps
Love the base recipe but want to play around? Here are some of my favorite ways to mix it up:
- Nutty Crunch: Add a cup of toasted, chopped walnuts or pecans to the cake batter for a wonderful textural contrast.
- Tropical Vibes: Stir ½ cup of shredded coconut into the batter and even toast a little extra to sprinkle on top of the frosting.
- Chocolate Drizzle: For the chocolate lovers, a simple dark chocolate ganache drizzle over the top of the frosted cake is a decadent and gorgeous addition.
- Gluten-Free Friendly: You can easily swap the all-purpose flour for a 1:1 gluten-free baking blend. I’ve had great success with this!
- Dairy-Free Delight: Use vegan butter, plant-based milk mixed with lemon juice for the “buttermilk,” and coconut cream chilled overnight for the frosting. Use a vegan mascarpone alternative if you can find one!
Beau’s Kitchen Chronicles
This recipe has become a Feastical favorite, and I’ve made it more times than I can count. Over the years, I’ve learned a few things. The first time I made the frosting, I was too eager and my mascarpone was a bit too warm. It turned into a soupy, delicious, but entirely un-spreadable mess. I had to chill it, re-whip it, and it was fine, but it taught me the importance of cold ingredients! I also used to be shy with the matcha, but I’ve found that the 1.5 teaspoons is the sweet spot for a flavor that’s present but not overpowering. This cake has been the star of birthdays, baby showers, and “just because” Tuesdays in my house, and I hope it finds a place in yours, too.
Your Questions, Answered!
Here are answers to some common questions to ensure your baking success.
Q: My frosting is too runny. What happened?
A: This is almost always a temperature issue! Either the mascarpone or heavy cream wasn’t cold enough, or the bowl was warm. Pop the entire bowl of frosting into the fridge for 20-30 minutes, then try whipping it again. Also, be careful not to overbeat, as mascarpone can sometimes “break” and become liquidy if whipped too vigorously.
Q: Can I make this cake ahead of time?
A: Absolutely! You can bake the cake layers a day in advance. Let them cool completely, then wrap them tightly in plastic wrap and store at room temperature. The frosting can be made a day ahead and stored in an airtight container in the fridge. Just give it a quick whip before assembling the cake. The fully assembled cake keeps beautifully in the fridge for up to 2 days.
Q: What kind of matcha should I use?
A> For the best color and a smooth, not bitter, flavor, I highly recommend a ceremonial-grade or a high-quality culinary-grade matcha. The bright, vibrant green color is a good indicator of quality. Avoid matcha that looks dull or brownish-green.
Q: My cake layers are dense. Why?
A> The most common culprit is overmixing the batter once the flour is added. This develops the gluten and leads to a tougher, denser texture. Remember, “just until combined” is your mantra! Also, double-check that your baking soda is fresh.
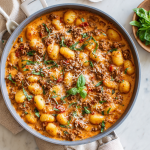
Banana Matcha Layer Cake
Description
Moist Banana Matcha Layer Cake with Creamy Mascarpone Frosting
A soft, banana-rich cake paired with a lightly sweet, earthy matcha mascarpone frosting. Beautiful, balanced, and perfect for any special occasion.
Ingredients
Banana Cake Layers
-
3 ripe bananas, mashed
-
2½ cups all-purpose flour
-
1½ tsp baking soda
-
½ tsp salt
-
¾ cup unsalted butter, softened
-
1 cup granulated sugar
-
½ cup light brown sugar
-
2 large eggs, room temperature
-
1 tsp vanilla extract
-
1 cup buttermilk
-
DIY buttermilk: Add 1 tbsp lemon juice or white vinegar to a cup, then fill with whole milk. Sit 5 min.
-
Matcha Mascarpone Frosting
-
16 oz mascarpone cheese, cold
-
1½ cups heavy cream, cold
-
½ cup powdered sugar
-
1½ tsp high-quality matcha powder
-
1 tsp vanilla extract
Instructions
1. Prepare the Cake Pans
-
Preheat oven to 350°F (175°C).
-
Grease three 8-inch round pans and line bottoms with parchment.
-
If you only have two pans: Bake two layers, then wash and reuse for the third.
-
2. Mix the Dry Ingredients
In a medium bowl, whisk together:
-
flour
-
baking soda
-
salt
Set aside.
3. Cream the Butter & Sugars
In a large bowl, using a hand mixer or stand mixer:
-
Beat softened butter, granulated sugar, and brown sugar for 2–3 minutes until light and fluffy.
4. Add Wet Ingredients
-
Beat in the eggs one at a time.
-
Mix in mashed bananas and vanilla.
5. Combine Wet & Dry
On low speed:
-
Add ⅓ of the dry ingredients
-
Add ½ the buttermilk
-
Add another ⅓ dry
-
Add remaining buttermilk
-
Finish with last ⅓ dry
Mix only until combined. Do not overmix.
6. Bake
-
Divide batter evenly among the three pans.
-
Bake 22–26 minutes, rotating halfway through.
-
Cakes are done when a toothpick comes out clean or with moist crumbs.
-
Cool in pans 10 minutes, then invert onto a rack and cool completely.
7. Make the Matcha Mascarpone Frosting
Use a cold bowl for best results.
-
Add mascarpone, heavy cream, powdered sugar, matcha, and vanilla.
-
Start mixing on low, then raise to medium-high.
-
Beat until medium-stiff peaks form.
-
Stop as soon as it holds shape — overwhipping can make mascarpone grainy.
-
8. Assemble the Cake
-
Place first cooled cake layer on a stand.
-
Spread frosting evenly.
-
Repeat with layer two and three.
-
Spread frosting on top and sides.
-
Keep chilled until serving for best stability.
Optional Decorations
-
Light matcha dusting
-
Crushed pistachios
-
Toasted coconut
-
Small flowers (food-safe)
Notes
Frosting too runny?
-
Mascarpone or cream wasn’t cold enough. Chill 20–30 min and rewhip.
Cake too dense?
-
Batter was overmixed
-
Baking soda may be old
Make-ahead
-
Cake layers: 1 day ahead, wrapped tightly at room temp
-
Frosting: 1 day ahead, refrigerate, re-whip before using
-
Fully assembled cake keeps 2 days in fridge
A Quick Nutritional Glance
Hey, I’m all about balance! While this is definitely a celebratory treat, it’s nice to know what you’re enjoying. This nutritional information is per slice (based on 12 slices) and is an estimate. The ripe bananas provide natural sugars and a bit of potassium, while the matcha offers a gentle caffeine lift and antioxidants. Remember, enjoying food made with love and shared with others is its own kind of nourishment!
Per Serving: Calories: ~420, Total Fat: 28g, Saturated Fat: 17g, Carbohydrates: 38g, Sugar: 23g, Protein: 6g, Fiber: 1g
Final Thoughts
And there you have it, my friends! The Banana Matcha Layer Cake that’s sure to become a new favorite. It’s a recipe that proves a little creativity can turn a simple ingredient like a brown banana into something extraordinary. It has the cozy, familiar comfort of banana bread but dressed up in its most elegant, party-ready outfit. I am so excited for you to try this. When you do, please tag me @Feastical or use the hashtag #Feastical so I can see your beautiful creations and share in the joy. Happy baking!

Banana Burnt Sugar Crunch Cake : A Lush Dessert with a Crackly Twist
Banana Burnt Sugar Crunch Cake: The Dessert That’s a Warm Hug and a Party Trick
Hey friends, Beau here. Let’s talk about that moment. You know the one. You’re standing in your kitchen, looking at a trio of bananas on your counter that have officially crossed over to the dark side. They’re speckled, they’re soft, they’re practically begging for a second act. Your first thought might be banana bread—and hey, I love a classic loaf as much as the next guy. But today? Today, we’re turning those humble, overripe fruits into something that feels like a celebration. We’re making my Banana Burnt Sugar Crunch Cake.
This isn’t just another banana cake. This is the cake that makes people’s eyes go wide. It’s the dessert you bring out and get to say, “Oh, that little crackly top? That’s just the burnt sugar crunch.” It’s soft, soulful, and deeply moist on the inside, thanks to our banana-starring role. But the real showstopper is that roof: a shatteringly crisp, translucent layer of caramelized sugar that breaks with a satisfying *snap*,
much like the top of a perfect crème brûlée. It’s a texture party in your mouth, and everyone’s invited. It’s the kind of simple-but-spectacular magic I live for here at Feastical, and I am so excited to walk you through it. So, tie on that apron, find that spatula (check the dishwasher, it’s probably in there), and let’s bake up some joy.
The Cake That Started With a “Whoops!”
This recipe has its roots in a happy little kitchen accident, as the best ones often do. I was about ten years old, “helping” my grandma make her famous banana cake. She was the queen of comfort food, and her kitchen always smelled like cinnamon and love. My job was to make the simple glaze—just sugar and a bit of water heated together. Well, I got distracted by our dog chasing his tail in the backyard, and by the time I looked back, the clear syrup had turned into a deep, dark, amber liquid. I was mortified. I thought I’d ruined everything.
But my grandma, being the kitchen wizard she was, just peered into the pot, gave a thoughtful hum, and said, “Well now, Beau, looks like we’ve made burnt sugar. It’s not a mistake, it’s a new recipe.” She let it harden on a piece of buttered foil, broke it into jagged pieces, and we scattered it over the top of the warm cake. That first bite was a revelation. The familiar, tender crumb was suddenly punctuated by this incredible, bitter-sweet, glass-like crunch. It was a lesson I’ve carried with me ever since: sometimes the best flavors come from taking things a step further, even if you get there by accident.
Gathering Your Cast of Characters
One of the things I love most about this cake is how simple the ingredient list is. We’re using pantry staples and turning them into pure gold. Here’s everything you’ll need, with a few of my chef-y insights to help you understand the “why” behind the “what.”
For the Banana Cake:
- 3 Ripe Bananas, Mashed: The spottier, the better! Those black freckles mean the starches have converted to sugars, giving you maximum sweetness and that intense banana flavor we’re after. No ripe bananas? You can “ripen” them quickly by baking whole, unpeeled bananas at 300°F for 15-20 minutes until the skins are black.
- 2 Eggs: Our trusty binders. They provide structure and richness. For a dairy-free version, a flax egg (1 tbsp ground flax + 3 tbsp water per egg, let sit for 5 mins) works beautifully.
- ½ Cup Unsalted Butter, Melted: This gives us an incredibly moist and tender crumb. Using unsalted lets us control the salt level. If you only have salted, just reduce the added salt in the dry ingredients by a quarter teaspoon.
- ¾ Cup Brown Sugar: I prefer brown sugar here for its deep molasses notes. It pairs so well with the bananas and adds a lovely moisture you don’t quite get with white sugar.
- 1 tsp Vanilla Extract: The flavor enhancer. It rounds out all the other flavors. Don’t skip it!
- 1 ½ Cups All-Purpose Flour: The foundation of our cake. For a slightly denser, whole-grain version, you can swap out up to half for whole wheat flour.
- 1 tsp Baking Soda: This is our leavening agent. It’s what gives the cake its lift and open texture. Make sure it’s fresh!
- ½ tsp Salt: Crucial for balancing the sweetness and making the flavors pop. It’s the secret weapon in every dessert.
- ½ tsp Cinnamon (Optional): I say “optional,” but I highly recommend it. It adds a warm, cozy depth that makes the whole kitchen smell like heaven.
For the Burnt Sugar Crunch Topping:
- ½ Cup Granulated Sugar: White sugar is best here because it caramelizes cleanly and clearly, giving us that beautiful glass-like finish.
- 1 tbsp Water: Just enough to get the sugar wet and help it dissolve evenly as it heats. It’s the kickstarter for our caramel.
- Pinch of Salt: A tiny pinch right in the caramel cuts the sweetness and makes the flavor more complex. Trust me on this.
Let’s Build Some Magic: Step-by-Step
Okay, team. Time to get our hands dirty (figuratively, of course—we’re using spoons). Follow these steps, and you’ll be a burnt sugar pro in no time.
- Preheat and Prep. First things first, get that oven preheating to a cozy 350°F (175°C). This gives it plenty of time to reach the perfect, even temperature. While it’s warming up, grease your 9-inch round cake pan. I’m a big fan of using a little butter and a dusting of flour, or for ultimate non-stick insurance, a quick spray of baking spray. Chef’s Hack: Line the bottom with a circle of parchment paper. It guarantees a clean release every single time.
- The Wet Team Assembles. In a large bowl, take your beautifully mashed bananas and add the eggs, melted (and slightly cooled) butter, brown sugar, and vanilla. Whisk it all together until it’s one happy, homogenous mixture. Don’t worry if it looks a little lumpy from the bananas—that’s texture and flavor! We want to see those little flecks.
- Bring in the Dry Squad. Now, gently sprinkle the flour, baking soda, salt, and that wonderful cinnamon over your wet ingredients. Use a spatula and fold everything together. Here’s the golden rule: stop mixing as soon as you no longer see streaks of flour. A few tiny lumps are A-OK. Overmixing is the enemy of a tender cake—it develops the gluten and can make it tough. We’re going for light and lovely.
- Bake to Perfection. Pour your batter into the prepared pan and smooth the top. Slide it into the center of your preheated oven and let it work its magic for 35-40 minutes. You’ll know it’s done when the top is golden, the edges pull away from the pan slightly, and a toothpick inserted into the center comes out clean or with a few moist crumbs. Chef’s Hack: Avoid opening the oven door for the first 25 minutes! That rush of cold air can cause the cake to fall.
- The All-Important Cool Down. Once baked, take the cake out and let it cool completely in the pan on a wire rack. I know, I know, it’s tempting to dig in. But patience is key here. If you try to add the hot sugar topping to a warm cake, it will melt and make the top sticky instead of crisp. We’re going for crunch!
- Create the “Crackle.” This is the fun part! In a small, heavy-bottomed saucepan, combine the granulated sugar, water, and pinch of salt. Place it over medium heat. Here’s the most important instruction: DO NOT STIR. Swirling the pan gently is allowed—and encouraged—to ensure even heating. But if you stir, the sugar can crystallize and become grainy. Just watch as it transforms from clear, to bubbling, to a light amber, and finally to a deep amber color. The second it hits that deep amber, take it off the heat! It will continue to cook from the residual heat in the pan.
- Form the Topping. Immediately and carefully pour the hot caramel onto a sheet of parchment paper. Tilt the pan or use the back of a spoon to spread it into a thin, even layer. It will harden within minutes. Let it cool completely, then break it into dramatic, jagged shards with your hands or the bottom of a glass.
- The Grand Finale. Just before you’re ready to serve, artfully arrange the burnt sugar shards over the top of your completely cooled cake. This keeps the crunch intact. Then, stand back and accept the applause.
How to Serve This Stunner
Presentation is part of the fun! You’ve created a masterpiece, so let’s show it off. I like to place the whole cake on a beautiful cake stand or a simple wooden board. When you cut a slice, you’ll hear that satisfying *crack* as the sugar topping shatters—it’s part of the experience!
While this cake is absolutely glorious all on its own, a few accompaniments can take it over the top. A dollop of freshly whipped cream is a classic choice, its cool creaminess balancing the rich cake and bitter-sweet crunch. For a real indulgence, a scoop of vanilla bean ice cream slowly melting into the warm cake (if you’ve served it slightly warmed) is pure bliss. And for my fellow coffee lovers, a strong cup of black coffee is the perfect partner to cut through the sweetness.
Make It Your Own: Fun Flavor Twists
The basic recipe is a total winner, but don’t be afraid to play with your food! Here are a few of my favorite ways to mix it up.
- Nutty Professor: Fold ¾ cup of chopped toasted walnuts or pecans into the batter right before pouring it into the pan. The nutty flavor and extra crunch are a match made in heaven with the bananas and caramel.
- Chocolate Chip Celebration: Who can resist? Add a heaping ½ cup of semi-sweet or dark chocolate chips to the batter. The pockets of melted chocolate make every bite a delightful surprise.
- Boozy Banana: For a more grown-up version, add a tablespoon of dark rum or bourbon to the wet ingredients. The flavor it adds is deep and incredible.
- Dairy-Free & Vegan Delight: It’s easy to adapt! Use vegan butter, two flax eggs, and make sure your sugar is certified vegan. The cake will be just as moist and delicious.
- Spiced Crunch: Add a pinch of cayenne pepper or smoked paprika to the sugar while you’re making the caramel. The subtle heat playing against the sweet is a next-level move for the adventurous foodie.
Beau’s Kitchen Chronicles
This cake has been with me through countless potlucks, birthday parties, and “just because” Tuesdays. It’s the recipe I get the most texts about, usually with a picture and a message like, “I can’t believe I made this!” The funniest story was the time I was demonstrating it for a friend and was talking so much I let the sugar get a *little* too dark. Let’s just say “burnt sugar” was taken very literally—it had a seriously smoky, almost bitter edge. We used it anyway, and you know what? My friend loved the intense, grown-up flavor. It was a good reminder that even within a “mistake,” there’s a personal preference waiting to be discovered. Don’t fear the amber color!
Your Questions, Answered
I’ve gotten a lot of questions about this cake over the years, so I’ve gathered the most common ones here to help you out.
Q: My burnt sugar topping turned out chewy, not crunchy. What happened?
A: This usually means one of two things: 1) The sugar wasn’t cooked to a deep enough amber color. It needs to be a pretty dark shade to harden properly. Or 2) The caramel was poured onto the cake before it had cooled completely, causing the steam to soften the sugar. Always make sure both the cake and the sugar disk are fully cooled before combining them.
Q: Can I make this cake ahead of time?
A: Absolutely! You can bake the cake a day in advance, wrap it tightly in plastic wrap once cool, and store it at room temperature. Make the sugar shards and store them in an airtight container at room temperature. Assemble right before serving to preserve the crunch.
Q: I’m scared of making caramel. Any tips?
A: You can do it! The key is patience and trusting your eyes, not the clock. Don’t stir, just swirl. And have all your tools ready (parchment laid out) because once it’s ready, you need to move quickly. If you see smoke, it’s probably a few seconds past perfect, but don’t panic—it’ll still be tasty!
Q: My cake is dense and didn’t rise much. Why?
A: The most common culprit is overmixing the batter after adding the flour. Remember, fold just until combined! Also, check the expiration date on your baking soda; if it’s old, it won’t provide the necessary lift.
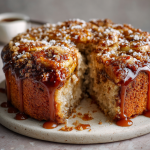
Banana Burnt Sugar Crunch Cake : A Lush Dessert with a Crackly Twist
Description
Banana Burnt Sugar Crunch Cake
A soft, moist banana cake topped with a shatteringly crisp caramel “crunch.”
Ingredients
For the Banana Cake
-
3 ripe bananas, mashed
-
2 large eggs
-
½ cup unsalted butter, melted (and slightly cooled)
-
¾ cup brown sugar
-
1 tsp vanilla extract
-
1 ½ cups all-purpose flour
-
1 tsp baking soda
-
½ tsp salt
-
½ tsp cinnamon (optional but recommended)
For the Burnt Sugar Crunch Topping
-
½ cup granulated sugar
-
1 tbsp water
-
Pinch of salt
Instructions
1. Prep
-
Preheat oven to 350°F (175°C).
-
Grease a 9-inch round cake pan, and line the bottom with parchment for easy removal.
2. Make the Cake Batter
-
In a large bowl, whisk together:
-
mashed bananas
-
eggs
-
melted butter
-
brown sugar
-
vanilla
-
-
In another bowl, whisk together:
-
flour
-
baking soda
-
salt
-
cinnamon
-
-
Add dry ingredients to the banana mixture and fold gently until just combined.
Don’t overmix — a few small lumps are fine.
3. Bake
-
Pour batter into prepared pan.
-
Bake 35–40 minutes, or until a toothpick comes out clean or with moist crumbs.
-
Cool completely in the pan.
4. Make the Burnt Sugar Crunch
Do this only once the cake is fully cooled.
-
Add sugar, water, and a pinch of salt to a small saucepan.
-
Heat over medium.
-
Do NOT stir.
-
Swirl the pan gently as it melts and darkens.
-
-
Cook until the sugar turns a deep amber color.
-
Immediately pour the hot caramel onto a sheet of parchment paper.
-
Spread thinly with the back of a spoon or by tilting the paper.
-
Let it harden fully, then break into “glass-like” shards.
5. Assemble
-
Place shards of burnt sugar on top of the cooled cake right before serving.
-
Slice and enjoy the crackly top + super moist banana cake underneath!
Notes
-
a step-by-step version with photos,
-
a one-page printable,
-
a shortened TikTok-style recipe,
-
or a metric version.
Nutritional Information (Because We’re Curious!)
I’m all about balance, and I believe knowing what’s in your food is part of the joy of cooking. Here’s a general breakdown per slice (assuming 10 generous slices). Remember, these are estimates and can vary based on the specific ingredients you use.
- Calories: 290
- Protein: 3g
- Carbohydrates: 38g
- Sugar: 25g
- Fat: 14g
- Saturated Fat: 7g
- Fiber: 2g
- Sodium: 180mg
This cake gets its natural sweetness and fiber from the bananas, and the brown sugar provides those lovely molasses notes. It’s a treat, for sure, but one made with real, simple ingredients you can feel good about sharing.
Final Thoughts
Well, there you have it. My go-to recipe for turning forgotten bananas into a dessert that feels both comforting and spectacularly fancy. It proves that you don’t need a long list of complicated ingredients to create something truly memorable. All you need is a little bit of knowledge, a willingness to embrace a happy accident or two,

Chocolate Strawberry Yogurt Clusters : Easy Healthy Viral Dessert
Looking for a guilt-free sweet bite that actually satisfies? These chocolate strawberry yogurt clusters are the viral dessert everyone’s loving – and for good reason. With simple, wholesome ingredients like Greek yogurt, fresh strawberries, and dark chocolate, they strike the perfect balance between indulgent and nourishing. Make a batch in under an hour and keep them ready in your freezer for snack cravings or a light dessert. It’s the kind of treat that hits the sweet spot every time.
The Dessert That’s Sweeping the Nation (And Your Freezer!)
Hey friends, Beau here! Let’s be real for a second. We all have that moment, right? It’s 3 PM, or maybe 9 PM, and a little voice in your head starts whispering about something sweet. Not a whole slice of cake, not a giant bowl of ice cream, but just a little something. A satisfying bite that feels like a treat but doesn’t leave you with that heavy, sugar-crashed regret.
For the longest time, my answer to that call was a handful of chocolate chips straight from the bag. It worked, but it wasn’t exactly a culinary triumph. Then, I discovered the magic of frozen yogurt clusters, and my snack game changed forever. These little guys are the superheroes of the feel-good food world. They’re popping up all over social media, and after you make your first batch, you’ll understand exactly why.
Imagine this: a creamy, tangy center packed with juicy, fresh strawberries, all enveloped in a crisp, rich shell of dark chocolate. They’re like a more sophisticated, healthier, and downright fun version of a certain popular candy-coated yogurt. The best part? You control the ingredients. You can make them as sweet or as simple as you like. They come together in minutes, and your freezer does most of the work. So, if you’re ready to have your new favorite healthy-ish dessert ready at a moment’s notice, grab a bowl and let’s get clustering!
A Berry Sweet Memory
This recipe takes me right back to my grandma’s kitchen. She wasn’t a fancy chef, but she was a wizard with simple, good food. Every summer, when strawberries were at their peak, we’d go to a pick-your-own farm. I’d inevitably end up with a red-stained shirt and a belly full of berries, and she’d just laugh.
Back home, she’d slice them up, mix them with a little sugar, and let them macerate until they created their own magical syrup. She’d serve them over pound cake or ice cream, but my favorite was when she’d let me dip the leftover berries in a tub of cool, plain yogurt and eat them like popsicles. That combination of tart yogurt and sun-warmed, sweet strawberries is a core taste memory for me. These clusters are my grown-up, chocolate-dipped homage to those afternoons. They capture that same joyful, simple spirit, with an extra layer of indulgence that I know my grandma would absolutely approve of.
Gathering Your Goodies: What You’ll Need
One of the things I love most about this recipe is its beautiful simplicity. You only need a handful of ingredients to create something truly special. Here’s the lineup:
- 1 cup fresh strawberries, diced – Look for berries that are bright red and fragrant. They’re the star of the show, so their flavor really shines through! If they’re a bit tart, don’t worry; we can adjust the sweetness. Chef’s Tip: Pat them dry after dicing to prevent excess water from making our clusters icy.
- 1 cup Greek yogurt (plain or vanilla) – I prefer full-fat Greek yogurt for its ultra-creamy texture and richness, but any fat percentage works. The Greek style is key because its thickness prevents the clusters from becoming too runny. Plain gives you a lovely tang, while vanilla adds a built-in sweetness.
- 1 tablespoon honey or maple syrup (optional) – This is your sweetness lever! Taste your strawberry-yogurt mix before freezing. If you like things a little sweeter, a drizzle of honey or maple syrup does the trick beautifully. For a sugar-free version, a drop of liquid monk fruit or stevia works too.
- 1 teaspoon vanilla extract (if using plain yogurt) – A splash of vanilla adds a warm, aromatic depth that pairs perfectly with both the berries and the chocolate. If you’re using vanilla yogurt, you can skip this.
- 1 ½ cups dark chocolate chips or melting chocolate – This is our glorious chocolate shell. I’m a dark chocolate fan (60-70% cacao) for its rich flavor and lower sugar, but milk chocolate or even white chocolate are fantastic here. For the smoothest dipping, I recommend using “melting wafers” like Ghirardelli or Guittard, as they’re specifically designed to set with a perfect snap.
- 1 teaspoon coconut oil – This little secret weapon makes your melted chocolate more fluid and easier to work with, resulting in a thinner, crispier shell. If you don’t have coconut oil, a tiny bit of refined avocado oil or even cocoa butter will work.
Let’s Make Some Magic: The Step-by-Step
Ready to see how these beautiful bites come together? It’s so easy, you’ll be a pro after one batch. Let’s walk through it.
- Prep Your Station. First things first, line a baking sheet with parchment paper. Don’t use wax paper, friends—it can stick and create a mess. Having your tray ready before you mix means you can work quickly and keep everything cold. Pop this empty tray into the freezer while you prepare the mixture. A cold tray helps the clusters start firming up faster!
- Create the Creamy Berry Heart. In a medium bowl, gently combine the diced strawberries, Greek yogurt, vanilla extract (if using), and your optional sweetener. The goal here is to coat the strawberries evenly without turning them into complete mush. A few gentle folds with a spatula does the trick. We want pockets of juicy berry, not strawberry soup.
- Form Your Clusters. Pull your cold baking sheet from the freezer. Using a spoon or a small cookie scoop (my personal favorite for uniform clusters), drop tablespoon-sized mounds of the mixture onto the parchment. You don’t need to be perfect, but try to keep them in distinct mounds so they freeze individually. Think of them as little flavor islands!
- The Big Freeze. Carefully slide the baking sheet into the freezer. Now, we practice a little patience. Let them freeze solid for at least 30-45 minutes. You’ll know they’re ready when you can poke one and it feels firm and doesn’t stick to your finger. This step is crucial—a firm cluster is a dippable cluster!
- Melt the Chocolate Dream. While the clusters are getting nice and cold, it’s chocolate time! You can melt your chocolate and coconut oil in a double boiler, but my go-to method is the microwave because it’s fast and easy. Put them in a microwave-safe bowl and heat in 20-second bursts, stirring vigorously after each burst. Stop when there are just a few small lumps left—the residual heat will melt them as you stir. This prevents the chocolate from burning and seizing. You want it smooth and glossy!
- The Grand Dipping (or Drizzling!). Now for the fun part! Remove your rock-solid clusters from the freezer. Using a fork or a dipping tool, quickly dip each cluster into the melted chocolate, swirling to coat it completely. Let the excess chocolate drip back into the bowl before placing it back on the parchment paper. If you’re more of a drizzler, just use a spoon to artfully lace the chocolate over the top. Both ways are delicious and look gorgeous.
- Set It and Forget It (For 15 Minutes). Once all your clusters are beautifully coated, return the baking sheet to the freezer for a final 15-20 minutes. This allows the chocolate shell to harden completely, giving you that satisfying snap when you bite into one.
How to Serve These Frozen Gems
Okay, the hardest part is over—waiting! Now, how do you enjoy your masterpiece? The beauty of these clusters is that they are meant to be eaten straight from the freezer. I keep a sealed container of them in there at all times for instant gratification.
For a simple dessert, pile a few into a small bowl and let them sit for just a minute before eating. That slight thaw makes the center extra creamy. Want to impress guests at a dinner party? Serve a couple of clusters alongside a cup of freshly brewed coffee for a sophisticated, light finish to the meal. They also make a fantastic packed lunch surprise or a post-workout refresher. Honestly, there’s no wrong time for one of these bites of joy.
Make It Your Own: Fun Flavor Twists
Once you’ve mastered the classic strawberry, the world is your oyster! This recipe is a fantastic blank canvas. Here are a few of my favorite riffs:
- Triple Berry Bliss: Swap the cup of strawberries for a mix of diced raspberries, blueberries, and blackberries. The different textures and flavors are incredible.
- Tropical Escape: Use diced mango and pineapple instead of strawberries, and mix a tablespoon of shredded coconut into the yogurt. For the chocolate, a white chocolate shell pairs perfectly here.
- Peanut Butter Cup Vibes: Fold two tablespoons of natural peanut butter or powdered peanut butter into the Greek yogurt base and use diced bananas instead of strawberries. Dip in milk chocolate for the ultimate PB&Chocolate experience.
- Lemon Blueberry Cheesecake: Use blueberries and add a tablespoon of lemon zest and a squeeze of lemon juice to the yogurt. It’s bright, tangy, and tastes just like a frozen cheesecake bite.
- Dairy-Free Delight: Easily make this vegan by using a plant-based Greek-style yogurt (like Kite Hill or Cocojune) and maple syrup, and ensure your chocolate is dairy-free.
Beau’s Kitchen Chronicles
This recipe has become a staple in my house, and it’s evolved in some funny ways. The first time I made them, I was in a hurry and didn’t pat my strawberries dry. Let’s just say I ended up with more of a chocolate-covered strawberry-yogurt *puddle*. They tasted great, but they looked… abstract. Lesson learned!
I’ve also found that using a small cookie scoop (the one I use for mini muffins) is an absolute game-changer. It keeps the clusters uniform, which means they freeze at the same rate and look professionally made. My other pro-tip? Make a double batch. You’ll be shocked at how quickly they disappear. I once caught my nephew sneaking them for breakfast, and honestly, I couldn’t even be mad.
Your Questions, Answered!
I’ve gotten a lot of DMs about this recipe, so I figured I’d answer the most common questions right here.
Q: Why are my clusters soupy/not freezing firm?
A: This usually boils down to two things: too much liquid from the strawberries (always pat them dry!) or not using a thick enough yogurt. Make sure you’re using Greek yogurt, not regular yogurt, which is much thinner. Also, ensure your freezer is at the correct temperature and you’re giving them the full freezing time.
Q: Can I use frozen strawberries?
A: You can, but you must thaw them completely and then press them in a paper towel to remove as much liquid as humanly possible. Frozen berries release a lot of water as they thaw, which can make your mixture too wet. For your first time, I highly recommend fresh.
Q: My chocolate cracked when I bit into it. What happened?
A: Ah, the classic chocolate shell crack! This happens if the frozen cluster is too cold when dipped, causing the chocolate to set too quickly and become brittle. Let your clusters sit on the counter for just 60-90 seconds before dipping to take the deep freeze off. The coconut oil also helps prevent this by making the chocolate a little more flexible.
Q: How long do they last in the freezer?
A: Stored in an airtight container or a freezer bag, they’ll keep their best quality for about 2-3 months. But let’s be honest, they’ve never lasted that long in my house!

Chocolate Strawberry Yogurt Clusters : Easy Healthy Viral Dessert
Description
These chocolate strawberry yogurt clusters are the viral snack everyone is loving. With just Greek yogurt, fresh strawberries, and melted chocolate, you get a satisfying bite that feels indulgent but still light and nourishing. They take minutes to make and store beautifully in the freezer for whenever cravings hit.
Ingredients
-
1 cup strawberries, diced and patted dry
-
1 cup Greek yogurt (plain or vanilla)
-
1 tbsp honey or maple syrup (optional)
-
1 tsp vanilla extract (skip if using vanilla yogurt)
-
1 ½ cups dark chocolate chips or melting wafers
-
1 tsp coconut oil
Notes
-
Triple Berry: Use raspberries, blueberries, and strawberries.
-
Tropical: Mango + pineapple + white chocolate.
-
Peanut Butter Cup: Add PB to the yogurt and use banana instead of strawberries.
-
Lemon Blueberry: Greek yogurt + blueberries + lemon zest.
A Nourishing Bite
Now, I’m not a nutritionist, but I am a chef who cares about what goes into my body. I love that this treat feels indulgent while also giving you a boost of good stuff. Using high-quality dark chocolate provides antioxidants, while the Greek yogurt packs a protein punch that helps keep you full and satisfied. The fresh strawberries add a dose of Vitamin C and fiber. It’s a dessert you can genuinely feel good about enjoying.
Here’s a rough nutritional breakdown per cluster (assuming the recipe makes 12 clusters):
- Calories: 120
- Protein: 4g
- Carbohydrates: 13g
- Sugar: 9g
- Fat: 6g
- Fiber: 2g
- Saturated Fat: 3g
- Sodium: 15mg
Final Thoughts
And there you have it! Your guide to making the easiest, most delightful healthy-ish dessert on the internet. These Chocolate Strawberry Yogurt Clusters are more than just a recipe; they’re your ticket to satisfying those sweet cravings without the compromise. They’re proof that feeling good about what you eat and treating yourself aren’t mutually exclusive concepts.
So, what are you waiting for? Grab those strawberries, fire up that freezer, and get ready to fall in love with your new favorite snack. I’d love to see your creations! Tag me @Feastical on social media so I can share your beautiful clusters with the community. Happy cooking, friends!
With a full heart and a happy freezer,
Beau
***
Prep Time: 10 minutes | Freeze Time: 1 hour | Total Time: 1 hour 10 minutes | Servings: 10–12 clusters