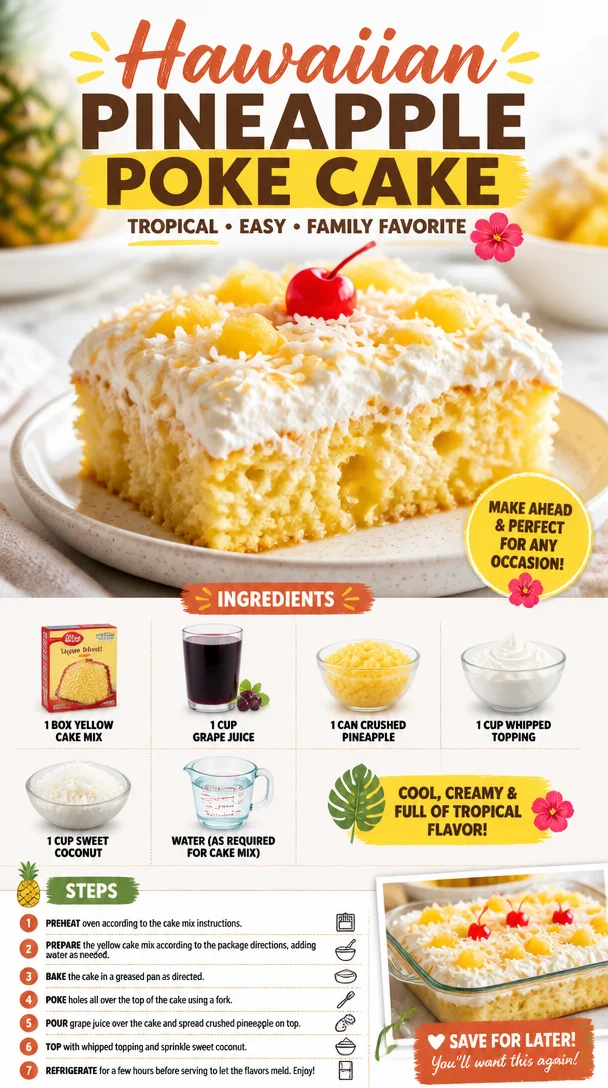
Hawaiian Pineapple Poke Cake
Hey there, food lovers! Welcome back to Feastical! Today we’re diving into something truly special—a delightful Hawaiian Pineapple Poke Cake that’s guaranteed to bring sunshine to your table and smiles to your guests. If you’ve ever had the pleasure of tasting a poke cake, you know exactly what I’m talking about. If not, well, buckle up because we’re about to take your dessert game to an entirely new level.
This cake is everything you could want in a dessert: moist, sweet, and bursting with tropical flavors. Imagine biting into a slice that has soaked up the essence of crushed pineapple and grape juice, creating a flavor explosion that transports you straight to a sunny beach in Hawaii. Not only is it utterly delightful, but it’s also among the simplest cakes you can whip up. Seriously, if you can mix ingredients and wait a little while for it to bake, you’re golden!
Now, this Hawaiian Pineapple Poke Cake is not just a recipe; it’s a loaded trunk of memories for me. I remember the first time I made it—it was for a family gathering, and the moment the cake came out of the oven, I was greeted with a wave of nostalgia. My Aunt Mabel used to make this cake every summer, and the scent alone was enough to bring everyone running to the kitchen. The best part? It was always an enthusiastic mess! We would all help with decorating and taste-testing—even the little ones had their hands on spoons. It was a true family affair filled with laughter, love, and, of course, a heaping dose of pineapple goodness.
Now, let’s get this party started! Grab your apron, and let’s bring a little piece of paradise into your kitchen.
Personal Story
Okay, let me take you back to one summer that feels forever etched in my memory. I was about ten years old, reeling with excitement because we were hosting our annual family luau in the backyard—a time when the sun never seemed to set and laughter echoed through our neighborhood. My Aunt Mabel, a culinary wizard, had just announced that she was bringing her famous Hawaiian Pineapple Poke Cake.
Now, if you’ve never experienced the joy of Aunt Mabel’s poke cake, let me paint a picture. The cake was always topped with clouds of whipped cream, crowned with sweet coconut shavings, and decorated with maraschino cherries—she called it “island bliss.” On the afternoon of the luau, the tantalizing aroma wafted through the open doors like an enchanting spell, pulling all of us toward the kitchen. I remember peeking at the cake cooling on the counter, only to be shooed away by Aunt Mabel, who insisted that patience was key.
The moment the cake was finally served, it practically disappeared. I recall sitting cross-legged on the grass, the sun kissing my cheeks, desperately trying to savor my slice while sneaking glances at everyone else’s faces as they delved into the deliciousness. That cake became a staple at our summer gatherings, and each bite was like a taste of joy itself—a beautiful reminder of food bringing us all together.
Looking back, I realize it isn’t just about the cake; it’s about shared experiences and creating new memories with loved ones. So let’s dive in and recreate those moments with your very own Hawaiian Pineapple Poke Cake!
Ingredients
Here’s what you’ll need to whip up this amazing Hawaiian Pineapple Poke Cake:
-
1 box yellow cake mix
This is the base of our poke cake! You can choose any brand you prefer, but I recommend going with a classic for that timeless flavor. If you want to lighten things up, a sugar-free cake mix works great too! -
1 cup grape juice
This gives a unique flavor profile while adding moisture. Feel free to swap it out with apple juice or a fruit punch if you want something a bit different. -
1 can crushed pineapple
This is the star of the show! The pineapple adds sweetness and pairs beautifully with the grape juice. Be sure to reserve the juice for mixing into your poke. You can also use fresh pineapple if you’re feeling fancy and adventurous! -
1 cup whipped topping
It’s what gives that creamy, dreamy texture on top. You can go for the store-bought kind or make your own—you know I’m all about keeping it simple, but it’s your cake! -
1 cup sweet coconut
This provides a lovely texture and a little tropical flair. Toasting the coconut before topping can intensify the flavor, but that’s entirely up to your taste! -
Water (as required for cake mix)
Follow the instructions on your cake mix box; usually, it requires some water in addition to the other ingredients.
Get these ingredients together, and get ready for something magical!
Step-by-Step Instructions
Now, let’s get started on creating this delicious cake! Don’t worry; I’ve got your back with some helpful tips and tricks along the way.
-
Preheat your oven
Preheat your oven to 350°F (175°C). This is an important first step because you want the oven nice and hot when your cake goes in. Think of it as giving your cake a warm welcoming hug! -
Prepare the baking pan
Grease a 9×13-inch baking pan with a little cooking spray or butter. This will ensure that your masterpiece doesn’t stick. Trust me, you don’t want to have a sticky situation on your hands! -
Mix the cake batter
In a large mixing bowl, combine the yellow cake mix, water (as per the package), and grape juice. Mix it on medium speed for about 2-3 minutes until it’s all well-combined and smooth. You could use an electric mixer or whisk it by hand—you do you! -
Pour into the pan
Now, it’s time to pour that vibrant batter into your greased pan, spreading it evenly. As you pour it in, take a moment to admire the swirls and colors. Doesn’t it look stunning already? -
Bake the cake
Pop the cake into your preheated oven and let it bake for about 25-30 minutes or until a toothpick inserted into the center comes out clean. While it’s baking, your kitchen will start to fill with that delicious, comforting smell. -
Cool the cake
Once baked, remove the cake from the oven and let it cool in the pan for about 10 minutes. After that, gently remove it from the pan to cool completely on a wire rack. This is crucial since we’ll be poking holes in it soon! -
Poke the cake
Once the cake is cooled, grab a fork and make holes evenly across its surface—about 1 inch apart. This is where the magic happens! The holes allow the juice to seep in, creating that delightful moistness that makes a poke cake so special. -
Prepare the pineapple and juice mix
While the cake is cooling, mix the reserved juice from the can of crushed pineapple and the pineapple itself together in a small bowl. Pour this mixture evenly over the poked cake. The juice will work its way down into the holes, flavoring every bite! -
Frost the cake
After the juice has been absorbed (give it about 30 minutes), it’s time to spread the whipped topping over the cake. Don’t be shy—make it thick and decadent! -
Add coconut
Finally, sprinkle the sweet coconut on top. If you’re feeling fancy, you can toast it lightly in the oven for a few minutes first. That added crunch and nutty flavor will take your cake to the next level! -
Chill the cake
Cover the cake and refrigerate it for at least an hour before serving. This helps meld all those flavors together beautifully.
And voila! You’ve created a Hawaiian Pineapple Poke Cake that’s not only delicious but also a blast to make.
Serving Suggestions
When it comes to serving your Hawaiian Pineapple Poke Cake, there are a few fun ideas to elevate your presentation.
-
Slice and Platter
Simply slice the cake into generous squares and place them on a festive platter. You can add a sprinkle of additional coconut and a maraschino cherry on top of each slice for that classic poke cake look! -
Individual Portions
For a more personal touch, serve the cake in individual glass cups. Layer some cake, a spoonful of extra pineapple, a dollop of whipped topping, and a sprinkle of coconut. Not only is it adorable, but it’s also super easy for guests to grab! -
Tropical Garnish
For that extra flair, consider adding some fresh tropical fruits like mango slices or kiwi on the side. It makes your dessert plate look spectacular and adds a pop of color! -
Serve with Ice Cream
A scoop of vanilla or coconut ice cream complements the poke cake beautifully, enhancing the creamy goodness and adding a delightful chill!
No matter how you serve it, this Hawaiian Pineapple Poke Cake is sure to be a crowd-pleaser.
Recipe Variations
Feeling adventurous? Here are a few delicious and unique variations of the Hawaiian Pineapple Poke Cake:
-
Mango-Pineapple Poke Cake
Swap half of the crushed pineapple for canned or pureed mango. The mango adds a tropical twist and brings a whole new dimension to your poke cake! -
Coconut Milk Substitute
For a more profound coconut flavor, replace the grape juice with coconut-infused juice or coconut milk mixed with a touch of sweetener. -
Nutty Addition
Add some chopped macadamia nuts to the top of your cake before serving for a delightful crunch and an authentic Hawaiian touch! -
Boozy Option
For adults only, consider adding a splash of rum to the pineapple juice or even a layer of coconut rum-flavored whipped topping. It’s a fun beachy twist! -
Sugar-Free Twist
Substitute the cake mix and grape juice for their sugar-free counterparts along with light whipped topping for a guilt-free dessert without sacrificing flavor!
Feel free to mix and match these variations to create your own signature poke cake!
Chef’s Notes
Despite its simplicity, this Hawaiian Pineapple Poke Cake has quite a history in my kitchen. What started as a beloved family treat has evolved into numerous variations to suit any occasion—birthdays, potlucks, or just a Tuesday night craving.
And the best part? It’s become a tradition for my own kids to help create it, each one adding their special touch or a little secret ingredient they come up with. The laughter and creativity they bring to the kitchen remind me of my own childhood, and it’s a beautiful cycle of loving food and laughter.
Plus, I can’t help but giggle when I think back to my attempt at turning this recipe into a multi-layer cake—in theory, it sounded great, but let’s just say it didn’t quite have the same vibe! I ended up transforming it back into a poke cake. Lesson learned: sometimes simple is best.
FAQs and Troubleshooting
Let’s tackle some common questions and potential hiccups you might run into!
-
Why is my cake dry?
If your cake comes out dry, it may not have been baked for the right amount of time or perhaps it didn’t get enough moisture. Make sure to follow the instructions and pour enough juice over the poked sections. -
Can I use fresh pineapple instead of canned?
Absolutely! Just make sure to finely chop it, and don’t forget to reserve the juice for that amazing flavor. -
Can I substitute the whipped topping?
Yes, you can definitely make your own whipped cream using heavy whipping cream, sugar, and vanilla extract if you prefer a homemade touch! -
How long will the cake last?
This cake is best enjoyed within 3-4 days when stored in the refrigerator. The longer it sits, the more the cake absorbs the juice—which can be good or bad depending on your taste!
Nutritional Info
While I always recommend enjoying treats like this in moderation, here’s a rough breakdown of the nutritional info for one slice of Hawaiian Pineapple Poke Cake (based on 12 servings):
- Calories: Approximately 250
- Total Fat: 7g
- Saturated Fat: 5g
- Cholesterol: 20mg
- Sodium: 250mg
- Total Carbohydrates: 43g
- Dietary Fiber: 1g
- Sugars: 25g
- Protein: 2g
Remember, these figures can change depending on the brands you use and if you add any variations!
Final Thoughts
There you have it, my friends! A delicious Hawaiian Pineapple Poke Cake ready to take center stage at your next gathering, backyard BBQ, or even just a cozy night at home. I hope this recipe transports you to a sunny paradise, packing each bite with nostalgia, family, and love.
As you dive into making your own poke cake, remember it’s not just about following the steps; it’s a journey of creativity, nostalgia, and deliciousness. Don’t hesitate to get playful with the flavors, twinkling in your own special touch.
So go ahead, grab your ingredients, gather your loved ones around the kitchen, and let’s make memories with this scrumptious Hawaiian Pineapple Poke Cake. After all, great food is meant to be shared and celebrated. Happy baking, and enjoy every bite! 🌺🍍✨
Print
Hawaiian Pineapple Poke Cake
- Total Time: 45 minutes
- Yield: 12 servings 1x
- Diet: Vegetarian
Description
A delightful Hawaiian Pineapple Poke Cake that’s moist, sweet, and bursting with tropical flavors, perfect for any gathering.
Ingredients
- 1 box yellow cake mix
- 1 cup grape juice
- 1 can crushed pineapple
- 1 cup whipped topping
- 1 cup sweet coconut
- Water (as required for cake mix)
Instructions
- Preheat your oven to 350°F (175°C).
- Prepare a 9×13-inch baking pan by greasing it with cooking spray or butter.
- Mix the yellow cake mix, water, and grape juice in a large mixing bowl on medium speed for about 2-3 minutes.
- Pour the batter into the greased pan, spreading it evenly.
- Bake the cake for about 25-30 minutes or until a toothpick comes out clean.
- Cool the cake in the pan for about 10 minutes, then remove it to cool completely on a wire rack.
- Poke holes evenly across the cooled cake using a fork.
- Prepare a mixture of reserved juice from the crushed pineapple and the pineapple itself, then pour it over the poked cake.
- Frost the cake with whipped topping after the juice has absorbed.
- Add sweet coconut on top, toasting it if desired.
- Chill the cake in the refrigerator for at least an hour before serving.
Notes
Serve with additional coconut, maraschino cherries, or tropical fruits like mango for an extra special touch.
- Prep Time: 15 minutes
- Cook Time: 30 minutes
- Category: Dessert
- Method: Baking
- Cuisine: Hawaiian
Nutrition
- Serving Size: 1 serving
- Calories: 250
- Sugar: 25g
- Sodium: 250mg
- Fat: 7g
- Saturated Fat: 5g
- Unsaturated Fat: 2g
- Trans Fat: 0g
- Carbohydrates: 43g
- Fiber: 1g
- Protein: 2g
- Cholesterol: 20mg
Keywords: poke cake, Hawaiian dessert, pineapple cake, tropical dessert, family recipe
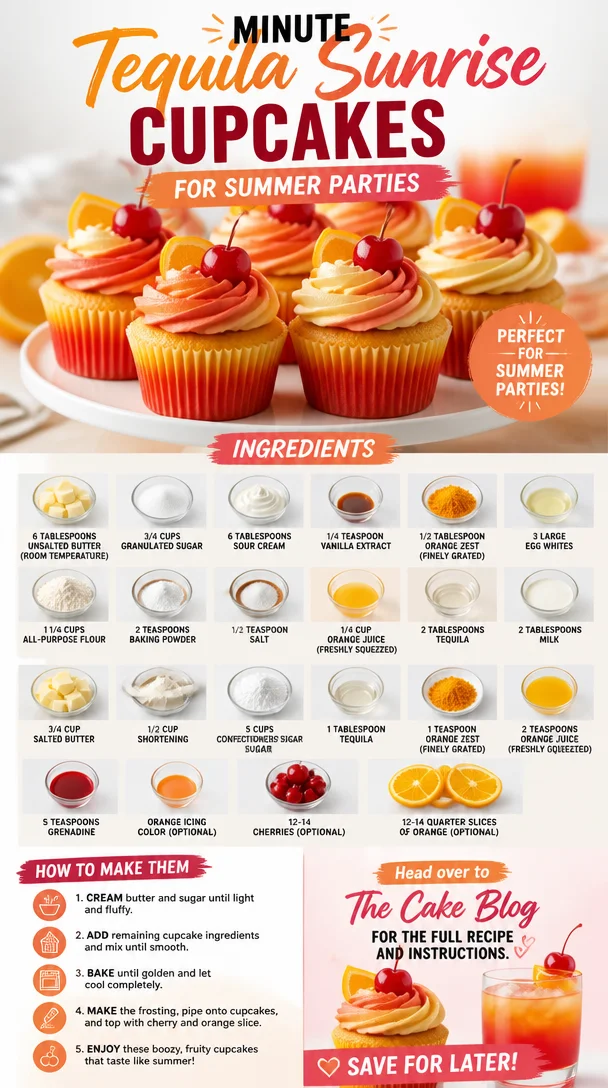
Minute Tequila Sunrise Cupcakes for Summer Parties
Tequila Sunrise Cupcakes: A Sweet Twist on a Classic Cocktail
Hey there, fellow food lovers! Welcome back to Feastical, where we whip up the most delicious and heartwarming recipes that bring joy and flavor to every kitchen. Today, I’m thrilled to share a fun and flavorful treat that captures the vibrant spirit of one of my favorite cocktails: Tequila Sunrise Cupcakes!
Imagine indulging in a moist, tender cupcake that’s infused with the sunny flavors of orange and tequila, all crowned with a fluffy, dreamy icing. Sounds like a party, right? Whether you’re hosting a festive gathering, celebrating a birthday, or just want to treat yourself to something delicious, these Tequila Sunrise Cupcakes are the perfect way to brighten up your day and sweeten your table.
Now, I know what you might be thinking—cupcakes and tequila? How did these two come together? Well, strap in, because I’ve got a story that will take you back to my days experimenting in the kitchen and discovering the joy of mixing flavors, especially when it comes to dessert!
A Shot of Nostalgia
Let me take you back to a warm summer evening a few years ago when my friends and I gathered at a local beach. We had set up picnic tables under the stars, and someone had brought along a bottle of tequila for the ultimate sunset toast. That magical moment was made even sweeter by the delicious cupcake my friend had baked as a little treat to celebrate our summer adventures.
As we sipped on our refreshing Tequila Sunsrises, the vivid colors of the sky above mirrored the hues of our drinks, and the taste of orange, grenadine, and tequila filled the air with laughter and love. It sparked an idea: what if I could bottle that nostalgic moment and turn it into a dessert? And voila! The Tequila Sunrise Cupcake recipe was born. Sharing this with you feels like a big hug, and it allows me to relive those cherished memories every time I bake them.
Ingredients
Let’s gather our essentials for these Tequila Sunrise Cupcakes! Here’s what you’ll need:
Cupcake Batter
- 6 tablespoons unsalted butter (room temperature): This adds moisture and a rich flavor to your cupcakes. If you’re looking to cut back on dairy, feel free to substitute with a plant-based butter.
- 3/4 cup granulated sugar: This sweetens the cupcakes perfectly, creating that tender crumb. Brown sugar can be used for a deeper flavor.
- 6 tablespoons sour cream: This ingredient keeps the cupcakes moist and adds a delightful tang. Greek yogurt makes an excellent substitute!
- 1/4 teaspoon vanilla extract: A hint of vanilla enhances all the flavors beautifully. Don’t skip it!
- 1/2 tablespoon orange zest (finely grated): Adds a bright, citrus note. If fresh oranges aren’t on hand, lemon zest can work too.
- 3 large egg whites: These keep our cupcakes light and fluffy. If you’re vegan, use aquafaba as a fabulous egg substitute.
- 1 1/4 cups all-purpose flour: The foundation for our cupcake batter. Make sure to spoon it into the measuring cup for accuracy!
- 2 teaspoons baking powder: This helps our cupcakes rise. Make sure it’s fresh for best results.
- 1/2 teaspoon salt: Just a pinch enhances all the flavors. Don’t skip it!
- 1/4 cup orange juice (freshly squeezed): Brings the freshness of citrus to each bite. Store-bought works too if you’re in a pinch.
- 2 tablespoons tequila: The star of our show! If you’re feeling adventurous, try using flavored tequila, like jalapeño or orange.
Frosting
- 3/4 cup salted butter: Provides a creamy base for our frosting. You can use unsalted butter if you prefer more control over salt levels.
- 1/2 cup shortening: This helps the frosting maintain its shape. If you want a purely butter-based frosting, that’s perfectly fine too!
- 5 cups confectioners’ sugar: This will make our frosting sweet and fluffy. You may want to adjust the amount based on how sweet you like your frosting.
- 1 tablespoon tequila: A little splash of pizzazz! It ties in the cupcake’s flavor nicely.
- 1 teaspoon orange zest (finely grated): For an extra zing in our icing.
- 2 teaspoons orange juice (freshly squeezed): To soften the frosting and add flavor.
- 5 teaspoons grenadine: Regular or a cherry syrup version for that lovely sunset color!
- Orange icing color (optional): For fun added color and visual appeal!
- 12-14 cherries (optional): For garnishing on top—can’t resist a cherry!
- 12-14 quarter slices of orange (optional): Adds a festive touch to your cupcakes.
Step-by-Step Instructions
Alright, my eager bakers, let’s get those aprons on! We’re about to create some mouthwatering Tequila Sunrise Cupcakes.
-
Preheat your oven: Set your oven to 350°F (175°C) so it’s nice and hot when our cupcakes are ready to go.
-
Prep your muffin tins: Line your cupcake pans with paper liners. This makes for easy clean-up and adds a pop of color!
-
Cream the butter and sugar: In a large bowl, beat together the unsalted butter and granulated sugar until light and fluffy. This process is essential for creating a light cupcake. It can take about 3-5 minutes. Pro tip: Use a handheld or stand mixer for the best results!
-
Add the sour cream and vanilla: Mix in the sour cream, vanilla extract, and orange zest until well combined. These ingredients will help create a tender cupcake and infuse it with flavor.
-
Incorporate the egg whites: Add the egg whites in one at a time, mixing just until blended after each addition. Don’t overmix; we want to keep it airy!
-
Combine dry ingredients: In a separate bowl, whisk together the flour, baking powder, and salt. This helps ensure even distribution and prevents clumps.
-
Gradually mix it all: Alternately add the dry ingredients and the freshly squeezed orange juice to the wet mixture. I usually start and end with the dry ingredients. Gently fold everything together with a spatula until just combined. Don’t worry if a few lumps remain!
-
Fold in the tequila: Now comes the fun part! Add in those 2 tablespoons of tequila and gently fold until combined. Trust me; this adds a delicious kick!
-
Fill the cupcake liners: Using an ice cream scoop or a spoon, fill the liners about two-thirds full—this allows room for the cupcakes to rise beautifully.
-
Bake those beauties: Pop them into the preheated oven and bake for 18-20 minutes, or until a toothpick inserted in the center comes out clean. Bake them until they’re just golden on top—this ensures the moistness inside.
-
Cool the cupcakes: Once done, let them cool in the pans for a few minutes, then carefully transfer them to a wire rack to cool completely.
Frosting Time!
-
Beat the butter and shortening: In a large bowl, cream together the salted butter and shortening until light and fluffy. This can take about 3-5 minutes too!
-
Add the confectioners’ sugar: Gradually add in your confectioners’ sugar, mixing on low to prevent a sugary cloud. Once combined, increase to medium speed until smooth and creamy.
-
The flavorings: Combine the tequila, orange zest, and orange juice, and add it to the frosting mixture. Mix until well blended.
-
Adjust consistency: If your frosting is too thick, add a splash more of orange juice. If it seems too thin, adding more powdered sugar should do the trick!
-
Add the grenadine: Finally, fold in those five teaspoons of grenadine for an added swirl of color and flavor. You can also put some in a piping bag for decoration!
-
Decorate your cupcakes: Use a piping bag with a star nozzle to give those cupcakes a beautiful, swirled finish. You can also spread it on with a knife for a rustic look.
Serving Suggestions
Once your gorgeous Tequila Sunrise Cupcakes are iced, it’s time to present them! An ideal way to serve is to place them on a decorative cake stand or platter. This adds that wow factor for guests and elevates the whole dessert experience.
To make it even more festive, garnish each cupcake with a cherry or a quarter slice of orange on top. For an Instagram-worthy touch, you can drizzle more grenadine over the top just before serving. Your guests will love the presentation almost as much as the flavor!
Recipe Variations
Now that you’ve got the classic Tequila Sunrise Cupcakes down, let’s jazz things up with some fun variations! Here are a few ideas:
-
Spicy Twist: Add a pinch of cayenne or chili powder to the batter for a spicy kick! It pairs surprisingly well with the sweetness.
-
Fruit Infusion: Instead of using just orange juice, try mixing in some pineapple or mango juice for a tropical flair!
-
Mini Cupcakes: Got a party? Make these as mini cupcakes for bite-sized treats. Just reduce the baking time to about 10-12 minutes!
-
Vegan Delight: Swap out the eggs for aquafaba, the butter for plant-based alternatives, and use coconut cream for the frosting to make this recipe vegan!
-
Get Creative with Icing: Try a different-flavored frosting, like key lime or coconut. The possibilities are endless!
Chef’s Notes
Baking is all about joy, creativity, and a sprinkle of love. I remember the first time I tried these cupcakes at a summer BBQ; everyone was buzzing over how delightful they were! Over the years, I’ve made tweaks and substitutions depending on my audience and preferences, and that’s the best part about baking—make it your own!
Fun fact: the idea of turning a cocktail into a dessert was a “lightbulb” moment for me, and it inspired several other boozy dessert recipes! Who knew cocktails and cupcakes could get along so well?
FAQs and Troubleshooting
-
What if my cupcakes are too dense?
- This usually happens if overmixed. Always mix until just combined, especially after adding dry ingredients.
-
Can I make these cupcakes ahead of time?
- Absolutely! You can bake them a day or two ahead. Just store them in an airtight container. Frost them the day you plan to serve.
-
Is the alcohol content high?
- Not at all! The alcohol cooks out during baking, leaving just the flavors behind. However, if you prefer, you can eliminate the tequila entirely and still have delicious cupcakes!
-
Can I freeze these cupcakes?
- Yes, you can! Either freeze the unfrosted cupcakes or frost them first. Just wrap tightly and they’ll stay fresh for up to 3 months.
Nutritional Info
Now, let’s break down the nutritional aspects of our delicious Tequila Sunrise Cupcakes. Each cupcake (without frosting) contains approximately:
- Calories: 180-220
- Total Fat: 8g
- Saturated Fat: 4g
- Cholesterol: 40mg
- Sodium: 50mg
- Total Carbohydrates: 30g
- Dietary Fiber: 0g
- Sugars: 15g
- Protein: 2g
Keep in mind that adding the frosting will increase the calorie count, so treat yourself in moderation, or share with friends!
Final Thoughts
Well, friends, that wraps up another exhilarating culinary adventure here at Feastical. I hope you’re as excited to make these Tequila Sunrise Cupcakes as I am to share them with you! They’re not just cupcakes; they’re a celebration in each bite, a memory on your plate, and a treat for the soul.
Remember, every great recipe can be adapted, personalized, and—most importantly—shared with the people you love. So now, go grab those ingredients and get baking! Don’t forget to snap a pic of your creations and tag me so I can see your delicious handiwork. Until next time, happy baking and cheers to your next kitchen adventure!
Print
Tequila Sunrise Cupcakes
- Total Time: 50 minutes
- Yield: 12 servings 1x
- Diet: Vegetarian
Description
Delicious cupcakes infused with orange and tequila flavors, topped with fluffy frosting and garnished with cherries and orange slices.
Ingredients
- 6 tablespoons unsalted butter (room temperature)
- 3/4 cup granulated sugar
- 6 tablespoons sour cream
- 1/4 teaspoon vanilla extract
- 1/2 tablespoon orange zest (finely grated)
- 3 large egg whites
- 1 1/4 cups all-purpose flour
- 2 teaspoons baking powder
- 1/2 teaspoon salt
- 1/4 cup orange juice (freshly squeezed)
- 2 tablespoons tequila
- 3/4 cup salted butter
- 1/2 cup shortening
- 5 cups confectioners’ sugar
- 1 tablespoon tequila (for frosting)
- 1 teaspoon orange zest (finely grated, for frosting)
- 2 teaspoons orange juice (freshly squeezed, for frosting)
- 5 teaspoons grenadine
- 12–14 cherries (optional, for garnish)
- 12–14 quarter slices of orange (optional, for garnish)
Instructions
- Preheat your oven: Set your oven to 350°F (175°C).
- Prep your muffin tins: Line your cupcake pans with paper liners.
- Cream the butter and sugar: In a large bowl, beat together the unsalted butter and granulated sugar until light and fluffy.
- Add the sour cream and vanilla: Mix in the sour cream, vanilla extract, and orange zest until well combined.
- Incorporate the egg whites: Add the egg whites in one at a time, mixing just until blended.
- Combine dry ingredients: In a separate bowl, whisk together the flour, baking powder, and salt.
- Gradually mix it all: Alternately add the dry ingredients and orange juice to the wet mixture.
- Fold in the tequila: Add in the 2 tablespoons of tequila and gently fold until combined.
- Fill the cupcake liners: Fill the liners about two-thirds full.
- Bake those beauties: Bake for 18-20 minutes, until a toothpick comes out clean.
- Cool the cupcakes: Let them cool in the pans for a few minutes, then transfer them to a wire rack.
- Beat the butter and shortening for frosting: In a large bowl, cream together the salted butter and shortening until light and fluffy.
- Add the confectioners’ sugar: Gradually mix in the sugar until smooth and creamy.
- The flavorings: Combine the tequila, orange zest, and orange juice, and add to the frosting mixture.
- Adjust consistency: If too thick, add more orange juice; if too thin, add more powdered sugar.
- Add the grenadine: Fold in the grenadine for color and flavor.
- Decorate your cupcakes: Use a piping bag for decoration.
Notes
For an extra festive touch, garnish each cupcake with a cherry or orange slice. Adjust the sweetness of the frosting by modifying the confectioners’ sugar to your liking.
- Prep Time: 30 minutes
- Cook Time: 20 minutes
- Category: Dessert
- Method: Baking
- Cuisine: Mexican
Nutrition
- Serving Size: 1 cupcake
- Calories: 250
- Sugar: 16g
- Sodium: 200mg
- Fat: 10g
- Saturated Fat: 5g
- Unsaturated Fat: 3g
- Trans Fat: 0g
- Carbohydrates: 35g
- Fiber: 0g
- Protein: 2g
- Cholesterol: 40mg
Keywords: tequila cupcakes, dessert, festive dessert, cupcakes, cocktail-inspired desserts
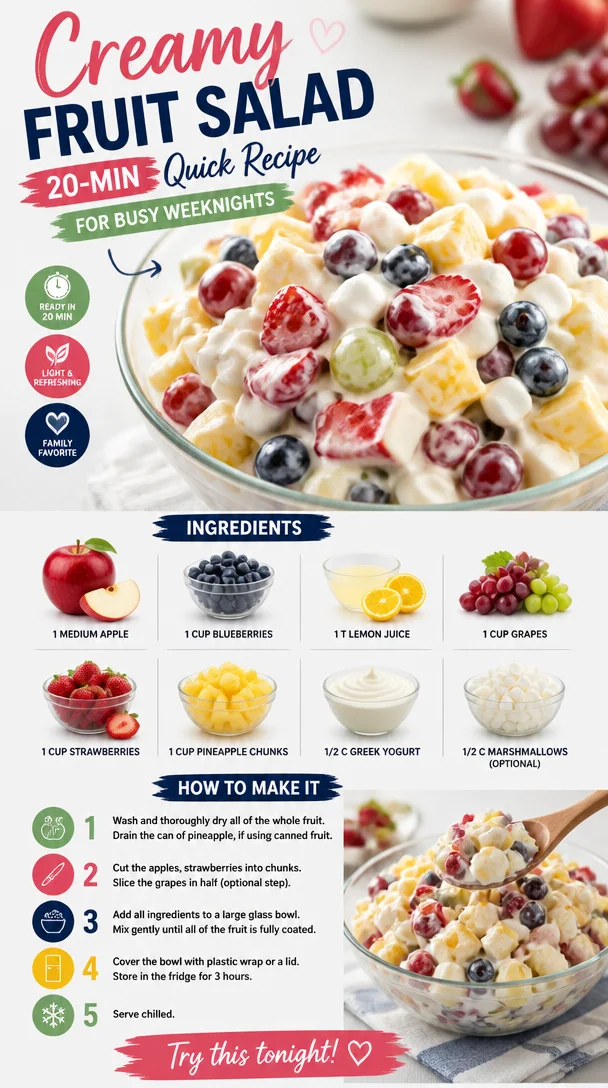
Creamy Fruit Salad: 20-Min Quick Recipe for Busy Weeknights
Creamy Fruit Salad: A Bowl of Sunshine
Welcome back to Feastical, my foodie friends! Today, we’re diving into a dish that’s as vibrant and delightful as a summer day: Creamy Fruit Salad! This isn’t just any ol’ fruit salad; oh no! We’re talking about a colorful medley of fruity goodness, drizzled in a smooth, creamy dressing that is guaranteed to transport your taste buds straight to happyville. Whether it’s a potluck, picnic, or simply a fresh addition to your everyday meals, this creamy fruit salad is a showstopper that brings joy with every bite.
A Dash of Nostalgia
Isn’t it funny how food has a way of bringing back memories? For me, my love affair with fruit salad began in my grandma’s kitchen during hot summer afternoons. The little wooden table was often piled high with fresh fruits from her garden: juicy strawberries, plump blueberries, and the sweetest grapes you could ever imagine. As a kid, I loved to help her chop up the fruit. We had this simple yet delightful ritual: she’d whip up a creamy dressing using yogurt and a splash of lemon juice, and together, we’d toss the fruit together like the perfect harmony of flavors. I still remember how the sun poured through the window, lighting up the colorful fruit like jewels, and how my grandma would wink and say, “Food tastes better when you make it with love!” That’s the spirit I’ve captured in this recipe!
A Rainbow of Ingredients
Let’s gather the ingredients for our Creamy Fruit Salad—trust me when I say, it’s as easy-peasy as it gets!
-
1 medium apple: A crunchy addition. Use a sweet variety like Fuji or Gala for extra flavor, or swap in pears for a twist!
-
1 cup blueberries: Bursting with antioxidants and flavor. If you’re out of blueberries, just include another berry like raspberries or blackberries for a similar vibe.
-
1 tablespoon lemon juice: Adds zing and helps keep the fruit fresh. You can use lime juice if you’re looking for a different citrus kick!
-
1 cup grapes: Juicy and bite-sized—perfect for salad! Red, green, or even a mix work beautifully. No grapes? Chopped kiwi would be a fun alternative.
-
1 cup strawberries: Sweet and bright; cut them into halves or quarters. If strawberries are out of season, consider using diced mango instead—they’re both tropical and fun!
-
1 cup pineapple chunks: Adds a tropical flair that’ll leave you daydreaming about the beach! You can opt for canned in juice (drained) if fresh isn’t available.
-
1/2 cup Greek yogurt: This is the creaminess factor! Full-fat or low-fat works too. If you’re after a vegan option, coconut yogurt is a fabulous substitute to create that luscious mouthfeel.
-
1/2 cup marshmallows (optional): For those wanting a bit of nostalgia and fluffiness! You can skip these if you prefer a less sweet salad or want to keep things healthy.
Step-by-Step Instructions
Alright, let’s make this magic happen! Follow these steps, and watch as your kitchen transforms into a fruity wonderland:
-
Prepare the Fruit: Start by washing all your fruits thoroughly. Pat them dry with a clean kitchen towel or paper towels. This step is essential—no one likes a soggy fruit salad!
-
Chop the Apple: Dice your apple into bite-sized pieces. There’s no need to peel; the peel adds color and nutrients. Plus, it’s quicker! Just remember to core it. If you’re worried about browning, toss the pieces in a teeny splash of lemon juice right after cutting.
-
Slice the Strawberries: Remove the green tops and slice them into halves or quarters depending on their size. This allows for an even mix with the other fruits while showcasing their gorgeous color.
-
Prep the Grapes and Blueberries: For grapes, simply wash them and remove from the stem. Keep them whole for pops of juice in each bite! Wash the blueberries too—no fuss here. They can just join the party!
-
Tropical Vibes with Pineapple: If you’re using fresh pineapple, cut off the skin and core, then chop into uniform chunks. If canned, drain well and give them a quick rinse.
-
Make the Creamy Dressing: In a medium bowl, combine your Greek yogurt, the tablespoon of lemon juice, and mix well until creamy and smooth. This is where the magic happens! Feel free to add a drizzle of honey or maple syrup if you prefer it sweeter.
-
Combine the Ingredients: In a large mixing bowl, combine all your freshly cut fruits with the creamy dressing. Gently fold everything together with a spatula so as not to mush the delicate fruits!
-
Add Marshmallows: If you’re going the extra sweet route and adding marshmallows, now’s the time. Fold them through the salad for a delightful surprise.
-
Chill and Serve: Cover the bowl with cling wrap or a lid, and let it chill in the refrigerator for about 30 minutes. This allows the flavors to meld beautifully and keeps it refreshingly cool!
Plating and Serving Suggestions
Now that your creamy fruit salad is all ready to go, let’s talk about how to present this beauty! A large glass bowl allows the colors to shine through—think of it as showing off a delightful gem. Serve it alongside your favorite brunch dishes, as a vibrant side at barbecues, or even as a delightful dessert.
For an elegant touch, consider serving it in individual glasses or bowls. You can even garnish each serving with a sprig of mint or sprinkle some crushed nuts on top for texture. Pair with homemade granola for an added crunch, or serve it as part of a larger brunch spread with pancakes or waffles. Each scoop should feel like a little burst of summer!
Recipe Variations
Get ready to switch things up! Here are a few creative variations to jazz up your creamy fruit salad:
-
Citrus Melange: Swap the pineapple and apples for oranges and grapefruit for a refreshing citrus take. Do keep the creamy dressing for balance!
-
Nutty Addition: Toss in some walnuts or almonds for added crunch and healthy fats.
-
Tropical Paradise: Add diced kiwi and papaya instead of apples and pineapple for a true island experience.
-
Berry Blast: Make it a berry medley! Combine strawberries, blueberries, raspberries, and blackberries for a double-dose of fruit flavor.
-
Vegan Delight: Use your favorite non-dairy yogurt and add chia seeds for extra nutrition!
A Few Chef’s Notes
As with any beloved recipe, this creamy fruit salad has its roots in the desire for simplicity and heartiness. Back in Grandma’s kitchen, we didn’t have fancy ingredients—just whatever she had in her pantry. That’s part of what’s so special about this dish: it evolves with what’s on hand and your taste preferences. Plus, have I mentioned how forgiving this recipe is? Feel free to play around with the fruits; there’s no right or wrong here!
Oh, and I must confess: I once made this salad for a potluck, and instead of marshmallows, I accidentally grabbed a bag of jelly beans. Let’s just say the kids loved it, and it became a ‘Dessert Salad’ instead!
FAQs and Troubleshooting
Q: Can I make this salad ahead of time?
A: Yes, you can! Just prepare the fruits and dressing separately and combine them a few hours before serving. This keeps everything fresh and prevents the fruit from getting too mushy.
Q: My dressing is too thick; what do I do?
A: No worries! You can thin it out with a splash of milk or almond milk. Stir until you reach your desired consistency!
Q: Can I use frozen fruit?
A: Absolutely! Just thaw it out first, pat it dry, and use it the same way. Keep in mind it might release more juice into the salad.
Q: What if I’m allergic to one of the fruits?
A: Substitute it with any other fruit you enjoy! The beauty of a fruit salad is its versatility—there’s always room for your favorites.
Nutritional Information
While this creamy fruit salad is a treat for your taste buds, it’s also packed with nutrition! Here’s a general breakdown per serving, though it can vary based on your exact fruit choices:
- Calories: Approximately 180
- Protein: 6g (thanks to Greek yogurt!)
- Carbohydrates: 30g
- Dietary Fiber: 3g
- Sugars: 12g (natural sugars from fruits)
- Fat: 3g
Loaded with vitamins, antioxidants, and healthy fats, this salad is not only a delicious dish but also a nutritious one!
Final Thoughts
So there you have it, friends! Just a bowl of simple pleasures that brings a smile to your face and some sunshine to your day. This creamy fruit salad isn’t just about the flavors; it’s about the memories, the laughter, and the connections we make around the table. As you gather your fruits and whip up this delightful dish, I hope it sparks joy and maybe a few nostalgic moments of your own!
Go ahead, dig in, and remember: life’s too short for boring salads! Keep it colorful, keep it creamy, and above all, keep it delicious. Until next time, happy cooking!
Print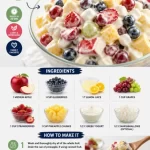
Creamy Fruit Salad
- Total Time: 30 minutes
- Yield: 4 servings 1x
- Diet: Vegetarian
Description
A colorful medley of fruity goodness drizzled in a smooth, creamy dressing, perfect for potlucks and picnics.
Ingredients
- 1 medium apple (Fuji or Gala)
- 1 cup blueberries
- 1 tablespoon lemon juice
- 1 cup grapes
- 1 cup strawberries
- 1 cup pineapple chunks
- 1/2 cup Greek yogurt
- 1/2 cup marshmallows (optional)
Instructions
- Prepare the Fruit: Wash all your fruits thoroughly and pat them dry.
- Chop the Apple: Dice your apple into bite-sized pieces without peeling it.
- Slice the Strawberries: Remove green tops and slice them into halves or quarters.
- Prep the Grapes and Blueberries: Wash the grapes and blueberries and keep them whole.
- Tropical Vibes with Pineapple: Chop fresh pineapple or drain canned pineapple.
- Make the Creamy Dressing: Combine Greek yogurt and lemon juice until creamy.
- Combine the Ingredients: In a large mixing bowl, mix fruits with the creamy dressing.
- Add Marshmallows: Fold in marshmallows if desired.
- Chill and Serve: Cover and chill for about 30 minutes before serving.
Notes
Serve in a large glass bowl or individual glasses, garnished with mint or nuts for added texture.
- Prep Time: 15 minutes
- Cook Time: 0 minutes
- Category: Side Dish
- Method: No-Cook
- Cuisine: American
Nutrition
- Serving Size: 1 serving
- Calories: 180
- Sugar: 12g
- Sodium: 30mg
- Fat: 3g
- Saturated Fat: 1g
- Unsaturated Fat: 2g
- Trans Fat: 0g
- Carbohydrates: 30g
- Fiber: 3g
- Protein: 6g
- Cholesterol: 10mg
Keywords: fruit salad, creamy salad, summer recipe, potluck dish, healthy dessert
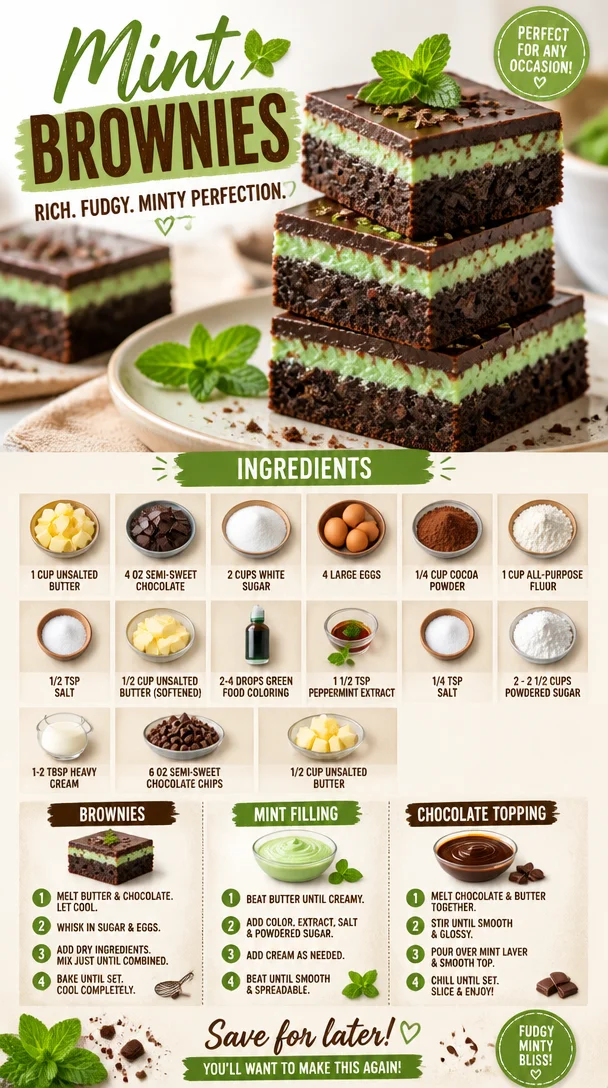
Mint Brownies
Hey there, fellow foodies! I’m thrilled to have you here at Feastical, where we whip up joy, one delicious recipe at a time. Today, we’re diving into a dessert that boasts a perfect blend of rich chocolate and refreshing mint: Mint Brownies! If you’ve ever experienced that blissful moment when you bite into a chewy brownie with a hint of mint, you know exactly what I mean. These Mint Brownies are not just a treat; they’re a delightful excuse to gather your friends and family around the table, share stories, and indulge in a sweet, nostalgic experience.
But let me tell you, these brownies didn’t just pop into my life overnight. Oh no! They come with a little history, a sprinkle of love, and a dash of memory. Growing up, the smell of rich chocolate wafting through the air was a clue that something special was happening in the kitchen. My mom would often make a version of these brownies whenever we had friends over. The laughter, the chatter, and that unmistakable scent created a cozy atmosphere that I still cherish to this day. Fast forward to today, and I’m excited to bring you a recipe that not only captures that essence of home but also adds a modern twist that’s absolutely irresistible.
Imagine serving these Mint Brownies at your next gathering, the vibrant green and decadent chocolate enticing everyone to take a bite. And once they do? Smiles all around! Get ready to treat yourself and your loved ones to a dessert that feels like a warm hug. So, without further ado, let’s roll up our sleeves and get cooking!
Personal Story
Back in the day, my best friend and I would spend our weekends embarking on a “bake-off” challenge at my house. You see, my mom was a powerhouse in the kitchen, and she inspired us to try our hand at everything from bread to cookies to brownies. One sunny Saturday, armed with a generous helping of chocolate and a bottle of peppermint extract that somehow made its way into our pantry, we decided to take our brownie game to the next level.
What began as a simple brownie recipe morphed into the most glorious Mint Brownies we could have imagined! As we sprinkled in those minty drops and watched the batter transform into a lush green masterpiece, we couldn’t wait to taste our creation. The moment we took that first bite, a magical experience took over; the chocolate was rich, the mint was refreshing, and it was pure bliss.
That carefree kitchen adventure brought us together as friends and as the taste testers of our own creation. To this day, whenever I whip up these Mint Brownies, I’m reminded of those laughter-filled afternoons, the little messes we made, and the creations we celebrated. It’s a reminder of the joy that food brings to our lives and how sharing it can create memories that last forever.
Ingredients
For the Brownies:
- 1 cup unsalted butter (226 grams): The base of our brownies, creating that moist, fudgy texture we love. Unsalted is preferred so we can control the saltiness.
- 4 oz semi-sweet chocolate (112 grams) (or 50-70% dark chocolate): This adds depth and richness; feel free to swap with dark chocolate if you prefer a more intense flavor!
- 2 cups white sugar (400 grams): Sweetness is key! This will balance the dark chocolate and create a lovely crust on top of your brownies.
- 4 large eggs (room temperature): Eggs are the binding agents; room temperature ensures they mix evenly with other ingredients.
- 1/4 cup cocoa powder (22 grams): For that extra chocolatey goodness! You can substitute with extra flour if you’re in a pinch.
- 1 cup all-purpose flour (125 grams): This provides structure and stability to our brownies.
- 1/2 teaspoon salt: Enhances the overall flavor—it’s surprising how much this little ingredient can do!
For the Mint Cream Layer:
- 1/2 cup unsalted butter (112 grams) (softened): Softened butter combines easily with sugar to create a creamy mint layer.
- 2-4 drops green food coloring: Just a touch to achieve that charming minty hue; you can leave this out if you prefer a natural look!
- 1 1/2 teaspoons peppermint extract (to taste): This is the star of our mint layer—adjust according to your taste buds!
- 1/4 teaspoon salt: Helps balance the sweetness of the powdered sugar.
- 2 – 2 1/2 cups powdered sugar (220 – 275 grams): This gives the mint layer its sweetness and creamy texture.
- 1-2 tablespoons heavy cream (or whipping cream or milk, as needed): Helps achieve that perfect frosting consistency—add more for a thinner layer!
For the Chocolate Glaze:
- 6 oz semi-sweet chocolate (about 3/4 cup, 170 grams): A rich chocolate glaze to crown our brownies!
- 1/2 cup unsalted butter (112 grams): Adds shine and richness to our glaze.
Step-by-Step Instructions
Now that we have our ingredients lined up, let’s get cooking! Follow these steps to make the most delicious Mint Brownies from scratch.
Step 1: Preheat and Prep
First things first, preheat your oven to 350°F (175°C). While it’s warming up, grease a 9×13-inch baking pan (or line it with parchment paper) to ensure those brownies come out without a hitch. Your future self will thank you!
Step 2: Melt Butter and Chocolate
In a medium saucepan over low heat, melt the 1 cup of unsalted butter and the 4 oz of semi-sweet chocolate. Stir them together until they’re smooth and shiny. Pro Tip: Remove the pan from the heat as soon as it’s melted – you don’t want to burn the chocolate. Take a moment to inhale that heavenly chocolate aroma!
Step 3: Mix Wet Ingredients
Once melted, transfer the mixture to a large mixing bowl (if you used a saucepan). Add 2 cups of white sugar and stir it in until it’s combined. Then, crack in 4 large eggs, one by one, mixing well after each addition. This will create a beautiful, glossy batter. Then, mix in the 1/4 cup of cocoa powder and 1/2 teaspoon of salt until fully blended.
Step 4: Add Dry Ingredients
Next, gently fold in 1 cup of all-purpose flour. Don’t overmix; we want our brownies to be dense but not tough. A few streaks of flour are okay; they’ll blend more as you spread the batter into the pan.
Step 5: Bake the Brownies
Pour the brownie batter into your prepared baking pan and spread it out evenly. Bake in the preheated oven for about 20-25 minutes. To test for doneness, insert a toothpick into the center—it should come out with a few moist crumbs but not wet batter.
Step 6: Cool the Brownies
Once baked, take them out of the oven and let them cool in the pan on a wire rack. Patience is key here, folks! You want them to set properly for that perfect bite.
Step 7: Make the Mint Cream Layer
While those brownies are cooling, it’s time for the minty magic! In a mixing bowl, cream together the 1/2 cup softened unsalted butter and 2 cups powdered sugar. Then, mix in the 1 1/2 teaspoons peppermint extract and 2-4 drops of green food coloring, blending until smooth and creamy. If your frosting is too thick, use the 1-2 tablespoons of heavy cream to loosen it up a bit.
Step 8: Spread It On
Once the brownies are cool, spread the mint cream layer evenly over the top. Take your time; you want it to look as lovely as it tastes!
Step 9: Prepare the Chocolate Glaze
Now for the pièce de résistance! In a saucepan, melt 6 oz semisweet chocolate and 1/2 cup butter over low heat, stirring until smooth. Once melted, pour the chocolate glaze over the mint layer and spread it evenly. Victory is yours!
Step 10: Chill and Slice
Pop the brownies back into the fridge for about 30 minutes to let the glaze set. Once set, slice them into squares or triangles (or any shape your heart desires) and serve!
Serving Suggestions
Ah, the moment of truth! Time to serve your Mint Brownies in style. Plate them up on a colorful dessert platter, and don’t be shy with the presentation. For that extra touch, you could sprinkle some crushed peppermint candies on top or even drizzle some additional melted chocolate along the plate. It adds a sophisticated flair and makes passing them around a breeze!
Pair these Mint Brownies with a scoop of vanilla ice cream for an indulgent dessert. The temperature and creaminess of the ice cream paired with the rich chocolate and refreshing mint create a symphony of flavors that’ll make your taste buds sing! Want to dress it up even more? Garnish with fresh mint leaves for a beautiful, aromatic touch. Who doesn’t love a dish that looks stunning and tastes divine?
Recipe Variations
Let’s get creative! Here are a few twists you can take on these classic Mint Brownies:
-
Nutty Delight: Add 1 cup of chopped walnuts or pecans to the brownie batter for a crunchy texture.
-
Mint Chocolate Chip: Fold in 1 cup of chocolate mint chips or green chocolate chips right before pouring into the baking pan for even more minty goodness.
-
Caramel Swirl: Drizzle some store-bought or homemade caramel sauce into the brownie batter before baking for an added layer of sweetness.
-
Gluten-Free Option: Substitute the all-purpose flour with a 1:1 gluten-free baking blend—still delicious and fudge-like!
-
Vegan Twist: Use dairy-free butter, flax eggs (1 tablespoon flaxseed meal mixed with 2.5 tablespoons water, let it sit to thicken), and dark chocolate without milk for a vegan-friendly treat.
Chef’s Notes
You know, I’ve played around with this recipe over the years, and it always brings back joyful memories of baking sessions with friends and family. One time, I decided to experiment with green tea powder to give it an Asian twist, and let’s just say that was a “no-go”—the mint flavor is just too perfect as it stands! And don’t get me started on the time we got into a heated debate over the right amount of peppermint extract. Turns out, it can be quite polarizing; some love it intense, while others prefer subtle. Play around; find what suits your palate!
FAQs and Troubleshooting
Q: Why are my brownies too cakey?
A: If the brownies turned out cakey, it might be that you overmixed the batter or incorporated too much air, or you may have baked them too long. Aim for a fudgier texture!
Q: How can I fix a mint cream layer that’s too runny?
A: If your mint cream layer is runny, simply add more powdered sugar a tablespoon at a time until it reaches the desired consistency.
Q: Can I make these brownies ahead of time?
A: Absolutely! You can prep these Mint Brownies a day or two ahead. Just keep them in an airtight container to maintain freshness.
Q: How do I store leftover brownies?
A: Keep any leftovers in an airtight container, either at room temperature for a few days or in the fridge for longer-lasting freshness.
Nutritional Info
Let’s chat about nutritional facts. Each square of these Mint Brownies is a decadent treat, but a single serving can average around 220 calories, featuring about 10g of fat, 32g of carbohydrates, and 2g of protein. Customize your baked goods with my suggestions above; it’s possible to create lighter or even healthier versions if you’re looking to indulge without straying too far from your nutritional goals. Remember, moderation is key—enjoy every delicious bite!
Final Thoughts
As we wrap up this Mint Brownie journey, I hope you feel inspired to channel your inner chef and create this delightful treat! Food has the magical ability to bring us closer, spark memories, and create new ones around the table. So grab your loved ones, whip up these Mint Brownies, and get ready to share smiles galore.
Let me know your thoughts and triumphs in the kitchen; I love hearing your stories and recipe adaptations! Until next time, keep cooking, keep sharing, and most importantly, keep enjoying the journey of food! Happy baking!
Print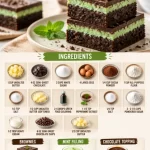
Mint Brownies
- Total Time: 45 minutes
- Yield: 16 servings 1x
- Diet: Vegetarian
Description
A delightful blend of rich chocolate and refreshing mint, these brownies are perfect for gatherings and family celebrations.
Ingredients
- 1 cup unsalted butter (226 grams)
- 4 oz semi-sweet chocolate (112 grams)
- 2 cups white sugar (400 grams)
- 4 large eggs (room temperature)
- 1/4 cup cocoa powder (22 grams)
- 1 cup all-purpose flour (125 grams)
- 1/2 teaspoon salt
- 1/2 cup unsalted butter (112 grams) (softened) for mint layer
- 2–4 drops green food coloring
- 1 1/2 teaspoons peppermint extract (to taste)
- 1/4 teaspoon salt for mint layer
- 2–2 1/2 cups powdered sugar (220–275 grams)
- 1–2 tablespoons heavy cream (or whipping cream)
- 6 oz semi-sweet chocolate (170 grams) for glaze
- 1/2 cup unsalted butter (112 grams) for glaze
Instructions
- Preheat your oven to 350°F (175°C). Grease a 9×13-inch baking pan.
- Melt the butter and chocolate in a saucepan over low heat until smooth.
- Mix the sugar into the melted mixture, then add the eggs one by one, mixing well.
- Add the cocoa powder and salt, combining until blended.
- Fold in the flour gently to avoid overmixing.
- Bake for 20-25 minutes in the preheated oven until a toothpick comes out with a few moist crumbs.
- Cool the brownies in the pan on a wire rack.
- Make the mint cream layer by creaming together softened butter and powdered sugar, then mixing in peppermint extract and food coloring.
- Spread the mint cream layer over the cooled brownies.
- Prepare the chocolate glaze by melting chocolate and butter, then pour it over the mint layer.
- Chill in the fridge for 30 minutes, then slice into squares.
Notes
Serve with a scoop of vanilla ice cream for extra indulgence. You can also customize with nuts or mint chips.
- Prep Time: 15 minutes
- Cook Time: 25 minutes
- Category: Dessert
- Method: Baking
- Cuisine: American
Nutrition
- Serving Size: 1 brownie
- Calories: 220
- Sugar: 30g
- Sodium: 80mg
- Fat: 10g
- Saturated Fat: 6g
- Unsaturated Fat: 4g
- Trans Fat: 0g
- Carbohydrates: 32g
- Fiber: 1g
- Protein: 2g
- Cholesterol: 40mg
Keywords: brownies, mint, chocolate dessert, baking, sweet treats
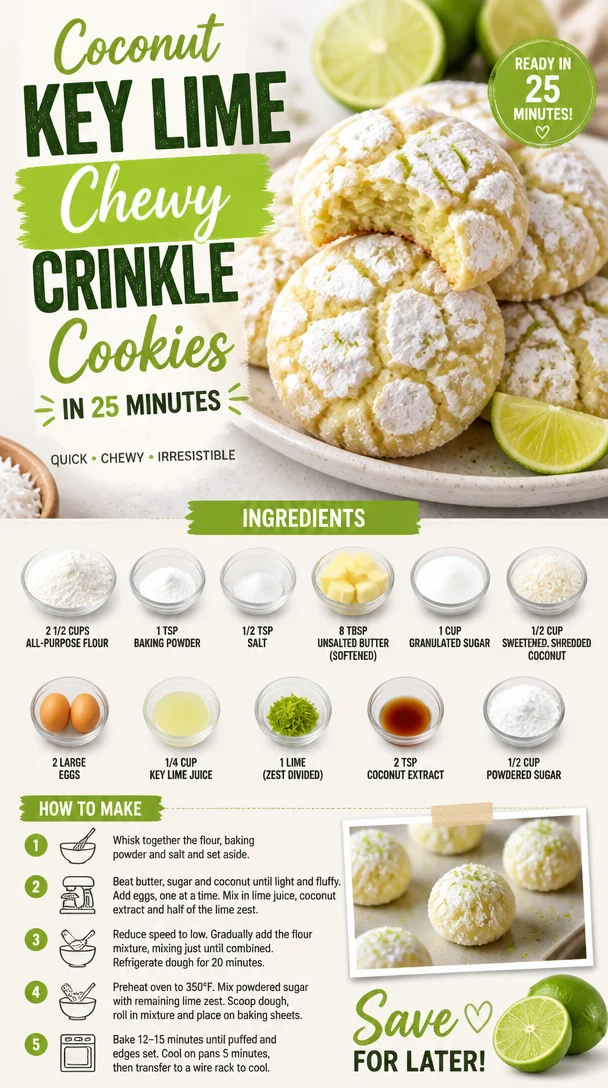
Coconut Key Lime Chewy Crinkle Cookies in 25 Minutes
Coconut Key Lime Crinkle Cookies: A Journey of Sweetness and Sunshine
Hey there, cookie lovers! If you’re anything like me, you’ve got a soft spot for desserts that evoke sunshine and happy memories. Nestled in the cozy corners of my kitchen is a treasure of recipes, but today, I want to share one that truly makes my heart sing: Coconut Key Lime Crinkle Cookies. Imagine biting into a soft, chewy cookie that hugs your taste buds with the tanginess of key lime and the tropical allure of coconut. It’s the kind of treat that’ll transport you straight to your happy place.
These cookies are not just a delightful indulgence; they carry stories and warmth from the oven. They’re fantastic for sharing at summer barbecues, cozy holiday gatherings, or even for a sweet afternoon pick-me-up. Plus, who doesn’t love a cookie that looks as good as it tastes? With those gorgeous crinkle tops dusted in powdered sugar, Coconut Key Lime Crinkle Cookies are a feast for the eyes and the tummy. So rally your taste buds, grab your mixing bowl, and let’s embark on this delicious adventure together!
Personal Story
I’ll never forget the first time I baked these cookies. It was a sunny afternoon, and I had a craving for something citrusy and sweet. I rummaged through my pantry and stumbled upon some key limes that were just begging to be used. As I remembered my grandmother’s fondness for lime desserts, a wave of nostalgia hit me. She was a master baker, her kitchen always buzzing with the inviting scent of freshly baked goods.
I decided to channel her spirit that day, so I got to work, combining buttery goodness with tangy key lime and a generous handful of shredded coconut. The recipe was born out of joy and experimentation, and soon my kitchen filled with the fragrant aroma of cookies baking—the perfect blend of sweet and zesty! When I pulled those golden treats from the oven, I couldn’t help but smile. I wrapped them up for friends who came over later that evening, and the reactions were priceless! The laughter, compliments, and crumbs that followed told me I had struck gold. That day solidified my love for coconut and lime together, sparking the journey of these scrumptious Coconut Key Lime Crinkle Cookies.
Ingredients
Here’s what you’ll need to create these delightful cookies:
-
2 1/2 cups all-purpose flour
The backbone of our cookie dough. You can swap this for a gluten-free blend if needed—just ensure it includes xanthan gum for the right texture! -
1 tsp baking powder
This is your leavening agent that helps the cookies rise. Don’t skimp on it; freshness is key! Check the expiration date. -
1/2 tsp salt
A little pinch enhances flavors and balances the sweetness. You can use sea salt for a bit of extra crunch if you like! -
8 tbsp unsalted butter (softened)
Softened to room temperature for easy creaming with sugar. If you’re dairy-free, coconut oil works well here (just let it cool after melting). -
1 cup granulated sugar
This adds sweetness and a touch of tenderness to our cookies. For a healthier option, feel free to use coconut sugar—it complements the coconut flavor beautifully. -
1/2 cup sweetened, shredded coconut
The star of the show! Adds texture and that coconutty goodness. If you prefer a less sweet cookie, try unsweetened coconut. -
2 large eggs
These bind the ingredients together and add moisture. If you’re vegan, flax eggs (1 tablespoon of ground flaxseed + 2.5 tablespoons of water per egg) are a great substitute. -
1/4 cup key lime juice
Our zesty friend that brings the essential tartness to the cookies. Don’t have key limes? Regular limes work just as well, though the flavor will be slightly different. -
1 lime (zest divided)
Using the zest enhances the key lime flavor without adding extra liquid. Zest a whole lime for an extra burst of citrus! -
2 tsp coconut extract
This amplifies the coconut flavor in our cookies. If you’re out of coconut extract, vanilla extract is a flavorful alternative that works wonders. -
1/2 cup powdered sugar
For dusting—that finishing touch of sweetness!
Step-by-Step Instructions
Let’s roll up those sleeves and get baking! Here’s a detailed guide to whipping up your Coconut Key Lime Crinkle Cookies:
-
Preheat the Oven
Preheat your oven to 350°F (175°C). This is a crucial step—baking cookies at the right temperature ensures they come out perfectly chewy and not overcooked. -
Mix the Dry Ingredients
In a medium bowl, whisk together the all-purpose flour, baking powder, and salt until combined. This helps to evenly distribute the baking powder, ensuring all your cookies rise uniformly. Set aside. -
Cream Butter and Sugar
In a large mixing bowl, beat the softened butter and granulated sugar with a hand mixer or stand mixer until light and fluffy—about 3-5 minutes. This step is crucial for creating a perfectly tender texture. You want to see it almost pale in color! -
Add Eggs and Flavorings
Beat in the eggs, key lime juice, lime zest, and coconut extract until fully combined. The mixture may look a bit curdled, but don’t worry; it’ll come together once you add the dry ingredients. -
Combine Wet and Dry
Gradually add the flour mixture to the wet ingredients, mixing on low speed until just combined. You want to avoid overmixing, which could make the cookies tough! Gently fold in the shredded coconut. -
Chill the Dough
For the best texture, cover the bowl with plastic wrap and chill the dough in the refrigerator for at least 30 minutes. This step solidifies the fats in the dough, resulting in a more structured cookie. -
Scoop and Roll
Once chilled, scoop out tablespoon-sized portions of the dough and roll them into balls between your palms. You want them to be uniform in size for even baking! -
Coat in Powdered Sugar
Roll each ball in powdered sugar until they’re fully coated. This gives them that iconic crinkle effect while baking and adds extra sweetness, creating that cute powdered appearance once baked. -
Bake
Place the cookie balls on parchment-lined baking sheets, spaced about 2 inches apart (they spread a bit!). Bake for 10-12 minutes, or until the edges are set but the center is still soft. You’re looking for a beautiful crinkle on top! -
Cool
Let the cookies cool on the baking sheet for 5 minutes before transferring them to wire racks to cool completely. This allows them to firm up a bit before you go for that first bite.
Serving Suggestions
Ready to impress your guests? Here’s how to serve those Coconut Key Lime Crinkle Cookies! Arrange them on a colorful platter, and drizzle a little extra key lime juice reduction over the top for a pop of flavor and visual appeal. You could also serve them alongside a tropical fruit salad or a refreshing coconut milkshake to amplify those sunny vibes.
For a delightful finishing touch, consider adding a tiny mint leaf garnish on each cookie for color and freshness. The combination of textures and flavors is sure to bring smiles all around the table!
Recipe Variations
Feeling a little experimental? Here are some creative twists you might consider for your Coconut Key Lime Crinkle Cookies:
-
Chocolate Coconut Crinkle Cookies
Add in some mini chocolate chips to the batter for a decadent twist. The chocolate pairs wonderfully with lime and coconut! -
Macadamia Nut Tropicana Cookies
Toss in some chopped macadamia nuts for added crunch and a nutty flavor that complements the tropical theme. -
Gluten-Free Option
Swap the all-purpose flour for a 1:1 gluten-free flour blend. Just make sure your baking powder and coconut are certified gluten-free! -
Coconut Lime Sandwich Cookies
Make them into sandwich cookies by spreading a zesty lime cream or coconut frosting between two cookies. Heaven, right? -
Lemon Lime Crinkle Cookies
Use lemon juice and zest instead of limes for a fresh twist. The bright zing of lemon will elevate the cookies to a new level of delicious!
Chef’s Notes
As I’ve baked these cookies over the years, I’ve learned a few things about what truly brings out their best qualities. For instance, the freshness of your ingredients makes a world of difference—especially the key lime juice. When possible, opt for fresh juice squeezed right from the fruit. It’s worth the extra effort and gives a bright pop of tartness!
And don’t be afraid to get creative! I once hosted a cookie baking party where we all brought our favorite add-ins—chocolate chips, candied ginger, you name it. It turned into a delightful experiment that led to some fantastic flavor combinations.
FAQs and Troubleshooting
-
Why are my cookies spreading too much?
Ensuring your dough is well-chilled before baking is essential. If this happens, you might also want to check your oven temperature—the dough should hold its shape nicely. -
Can I keep these cookies?
Yes! Store them in an airtight container at room temperature for up to a week. If you’d like to enjoy them longer, consider freezing the cookie dough balls and baking them fresh as needed! -
What if I can’t find key limes?
Regular limes are a perfect substitute, but if you want that special tang, try mixing in a bit of lemon juice for that citrus zing! -
How do I achieve those perfect crinkles?
It’s all in the sugar coating! Make sure to roll them well in powdered sugar before baking, as this is what gives them that signature cracked top.
Nutritional Info
While indulging in these Coconut Key Lime Crinkle Cookies, here’s a rough dump of the nutritional data per cookie (approx.):
- Calories: 120
- Total Fat: 5g
- Saturated Fat: 3g
- Cholesterol: 25mg
- Sodium: 50mg
- Total Carbohydrates: 18g
- Dietary Fiber: 0.5g
- Sugars: 8g
- Protein: 1g
Keep in mind that modifying the recipe (like using different add-ins or substitutions) can slightly change these numbers. And while it’s important to enjoy these cookies in moderation, remember that life is too short to skip dessert!
Final Thoughts
As you make your way through this delightful journey of baking Coconut Key Lime Crinkle Cookies, I hope it fills your kitchen with laughter, creativity, and memories that stick like the sweetness of coconut. With every crackled bite, let it remind you of sunshine-filled days and good company.
So grab your apron, roll up your sleeves, and let’s bake something magical! Let these cookies bring a little slice of paradise into your life, and if you end up sharing them, get ready for compliments galore. Remember, cooking isn’t just about feeding our bodies; it’s about cherishing moments and savoring each delicious experience. Happy baking!
Print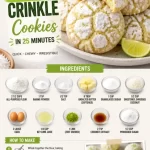
Coconut Key Lime Crinkle Cookies
- Total Time: 45 minutes
- Yield: 24 cookies 1x
- Diet: Vegetarian
Description
Soft, chewy cookies embracing the tanginess of key lime and the tropical allure of coconut, perfect for summer gatherings.
Ingredients
- 2 1/2 cups all-purpose flour
- 1 tsp baking powder
- 1/2 tsp salt
- 8 tbsp unsalted butter (softened)
- 1 cup granulated sugar
- 1/2 cup sweetened, shredded coconut
- 2 large eggs
- 1/4 cup key lime juice
- 1 lime (zest divided)
- 2 tsp coconut extract
- 1/2 cup powdered sugar
Instructions
- Preheat your oven to 350°F (175°C).
- Mix together the all-purpose flour, baking powder, and salt in a medium bowl.
- Cream the softened butter and granulated sugar in a large mixing bowl until light and fluffy.
- Add the eggs, key lime juice, lime zest, and coconut extract, mixing until fully combined.
- Combine the flour mixture into the wet ingredients gradually.
- Chill the dough in the refrigerator for at least 30 minutes.
- Scoop out tablespoon-sized portions and roll them into balls.
- Coat each ball in powdered sugar until fully covered.
- Bake for 10-12 minutes until edges are set, with the center remaining soft.
- Cool on the baking sheet for 5 minutes before transferring to wire racks.
Notes
For a vegan option, substitute eggs with flax eggs. Use fresh key lime juice for the best flavor.
- Prep Time: 15 minutes
- Cook Time: 12 minutes
- Category: Dessert
- Method: Baking
- Cuisine: American
Nutrition
- Serving Size: 1 cookie
- Calories: 120
- Sugar: 8g
- Sodium: 50mg
- Fat: 5g
- Saturated Fat: 3g
- Unsaturated Fat: 1g
- Trans Fat: 0g
- Carbohydrates: 18g
- Fiber: 0.5g
- Protein: 1g
- Cholesterol: 25mg
Keywords: cookies, key lime, coconut, dessert, baking, summer treats
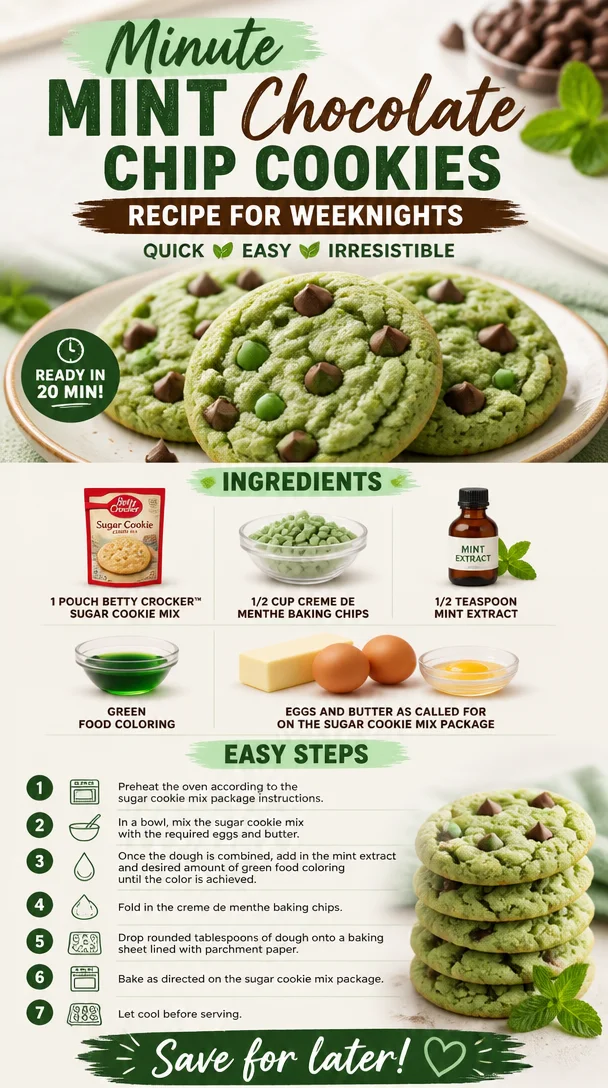
Minute Mint Chocolate Chip Cookies Recipe for Weeknights
Mint Chocolate Chip Cookies: A Sweet Adventure Awaits!
Welcome to Feastical, my culinary playground! Today, we’re diving into the whimsical world of cookies with a delightful twist: Mint Chocolate Chip Cookies. Picture this: chewy and soft sugar cookies bursting with vibrant minty goodness, studded with creamy chocolate morsels that make every bite a celebration. If that doesn’t make your sweet tooth dance, I don’t know what will!
Baking is one of those magical experiences that always brings a smile to my face. These cookies, in particular, have a special place in my heart. They remind me of my childhood kitchen adventures with my mom, where we would create tasty memories that lingered long after the last cookie was devoured. The mint chocolate chip combination becomes an instant classic in my home, and I can’t wait to share this vibrant recipe with you all!
The best part about these cookies is how easy they are to whip up! You’ll be left with a batch of cookies that not only taste amazing but also fill your kitchen with the sweet aroma of mint and chocolate—perfect for any occasion, from holiday parties to cozy nights in. So, preheat your oven, gather your ingredients, and let’s get baking!
A Flavorful Memory
Ah, the nostalgia! I still vividly remember the first time I tasted mint chocolate chip cookies. It was a chilly winter afternoon, and I was at my best friend’s house. Her mom was baking cookies, and the scent wafting through the air was nothing short of heavenly. As soon as those golden delights came out of the oven, I was hooked! The bright green hue and chocolate specks looked enticing, and the first bite sent me straight to dessert heaven.
Baking those cookies with my mom is where my love for the kitchen truly blossomed. We would add a dash of mint extract and sneak in extra chocolate chips when my mom wasn’t looking. Those moments spent mixing and rolling dough created countless memories that shaped my culinary journey. Now, I’m thrilled to bring that experience to you with my Mint Chocolate Chip Cookies!
Ingredients You’ll Need
Before we get into the nitty-gritty of baking, let’s gather the ingredients. Here’s what you’ll need for our minty masterpiece:
-
1 pouch Betty Crocker™ sugar cookie mix
This convenient mix makes for a quick and easy cookie base, offering a soft sweetness. If you’re feeling adventurous, you can switch to homemade sugar cookie dough. Just make sure it has a similar consistency! -
1/2 cup creme de menthe baking chips
These gems give our cookies a deliciously minty flavor that’s both refreshing and indulgent. You can substitute them with chocolate chips or even white chocolate chips if you prefer a creamier flavor. -
1/2 teaspoon mint extract
This ingredient amplifies the minty notes in our cookies. If you’re not a mint fan, feel free to swap this out for vanilla extract for a classic flavor twist. -
Green food coloring
A few drops of this will transform our cookies into a festive treat. You can omit it if you want a more natural look (or if you’re just not feeling the green!). -
Eggs and butter (as directed on the sugar cookie mix package)
These fundamental ingredients bring richness and moisture to the cookies. For a dairy-free version, you can use applesauce instead of butter and egg substitutes like flax eggs.
Step-by-Step Instructions
Alright, it’s time to get our hands a little floury! Follow these step-by-step instructions for Mint Chocolate Chip Cookies that will have everyone asking for your secret recipe.
-
Preheat Your Oven
First things first—preheat your oven to 350°F (175°C). This heat is crucial for achieving that perfectly baked cookie texture. -
Mix the Dry Ingredients
In a large mixing bowl, combine the contents of the sugar cookie mix with the mint extract. This step helps ensure the flavors meld together beautifully. -
Add the Wet Ingredients
Now, it’s time to add the required eggs and softened butter (or your chosen substitutes). Mix everything with a spatula or a hand mixer until combined. Make sure not to overmix—this keeps our cookies nice and tender! -
Get Your Green On
Add a few drops of green food coloring to the mix. Use a spatula or a whisk to evenly distribute the color. Stop when you reach your desired minty hue—bright and cheerful is the aim here! -
Fold in the Chips
Gently fold in the creme de menthe baking chips until they are distributed evenly throughout the dough. This will ensure every bite is packed with minty chocolate goodness. -
Scoop the Dough
Use a cookie scoop or a tablespoon to portion out the dough onto a baking sheet lined with parchment paper. Leave space between the cookies—about 2 inches—as they will spread while baking. -
Bake
Bake in the preheated oven for 10-12 minutes, or until the bottoms are golden brown. You want them to look just set—don’t worry; they’ll firm up as they cool! -
Cool Down
Allow the cookies to cool for a few minutes on the baking sheet before transferring them to a wire rack. This helps them hold their shape perfectly.
Serving Suggestions
Now that your cookies are baked to perfection, let’s talk about how to serve these beauties. You can plate them up simply on a decorative platter, or for a fun twist, stack several cookies with some mint chocolate ice cream in between for an impromptu cookie ice cream sandwich!
For a little extra flair, dust the cookies with powdered sugar or drizzle melted chocolate on top. A sprinkle of crushed mint leaves can add a lovely touch of freshness and color. If you’re serving these for a get-together, consider placing them on a cake stand to elevate your dessert display.
Recipe Variations
Get ready to experiment! Here are some fun twists and variations you can try with the Mint Chocolate Chip Cookies:
-
Double Chocolate Mint Cookies: Add cocoa powder to your sugar cookie mix to make it a double chocolate delight.
-
Mint Oreo Delight: Chop up some mint Oreos and fold them into your cookie dough for a crunchy surprise.
-
Sugar-Free Option: Use a sugar-free sugar cookie mix and sugar-free chocolate chips to create a guilt-free version.
-
Nuts About Mint: Add some crushed walnuts or pecans for an added crunch and flavor contrast.
-
Chocolate Drizzle: Drizzle melted dark chocolate over the cooled cookies for an elegant touch.
Chef’s Notes
These cookies have a special place in my baking repertoire. I remember the first time I tried to bake them for a holiday party—let’s just say I had a small disaster! I accidentally swapped the amounts of butter and sugar and ended up with a gooey mess. But it was a learning moment; I realized how important it is to double-check your measurements.
As I perfected this recipe over the years, I’ve come to appreciate how versatile it is. Whether you enjoy them at Christmas, St. Patrick’s Day, or just because, these cookies are always a hit. Whenever I bake them, I can’t help but smile, remembering those cozy kitchens and fun moments!
FAQs and Troubleshooting
Got questions? I’ve got answers! Here are some common queries you might have about baking Mint Chocolate Chip Cookies:
-
Why are my cookies flat?
This can happen if the dough is too warm or you didn’t use enough flour. Make sure to chill the dough for about 30 minutes before scooping, and check your measurements carefully! -
Can I freeze these cookies?
Absolutely! You can freeze the cookie dough for up to three months. Just scoop them onto a baking sheet, freeze until solid, and store them in an airtight container. Bake from frozen, adding an extra 1-2 minutes to the bake time. -
What if I don’t have mint extract?
If you don’t have mint extract on hand, using vanilla extract will impart a wonderful flavor, though it won’t have that minty kick we love. -
How do I know when the cookies are done?
Look for the edges to be lightly golden while the center appears slightly soft—this is key for that perfect chewy texture!
Nutritional Info
When it comes to enjoying cookies, you might wonder about the nutritional value. Here’s a breakdown per cookie (based on 24 cookies):
- Calories: 120
- Total Fat: 5g
- Saturated Fat: 3g
- Cholesterol: 25mg
- Sodium: 60mg
- Carbohydrates: 18g
- Fiber: 0g
- Sugar: 8g
- Protein: 1g
Keep in mind that these values are approximate and can vary based on portion size and ingredient choices.
Final Thoughts
There you have it—Mint Chocolate Chip Cookies that are sure to bring joy to any occasion! Whether you’re enjoying them solo with a glass of milk or sharing them with friends and family, these cookies are a delightful treat packed with flavor and fond memories.
Let your creativity flow as you explore variations, serving options, and flavors. Every batch is an opportunity for a special moment, a shared smile, or a nostalgic reminder of your culinary adventures. Now go on, unleash your inner cookie artist, and have fun baking up these delightful treats! And, as always, don’t forget to grab a fork (or your favorite mug) to dig in. Happy baking!
Print
Mint Chocolate Chip Cookies
- Total Time: 27 minutes
- Yield: 24 cookies 1x
- Diet: Vegetarian
Description
Delightful and chewy Mint Chocolate Chip Cookies filled with creamy chocolate morsels and refreshing mint flavors.
Ingredients
- 1 pouch Betty Crocker™ sugar cookie mix
- 1/2 cup creme de menthe baking chips
- 1/2 teaspoon mint extract
- Green food coloring
- Eggs and butter (as directed on the sugar cookie mix package)
Instructions
- Preheat your oven to 350°F (175°C).
- Mix the contents of the sugar cookie mix with the mint extract in a large mixing bowl.
- Add the required eggs and softened butter, then mix until combined.
- Get a few drops of green food coloring and add to the mix, then combine.
- Fold in the creme de menthe baking chips gently.
- Scoop the dough onto a baking sheet lined with parchment paper, leaving some space between the cookies.
- Bake for 10-12 minutes until the bottoms are golden brown.
- Cool on the baking sheet for a few minutes before transferring to a wire rack.
Notes
For a fun serving suggestion, stack cookies with mint chocolate ice cream for an ice cream sandwich!
- Prep Time: 15 minutes
- Cook Time: 12 minutes
- Category: Dessert
- Method: Baking
- Cuisine: American
Nutrition
- Serving Size: 1 cookie
- Calories: 120
- Sugar: 8g
- Sodium: 60mg
- Fat: 5g
- Saturated Fat: 3g
- Unsaturated Fat: 2g
- Trans Fat: 0g
- Carbohydrates: 18g
- Fiber: 0g
- Protein: 1g
- Cholesterol: 25mg
Keywords: mint cookies, chocolate chip cookies, dessert, baking, holiday treats
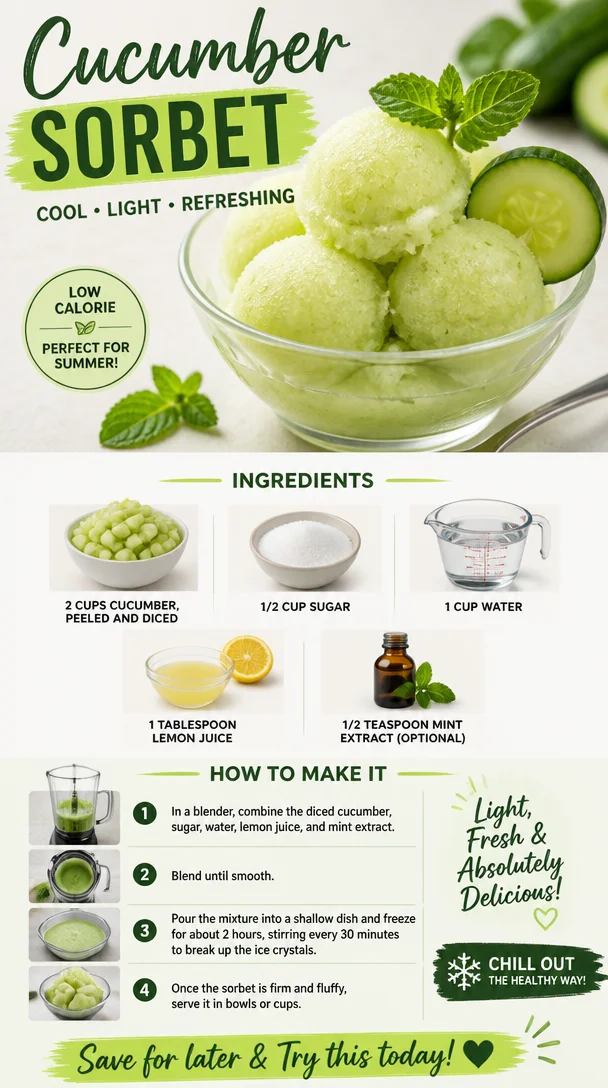
Cucumber Sorbet
Refreshing Cucumber Sorbet: A Cool Delight for Hot Days
Hey there, fellow food lovers! If you’re looking for a treat that’s not only delicious but also refreshingly light and utterly satisfying, you’ve arrived at the right spot. Today, let’s whip up something that’ll cool down even the hottest summer days—Cucumber Sorbet!
Imagine, if you will, a scorching day where the sun is blazing, and you’re searching for a way to satisfy your sweet tooth without overdoing it. This cucumber sorbet is precisely the answer! It’s not just about cooling down; it’s about enjoying a delightful fruit-based dessert that brings a splash of summertime flavor to your palate. With its subtle sweetness and the crisp, refreshing taste of cucumber, this sorbet will steal the show at any gathering.
But here’s the best part—making cucumber sorbet is not just easy; it’s a fun way to play in the kitchen! Join me as we dive into the world of sorbet-making, perfect for impressing your family and friends or just treating yourself to something special after a long day. So, let’s grab our aprons, dust off those mixing bowls, and create something fabulous!
A Slice of Nostalgia
Growing up in my grandmother’s kitchen, summer meant two things: juicy watermelons and the most refreshing cucumber salad you’ve ever tasted. But what really stuck in my mind was that one sultry afternoon when my cousin and I decided to take a creative twist on grandma’s classic recipe. Armed with her kitchen tools, we snuck a few ingredients out of the pantry and decided to blend cucumbers in an ice cream maker, hoping for something delightful.
To our surprise, we stumbled upon a version of what would someday become one of my go-to summer recipes: Cucumber Sorbet! We weren’t sure if it was a culinary miracle or just a fluke, but that icy, sweet concoction was everything we hoped for and more. Fast forward years later, and here I am, sharing that original spirit of summer exploration with you.
Ingredients for Cucumber Sorbet
Let’s break it down! Here’s what you’ll need to create your own batch of this delightful Cucumber Sorbet:
-
2 cups cucumber, peeled and diced:
The star of our sorbet! Use fresh, firm cucumbers to ensure a great texture. If you can find English cucumbers, they have fewer seeds and are perfect for this sorbet. -
1/2 cup sugar:
This helps balance the refreshing flavor of the cucumbers. If you’re looking for a healthier option, consider using a sugar substitute like stevia or agave syrup. -
1 cup water:
Essential for dissolving the sugar and creating a smooth base for your sorbet. No special tricks here—just good ol’ H2O! -
1 tablespoon lemon juice:
This adds a touch of acidity that brightens up the flavors. You can easily swap this for lime juice if you’re feeling adventurous! -
1/2 teaspoon mint extract (optional):
Mint provides an additional refreshing vibe. If mint isn’t your thing, you can leave it out or replace it with fresh mint leaves for a more vibrant taste.
Step-by-Step Instructions
Time to get cooking! Follow these simple steps to create your very own Cucumber Sorbet:
-
Prepare Your Cucumbers:
Start by peeling and dicing the cucumbers. In my experience, cutting them into smaller pieces makes them easier to blend and ensures a smoother sorbet. -
Blend It Up:
In a blender, combine the diced cucumbers, sugar, water, and lemon juice. If you’re adding mint extract, go ahead and toss that in too! Blend until everything is smooth and well combined. You want a mixture that’s completely free of lumps—think of it as cucumber bliss! -
Taste Test:
Here comes the fun part! Give your mixture a little taste. Adjust the sweetness by adding more sugar or acidity if necessary. If you want that extra refreshing punch, you can add a touch more lemon juice or mint extract. -
Chill It Down:
Pour the mixture into a shallow dish and pop it into the freezer. Let it chill for about 1 to 2 hours until it starts to firm up. -
Stir it Up:
After the initial chill period, take it out and give it a good stir using a fork. This will help break up any ice crystals that have formed. This is a trick I learned over the years to ensure a creamy texture! -
Freeze Again:
Place it back into the freezer for another 2-3 hours. If you can, give it a stir every hour. This little hack will ensure your sorbet stays fluffy and light! -
Serve and Enjoy:
Once fully frozen, scoop it into servings, and voila! You’ve made a tasty, refreshing dessert that’s sure to impress.
Serving Suggestions
Now that your cucumber sorbet is ready, how do we serve this eye-catching treat? Here are a few delightful ways to present it:
-
Chilled Bowls: Serve your sorbet in chilled bowls or elegant sorbet cups. The frostiness adds to the experience and keeps it refreshing for longer.
-
Garnish with Fresh Mint: A sprig of fresh mint on top will not only make it look appetizing but also add a touch of sophistication.
-
Pair with Fresh Fruits: This sorbet pairs beautifully with a medley of fresh fruits like strawberries, raspberries, or even a scoop of vanilla ice cream for a splendid dessert experience!
-
Cucumber Spiral: If you’re feeling particularly fancy, thinly slice your cucumbers and create a spiral to adorn your dishes. It’s all about the presentation!
Recipe Variations
Here are a few fun twists you could try to mix things up with your cucumber sorbet:
-
Cucumber-Mint Fusion: Add more fresh mint leaves instead of mint extract for a burst of herbaceous flavor. Muddle the leaves with the sugar and lemon juice before blending for a more aromatic kick.
-
Citrus Blast: Swap the lemon juice for grapefruit or orange juice for a zesty twist. This will brighten the flavor profile in a whole new way!
-
Green Tea Infusion: Brew a cup of green tea and replace the water in the recipe with a cooled version. This will impart a unique earthiness to the sorbet.
-
Spicy Kick: For those who like a little heat, add a pinch of cayenne pepper or finely diced jalapeño (just a little!) to your cucumber mixture for a spicy surprise.
-
Berry Blast: Add in some diced strawberries or blueberries before freezing for a refreshing and colorful sorbet that’s a hit at any party!
Chef’s Notes
It’s always fascinating to see how recipes evolve over time! I initially made this cucumber sorbet as a last-minute summer treat for impromptu family gatherings. What started as a simple, "I just want something refreshing!" has turned into a cherished recipe I share with friends each summer. I always encourage others to play around with flavors; it’s one of the best parts of being in the kitchen. Don’t be afraid to experiment, folks!
FAQs and Troubleshooting
How long will my sorbet last in the freezer?
Homemade cucumber sorbet typically lasts about a week in the freezer if stored properly. Just make sure to seal it in an airtight container to protect it from ice crystals and freezer burn.
My sorbet is too icy! What happened?
If your mixture gets too hard or icy, it might be because it needed more frequent stirring while it was freezing. On your next attempt, remember to stir it every hour for a smoother texture!
Can I make this sorbet without an ice cream maker?
Absolutely! The method I’ve shared here is designed for those without fancy equipment. Just remember to give it a good stir every hour as it freezes to prevent ice from forming.
What’s the best way to use leftover sorbet?
Using leftover sorbet is creative fun! You can blend it into smoothies, swirl it into yogurt, or even use it as a refreshing cocktail mixer!
Nutritional Info
Each serving of cucumber sorbet (about 1/2 cup) typically contains roughly:
- Calories: 90
- Total Fat: 0g
- Saturated Fat: 0g
- Carbohydrate: 22g
- Sugar: 17g
- Protein: 1g
This refreshing treat is low in calories and fat, making it an excellent guilt-free option. Plus, it’s hydrating due to the cucumber!
Final Thoughts
And there you have it—a cool and delicious Cucumber Sorbet recipe that’s sure to become a staple in your summertime repertoire! There’s something truly magical about enjoying a homemade treat that’s as refreshing as a summer breeze and as simple as a few fresh ingredients.
Whether you’re looking to impress guests or simply enjoy a dose of self-care, give this recipe a whirl. Remember, the best meals are made with joy, and there’s no wrong way to enjoy a little play in your kitchen. So, let your culinary creativity run wild, and may your summer always be filled with sweet, refreshing delights! Happy cooking, my friends!
Print
Refreshing Cucumber Sorbet
- Total Time: 120 minutes
- Yield: 4 servings 1x
- Diet: Vegan
Description
A light and refreshing Cucumber Sorbet that’s perfect for hot summer days.
Ingredients
- 2 cups cucumber, peeled and diced
- 1/2 cup sugar
- 1 cup water
- 1 tablespoon lemon juice
- 1/2 teaspoon mint extract (optional)
Instructions
- Prepare your cucumbers by peeling and dicing them into smaller pieces.
- Blend the diced cucumbers, sugar, water, and lemon juice until smooth.
- Taste the mixture and adjust sweetness as needed.
- Chill the mixture in a shallow dish in the freezer for about 1 to 2 hours.
- Stir the mixture with a fork to break up any ice crystals after the initial chill.
- Freeze again for 2-3 hours, stirring every hour if possible.
- Serve the sorbet in chilled bowls and enjoy!
Notes
For best results, stir the sorbet every hour while freezing for a creamy texture. Try variations by adding fresh mint leaves or citrus juice.
- Prep Time: 10 minutes
- Cook Time: 0 minutes
- Category: Dessert
- Method: Freezing
- Cuisine: American
Nutrition
- Serving Size: 1/2 cup
- Calories: 90
- Sugar: 17g
- Sodium: 0mg
- Fat: 0g
- Saturated Fat: 0g
- Unsaturated Fat: 0g
- Trans Fat: 0g
- Carbohydrates: 22g
- Fiber: 1g
- Protein: 1g
- Cholesterol: 0mg
Keywords: cucumber sorbet, refreshing dessert, summer treat
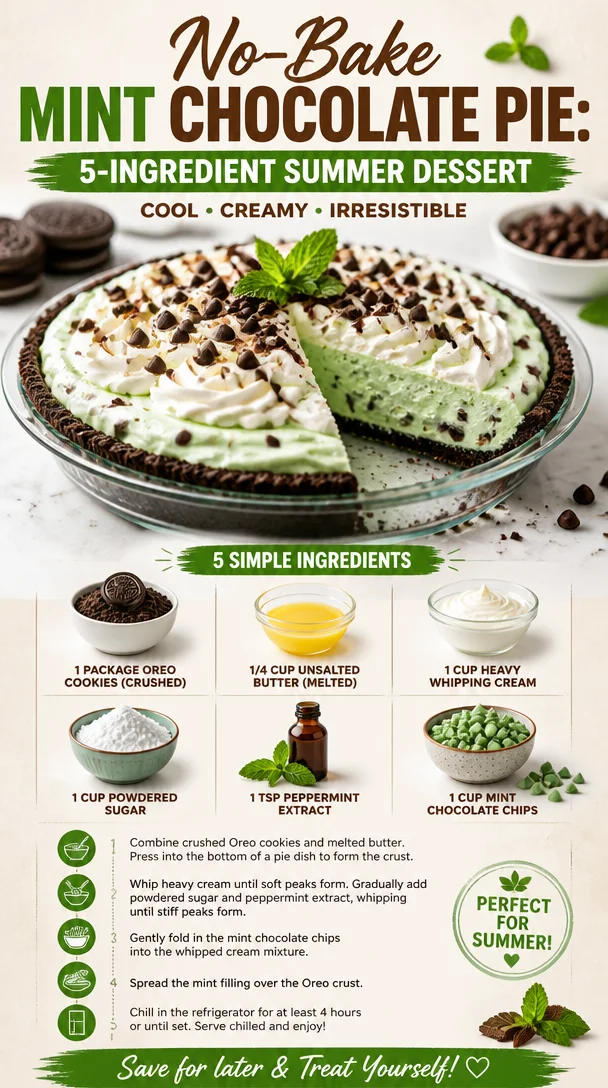
No-Bake Mint Chocolate Pie: 5-Ingredient Summer Dessert
No-Bake Mint Chocolate Pie: A Timeless Treat for Every Occasion
Hello, my fellow food lovers! I’m thrilled you’re here because today, we’re diving into a dessert that perfectly embodies the spirit of comfort food while also refreshing your taste buds—the delightful No-Bake Mint Chocolate Pie. Whether you’re hosting a summer picnic, celebrating a birthday, or just craving a sweet treat, this pie is bound to bring smiles and joy all around.
A Memory to Savor
Before I share my kitchen secrets, let me take you down memory lane for a moment. I vividly remember my childhood summers spent at my grandparents’ house. There was a tiny kitchen tucked away at the back of their charming cottage, where my grandma would often whip up her own version of a mint chocolate pie. It was a tried-and-true family favorite that seemed to vanish before our eyes!
Every summer, the air would be filled with laughter, and the sounds of my cousins battling in the backyard gave way to the sweet, unmistakable scent of mint and chocolate wafting from the kitchen. Those delicious moments, back-to-back with my grandma’s playful challenges to come help her mix the cream or crush the cookies, created lasting memories that still warm my heart today. You see, that’s the magic of food; it has a way of tethering us to our memories and making every bite feel special.
Ingredients: The Building Blocks of Bliss
Let’s break down the ingredients you’ll need for this luscious pie. Here’s the full lineup:
-
1 package Oreo cookies (crushed)
These are the perfect base for our crust. You can easily substitute with gluten-free Oreos or any chocolate cookie you love. -
1/4 cup unsalted butter (melted)
This helps bind the crust together. If you’re looking for a dairy-free option, coconut oil works beautifully. -
1 cup heavy whipping cream
This is crucial for our fluffy filling. If you want a lighter version, you can use coconut cream, but be ready for a bit of a flavor twist! -
1 cup powdered sugar
For that sweet touch! If you’re looking to cut down on sugar, consider using a powdered sugar substitute available at most grocery stores. -
1 tsp peppermint extract
This gives the pie its refreshing essence. You can play around with the amount depending on your minty preference! -
1 cup mint chocolate chips
These add that essential flavor kick. Feel free to swap them for dark chocolate chips if you want a richer taste.
Each ingredient plays a vital role in creating a sweet escape for the senses. So, let’s gather these goodies and get to work!
Step-by-Step Instructions: Your Culinary Adventure Awaits
Alright, time to roll up those sleeves and unleash your inner chef! Let’s walk through the process step-by-step.
-
Crush Those Oreos
Grab a large zip-top bag and fill it with your Oreos. Have some fun and crush them with a rolling pin, or get your kids involved! You want fine crumbs, almost like sand. Alternatively, you can use a food processor if you’re feeling fancy! -
Mix in the Melted Butter
In a bowl, combine the crushed Oreos with your melted butter. Stir until all the crumbs are coated. It’s like the sand on the beach, and you want it to stick together like a happy family! -
Form the Crust
Press this mixture evenly into the bottom and up the sides of a 9-inch pie pan. Use the flat bottom of a measuring cup or your fingers to pack it down tightly. The firmer it is, the better it’ll hold together when we cut into it! -
Refrigerate While You Make the Filling
Pop the crust into the fridge for about 15 minutes to set while we get to whipping. -
Whip the Cream
In a mixing bowl, beat the heavy whipping cream on medium speed until soft peaks form. This is where the magic really starts to happen! The cream will turn fluffy before your eyes! -
Add the Sugar and Mint Extract
Gradually mix in the powdered sugar and peppermint extract while continuing to whip. You’re going to achieve beautiful, billowy peaks that have a delightful sweetness and minty aroma. -
Fold in the Mint Chocolate Chips
Gently fold in the mint chocolate chips with a spatula. Remember, we don’t want to deflate our whipped cream. This step should feel light and airy! -
Fill the Crust
Spoon this fluffy mixture into your chilled Oreo crust, spreading it evenly. This is where you can feel like an artist, smoothing the top to your desired level of perfection. -
Chill Again
Cover your pie and refrigerate for at least 4 hours, but overnight is even better if you can wait! During this time, the flavors will meld together, and you’ll get a perfectly set pie. -
Serve and Enjoy
Before serving, you can add some extra mint chocolate chips or even shaved chocolate on top for that extra touch of decadence. Slice it up, and watch the smiles unfold!
Serving Suggestions: Let’s Get Creative!
Now that your pie is ready, let’s chat about how to make it a showstopper when serving. Presenting food is half the fun, right?
-
Pair with Fresh Mint Leaves: A few fresh mint leaves on top of each slice will elevate the presentation and add a burst of color.
-
Chocolate Drizzle: A drizzle of chocolate sauce over the pie gives it that extra hint of elegance.
-
Serve with Whipped Cream: A dollop of whipped cream on the side or even a full bowl for guest self-serve is always a hit.
-
Make Mini Pies: Use individual serving dishes to create mini pies! Not only are they cute, but they also make portion control a breeze.
-
Add Berries: Fresh raspberries or strawberries on the side complement the mint chocolate beautifully, adding a lovely tartness and a splash of color.
Recipe Variations: Spice Things Up!
The beauty of a No-Bake Mint Chocolate Pie is its adaptability! Here are a few variations to keep your taste buds excited:
-
Double Chocolate Delight: Use chocolate sandwich cookies for the crust instead of Oreos, and add more chocolate chips to the filling.
-
Peanut Butter Twist: Add some creamy peanut butter to the whipped cream filling for a delightful chocolate-peanut butter pairing.
-
Coffee Infusion: For the coffee lovers, add a teaspoon of instant coffee granules to the whipped cream for a mocha mint chocolate experience.
-
Fruit Fusion: Experiment by folding in fresh raspberries or crushed pineapple for a fruity twist. Just make sure to drain any excess liquid!
-
Dairy-Free Dreams: Use vegan whipped cream and dairy-free chocolate chips for a completely dairy-free version. You can even substitute coconut cream in place of heavy cream!
Chef’s Notes: A Dash of Personal Touch
What I love most about this recipe is how it has evolved over the years. I can still feel the warmth of those summer days in my grandparents’ kitchen, and once I was old enough to cook, I started experimenting. I remember one time, I accidentally left out the sugar but added an extra splash of peppermint extract—let’s just say it was a very minty evening! My family didn’t let me forget it, but it gave me a great lead-in to making this splendid dessert a family tradition.
I hope you give this No-Bake Mint Chocolate Pie a try—you’ll be the star of every gathering, and all your friends will be begging for the recipe.
FAQs and Troubleshooting: Your Questions Answered!
-
My filling didn’t set properly. What went wrong?
It’s crucial to whip the heavy cream to the right consistency! If it’s under-whipped, the filling may not hold its shape. Also, chilling time is essential—don’t rush it! -
How long will this pie last?
It should keep in the fridge for about 4-5 days, but trust me, it’s unlikely to last that long! -
Can I freeze this pie?
Absolutely! Just cover it tightly and freeze for up to a month. Let it thaw in the fridge before serving. -
Can I use other flavors instead of mint?
Certainly! You can experiment with different extracts like vanilla, almond, or citrus for a fresh twist.
Nutritional Info
This No-Bake Mint Chocolate Pie is indulgent, but here’s a general idea of what you’re looking at nutritionally per slice (based on a total of 8 slices):
- Calories: ~350
- Fat: 20g
- Carbohydrates: 40g
- Protein: 4g
- Sugar: 22g
Remember, nutrition varies with ingredient substitutions and portion sizes, so keep that in mind as you make this recipe your own.
Final Thoughts: Bringing It All Together
And there you have it! A No-Bake Mint Chocolate Pie that’s sure to become a household favorite, just like it did in my family. Everyone deserves a bite of something sweet and refreshing, and this pie delivers in spades—without a single stove top in sight!
So gather your ingredients, invite some loved ones into the kitchen, and let this pie bring you all together. I’d love to hear how your version turns out or any fun stories you create along the way. Feel free to share your experiences below or reach out to me through Feastical.com!
Until next time, happy cooking, and may every bite taste like a warm hug!
Print
No-Bake Mint Chocolate Pie
- Total Time: 240 minutes
- Yield: 8 servings 1x
- Diet: Vegetarian
Description
A delightful No-Bake Mint Chocolate Pie that combines refreshing mint and rich chocolate flavors. Perfect for any occasion, this pie is easy to make and sure to impress.
Ingredients
- 1 package Oreo cookies (crushed)
- 1/4 cup unsalted butter (melted)
- 1 cup heavy whipping cream
- 1 cup powdered sugar
- 1 tsp peppermint extract
- 1 cup mint chocolate chips
Instructions
- Crush those Oreos in a zip-top bag with a rolling pin or food processor.
- Mix in the melted butter until all crumbs are coated.
- Form the crust in a 9-inch pie pan, packing it tightly.
- Refrigerate the crust for 15 minutes.
- Whip the cream until soft peaks form.
- Add sugar and mint extract, mixing until billowy peaks form.
- Fold in the mint chocolate chips gently.
- Fill the crust with the cream mixture and smooth the top.
- Chill again for at least 4 hours or overnight.
- Serve and enjoy, optionally garnishing with mint chocolate chips or whipped cream.
Notes
For a dairy-free version, replace heavy cream with coconut cream and use dairy-free chocolate chips.
- Prep Time: 15 minutes
- Cook Time: 0 minutes
- Category: Dessert
- Method: No-Bake
- Cuisine: American
Nutrition
- Serving Size: 1 slice
- Calories: 350
- Sugar: 22g
- Sodium: 200mg
- Fat: 20g
- Saturated Fat: 12g
- Unsaturated Fat: 8g
- Trans Fat: 0g
- Carbohydrates: 40g
- Fiber: 2g
- Protein: 4g
- Cholesterol: 40mg
Keywords: mint chocolate pie, no-bake dessert, summer pie, chocolate pie, easy dessert

Andes Mint Dip
A Deliciously Sweet Escape: Andes Mint Dip
Hey there, fellow food lovers! It’s your chef pal, Beau Collier, and today we’re diving into a creamy, dreamy treat that’s sure to elevate your snack game: Andes Mint Dip. Picture this: a velvety dip that tastes just like those iconic green mint-chocolate candies we all adore. Yep, you heard me right! This dip is a flavor-packed journey through minty bliss and chocolatey goodness.
Whether you’re planning a cozy gathering with friends or just need a delicious way to unwind at the end of a long day, this Andes Mint Dip is your ticket to happy taste buds. You can whip it up in no time, and trust me, it’s always a hit! So grab your favorite mixing bowl and let’s get started!
A Whiff of Nostalgia
Let me take you back to one of my favorite childhood memories. Picture this: my family gathered around the table after a hearty dinner, and instead of traditional dessert, my mom would surprise us with her famous mint dip. I remember watching in awe as she whipped together the cream cheese, mint extract, and all the magical ingredients that would eventually create this incredible concoction. The excitement in the air was tangible; you could practically taste the anticipation!
As we dug in, our faces lit up with joy. The creamy texture, the cool mint, the rich chocolate — it was a flavor explosion that felt so comforting and indulgent. The best part? We’d pair it with graham crackers, fresh fruit, or even just enjoy it straight from the bowl (no judgment here!). It was our little post-dinner ritual, and until today, that memory brings a smile to my face. Sharing recipes is like sharing a piece of my heart, and I can’t wait for you to create your own precious memories with this Andes Mint Dip!
Ingredients
Here’s what you’ll need to whip up your scrumptious Andes Mint Dip:
-
1 (8-ounce) package cream cheese
A key ingredient that gives your dip that lovely creaminess. If you’re looking for a lighter option, you can substitute with Neufchâtel cheese or Greek yogurt. -
1 teaspoon mint extract
The magical ingredient that will elevate your dip with a refreshing burst of mint. Don’t have mint extract on hand? You can use peppermint extract for a more intense flavor! -
1 cup powdered sugar
This adds sweetness and helps achieve that smooth consistency. If you’re watching your sugar intake, feel free to swap it out with powdered monk fruit sweetener or coconut sugar mixed with a bit of cornstarch. -
1 (8-ounce) container whipped topping
This adds a light, fluffy texture to our dip. You can use homemade whipped cream for a fresher taste, or even coconut whipped topping for a dairy-free version. -
1/3 cup mini chocolate chips
These little guys are packed with chocolatey goodness. If you want to get fancy, try dark chocolate or even white chocolate chips! -
1/3 cup chopped Andes mints (plus more for topping)
Ah, the star of the show! Those chopped mints take this dip to a whole new level. If you can’t find Andes mints, chocolate-covered mint candies work well too. -
Green food coloring (optional)
For that pop of festive color! If you’re feeling adventurous, add a drop or two to make your dip even more eye-catching.
Step-by-Step Instructions
Alright, foodies! Let’s dive into the nitty-gritty of making this delightful Andes Mint Dip.
-
Prepare Your Ingredients
Begin by gathering all your ingredients. This makes the cooking process smooth and enjoyable. Plus, it has a cool chef vibe! -
Soften the Cream Cheese
Leave your cream cheese at room temperature for about 30 minutes before you start. This will make it much easier to mix. If you forgot, no worries! Just microwave it for about 10-15 seconds. -
Mix the Cream Cheese and Mint Extract
In a large mixing bowl, combine the softened cream cheese and the mint extract. Using a hand mixer, beat them together until the mixture is smooth and creamy. It should resemble a fluffy cloud of deliciousness! -
Add the Powdered Sugar
Gradually add the powdered sugar to the cream cheese mixture. Increasing the mixer speed as you go will help you avoid a cloud of sugar dust! Mix until combined, and don’t be afraid to taste the sweetness! -
Fold in the Whipped Topping
Gently fold in the whipped topping. Use a spatula and be careful not to over-mix; we want that light, airy texture to stay intact. -
Stir in the Chocolate Chips and Andes Mints
Time to bring in the chocolate! Fold in the mini chocolate chips and the chopped Andes mints. This is where the magic really begins; you’ll feel like a master chocolatier! -
Add Food Coloring (Optional)
If you want that gorgeous minty green hue, now’s the time to mix in a few drops of food coloring. Start with one drop, stir, and adjust until you reach your desired color. -
Serve and Garnish
Transfer the dip to a serving bowl and sprinkle some extra chopped Andes mints on top for that finishing touch. You might also want to add a few mini chocolate chips for flair! -
Chill (Optional)
This dip can be served immediately, but if you have the patience, refrigerate it for about an hour. The flavors really meld together beautifully in the fridge, making it even tastier!
Serving Suggestions
Now that your Andes Mint Dip is ready to dazzle, it’s time to think about how to serve it! Here are some fabulous ideas:
-
Fresh Fruit: Pair the dip with strawberries, apples, or banana slices. The fresh sweetness of the fruit balances the creamy minty goodness perfectly!
-
Graham Crackers: The classic pairing! The crunchy texture creates a delightful contrast to the creamy dip. Feel free to use flavored graham crackers like chocolate or honey for an extra special treat.
-
Pretzels: If you’re in the mood for a sweet and salty combo, dip pretzels into that minty concoction for a flavor explosion. Trust me; it’ll leave you wanting more!
-
Chocolate Wafer Cookies: Channel your inner dessert connoisseur with chocolate wafer cookies. They add a satisfying crunch that complements the dip’s smooth texture.
-
Spoonful of Happiness: Of course, there’s nothing wrong with grabbing a spoon and enjoying this goodness straight from the bowl. Sometimes, simple is best!
Recipe Variations
Here are some fun twists on this Andes Mint Dip to get those creative juices flowing:
-
Mint Chocolate Chip Ice Cream Dip: Use softened mint chocolate chip ice cream instead of whipped topping for a refreshing twist!
-
Add a Pinch of Sea Salt: A little sprinkle of sea salt adds a delightful contrast to the sweet mint. Sweet and salty, anyone?
-
Chocolate Drizzle: Top the dip with a drizzle of melted chocolate for an extra indulgent treat. You can also add a splash of peppermint extract for that extra minty punch.
-
Dairy-Free Delight: Substitute the cream cheese with dairy-free cream cheese and the whipped topping with coconut whipped topping for an entire vegan experience!
-
Mint Flavored Syrup: For a boom of minty goodness, stir in a tablespoon of mint-flavored syrup. It’s a double whammy of flavor!
Chef’s Notes
This Andes Mint Dip has come a long way since those early family dinners. I’ve fondly adapted this recipe over the years, tweaking it here and there to suit the ever-changing tastes of my loved ones. There was even one particularly chaotic dinner party where I accidentally added too much mint extract, and let me tell you, that created a whole new level of minty madness!
But every culinary blunder is a chance to learn. Now, when I make it, I always remind myself to taste as I go and trust my instincts. Whether you’re trying this dip for the first time or the hundredth, remember the joy it brings doesn’t just come from perfect execution; it comes from the laughter, love, and memories you create along the way.
FAQs and Troubleshooting
1. My dip turned out too runny! What happened?
If you used a low-fat cream cheese or under-measured the powdered sugar, it can affect the dip’s consistency. Using full-fat cream cheese will give you that creamy dip. In a pinch, you could chill it in the fridge for a little longer, allowing it to thicken up!
2. Can I make this dip ahead of time?
Absolutely! In fact, making this dip ahead of time allows the flavors to meld, creating an even more delicious treat. Just be sure to store it in an airtight container in the fridge until you’re ready to serve.
3. What can I use if I can’t find Andes mints?
Don’t sweat it! You can use any chocolate mint candy, chocolate-covered mints, or even crushed peppermint candies. The key is to keep that minty flavor alive!
4. What do I do if it’s too sweet for my taste?
Adjusting sweetness is a breeze! You can add a pinch of salt to cut the sweetness, or mix in some plain Greek yogurt to balance it out.
Nutritional Info
Do you want a delicious scoop of nutritional knowledge? Here’s a breakdown of what’s going on per serving:
- Calories: 212
- Total Fat: 10g
- Saturated Fat: 6g
- Carbohydrates: 30g
- Sugar: 26g
- Protein: 2g
Keep in mind that these values may vary based on your specific ingredients and portion sizes. However, I believe in enjoying a treat like this in moderation. Life’s all about balance, am I right?
Final Thoughts
And there you have it, my lovely food friends: a decadent Andes Mint Dip that’s not just delicious but also reminiscent of sweet childhood moments. This recipe is a delightful reminder that cooking is more than just a task; it’s about connection, joy, and the magic that happens when you share what you’ve created with others.
So whether you’re serving this dip at a festive gathering, a chill movie night, or simply indulging on a quiet evening, let the flavors transport you to those warm, snuggly memories just like they did for me. Now go forth, gather your ingredients, and create some heartwarming goodness. I can’t wait to hear your stories and see your delicious creations!
Happy dipping!
Print
Andes Mint Dip
- Total Time: 15 minutes
- Yield: 8 servings 1x
- Diet: Vegetarian
Description
A creamy, dreamy Andes Mint Dip that tastes just like the iconic green mint-chocolate candies, perfect for snacks or gatherings.
Ingredients
- 1 (8-ounce) package cream cheese
- 1 teaspoon mint extract
- 1 cup powdered sugar
- 1 (8-ounce) container whipped topping
- 1/3 cup mini chocolate chips
- 1/3 cup chopped Andes mints (plus more for topping)
- Green food coloring (optional)
Instructions
- Prepare your ingredients.
- Soften the cream cheese by leaving it at room temperature for about 30 minutes.
- Mix the cream cheese and mint extract until smooth.
- Add the powdered sugar gradually, mixing until combined.
- Fold in the whipped topping gently.
- Stir in the chocolate chips and chopped Andes mints.
- Add food coloring if desired.
- Serve the dip in a bowl and garnish with extra chopped Andes mints.
- Chill for about an hour if time allows for better flavor melding.
Notes
This dip can be prepared ahead of time for better flavor. Feel free to get creative with serving options!
- Prep Time: 15 minutes
- Cook Time: 0 minutes
- Category: Dessert
- Method: Mixing
- Cuisine: American
Nutrition
- Serving Size: 1 serving
- Calories: 212
- Sugar: 26g
- Sodium: 300mg
- Fat: 10g
- Saturated Fat: 6g
- Unsaturated Fat: 4g
- Trans Fat: 0g
- Carbohydrates: 30g
- Fiber: 1g
- Protein: 2g
- Cholesterol: 30mg
Keywords: Andes Mint Dip, mint dip, dessert dip, creamy dip, chocolate dip

Weeknight Tomato Galette with Goat Cheese (30-Min Prep)
Easy Tomato Galette with Goat Cheese: A Slice of Comfort
Hey food lovers! Buckle up because today we’re diving into a dish that screams summer and comfort all at once – the Easy Tomato Galette with Goat Cheese. This dish combines the lusciousness of ripe tomatoes with the creamy goodness of goat cheese, all enveloped in a flaky, buttery crust. It’s rustic, it’s fabulous, and it’s impossible not to love!
The galette is the laid-back cousin of the tart. And like a laid-back friend, it doesn’t mind how you dress it up; it just wants to be enjoyed, preferably with a glass of wine and good company. Whether you’re hosting a summer gathering or just want to treat yourself on a cozy night in, this galette is the answer. So let’s gather our ingredients and turn up the heat in our kitchens together!
Personal Story: The First Taste of Summer
I’ll never forget the summer I first made a galette. It was one of those lazy afternoons where time seemed to melt away under the warm sun. I had just returned from the local farmer’s market, arms laden with ripe tomatoes, their colors bursting like little pieces of sunshine. As I wandered into my kitchen, I felt inspired. The leftover pie crust from my last baking adventure was calling my name, just dying to be filled with something delicious.
With a sprinkle of creativity and some goat cheese I had on hand, the Easy Tomato Galette was born. The smell of tomatoes roasting combined with the tang of goat cheese wafted through my home, inviting anyone nearby to come and share the joy. That galette was not just a dish; it was a memory, a reminder of the vibrant flavors summer has to offer. And what’s better? With each bite, I felt transported back to those sunny days, each forkful bursting with nostalgia. Ever since, this recipe has become a staple in my kitchen!
Ingredients
Let’s talk ingredients! Here’s what you’ll need:
-
2-3 medium summer tomatoes, sliced
Ripe, juicy heirloom or vine-ripened tomatoes are perfect for this recipe. If you’re short on fresh tomatoes, you can substitute with canned whole tomatoes, just drain them first and slice. -
4 oz goat cheese, crumbled
The creamy texture of goat cheese elevates the dish. If you’re not a goat cheese fan, feta or ricotta can work too, giving a different flair to flavors. -
Fresh basil leaves, chopped
Basil adds that lovely aroma reminiscent of summer. If you don’t have basil, fresh oregano or parsley can do the trick for a different herbaceous flavor. -
Fresh thyme leaves
Thyme complements the tomatoes beautifully, adding depth. Dried thyme is an option here too; just halve the amount since it’s more potent. -
1 refrigerated pie crust or homemade pastry dough
I often use a pre-made crust for convenience, but if you’re feeling adventurous, try whipping up your own! It only takes a few ingredients, and I promise it’s worth it. -
Salt and pepper to taste
These are essential for enhancing the flavors; don’t skimp on them! -
1 egg (for egg wash, optional)
Giving the crust an egg wash before baking gives it a lovely golden color. If you’re skipping the egg wash, just brush a little olive oil for a nice sheen.
Step-by-Step Instructions
It’s time to roll up those sleeves and create something scrumptious! Here’s how to whip up this Easy Tomato Galette:
-
Preheat the Oven:
Start by preheating your oven to 400°F (200°C). Preheating is crucial – it helps ensure that your galette cooks evenly! -
Prepare Your Pie Crust:
If you’re using a homemade crust, roll it out on a lightly floured surface until it’s about 12 inches in diameter. Don’t stress about it being perfectly round; the rustic look is part of its charm! If you’re using a store-bought crust, simply unfurl it directly onto your baking sheet lined with parchment paper. -
Slice the Tomatoes:
While the oven heats up, slice your tomatoes into thin rounds. Aim for about 1/4-inch slices. After slicing, sprinkle them lightly with salt and let them sit for about 10 minutes. This helps draw out excess moisture, preventing a soggy galette. -
Assemble the Galette:
Sprinkle a thin layer of crumbled goat cheese over the pie crust, leaving about an inch border around the edges. Then, layer those beautiful tomato slices on top, slightly overlapping them for that Instagram-worthy presentation. Scatter chopped basil and thyme across the tomatoes, giving it a generous seasoning of salt and pepper too. -
Fold the Crust:
Now, here comes the fun part! Fold the edges of the crust over the filling, overlapping slightly as you go. Don’t worry if it’s not perfect – the rustic vibe is what we love about galettes! -
Egg Wash (Optional):
If you want that lovely golden crust, whisk the egg in a small bowl and brush it over the exposed crust. Not a fan of eggs? Just a drizzle of olive oil will do the trick. -
Bake:
Pop your galette in the preheated oven and bake for about 30-35 minutes, or until the crust is golden brown and the tomatoes are bubbly. The smell wafting through your kitchen will be irresistible! -
Cool & Serve:
Once out of the oven, let it cool for about 10 minutes. This step helps the filling set up a little. Slice it up and serve warm, or at room temperature. Trust me, it’s just as delicious!
Serving Suggestions
When it comes to serving, the possibilities are endless! I love to serve the galette on a rustic wooden board for that homey feel. It’s a showstopper; it’ll surely impress your family and friends.
Top it off with a light drizzle of balsamic reduction or a sprinkle of extra fresh herbs to elevate those flavors. Pair it with a green salad dressed in lemon vinaigrette to balance the richness of the cheese and tomatoes.
And hey, a chilled glass of Sauvignon Blanc or Rosé makes for the perfect pairing on a warm evening!
Recipe Variations
Let’s get creative! Here are a few delicious variations of this recipe to keep things exciting:
-
Mediterranean Twist: Add slices of olives and roasted red peppers for a flavor-packed Mediterranean galette.
-
Spicy Kick: Sprinkle a pinch of red pepper flakes over the tomatoes for a touch of heat – it’s a game-changer!
-
Veggie Galette: Incorporate sliced zucchini or mushrooms along with the tomatoes for an extra veggie boost.
-
Herbed Cream Cheese: Swap out goat cheese for herbed cream cheese for a creamy and tangy twist.
-
Pesto Delight: Spread a thin layer of pesto on the crust before adding the cheese and tomatoes to amp up those flavors!
Chef’s Notes
You know, my relationship with the galette has evolved over the years. Initially, I used to stress about making everything "perfect" – the circular crust, the spacing of the toppings. Over time, I’ve realized that cooking, much like life, is about embracing the imperfections. A little char here, a bit of overflow there – it all adds to the charm!
This galette has become a tradition in so many ways. It’s not just a recipe; it’s a celebration of summer, fresh produce, and moments shared with loved ones.
FAQs and Troubleshooting
1. Why is my galette soggy?
Ensure you salt your tomatoes ahead of time; this helps draw out moisture. Use a baking sheet with parchment paper to catch any excess liquid.
2. Can I make this ahead of time?
Yes! You can assemble it ahead of time and keep it in the fridge. Just pop it in the oven when you’re ready to bake.
3. Is there a gluten-free option?
Absolutely! You can use a gluten-free pie crust or even a cauliflower crust for a delicious twist.
4. How do I store leftovers?
Keep it in an airtight container in the refrigerator for about 2-3 days. Reheat in the oven for the best results.
Nutritional Info
This Easy Tomato Galette is not just tasty, but it also packs in some vitamins and nutrients. Here’s a quick glance at what you’re getting:
- Calories: Approximately 300 per serving (1/8 of galette)
- Fat: 20g (healthy fats from goat cheese and crust)
- Carbohydrates: 25g (good from the crust and veggies)
- Protein: 6g (thanks to the cheese)
- Fiber: 2g (vegetables are fiber-rich, keeping you satisfied!)
Keep in mind these values can vary based on specific ingredients and serving sizes, so feel free to provide specific information that fits your ingredients or audience.
Final Thoughts
And there you have it – an Easy Tomato Galette with Goat Cheese, perfect for any season but especially vibrant for summer! Cooking is all about the journey, the flavors, and the memories it creates. So gather your friends, create a spread that feels good, and savor every slice one delightful bite at a time.
Whether you’re sharing your galette at a backyard barbecue or indulging in it solo on a quiet evening, remember that food is meant to bring joy. Keep exploring, keep cooking, and don’t forget to share your kitchen stories! Until next time, happy feasting! 🍅🥧✨
Print
Easy Tomato Galette with Goat Cheese
- Total Time: 50 minutes
- Yield: 8 servings 1x
- Diet: Vegetarian
Description
A rustic galette combining ripe tomatoes with creamy goat cheese in a flaky crust, perfect for summer gatherings.
Ingredients
- 2–3 medium summer tomatoes, sliced
- 4 oz goat cheese, crumbled
- Fresh basil leaves, chopped
- Fresh thyme leaves
- 1 refrigerated pie crust or homemade pastry dough
- Salt and pepper to taste
- 1 egg (for egg wash, optional)
Instructions
- Preheat the oven to 400°F (200°C).
- Prepare your pie crust on a floured surface until about 12 inches in diameter.
- Slice your tomatoes into thin rounds, sprinkle with salt, and let sit for 10 minutes.
- Assemble the galette by sprinkling goat cheese on the crust, followed by tomato slices, chopped basil, and thyme.
- Fold the edges of the crust over the filling, overlapping slightly.
- Brush with egg wash if desired for a golden crust.
- Bake for 30-35 minutes until golden brown.
- Cool for 10 minutes, then slice and serve warm or at room temperature.
Notes
Top with balsamic reduction or fresh herbs. Pairs well with green salad and chilled wine.
- Prep Time: 15 minutes
- Cook Time: 35 minutes
- Category: Main Course
- Method: Baking
- Cuisine: Italian
Nutrition
- Serving Size: 1 serving
- Calories: 350
- Sugar: 6g
- Sodium: 300mg
- Fat: 20g
- Saturated Fat: 6g
- Unsaturated Fat: 10g
- Trans Fat: 0g
- Carbohydrates: 30g
- Fiber: 3g
- Protein: 8g
- Cholesterol: 50mg
Keywords: tomato galette, goat cheese, summer recipe, vegetarian, baking