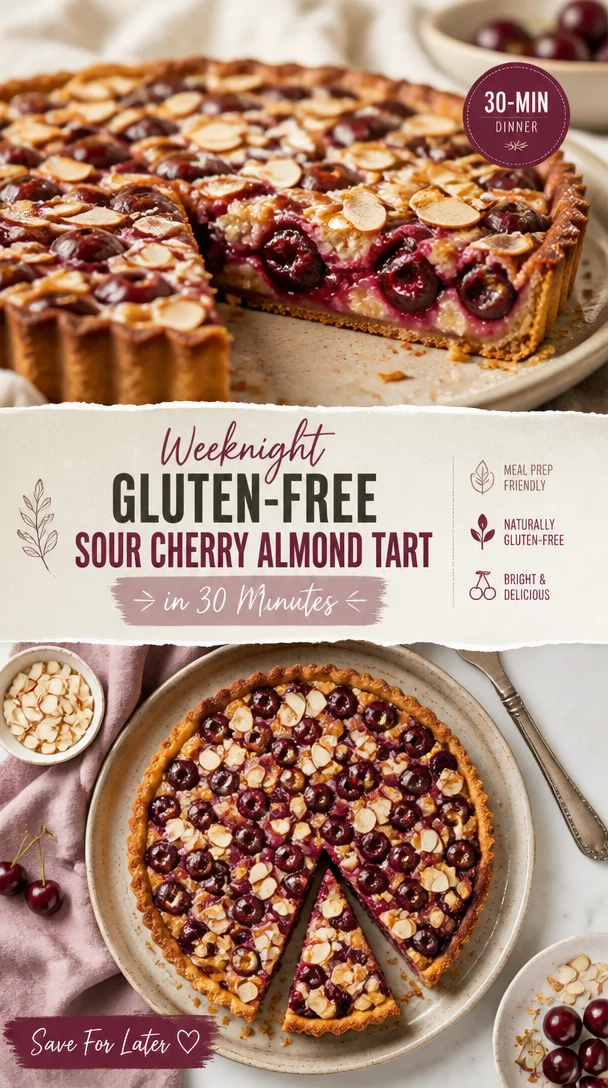
Weeknight Gluten-Free Sour Cherry Almond Tart in 30 Minutes
Gluten-Free Sour Cherry Almond Tart: A Deliciously Nostalgic Treat
Hey there, fellow food enthusiasts! Welcome back to Feastical, where the kitchen is always buzzing with joy, laughter, and mouth-watering delights. Today, we’re diving deep into a treat that not only captures the essence of summer but also sends a wave of nostalgia crashing over us like a warm hug from grandma. I’m excited to take you through the steps of making a Gluten-Free Sour Cherry Almond Tart! This beautifully vibrant tart is perfect for gatherings, or simply to spoil yourself (because you deserve it!).
A Bite of Nostalgia
Let me take you back to summers spent in my grandmother’s kitchen. The moment I walked through the door, the sweet tang of ripe cherries filled the air. She’d be bustling about, apron on, tossing flour and sugar like a painter splashes color across a canvas. “This batch is extra special,” she would say, raising an eyebrow with a cheeky grin.
Sour cherries have always had a place in my heart. You see, every summer, we’d visit the local orchard, picking bucketfuls of these tart gems, their vibrant red providing a bold contrast to the lush green leaves. We’d chatter about the flavors of the season, sampling sweet cherry treats and sharing recipes that had been passed down through generations.
One of my fondest memories is helping grandma make this very tart. While she expertly crafted the crust, I would sit on the counter, swinging my legs, eagerly waiting to drizzle that syrupy cherry concoction over the top. The smell wafting from the oven was pure magic, and nothing could compare to the taste of that tart with a scoop of vanilla ice cream melting into the crevices. It’s these wonderful memories and flavors that have inspired me to recreate this Gluten-Free Sour Cherry Almond Tart for you!
Ingredients
Let’s get our hands busy with the following ingredients, shall we? Each one plays a vital role in creating that dreamy tart:
-
1 cup almond flour (finely ground, packed)
Almond flour gives the tart a nutty flavor and a lovely texture that’s hard to resist. For a nut-free option, you could try sunflower seed flour, though the flavor will be slightly different. -
1 cup oat flour (gluten-free, if necessary)
Oat flour brings a subtle sweetness and helps bind everything together. If you can’t find oat flour, you can easily make your own by grinding rolled oats in a blender until fine—or sub in brown rice flour for a different flavor. -
1/4 cup butter or coconut oil (melted)
Rich and buttery, this fat provides the tart with a beautiful crumb. Coconut oil is a fantastic dairy-free substitute if you’re looking to keep it vegan. -
3 tbsp maple syrup
The maple syrup adds a natural sweetness that really complements those tart cherries. Honey can be used as a substitute for those who aren’t strict about vegan options. -
2 cups jarred, pitted sour cherries plus 1 1/4 cups juice from the jar (1-19 oz jar)
Ensure you choose quality cherries from a good source; they’re the star of our show! If you’re feeling adventurous, you could swap in fresh or frozen cherries when they’re in season, but adjust the sugar accordingly if they’re sweeter. -
2 tablespoons cornstarch
This is our thickening agent, giving our cherry filling a luscious, perfect consistency. For a substitute, you could use arrowroot for a similar result. -
1/4 teaspoon pure almond extract
This adds depth and enhances the almond flavor in the tart. If you’re not a fan of almond, vanilla extract works just fine too. -
1/2 cup sliced almonds
These provide fantastic crunch and an extra nutty flavor. Feel free to toast them lightly for additional richness! -
2 tablespoons sugar
This helps caramelize the tart’s top beautifully. If you’re looking to cut down on sugar, feel free to adjust the amount or opt for a sugar alternative. -
1 tablespoon beaten egg white
This acts as a glaze to give the tart a lovely golden finish. If you’re vegan, consider using a bit of non-dairy milk for a similar effect.
Step-by-Step Instructions
Alright, buckle up! Let’s get cooking. Here’s how to whip up your very own Gluten-Free Sour Cherry Almond Tart.
-
Preheat Your Oven
Preheat your oven to 350°F (175°C). Trust me, you don’t want to forget this crucial step. A properly heated oven ensures even baking and prevents the tart crust from getting soggy. -
Prepare Your Tart Pan
Grease a tart pan (9-inch works great) with a little butter or coconut oil. If you want a fool-proof release, consider lining the bottom with parchment paper. -
Make the Crust
In a mixing bowl, combine the almond flour and oat flour. Pour in the melted butter (or coconut oil) and maple syrup. Mix until it resembles coarse crumbs and starts to come together into a dough. If it feels a bit dry, add a spoonful of cold water until dough forms. -
Form the Crust
Press the dough evenly into the bottom and up the sides of your tart pan. Use a fork to poke a few holes in the bottom (this helps prevent bubbling). Pop it in the fridge for about 15-20 minutes to chill while you prepare the filling. -
Prepare the Cherry Filling
In a saucepan, combine the sour cherries, juice, and sugar over medium heat. Bring to a gentle simmer, then stir in the cornstarch mixed with a tablespoon of cold water to thicken. Add the almond extract. You’ll know it’s ready when it visibly thickens and coats the back of a spoon. -
Assemble the Tart
Pour the cherry mixture into the prepared crust, spreading it evenly. Sprinkle the sliced almonds on top; they’ll toast nicely while baking. -
Bake Your Tart
Bake in your preheated oven for about 30-35 minutes, or until the filling is bubbly, and the crust is golden brown. Keep an eye on it towards the end to prevent over-browning. -
Glaze the Tart
In the last few minutes of baking, brush the top of the tart with the beaten egg white for that glossy finish. This adds a lovely shine that makes your tart look even more irresistible! -
Let It Cool
Once done, allow it to cool in the pan for about 10-15 minutes before transferring it to a wire rack to cool completely. This cooling time is essential for the filling to set properly.
Serving Suggestions
Now that your tart is ready, it’s time to showcase your masterpiece! I suggest slicing it into generous wedges and serving it warm (or at room temperature) with a dollop of freshly whipped cream or a scoop of vanilla ice cream on the side. For an extra flourish, sprinkle some powdered sugar over the top for that café-style presentation. You can also serve it with a cup of coffee or tea—perfect for a cozy afternoon treat or a delightful brunch option!
Recipe Variations
Here are a few creative twists you can try with this tart:
-
Cherry-Almond-Lavender: Add a hint of dried culinary lavender to your cherry filling for a fragrant twist that elevates its flavor.
-
Chocolate Cherry Tart: Drizzle some melted dark chocolate over the top before serving for a decadent finish that pairs beautifully with the tart cherries.
-
Citrus Zing: Introduce a splash of orange or lemon juice to the cherry filling for a refreshing citrus kick.
-
Nut-Free Option: Swap out almond flour and sliced almonds for sunflower seed flour and pumpkin seeds for a nut-free delight.
-
Berry Blend: Use a mix of sour cherries and blueberries or raspberries for a berry explosion of flavor.
Chef’s Notes
Over the years, I’ve tweaked this recipe countless times, inspiring some fun kitchen experiments! There was one time I tried to make a savory twist by mixing in some cheese into the crust. Let’s just say it was… interesting! But that’s the beauty of cooking—you get to experiment and have fun while doing it. Each time I make this tart, I’m reminded of those sweet summer days with my grandma, and it reignites my passion for sharing food that brings joy.
FAQs and Troubleshooting
1. What if my tart crust crumbles?
If the crust crumbles, it might need a tad more moisture. Adding a small amount of cold water can help it hold together better.
2. How can I tell when my tart is done?
The filling should be bubbly, and the crust should be a lovely golden brown. If you’re unsure, a toothpick inserted into the crust can give you a good indication; if it comes out clean, it’s ready!
3. Can I freeze the tart?
Yes, you can freeze it! Just make sure it’s completely cooled and wrapped tightly in plastic wrap and then in foil. Thaw in the fridge overnight before serving.
4. How do I store leftovers?
Store any leftovers in an airtight container in the fridge for up to three days (if they last that long!). Reheat in the oven for a few minutes if you like it warm.
Nutritional Info
While I focus more on the love that goes into cooking rather than the nutritional facts, a slice of this tart clocks in around 250 calories (without toppings), primarily coming from healthy fats (thanks to the almond and coconut oil) and natural sugars from the cherries and maple syrup. It’s gluten-free and packed with good ingredients, making it a delightful treat you won’t feel guilty about.
Final Thoughts
So there you have it, food friends! A heartwarming, delightful recipe that’s sure to impress your guests or treat yourself on a quiet evening. Cooking should always be filled with joy, nostalgia, and the exploration of flavors. I hope this Gluten-Free Sour Cherry Almond Tart brings a sprinkle of sunshine to your kitchen and your taste buds!
Take a moment to savor the process, enjoy the flavors, and remember, it’s all about sharing love through food. Now, go grab that spatula, put on your favorite tunes, and let’s create culinary memories that will last a lifetime!
Happy cooking from me to you! 🍒✨
Print
Gluten-Free Sour Cherry Almond Tart
- Total Time: 55 minutes
- Yield: 8 servings 1x
- Diet: Gluten-Free
Description
A delightful tart that captures the essence of summer with the tartness of cherries and nuttiness of almond flour.
Ingredients
- 1 cup almond flour (finely ground, packed)
- 1 cup oat flour (gluten-free, if necessary)
- 1/4 cup butter or coconut oil (melted)
- 3 tbsp maple syrup
- 2 cups jarred, pitted sour cherries plus 1 1/4 cups juice from the jar (1–19 oz jar)
- 2 tablespoons cornstarch
- 1/4 teaspoon pure almond extract
- 1/2 cup sliced almonds
- 2 tablespoons sugar
- 1 tablespoon beaten egg white
Instructions
- Preheat your oven to 350°F (175°C).
- Grease a tart pan (9-inch works great) with a little butter or coconut oil.
- Combine the almond flour and oat flour in a mixing bowl. Pour in the melted butter (or coconut oil) and maple syrup. Mix until it resembles coarse crumbs and starts to form a dough.
- Press the dough evenly into the bottom and up the sides of your tart pan. Poke a few holes in the bottom and chill in the fridge for about 15-20 minutes.
- In a saucepan, combine the sour cherries, juice, and sugar over medium heat. Bring to a gentle simmer, then stir in the cornstarch mixed with a tablespoon of cold water.
- Add the almond extract to the thickened mixture.
- Pour the cherry mixture into the prepared crust, spreading it evenly. Sprinkle sliced almonds on top.
- Bake in your preheated oven for about 30-35 minutes, or until the filling is bubbly and the crust is golden brown.
- Brush the top of the tart with the beaten egg white for a glossy finish.
- Allow to cool in the pan for about 10-15 minutes before transferring to a wire rack to cool completely.
Notes
Serve warm or at room temperature with whipped cream or vanilla ice cream.
- Prep Time: 20 minutes
- Cook Time: 35 minutes
- Category: Dessert
- Method: Baking
- Cuisine: American
Nutrition
- Serving Size: 1 slice
- Calories: 250
- Sugar: 10g
- Sodium: 150mg
- Fat: 12g
- Saturated Fat: 3g
- Unsaturated Fat: 8g
- Trans Fat: 0g
- Carbohydrates: 30g
- Fiber: 3g
- Protein: 6g
- Cholesterol: 10mg
Keywords: gluten-free tart, cherry dessert, almond tart, summer dessert, nostalgic recipes

Ingredient Roasted Apricots for Busy Weeknights
Roasted Apricots – A Sweet Summer Delight at Kinsey’s Kitchen
Hey there, fellow food lovers! I’m Beau Collier, and I’m thrilled to have you join me today at Feastical! If you’re looking to indulge in a delicious summer treat, you’ve come to the right place. Today, we’re diving into the delightful world of roasted apricots—a simple yet spectacular dish that’s sure to become a seasonal favorite in your kitchen. Let’s warm up those ovens and get ready to savor some juicy, caramelized apricots!
Introduction
Roasted apricots have a special place in my heart, and I can’t wait to share with you why. There’s something magical about the way the heat transforms these little fruits, bringing out their natural sweetness and enhancing their flavor. As summer rolls in and the farmers’ markets come alive with vibrant colors, apricots are one of those treasures I always look forward to bringing home.
Imagine walking through a sun-kissed orchard, the sweet scent of ripe fruit wafting in the warm breeze. That’s the essence of summer, isn’t it? And when it comes to using apricots in the kitchen, roasting them turns this already delightful fruit into something spectacular. The roasting process transforms their texture, giving them a tender, caramelized exterior that’s almost like candy. Seriously, it’s like each bite is a warm hug from summer!
Not only are roasted apricots mouthwatering on their own, but they also lend themselves beautifully to various dishes. Whether you’re dressing them up with yogurt for breakfast, slathering them on toast for a sweet snack, or serving them alongside savory meats for a fancy dinner, they genuinely shine in all roles. So grab your apron, and let’s explore this luscious recipe that’s as easy to make as it is to eat. I promise you it’ll be a dish that’ll transport you straight to summer, no matter what season it is!
Personal Story
I remember my very first encounter with roasted apricots like it was yesterday. It was a lovely summer evening, and my good friend Kinsey had invited me over for dinner. As I arrived, the intoxicating aroma wafting from the kitchen made my mouth water. Kinsey is a wizard in the kitchen, and her juicy roasted apricots stole the show that night.
She served them warm on a platter, drizzled with velvety honey and a sprinkle of fresh mint. I was in paradise! The combination of the sweet, soft apricots paired with the honey’s rich flavor and the mint’s refreshing touch was pure magic. It was a simple dish, but it left a lasting impression on me—a reminder of the joy simple ingredients can bring when treated with love. Ever since then, roasted apricots have been a summer staple in my kitchen, and I couldn’t wait to share the recipe with all of you!
Ingredients
Let’s gather our ingredients! Here’s what you’ll need to create these roasted apricots and a couple of handy tips to make sure your dish shines:
-
Fresh Apricots (8-10 pieces)
Look for apricots that are slightly soft to the touch but not too mushy. They should have a beautiful golden hue. If you can’t find fresh apricots, peaches or nectarines are great substitutes as they roast beautifully too. -
Honey (2-3 tablespoons)
Honey adds a natural sweetness that enhances the apricots. Use local honey if you can—it’s a delightful way to support local beekeepers and can have unique flavors based on the blossoms. Maple syrup is a fabulous alternative if you’re looking for something a bit different! -
Fresh Mint Leaves (a handful)
Mint provides a refreshing burst of flavor. Snip the leaves just before serving for maximum brightness. You can also substitute with basil for a more unexpected flavor twist! -
Olive Oil (1 tablespoon)
A light drizzle of olive oil adds a beautiful sheen and prevents the apricots from sticking. If you’re up for it, try using a flavored oil like rosemary or garlic olive oil—it will introduce an exciting complexity. -
Sea Salt (a pinch)
A dash of sea salt helps to balance the sweetness of the honey and apricots. Don’t skip this, even if it seems counterintuitive; a little salt can elevate the dish to another level!
With these ingredients in hand, we’re well on our way to creating a glorious summer dish!
Step-by-Step Instructions
Now that we’ve gathered our ingredients, it’s time to get cooking! These roasted apricots come together quickly, so let’s jump right into it:
-
Preheat Your Oven
Start by preheating your oven to 350°F (175°C). This temperature is perfect for slowly roasting the apricots, allowing their natural sugars to caramelize without burning. If your oven has a convection option, feel free to use it for an even roast! -
Prepare the Apricots
Rinse the apricots under cool water, and then pat them dry gently with a clean kitchen towel. Cut each apricot in half, and carefully remove the pit. Don’t worry if they aren’t perfectly halved—imperfections add character! -
Arrange on a Baking Tray
Take a baking tray lined with parchment paper and arrange the apricot halves cut-side up. Give them a bit of space to breathe; you want them to roast, not steam. Arrange them in a single layer for even cooking. -
Drizzle with Olive Oil and Honey
Drizzle olive oil over the apricot halves, just enough to coat them lightly. Next, drizzle honey generously over the top. If you’re using flavored oils or different sweeteners, sprinkle that on at this stage. The heat will meld the flavors beautifully! -
Sprinkle with Sea Salt
Don’t forget the pinch of sea salt! A little can go a long way in enhancing the overall flavor. Just a bit on each apricot will do. -
Roast Them Up
Pop the tray into your preheated oven and roast for about 20-25 minutes. Keep an eye on them towards the end so they don’t get too dark. You’re looking for a golden, caramelized look. The apricots should be soft but still hold their shape. -
Fresh Mint Magic
Once they’re out of the oven, let them cool for just a couple of minutes. While they’re still warm, sprinkle on the fresh mint leaves. The warmth will release the oil in the mint, bursting with flavor! -
Plate and Serve
To serve, you can arrange them on a cute little platter or even in individual bowls. They are delectable on their own, but also fabulous with a dollop of Greek yogurt or a scoop of vanilla ice cream for that extra indulgence!
Serving Suggestions
When it comes to plating these roasted apricots, think simple but elegant! You can easily serve them in a shallow bowl or on a rustic wooden board for that homemade vibe. Arrange the apricots so they look inviting, with a sprinkle of fresh mint leaves on top for that pop of green!
If you want to dress them up even further, a drizzle of balsamic glaze or a savory blue cheese crumble can elevate your dish in no time—trust me, the flavor contrast is heavenly! Pair them with a nice cheese board for an easy appetizer that’ll wow your guests or serve them alongside grilled meats for a refreshing contrast on your summer dinner table.
Want to bring even more indulgence to the table? Serve alongside a little whipped cream or a scoop of tangy gelato. You’ll be surprised how delightful these warm roasted apricots can be with a cold, creamy companion—just imagine the textures blending together.
Recipe Variations
Now let’s talk about how you can play around with this recipe. The beauty of roasting apricots is that it’s super versatile. Here are some delightful variations you can try:
-
Cinnamon and Cardamom Twist
Add a pinch of ground cinnamon or cardamom to your honey before drizzling for a cozy, spiced flavor that pairs wonderfully with the apricots. -
Nutty Crunch
For a texture contrast, sprinkle some chopped nuts like walnuts or pistachios on the roasted apricots for a delightful crunch. Toasting them beforehand can enhance their flavor! -
Balsamic Reduction
Instead of honey, drizzle with a homemade balsamic reduction for a tangy-sweet contrast that’s perfect over cheese or meats. -
Fruit Fusion
Roasting apricots with other fruits like plums or cherries can work wonders, creating a fruit medley that’s bursting with flavor! -
Vegan Delight
Substitute honey with agave syrup or maple syrup for a completely vegan option without sacrificing that lovely sweetness.
Chef’s Notes
Roasted apricots have been around for a long time, and while the basic concept remains unchanged, I love how versatile this dish is—each time I make it, I add something new! Once, during a camping trip, I roasted them over a campfire with a sprinkle of brown sugar—pure bliss under a starlit sky! It’s funny how simple things can create some of the best memories.
One tip I swear by is to keep an eye on your oven; roasting times can vary based on the ripeness of the fruit and your specific oven type. If you’re keeping an eye on them, you can prevent those lovely fruits from turning into just a tasty dark morsel!
FAQs and Troubleshooting
1. Why are my apricots mushy after roasting?
Overripe apricots can turn mushy when roasted, so be sure to choose fruit that is ripe but still firm to the touch. If they are extremely soft before roasting, they may break apart during cooking.
2. Can I use frozen apricots?
Yes, frozen apricots can be used, but they will release more moisture as they roast, so adjust your cooking time. You might want to reduce the roasting time a bit to avoid them becoming too soggy.
3. How do I know when they’re done?
Look for a deep golden color and soft texture, but they should still hold their shape. If you poke one with a fork, it should give easily.
4. What can I do with leftovers?
Leftover roasted apricots can be stored in the refrigerator for up to three days! They are fantastic added to salads, blended into smoothies, or spooned over oatmeal for breakfast.
Nutritional Info
While apricots are delicious, they’re also packed with nutrients! A serving of roasted apricots (about 2-3 halves) offers:
- Calories: Approximately 60-80 calories (depending on how much honey you use)
- Carbohydrates: 16-20g
- Fiber: 2g
- Sugar: About 12g
- Vitamin A: Essential for eye health
- Vitamin C: Great for your immune system
This dish is not only a treat for the taste buds but also a boost for your health!
Final Thoughts
So there you have it—roasted apricots that will transport your taste buds straight to summer bliss! It’s amazing how such a simple recipe can turn into a highlight of your meal. Whether you enjoy them as a sweet snack, a side dish, or even a breakfast treat, I’m sure these little gems will be a hit in your kitchen.
Remember, cooking is all about infusion—infusing flavors, love, and memories into every dish. I hope you’ll take this recipe for roasted apricots and make it your own. Don’t forget to share your creations with me, and let’s keep spreading the joy of good food together! Happy cooking, my friends!
Print
Roasted Apricots
- Total Time: 35 minutes
- Yield: 4 servings
- Diet: Vegetarian
Description
A simple yet spectacular dish of roasted apricots that enhances their natural sweetness, perfect for summer.
Ingredients
- Fresh Apricots (8-10 pieces)
- Honey (2-3 tablespoons)
- Fresh Mint Leaves (a handful)
- Olive Oil (1 tablespoon)
- Sea Salt (a pinch)
Instructions
- Preheat your oven to 350°F (175°C).
- Rinse the apricots under cool water and pat them dry.
- Cut each apricot in half and remove the pit.
- Arrange apricot halves cut-side up on a baking tray lined with parchment paper.
- Drizzle olive oil and honey over the apricots.
- Sprinkle with a pinch of sea salt.
- Roast in the oven for about 20-25 minutes until golden.
- Cool for a couple of minutes and sprinkle fresh mint leaves before serving.
- Plate and serve with yogurt or ice cream if desired.
Notes
Try using flavored olive oils for an exciting twist. Pair with yogurt or ice cream for a delightful contrast.
- Prep Time: 10 minutes
- Cook Time: 25 minutes
- Category: Dessert
- Method: Roasting
- Cuisine: American
Nutrition
- Serving Size: 1 serving
- Calories: 70
- Sugar: 12g
- Sodium: 5mg
- Fat: 2g
- Saturated Fat: 0g
- Unsaturated Fat: 2g
- Trans Fat: 0g
- Carbohydrates: 16g
- Fiber: 2g
- Protein: 1g
- Cholesterol: 0mg
Keywords: roasted apricots, summer desserts, quick desserts

One-Pan Curried Apricot Chicken for Weeknight Dinners
Curried Apricot Chicken: A Flavorful Journey to Your Kitchen
Hey there, food lovers! It’s Beau Collier from Feastical, where good food and warm vibes come together in perfect harmony. Today, I’m thrilled to share a delightful dish that’s not only pleasing to the palate but also takes you on a journey filled with nostalgia and comfort: Curried Apricot Chicken. This dish is a celebration of flavors, combining the sweetness of apricots with the warm spices of curry, making a meal that’s both vibrant and scrumptious.
Introduction
Picture this: the sun is setting, casting a warm glow in your kitchen, and the air is filled with the mouth-watering aroma of spices simmering on the stove. That’s the essence of making Curried Apricot Chicken! There’s something absolutely magical about cooking with spices — they transport you to faraway lands and create memories that linger long after the last bite. From the first sprinkle of curry powder to that first taste of succulent chicken with a sweet apricot glaze, it’s a culinary adventure that can turn a regular weeknight into a special occasion.
When I first stumbled upon the combination of curried spices and apricots, it was love at first bite! I remember enjoying this dish at a friend’s dinner party, standing around the table filled with laughter and delicious food. The flavors danced on my tongue, and I knew I had to recreate it in my own kitchen. It felt like a warm hug on a plate—comforting, satisfying, and oh-so-delicious.
So, gather your ingredients, put on your favorite tunes, and let’s dive into the world of Curried Apricot Chicken. Whether you’re cooking for a cozy family dinner or impressing guests at a gathering, this dish is sure to be a hit! Trust me, you’ll want to remember this recipe because it’s one you’ll come back to time and time again.
Personal Story
I can still vividly recall the first time I made Curried Apricot Chicken. It was one of those chilly fall evenings when the leaves were changing colors, and I craved something warming and flavorful. My best friend, Sarah, was coming over for dinner, and I wanted to impress her with a dish that spoke of home and comfort.
I decided to take the plunge and try making Curried Apricot Chicken—having experienced it once before, in a charming little café that served world cuisine. With a few notes jotted down and sheer determination, I started chopping and stirring. As I poured the apricot preserves into the pan, I couldn’t help but feel excited about the flavors that were about to unfold. When Sarah arrived, the rich aroma filled my kitchen, making her eyes widen with anticipation.
That evening became a cherished memory, filled with laughter, moments around the table, and the satisfaction of sharing a homemade meal. Every forkful was met with delighted smiles, and we spent hours discussing our favorite recipes and reminiscing about childhood meals. That dish marked the beginning of many cooking adventures we would share, solidifying our bond over the love of delicious food.
Ingredients
Here’s what you’ll need to whip up this amazing Curried Apricot Chicken:
-
2 lbs chicken thighs, boneless and skinless: I prefer chicken thighs for their juiciness and rich flavor, but you can also use chicken breasts if you like. Just keep an eye on the cooking time as they may dry out more quickly.
-
1 cup apricot preserves: The star of this dish, apricot preserves give that sweet, flavorful kick. If you’re feeling adventurous, you might try peach or mango preserves as an alternative!
-
2 tablespoons curry powder: This adds warmth and depth to our dish; feel free to experiment with different curry blends—Madras for heat or a mild blend for something soothing.
-
1 medium onion, chopped: Onions are essential for building flavor. Make sure to chop them finely for a great base; shallots also work if you prefer a milder onion flavor.
-
3 cloves garlic, minced: Fresh garlic adds a fantastic aroma and taste! If you’re in a pinch, garlic powder can work as a substitute, but fresh is always best.
-
1 tablespoon fresh ginger, grated: Ginger adds a beautiful zing! You can use ground ginger in a hurry, but fresh will give the dish a much brighter flavor.
-
1 cup chicken broth: This brings everything together and adds lovely moisture. You can use low-sodium broth to control the saltiness, or try vegetable broth for a vegetarian-friendly version.
-
2 tablespoons olive oil: Perfect for sautéing your onions and garlic. If you like a different flavor, coconut oil can give a tropical twist!
-
Salt and pepper to taste: Always an essential seasoning duo—use as needed to enhance the flavors.
-
Chopped cilantro for garnish: This fresh herb brings a burst of color and flavor. If you’re not a fan, parsley works well too, or feel free to omit it altogether.
Step-by-Step Instructions
Let’s get cooking! Here’s how to create your Curried Apricot Chicken:
-
Prepare the Ingredients: Start by gathering all your ingredients. Make sure everything is chopped, minced, and ready to go—this makes cooking a breeze! It’s always a good idea to be organized; this way, you won’t find yourself scrambling halfway through the recipe.
-
Heat the Olive Oil: In a large skillet over medium heat, add the olive oil. You want to reach a point where it shimmers but doesn’t smoke. This will create a lovely sautéing environment for your onions and garlic.
-
Sauté the Onions: Toss in your chopped onions and cook for about 5-7 minutes, stirring occasionally until they become soft and translucent. This step is crucial for building the base flavor of the dish—don’t rush it!
-
Add Garlic and Ginger: Next, stir in the minced garlic and grated ginger, cooking for an additional 2-3 minutes. The aroma will be heavenly! Make sure not to let the garlic burn; it can get bitter if overcooked.
-
Introduce the Chicken: Now, add the chicken thighs to the skillet. Season them with salt and pepper and cook for about 5 minutes, browned on all sides. Don’t worry if they’re not fully cooked yet—they’ll finish cooking in the sauce!
-
Mix the Curry Powder: Sprinkle in the curry powder and stir well to coat the chicken and onions evenly. This step brings the aromatic spices forward, filling your kitchen with mouth-watering scents.
-
Incorporate the Apricot Preserves: Pour in the apricot preserves along with the chicken broth. Stir everything together—this is where the magic happens! The preserves will melt into the sauce, creating a luscious glaze.
-
Simmer and Cook: Bring the mixture to a gentle simmer and cover the skillet. Reduce the heat to low and let it cook for about 20-25 minutes, or until the chicken is fully cooked and tender. This is the time when all those lovely flavors get to know each other, transforming your dish into a comforting delight.
-
Taste and Adjust: Once the chicken is cooked, taste the sauce and adjust seasoning with salt and pepper if needed. If it’s too sweet for your liking, a squeeze of fresh lemon juice can help balance it out!
-
Serve It Up: Once you’re satisfied with the flavors, it’s time to plate it up! Remove the skillet from heat and get your plates ready for this feast.
Serving Suggestions
Now that your Curried Apricot Chicken is ready, let’s talk about how to serve it up for maximum impact. I recommend serving it over fluffy jasmine rice, which absorbs all that delicious sauce beautifully! You can also add a side of steamed veggies—think broccoli or sugar snap peas for a pop of color and crunch.
To plate, place a generous scoop of rice on your dish, top it with pieces of the chicken and spoon a good glug of the velvety apricot curry sauce over it. A sprinkle of fresh chopped cilantro on top adds a lovely contrast, making the dish look as good as it tastes. And don’t forget, serving this dish with warm naan or crusty bread is a hit for scooping up every last bit!
Recipe Variations
Looking to switch things up? Here are a few variations to consider for your Curried Apricot Chicken:
-
Add Veggies: Toss in some bell peppers, carrots, or snap peas for added color and nutrients. Just sauté them along with the onions for extra flavor!
-
Make it Spicy: If you love a kick, add some diced jalapeños or a dash of cayenne pepper when you add the curry powder. Trust me, it elevates the dish!
-
Go Coconut: Stir in half a can of coconut milk with the chicken broth for a richer, creamier sauce. This also adds a touch of richness that pairs beautifully with the apricot.
-
Dairy-Free: If you’d like to make a dairy-free version, simply omit any dairy and stick with the chicken broth or coconut milk!
-
Meal Prep: This dish is fantastic for meal prep! Just make a big batch and store leftovers in the fridge for quick lunches throughout the week.
Chef’s Notes
What I love most about cooking is how recipes evolve over time. When I first started making Curried Apricot Chicken, I was nervous about using curry powder—it seemed so foreign to me. I quickly learned, though, that it’s a warm hug of spices that can transport you to different culinary experiences.
As I’ve perfected this dish, I’ve made adjustments here and there based on what I had in my pantry or what was in season. The charm of this recipe is its flexibility. Want a little more tang? Add a splash of vinegar or lemon juice. Need it sweeter? Toss in extra apricot preserves or some honey. The options are endless!
And let’s not forget about the moments that happen in the kitchen—the little disasters, the triumphs, and the laughter shared with loved ones. Those are what make cooking so worthwhile.
FAQs and Troubleshooting
1. My sauce is too thick! What can I do?
If your sauce is thicker than you’d like, add a little more chicken broth or water to loosen it up. Let it simmer just a bit longer to let the flavors meld.
2. Can I use frozen chicken?
Yes, but make sure to thaw the frozen chicken before you start. Cooking it straight from frozen will take longer and may result in uneven cooking.
3. What if I can’t find apricot preserves?
No problem! You can try other fruit preserves like peach, mango, or even raspberry. Just adjust the sweetness to your taste.
4. I don’t like ginger. What can I substitute?
If ginger isn’t your friend, you can simply leave it out. The dish will still taste delicious with just garlic and onion!
Nutritional Info
Curried Apricot Chicken is not only tasty but also packed with nutrition. Here’s a quick breakdown of what you can expect per serving (based on serving about 4 people):
- Calories: Approximately 380
- Protein: 30g (from chicken)
- Carbohydrates: 35g (mostly from apricot preserves and any rice)
- Fat: 15g (depending on the oil)
- Fiber: 2g (from onions and chicken)
It’s a well-rounded meal, full of protein, and can be made lighter if served with veggies instead of rice. Adjusting ingredients also allows for flexibility to meet dietary needs!
Final Thoughts
And there you have it—Curried Apricot Chicken! A dish that brings warmth, comfort, and delightful flavors right into your kitchen. Whether you’re cooking for yourself or gathering around the table with loved ones, this recipe is sure to create memories and a scrumptious experience.
So go ahead, embrace your inner chef, and give this recipe a try! Personalize it with your favorite ingredients, share it with friends, and let the aromas fill your kitchen with love. As always, I’d love to hear about your cooking adventures, so feel free to drop your comments or share your photos. Happy cooking! Let’s make mealtime a joyous and flavorful occasion—because, at Feastical, food is meant to be celebrated!
Print
Curried Apricot Chicken
- Total Time: 45 minutes
- Yield: 4 servings 1x
- Diet: Gluten-Free
Description
A delightful combination of juicy chicken thighs and sweet apricot preserves, spiced with curry for a vibrant and comforting dish.
Ingredients
- 2 lbs chicken thighs, boneless and skinless
- 1 cup apricot preserves
- 2 tablespoons curry powder
- 1 medium onion, chopped
- 3 cloves garlic, minced
- 1 tablespoon fresh ginger, grated
- 1 cup chicken broth
- 2 tablespoons olive oil
- Salt and pepper to taste
- Chopped cilantro for garnish
Instructions
- Prepare the Ingredients: Gather all ingredients, chopping and mincing as needed.
- Heat the Olive Oil: In a large skillet over medium heat, add olive oil until it shimmers.
- Sauté the Onions: Cook chopped onions for 5-7 minutes until soft and translucent.
- Add Garlic and Ginger: Stir in minced garlic and grated ginger, cooking for an additional 2-3 minutes.
- Introduce the Chicken: Add chicken thighs, seasoning with salt and pepper; brown for about 5 minutes.
- Mix the Curry Powder: Sprinkle curry powder and stir to coat the chicken and onions.
- Incorporate the Apricot Preserves: Pour in apricot preserves and chicken broth; stir until mixed.
- Simmer and Cook: Bring to a simmer, cover, and cook on low for 20-25 minutes until chicken is cooked through.
- Taste and Adjust: Adjust seasoning with salt and pepper, and add lemon juice if needed.
- Serve It Up: Plate the dish with rice, chicken, sauce, and garnish with cilantro.
Notes
Serve over jasmine rice with a side of steamed vegetables. Variations include adding bell peppers or coconut milk for creaminess.
- Prep Time: 15 minutes
- Cook Time: 30 minutes
- Category: Main Course
- Method: Sautéing
- Cuisine: International
Nutrition
- Serving Size: 1 serving
- Calories: 380
- Sugar: 25g
- Sodium: 600mg
- Fat: 15g
- Saturated Fat: 2g
- Unsaturated Fat: 10g
- Trans Fat: 0g
- Carbohydrates: 35g
- Fiber: 2g
- Protein: 30g
- Cholesterol: 80mg
Keywords: curried chicken, apricot chicken, comfort food, easy dinner, spices

Minute Italian Bruschetta: Crispy, Fresh Flavor Boost
The Joy of Making Italian Bruschetta: A Taste of Love & Home
Hey there, food lover! Pull up a chair, grab a snack, and let’s chat about one of my all-time favorite appetizers: Italian Bruschetta. This dish is like a warm hug with a heirloom tomato on top, and trust me, once you get the hang of it, you’ll find yourself making it for every get-together or even just a cozy night in.
Bruschetta is not just about the vibrant colors of fresh tomatoes or the crunch of a perfectly toasted baguette; it’s about sharing. It’s about gathering with friends and family, laughing over a glass of wine, and forgetting the worries of the day, if only for a moment. The garden-fresh flavors of ripe tomatoes, fragrant basil, and sharp garlic mingle in a way that instantly transports you to a sun-drenched Italian hillside, even if you’re stuck at home.
Now, I’d be lying if I said I made this dish right the first time. I vividly remember my very first attempt—I had an abundance of tomatoes from my backyard garden, all begging to be used. I thought, "How hard can it be to make Bruschetta?" Fast forward to an overzealous amount of spices and soggy bread concern that left me a bit defeated. But, being the resilient foodie that I am, I bravely dusted myself off, adjusted my rhythm, and eventually found the magic balance. And oh boy, was it worth it!
What I love most about Bruschetta is that it feels sophisticated but is super easy to master. It’s a fantastic starting point for new cooks, and I promise, no culinary degree is needed! So, if you’re ready, let’s dive into the creation of this delightful dish together.
A Taste of Nostalgia
Picture it: I was a kid, maybe eight or nine years old, sitting at my grandmother’s wooden kitchen table. The sun streamed through the window, casting a warm glow over the room. My grandma was bustling around, preparing our family’s Sunday dinner. The fragrant aroma of roasted veggies and simmering sauce wafted through the air—it was pure magic.
On that particular day, she taught me how to make her famous Bruschetta. She demonstrated how to chop the tomatoes just right and how a pinch of salt really enhances those garden-fresh flavors. “Make sure you smell the basil, Beau,” she would say, her eyes twinkling with delight. And indeed, that first whiff of basil, so aromatic and uplifting, always felt like a promise of deliciousness. We laughed and shared stories, and as always, I melted into those moments—every bite of Bruschetta reminding me of love, family, and the joy of simple pleasures.
Her handmade loaf of bread, toasted just right, became the canvas for our fresh ingredients, sprinkled with a touch of olive oil and balsamic glaze. Even to this day, I can close my eyes and picture her soft hands nurturing those tomatoes—such simple, humble work and yet so profound. That’s the beauty of Bruschetta; it’s more than just an appetizer; it’s a vessel for cherished memories.
Ingredients That Sing
Let’s talk ingredients! Each element plays a special role in creating that deliciously fresh Bruschetta. Here’s what you’ll need:
-
4 cups tomatoes (diced or quartered)
The star of the show! Use ripe, flavorful tomatoes. I love heirlooms for their variety and richness, but feel free to use Roma or vine-ripened tomatoes too. If you can’t find fresh tomatoes, canned whole tomatoes in high-quality juice work as a decent substitute. Just make sure to drain them well! -
1/2 cup red onion (diced)
Gives a nice crunch and a touch of sharpness. If red onion is too strong for your taste, you can opt for sweet onion or shallots. For a milder flavor, soak diced red onion in cold water for about 10 minutes before use to tone down the bite. -
2 cloves garlic (minced)
A key flavor contributor! Fresh is always best, but if you’re in a pinch, pre-minced garlic, garlic powder, or even garlic-infused olive oil can add that beloved garlic essence. -
1/4 cup olive oil (divided)
Use good quality extra virgin olive oil for the best flavor. A little drizzled on the tomato mixture adds richness, while you’ll use some to brush on the bread for that delightful crunch. If you’re looking for alternatives, avocado oil does a nice job too! -
8 leaves fresh basil (chopped or thinly sliced)
Fresh basil invigorates the dish with its aromatic presence. If you don’t have basil, you could experiment with other herbs like parsley or even mint in a pinch. -
1/2 teaspoon coarse salt
Salt elevates the flavors, bringing everything together, so don’t skip it! Adjust according to your taste preferences, but I suggest starting with half a teaspoon and working your way from there. -
Black pepper (to taste)
A little freshly cracked pepper adds a pop of flavor. If you prefer heat, consider a sprinkle of red pepper flakes instead. -
1 large baguette (sliced)
The perfect vehicle for your delicious topping. Use a fresh, crusty French baguette or a ciabatta loaf for varied texture. If gluten-free is your jam, you can use gluten-free bread too! Just make sure it’s sturdy enough to hold up. -
1 tablespoon balsamic reduction (optional, for garnish)
A drizzle of balsamic reduction adds complexity and a touch of sweetness. If you lack a reduction, you can simmer balsamic vinegar until it thickens, or just serve it on the side for guests to add as they please!
Step-by-Step Instructions
Alright, let’s get down to business! Follow these steps, and you’ll craft a Bruschetta that’ll have everyone asking for your secret.
-
Prep Your Tomatoes
Start with those lovely tomatoes! Give them a good rinse and chop them into bite-sized pieces. If you’re using larger tomatoes, feel free to quarter them. The goal is to have about 4 cups total.Chef’s Tip: Make sure to remove any seeds or excess moisture for a less soggy topping.
-
Mix & Marinate
Place the chopped tomatoes into a mixing bowl. Add the diced red onion, minced garlic, half of the olive oil, chopped basil, and coarse salt. Gently toss to combine. Letting it sit for about 15-20 minutes allows those flavors to meld beautifully.Commentary: This is the moment to savor that fresh aroma! You can sneak a taste here too; just be careful to leave some for the final assembly.
-
Prepare the Baguette
While your tomato mixture is soaking up all that delicious goodness, let’s toast the bread. Preheat your oven to 400°F (200°C). Slice your baguette diagonally into 1-inch thick pieces. Arrange them on a baking sheet and brush each side with the remaining olive oil. Sprinkle a little salt on top.Little Hack: For extra flavor, rub each slice with a halved garlic clove before toasting!
-
Toast the Bread
Bake the baguette slices in the preheated oven for about 5-7 minutes, or until they are golden brown and crisp. Keep an eye on them to prevent burning!Chef’s Peek: You can also grill or toast the bread on a grill pan for beautiful grill marks and added smoky flavor.
-
Bring It All Together
Once your bread is nice and toasty, take them out of the oven and let them cool for a minute. To assemble, spoon a generous amount of the tomato mixture onto each slice of toast. Drizzle with the optional balsamic reduction for that gourmet touch.Final Touch: Add a sprinkle of fresh black pepper or additional basil on top for presentation.
-
Serve & Enjoy!
Arrange your Bruschetta on a serving platter, and voila! You’ve created a dish that looks as good as it tastes.
Serving Suggestions
Now, let’s talk presentation! Food should not only taste amazing but look stunning too. Arrange your bruschetta on a large platter with plenty of space, allowing guests to swoon over your creation. For an extra touch, garnish with a few whole basil leaves or drizzle a balsamic reduction artistically across the plate.
You might consider accompanying the Bruschetta with a light salad, olive tapenade, or even some quality cheeses like fresh mozzarella. Pair it with a chilled white wine, and you’ve got a simple yet elegant appetizer that’s totally Instagram-worthy!
Recipe Variations
Bruschetta is a canvas—so let your creative juices flow with these delightful variations!
-
Mediterranean Twist: Swap out the tomatoes for roasted red peppers and add crumbled feta cheese, olives, and a sprinkle of oregano for a Mediterranean flair.
-
Avocado Bruschetta: Trade tomatoes for ripe avocados for a creamy twist. Add lime juice and jalapeño for a refreshing and zesty flavor.
-
Caprese Style: Top with a slice of fresh mozzarella and a drizzle of pesto, transforming your Bruschetta into a Caprese masterpiece with a twist!
-
Fruit-Infused Delight: For summer gatherings, use diced peaches or strawberries in place of tomatoes, adding a sprinkle of mint for a fruity surprise.
-
Spicy Salsa Variation: Add diced jalapeños or a pinch of cayenne to the tomato mixture for a little kick. Hot sauce drizzled on top can also take things up a notch!
Chef’s Notes
Over the years, my Bruschetta has transformed and evolved alongside my ever-changing palate and the seasons. I recall a winter where I experimented with roasted tomatoes for a cozier flavor—absolutely divine!
And oh, the mishaps! I must share a funny kitchen quirk—once, I mistakenly grabbed powdered garlic instead of fresh. The result? Let’s say it wasn’t my finest hour as I nearly blinded my family with the intensity of the seasoning!
But those “oops” moments are what cooking is all about. Every error is simply an opportunity to learn. Embrace the culinary journey, dear foodies!
FAQs and Troubleshooting
1. Why is my Bruschetta soggy?
If your Bruschetta ends up soggy, it may be because of excess moisture from the tomatoes. Make sure to remove seeds and moisture before mixing, and avoid leaving it on the bread for too long. Serve it immediately!
2. What can I use instead of fresh basil?
If you can’t find fresh basil, you can substitute it with dried basil—just remember that dried herbs are stronger, so use only half the amount. Herbs like parsley, dill, or mint also provide a unique touch!
3. How long can I store leftover Bruschetta?
The assembled Bruschetta is best enjoyed fresh, but if you have leftovers, store the tomato mixture in the fridge and toast fresh bread only when ready to eat. It’ll keep for about a day.
4. Can I make Bruschetta ahead of time?
You can prepare the tomato topping in advance, but I recommend holding off on assembling it until just before serving. Toast the bread, add the toppings, and you’ll have a fresh and crisp appetizer ready in no time!
Nutritional Info
While Bruschetta is primarily a starter, it’s surprisingly nutritious! Tomatoes are loaded with vitamins C and K, while basil provides essential oils and antioxidants. The olive oil offers healthy fats, promoting heart health. If you enjoy them in moderation, you can indulge guilt-free!
Here’s a quick breakdown per serving (based on 8 servings):
- Calories: 180
- Protein: 2g
- Carbohydrates: 22g
- Fat: 9g
- Fiber: 2g
- Sugar: 2g
Nutritional Wisdom:
Of course, the nutritional values can vary widely depending on portion sizes and the specific ingredients you choose. Feel free to adjust the portions to suit dietary needs!
Final Thoughts
And there you have it—a quick journey through the wonderful world of Italian Bruschetta! It’s a dish that holds a special spot in my heart, born out of love, memories, and good times around the dinner table. I truly hope you enjoy creating this delightful treat as much as I do.
So, gather your ingredients, channel your inner chef, and let’s toast to good food, great company, and the simple pleasures in life. Until next time, happy cooking, friends! Here’s to delicious adventures in your kitchen—may your Bruschetta always be fresh and your hearts full!
Print
Italian Bruschetta
- Total Time: 25 minutes
- Yield: 8 servings 1x
- Diet: Vegetarian
Description
A delightful Italian appetizer featuring fresh tomatoes, basil, and toasted bread, perfect for gatherings or cozy nights in.
Ingredients
- 4 cups tomatoes (diced or quartered)
- 1/2 cup red onion (diced)
- 2 cloves garlic (minced)
- 1/4 cup olive oil (divided)
- 8 leaves fresh basil (chopped or thinly sliced)
- 1/2 teaspoon coarse salt
- Black pepper (to taste)
- 1 large baguette (sliced)
- 1 tablespoon balsamic reduction (optional, for garnish)
Instructions
- Prep your tomatoes by rinsing and chopping them into bite-sized pieces.
- Mix & marinate the chopped tomatoes with onion, garlic, half of the olive oil, basil, and salt.
- Prepare the baguette by slicing it and brushing each side with remaining olive oil.
- Toast the bread in the preheated oven at 400°F (200°C) for about 5-7 minutes until golden brown.
- Bring it all together by spooning the tomato mixture onto the toasted bread.
- Serve & enjoy your Bruschetta on a platter!
Notes
Remove seeds and moisture from tomatoes to prevent sogginess. Serve immediately for best results.
- Prep Time: 15 minutes
- Cook Time: 10 minutes
- Category: Appetizer
- Method: Baking
- Cuisine: Italian
Nutrition
- Serving Size: 1 serving
- Calories: 180
- Sugar: 2g
- Sodium: 300mg
- Fat: 9g
- Saturated Fat: 1g
- Unsaturated Fat: 7g
- Trans Fat: 0g
- Carbohydrates: 22g
- Fiber: 2g
- Protein: 2g
- Cholesterol: 0mg
Keywords: Bruschetta, appetizer, Italian, tomatoes, basil, easy recipes

DIY Sour Cherry Soda Recipe: Quick Homemade Fizz for Summer
Homemade Sour Cherry Soda: A Refreshing and Flavorful Treat
Hey there, fellow food enthusiasts! Today, I’m excited to whip up a refreshing drink that will tickle your taste buds and rejuvenate your spirit: homemade sour cherry soda! If you’re looking for a vibrant and sparkling beverage that combines the sweet-and-sour taste of fresh cherries with a bubbly twist, you’re in the right place. Let’s dig into this delightful recipe that’s perfect for soaking up summer sun or cozying up during those cool evenings.
A Bit of Cherry History
Before we dive into the recipe, let’s take a moment to appreciate cherries. These little gems are often associated with nostalgia and traditional summertime fun. I remember plucking ripe cherries from my grandmother’s backyard tree during carefree summer days. We’d wash them off in the cool water of the hose and enjoy their juicy sweetness—nothing compares! During those lazy afternoons, my grandmother would whip up all sorts of delightful treats, but the highlight was definitely her homemade cherry soda.
Her method was simple: she’d boil the cherries, allow their tartness to infuse, and mix it with sparkling water for the most refreshing beverage. It was nothing short of liquid sunshine, and it’s this sentimental charm that inspired me to recreate that experience so I can share it with you.
The Ingredients
Let’s gather our ingredients for this delightful homemade sour cherry soda. Each component plays an essential role in crafting this colorful and vibrant drink.
-
1 pound tart cherries
These are the stars of the show! Tart cherries pack a punch of flavor and give your soda that zing. If tart cherries aren’t available, you can use sweet cherries, though you might want to adjust the sugar. -
1 cup sugar
This sweetens up our tart cherries, balancing their natural sourness. Feel free to use less or substitute with honey or agave syrup if you’re looking to cut down on refined sugar. -
1 cup water
Water is the base of our cherry syrup. It helps extract the natural flavors when cooked. Use filtered water for the best results! -
Ice
This is essential for serving! Ice keeps your soda chilled and refreshing. -
Sparkling water
The fizz that makes this drink special! You can use flavored sparkling water for an extra twist, like lemon or lime, if you’re feeling adventurous.
Step-by-Step Instructions
Now that we have our ingredients ready, let’s dive into making this tantalizing homemade sour cherry soda!
-
Prepare the cherries
Start by washing your tart cherries thoroughly under cold water. Remove the stems and pit them. Don’t worry if you can’t find a cherry pitter; just use a sharp knife or cut them in half and pop the pit out with your fingers. It’s a bit messy but totally worth it! -
Make the cherry syrup
In a medium saucepan, combine the pitted cherries, 1 cup of sugar, and 1 cup of water. Place it on the stove over medium heat. Keep stirring until the sugar dissolves, and the mixture begins to simmer. This process will take about 5–7 minutes. -
Infuse the flavors
Allow the mixture to simmer for about 10 minutes, stirring occasionally. You want the cherries to soften and release their juice into the syrup. Once you start seeing that rich red color, you know you’re on the right track! Feel free to mash the cherries lightly with the back of a spoon to help this process along. -
Strain the syrup
After simmering, remove the saucepan from the heat and let it cool for a few minutes. Place a fine mesh strainer over a heatproof bowl or jar and pour the cherry mixture through the strainer. This will separate the juicy syrup from the cherry pulp. Use the back of a spoon to press the cherries against the strainer to extract as much liquid as possible. You should end up with approximately 1 cup of cherry syrup. -
Chill the syrup
Let the cherry syrup cool to room temperature, then refrigerate it for at least 30 minutes to chill. You want it nice and cold for that refreshing soda experience! -
Assemble your cherry soda
To serve, fill a glass halfway with ice. Pour in 1–2 ounces of your chilled cherry syrup, depending on how sweet you want your soda. Top off with sparkling water, give it a gentle stir, and garnish with a fresh cherry or a sprig of mint for an extra pop of color.
Serving Suggestions
When it comes to serving your homemade sour cherry soda, presentation is key! Here are some fun ways to plate or serve this refreshing drink:
-
Garnish with style: Add a fresh cherry on top or a sprig of mint to your glass. You can even rim the glasses with sugar for that extra sparkly touch!
-
Large batch fun: Consider making a pitcher for gatherings. Simply multiply the ingredients by the number of servings, mix, and serve from a lovely glass pitcher.
-
Summer vibes: Pair your soda with light appetizers like cheese platters, fresh salads, or even a simple sandwich during outdoor barbecues or picnics.
Recipe Variations
Feeling creative? Here are a few variations to amp up your sour cherry soda:
-
Lavender Cherry Soda: Add a teaspoon of culinary lavender to your cherry syrup while it simmers for a floral twist!
-
Cherry Limeade: Squeeze fresh lime juice into your soda before serving. The tartness of lime complements the cherry perfectly.
-
Herbal Infusion: Try adding fresh basil or mint into the mixture while simmering for a refreshing herbal aroma.
-
Vanilla Cherry Soda: Stir in a splash of vanilla extract to your syrup for a creamy flavor that pairs beautifully with the cherries.
-
Almond Cherry Soda: Add a drop or two of almond extract for a lovely nutty flavor addition that enhances the cherry profile.
Chef’s Notes
Making this homemade sour cherry soda has become one of my go-to summer traditions! Every time I make it, I think back to those hot afternoons at my grandma’s house. My friends often request it for summer get-togethers, and I’m always happy to oblige. It’s amazing how such a simple combination of ingredients can create something so full of love and memories.
Over the years, I’ve tweaked the recipe here and there, experimenting with flavors and techniques. The best part? You can tailor it to your taste! Whether you prefer it sweeter or with more of that tart kick, the flexibility is what makes it fun.
FAQs and Troubleshooting
-
Can I use frozen cherries?
Absolutely! Frozen cherries work just fine. You may need to adjust your cooking time slightly since they’ll release more liquid initially. -
My syrup is too sweet; what can I do?
If you find the syrup’s sweetness overwhelming, try diluting it with a little more water or add more sparkling water when serving! -
What if I can’t find sour cherries?
Sweet cherries are an excellent substitute, but you may want to cut back on the sugar depending on your preference. -
How long does the syrup last?
The cherry syrup can be stored in the refrigerator for up to one week. Just make sure to keep it in an airtight container to maintain freshness.
Nutritional Info
Depending on how you serve your homemade sour cherry soda, the nutritional breakdown will vary, but let’s take a look at an estimated breakdown per serving:
- Calories: Approximately 120-150 (with 2 ounces of syrup and 8 ounces of sparkling water)
- Sugars: Around 20-25g (predominantly from the syrup)
- Sodium: Almost zero
By substituting sugar for alternatives, you can also adjust the calorie count to fit your dietary preferences.
Final Thoughts
There you have it—your very own homemade sour cherry soda that’s as delicious as it is easy to make! This sparkling treat is the epitome of how simple ingredients can come together to create something truly magical. So the next time you’re craving something refreshing and sweet, head to your kitchen, grab those cherries, and let’s get fizzing! Cheers to summer joys and the sweet memories we create in our kitchens. Enjoy every bubbly sip!
Print
Homemade Sour Cherry Soda
- Total Time: 35 minutes
- Yield: 4 servings 1x
- Diet: Vegan
Description
A refreshing and flavorful homemade soda combining the sweet-and-sour taste of fresh cherries with a bubbly twist.
Ingredients
- 1 pound tart cherries
- 1 cup sugar
- 1 cup water
- Ice
- Sparkling water
Instructions
- Prepare the cherries by washing them under cold water, removing stems, and pitting them.
- Make the cherry syrup by combining pitted cherries, sugar, and water in a saucepan over medium heat.
- Infuse the flavors by allowing the mixture to simmer for about 10 minutes until the cherries soften.
- Strain the syrup through a fine mesh strainer to separate the liquid from the pulp.
- Chill the syrup by refrigerating it for at least 30 minutes.
- Assemble your cherry soda by filling a glass with ice, pouring in the chilled syrup, topping with sparkling water, and garnishing.
Notes
Garnish with a fresh cherry or mint sprig for an extra touch. You can also try variations like Lavender Cherry Soda or Cherry Limeade.
- Prep Time: 15 minutes
- Cook Time: 20 minutes
- Category: Beverage
- Method: Mixing
- Cuisine: American
Nutrition
- Serving Size: 1 serving
- Calories: 135
- Sugar: 22g
- Sodium: 10mg
- Fat: 0g
- Saturated Fat: 0g
- Unsaturated Fat: 0g
- Trans Fat: 0g
- Carbohydrates: 34g
- Fiber: 1g
- Protein: 1g
- Cholesterol: 0mg
Keywords: cherry soda, homemade soda, refreshing drink, summer beverage, tart cherry

Minute Apricot Sweet Rolls for Easy Weekend Brunch
The Magic of Apricot Sweet Rolls: A Warm Hug from the Oven
Hey there, food lovers! I’m Beau Collier, and I’m thrilled to share one of my absolute favorite recipes with you today: Apricot Sweet Rolls. Think of them as little bites of sunshine wrapped in soft, pillowy dough, and they have a special way of bringing warmth and happiness to any gathering—or just your cozy home on a lazy Sunday morning.
Now, who doesn’t love the rise of sweet dough in the kitchen? The aroma of baking rolls wafting through the house? And most importantly, the satisfying moment when you pull those golden, gooey treasures out of the oven? I’m getting excited just thinking about it!
Let’s dive in, shall we? When I think about sweet rolls, I can’t help but reminisce about my grandmother’s kitchen, where I spent countless hours helping her whisk, knead, and create deliciousness. She always said cooking was an act of love, and she poured that love into everything she made—from hearty casseroles to delightful desserts. One of those recipes that stood out was her fruity sweet rolls, where she’d use whatever fresh fruit was in season. The apricot version became a family favorite, and it’s the one I can still see—and smell—in my mind’s eye.
These Apricot Sweet Rolls are filled with juicy, fragrant apricots and topped with a creamy glaze that will make you weak in the knees. Perfect for brunch, dessert, or just a delightful indulgence, they bring back memories of good times spent around the table, laughter, and joy. So pull out your mixing bowls and let’s create some magical rolls that will remind you of all those warm hugs your culture defines through food!
A Sweet Memory of Baking with Grandma
Some of my fondest memories growing up revolve around my grandmother’s kitchen, an oasis of warmth filled with the sweet smell of fresh-baked goods. It was her secret hideaway, a space adorned with fragrant herbs, wholesome spices, and, most importantly, baskets of fresh fruits. Apricots were always her favorite, and its golden hue was a staple on her countertop during the summer months.
One summer afternoon, as the sun beamed through the window, I found myself on my tiptoes, reaching for a perfectly ripe apricot. It was during this outing that Grandma decided to let me take the reins on her iconic sweet rolls recipe.
With flour dusting our clothes, laughter echoing in the air, and my small hands attempting to knead the dough, I crafted my first batch of her famous rolls. I’ll never forget the joy on her face when we pulled the batch out of the oven—golden brown and bubbling with sticky apricot goodness. From that day on, every time I make these rolls, I feel as if she’s right there beside me, guiding my hands and filling my heart with love.
Ingredients You’ll Need
Let’s gather up our ingredients! Here’s what you’ll need to create this scrumptious batch of Apricot Sweet Rolls:
-
1 cup milk (warmed): The warm milk activates the yeast, creating a light and airy roll. If you’re lactose intolerant, feel free to substitute with almond milk or oat milk.
-
2¼ teaspoons yeast (or one package): This little powerhouse is the magic ingredient that helps our rolls rise. You can use active dry yeast or instant yeast; just make sure it’s fresh!
-
3 tablespoons sugar: Sugar adds sweetness and helps the yeast activate. Brown sugar can work too, giving a deeper taste.
-
3 whole eggs: These are our binders and will give the rolls a richer texture. If you’re vegan, consider using flax eggs (1 tablespoon of flaxseed meal combined with 2.5 tablespoons of water per egg).
-
½ cup butter (melted and cooled): Butter adds richness and flavor; be sure to let it cool slightly before adding to the mixture. If you want to lighten things up, unsweetened applesauce can be a fantastic substitute.
-
1 teaspoon salt: Salt enhances all the flavors, making them pop!
-
5 – 5½ cups all-purpose flour: This is the base of our dough. Start with less—you’re looking for a soft, slightly sticky dough that doesn’t stick to your fingers.
-
¼ cup melted butter (for filling): This will keep our apricot filling moist and flavorful in each roll!
-
½ cup sugar (for filling): Sweetens the apricots beautifully; you could also try cinnamon sugar for a cozy twist.
-
1 cup finely chopped fresh apricots: The star of the show! Fresh apricots are juicy and sweet, but you could use dried apricots if needed. Just soak them in warm water for about 15 minutes before chopping.
-
½ cup powdered sugar (for glaze): This adds that dreamy frosting on top! Feel free to swap it with a sugar alternative if you’re looking for a healthier option.
-
1–2 tablespoons milk (for glaze): To achieve the right consistency. Use a non-dairy milk for a vegan option!
Step-by-Step Instructions to Create Your Rolls
-
Activate the Yeast:
Start by warming your milk to about 110°F (you can comfortably test it on your wrist). Combine the warm milk, yeast, and 1 tablespoon of sugar in a bowl. Set it aside for about 10–15 minutes until it’s nice and frothy—think of it as a bubbly froth bath for the yeast! -
Mix the Dough:
In a large mixing bowl, whisk together the melted butter, eggs, the remaining sugar, and salt. Once combined, add in the bubbly yeast mixture. -
Add Flour:
Gradually incorporate 5 cups of flour into the wet ingredients. Stir until combined; the dough will start to pull away from the sides of the bowl. If it feels too sticky, add the additional flour, a little at a time. -
Knead the Dough:
Transfer the dough onto a floured surface. Knead the dough for about 8–10 minutes, until it’s smooth and elastic. While you’re kneading, don’t forget to tell yourself how amazing this roll will taste! -
Let It Rise:
Place the kneaded dough in a lightly greased bowl, cover with a clean cloth, and let it rise in a warm spot for about 1 hour or until doubled in size. -
Prepare the Filling:
As the dough rises, mix together the melted butter, sugar, and chopped apricots in a bowl. This will create a luscious filling! -
Roll It Out:
Once the dough has risen, punch it down to release the air. On a floured surface, roll it out into a rectangle (about ¼ inch thick). Don’t worry about perfection; the rolls will taste divine regardless! -
Spread the Filling:
Evenly spread your apricot mixture over the rolled dough, leaving a little edge to seal. -
Roll It Up:
Starting from one side of the rectangle, carefully roll the dough tightly into a log shape. Seal the edge by pinching the dough together. -
Slice and Arrange:
Cut the roll into 1-inch slices with a sharp knife. Arrange them in a greased baking dish, ensuring they’re close but not touching. -
Second Rise:
Cover the rolls with a towel and let them rise again for about 30 minutes. -
Bake:
Preheat your oven to 350°F (175°C). Bake the rolls for 25–30 minutes or until golden brown. Your kitchen will smell absolutely heavenly! -
Prepare the Glaze:
While the rolls cool slightly, whisk together powdered sugar and milk in a bowl until smooth. Drizzle it over the warm rolls for that final touch of sweetness!
Serving Suggestions
These Apricot Sweet Rolls are perfect just as they are, but a little thought can elevate your presentation! For serving, arrange them on a platter and drizzle the glaze generously on top. If you’re feeling a bit fancy, a sprig of mint or a dusting of powdered sugar can make them look even more exquisite. Pair these rolls with a piping hot cup of coffee or tea, and you’ll have a delightful breakfast or brunch spread that no one can resist!
Recipe Variations
Feeling inspired to tweak? Here are some fantastic ways to make these sweet rolls your own:
-
Mixed Fruit Medley: Combine apricots with other fruits like peaches or berries for a colorful fruit filling.
-
Nutty Crunch: Add some chopped walnuts or almonds into the filling for a delightful crunch.
-
Spiced Delight: Incorporate cinnamon and nutmeg into the dough or filling to add warmth—perfect for fall!
-
Savory Twist: Swap out the apricots for savory ingredients like cream cheese and spinach for a unique take.
-
Vegan Version: Substitute eggs with flax eggs, and use any plant-based butter and milk to create a delightful vegan version of these rolls.
Chef’s Notes
Every time I make these Apricot Sweet Rolls, I can’t help but think of Grandma and her endless kitchen wisdom. One of my favorite kitchen stories is when I accidentally dropped a handful of flour on the floor. There I stood, mortified, but Grandma only laughed and said we’d just created our very own “flour fairy” dust. The kitchen has its quirks, and it’s moments like these that you can turn mistakes into laughter and fond memories. Over the years, I’ve evolved the recipe a bit, adjusting the sugar and even the types of fruit used based on what’s in season. It’s all about adapting and enjoying the process, right?
FAQs and Troubleshooting
1. Why did my rolls not rise?
This might happen if the yeast is old or if the milk was too hot. Make sure to check the expiration date on your yeast and keep the milk at a warm temperature, not hot.
2. Can I use dried apricots instead of fresh ones?
Absolutely! Just soak them in warm water for about 15-20 minutes, then chop them before use.
3. How do I store my leftover rolls?
Store in an airtight container at room temperature for up to 2 days, or refrigerate for a week. You can also freeze them for up to 3 months—just pop them in the microwave to reheat!
4. What if my dough is too sticky?
If your dough sticks to your hands or the board, incrementally add more flour—start with a tablespoon at a time until it softens up and turns smooth.
Nutritional Info
While these Apricot Sweet Rolls are an indulgence, they also bring a delightful dose of fruit to the table. Each roll contains the goodness of apricots, rich in vitamins A and C and fiber. Typically, a single sweet roll contains around 250 calories, but feel free to adjust the sugar and filling to make them even healthier! Remember to enjoy them in moderation as part of a balanced diet.
Final Thoughts
Making these Apricot Sweet Rolls is not just about whipping up a batch of dough; it’s about creating memories, sharing love through food, and bringing people together. They are meant to be savored, shared, and enjoyed—whether at a bustling brunch with friends or a quiet morning with your favorite book.
So roll up your sleeves, gather your loved ones, and let’s enjoy the simple joy of baking. Remember, cooking isn’t about perfection; it’s about passion, laughter, and a sprinkle of creativity. Now, who’s ready to share a warm hug from their kitchen? Let’s get rolling!
Print
Apricot Sweet Rolls
- Total Time: 45 minutes
- Yield: 12 servings 1x
- Diet: Vegetarian
Description
Deliciously soft and sweet rolls filled with juicy apricots and topped with a creamy glaze, perfect for brunch or a delightful treat.
Ingredients
- 1 cup milk (warmed)
- 2¼ teaspoons yeast (or one package)
- 3 tablespoons sugar
- 3 whole eggs
- ½ cup butter (melted and cooled)
- 1 teaspoon salt
- 5 – 5½ cups all-purpose flour
- ¼ cup melted butter (for filling)
- ½ cup sugar (for filling)
- 1 cup finely chopped fresh apricots
- ½ cup powdered sugar (for glaze)
- 1–2 tablespoons milk (for glaze)
Instructions
- Activate the yeast: Start by warming your milk to about 110°F. Combine the warm milk, yeast, and 1 tablespoon of sugar in a bowl and let it froth for 10-15 minutes.
- Mix the dough: In a mixing bowl, whisk together the melted butter, eggs, the remaining sugar, and salt. Add the yeast mixture.
- Add flour: Gradually incorporate 5 cups of flour until the dough pulls away from the bowl. Add more flour if too sticky.
- Knead the dough: Transfer to a floured surface and knead for 8–10 minutes until smooth and elastic.
- Let it rise: Place in a greased bowl, cover, and let it rise in a warm spot for about 1 hour.
- Prepare the filling: Mix melted butter, sugar, and chopped apricots in a bowl.
- Roll it out: After rising, punch down the dough and roll it into a rectangle (about ¼ inch thick).
- Spread the filling: Evenly spread the apricot mixture over the rolled dough.
- Roll it up: Roll the dough tightly into a log shape and seal the edge.
- Slice and arrange: Cut into 1-inch slices and place them in a greased baking dish.
- Second rise: Let them rise again for about 30 minutes.
- Bake: Preheat the oven to 350°F (175°C) and bake for 25–30 minutes until golden brown.
- Prepare the glaze: Whisk together powdered sugar and milk and drizzle it over the warm rolls.
Notes
For a vegan version, substitute eggs with flax eggs and use plant-based butter and milk.
- Prep Time: 15 minutes
- Cook Time: 30 minutes
- Category: Dessert
- Method: Baking
- Cuisine: American
Nutrition
- Serving Size: 1 roll
- Calories: 250
- Sugar: 12g
- Sodium: 220mg
- Fat: 10g
- Saturated Fat: 5g
- Unsaturated Fat: 3g
- Trans Fat: 0g
- Carbohydrates: 34g
- Fiber: 1g
- Protein: 5g
- Cholesterol: 50mg
Keywords: sweet rolls, dessert, brunch, apricot, baking

Beginner-Friendly Caramelized Apricot Upside-Down Cake
Caramelized Apricot Upside Down Cake: A Sweet Slice of Summer
Introduction
Hey there, fellow food lovers! I’m Beau Collier, and welcome back to Feastical, the cozy corner of the internet where food isn’t just about sustenance – it’s about connection, joy, and a sprinkle of love. Today, we’re going to whip up something that feels like summer on a plate: the delightful Caramelized Apricot Upside Down Cake. Picture this: a fluffy cake layered with golden, juicy apricots, all resting on a luscious caramel sauce. It’s a dessert that not only dazzles the eye but also warms the heart and soul.
What’s really awesome about this cake is the way it wraps you in nostalgia. I can just smell those sweet apricots roasting in the oven, their sugary scent wafting through the kitchen, wrapping around me like my grandmother’s comforting hug. She often made delicious treats with the season’s bounty, and apricots were always her favorite. I can still recall the sound of her mixing bowl as she whisked the ingredients together, the laughter and chatter of family in the background as we awaited our slice of heaven.
Whether you’re looking to impress guests at a summer dinner party or just need a slice of sweet nostalgia at home, this Caramelized Apricot Upside Down Cake will bring smiles all around. With a modest list of ingredients, it’s easy to make, and the end result is absolutely uplifting. So, preheat that oven, and let’s dive into the buttery, fruity world of upside-down cakes together!
Personal Story
Growing up, weekends in my house were always filled with the enticing aroma of baked goods. My mom would often gather us around the kitchen island, ingredients laid out like a painter’s palette. One of her signature desserts was an apricot tart that could make anyone weak in the knees. It was during one of those Saturday afternoons, with flour dusting the countertops and apricots spilling out of the basket like sunny jewels, that I learned the importance of creating something with love. We would work as a team, laughing, tasting, and occasionally sneaking pieces of fruit when we thought nobody was looking.
As I grew older and started to experiment in my own kitchen, I found myself drawn back to those moments. However, I wanted to put my twist on things. That’s when I first tried my hand at an upside-down cake. The idea of caramelizing apricots and watching them transform into a gooey, golden masterpiece was too tempting to resist. From that day forward, this cake became a staple in my kitchen, reminding me of those cherished moments with family. Each slice tastes like nostalgia, happiness, and a dash of sunshine.
Ingredients
Let’s gather the stars of our show! Here’s what you’ll need to create your Caramelized Apricot Upside Down Cake:
-
1 cup brown sugar
The secret to that rich caramel flavor! Brown sugar has molasses, which adds depth and moisture. If you’re in a pinch, you can substitute it with white sugar mixed with a little bit of molasses. -
1/2 cup unsalted butter
Butter adds richness and tenderness to the cake. Unsalted is preferred because it allows you to control the overall saltiness. If you’re looking for a dairy-free option, coconut oil works great here! -
6-8 fresh apricots, halved and pitted
Fresh apricots are the star of this cake, bursting with juicy flavor. If you can’t find fresh apricots, canned ones will do, but make sure they’re packed in juice, not syrup. -
1 1/2 cups all-purpose flour
This is the backbone of our cake. All-purpose keeps it wonderfully fluffy, but if you’d like a gluten-free option, almond flour can make an excellent substitute! -
1 cup granulated sugar
For sweetness and a light texture, granulated sugar helps our cake rise. You can use coconut sugar for a raw alternative, but be aware it might alter the taste slightly. -
1/2 cup milk
Milk adds moisture and enriches the cake. You can swap in almond milk or buttermilk if you prefer or need a lactose-free option. -
2 large eggs
Eggs help bind the ingredients together and act as a leavening agent. If you need a vegan option, try using 1/4 cup of unsweetened applesauce per egg. -
1 teaspoon vanilla extract
Vanilla adds a beautiful aromatic essence. If you’re feeling ambitious, homemade vanilla extract is divine but store-bought works just fine! -
1 teaspoon baking powder
This is our rising agent! Make sure it’s fresh for the best lift. If you’re out, you can mix 1/4 teaspoon baking soda with 1/2 teaspoon vinegar as a substitute. -
1/2 teaspoon baking soda
This works in tandem with baking powder for a beautifully risen cake. If you’re out, just use double the baking powder—easy peasy! -
1/4 teaspoon salt
A pinch of salt enhances all the flavors and balances the sweetness. If you’re on a low-sodium diet, you can reduce it a little, but don’t eliminate it completely.
Step-by-Step Instructions
Now, let’s get into the nitty-gritty of bringing our cake to life!
-
Preheat your oven to 350°F (175°C)
This is the first and most vital step! You want your oven nice and hot so that your cake bakes evenly. Meanwhile, grab your favorite mixing bowl. -
Prepare the caramel layer
In a medium-sized saucepan over medium heat, melt the 1/2 cup of unsalted butter and 1 cup of brown sugar together. Stir constantly until it’s bubbling and smooth—about 3-5 minutes. Don’t wander too far; it can turn from fab to burnt in an instant! Once it’s ready, pour it into the bottom of a greased 9-inch round cake pan. This will be the delicious base that our apricots sit on. -
Arrange the apricots
After pouring the caramel mix into the pan, arrange your halved apricots, cut side down, on top of the caramel. Be fancy about it! You want it to look beautiful because that’s the side your guests will see first once it’s flipped. Plus, the more apricots, the better! -
Mix the batter
In a large bowl, beat together the 2 large eggs, 1 cup of granulated sugar, and 1 teaspoon of vanilla extract until fluffy. This should take about 2 minutes with an electric mixer. Next, add the 1/2 cup of milk and mix until combined. -
Combine the dry ingredients
In a separate bowl, whisk together the 1 1/2 cups of all-purpose flour, 1 teaspoon of baking powder, 1/2 teaspoon of baking soda, and 1/4 teaspoon of salt. Gradually add these dry ingredients to your wet mixture. Mix until just combined – a few lumps are okay. -
Bake your cake
Pour the batter carefully over the apricots in your pan, smoothing it out gently. Bake for 35-40 minutes or until a toothpick inserted comes out clean. The aroma will start to envelop your home, and trust me, you’ll know it’s almost done when that sweet scent fills the air! -
Cool and flip
Once your cake is out of the oven, let it rest in the pan for about 10 minutes. Then, take a large plate and carefully flip it over to reveal the beautiful apricot caramelized layer. Be cautious—the caramel will be hot! -
Serve warm or at room temperature
Enjoy your cake warm, perhaps with a scoop of vanilla ice cream or a dollop of whipped cream. It’s a heavenly combination that takes this dessert to the next level!
Serving Suggestions
Now that your Caramelized Apricot Upside Down Cake is on display, how do we serve it up nicely? Consider drizzling honey or a little heavy cream over each slice for an extra splash of indulgence! A sprinkle of powdered sugar can also elevate the dessert’s presentation, giving it that bakery-fresh feel. If you want to bring in some contrast, serve a dollop of tart Greek yogurt on the side—it pairs wonderfully with the sweetness of the apricots.
For those summer backyard gatherings, you could even serve the cake on a wooden cutting board surrounded by fresh apricots and fragrant mint leaves for a beautiful touch. This not only looks stunning but also invites your guests to dig in and enjoy.
Recipe Variations
-
Berry Blast: Swap out some of the apricots for fresh berries like blueberries or raspberries. The tartness works beautifully with the sweet caramel.
-
Nutty Crunch: Add in 1/2 cup of chopped walnuts or pecans to the batter for some added texture. The nuttiness will enhance the flavor profile!
-
Zesty Twist: Add a tablespoon of lemon or orange zest in with your wet ingredients to brighten the flavor—a little zing goes a long way.
-
Spiced Up: Try stirring in a teaspoon of cinnamon or nutmeg for a warm, cozy flavor, especially perfect for fall gatherings.
-
Gluten-Free Delight: Substitute the all-purpose flour with a gluten-free blend and make sure that your baking powder is certified gluten-free.
Chef’s Notes
Every recipe tells a story, and this one is no exception. I’ve made this cake for countless family gatherings, and it’s never failed to impress. One time, I experimented by swapping apricots with peaches, and though it was delicious, nothing quite captures the spirit of summer for me like the apricot version. Life in the kitchen is all about learning and adapting, and there’s always room for improvisation. I encourage you to put your flair into this recipe! After all, cooking is about making it your own while savoring every moment.
FAQs and Troubleshooting
Q: My cake sank in the middle. What happened?
A: This usually happens due to overmixing the batter or opening the oven too early. Ensure that your ingredients are at room temperature, and don’t peek until it’s almost done!
Q: Can I use frozen apricots?
A: Yes! Just be sure to thaw and drain them properly beforehand. They may release some moisture, so you might want to reduce the milk slightly.
Q: How do I store leftovers?
A: Store leftovers in an airtight container in the refrigerator for up to 3 days. You can reheat individual slices in the microwave for a delicious warm dessert!
Q: Can I make this ahead of time?
A: Absolutely! You can prepare the caramel and arrange the apricots ahead of time, then mix the batter right before you’re ready to bake!
Nutritional Info
Each slice of this Caramelized Apricot Upside Down Cake is not just a treat for the taste buds but also packs a nutritional punch. With real fruits, healthy fats from butter, and quality sugars, it can be a delightful addition to a balanced diet. In moderation, enjoy all the goodness that comes with fresh apricots – full of vitamins A and C, as well as dietary fiber. Of course, since it is a dessert, it is best to enjoy it occasionally as part of a varied diet. The sweetness and fruitiness can satisfy any dessert craving without the guilt—just remember to share!
Final Thoughts
As we wrap up our time together today, I hope you feel inspired to grab those apricots and head to the kitchen. Making Caramelized Apricot Upside Down Cake isn’t just about the end result—it’s about the joy of baking, the love you put into it, and the stories you’ll share over each slice. So, whether you’re gathering with family, enjoying a quiet evening alone, or throwing an epic summer barbecue, remember that food is best shared.
Here’s to many delicious moments ahead, filled with laughter, love, and of course, wonderful food. Until next time, happy baking! Don’t forget to experiment, have fun, and let your kitchen be a haven of tasty exploration. Can’t wait to hear your own stories and see photos of your beautiful cakes! Dig in, my friends!
Print
Caramelized Apricot Upside Down Cake
- Total Time: 55 minutes
- Yield: 8 servings 1x
- Diet: Vegetarian
Description
A fluffy upside-down cake layered with golden apricots and luscious caramel sauce, perfect for summer gatherings.
Ingredients
- 1 cup brown sugar
- 1/2 cup unsalted butter
- 6–8 fresh apricots, halved and pitted
- 1 1/2 cups all-purpose flour
- 1 cup granulated sugar
- 1/2 cup milk
- 2 large eggs
- 1 teaspoon vanilla extract
- 1 teaspoon baking powder
- 1/2 teaspoon baking soda
- 1/4 teaspoon salt
Instructions
- Preheat your oven to 350°F (175°C).
- Prepare the caramel layer by melting butter and brown sugar in a saucepan.
- Pour the caramel mix into a greased pan and arrange the apricots cut side down.
- Mix the wet ingredients: eggs, granulated sugar, and vanilla extract until fluffy.
- Add milk to the wet mixture and combine.
- Combine the dry ingredients and add them to the wet mixture.
- Pour the batter over the apricots in the pan and smooth it out.
- Bake for 35-40 minutes until a toothpick comes out clean.
- Cool for 10 minutes before flipping onto a plate.
- Serve warm or at room temperature with ice cream or whipped cream.
Notes
Consider drizzling honey or heavy cream on top for an extra indulgence.
- Prep Time: 15 minutes
- Cook Time: 40 minutes
- Category: Dessert
- Method: Baking
- Cuisine: American
Nutrition
- Serving Size: 1 slice
- Calories: 350
- Sugar: 30g
- Sodium: 200mg
- Fat: 15g
- Saturated Fat: 8g
- Unsaturated Fat: 5g
- Trans Fat: 0g
- Carbohydrates: 50g
- Fiber: 2g
- Protein: 4g
- Cholesterol: 80mg
Keywords: apricot cake, upside down cake, summer dessert, caramel dessert, baking, family recipe

Easy Red Tart Cherry Pie Bars (Weeknight-Ready Treat)
The Sweet and Tart Symphony of Red Tart Cherry Pie Bars
Hey there, fellow food lovers! Today we’re diving into a delightful treat that’s sure to tickle your taste buds and create a little magic in your kitchen: Red Tart Cherry Pie Bars. Picture this: a buttery crust, a vibrant cherry filling bursting with flavor, and a sprinkle of coconut for that extra touch. Sounds divine, right? Trust me, these bars are the ultimate comfort dessert that’ll have everyone coming back for seconds.
When I first stumbled upon red tart cherries, I was instantly captivated. Their sweet yet slightly tart flavor spoke to me, and I knew they would be the star of a scrumptious recipe. Fast forward to many at-home baking sessions, and these cherry pie bars quickly became a staple in my kitchen—perfect for potlucks, picnics, or just a cozy night in with family. Let’s embark on this dreamy culinary journey together and create something memorable!
A Slice of Nostalgia
Let me take you back to one of my fondest childhood memories. Every summer, my family would pile into the car and head to our favorite local orchard. The air was filled with the fragrant aroma of ripe cherries, and I could barely contain my excitement. My mom would hand me a small bucket, and we’d race through the orchard, plucking the brightest red cherries we could find. The experience was thrilling, as I enjoyed the one-of-a-kind sweetness of those tart cherries fresh from the tree.
Later, my mom would whip up her famous cherry pie, filling the house with the most delightful aroma. The buttery crust, vibrant cherry filling, and sweet-tart flavor combination created a sense of warmth and joy. As we gathered around the dining table after dinner, I always savored that first bite. Fast forward to today, and those cherished memories inspired my rendition of cherry pie—just in a more portable and fun form: Red Tart Cherry Pie Bars. Now, every time I bake these bars, I relive those sweet summer days, and I can’t wait for you to create your own beautiful memories!
Ingredients
Let’s gather our ingredients and prepare to create these spectacular cherry pie bars. Here’s what you’ll need:
-
2 cans (14 ounces each) Oregon Fruit Red Tart Cherries: The star of the show! These canned cherries save us time while packing in loads of flavor. If you’re feeling adventurous, you can easily swap them with fresh cherries when they’re in season, just be sure to adjust the sweetness accordingly!
-
1/2 cup (100 grams) sugar: This will balance the tartness of the cherries. Feel free to reduce the sugar for a less sweet filling or substitute with a natural sweetener, like honey or maple syrup.
-
2 tablespoons (18 grams) cornstarch: Cornstarch acts as a thickener for our cherry filling. If you find yourself out of cornstarch, you can use flour, but keep in mind it may alter the texture a bit.
-
1/4 teaspoon kosher salt: A pinch of salt brings all the flavors to life. You can use regular table salt if that’s what you have, but kosher salt is my go-to for a more delicate touch.
-
1 tablespoon lemon juice: Just a splash brightens the flavors and enhances the cherries’ natural tartness. If you prefer, you can use lime juice for a fun twist.
-
1 teaspoon vanilla extract: Because, let’s be honest, everything is better with a hint of vanilla. If you’re feeling fancy, consider using a high-quality vanilla bean or vanilla paste.
-
2 5/8 cups (336 grams) unbleached all-purpose flour: This forms the base of our buttery crust. You can substitute whole wheat flour for a nuttier flavor or gluten-free flour for a dietary adjustment.
-
3/4 cup (150 grams) granulated sugar: More sweetness for our crust, which creates a lovely contrast with the tart filling.
-
1/2 teaspoon kosher salt: Just like before, this balances the sweetness.
-
1/4 teaspoon baking powder: A bit of leavening agent for that perfect texture.
-
16 tablespoons (227 grams) unsalted butter: Melted down, this will create a rich and delicious crust. If you’re looking for a dairy-free option, coconut oil works wonderfully!
-
3 tablespoons sweetened shredded coconut: This adds a delightful texture and tropical flair to our crust. If you prefer a classic flavor, feel free to omit it.
Step-by-Step Instructions
Ready to get baking? Let’s roll up our sleeves and dive into the detailed steps for creating these fabulous Red Tart Cherry Pie Bars!
-
Preheat the Oven: Preheat your oven to 350°F (175°C). Preheating helps ensure a uniform baking temperature from the start, resulting in even cooking.
-
Prepare the Pan: Grab a 9×13-inch baking pan (that’s the perfect size for bar recipes!) and brush the sides and bottom with melted butter. This will help prevent sticking.
-
Create the Crust:
- In a large mixing bowl, combine the flour, granulated sugar, salt, and baking powder.
- Next, stir in the melted butter until it forms a crumbly mixture. You can use a fork or your hands for that homestyle vibe. If you like a thicker crust, you can reserve a little of the mixture to sprinkle on top of the cherry filling later.
-
Press the Crust: Pour the crumbly crust mixture into the prepared pan and press it evenly across the bottom with your fingers or a spatula. This will create a solid foundation for our juicy filling!
-
Bake the Crust: Pop the crust into the preheated oven and bake for about 15-20 minutes or until it’s lightly golden. Keep an eye on it, as we want a lovely golden hue without overbaking.
-
Prepare the Filling: While the crust is baking, it’s time to whip up the cherry filling!
- In a mixing bowl, combine the drained red tart cherries, sugar, cornstarch, salt, lemon juice, and vanilla extract. Gently toss until the cherries are coated well, letting those flavors meld beautifully.
-
Assemble the Bars: Once your crust is done baking and has cooled for just a moment, pour the cherry filling over the warm crust. Spread it evenly, making sure every inch is covered with luscious cherry goodness.
-
Add Toppings (if desired): If you saved a bit of the crust mixture, sprinkle it over the cherry filling for a crumble topping! Alternatively, you can sprinkle shredded coconut over the cherries for that extra delicious touch.
-
Bake Again: Return the pan to the oven and bake for an additional 25-30 minutes. The filling should be bubbling, and the top should be lightly golden.
-
Cool and Slice: Once out of the oven, let the pie bars cool completely in the pan. I know it’s tough to wait, but trust me—it’ll be worth it! Once cooled, slice them into generous squares or rectangles, and get ready for the taste explosion.
Serving Suggestions
These Red Tart Cherry Pie Bars are perfect for any occasion! Here are some fun ways to plate and serve them:
-
Classic Presentation: Simply serve the bars as is, dusted with powdered sugar for a charming touch. It adds an enchanting visual and a hint of sweetness with every bite.
-
À la Mode: Get decadent by serving warm bars with a scoop of vanilla ice cream on top. The creamy ice cream beautifully balances the tart cherries and buttery crust.
-
Tart Cherry Drizzle: For an extra burst of flavor, drizzle a simple sauce made from reduced cherry juice over the bars before serving.
-
Pair with Coffee or Tea: These bars are perfect for a cozy afternoon treat. Serve them alongside a steaming cup of coffee or tea, and enjoy the delightful combination of flavors.
Recipe Variations
Why stop at just one version? Here are some fun twists you can explore with your Red Tart Cherry Pie Bars:
-
Almond Joy Bars: Add sliced almonds and use almond extract instead of vanilla for a nutty flavor.
-
Chocolate Cherry Bars: Incorporate chocolate chips into the crust for a chocolatey complement to the cherries.
-
Cranberry Cherry Combo: Mix in some fresh cranberries with the red tart cherries for a festive red-and-white bar, perfect for the holidays!
-
Vegan Friendly: Substitute the butter with coconut oil or vegan butter and use a flax egg to bind the crust for a plant-based take.
-
Spicy Kick: Add a sprinkle of cayenne pepper or cinnamon to the filling for a little bit of heat that pairs beautifully with the tartness.
Chef’s Notes
These Red Tart Cherry Pie Bars have evolved over the years in my kitchen. Initially, I only used fresh cherries, but life has a way of steering us toward simplicity—canned cherries are now my go-to! They save time and still deliver an amazing flavor. And don’t get me started on how helpful they are during cherry off-seasons. I’ll never forget the first time I made these for a summer gathering. Everyone dove in and schooled me on not reserving enough for leftovers. It was that good!
FAQs and Troubleshooting
1. Why did my cherry filling turn out runny?
If your filling is runny, it could be because the cherries released too much juice, or you didn’t use enough cornstarch. Make sure to drain canned cherries well before mixing or add a little extra cornstarch next time.
2. Can I use frozen cherries instead of canned?
Absolutely! Just be sure to thaw them and drain off excess liquid before using. You might need to adjust the sugar and cornstarch, depending on your taste.
3. My crust didn’t bake evenly; what happened?
Make sure your oven temperature is accurate—an oven thermometer can help you check this. Also, ensure the crust mixture is pressed down evenly in the pan.
4. Can I make these bars ahead of time?
Yes! These bars can be made a day in advance. Just store them in an airtight container in the fridge. The flavors often deepen, making them even more delicious!
Nutritional Info
When it comes to baking, it’s essential to balance indulgence with nutritional awareness. Here’s a rough breakdown per serving (if you cut the batch into 12 bars):
- Calories: Approximately 250-300
- Total Fat: 13g (saturated fat approx. 8g)
- Cholesterol: 30mg
- Sodium: 80mg
- Total Carbohydrates: 34g (fiber approx. 1g, sugars approx. 20g)
- Protein: 2g
Remember, these numbers can vary based on the specific ingredients you choose. Enjoy these bars in moderation—every bite is worth it!
Final Thoughts
There you have it—your guide to creating delightful Red Tart Cherry Pie Bars! I hope this recipe inspires you to get into the kitchen and whip up something delectable that also holds a part of your heart, just as it does for me. Whether you share these bars with friends and family or savor them solo on a cozy evening, the joy they bring is sure to warm your soul.
So, let’s keep the oven warm and the cherries rolling! I can’t wait to hear your own stories and twists on this recipe. After all, every memorable meal has a story, and I’m thrilled to have shared this one with you. Happy baking, foodies! 🥧✨
Print
Red Tart Cherry Pie Bars
- Total Time: 70 minutes
- Yield: 12 servings 1x
- Diet: Vegetarian
Description
Delicious and portable cherry pie bars with a buttery crust and vibrant cherry filling, sprinkled with coconut.
Ingredients
- 2 cans (14 ounces each) Oregon Fruit Red Tart Cherries
- 1/2 cup (100 grams) sugar
- 2 tablespoons (18 grams) cornstarch
- 1/4 teaspoon kosher salt
- 1 tablespoon lemon juice
- 1 teaspoon vanilla extract
- 2 5/8 cups (336 grams) unbleached all-purpose flour
- 3/4 cup (150 grams) granulated sugar
- 1/2 teaspoon kosher salt
- 1/4 teaspoon baking powder
- 16 tablespoons (227 grams) unsalted butter, melted
- 3 tablespoons sweetened shredded coconut
Instructions
- Preheat your oven to 350°F (175°C).
- Prepare a 9×13-inch baking pan by brushing it with melted butter.
- In a large mixing bowl, combine flour, sugar, salt, and baking powder.
- Stir in melted butter until the mixture is crumbly.
- Pour the crust mixture into the prepared pan and press it evenly across the bottom.
- Bake in the preheated oven for 15-20 minutes until golden.
- Combine drained cherries, sugar, cornstarch, salt, lemon juice, and vanilla extract in a mixing bowl.
- Pour the cherry filling over the warm crust and spread evenly.
- Sprinkle reserved crust mixture or coconut over the filling, if desired.
- Bake again for 25-30 minutes until bubbly and golden.
- Cool completely in the pan before slicing into bars.
Notes
Serve with powdered sugar, vanilla ice cream, or a drizzle of cherry sauce for added flavor.
- Prep Time: 20 minutes
- Cook Time: 50 minutes
- Category: Dessert
- Method: Baking
- Cuisine: American
Nutrition
- Serving Size: 1 bar
- Calories: 275
- Sugar: 20g
- Sodium: 100mg
- Fat: 13g
- Saturated Fat: 8g
- Unsaturated Fat: 5g
- Trans Fat: 0g
- Carbohydrates: 36g
- Fiber: 2g
- Protein: 3g
- Cholesterol: 30mg
Keywords: cherry pie bars, dessert recipe, baking, sweet treat
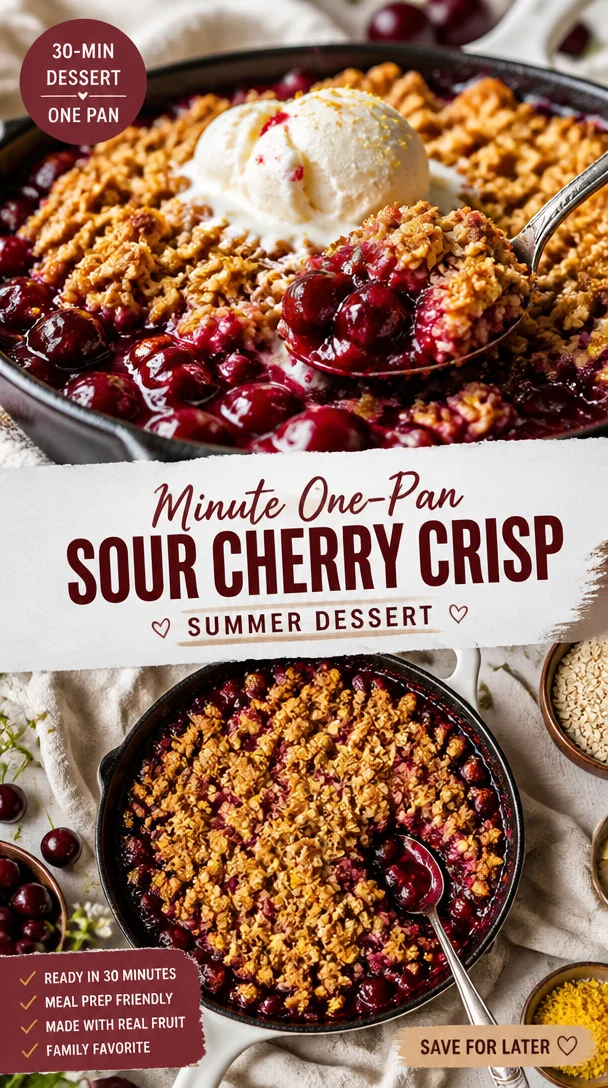
Minute One-Pan Sour Cherry Crisp (Summer Dessert)
Discovering Joy in a Tart: The Magic of Sour Cherry Crisp
Hey foodies! It’s Beau Collier here, and I’m so thrilled to dive into a dish that’s all about bringing warmth and happiness to your kitchen: Sour Cherry Crisp. If you ever needed a recipe that feels like a warm hug, this is it! Tart, sweet, and a bit nutty, this dessert is pure comfort in a bowl. Whether it’s a crisp fall evening or a bright summer day, a homemade crisp can turn any moment into a celebration.
Now, let me set the scene for you. Picture this: the air is filled with the sweet, tangy aroma of sour cherries baking in the oven, each juicy bite bursting with flavor. This dish isn’t just a scrumptious treat; it’s a mosaic of memories stitched together with love, laughter, and, of course, food.
Sour cherry season always feels like a mini-festival in my house. My family would head to the local orchard equipped with buckets the size of my eagerness to pick those bright red beauties. It became a cherished tradition—an opportunity to disconnect from the daily grind and reconnect with nature and each other. I can still hear my mother’s voice, laughter bubbling over as she recounted her favorite cherry-picking mishaps while my father expertly supervised our cherry collection efforts, ensuring we didn’t bite into too many along the way (not that I’d admit to snacking!).
Little did I know, those cherished cherries would often find their way into my kitchen, eventually leading to evenings spent making Sour Cherry Crisp. The laughter of family gatherings is woven through every spoonful, and I want to share that joyful experience with you!
Ingredients You’ll Need
Here’s a straightforward list of the ingredients you’ll need to whip up this delightful dish:
- 4 cups sour cherries, pitted: Fresh is best, but frozen can work in a pinch! Just be sure to thaw them completely.
- 1 cup rolled oats: These are crucial for that heartwarming crisp topping. If you need gluten-free, swap in gluten-free oats!
- 1 cup all-purpose flour: This gives structure to both the topping and filling. Substitute with almond flour for a nutty twist if you’re feeling adventurous!
- 1/2 cup brown sugar: It adds a lovely depth of flavor. You could use coconut sugar for a lighter option.
- 1/2 cup granulated sugar: This will sweeten up those tart cherries. If you’re watching your sugar, you can cut this down or use honey or maple syrup.
- 1/2 teaspoon cinnamon: A hint of spice brings out the fruitiness. Feel free to play with nutmeg or cardamom for a different flavor profile!
- 1/4 teaspoon salt: A little salt elevates all the sweet and tart notes.
- 1/2 cup unsalted butter, melted: This is the glue that brings that crumbly topping together. Margarine or coconut oil can work for a dairy-free alternative.
Step-by-Step Instructions
-
Preheat the Oven: Start by preheating your oven to 350°F (175°C). Getting your oven nice and warm ensures a perfectly baked crisp.
-
Prepare the Cherries: In a large bowl, combine your pitted sour cherries, 1/4 cup of granulated sugar, 1 tablespoon of flour (this will help thicken the juices), and a dash of cinnamon. Toss everything gently until the cherries are evenly coated. Let it sit while you prepare the topping.
Tip: If you find fresh cherries a bit tart, add another tablespoon of sugar. Taste-testing is key!
-
Make the Crisp Topping: In a separate bowl, whisk together the rolled oats, remaining flour, brown sugar, cinnamon, and salt. Add the melted butter, stirring until you see nice crumbly bits—this is where your crisp magic happens!
Little chef hack: Don’t overmix! We want to keep those crumbs golden and textured.
-
Assemble the Crisp: Fling those cherries into a greased baking dish (about 9×13 inches should do the trick!) and spread them evenly. Now, dust that glorious oat mixture over the top, ensuring you cover the cherries as evenly as possible.
-
Bake to Perfection: Pop your assembled crisp in the oven and bake for about 30-35 minutes, or until the topping is gorgeous and golden brown and the cherries are bubbling up around the edges.
Chef tip: If the topping gets too brown before the cherries are done, cover it loosely with foil.
-
Cool and Serve: Once baked, let your sour cherry crisp rest for a few minutes to cool slightly. This also helps those bubbly juices thicken a tad!
Important note: It’s always hard to wait, I know! Resist the urge to dig in right away; it’s worth it!
Serving Suggestions
Now that your kitchen smells like a cherry-laden dream, here’s how to serve this beauty! Scoop a generous portion into a lovely bowl (I recommend using a shallow one so you can get a good mix of topping and cherries in every bite). For a touch of decadence, add a scoop of vanilla ice cream or a dollop of whipped cream atop the warm crisp—this contrasts gorgeously with the tart cherries and crumbly topping.
Feeling a bit fancy? Drizzle a little balsamic reduction over your creation—seriously, it elevates the dish! Or sprinkle some chopped nuts for an extra crunch on top. Serve it family-style in the baking dish for a cozy, rustic presentation that encourages everyone to dig in!
Recipe Variations
Now, as much as I adore the classic sour cherry crisp, there are countless ways to mix things up! Here are a few variations to consider:
-
Mixed Berry Crisp: Swap half the sour cherries with blueberries or raspberries for an extra burst of flavor.
-
Nutty Crunch: For added texture, mix some chopped pecans or walnuts into your topping.
-
Tropical Twist: Add a splash of coconut in the topping and substitute some cherries with diced pineapple for a sunny vibe.
-
Gluten-Free Delight: Substitute the all-purpose flour with a mix of almond flour and gluten-free oats for a guilt-free indulgence.
-
Spice It Up: Experiment with different spices like ginger or cardamom mixed in with the cherries for a warm flavor profile.
Chef’s Notes
You know, this recipe has come a long way since those family orchard days! It started as just a way to deal with an abundance of cherries, and now it’s a staple in my home. I remember the first time I made it for friends; there was this gasp of excitement when they took their first bite.
Now, it’s my go-to dessert for potlucks, BBQs, and cozy nights in. The funny thing is, it’s so versatile! Most often, I find myself changing it depending on what’s in season or what I have on hand. That’s the beauty of a crisp—you can really make it your own!
FAQs and Troubleshooting
-
Can I use frozen cherries?
Absolutely! Just thaw them and drain excess liquid before mixing them with sugar and flour. -
Why does my topping burn during baking?
Your oven might be running hot, or your crisp is too close to the top heating element. Cover with foil if it browns too quickly! -
Can I make this ahead of time?
For sure! Assemble it the night before, cover with foil, and refrigerate. Just add a few extra minutes to your baking time. -
How should I store leftovers?
Store any leftovers in the fridge, covered. Reheat in the oven or microwave before serving; it’s just as delicious!
Nutritional Info
While I love comfort food, I also know many of you are conscious of your nutritional intake! So let’s break down the basic nutritional benefits of a serving of Sour Cherry Crisp (recipe serves about 8):
- Calories: ~250 (varies based on exact ingredients)
- Protein: 3g
- Fiber: 3g
- Carbohydrates: 40g
- Fat: 10g (varies based on butter and any added nuts)
Sour cherries are rich in antioxidants, and when you combine them with oats and a bit of whole grain flour, you’re indulging while still sneaking in some wholesome goodness.
Final Thoughts
There you have it, my dear foodies! Sour Cherry Crisp is more than just a dessert; it’s a link to tradition, a canvas for creativity, and a vehicle for joy! I hope you’ll create your own cherry-picking stories and share batches filled with love, laughter, and perhaps a little sticky-fingered mischief.
Remember, cooking is about exploration and connection. So grab your spatula, gather your loved ones, and dive into this delightful recipe! Can’t wait to see your takes on this favorite dish. Until next time, keep it delicious and soulful! 🍒✨
Print
Sour Cherry Crisp
- Total Time: 50 minutes
- Yield: 8 servings 1x
- Diet: Vegetarian
Description
A delightful and comforting dessert that blends tart sour cherries with a crunchy, nutty topping, perfect for any season.
Ingredients
- 4 cups sour cherries, pitted
- 1 cup rolled oats
- 1 cup all-purpose flour
- 1/2 cup brown sugar
- 1/2 cup granulated sugar
- 1/2 teaspoon cinnamon
- 1/4 teaspoon salt
- 1/2 cup unsalted butter, melted
Instructions
- Preheat the oven to 350°F (175°C).
- Combine sour cherries, 1/4 cup granulated sugar, 1 tablespoon flour, and a dash of cinnamon in a large bowl; toss gently.
- Whisk together rolled oats, remaining flour, brown sugar, cinnamon, and salt in a separate bowl.
- Add melted butter, stirring until crumbly.
- Spread cherries in a greased baking dish and cover with the oat mixture.
- Bake for 30-35 minutes, or until golden brown.
- Cool for a few minutes before serving.
Notes
For an extra touch, serve with vanilla ice cream or a drizzle of balsamic reduction.
- Prep Time: 15 minutes
- Cook Time: 35 minutes
- Category: Dessert
- Method: Baking
- Cuisine: American
Nutrition
- Serving Size: 1 serving
- Calories: 250
- Sugar: 20g
- Sodium: 200mg
- Fat: 10g
- Saturated Fat: 6g
- Unsaturated Fat: 4g
- Trans Fat: 0g
- Carbohydrates: 40g
- Fiber: 3g
- Protein: 3g
- Cholesterol: 30mg
Keywords: sour cherry crisp, dessert, baked, fruit crisp, family recipe

One-Pot Sweet Potato Turkey Chili for Weeknight Dinners
Sweet Potato Turkey Chili: A Heartwarming Comfort Food
Hey there, foodies! Welcome back to Feastical! Today, I’ve got something truly comforting for you: Sweet Potato Turkey Chili. This dish is like a warm hug on a chilly evening, and it’s packed full of flavor. Perfect for cozy nights in or when you want to impress your friends at dinner! And the best part? It’s easy to make and guarantees seconds—or maybe thirds!
A Bowl Full of Memories
Let me take you back to a crystal-clear autumn evening a few years ago. Picture this: I was in my kitchen, the aroma of chili bubbling away on the stovetop, while the leaves outside danced to the ground in shades of orange and gold. My roommate at the time, Sam, was prepping cornbread, adding just a touch of honey to the batter because, well, why not?
We had invited a bunch of friends over, and it was one of those laid-back gatherings where everyone felt at home. As the sun dipped below the horizon, we all gathered around the kitchen counter—my favorite place, where food and laughter flow.
When we finally dug into that Sweet Potato Turkey Chili, it was one of those magical moments where every bite felt like a celebration. The chili was filling, the sweet potato brought a lovely sweetness that balanced the spices perfectly, and the turkey gave it a heartiness that was just right. We topped it off with crispy tortilla chips, a dollop of sour cream, and a sprinkle of fresh cilantro. Can you say heaven on a plate?
That evening taught me something special: food isn’t just about nutrition; it’s about connection. It’s about gathering the people you love around a table and sharing stories, flavors, and laughter. And that’s exactly what this chili embodies!
Ingredients
Let’s dive into the ingredients that will transform your kitchen into flavor town while ensuring your sweet potato turkey chili is full of deliciousness.
-
1 lb ground turkey: A lean protein that’s perfect for keeping things light. If you’re not into turkey, feel free to swap in ground chicken or even plant-based crumbles for a vegetarian option!
-
2 large sweet potatoes, diced: These little beauties add sweetness and a creamy texture. Not a fan of sweet potatoes? Try using butternut squash or regular potatoes instead for that hearty base.
-
1 can diced tomatoes: The foundation of our chili. You can use fire-roasted diced tomatoes for an extra smokey flavor, or even crushed tomatoes if you’re after a thicker consistency.
-
1 cup corn (frozen or canned): Adds sweetness and texture. I love using frozen corn in the winter months; it tastes fresh and is super easy to grab from the freezer.
-
1 onion, chopped: Creates depth and sweetness. Sweet onions or red onions work wonderfully here.
-
2 cloves garlic, minced: Garlic is essential for flavor! If fresh garlic isn’t around, 1/2 tsp of garlic powder can work in a pinch.
-
2 cups chicken broth: This is the soul of the chili! Vegetable broth works too, and for a richer flavor, consider homemade broth or low-sodium styles.
-
1 tablespoon chili powder: This is where the magic happens! Add more for extra heat or use mild paprika if you’re sensitive to spice.
-
1 teaspoon cumin: Adds that warm, earthy flavor. Ground coriander could be a nice alternative for a different twist.
-
Salt and pepper to taste: Essential for flavor! Always season toward the end to adjust according to your liking.
-
Olive oil for cooking: A splash to get things sizzling! You could use avocado oil or even butter for a richer taste.
With these ingredients, you’re on your way to producing an aromatic pot of sweet potato turkey chili that will make your kitchen smell divine!
Step-by-Step Instructions
Now that we have our ingredients ready, let’s get down to cooking this delicious dish.
-
Prep Your Ingredients: Imagine you’re at a beautiful farmer’s market—take your time to chop your sweet potatoes and onions. Mindfulness in cooking is important!
-
Heat the Olive Oil: In a large pot or Dutch oven, pour in a tablespoon of olive oil over medium heat. Let it warm for a couple of minutes; you want it glistening, not smoking.
-
Sauté the Veggies: Toss the chopped onion into the pot and sauté for about 3-4 minutes until they’re translucent. Don’t rush this step! Let that sweetness develop! Add in the minced garlic and keep stirring for another minute—trust me, you want to smell that garlicky goodness wafting through your kitchen!
-
Brown the Turkey: Now, add in the ground turkey. Break it apart with your spoon and sauté until it’s fully cooked and browned, which takes about 5-7 minutes. Keep stirring to ensure even browning and that you don’t have any pink left.
-
Add the Sweet Potatoes: Stir in your diced sweet potatoes and cook for an additional 3 minutes. This pre-cooking step helps to slightly soften them before adding the liquids.
-
Pour in the Goodness: Now, it’s time for the chicken broth and diced tomatoes. Stir everything well, scraping up any bits that may have stuck to the bottom of the pot.
-
Spice it Up: Sprinkle in the chili powder, cumin, salt, and pepper. Stir and let it simmer for about 30 minutes. If it looks too thick, add a touch more broth; if it’s too soupy, let it simmer uncovered. You’re in charge of the consistency here!
-
Add the Corn: About 5 minutes before serving, toss in the corn. Stir it in and let it warm through for a wonderful pop of sweetness!
-
Final Taste Check: Give it a taste and adjust the seasoning if needed. Sometimes, adding a dash of lime juice or a pinch of cayenne can take it to the next level!
-
Serve: Once everything is perfectly cooked and flavorful, remove from heat and allow to cool slightly before serving.
With each step, take a moment to enjoy the aromas, maybe sip on a glass of something refreshing—this part is as crucial as the cooking itself!
Serving Suggestions
I love to serve this Sweet Potato Turkey Chili in hearty bowls! Top it with some crushed tortilla chips for that crunch, a dollop of sour cream or Greek yogurt for creaminess, and a sprinkle of fresh cilantro for a burst of freshness. If you’re feeling extra cheesy (who isn’t?), a handful of shredded cheese on top can make everything even more delightful.
Pair it with some warm cornbread or a side salad, and you’ve got yourself a fantastic meal. And let’s be honest—this dish is perfect for meal prep too! It tastes even better after a day in the fridge, and reheating it yields a comforting dinner in a snap.
Recipe Variations
Now, if you’re anything like me, you love to switch things up! Here are some fun variations to keep your chili game fresh:
-
Spicy Kick: Add in a diced jalapeño for a fiery twist. If you love heat, toss in some cayenne pepper or crushed red pepper flakes!
-
Beans Galore: Throw in a can of black beans or kidney beans to up the protein and fiber.
-
Vegan Delight: Swap the ground turkey for plant-based crumbles and use vegetable broth. I promise you won’t miss the meat!
-
Extra Veggies: Add in chopped bell peppers, zucchini, or any leftover veggies lurking in your fridge for more taste and nutrition.
-
Sweet & Savory: Drizzle a bit of maple syrup for a sweet contrast to the heat. It’s not expected, but it’s oh-so-good!
With all these variations, it’s like having a whole new dish every time you cook it! Love that versatility!
Chef’s Notes
I’ve been making this chili for a few years now, and it’s evolved beautifully over time. The first version was far too spicy—my friends still tease me about it! With every batch, I learned something new about balance and flavor.
Honestly, I just love the way this recipe brings people together. It’s perfect for casual dinners, game days, or even cozy nights on the couch. Plus, it’s a total crowd-pleaser. I once had a guest declare it the best chili they’d ever had, and that seriously made my day!
FAQs and Troubleshooting
1. Why is my chili too watery?
If your chili turns out too runny, let it simmer an additional 10-15 minutes uncovered to allow some of that liquid to evaporate. Alternatively, if you prefer it thicker, mash or blend a small portion of the sweet potatoes into the pot.
2. Can I freeze this chili?
Absolutely! Once cooled, transfer it to an airtight container or zip-top bag and freeze for up to 3 months. Just thaw it overnight in the fridge before reheating!
3. How can I make it spicier?
If you’re ready to bring the heat, add more chili powder or diced jalapeños. A dash of hot sauce can also work wonders. Just remember to taste as you go!
4. What do I do if I don’t have chicken broth?
No worries, my friend! You can use vegetable broth, water with a splash of soy or Worcestershire sauce, or even tomato juice for a unique twist.
Nutritional Info
Now let’s chat about nutrition! This Sweet Potato Turkey Chili is not just tasty but also nutrient-packed. Each serving offers an excellent balance of protein, fiber, and a variety of vitamins from the sweet potatoes and corn. Here’s a quick rundown for one serving:
- Calories: Approximately 350
- Protein: 25g
- Fat: 10g
- Carbohydrates: 40g
- Fiber: 8g
With all those immune-boosting ingredients, you can enjoy every spoonful knowing you’re nourishing your body as you feast!
Final Thoughts
There you have it, dear friends! A big ol’ pot of Sweet Potato Turkey Chili just waiting to find its way into your hearts and homes. Cooking is not just a task; it’s an experience, a chance to connect and share love through food. Each bowl tells a story, and I can’t wait to hear yours!
So gather your ingredients, roll up those sleeves, and let this recipe inspire you to create something wonderful. And remember, cooking doesn’t always look pretty, but it sure tastes divine. Don’t forget to tag me on social media when you whip up your own chili masterpiece. Happy cooking, and until next time—let the flavors shine!
Print
Sweet Potato Turkey Chili
- Total Time: 60 minutes
- Yield: 4 servings 1x
- Diet: Gluten-Free
Description
A heartwarming sweet potato turkey chili that’s perfect for cozy nights in or gatherings with friends, packed with flavor and nutritious ingredients.
Ingredients
- 1 lb ground turkey
- 2 large sweet potatoes, diced
- 1 can diced tomatoes
- 1 cup corn (frozen or canned)
- 1 onion, chopped
- 2 cloves garlic, minced
- 2 cups chicken broth
- 1 tablespoon chili powder
- 1 teaspoon cumin
- Salt and pepper to taste
- Olive oil for cooking
Instructions
- Prep your ingredients: chop your sweet potatoes and onions.
- Heat the olive oil in a large pot over medium heat.
- Sauté the chopped onion for 3-4 minutes until translucent, then add garlic and stir for another minute.
- Brown the ground turkey for 5-7 minutes until fully cooked.
- Add the sweet potatoes and cook for 3 minutes.
- Pour in the chicken broth and diced tomatoes, scraping up any bits stuck to the pot.
- Spice it up with chili powder, cumin, salt, and pepper, and let it simmer for 30 minutes.
- Add the corn 5 minutes before serving.
- Final taste check and adjust seasoning.
- Serve in bowls with toppings of choice.
Notes
Perfect for meal prepping; tastes even better the next day!
- Prep Time: 15 minutes
- Cook Time: 45 minutes
- Category: Main Course
- Method: Stovetop
- Cuisine: American
Nutrition
- Serving Size: 1 serving
- Calories: 350
- Sugar: 6g
- Sodium: 500mg
- Fat: 10g
- Saturated Fat: 2g
- Unsaturated Fat: 8g
- Trans Fat: 0g
- Carbohydrates: 40g
- Fiber: 8g
- Protein: 25g
- Cholesterol: 75mg
Keywords: chili, turkey, sweet potato, comfort food, easy recipes