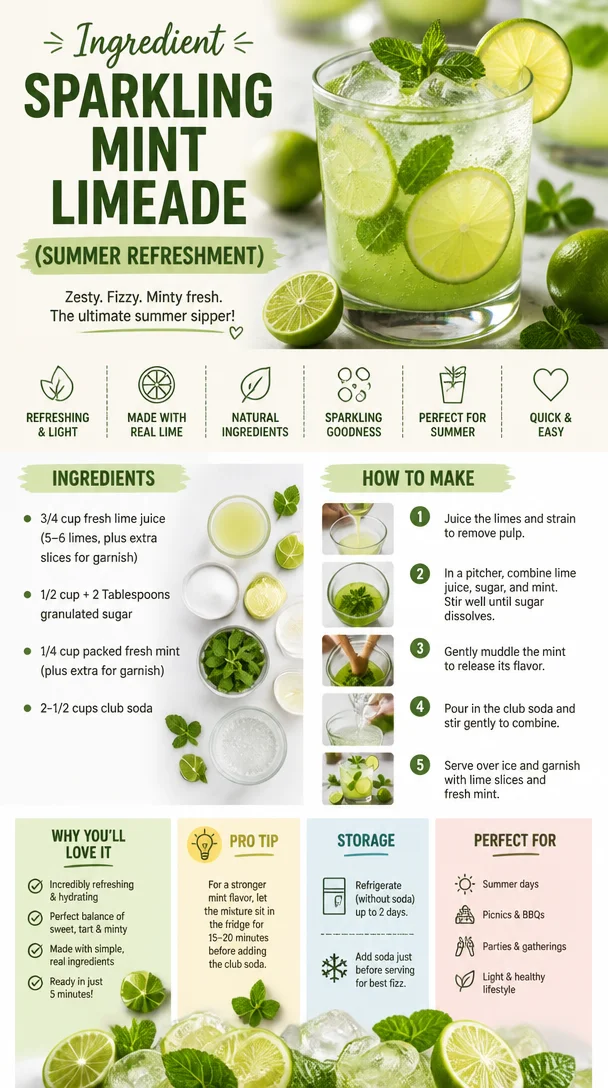
Ingredient Sparkling Mint Limeade (Summer Refreshment)
Sparkling Mint Limeade: A Refreshing Twist on a Classic Drink
Hey food enthusiasts! Let’s gather around the kitchen, dust off those cocktail glasses (or mason jars—no judgment here!), and whip up a thirst-quenching drink that screams summer: Sparkling Mint Limeade! This vibrant concoction is not just a drink; it’s a nostalgia bomb that brings back sun-soaked afternoons and laughter-filled gatherings. With zesty lime, fresh mint, and a delightful fizz, it’s the perfect way to cool down when the heat is on!
A Taste of Nostalgia
Let me take you back to my childhood, a time when the simple joys of life were embodied in lazy days spent outdoors. Picture this: my family’s backyard, adorned with colorful kites flying high against a bright blue sky, and laughter ringing out like music. The highlight of those afternoons? My grandmother’s famous limeade.
Every summer, she would gather us around the kitchen counter, the air thick with excitement and a hint of lime. As she fussed over fresh limes and mint leaves, we would eagerly await our turn for a taste test. The vibrant green of the mint mingled perfectly with the tangy lime, while the bubbles from the soda danced enthusiastically in our cups. It was infectious! We learned to mix, taste, and adjust until it was just right. This sparkling mint limeade wasn’t just a drink; it was a celebration of togetherness and creativity. Fast forward to today, and I still find myself reminiscing while sipping this refreshing drink. Let’s recreate that magic together!
Ingredients
Here’s what you’ll need for the ultimate Sparkling Mint Limeade:
-
3/4 cup fresh lime juice (about 5-6 limes)
- Fresh lime juice is the star of the show! For a sweeter kick, use an extra lime or two (and save some slices for garnish).
-
1/2 cup + 2 tablespoons granulated sugar
- This sugar helps balance out the tartness of the limes. For a healthier alternative, feel free to use honey or agave syrup. Start with a bit less if you’re watching sugar intake!
-
1/4 cup packed fresh mint (plus extra for garnish)
- Fresh mint is essential for that aromatic freshness. Dried mint can be used in a pinch, but nothing beats the vibrancy of fresh leaves.
-
2-1/2 cups club soda
- The bubbly base! Club soda adds that fantastic fizz we all love. For a fruitier variation, swap with flavored sparkling water (like lime or mint).
Step-by-Step Instructions
Ready to get mixing? Here’s how to make this refreshing treat, step by step:
-
Juicing the Limes:
- Start by rolling the limes on the counter to break down the membranes—this helps them release more juice. Cut them in half and juice them into a measuring cup, removing any seeds. Aim for about 3/4 cup of juice. If you find some extra limes lying around, go ahead and juice a couple more for an extra zing!
-
Mint Magic:
- While you’re juicing, grab your mint. Pile those leafy green wonders into your palm, and give them a gentle slap (yes, you heard that right!). This “bruising” releases the essential oils, boosting the minty flavor. Chop it roughly and set aside some leaves for garnish.
-
Mixing it Up:
- In a medium saucepan, combine the fresh lime juice, sugar, and chopped mint. Heat it on low, stirring until the sugar is fully dissolved. Don’t let it boil; we just want to create a flavorful syrup. This should take about 2-3 minutes. Once dissolved, let it cool slightly before moving to the next step.
-
Combine and Chill:
- In a large pitcher, combine your mint-lime syrup with the remaining club soda. Give it a gentle stir to mix everything together. Taste and adjust! Want more sweetness? Add a bit more sugar! Need more fizz? Top it off with additional club soda.
-
Serve it Up:
- Now, add ice cubes to your serving glasses, and pour the sparkling mint limeade over the ice. Garnish with a slice of lime and a sprig of mint for that picture-perfect finish. Trust me, your friends will be impressed!
Serving Suggestions
Presentation is key! Here’s how to serve your sparkling mint limeade like a pro:
-
Glassware: Use tall, clear glassware to showcase the vibrant green color—that first glimpse is a feast for the eyes! Mason jars are also a fun, rustic option.
-
Garnishes: Add extra lime slices and mint leaves for a pop of color. For an extra touch of whimsy, you can even rim the glasses with sugar!
-
Straws: Tie a simple paper straw to a sprig of mint or a lime wedge for a charming touch.
Pair this refreshing drink with light snacks, such as fresh fruit skewers, savory mini quiches, or a crunchy veggie platter. It’s a hit at summer parties, picnics, or just kicking back on your patio!
Recipe Variations
Want to mix things up? Here are a few creative twists on this classic drink:
-
Berry Burst: Add muddled berries (like strawberries or raspberries) to your limeade for a fruity explosion. Use about 1 cup of your preferred berries in the mixing stage!
-
Spicy Mint Limeade: Give it a kick by muddling a few slices of jalapeño along with the mint. It adds a surprising layer of flavor!
-
Coconut Limeade: Swap half of the club soda for coconut water. This tropical twist is both refreshing and hydrating.
-
Extra Citrus: Enhance the flavor by adding a splash of orange or grapefruit juice to the mixture. This often complements the lime beautifully.
Chef’s Notes
Here’s a little secret for you: experimentation is half the fun! Over the years, I’ve played around with countless variations. From swapping mint for basil one summer to adding a hint of lavender another, I’ve seen how versatile this drink can be. Each twist brings back old memories while creating new ones—just like my grandma did.
Oh, and the next time you have a bit of leftover syrup, drizzle it over vanilla ice cream for an unexpected but delightful dessert!
FAQs and Troubleshooting
Q: I can’t find fresh mint. Can I use dried mint?
A: Absolutely! Dried mint can be a great alternative, but use only about 1-2 tablespoons as it’s more potent. To release its flavor, steep the dried mint in the hot lime mixture.
Q: My limeade turned out too tart. What can I do?
A: Don’t worry! Just sweeten it up a bit. Mix in more sugar or a splash of simple syrup. You can also dilute with extra club soda to balance it out.
Q: How can I make this a cocktail?
A: Add a splash of your favorite spirit, like rum or vodka, to turn this refreshing drink into a bubbly cocktail. Mmm, cheers to that!
Q: How long does this last in the fridge?
A: It’s best served fresh, but it can generally last 1-2 days in the fridge. If you’re storing, keep it in an airtight container; just remember to stir gently before serving!
Nutritional Info
Let’s break down the nutrition a bit! While I love to emphasize using fresh ingredients, I know many of you might be curious about the nutritional aspect of this refreshing drink.
Nutritional Breakdown (per serving):
- Calories: Approximately 100 kcal, depending on the sugar used.
- Sugar: Roughly 22g (this can vary if you alter the sugar content).
- Vitamin C: You’ll get a good dose from the fresh lime!
Feel free to reduce the sugar to meet your dietary needs. Remember, the freshest ingredients always lead to the best results!
Final Thoughts
And there you have it, my fellow food lovers! Our Sparkling Mint Limeade isn’t just a drink; it’s a vibrant experience filled with flavor, joy, and a touch of nostalgia. Whether you sip it solo or share it with friends, it’s the ultimate refreshment for any occasion.
So, before summer slips away, grab those limes, muddle that mint, and embrace the sparkle that this drink brings. Here’s to good times, delicious flavors, and the fun that happens when we gather around great food. Let’s keep the kitchen magical together, one sip at a time!
Remember, whenever you feel that summer heat creeping in, this minty delight is here to cool you down. Happy sipping—and don’t forget to share your mint limeade stories with me!
PrintSparkling Mint Limeade
- Total Time: 15 minutes
- Yield: 4 servings 1x
- Diet: Vegan
Description
A refreshing and zesty drink featuring lime, fresh mint, and a delightful fizz—perfect for summer gatherings.
Ingredients
- 3/4 cup fresh lime juice (about 5–6 limes)
- 1/2 cup + 2 tablespoons granulated sugar
- 1/4 cup packed fresh mint (plus extra for garnish)
- 2–1/2 cups club soda
Instructions
- Start by rolling the limes on the counter to break down the membranes—this helps them release more juice. Cut them in half and juice them into a measuring cup, removing any seeds.
- Grab your mint, pile those leafy green wonders into your palm, and give them a gentle slap to release the essential oils.
- Combine the fresh lime juice, sugar, and chopped mint in a medium saucepan. Heat on low, stirring until the sugar is dissolved, about 2-3 minutes.
- In a large pitcher, combine your mint-lime syrup with the remaining club soda. Stir gently to mix.
- Add ice cubes to your serving glasses, and pour the sparkling mint limeade over the ice. Garnish with a slice of lime and a sprig of mint for a picture-perfect finish.
Notes
Experiment with variations like adding muddled berries or a splash of orange juice. Best served fresh, but can last 1-2 days refrigerated.
- Prep Time: 10 minutes
- Cook Time: 5 minutes
- Category: Beverage
- Method: Mixing
- Cuisine: American
Nutrition
- Serving Size: 1 serving
- Calories: 100
- Sugar: 22g
- Sodium: 5mg
- Fat: 0g
- Saturated Fat: 0g
- Unsaturated Fat: 0g
- Trans Fat: 0g
- Carbohydrates: 26g
- Fiber: 0g
- Protein: 0g
- Cholesterol: 0mg
Keywords: mint, limeade, refreshing drink, summer, beverage
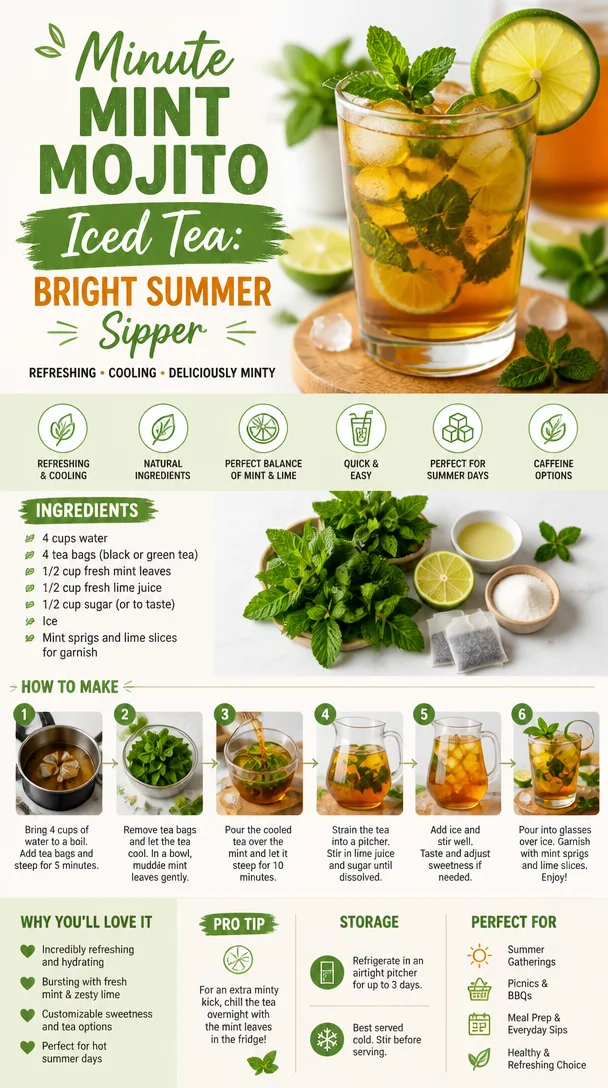
Minute Mint Mojito Iced Tea: Bright Summer Sipper
Refreshing Mint Mojito Iced Tea: A Perfect Sipper for Any Occasion
Hey there, food lovers and fellow kitchen adventurers! It’s Beau here, and today I have a refreshing treat that’s just begging to be sipped on a sunny afternoon or during a cozy get-together. If you’re looking to elevate your summer drink game while keeping it simple yet delicious, I present to you: Mint Mojito Iced Tea! Think of it as a delightful twist on your classic iced tea, but with the zesty flair of mojito vibes.
Imagine this: a warm summer day, the sun is shining, and you’re lounging on your porch or at a picnic park with friends. You reach for a glass filled with this vibrant Madagascar amber, and as you take that first sip, the coolness of the fresh mint and the zing of lime instantly transport you to paradise. This isn’t just a drink; it’s a hug in a glass!
Not only is this Mint Mojito Iced Tea incredibly refreshing, but it also packs a punch of flavor that’ll have your taste buds dancing. Plus, making it is a breeze – perfect for those of us who like to keep it low-key in the kitchen while still impressing our guests. Whether you’re hosting a gathering or just treating yourself, this drink is sure to be a crowd-pleaser.
So grab your mixing pitcher, and let’s dive into the world of minty goodness. We’re about to make a drink that’s not only delightful but one you’ll want to keep in your recipe book forever!
Personal Story
Ah, the memories of summer gatherings and the clinking of ice in glasses bring a smile to my face! My first encounter with mojitos was a family barbecue at my uncle’s house when I was around 10 years old. While the adults were savoring their cocktails, I was on a mission to make my own non-alcoholic version that still felt fancy and fun. Armed with my trusty muddler and whatever I could find from the herb garden, I scrounged together mint leaves and limes and mixed them with some lemonade.
To my surprise, the drink turned out so delicious that even the adults were stealing sips from my glass! That moment sparked my love for creating non-alcoholic cocktails, paving the way for all sorts of refreshing concoctions, including this Mint Mojito Iced Tea. Every time I make it now, I’m transported back to that summer day filled with laughter, sunshine, and the joyous spirit of family and friendship – all bundled up in a glass.
Ingredients
Let’s get into the fun part: the ingredients! Here’s what you’ll need to create this refreshing Mint Mojito Iced Tea:
-
4 cups water
The base for our tea. Any good-quality filtered water will do the trick, but feel free to replace some with sparkling water for an extra fizzy kick! -
4 tea bags (black or green tea)
Choose your favorite kind; black tea adds depth, while green tea keeps it light. For caffeine-free options, try herbal tea bags like chamomile or rooibos. -
1/2 cup fresh mint leaves
Mint is the star of the show here! The fresher, the better. You can also use peppermint or spearmint based on your preference. Don’t have fresh mint? Try a few drops of mint extract (but go easy!). -
1/2 cup fresh lime juice
The tartness of lime is key to brightening the drink. Freshly squeezed is best, but bottled lime juice can work in a pinch. For a twist, you could use lemon juice as well. -
1/2 cup sugar (or to taste)
Sweeten to your liking! Feel free to swap with honey, agave syrup, or even a sugar substitute if that’s your jam. -
Ice
Lots of it! This drink deserves to be chilled to perfection. -
Mint sprigs and lime slices for garnish
These are optional, but trust me, they make your drink look extra fab and festive!
Step-by-Step Instructions
Now that we have our ingredients, it’s time to bring our Mint Mojito Iced Tea to life! Follow these easy steps for a delightful drink:
-
Boil the Water
Start by bringing 4 cups of water to a near boil in a pot or kettle. This is where the magic begins, as you infuse flavor into your tea! -
Steep the Tea
Once the water is boiling, remove it from heat and add the tea bags. Let them steep for about 5-7 minutes. The longer you steep, the stronger your tea; so, adjust it according to your taste. -
Add the Mint
After steeping, it’s time to introduce the fresh mint leaves! Add them to the pot and allow them to sit in the warm tea for about 5 minutes. This will help release their delightful oils, infusing the tea with minty goodness. (A little pro tip: Gently muddle the mint leaves with a wooden spoon to release even more flavor.) -
Sweeten it Up
Remove the tea bags and mint leaves using a slotted spoon. While the tea is still warm, stir in your sugar or sweetener until it’s completely dissolved. Taste your concoction! If you like it sweeter, feel free to add a bit more. -
Add Lime Juice
Once sweetened, mix in the fresh lime juice. This adds that vibrant, zesty kick we absolutely love! Give it another taste – it should be a harmonious blend of sweet, tart, and refreshing! -
Chill
Let your tea cool down to room temperature, then transfer it to a pitcher and refrigerate for at least an hour. The longer it chills, the better it’ll taste. -
Serve Over Ice
Fill glasses with ice and pour the chilled Mint Mojito Iced Tea over the top. This is where peachy moments happen! Garnish with additional mint sprigs and lime slices for that gorgeous presentation.
And there you have it! Each step is simple, flowing, and fun—just like the drink itself!
Serving Suggestions
When it comes to serving your Mint Mojito Iced Tea, presentation is key! Here are a few ideas to make your drink not only delicious but also visually stunning:
-
Chic Glassware: Use mason jars for a rustic vibe, or fancy glassware for a more elegant affair. Feel free to mix and match!
-
Garnish Game: Add a couple of vibrant mint sprigs and a slice of lime on the rim of your glass. A splash of color can elevate your drink’s appeal.
-
Minty Ice Cubes: For added charm, freeze a few mint leaves and lime slices in your ice cubes beforehand! As they melt, they’ll infuse even more flavor while looking gorgeous.
-
Themed Parties: If you’re hosting a summer backyard bash or a mojito-themed evening, set up a self-serve drink station! Let guests add their garnishes – think fresh fruit, berries, or coconut if you’re in the tropical mood.
Recipe Variations
Want to switch it up? Here are some creative twists and ideas for different flavors:
-
Berry Mojito Iced Tea: Add muddled berries like raspberries or strawberries for a fruity explosion. They pair wonderfully with the mint and lime!
-
Coconut Mojito Iced Tea: For a tropical twist, incorporate coconut water instead of some of the regular water. You can also sprinkle some shredded coconut on top for style!
-
Ginger Mint Mojito Iced Tea: Slice some fresh ginger and let it steep with your tea. It adds a gentle spiciness that complements the mint beautifully.
-
Cucumber Cooler: Throw in a few slices of cucumber for an ultra-refreshing feel, especially on hot days.
-
Herbal Twist: Replace lime with lemon, and experiment with different herbs like basil or thyme. They can add a lovely aromatic scent and flavor.
Chef’s Notes
I absolutely love how this Mint Mojito Iced Tea has evolved over the years! Initially, I would make it with just the basics, but now I dabble in different combinations and flavors depending on the season or mood. Sometimes on a particularly hot day, I’ll even blend some of the tea with ice in a blender for a frosty smoothie-style drink—so chill and refreshing!
And let me tell you about that time I accidentally added way too much lime, turning my drink into a puckery paradise! Instead of sulking, I embraced it, calling it my “Mint Lime Loca.” Now, as it turns out, my friends loved it! So remember, the kitchen is about having fun, trying new things, and maybe embracing a few ‘oops’ moments—we chefs love them!
FAQs and Troubleshooting
Here are some common questions I receive, along with helpful answers to keep you on track:
-
Can I use bottled lime juice?
Absolutely! While fresh lime juice gives the best flavor, bottled juice works just fine. Focus on getting the balance right with sweetness to still enjoy the drink. -
What if my drink is too sweet?
If you find it a bit too sweet, add more lime juice or even a splash of additional water to cut the sweetness down. -
How long does this drink last in the fridge?
It can last for about 3-5 days in the fridge if stored in an airtight container. However, I recommend making fresh batches to keep that minty flavor vibrant! -
Can I make this drink ahead of time?
Definitely! Prepare the tea beforehand and store it in the fridge. Add ice and garnishes only when serving, ensuring your drink stays fresh and crisp.
Nutritional Info
Now, let’s talk numbers! This Mint Mojito Iced Tea is not just delicious, but also relatively low in calories, especially if you adjust the sugar. One serving (about 8 ounces) comes in at roughly:
- Calories: 70-100 (depending on sugar used)
- Fat: 0g
- Carbohydrates: 18g
- Sugars: 16g (again, depending on sugar used)
- Protein: 0g
Feel free to swap out sugar for your preferred sweetener; many sugar substitutes contain fewer calories and carbs, allowing you to enjoy this drink guilt-free!
Final Thoughts
So there you have it, friends! This Mint Mojito Iced Tea is not just a beverage, but a true experience, stirring up joyful memories and brightening your days. It’s versatile, easy to make, and offers countless variations to keep things exciting. Remember, cooking is about sharing love and collecting moments, and what better way to do that than with a refreshing drink that brings us all together?
I can’t wait for you to try your hand at this recipe. It’s perfect for any occasion, be it a summer BBQ, a garden party, or simply a cozy evening on the sofa. So gather your ingredients, get that pitcher ready, and let’s make some minty magic happen!
Cheers to delicious sips and happy times ahead! 🍃✨
Mint Mojito Iced Tea
- Total Time: 20 minutes
- Yield: 4 servings 1x
- Diet: Vegetarian
Description
A refreshing twist on classic iced tea with mint and lime flavors, perfect for summer gatherings.
Ingredients
- 4 cups water
- 4 tea bags (black or green tea)
- 1/2 cup fresh mint leaves
- 1/2 cup fresh lime juice
- 1/2 cup sugar (or to taste)
- Ice (as needed)
- Mint sprigs and lime slices for garnish
Instructions
- Boil the water by bringing it to a near boil in a pot or kettle.
- Steep the tea by adding the tea bags to the hot water and letting them steep for 5-7 minutes.
- Add the mint leaves to the tea and let sit for about 5 minutes.
- Sweeten the mixture by removing the tea bags and mint leaves, then stir in sugar until dissolved.
- Add lime juice to the sweetened tea, blending well.
- Chill the tea until it cools to room temperature, then refrigerate for at least an hour.
- Serve over ice and garnish with mint sprigs and lime slices.
Notes
This drink can be made ahead of time and stored in the fridge for 3-5 days. Adjust sweetness according to taste.
- Prep Time: 10 minutes
- Cook Time: 10 minutes
- Category: Beverage
- Method: Chilling
- Cuisine: American
Nutrition
- Serving Size: 1 serving
- Calories: 100
- Sugar: 16g
- Sodium: 5mg
- Fat: 0g
- Saturated Fat: 0g
- Unsaturated Fat: 0g
- Trans Fat: 0g
- Carbohydrates: 18g
- Fiber: 0g
- Protein: 0g
- Cholesterol: 0mg
Keywords: mojito, iced tea, mint, summer drink, refreshing beverage

DIY Sour Cherry Soda Recipe: Quick Homemade Fizz for Summer
Homemade Sour Cherry Soda: A Refreshing and Flavorful Treat
Hey there, fellow food enthusiasts! Today, I’m excited to whip up a refreshing drink that will tickle your taste buds and rejuvenate your spirit: homemade sour cherry soda! If you’re looking for a vibrant and sparkling beverage that combines the sweet-and-sour taste of fresh cherries with a bubbly twist, you’re in the right place. Let’s dig into this delightful recipe that’s perfect for soaking up summer sun or cozying up during those cool evenings.
A Bit of Cherry History
Before we dive into the recipe, let’s take a moment to appreciate cherries. These little gems are often associated with nostalgia and traditional summertime fun. I remember plucking ripe cherries from my grandmother’s backyard tree during carefree summer days. We’d wash them off in the cool water of the hose and enjoy their juicy sweetness—nothing compares! During those lazy afternoons, my grandmother would whip up all sorts of delightful treats, but the highlight was definitely her homemade cherry soda.
Her method was simple: she’d boil the cherries, allow their tartness to infuse, and mix it with sparkling water for the most refreshing beverage. It was nothing short of liquid sunshine, and it’s this sentimental charm that inspired me to recreate that experience so I can share it with you.
The Ingredients
Let’s gather our ingredients for this delightful homemade sour cherry soda. Each component plays an essential role in crafting this colorful and vibrant drink.
-
1 pound tart cherries
These are the stars of the show! Tart cherries pack a punch of flavor and give your soda that zing. If tart cherries aren’t available, you can use sweet cherries, though you might want to adjust the sugar. -
1 cup sugar
This sweetens up our tart cherries, balancing their natural sourness. Feel free to use less or substitute with honey or agave syrup if you’re looking to cut down on refined sugar. -
1 cup water
Water is the base of our cherry syrup. It helps extract the natural flavors when cooked. Use filtered water for the best results! -
Ice
This is essential for serving! Ice keeps your soda chilled and refreshing. -
Sparkling water
The fizz that makes this drink special! You can use flavored sparkling water for an extra twist, like lemon or lime, if you’re feeling adventurous.
Step-by-Step Instructions
Now that we have our ingredients ready, let’s dive into making this tantalizing homemade sour cherry soda!
-
Prepare the cherries
Start by washing your tart cherries thoroughly under cold water. Remove the stems and pit them. Don’t worry if you can’t find a cherry pitter; just use a sharp knife or cut them in half and pop the pit out with your fingers. It’s a bit messy but totally worth it! -
Make the cherry syrup
In a medium saucepan, combine the pitted cherries, 1 cup of sugar, and 1 cup of water. Place it on the stove over medium heat. Keep stirring until the sugar dissolves, and the mixture begins to simmer. This process will take about 5–7 minutes. -
Infuse the flavors
Allow the mixture to simmer for about 10 minutes, stirring occasionally. You want the cherries to soften and release their juice into the syrup. Once you start seeing that rich red color, you know you’re on the right track! Feel free to mash the cherries lightly with the back of a spoon to help this process along. -
Strain the syrup
After simmering, remove the saucepan from the heat and let it cool for a few minutes. Place a fine mesh strainer over a heatproof bowl or jar and pour the cherry mixture through the strainer. This will separate the juicy syrup from the cherry pulp. Use the back of a spoon to press the cherries against the strainer to extract as much liquid as possible. You should end up with approximately 1 cup of cherry syrup. -
Chill the syrup
Let the cherry syrup cool to room temperature, then refrigerate it for at least 30 minutes to chill. You want it nice and cold for that refreshing soda experience! -
Assemble your cherry soda
To serve, fill a glass halfway with ice. Pour in 1–2 ounces of your chilled cherry syrup, depending on how sweet you want your soda. Top off with sparkling water, give it a gentle stir, and garnish with a fresh cherry or a sprig of mint for an extra pop of color.
Serving Suggestions
When it comes to serving your homemade sour cherry soda, presentation is key! Here are some fun ways to plate or serve this refreshing drink:
-
Garnish with style: Add a fresh cherry on top or a sprig of mint to your glass. You can even rim the glasses with sugar for that extra sparkly touch!
-
Large batch fun: Consider making a pitcher for gatherings. Simply multiply the ingredients by the number of servings, mix, and serve from a lovely glass pitcher.
-
Summer vibes: Pair your soda with light appetizers like cheese platters, fresh salads, or even a simple sandwich during outdoor barbecues or picnics.
Recipe Variations
Feeling creative? Here are a few variations to amp up your sour cherry soda:
-
Lavender Cherry Soda: Add a teaspoon of culinary lavender to your cherry syrup while it simmers for a floral twist!
-
Cherry Limeade: Squeeze fresh lime juice into your soda before serving. The tartness of lime complements the cherry perfectly.
-
Herbal Infusion: Try adding fresh basil or mint into the mixture while simmering for a refreshing herbal aroma.
-
Vanilla Cherry Soda: Stir in a splash of vanilla extract to your syrup for a creamy flavor that pairs beautifully with the cherries.
-
Almond Cherry Soda: Add a drop or two of almond extract for a lovely nutty flavor addition that enhances the cherry profile.
Chef’s Notes
Making this homemade sour cherry soda has become one of my go-to summer traditions! Every time I make it, I think back to those hot afternoons at my grandma’s house. My friends often request it for summer get-togethers, and I’m always happy to oblige. It’s amazing how such a simple combination of ingredients can create something so full of love and memories.
Over the years, I’ve tweaked the recipe here and there, experimenting with flavors and techniques. The best part? You can tailor it to your taste! Whether you prefer it sweeter or with more of that tart kick, the flexibility is what makes it fun.
FAQs and Troubleshooting
-
Can I use frozen cherries?
Absolutely! Frozen cherries work just fine. You may need to adjust your cooking time slightly since they’ll release more liquid initially. -
My syrup is too sweet; what can I do?
If you find the syrup’s sweetness overwhelming, try diluting it with a little more water or add more sparkling water when serving! -
What if I can’t find sour cherries?
Sweet cherries are an excellent substitute, but you may want to cut back on the sugar depending on your preference. -
How long does the syrup last?
The cherry syrup can be stored in the refrigerator for up to one week. Just make sure to keep it in an airtight container to maintain freshness.
Nutritional Info
Depending on how you serve your homemade sour cherry soda, the nutritional breakdown will vary, but let’s take a look at an estimated breakdown per serving:
- Calories: Approximately 120-150 (with 2 ounces of syrup and 8 ounces of sparkling water)
- Sugars: Around 20-25g (predominantly from the syrup)
- Sodium: Almost zero
By substituting sugar for alternatives, you can also adjust the calorie count to fit your dietary preferences.
Final Thoughts
There you have it—your very own homemade sour cherry soda that’s as delicious as it is easy to make! This sparkling treat is the epitome of how simple ingredients can come together to create something truly magical. So the next time you’re craving something refreshing and sweet, head to your kitchen, grab those cherries, and let’s get fizzing! Cheers to summer joys and the sweet memories we create in our kitchens. Enjoy every bubbly sip!
Print
Homemade Sour Cherry Soda
- Total Time: 35 minutes
- Yield: 4 servings 1x
- Diet: Vegan
Description
A refreshing and flavorful homemade soda combining the sweet-and-sour taste of fresh cherries with a bubbly twist.
Ingredients
- 1 pound tart cherries
- 1 cup sugar
- 1 cup water
- Ice
- Sparkling water
Instructions
- Prepare the cherries by washing them under cold water, removing stems, and pitting them.
- Make the cherry syrup by combining pitted cherries, sugar, and water in a saucepan over medium heat.
- Infuse the flavors by allowing the mixture to simmer for about 10 minutes until the cherries soften.
- Strain the syrup through a fine mesh strainer to separate the liquid from the pulp.
- Chill the syrup by refrigerating it for at least 30 minutes.
- Assemble your cherry soda by filling a glass with ice, pouring in the chilled syrup, topping with sparkling water, and garnishing.
Notes
Garnish with a fresh cherry or mint sprig for an extra touch. You can also try variations like Lavender Cherry Soda or Cherry Limeade.
- Prep Time: 15 minutes
- Cook Time: 20 minutes
- Category: Beverage
- Method: Mixing
- Cuisine: American
Nutrition
- Serving Size: 1 serving
- Calories: 135
- Sugar: 22g
- Sodium: 10mg
- Fat: 0g
- Saturated Fat: 0g
- Unsaturated Fat: 0g
- Trans Fat: 0g
- Carbohydrates: 34g
- Fiber: 1g
- Protein: 1g
- Cholesterol: 0mg
Keywords: cherry soda, homemade soda, refreshing drink, summer beverage, tart cherry

Earl Grey Raspberry Iced Tea
Sip into Summer with Earl Grey Raspberry Iced Tea
Hey there, fellow foodies! Welcome back to Feastical, your go-to spot for all things delicious and heartwarming. Today, I’m thrilled to share one of my absolute favorite refreshers that’s perfect for warming summer days and cozy evenings alike: Earl Grey Raspberry Iced Tea. When the sun starts to blare and the air gets a little too sticky, there’s nothing like a tall glass of this delightful iced tea, infused with the musky, citrusy notes of Earl Grey and the burst of fresh raspberries. Trust me, it’s like summer in a glass!
Why Earl Grey Raspberry Iced Tea? Well, let me tell you, this isn’t just a drink; it’s a nostalgia trip! I can vividly recall summer afternoons spent in my grandmother’s garden, surrounded by vibrant blooms and the sweet scent of ripe berries. She’d brew up a pot of Earl Grey tea, steeped to perfection, and then kick it up a notch with her secret ingredient: raspberries plucked straight from her garden. Each sip was sheer bliss! Fast forward to today, and whenever I whip up a batch of this iced tea, it’s like I’m transported back to those sunny afternoons. A sip of this drink brings a wave of comfort, laughter, and a touch of nostalgia.
So let’s get to it! Dive in with me as we create this beautiful drink that not only quenches your thirst but also envelops you in sweet, fragrant memories. Ready to sip your way through summer? Let’s get brewing!
Personal Story
Ah, where do I begin? My grandmother had this magical ability to turn simple moments into cherished memories, especially when it came to food. One lazy summer afternoon, long ago, she decided to introduce me to the world of tea. We’ll always remember distinct scents more than anything else, and hers was of freshly brewed Earl Grey mingling with the sweet aroma of ripe raspberries. We spent the afternoon outside, her garden bursting with colorful blooms and the air filled with joyous laughter.
As she showed me how to steep the tea just right, I couldn’t help but notice how each step seemed like a little dance. “Just like life, my dear,” she’d say with a wink, “it’s about balance. Too much of anything and it gets bitter.” This inspired me to experiment with flavors on my own, and her love for tea became a channel for me to express my creativity in the kitchen. It was not just tea; it was a whole experience, a warm hug on a summer day. Today, I carry that tradition with me, and you can trust me when I say, Earl Grey Raspberry Iced Tea will give you the same sweet escape!
Ingredients
Alright, let’s gather our ingredients, friends! This lovely iced tea requires just a handful of simple items that you might already have in your kitchen:
-
2 cups water
Fresh, filtered water makes a difference. If your tap water doesn’t taste great, consider using bottled or filtered water for a smooth flavor. -
2 Earl Grey tea bags
Earl Grey is characterized by its distinct bergamot flavor. Feel free to try loose leaf tea for a more robust infusion, just remember to strain it afterward! -
1/2 cup fresh or frozen raspberries
Fresh raspberries add a delightful sweetness and color. If you’re using frozen, no worries! They add a chill and flavor punch without any extra hassle. -
2 tablespoons honey or sugar (adjust to taste)
Sweetness is subjective, my friends! Start with a little and adjust based on your preference. You can also try agave syrup, maple syrup, or even stevia for healthier alternatives. -
Juice of 1/2 lemon
Fresh lemon juice enhances the overall flavor of the tea and balances the sweetness. You can substitute with lime for different citrus notes. -
Ice cubes
Can’t have iced tea without ice, am I right? Make sure to fill that glass! -
Fresh lemon slice or a mint sprig (for garnish, optional)
These garnishes not only look beautiful; they add an extra zing and freshness to every sip.
Step-by-Step Instructions
Now that we’ve got our ingredients, it’s time to dive into the heart of the recipe! Follow these steps, and I promise you’ll be sipping on this refreshing iced tea in no time.
-
Boil the Water
Start by bringing 2 cups of water to a rolling boil in a small saucepan. Boiling water is essential for properly extracting the flavors from the tea. Remember, patience pays off! -
Steep the Tea
Once your water is boiling, remove it from heat and add the two Earl Grey tea bags. Let it steep for about 4-5 minutes—this is where the magic happens! The longer you steep, the stronger the flavor, but beware, steeping too long can lead to bitterness. A little tip: set a timer to avoid distractions! -
Add Raspberries
Now, while your tea is still warm, add in the raspberries. They’ll start to break down slightly, releasing their sweet juices into the tea. Use a spoon to gently muddle them if you want a stronger raspberry flavor! -
Infuse the Sweetness
Stir in your choice of honey or sugar while the tea is still warm; it helps dissolve the sweetener more effectively. Taste as you go—this is your creation! -
Lemon Juice
Squeeze in the juice from half a lemon, giving your iced tea a zesty twist. Feel free to add more or less lemon based on your personal taste; it’s all about that balance! -
Cool It Down
Let your mixture sit at room temperature until it cools down, then pop it in the refrigerator for about 30 minutes. If you’re impatient (like me), you can immediately pour it over a glass filled with ice. -
Serve
Once chilled, grab a fabulous glass, fill it with ice cubes, and pour your Earl Grey Raspberry Iced Tea over it! Garnish with a fresh lemon slice or mint sprig for that café-quality presentation.
And voilà! You’ve made a delightful batch of Earl Grey Raspberry Iced Tea. Sip slowly and relish in that refreshing, fruity goodness!
Serving Suggestions
Now that you’ve crafted this beautiful tea, let’s talk presentation! The right serving can elevate your drink from delicious to absolutely gorgeous.
-
Tall Glasses: Use clear tall glasses to show off that vibrant ruby-red color. People eat (and drink) with their eyes first, so make it pretty!
-
Garnishes: Add fresh lemon slices or mint sprigs for a pop of color and an aromatic touch. It creates an inviting presentation that is sure to impress your friends.
-
Iced Tea Pitcher: Consider making a larger batch and serving it in a pitcher. It’s perfect for backyard barbecues or summer get-togethers, and allows guests to help themselves!
-
Pairings: Pair your iced tea with light snacks like fresh fruit, scones, or even those yummy little tea sandwiches for a delightful afternoon tea experience!
Recipe Variations
As with any great recipe, you can mix things up for some variety! Here are a few twists you might want to try:
-
Peachy Twist: Swap out the raspberries for ripe peaches for a sweet, southern-inspired iced tea.
-
Herbal Infusion: Add a sprig of rosemary or thyme while steeping the tea for an herbal twist that pairs beautifully with the bergamot.
-
Flavored Syrups: Try adding flavored syrups such as lavender or vanilla for a unique and aromatic touch.
-
Chai Grey: Mix half Earl Grey and half chai tea for a spicy fusion of flavors that’s perfect for chai lovers.
-
Sparkling Version: Add a splash of club soda to give your iced tea a fizzy kick for those hot summer parties!
Chef’s Notes
Every recipe has a story, and this one is no different! This Earl Grey Raspberry Iced Tea has been through its share of tweaks and experiments in my kitchen. I remember the first time I tried it with mint; I thought I had discovered gold! And let me tell you, there’s something special about sipping tea on a warm, breezy afternoon while lounging on the porch. It reminds me of those summers spent with my grandmother—sipping tea, sharing stories, and soaking up the sunshine.
FAQs and Troubleshooting
-
Why is my tea bitter?
If your tea turns out bitter, it might be due to over-steeping the tea bags. Next time, reduce the steeping time to 3-4 minutes. -
Can I use green tea instead of Earl Grey?
Absolutely! Just keep in mind that the flavor profile will change dramatically. You might want to adjust the quantities of lemon and sweetener! -
How do I sweeten iced tea without adding sugar?
Consider natural sweeteners like honey, maple syrup, or agave. You can also blend fresh fruits or stevia for a sugar-free option! -
Can this be stored?
Yes! It can be stored in the refrigerator for up to 3 days. However, it’s best enjoyed fresh to capture those vibrant flavors.
Nutritional Info
Now, let’s break it down! Here’s an approximate nutritional breakdown per serving of Earl Grey Raspberry Iced Tea (assuming 4 servings):
- Calories: 40
- Total Fat: 0g
- Sodium: 2mg
- Total Carbohydrates: 11g
- Sugars: 9g
- Protein: 0g
Keep in mind these values can change based on the sweeteners and additional ingredients used!
Final Thoughts
And there you have it, friends! Earl Grey Raspberry Iced Tea, a refreshing blend of flavors and fond memories in a glass. It’s simple yet sophisticated, and perfect for sharing with friends and family or treating yourself on a sunny afternoon. I hope this recipe evokes the warmth of summer days and fills your kitchen with laughter and delicious aromas.
So grab your tea bags and raspberries, and let’s embrace the sweet moments life has to offer, one sip at a time. Until next time, happy sipping and cooking! Don’t forget to share your creations with me—I love seeing what you whip up in your kitchens! 🍓🍋
Print
Earl Grey Raspberry Iced Tea
- Total Time: 45 minutes
- Yield: 4 servings 1x
- Diet: Vegan
Description
A refreshing iced tea infused with Earl Grey and fresh raspberries, perfect for warm summer days.
Ingredients
- 2 cups water
- 2 Earl Grey tea bags
- 1/2 cup fresh or frozen raspberries
- 2 tablespoons honey or sugar (adjust to taste)
- Juice of 1/2 lemon
- Ice cubes
- Fresh lemon slice or a mint sprig (for garnish, optional)
Instructions
- Boil the water by bringing 2 cups to a rolling boil in a small saucepan.
- Steep the tea by removing boiling water from heat and adding the two tea bags for about 4-5 minutes.
- Add the raspberries to the warm tea and muddle gently for extra flavor.
- Infuse the sweetness by stirring in honey or sugar while the tea is still warm.
- Squeeze in the juice from half a lemon for a zesty twist.
- Cool the mixture down by letting it sit at room temperature, then refrigerate for about 30 minutes.
- Serve the chilled tea over ice, garnished with a lemon slice or mint sprig.
Notes
Feel free to adjust the sweetness or substitute lemon with lime for a different flavor.
- Prep Time: 10 minutes
- Cook Time: 5 minutes
- Category: Beverage
- Method: Brewing
- Cuisine: American
Nutrition
- Serving Size: 1 serving
- Calories: 40
- Sugar: 9g
- Sodium: 2mg
- Fat: 0g
- Saturated Fat: 0g
- Unsaturated Fat: 0g
- Trans Fat: 0g
- Carbohydrates: 11g
- Fiber: 1g
- Protein: 0g
- Cholesterol: 0mg
Keywords: iced tea, raspberry, Earl Grey, summer drink, refreshing beverage

Min Raspberry Colada Twist: Summer Tropical Cocktail
Easy Raspberry Colada Twist Recipe: A Refreshing Tropical Delight
Hey there, food lovers! If you’re looking to evoke sunny beach vibes, feel-good flavors, and maybe even a little bit of nostalgia, you’re in the right spot! Today, I’m excited to share my Easy Raspberry Colada Twist Recipe, a delightful beverage that’s perfect for any gathering or simply to sip on during a sunny afternoon. This drink offers the tropical charm of the classic Piña Colada with a zesty twist of fresh raspberries. Trust me; this concoction is a refreshing hug for your taste buds!
Ever since I made my first Piña Colada during a family vacation, I’ve been obsessed with experimenting. That bright yellow color and creamy texture were mesmerizing, but I always felt it could use a little extra jazz. Fast forward a few years, and the Raspberry Colada Twist was born—bringing a burst of fruity flavor and vibrant color to this classic favorite!
Let’s dive into the tropics together and discover how easy it is to whip up this delicious drink right in the comfort of your own home. Roll up your sleeves, and let’s get blending!
Personal Story
Ah, memories in the kitchen! I can still recall the day our family rented a beach house for a week-long escape. Picture this: sun-soaked afternoons, the sound of the waves crashing, and a cheeky little cookbook tucked under my arm. Inspired, I decided to whip up some Piña Coladas for the family. I mean, why not fuse vacation vibes with a splash of fun?
The blender whirred as I knocked together ripe pineapple, rich coconut cream, and, of course, a generous pour of rum. But there was something missing when I took that first sip. It was tasty, yes, but I craved something bolder. That’s when I dug out a pack of vibrant raspberries we brought back from the local market and blended them into the mix.
The result? A vibrant pink drink that not only satisfied my pineapple cravings but added a delightful tartness that danced on my palate! My family loved it, and our beach parties became a little livelier, serving up what I fondly called the Raspberry Colada Twist. Now, every time I find myself navigating the aisles of the grocery store, I can’t help but smile at the sight of those bright berries, reminding me of that beachside adventure!
Ingredients
Here’s what you’ll need to whip up this tropical delight:
-
1 cup fresh or frozen raspberries
- Add a bright and tart flavor with lovely antioxidants working their magic! If using frozen, you’ll save some time without compromising taste.
-
1 cup pineapple chunks
- This sweet fruit is the star of any colada! You can use fresh pineapple or canned in juice for that natural sweetness.
-
1/2 cup coconut cream
- Creamy and rich, this ingredient is essential for that velvety texture. If you’re keeping it light, feel free to use light coconut milk instead.
-
1/2 cup white rum (optional)
- Traditional in coladas, but feel free to leave it out for a delightful non-alcoholic version. You could even swap in vodka or tequila for a different flavor twist!
-
1/4 cup coconut water
- Adds hydration and lightness, balancing out the creaminess of the coconut cream. A perfect choice for a hot day!
-
2 tablespoons lime juice
- Freshly squeezed for that zesty zing! It’ll elevate the flavors and make your drink sing.
-
1 tablespoon honey or agave syrup (optional)
- This is an optional touch if you like your drink a tad sweeter. Agave is a great vegan alternative if that’s your thing!
-
Ice cubes (about 1 cup)
- Essential for that chilly, refreshing experience! Just the right texture and temperature to melt away your worries.
Step-by-Step Instructions
Alright, let’s get down to business! Follow these simple steps to create your very own Raspberry Colada Twist:
-
Prep Your Ingredients:
- Start by gathering all your ingredients on the kitchen counter. Make sure your fruits are nicely prepped and ready to go. Remove any stems from the raspberries if you’re using fresh ones.
-
Blend the Fruits:
- In your trusty blender, add the raspberries and pineapple chunks. Blend on high until the fruit is smooth, which should take about 30 seconds. You want a silky smooth texture here!
-
Mix in the Cream:
- Next, add the coconut cream, coconut water, lime juice, and honey or agave syrup (if using). Blend again until fully combined. If you like your drinks on the thicker side, feel free to adjust the amount of coconut cream.
-
Ice Ice Baby:
- Time to add the ice! Toss in about a cup of ice cubes and blend on pulse until well incorporated. You’re looking for a slushy consistency with a bit of texture, but feel free to blend more if you prefer it super thick.
-
Taste Test:
- Here’s a little chef’s hack: Always taste your creation! Adjust sweetness with a bit more honey or lime juice based on your preference. If it’s too thick, add a splash more coconut water to loosen it up.
-
Garnish and Serve:
- Once you’re satisfied with your Raspberry Colada Twist, pour it into your favorite glass. I love to garnish with a few whole raspberries or a slice of pineapple on the rim. How refreshing does that look?
Serving Suggestions
Now that you’ve got this beautiful drink, how do you serve it to really impress your friends and family? For a fun twist, you might consider:
-
Mason Jars: Use these charming jars for a rustic feel. They’re perfect for summer picnics or backyard barbecues!
-
Fancy Glassware: If you’re feeling a little snazzy, serve it in highball glasses or hurricane glasses for that tropical vibe.
-
Garnishes: Get a little creative here! Add a sprig of mint, edible flowers, or a carved fruit spear for a pop of color and flair.
-
Straws: Reusable straws not only make it easy to sip but add a fun touch to your drink presentation. Try using vibrant colors that match the drink!
Recipe Variations
Feeling adventurous? Here are some delicious twists to keep your taste buds on their toes:
-
Berry Blast: Swap out the raspberries for strawberries or blueberries for a different fruity flavor profile. You could also mix them for a berry medley!
-
Tropical Mix: Toss in some mango chunks alongside the pineapple for a tropical fusion. The sweetness of mango will add an extra layer of flavor.
-
Spicy Twist: Add a slice of jalapeño or a pinch of cayenne to create a little heat. This spicy contrast marries beautifully with the sweetness!
-
Mocktail Version: For a non-alcoholic splash, eliminate the rum and replace the coconut water with sparkling water for fizz. It’s refreshing and light!
-
Creamy Dream: For a dessert spin, blend in some vanilla ice cream or Greek yogurt to create an indulgent freeze. It’s like a tropical milkshake!
Chef’s Notes
Every recipe has its quirks, and the Raspberry Colada Twist is no exception! I remember the first time I made this for a gathering. I was so eager to impress that I forgot to taste it before serving. Spoiler alert: It was overly tart, and my friends’ faces were priceless! Now, I always double-check the sweetness factor.
Over the years, I’ve played with this recipe so much that it has evolved into a staple in my kitchen. Each time, I try something new—a different fruit, a unique garnish, or even an ingredient swap. It’s amazing how a simple change can make an old favorite feel like new again!
FAQs and Troubleshooting
Q: Can I freeze the drink for later?
A: Absolutely! Pour your blended beverage into ice cube trays or freezer-safe containers. Just blend again with a splash of coconut water before serving it up later to regain that slushy texture.
Q: What if my drink is too thick?
A: No worries! Just add a little more coconut water or even some juice to thin it out to your desired consistency. Blend until smooth.
Q: How do I make it less sweet?
A: You can cut back on the honey or agave syrup, or add an extra squeeze of lime juice for that tangy contrast with your sweetness.
Q: What if my raspberries are out of season?
A: Frozen raspberries work beautifully! They’re picked at the peak of ripeness and freeze extremely well, delivering bright flavor year-round.
Nutritional Info
Let’s take a moment to appreciate what you’re putting into your body! Here’s a rough breakdown of what you can expect from a serving of this delightful Raspberry Colada Twist:
- Calories: Approximately 250 (depending on the choice of sweetener and whether you include alcohol)
- Total Fat: 12g (mostly from coconut cream)
- Saturated Fat: 10g
- Carbohydrates: 30g
- Fiber: 4g
- Sugar: 15g (naturally from fruits, plus any added sweeteners)
- Protein: 2g
This drink offers a lovely mix of healthy fats from the coconut cream while packing in fiber and vitamins from the raspberries and pineapple. It’s a treat, but with benefits!
Final Thoughts
And there you have it, folks! Your guide to whipping up a refreshing Raspberry Colada Twist. Whether you’re lounging by the pool, hosting a summer gathering, or simply trying to bring a bit of sunshine into your kitchen, this drink is sure to brighten your day.
Don’t be afraid to play around with the recipe and make it your own! This is the magic of cooking—it’s all about having fun and sharing delicious moments with the people we love. So the next time you need a taste of the tropics, come back to this recipe, raise your glass, and let the festivities begin!
Now, get blending, enjoy every sip, and as always—keep it delicious!
Print
Easy Raspberry Colada Twist
- Total Time: 10 minutes
- Yield: 2 servings 1x
- Diet: Vegetarian
Description
A refreshing tropical beverage that fuses classic Piña Colada flavors with fresh raspberries for a zesty twist.
Ingredients
- 1 cup fresh or frozen raspberries
- 1 cup pineapple chunks
- 1/2 cup coconut cream
- 1/2 cup white rum (optional)
- 1/4 cup coconut water
- 2 tablespoons lime juice
- 1 tablespoon honey or agave syrup (optional)
- Ice cubes (about 1 cup)
Instructions
- Prep your ingredients: Gather all your ingredients and prep the fruits.
- Blend the fruits: Combine raspberries and pineapple in a blender and blend until smooth.
- Mix in the cream: Add coconut cream, coconut water, lime juice, and honey/agave and blend until combined.
- Add ice: Toss in ice cubes and blend until slushy.
- Taste test: Adjust sweetness or consistency as desired.
- Garnish and serve: Pour into glasses and garnish with raspberries or pineapple.
Notes
This drink can be adjusted by using different fruits or sweeteners based on your preference.
- Prep Time: 10 minutes
- Cook Time: 0 minutes
- Category: Beverage
- Method: Blending
- Cuisine: Tropical
Nutrition
- Serving Size: 1 serving
- Calories: 250
- Sugar: 15g
- Sodium: 10mg
- Fat: 12g
- Saturated Fat: 10g
- Unsaturated Fat: 2g
- Trans Fat: 0g
- Carbohydrates: 30g
- Fiber: 4g
- Protein: 2g
- Cholesterol: 0mg
Keywords: Raspberry, Colada, Tropical, Beverage, Summer, Refreshing, Easy
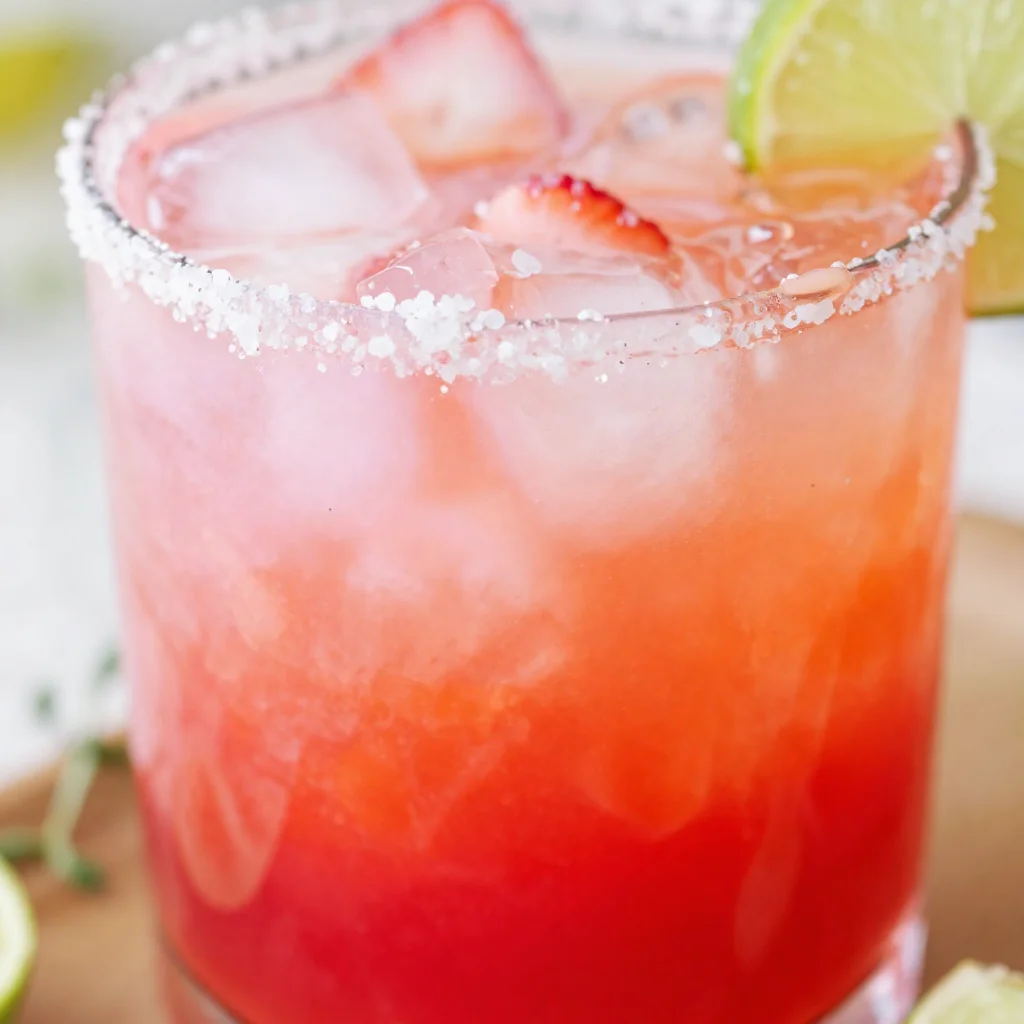
Ingredient Strawberry Lime Mocktail Margarita for Summer
Welcome to the Festivities: Strawberry Lime Mocktail Margarita
Hey there, fellow foodies! I’m so glad you’ve joined me today for a refreshing adventure into one of the most delightful mocktails you can whip up in the comfort of your own kitchen – the Strawberry Lime Mocktail Margarita. Picture this: it’s a sunny afternoon, you’re lounging in your backyard or on your balcony, and a drink that’s bursting with vibrant flavors and colors is in hand. Not only is it fresh and invigorating, but this mocktail also carries those nostalgic vibes that bring laughter and smiles.
I still remember the first time I had a mocktail at a friend’s backyard barbecue—a classic summer party with laughter drifting through the air. It was a simple blend of fruit juices, but I was blown away by how such a straightforward concoction could be so refreshing and satisfying. From that day on, I made it my mission to create delightful non-alcoholic drinks that everyone could enjoy, regardless of whether they were raising a glass full of spirits or something a little lighter.
Today, I’m excited to share my twist on that childhood memory: a Strawberry Lime Mocktail Margarita that’s perfect for adults and kids alike. It’s simple, fun, and oh-so-delicious! So grab some strawberries, a juicer, and let’s dive right into this fantastic recipe.
A Slice of Nostalgia
Every great recipe comes with a memory. For me, the inspiration for this Strawberry Lime Mocktail Margarita came from hot summer afternoons spent with my grandparents. They had the most beautiful garden filled with fruits and vegetables, along with a patio full of friends and laughter.
One afternoon, my grandma decided we could no longer indulge in her usual iced tea and decided to surprise us with homemade mocktails. She blended fresh strawberries from the garden, mixed in some lime juice, and added sparkling water to give it that special fizz. Watching the vibrant red drink sway in the sunlight was mesmerizing, and you could see the excitement on everyone’s faces as they took their first sip. It felt like summer encapsulated in a glass.
Every time I prepare this drink, I’m taken back to those carefree moments. I can hear my grandma’s laughter as we enjoyed our drinks under the warm sun, sharing stories, and making memories. It reminds me that food and drinks do more than fill our bellies; they connect us, bringing us back to cherished times with those we love. So let’s create our own beautiful memories with this Strawberry Lime Mocktail Margarita!
Ingredients
Here’s what you’ll need to create this refreshing Strawberry Lime Mocktail Margarita:
-
3-4 medium fresh strawberries: The star of our show! Strawberries bring a natural sweetness and vibrant color. If they’re out of season, you can substitute with frozen strawberries; just remember to let them thaw first.
-
0.75 ounces lime juice: Fresh lime juice is essential for that zesty kick. If you don’t have fresh limes, bottled juice will work, although I always recommend fresh for the best flavor.
-
1 tablespoon honey (or agave syrup): While honey adds a delightful natural sweetness, agave syrup is a fantastic vegan alternative. You can also use maple syrup or simple syrup based on your preference.
-
2 ounces orange juice: This adds another layer of sweetness and a touch of citrusy goodness. Feel free to replace it with other fruit juices, like pineapple, for a tropical twist.
-
Club soda, sparkling water, or ginger beer (to taste): This is what gives our mocktail that bubbly, celebratory feel. Ginger beer adds a kick, while club soda is super refreshing. Choose what speaks to you.
-
Flaky salt (for rim): To elevate the drink and enhance the flavor, lightly rimming your glass with flaky salt is a must! If you’re looking for a sweeter option, you could use sugar instead.
Let’s get ready to mix and create some magic!
Step-by-Step Instructions
Alright, let’s dive into the fun part—making our Strawberry Lime Mocktail Margarita!
-
Prep your strawberries: Begin by washing your strawberries thoroughly under cold water. Remove the green tops and slice them into halves. This makes it easier for them to blend and release all their yummy juices.
-
Blend the strawberries: Toss your sliced strawberries into a blender. If you like a pulpy texture, you can blend them less, but I recommend blending them until smooth for that silky drink experience. Add your lime juice and blend again to combine. If you really want to amp up the strawberry flavor, adjust the ratio to your taste!
-
Sweeten the mix: Pour in the honey or agave syrup and blend again for a few seconds. Here’s a pro tip: taste your mixture! If it needs more sweetness or tang, consider adding a little more honey or lime juice.
-
Combine with orange juice: In a mixing pitcher, combine your strawberry-lime blend with the orange juice. Stir well so that flavor complements every sip!
-
Prepare your glasses: Take the glasses you’ll be using, and rub a lime wedge around the rim. Dip each glass into flaky salt (or sugar if you prefer). This simple step adds a delightful contrast to the sweetness of the mocktail.
-
Pour in the magic: Fill your salt-rimmed glasses halfway with the strawberry-lime-orange mixture. Top off each glass with the club soda, sparkling water, or ginger beer. Don’t hesitate to experiment with the fizz level—more bubbles can make it feel even more festive!
-
Garnish and serve: For that extra pop, you can slice a fresh strawberry or add a lime wedge as a garnish. Serve right away—you want to enjoy those bubbles while they’re dancing!
Serving Suggestions
To elevate your serving game, consider these delightful touches for your Strawberry Lime Mocktail Margarita:
-
Chill your glasses: Before serving, pop your glasses in the freezer for a few minutes to keep your drink refreshing for longer. Trust me, it makes a difference!
-
Add fresh mint: Throw in a few fresh mint leaves for a beautiful aesthetic and a fragrant addition that complements the strawberries and lime beautifully.
-
Perfect for gatherings: If you’re hosting a barbecue or a summer party, consider making a large batch and serving it in a punch bowl with extra fruit slices for a stunning centerpiece.
-
Stir up the fun: Provide cute cocktail stirrers or even colorful straws so your guests can mix their drink to perfection.
Recipe Variations
The beauty of a Strawberry Lime Mocktail Margarita is its versatility! Here are a few creative twists you can try:
-
Berry Blast: Add other berries like blueberries or raspberries for a mixed-berry wonder that’s bursting with antioxidants and flavors.
-
Tropical Twist: Substitute half of the orange juice with pineapple juice for a sweeter, tropical flair that will transport your taste buds to a beachside paradise.
-
Spicy Kick: If you’re a fan of spicy flavors, muddle a slice of jalapeño with the strawberries before blending. It’ll add a fiery twist that pairs surprisingly well with the sweetness!
-
Coconut Cream: For a creamier texture, blend in a splash of coconut cream. It’ll create a luscious mocktail perfect for tropical-themed parties.
-
Sugar-Free Option: Use a sugar substitute like stevia to keep it low-calorie and fit for those watching their sugar intake.
Chef’s Notes
As a passionate foodie, I always find joy in expanding recipes through experimentation! When I first created this Strawberry Lime Mocktail Margarita, it was a simple blend while hanging out with friends. Over time, I discovered the magic of rimming the glasses with salt, which adds an unexpected contrast.
Funny story: At a recent party, someone accidentally grabbed the salt instead of the sugar, and believe it or not, people ended up loving the unexpected blend of salty and sweet! Lesson learned: always be adventurous in the kitchen—but perhaps keep the salt and sugar separate for more control!
FAQs and Troubleshooting
Here are a few common questions that crop up when making a mocktail, along with some troubleshooting tips:
-
Q: My drink is too sweet, what can I do?
- A: If your mocktail feels sweeter than desired, balance it out with a splash more lime juice or club soda to cut through the sweetness.
-
Q: How do I make this mocktail in bulk?
- A: Simply multiply the ingredient amounts according to how many servings you need! Mix everything together, but remember to add the soda right before serving to keep it bubbly.
-
Q: What can I do if I don’t have any fresh strawberries?
- A: Frozen strawberries work wonderfully! Just be sure to let them thaw a bit before blending. You can also experiment with other fruit, such as mango or peaches!
-
Q: Can I make this a cocktail?
- A: Absolutely! Just add a splash of vodka, tequila, or rum to that beautiful mix. It’s likely to become your new favorite cocktail variation!
Nutritional Info
Here’s a quick look at the nutritional value (per serving) of your freshly made Strawberry Lime Mocktail Margarita:
- Calories: Approximately 80-100 calories (depending on sweetener)
- Carbohydrates: About 22g (mostly from the fruit)
- Sugars: Around 12-16g (natural sugars from the fruit and sweetener)
- Vitamin C: A great source of vitamin C courtesy of the strawberries and lime.
This mocktail is low-calorie and nutrient-rich, making it a delightful treat that you can sip guilt-free!
Final Thoughts
And there you have it! Your Strawberry Lime Mocktail Margarita is ready to be enjoyed. Whether you’re prepping for a sunny day at the beach, hosting a backyard bash, or simply seeking a refreshing drink to enjoy on your own, this recipe is sure to impress.
Remember, cooking is all about having fun and adding your personal touch—so don’t be afraid to make this drink your own! Share it with family and friends, and relish in those cherished moments that come with great food and laughter.
Until next time, keep exploring the culinary world, and remember—life is too short to enjoy anything less than delicious! Cheers to flavorful experiences and the joy we find in the kitchen together!
Print
Strawberry Lime Mocktail Margarita
- Total Time: 10 minutes
- Yield: 2 servings 1x
- Diet: Vegan
Description
A refreshing and vibrant Strawberry Lime Mocktail Margarita, perfect for all occasions, filled with sweet strawberries and zesty lime.
Ingredients
- 3–4 medium fresh strawberries
- 0.75 ounces lime juice
- 1 tablespoon honey (or agave syrup)
- 2 ounces orange juice
- Club soda, sparkling water, or ginger beer (to taste)
- Flaky salt (for rim)
Instructions
- Prep your strawberries: Wash them thoroughly, remove the green tops, and slice them into halves.
- Blend the strawberries: Toss them into a blender and blend until smooth. Add lime juice and blend again.
- Sweeten the mix: Pour in honey or agave syrup and blend again. Taste and adjust sweetness if needed.
- Combine with orange juice: In a mixing pitcher, combine your strawberry-lime blend with the orange juice and stir well.
- Prepare your glasses: Rub a lime wedge around the rim of each glass and dip into flaky salt.
- Pour in the magic: Fill each glass halfway with the strawberry-lime-orange mixture and top off with club soda, sparkling water, or ginger beer.
- Garnish and serve: Add a fresh strawberry or lime wedge as a garnish and serve immediately.
Notes
Chill your glasses before serving for a refreshing experience. Consider adding fresh mint leaves for added flavor.
- Prep Time: 10 minutes
- Cook Time: 0 minutes
- Category: Beverage
- Method: Blending
- Cuisine: American
Nutrition
- Serving Size: 1 serving
- Calories: 90
- Sugar: 14g
- Sodium: 50mg
- Fat: 0g
- Saturated Fat: 0g
- Unsaturated Fat: 0g
- Trans Fat: 0g
- Carbohydrates: 22g
- Fiber: 2g
- Protein: 1g
- Cholesterol: 0mg
Keywords: mocktail, strawberry, lime, festive drink, non-alcoholic beverage
Minute Lemon Ginger Mocktail Spritz (Summer Edition)
Refreshing Lemon Ginger Mocktail Spritz: A Taste of Zest and Cheer
Hey there, my fellow food enthusiasts! Today, I am super excited to share with you one of my all-time favorite refreshing beverages— the Lemon Ginger Mocktail Spritz! Perfect for those sunny afternoons or cozy evenings, this spritz is not just delicious; it’s like sunshine in a glass! It’s the ideal drink to whip up when hosting friends, or simply when you want to treat yourself to something special without the buzz of alcohol. So grab your shaker, and let’s get mixing!
Kick Off with a Bubble of Joy
Now, let me take you back to the first time I tried a ginger drink. It was a few summers ago, during a backyard barbecue that my family hosted. The sun was shining, and the laughter of friends and family filled the air. My aunt, the queen of summer treats, served up her famous ginger lemonade. It was a hit— zesty, spicy, and refreshing all at once! I couldn’t stop sipping on it. There’s something magical about ginger that just complements the zing of lemon, don’t you think?
That day ignited my passion for experimenting with flavors. I started playing around with various ingredients, swapping out sodas for healthier alternatives, and before I knew it, I had concocted my own version: the Lemon Ginger Mocktail Spritz. It captures those summer vibes but also feels uplifting no matter the season. Plus, I love that I can incorporate honey for natural sweetness, making it not just refreshing but also a bit wholesome.
So, why am I so keen on this drink? Because it’s one of those rare recipes that’s easy to make, yet stunning enough to impress. So whether it’s a casual gathering, a fancy brunch, or just winding down after a busy day, this mocktail has got your back!
Ingredients You’ll Need
Here’s a breakdown of the ingredients to make this mocktail sparkle:
-
1/2 oz honey syrup: Honey adds a delightful sweetness and brings a depth of flavor. You can easily make honey syrup by mixing equal parts honey and hot water until blended. If you’re looking for a vegan alternative, agave syrup is a fantastic option!
-
3/4 oz ginger juice: The star of the show! Ginger juice packs a spicy punch that pairs beautifully with the tang of lemon. You can make your own by grating fresh ginger and squeezing it through a strainer, or check for bottled ginger juice in your local store.
-
1 oz fresh lemon juice: Freshly squeezed lemon juice is key to a bright, zesty flavor. You can substitute lime juice for a fun twist, but be careful—the flavor profile will change a bit.
-
1-2 oz sparkling water: This is where the fizz comes in! The sparkling water lightens up the drink, adding that refreshing bubble. Feel free to swap regular sparkling water with flavored varieties for an extra layer of fun.
-
1/4 cup filtered water: This is mainly for making the ginger juice if you’re opting to prepare it from scratch. If you’re using bottled ginger juice, you can skip this if you like.
Step-by-Step Instructions
Ready to whip up your Lemon Ginger Mocktail Spritz? Let’s dive into the step-by-step process!
-
Prepare your ginger juice: If you’re using fresh ginger, start by washing a small knob of it under cold water. Peel it with a spoon (yes, a spoon—it’s less messy!). Grate the ginger into a bowl, then use a fine mesh strainer or a clean cloth to squeeze out the juice. You need about 3/4 oz. It’s a potent little powerhouse, so don’t overdo it if you’re sensitive to spice!
-
Mix your honey syrup: If you haven’t made your honey syrup yet, mix equal parts honey and hot water in a small bowl or jar until combined. If you happen to have a bit of leftover syrup, it’s a delicious addition to tea or drizzled over fruits!
-
Combine liquids: Grab a cocktail shaker or a mason jar (we’re keeping it casual here)! Add the freshly squeezed lemon juice, ginger juice, and honey syrup.
-
Shake it up: Add ice to your shaker, then cover and shake it over ice for about 30 seconds until well chilled. This step is important—it blends all the flavors magically! Just imagine yourself shaking and mixing with flair; it’s super fun!
-
Strain and pour: Remove the ice from your shaker and strain the mixture into a glass filled with ice (if you like it chilled).
-
Top it off: Add sparkling water to the glass and stir gently. You want that fizz to stay as you mix it!
-
Garnish it right: Finish off your spritz with a lemon wedge and a twist of fresh ginger for extra flair. You can even toss in some mint leaves if you’re feeling extra fancy.
Voilà! You have yourself a gorgeous Lemon Ginger Mocktail Spritz ready to enjoy!
Serving Suggestions
Now that you’ve got this beautiful drink made, let’s talk about how to serve it up! First, consider using a glass that’s as vibrant as your drink—think clear mason jars or highball glasses to showcase those lovely layers. You might want to chill your glasses in the fridge before serving for that ultra-cool look!
For a party, set up a mocktail bar and let guests get involved. Have a variety of garnishes like fresh herbs, lemon slices, or even assorted berries available for customization. You might even inspire someone to mix their own concoctions! Remember, a spritz is about sharing enjoyment—so don’t forget to raise a glass and toast to good times!
Recipe Variations
If you’re feeling adventurous or want to mix things up, I’ve got a few fun variations to consider:
-
Minty Fresh Mocktail: Add a handful of fresh mint leaves to the shaker. It brings a cooling element that contrasts beautifully with the spice of the ginger.
-
Citrus Burst: Swap lemon juice for lime or add some orange juice. This will create a lovely citrus medley that’s equally refreshing.
-
Chili Spice: If you want to turn up the heat, consider adding a pinched bit of chili powder to the mix. Just a tiny touch can create a tantalizing kick!
-
Berry-Infused: Mash up some fresh berries—like strawberries or raspberries—before adding them to your drink. The sweet and tart flavors will add a delightful twist.
-
Herbal Infusion: Experiment with other herbs like basil or thyme for a sophisticated touch. Just muddle them gently before adding the liquids.
Chef’s Notes
As with any recipe, feel free to make it your own! This mocktail has undergone its fair share of transformations since I first created it. I initially didn’t think honey would pair as well with ginger, but boy was I wrong—it adds that comforting sweetness that rounds everything out beautifully.
Funny kitchen stories seem to occur every time I whip up this drink for friends—they’re always amazed by the ginger juice, commenting on how it’s like a little flavor bomb! Remember, the secret ingredient so often, is just a sprinkle of love (and a good dose of laughter).
FAQs and Troubleshooting
Let’s tackle some common questions you might have as you get your mocktail ready:
-
Can I use bottled lemon juice? Sure! While fresh juice is always best for flavor, bottled lemon juice is a convenient option—just keep in mind that it might not have the same brightness.
-
What if I can’t find ginger juice? No problem! You can use freshly grated ginger, but keep in mind you’ll need to strain it to avoid any bits.
-
Is this drink too spicy? If you’re nervous about the ginger’s spiciness, start with less ginger juice and gradually add more until you find the balance you love!
-
Can I make this mocktail in bulk for a party? Absolutely! Just scale up the ingredients and serve in a big pitcher. You can add the sparkling water last, so it stays bubbly and fresh until serving time.
Nutritional Info
This Lemon Ginger Mocktail Spritz is not only a treat for the taste buds, but it’s also pretty guilt-free! Here’s a quick nutritional overview for one serving:
- Calories: Approximately 70-80 calories
- Carbohydrates: 18-20g (mostly from honey and fruit)
- Sugar: About 15g (depending on how much honey or syrup you use)
- Vitamin C: High, thanks to the lemon, boosting your immune system and brightening your day!
Final Thoughts
I hope you find this Lemon Ginger Mocktail Spritz as uplifting as I do! It’s one of those recipes that brings a slice of joy to your day, while also making you feel good about what you’re sipping. Whether you’re kicking back on a warm afternoon or entertaining friends, this mocktail serves as a reminder to embrace the flavors of life and enjoy those little moments.
Next time you’re pondering what refreshing drink to make, remember this spritz—it’s simple, delightful, and honestly the perfect way to celebrate everyday occasions. Cheers to you, my fellow foodie friend, and happy mixing!
Print
Refreshing Lemon Ginger Mocktail Spritz
- Total Time: 10 minutes
- Yield: 1 serving 1x
- Diet: Vegan
Description
A delightful non-alcoholic drink combining fresh lemon juice, spicy ginger, and honey syrup for a refreshing twist.
Ingredients
- 1/2 oz honey syrup
- 3/4 oz ginger juice
- 1 oz fresh lemon juice
- 1–2 oz sparkling water
- 1/4 cup filtered water
Instructions
- Prepare your ginger juice: Wash and peel fresh ginger, grate it, then strain to extract juice.
- Mix your honey syrup: Combine equal parts honey and hot water in a bowl until blended.
- Combine liquids: In a shaker, add lemon juice, ginger juice, and honey syrup.
- Shake it up: Add ice, cover, and shake for about 30 seconds until well chilled.
- Strain and pour: Remove ice and strain into a glass filled with ice.
- Top it off: Add sparkling water and stir gently.
- Garnish it right: Finish with a lemon wedge and twist of fresh ginger.
Notes
You can customize garnishes with fresh herbs or fruits. Consider using a vibrant glass to showcase the drink.
- Prep Time: 10 minutes
- Cook Time: 0 minutes
- Category: Beverage
- Method: Mixing
- Cuisine: American
Nutrition
- Serving Size: 1 serving
- Calories: 75
- Sugar: 15g
- Sodium: 10mg
- Fat: 0g
- Saturated Fat: 0g
- Unsaturated Fat: 0g
- Trans Fat: 0g
- Carbohydrates: 20g
- Fiber: 0g
- Protein: 0g
- Cholesterol: 0mg
Keywords: mocktail, lemon, ginger, refreshing drink, non-alcoholic
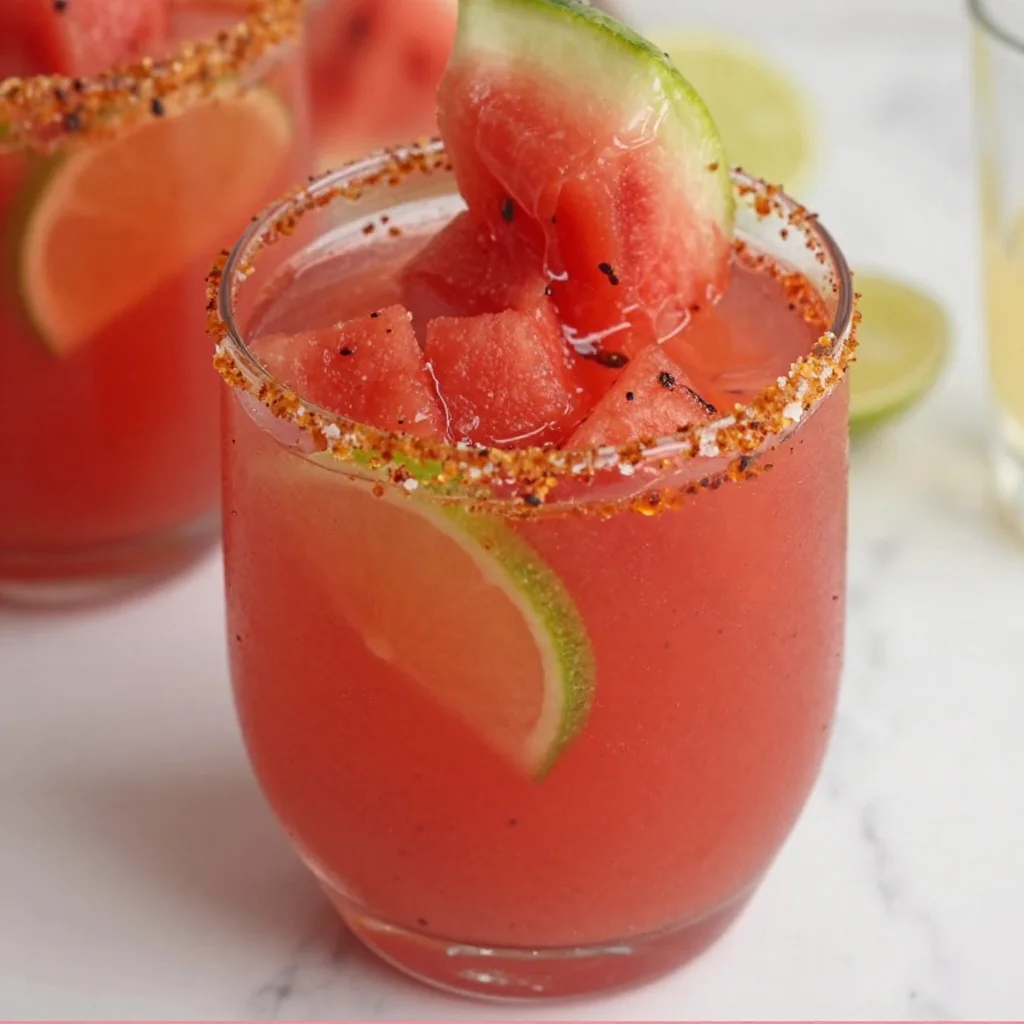
Ingredient Seasonal Watermelon Margarita Mocktail
Refreshing Watermelon Margarita Mocktail: A Taste of Summer
Hey there, my fellow foodies! Today we’re going to dive into something that’s not just refreshing but also reminds me of summer days spent with good friends and laughter—you guessed it, the Watermelon Margarita Mocktail! This delightful drink is perfect for those of us who want to enjoy a flavorful beverage without the alcohol. Trust me, once you take a sip of this vibrant concoction, it’s like a mini-vacation in a glass!
Let’s set the scene. Picture this: a warm summer afternoon, the sun is shining down, kids are playing in the yard, and the sound of laughter fills the air. I remember my family hosting weekend cookouts, the kind where the aroma of BBQ wafting through the air dances in perfect harmony with the delightful sound of clinking glasses. My aunt would always make a huge pitcher of watermelon juice to keep everyone cool, and I was smitten by it. As I got older, I discovered how to transform that beloved summer staple into something more—the watermelon margarita!
I quickly realized how versatile watermelon can be—it’s sweet, juicy, and packed with flavor. My twist on the classic margarita takes all those fond memories and wraps them in a big, delicious hug. This mocktail is as vibrant as summer itself and bursting with the sweet essence of juicy watermelon, tangy lime, and just a hint of sparkle! Now, grab your favorite mug (the one that feels like home), and let’s make this refreshing drink together!
A Memory That Sparks Joy
One sunny afternoon, I was tasked with bringing a refreshing drink to a neighborhood barbecue. With watermelon being in season, my mind instantly went back to those family cookouts. Armed with ripe, juicy watermelon, I decided to create a mocktail that would not only please the palette but also evoke nostalgia. It was my first attempt at a mocktail, and I was nervous but excited!
As I blended the watermelon, the vibrant pink liquid whirred to life, creating a beautiful splash against the wall of my blender. The first sip was a revelation! The watermelon’s sweetness paired with zesty lime was like a choir of flavors dancing on my taste buds. I topped it off with sparkling water for an exciting fizz and garnished it with fresh lime slices. Let me tell you, the excitement in the room as people tried my creation made all the effort worthwhile. Hands down, that day marked the birth of my beloved Watermelon Margarita Mocktail—an instant summer classic in my household!
Ingredients
Here’s what you’ll need to craft your very own Watermelon Margarita Mocktail:
-
2 cups watermelon, cubed
Sweet, juicy watermelon is the star of the show! Opt for seedless varieties for easier blending. If watermelon isn’t in season, you can substitute with a mix of strawberries and cantaloupe for a delightful twist. -
1/4 cup lime juice
Freshly squeezed is best! It adds a tart kick that balances perfectly with the sweetness of the watermelon. If you’re short on limes, lemon juice can work in a pinch—but just be mindful that it’ll change the flavor profile slightly. -
1 tablespoon agave syrup or honey
This natural sweetener amps up the sweetness of your drink. If you’re vegan, stick with agave; for a sugar-free option, consider using stevia or monk fruit sweetener. -
1/2 cup sparkling water
The fizz is what makes this drink so special! Feel free to use flavored sparkling water like lime or raspberry for a fun twist. -
Lime slices, for garnish
Freshly cut lime slices add a pop of color and a visual appeal that’s hard to ignore. Plus, they give an extra citrusy aroma as you sip! -
Salt, for rimming the glass (optional)
Rimming your glass with salt elevates the experience! It enhances the tartness of the lime and creates a flavorful contrast with the sweet watermelon.
Step-by-Step Instructions
Alright, let’s get down to business! Follow these simple steps, and you’ll be sipping on your refreshing Watermelon Margarita Mocktail in no time.
Step 1: Prepare Your Watermelon
First things first, grab a fresh, ripe watermelon. Cut it open, and scoop out roughly 2 cups of juicy goodness. Make sure to remove any seeds—trust me, no one wants a crunchy surprise! Cube the watermelon and place it into a blender. Pro tip: if you’re short on time, pre-cut watermelon from your local grocery store works too.
Step 2: Blend Away
Pop a lid on your blender and blend the watermelon until it’s nice and smooth. You’re looking for a waterfall of watermelon juice that looks too good to resist! Taste it—this is the moment you can decide if you need more sweetness. If you do, add a little agave syrup or honey and blend once more.
Step 3: Add Lime Juice
Now, it’s time for the lime juice! Squeeze fresh limes until you reach a quarter cup, and carefully pour it into the blender. This is your secret weapon! Blend briefly to combine and make sure those flavors harmonize perfectly. If you like it tart, add a splash more lime juice—you’ve got the power!
Step 4: Get Fizzy
Pour in the sparkling water and give it a quick blend—just a pulse or two. You want bubbles, but you don’t want to lose the fizz in your mocktail. Pro tip: use chilled sparkling water for an extra refreshing vibe!
Step 5: Time to Serve
Now for the fun part: serving! If you’re opting to rim your glasses with salt, take a lime wedge and run it around the edge of the glass to help the salt adhere. Dip the rim into a plate filled with salt and watch as it sparkles! Pour your watermelon mixture into the glasses, and garnish with a slice of lime on the rim.
Step 6: Enjoy
Grab a straw (or, you know, one of those fancy drink umbrellas if you want to go all out) and enjoy your refreshing creation. Watch as your friends indulge in every sip, and bask in the delight of sharing your culinary triumph!
Serving Suggestions
Serving your Watermelon Margarita Mocktail is all about presentation! Use tall glasses that showcase that stunning pink color, and embellish with lime slices or even a sprig of mint for an aromatic touch. If you want to transform this mocktail into a soirée centerpiece, consider serving it in a large pitcher with ice and colorful straws—ready to pour into individual glasses as guests arrive. You’d be surprised how simple tweaks can wow your guests!
Additionally, consider pairing your mocktail with light appetizers—think fresh fruit skewers, chips and guacamole, or a vibrant summer salad. The refreshing nature of this drink complements a wide array of dishes and elevates any summertime gathering to the next level!
Recipe Variations
This recipe is super versatile, and you can get creative with your Watermelon Margarita Mocktail in so many different ways! Here are a few variations to keep things exciting:
-
Berry Bliss: Add a handful of fresh strawberries or raspberries to your watermelon mix before blending for a refreshing berry twist!
-
Minty Fresh: Stir in fresh mint leaves or muddle some at the bottom of the glass for a fragrant kick. It’ll bring a lovely herbal aroma to each sip!
-
Coconut Cream: For a tropical vibe, blend in a splash of coconut cream. This adds a creamy texture and balances the tartness beautifully.
-
Spicy Kick: Want to add a little heat? Muddle a few jalapeño slices at the bottom of your glass before adding the watermelon mocktail. It’s an exciting flavor surprise!
-
Infused Citrus: Try using other citrus juices beyond lime, like grapefruit or orange, for a fun flavor ride. Each brings its own character to the mix!
Chef’s Notes
As a chef who loves experimenting, I can tell you that this mocktail has taken on a life of its own since I first made it! I’ve added new ingredients, swapped things around, and tried different serving methods, each time discovering new combinations of flavors that surprise and delight. It’s the perfect reminder that cooking, much like life, is all about adapting and exploring!
I also have to share a fun kitchen story—one time I accidentally grabbed the hot sauce instead of agave syrup while making this drink. Instead of panic, I decided to embrace the surprise and turned it into a new recipe—I called it the “Spicy Watermelon Fizz.” People actually loved it! So if life gives you silly mistakes in the kitchen, roll with it and make something extraordinary out of it!
FAQs and Troubleshooting
Q1: Can I make this ahead of time?
Absolutely! You can blend the watermelon and lime juice mix ahead of time and store it in the fridge for up to 24 hours. Just add the sparkling water right before serving to keep that refreshing fizz!
Q2: How do I avoid a watery mocktail?
To prevent a watery mocktail, avoid blending the watermelon for too long. Also, straining the juice through a fine mesh if you prefer a smoother texture can help maintain flavor without excess water.
Q3: What’s the best way to sweeten my drink?
Taste as you go! If you prefer a sweeter mocktail, go for the agave syrup; if you want it less sweet, start with a small amount and adjust accordingly.
Q4: Can I use frozen watermelon?
For sure! Frozen watermelon is a great option, especially for making a slushy texture. Just give it some time to thaw so you can blend it easily.
Nutritional Info
Let’s talk nutrition! This Watermelon Margarita Mocktail isn’t just delicious; it comes packed with hydrating goodness. Watermelon is primarily water, making this drink super hydrating—ideal for those hot summer days. Here’s a rough breakdown of the nutritional elements per serving (assuming the recipe makes two servings):
- Calories: Approximately 60
- Carbohydrates: 15g
- Sugars: 12g (natural sugars from watermelon)
- Fiber: 0.5g
- Vitamin C: 20% of the Daily Value (DV)
- Vitamin A: 5% of the DV
The best part? You’re getting all those vitamins without the added calories or sugar from sodas and energy drinks. It’s a delicious way to hydrate!
Final Thoughts
So there you have it—a delicious, refreshing Watermelon Margarita Mocktail that’s easy to whip up and perfect for any summer gathering! This mocktail doesn’t just convey flavors; it carries memories, emotions, and that warm feeling of togetherness we all cherish.
Whether you’re hosting a barbecue or just hanging out with loved ones, this drink is sure to elevate the moment. And who knows? You might inspire someone else to create their own unique twist along the way. So, grab those ingredients, turn up your favorite tunes, and let’s make something magical in the kitchen together! Cheers to good food and great company! 🍉🍹
Print
Refreshing Watermelon Margarita Mocktail
- Total Time: 10 minutes
- Yield: 2 servings 1x
- Diet: Vegan
Description
A delightful non-alcoholic watermelon margarita mocktail perfect for summer gatherings.
Ingredients
- 2 cups watermelon, cubed
- 1/4 cup lime juice
- 1 tablespoon agave syrup or honey
- 1/2 cup sparkling water
- Lime slices, for garnish
- Salt, for rimming the glass (optional)
Instructions
- Prepare your watermelon: Cut open a fresh watermelon, scoop out 2 cups, cube it, and place in a blender.
- Blend until smooth, adjusting sweetness with agave syrup or honey.
- Add lime juice to the blender and blend briefly to combine.
- Get fizzy by pouring in the sparkling water and pulse blend to keep bubbles.
- Time to serve: Rim glasses with salt and pour in the mixture, garnishing with lime slices.
- Enjoy your refreshing creation with friends!
Notes
This mocktail can be made ahead of time; just add sparkling water before serving.
- Prep Time: 10 minutes
- Cook Time: 0 minutes
- Category: Beverage
- Method: Blending
- Cuisine: American
Nutrition
- Serving Size: 1 serving
- Calories: 60
- Sugar: 12g
- Sodium: 5mg
- Fat: 0g
- Saturated Fat: 0g
- Unsaturated Fat: 0g
- Trans Fat: 0g
- Carbohydrates: 15g
- Fiber: 0.5g
- Protein: 1g
- Cholesterol: 0mg
Keywords: mocktail, watermelon, summer drink, non-alcoholic beverage, refreshing drink
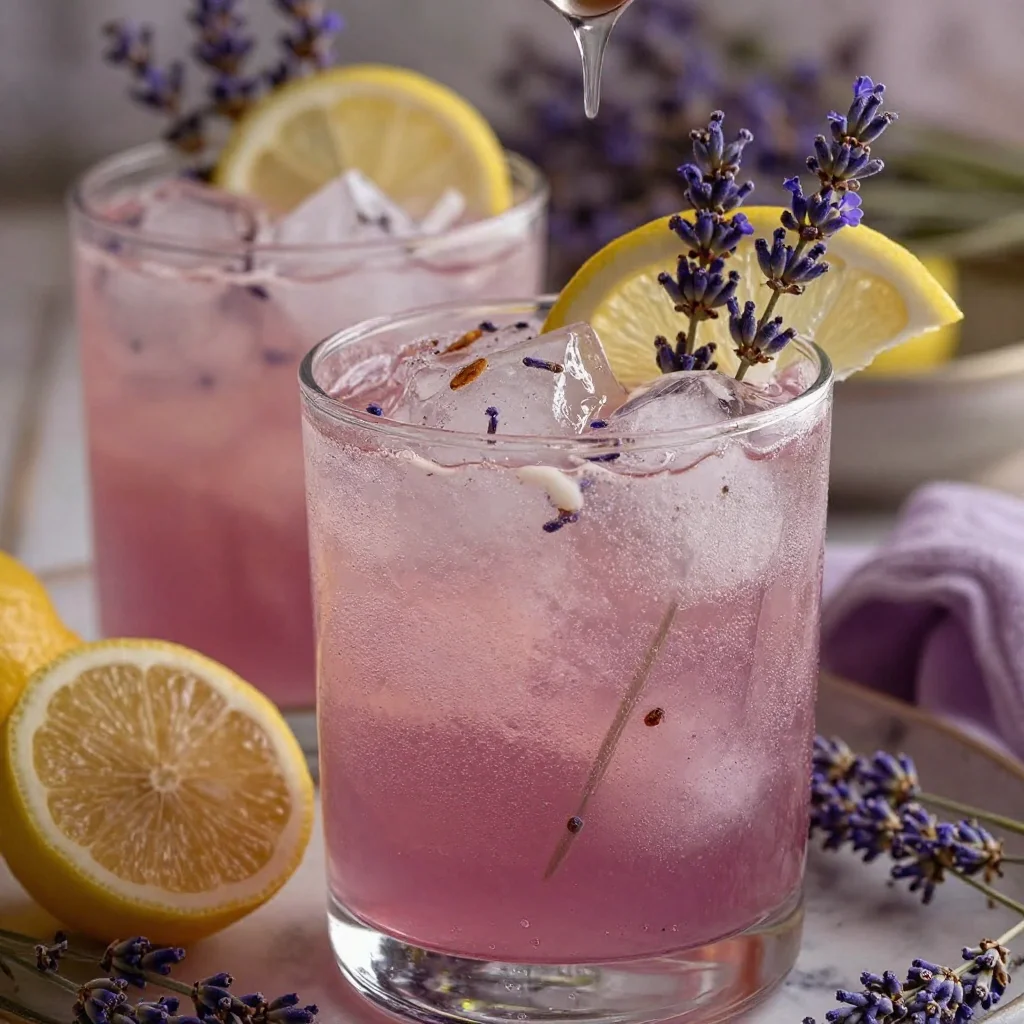
Minute Sparkling Lavender Lemonade Mocktail
Sparkling Lavender Lemonade Mocktail: A Refreshing Twist on a Classic
Hey there, fellow food lover! If you’re on the hunt for a drink that’s as refreshing as a sun-drenched afternoon and as delightful as a garden in full bloom, you’ve stumbled upon the right spot! Today, let’s whip up something special together—Sparkling Lavender Lemonade Mocktail. Sounds fancy, doesn’t it? But trust me, this recipe is straightforward and oh-so-satisfying.
Imagine taking a sip of lemonade that isn’t just a thirst quencher; it’s an experience tinged with floral elegance and refreshing bubbles. The combination of fresh lemon juice, homemade lavender simple syrup, and sparkling water creates a drink that’s perfect for any occasion—be it a summer soirée, a cozy family gathering, or just a sunny day in your backyard.
Now, why lavender lemonade, you may ask? Well, lavender has a subtle, aromatic flair that transforms a classic drink into something extraordinary. This mocktail celebrates the simplicity of summer while inviting a touch of the garden into your glass. Plus, it looks stunning! Picture this: frosty glasses adorned with vibrant lemon slices and dainty lavender sprigs—total Instagram gold, right?
So, grab your favorite pitcher, let’s gather some fresh ingredients, and dive into this delightful recipe. Your taste buds are in for a treat!
A Taste of Nostalgia
Every time I make Sparkling Lavender Lemonade, I’m transported back to my grandmother’s backyard. She had the lushest garden filled with all sorts of flowers, particularly purple lavender that danced in the breeze. On those warm summer days, she would gather the family for afternoon teas, complete with homemade lemonade and a sprinkle of lavender.
I still remember how the scent of that lavender mingled with the tangy sweetness of lemon as we sat outside, laughter echoing through the garden. It was more than just a drink; it was a celebration of warmth, family, and the simple joys of life. Inspired by those lovely afternoons, I created this mocktail to bring a taste of that nostalgia into every sip.
Now that we’ve shared a memory, let’s talk about the ingredients so you can bring your own piece of sunshine and delight into your kitchen!
Ingredients
-
1 cup fresh lemon juice: The star of our mocktail! Freshly squeezed lemon juice packs a zesty punch, balancing sweetness with tartness. If you’re in a pinch, bottled lemon juice can work, but nothing beats the bright flavor of fresh lemons.
-
1/2 cup lavender simple syrup: This is where the magic happens! To make lavender simple syrup, combine equal parts sugar and water, infused with dried lavender. Want to save time? You can find pre-made lavender syrup at specialty stores, but making your own is super easy!
-
4 cups sparkling water: This bubbly addition is what makes our drink feel festive! You can use plain sparkling water or flavored varieties (like lemon or grapefruit) for an extra layer of zest.
-
Ice cubes: Chill that lemonade, friends! The ice will keep your drink refreshingly cold. Want a fun twist? Freeze some edible flowers in the ice cubes for an enchanting visual.
-
Lemon slices for garnish: A splash of color always elevates a drink! Lemon slices not only look beautiful but also intensify the citrusy flavor.
-
Fresh lavender sprigs for garnish: For that extra touch of elegance, garnishing with lavender sprigs will transform your mocktail into a true showstopper.
Step-by-Step Instructions
-
Make the Lavender Simple Syrup:
- In a small saucepan over medium heat, combine equal parts sugar and water (1/2 cup each). Add about 2 tablespoons of dried lavender. Stir until the sugar dissolves completely, then bring it to a gentle simmer.
- Allow the mixture to simmer for about 5 minutes—this will help infuse the lavender flavor.
- Remove from heat and let it cool completely. Once cooled, strain out the lavender using a fine mesh strainer or cheesecloth. Voilà! You’ve got yourself homemade lavender simple syrup!
-
Juicing the Lemons:
- Now, it’s lemon time! Cut your lemons in half and juice them until you have 1 cup of beautiful, tart lemon juice. Make sure to remove any seeds! You can use a classic citrus juicer or your trusty handheld juicer to get every last drop of juice.
-
Mixing the Mocktail:
- In a large pitcher, combine the fresh lemon juice and lavender simple syrup. Stir well to blend the flavors beautifully.
- Slowly add in the sparkling water, giving it a gentle stir—you want to preserve those lovely bubbles!
-
Ice It Up:
- Fill your glasses with ice cubes. Pour the sparkling lavender lemonade over the ice, ensuring each glass gets a refreshing frosty layer.
-
Garnish and Serve:
- Time for the finishing touches! Garnish each glass with a slice of lemon and a sprig of fresh lavender. They should look as good as they taste. Serve immediately and enjoy the smiling faces as everyone takes their first sip!
And there you have it! You’re now the proud creator of Sparkling Lavender Lemonade Mocktail. Here’s a little tip: you can make the lavender simple syrup ahead of time and keep it in your refrigerator. It will last about a month, making it easy for you to whip up this delightful mocktail whenever the mood strikes.
Serving Suggestions
When it comes to serving your Sparkling Lavender Lemonade Mocktail, presentation is key! Here are a few tips to ensure you impress your guests:
-
Fancy Glassware: Use clear glasses to showcase the vibrant color of the lemonade. If you’re in the mood for a bit of flair, try using tall champagne flutes or mason jars for a rustic vibe.
-
Layer It Up: You could create a layered effect by pouring the lavender syrup at the bottom before adding the lemon juice and sparkling water. This way, as guests pour, they’ll see the colors mingling beautifully!
-
Pop of Color: Add thin slices of fresh cucumber or a few berries in addition to the lemon slices for a colorful garnish.
-
Serve with Snacks: Pair your mocktail with some light snacks like cucumber sandwiches, cheese platters, or even a refreshing fruit salad for a complete summer experience.
Recipe Variations
Now that you’ve made Sparkling Lavender Lemonade Mocktail, let’s shake things up a bit! Here are a few creative variations you can try:
-
Berry Lavender Lemonade: Muddle some fresh berries (like blueberries or raspberries) in the bottom of your glass before adding the ice and mocktail mixture for a fruity twist.
-
Herbal Infusion: Add a sprig of fresh mint or rosemary to complement the floral notes of the lavender. Simply muddle the herbs gently at the bottom of the glass before pouring your lemonade.
-
Spicy Lavender Lemonade: For something unique, throw in a pinch of cayenne pepper or sliced jalapeños to create a spicy version. The heat matches surprisingly well with the sweetness of the syrup!
-
Ginger Lavender Lemonade: Infuse ginger in your simple syrup by slicing some fresh ginger and letting it simmer with the sugar and water. This adds a warm, zesty kick to the drink.
-
Lavender Iced Tea Combo: Combine brewed iced tea with the lavender lemonade for a refreshing half-and-half twist. Earl Grey pairs beautifully with lavender, creating a sophisticated flavor.
Chef’s Notes
As with any recipe, feel free to play around with ratios and flavors to make this drink your own. My journey with this mocktail began on those balmy summer days, but it’s evolved over time. I’ve experimented with various ingredients and garnishes, and honestly, it’s hard to pick a favorite version!
One of my funniest kitchen stories involves a wild attempt to serve this drink at a friend’s baby shower. Let’s just say I may have gone a bit overboard with the lavender—who knew it would create such a fragrant whirl? The room filled with scents of perfume instead of lavishing lemonade, but everyone got a good laugh, and we enjoyed some tasty cocktails nonetheless! It’s moments like these that make cooking an adventure, and that’s what I love most.
FAQs and Troubleshooting
-
Can I use dried lavender instead of fresh?
Absolutely! Dried lavender works wonderfully in your simple syrup. Just remember that it’s more concentrated; use about half the amount listed. -
What if my lemonade is too sweet or too sour?
Don’t stress! If it’s too sweet, add a splash more lemon juice. If it’s too tart, just a touch more lavender syrup will balance it out perfectly. -
Is it possible to make this drink ahead of time?
Yes, you can mix the lavender syrup, lemon juice, and sparkling water and store the combination in your refrigerator for a few hours. Just add ice before serving for the freshest taste! -
Can I make this a cocktail?
You bet! Add a splash of gin or vodka for an exciting adult twist. Just be mindful of the ratios, as the spirit can change the drink’s balance!
Nutritional Info
This Sparkling Lavender Lemonade Mocktail is a guilt-free, refreshing treat! A standard serving (8 ounces) contains approximately:
- Calories: 75
- Total Fat: 0g
- Sodium: 5mg
- Total Carbohydrates: 19g
- Sugars: 16g
- Protein: 0g
Note that the nutritional values can vary depending on the specific brands of syrup and sparkling water used, so feel free to adjust according to your dietary preferences.
Final Thoughts
As we wrap up this delightful culinary journey, I hope you feel inspired to whip up your very own Sparkling Lavender Lemonade Mocktail. It’s a drink that’s not just refreshing but also rich with memories and flavors that dance on your palate.
Whether you’re sipping it on a sunny afternoon, serving it at a gathering, or simply enjoying a quiet moment with yourself, this mocktail captures the joy of summer in every drop. Remember, it’s all about the experience, the fun, and the happiness that comes with sharing delicious recipes and making new memories.
So, cheers to fresh lemonade, wonderful company, and the joy of cooking! Can’t wait to hear how you’ve made it your own! Happy sippin’, my friend!
Print
Sparkling Lavender Lemonade Mocktail
- Total Time: 15 minutes
- Yield: 4 servings 1x
- Diet: Vegan
Description
A refreshing and floral twist on classic lemonade, combining fresh lemon juice, homemade lavender simple syrup, and sparkling water for an elegant mocktail.
Ingredients
- 1 cup fresh lemon juice
- 1/2 cup lavender simple syrup
- 4 cups sparkling water
- Ice cubes
- Lemon slices for garnish
- Fresh lavender sprigs for garnish
Instructions
- Make the Lavender Simple Syrup: In a small saucepan, combine sugar and water. Add dried lavender, stir until dissolved, and simmer for 5 minutes. Cool and strain.
- Juicing the Lemons: Cut lemons in half and juice them to get 1 cup of juice, removing any seeds.
- Mixing the Mocktail: In a pitcher, combine lemon juice and lavender syrup, then slowly add sparkling water, stirring gently.
- Ice It Up: Fill glasses with ice cubes and pour the lavender lemonade over them.
- Garnish and Serve: Add lemon slices and lavender sprigs to each glass, then serve immediately.
Notes
Make the lavender simple syrup ahead of time to easily whip up this mocktail anytime.
- Prep Time: 10 minutes
- Cook Time: 5 minutes
- Category: Beverage
- Method: Mixing
- Cuisine: American
Nutrition
- Serving Size: 1 serving
- Calories: 75
- Sugar: 16g
- Sodium: 5mg
- Fat: 0g
- Saturated Fat: 0g
- Unsaturated Fat: 0g
- Trans Fat: 0g
- Carbohydrates: 19g
- Fiber: 0g
- Protein: 0g
- Cholesterol: 0mg
Keywords: mocktail, lemonade, lavender, summer drink, refreshing beverage
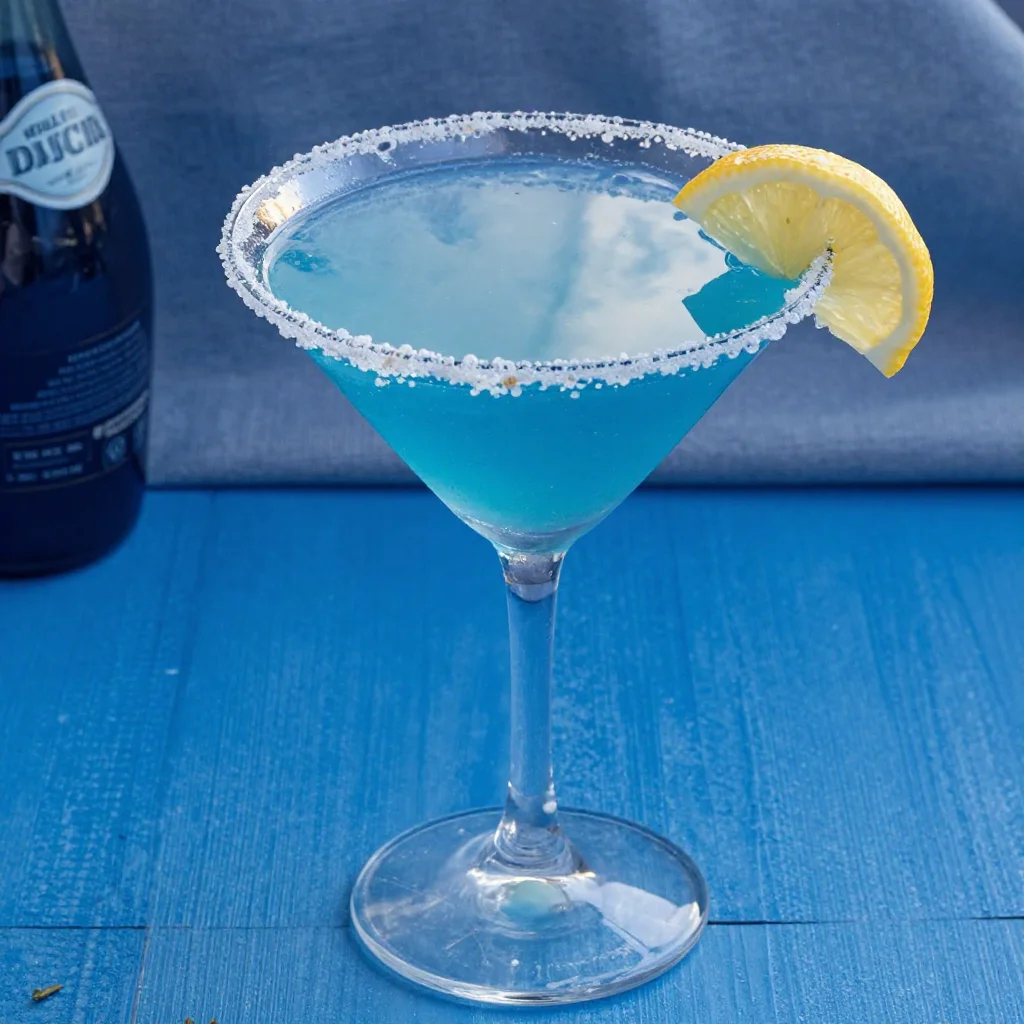
Min Glacier Fusion Daiquiri: A Frozen Summer Cocktail
Glacier Fusion Daiquiri: A Cool Twist on a Classic
Hey there, Feastical friends! Today, we’re diving into a refreshing cocktail that’s perfect for warm summer evenings, beach parties, or just about any occasion that calls for a little fun. Grab your favorite glass, and let’s mix up something special—introducing the Glacier Fusion Daiquiri! This vibrant and delicious drink combines the classic charm of a daiquiri with a twist of colorful flair that will make your taste buds sing.
A Splash of Background
Now, let’s be honest: who doesn’t love a good cocktail? My love for cocktails started in my college days when my friends and I would experiment in the kitchen, shaking up all sorts of concoctions. But what stood out the most was my first encounter with a classic daiquiri. It was at a little beach bar during a summer trip, and there was something magical about sipping that ice-cold drink under the sun, watching the waves crash against the shore.
That daiquiri was simple—just rum, lime juice, and sugar—but oh-so-refreshing! But as a self-proclaimed flavor explorer, I couldn’t leave well enough alone. I turned that classic into my own version, adding luscious apple juice and that eye-catching Blue Curaçao. The result? A cocktail that looks as stunning as it tastes and carries a story of camaraderie and adventure in every sip.
So, let’s get down to the delicious details about making your very own Glacier Fusion Daiquiri!
Ingredients
Here’s a list of what you’ll need to whip up this delightful drink, along with some handy tips to help you along the way:
-
35 ml (1 ¼ oz.) apple juice
A sweet, crisp flavor that pairs beautifully with the tartness of the lemon. For a twist, try using fresh-pressed apple juice or a no-sugar-added variety for a healthier option. -
20 ml (2/3 oz.) lemon juice
Freshly squeezed is best! The citrus adds a zesty kick, cutting through the sweetness. Substitute with lime juice if you’re feeling adventurous. -
45 ml (1 ½ oz.) white rum
The backbone of your daiquiri! A decent-quality white rum gives the cocktail a mellow warmth. In a pinch, you can swap it with vodka for a different vibe. -
15 ml (½ oz.) Blue Curaçao
This vibrant liqueur adds a gorgeous hue and a subtle orange flavor. If you’re in a tropical mood, feel free to swap it with an orange liqueur like triple sec or Contreau. -
30 ml (1 oz.) simple syrup
Super easy to make! Just mix equal parts water and sugar until dissolved. For a healthier option, consider using agave syrup or honey.
Step-by-Step Instructions
Now that we’ve gathered our colorful crew of ingredients, let’s jump into the fun process of making the Glacier Fusion Daiquiri. Follow these steps, and you’ll be well on your way to cocktail mastery:
-
Gather Your Tools
First things first, let’s locate our tools! You’ll need a cocktail shaker, a jigger (for measuring), and a strainer. If you don’t have a strainer, no worries! You can pour the mix directly from the shaker, but be careful with the ice. -
Add the Juicy Ingredients
Inside your cocktail shaker, combine the apple juice, lemon juice, and simple syrup. This combo is a match made in mixology heaven! Not only does it taste divine, but the vibrant colors will have you excited. -
Pour in the White Rum
Measure out your white rum and pour it into the shaker. This is where the magic starts! I love hearing a good ‘slosh’ as I add the rum—it’s music to a cocktail lover’s ears! -
Shake It Up!
Add ice to your shaker until it’s about two-thirds full. Secure the lid tight and shake with gusto for about 15-20 seconds. This isn’t the time to be gentle—shake like no one’s watching! You want to chill the drink thoroughly while mixing it well. -
Strain Into Your Glass
Take your strainer (or use the lid of your shaker if you’re going old school) and pour your delicious mix into a chilled glass. If you want to elevate the presentation, consider using a coupe or a fun tiki glass. -
Top it Off with Blue Curaçao
Now for the finishing touch: gently pour the Blue Curaçao over the top of your mix. It should beautifully cascade down, creating that stunning “glacier” effect. It’s all about that visual appeal, my friends! -
Garnish and Enjoy!
Consider garnishing with a lemon twist, or an apple slice for that extra touch of personality. Take a moment to appreciate your creation, and then take that first sip—you’ve earned it!
Serving Suggestions
When it comes to serving your Glacier Fusion Daiquiri, presentation is key! Here are my top recommendations:
- Margarita Glass: For a fun twist, serve in a margarita-shaped glass with a salted rim for an extra zing!
- Fancy Cocktail Garnish: Use an apple slice or a twist of lemon peel as a garnish for that restaurant-quality touch. A fresh sprig of mint can add a lovely aroma—perfect for impressing guests.
- Pairing: This cocktail pairs beautifully with light bites like shrimp tacos, coconut shrimp, or even a fresh salad topped with citrus dressing.
Recipe Variations
Feeling creative? Here are some fun twists to make this cocktail your own:
- Frozen Fusion Daiquiri: Blend all ingredients with ice for a slushy version. Perfect for those hot summer days!
- Berry Blast: Add some muddled strawberries or raspberries to the shaker for a fruity explosion. Just let them sit in the shaker for a minute before shaking away!
- Herbal Touch: Toss in a few fresh basil leaves or mint before shaking to add a fragrant twist.
- Spicy Kick: Add a dash of jalapeño or a few slices to your shaker. It adds a delightful heat that contrasts beautifully with the sweet!
- Tropical Vibes: Swap the apple juice for pineapple juice, and watch your drink transform into a tropical getaway.
Chef’s Notes
Making cocktails has been an adventure of both fun and mishaps! I remember a time I attempted to impress friends by making a layered drink. Let’s just say, you could barely see the layers, and needless to say, it didn’t win any visual awards. But it was still delicious! This Glacier Fusion Daiquiri evolved from the mere idea of a classic daiquiri into something full of life and vigor, reminding us that sometimes, embracing the bold can lead to beautiful flavors.
FAQs and Troubleshooting
1. Can I use bottled juices?
Absolutely! While fresh juice adds a beautiful flavor, bottled juices work just fine for convenience. Look for high-quality brands without added sugars for the best taste.
2. Why is my cocktail not blue?
If the Blue Curaçao isn’t creating that beautiful layered look, it could be because you poured it in too quickly. Try pouring it slowly over a spoon or gently on top of the cocktail for more of a glacier effect.
3. What if I don’t have a cocktail shaker?
No shaker? No problem! Use a large mason jar or any tightly-sealed container to shake your ingredients. Just make sure it seals well, or you might have a little mess on your hands!
4. Can I make a non-alcoholic version?
Definitely! Simply skip the rum and replace it with an equal amount of sparkling water or soda for a refreshing mocktail. Add some extra lemon juice to keep the zing!
Nutritional Info
Each serving of the Glacier Fusion Daiquiri roughly contains:
- Calories: 200-250, depending on juice and syrup used
- Sugar: 20g (can be reduced by using less simple syrup)
- Carbohydrates: 25g
- Fat: 0g
- Protein: 0g
Note that these numbers can vary based on the specific brands and variations you use. Always consider moderation and enjoy!
Final Thoughts
Who knew that making a cocktail could be so rewarding and fun? The Glacier Fusion Daiquiri combines the vibrancy of mixology with the love for comforting flavors, reminding us that kitchens are not just for cooking, but for creating memories. So whether you’re enjoying this on your porch or hosting friends for a cozy gathering, know that you’ve crafted something not only delightful to sip but also filled with warmth and love.
Now that you’re armed with all this information, it’s time to get mixing! Cheers to good times and even better friends! 🍹✨
Print
Glacier Fusion Daiquiri
- Total Time: 5 minutes
- Yield: 1 serving 1x
- Diet: Vegan
Description
A refreshing cocktail that combines classic daiquiri flavors with a colorful twist, perfect for summer gatherings.
Ingredients
- 35 ml (1 ¼ oz.) apple juice
- 20 ml (2/3 oz.) lemon juice
- 45 ml (1 ½ oz.) white rum
- 15 ml (½ oz.) Blue Curaçao
- 30 ml (1 oz.) simple syrup
Instructions
- Gather your tools, including a cocktail shaker, jigger, and strainer.
- Add apple juice, lemon juice, and simple syrup to the shaker.
- Pour in the white rum.
- Shake with ice for about 15-20 seconds.
- Strain into a chilled glass.
- Top with Blue Curaçao for the glacier effect.
- Garnish with a lemon twist or apple slice.
Notes
For a fun twist, serve in a margarita glass with a salted rim.
- Prep Time: 5 minutes
- Cook Time: 0 minutes
- Category: Cocktail
- Method: Shaking
- Cuisine: International
Nutrition
- Serving Size: 1 serving
- Calories: 225
- Sugar: 20g
- Sodium: 5mg
- Fat: 0g
- Saturated Fat: 0g
- Unsaturated Fat: 0g
- Trans Fat: 0g
- Carbohydrates: 25g
- Fiber: 0g
- Protein: 0g
- Cholesterol: 0mg
Keywords: cocktail, daiquiri, summer drinks, refreshing cocktails, Glacier Fusion