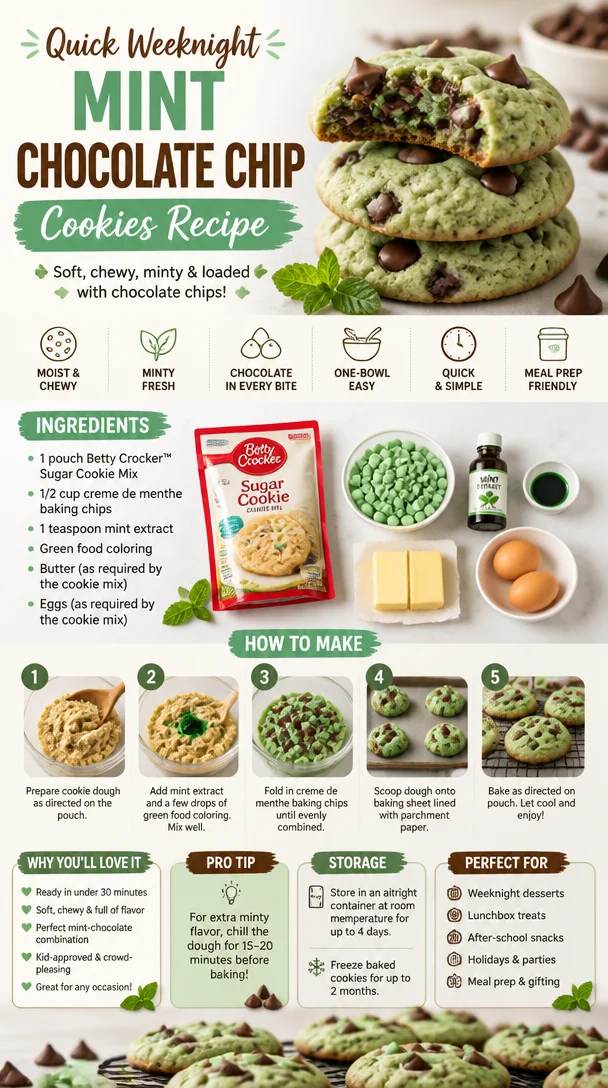
Quick Weeknight Mint Chocolate Chip Cookies Recipe
The Ultimate Mint Chocolate Chip Cookie Recipe: A Nostalgic Twist on a Classic Favorite
Hey there, food lovers! Welcome to Feastical! Today, we’re diving into a dessert that’s bound to tickle your taste buds and spark delightful memories—Mint Chocolate Chip Cookies. Now, I know what you might be thinking: “Mint and chocolate? Isn’t that just for ice cream?” I used to think so, too, until I embarked on a deliciously nostalgic journey back to my childhood kitchen. Get ready to whip up some sweet, minty goodness that not only satisfies your cravings but also warms your heart!
A Sweet Slice of Nostalgia
Picture this: it’s a warm summer afternoon, and the scent of freshly baked cookies wafts through the air. I remember my mom in her sunny yellow apron, the kind that had a little bit of flour on the front because, let’s be honest, no good baker comes out without a sprinkle on their clothes. She’d mix up her standard chocolate chip cookie batter, but then she’d bring out a special secret ingredient—mint extract! Little me would bounce around the kitchen, hardly able to contain my excitement, waiting for that moment when the cookies came out of the oven, all warm and gooey.
The first bite was always magical—the coolness of mint melding perfectly with rich chocolate as they danced on my taste buds. Those cookies became the highlight of family get-togethers, often stealing the spotlight from more traditional desserts. And so, this recipe is as much about memory as it is about flavor. Inspired by those sunny afternoons, I’m here to share my version of Mint Chocolate Chip Cookies, complete with a few fun twists inspired by my own kitchen adventures. Ready to roll up your sleeves? Let’s get baking!
Ingredients You’ll Need
Here’s what you’ll need to bring this minty wonder to life:
-
1 pouch of classic Betty Crocker™ sugar cookie mix: The base of our delicious cookies. This mix is perfect for making things quick and easy without sacrificing any taste. If you’re feeling adventurous, you could swap it out for homemade sugar cookie dough.
-
1/2 cup of creme de menthe baking chips: For those bursts of minty flavor. If you can’t find these, don’t sweat it! You can use mint chocolate chips or even break up some regular chocolate with a drop of peppermint extract added in.
-
1 teaspoon of mint extract: This is where the magic happens. It intensifies the mint flavor beyond just the chips. But remember, a little goes a long way! If you’re not a huge mint fan, feel free to reduce this.
-
Green food coloring: Just a few drops to give your cookies that classic minty green hue. It’s optional, but it definitely adds a fun touch! You can skip this entirely or even replace it with all-natural coloring if you prefer.
-
Butter and eggs as required by the cookie mix: These are key to making your cookies rich and chewy. If you’re looking for a lighter version, go for applesauce as a butter substitute, and a flax egg instead of a regular egg.
Step-by-Step Instructions
Ready to get those mint chocolate chip cookies into your oven? Here’s how to do it in just a few simple steps:
-
Preheat your oven: Heat it up to 350°F (175°C). This is where the magic begins! A properly preheated oven ensures your cookies bake evenly.
-
Mix the ingredients: In a large bowl, combine the sugar cookie mix, butter, and eggs according to the package instructions. The dough should be thick and a bit sticky. Here’s a little tip: let your butter come to room temperature before mixing—it makes for a smoother dough!
-
Add your flavors: Slowly stir in the creme de menthe baking chips and the teaspoon of mint extract. Don’t forget to taste the dough—it’s a crucial step in quality control (make sure to leave some for the cookies, though!).
-
Get colorful: Now, this is the fun part! Add a few drops of green food coloring. You can mix until you achieve your desired shade of minty green. Just remember, you’re going for a festive vibe—don’t hold back!
-
Scoop the dough: Using a spoon or a cookie scoop, place rounded tablespoons of dough on a cookie sheet lined with parchment paper. Space them about 2 inches apart; they’ll spread out as they bake.
-
Bake them to perfection: Pop your cookie sheet into the oven and bake for about 9-11 minutes, or until the edges are lightly golden. Keep an eye on them; overbaking will turn them crisp instead of chewy.
-
Cool it down: Once they’re done, take them out of the oven and let them cool on the sheet for a few minutes before transferring them to a wire rack. This helps them firm up and retain that chewy goodness!
-
Enjoy!: Now, the best part! Grab a glass of milk, pour a cup of coffee, or enjoy them as they are. You’re in for a treat!
Serving Suggestions
Serving these Mint Chocolate Chip Cookies is half the fun! You can present them on a rustic wooden board for a cozy gathering, or stack them high for a more dramatic dessert effect. For an added touch of indulgence, serve them alongside a scoop of mint chocolate chip ice cream—trust me, the flavors complement each other perfectly!
For a festive twist, you could dust them lightly with powdered sugar or drizzle with melted chocolate as a finishing touch. If you’re feeling extra creative, sandwich two cookies around a scoop of your favorite ice cream for a delightful mint chocolate chip cookie ice cream sandwich!
Recipe Variations
Now that you’ve got the base recipe down, let’s get creative! Here are a few fun variations you can try:
-
Double chocolate mint cookies: Add 1/4 cup of cocoa powder to the dough for a rich, chocolatey flavor that pairs beautifully with mint.
-
Nutty crunch: Fold in some chopped nuts like walnuts or pecans for extra texture. They’ll add a delightful crunch to the chewy cookies.
-
Gluten-free version: Use a gluten-free sugar cookie mix instead of the classic Betty Crocker™. The mint flavor will still shine through!
-
Minty mocha cookies: For a caffeine kick, add 1-2 teaspoons of instant coffee or espresso powder to the dough for a mocha mint twist.
-
Fruity mint cookies: Toss in some finely chopped dried cherries or raspberries for a sweet and tangy surprise that brightens the mint flavor.
Chef’s Notes
These Mint Chocolate Chip Cookies have a special place in my heart. Over the years, I’ve experimented with various mint chocolate recipes, trying everything from brownies to cakes, but there’s something about a simple cookie that takes me back to those sun-filled days in my childhood kitchen.
Sometimes, though, cooking can lead to some funny mishaps! I remember one time I misread a recipe and added too much mint extract—let’s just say, those cookies were… a little more minty than most people prefer. But hey, that’s what cooking is about: learning, adapting, and laughing through the mishaps.
FAQs and Troubleshooting
-
Why are my cookies spreading too much?
- This can happen if your butter is too warm or if you didn’t chill the dough. If your cookies spread too much, try chilling the dough for 30 minutes before baking.
-
How can I store leftover cookies?
- Keep them in an airtight container at room temperature for about a week. You can also freeze them for up to three months—perfect for whenever those cravings hit!
-
Can I substitute the sugar cookie mix?
- Absolutely! You can use any sugar cookie recipe or even oat flour for a gluten-free option, just make sure to adjust the measurements accordingly.
-
How can I make my cookies chewier?
- For chewier cookies, try using a little more brown sugar in place of some of the granulated sugar, or add a little extra butter.
Nutritional Info
While indulging in these minty delights, it’s good to know what you’re munching on! Each cookie (depending on size) provides roughly 120 calories, with 5g of fat, 16g of carbs, and 1g of protein. These cookies are great for a sweet treat, but keep moderation in mind, especially if you’re watching your intake.
For a healthier perspective, consider pairing them with a fresh fruit salad or smoothies to balance it all out!
Final Thoughts
I hope you had as much fun reading about and making these Mint Chocolate Chip Cookies as I did sharing them! There’s just something magical about baking—how it brings us together and creates joyous memories, delicious aromas, and sweet moments worth savoring.
So roll up those sleeves, grab a spatula (and maybe a spoon for tasting), and dive into this delightful journey of baking. I can’t wait to hear how your cookies turn out and what memories they bring back for you! Happy baking, my friends—until next time here at Feastical!
PrintMint Chocolate Chip Cookies
- Total Time: 26 minutes
- Yield: 24 cookies 1x
- Diet: Vegetarian
Description
A nostalgic twist on classic chocolate chip cookies with refreshing mint flavor.
Ingredients
- 1 pouch of classic Betty Crocker™ sugar cookie mix
- 1/2 cup of creme de menthe baking chips
- 1 teaspoon of mint extract
- Green food coloring (optional)
- Butter and eggs as required by the cookie mix
Instructions
- Preheat your oven to 350°F (175°C).
- Mix the sugar cookie mix, butter, and eggs according to the package instructions.
- Add the creme de menthe baking chips and mint extract; taste the dough.
- Get colorful by adding green food coloring until desired shade is achieved.
- Scoop rounded tablespoons of dough onto a lined cookie sheet, spacing them 2 inches apart.
- Bake for about 9-11 minutes, until edges are lightly golden.
- Cool on the sheet for a few minutes before transferring to a wire rack.
- Enjoy with a glass of milk or your favorite beverage!
Notes
For chewier cookies, use a bit more brown sugar or extra butter. Store in an airtight container for up to a week or freeze for three months.
- Prep Time: 15 minutes
- Cook Time: 11 minutes
- Category: Dessert
- Method: Baking
- Cuisine: American
Nutrition
- Serving Size: 1 cookie
- Calories: 120
- Sugar: 8g
- Sodium: 200mg
- Fat: 5g
- Saturated Fat: 3g
- Unsaturated Fat: 2g
- Trans Fat: 0g
- Carbohydrates: 16g
- Fiber: 0g
- Protein: 1g
- Cholesterol: 40mg
Keywords: Mint Chocolate Chip Cookies, dessert, baking, nostalgic recipes
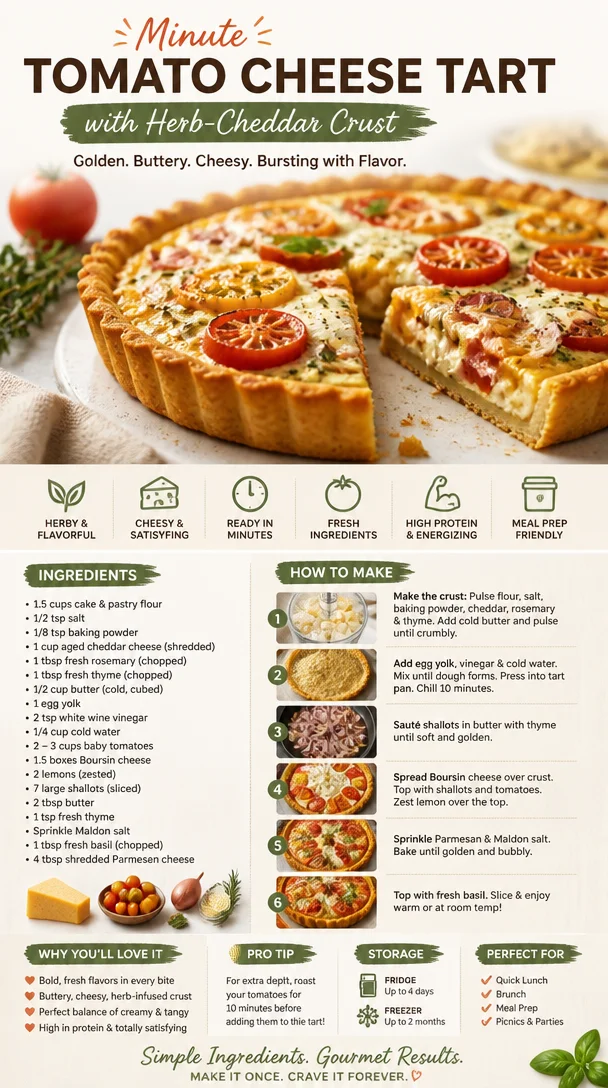
Minute Tomato Cheese Tart with Herb-Cheddar Crust
A Slice of Heaven: Cheese Tart with Tomatoes and a Herb and Cheddar Crust
Hey food lover! Welcome back to Feastical, where happy cooking feels like home! Today, I’m excited to share a recipe that’s not just a feast for your taste buds but also a hug for your soul. It’s a Cheese Tart with Tomatoes and a Herb and Cheddar Crust that will make your dinner guests swoon and your family gather around the table with smiles.
Imagine biting into a warm slice of savory cheese tart, where creamy Boursin cheese mingles with a medley of roasted tomatoes and a crunchy herb-infused crust. It’s the kind of dish that brings back memories and flavors that feel just right. So, if you’ve ever wanted to impress at a potluck or simply enjoy a cozy night in, stick around as we dive into this culinary adventure!
My Kitchen Story: The Birth of the Cheese Tart
Let me take you back to a warm summer evening at my grandma’s house. The sun was setting, casting a golden hue over the backyard, where herbs grew like they were auditioning for a cooking show. It was one of those perfect family gatherings where laughter filled the air, and the scent of something delicious was wafting from the kitchen.
Grandma had this magical way of turning basic ingredients into something extraordinary, and I remember her making a cheesy dish that was nothing short of sensational. That evening, she taught me the art of combining simple ingredients with love, and we created a cheesy delight that brought the family together. That memory stayed with me and inspired this very Cheese Tart. It’s a recipe that symbolizes togetherness, creativity, and the beautiful flavors of family traditions. So let’s get cooking and create our own memories!
Ingredients: Let’s Gather Our Goodies
Before we dive into the cooking, let’s gather the fresh, flavorful ingredients for our tarty delight! Here’s what you’ll need:
-
1.5 cups cake and pastry flour: This flour keeps our crust light and flaky. You can swap it with all-purpose flour if that’s what you have on hand.
-
1/2 tsp salt: We need a pinch of salt to enhance the flavors. Don’t skip out on this!
-
1/8 tsp baking powder: A little lift goes a long way in keeping that crust from being too dense.
-
1 cup aged cheddar cheese (shredded): For that rich, nutty flavor! You can play around and use other hard cheeses like Gruyère.
-
1 tbsp fresh rosemary (chopped): This herb adds a wonderful aroma. Fresh is best, but dried will do in a pinch—just use less.
-
1 tbsp fresh thyme (chopped): Thyme gives a savory kick. If your garden is dry, dried thyme can easily step in.
-
1/2 cup butter (cold and cubed): Cold butter is key for a flaky crust. Margarine won’t quite cut it.
-
1 egg yolk: This helps bind the crust together, but if you’re egg-free, use 2 tablespoons of plain yogurt.
-
2 tsp white wine vinegar: This adds a lovely tang and helps with the crust’s flakiness. If you’re keeping it alcohol-free, go for apple cider vinegar.
-
1/4 cup cold water: Adjust for the crust’s consistency.
-
2 – 3 cups baby tomatoes: Choose ripe ones for maximum sweetness. Any small tomato variety will do, like cherry or grape.
-
1.5 boxes Boursin cheese: Creamy, herby goodness! If you can’t find it, a mix of cream cheese with herbs works too.
-
2 lemons (zested): For brightness! The zest is where the flavor is concentrated.
-
7 large shallots (sliced): These add a sweet depth. You can substitute with onions, but shallots bring a special touch.
-
2 tbsp butter (for sautéing): This is purely for flavor—don’t use less!
-
1 tsp fresh thyme (for garnish): To sprinkle on top like a chef.
-
Sprinkle of Maldon salt: This flaky salt adds just the right amount of crunch and a burst of flavor.
-
1 tbsp fresh basil (chopped): Fresh basil finishes our tart with brightness. Dried basil can be used but use sparingly.
-
4 tbsp shredded parmesan cheese: For a salty finish. Feel free to swap with pecorino for a sharper flavor!
Step-by-Step Instructions: Let’s Create Some Magic
-
Whisk it Up!
In a large bowl, combine the flour, salt, and baking powder, whisking until well mixed. Take a moment to breathe in those lovely floury scents that remind us of home. -
Cheese It!
Fold in the aged cheddar cheese, rosemary, and thyme. This is where the magic starts to happen! The smell is incredible, folks—like a cozy embrace right in your kitchen. -
Cut in the Butter
Add the cold, cubed butter. Using a pastry cutter (or your fingers, which I prefer because it feels more personal), cut the butter into the flour mixture until it resembles coarse crumbs. You want that perfectly crumbly texture; it’s the secret to a flaky crust, trust me! -
Add the Wet Ingredients
In a small bowl, whisk together the egg yolk, white wine vinegar, and cold water. Add this mixture to the flour and cheese blend, stirring gently until it just comes together. If it feels too dry, add a bit more water—go by feel! -
Chill Time!
Shape the dough into a disk, wrap it in plastic wrap, and refrigerate for at least 30 minutes. This step is crucial! It relaxes the dough and prevents shrinkage when baking. -
Prep the Tomatoes
While the dough chills, slice your baby tomatoes in half and set them aside. Feel free to toss them with a sprinkle of salt and a dash of olive oil for extra flavor. -
Sauté the Shallots
In a skillet over medium heat, melt 2 tablespoons of butter. Add the sliced shallots and sauté until they become soft and caramelized. This will take about 10-15 minutes. Don’t rush this step—the sweetness of shallots is magical! -
Mix the Filling
Once your shallots are golden and glorious, remove from heat and let them cool slightly. In a mixing bowl, combine the cooled shallots, Boursin cheese, lemon zest, and fresh thyme. Mix until smooth and creamy—imagine that first taste already! -
Roll it Out
Preheat your oven to 375°F (190°C). Once your dough is chilled, roll it out on a floured surface to fit your tart pan. If you don’t have a tart pan, a pie dish will do! Gently transfer the rolled-out dough into your pan, pressing it into the edges. Trim any excess. -
Fill ‘Er Up!
Spread the creamy filling onto the crust, then artfully arrange your halved tomatoes on top. Sprinkle with the Maldon salt, fresh basil, and shredded parmesan—this is where you can show off your plating skills! -
Bake to Perfection
Pop your tart into the oven and bake for about 30-35 minutes, or until the tart is golden and the filling is bubbling slightly. The aroma filling your kitchen will have everyone asking what’s cooking! -
Cool and Serve
Once baked, let your tart cool for about 10-15 minutes. This makes it easier to slice. Serve warm or at room temperature, and watch your friends and family gather around for a taste!
Serving Suggestions: Plate It Like a Pro
To take your Cheese Tart to the next level, consider serving it alongside a simple green salad with a light vinaigrette. The acidity of the dressing will complement the richness of the tart beautifully. You can also serve it with a dollop of crème fraîche infused with herbs, elevating the dish further.
For a more rustic vibe, slice the tart into generous wedges and serve on a beautiful wooden cutting board, letting everyone dig in family-style. Don’t forget to garnish with fresh herbs or a sprinkle of lemon zest for a pop of color and flavor!
Recipe Variations: Switch It Up!
- Veggie Lovers’ Delight: Add sautéed spinach or zucchini to your cheese filling for a veggie boost.
- Spicy Kick: Incorporate some crushed red pepper flakes into the filling if you like a little heat.
- Savory Switch-Up: Try using goat cheese instead of Boursin for a tangy twist.
- Herb Infusion: Mix in some dill or chives with the herbs for a fresh flavor profile.
- Gluten-Free Option: Substitute the flour with gluten-free all-purpose flour or almond flour for a gluten-free variation of the crust!
Chef’s Notes: A Little Slice of History
This Cheese Tart with Tomatoes and a Herb and Cheddar Crust has evolved over time in my kitchen. I started with a basic quiche recipe, but as I experimented with flavors and textures, this delightful tart was born. It symbolizes the spirit of improvisation I embraced in my own cooking journey. Every time I make it, I discover new ways to tweak it based on the season or what I have on hand. The best recipes grow and change, much like us!
FAQs and Troubleshooting: Let’s Tackle Those Questions
-
Can I make the crust ahead of time?
Absolutely! You can prepare the crust the day before and keep it wrapped in the fridge, ready for baking. -
Why is my crust tough?
If your crust is tough, you probably overworked the dough or didn’t use cold butter. Remember, less is more when mixing! -
What should I do if my tart filling is too runny?
If you find your filling is too watery, it may be due to the tomatoes’ juices. Consider roasting them first to concentrate the flavors and reduce moisture! -
How long will leftovers last?
This tart is perfect for leftovers! Store it in an airtight container in the fridge, and it will stay fresh for about 3-4 days.
Nutritional Info
While I’m not here to count calories, it helps to know that a slice of this heavenly tart offers a delightful balance of protein from the cheese, healthy fats from the butter, and a taste of nature’s best with those bright tomatoes and herbs. If you’re watching macros or calories, remember moderation is key! Enjoy a slice packed with flavor, vitamins, and a hearty dose of happiness.
Final Thoughts: A Taste of Inspiration
Cooking is about the joyful moments we share around the table, the laughter that fills the air, and the love we pour into every bite. This Cheese Tart with Tomatoes and a Herb and Cheddar Crust is more than a recipe; it’s an experience, a delicious journey back to nostalgic evenings spent with family and friends.
So, grab your apron, gather your loved ones, and make this tart a beloved staple in your kitchen. I’m so excited for you to taste the goodness and create new memories with every slice.
Thank you for joining me at Feastical, and I can’t wait to hear how your tart turns out! Let’s keep spreading those good vibes through food, one delightful dish at a time. Happy cooking!
PrintCheese Tart with Tomatoes and Herb and Cheddar Crust
- Total Time: 50 minutes
- Yield: 8 servings 1x
- Diet: Vegetarian
Description
A warm and savory Cheese Tart with creamy Boursin cheese, roasted tomatoes, and a herb-infused cheddar crust that will impress dinner guests and bring the family together.
Ingredients
- 1.5 cups cake and pastry flour
- 1/2 tsp salt
- 1/8 tsp baking powder
- 1 cup aged cheddar cheese (shredded)
- 1 tbsp fresh rosemary (chopped)
- 1 tbsp fresh thyme (chopped)
- 1/2 cup butter (cold and cubed)
- 1 egg yolk
- 2 tsp white wine vinegar
- 1/4 cup cold water
- 2 – 3 cups baby tomatoes
- 1.5 boxes Boursin cheese
- 2 lemons (zested)
- 7 large shallots (sliced)
- 2 tbsp butter (for sautéing)
- 1 tsp fresh thyme (for garnish)
- Sprinkle of Maldon salt
- 1 tbsp fresh basil (chopped)
- 4 tbsp shredded parmesan cheese
Instructions
- Whisk together the flour, salt, and baking powder in a large bowl.
- Fold in the aged cheddar cheese, rosemary, and thyme.
- Cut in the cold, cubed butter until it resembles coarse crumbs.
- Add the egg yolk, white wine vinegar, and cold water to the flour mixture.
- Shape the dough into a disk, wrap in plastic wrap, and refrigerate for at least 30 minutes.
- Slice the baby tomatoes in half and set aside.
- Sauté the sliced shallots in melted butter until soft and caramelized, about 10-15 minutes.
- Combine the cooled shallots, Boursin cheese, lemon zest, and fresh thyme in a bowl.
- Preheat the oven to 375°F (190°C) and roll out the chilled dough.
- Spread the creamy filling onto the crust and arrange the halved tomatoes on top.
- Bake for 30-35 minutes, or until golden and bubbly.
- Cool for 10-15 minutes before serving.
Notes
To serve, pair the tart with a green salad or a dollop of herbed crème fraîche. Store leftovers for 3-4 days in the fridge.
- Prep Time: 15 minutes
- Cook Time: 35 minutes
- Category: Main Course
- Method: Baking
- Cuisine: Italian
Nutrition
- Serving Size: 1 slice
- Calories: 320
- Sugar: 4g
- Sodium: 450mg
- Fat: 22g
- Saturated Fat: 12g
- Unsaturated Fat: 9g
- Trans Fat: 0g
- Carbohydrates: 25g
- Fiber: 2g
- Protein: 9g
- Cholesterol: 50mg
Keywords: cheese tart, savory tart, vegetarian recipe, comfort food, party food
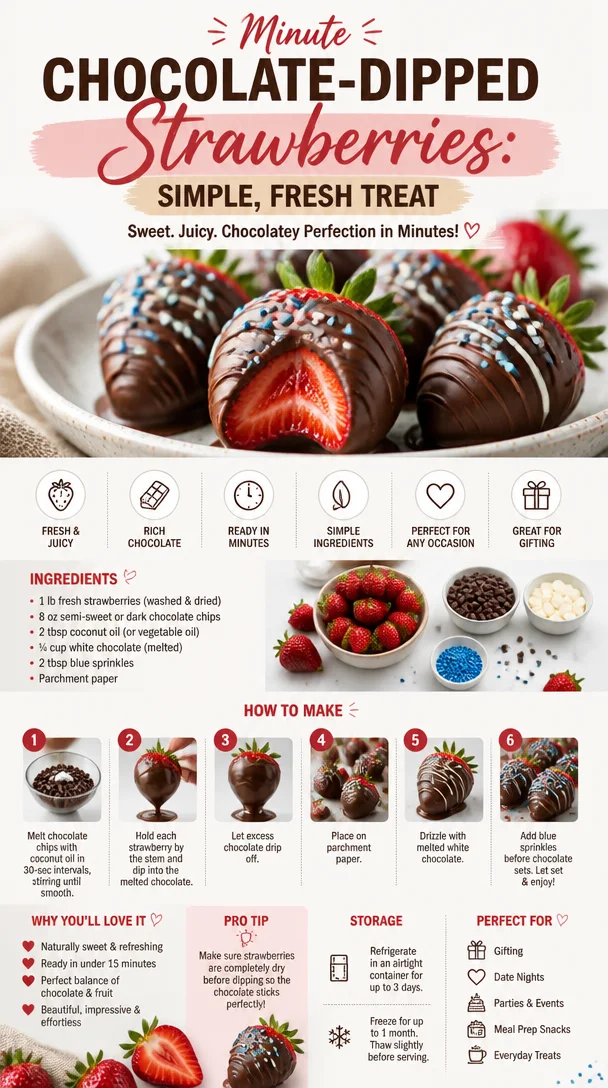
Minute Chocolate-Dipped Strawberries: Simple, Fresh Treat
Dive into Delight: Chocolate Dipped Strawberries
Hey there, fellow food lovers! Today, we’re plunging into the delectable world of chocolate-dipped strawberries. This sweet treat is not just an indulgence; it’s a celebration of simplicity, love, and a touch of nostalgia. Whether you’re looking to impress someone special, dress up a party platter, or simply satisfy your sweet tooth, these strawberries are here to save the day!
I remember the first time I made chocolate-dipped strawberries. It was a sunny afternoon in my grandmother’s cozy kitchen. She was whipping up a batch for a family gathering, and I was her eager little sous chef. The air was filled with laughter, and as we melted the chocolate, she shared stories of her own childhood baking adventures. Those strawberries weren’t just a dessert; they were a bridge connecting generations, rich with memories and love.
Now, I like to believe that anyone can recreate that moment, and I’m here to guide you through it! So, roll up your sleeves, and let’s get to work on these scrumptious treats that come together in a snap but carry a whole lot of joy!
Ingredients
Here’s what you’ll need to whip up these delightful treats:
-
Fresh Strawberries:
- Look for plump, ripe strawberries with a bright red hue. The fresher, the better! If strawberries aren’t in season, you can swap them for other fruits like bananas or pineapple.
-
White Chocolate:
- I prefer using high-quality white chocolate chips because they melt smoothly and taste heavenly. If you want to keep things dairy-free, look for plant-based options!
-
Blue Sprinkles:
- These add a fun pop of color! Feel free to get creative—switch it up with different colored sprinkles to match any theme or occasion.
The combination of these ingredients makes for not just a treat but a canvas for creativity. They’re perfect for romantic date nights, birthday bashes, or just a fun Saturday in with your best friends!
Step-by-Step Instructions
Let’s get down to the nitty-gritty, shall we? Here’s how to make those chocolate-dipped strawberries:
-
Preparation:
- Rinse your strawberries gently under cold water, pat them dry with a clean towel, and leave the green tops intact. This helps with handling them later and adds a rustic touch to your presentation.
- Chef’s Tip: Ensure the strawberries are completely dry. Any moisture can make the chocolate seize up!
-
Melt the White Chocolate:
- Place the white chocolate chips in a microwave-safe bowl and pop them in the microwave. Start with 30 seconds on high and stir. Continue in 15-second intervals until it’s smooth.
- Chef’s Tip: Stirring often will help avoid any burning, and using a glass bowl can give you an even melt!
-
Dipping Time:
- Hold a strawberry by its green stem and dip it into the melted white chocolate, swirling to coat it evenly. Don’t forget to scrape off the excess chocolate on the bowl’s edge before setting it down!
- Chef’s Tip: For a chic finish, dip the strawberry at an angle for a beautiful tapered look.
-
Adding Sprinkles:
- While the chocolate is still warm and gooey, sprinkle those blue sprinkles on top. Feel free to go wild—there’s no such thing as too much joy here!
- Chef’s Note: If you want a two-tone effect, allow the first layer of white chocolate to harden before dipping the strawberry into a contrasting chocolate.
-
Chill:
- Place your strawberries on a lined tray or cooling rack and pop them into the fridge for at least 30 minutes. This will help the chocolate set perfectly into a shiny coat of goodness.
- Chef’s Tip: For an extra smoothing effect, you can gently warm the chocolate again if it starts to thicken.
-
Serve and Enjoy:
- Once the chocolate is firmly set, arrange the strawberries on a festive platter or serve them in individual cups.
- Chef’s Suggestion: Pair them with whipped cream or a drizzle of dark chocolate for a delightful contrast!
Serving Suggestions
Now that you’ve made these beauties, let’s talk presentation! The way you serve your chocolate-dipped strawberries can elevate the whole experience.
-
Festive Platter:
- Arrange them on a decorative plate with mint leaves for a pop of color. Use a mix of berries around them for a beautiful berry medley!
-
In a Glass:
- Serve them upright in a tall glass filled with colored candies or rice. They’ll look like a bouquet that’s both edible and gorgeous!
-
On a Stick:
- For a fun twist, consider inserting a skewer into each strawberry and arranging them like a fruit bouquet. Kids and adults alike will love this playful option!
Recipe Variations
Get ready to shake things up! Here are some creative twists you can try with this recipe:
-
Chocolate Combo:
- Instead of just using white chocolate, dip half the strawberry in dark chocolate for a beautiful contrast and an added flavor twist.
-
Nutty Crunch:
- After dipping in white chocolate, roll the strawberries in crushed nuts like almonds or pistachios for a crunchy layer.
-
Caramel Drizzle:
- Drizzle melt caramel over the dipped strawberries for an extra layer of sweetness—who doesn’t love caramel?
-
Spicy Kick:
- Mix a dash of cayenne pepper into your white chocolate for a surprising kick!
-
Fruit Variety:
- Swap strawberries for other fruits like apples or grapes for a fun fruit fondue night!
Chef’s Notes
These chocolate-dipped strawberries have become a staple in my kitchen. They have evolved over the years, but one thing remains true: they bring people together. I remember the first batch I made for my best friend’s surprise birthday party; it was a hit! Not only was it a delicious dessert, but it also sparked a night full of laughter and memorable moments.
Sometimes, I play around with the chocolate flavors depending on the season or occasion. Remember, cooking is all about the journey and the stories we create along the way!
FAQs and Troubleshooting
Here are some common questions I often receive about chocolate-dipped strawberries:
-
Why does my chocolate seize?
- If even a drop of water gets into your chocolate, it can seize. Always make sure the bowl, strawberries, and utensils are completely dry.
-
How can I store chocolate-dipped strawberries?
- Store them in the fridge in a single layer in an airtight container. They’re best consumed within 1-2 days for optimal freshness!
-
What if the chocolate doesn’t coat well?
- If your chocolate is too thick, you can reheat it slightly and add a teaspoon of vegetable oil to thin it out!
-
Can I use milk chocolate instead?
- Absolutely! Feel free to experiment with any type of chocolate you love.
Nutritional Info
Here’s a quick breakdown of the nutritional info (per serving of 3 strawberries):
- Calories: Approximately 150
- Fat: 8g
- Carbohydrates: 20g
- Sugar: 15g
- Protein: 1g
These figures may vary based on the exact type of chocolate and strawberries used, so feel free to calculate based on your specific ingredients. Just remember, moderation is key—indulge guilt-free!
Final Thoughts
Chocolate-dipped strawberries are such a simple yet profound treat that can spark joy on any occasion. From the first bite to the last, they remind us of shared moments and sweet memories. With just a few ingredients and simple techniques, you can create something truly beautiful. So, gather your friends, whip up a batch, and dig in. I can’t wait to hear your stories—let’s keep the joy of cooking alive!
Happy dipping, foodies! 🍓🍫
PrintChocolate Dipped Strawberries
- Total Time: 20 minutes
- Yield: 12 servings
- Diet: Vegetarian
Description
Sweet and simple chocolate-dipped strawberries perfect for any occasion.
Ingredients
- Fresh strawberries
- High-quality white chocolate chips
- Blue sprinkles
Instructions
- Rinse your strawberries gently under cold water, pat them dry with a clean towel, and leave the green tops intact.
- Place the white chocolate chips in a microwave-safe bowl and pop them in the microwave. Start with 30 seconds on high and stir, continuing in 15-second intervals until smooth.
- Hold a strawberry by its green stem and dip it into the melted white chocolate, swirling to coat it evenly.
- While the chocolate is still warm, sprinkle blue sprinkles on top.
- Place your strawberries on a lined tray and pop them into the fridge for at least 30 minutes.
- Once the chocolate is firmly set, arrange the strawberries on a festive platter or serve them in individual cups.
Notes
Store chocolate-dipped strawberries in the fridge in a single layer for best freshness. Enjoy within 1-2 days.
- Prep Time: 15 minutes
- Cook Time: 5 minutes
- Category: Dessert
- Method: Chilling
- Cuisine: American
Nutrition
- Serving Size: 3 strawberries
- Calories: 150
- Sugar: 15g
- Sodium: 0mg
- Fat: 8g
- Saturated Fat: 5g
- Unsaturated Fat: 3g
- Trans Fat: 0g
- Carbohydrates: 20g
- Fiber: 1g
- Protein: 1g
- Cholesterol: 0mg
Keywords: chocolate, strawberries, dessert, easy recipe, party treat, sweet treats
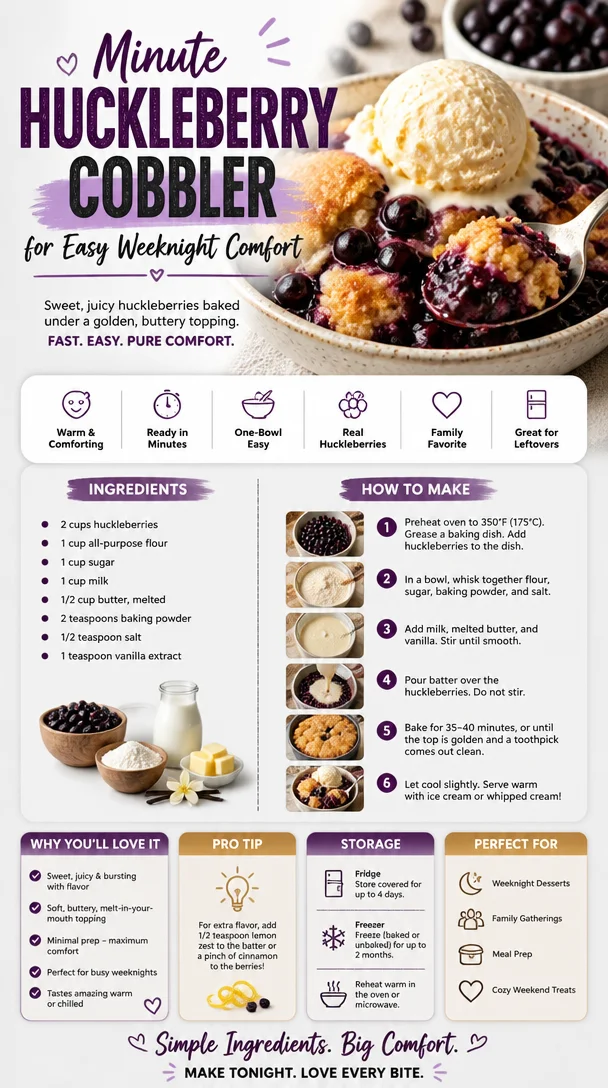
Minute Huckleberry Cobbler for Easy Weeknight Comfort
Huckleberry Cobbler: A Taste of Summer Memories
Hey there, fellow foodies! Welcome back to Feastical, where we whip up feel-good dishes that not only satisfy the palate but spark joy and nostalgia. Today, we’re diving into a classic dessert that screams summer and celebrates the wonderful huckleberry—the Huckleberry Cobbler. If you’ve never had huckleberries, you’re in for a treat. Sweet, tart, and oh-so-delicious, they transform simple ingredients into an unforgettable dessert that is both comforting and magical.
A Slice of Nostalgia: My Huckleberry Experience
Growing up, summer meant family road trips and adventures into the wild—one of my fondest memories is foraging for huckleberries with my grandma. We would hike through the dense woods, her laughter ringing out like a melody as I picked the small, juicy berries off the bushes. Each bite was a burst of sweetness followed by a mild tartness that was utterly refreshing. After a long day of berry picking, we’d head back home, arms filled with our treasure, and my grandma would whip up her famous Huckleberry Cobbler.
The smell of butter and sugar mingling with the earthiness of the huckleberries would fill the house, wrapping us all in a cozy embrace. As we gathered around the table, the cobbler would be served hot, bubbling, and golden, making our taste buds dance in delight. Those summer days were not merely about eating; they were about bonding, sharing stories, and creating a sense of family that lasted well beyond that slice of cobbler. So, are you ready to create some delicious memories? Let’s get started!
Ingredients
To make this tasty Huckleberry Cobbler, you’ll need the following ingredients:
- 2 cups huckleberries
Fresh is best, but if you can’t find huckleberries, blueberries or blackberries work great, too! - 1 cup all-purpose flour
This forms the base of the cobbler; for a gluten-free option, use almond flour or a gluten-free blend. - 1 cup sugar
A sweetener to balance the acidity of the huckleberries; you can reduce it to ¾ cup for a less sweet version. - 1 cup milk
Adds moisture; for a dairy-free option, almond milk or oat milk are excellent substitutes. - ½ cup butter, melted
This adds richness; coconut oil can be swapped in for a dairy-free option. - 2 teaspoons baking powder
Ensures the batter rises beautifully. - ½ teaspoon salt
Enhances the flavors and balances the sweetness. - 1 teaspoon vanilla extract
A flavor booster; feel free to use almond extract for a different twist.
Step-by-Step Instructions
Rolling up our sleeves? Let’s get our cobbler on!
-
Preheat the Oven
Start by preheating your oven to 350°F (175°C). This is crucial, as it helps the cobbler cook evenly and become golden on top. -
Prep the Berries
In a bowl, toss the huckleberries with a tablespoon of sugar (optional). This helps to release some of their juices and creates a lovely syrup in the cobbler. Let them sit while you prepare the batter. -
Make the Batter
In a large mixing bowl, whisk together the flour, sugar, baking powder, and salt. Create a well in the center and pour in the milk, melted butter, and vanilla extract. Mix until just combined—no one likes a tough cobbler! -
Assembly Time!
In a greased 9×13 inch baking dish, pour in the batter, spreading it out evenly. Do not fret if it looks a bit lumpy; that’s just the way cobblers roll. Next, spoon the huckleberries (and any released juice) on top of the batter. Don’t mix them in—this creates that beautiful bubbling topping! -
Bake
Place your dish in the oven and let it bake for about 35-40 minutes or until the top is golden brown and the juices are bubbling. It might be tough, but resist the urge to peek—let it do its magic! -
Cool and Serve
Once baked, remove the cobbler from the oven and let it sit for about 10 minutes (if you can wait!). This allows the juices to settle. Serve warm with a scoop of vanilla ice cream or whipped cream—heavenly!
Serving Suggestions
Plating a cobbler can be as simple or as fancy as you want! For a casual vibe, scoop out servings directly from the baking dish. However, if you’re looking to impress, try using a large spoon to serve individual portions neatly on plates. Drizzle a bit of the juices over the cobbler for an extra touch. Add a dollop of whipped cream or a generous scoop of vanilla ice cream on the side—it tastes divine and adds to the whole experience. Garnish with a few fresh huckleberries or mint leaves for that beautiful, restaurant-worthy finish!
Recipe Variations
While the classic Huckleberry Cobbler is fantastic just as it is, here are a few creative variations to shake things up:
-
Berry Medley Cobbler
Replace huckleberries with a mix of strawberries, blueberries, and raspberries for a rainbow of flavors. -
Peach-Huckleberry Cobbler
Add chopped peaches to the mix for a sweet and juicy twist. The peaches balance the tartness of the huckleberries beautifully! -
Coconut Huckleberry Cobbler
Swap out half the milk for coconut milk and sprinkle some shredded coconut on top of the batter before baking. -
Vegan Huckleberry Cobbler
Replace the milk with almond milk, the butter with coconut oil, and the egg with a flax egg for a dairy-free delight! -
Spiced Huckleberry Cobbler
Add a teaspoon of cinnamon or nutmeg to the batter for a warm, autumnal flavor twist.
Chef’s Notes
Cooking is often an adventure, an evolution, and my Huckleberry Cobbler is no different. I’ve tweaked this recipe over the years to match my taste and the ingredients available to me. What started as a simple family dessert has now become a staple at potlucks and gatherings. I love how it brings everyone together, just like those summer hikes with Grandma. Oh, and trust me when I say: do not be afraid to get creative with your huckleberries. Experimenting is half the fun!
FAQs and Troubleshooting
-
Why did my cobbler turn out soggy?
A soggy cobbler may result from too much liquid from the berries. Make sure to toss the berries with a touch of sugar as this helps to balance out the moisture! -
Can I use frozen huckleberries?
Absolutely! Frozen huckleberries can be used, but they might need a little longer to cook so expect a longer bake time. -
How do I store leftover cobbler?
Store any leftovers in an airtight container in the fridge for up to 3 days. You can reheat in the oven for a few minutes to crisp it back up. -
Can this recipe be doubled?
Yes! Just make sure to use a larger baking dish and adjust the cooking time slightly.
Nutritional Info
While comfort food isn’t always known for its health benefits, this Huckleberry Cobbler is relatively friendly compared to other desserts! Each serving is approximately 290 calories, with 12g fat, 43g carbohydrates, and 3g protein. It’s packed with antioxidants from the huckleberries, making it a tasty treat you can enjoy in moderation. Plus, when paired with fresh fruit or ice cream, the joy it brings is just unbeatable!
Final Thoughts
And there you have it—a heartwarming recipe for Huckleberry Cobbler that’s bound to fill your kitchen with delightful aromas and your hearts with joyful memories. I hope you make it your own and create beautiful moments with loved ones around the table. Whether it’s the laughter of kids, the stories of family, or simply the bliss of a delicious dessert, food is a bridge to connect us all. So gather your ingredients, embrace the messiness, and dig into this scrumptious cobbler. Until next time, happy feasting!
PrintHuckleberry Cobbler
- Total Time: 55 minutes
- Yield: 8 servings 1x
- Diet: Vegetarian
Description
A comforting and magical dessert featuring sweet and tart huckleberries, perfect for summer gatherings.
Ingredients
- 2 cups huckleberries
- 1 cup all-purpose flour
- 1 cup sugar
- 1 cup milk
- ½ cup butter, melted
- 2 teaspoons baking powder
- ½ teaspoon salt
- 1 teaspoon vanilla extract
Instructions
- Preheat the oven to 350°F (175°C).
- In a bowl, toss the huckleberries with a tablespoon of sugar (optional) and let them sit.
- Whisk together the flour, sugar, baking powder, and salt in a large mixing bowl.
- Create a well in the center and pour in the milk, melted butter, and vanilla extract. Mix until just combined.
- Pour the batter into a greased 9×13 inch baking dish and spread it evenly.
- Spoon the huckleberries on top of the batter, do not mix.
- Place the dish in the oven and bake for about 35-40 minutes, or until golden brown and bubbling.
- Remove from the oven and let it sit for about 10 minutes before serving warm.
Notes
Serve this cobbler warm with a scoop of vanilla ice cream or whipped cream for a delightful treat.
- Prep Time: 15 minutes
- Cook Time: 40 minutes
- Category: Dessert
- Method: Baking
- Cuisine: American
Nutrition
- Serving Size: 1 serving
- Calories: 290
- Sugar: 18g
- Sodium: 200mg
- Fat: 12g
- Saturated Fat: 7g
- Unsaturated Fat: 4g
- Trans Fat: 0g
- Carbohydrates: 43g
- Fiber: 3g
- Protein: 3g
- Cholesterol: 30mg
Keywords: huckleberry cobbler, summer dessert, berry dessert

Creamy Elote Street-Corn Soup in 25 Minutes (Meal-Prep)
A Warm Welcome to the World of Mexican Street Corn Soup!
Hey there, food lovers! It’s Beau Collier, and today I’m absolutely thrilled to be sharing one of my all-time favorites: Mexican Street Corn Soup! If you are as obsessed with the delightful flavors of street corn as I am, this recipe will warm your soul and tantalize your taste buds. Imagine the smoky, sweet, and creamy essence of elote, transformed into a hearty soup that’s perfect for any season.
But wait, it gets better! This soup is not only packed with flavor but is super simple to whip up, making it suitable for any day of the week – even those busy weekdays when you feel like your spatula is running away from you! Trust me when I say, this dish is like getting a big, comforting hug, one spoonful at a time.
Now, let me set the scene for you. Picture yourself on a sunny afternoon at a lively street fair in Mexico. The air is filled with the aroma of roasted corn paired with zesty lime, spicy chili powder, and the delicious sizzle of street vendors at work. That’s the kind of vibe we’re going for with this Mexican Street Corn Soup. So, let’s dive in, shall we?
My Nostalgic Corner of Mexico
I’ll never forget my first taste of true Mexican street corn, or "elote," at a bustling outdoor market with my best friend. We wandered around, sampling everything from churros to tamales, but it was the elote that knocked me off my feet. The way the vendor charred the corn over open flames, then slathered it with crema, rolled it in crumbled cheese, and topped it with a sprinkle of chili powder made for an unforgettable experience. We devoured it together, laughing and wiping the spicy goodness from our faces. Fast forward to today, and I’ve transformed that joyous memory into this comforting soup recipe. It encapsulates all the flavors I cherished, bringing that street fair vibe right into your kitchen.
Ingredients
Here’s what you’ll need for this flavorful fiesta in a bowl:
-
1 tbsp olive oil
Olive oil is perfect for sautéing and adds a subtle depth of flavor. For a different taste, you can substitute it with avocado oil. -
1 small red onion, diced
Red onions add a touch of sweetness and vibrant color. If you don’t have them on hand, yellow or white onions work just as well. -
1 medium jalapeño, seeded and diced
This little guy brings the heat! If you prefer a milder soup, feel free to leave it out or use a bell pepper instead. -
3 cloves garlic, minced
Garlic is a must-have for depth and aroma. I mean, who can resist the smell of sautéed garlic? -
2 (12 oz.) boneless, skinless chicken breasts
Chicken adds protein and heartiness. If you’re vegetarian, you can skip this altogether or use canned beans for a protein boost. -
1 (12 oz.) package fire-roasted frozen corn (or fresh corn)
Fire-roasted corn brings incredible smoky flavor! Fresh corn can also be used—it’s equally delicious and adds sweetness. -
1 (4 oz.) can diced green chiles
These add a mild spicy kick. If you want to amp up the heat, diced jalapeños can be an exciting substitution. -
1 tbsp Tajín seasoning
This Mexican seasoning blend enhances the flavors beautifully. If you can’t find it, a mix of lime zest, chili powder, and salt will do just fine. -
2 tsp ground cumin
Cumin offers a warm, earthy flavor that rounds out the soup perfectly. -
2 tsp chili powder
Just the right amount of spice! If you’re feeling adventurous, you could even blend in some smoked paprika. -
½ tsp table salt and ¼ tsp finely ground black pepper
Essential for seasoning! Always taste as you go—you might need a pinch more or less. -
4 cups (32 oz.) chicken stock or low-sodium chicken broth
This forms the base of your delightful soup. You can also use vegetable broth if you prefer. -
2 cups sour cream (full-fat) or Greek yogurt (full-fat)
For creaminess, either option works wonderfully. Greek yogurt will give a tangier twist—it’s your call! -
½ cup shredded Monterey Jack cheese
This cheese melts beautifully and adds a rich flavor. Feel free to substitute with Cheddar or Pepper Jack for a kick! -
Juice of one lime
Fresh lime juice brightens everything up. Don’t skip it! -
¼ cup chopped cilantro
For that fresh, herbaceous note. If cilantro isn’t your jam, parsley is a great alternative. -
½ cup crumbled queso fresco
This crumbly cheese is a traditional topping. If it’s hard to find, feta cheese can be an excellent stand-in!
Step-by-Step Instructions
Let’s get cooking, shall we? Follow along, and I promise this will become a staple recipe in your household!
-
Heat the Olive Oil
In a large pot, heat the olive oil over medium heat. You want just enough sizzle to greet you when you dump in that onion. -
Sauté the Aromatics
Toss in the diced red onion and let it sweat for a couple of minutes until it turns translucent and lovely. This step creates a flavor-packed base! Then add the minced garlic and diced jalapeño. Stir for about a minute until fragrant—nothing beats that aroma. -
Add Chicken and Corn
Now, it’s time for the chicken breasts! Browning them slightly on each side ensures they lock in all the flavors. Once they’re golden, add the fire-roasted corn and green chiles. Stir to combine and enjoy that stunning color palette in your pot. -
Season It Up
Sprinkle in Tajín, cumin, chili powder, salt, and pepper. Mix it all together—make sure everything is coated in those spices because trust me, this is where the magic happens! -
Pour in the Stock
Pour in the chicken stock, turning up the heat slightly to bring it all to a boil. Once it boils, reduce the heat to a simmer and cover. Let it bubble gently for about 15-20 minutes, or until the chicken is cooked through. -
Shred the Chicken
Once your chicken is cooked, carefully remove it from the pot. Give it a few moments to cool and then shred it using two forks. Return the shredded chicken back to the soup—this adds a heartiness that makes it extra comforting. -
Add the Creaminess
Stir in the sour cream or Greek yogurt, and watch as it creates a creamy texture that enhances the soup’s richness. You’ll want to make sure everything is well incorporated, so give it a good stir. -
Finish It Off
Squeeze in the juice of one lime and fold in the shredded Monterey Jack cheese. This last bit makes it irresistibly creamy and flavorful. -
Garnish and Enjoy
Ladle the soup into bowls, top with crumbled queso fresco and fresh cilantro. A lively splash of lime juice on top just before serving can elevate it to new heights!
Serving Suggestions
I love to serve this soup with a side of warm tortilla chips for some satisfying crunch! Or you can even line the rim of your soup bowl with a little extra lime juice and Tajín for a tasty twist. For a more filling meal, add a side of Mexican rice or a simple avocado salad. You can even pair it with a refreshing margarita—because why not make it a fiesta?
Recipe Variations
-
Vegetarian Delight
Swap out chicken for canned black beans or chickpeas for a fabulous vegetarian option. Just make sure to skip the stock for vegetable broth! -
Spicy Kick
Add diced habanero or serrano peppers to the mix for those who like an extra kick. -
Cheesy Lovers
Stir in additional cheese varieties like Pepper Jack or even cream cheese for an incredibly rich flavor. -
Add Sweetness
For a hint of sweetness, try adding a cup of diced red bell pepper or even some roasted sweet potatoes. -
Dairy-Free Option
Use coconut milk in place of sour cream for a creamy texture that’s dairy-free. And for cheese lovers, nutritional yeast can add that cheesy note.
Chef’s Notes
This recipe has evolved over the years, finding its sweet spot between comforting and bold. It wasn’t always a soup; my original approach was to enjoy elote prepared on-the-cob. However, once the fall season rolled in, I knew I needed to create a cozy soup that captured those same vibes. And voila! Mexican Street Corn Soup was born, making family gatherings and cozy nights in feel super special.
Oh, and a funny little kitchen story: I once attempted to impress a date with this soup, and I may have gone a little overboard on the jalapeños. Let’s just say there were many glasses of milk consumed that night… Oops!
FAQs and Troubleshooting
1. My soup is too thick—what do I do?
Add more chicken stock or water, little by little until you reach your desired consistency. Always taste as you go!
2. How can I store it?
Cool it completely, then transfer it to an airtight container. It’s good in the fridge for about 3-4 days.
3. Can I freeze this soup?
Absolutely! It freezes beautifully. Just be sure to leave out the creamy ingredients until you reheat.
4. My soup is too spicy; what can I do?
To help tone down the spice, try adding more sour cream or Greek yogurt, which will help mellow out the heat.
Nutritional Info
This Mexican Street Corn Soup is packed with nutritional value! Each serving contains a healthy blend of protein from the chicken, healthy fats from the olive oil and cheese, plus a fantastic array of vitamins and minerals from the veggies. Each bowl is a delightful balance of around 350 calories, providing 25g of protein, 20g of carbs, and 15g of fat. Remember, nutritional values may vary, so feel free to adjust for your specific dietary needs!
Final Thoughts
There you have it, amigos! A cozy bowl of Mexican Street Corn Soup that’s sure to warm your heart and fill your belly with wonderful flavor. It’s a dish that not only satisfies your cravings but also brings back all those beautiful memories of laughter, sunny days, and good friends. Cooking is all about sharing stories and creating memories—so as you enjoy this recipe, know that you’re also a part of mine.
Now grab your spoons and dive in—you’ve got a warm hug waiting for you in every bite! Until next time, happy cooking and happy eating!
Print
Mexican Street Corn Soup
- Total Time: 45 minutes
- Yield: 4 servings 1x
- Diet: Paleo
Description
A comforting soup that captures the delightful flavors of Mexican street corn, perfect for any season.
Ingredients
- 1 tbsp olive oil
- 1 small red onion, diced
- 1 medium jalapeño, seeded and diced
- 3 cloves garlic, minced
- 2 (12 oz.) boneless, skinless chicken breasts
- 1 (12 oz.) package fire-roasted frozen corn (or fresh corn)
- 1 (4 oz.) can diced green chiles
- 1 tbsp Tajín seasoning
- 2 tsp ground cumin
- 2 tsp chili powder
- ½ tsp table salt
- ¼ tsp finely ground black pepper
- 4 cups (32 oz.) chicken stock or low-sodium chicken broth
- 2 cups sour cream (full-fat) or Greek yogurt (full-fat)
- ½ cup shredded Monterey Jack cheese
- Juice of one lime
- ¼ cup chopped cilantro
- ½ cup crumbled queso fresco
Instructions
- Heat the olive oil in a large pot over medium heat.
- Toss in the diced red onion and let it sweat for a couple of minutes.
- Add the minced garlic and diced jalapeño, stirring for a minute until fragrant.
- Add the chicken breasts and brown them slightly on each side.
- Add the fire-roasted corn and green chiles, stirring to combine.
- Sprinkle in Tajín, cumin, chili powder, salt, and pepper.
- Pour in the chicken stock, bring to a boil, then reduce to a simmer and cover.
- Shred the chicken after cooking it through, then return it to the soup.
- Stir in the sour cream or Greek yogurt.
- Squeeze in the lime juice and fold in the Monterey Jack cheese.
- Garnish with crumbled queso fresco and fresh cilantro before serving.
Notes
For a vegetarian version, substitute chicken with canned black beans or chickpeas. Adjust spice levels to your taste.
- Prep Time: 15 minutes
- Cook Time: 30 minutes
- Category: Soup
- Method: Stovetop
- Cuisine: Mexican
Nutrition
- Serving Size: 1 bowl
- Calories: 350
- Sugar: 5g
- Sodium: 400mg
- Fat: 15g
- Saturated Fat: 7g
- Unsaturated Fat: 6g
- Trans Fat: 0g
- Carbohydrates: 20g
- Fiber: 3g
- Protein: 25g
- Cholesterol: 70mg
Keywords: Mexican soup, corn soup, street corn, comfort food, easy recipe

Fall Cinnamon Swirl Pumpkin Bread Minis (25-Min Bake)
Cinnamon Swirl Pumpkin Bread Minis: A Cozy Fall Treat
Hey there, fellow food lovers! With the crispness of autumn in the air and pumpkin spice everything taking over our favorite cafes, I can’t help but get a bit sentimental and inspired in the kitchen. I’m super excited to share a delicious recipe that captures all the warm and cozy vibes of fall: Cinnamon Swirl Pumpkin Bread Minis. These little lovelies are not just cute; they embody everything comforting about the season—rich pumpkin flavor, a sweet cinnamon swirl, and that mouthwatering aroma wafting through the house.
Imagine waking up on a chilly morning, wrapping your hands around a warm mug of coffee, and sinking your teeth into one of these delightful mini loaves. It’s pure bliss! What’s even better? They freeze beautifully, which means you can whip up a batch now and savor the flavors of fall throughout the year.
But before we dive into making these cinnamon-packed treats, let me take you back for a moment. There’s a funny story tied to pumpkin bread in my life, one that transformed an ordinary baked good into a legendary family tradition.
Personal Story
Growing up, my mom was the queen of the kitchen, and her pumpkin bread was the stuff of legends. One autumn afternoon, I remember her bustling in the kitchen while I attempted to “help.” As a kid, my idea of assisting often meant sneaking in extra sugar and cinnamon when she wasn’t looking. Well, that fateful day, I learned firsthand that the difference between a sweet treat and a sugar bomb is a delicate balance!
As my mom pulled her freshly baked loaf from the oven, I was practically hovering with excitement. The moment she sliced into it, the soft, pillowy bread crackled slightly, and the intoxicating scent of cinnamon filled the air. But when it hit my taste buds, I realized I might have overdone it on the sugar. What was supposed to be the perfect blend of warmth and sweetness turned into a laughable “sweet tooth explosion.”
Mom just chuckled, shook her head, and said, “Beau, sometimes less is more!” We all laughed, and from that day on, I vowed to perfect the pumpkin bread recipe with my own flair, which eventually led to these adorable mini versions. So, whether you’re nostalgic for fall or just in need of a cozy treat, I guarantee these Cinnamon Swirl Pumpkin Bread Minis will win your heart just like they did mine!
Ingredients
Here’s what you’ll need to bring this recipe to life:
-
1 cup canned pumpkin
The star of the show! Canned pumpkin is super convenient, but if you’re feeling adventurous, you can roast and puree your own pumpkin. You’ll get a fresher taste, but canned works perfectly for this recipe. -
1/2 cup granulated sugar
This is the sweet base of your bread. Feel free to swap with coconut sugar or a sugar alternative if you’re looking for a lighter option. -
1/4 cup brown sugar
The molasses in brown sugar adds a rich depth of flavor. If you don’t have brown sugar, you can make your own by mixing granulated sugar with a bit of molasses. -
1/2 cup vegetable oil
This keeps our bread moist. You can substitute it with melted coconut oil for a hint of tropical flavor. -
2 large eggs
The eggs help bind everything together. For a vegan option, substitute each egg with 1/4 cup of unsweetened applesauce or mashed bananas. -
1 1/2 cups all-purpose flour
The foundation for our mini loaves. Whole wheat flour can be used for a nuttier flavor and added nutrition. -
1 tsp baking powder
This is our leavening agent to help the bread rise. Don’t skip this! -
1/2 tsp baking soda
Works in tandem with the baking powder. Ensure it’s fresh for the best rise! -
1/2 tsp salt
Just a pinch to balance the flavors. A little salt goes a long way in baked goods. -
1 tsp ground cinnamon
Adds warmth and spice! You can also add a dash of cardamom for an extra punch. -
1/2 tsp ground nutmeg
A lovely addition for that cozy fall flavor. Use fresh nutmeg if you have it; it makes a difference! -
1/4 tsp ground ginger
It adds a subtle warmth that complements the pumpkin beautifully. -
1/4 cup granulated sugar (for topping)
Extra sweetness on top gives our minis that bakery-style finish. -
1 tsp ground cinnamon (for topping)
Enhances the sweetness and adds visual appeal. You’ll want to sprinkle this generously!
Step-by-Step Instructions
Step 1: Preheat Your Oven
First things first—preheat your oven to 350°F (175°C) and line your mini loaf pans with parchment paper or spray them well with non-stick spray. This is crucial to prevent our scrumptious minis from sticking.
Step 2: Mix the Wet Ingredients
In a large mixing bowl, combine the canned pumpkin, granulated sugar, brown sugar, and vegetable oil. Whisk them together until well blended. This takes about a minute. Look for a smooth consistency—this will give your bread that moist, tender crumb we’re aiming for.
Step 3: Add the Eggs
Next, crack in those two large eggs. Whisk them in until the mixture is fluffy. You’ll see a beautiful golden hue emerge, inviting and luscious!
Step 4: Combine the Dry Ingredients
In another bowl, sift together the all-purpose flour, baking powder, baking soda, salt, cinnamon, nutmeg, and ginger. Sifting helps eliminate any lumps and ensures even distribution of the dry ingredients—something I can’t emphasize enough!
Step 5: Mix It All Together
Slowly incorporate the dry ingredients into the wet mixture. Use a spatula or wooden spoon to fold them together gently, just until combined. A few lumps are okay; we don’t want to overmix, or we risk a dense loaf.
Step 6: Prepare the Cinnamon Swirl
In a small bowl, mix the 1/4 cup granulated sugar and 1 tsp ground cinnamon together. This will be our glorious swirl!
Step 7: Assemble the Mini Loaves
Now, here’s where it gets fun! Divide the batter evenly among your prepared mini loaf pans, filling each about halfway. Sprinkle some of the cinnamon-sugar mixture on top of the batter. Use a toothpick or a knife to swirl it gently into the batter. Don’t overdo it; you want to see beautiful ribbons of cinnamon throughout.
Step 8: Bake
Pop those pans in your preheated oven and bake for 25-30 minutes, or until a toothpick comes out clean when inserted in the center. Your kitchen should smell like heaven at this point!
Step 9: Cool
Once baked, remove the pans from the oven and let them cool for about 10 minutes. Then, transfer the loaves to a wire rack to cool completely. Resist the urge to slice right away—the flavors will deepen as they cool!
Serving Suggestions
So, you’ve got your fabulous Cinnamon Swirl Pumpkin Bread Minis cooling down. Now, how to serve? Honestly, they’re delightful all on their own, but if you want to elevate the experience, here are some suggestions:
- With Butter: Spread a bit of softened butter on a warm slice. The butter melts into the bread—pure magic!
- Cream Cheese Spread: Whip up a creamy spread with some cream cheese, a little bit of sugar, and a dash of vanilla extract. It’s to-die-for!
- Garnish: Dust with powdered sugar for a pretty presentation. You’ll impress your friends on any brunch table!
- Coffee Pairing: Serve these beauties alongside your favorite coffee or chai latte. The spices harmonize perfectly, creating a symphony of autumnal flavors.
- As Gifts: If you’re feeling generous, package them up with a cute ribbon. Homemade treats always carry a personal touch that store-bought goodies lack.
Recipe Variations
Feeling experimental? Here are a few ideas to shake things up!
-
Chocolate Chip Twist: Add 1/2 cup of chocolate chips to the batter before pouring it into the pans. Yes, chocolate and pumpkin are a match made in heaven!
-
Nutty Delight: Stir in 1/2 cup of chopped pecans or walnuts for some crunch and added flavor.
-
Gluten-Free Option: Substitute all-purpose flour with a gluten-free flour blend to accommodate any dietary needs.
-
Dairy-Free: Use unsweetened almond milk instead of eggs (1/4 cup applesauce per egg) and make sure your butter is dairy-free.
-
Spiced Pumpkin Bread: Want to amp up the spice? Add a pinch of cloves and allspice for a more intense autumn flavor.
Chef’s Notes
Just a little nugget from my kitchen adventures—this recipe has transformed over the years. My initial attempt featured a few disastrous flavors, largely due to my overzealous use of spices and sweetness. Let’s just say my sweet tooth got the better of me more than once, but hey, that’s how we learn!
Each time I made it, I learned something valuable, and eventually, these mini delights became one of my go-to recipes. As pumpkin season rolls around, I love to prep them ahead of time for gatherings or cozy nights in. The best part? They freeze incredibly well! Make a double batch, wrap them up, and you’ll have a taste of fall whenever you need a pick-me-up.
FAQs and Troubleshooting
1. Why did my bread sink in the middle?
This could be due to underbaking or overmixing. Ensure you’re measuring your flour correctly and don’t skip the toothpick test!
2. Can I use fresh pumpkin instead of canned?
Absolutely! Just make sure it’s well-pureed and free of excess moisture to maintain the texture.
3. My bread is too dry. What went wrong?
Too much flour, baking too long, or not enough oil could be the culprit. Ensure you’re using the right measurements and keeping an eye on the baking time.
4. How do I store leftovers?
Once cooled, wrap each mini loaf in plastic wrap, and they’ll keep in the fridge for about a week. For longer storage, pop them in the freezer for up to 3 months!
Nutritional Info
While I usually focus on the deliciousness of a recipe, I know many of us keep an eye on what we’re eating. So, here’s a rough breakdown per mini loaf (based on standard ingredients and 12 loaves total):
- Calories: 150
- Protein: 2g
- Fat: 6g
- Carbohydrates: 22g
- Fiber: 1g
- Sugar: 8g
These minis are perfect for an indulgent snack or a sweet breakfast treat, especially when you account for the wholesome pumpkin and spices packed in!
Final Thoughts
Well, there you have it, folks—a delightful recipe that not only fills your kitchen with heavenly aromas but also fills your heart with cozy fall feelings. Cinnamon Swirl Pumpkin Bread Minis will undoubtedly be the star of your kitchen, a treat to share, or even keep all to yourself (I won’t tell!).
So, grab your mixing bowls and get ready to whip up a batch. Trust me, once you take that first bite, you’ll feel like you’re wrapped in a warm hug! Happy baking, and until next time, keep cooking up those good vibes!
Print
Cinnamon Swirl Pumpkin Bread Minis
- Total Time: 45 minutes
- Yield: 12 minis 1x
- Diet: Vegetarian
Description
These adorable mini loaves capture the essence of fall with rich pumpkin flavor, a sweet cinnamon swirl, and a delightful aroma.
Ingredients
- 1 cup canned pumpkin
- 1/2 cup granulated sugar
- 1/4 cup brown sugar
- 1/2 cup vegetable oil
- 2 large eggs
- 1 1/2 cups all-purpose flour
- 1 tsp baking powder
- 1/2 tsp baking soda
- 1/2 tsp salt
- 1 tsp ground cinnamon
- 1/2 tsp ground nutmeg
- 1/4 tsp ground ginger
- 1/4 cup granulated sugar (for topping)
- 1 tsp ground cinnamon (for topping)
Instructions
- Preheat your oven to 350°F (175°C) and line your mini loaf pans with parchment paper or spray them well with non-stick spray.
- Mix the canned pumpkin, granulated sugar, brown sugar, and vegetable oil in a large mixing bowl until well blended.
- Add the eggs and whisk until the mixture is fluffy.
- Combine the flour, baking powder, baking soda, salt, cinnamon, nutmeg, and ginger in another bowl.
- Mix the dry ingredients into the wet mixture until just combined.
- Prepare the cinnamon swirl by mixing the 1/4 cup granulated sugar and 1 tsp ground cinnamon together.
- Assemble the mini loaves by dividing the batter among the prepared pans, sprinkling the cinnamon-sugar mixture on top, and swirling it gently into the batter.
- Bake for 25-30 minutes, or until a toothpick comes out clean.
- Cool for about 10 minutes in the pans before transferring to a wire rack to cool completely.
Notes
These mini loaves freeze beautifully, making them perfect for a cozy treat anytime.
- Prep Time: 15 minutes
- Cook Time: 30 minutes
- Category: Dessert
- Method: Baking
- Cuisine: American
Nutrition
- Serving Size: 1 mini loaf
- Calories: 150
- Sugar: 8g
- Sodium: 200mg
- Fat: 6g
- Saturated Fat: 1g
- Unsaturated Fat: 5g
- Trans Fat: 0g
- Carbohydrates: 22g
- Fiber: 1g
- Protein: 2g
- Cholesterol: 30mg
Keywords: pumpkin bread, fall recipes, cinnamon, cozy baking, dessert
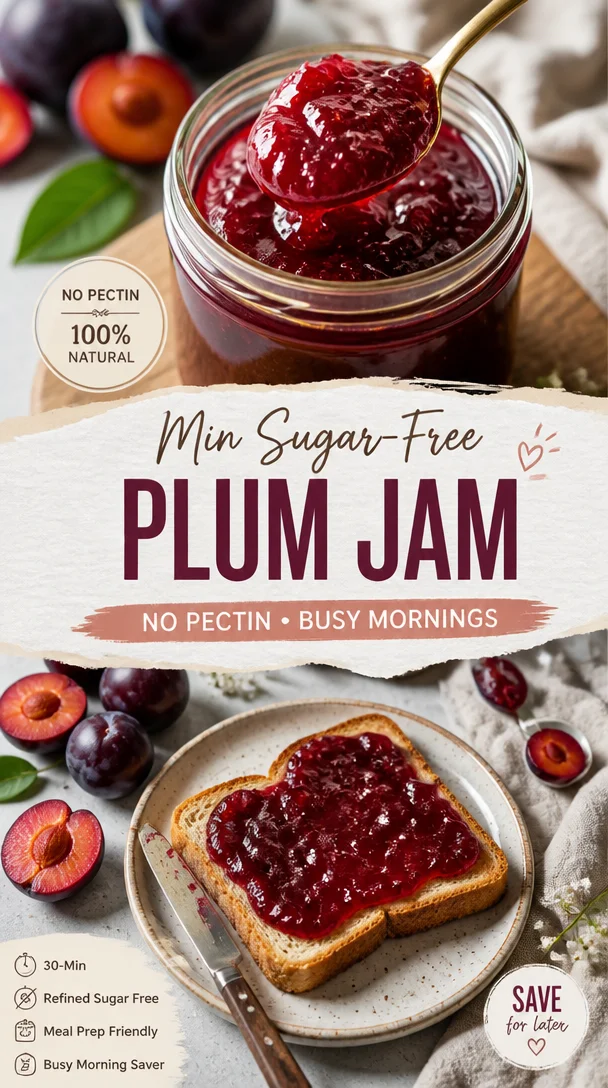
Min Sugar-Free Plum Jam (No Pectin) for Busy Mornings
How to Make Sugar-Free Plum Jam with No Pectin: A Delightful DIY Delight
Hey there, fellow food lovers! If you’re looking to bottle up some sweet summer vibes and spread them on a piece of toast, you’ve come to the right place. Today, we’re diving into the world of homemade Sugar-Free Plum Jam with no pectin. Yes, you heard that right! This jam is not only bursting with flavor, but it’s also made from simple ingredients, so you can whip it up without any fuss. Grab your apron, and let’s get jammin’!
It’s Jam Time!
Let’s take a moment to ponder this: what kicks off your warm memories of love and comfort? For me, it’s the sweet aroma of fruit simmering on the stove. Growing up, my grandmother would invite me into her cozy kitchen to make jam from the plums she harvested each summer. I can still vividly remember those hot summer days when we’d pick the ripest fruits from her garden and spend hours chatting and laughing while we transformed those juicy gems into jars of joy. The best part? Those fragrant wafts would fill the house, making everyone’s mouths water in anticipation.
One of my favorite moments was when she let me stir the mixture, teaching me the importance of patience as we waited for the plums to break down and become that perfect jammy consistency. It was there, in that small kitchen filled with the warmth of love and family, that I learned that making jam is more than just a recipe—it’s a celebration of togetherness and the simple joys of life. Thank you, Grandma, for the knowledge, the stories, and those cherished moments we spent together!
Ingredients You’ll Need
Let’s roll up our sleeves and get to the fun part—ingredients! Here’s what you’ll need to make your own Sugar-Free Plum Jam:
-
1000 g of Very Ripe Plums
The stars of the show! Go for those plump, juicy, and slightly overripe plums; they’re naturally sweeter and burst with flavor. If plums aren’t available, you can substitute them with peaches or apricots for a different twist! -
1 Apple
This little gem adds natural pectin and sweetness, helping your jam thicken without any added sugar. If you’re not keen on apples, try another fruity option like a pear! -
100 mL of Water
Just enough to get the cooking process started and help the fruits soften. You can use apple juice for added flavor if you want a bit of a kick! -
1 tbsp of Lemon Juice
Freshly squeezed lemon juice brightens the jam and balances the sweetness of the plums and apple. If you’re out of fresh lemons, bottled lemon juice will also work! -
0.5 tsp of Cinnamon
A delightful spice that warms up the flavors. You can swap this with nutmeg or leave it out if you’re not a cinnamon fan! -
0.5 tsp of Ginger
Fresh or powdered, ginger adds a lovely zing! You can adjust to taste or omit if you prefer a milder flavor.
Step-by-Step Instructions
Are you ready to make some magic happen? Let’s jump into the cooking steps:
-
Prep the Plums
Start by washing your plums thoroughly. Slice them in half and pit them. Don’t worry about being super neat; they’ll break down while cooking! Oh, and keep those skins on— they’ll add even more flavor and color to the jam. -
Chop the Apple
Peel and chop your apple into small chunks. This step doesn’t need to be perfect, but make sure you remove the core and seeds. And remember, no need to peel—it’s the nutrients in the skin that help with that lovely color and texture! -
Combine Ingredients
In a heavy-bottomed pot, combine those glorious plums, chopped apple, water, lemon juice, cinnamon, and ginger. Stir everything together, and gently bring it to a simmer over medium heat. At this stage, it’s about warming those flavors up! -
Get Simmering
Once it’s simmering, lower the heat and let it cook for about 30-40 minutes. Stir occasionally, making sure nothing is sticking to the bottom. As the fruits break down, you’ll see your concoction transforming into a fragrant jammy mixture. Here’s a little hack: use a potato masher to break down the fruit further and achieve your desired consistency! -
Taste and Adjust
Here’s the fun part! Give your jam a taste. If it needs a bit more zing, feel free to add a dash more lemon juice. If you enjoy a stronger spice flavor, sprinkle in extra cinnamon or ginger to your preference. -
Cool and Jar Up
Once it’s thickened up to your liking (you want a spreadable consistency!), remove it from heat. Let it cool for a bit before transferring it to sterilized jars. It’s important to use clean jars so your jam is preserved properly. Seal them up tight and store them in the fridge!
Serving Suggestions
Now, how to indulge in this sweet goodness? Spread your homemade Sugar-Free Plum Jam generously on toasted bread or fresh pancakes for breakfast bliss! Mix it into yogurt for a delicious snack, or swirl it in chia pudding for a fruity explosion. Feeling fancy? Use it as a filling in pastries or serve it alongside cheese for a stunning cheese board. Trust me, it’ll impress everyone at your next gathering!
Recipe Variations
Want to mix things up? Here are some creative twists to consider:
-
Spiced Plum Jam: Add a pinch of nutmeg or a tiny dash of ground cloves for a classic spice twist.
-
Berry Blast: Toss in a cup of fresh berries, like raspberries or blueberries, for a mixed-fruit jam!
-
Herbal Infusion: Steep some fresh mint or rosemary in your water before cooking for a unique herbal taste.
-
Chili Plum Jam: For a spicy kick, add a few red pepper flakes to the mix for that sweet and spicy combo.
-
Alcohol-Infused Jam: Feel adventurous? Stir in a splash of brandy or bourbon just before removing from heat for a sophisticated twist!
Chef’s Notes
This recipe is dear to my heart, and it has evolved nicely over time. Initially, I used traditional sugar and pectin, but as I experimented, I found that relying on nature’s sweetness could yield a more wholesome treat! Plus, there’s just something magical about knowing exactly what goes into your food. And who wouldn’t love introducing a sugar-free option into their snacking repertoire? My grandma would be proud!
FAQs and Troubleshooting
1. My jam turned out too runny! What can I do?
No worries! Simply return the jam to the stove and continue cooking on low heat, stirring frequently until it thickens to your liking.
2. Can I can this jam for longer storage?
Absolutely! Just ensure you use sterilized jars and process them in a boiling water bath for about 10 minutes to seal them properly.
3. What if I don’t have enough ripe plums?
No problem! You can mix with other fruits like peaches or apricots. Just keep the proportions similar for the best flavor.
4. How do I know when the jam is done?
A good test is the plate test: drop a spoonful of jam on a cold plate and let it cool. If it sets and doesn’t run, you’re good to go!
Nutritional Info
For those mindful of their intake, this Sugar-Free Plum Jam is low-calorie and full of natural goodness. With no added sugars, the calories primarily come from the fruits themselves. Plums provide great health benefits, including vitamins A and C, while apples pack fiber and antioxidants. Enjoy every spread without the guilt!
Final Thoughts
And there you have it, my friends—your very own Sugar-Free Plum Jam! Making jam from scratch isn’t just a culinary project; it’s a way to infuse your life with flavor and heart. I hope this recipe brings you as much joy as it has brought to me and my family. So why wait? Roll up your sleeves, pop some music on, and get cookin’!
Remember, cooking should be as much about the experiences and memories as it is about the food itself. Happy jam-making, and I can’t wait to hear how yours turns out!
Until next time, happy feasting!
Print
Sugar-Free Plum Jam with No Pectin
- Total Time: 55 minutes
- Yield: 4 servings 1x
- Diet: Vegetarian
Description
A delightful homemade jam using ripe plums, offering a sugar-free alternative with natural sweetness.
Ingredients
- 1000 g of Very Ripe Plums
- 1 Apple
- 100 mL of Water
- 1 tbsp of Lemon Juice
- 0.5 tsp of Cinnamon
- 0.5 tsp of Ginger
Instructions
- Prep the plums by washing them thoroughly, slicing in half, and removing the pits. Keep the skins on for added flavor.
- Chop the apple into small chunks, removing the core and seeds.
- Combine plums, chopped apple, water, lemon juice, cinnamon, and ginger in a heavy-bottomed pot.
- Get simmering by bringing the mixture to a simmer over medium heat, stirring gently.
- Cook for about 30-40 minutes, stirring occasionally, and use a potato masher to achieve desired consistency.
- Taste and adjust flavors with more lemon juice or spices as preferred.
- Cool the jam before transferring it to sterilized jars and seal tightly.
Notes
Use clean jars for preservation, and consider alternative fruits if plums are unavailable.
- Prep Time: 15 minutes
- Cook Time: 40 minutes
- Category: Condiment
- Method: Stovetop Cooking
- Cuisine: Preserving
Nutrition
- Serving Size: 1 tablespoon
- Calories: 50
- Sugar: 0g
- Sodium: 1mg
- Fat: 0g
- Saturated Fat: 0g
- Unsaturated Fat: 0g
- Trans Fat: 0g
- Carbohydrates: 13g
- Fiber: 1g
- Protein: 0g
- Cholesterol: 0mg
Keywords: plum jam, sugar-free jam, homemade jam, preserving, fruit spread

Ingredient Coconut Apricot Muffins: Quick Breakfast
Coconut and Fresh Apricot Muffins: A Taste of Summer
Hey there, fellow foodies! Today, I am thrilled to share with you a recipe that celebrates the sunny flavors of summer—Coconut and Fresh Apricot Muffins. If you’re anything like me, the scent of freshly baked goods wafting through your kitchen is pure magic. It transports you to better days filled with laughter, love, and sweet memories. So, grab your apron, and let’s whip up a batch of these delightful muffins that are bursting with tropical vibes and the luscious taste of apricots!
A Toast to Nostalgia
Let me take you back to a sun-soaked summer afternoon a few years ago, one that stands out among my fond kitchen memories. I was visiting my grandmother, who always seemed to have a secret stash of delicious treats tucked away in her pantry. One day, she handed me a basket filled with freshly picked apricots from her garden. The fragrance was intoxicating, sweet and tangy, and I could hardly wait to dive into a culinary adventure with them.
As we baked together, her sage advice filled the air—“Don’t rush, enjoy the process; cooking is as much about the journey as the destination.” We decided to create muffins instead of the usual cobbler. By combining those vibrant apricots with rich coconut, we nailed a taste that felt both comforting and exciting. It was one of those moments where the love of cooking transformed our kitchen into a magical place filled with laughter and happiness. Every bite of those muffins was a warm hug, reminding me that good food brings people together.
Now, let’s recreate that wonderful experience in your kitchen with these Coconut and Fresh Apricot Muffins!
The Perfect Ingredients for Muffin Perfection
Before we dive into the cooking, let’s gather our ingredients. Here’s what you need:
- 280 g plain flour: This serves as the muffin’s base. You can swap it for whole wheat flour for a nuttier flavor or a gluten-free blend if you’re going for a gluten-free option.
- 2 tsp baking powder: This leavening agent gives our muffins a delightful rise. Remember, baking powder loses its potency over time, so check the expiration date!
- 1/2 tsp bicarbonate of soda: Also known as baking soda, it adds extra fluffiness to our muffins. It works best when paired with acidic ingredients like buttermilk or yogurt.
- 1/2 tsp salt: Just a pinch enhances the flavors without making your muffins salty.
- 75 g sugar: For sweetness! You can substitute with coconut sugar or even a sugar alternative if you’re watching your intake.
- 50 g desiccated coconut (unsweetened): This adds a tropical flair. Feel free to use sweetened if you prefer a sweeter taste!
- 90 ml sunflower oil: A neutral oil that keeps our muffins moist. You can swap it for melted coconut oil for even more coconut flavor.
- 150 ml milk: I used oat milk, but any type of milk will do—dairy, almond, or even coconut milk for an extra flavor boost.
- 1 egg: For binding ingredients together. To make this vegan, use a flax egg (1 tbsp flaxseed meal + 2.5 tbsp water).
- 1 ripe banana: This will add natural sweetness and moisture to the muffins. The riper, the better—look for those lovely brown spots!
- 175 g apricots: Fresh, juicy apricots are the star here! If apricots aren’t in season, you can replace them with peaches or nectarines for a similar taste.
Step-By-Step Instructions to Muffin Nirvana
Are you excited yet? Let’s get our hands floury and dive into the steps!
-
Preheat Your Oven: Start by preheating your oven to 180°C (350°F) and lining a muffin tray with paper liners or greasing it lightly. This ensures our muffins don’t stick and makes cleanup a breeze!
-
Mix Dry Ingredients: In a large mixing bowl, combine the plain flour, baking powder, bicarbonate of soda, salt, sugar, and desiccated coconut. Mix it all up with a whisk and feel free to do a little dance—it makes cooking more fun!
-
Mash That Banana: In another bowl, mash the ripe banana until it’s a smooth puree. This is where the magic begins—the banana will provide natural sweetness, moisture, and make our muffins super fluffy!
-
Add Wet Ingredients: To the mashed banana, add the sunflower oil, milk, and the egg. Whisk until everything is combined and you see a beautiful blend of colors. Yum!
-
Combine Wet and Dry: Slowly pour the wet mixture into the bowl of dry ingredients. Gently fold them together using a spatula or wooden spoon. Be careful not to overmix—some lumps are okay! This will keep our muffins soft and tender.
-
Chop Those Apricots: Take your fresh apricots and chop them into bite-sized pieces. Gently fold them into the muffin batter. I like to keep a few pieces aside to place on top before baking for that extra pop of color!
-
Scoop it In: Using a large spoon or ice cream scoop, portion the batter into the prepared muffin tray, filling each liner about 2/3 full. This allows room for rising without overflowing.
-
Bake to Perfection: Pop your muffin tray into the preheated oven and bake for about 20-25 minutes or until they’re golden brown and a toothpick inserted in the center comes out clean. The aroma will have you salivating—trust me!
-
Cooling Down: Once they’re baked, take them out and let them cool in the tray for about 5 minutes before transferring them to a wire rack to cool completely. This step may feel excruciating, but trust me, it’s worth the wait!
Creating an Inviting Plating
Now that your Coconut and Fresh Apricot Muffins are ready, let’s talk about how to serve them. For a cozy presentation, arrange a few muffins on a rustic wooden board, possibly dusting them lightly with powdered sugar to elevate their appearance. You can accompany them with a small jar of homemade jam or a dollop of whipped cream cheese. If you’re feeling fancy, sprinkle some extra desiccated coconut on top for that tropical flair!
These muffins are perfect for breakfast, a brunch gathering, or simply a treat any time of day—trust me, they’ll disappear fast!
Recipe Variations to Keep It Fresh
Every recipe can be tweaked to fit your cravings or dietary preferences, and these muffins are no exception! Here are some variations and tips to keep things creative:
- Tropical Twist: Add some crushed pineapple along with the apricots for a true tropical muffin adventure!
- Nutty Delight: Toss in some chopped nuts like almonds or walnuts for a lovely crunch and added protein.
- Berry Goodness: Swap out apricots for blueberries or raspberries in the summer for a juicy and refreshing flavor.
- Vegan Option: As mentioned earlier, substitute the egg with a flax egg and use coconut milk for richness.
- Zesty Addition: Add a teaspoon of vanilla extract or a bit of grated lemon or orange zest for a citrus kick.
Chef’s Notes from the Kitchen
Here’s a little secret: the first batch of these muffins was actually inspired by a recipe I found in an old cookbook my grandmother passed down to me. Over time, though, I tweaked it to incorporate the tropical flavors we all love today. I remember the look on her face when she took that first bite—pure bliss! Sometimes our favorite recipes find their soul over generations, and it’s so rewarding to share them with friends and family.
FAQs and Troubleshooting
1. What if my muffins are too dense?
Difficulty in fluffiness might stem from overmixing the batter or not enough leavening agents. Keep mixing to a minimum, and double-check your baking powder and bicarbonate for freshness!
2. Can I make these muffins ahead of time?
Absolutely! Store them in an airtight container at room temperature for up to 2 days. You can also freeze them and defrost as needed; they’re just as delightful when reheated!
3. Why didn’t my muffins rise?
Check that your oven is at the right temperature. Also, make sure your baking powder is fresh and active. This is key for achieving fluffy muffins!
4. Can I add chocolate to the batter?
Why not! Feel free to fold in some chocolate chips for a delectable chocolate twist. It’s a great way to indulge even more!
Nutritional Info
Let’s talk about those delicious muffins—each one is packed with flavor as well as nourishment. Here’s a rough breakdown of the nutrition per muffin (based on 12 servings):
- Calories: Approximately 180 kcal
- Protein: 3 g
- Fat: 6 g
- Carbohydrates: 28 g
- Fiber: 2 g
- Sugar: 8 g
These muffins are a delightful treat that brings coconut and apricot goodness to your snack time while still being a reasonable option for a sweet break!
Final Thoughts
And there you have it, my dear food enthusiasts! Coconut and Fresh Apricot Muffins—soft, scrumptious, and so easy to whip up. They’re not just muffins; they’re a ticket to joyful memories, cozy moments, and a taste of summer that you can enjoy in any season.
As you bake these delightful treats, remember they aren’t just food; they’re experiences waiting to happen. So gather your friends and family around, share these muffins, and savor the delicious moments together. Because food is much more than just sustenance; it’s a bridge to connections, love, and joy.
Happy baking, everyone, and until next time, may your kitchens always be filled with warmth, laughter, and, of course, the delightful aroma of something delicious! Let’s dig in!
Print
Coconut and Fresh Apricot Muffins
- Total Time: 40 minutes
- Yield: 12 servings 1x
- Diet: Vegetarian
Description
Delight in the sunny flavors of summer with these Coconut and Fresh Apricot Muffins, perfect for breakfast or a sweet treat any time of day.
Ingredients
- 280 g plain flour
- 2 tsp baking powder
- 1/2 tsp bicarbonate of soda
- 1/2 tsp salt
- 75 g sugar
- 50 g desiccated coconut (unsweetened)
- 90 ml sunflower oil
- 150 ml milk
- 1 egg
- 1 ripe banana
- 175 g apricots
Instructions
- Preheat your oven to 180°C (350°F) and prepare a muffin tray.
- Mix the dry ingredients together: flour, baking powder, bicarbonate of soda, salt, sugar, and desiccated coconut.
- Mash the ripe banana until smooth in another bowl.
- Add the sunflower oil, milk, and egg to the banana and whisk until combined.
- Combine the wet and dry ingredients without overmixing.
- Chop fresh apricots and gently fold them into the muffin batter.
- Scoop the batter into the muffin tray, filling each liner about 2/3 full.
- Bake for 20-25 minutes or until golden brown.
- Cool in the tray for 5 minutes, then transfer to a wire rack.
Notes
For a vegan version, substitute the egg with a flax egg and use coconut milk for richness.
- Prep Time: 15 minutes
- Cook Time: 25 minutes
- Category: Breakfast
- Method: Baking
- Cuisine: American
Nutrition
- Serving Size: 1 muffin
- Calories: 180
- Sugar: 8g
- Sodium: 220mg
- Fat: 6g
- Saturated Fat: 3g
- Unsaturated Fat: 2g
- Trans Fat: 0g
- Carbohydrates: 28g
- Fiber: 2g
- Protein: 3g
- Cholesterol: 30mg
Keywords: coconut muffins, apricot muffins, summer recipes, baking, vegetarian treats
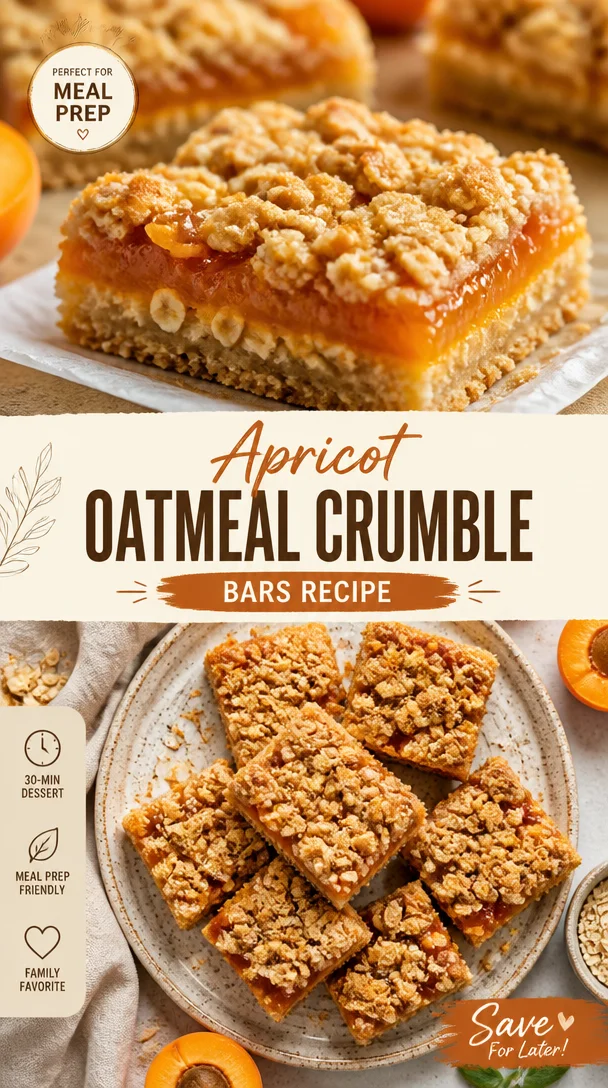
Apricot Oatmeal Crumble Bars Recipe
Apricot Oatmeal Crumble Bars: A Sweet Nostalgic Delight
Hey there, Foodie Friends! I’m so excited to have you here at Feastical, where we turn simple ingredients into soul-warming dishes. Today, we’re diving into a recipe that’s near and dear to my heart: Apricot Oatmeal Crumble Bars. These bars are not just a treat for your taste buds; they’re a delicious reminder of cozy afternoons spent in the kitchen with loved ones.
When I think back to my childhood, one of my fondest memories is baking with my grandmother during summer break. Armed with her trusty apron and a sense of adventure, we’d whip up all sorts of goodies. There was always a pint of apricot preserves involved for at least one of our creations. The aroma of sweet apricots and warm oats filled the air, inviting my siblings and me to gather around the kitchen table, eager to devour whatever we had baked.
These Apricot Oatmeal Crumble Bars are inspired by those afternoons. They’re super easy to make and perfect for sharing. Whether you’re prepping for a potluck, looking for a delicious snack, or simply wanting to indulge in a little nostalgia, these bars will hit the spot. Let’s roll up our sleeves and make some kitchen magic happen!
My Personal Oatmeal Story
One summer afternoon, when I was about ten years old, I was given the “big kid” task of mixing the ingredients while my grandmother prepared the apricot filling. The kitchen was bustling, with pots clanging and the sweet sounds of laughter echoing through the air. I still remember the first time I tasted these Apricot Oatmeal Crumble Bars as they came out of the oven—golden, crumbly, and drizzled with a hint of warmth. My grandma smiled as I took a huge bite, and my eyes widened in delight.
That moment sparked my lifelong love for cooking and baking! My grandmother always said that cooking is like giving someone a hug—and these bars were just that. I continue to make these delightful treats to this day, sharing them with friends and family. Now, I can’t wait for you to bake them too, and create your own warm memories in the kitchen!
Ingredients
Here’s what you’ll need to whip up these delightful Apricot Oatmeal Crumble Bars:
- 1 ¼ cups rolled oats: Rolled oats give these bars a chewy texture. If you need gluten-free options, look for certified gluten-free oats.
- ¾ cup all-purpose flour: This gives the crumble a sturdy base. You can use whole wheat flour for a nuttier flavor or almond flour for a gluten-free version.
- 1 cup apricot preserves: The star of the show! Feel free to substitute with any fruit preserves you have on hand, such as peach or raspberry, for a different twist.
- ½ cup butter, softened to room temperature: Butter adds richness. For a dairy-free option, you can swap in coconut oil or vegan butter.
- ½ cup packed brown sugar: This sweetener adds depth and a bit of moisture. If you’re watching sugar intake, you can reduce it or use coconut sugar for a healthier option.
- ¼ teaspoon baking soda: This creates slight leavening in the bars, giving them a nice texture. If you run out, you can skip it, but the bars will be denser.
With these simple yet versatile ingredients, you’ll create a treat that warms the heart!
Step-by-Step Instructions
Let’s get cooking! Follow these steps to create your scrumptious Apricot Oatmeal Crumble Bars:
-
Preheat your oven to 350°F (175°C). Preparing your oven is key to a perfect bake. Preheating ensures that everything cooks evenly from the get-go!
-
Grease a 9×9-inch baking pan. Using a bit of cooking spray or butter, coat the bottom and sides of the pan, so your bars don’t stick. It’s a little detail that makes a big difference!
-
Mix the dry ingredients in a bowl. In a large mixing bowl, combine the rolled oats, all-purpose flour, brown sugar, and baking soda. Stir until well-combined. Feel free to add a pinch of salt to enhance the sweetness; it’s a chef’s secret weapon!
-
Incorporate the butter. Add the softened butter to your dry mixture. Using your fingers or a pastry cutter, mix until the mixture resembles coarse crumbs. This is the fun part! Get your hands in there and feel the texture; you want some nice, crumbly bits!
-
Set aside a cup for the topping. Remember to reserve about a cup of this crumble mixture for the topping later. It’s like keeping a little piece of magic for the final touch!
-
Press the remaining mixture into the pan. Use a spatula or your fingers to press the crumble into an even layer at the bottom of the baking pan. It should be compact enough to hold together when baked.
-
Spread the apricot preserves evenly. Spoon the apricot preserves over the pressed crumble, spreading it gently to ensure every bite has a lovely fruit filling. The sweetness will remind you of childhood!
-
Top with the reserved crumble. Sprinkle the remaining mixture evenly over the apricot preserves. This will create a lovely crust on top, giving your bars that signature crumble.
-
Bake for 25-30 minutes. Place the pan into the preheated oven and bake until the top is golden brown and fragrant. Keep an eye on it—because no one likes burnt bars!
-
Cool and cut. Once baked, remove from the oven and let the bars cool in the pan for about 10-15 minutes. This makes them easier to cut. Slice them into squares or bars, depending on your mood!
There you have it—a beautifully baked batch of Apricot Oatmeal Crumble Bars, with an irresistible aroma wafting through your kitchen.
Serving Suggestions
It’s time to enjoy those beautiful bars! You can serve them warm, straight from the oven, or at room temperature. They are delightful on their own, but if you want to elevate the experience, here are a few serving ideas:
-
Top with a scoop of vanilla ice cream: You can never go wrong with warm crumble bars and a scoop of ice cream! The creaminess perfectly balances the sweetness.
-
Dust with powdered sugar: A light dusting gives them an elegant touch and a hint of sweetness!
-
Pair with a cup of tea or coffee: These bars are perfect for afternoon tea or a coffee break. The flavors complement each other beautifully.
-
Add some fresh fruit: Slicing up some fresh strawberries or peaches adds a lively burst of flavor and freshness!
With these serving suggestions, you’re set to impress anyone lucky enough to indulge!
Recipe Variations
One of the best parts about baking is that there’s always room for creativity. Here are some tasty twists on the classic Apricot Oatmeal Crumble Bars:
-
Nutty Additions: Stir in ½ cup of chopped nuts like almonds or walnuts for extra crunch and flavor.
-
Spiced Up: Add a teaspoon of cinnamon or nutmeg to the dry mixture for a warm spice note.
-
Chocolate Lovers: Fold in ½ cup of chocolate chips into the crumble mix for a decadent twist on the classic bars.
-
Fruit Fiesta: Mix it up by using a combination of fruit preserves. Try adding raspberry or peach for a layered fruit flavor!
-
Healthy Alternative: Swap the butter with coconut oil, use a sugar substitute, and incorporate flaxseed or chia seeds for added nutrition.
These variations keep the recipe fresh while still providing that comfort-food vibe!
Chef’s Notes
Every recipe tells a story, and this one is no different. Over the years, I’ve tweaked the original recipe to fit my taste and the occasions I bake for. I remember a particularly hilarious attempt when I accidentally used salt instead of sugar—let’s just say the reactions from my family were unforgettable!
Fortunately, I quickly became a pro at knowing exactly how much of each ingredient brings the best flavor. These bars have evolved into a go-to comfort food item for family gatherings. My friends affectionately refer to them as “Beau’s baked magic.” I love that a simple recipe can turn into something that spreads joy.
FAQs and Troubleshooting
To ensure your baking adventure goes smoothly, here are some common questions and answers about the Apricot Oatmeal Crumble Bars:
-
Why did my crumble bars fall apart?
If your bars are crumbling and falling apart, it might be that they needed a bit more baking time to firm up or that they didn’t cool long enough before cutting. Also, make sure to compact the base mixture well before spreading the preserves. -
Can I make these bars ahead of time?
Absolutely! You can prepare them a day in advance, store them in an airtight container, and enjoy them the next day. Just reheat them in a microwave for a few seconds to warm them up! -
What if I don’t have apricot preserves?
You can easily swap the apricot preserves with any fruit spread you love! Raspberry, strawberry, or even a mixed berry blend will work wonderfully! -
How do I store leftovers?
Keep these bars in an airtight container in the fridge for up to a week. They can also be frozen for up to three months—just make sure to wrap them well!
Nutritional Info
Here’s a little insight into the nutritional side of these delicious Apricot Oatmeal Crumble Bars (per serving, approximately):
- Calories: 200
- Protein: 2g
- Carbohydrates: 30g
- Dietary Fiber: 2g
- Sugars: 10g
- Fats: 10g
These bars may not be “health food” per se, but they provide a delightful balance of sweetness and wholesome oats. As with all things—enjoy them in moderation!
Final Thoughts
And there you have it! Apricot Oatmeal Crumble Bars, full of nostalgia, flavor, and a whole lot of love. This recipe is a wonderful way to celebrate the little things in life—a simple mix of ingredients transforming into something magical in the kitchen.
Whether you’re whipping them up for a family gathering, a special event, or just a cozy night in, I hope these bars become a beloved recipe in your home too. Remember, cooking is all about bringing people together and sharing happiness—and there’s nothing like a homemade treat to do just that!
So grab your ingredients, turn up some music, and let’s create some sweet kitchen memories! If you make these bars, feel free to tag me on social media. I’d love to see your creations!
Happy baking, Foodie Friends! 🍑✨
Print
Apricot Oatmeal Crumble Bars
- Total Time: 45 minutes
- Yield: 16 servings 1x
- Diet: Vegetarian
Description
Delightful Apricot Oatmeal Crumble Bars inspired by childhood baking memories, perfect for sharing and indulging.
Ingredients
- 1 ¼ cups rolled oats
- ¾ cup all-purpose flour
- 1 cup apricot preserves
- ½ cup butter, softened to room temperature
- ½ cup packed brown sugar
- ¼ teaspoon baking soda
Instructions
- Preheat your oven to 350°F (175°C).
- Grease a 9×9-inch baking pan.
- Mix the dry ingredients in a bowl.
- Incorporate the butter.
- Set aside a cup for the topping.
- Press the remaining mixture into the pan.
- Spread the apricot preserves evenly.
- Top with the reserved crumble.
- Bake for 25-30 minutes.
- Cool and cut.
Notes
For a healthier option, consider swapping butter with coconut oil and using a sugar substitute.
- Prep Time: 15 minutes
- Cook Time: 30 minutes
- Category: Dessert
- Method: Baking
- Cuisine: American
Nutrition
- Serving Size: 1 bar
- Calories: 200
- Sugar: 10g
- Sodium: 150mg
- Fat: 10g
- Saturated Fat: 6g
- Unsaturated Fat: 4g
- Trans Fat: 0g
- Carbohydrates: 30g
- Fiber: 2g
- Protein: 2g
- Cholesterol: 30mg
Keywords: apricot bars, oatmeal crumble, dessert, baking, nostalgic treats

Minute Apricot Chicken Thighs: One-Pan Weeknight Dinner
Apricot Chicken Thighs: A Heartwarming Delight
Hey there, friends! Today, we’re diving into the vibrant world of flavors with a delightful dish that’s been making its rounds in kitchens for generations—Apricot Chicken Thighs! If you’re looking for a recipe that blends sweet, savory, and just a hint of tang, you’ve hit the jackpot. This dish is not only scrumptious but also incredibly easy to whip up, making it perfect for families or a cozy dinner with friends.
When it comes to food, I’ve always believed it bears the essence of love, tradition, and memories. Food is our connection, our celebration, and sometimes even a little nostalgia. I can’t tell you how many times I’ve gathered around the dinner table with family and friends, sharing laughter and stories over a wonderful meal. Apricot Chicken Thighs is one of those dishes that brings back some of my fondest memories in the kitchen.
A Journey Back in Time
Growing up, Sundays were sacred in my household. It was the day my mom would experiment with various recipes, but there was one dish she always returned to: Apricot Chicken Thighs. I remember coming home from school, the warm, sweet aroma of apricot mingling with savory chicken drifting through the front door, greeting me like an old friend. My sisters and I would rush to the kitchen, giddy with anticipation. It was never just about the food; it was about the love and care put into every bite.
After dinner, we would inevitably end up on the couch, laughter filling the room as my mom scrolled through her recipe box, planning the next week’s meals. This dish not only fed our bellies; it nurtured our hearts and brought us closer together. Now, I’m thrilled to share this cherished recipe with you, hoping it will bring the same joy and connection to your home.
Ingredient List
To prepare these heavenly Apricot Chicken Thighs, here’s what you’ll need:
-
1 cup apricot jam
A must-have for that luscious sweetness! If you’re looking for a lower sugar option, consider using fruit preserves or a homemade jam without added sugars. -
¼ cup finely diced onions
Onions add a nice layer of flavor. You can swap them for shallots or even green onions for a milder taste if preferred. -
2 tablespoons soy sauce
This salty ingredient brings depth to the dish. Tamari works as a gluten-free alternative if needed. -
1 tablespoon honey
Adds complexity! You can replace it with maple syrup for a vegan version or agave for a lighter alternative. -
1 tablespoon Dijon mustard
This gives a nice zing! If you’re out, regular yellow mustard works in a pinch, though it’s milder in flavor. -
1 tablespoon apple cider vinegar
This ingredient brightens the dish with acidity. Substitute with lemon juice if you prefer a fresh citrus twist. -
1 teaspoon minced garlic
Garlic is the MVP of flavor—adds a savory punch! You can use garlic powder (1/4 tsp) if you’re in a rush. -
1 teaspoon ground ginger
A warm spice that marries beautifully with chicken. Fresh ginger is a fantastic substitute if you have it on hand. -
⅛ teaspoon red pepper flakes (optional)
A touch of heat if you’re feeling adventurous! You can leave it out entirely for a milder flavor. -
6 chicken thighs
Juicy and flavorful, chicken thighs are perfect for this dish! Bone-in, skin-on adds more flavor, but boneless and skinless work too. -
Fresh parsley for garnish (optional)
Don’t underestimate the power of fresh herbs! They elevate the dish visually and add a fresh taste.
Step-by-Step Instructions
Now, let’s dig into the cooking process! Grab your apron and let’s get cooking!
Step 1: Preheat and Prepare
Preheat your oven to 375°F (190°C). While it’s heating up, grab a large mixing bowl to combine your sauce ingredients. This bowl will ensure that each chicken thigh gets the attention it deserves!
Step 2: Whisk That Sauce
In the bowl, combine the 1 cup of apricot jam, ¼ cup of finely diced onions, 2 tablespoons of soy sauce, 1 tablespoon of honey, 1 tablespoon of Dijon mustard, 1 tablespoon of apple cider vinegar, 1 teaspoon of minced garlic, and 1 teaspoon of ground ginger. If you’re adding heat, toss in ⅛ teaspoon of red pepper flakes too.
Use a whisk to blend everything together until it’s smooth and well-combined. This is where the magic begins, as the flavors will meld beautifully during cooking!
Step 3: Marinate the Chicken
Grab your chicken thighs and add them to your mixing bowl. Make sure they’re nicely coated in the sauce. If you have time, let them marinate for at least 30 minutes. This allows the meat to absorb all those incredible flavors. But if you’re in a hurry, you can skip this—just be sure to thoroughly coat them before cooking!
Step 4: Sear for Flavor
In a large oven-safe skillet (cast iron works great!), heat a tablespoon of olive oil over medium-high heat. Once it’s hot, carefully place the chicken thighs skin-side down. Sear them for about 5 minutes until they’re beautifully browned. This step adds a lovely crispy texture. Don’t be afraid to peek under them; you want a nice golden brown color!
Step 5: Saucy Transition
After searing both sides for about 5 minutes each, pour the leftover apricot sauce over the chicken in the skillet. For the ultimate flavor infusion, let it sizzle for a minute.
Step 6: Bake to Perfection
Transfer the skillet to your preheated oven. Bake for 30 to 35 minutes, or until the chicken reaches an internal temperature of 165°F (74°C). Your kitchen will fill with the heavenly aroma of sweet and savory goodness—seriously, your neighbors will be intrigued!
Step 7: Rest and Garnish
Once done, pull the skillet from the oven and allow the chicken to rest for about 5 minutes. This resting period is crucial as it allows the juices to settle. Sprinkle with fresh parsley for that added touch of vibrancy just before serving.
Serving Suggestions
Plate your Apricot Chicken Thighs by serving them on a bed of fluffy rice or with roasted vegetables on the side. Drizzling some of that luscious apricot sauce from the skillet on top? Oh yes, absolutely! For a fresh touch, consider adding a squeeze of lemon or a sprinkle of sesame seeds for added texture and flavor.
Pair this dish with a refreshing salad or even some crusty bread to soak up every last bit of sauce. Gather your friends or family around the table, pour a glass of wine, and enjoy the warmth of good food and company!
Recipe Variations
Feeling adventurous? Here are some variations to keep things exciting:
-
Tropical Twist: Add chunks of pineapple or mango to the apricot mixture for a fruity flavor explosion!
-
Herbed Delight: Experiment with fresh herbs like rosemary or thyme in the sauce for a fresh, fragrant take.
-
Spicy Kick: Increase the red pepper flakes for a hotter version or toss in some jalapeños.
-
Citrus Infusion: Mix in the zest of an orange or lemon to brighten the dish even further.
-
Sweet and Savory: Replace half the apricot jam with orange marmalade for a citrusy sweet delight.
Chef’s Notes
My journey with Apricot Chicken Thighs has been a delightful one. What started as my mom’s signature dish has evolved into my own creation, with a few personal touches along the way. One time, I decided to add a splash of bourbon to the sauce, thinking it might bring a new depth. Let’s just say… it didn’t last long! Not every kitchen experiment goes perfectly, but those mishaps often lead to the best laughter!
Over the years, I’ve found that using quality ingredients makes a huge difference. So, if you can find local apricot jam or organic chicken, grab them! They elevate this simple dish into a culinary masterpiece.
FAQs and Troubleshooting
-
What can I use if I don’t have apricot jam?
A fruit preserves or a homemade fruit spread can be substituted, but keep an eye on the sweetness level. -
Can I make this dish ahead of time?
Absolutely! You can marinate the chicken up to 24 hours in advance and then proceed with the recipe. -
What if my chicken is dry?
Ensure you’re cooking it at the right temperature and avoid overcooking. If dry, you can create a quick pan sauce by deglazing with chicken broth after cooking. -
Can I use chicken breasts instead?
Sure! Just keep an eye on the cooking time, as breasts will cook faster and can dry out if overdone.
Nutritional Info
Each serving of Apricot Chicken Thighs is packed with flavor and nutrition. Here’s a quick rundown of the approximate nutritional content (per serving):
- Calories: 350
- Protein: 27g
- Carbohydrates: 29g
- Fat: 15g
- Fiber: 1g
- Sugar: 18g
This dish is a great source of protein and balanced with a sweet touch from the apricot jam, making it a hearty and satisfying choice for any meal.
Final Thoughts
And there you have it, my lovely foodies! Apricot Chicken Thighs—a dish steeped in nostalgia, love, and deliciousness. I hope this recipe brings warmth to your kitchen and joy to your dinner table, just as it did for me growing up. Remember, the best meals are made with heart and shared with loved ones. So, gather around the table, enjoy, and make your own memories that will last a lifetime.
Thanks for joining me today in the kitchen! Until next time, keep cooking, keep sharing, and never stop experimenting—because every great dish begins with a pinch of courage and a spoonful of love. Happy cooking!
Print
Apricot Chicken Thighs
- Total Time: 50 minutes
- Yield: 4 servings 1x
- Diet: None
Description
A delightful dish that blends sweet, savory, and just a hint of tang, perfect for family gatherings and cozy dinners.
Ingredients
- 1 cup apricot jam
- ¼ cup finely diced onions
- 2 tablespoons soy sauce
- 1 tablespoon honey
- 1 tablespoon Dijon mustard
- 1 tablespoon apple cider vinegar
- 1 teaspoon minced garlic
- 1 teaspoon ground ginger
- ⅛ teaspoon red pepper flakes (optional)
- 6 chicken thighs
- Fresh parsley for garnish (optional)
Instructions
- Preheat your oven to 375°F (190°C). Grab a large mixing bowl to combine your sauce ingredients.
- Whisk together 1 cup of apricot jam, ¼ cup of finely diced onions, 2 tablespoons of soy sauce, 1 tablespoon of honey, 1 tablespoon of Dijon mustard, 1 tablespoon of apple cider vinegar, 1 teaspoon of minced garlic, and 1 teaspoon of ground ginger.
- Marinate the chicken thighs in the sauce, letting them soak for at least 30 minutes if possible.
- Sear the chicken thighs skin-side down in a hot skillet with olive oil for about 5 minutes until browned.
- Pour the leftover apricot sauce over the chicken in the skillet.
- Bake in the oven for 30 to 35 minutes, until the chicken reaches an internal temperature of 165°F (74°C).
- Rest the chicken for 5 minutes, then sprinkle with fresh parsley before serving.
Notes
Serve on a bed of rice or with roasted vegetables. Drizzle extra apricot sauce on top for added flavor.
- Prep Time: 15 minutes
- Cook Time: 35 minutes
- Category: Main Course
- Method: Baking
- Cuisine: American
Nutrition
- Serving Size: 1 serving
- Calories: 350
- Sugar: 18g
- Sodium: 500mg
- Fat: 15g
- Saturated Fat: 4g
- Unsaturated Fat: 8g
- Trans Fat: 0g
- Carbohydrates: 29g
- Fiber: 1g
- Protein: 27g
- Cholesterol: 70mg
Keywords: Apricot Chicken, Chicken Thighs, Easy Dinner Recipe, Family Recipe, Sweet and Savory Chicken