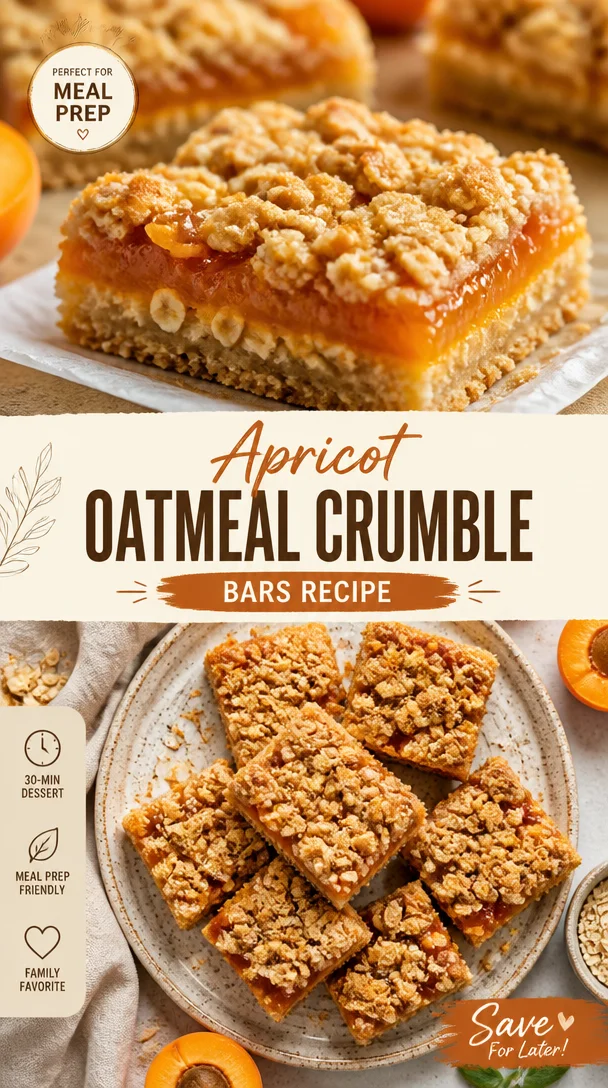
Apricot Oatmeal Crumble Bars Recipe
Apricot Oatmeal Crumble Bars: A Sweet Nostalgic Delight
Hey there, Foodie Friends! I’m so excited to have you here at Feastical, where we turn simple ingredients into soul-warming dishes. Today, we’re diving into a recipe that’s near and dear to my heart: Apricot Oatmeal Crumble Bars. These bars are not just a treat for your taste buds; they’re a delicious reminder of cozy afternoons spent in the kitchen with loved ones.
When I think back to my childhood, one of my fondest memories is baking with my grandmother during summer break. Armed with her trusty apron and a sense of adventure, we’d whip up all sorts of goodies. There was always a pint of apricot preserves involved for at least one of our creations. The aroma of sweet apricots and warm oats filled the air, inviting my siblings and me to gather around the kitchen table, eager to devour whatever we had baked.
These Apricot Oatmeal Crumble Bars are inspired by those afternoons. They’re super easy to make and perfect for sharing. Whether you’re prepping for a potluck, looking for a delicious snack, or simply wanting to indulge in a little nostalgia, these bars will hit the spot. Let’s roll up our sleeves and make some kitchen magic happen!
My Personal Oatmeal Story
One summer afternoon, when I was about ten years old, I was given the “big kid” task of mixing the ingredients while my grandmother prepared the apricot filling. The kitchen was bustling, with pots clanging and the sweet sounds of laughter echoing through the air. I still remember the first time I tasted these Apricot Oatmeal Crumble Bars as they came out of the oven—golden, crumbly, and drizzled with a hint of warmth. My grandma smiled as I took a huge bite, and my eyes widened in delight.
That moment sparked my lifelong love for cooking and baking! My grandmother always said that cooking is like giving someone a hug—and these bars were just that. I continue to make these delightful treats to this day, sharing them with friends and family. Now, I can’t wait for you to bake them too, and create your own warm memories in the kitchen!
Ingredients
Here’s what you’ll need to whip up these delightful Apricot Oatmeal Crumble Bars:
- 1 ¼ cups rolled oats: Rolled oats give these bars a chewy texture. If you need gluten-free options, look for certified gluten-free oats.
- ¾ cup all-purpose flour: This gives the crumble a sturdy base. You can use whole wheat flour for a nuttier flavor or almond flour for a gluten-free version.
- 1 cup apricot preserves: The star of the show! Feel free to substitute with any fruit preserves you have on hand, such as peach or raspberry, for a different twist.
- ½ cup butter, softened to room temperature: Butter adds richness. For a dairy-free option, you can swap in coconut oil or vegan butter.
- ½ cup packed brown sugar: This sweetener adds depth and a bit of moisture. If you’re watching sugar intake, you can reduce it or use coconut sugar for a healthier option.
- ¼ teaspoon baking soda: This creates slight leavening in the bars, giving them a nice texture. If you run out, you can skip it, but the bars will be denser.
With these simple yet versatile ingredients, you’ll create a treat that warms the heart!
Step-by-Step Instructions
Let’s get cooking! Follow these steps to create your scrumptious Apricot Oatmeal Crumble Bars:
-
Preheat your oven to 350°F (175°C). Preparing your oven is key to a perfect bake. Preheating ensures that everything cooks evenly from the get-go!
-
Grease a 9×9-inch baking pan. Using a bit of cooking spray or butter, coat the bottom and sides of the pan, so your bars don’t stick. It’s a little detail that makes a big difference!
-
Mix the dry ingredients in a bowl. In a large mixing bowl, combine the rolled oats, all-purpose flour, brown sugar, and baking soda. Stir until well-combined. Feel free to add a pinch of salt to enhance the sweetness; it’s a chef’s secret weapon!
-
Incorporate the butter. Add the softened butter to your dry mixture. Using your fingers or a pastry cutter, mix until the mixture resembles coarse crumbs. This is the fun part! Get your hands in there and feel the texture; you want some nice, crumbly bits!
-
Set aside a cup for the topping. Remember to reserve about a cup of this crumble mixture for the topping later. It’s like keeping a little piece of magic for the final touch!
-
Press the remaining mixture into the pan. Use a spatula or your fingers to press the crumble into an even layer at the bottom of the baking pan. It should be compact enough to hold together when baked.
-
Spread the apricot preserves evenly. Spoon the apricot preserves over the pressed crumble, spreading it gently to ensure every bite has a lovely fruit filling. The sweetness will remind you of childhood!
-
Top with the reserved crumble. Sprinkle the remaining mixture evenly over the apricot preserves. This will create a lovely crust on top, giving your bars that signature crumble.
-
Bake for 25-30 minutes. Place the pan into the preheated oven and bake until the top is golden brown and fragrant. Keep an eye on it—because no one likes burnt bars!
-
Cool and cut. Once baked, remove from the oven and let the bars cool in the pan for about 10-15 minutes. This makes them easier to cut. Slice them into squares or bars, depending on your mood!
There you have it—a beautifully baked batch of Apricot Oatmeal Crumble Bars, with an irresistible aroma wafting through your kitchen.
Serving Suggestions
It’s time to enjoy those beautiful bars! You can serve them warm, straight from the oven, or at room temperature. They are delightful on their own, but if you want to elevate the experience, here are a few serving ideas:
-
Top with a scoop of vanilla ice cream: You can never go wrong with warm crumble bars and a scoop of ice cream! The creaminess perfectly balances the sweetness.
-
Dust with powdered sugar: A light dusting gives them an elegant touch and a hint of sweetness!
-
Pair with a cup of tea or coffee: These bars are perfect for afternoon tea or a coffee break. The flavors complement each other beautifully.
-
Add some fresh fruit: Slicing up some fresh strawberries or peaches adds a lively burst of flavor and freshness!
With these serving suggestions, you’re set to impress anyone lucky enough to indulge!
Recipe Variations
One of the best parts about baking is that there’s always room for creativity. Here are some tasty twists on the classic Apricot Oatmeal Crumble Bars:
-
Nutty Additions: Stir in ½ cup of chopped nuts like almonds or walnuts for extra crunch and flavor.
-
Spiced Up: Add a teaspoon of cinnamon or nutmeg to the dry mixture for a warm spice note.
-
Chocolate Lovers: Fold in ½ cup of chocolate chips into the crumble mix for a decadent twist on the classic bars.
-
Fruit Fiesta: Mix it up by using a combination of fruit preserves. Try adding raspberry or peach for a layered fruit flavor!
-
Healthy Alternative: Swap the butter with coconut oil, use a sugar substitute, and incorporate flaxseed or chia seeds for added nutrition.
These variations keep the recipe fresh while still providing that comfort-food vibe!
Chef’s Notes
Every recipe tells a story, and this one is no different. Over the years, I’ve tweaked the original recipe to fit my taste and the occasions I bake for. I remember a particularly hilarious attempt when I accidentally used salt instead of sugar—let’s just say the reactions from my family were unforgettable!
Fortunately, I quickly became a pro at knowing exactly how much of each ingredient brings the best flavor. These bars have evolved into a go-to comfort food item for family gatherings. My friends affectionately refer to them as “Beau’s baked magic.” I love that a simple recipe can turn into something that spreads joy.
FAQs and Troubleshooting
To ensure your baking adventure goes smoothly, here are some common questions and answers about the Apricot Oatmeal Crumble Bars:
-
Why did my crumble bars fall apart?
If your bars are crumbling and falling apart, it might be that they needed a bit more baking time to firm up or that they didn’t cool long enough before cutting. Also, make sure to compact the base mixture well before spreading the preserves. -
Can I make these bars ahead of time?
Absolutely! You can prepare them a day in advance, store them in an airtight container, and enjoy them the next day. Just reheat them in a microwave for a few seconds to warm them up! -
What if I don’t have apricot preserves?
You can easily swap the apricot preserves with any fruit spread you love! Raspberry, strawberry, or even a mixed berry blend will work wonderfully! -
How do I store leftovers?
Keep these bars in an airtight container in the fridge for up to a week. They can also be frozen for up to three months—just make sure to wrap them well!
Nutritional Info
Here’s a little insight into the nutritional side of these delicious Apricot Oatmeal Crumble Bars (per serving, approximately):
- Calories: 200
- Protein: 2g
- Carbohydrates: 30g
- Dietary Fiber: 2g
- Sugars: 10g
- Fats: 10g
These bars may not be “health food” per se, but they provide a delightful balance of sweetness and wholesome oats. As with all things—enjoy them in moderation!
Final Thoughts
And there you have it! Apricot Oatmeal Crumble Bars, full of nostalgia, flavor, and a whole lot of love. This recipe is a wonderful way to celebrate the little things in life—a simple mix of ingredients transforming into something magical in the kitchen.
Whether you’re whipping them up for a family gathering, a special event, or just a cozy night in, I hope these bars become a beloved recipe in your home too. Remember, cooking is all about bringing people together and sharing happiness—and there’s nothing like a homemade treat to do just that!
So grab your ingredients, turn up some music, and let’s create some sweet kitchen memories! If you make these bars, feel free to tag me on social media. I’d love to see your creations!
Happy baking, Foodie Friends! 🍑✨
Print
Apricot Oatmeal Crumble Bars
- Total Time: 45 minutes
- Yield: 16 servings 1x
- Diet: Vegetarian
Description
Delightful Apricot Oatmeal Crumble Bars inspired by childhood baking memories, perfect for sharing and indulging.
Ingredients
- 1 ¼ cups rolled oats
- ¾ cup all-purpose flour
- 1 cup apricot preserves
- ½ cup butter, softened to room temperature
- ½ cup packed brown sugar
- ¼ teaspoon baking soda
Instructions
- Preheat your oven to 350°F (175°C).
- Grease a 9×9-inch baking pan.
- Mix the dry ingredients in a bowl.
- Incorporate the butter.
- Set aside a cup for the topping.
- Press the remaining mixture into the pan.
- Spread the apricot preserves evenly.
- Top with the reserved crumble.
- Bake for 25-30 minutes.
- Cool and cut.
Notes
For a healthier option, consider swapping butter with coconut oil and using a sugar substitute.
- Prep Time: 15 minutes
- Cook Time: 30 minutes
- Category: Dessert
- Method: Baking
- Cuisine: American
Nutrition
- Serving Size: 1 bar
- Calories: 200
- Sugar: 10g
- Sodium: 150mg
- Fat: 10g
- Saturated Fat: 6g
- Unsaturated Fat: 4g
- Trans Fat: 0g
- Carbohydrates: 30g
- Fiber: 2g
- Protein: 2g
- Cholesterol: 30mg
Keywords: apricot bars, oatmeal crumble, dessert, baking, nostalgic treats
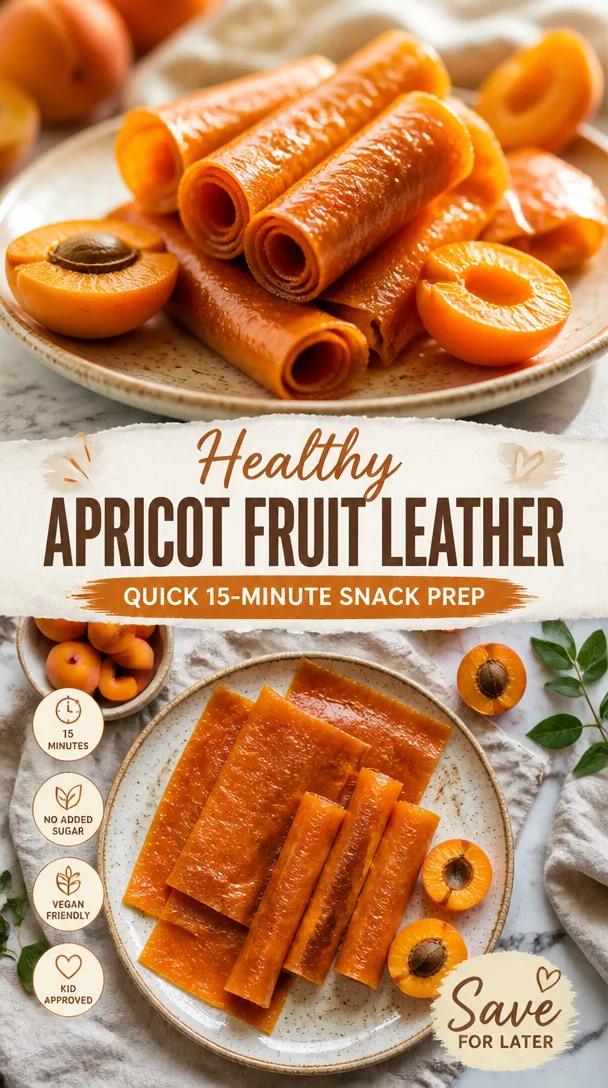
Healthy Apricot Fruit Leather: Quick 15-Minute Snack Prep
The Sweet Simplicity of Homemade Apricot Fruit Leather
Hey there, fellow foodies! Welcome back to Feastical, where we celebrate the joys of cooking in the cozy embrace of our kitchens. Today, we’re diving into a delightful recipe that’s not just delicious but also a walk down memory lane. We’re talking about homemade apricot fruit leather! If you’ve ever grabbed a pack at the store and wondered why it tasted so good yet was so boring to buy, you’re in for a treat. It’s easy, fun to make, and your kitchen is about to smell like fruity heaven!
A Journey Back to My Childhood
Let me take you on a little journey. As a kid, my summers were filled with road trips and picnics packed with homemade snacks. My mom would often whip up apricot fruit leather, and let me tell you, it was always the highlight of our travel treats. We’d open the windows wide as we sped along winding roads, the vibrant flavors of the apricot leather bursting in our mouths. It was sticky, sweet, and just a tad chewy—every bite a snapshot of sunny days spent exploring the great outdoors.
There was this one specific summer when our family decided to visit the mountains. The landscape was full of lush greenery, and we parked under a massive oak tree to have lunch. My mom handed each of us a piece of that homemade fruit leather, and as we sunk our teeth into it, our worries melted away. It became our go-to snack, bridging the gap between savory sandwiches and refreshing lemonade. It tasted like sunshine and adventure all rolled into one—and you just can’t replicate those vibes with store-bought snacks.
Ingredients You’ll Need
Now that I’ve whetted your appetite, let’s get to the good stuff! Here’s what you need to whip up your very own apricot fruit leather:
-
Dried Apricots
The star of the show! Dried apricots are naturally sweet and have a wonderful chewy texture that translates beautifully into leather. You can also substitute with other dried fruits like peaches or mangoes for different flavor profiles. -
Water
Essential for softening the dried apricots before blending. This ingredient transforms our dried fruit into a smooth, luscious purée. If you want to enhance the flavor, consider using orange juice or coconut water instead of plain water.
Step-by-Step Instructions
Ready to embark on this fruity adventure? Let’s get you geared up for the task!
-
Soak the Dried Apricots
Start by placing 2 cups of dried apricots in a bowl and covering them with water. Let them soak for at least an hour. This step is crucial as it softens the apricots, making them easier to blend into a smooth purée. Pro tip: For an extra flavor punch, mix in a splash of vanilla extract. -
Blend to Perfection
Drain the soaked apricots and transfer them to a blender or food processor. Add 1/2 cup of fresh water (or juice) to the mix. Blend until you have a smooth, creamy consistency. Don’t be shy—give it a good whirl! This is your chance to customize the sweetness; if you prefer things sweeter, toss in a bit of honey or agave syrup. -
Prepare Your Baking Sheet
Preheat your oven to a low temperature, around 170°F (77°C). Line a baking sheet with parchment paper, ensuring it goes up the sides a bit. This helps the fruit leather peel away easily once it’s done. -
Spread the Mixture
Pour the blended apricot mixture onto the lined baking sheet. With a spatula, spread it out to create an even layer about 1/8 inch thick. Aim for a smooth texture! If there are any uneven parts, your fruit leather may dry inconsistently. -
Bake, Bake, Bake
Pop your sheet in the oven and let it bake for about 6 to 8 hours. Yes, you read that right; low and slow is the name of the game! You’ll know it’s done when the leather is no longer sticky to touch and peels away from the parchment easily. Note: If you’re short on time, a dehydrator can work magic on this recipe too, and it’ll speed up the process significantly. -
Cut and Store
Once cooled, transfer the fruit leather to a cutting board. Use scissors to cut it into strips or squares, then roll them up in parchment paper for easy snacking. Store your homemade apricot fruit leather in an airtight container, and it’ll keep for about 2 weeks—if you can resist eating it all in one sitting!
Serving Suggestions
Now that you have this delicious treat ready, how should you serve it? The beauty of apricot fruit leather lies in its versatility! Serve it as an after-school snack for your kids, pack it for hiking adventures, or include it in a delightful gift basket filled with homemade goodies. You can even toss some pieces into your lunch alongside cheese and crackers for a fancy touch. The sweetness of the apricot pairs exceptionally well with a sharp cheddar or rich brie—trust me!
Recipe Variations
Ready to get creative? Here are a few twists you can experiment with when making your apricot fruit leather:
- Tropical Twist: Combine dried apricots with pineapple for a deliciously sunny fruit leather.
- Cocoa Delight: Add a tablespoon of cocoa powder in the blending step for a chocolate-infused version that makes for a unique snack.
- Spiced Up: Sprinkle some cinnamon or ginger into the blender for a warm, spicy flavor that pairs wonderfully with the sweetness of the apricots.
- Berry Boost: Toss in a cup of dried berries alongside your apricots for an extra punch of flavor and color.
Chef’s Notes
Making this fruit leather is almost like crafting a work of art; the process is filled with joy and nostalgia. Over the years, I’ve adjusted this recipe to accommodate my kids’ preferences—there are days when they want something tangy, and others when they yearn for a touch of sweetness. It’s fascinating to see how a simple recipe can evolve to reflect the taste buds in your home. Plus, every time we make it together, I get to share stories about our memorable road trips, and it’s a wonderful way to bond!
FAQs and Troubleshooting
-
Can I use fresh apricots instead of dried?
Absolutely! If you can find fresh apricots, you’ll need to cook them down first, turning them into a purée before proceeding with the rest of the steps. -
My fruit leather is too sticky. What did I do wrong?
It may need longer in the oven. Remember, it should not feel sticky when it’s done. Perhaps try checking on it every hour once you hit the 6-hour mark. -
How can I tell when my fruit leather is done?
It should peel off the parchment easily and feel slightly tacky but not sticky to the touch. Trust your instincts! -
Can I freeze fruit leather?
Yes! Just make sure to wrap them well before freezing, and they’ll keep for up to six months.
Nutritional Info
Feeling good about what you’re munching on is essential, right? Here’s a quick rundown of the nutritional benefits of apricot fruit leather. When prepared with just dried apricots and water, it’s a nutrient-dense snack!
- Calories: Approximately 40-50 calories per piece
- Fiber: Dried apricots are high in fiber, aiding digestion and keeping you feeling full.
- Vitamins: Rich in vitamins A and C, helping support healthy skin and boosting immunity.
- Potassium: Dried apricots contain potassium, which is great for heart health.
Final Thoughts
Making your own apricot fruit leather is not just a way to enjoy a tasty treat; it’s about sharing joy, love, and memories one chew at a time. Whether you’re snacking with family, packing a lunch, or simply indulging on a cozy afternoon, this recipe brings a taste of nostalgia and sweetness into your life.
So what are you waiting for? Roll up those sleeves, grab those dried apricots, and let’s create some magic! Remember, cooking is about experimenting and having fun, so don’t be afraid to add your flair. Happy cooking! 🍑
Print
Homemade Apricot Fruit Leather
- Total Time: 540 minutes
- Yield: 15 pieces 1x
- Diet: Vegetarian
Description
A nostalgic and delightful recipe for homemade apricot fruit leather, perfect for snacking and sharing.
Ingredients
- 2 cups Dried Apricots
- 1/2 cup Water (or orange juice/coconut water)
Instructions
- Soak the dried apricots in water for at least an hour.
- Drain the apricots and blend with fresh water until smooth.
- Preheat the oven to 170°F (77°C) and line a baking sheet with parchment paper.
- Pour the blended apricot mixture onto the lined baking sheet and spread it evenly.
- Bake for 6 to 8 hours until not sticky to touch.
- Cut the cooled fruit leather into strips and roll them up in parchment paper.
Notes
Store in an airtight container for up to 2 weeks. You can use variations like adding pineapple or cocoa for different flavors.
- Prep Time: 60 minutes
- Cook Time: 480 minutes
- Category: Snack
- Method: Baking
- Cuisine: American
Nutrition
- Serving Size: 1 piece
- Calories: 50
- Sugar: 12g
- Sodium: 5mg
- Fat: 0g
- Saturated Fat: 0g
- Unsaturated Fat: 0g
- Trans Fat: 0g
- Carbohydrates: 13g
- Fiber: 2g
- Protein: 1g
- Cholesterol: 0mg
Keywords: apricot, fruit leather, homemade snacks, easy recipe
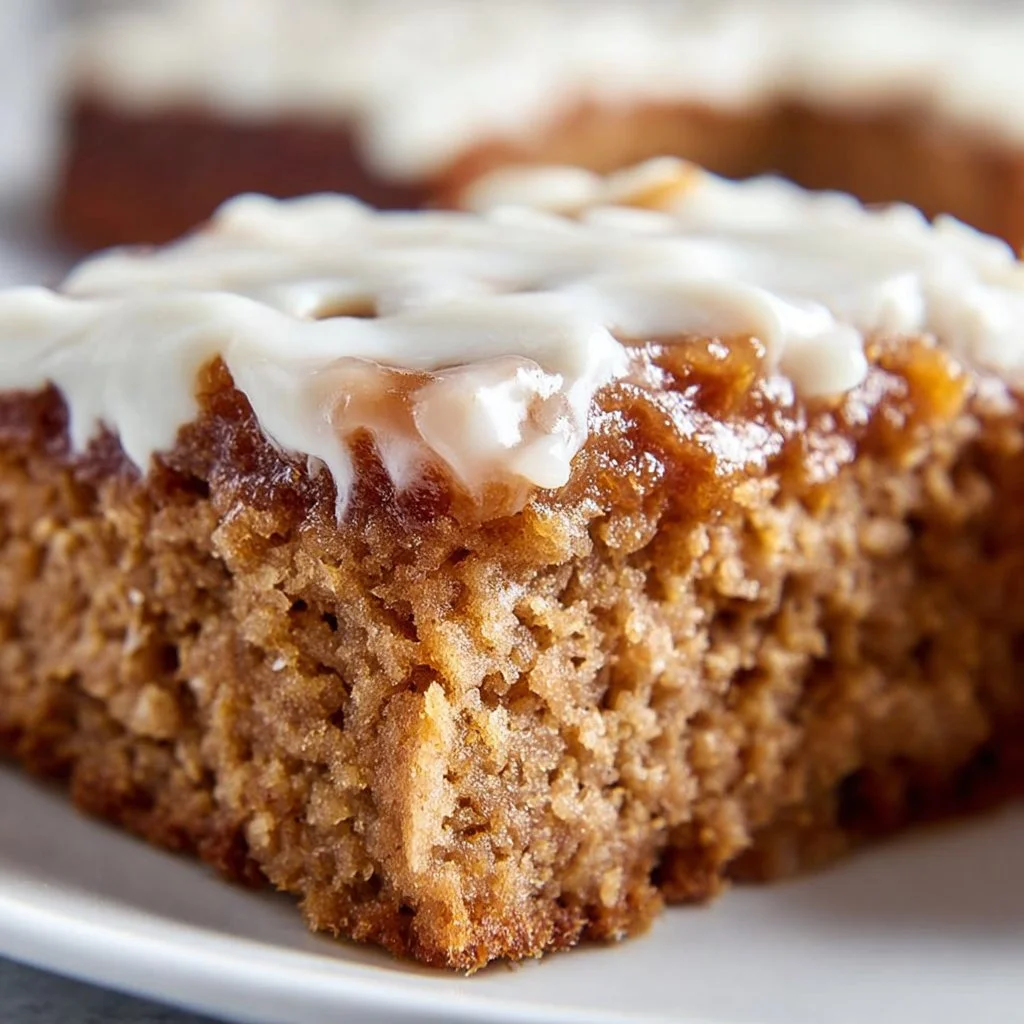
100 Calorie Applesauce Snack Cake
100 Calorie Applesauce Snack Cake: A Cozy Recipe to Crave
Introduction
Hey there, fellow foodies! I’m Beau Collier, and today we’re diving into a delightful treat that will make your heart sing and your taste buds celebrate—the 100 Calorie Applesauce Snack Cake! 🎉 Trust me, this isn’t just any cake; it’s a warm hug in dessert form. Perfect for those lazy afternoons or even as a wholesome breakfast option, this cake brings comfort without the guilt.
As a passionate home cook who believes food should be fun and uncomplicated, I crafted this recipe while trying to find a satisfying snack that didn’t derail my healthy eating goals. And let me tell you, this cake ticks all the boxes! It’s moist, flavorful, and incredibly easy to whip up, which makes it an instant favorite in my kitchen. So roll up your sleeves, grab your spatula (or just a fork), and let’s dive into the delicious world of applesauce cake together!
But before we get our hands messy, let me share a little story that makes this recipe extra special. You see, this cake isn’t just about the ingredients; it’s about memories, aromas, and the love that fills the kitchen when you bake. So let’s get to it!
Personal Story
Oh, the memories I have tied to applesauce cake! Growing up, my grandmother had a knack for baking. Her kitchen always smelled like a warm embrace, filled with cinnamon, sugar, and love. One of my favorite childhood memories is when she’d invite me to help her bake her famous applesauce cake every autumn. We’d use the apples from our backyard tree—crisp, juicy, and bursting with flavor.
I remember standing on a stool to reach the counter, carefully measuring flour while she whisked together spices and the sweet-smelling applesauce. I couldn’t wait to lick the spoon (who doesn’t love a little kitchen mischief?). The excitement was palpable as we waited for the cake to bake. We’d sneak little bits of batter and giggle as the heavenly aroma floated around the house.
When the timer finally went off, we’d stick a toothpick in and if it came out clean, we’d dance around the kitchen, singing our silly songs! It became a cherished tradition, one that instilled in me a love for cooking and a profound appreciation for the simple joys of homemade food. Now, I want to share that joy with you through this 100 Calorie Applesauce Snack Cake. Let’s make new memories in your kitchen!
Ingredients
Here’s what you’ll need for the most scrumptious 100 Calorie Applesauce Snack Cake:
-
1 cup unsweetened applesauce: The star of the show! This adds moisture and natural sweetness to your cake. If you’re in a pinch, homemade applesauce works like a charm too!
-
1 cup whole wheat flour: A healthier alternative to all-purpose flour, adding a nutty flavor and extra fiber. Need a gluten-free option? Substitute with almond flour or a gluten-free flour blend.
-
1/2 cup maple syrup or agave nectar: This sweetener brings a lovely rich flavor. If you’re looking for a lower-calorie option, try using Stevia or a sugar-free syrup.
-
1 tsp baking powder: This helps your cake rise to fluffy perfection. Check your pantry—make sure it’s not expired for best results!
-
1/2 tsp baking soda: A little extra lift! It’s perfect when paired with the acidity in your applesauce.
-
1/2 tsp cinnamon: This adds warmth and depth to your cake. Adjust the spice level based on your preference—add more for a cozy kick!
-
1/4 tsp salt: Balances all the sweetness and enhances the flavors. Don’t skip it!
-
1/2 cup additional unsweetened applesauce: This keeps the cake moist. You can also replace it with mashed bananas for a different twist.
-
1/4 cup almond milk (or any plant-based milk): This keeps your cake light and fluffy. Use regular milk if that’s what you have on hand!
-
1 tsp vanilla extract: For that signature flavor! Homemade vanilla extract adds a special touch—just saying!
Step-by-Step Instructions
Ready to bake? Let’s make some magic happen in the kitchen!
-
Preheat Your Oven: Start by preheating your oven to 350°F (175°C). This way, you’ll have a perfectly heated environment for your cake to rise beautifully. Pro tip: Place your rack in the middle for even cooking!
-
Gather Your Ingredients: Before you begin mixing, take a moment to gather all your ingredients. Trust me; this will make the entire process smoother and more enjoyable. Plus, you’ll feel like a real chef!
-
Mix the Dry Ingredients: In a big bowl, whisk together the whole wheat flour, baking powder, baking soda, cinnamon, and salt. This step is crucial because it ensures even distribution of the leavening agents and spices—no clumps allowed!
-
Combine the Wet Ingredients: In another bowl, combine the unsweetened applesauce, maple syrup (or agave nectar), additional applesauce, almond milk, and vanilla extract. Stir until well combined. It should smell divine—trust your nose!
-
Mix It All Together: Pour the wet mixture into the dry ingredients and gently fold them together using a spatula or wooden spoon. Be careful—overmixing can lead to a dense cake! You want it to be just combined and a little lumpy.
-
Prepare Your Baking Dish: Grease an 8×8 square baking dish or line it with parchment paper for easy removal. This cake loves to stick if you skip this step, so don’t even think about it!
-
Pour & Spread: Gently pour your batter into the prepared baking dish. Smooth the top with a spatula for a nice presentation. No one wants a lumpy cake!
-
Bake Time!: Pop your baking dish into the oven and bake for about 25 to 30 minutes. Keep an eye on it! You’ll know it’s done when a toothpick comes out clean. (And bonus, your house will smell amazing!)
-
Cool Down: Once baked, remove the cake from the oven and let it cool in the pan for about 10 minutes before transferring it to a wire rack. This is key to avoid a mushy bottom. Then patience, my friend! Let it cool for a while longer before slicing into it.
-
Slice & Serve: Once cooled, slice it into squares and get ready for a taste sensation! Feel free to dust with a little extra cinnamon or powdered sugar for presentation.
Serving Suggestions
Now that your 100 Calorie Applesauce Snack Cake is fresh out of the oven, let’s talk about how to serve this beauty.
-
Plain and Simple: This cake is delicious on its own—perfect for a quick snack or a light dessert. Just slice it up and enjoy!
-
With a Dollop of Greek Yogurt: For a bit of creaminess, consider a dollop of plain Greek yogurt on top. This adds protein and pairs beautifully with the cake’s sweet flavor.
-
Top it with Fruit: Fresh slices of banana, berries, or even a drizzle of honey can elevate your dessert to new heights!
-
Pair with a Cup of Tea or Coffee: There’s nothing quite like indulging in a slice of this cake with your favorite warm beverage. Cozy vibes, anyone?
Recipe Variations
Feeling adventurous? Here are some fun variations to switch things up with your applesauce snack cake!
-
Add Nuts: Toss in a handful of walnuts or pecans for a delightful crunch. They add texture and healthy fats!
-
Stay Fruity: Mix in some raisins, dried cranberries, or chocolate chips for added sweetness and flavor explosions in every bite.
-
Spice it Up: Want a kick? Add some nutmeg or ginger alongside the cinnamon for a bolder flavor profile.
-
Cocoa Delight: Craving chocolate? Swap out a little flour for cocoa powder; you’ll have a chocolaty applesauce cake that’s to die for.
-
Orange Zest: For a citrusy twist, grate a bit of orange zest into the batter. It brightens up the flavors and makes your cake even more aromatic!
Chef’s Notes
Oh, how I love this recipe! It’s evolved over the years, and I’ve tried countless variations in pursuit of the perfect balance of flavor and health. I remember the first time I experimented with whole wheat flour—it felt like a leap of faith! The result was a hearty yet tender cake that my whole family couldn’t get enough of.
And don’t be surprised if your kitchen seems to get a little louder during the baking process. Between the sizzling oven and my silly singing, it can turn into a mini kitchen concert! Embrace the mess and the laughter; that’s what cooking is all about!
FAQs and Troubleshooting
-
Why did my cake not rise?
- Most likely, the baking powder or baking soda was expired, or it wasn’t mixed well enough with the dry ingredients. Make sure to check those dates!
-
Can I use regular all-purpose flour?
- Absolutely! However, the nutrition profile will change. It may also result in a slightly different texture. You might want to add a bit more liquid since all-purpose flour absorbs differently.
-
How can I make it vegan?
- You’re in luck! This recipe is mostly vegan as is; just use maple syrup and almond milk, plus ensure your vanilla extract is pure without additives.
-
The cake came out too dense. What went wrong?
- A common culprit here is overmixing the batter. Mix just until combined, and ensure your wet and dry ingredients are at room temperature before mixing.
Nutritional Info
Here’s a quick breakdown to help you count those calories! Each slice of this 100 Calorie Applesauce Snack Cake contains approximately:
- Calories: 100
- Protein: 3g
- Total Fat: 1.5g
- Carbohydrates: 20g
- Fiber: 3g
- Sugar: 5g
This makes it an excellent snack or dessert option that won’t leave you feeling guilty!
Final Thoughts
Well, there you have it—the warmly inviting, delightfully scrumptious, and oh-so-easy 100 Calorie Applesauce Snack Cake! I truly hope this recipe fills your kitchen with smiles and delicious aromas, just like it did in my grandmother’s kitchen. Remember, cooking should be about letting your personality shine through in every dish. Don’t hesitate to tweak the recipe, add your own twist, or even create lasting memories with loved ones as you bake.
So next time you’re craving something sweet, you know exactly what to whip up! Enjoy every bite—and who knows? Maybe this cake will become a new tradition in your home, just like it did in mine. Until next time, keep it simple, keep it soulful, and most importantly, keep it delicious! 🍰💖
Print
100 Calorie Applesauce Snack Cake
- Total Time: 40 minutes
- Yield: 8 servings 1x
- Diet: Vegetarian
Description
A delightful low-calorie snack cake made with applesauce, perfect for a guilt-free treat any time of day.
Ingredients
- 1 cup unsweetened applesauce
- 1 cup whole wheat flour
- 1/2 cup maple syrup or agave nectar
- 1 tsp baking powder
- 1/2 tsp baking soda
- 1/2 tsp cinnamon
- 1/4 tsp salt
- 1/2 cup additional unsweetened applesauce
- 1/4 cup almond milk (or any plant-based milk)
- 1 tsp vanilla extract
Instructions
- Preheat your oven to 350°F (175°C).
- Gather all your ingredients.
- Mix the dry ingredients in a bowl.
- Combine the wet ingredients in another bowl.
- Mix the wet and dry ingredients together until just combined.
- Prepare an 8×8 square baking dish.
- Pour the batter into the prepared baking dish.
- Bake for about 25 to 30 minutes.
- Cool for about 10 minutes before transferring to a wire rack.
- Slice and serve as desired.
Notes
Add nuts or dried fruits for extra flavor. Can be enjoyed plain or with a dollop of Greek yogurt.
- Prep Time: 10 minutes
- Cook Time: 30 minutes
- Category: Dessert
- Method: Baking
- Cuisine: American
Nutrition
- Serving Size: 1 serving
- Calories: 100
- Sugar: 5g
- Sodium: 200mg
- Fat: 1.5g
- Saturated Fat: 0.5g
- Unsaturated Fat: 1g
- Trans Fat: 0g
- Carbohydrates: 20g
- Fiber: 3g
- Protein: 3g
- Cholesterol: 0mg
Keywords: applesauce cake, healthy dessert, low calorie cake, snack cake, autumn baking