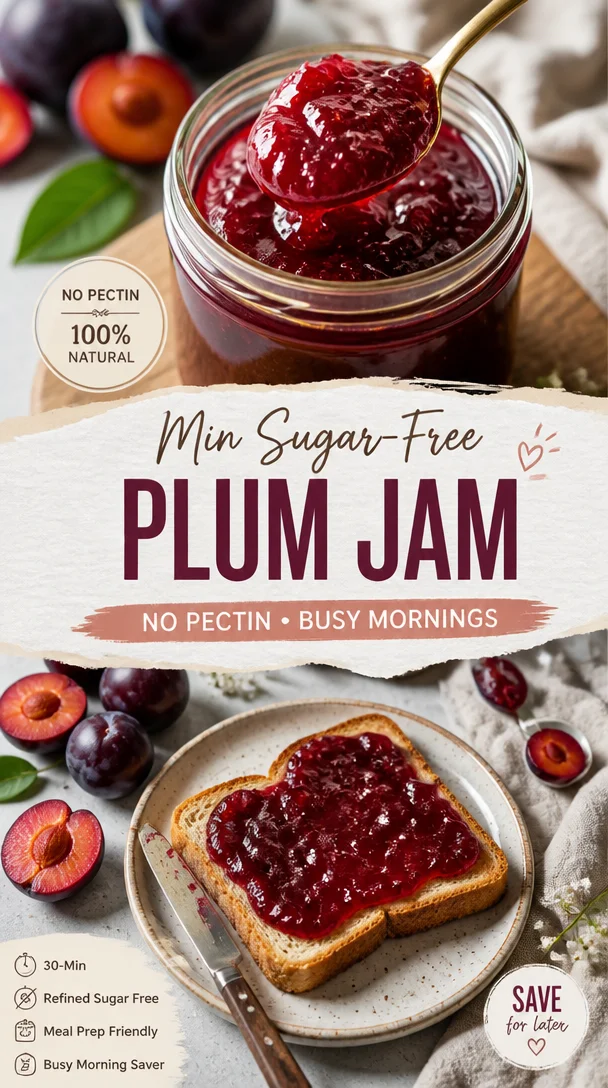
Min Sugar-Free Plum Jam (No Pectin) for Busy Mornings
How to Make Sugar-Free Plum Jam with No Pectin: A Delightful DIY Delight
Hey there, fellow food lovers! If you’re looking to bottle up some sweet summer vibes and spread them on a piece of toast, you’ve come to the right place. Today, we’re diving into the world of homemade Sugar-Free Plum Jam with no pectin. Yes, you heard that right! This jam is not only bursting with flavor, but it’s also made from simple ingredients, so you can whip it up without any fuss. Grab your apron, and let’s get jammin’!
It’s Jam Time!
Let’s take a moment to ponder this: what kicks off your warm memories of love and comfort? For me, it’s the sweet aroma of fruit simmering on the stove. Growing up, my grandmother would invite me into her cozy kitchen to make jam from the plums she harvested each summer. I can still vividly remember those hot summer days when we’d pick the ripest fruits from her garden and spend hours chatting and laughing while we transformed those juicy gems into jars of joy. The best part? Those fragrant wafts would fill the house, making everyone’s mouths water in anticipation.
One of my favorite moments was when she let me stir the mixture, teaching me the importance of patience as we waited for the plums to break down and become that perfect jammy consistency. It was there, in that small kitchen filled with the warmth of love and family, that I learned that making jam is more than just a recipe—it’s a celebration of togetherness and the simple joys of life. Thank you, Grandma, for the knowledge, the stories, and those cherished moments we spent together!
Ingredients You’ll Need
Let’s roll up our sleeves and get to the fun part—ingredients! Here’s what you’ll need to make your own Sugar-Free Plum Jam:
-
1000 g of Very Ripe Plums
The stars of the show! Go for those plump, juicy, and slightly overripe plums; they’re naturally sweeter and burst with flavor. If plums aren’t available, you can substitute them with peaches or apricots for a different twist! -
1 Apple
This little gem adds natural pectin and sweetness, helping your jam thicken without any added sugar. If you’re not keen on apples, try another fruity option like a pear! -
100 mL of Water
Just enough to get the cooking process started and help the fruits soften. You can use apple juice for added flavor if you want a bit of a kick! -
1 tbsp of Lemon Juice
Freshly squeezed lemon juice brightens the jam and balances the sweetness of the plums and apple. If you’re out of fresh lemons, bottled lemon juice will also work! -
0.5 tsp of Cinnamon
A delightful spice that warms up the flavors. You can swap this with nutmeg or leave it out if you’re not a cinnamon fan! -
0.5 tsp of Ginger
Fresh or powdered, ginger adds a lovely zing! You can adjust to taste or omit if you prefer a milder flavor.
Step-by-Step Instructions
Are you ready to make some magic happen? Let’s jump into the cooking steps:
-
Prep the Plums
Start by washing your plums thoroughly. Slice them in half and pit them. Don’t worry about being super neat; they’ll break down while cooking! Oh, and keep those skins on— they’ll add even more flavor and color to the jam. -
Chop the Apple
Peel and chop your apple into small chunks. This step doesn’t need to be perfect, but make sure you remove the core and seeds. And remember, no need to peel—it’s the nutrients in the skin that help with that lovely color and texture! -
Combine Ingredients
In a heavy-bottomed pot, combine those glorious plums, chopped apple, water, lemon juice, cinnamon, and ginger. Stir everything together, and gently bring it to a simmer over medium heat. At this stage, it’s about warming those flavors up! -
Get Simmering
Once it’s simmering, lower the heat and let it cook for about 30-40 minutes. Stir occasionally, making sure nothing is sticking to the bottom. As the fruits break down, you’ll see your concoction transforming into a fragrant jammy mixture. Here’s a little hack: use a potato masher to break down the fruit further and achieve your desired consistency! -
Taste and Adjust
Here’s the fun part! Give your jam a taste. If it needs a bit more zing, feel free to add a dash more lemon juice. If you enjoy a stronger spice flavor, sprinkle in extra cinnamon or ginger to your preference. -
Cool and Jar Up
Once it’s thickened up to your liking (you want a spreadable consistency!), remove it from heat. Let it cool for a bit before transferring it to sterilized jars. It’s important to use clean jars so your jam is preserved properly. Seal them up tight and store them in the fridge!
Serving Suggestions
Now, how to indulge in this sweet goodness? Spread your homemade Sugar-Free Plum Jam generously on toasted bread or fresh pancakes for breakfast bliss! Mix it into yogurt for a delicious snack, or swirl it in chia pudding for a fruity explosion. Feeling fancy? Use it as a filling in pastries or serve it alongside cheese for a stunning cheese board. Trust me, it’ll impress everyone at your next gathering!
Recipe Variations
Want to mix things up? Here are some creative twists to consider:
-
Spiced Plum Jam: Add a pinch of nutmeg or a tiny dash of ground cloves for a classic spice twist.
-
Berry Blast: Toss in a cup of fresh berries, like raspberries or blueberries, for a mixed-fruit jam!
-
Herbal Infusion: Steep some fresh mint or rosemary in your water before cooking for a unique herbal taste.
-
Chili Plum Jam: For a spicy kick, add a few red pepper flakes to the mix for that sweet and spicy combo.
-
Alcohol-Infused Jam: Feel adventurous? Stir in a splash of brandy or bourbon just before removing from heat for a sophisticated twist!
Chef’s Notes
This recipe is dear to my heart, and it has evolved nicely over time. Initially, I used traditional sugar and pectin, but as I experimented, I found that relying on nature’s sweetness could yield a more wholesome treat! Plus, there’s just something magical about knowing exactly what goes into your food. And who wouldn’t love introducing a sugar-free option into their snacking repertoire? My grandma would be proud!
FAQs and Troubleshooting
1. My jam turned out too runny! What can I do?
No worries! Simply return the jam to the stove and continue cooking on low heat, stirring frequently until it thickens to your liking.
2. Can I can this jam for longer storage?
Absolutely! Just ensure you use sterilized jars and process them in a boiling water bath for about 10 minutes to seal them properly.
3. What if I don’t have enough ripe plums?
No problem! You can mix with other fruits like peaches or apricots. Just keep the proportions similar for the best flavor.
4. How do I know when the jam is done?
A good test is the plate test: drop a spoonful of jam on a cold plate and let it cool. If it sets and doesn’t run, you’re good to go!
Nutritional Info
For those mindful of their intake, this Sugar-Free Plum Jam is low-calorie and full of natural goodness. With no added sugars, the calories primarily come from the fruits themselves. Plums provide great health benefits, including vitamins A and C, while apples pack fiber and antioxidants. Enjoy every spread without the guilt!
Final Thoughts
And there you have it, my friends—your very own Sugar-Free Plum Jam! Making jam from scratch isn’t just a culinary project; it’s a way to infuse your life with flavor and heart. I hope this recipe brings you as much joy as it has brought to me and my family. So why wait? Roll up your sleeves, pop some music on, and get cookin’!
Remember, cooking should be as much about the experiences and memories as it is about the food itself. Happy jam-making, and I can’t wait to hear how yours turns out!
Until next time, happy feasting!
Print
Sugar-Free Plum Jam with No Pectin
- Total Time: 55 minutes
- Yield: 4 servings 1x
- Diet: Vegetarian
Description
A delightful homemade jam using ripe plums, offering a sugar-free alternative with natural sweetness.
Ingredients
- 1000 g of Very Ripe Plums
- 1 Apple
- 100 mL of Water
- 1 tbsp of Lemon Juice
- 0.5 tsp of Cinnamon
- 0.5 tsp of Ginger
Instructions
- Prep the plums by washing them thoroughly, slicing in half, and removing the pits. Keep the skins on for added flavor.
- Chop the apple into small chunks, removing the core and seeds.
- Combine plums, chopped apple, water, lemon juice, cinnamon, and ginger in a heavy-bottomed pot.
- Get simmering by bringing the mixture to a simmer over medium heat, stirring gently.
- Cook for about 30-40 minutes, stirring occasionally, and use a potato masher to achieve desired consistency.
- Taste and adjust flavors with more lemon juice or spices as preferred.
- Cool the jam before transferring it to sterilized jars and seal tightly.
Notes
Use clean jars for preservation, and consider alternative fruits if plums are unavailable.
- Prep Time: 15 minutes
- Cook Time: 40 minutes
- Category: Condiment
- Method: Stovetop Cooking
- Cuisine: Preserving
Nutrition
- Serving Size: 1 tablespoon
- Calories: 50
- Sugar: 0g
- Sodium: 1mg
- Fat: 0g
- Saturated Fat: 0g
- Unsaturated Fat: 0g
- Trans Fat: 0g
- Carbohydrates: 13g
- Fiber: 1g
- Protein: 0g
- Cholesterol: 0mg
Keywords: plum jam, sugar-free jam, homemade jam, preserving, fruit spread
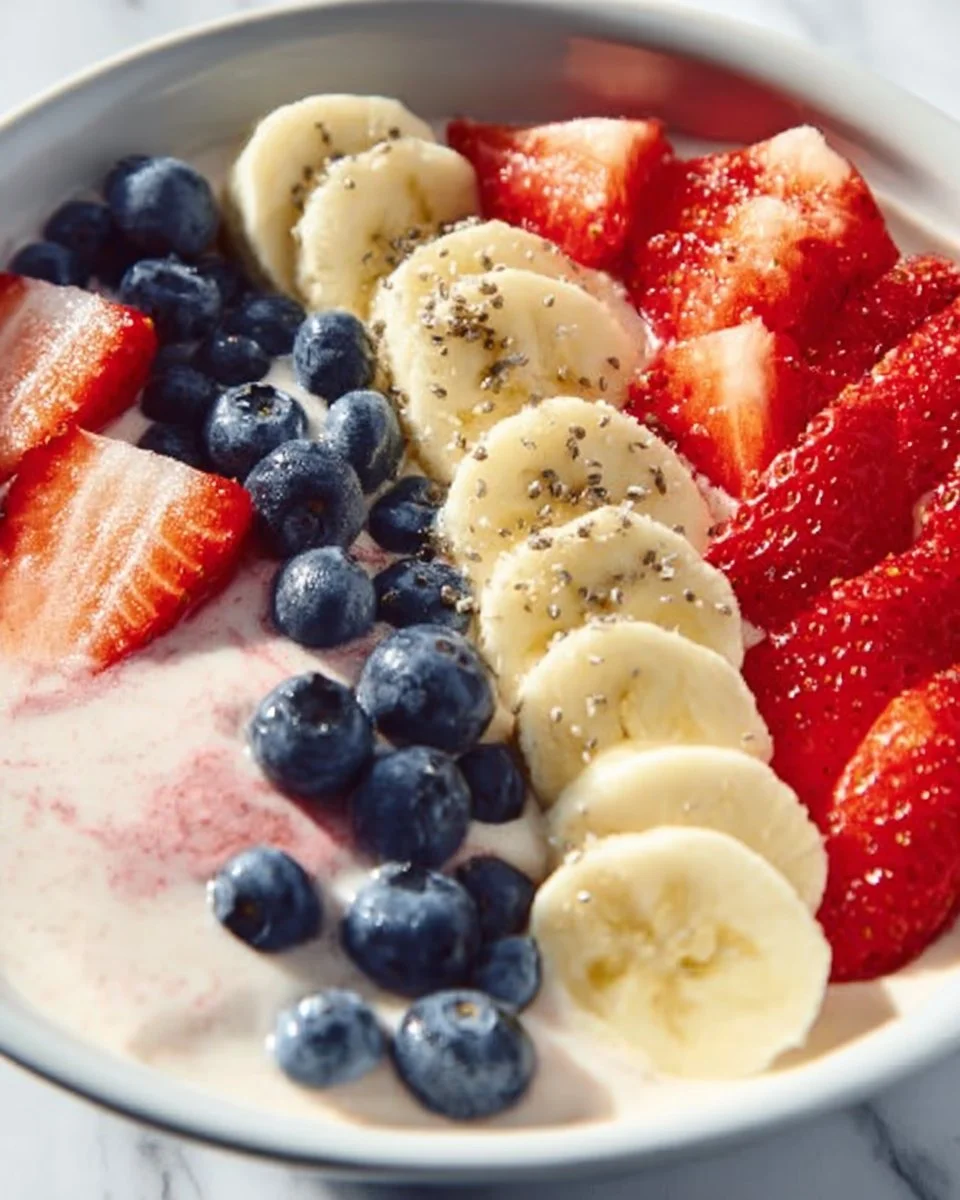
5-Minute Fruit Smoothie Bowl (with Greek Yogurt)
Welcome to the Bright and Flavorful World of 5-Minute Fruit Smoothie Bowls!
Hey there, foodies! Beau Collier here from Feastical, and today we’re diving into a burst of sunshine that’ll make your mornings sparkle like a fresh day. I’m talking about the delightful and incredibly versatile 5-Minute Fruit Smoothie Bowl! 🌞 If you’re anything like me, you occasionally stand in front of the fridge, hoping the contents of it will transform into a gourmet meal without much effort. Well, you’re in luck—this smoothie bowl is so simple, so delicious, and oh-so-good for you, it practically makes itself!
Imagine waking up and whipping up a breakfast that not only tastes heavenly but also looks like a work of art! The bright colors of fruits, the creaminess of Greek yogurt, and the crunchy toppings combine to create a dish that feels indulgent while keeping things on the healthy side. Whether you’re rushing to work, have kids to feed, or just want to treat yourself to something special, this smoothie bowl is exactly what you need. Plus, we’ll sprinkle in some little chef tips and stories along the way because what’s cooking without a little flavor?
So, grab your blender, and let’s dive into the delightful world of smoothie bowls that’ll have you feeling like a breakfast champion! This recipe is not just about filling up your stomach but feeding your soul.
A Slice of Nostalgia
Let me take you back to a sun-kissed morning years ago. I was visiting my favorite aunt who lived by the coast, and every morning, she had this delightful ritual. She would rise before everyone else, tiptoe into the kitchen, and whip up these amazing smoothie bowls that made our hearts skip a beat. The kitchen would fill with laughter as we all gathered around the table, each of us trying to outdo the other with the most extravagant toppings on our smoothie bowls.
I remember one specific morning: my aunt let me pick the ingredients. I was all about a crazy mix of frozen berries—because let’s face it, who can resist those vibrant colors? She showed me how to layer each ingredient with care, almost like painting a canvas. I can still feel the sun on my face and hear the waves crashing in the distance as we savored those vibrant creations together.
Fast forward to today, I find that same joy each time I whip up a smoothie bowl, turning a simple meal into a delightful experience. It’s all about those precious moments spent in the kitchen, gathering around to share stories, laughter, and, of course, scrumptious food!
Ingredients
Now, let’s talk about what you’ll need to create your smoothie bowl masterpiece. Here’s a handy list of ingredients, and I’ll drop in a chef insight or substitution tip for each:
-
1 Banana: The creamy base of your smoothie. If you’re out of bananas, try using avocado for a similar texture with a hint of nuttiness.
-
1 Cup Frozen Strawberries: Adds sweetness and a vibrant red color. Fresh strawberries work too, but you might want to add some ice to cool things down.
-
1/3 Cup Frozen Pineapple Chunks: A tropical twist! This gives your smoothie that refreshing zing. Canned pineapple can substitute, but drain it well.
-
1/2 Cup Vanilla Greek Yogurt: Creamy goodness plus protein! Can’t find vanilla? Regular Greek yogurt will do, and you can add a splash of vanilla extract instead.
-
Sliced Strawberries: For topping, they add freshness and a pop of color. Other berries work great too—experiment with what’s in season!
-
Sliced Bananas: More freshness on top. Again, swap with kiwis or mango if you’re feeling adventurous!
-
Fresh Blueberries: Bursting with flavor and nutrients. If fresh blueberries are unavailable, frozen ones can work nicely.
-
Granola: For that satisfying crunch. Look for nut-free or gluten-free options if you have dietary restrictions.
-
Shredded Coconut: Adds a tropical flair. Unsweetened is best for a healthier twist, but sweetened can take it to dessert level.
-
Slivered Almonds: For a little extra crunch and protein. Walnuts can be used instead for an earthier flavor.
-
Chopped Walnuts: Perfect for texture! You can swap these for pecans, which offer a slightly sweeter taste.
-
Chia Seeds: Packed with nutrients and a great thickening agent! Flaxseeds can be a substitute if you prefer those instead.
-
Sunflower Seeds: Adds a nutty crunch without allergies. Raw pumpkin seeds are also a fantastic swap.
Step-by-Step Instructions
Let’s get to the fun part—making your smoothie bowl! Grab your blender, and let’s make some magic happen.
-
Prep Your Ingredients: Start with peeling your banana and measuring out your frozen fruits and yogurt. If you’re using fresh fruits, make sure they’re washed and ready to go. Prep work is key! The less time you spend looking for things, the more time you have to enjoy your delicious creation.
-
Blend It Up: Toss the banana, frozen strawberries, frozen pineapple, and Greek yogurt into the blender. Blend on high until smooth and creamy. If your blender is struggling, you can add a splash of water or almond milk to help loosen it up. The goal is a thick, creamy texture, not a thin smoothie, so keep an eye on it!
-
Taste Test: Here’s where we get to be chefs! Taste your smoothie before pouring it out. If you want it sweeter, feel free to add a drizzle of honey or agave syrup. You can also add a little more Greek yogurt if you want a richer body.
-
Pour and Decorate: Now, pour the creamy goodness into your favorite bowl. This is where you can unleash your inner artist! Start by placing sliced strawberries and sliced bananas in a beautiful design on top of the smoothie.
-
Add Crunch and Flavor: Sprinkle granola, shredded coconut, slivered almonds, and chopped walnuts on top. Make it rain toppings! You want it to look as good as it tastes, so go wild here.
-
Final Touches: Scatter some fresh blueberries and a few chia seeds over the top. A drizzle of honey can also be a lovely finishing touch if you fancy a bit more sweetness.
Serving Suggestions
Serving your smoothie bowl is an art in itself! Personally, I love to grab a bright, colorful bowl that makes the fruits pop. Arrange those toppings thoughtfully, and don’t be afraid to pile them high! Use a spoon or a little slotted spatula to create heights and depth with the granola and fruits—this gives that gorgeous Instagram-worthy look.
For a special touch, you could even serve it with a cute little side of extra toppings, so folks can customize their bowls at the table. A refreshing glass of orange juice or a hot cup of herbal tea can make for a delightful breakfast spread that looks good and feels good!
Recipe Variations
Here are a few creative twists you can try with your smoothie bowl:
-
Tropical Paradise Bowl: Swap out the strawberries for mango and add a splash of coconut milk for that ultimate vacation vibe!
-
Green Goddess Bowl: Add a handful of spinach or kale for a nutrient boost. You won’t even taste it, and your smoothie will be a beautiful shade of green!
-
Chocolate Lover’s Delight: Mix in a tablespoon of cocoa powder or top with chocolate granola for a decadent spin. Dark chocolate shavings can take it to the next level!
-
Nut Butter Bliss: Swirl in a tablespoon of your favorite nut butter into the blend for added flavor—think almond or peanut butter. It adds richness and creaminess that’s absolutely divine.
-
Superfood Special: Incorporate acai powder or spirulina for extra superfood goodness! You might change the color slightly, but the flavor game is still strong.
Chef’s Notes
This recipe has traveled with me through the years, evolving with each new ingredient I discover. I remember when I first attempted to make it while on vacation—I didn’t have a blender, so I mashed everything up with a fork! It turned into a chunky smoothie bowl, and although it wasn’t the prettiest, it was tasty and sparked so much laughter.
I also love how this recipe encourages experimentation. Some days I throw in whatever fruit is about to go bad—no waste here! And honestly? It’s led to some delightful surprises!
FAQs and Troubleshooting
Q: My smoothie turned out too thick; what do I do?
A: No worries! Just add a splash of water or your favorite milk and blend again until you achieve that creamy texture.
Q: Can I make this ahead of time?
A: Sure! You can prep the ingredients the night before and store them in the fridge. Just blend in the morning and garnish your way!
Q: How do I make it dairy-free?
A: Simply swap out Greek yogurt for a plant-based yogurt. Almond or coconut yogurt works just as well!
Q: My toppings keep sinking; how can I fix this?
A: Make sure your smoothie is thick when pouring it into the bowl. You can also put a layer of granola as the base and then add fruit on top for better support!
Nutritional Info
Let’s talk about the health benefits of this smoothie bowl! This delicious creation is packed with nutrients.
- Protein: Thanks to Greek yogurt, you’re getting a protein boost to start the day right.
- Fiber: Fruits like bananas, strawberries, and chia seeds provide a great source of fiber, keeping you full for longer.
- Antioxidants: The vibrant colors of your fruits mean they’re loaded with essential vitamins and antioxidants.
- Healthy Fats: Toppings such as nuts and seeds bring in those healthy fats, perfect for brain function and overall wellbeing!
This smoothie bowl is not just a feast for the eyes—it’s a wholesome meal that fuels your body!
Final Thoughts
And there you have it, folks! The 5-Minute Fruit Smoothie Bowl is as quick and easy as it is delightful. It’s a canvas for your creativity and a hearty start to your day. Whether you whip it up for yourself on a busy morning or create a colorful breakfast spread for friends and family, this recipe will serve as the foundation for many delicious memories.
So, what are you waiting for? Get blending, and let your smoothie bowl journey begin! Remember, cooking is about joy and sharing. Each bowl tells a story, so let yours be filled with love and laughter. Until next time, keep exploring the flavors of life—one delicious dish at a time!
Print
5-Minute Fruit Smoothie Bowl
- Total Time: 5 minutes
- Yield: 2 servings 1x
- Diet: Vegetarian
Description
A colorful and nutritious smoothie bowl that comes together in just five minutes, perfect for a quick breakfast or a healthy treat.
Ingredients
- 1 Banana
- 1 Cup Frozen Strawberries
- 1/3 Cup Frozen Pineapple Chunks
- 1/2 Cup Vanilla Greek Yogurt
- Sliced Strawberries (for topping)
- Sliced Bananas (for topping)
- Fresh Blueberries (for topping)
- Granola (for topping)
- Shredded Coconut (for topping)
- Slivered Almonds (for topping)
- Chopped Walnuts (for topping)
- Chia Seeds (for topping)
- Sunflower Seeds (for topping)
Instructions
- Prep Your Ingredients: Start with peeling your banana and measuring out your frozen fruits and yogurt.
- Blend It Up: Toss the banana, frozen strawberries, frozen pineapple, and Greek yogurt into the blender. Blend until smooth and creamy.
- Taste Test: Adjust sweetness by adding honey or more Greek yogurt as desired.
- Pour and Decorate: Pour the smoothie into a bowl and arrange the sliced strawberries and bananas creatively on top.
- Add Crunch and Flavor: Sprinkle granola, shredded coconut, slivered almonds, and chopped walnuts over the top.
- Final Touches: Scatter fresh blueberries and chia seeds on top, adding a drizzle of honey if desired.
Notes
Feel free to mix and match fruits and toppings to suit your preferences. This recipe encourages creativity!
- Prep Time: 5 minutes
- Cook Time: 0 minutes
- Category: Breakfast
- Method: Blending
- Cuisine: American
Nutrition
- Serving Size: 1 bowl
- Calories: 300
- Sugar: 20g
- Sodium: 50mg
- Fat: 10g
- Saturated Fat: 2g
- Unsaturated Fat: 8g
- Trans Fat: 0g
- Carbohydrates: 45g
- Fiber: 6g
- Protein: 9g
- Cholesterol: 10mg
Keywords: smoothie bowl, healthy breakfast, quick recipe, fruit smoothie, nutritious bowl
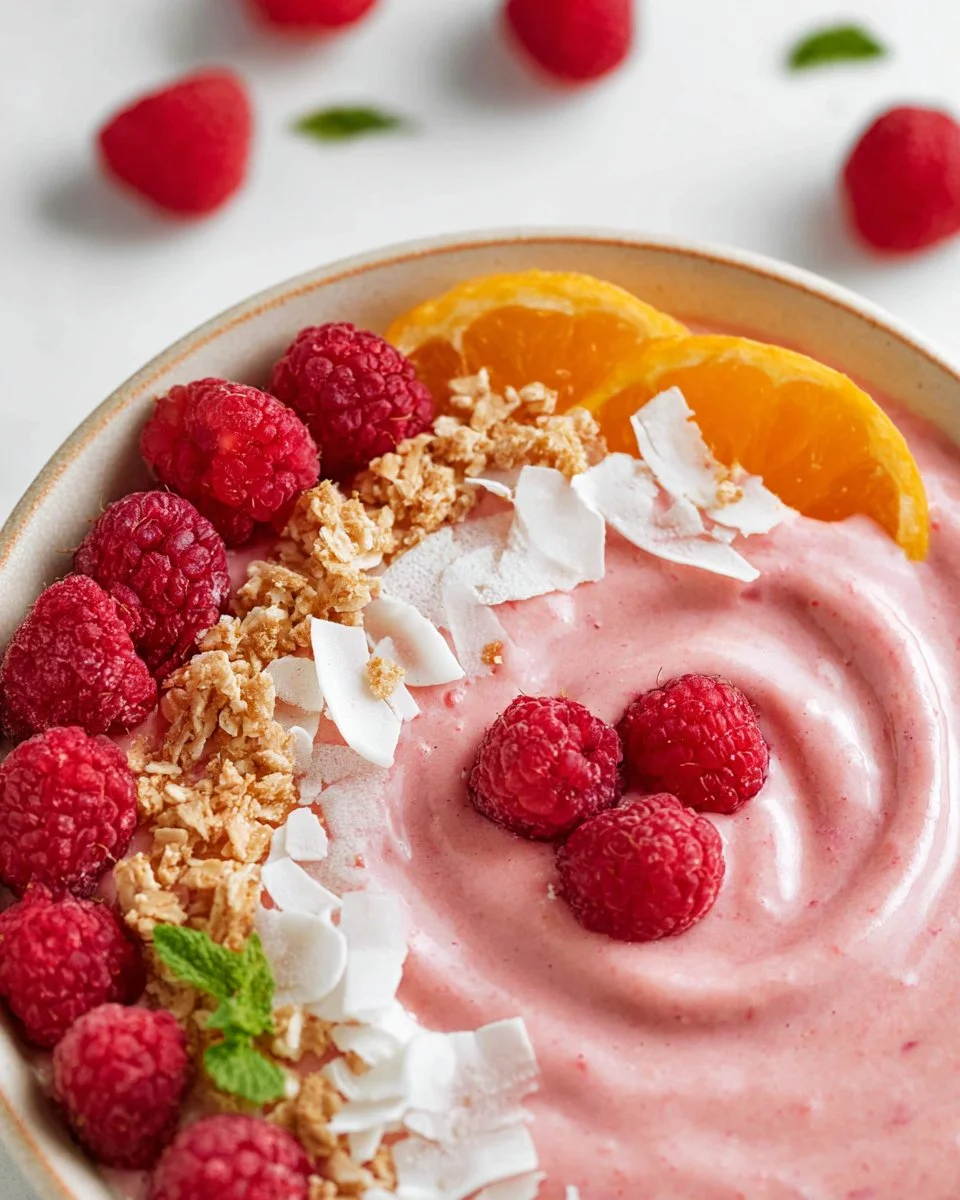
Raspberry Orange Smoothie Bowl
Dive into Deliciousness: Raspberry Orange Smoothie Bowl
Hey there, my fellow food enthusiasts! Welcome back to Feastical, your go-to site for feel-good food that celebrates the pleasures of kitchen creativity. Today, we’re going to whip up something that radiates sunshine and happiness—a Raspberry Orange Smoothie Bowl! This delightfully vibrant dish isn’t just a treat for your taste buds; it’s also a feast for the eyes. Imagine waking up on a bright morning, ready to embrace the day with a burst of fruity goodness!
Now, if you’re like me and love starting your mornings with a refreshing, wholesome snack, then this smoothie bowl is perfect! It’s easy to make, packed with nutrients, and can be customized to fit your flavor cravings. Plus, it’s one of those dishes that evokes warm memories, which makes it all the more special. So grab your blender, and let’s create some magic together!
Personal Story
I remember the first time I discovered the joy of smoothie bowls. It was a sunny Saturday morning about five years ago when I was visiting a local farmer’s market. The colors of the fresh fruits just caught my eye—the vibrant reds of raspberries, the sunny yellows of oranges, and those tantalizing glimmers of green from some overly ripe avocados calling out for a spotlight. As I strolled through the booths, I stumbled upon a charming café selling smoothie bowls. Intrigued, I decided to dive in.
That first bite was a revelation! The creamy texture, coupled with the tangy sweetness of the raspberries and oranges, had me hooked instantly. I found myself wanting to recreate that sensational experience at home. After countless experiments and some kitchen mishaps (don’t even ask about that time I forgot to add the liquid and created a fruity brick!), I finally nailed my own version of the raspberry orange smoothie bowl. It’s become a cherished morning staple in my house—and trust me, once you try it, it’ll become one for you too!
Ingredients
To whip up this dazzling Raspberry Orange Smoothie Bowl, you’ll need a few simple ingredients. Here’s what you’ll be gathering from your kitchen (or local grocery store):
-
2 frozen bananas (peeled prior to freezing)
Bananas add creaminess to your smoothie, turning it into a silky delight. If you don’t have bananas on hand, you can use avocados for a rich, buttery texture! -
1 frozen orange (peeled and segmented prior to freezing)
Oranges bring a refreshing zing to the bowl. If you’re feeling adventurous, swap with grapefruit or a ripe peach for a twist in flavor! -
1 cup frozen raspberries
These little gems are packed with antioxidants and give the smoothie a vibrant hue. Fresh raspberries are great too, but be mindful—if using fresh, consider reducing the liquid. -
1 tbsp orange zest
Zest enhances the citrusy flavor without additional juice. It’s a little kitchen secret that can elevate your dishes. You can sub it with lemon zest if you have it on hand! -
1/2 to 1 cup plant-based milk
This is your base! Adjust the quantity depending on how thick you like your smoothie. Almond milk or coconut milk work perfectly, but feel free to try oat or soy milk based on your preference. -
1-2 tbsp maple syrup (optional, to sweeten)
Depending on how sweet your fruits are, you may want to add some maple syrup. Honey is a delicious substitute unless you’re keeping it plant-based, in which case agave syrup would work well! -
Toppings of your choice:
Think colorful and crunchy—sliced fruits, granola, coconut flakes, nuts, seeds, or a drizzle of nut butter. This is where you can get creative!
Step-by-Step Instructions
Ready to dive in? Let’s get blending!
-
Preparation Time: Make sure your bananas and oranges are prepped and frozen as mentioned in the ingredient list. This step is crucial as it makes your smoothie thick and creamy—like a scoop of ice cream!
-
Blend the Base: Toss the frozen bananas, frozen orange, and frozen raspberries into a blender. Add ½ cup of plant-based milk to start. If you’re like me and can’t resist a bit of experimentation, consider throwing in a splash of vanilla extract for that extra level of deliciousness!
-
Add Zest and Sweetness: Toss in the orange zest and, if you’re after that sweetness, drizzle in the maple syrup. Blend until the mixture becomes velvety and smooth. If your blender struggles a bit, don’t hesitate to stop and scrape down the sides or add more milk!
-
Check Consistency: Now comes the fun part! Check the consistency—if you want it thicker, add more frozen fruit or reduce the milk. For a thinner smoothie, just add a bit more milk until it’s the perfect consistency for your liking.
-
Serve with Style: Once it’s blended to perfection, pour your smoothie into a bowl. Now, here’s where the artistry comes in. Use toppings to create a beautiful presentation. Think circular designs with coconut flakes, crunchy granola sprinkled artistically, and colorful fruits arranged like a rainbow.
Pro Tip:
Let your toppings shine! Serving your smoothie bowl like a canvas opens the door for creative expression. Slice your fruits neatly, arrange them like you’re at art class, and feel free to layer on extra coconut flakes or a sprinkle of seeds for that wow factor!
Serving Suggestions
Serve your Raspberry Orange Smoothie Bowl in a wide, shallow bowl to show off those gorgeous toppings! Grab a nice spoon and dig in. This bowl isn’t just a breakfast option; it makes a refreshing afternoon snack or dessert, especially on those warm days when you crave something light yet filling.
Pair your smoothie bowl with a side of whole grain toast topped with nut butter for a wholesome meal. Or enjoy it alongside a cup of herbal tea for a delightful afternoon moment of bliss. For an Instagrammable touch, snap a quick picture before you dig in—trust me, your friends and followers will be begging to try it!
Recipe Variations
As much as I love the classic Raspberry Orange Smoothie Bowl, the beauty of this recipe lies in its versatility! Here are some creative twists you can give it:
-
Berry Blast: Swap the raspberries for blueberries or strawberries for a different berry flavor. The former would give you a more mellow sweetness, while the latter packs a punch!
-
Tropical Vibes: Add pineapple chunks and a splash of coconut milk to take your smoothie bowl to the tropics. Think creamy piña colada vibes in your breakfast!
-
Nutty Delight: Incorporate a spoonful of peanut (or almond) butter into the blend for an energizing, protein-packed treat. The nutty flavor pairs beautifully with the fruity undertones.
-
Green Boost: Add a handful of spinach or kale to your smoothie base for added nutrients without altering the flavor significantly. Green goodness is always a win!
-
Choco Orange Twist: For all you chocolate lovers out there, toss in a tablespoon of cocoa powder. The chocolate and orange combination? Chef’s kiss!
Chef’s Notes
As I mentioned earlier, this smoothie bowl started as an experiment inspired by a market adventure, and over time, it sparked a love affair with smoothie bowls. I’ve discovered that food is all about having fun in the kitchen! So don’t be afraid to experiment, throw in some random ingredients, and make it a family affair. At the end of the day, cooking should feel like joy—not a chore.
A few years back, I even hosted a smoothie bowl party! Guests brought their favorite toppings, and we created custom masterpieces alongside laughter and music playing in the background. Memories like those remind me that food not only nourishes our bodies but also nourishes our relationships.
FAQs and Troubleshooting
-
Why is my smoothie too thick, and how do I fix it?
If your smoothie is too thick, simply add a splash more plant-based milk or water until you reach your desired consistency. Blend again until smooth! -
Can I use fresh fruit instead of frozen?
Absolutely! Just remember that your smoothie may not be as thick and creamy. You might need to add ice cubes for that icy texture, or reduce the liquid added at the start. -
What if my smoothie is too sweet?
No problem! Add in a little squeeze of lemon or lime juice. Their acidity helps counteract the sweetness and brings balance. -
How can I store leftovers?
If you happen to have any leftovers, pour them into an airtight container and store them in the freezer. You can thaw them in the fridge or give them a quick blend again before enjoying!
Nutritional Info
Let’s talk about nutrition, shall we? This Raspberry Orange Smoothie Bowl is not only a colorful feast, but it’s also brimming with health benefits:
- Calories: Approximately 350–400 per serving (depending on toppings)—a hearty yet nutritious meal.
- Vitamins: Rich in Vitamin C from the oranges and raspberries, which boosts your immune system.
- Fiber: Bananas and raspberries are excellent sources of dietary fiber, keeping you feeling full and satisfied.
- Antioxidants: Berries, particularly raspberries, are high in antioxidants, which combat oxidative stress and promote overall health.
- Healthy Fats: If you add toppings like nuts or nut butter, you’re incorporating healthy fats that are great for your heart.
Final Thoughts
There you have it, folks—a delightful Raspberry Orange Smoothie Bowl to brighten up your mornings and elevate your spirits. This dish is a reminder that cooking doesn’t have to be complicated to be delicious and nourishing! So whether you’re whipping this up for breakfast, a snack, or simply treating yourself to something sweet, I can assure you it will bring joy with every spoonful.
As you explore this recipe, remember that the kitchen is your playground. Let your creativity flow, bring your loved ones in to share and enjoy, and take time to savor the little moments—both in and out of the bowl. Until next time, happy cooking, tasting, and creating joyful memories in the kitchen!
Print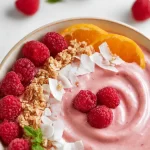
Raspberry Orange Smoothie Bowl
- Total Time: 15 minutes
- Yield: 1 serving 1x
- Diet: Vegan
Description
A vibrant and refreshing Raspberry Orange Smoothie Bowl packed with fruity goodness and nutritional benefits.
Ingredients
- 2 frozen bananas (peeled prior to freezing)
- 1 frozen orange (peeled and segmented prior to freezing)
- 1 cup frozen raspberries
- 1 tbsp orange zest
- 1/2 to 1 cup plant-based milk
- 1–2 tbsp maple syrup (optional, to sweeten)
- Toppings of your choice (sliced fruits, granola, coconut flakes, nuts, seeds, or nut butter)
Instructions
- Preparation Time: Make sure your bananas and oranges are prepped and frozen as mentioned in the ingredient list.
- Blend the Base: Toss the frozen bananas, frozen orange, and frozen raspberries into a blender. Add ½ cup of plant-based milk to start.
- Add Zest and Sweetness: Toss in the orange zest and drizzle in the maple syrup. Blend until velvety and smooth.
- Check Consistency: If you want it thicker, add more frozen fruit or reduce the milk. For a thinner smoothie, add more milk.
- Serve with Style: Pour your smoothie into a bowl and use toppings to create a beautiful presentation.
Notes
Experiment with toppings and ingredients! Feel free to customize the smoothie bowl with your favorite fruits and nut butters.
- Prep Time: 15 minutes
- Cook Time: 0 minutes
- Category: Breakfast
- Method: Blending
- Cuisine: Healthy
Nutrition
- Serving Size: 1 bowl
- Calories: 375
- Sugar: 25g
- Sodium: 45mg
- Fat: 8g
- Saturated Fat: 1g
- Unsaturated Fat: 7g
- Trans Fat: 0g
- Carbohydrates: 70g
- Fiber: 8g
- Protein: 5g
- Cholesterol: 0mg
Keywords: smoothie bowl, raspberry, orange, healthy breakfast, vegan recipe

Breakfast Burritos
Breakfast Burritos: Your New Morning Favorite!
Hey foodies, welcome back to Feastical! Today, we’re diving into a dish that’s not just a breakfast staple, but a wholesome hug wrapped in a tortilla—the glorious breakfast burrito! Picture this: a soft, warm tortilla filled with fluffy scrambled eggs, savory meat, colorful veggies, and a sprinkle of cheese. It’s a handheld breakfast that you can have on the go or at your kitchen table, and trust me, it’s going to be your new favorite way to kickstart your day.
Now, you might think breakfast burritos are complicated, but I promise you, making them is as simple as saying “o-mega delicious!” In fact, this dish is perfect for everyone—whether you’re a busy bee rushing out the door, a weekend warrior looking for a hearty breakfast, or a lazy Sunday brunch devotee. Not to mention, you can customize your burrito with personal touches, making each bite a delightful journey of flavors.
Why breakfast burritos, you ask? Let’s just say they remind me of the many mornings spent in my grandmother’s sunny kitchen—where the aroma of sizzling eggs and crispy bacon would blend with laughter and stories. That kind of atmosphere ignited my love for cooking and shared meals. In this post, I’ll guide you through creating your own breakfast burritos, sharing tips and tricks, so you can recreate that cozy kitchen magic right at home! So, roll up your sleeves and get ready—it’s time to fill those tortillas!
Personal Story
Ah, breakfast burritos! They transport me back to lazy Saturday mornings as a kid when I would wake up to the smell of my grandma’s cooking wafting through the house. I can still hear her humming an old tune as she flipped pancakes on the stove and scrambled eggs in a sizzling pan. But the real star of the show was her famous breakfast burritos. With each bite, I experienced an explosion of flavors that represented everything I loved about our family’s kitchen—comfort, creativity, and a whole lot of love.
I remember making these burritos with her. She’d let me crack the eggs and whisk them, giggling at my enthusiastic, somewhat clumsy attempts. We’d throw in whatever veggies we could find in the fridge—bell peppers, spinach, even leftover potatoes from the night before. Grandma always said, “Cooking is about making do with what you have,” and those burritos were a testament to that wisdom.
Looking back now, those mornings felt magical; it wasn’t just about the food, but also the connections we formed over those shared meals. So, friends, when you make your own breakfast burrito, remember that however simple or complex it might be, it’s an opportunity to create your own flavorful memories. Now, let’s gather some ingredients and get cooking!
Ingredients
Let’s gather everything you need to whip up these delicious breakfast burritos. Here’s the lineup:
-
4 large eggs
The star of the show! Fresh eggs provide a rich and creamy texture. You can substitute with egg whites or a plant-based egg alternative for a lighter option. -
1 cup cooked lean meat (such as turkey or chicken)
This adds protein and heartiness. Feel free to get creative with leftover meats or even try veggie sausage or tofu for a meat-free version. -
1/2 cup shredded cheese
Cheese adds gooey goodness to your burrito. Cheddar, Monterey Jack, or a spicy pepper jack can elevate the flavor profile. For a dairy-free option, shredded vegan cheese works great too! -
1 cup diced vegetables (such as bell peppers, onions, or spinach)
Fresh veggies add crunch and color! Use any combination you have on hand—zucchini, mushrooms, or even leftover roasted vegetables can work wonders. -
4 large tortillas
Flour tortillas are classic, but whole wheat or corn tortillas are perfect for a healthier twist. You can also try tortilla alternatives like lettuce wraps for a low-carb option. -
Salt and pepper to taste
Essential for seasoning! Don’t skip the salt; it brings out the flavors in your dish. You can also add smoked paprika or cumin for an extra kick. -
Optional: salsa or hot sauce
A little something to jazz it up! Use your favorite salsa for freshness or drizzle with hot sauce for extra heat.
Step-by-Step Instructions
Alright, let’s dive into the cooking process! Here’s how you can create mouth-watering breakfast burritos in just a few easy steps:
Step 1: Prep Your Ingredients
Before you start cooking, let’s prep everything. Dice your vegetables and cook any meat if needed. If you’re using leftover meat, just chop it into bite-sized pieces. Get your tortillas ready by heating them slightly on a dry skillet until they’re warm and pliable.
Chef Hack: If you want to save time, chop your veggies the night before or batch cook your scrambled eggs ahead of time!
Step 2: Whisk Those Eggs
Grab a bowl and crack those eggs! Whisk them vigorously until they’re frothy. This is key to getting fluffy scrambled eggs. Add a pinch of salt and pepper to season them.
Chef Insight: If you want to elevate your scrambled eggs even more, add a splash of milk or cream before whisking for extra creaminess!
Step 3: Cook the Filling
Heat a non-stick skillet over medium heat and add a drizzle of olive oil. Toss in your diced veggies first and sauté them until they’re soft, about 3-5 minutes. Then, if you’re using meat, add it to the pan and let it warm through.
Once your veggies are soft and the meat is heated, push everything to one side of the skillet and pour the beaten eggs into the other side.
Step 4: Scramble It Up!
Let the eggs sit for a few seconds, then gently stir with a spatula, incorporating the veggies and meat as you go. Cook for about 3-4 minutes or until the eggs are just set. Remember, they should feel soft and slightly runny—they’ll continue to cook a little after you remove them from the heat.
Chef Tip: To prevent rubbery eggs, always cook them on medium-low heat. Patience is key for fluffy results!
Step 5: Build Your Burrito
Now comes the fun part! Lay the warm tortillas on a clean surface. Spoon a generous portion of the egg and veggie mixture onto the center, then sprinkle cheese on top.
Chef Hack: If you want melted cheese in your burrito, you can add the cheese to the hot filling right before folding it up!
Step 6: Roll It Up
To fold your burrito, start by folding the sides of the tortilla in, then roll it from the bottom up, tucking the filling snugly as you go. Tada! Your burrito should look like a delicious, hand-held package.
Step 7: Serve or Store
You can serve your burritos immediately or seal them in foil or plastic wrap for a breakfast on the go. If you want to get fancy, you can toast them in the skillet for a couple of minutes on each side for a crispy texture.
Serving Suggestions
Presentation is key even for a casual breakfast. If you’re serving these breakfast burritos at the table, try slicing them in half on a diagonal to showcase the colorful filling. You can serve them alongside some fresh fruit, a side of salsa, or a dollop of sour cream or avocado if you’re feeling extra fancy!
Foodie Note: Garnish with fresh cilantro or green onions for added color and freshness!
Recipe Variations
Now, let’s get creative! Here are a few fun variations to switch things up:
-
Southwestern Style: Add black beans, corn, and a sprinkle of taco seasoning. Top with avocado slices and your favorite salsa.
-
Veggie Lover’s Delight: Stuff your burrito with an array of sautéed mushrooms, zucchini, and spinach, and use feta cheese for an extra flavor punch.
-
Spicy Chorizo: Substitute the lean meat with spicy chorizo sausage for a kick. Pair with diced jalapeños and pepper jack cheese.
-
Mediterranean Twist: Use feta cheese, add roasted red peppers, and spinach, and finish with a drizzle of tzatziki sauce.
-
Breakfast Quesadilla: For an extra crispy option, layer the filling between two tortillas and cook on a skillet until golden brown, then slice into wedges.
Chef’s Notes
Over the years, my breakfast burrito recipe has undergone quite an evolution. What started as a simple family recipe has transformed into a versatile dish that can cater to any palate or dietary need. I love how adaptable they are—it’s like a blank canvas for your breakfast cravings! And there’s nothing quite as satisfying as whipping these up after a long night.
Funny story: The first time I tried to make these on my own, I accidentally added sugar instead of salt to the eggs! Let’s just say it was an interesting sweet surprise that my friends still tease me about till today. But it taught me that every kitchen mishap is just a chance to learn and grow as a cook.
FAQs and Troubleshooting
-
Can I make my breakfast burritos in advance?
Absolutely! Prep the filling and store it in the fridge for up to 3 days. Just heat it up and assemble your burritos when you’re ready to eat. -
What if my tortillas break while rolling?
If your tortillas are cracking, try warming them up a bit more before folding, or use larger tortillas for more space! -
Can I freeze breakfast burritos?
Yes! Wrap them tightly in foil and freeze for up to 3 months. Just reheat them in the microwave or oven until heated through. -
I want them less messy! Any tips?
Don’t overfill your burritos! A little goes a long way. Also, try to keep the ingredients mainly toward the center for easier rolling.
Nutritional Info
For those keeping an eye on their nutrition, here’s a rough estimate of what you can expect per breakfast burrito:
- Calories: 350-450 (varies based on fillings)
- Protein: 20-25g (from eggs and lean meat)
- Carbohydrates: 35-45g
- Fat: 15-20g (depends on cheese and tortilla used)
Of course, customizing your ingredients can lead to adjustments in calories and nutrition, making this recipe as healthy or indulgent as you’d like!
Final Thoughts
And there you have it, my friends! Breakfast burritos that not only represent why I love cooking but also celebrate the magic of meals shared with family and friends. Now, you’ve got a great base recipe, but the possibilities are truly endless! I hope you get creative in your kitchen and make these your own.
Whether it’s a weekday rush or a weekend brunch, keep the spirit of cooking alive with your personal touch. I can’t wait to hear about the delicious variations you come up with! Now grab that spatula and let’s enjoy some breakfast burritos at your kitchen table! Cheers! 🥳
I hope you found this post helpful and inspiring. Remember to share your breakfast burrito adventures with me on social media! Happy cooking, everyone!
Print
Breakfast Burritos
- Total Time: 30 minutes
- Yield: 4 servings 1x
- Diet: Vegetarian
Description
A delightful breakfast staple, these breakfast burritos are filled with fluffy scrambled eggs, savory meat, colorful veggies, and gooey cheese, wrapped in a warm tortilla.
Ingredients
- 4 large eggs
- 1 cup cooked lean meat (such as turkey or chicken)
- 1/2 cup shredded cheese
- 1 cup diced vegetables (such as bell peppers, onions, or spinach)
- 4 large tortillas
- Salt and pepper to taste
- Optional: salsa or hot sauce
Instructions
- Prep your ingredients by dicing vegetables and cooking meat if necessary.
- Whisk the eggs in a bowl until frothy, adding salt and pepper.
- Heat a non-stick skillet over medium heat, add olive oil, and sauté diced veggies for 3-5 minutes.
- Add cooked meat to the pan and heat through.
- Pour the beaten eggs into the skillet, allowing them to sit briefly before stirring gently.
- Cook for 3-4 minutes until eggs are just set and soft.
- Lay warm tortillas on a clean surface and spoon the filling into the center, topping with cheese.
- Fold the sides of the tortilla in, then roll from the bottom up to form a burrito.
- Serve immediately or wrap for later, optionally toasting for crispy texture.
Notes
Customize ingredients to your preference, and garnish with fresh herbs for added freshness.
- Prep Time: 15 minutes
- Cook Time: 15 minutes
- Category: Breakfast
- Method: Cooking
- Cuisine: Mexican
Nutrition
- Serving Size: 1 burrito
- Calories: 400
- Sugar: 2g
- Sodium: 500mg
- Fat: 20g
- Saturated Fat: 8g
- Unsaturated Fat: 10g
- Trans Fat: 0g
- Carbohydrates: 35g
- Fiber: 3g
- Protein: 22g
- Cholesterol: 210mg
Keywords: breakfast, burrito, easy recipes, Mexican, family meals

High Protein Freezer Friendly Breakfast Bowls
High Protein Freezer Friendly Breakfast Bowls
Hey there, fellow foodies! I’m Beau Collier, and today we’re diving into the world of high-protein breakfast bowls that are not only tasty but also incredibly practical. I mean, who doesn’t want to kickstart their day with a meal that makes you feel like a superstar, right?
Imagine waking up on a chilly morning, the sun peeking through your window, and all you want is something warm, hearty, and full of flavor. But wait—who has the time to whip up a full-blown breakfast during the week? Enter the high-protein freezer-friendly breakfast bowl! These beauties are not just delicious; they’re a life-saver for those hectic mornings when you’re racing against the clock.
The great thing about these breakfast bowls is the versatility. You can customize them to fit your taste buds, throw in whatever veggies are cluttering up your fridge, and protein choices to keep it exciting. Plus, they’re super easy to make in bulk and freeze for later. Talk about a win-win!
In this blog post, I’ll guide you through my favorite recipe for high-protein breakfast bowls that’ll keep you satisfied and energized throughout your morning. This recipe packs a punch with six eggs, lean protein, and vibrant veggies that will make you feel like a breakfast champion! Ready? Let’s dive right into the magic of meal prep, where your future self will thank you for putting in a little love today!
Personal Story
One of my fondest breakfast memories centers around my grandmother, who had a knack for turning simple ingredients into soul-warming meals that filled our home with love and laughter. I still remember her bustling around the kitchen, her apron adorned with flour and a smile brightening the room. She introduced me to the concept of hearty breakfast bowls before I even knew what they were.
Her breakfast always included a hodgepodge of whatever leftovers were lying around. Leftover chicken? Toss it in! Morning vegetables? Absolutely! I recall her laughter as she proclaimed, “Food should be an adventure, not a chore!” It was in those moments—wafting aromas, sizzling pans, and her infectious giggle—that I learned the importance of improvisation in the kitchen.
Though her recipes weren’t always exact, they sparked creativity! My high-protein breakfast bowls today are a tribute to her spirit and a wonderful way to carry on the legacy of cooking with love, imagination, and of course, lots of flavor! So, let’s channel a bit of that kitchen magic as we prepare our own breakfast bowls that your future self will absolutely adore.
Ingredients
Here’s what you’ll need to whip up these flavor-packed breakfast bowls:
-
6 Eggs
- Tip: Eggs are a powerhouse of protein, and they add richness to your dish. If you’re looking for a vegan option, substitute with flax eggs or chickpea flour to keep the protein up.
-
1 cup cooked lean protein (chicken, turkey, or tofu)
- Chef Insight: Whatever you have on hand works! Rotisserie chicken, leftover turkey from Thanksgiving, or even pre-cooked tofu are all excellent options. If you plan ahead, you can batch-cook proteins for the week.
-
1 cup mixed veggies (spinach, bell peppers, onions, etc.)
- Substitution tip: Fresh or frozen veggies work beautifully! If you’re running low on fresh ones, frozen veggies can be a huge time saver and are just as nutritious.
-
Salt and pepper to taste
- Quick tip: Proper seasoning makes all the difference. Start light and adjust to your preference. It’s a balancing act!
-
1 teaspoon garlic powder
- Commentary: Garlic adds a lovely depth of flavor. Feel free to swap it for fresh minced garlic if you’re feeling fancy!
-
1 teaspoon paprika
- Insight: Paprika not only provides a lovely warm color but also a sweet smokiness. Experiment with smoked or sweet paprika depending on your mood!
-
Optional: cheese or hot sauce for serving
- Personal touch: Cheese can add creaminess, while hot sauce provides a kick! I personally love a splash of sriracha for that extra zing!
Step-by-Step Instructions
Step 1: Prepping the Ingredients
Start by gathering all your ingredients. Pre-cook your protein and veggies if they aren’t already done. While eggs provide the base of our bowls, remember that uniform-sized veggies cook more evenly—chop everything into bite-sized pieces.
Step 2: Whisk the Eggs
In a large bowl, crack the eggs and whisk them until they’re nicely beaten. Add a touch of salt, pepper, garlic powder, and paprika to incorporate some seasoning. Pro tip: a splash of milk or cream in the eggs will make them even fluffier!
Step 3: Cook the Eggs
In a non-stick skillet, add a drizzle of olive oil over medium heat, ensuring it gets nice and hot. Pour in the beaten egg mixture and gently stir as they cook. This helps prevent large curds and results in a fluffier texture. Cook until the eggs are just set, removing from heat as they’ll continue to cook in residual heat.
Step 4: Mix in the Protein and Veggies
Once your eggs are cooked to soft perfection, fold in your cooked protein and mixed veggies. Stir gently to combine all the flavors without breaking the eggs too much. This little dance of ingredients is where the magic happens—look at those vibrant colors!
Step 5: Portion and Cool
After everything is combined, it’s time to portion out your breakfast bowls! Use meal prep containers for easy freezing. Each portion should look colorful and inviting. Allow them to cool completely before placing them in the freezer; this will prevent ice crystals from forming.
Step 6: Freezing and Storing
Once cooled, cover each bowl tightly and place them in the freezer. Make sure to label them with the date! These bowls can last up to three months in the freezer—which is awesome when you’re rushed in the morning.
Step 7: Reheating Your Bowls
When you’re ready for breakfast, grab a bowl from the freezer and either defrost overnight in the refrigerator or microwave it straight from frozen for 2–3 minutes. If you’re reheating in the microwave, be sure to use a microwave-safe cover to prevent splatters.
Ta-da! Your high-protein breakfast bowl is ready. Add cheese or hot sauce at this stage if desired, and enjoy your warm morning hug of a meal!
Serving Suggestions
Now that your breakfast bowls are on the plate, let’s talk about how to serve them up. For an appealing presentation, I recommend layering the eggs, protein, and veggies to capture that rainbow of colors.
Top with a sprinkle of cheese or a drizzle of your favorite hot sauce. If you’re feeling extra fancy, a dollop of avocado or a sprinkle of fresh herbs, like cilantro or chives, can make a beautiful garnish. You can also pair your bowls with a side of fresh fruit or a piece of whole grain toast—keeps the vibe casual and beautiful!
Serve them warm, and watch everyone gather around the table with excitement. These breakfast bowls aren’t just meals; they’re invitations to begin your day with intention and flavor.
Recipe Variations
Here are a few creative twists to keep your breakfast bowls fresh and exciting:
-
Mediterranean Bowl: Swap out the chicken for feta and add olives and sun-dried tomatoes. Top with tzatziki for a zesty touch!
-
Southwestern Bowl: Use black beans instead of the lean protein, and fold in corn and diced tomatoes. Avocado and salsa make a fabulous final addition!
-
Italian Flavor: Substitute spinach for kale, add Italian sausage, and finish with freshly grated Parmesan. A touch of marinara sauce on top will take you to flavor town!
-
Vegan Delight: Replace eggs with chickpea flour to create a vegan scramble, and use avocado for creaminess. This bowl is all about plant protein goodness!
-
Spicy Sriracha Bowl: Add diced jalapeños or your choice of chili pepper for a heat boost! Finish with a generous drizzle of sriracha for those spice lovers.
Chef’s Notes
As a chef, I love how recipes evolve over time. This breakfast bowl idea started simply as a way to use up leftovers from my fridge! It’s how you can get creative and experiment while cooking that keeps things fun. I’ve had my share of breakfast fails too—like when I accidentally grabbed cayenne instead of paprika—but those “gourmet disasters” often lead to the best new creations. Cooking is about learning, having fun, and sharing delicious moments around the table.
FAQs and Troubleshooting
Q: Can I make these bowls vegetarian?
Absolutely! Just skip the meat altogether, using beans, legumes, or tofu as your protein source instead.
Q: How do I prevent eggs from becoming rubbery?
Make sure to cook the eggs on lower heat and remove them from the skillet when they’re still slightly undercooked. They’ll firm up as they cool.
Q: Can I freeze whole bowls?
Yes! Just ensure everything is cooked beforehand and allow complete cooling before sealing the containers. They’ll last up to three months, so you’ve got plenty of time to love them!
Q: How can I enhance the flavors?
Experiment with different seasonings! Fresh herbs and spices can do wonders to elevate your base recipe. Don’t be afraid to play around!
Nutritional Info
These high-protein breakfast bowls are a fantastic way to fuel your day. Each bowl contains approximately:
- Calories: 300-400 (can vary based on protein choice and additions)
- Protein: 30-40g (thanks to the eggs and lean protein)
- Carbohydrates: 30g (depending on added vegetables)
- Healthy Fats: 10g (from protein sources and optional toppings)
- Fiber: 5g (if you include veggies and optional sides)
These bowls keep you feeling satisfied while providing essential nutrients to kickstart your day!
Final Thoughts
So there you have it, my high-protein freezer-friendly breakfast bowls—your new favorite morning solution! They’re simple to make, downright delicious, and filled with the goodness of real food. You can whip up a whole batch, store them away, and when you’re racing out the door, you’ll feel like a breakfast rockstar!
Cooking isn’t just about the end result; it’s about the stories, the memories, and the love that goes into each dish. I hope you give these bowls a try and maybe even make them your own!
Remember, the kitchen is your playground, so have fun with it. Now, go out there and unleash your culinary creativity! Grab your fork, dig in, and enjoy every scrumptious bite of your breakfast bowl—your future self will be forever grateful!
Print
High Protein Freezer Friendly Breakfast Bowls
- Total Time: 35 minutes
- Yield: 4 servings 1x
- Diet: High Protein
Description
A versatile, high-protein breakfast bowl that can be made in bulk and frozen for busy mornings.
Ingredients
- 6 Eggs
- 1 cup cooked lean protein (chicken, turkey, or tofu)
- 1 cup mixed veggies (spinach, bell peppers, onions, etc.)
- Salt and pepper to taste
- 1 teaspoon garlic powder
- 1 teaspoon paprika
- Optional: cheese or hot sauce for serving
Instructions
- Start by gathering all your ingredients. Pre-cook your protein and veggies if they aren’t already done.
- Whisk the eggs in a large bowl, adding salt, pepper, garlic powder, and paprika.
- Cook the eggs in a non-stick skillet with olive oil over medium heat until just set.
- Fold in your cooked protein and mixed veggies gently.
- Portion out the mixture into meal prep containers.
- Cover and place in the freezer to store.
- Reheat bowls as needed, either overnight in the fridge or microwave for 2-3 minutes from frozen.
Notes
You can customize these bowls with different proteins and veggies to fit your taste.
- Prep Time: 15 minutes
- Cook Time: 20 minutes
- Category: Breakfast
- Method: Freezing
- Cuisine: American
Nutrition
- Serving Size: 1 bowl
- Calories: 350
- Sugar: 2g
- Sodium: 300mg
- Fat: 10g
- Saturated Fat: 3g
- Unsaturated Fat: 4g
- Trans Fat: 0g
- Carbohydrates: 30g
- Fiber: 5g
- Protein: 35g
- Cholesterol: 200mg
Keywords: protein breakfast, freezer meal, meal prep, healthy breakfast

Flourless Cottage Cheese Pancakes
Flourless Cottage Cheese Pancakes: A Delicious Morning Treat
Hey there, food lovers! It’s Beau Collier here, and today we’re flipping up something special in the kitchen that’s sure to make your mornings a whole lot brighter! If you’re on the hunt for a pancake recipe that’s packed with protein, deliciously fluffy, and totally flourless, then you’ve hit the jackpot with these Flourless Cottage Cheese Pancakes!
Now, I’ll be honest. Pancakes have always held a special place in my heart. They remind me of lazy Sunday mornings, the aroma of batter sizzling on the griddle, and the comforting joy of gathering around the table with loved ones. These cottage cheese pancakes take all that nostalgia and put a healthy, modern twist on it. They’re light yet satisfying, and the best part? They’re made with ingredients you probably already have in your fridge!
Picture this: a stack of golden-brown pancakes, perfectly fluffy and kissed with a hint of vanilla. Top them with fresh berries, a drizzle of maple syrup, or even a dollop of Greek yogurt, and you’ve got a meal that feels indulgent yet wholesome. And if you’re wondering how to whip them up, don’t worry! I’m here, guiding you every step of the way with love, a dash of humor, and plenty of chef insights to make your cooking experience a breeze.
So grab your spatula, put on that apron (or don’t—the cozy vibe is just as important), and let’s get cooking!
Personal Story
You know, I’ll never forget the first time I tried making pancakes. I was probably about eight years old, flipping through a cookbook I had pilfered from my mom’s collection—yes, I was that kid. There it was: a bright, colorful picture of fluffy pancakes dripping with syrup and crowned with fresh strawberries. It was love at first sight!
So, with my trusty mixing bowl, a few questionable measuring cups, and a wild idea (thanks to that cookbook), I ventured into the mysterious world of pancake-making. Long story short, the culinary journey took a slight detour, and I ended up creating something that could only be described as… "interesting." But hey, that’s part of the adventure, right? My first attempt was more pancake omelet than fluffy breakfast bite, but I learned two things that day: practice makes perfect, and pancakes are meant to be shared!
Fast forward to today, and my love for pancakes has turned into a passion for experimentation in the kitchen. These Flourless Cottage Cheese Pancakes are a result of that love—a blend of nostalgia, creativity, and a sprinkle of healthiness. So let’s roll up our sleeves and create some pancake magic together!
Ingredients
Let’s take a closer look at what you’ll need to make these fantastic pancakes. Each ingredient is selected for its deliciousness and function in the recipe. Here’s what you’ll need:
-
1 cup cottage cheese: This creamy goodness is the star of the show! Full of protein and calcium, it not only helps bind the pancakes together but also gives them a rich, fluffy texture. If you’re lactose intolerant, you can use a dairy-free cottage cheese alternative.
-
4 large eggs: These add richness and are crucial for the pancake’s structure. If you need an egg substitute, you can try flaxseeds mixed with water (1 tablespoon of ground flaxseed + 2.5 tablespoons of water = 1 egg).
-
1/2 cup oats (optional): These provide a lovely texture and added fiber. If you’re looking for a gluten-free option, make sure to use certified gluten-free oats, or you can skip them for an even lighter pancake.
-
1 teaspoon baking powder: This helps your pancakes rise and creates that delightful fluffiness we all love. Just make sure it’s fresh; old baking powder won’t do the trick!
-
1 teaspoon vanilla extract: A splash of this magical elixir brings a warm sweetness to the batter, making each bite taste like a hug. Feel free to experiment with almond or maple extract for a unique twist!
-
Pinch of salt: Salt enhances flavor and balances the sweetness of the pancakes, making every bite a perfect symphony of taste.
-
Butter or oil for cooking: Use your favorite cooking fat to grease your pan. Butter gives a rich flavor, while oil keeps things lighter. Coconut oil adds a fun tropical twist if you’re feeling adventurous!
Step-by-Step Instructions
Alright, it’s showtime! Follow these simple steps to whip up your Flourless Cottage Cheese Pancakes:
-
Blend the Ingredients: Start by adding the cottage cheese, eggs, oats (if using), baking powder, vanilla extract, and a pinch of salt into a blender or food processor. Blend it all until the mixture is smooth and creamy. This step is crucial for achieving that nice, fluffy texture.
Chef’s Tip: If you don’t have a blender, you can whisk the ingredients together in a bowl, but you might have to mix a little longer to ensure the cottage cheese breaks down nicely.
-
Heat the Pan: Place a non-stick skillet or griddle over medium heat and add a bit of butter or oil to coat the surface. Let it heat up to the point where the butter is melted and slightly bubbling.
Chef’s Note: If the pan isn’t hot enough, your pancakes will stick, and no one wants that! Test the heat by flicking a drop of water onto the pan—if it dances, you’re good to go!
-
Pour the Batter: Using a ladle or a measuring cup, pour about 1/4 cup of the batter onto the heated pan. You can make them as large or small as you’d like, but keep in mind that smaller pancakes are easier to flip!
Pro Tip: Leave enough space between pancakes, as they’ll spread a tiny bit while cooking.
-
Cooking Time: Cook the pancakes for about 2-3 minutes on one side or until you see bubbles forming on top and the edges look set. Then, use a spatula to flip them over gently.
Beau’s Hint: Don’t rush the flip—if you force it, you might end up with a pancake that’s more "scrambled" than "golden." Trust the bubbles; they’re your friends!
-
Finishing Touches: After flipping, cook for another 1-2 minutes until the second side is golden brown and fully cooked through. You can keep the finished pancakes warm in a low oven (about 200°F or 93°C) while you finish cooking the rest.
-
Serve and Enjoy: Stack them high on a plate and get creative with toppings! Fresh berries, a drizzle of maple syrup, or a dollop of Greek yogurt will make these pancakes sing!
Serving Suggestions
Now that your pancakes are beautifully cooked, how do you serve them? Presentation is key, my friends! Here are a few ideas:
-
The Classic Stack: Layer the pancakes in a neat stack and dust with powdered sugar for a touch of elegance. Add butter on top and let it melt into that warm goodness.
-
Toppings Galore: Serve with a variety of toppings on the side—think fresh berries, banana slices, chopped nuts, and drizzles of honey or maple syrup. Let everyone customize their pancake masterpiece!
-
Breakfast Bowl: Crumble the pancakes into a bowl and top with yogurt, fresh fruit, and a sprinkle of granola for a delightful breakfast bowl experience.
-
Savory Twist: Want to go savory? Top with avocado, cherry tomatoes, and a sprinkle of feta cheese for a unique brunch option that’s sure to impress!
Recipe Variations
Here’s the fun part—let’s get creative with these pancakes! Here are some delightful variations you can try:
-
Chocolate Chip: Fold in a handful of chocolate chips into the batter for a sweet treat that will have everyone swooning.
-
Banana-Rama: Mash a ripe banana into the batter for natural sweetness and a delicious hint of banana flavor. You can also omit the oats if you’re using bananas to keep the batter smooth.
-
Spiced Pumpkin: Add a few teaspoons of pumpkin puree and a pinch of pumpkin spice for a seasonal twist. You’ll have autumn on a plate!
-
Cinnamon Swirl: Mix in a teaspoon of ground cinnamon for a warm, cozy flavor, or swirl a cinnamon sugar mixture into the batter for a delightful surprise in every bite.
-
Nutty Goodness: Add chopped nuts like walnuts or pecans to the batter for a delicious crunch. Nuts pack a great protein punch and add a lovely texture.
Chef’s Notes
Oh, how this recipe has evolved! Originally, I stumbled upon blending cottage cheese into my pancake batter at a friend’s house during a lazy brunch. They were a hit! The more I made them, the more I realized how versatile they are. From sweet to savory, these pancakes truly can wear many hats.
I also love the fact that I can whip these up in no time and with very few dishes to wash afterward—bonus! They’re perfect for busy mornings when you want something hearty but don’t have all day to cook. That’s the magic of cottage cheese pancakes—they’re quick, satisfying, and endlessly fun to customize!
FAQs and Troubleshooting
-
Why are my pancakes sticking to the pan?
- Ensure your pan is heated properly and well-greased with enough butter or oil. You might need to try a non-stick surface if you’re having consistent sticking issues!
-
Can I prep the batter in advance?
- Absolutely! Just keep the batter in an airtight container in the fridge for up to 24 hours. Stir well before cooking, as it may thicken.
-
What if my pancakes are too runny?
- If you find the batter is too runny, add a little extra oats to thicken it. Just remember to blend again to incorporate the oats.
-
Can I double or triple the recipe?
- Of course! Just make sure you have a large enough mixing bowl and a big skillet, or cook them in batches for that perfect pancake stack.
Nutritional Info
While I don’t like to get too hung up on numbers, here’s a rough idea of what you can expect in one serving (2 pancakes):
- Calories: Approximately 150-180
- Protein: 12-15g (thanks, cottage cheese!)
- Carbohydrates: 15-18g (depending on oats)
- Fat: 5-8g (depending on cooking fat used)
These pancakes are an excellent way to start your day with a protein boost, especially handy for busy mornings!
Final Thoughts
So there you have it, my friends! A simple, feel-good recipe for Flourless Cottage Cheese Pancakes that are as versatile as they are delicious. Whether enjoyed on a special Sunday brunch or a regular weekday breakfast, these pancakes are sure to satisfy your cravings and nourish your soul.
Cooking is all about exploration, creativity, and a little love. So don’t be afraid to play with flavors and make these pancakes your own. Share them with your friends and family (or keep them all to yourself—I won’t judge!), and watch as everyone falls in love with this fluffy goodness.
As always, I’m here to help you along the way. Don’t forget to share your pancake photos or any variations you come up with on social media—let’s inspire each other to make our kitchens come alive!
Now, let’s get flipping, and remember: the best recipes are those shared with passion and joy. Happy cooking, and see you next time for more mouthwatering adventures in the kitchen!
Get ready to dig into those pancakes—trust me, they’re calling your name!
Print
Flourless Cottage Cheese Pancakes
- Total Time: 25 minutes
- Yield: 4 servings 1x
- Diet: Gluten-Free
Description
Deliciously fluffy pancakes made with cottage cheese, packed with protein and perfect for a wholesome breakfast.
Ingredients
- 1 cup cottage cheese
- 4 large eggs
- 1/2 cup oats (optional)
- 1 teaspoon baking powder
- 1 teaspoon vanilla extract
- Pinch of salt
- Butter or oil for cooking
Instructions
- Blend the cottage cheese, eggs, oats (if using), baking powder, vanilla extract, and a pinch of salt until smooth and creamy.
- Heat a non-stick skillet over medium heat and coat with butter or oil.
- Pour about 1/4 cup of batter onto the pan; leave space between pancakes.
- Cook for 2-3 minutes until bubbles form, then flip and cook for another 1-2 minutes until golden brown.
- Serve stacked high with your favorite toppings like berries or syrup.
Notes
These pancakes can be customized with add-ins like chocolate chips or fruit, and the batter can be prepped in advance for convenience.
- Prep Time: 10 minutes
- Cook Time: 15 minutes
- Category: Breakfast
- Method: Cooking on the stovetop
- Cuisine: American
Nutrition
- Serving Size: 2 pancakes
- Calories: 180
- Sugar: 1g
- Sodium: 400mg
- Fat: 5g
- Saturated Fat: 2g
- Unsaturated Fat: 3g
- Trans Fat: 0g
- Carbohydrates: 15g
- Fiber: 2g
- Protein: 15g
- Cholesterol: 180mg
Keywords: pancakes, breakfast, protein-rich, gluten-free, easy recipes, cottage cheese
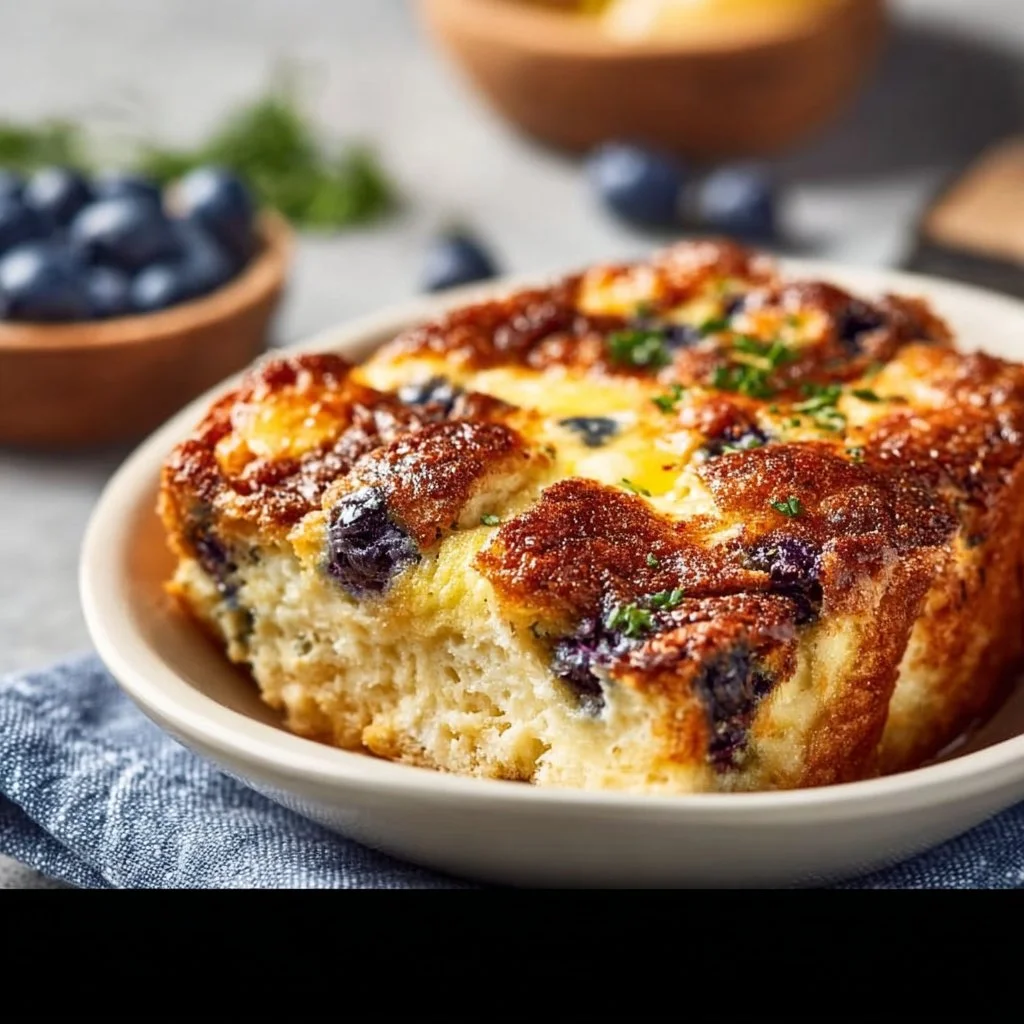
High-Protein Breakfast Bake
High-Protein Breakfast Bake: A Cozy Morning Delight
Hey, food lovers! Welcome back to Feastical, your go-to spot for recipes that warm your heart and fill your belly. Today, we’re diving into a dish that’s not only packed with protein but is also super easy to whip up—a High-Protein Breakfast Bake! If you’re like me, you know breakfast is often the most important meal of the day. But let’s face it; we’re all busy, and some mornings it feels like there’s just not enough time to serve up something healthy and delicious.
This Breakfast Bake is the solution you’ve been waiting for. Imagine waking up to the wafting aroma of baked oats mingling with the sweetness of honey and the fresh burst of blueberries. It’s like breakfast fairy dust sprinkled all over your kitchen. Not only is it nutritious, but it’s also versatile enough to be enjoyed any way you like—whether it’s a midweek boost to start your day right or a satisfying weekend brunch with family.
What I love most about this dish is its adaptability. You can meal prep it for the week, store it in the fridge, or even freeze portions for a quick breakfast on those extra-busy mornings. It’s a fantastic way to get all the goodness in one dish, and you can customize it to fit your tastes or dietary needs.
So, grab your apron, turn up that soft morning playlist, and let’s create something that’ll make you feel amazing from the first bite to the last!
Personal Story
A few years ago, I found myself in a breakfast rut—scrambling to make something nutritious before heading out the door. My mornings were a blur of coffee and toast, and while there’s nothing wrong with a classic toast, I knew I needed a refreshing change.
One sunny Sunday, I visited my grandmother who had just pulled a fresh batch of baked oatmeal out of the oven. With a twinkle in her eye, she told me all about her secret ingredients and how she’d always thrown in whatever was left in her pantry. That day, she used oats, eggs, and a handful of blueberries from her garden. We sat together, reminiscing about the summer mornings of my childhood, savoring each delightful bite. It was a revelation! Not only was it comforting, but it also fueled us up for a day of family adventures.
This High-Protein Breakfast Bake is inspired by those memories. It combines the wholesome ingredients my grandmother used with a modern twist. Every time I whip it up, it feels like I’m back in her warm kitchen, laughing and enjoying life’s simple pleasures.
Ingredients
Here’s what you’ll need to create your own High-Protein Breakfast Bake:
-
1 cup cottage cheese
A fantastic source of protein! It lends a creamy texture and richness to the bake. If you want to switch it up, Greek yogurt can be a great substitute. -
1 cup blueberries
These beauties add natural sweetness and a pop of flavor. Don’t have blueberries? Try using raspberries, strawberries, or even chopped apples. -
2 cups oats
Rolled oats are perfect for this recipe. They soak up moisture while baking, creating that hearty texture. If you’re gluten-free, make sure to use certified gluten-free oats. -
4 eggs
Eggs are the binding agent and power-packed with protein. If you’re looking for a vegan alternative, you could use flax eggs (1 tablespoon ground flaxseed + 2.5 tablespoons water per egg). -
1/4 cup honey or maple syrup
This adds the perfect hint of sweetness. If you’re watching sugar intake, you can reduce the amount or use a sugar substitute. -
1 tsp vanilla extract
A touch of vanilla elevates all the flavors. If you’re out, feel free to get creative with a splash of almond extract. -
1 tsp baking powder
This adds that extra fluffiness. It gives the bake a nice rise! Make sure it’s fresh for the best results. -
1/2 tsp salt
A pinch of salt not only enhances flavor but also balances the sweetness. You can use sea salt or kosher salt—both work wonders.
Step-by-Step Instructions
Preheat Your Oven
- Get Your Oven Ready: Preheat that oven to 350°F (175°C). This step is key; you want your bake to cook evenly and become perfectly golden brown on top.
Prepare the Baking Dish
- Grease Your Baking Dish: Grab a 9×9-inch baking dish—or any comparable size you have handy. Lightly grease it with oil, butter, or non-stick spray to ensure your breakfast bake doesn’t stick. Nothing is worse than losing that crispy top!
Mix the Wet Ingredients
-
Combine Cottage Cheese and Eggs: In a large mixing bowl, add 1 cup of cottage cheese and 4 eggs. Use a whisk to blend until it’s creamy. This step is crucial because it helps to create that soft, custardy texture in the final product.
-
Sweeten the Mix: Next, stir in 1/4 cup of your chosen sweetener (honey or maple syrup) along with 1 tsp of vanilla extract. Mix well until it’s all combined. Pro tip: If you’re using honey, slightly warming it will make it easier to mix.
Add the Dry Ingredients
-
Incorporate the Oats: Gently fold in 2 cups of oats to the wet mixture. This is where it starts becoming a breakfast bake! The oats soak up that creamy mixture and become tender while baking.
-
Incorporate Baking Powder and Salt: Don’t forget your baking powder and salt! Add 1 tsp of baking powder and 1/2 tsp of salt. Fold gently, keeping the mixture light and airy.
Add the Blueberries
- Toss in Blueberries: Finally, fold in 1 cup of blueberries. You can use fresh or frozen, depending on what you have available. If using frozen, there’s no need to thaw—just toss them in as is. You want to see those little beauties spread throughout the mixture!
Bake It Up!
-
Pour into Baking Dish: Transfer the mixture into your prepared baking dish and spread it out evenly. Use a spatula to smooth the top—after all, we eat with our eyes first!
-
Bake: Place it in the preheated oven and bake for about 30–35 minutes. You’ll know it’s done when a toothpick inserted into the center comes out clean and the top has turned a lovely golden brown color.
Cool and Serve
- Let It Cool: After baking, let the breakfast bake sit for about 10 minutes so it can set up a bit more. Trust me, this waiting time is worth it!
Enjoy!
- Slice and Serve: Cut into squares or scoop it right out of the dish. You could top it with a dollop of yogurt, some sliced bananas, or a drizzle of extra honey if you’re feeling fancy. Serve warm for the best experience!
Serving Suggestions
Presentation matters, even with breakfast! To serve, I love to place a slice of the bake on a small plate, topped with a spoonful of Greek yogurt for creaminess and a sprinkle of chopped nuts for texture. Pair it with a side of fresh fruit to add color and balance. If you want to feel extra fancy, dust a little cinnamon on top—it’s a beautiful and delicious finishing touch!
This makes for an excellent addition to any brunch spread. You can serve it warm or let it cool and slice it into bars for an on-the-go breakfast that you can grab before heading out the door.
Recipe Variations
-
Chocolate Chip Delight: Add a handful of dark chocolate chips to the batter for a sweet twist that will make everyone smile.
-
Nutty Banana Oat Bake: Mix in some sliced bananas and a few tablespoons of nut butter (like almond or peanut butter) for a nourishing nutty flavor.
-
Spiced Pumpkin Bake: Swapping in 1/2 cup of pumpkin puree and a dash of pumpkin spice can create an autumn-inspired version that’s delightful any time of the year.
-
Coconut Bliss: Toss in some shredded coconut for tropical vibes. It adds a nice chewiness and complements the sweetness of the blueberries.
-
Savory Spinach and Cheese Bake: For a savory breakfast option, you can omit the sweetener, replace blueberries with fresh spinach, and mix in some feta or cheddar cheese. It’s a whole new take that’s packed with flavor!
Chef’s Notes
This recipe has come a long way since my grandmother’s version. I added cottage cheese for that extra protein punch because we all know how important breakfast is! I often make this recipe while prepping for a busy week ahead, and it never gets old. A great thing I discovered is that it turns out beautifully in muffin tins too, making perfect breakfast muffins!
Another funny story comes to mind: I once forgot to add the eggs (yikes!) and ended up with a blueberry oatmeal blob! Surprisingly, it still tasted alright, and I called it a ‘breakfast crumble’ (which quickly became a family favorite). So, don’t worry if it doesn’t always go as planned; there’s always a silver lining in the kitchen!
FAQs and Troubleshooting
-
Why is my Breakfast Bake too dry?
If it turns out dry, it might’ve been cooked too long. Keep an eye on the time and do the toothpick test around the 30-minute mark. -
Can I make this ahead of time?
Absolutely! You can assemble the bake the night before, cover it, and place it in the fridge. Just pop it in the oven in the morning when you’re ready for a delicious breakfast. -
How do I store leftovers?
You can store them in an airtight container in the fridge for up to 4-5 days. Just reheat a slice in the microwave for a quick breakfast! -
Can I freeze this dish?
Yep! After cooling completely, slice it into portions and wrap tightly in plastic wrap, then place them in a freezer-safe container. They’ll stay good for up to 3 months.
Nutritional Info
Let’s break down the nutritional power of this delightful breakfast bake! Each serving (assuming 9 servings) contains:
- Calories: Approximately 180
- Protein: 10g
- Carbohydrates: 28g (mostly from the oats and blueberries)
- Dietary Fiber: 4g
- Sugars: 5g (if using honey or maple syrup)
- Fat: 4g
The combination of oats, cottage cheese, and eggs provides a balanced breakfast that keeps you energized throughout the day. With plenty of protein, fiber, and vitamins from the blueberries, it’s a wholesome start to your morning!
Final Thoughts
This High-Protein Breakfast Bake is more than just a recipe; it’s a nostalgic dish that brings people together around the table. The warmth of the flavors and the cozy feeling it brings can brighten even the busiest of mornings. The best part? It adapts to your preferences and dietary needs, making it the go-to breakfast for any occasion.
So, whether you whip it up for a family brunch, meal prep for the week, or simply indulge on a lazy Sunday morning, joy is just a bake away. I can’t wait for you to try it out—your mornings will never be the same again!
Don’t forget to share your creations with me. Happy cooking, and let’s dig in!
Print
High-Protein Breakfast Bake
- Total Time: 45 minutes
- Yield: 9 servings 1x
- Diet: High Protein
Description
A delicious and nutritious breakfast bake that’s easy to prepare, packed with protein, and perfect for meal prep.
Ingredients
- 1 cup cottage cheese
- 1 cup blueberries
- 2 cups oats
- 4 eggs
- 1/4 cup honey or maple syrup
- 1 tsp vanilla extract
- 1 tsp baking powder
- 1/2 tsp salt
Instructions
- Preheat the oven to 350°F (175°C).
- Grease a 9×9-inch baking dish with oil or non-stick spray.
- Combine cottage cheese and eggs in a large mixing bowl and whisk until creamy.
- Stir in honey or maple syrup and vanilla extract.
- Fold in the oats until well combined.
- Add baking powder and salt, folding gently.
- Toss in blueberries, folding them into the mixture.
- Pour the mixture into the greased baking dish and spread evenly.
- Bake for about 30–35 minutes, until golden brown and a toothpick comes out clean.
- Let cool for 10 minutes before slicing and serving.
Notes
Can be customized with various fruits, sweeteners, or add-ins like nuts or chocolate chips.
- Prep Time: 15 minutes
- Cook Time: 30 minutes
- Category: Breakfast
- Method: Baking
- Cuisine: American
Nutrition
- Serving Size: 1 slice
- Calories: 180
- Sugar: 5g
- Sodium: 200mg
- Fat: 4g
- Saturated Fat: 1g
- Unsaturated Fat: 3g
- Trans Fat: 0g
- Carbohydrates: 28g
- Fiber: 4g
- Protein: 10g
- Cholesterol: 70mg
Keywords: breakfast, protein bake, oatmeal, healthy recipe, meal prep
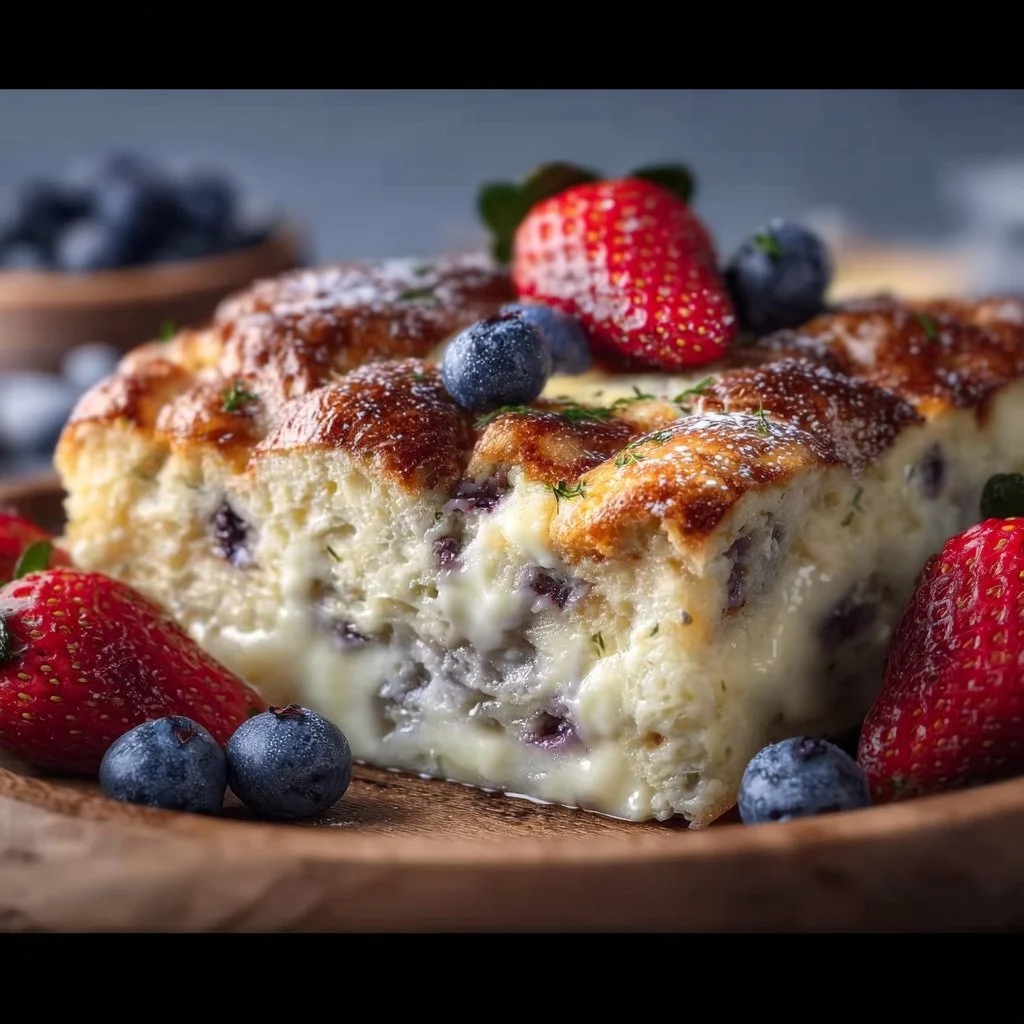
High-Protein Breakfast Bake
The Ultimate High-Protein Breakfast Bake: Fuel Your Day the Delicious Way!
Hey there, food lovers! I’m Beau Collier, and if you’re anything like me, breakfast is not just the first meal of the day; it’s a ritual that sets the tone for everything that follows. Today, we’re diving into a vibrant and nourishing dish that packs a punch of protein to fuel your morning: the High-Protein Breakfast Bake!
Imagine waking up to the enticing aroma of something warm and comforting lingering in your kitchen. The kind of breakfast that feels like a big hug but is also loaded with nutrients to kickstart your day. Trust me, whether you’re rushing to work, curling up with your favorite book, or lounging around on a lazy weekend, this Breakfast Bake is your answer to wholesome and delicious.
This bake is not just easy-peasy but super customizable—perfect for all my fellow foodies out there who love to play around in the kitchen. From toddlers to grandparents, everyone at the table will be reaching for seconds (or thirds!). Plus, you can prep it the night before for an extra smooth morning—bless those weekday hustle vibes!
So grab your apron, put on your favorite playlist, and let’s create something delightful you can be proud of. Get ready to whip up this High-Protein Breakfast Bake that’s ready to impress your taste buds and feed your soul!
Personal Story
As I reminisced about my childhood mornings, I’m taken back to my mom bustling around the kitchen, apron tied and a smile painted across her face. Those were the days when pancakes flipped with ease, and the air was thick with the scent of maple syrup and vanilla syrup wafting from the stove. While pancakes are delightful, I always imagined how fantastic a breakfast sweet that was packed with nutritional prowess could be.
One Sunday morning, my mom surprised us with a baked oatmeal dish filled with seasonal fruits and nuts. It was more than just breakfast; it was an experience—a warm family gathering around the table, laughter and stories mixing with the aroma of baked goodness. Ever since that day, I believed that breakfast should be more than a meal; it should be a celebration.
That was the inspiration behind my High-Protein Breakfast Bake. Bit by bit, I developed this recipe to combine the nostalgic warmth of those cozy breakfasts with health-giving ingredients that help us wake up with a spring in our step. And just like my mom made many versions of that baked dish, I encourage you to play with this recipe and make it your own!
Ingredients
Let’s get down to what you’ll need to whip up this delicious dish! Here’s your ingredient lineup:
-
1 cup cottage cheese
Creamy and rich in protein, cottage cheese is the star of the show here! If you’re not a fan or looking for a vegan alternative, try silken tofu for a similar texture. -
1 cup blueberries
Fresh or frozen, these bite-sized bursts of sweetness are packed with antioxidants. Not into blueberries? Try strawberries, raspberries, or even dried fruits like cranberries. -
1 cup oats
These whole grains are fiber-rich and keep you feeling full. For a gluten-free option, use certified gluten-free oats or swap for quinoa flakes if you’re feeling adventurous! -
3 large eggs
They add structure and protein to the bake. If you’re egg-free, try flax eggs (1 tablespoon ground flaxseed mixed with 2.5 tablespoons of water) for a vegan swap. -
1/4 cup honey or maple syrup
This natural sweetener adds flavor and moisture. Keep it gluten-free with pure maple syrup, or use agave nectar for a different flavor profile. -
1 teaspoon vanilla extract
This adds a warm, comforting flavor. Use pure vanilla extract for the best taste; imitation vanilla will work in a pinch but won’t be quite as good. -
1 teaspoon baking powder
This helps the batter rise, giving it a light, fluffy texture. A pinch of baking soda can be used too, but make sure you balance it with something acidic like a splash of lemon juice. -
Pinch of salt
A tiny bit of salt enhances all the flavors. It’s easy to overlook, but don’t skip it—it makes a difference!
Step-by-Step Instructions
Okay, it’s time to get our hands dirty in the kitchen and create some magic! Here’s how to bring this High-Protein Breakfast Bake to life:
-
Preheat and Prepare
First things first, let’s preheat that oven to 350°F (175°C). While it’s heating up, grab an 8×8-inch baking dish (or any suitable oven-safe dish you’ve got) and grease it lightly with cooking spray or a dab of butter. -
Mix It Up
In a large mixing bowl, combine the cottage cheese, eggs, honey or maple syrup, and vanilla extract. Use a whisk to combine everything until it’s nice and smooth. You want the cottage cheese to blend in well but don’t stress if there are a few small curds left here and there; they’ll add great texture! -
Fold in Dry Ingredients
Next, sprinkle the oats, baking powder, and salt into the wet mixture. Gently fold everything together until well incorporated. You want to avoid overmixing; just combine until you can’t see any dry oats peeking through. -
Add in the Blueberries
Fold in the blueberries with care. You don’t want them to completely burst; we’re aiming for juicy pockets of flavor throughout our bake! -
Spread and Smooth
Pour the mixture into your prepared baking dish and spread it out evenly. Give it a quick gentle shake to help the batter settle into all the corners. -
Pop It in the Oven
Time to bake! Slide that beauty into the oven and let it bake for around 30-35 minutes. The top should turn a golden brown, and a toothpick inserted into the center should come out clean. Don’t be tempted to open the oven door too soon! Let it bake steadily without interruption. -
Cool and Serve
Once it’s done, remove it from the oven and allow it to cool for about 10 minutes. This makes slicing easier! You can serve it warm or at room temperature. Cut into squares, and get ready to enjoy!
Serving Suggestions
Serving this High-Protein Breakfast Bake is as delightful as the bake itself! Here are a few tasty ideas:
- Fresh Fruit Topping: Serve slices with a dollop of Greek yogurt and a handful of fresh berries for a pop of freshness and tang.
- Nut Butter Drizzle: Drizzle with almond or peanut butter for a nutty flavor boost that complements the sweetness of the bake perfectly.
- Maple Glaze: A light drizzle of warm maple syrup across the top adds an indulgent touch.
- Coconut Flakes: For a tropical twist, sprinkle some toasted coconut flakes on top just before serving!
Recipe Variations
Let’s get creative! Here are some fun twists on our delicious breakfast bake:
- Savory Spin: Omit the sweet ingredients entirely and add chopped spinach, diced tomatoes, and crumbled feta cheese for a savory Italian-inspired breakfast bake.
- Nutty Delight: Fold in a handful of your favorite nuts—walnuts, pecans, or even sunflower seeds—for added crunch and nutrition.
- Banana Bliss: Replace the blueberries with diced bananas for a delightful twist. Drizzle with a bit of extra honey to bring out that sweet flavor.
- Spiced Up: Add a teaspoon of cinnamon or pumpkin pie spice to bring a warm fall flavor to your dish. It’s especially cozy during chilly mornings!
- Choco-Fruit: Mix in dark chocolate chips along with the blueberries for a decadent treat that feels like dessert.
Chef’s Notes
As a chef who’s been in the kitchen for quite some time, I find that recipes evolve as we do! This High-Protein Breakfast Bake began as a basic oatmeal bake but grew into something much heartier and versatile. Over time, I’ve added a few twists here and there—try adding vanilla protein powder for an extra protein kick. Who says you can’t indulge while keeping it healthy?
And remember, don’t hesitate to experiment. The kitchen is a creative playground, and you’re the artist!
FAQs and Troubleshooting
Here are a few common questions that come up when making this breakfast bake:
1. Can I make this ahead of time?
Absolutely! You can prepare the mixture the night before and store it in the fridge. Just pop it in the oven in the morning, and you’re good to go!
2. How do I store leftovers?
Store leftover bake slices in an airtight container in the fridge for up to five days. You can reheat them in the microwave for a quick, convenient breakfast.
3. My bake is too dry! What happened?
If your bake turns out a bit dry, it could be due to overbaking. Keep an eye on it in the oven, and do your toothpick test!
4. Can I freeze it?
Yes! Slice the bake into portions and freeze them in an airtight container. Just thaw and reheat when you’re ready to eat!
Nutritional Info
This High-Protein Breakfast Bake doesn’t just taste delicious; it’s a nutritional powerhouse that’ll fuel your morning! Here’s a breakdown of what you get per serving (based on generous 8 servings):
- Calories: ~190-220
- Protein: ~12-15g
- Carbohydrates: ~25-30g
- Fat: ~4-5g
- Fiber: ~3-4g
- Sugar: ~5-7g (depending on the sweetener used)
This dish is packed with protein from the cottage cheese and eggs while providing hearty oats for energy and fiber! It’s the ultimate well-rounded breakfast to kick off your day right.
Final Thoughts
There you have it—the ultimate High-Protein Breakfast Bake, a celebratory dish you’ll love to make and share! Whether you’re treating yourself to a comforting breakfast or serving it to family and friends, this recipe is sure to bring joy to your mornings.
Remember, cooking should be a joyful and creative experience. This breakfast bake recipe is just a jumping-off point, inviting you to make it your own and express your culinary creativity. So, grab your favorite ingredients, throw on a big smile, and let’s get cooking!
Happy baking, and until next time, keep your spatula at the ready and your heart full of flavor!
Print
High-Protein Breakfast Bake
- Total Time: 40 minutes
- Yield: 8 servings 1x
- Diet: Vegetarian
Description
A delightful and nourishing breakfast bake packed with protein, perfect for fueling your mornings and customizable for every taste.
Ingredients
- 1 cup cottage cheese
- 1 cup blueberries
- 1 cup oats
- 3 large eggs
- 1/4 cup honey or maple syrup
- 1 teaspoon vanilla extract
- 1 teaspoon baking powder
- Pinch of salt
Instructions
- Preheat the oven to 350°F (175°C) and grease an 8×8-inch baking dish.
- Mix the cottage cheese, eggs, honey or maple syrup, and vanilla extract until smooth.
- Fold in oats, baking powder, and salt until just combined.
- Carefully fold in the blueberries.
- Pour the mixture into the prepared baking dish and spread evenly.
- Bake for 30-35 minutes until golden brown and a toothpick inserted comes out clean.
- Cool for 10 minutes before slicing and serving.
Notes
Feel free to customize the recipe with different fruits, nuts, or flavors to suit your taste preferences.
- Prep Time: 10 minutes
- Cook Time: 30 minutes
- Category: Breakfast
- Method: Baking
- Cuisine: American
Nutrition
- Serving Size: 1 slice
- Calories: 200
- Sugar: 6g
- Sodium: 250mg
- Fat: 5g
- Saturated Fat: 2g
- Unsaturated Fat: 3g
- Trans Fat: 0g
- Carbohydrates: 30g
- Fiber: 4g
- Protein: 15g
- Cholesterol: 70mg
Keywords: healthy breakfast, high-protein, breakfast bake, easy breakfast, nutritious meal