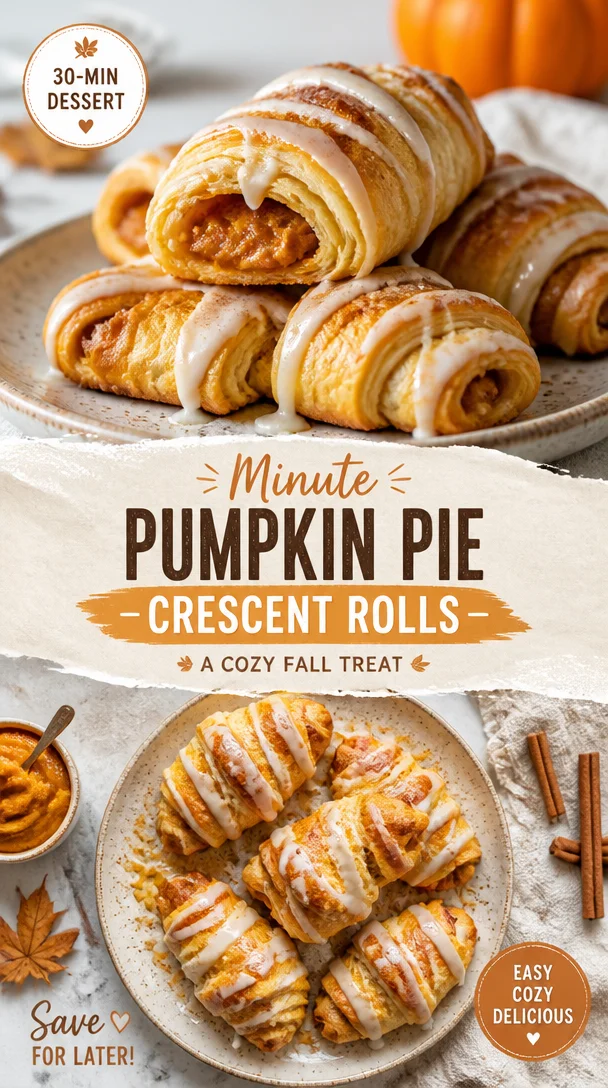
Minute Pumpkin Pie Crescent Rolls: A Cozy Fall Treat
The Cozy Comfort of Pumpkin Pie Crescent Rolls
Hey there, food lovers! If there’s one thing that warms my heart and fills my kitchen with joy, it’s the delicious aroma of freshly baked goods. Today, we’re diving deep into the world of comfort food with a twist—Pumpkin Pie Crescent Rolls! These delightful little treats combine all the flavors of classic pumpkin pie with the easy-to-handle charm of crescent rolls. Perfect for cozy gatherings, holiday celebrations, or an indulgent snack any day of the week!
Let’s face it, pumpkin pie is already a beloved dish, but who says we can’t spice things up a bit? By wrapping creamy pumpkin filling in flaky crescent dough, you’ll get that same beloved flavor in a fun and inviting form. Plus, these rolls are so simple to whip up that even beginner bakers will feel like kitchen rockstars!
So, grab your favorite apron, and let’s get started on a journey that will fill your home with the irresistible scent of warming spices and sweet goodness. Trust me, your friends and family will be lining up for seconds—and maybe even thirds!
A Bite of Nostalgia
Growing up, my fondest memories are entwined with the simple act of baking. My grandmother had a magical kitchen filled with treats that were as delightful to see as they were to taste. One of my all-time favorites was her pumpkin pie, rich and comforting, always baked to perfection right before Thanksgiving. It was the dish that brought our family together, a holiday staple that signaled it was time to gather around the table and share laughter and love.
But there was a twist! One year during our holiday prep, my grandmother, clutching a can of crescent rolls, boldly declared that she would create a new dessert. Boy, were we all curious! She spread that silky pumpkin filling onto the crescent dough and rolled them up into little bundles of joy. The result? A mix of our beloved pie and a fun, flaky roll that made me feel like it was the ultimate party food.
I’m excited to bring this gem back into your kitchen with my own take on Grandma’s creation. Trust me, once you taste these Pumpkin Pie Crescent Rolls, you’ll have a new family favorite to cherish!
Ingredients Overview
Here’s what you’ll need for these incredible rolls:
-
8-ounce container Pillsbury Crescent Rolls
- These ready-to-roll beauties make the process so simple. If you’re feeling adventurous, homemade crescent dough works too—though we won’t judge you for using store-bought!
-
½ cup canned pumpkin puree
- A must-have for that rich pumpkin flavor. You could also use fresh pumpkin puree if you’ve got some already roasted. Just make sure it’s not the spiced kind!
-
2 tablespoons sugar
- This adds the right amount of sweetness. For a healthier alternative, you can sub with coconut sugar or a sugar alternative like stevia.
-
1 whole egg (divided)
- We’ll use this for binding the filling and a wash for that golden crust! If you’re looking for an egg substitute, try a flax egg (1 tablespoon ground flaxseed mixed with 2.5 tablespoons water).
-
½ teaspoon pumpkin pie spice
- A crafter’s blend of cinnamon, nutmeg, ginger, and allspice to remind you of fall flavors. Feel free to make your own blend, or simply use cinnamon if that’s what you have!
-
½ cup powdered sugar
- This will create a lovely glaze for drizzling. If you need a healthier option, you can blend coconut sugar into a fine powder.
-
1 tablespoon milk
- Adds creaminess to the glaze. Any milk works—dairy or plant-based!
-
1 tablespoon pure maple syrup
- Sweetens our glaze with natural flavor. Honey or agave syrup are great substitutes!
Now that you have your ingredients lined up, let’s get cooking!
Step-by-Step Instructions
-
Preheat the Oven
Preheat your oven to 375°F (190°C). This is crucial for getting those rolls beautifully golden and perfectly cooked. A well-preheated oven can make all the difference in texture! -
Prepare the Filling
In a medium bowl, mix the canned pumpkin puree, sugar, and half of the egg (reserve the other half for later). Add in the pumpkin pie spice as well. Stir until well combined. Here’s my little chef hack: use a whisk to incorporate everything smoothly; it creates a creamy texture that will fill those rolls beautifully! -
Roll Out the Dough
Open your container of crescent rolls. Carefully unroll the dough on a lightly floured surface. You’ll want to keep the triangles intact, so try to avoid tearing them if possible. The flaky layers are what makes this dish special! -
Fill and Roll
Spoon a generous amount of the pumpkin filling onto the wider end of each triangle. Don’t be afraid to load it up—more filling means more flavor! Then roll each triangle from the wide end to the point. Place them seam-side down on a greased baking sheet. This helps keep them from unrolling during baking. -
Egg Wash
Brush the tops of the crescent rolls with the remaining egg. This step ensures a shiny, golden crust. If you want something a little healthier, you can skip this step, but I love that crunchy texture it adds! -
Bake Time
Bake in your preheated oven for about 12-15 minutes, or until they are golden brown. The scent? Absolutely heavenly! Make sure to keep an eye on them from the 10-minute mark onward—it’s easy to go from golden to burnt if you’re not careful. -
Prepare the Glaze
While your rolls are baking, whisk together powdered sugar, milk, and maple syrup in a separate bowl until smooth. This will make our delightful drizzle that completes the dish perfectly. -
Cool and Drizzle
Allow the rolls to cool for about 5 minutes after baking. Then, drizzle your glaze over the top—that sweet, creamy burst takes these rolls to a whole new level!
Serving Suggestions
When serving your Pumpkin Pie Crescent Rolls, think charming and rustic! Arrange them on a welcoming platter and sprinkle some extra powdered sugar on top for an elegant touch. You could also serve them alongside a small dollop of whipped cream or a scoop of vanilla ice cream, making it feel like a cozy dessert experience.
For a little extra flair, consider garnishing with a sprinkle of extra pumpkin pie spice or finely chopped pecans on top. Tie it all together with a steaming cup of coffee or spiced cider, and you’ll have a delightful autumn-themed gathering ready to impress!
Recipe Variations
Now that you’ve mastered the original recipe, why not explore some fun twists? Here are a few ideas:
-
Chocolate Chip Pumpkin Rolls: Add some mini chocolate chips to the filling before rolling them up. The creamy pumpkin paired with chocolate is a match made in heaven!
-
Nutty Crunch: Incorporate chopped walnuts or pecans into your pumpkin filling for a delightful crunch. It adds texture and a lovely nutty flavor!
-
Spiced Up: Experiment with different spices! Add a pinch of cardamom or swap out the pumpkin pie spice with your favorite chai blend for a different flavor profile.
-
Vegan Options: Substitute the egg with a flax egg, use almond milk in the glaze, and swap the butter in the crescent rolls for a plant-based version.
-
Cinnamon Roll Twist: After spreading the pumpkin filling, sprinkle a swirl of cinnamon and brown sugar before rolling them up for an even sweeter treat!
Chef’s Notes
This recipe holds a warm place in my heart, not only because of the memories tied to it but also how it has evolved over the years. Initially, I started with a basic filling, but I’ve experimented with flavor profiles and textures endlessly! My favorite variation so far is definitely the chocolate chip twist—it has been a hit at gatherings!
One of my fondest kitchen mishaps happened when I accidentally grabbed baking powder instead of baking soda for the filling. The rolls puffed up incredibly high but tasted amazing. That’s the beauty of cooking; even mistakes can lead to delicious discoveries!
FAQs and Troubleshooting
-
Why are my crescent rolls not rising?
Ensure your oven is preheated properly. Premade crescent rolls rely heavily on the heat to puff up. If they don’t feel flaky and rising, the dough may have lost its freshness—check your expiration dates! -
Can I make this ahead of time?
Absolutely! You can prepare the rolls a few hours ahead, just keep them covered in the fridge until you’re ready to bake. They may require an extra minute or two in the oven due to the chill. -
What if the filling leaks out?
If this happens, don’t fret! Make sure you’re rolling them tightly. If you do experience leakage, you can always serve them with a scoop of ice cream to help soothe the flavor mishap! -
How do I store leftovers?
Store any leftover rolls in an airtight container at room temperature for up to two days. If you want to keep them longer, you can refrigerate them and reheat in the oven for a minute or two to retain their flaky crust.
Nutritional Info
Each Pumpkin Pie Crescent Roll (estimated based on recipe with no additional toppings) contains approximately:
- Calories: 150
- Total Fat: 7g
- Saturated Fat: 1.5g
- Carbohydrates: 20g
- Fiber: 1g
- Sugars: 5g
- Protein: 2g
Note: Nutritional info may vary based on specific brand ingredients or substitutions used.
Final Thoughts
These Pumpkin Pie Crescent Rolls are not just a dessert; they’re a gateway to memories, comfort, and shared moments with the people you love. Whether it’s for a cozy fall gathering or just because you deserve a treat, these rolls will undoubtedly bring joy to your kitchen and your taste buds. The best part? They’re so easy to prepare that you’ll be whipping these up to impress anyone who steps foot into your kitchen!
So, roll up your sleeves, dive into this recipe, and share your creations with friends and family. Remember, cooking is all about joy, laughter, and creating unforgettable experiences—one flaky roll at a time. Happy baking, my fellow foodies! Let’s keep celebrating the magic of good food, and I can’t wait to see how you make this recipe your own!
Print
Pumpkin Pie Crescent Rolls
- Total Time: 30 minutes
- Yield: 8 servings 1x
- Diet: Vegetarian
Description
Delicious crescent rolls filled with creamy pumpkin filling, offering the perfect blend of classic pumpkin pie flavors in a fun, flaky form.
Ingredients
- 1 (8-ounce) container Pillsbury Crescent Rolls
- ½ cup canned pumpkin puree
- 2 tablespoons sugar
- 1 whole egg (divided)
- ½ teaspoon pumpkin pie spice
- ½ cup powdered sugar
- 1 tablespoon milk
- 1 tablespoon pure maple syrup
Instructions
- Preheat your oven to 375°F (190°C).
- Mix the canned pumpkin puree, sugar, and half of the egg in a medium bowl.
- Open the container of crescent rolls and unroll the dough on a floured surface.
- Spoon a generous amount of the pumpkin filling onto the wider end of each triangle.
- Roll each triangle from the wide end to the point and place seam-side down on a greased baking sheet.
- Brush the tops of the rolls with the remaining egg.
- Bake for about 12-15 minutes, or until golden brown.
- Whisk together powdered sugar, milk, and maple syrup for the glaze.
- Cool the rolls for about 5 minutes, then drizzle with glaze.
Notes
Serve warm with a sprinkle of powdered sugar or a dollop of whipped cream for an extra treat!
- Prep Time: 15 minutes
- Cook Time: 15 minutes
- Category: Dessert
- Method: Baking
- Cuisine: American
Nutrition
- Serving Size: 1 roll
- Calories: 150
- Sugar: 5g
- Sodium: 250mg
- Fat: 7g
- Saturated Fat: 1.5g
- Unsaturated Fat: 4g
- Trans Fat: 0g
- Carbohydrates: 20g
- Fiber: 1g
- Protein: 2g
- Cholesterol: 30mg
Keywords: pumpkin, crescent rolls, dessert, Thanksgiving, fall treats
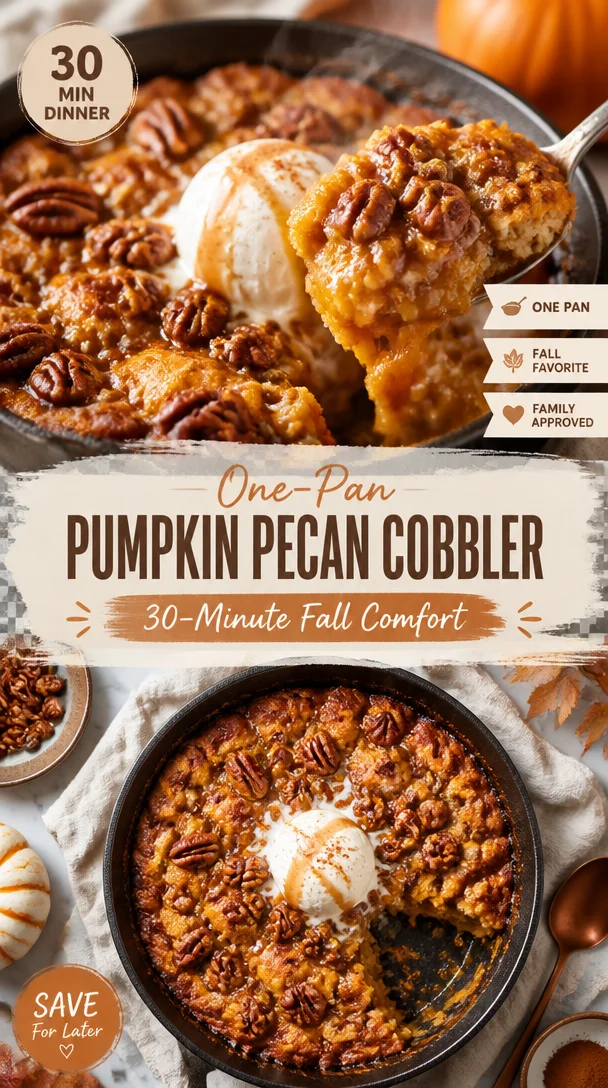
One-Pan Pumpkin Pecan Cobbler (30-Minute Fall Comfort)
Pumpkin Pecan Cobbler: A Cozy Autumn Delight
Hey there, food enthusiasts! I’m Beau Collier, and today we’re diving into a recipe that captures the essence of fall: Pumpkin Pecan Cobbler. It’s the kind of dish that makes you feel all warm and fuzzy inside, like wrapping up in your favorite sweater on a crisp autumn evening. Picture this: golden leaves falling, a gentle breeze rustling through the trees, and the sweet aroma of pumpkin wafting through your kitchen. It’s not just dessert; it’s a celebration of flavors that brings friends and family together!
I began my love affair with pumpkin desserts at a young age. My grandmother was a baking wizard, always experimenting with seasonal ingredients. One of my favorite memories is standing on a stool next to her as she whipped up her famous pumpkin pie. I remember the way she’d sprinkle cinnamon and nutmeg with a flourish, and the laughter we shared while tasting the pumpkin filling straight from the bowl. Those sweet moments inspired me to play with flavors and create my own recipes that keep those cherished memories alive.
At Feastical.com, we believe that cooking should be a joyful experience, and this Pumpkin Pecan Cobbler embodies that spirit. With its comforting combination of pumpkin, warm spices, and crunchy pecans, this dish is sure to become a go-to in your kitchen. So, let’s gather our ingredients and get started!
Ingredients
Here’s what you’ll need to make this delightful Pumpkin Pecan Cobbler:
-
1 cup + 3 tablespoons all-purpose flour
This forms the base of your cobbler. You can substitute with gluten-free flour if you want a gluten-free option, just ensure it’s a 1:1 blend! -
2 teaspoons baking powder
This little magic dust helps your cobbler rise and creates that beautiful, fluffy texture. -
1/2 teaspoon salt
Salt enhances the flavors beautifully; don’t skip this step! -
3/4 cup granulated sugar
The sweetener that balances the warm spices and pumpkin’s earthiness. You could also use coconut sugar for a lower glycemic option. -
1 teaspoon cinnamon
The quintessential fall spice! If you want to spice things up, try using a pumpkin pie spice blend for added warmth. -
1/2 teaspoon nutmeg
Nutmeg adds a lovely aromatic flavor that pairs perfectly with pumpkin. -
1/2 teaspoon cloves
Just a hint! Cloves can be powerful, so a little goes a long way in this cobbler. -
1/2 cup pumpkin puree
The heart of our dish! You can use homemade pumpkin puree, but make sure it’s pure without any added sugars or spices. -
1/4 cup milk
This adds moisture; feel free to swap with almond milk or oat milk for a dairy-free option. -
1/4 cup melted butter or vegetable oil
Butter adds richness, while vegetable oil maintains moisture. Choose what suits your taste! -
1 1/2 teaspoons vanilla extract
Add a splash of warmth and sweetness; it’s like a hug for your taste buds! -
1/2 cup granulated sugar (for the topping)
This gets caramelized on top to create that perfect crust. -
1/2 cup brown sugar
Brown sugar adds richness and depth; you can substitute with light or dark depending on your preference. -
1/4 cup chopped pecans
These add a crunchy texture. You can swap with walnuts or omit completely if nuts aren’t your thing. -
1 1/2 cups very hot water
This step is crucial; it helps create that gooey bottom layer that you’ll just love.
Step-by-Step Instructions
Alright, let’s roll up our sleeves and get into the nitty-gritty of making this glorious Pumpkin Pecan Cobbler!
-
Preheat your oven
Start by preheating your oven to 350°F (175°C). This is essential for ensuring your cobbler bakes evenly and comes out golden brown. -
Prepare the baking dish
Grab a medium-sized baking dish (a 9×9 square works perfectly). You can grease it lightly with butter or cooking spray to prevent sticking. -
Mix the dry ingredients
In a large bowl, combine the flour, baking powder, salt, granulated sugar, cinnamon, nutmeg, and cloves. Whisk them together until well blended. This mixes the dry ingredients evenly, ensuring that every bite has that delicious spice. -
Combine wet ingredients
In another bowl, mix together the pumpkin puree, milk, melted butter (or oil), and vanilla extract. Give it a good stir until it’s smooth and creamy. This combo brings richness to your cobbler. -
Combine wet and dry mixtures
Gradually add the wet ingredients into the dry mixture, stirring until just combined. Over-mixing can lead to a dense cobbler, so stop as soon as no dry flour is visible! -
Pour the batter into the baking dish
Spread the batter evenly in your prepared baking dish. It doesn’t have to be perfect; a few lumps are totally fine. -
Sprinkle the toppings
In a separate bowl, mix the granulated sugar, brown sugar, and chopped pecans. Sprinkle this mixture generously over the batter. This is where the magic happens, forming that crunchy topping! -
Add hot water
Slowly pour the very hot water over the top of the batter. It may look a little strange, but trust me – this will create that wonderful gooey bottom layer that balances the crunchy topping. -
Bake
Now, pop it in the oven and let it bake for about 40–45 minutes. You’ll know it’s done when the top is golden and the cobbler is bubbling at the edges. Your kitchen will smell like a glorious autumn festival! -
Cool and serve
Let your cobbler cool for about 10-15 minutes before serving. This allows the flavors to settle and makes it easier to scoop!
Serving Suggestions
When it comes to serving this Pumpkin Pecan Cobbler, there are endless possibilities to make it even more delightful. You can serve it warm right from the oven in generous scoops. I love adding a dollop of whipped cream or a scoop of vanilla ice cream on top, allowing it to melt into the warm cobbler. If you want to get a bit fancy, drizzle some caramel sauce over the top or sprinkle with additional chopped pecans for crunch.
Place it on a rustic wooden board or in a warm dish to preserve its cozy vibe. Trust me, your friends and family will be raving about it even before they take a bite!
Recipe Variations
I’m a firm believer that recipes are meant to be played with, so here are a few variations you can try with this Pumpkin Pecan Cobbler:
-
Pumpkin Spice Swap: Replace the spices with your favorite pumpkin spice blend for a quick shortcut. It’s all about convenience!
-
Add Chocolate: For a flavor explosion, add a handful of chocolate chips to the batter before pouring it into the baking dish. Chocolate and pumpkin are a match made in heaven!
-
Dairy-Free Delight: Substitute almond milk for regular milk and use coconut oil instead of butter to make this cobbler dairy-free. You won’t miss the creaminess one bit!
-
Apple-Pecan Twist: Mix in some diced apples with the pumpkin for an extra layer of texture and flavor. This gives it a fun twist and makes it a bit more festive.
-
Pumpkin Cheesecake Cobbler: Swirl in some cream cheese or mascarpone into the pumpkin mixture before pouring it into the dish. This ups the creaminess game and creates a rich flavor profile!
Chef’s Notes
As I’ve played with this recipe over the years, it has evolved beautifully, gathering inspiration from all my culinary adventures. Once upon a time, I accidentally forgot the pecans! It turned out so deliciously soft and custardy that I just had to embrace the accident. Now, I often create a nut-free version for friends with allergies. Funny enough, that day in the kitchen led to an “accidental favorite”!
And there’s truly nothing like sharing this cobbler with loved ones. Whether it’s holiday gatherings, potlucks, or just a cozy night in, it feels like a hug in a dish.
FAQs and Troubleshooting
Let’s tackle some common questions and potential pitfalls when making your Pumpkin Pecan Cobbler:
-
Why did my cobbler turn out too dense?
This could be due to over-mixing the batter. Make sure to mix until just combined to keep it light and fluffy! -
Can I use fresh pumpkin puree?
Absolutely! Just make sure to cook and puree your pumpkin until smooth. Avoid any added sugars or spices unless you want to adjust the recipe accordingly. -
How do I know when the cobbler is done?
Look for a golden-brown top and bubbling edges. You can also test with a toothpick; it should come out clean if poked in the center. -
What if the topping is too crunchy?
If your cobbler topping feels overly crunchy, it could be due to too much sugar or long baking time. Keep an eye on it towards the end of baking, and reduce the sugar if needed.
Nutritional Info
You may be wondering about the nutritional content of this delicious Pumpkin Pecan Cobbler. While it might not be the lightest dessert, moderation is key! Here’s a rough estimation per serving (based on an 8-serving dish):
- Calories: Approximately 300–350
- Total Fat: 12–15g
- Sugars: 20–25g
- Fiber: 2g
- Protein: 3g
Feel free to adjust the sugar content or swap ingredients depending on your dietary needs. Remember that this cobbler is best enjoyed with a sprinkle of mindfulness and a generous helping of love!
Final Thoughts
There you have it, friends! This Pumpkin Pecan Cobbler is a delightful concoction that embodies all that is cozy and comforting about fall. It’s not just about filling your belly; it’s about making memories, sharing laughs, and celebrating the flavors of the season.
So, grab your ingredients, crank up your favorite tunes, and have fun with it! I can’t wait to hear all about your cobbler-making adventures, the tweaks you made, and the laughter shared around the table. Remember, at Feastical, we’re all about the joy of cooking and connecting through food. Happy baking!
Print
Pumpkin Pecan Cobbler
- Total Time: 60 minutes
- Yield: 8 servings 1x
- Diet: Vegetarian
Description
A cozy autumn dessert that combines pumpkin, warm spices, and crunchy pecans for a delightful treat.
Ingredients
- 1 cup + 3 tablespoons all-purpose flour
- 2 teaspoons baking powder
- 1/2 teaspoon salt
- 3/4 cup granulated sugar
- 1 teaspoon cinnamon
- 1/2 teaspoon nutmeg
- 1/2 teaspoon cloves
- 1/2 cup pumpkin puree
- 1/4 cup milk
- 1/4 cup melted butter or vegetable oil
- 1 1/2 teaspoons vanilla extract
- 1/2 cup granulated sugar (for topping)
- 1/2 cup brown sugar
- 1/4 cup chopped pecans
- 1 1/2 cups very hot water
Instructions
- Preheat your oven to 350°F (175°C).
- Prepare a medium-sized baking dish by greasing it lightly with butter or cooking spray.
- Mix the dry ingredients in a large bowl: flour, baking powder, salt, granulated sugar, cinnamon, nutmeg, and cloves.
- Combine the wet ingredients in another bowl: pumpkin puree, milk, melted butter (or oil), and vanilla extract.
- Combine the wet and dry mixtures, stirring until just combined.
- Pour the batter into the prepared baking dish.
- Sprinkle the topping mixture of granulated sugar, brown sugar, and chopped pecans over the batter.
- Add the very hot water over the top of the batter.
- Bake for 40–45 minutes or until golden and bubbling.
- Cool for about 10-15 minutes before serving.
Notes
For a twist, try adding chocolate chips or swapping in a pumpkin spice blend.
- Prep Time: 15 minutes
- Cook Time: 45 minutes
- Category: Dessert
- Method: Baking
- Cuisine: American
Nutrition
- Serving Size: 1 serving
- Calories: 325
- Sugar: 22g
- Sodium: 360mg
- Fat: 14g
- Saturated Fat: 7g
- Unsaturated Fat: 5g
- Trans Fat: 0g
- Carbohydrates: 45g
- Fiber: 3g
- Protein: 4g
- Cholesterol: 30mg
Keywords: pumpkin dessert, fall dessert, cobbler, pecan cobbler, cozy recipe

One-Pan Fall Dinner: Quick, Cozy Skillet for Busy Weeknights
The Cozy Fall Dinner Dad Throws on One Pan for You!
Hey there, foodies! As the leaves start to change and the air gets that crisp, cozy feel, there’s nothing like curling up with a warm, hearty meal. Today, I’m excited to share a one-pan dish that will not only fill your belly but also warm your heart. It’s the kind of recipe my dad used to whip up when the cooler months rolled in, and let me tell you, it’s still a favorite around here. So, grab your favorite apron and let’s dive into this cozy fall dinner featuring succulent chicken thighs, vibrant Brussels sprouts, sweet potatoes, and all the yummy seasonings!
A Trip Down Memory Lane
Growing up, my dad was the king of comfort food—seriously, he had a magical way of turning everyday ingredients into something extraordinary. I’ll never forget those crisp autumn evenings where the whole family would gather around the table, the smell of roasted chicken and sweet potatoes wafting through the house. My dad always said that food brings people together, and he was absolutely right.
One specific evening sticks in my memory: Dad was in the kitchen, sleeves rolled up, prepping this one-pan masterpiece. The Brussels sprouts sizzled in the oven while he cracked jokes and recounted stories from his childhood. I remember laughing so hard I nearly cried, all while the golden-brown chicken thighs roasted to perfection. Once we all sat down, the warmth of the food coupled with our laughter made for the coziest dinner imaginable.
That’s what I want you to capture with this dish. It’s not just about the food; it’s about the experience, the memories, and the love that goes into each bite. Ready to make your own magic? Let’s gather our ingredients!
Ingredients
Here’s what you’ll need to whip up this cozy fall dinner. Each ingredient plays a special role in creating the wholesome flavors you’re going to love:
-
1 lb chicken thighs
These juicy cuts are perfect for roasting. They hold moisture well and become incredibly tender. If you’re looking for a leaner option, you can swap them for chicken breasts, but be careful not to overcook them! -
2 cups Brussels sprouts, halved
These little green gems not only add color but also a beautiful, nutty flavor. If Brussels sprouts aren’t your jam, feel free to use green beans or broccoli instead. -
2 cups sweet potatoes, diced
Sweet potatoes bring a delightful sweetness and are packed with nutrients. They can be swapped with regular potatoes or butternut squash if you prefer. -
1 red onion, sliced
Red onions add a subtle sweetness and balance the dish beautifully. Yellow or white onions work well too! -
3 cloves garlic, minced
Garlic is the hero of many dishes, adding depth and flavor. If you want a milder taste, you can use garlic powder. -
2 tbsp olive oil
This helps everything roast nicely and adds healthy fats. You can replace olive oil with avocado oil if you prefer. -
1 tsp dried thyme
A classic herb for fall dishes. Fresh thyme is fantastic, too—just double the amount if using fresh! -
1 tsp paprika
This adds warmth and a touch of smokiness to the dish. Feel free to use smoked paprika for an even deeper flavor! -
Salt and pepper to taste
Essential for enhancing all the wonderful flavors in the dish. Always season to your liking!
Step-by-Step Instructions
Now that we have our ingredients lined up, let’s get to the part where the magic happens! Here’s how to prepare this cozy fall dinner:
-
Preheat Your Oven
Start by preheating your oven to 400°F (200°C). This ensures everything roasts evenly and gets that gorgeous golden-brown color. -
Prepare the Veggies
Grab a large mixing bowl and toss the halved Brussels sprouts, diced sweet potatoes, and sliced red onion together. Don’t worry if they look a little crowded—once they roast, they’ll shrink down! -
Season the Vegetables
Drizzle your veggies with olive oil, sprinkle in the minced garlic, thyme, paprika, salt, and pepper. Give everything a good toss until all the vegetables are well coated in those spices. Pro tip: Use your hands for this! It’s a great way to ensure every piece gets love. -
Arrange on the Baking Sheet
Spread the seasoned veggies on one side of a large baking sheet. Don’t overcrowd them, or they’ll steam instead of roast. On the other side, place the chicken thighs skin-side up. Drizzle them with a little more olive oil, and season with salt, pepper, and a sprinkle of paprika for that extra oomph. -
Time to Roast
Pop the baking sheet into your preheated oven and roast for about 30-35 minutes. You want the chicken to be cooked through and the vegetables to be tender and caramelized. The skin on the chicken should be crispy and golden, just like those good memories from your childhood! -
Check for Doneness
Use a meat thermometer to ensure your chicken thighs have reached an internal temperature of 165°F (74°C). If they’re not there yet, give them a few extra minutes! -
Let It Rest
Once everything is out of the oven, let it sit for about 5 minutes before serving. This allows the juices to redistribute in the chicken, making it tender and juicy.
Serving Suggestions
Now, let’s talk presentation! Serve the chicken thighs nestled among the roasted Brussels sprouts and sweet potatoes. Don’t forget to drizzle any delicious juices left on the baking sheet over everything for added flavor. A sprinkle of fresh herbs like parsley or thyme on top adds a lovely touch. If you’re feeling extra fancy, a squeeze of lemon juice over the top brightens the whole dish beautifully!
Recipe Variations
Want to switch it up? Here are a few creative twists you can try:
-
Herb Swap: Substitute thyme with rosemary or sage for a different flavor profile. Both herbs scream fall!
-
Add Protein: Want to bulk it up? Toss in some cooked sausage or chickpeas for extra protein and heartiness.
-
Spicy Kick: Add a pinch of cayenne pepper or crushed red pepper flakes to the mix for a bit of heat.
-
Vegan Option: Try swapping the chicken for tofu or tempeh, and use vegetable broth instead of olive oil for seasoning (make sure to cook the tofu beforehand for the best texture).
-
Cranberry Flair: Toss a handful of dried cranberries or pomegranate seeds into the veggies in the last few minutes of roasting for a sweet-tart twist.
Chef’s Notes
Over the years, this recipe has evolved along with my cooking style. I remember the first time I made this myself; it felt like a rite of passage. My dad was there, guiding me through each step with patience and a few well-timed dad jokes! This recipe captures not only the essence of cozy comfort food but also the spirit of cooking together and making lasting memories with loved ones.
FAQs and Troubleshooting
-
Why are my chicken thighs not crispy?
Ensure you’re using skin-on chicken thighs and that your oven is properly preheated. A crowded pan can also cause steaming rather than roasting, so keep space between your ingredients. -
What if my veggies are burning?
If you notice your vegetables browning too quickly, try lowering the oven temperature a bit and checking for doneness more frequently. -
Can I make this ahead?
Absolutely! You can prep the ingredients and store them in the fridge, then roast them when it’s time to eat. -
How do I store leftovers?
Store any leftovers in an airtight container in the fridge for up to 3 days. Reheat gently in the microwave or oven to avoid drying out the chicken.
Nutritional Info
This cozy one-pan meal is not only delicious but also nutritious! Here’s a quick breakdown per serving:
- Calories: Approximately 450
- Protein: 35g
- Carbohydrates: 30g
- Fat: 20g
- Fiber: 7g
It’s packed with protein from the chicken and fiber from the veggies, giving you a balanced meal that fuels your body and keeps you satisfied. Plus, the vitamins from the sweet potatoes and Brussels sprouts are an added bonus!
Final Thoughts
Take a moment to step back and appreciate this hearty meal you’ve created. Cooking is more than just following a recipe; it’s about love, family, and making connections. So, gather around the table, share stories, and create memories—you’re bound to have a special moment with each bite.
Thank you for joining me on this cozy fall culinary journey! I hope this one-pan chicken and veggie dish warms your heart and home just like it did for me growing up. Happy cooking, and I can’t wait to hear how it turns out for you!
Print
Cozy One-Pan Chicken Dinner
- Total Time: 50 minutes
- Yield: 4 servings 1x
- Diet: Gluten-Free
Description
A warm, hearty one-pan meal featuring roasted chicken thighs, Brussels sprouts, and sweet potatoes, perfect for cozy fall evenings.
Ingredients
- 1 lb chicken thighs
- 2 cups Brussels sprouts, halved
- 2 cups sweet potatoes, diced
- 1 red onion, sliced
- 3 cloves garlic, minced
- 2 tbsp olive oil
- 1 tsp dried thyme
- 1 tsp paprika
- Salt and pepper to taste
Instructions
- Preheat your oven to 400°F (200°C).
- Prepare a large mixing bowl and toss the halved Brussels sprouts, diced sweet potatoes, and sliced red onion together.
- Season the vegetables with olive oil, minced garlic, thyme, paprika, salt, and pepper.
- Arrange the seasoned veggies on one side of a large baking sheet, and on the other side, place the chicken thighs skin-side up.
- Drizzle the chicken with more olive oil and season with salt, pepper, and paprika.
- Roast in the preheated oven for 30-35 minutes until the chicken is cooked through and the vegetables are tender.
- Check the chicken’s internal temperature to ensure it reaches 165°F (74°C).
- Let it sit for about 5 minutes before serving.
Notes
For variations, consider swapping herbs or adding extra protein. Store leftovers in an airtight container for up to 3 days.
- Prep Time: 15 minutes
- Cook Time: 35 minutes
- Category: Main Course
- Method: Baking
- Cuisine: American
Nutrition
- Serving Size: 1 serving
- Calories: 450
- Sugar: 6g
- Sodium: 500mg
- Fat: 20g
- Saturated Fat: 5g
- Unsaturated Fat: 10g
- Trans Fat: 0g
- Carbohydrates: 30g
- Fiber: 7g
- Protein: 35g
- Cholesterol: 80mg
Keywords: cozy dinner, one-pan meal, fall recipes, chicken dinner, vegetable roast
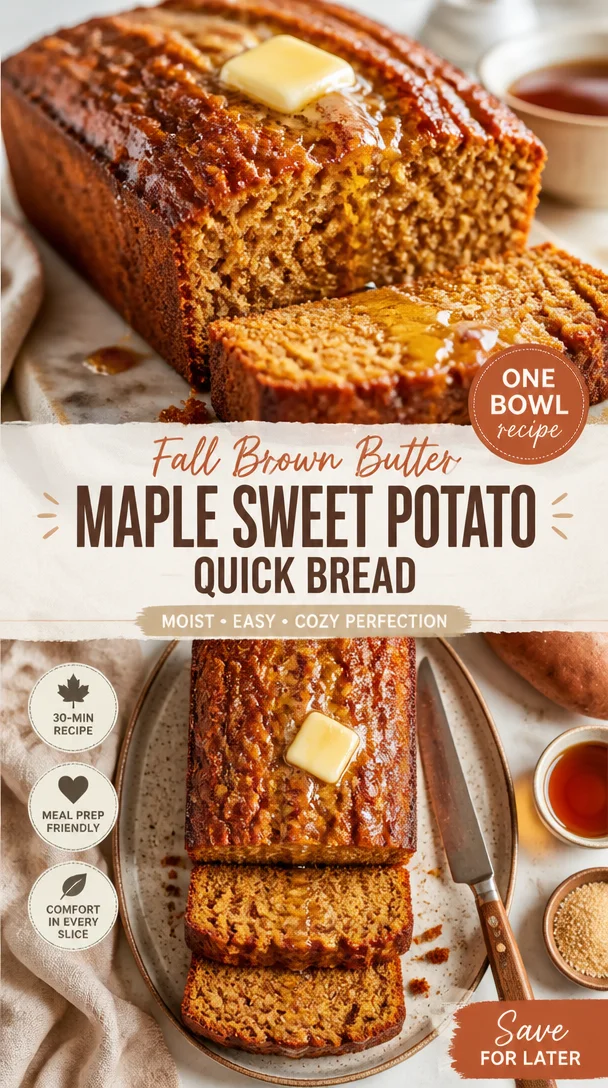
Fall Brown Butter Maple Sweet Potato Quick Bread (One-Bowl)
Fall Brown Butter Maple Sweet Potato Bread
Introduction
Hey there, food lovers! As the leaves start to change and there’s a crispness in the air, it’s the perfect time to cozy up in the kitchen and whip up something that fills your home with warmth and delightful aromas. Welcome to my blog, where today we’re diving headfirst into a mouthwatering Fall Brown Butter Maple Sweet Potato Bread. Yes, you heard that right! This isn’t just any bread; it’s a slice of autumn perfection!
Imagine the rich, nutty flavor of brown butter, the comforting sweetness of maple, and the delightful earthiness of sweet potatoes all wrapped up in one delicious loaf. This recipe is not only super easy to make, but it also screams comfort and nostalgia, making it a must-have for your fall baking repertoire. And you know what’s even better? It fills your kitchen with the heavenly scent of baking that’s so inviting, your loved ones will flock to the kitchen like bees to honey.
This sweet potato bread is perfect for breakfast, an afternoon snack, or even as a dessert. Whether you’re enjoying it plain or slathered with a little butter, each bite will evoke warm memories of fall festivities. So, go ahead, grab your apron and let’s get this bread rising with a sprinkle of love and a dash of fun!
Personal Story
As I reminisce about my childhood, one vibrant memory floods my mind: Thanksgiving mornings spent in my grandmother’s cozy kitchen, where the anticipation of the feast filled the air. I can almost hear the soft crackling of the wood fireplace and the clanking of pots and pans, paired with laughter echoing around the family table. It was during one of those mornings that I tasted my first sweet potato bread. Grandma had perfected her recipe over the years, and as I sat there, a slice in hand, I couldn’t help but smile. The warm sweetness wrapped around my taste buds, and I was smitten!
Now, every time I bake sweet potato bread, I feel that same warmth wash over me. It reminds me of family, love, and the simple joy of sharing food. This particular recipe, featuring brown butter and maple syrup, took years to perfect, but it’s worth every trial and error. Just like those early mornings with Grandma, I believe cooking is about creating memories, and I hope this bread brings a little magic into your kitchen!
Ingredients
-
1 cup (240 ml) sweet potato puree
Sweet potatoes are the star of this bread, bringing natural sweetness and moisture. You can use store-bought puree or roast and blend fresh sweet potatoes for an extra flavor boost. -
6 tablespoons (85 g) brown butter
Brown butter adds a rich, nutty depth that elevates the entire loaf. To brown butter, simply heat unsalted butter in a pan until it melts and turns golden brown. Watch closely to avoid burning! -
1/3 cup (80 ml) maple syrup
Pure maple syrup is a must for that signature fall flavor. If you’re in a pinch, you can substitute with agave or honey, but the maple has a unique taste that’s hard to replace. -
1 3/4 cups (220 g) all-purpose flour
The base of your loaf, all-purpose flour provides the structure. For a gluten-free option, try a 1:1 gluten-free flour blend. -
1 teaspoon baking soda
Baking soda works as a leavening agent, helping your bread rise and become fluffy. Make sure it’s fresh for the best results. -
1 teaspoon ground cinnamon
Cinnamon is a must-have for this recipe! Its warm, sweet aroma is like a hug in spice form—perfect for fall. -
1/4 teaspoon ground nutmeg
Just a dash of nutmeg adds a hint of complexity. If you don’t have it, feel free to leave it out, but it does bring an extra layer of flavor. -
1/2 teaspoon salt
A little salt enhances all the flavors in the bread, balancing the sweetness and creating a rounded taste. -
2 large eggs
Eggs provide moisture and help bind the ingredients together. You can substitute them with flax eggs for a vegan option. -
1 teaspoon vanilla extract
A splash of vanilla adds warmth and richness. Choose pure vanilla extract for the best flavor—it really makes a difference!
Step-by-Step Instructions
-
Preheat Your Oven: Start by preheating your oven to 350°F (175°C) and grease a 9×5 inch loaf pan. This ensures that your bread doesn’t stick, giving you a beautiful release when it’s done baking.
-
Brown the Butter: In a medium saucepan, melt the butter over medium heat, stirring frequently. Keep an eye on it as it transforms from a liquid to a foamy state, and then to a golden color with nutty aromas. The whole process takes about 5-7 minutes, and trust me, it’s worth the wait!
-
Mix the Wet Ingredients: In a large mixing bowl, combine the sweet potato puree, brown butter (let it cool slightly first), maple syrup, eggs, and vanilla extract. Whisk until everything is well combined, inviting all those flavors to unite.
-
Combine Dry Ingredients: In another bowl, whisk together the flour, baking soda, cinnamon, nutmeg, and salt. This helps to ensure that the leavening agent is evenly distributed throughout the flour.
-
Mix It All Together: Gradually add the dry ingredients to the wet ingredients, mixing until just combined. Be careful not to overmix! It’s totally cool if a few lumps remain; they’ll bake out in the oven.
-
Pour and Smooth: Pour the batter into your prepared loaf pan and smooth the top with a spatula. This helps to create an even bake. Plus, it’s super satisfying to make everything neat and tidy!
-
Bake Away: Bake for about 55-60 minutes or until a toothpick inserted into the center comes out clean. Your kitchen will smell heavenly! If the top is browning too quickly, you can tent it with aluminum foil midway through baking.
-
Cool This Beauty Down: Once baked, allow your bread to cool in the pan for about 10 minutes before transferring it to a wire rack. Try not to slice into it while it’s still warm, although I know it’ll be tempting!
Serving Suggestions
When it comes to serving your Fall Brown Butter Maple Sweet Potato Bread, think cozy and charming. Slice thick pieces (or thin if you’re feeling fancy!) and plate them with a pat of softened butter that melts right into the warm bread. You could also drizzle a little extra maple syrup or honey on top for a sweet touch.
For a delightful brunch, serve alongside fresh fruit, yogurt, or a warm latte. You can also toast the slices for a little extra crunch; trust me, that golden, crispy edge goes perfectly with the soft interior!
For those dinner parties or holiday gatherings, a slice of this bread alongside a scoop of creamy vanilla ice cream or a dollop of whipped cream can turn it into a lovely dessert.
Recipe Variations
-
Nutty Delight: Toss in some chopped walnuts or pecans for a little crunch and added flavor. Just be sure to toast them first for that extra nutty aroma!
-
Pumpkin Spice Fusion: If you want to switch things up, substitute the sweet potato puree with pumpkin puree and add a teaspoon of pumpkin pie spice instead of cinnamon and nutmeg.
-
Choco-Berry Bliss: Fold in chocolate chips and dried cranberries to give a sweet and tart burst in every bite. Who doesn’t love a surprise treat?
-
Cinnamon Swirl: Before pouring the batter into the pan, sprinkle a mixture of cinnamon and sugar in the middle of the batter for a delightful cinnamon swirl bread.
-
Vegan-Friendly: Swap out the eggs with flax eggs (1 tablespoon flaxseed meal mixed with 2.5 tablespoons water per egg) and use almond milk instead of butter.
Chef’s Notes
As with any recipe, this one has evolved over the years. I’ve experimented with different sweeteners, flours, and even added ingredients. I remember the first time I tried adding brown butter; it felt like an epiphany! The flavor it lent to the bread was transformative.
And hey, if you ever have leftover sweet potato puree (which you totally should because it’s delicious), feel free to throw it into pancakes, smoothies, or even mac and cheese. Waste not, want not, am I right?
A funny little story: one time, I was so excited about this recipe that I forgot to add the eggs and didn’t realize until the batter was in the oven. Miraculously, it still turned out tasty, but it was a heavy, dense bread! You bet I learned to double-check my ingredients after that!
FAQs and Troubleshooting
-
Why did my bread come out too dense?
It’s likely due to overmixing or excessive flour. Make sure to mix until just combined and use the spoon-and-level method for measuring flour. -
Can I use canned sweet potato puree?
Yes! Just ensure you’re using plain, unsweetened puree for the best flavor. -
How can I tell if my bread is done?
Use a toothpick! Insert it into the center, and if it comes out clean or with a few crumbs, it’s done. If it’s wet with batter, give it more time. -
What should I do if my bread is browning too quickly?
If you find that the top is getting too dark before the inside is fully baked, simply cover it loosely with aluminum foil and continue baking.
Nutritional Info
Let’s talk numbers! Each slice of this delightful Fall Brown Butter Maple Sweet Potato Bread has an estimated nutritional breakdown that goes something like this:
- Calories: About 180 calories
- Carbohydrates: Approximately 28g
- Protein: Around 3g
- Fat: About 7g
- Fiber: Roughly 2g
These values can vary based on portion size and specific ingredients used, but it gives you a general idea to feel good about this tasty treat packed with wholesome ingredients!
Final Thoughts
Embracing the flavors of fall with this Fall Brown Butter Maple Sweet Potato Bread is bound to become a cherished tradition in your household. Whether you’re baking for family, friends, or just that wonderful inner foodie spirit, this recipe is sure to be a hit. Remember, cooking is about the love and joy we put into it, and this bread is a perfect canvas for sharing that warmth with others.
So, what are you waiting for? Head to the kitchen and let’s bake up some memories together! And as always, I can’t wait to see how your bread turns out. Drop me a comment or tag me on social media with your baking adventures. Happy baking, foodies!
Print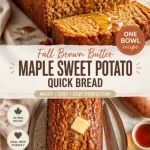
Fall Brown Butter Maple Sweet Potato Bread
- Total Time: 75 minutes
- Yield: 12 slices 1x
- Diet: Vegetarian
Description
A warm, comforting loaf of bread featuring the rich flavors of brown butter, maple, and sweet potatoes, perfect for fall.
Ingredients
- 1 cup (240 ml) sweet potato puree
- 6 tablespoons (85 g) brown butter
- 1/3 cup (80 ml) maple syrup
- 1 3/4 cups (220 g) all-purpose flour
- 1 teaspoon baking soda
- 1 teaspoon ground cinnamon
- 1/4 teaspoon ground nutmeg
- 1/2 teaspoon salt
- 2 large eggs
- 1 teaspoon vanilla extract
Instructions
- Preheat your oven to 350°F (175°C) and grease a 9×5 inch loaf pan.
- Brown the butter in a medium saucepan over medium heat, stirring frequently for about 5-7 minutes until golden and nutty.
- Mix the sweet potato puree, brown butter (slightly cooled), maple syrup, eggs, and vanilla extract in a large bowl.
- Combine the flour, baking soda, cinnamon, nutmeg, and salt in another bowl.
- Mix the dry ingredients into the wet ingredients until just combined.
- Pour the batter into the prepared loaf pan and smooth the top.
- Bake for about 55-60 minutes or until a toothpick inserted in the center comes out clean.
- Cool the bread in the pan for 10 minutes before transferring to a wire rack.
Notes
Serve warm with butter or maple syrup. Perfect for breakfast, snacks, or dessert.
- Prep Time: 15 minutes
- Cook Time: 60 minutes
- Category: Dessert
- Method: Baking
- Cuisine: American
Nutrition
- Serving Size: 1 slice
- Calories: 180
- Sugar: 10g
- Sodium: 150mg
- Fat: 7g
- Saturated Fat: 4g
- Unsaturated Fat: 3g
- Trans Fat: 0g
- Carbohydrates: 28g
- Fiber: 2g
- Protein: 3g
- Cholesterol: 60mg
Keywords: fall bread, sweet potato bread, maple bread, autumn baking
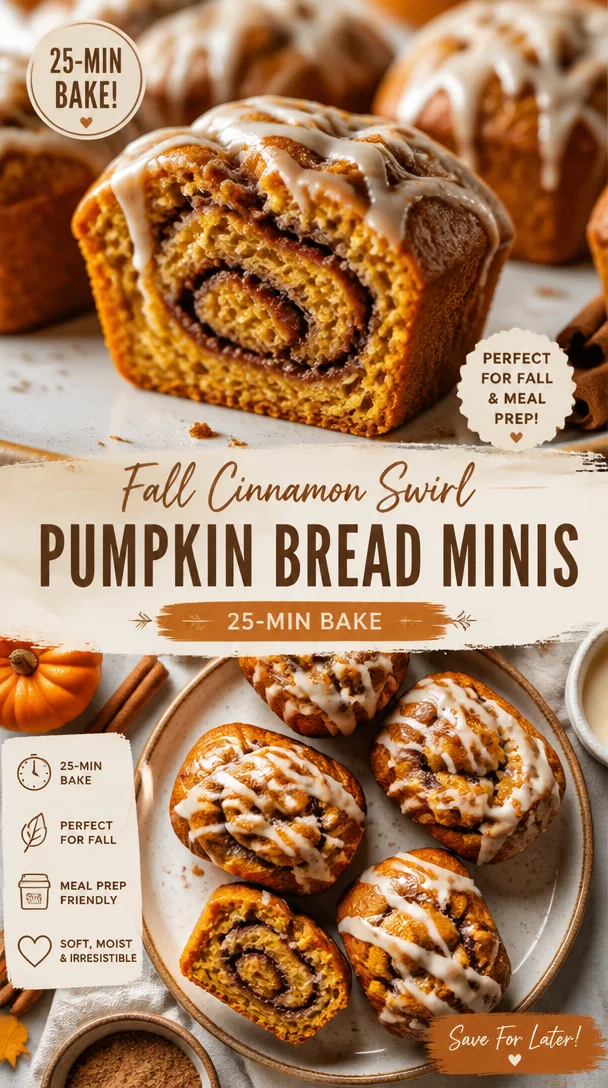
Fall Cinnamon Swirl Pumpkin Bread Minis (25-Min Bake)
Cinnamon Swirl Pumpkin Bread Minis: A Cozy Fall Treat
Hey there, fellow food lovers! With the crispness of autumn in the air and pumpkin spice everything taking over our favorite cafes, I can’t help but get a bit sentimental and inspired in the kitchen. I’m super excited to share a delicious recipe that captures all the warm and cozy vibes of fall: Cinnamon Swirl Pumpkin Bread Minis. These little lovelies are not just cute; they embody everything comforting about the season—rich pumpkin flavor, a sweet cinnamon swirl, and that mouthwatering aroma wafting through the house.
Imagine waking up on a chilly morning, wrapping your hands around a warm mug of coffee, and sinking your teeth into one of these delightful mini loaves. It’s pure bliss! What’s even better? They freeze beautifully, which means you can whip up a batch now and savor the flavors of fall throughout the year.
But before we dive into making these cinnamon-packed treats, let me take you back for a moment. There’s a funny story tied to pumpkin bread in my life, one that transformed an ordinary baked good into a legendary family tradition.
Personal Story
Growing up, my mom was the queen of the kitchen, and her pumpkin bread was the stuff of legends. One autumn afternoon, I remember her bustling in the kitchen while I attempted to “help.” As a kid, my idea of assisting often meant sneaking in extra sugar and cinnamon when she wasn’t looking. Well, that fateful day, I learned firsthand that the difference between a sweet treat and a sugar bomb is a delicate balance!
As my mom pulled her freshly baked loaf from the oven, I was practically hovering with excitement. The moment she sliced into it, the soft, pillowy bread crackled slightly, and the intoxicating scent of cinnamon filled the air. But when it hit my taste buds, I realized I might have overdone it on the sugar. What was supposed to be the perfect blend of warmth and sweetness turned into a laughable “sweet tooth explosion.”
Mom just chuckled, shook her head, and said, “Beau, sometimes less is more!” We all laughed, and from that day on, I vowed to perfect the pumpkin bread recipe with my own flair, which eventually led to these adorable mini versions. So, whether you’re nostalgic for fall or just in need of a cozy treat, I guarantee these Cinnamon Swirl Pumpkin Bread Minis will win your heart just like they did mine!
Ingredients
Here’s what you’ll need to bring this recipe to life:
-
1 cup canned pumpkin
The star of the show! Canned pumpkin is super convenient, but if you’re feeling adventurous, you can roast and puree your own pumpkin. You’ll get a fresher taste, but canned works perfectly for this recipe. -
1/2 cup granulated sugar
This is the sweet base of your bread. Feel free to swap with coconut sugar or a sugar alternative if you’re looking for a lighter option. -
1/4 cup brown sugar
The molasses in brown sugar adds a rich depth of flavor. If you don’t have brown sugar, you can make your own by mixing granulated sugar with a bit of molasses. -
1/2 cup vegetable oil
This keeps our bread moist. You can substitute it with melted coconut oil for a hint of tropical flavor. -
2 large eggs
The eggs help bind everything together. For a vegan option, substitute each egg with 1/4 cup of unsweetened applesauce or mashed bananas. -
1 1/2 cups all-purpose flour
The foundation for our mini loaves. Whole wheat flour can be used for a nuttier flavor and added nutrition. -
1 tsp baking powder
This is our leavening agent to help the bread rise. Don’t skip this! -
1/2 tsp baking soda
Works in tandem with the baking powder. Ensure it’s fresh for the best rise! -
1/2 tsp salt
Just a pinch to balance the flavors. A little salt goes a long way in baked goods. -
1 tsp ground cinnamon
Adds warmth and spice! You can also add a dash of cardamom for an extra punch. -
1/2 tsp ground nutmeg
A lovely addition for that cozy fall flavor. Use fresh nutmeg if you have it; it makes a difference! -
1/4 tsp ground ginger
It adds a subtle warmth that complements the pumpkin beautifully. -
1/4 cup granulated sugar (for topping)
Extra sweetness on top gives our minis that bakery-style finish. -
1 tsp ground cinnamon (for topping)
Enhances the sweetness and adds visual appeal. You’ll want to sprinkle this generously!
Step-by-Step Instructions
Step 1: Preheat Your Oven
First things first—preheat your oven to 350°F (175°C) and line your mini loaf pans with parchment paper or spray them well with non-stick spray. This is crucial to prevent our scrumptious minis from sticking.
Step 2: Mix the Wet Ingredients
In a large mixing bowl, combine the canned pumpkin, granulated sugar, brown sugar, and vegetable oil. Whisk them together until well blended. This takes about a minute. Look for a smooth consistency—this will give your bread that moist, tender crumb we’re aiming for.
Step 3: Add the Eggs
Next, crack in those two large eggs. Whisk them in until the mixture is fluffy. You’ll see a beautiful golden hue emerge, inviting and luscious!
Step 4: Combine the Dry Ingredients
In another bowl, sift together the all-purpose flour, baking powder, baking soda, salt, cinnamon, nutmeg, and ginger. Sifting helps eliminate any lumps and ensures even distribution of the dry ingredients—something I can’t emphasize enough!
Step 5: Mix It All Together
Slowly incorporate the dry ingredients into the wet mixture. Use a spatula or wooden spoon to fold them together gently, just until combined. A few lumps are okay; we don’t want to overmix, or we risk a dense loaf.
Step 6: Prepare the Cinnamon Swirl
In a small bowl, mix the 1/4 cup granulated sugar and 1 tsp ground cinnamon together. This will be our glorious swirl!
Step 7: Assemble the Mini Loaves
Now, here’s where it gets fun! Divide the batter evenly among your prepared mini loaf pans, filling each about halfway. Sprinkle some of the cinnamon-sugar mixture on top of the batter. Use a toothpick or a knife to swirl it gently into the batter. Don’t overdo it; you want to see beautiful ribbons of cinnamon throughout.
Step 8: Bake
Pop those pans in your preheated oven and bake for 25-30 minutes, or until a toothpick comes out clean when inserted in the center. Your kitchen should smell like heaven at this point!
Step 9: Cool
Once baked, remove the pans from the oven and let them cool for about 10 minutes. Then, transfer the loaves to a wire rack to cool completely. Resist the urge to slice right away—the flavors will deepen as they cool!
Serving Suggestions
So, you’ve got your fabulous Cinnamon Swirl Pumpkin Bread Minis cooling down. Now, how to serve? Honestly, they’re delightful all on their own, but if you want to elevate the experience, here are some suggestions:
- With Butter: Spread a bit of softened butter on a warm slice. The butter melts into the bread—pure magic!
- Cream Cheese Spread: Whip up a creamy spread with some cream cheese, a little bit of sugar, and a dash of vanilla extract. It’s to-die-for!
- Garnish: Dust with powdered sugar for a pretty presentation. You’ll impress your friends on any brunch table!
- Coffee Pairing: Serve these beauties alongside your favorite coffee or chai latte. The spices harmonize perfectly, creating a symphony of autumnal flavors.
- As Gifts: If you’re feeling generous, package them up with a cute ribbon. Homemade treats always carry a personal touch that store-bought goodies lack.
Recipe Variations
Feeling experimental? Here are a few ideas to shake things up!
-
Chocolate Chip Twist: Add 1/2 cup of chocolate chips to the batter before pouring it into the pans. Yes, chocolate and pumpkin are a match made in heaven!
-
Nutty Delight: Stir in 1/2 cup of chopped pecans or walnuts for some crunch and added flavor.
-
Gluten-Free Option: Substitute all-purpose flour with a gluten-free flour blend to accommodate any dietary needs.
-
Dairy-Free: Use unsweetened almond milk instead of eggs (1/4 cup applesauce per egg) and make sure your butter is dairy-free.
-
Spiced Pumpkin Bread: Want to amp up the spice? Add a pinch of cloves and allspice for a more intense autumn flavor.
Chef’s Notes
Just a little nugget from my kitchen adventures—this recipe has transformed over the years. My initial attempt featured a few disastrous flavors, largely due to my overzealous use of spices and sweetness. Let’s just say my sweet tooth got the better of me more than once, but hey, that’s how we learn!
Each time I made it, I learned something valuable, and eventually, these mini delights became one of my go-to recipes. As pumpkin season rolls around, I love to prep them ahead of time for gatherings or cozy nights in. The best part? They freeze incredibly well! Make a double batch, wrap them up, and you’ll have a taste of fall whenever you need a pick-me-up.
FAQs and Troubleshooting
1. Why did my bread sink in the middle?
This could be due to underbaking or overmixing. Ensure you’re measuring your flour correctly and don’t skip the toothpick test!
2. Can I use fresh pumpkin instead of canned?
Absolutely! Just make sure it’s well-pureed and free of excess moisture to maintain the texture.
3. My bread is too dry. What went wrong?
Too much flour, baking too long, or not enough oil could be the culprit. Ensure you’re using the right measurements and keeping an eye on the baking time.
4. How do I store leftovers?
Once cooled, wrap each mini loaf in plastic wrap, and they’ll keep in the fridge for about a week. For longer storage, pop them in the freezer for up to 3 months!
Nutritional Info
While I usually focus on the deliciousness of a recipe, I know many of us keep an eye on what we’re eating. So, here’s a rough breakdown per mini loaf (based on standard ingredients and 12 loaves total):
- Calories: 150
- Protein: 2g
- Fat: 6g
- Carbohydrates: 22g
- Fiber: 1g
- Sugar: 8g
These minis are perfect for an indulgent snack or a sweet breakfast treat, especially when you account for the wholesome pumpkin and spices packed in!
Final Thoughts
Well, there you have it, folks—a delightful recipe that not only fills your kitchen with heavenly aromas but also fills your heart with cozy fall feelings. Cinnamon Swirl Pumpkin Bread Minis will undoubtedly be the star of your kitchen, a treat to share, or even keep all to yourself (I won’t tell!).
So, grab your mixing bowls and get ready to whip up a batch. Trust me, once you take that first bite, you’ll feel like you’re wrapped in a warm hug! Happy baking, and until next time, keep cooking up those good vibes!
Print
Cinnamon Swirl Pumpkin Bread Minis
- Total Time: 45 minutes
- Yield: 12 minis 1x
- Diet: Vegetarian
Description
These adorable mini loaves capture the essence of fall with rich pumpkin flavor, a sweet cinnamon swirl, and a delightful aroma.
Ingredients
- 1 cup canned pumpkin
- 1/2 cup granulated sugar
- 1/4 cup brown sugar
- 1/2 cup vegetable oil
- 2 large eggs
- 1 1/2 cups all-purpose flour
- 1 tsp baking powder
- 1/2 tsp baking soda
- 1/2 tsp salt
- 1 tsp ground cinnamon
- 1/2 tsp ground nutmeg
- 1/4 tsp ground ginger
- 1/4 cup granulated sugar (for topping)
- 1 tsp ground cinnamon (for topping)
Instructions
- Preheat your oven to 350°F (175°C) and line your mini loaf pans with parchment paper or spray them well with non-stick spray.
- Mix the canned pumpkin, granulated sugar, brown sugar, and vegetable oil in a large mixing bowl until well blended.
- Add the eggs and whisk until the mixture is fluffy.
- Combine the flour, baking powder, baking soda, salt, cinnamon, nutmeg, and ginger in another bowl.
- Mix the dry ingredients into the wet mixture until just combined.
- Prepare the cinnamon swirl by mixing the 1/4 cup granulated sugar and 1 tsp ground cinnamon together.
- Assemble the mini loaves by dividing the batter among the prepared pans, sprinkling the cinnamon-sugar mixture on top, and swirling it gently into the batter.
- Bake for 25-30 minutes, or until a toothpick comes out clean.
- Cool for about 10 minutes in the pans before transferring to a wire rack to cool completely.
Notes
These mini loaves freeze beautifully, making them perfect for a cozy treat anytime.
- Prep Time: 15 minutes
- Cook Time: 30 minutes
- Category: Dessert
- Method: Baking
- Cuisine: American
Nutrition
- Serving Size: 1 mini loaf
- Calories: 150
- Sugar: 8g
- Sodium: 200mg
- Fat: 6g
- Saturated Fat: 1g
- Unsaturated Fat: 5g
- Trans Fat: 0g
- Carbohydrates: 22g
- Fiber: 1g
- Protein: 2g
- Cholesterol: 30mg
Keywords: pumpkin bread, fall recipes, cinnamon, cozy baking, dessert
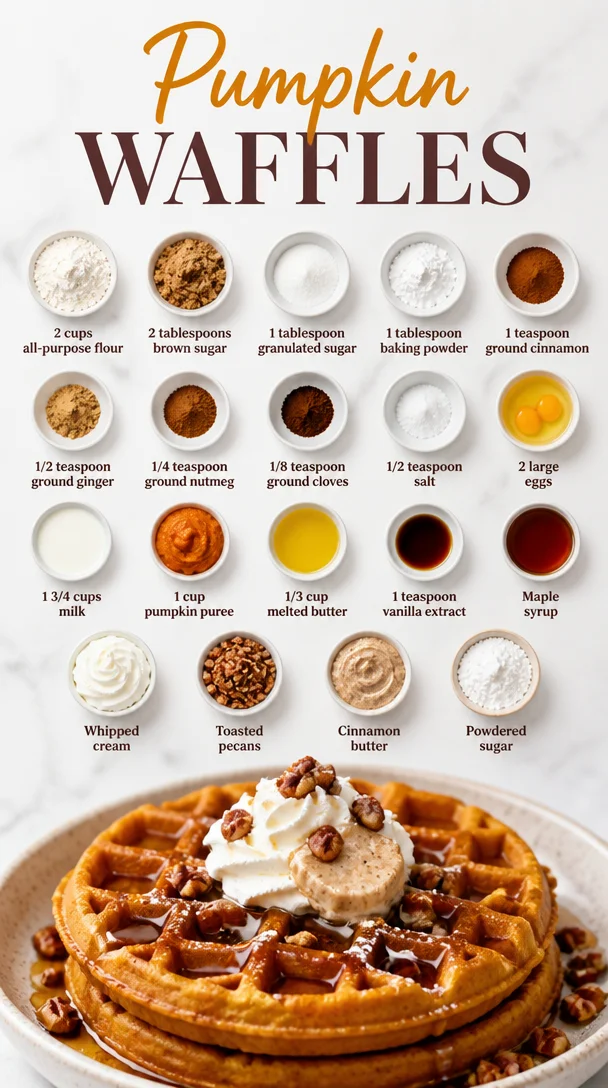
Pumpkin Waffles
The Ultimate Pumpkin Waffles: A Flavorful Fall Delight
Hey there, fellow food enthusiasts! It’s Beau Collier, your kitchen companion at Feastical. With the leaves turning golden and that crisp autumn air settling in, what better way to welcome the season than with some scrumptious Pumpkin Waffles? Trust me, once you whip up these divine pancakes for breakfast or brunch, you’ll be hooked on that cozy pumpkin goodness.
There’s something incredibly heartwarming about the combination of pumpkin spices and fluffy waffles. They become a canvas for so many tasty toppings, whether you prefer syrup, whipped cream, or even a drizzle of cinnamon butter. Let’s dive in, shall we?
Why Pumpkin Waffles?
You might be wondering, "Why waffles over pancakes?" Well, as much as I adore fluffy pancakes, waffles have that extra crispy texture on the outside that creates the perfect contrast to the soft interior. Plus, those little pockets are just begging to hold all the syrup and toppings! And when it comes to pumpkin, we’re talking warm spices that make every bite feel like a cuddle from a loved one.
Now, I remember the first time I made pumpkin waffles. It was one drizzly October morning, and I was hoping to impress a few friends with brunch. I was a bit nervous – after all, I wanted to show off my culinary skills while creating a comfy atmosphere. As the batter was whisked and the waffles began to cook, the aroma filled my kitchen, transporting me straight back to my grandma’s house. Growing up, she made the best pumpkin treats – she’s the one who taught me that cooking is all about sharing love and connection.
With each bite, I could feel her warmth and encouragement, reminding me that food isn’t just about sustenance; it’s about bringing people together and creating memories. So grab your favorite mug – perhaps filled with a spiced latte – and let’s get cooking the Pumpkin Waffles that’ll have everyone asking for seconds!
Ingredients
Let’s gather what you’ll need to make the best pumpkin waffles ever!
- 2 cups all-purpose flour: This is your foundation. For a gluten-free option, substitute with a 1:1 gluten-free flour blend.
- 2 tablespoons brown sugar: It adds a lovely caramelly touch. You can also try using coconut sugar for a healthier alternative.
- 1 tablespoon granulated sugar: Just a tad more sweetness. Feel free to skip it if you prefer less sugar.
- 1 tablespoon baking powder: This helps our waffles rise and become fluffy. Don’t forget it!
- 1 teaspoon ground cinnamon: A classic spice that brings warmth. You can switch this out for pumpkin pie spice if you prefer.
- 1/2 teaspoon ground ginger: Adds a nice zing. If you don’t have fresh ginger, ground ginger works wonders.
- 1/4 teaspoon ground nutmeg: This gives a cozy fragrance. You can omit it if you’re not a fan of nutmeg.
- 1/8 teaspoon ground cloves: A little offseason spice we can’t resist! Cloves can be potent, so adjust to your liking.
- 1/2 teaspoon salt: Brings out all the flavors. Keep this in; it makes a huge difference!
- 2 large eggs: These help bind the ingredients together; for a vegan version, try flax eggs (1 tablespoon ground flaxseed mixed with 2.5 tablespoons water).
- 1 3/4 cups milk: Conventional or plant-based milk works; just pick your favorite!
- 1 cup pumpkin puree: The star of the show! Make sure it’s pure pumpkin, not the spiced pie filling.
- 1/3 cup melted butter: For richness, or use coconut oil for a different flavor profile.
- 1 teaspoon vanilla extract: Because vanilla makes everything better! You can try using maple extract for an extra layer of flavor.
For Serving:
- Maple syrup: A staple! You can also use honey or agave if you prefer.
- Whipped cream: Light and fluffy; you can easily whip some up or buy a can!
- Toasted pecans: These add a lovely crunch and nutty flavor. Almonds work too for a different twist!
- Cinnamon butter: A smidge of cinnamon in softened butter takes these waffles to the next level.
- Powdered sugar: Just a dusting for that fancy touch without much fuss.
Step-by-Step Instructions
Ready to bring those ingredients to life? Here’s how to make each waffle sing!
-
Prepare the Waffle Iron: Preheat your waffle iron according to the manufacturer’s instructions. A well-preheated iron yields the crispiest waffles! If you’re feeling brave, lightly brush it with melted butter or non-stick spray for the perfect golden exterior.
-
Combine Dry Ingredients: In a large mixing bowl, whisk together the flour, brown sugar, granulated sugar, baking powder, cinnamon, ginger, nutmeg, cloves, and salt. This ensures even distribution of each ingredient and creates a well-mixed batter.
-
Mix Wet Ingredients: In another bowl, beat the eggs. Add the milk, pumpkin puree, melted butter, and vanilla extract. Whisk until everything is smooth and combined. Make sure the butter isn’t too hot – we don’t want to scramble the eggs!
-
Combine Wet and Dry: Pour the wet mixture into the dry ingredients. Gently stir until just combined; it’s okay if there are a few lumps. Overmixing leads to tough waffles, and nobody wants that!
-
Cook the Waffles: Pour the recommended amount of batter onto the preheated waffle iron. Close the lid and cook according to your waffle iron’s instructions (usually about 4-5 minutes). Keep an eye on them until they’re golden brown and crispy.
-
Serve Immediately: Carefully remove the waffles and serve hot. If you’re making a big batch, keep them warm in the oven at a low setting while you finish up the rest.
-
Add Your Favorite Toppings: Generously drizzle with maple syrup, crown with whipped cream, sprinkle some toasted pecans, or spread a pat of cinnamon butter on top!
Serving Suggestions
Presentation matters, right? So let’s make these waffles irresistible on the plate!
Grab a large, colorful serving platter and stack the waffles like a tower of deliciousness. Dust with powdered sugar for that fancier touch. Drizzle syrup artfully across the stack. This gives your dish more visual appeal and makes everyone up for a picture before digging in.
Don’t shy away from offering toppings on the side, too! Set out bowls of whipped cream, toasted pecans, and cinnamon butter. Let your guests build their perfect waffle creation! The more toppings, the merrier!
Recipe Variations
Here are a few creative twists for your pumpkin waffles that’ll keep the routine fresh:
-
Pumpkin Chocolate Chip Waffles: Add some semi-sweet or dark chocolate chips to the batter for a sweet surprise in every bite.
-
Vegan Pumpkin Waffles: Swap eggs for flax eggs and use almond milk or oat milk instead of regular milk for a vegan-friendly version.
-
Spiced Pumpkin Waffles: Want a kick? Add a tablespoon of chili powder or cayenne pepper to the batter for a spicy twist that’ll make your taste buds dance.
-
Whole Wheat Pumpkin Waffles: Substitute half or all of the all-purpose flour with whole wheat flour for added fiber and a nutty flavor.
-
Savory Pumpkin Waffles: Add some shredded cheese or herbs into the batter for a savory option – serve with poached eggs for an indulgent brunch experience!
Chef’s Notes
Each time I make these waffles, I can’t help but smile, thinking of those cozy brunches with my loved ones. Over the years, I’ve played around with the ingredients, adding protein powder or even sweet potato puree with great success. For any pumpkin lover out there, this recipe is super forgiving – feel free to make it your own!
Funny story: The first time I used fresh pumpkin instead of the puree, I totally miscalculated and ended up with pumpkin soup! It turned into an accidental pumpkin pie batter – who knew? It taught me that cooking is all about experimenting and embracing those moments in the kitchen.
FAQs and Troubleshooting
1. My waffles turned out soggy; what happened?
If your waffles come out soggy, it’s likely due to too much liquid or not preheating the waffle iron enough. Make sure you’re measuring the ingredients accurately and allowing your iron to heat fully before cooking.
2. Can I freeze leftover waffles?
Absolutely! Let them cool completely, then pop them in a freezer-safe bag or container. When you’re ready to eat, just reheat them in the toaster or oven for a quick breakfast!
3. Can I use fresh pumpkin instead of the canned puree?
Yes, but be sure to cook and puree it well before measuring. Canned pumpkin tends to be thicker, so you may need to adjust your liquid content.
4. Why do my waffles fall apart when I try to remove them?
This could be because they weren’t cooked through enough or didn’t have enough fat (butter/oil). If you’re using a non-stick waffle iron, oil or buttering it lightly can also make a big difference.
Nutritional Info
Let’s take a peek at the nutrition behind these delightful waffles, shall we? Here’s a rough breakdown (per serving based on 8 servings):
- Calories: ~220
- Protein: 5g
- Fat: 10g
- Carbohydrates: 30g
- Fiber: 2g
- Sugar: 6g
Feel free to tweak the recipe by reducing sugar, using nut milk, or opting for whole-grain flour to make it even healthier!
Final Thoughts
There you have it: a delightful recipe for Pumpkin Waffles that will surely become a staple in your kitchen. Whether it’s a leisurely Sunday brunch with family or just a treat for yourself, these waffles are a reminder of the joy that cooking can bring into our lives.
So, what are you waiting for? Gather those ingredients, put on your favorite playlist, and create something magical in your kitchen. Remember, cooking is all about sharing love, laughter, and perhaps a few delicious bites!
Happy cooking, friends! Let’s make this fall the most flavorful one yet!
Print
Ultimate Pumpkin Waffles
- Total Time: 30 minutes
- Yield: 8 servings 1x
- Diet: Vegetarian
Description
Delightful pumpkin waffles infused with warm spices, perfect for breakfasts and brunches during the fall season.
Ingredients
- 2 cups all-purpose flour
- 2 tablespoons brown sugar
- 1 tablespoon granulated sugar
- 1 tablespoon baking powder
- 1 teaspoon ground cinnamon
- 1/2 teaspoon ground ginger
- 1/4 teaspoon ground nutmeg
- 1/8 teaspoon ground cloves
- 1/2 teaspoon salt
- 2 large eggs
- 1 3/4 cups milk
- 1 cup pumpkin puree
- 1/3 cup melted butter
- 1 teaspoon vanilla extract
- For Serving:
- Maple syrup
- Whipped cream
- Toasted pecans
- Cinnamon butter
- Powdered sugar
Instructions
- Prepare the Waffle Iron: Preheat your waffle iron according to the manufacturer’s instructions. A well-preheated iron yields the crispiest waffles!
- Combine Dry Ingredients: In a large mixing bowl, whisk together the flour, brown sugar, granulated sugar, baking powder, cinnamon, ginger, nutmeg, cloves, and salt.
- Mix Wet Ingredients: In another bowl, beat the eggs. Add the milk, pumpkin puree, melted butter, and vanilla extract. Whisk until everything is smooth and combined.
- Combine Wet and Dry: Pour the wet mixture into the dry ingredients. Gently stir until just combined; it’s okay if there are a few lumps.
- Cook the Waffles: Pour the recommended amount of batter onto the preheated waffle iron and cook according to your waffle iron’s instructions (usually about 4-5 minutes).
- Serve Immediately: Carefully remove the waffles and serve hot with your favorite toppings.
- Add Your Favorite Toppings: Generously drizzle with maple syrup, crown with whipped cream, sprinkle with toasted pecans, or spread cinnamon butter on top!
Notes
Feel free to experiment with toppings and ingredients for variations. These waffles can easily be made vegan or adapted for other dietary preferences.
- Prep Time: 10 minutes
- Cook Time: 20 minutes
- Category: Breakfast
- Method: Waffle Making
- Cuisine: American
Nutrition
- Serving Size: 1 waffle
- Calories: 220
- Sugar: 6g
- Sodium: 300mg
- Fat: 10g
- Saturated Fat: 6g
- Unsaturated Fat: 4g
- Trans Fat: 0g
- Carbohydrates: 30g
- Fiber: 2g
- Protein: 5g
- Cholesterol: 80mg
Keywords: pumpkin waffles, fall recipes, breakfast, brunch
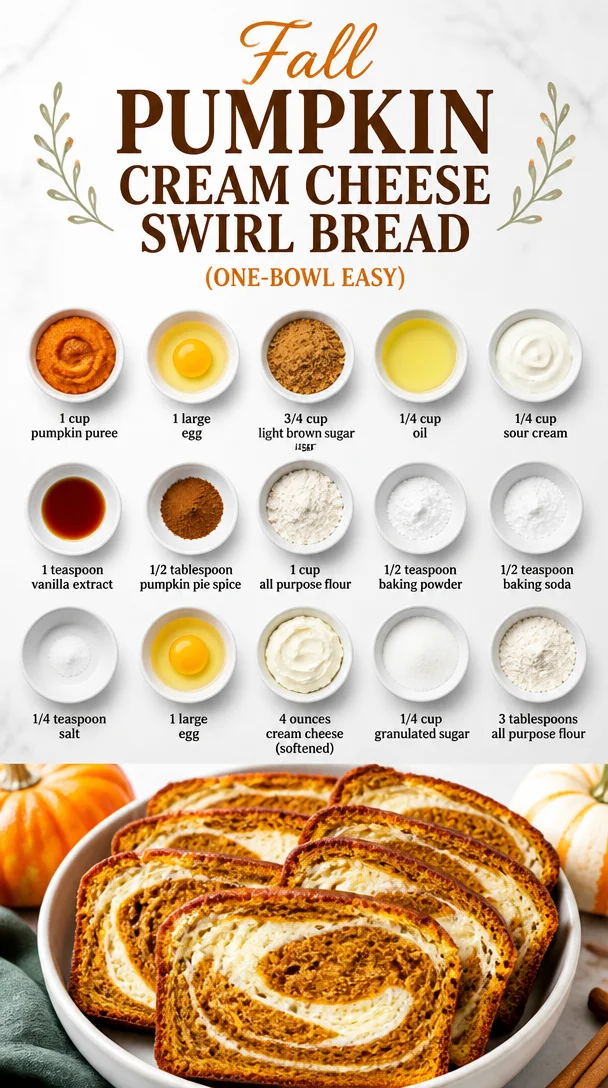
Fall Pumpkin Cream Cheese Swirl Bread (One-Bowl Easy)
The Ultimate Guide to Pumpkin Cream Cheese Bread: A Cozy Fall Favorite
Hey there! I’m so glad you stopped by the cozy kitchen of Feastical! Today, we’re diving into a recipe that wraps up all the warmth and joy of autumn in one bite: Pumpkin Cream Cheese Bread. Trust me, if you’re looking for a treat that makes you feel like you’re wrapped in a snug blanket on a cool fall day, this is it!
Introduction
Ah, pumpkin season! It’s that magical time of year when the leaves change color, the air gets a bit crisper, and the smell of spiced pumpkin wafts through our kitchens. There’s something incredibly heartwarming about baking with pumpkin—maybe it’s the vibrant color, or the rich, earthy flavor that instantly elevates any dish into a cozy masterpiece. When it comes to fall baking, Pumpkin Cream Cheese Bread holds a special place in my heart—and on my countertop!
This delightful bread merges the robustness of pumpkin with the creaminess of cream cheese—a combo that dances on your taste buds and leaves you wanting more. The best part? It’s super easy to whip up, whether you’re a seasoned baker or just starting your culinary journey. This recipe doesn’t just fill your home with the scrumptious scents of fall; it fills your stomach and warms your soul. So, grab your apron and let’s get baking together!
Personal Story
I remember the first time I made this Pumpkin Cream Cheese Bread. It was a crisp October afternoon, and my parents had invited some friends over for a casual gathering. The air was thick with laughter, and the sweet scent of cinnamon and nutmeg was wafting through the house—classic fall vibes, right? I decided it was the perfect occasion to try my hand at baking.
After rummaging through the pantry and pulling out a can of pumpkin, I decided to go for it. I had no idea that this little experiment would become a staple in our family’s fall traditions! That evening, as we savored slice after slice, my friends adored it so much that they begged for the recipe. It was a proud moment for me! From that day on, this Pumpkin Cream Cheese Bread has graced our holiday tables, cozy morning breakfasts, and even the odd late-night snack. It’s a memory I treasure, and I can’t wait for you to experience the joy it brings to your own gatherings!
Ingredients
Here’s what you’ll need to whip up this delightful Pumpkin Cream Cheese Bread:
-
1 cup pumpkin puree (not pumpkin pie filling)
Use pure pumpkin puree for the best flavor. If you don’t have any on hand, you can roast and puree fresh pumpkin or use canned pumpkin from the store. -
1 large egg
The egg brings the batter together and adds moisture. For a vegan option, you can substitute with 1/4 cup of unsweetened applesauce. -
3/4 cup light brown sugar
This adds a lovely caramel flavor. If you prefer a less sweet bread, you can reduce the sugar to 1/2 cup. -
1/4 cup oil
I recommend vegetable oil, but melted coconut oil or even apple sauce works well for a lighter option. -
1/4 cup sour cream
Sour cream lends a lovely tanginess to balance the sweetness! Greek yogurt is a great substitute and will add extra protein. -
1 teaspoon vanilla extract
Vanilla elevates the overall flavor. Try using homemade vanilla extract if you have that on hand—it’s a game-changer! -
1/2 tablespoon pumpkin pie spice
Pumpkin pie spice is a blend of spices but feel free to make your own using cinnamon, nutmeg, and ginger. -
1 cup all-purpose flour
All-purpose flour works best here, but for a gluten-free option, you can use a 1:1 gluten-free baking mix. -
1/2 teaspoon baking powder
This contributes to the bread’s rise and fluffiness. Make sure it’s fresh for the best results! -
1/2 teaspoon baking soda
Baking soda also helps with leavening but requires an acid (like buttermilk) to activate. No worries, the sour cream does the job here! -
1/4 teaspoon salt
Never forget the salt! It enhances all the flavors in your bread, making it taste even more delicious. -
4 ounces cream cheese (softened)
The star of our filling! Make sure it’s softened for easy mixing. Neufchâtel cheese is a great lower-fat option. -
1/4 cup granulated sugar
This sweetens the cream cheese filling. You can opt for powdered sugar if you prefer a finer texture. -
3 tablespoons all-purpose flour
This helps to thicken the cream cheese filling so it stays in place when you slice your bread.
Step-by-Step Instructions
Alright, let’s get to the fun part! Follow these steps to create your own delicious Pumpkin Cream Cheese Bread:
-
Preheat Your Oven
Set your oven to 350°F (175°C). This will ensure it’s hot and ready when your batter is all whipped up. -
Prepare Your Loaf Pan
Grease a 9×5 inch loaf pan, or better yet, line it with parchment paper for easy removal later. This little step goes a long way in making cleanup a breeze! -
Mix the Wet Ingredients
In a large mixing bowl, whisk together your pumpkin puree, egg, light brown sugar, oil, sour cream, and vanilla extract until it’s smooth and well combined. The mixture should be thick yet creamy. -
Combine the Dry Ingredients
In a separate bowl, whisk together the all-purpose flour, pumpkin pie spice, baking powder, baking soda, and salt. Mixing these dry ingredients separately helps to ensure an even distribution. -
Combine the Mixtures
Now, carefully fold the dry ingredients into the wet ingredients. Gently stir until just combined—you don’t want to overmix! A few lumps are completely okay—this ensures your bread stays tender. -
Prepare the Cream Cheese Filling
In a small bowl, beat together the softened cream cheese, granulated sugar, and 3 tablespoons of flour. Mix until smooth. You want a creamy filling that you can dollop into your batter later. -
Layer the Batter
Here comes the fun part! Pour half of your pumpkin batter into the prepared loaf pan. Spoon dollops of the cream cheese mixture over the batter and then layer the remaining pumpkin batter on top. Using a knife, gently swirl the mixtures together to create a marbled effect. -
Bake
Pop the loaf pan into your preheated oven and bake for 55-65 minutes, or until a toothpick inserted into the center comes out clean. Your kitchen will smell absolutely divine during this time! -
Cool Down
Once baked, remove the bread from the oven and let it cool in the pan for about 10 minutes. Then, transfer it to a wire rack to cool completely. This will help the flavors settle and make it easier to slice! -
Serve and Enjoy
Slice it up and serve with a dab of butter, a drizzle of caramel sauce, or simply on its own. I won’t tell if you snack on the freshly baked loaf while it’s still warm!
Serving Suggestions
Serving this Pumpkin Cream Cheese Bread is all about presentation and making it extra special! Here are a few ideas to elevate your bread to a whole new level:
-
Drizzle with Maple Glaze: A simple mix of maple syrup and powdered sugar creates an irresistible glaze that complements the pumpkin flavor beautifully.
-
Sprinkle with Nuts: Add a sprinkle of toasted pecans or walnuts on top for a delightful crunch.
-
Plate with Cream Cheese Frosting: If you’re feeling indulgent, whip up some cream cheese frosting—just cream together softened cream cheese, butter, powdered sugar, and a splash of vanilla extract.
-
Accompany with Coffee or Spiced Tea: Enjoy slices of this bread with a hot cup of coffee or a spiced chai to enhance those warm, cozy vibes.
Recipe Variations
Once you’ve mastered the classic Pumpkin Cream Cheese Bread, feel free to get creative! Here are some fun twists to try:
-
Chocolate Chip Pumpkin Bread: Stir in a cup of chocolate chips into the pumpkin batter for an indulgent treat.
-
Nutty Pumpkin Bread: Add 1/2 cup of chopped walnuts or pecans to the batter for an added crunch.
-
Cranberry Pumpkin Bread: Toss in dried cranberries or fresh cranberries for a tart twist.
-
Spiced Cakes: Swap out the pumpkin pie spice for chai spice for a unique flavor profile.
-
Gluten-Free Option: Use a gluten-free flour blend to make this bread suitable for those on a gluten-free diet.
Chef’s Notes
This recipe has been a family favorite for years, with each version more delicious than the last! I love that it goes beyond just being a dessert. It’s perfect for breakfast, an afternoon snack, or even as a homemade gift. I often bake a couple of loaves at a time, especially when gatherings are around the corner. The smell of pumpkin in the oven is a guaranteed way to attract friends and family to your kitchen!
Don’t forget about the incredible power of leftovers—this bread tastes even better the next day, and it freezes beautifully. Just wrap slices tightly in plastic then place them in a zip-top bag before freezing. Pull out a slice whenever you need a little cozy pick-me-up!
FAQs and Troubleshooting
1. My bread didn’t rise! What went wrong?
Be sure that your baking powder and baking soda are fresh. If they’re too old, they might not provide the necessary lift.
2. Why is my bread too dense?
Overmixing can sometimes lead to a denser texture. Mix just until everything is combined to keep it light.
3. Can I use fresh pumpkin instead of canned?
Absolutely! Just make sure to cook and puree the pumpkin thoroughly before using it in the recipe.
4. How do I know when my bread is done?
Use a toothpick! Insert it in the center of the bread, if it comes out clean or with a few crumbs (not wet batter), it’s ready to come out of the oven.
Nutritional Info
While I don’t typically focus on numbers, munching on this Pumpkin Cream Cheese Bread does come with some nutritional perks! Pumpkin is packed with vitamins A and C, while cream cheese provides a dose of calcium. Plus, you get protein from the egg! Moderation is key here, so enjoy this tasty bread as part of a balanced diet. Remember, food is not just about numbers but about enjoyment and satisfaction!
Final Thoughts
And there you have it, friends—your ultimate guide to creating the most scrumptious Pumpkin Cream Cheese Bread you’ve ever tasted! It’s perfect for sharing, gifting, or simply treating yourself after a long day.
As you bake, know that each ingredient and step contributes not just to a meal but to memories around the table. So, gather your loved ones, and don’t forget to share your creation with a smile (and an extra slice of bread). Happy baking, and may your fall be filled with warmth, joy, and delicious food!
Print
Pumpkin Cream Cheese Bread
- Total Time: 80 minutes
- Yield: 8 servings 1x
- Diet: Vegetarian
Description
Enjoy the warmth of autumn with this delightful Pumpkin Cream Cheese Bread that blends robust pumpkin flavor with creamy filling.
Ingredients
- 1 cup pumpkin puree
- 1 large egg
- 3/4 cup light brown sugar
- 1/4 cup oil
- 1/4 cup sour cream
- 1 teaspoon vanilla extract
- 1/2 tablespoon pumpkin pie spice
- 1 cup all-purpose flour
- 1/2 teaspoon baking powder
- 1/2 teaspoon baking soda
- 1/4 teaspoon salt
- 4 ounces cream cheese (softened)
- 1/4 cup granulated sugar
- 3 tablespoons all-purpose flour
Instructions
- Preheat Your Oven to 350°F (175°C).
- Prepare Your Loaf Pan by greasing it or lining it with parchment paper.
- Mix the Wet Ingredients together in a large mixing bowl until smooth.
- Combine the Dry Ingredients in a separate bowl.
- Combine the Mixtures by folding the dry ingredients into the wet ingredients.
- Prepare the Cream Cheese Filling by beating the softened cream cheese, granulated sugar, and 3 tablespoons of flour together until smooth.
- Layer the Batter by pouring half of the pumpkin batter into the loaf pan, adding cream cheese mixture, and layering the remaining batter on top.
- Bake for 55-65 minutes until a toothpick comes out clean.
- Cool Down in the pan for about 10 minutes before transferring to a wire rack.
- Serve and Enjoy with butter or caramel sauce.
Notes
This bread tastes even better the next day and can be frozen for later use by wrapping slices tightly in plastic.
- Prep Time: 15 minutes
- Cook Time: 65 minutes
- Category: Baked Goods
- Method: Baking
- Cuisine: American
Nutrition
- Serving Size: 1 slice
- Calories: 250
- Sugar: 20g
- Sodium: 200mg
- Fat: 10g
- Saturated Fat: 3g
- Unsaturated Fat: 5g
- Trans Fat: 0g
- Carbohydrates: 35g
- Fiber: 2g
- Protein: 4g
- Cholesterol: 30mg
Keywords: pumpkin bread, cream cheese bread, fall recipes, baking, cozy recipes
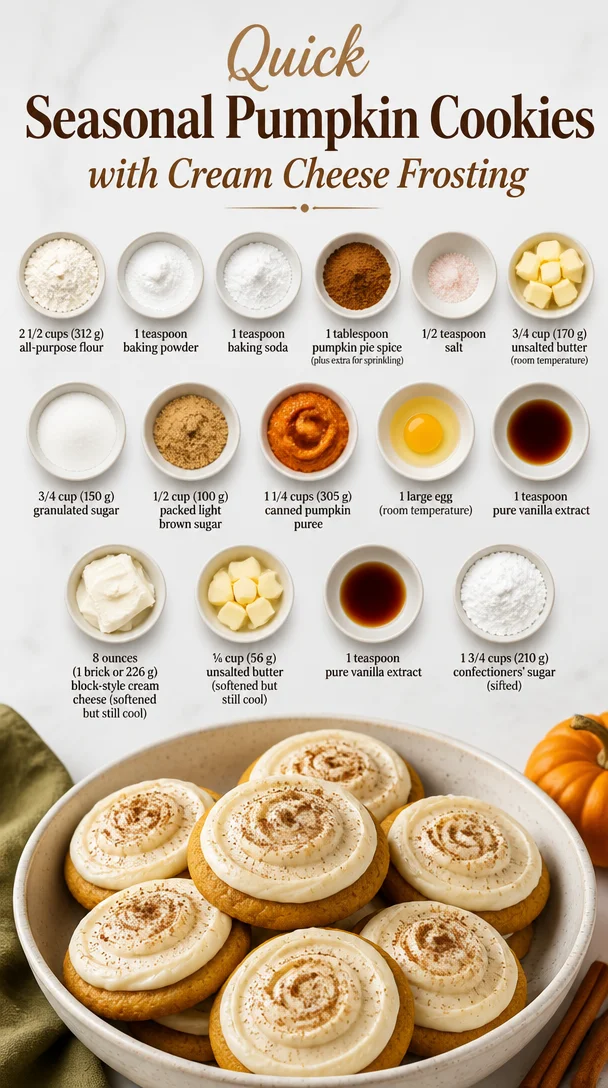
Quick Seasonal Pumpkin Cookies with Cream Cheese Frosting
Pumpkin Cookies with Cream Cheese Frosting: The Ultimate Fall Indulgence
Hey there, fellow food lovers! Welcome back to Feastical, where we whip up delightful dishes that warm both our hearts and our homes. As the air turns crisp and the leaves wear their beautiful autumn coats, there’s nothing quite like the scent of pumpkin baking in the oven to fill your kitchen with cozy vibes. Today, we’re diving into the world of Pumpkin Cookies with Cream Cheese Frosting—a recipe that’s like a warm hug wrapped in deliciousness and nostalgia.
The Comfort of Fall Flavors
Pumpkin cookies have a special place in my heart, and I’m sure they will in yours too after you make them! I remember the first time I baked these cookies—it was a blustery October afternoon, and I was rained in. The storm outside was so loud that it seemed only the rhythmic mixing of ingredients could drown it out. I had cans of pumpkin and bags of flour lying around from an earlier baking frenzy, so I decided to throw together a batch of these cookies.
The aroma started wafting through my home, enticing friends and family to gather in the kitchen. There’s something magical about fall baking—the anticipation, the flavors, the memories. When those cookies emerged from the oven, golden and soft, topped with velvety cream cheese frosting, smiles spread across everyone’s faces. It was a pure celebration of all things cozy and comforting!
So, let’s gather our ingredients and create some delightful pumpkin cookies that will surely make your home a happier place.
Ingredients
Here’s what you’ll need to make these fabulous pumpkin cookies:
-
2 1/2 cups (312 g) all-purpose flour
A standard in most baking recipes, this flour gives structure to your cookies. For a gluten-free alternative, try using an all-purpose gluten-free flour blend, but be sure to check if it contains xanthan gum for better texture. -
1 teaspoon baking powder
This helps the cookies rise and gives them a fluffy texture. If you’re out, you can substitute it with 1/4 teaspoon of baking soda combined with 1/2 teaspoon of lemon juice or vinegar. -
1 teaspoon baking soda
Essential for the perfect chewiness, baking soda activates when it meets acidity, like pumpkin. If you run out, simply double the baking powder—though the texture might vary slightly. -
1 tablespoon pumpkin pie spice (plus extra for sprinkling)
This mix usually includes cinnamon, nutmeg, ginger, and cloves, capturing the essence of fall in every bite. No pumpkin pie spice? No problem! Just mix equal parts cinnamon and nutmeg, and a pinch of ginger. -
1/2 teaspoon salt
Balances the sweetness. If you’re watching your sodium intake, feel free to reduce or omit the salt—the cookies will still be great! -
3/4 cup (170 g) unsalted butter (room temperature)
Butter adds richness and flavor. For a dairy-free option, try using coconut oil or vegan butter. Just let it soften to room temperature for best results. -
3/4 cup (150 g) granulated sugar
Sweetness galore! You can substitute a portion with coconut sugar for a deeper flavor, although the texture might change a touch. -
1/2 cup (100 g) packed light brown sugar
Adds moisture and a hint of caramel flavor. Dark brown sugar works too, giving a richer flavor if that’s what you prefer. -
1 1/4 cups (305 g) canned pumpkin puree
The star of the show! Make sure you get pure pumpkin puree, not pumpkin pie filling. If you want a fresher flavor, roast and blend fresh pumpkin. -
1 large egg (room temperature)
Helps bind everything together. Aquafaba (chickpea liquid) can replace this for a vegan option—just use 3 tablespoons! -
1 teaspoon pure vanilla extract
An aromatic touch that elevates flavors. Always opt for pure vanilla for the best taste.
For the Cream Cheese Frosting:
-
8 ounces (1 brick or 226 g) block-style cream cheese (softened but still cool)
This will give you that perfect creamy frosting. Forgetting to soften it? A quick 15-second zap in the microwave works wonders—just don’t melt it! -
1/4 cup (56 g) unsalted butter (softened but still cool)
Adds smoothness and some lusciousness to the frosting. You can use vegan butter here as well for a dairy-free frosting. -
1 teaspoon pure vanilla extract
Same deal as before—pure is best! It captures that warm, comforting aroma. -
1 3/4 cups (210 g) confectioners’ sugar (sifted)
To sweeten the deal! Sifting helps avoid lumps, which means a smoother frosting.
Step-by-Step Instructions
Now that we have all our goodies, let’s get cooking! Follow these steps for cookie perfection:
-
Preheat Your Oven: Start by preheating your oven to 350°F (175°C). This ensures your cookies bake evenly and gives them that perfect chewy texture.
-
Prepare Your Baking Sheets: Line two baking sheets with parchment paper. You want to be able to easily slide those cookies off once they’re baked—trust me, no one wants to wrestle with a cookie!
-
Mix the Dry Ingredients: In a bowl, whisk together the flour, baking powder, baking soda, pumpkin pie spice, and salt. This step is super important! Whisking helps evenly distribute the leavening agents and spices so that every cookie is perfectly flavored.
-
Cream the Butter and Sugars: In another bowl, beat the softened unsalted butter, granulated sugar, and brown sugar together until the mixture is light and fluffy—about 3-4 minutes. This infusion of air is what gives the cookies their wonderful texture. If you don’t have a mixer, don’t worry! You can use a whisk and some good ol’ elbow grease.
-
Add the Pumpkin, Egg, and Vanilla: Mix in the pumpkin puree, egg, and vanilla extract until fully combined. This will be a bit thick, and it’s okay! We’re diving into creamy goodness.
-
Combine Wet and Dry Ingredients: Gradually add the dry mixture to the wet mixture. Gently fold it in until just combined—be careful not to overmix, or we’ll lose that tender texture we’re aiming for!
-
Scoop and Shape: Use a cookie scoop or two tablespoons to drop the dough onto your prepared baking sheets. Make sure to leave some space between each one, as they will spread a little while baking. Sprinkle with extra pumpkin pie spice for that aromatic touch!
-
Bake the Cookies: Pop them into the oven for 10-12 minutes or until the edges are lightly golden. They may look slightly underbaked in the center; that’s perfect! Let them cool on the baking sheet for a few minutes before transferring them to a wire rack to cool completely.
-
Make the Frosting: While those cookies cool, let’s whip up the frosting! In a mixing bowl, beat the softened cream cheese and butter until creamy. Add that sweet vanilla and sifted confectioners’ sugar. Mix until smooth and fluffy. If it’s too thick, add a teaspoon of milk.
-
Frost Away: Once your cookies are completely cooled, spread that luscious frosting over the tops. Get all fancy, or go for a rustic smear—whatever feels good to you!
Serving Suggestions
These pumpkin cookies are a perfect treat for any occasion, whether it’s a cozy family gathering, a festive potluck, or just a personal indulgence. For a lovely presentation, stack them on a cute platter and sprinkle a bit of extra pumpkin pie spice or even some chopped pecans on top for a bit of crunch. You could also pair them with a warm cup of spiced chai or a classic pumpkin spice latte. Oh, the possibilities!
Recipe Variations
Now, let’s get creative! Here are some variations you might enjoy:
-
Chocolate Chip Pumpkin Cookies: Fold in a cup of semi-sweet chocolate chips at the end of the mixing process for a sweet surprise in every bite.
-
Nutty Delight: Add a half-cup of finely chopped walnuts or pecans to the dough for an extra crunch and nutty flavor.
-
Maple Cream Cheese Frosting: Instead of using vanilla extract, try maple syrup in your frosting for a delicious twist on flavor!
-
Vegan Version: Substitute the cream cheese with a vegan cream cheese alternative and use flax eggs in place of the regular egg.
-
Spiced-Up Cookies: Add a teaspoon of ground ginger or a sprinkle of cayenne pepper to the dough for a warming kick!
Chef’s Notes
Over the years, I’ve tinkered with this recipe, swaying between using more pumpkin or incorporating additional spices. I’ve observed that letting your dough chill for about 30 minutes really enhances the flavors and leads to a thicker cookie. Additionally, doubling the recipe just means more cookies to share (or hoard, no judgment here)!
FAQs and Troubleshooting
-
Why did my cookies spread too much?
If your cookies spread excessively, it might be because the butter was too warm. Always ensure the butter is softened but still cool before mixing. -
Can I freeze the dough?
Absolutely! If you’re not ready to bake them all, scoop the dough onto a baking sheet and freeze. Once firm, transfer to a freezer bag and store for up to three months. When you’re ready, bake directly from frozen—just add a couple of extra minutes to the baking time. -
How can I avoid a dense cookie?
Be cautious not to overmix after adding the flour; overmixing can lead to tougher cookies. Also, make sure your baking powder and baking soda are fresh. -
What can I do if my frosting is too runny?
If your frosting is too thin, try adding a bit more sifted confectioners’ sugar until it reaches a spreadable consistency.
Nutritional Info
Each cookie has approximately 120-150 calories, depending on your precise measurements and whether you’ve added any variations. They pack a delicious punch of carbohydrates and fats, primarily because of the sugars and butter. Looking for comfort? These will hit the spot! They also provide some dietary fiber from the pumpkin, making them a touch healthier. Enjoy them in moderation, and don’t forget—a little indulgence goes a long way!
Final Thoughts
Baking these Pumpkin Cookies with Cream Cheese Frosting isn’t just about the cookies themselves—it’s about creating an experience, sparking joy, and fostering connection through food. Whether you’re sharing these cookies with friends or savoring them solo, I hope you take a moment to enjoy the process and the delicious results.
So what are you waiting for? Grab that apron, preheat your oven, and let’s make some cookie magic happen! Don’t forget to share your creations—tag me at Feastical so I can see all your delicious masterpieces. Happy baking, everyone!
Print
Pumpkin Cookies with Cream Cheese Frosting
- Total Time: 27 minutes
- Yield: 24 servings 1x
- Diet: Vegetarian
Description
Delightful pumpkin cookies topped with creamy cream cheese frosting, perfect for fall indulgence.
Ingredients
- 2 1/2 cups (312 g) all-purpose flour
- 1 teaspoon baking powder
- 1 teaspoon baking soda
- 1 tablespoon pumpkin pie spice (plus extra for sprinkling)
- 1/2 teaspoon salt
- 3/4 cup (170 g) unsalted butter (room temperature)
- 3/4 cup (150 g) granulated sugar
- 1/2 cup (100 g) packed light brown sugar
- 1 1/4 cups (305 g) canned pumpkin puree
- 1 large egg (room temperature)
- 1 teaspoon pure vanilla extract
- 8 ounces (226 g) block-style cream cheese (softened but still cool)
- 1/4 cup (56 g) unsalted butter (softened but still cool)
- 1 teaspoon pure vanilla extract
- 1 3/4 cups (210 g) confectioners’ sugar (sifted)
Instructions
- Preheat your oven to 350°F (175°C).
- Prepare your baking sheets by lining them with parchment paper.
- Mix the dry ingredients: whisk together the flour, baking powder, baking soda, pumpkin pie spice, and salt.
- Cream the butter, granulated sugar, and brown sugar until light and fluffy (about 3-4 minutes).
- Add the pumpkin puree, egg, and vanilla extract; mix until fully combined.
- Combine the wet and dry mixtures gradually, folding until just combined.
- Scoop and shape the dough onto baking sheets, spacing them out.
- Bake in the oven for 10-12 minutes until edges are lightly golden.
- Make the frosting by beating together cream cheese and butter until creamy, then mix in vanilla and sifted confectioners’ sugar.
- Frost the cooled cookies with the cream cheese frosting.
Notes
Chilling the dough for 30 minutes enhances flavors and texture; cookies can also be frozen before baking.
- Prep Time: 15 minutes
- Cook Time: 12 minutes
- Category: Dessert
- Method: Baking
- Cuisine: American
Nutrition
- Serving Size: 1 cookie
- Calories: 150
- Sugar: 10g
- Sodium: 100mg
- Fat: 7g
- Saturated Fat: 4g
- Unsaturated Fat: 3g
- Trans Fat: 0g
- Carbohydrates: 22g
- Fiber: 1g
- Protein: 2g
- Cholesterol: 20mg
Keywords: pumpkin cookies, cream cheese frosting, fall desserts, autumn baking, cozy treats
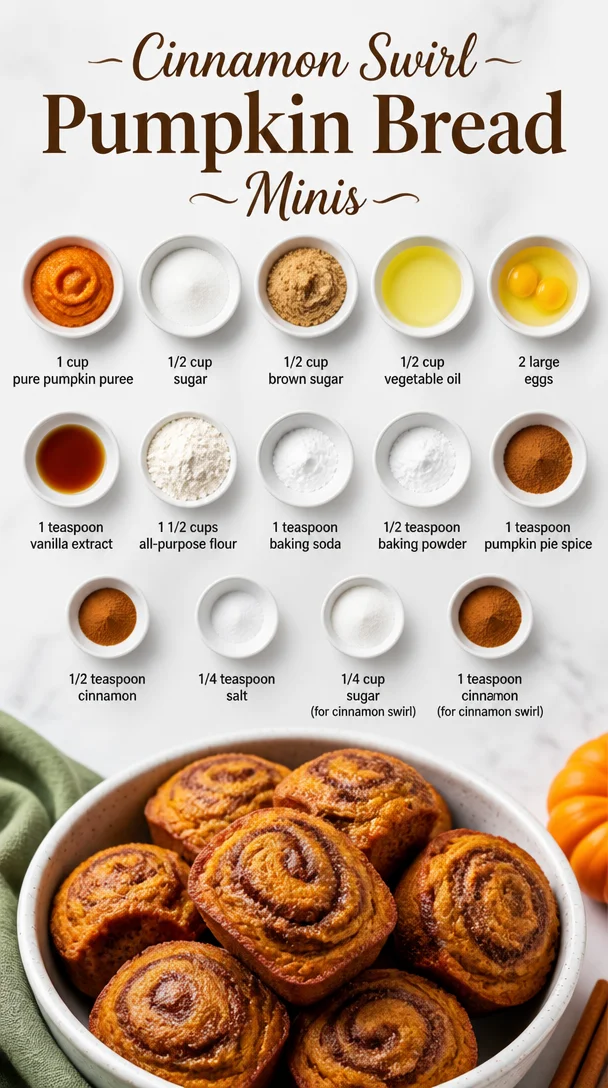
Cinnamon Swirl Pumpkin Bread Minis
Cinnamon Swirl Pumpkin Bread Minis: A Cozy Treat for Every Season
Hey there, fellow food lover! I’m thrilled to have you here at Feastical, where we whip up feel-good recipes that wrap around your heart like a warm hug. Today, we’re diving into a recipe that sings autumn and joy: Cinnamon Swirl Pumpkin Bread Minis. Trust me, whether you’re lounging on the couch or hosting a delightful brunch, these mini loaves will be the stars of the show.
Let me paint a picture for you. It’s a crisp autumn afternoon, the leaves are swirling outside like nature’s confetti, and the aroma of cinnamon is wafting through the air. I’m back in my kitchen, apron on, and the moment I open that can of pure pumpkin puree, a wave of nostalgia washes over me. Cooking was always a family affair when I was growing up. My mom and I would spend whole weekends baking and laughing, our kitchen a whirlwind of flour and fun. That unmistakable scent of sugar and spice always made our home feel like a cozy haven.
This memory fuels my passion for cooking—and especially baking, since it brings back those sweet moments of togetherness. Every time I bake this Cinnamon Swirl Pumpkin Bread, I’m not just following a recipe; I’m revisiting a cherished chapter of my life. So, grab your spatula, and let’s create some delicious mini loaves that are meant to be shared and savored.
Ingredients
Before we get going, let’s gather our ingredients. Here’s what you’ll need to whip up our delightful Cinnamon Swirl Pumpkin Bread Minis:
-
1 cup pure pumpkin puree
[Chef Insight: Make sure to get pure pumpkin puree, not pie filling, which is mixed with sweeteners and spices! You can swap in homemade puree if you’re up for it—just bake a pumpkin until soft, scoop it out, and blend!] -
1/2 cup granulated sugar
[Substitution Tip: If you’re looking to make this healthier, you can use coconut sugar or even agave nectar! Just remember that the sweetness may vary slightly.] -
1/2 cup brown sugar
[Chefs Hack: Use dark brown sugar for a deeper flavor or light brown for a more subtle sweetness.] -
1/2 cup vegetable oil
[Substitution Insight: You can replace vegetable oil with applesauce for a lighter version! Just note that it might slightly change the texture.] -
2 large eggs
[Egg Substitution: If you want a vegan version, 1/4 cup of unsweetened applesauce can replace each egg.] -
1 teaspoon vanilla extract
[Tip: Always opt for pure vanilla extract over imitation for the best flavor!] -
1 1/2 cups all-purpose flour
[Substitution: For gluten-free options, use a 1:1 gluten-free flour mix.] -
1 teaspoon baking soda
[Baking Tip: Make sure your baking soda is fresh for optimal rise!] -
1/2 teaspoon baking powder
[Insight: This gives the bread an extra fluffiness, so don’t skip it!] -
1 teaspoon pumpkin pie spice
[Tip: You can make your own mix at home with equal parts cinnamon, nutmeg, ginger, and allspice.] -
1/2 teaspoon ground cinnamon
[Chefs Hack: A pinch of freshly grated nutmeg can elevate this flavor even more!] -
1/4 cup sugar (for cinnamon swirl)
[Tip: Splurge a little on this layer—the more, the merrier!] -
1 teaspoon ground cinnamon (for cinnamon swirl)
[Substitution: Want some heat? A dash of cayenne can give it a surprising kick!]
Gather these goodies, and let’s get cooking!
Step-by-Step Instructions
Alright, let’s roll up those sleeves and get to work! Here’s how we make our Cinnamon Swirl Pumpkin Bread Minis.
-
Preheat the Oven
Preheat your oven to 350°F (175°C). This is important because you want to get that temperature just right before popping your minis in! -
Prepare Your Mini Loaf Pans
Grease your mini loaf pans with a bit of oil or non-stick spray. This step is key to ensuring that your bread slides right out after baking. Alternatively, you can line them with parchment paper for easy removal. -
Mix the Wet Ingredients
In a large mixing bowl, whisk together the pumpkin puree, granulated sugar, brown sugar, and vegetable oil. These ingredients create the moist foundation for your bread! Once combined, add the eggs and vanilla extract, mixing until everything is well blended. -
Combine the Dry Ingredients
In another bowl, whisk together the all-purpose flour, baking soda, baking powder, pumpkin pie spice, ground cinnamon, and salt. Incorporating dry ingredients in a separate bowl helps ensure even distribution of leavening agents and spices—hence, an even rise! -
Mix Everything Together
Gradually add the dry ingredients to the wet mixture, stirring gently until just combined. Be careful not to overmix, as this can lead to dense bread. A few lumps are perfectly fine! -
Make the Cinnamon Swirl Mixture
In a small bowl, mix the swirl sugar and cinnamon together until combined. Now, the magic happens here! Gently fold about 1/3 of the batter into the cinnamon-sugar mixture for that marvelous swirl. You can also choose to layer the batter in the pans with a sprinkle of the swirl in between for added visual delight. -
Fill the Mini Loaf Pans
Pour the batter into your prepared mini loaf pans, filling each about 2/3 full. Swirl a little extra of the cinnamon-sugar mixture on top for that extra oomph! -
Bake
Pop the pans in the oven and bake for about 25–30 minutes, or until a toothpick inserted in the center comes out clean. That kitchen smell will have everyone dreaming of pumpkin spice! -
Cool and Serve
Once baked, allow the bread to cool in the pans for about 10 minutes, then turn them out onto a wire rack to cool completely. Patience is a virtue, my friends; this resting time makes all the difference!
And voilà! You’ve just created delicious, cinnamon-swirl-infused pumpkin mini loaves that are bursting with flavor.
Serving Suggestions
Now that your mini loaves are beautifully baked and cooling, let’s talk presentation! Here are some fun serving suggestions to elevate your Cinnamon Swirl Pumpkin Bread experience:
-
Slice and Serve: Serve the mini loaves sliced up, arranged on a rustic wooden board. You can even dust them lightly with powdered sugar for an elegant touch.
-
Add a Spread: Pair them with a luscious whipped cream cheese spread made from softened cream cheese and a sprinkle of cinnamon. It’s a match made in heaven!
-
Garnish: Add a sprinkle of chopped pecans or walnuts on top for some crunch. A drizzle of maple syrup can also enhance the sweetness and pairs beautifully with pumpkin.
-
Coffee Companion: These minis are perfect with a steaming cup of pumpkin spice latte or a fresh-brewed coffee. Nothing says cozy like this pairing!
Recipe Variations
Feeling adventurous? Here are a few creative twists and variations you can try with your Cinnamon Swirl Pumpkin Bread Minis:
-
Chocolate Chip Delight: Add half a cup of semi-sweet chocolate chips to the batter for a decadent twist. The melted chocolate adds richness that contrasts perfectly with the pumpkin and cinnamon.
-
Nutty Goodness: Fold in chopped pecans or walnuts into the batter for a nutty crunch. You can also top with whole nuts for a beautiful presentation.
-
Gluten-Free Magic: Swap the all-purpose flour for a 1:1 gluten-free flour mix. Just ensure your baking powder and soda are gluten-free as well.
-
Spicy Kick: For those who like it hot, add a pinch of cayenne pepper to the batter. It gives an unexpected kick that’ll surprise everyone!
-
Dairy-Free Version: Substitute eggs with flax eggs (1 tablespoon ground flaxseed mixed with 2.5 tablespoons water) and use almond milk instead of vegetable oil.
Chef’s Notes
Can we take a moment to appreciate how this Cinnamon Swirl Pumpkin Bread has evolved over time? What started as a simple family recipe has transformed into a delightful mini version that not only looks adorable but also bakes quicker—perfect for those busy days when you need a comforting treat, stat!
And let me tell you, over the years, I’ve had my fair share of kitchen mishaps. One memorable moment was when I mistakenly grabbed baking soda instead of baking powder. Let’s just say we had a mini volcano situation. But, hey, that just added to the charm of cooking, right?
FAQs and Troubleshooting
I know you might have some questions, so let’s tackle a few common ones to ensure your baking adventure is smooth sailing!
-
Why is my bread dense?
Overmixing can lead to dense bread! Remember to mix until just combined. Also, check your leavening agents; freshness matters! -
Can I bake this as a regular-sized loaf?
Absolutely! You can pour the batter into a standard-sized loaf pan. Just increase the baking time to 50-60 minutes. Make sure to do the toothpick test! -
How do I store leftovers?
Store your cinnamon swirl pumpkin bread in an airtight container at room temperature for up to three days. It also freezes beautifully! Just wrap it tightly in plastic wrap and foil for up to three months. -
Can I add fruits like blueberries?
Sure! Fruits add a burst of flavor. Just be mindful of the moisture they bring; you may need to adjust baking time slightly.
Nutritional Info
Here’s a quick rundown of the nutritional info for each mini loaf. Keep in mind that actual values may vary based on specific brands and any variations you decide to implement!
- Calories: Approximately 150-200 per mini loaf
- Fat: 8g
- Carbohydrates: 20g
- Sugar: 10g
- Protein: 2g
- Fiber: 1g
These little guys pack a delightful punch without tipping the scale too much—perfect for a treat any time you crave something delicious and comforting!
Final Thoughts
Baking is an expression of love, nostalgia, and creativity, and I can’t wait for you to embark on this journey with my Cinnamon Swirl Pumpkin Bread Minis. There’s something truly magical about the fragrance of cinnamon mingling with pumpkin as it fills your kitchen, evoking memories of cozy family moments, warm hugs, and sweet togetherness.
So, grab your favorite mug, pour yourself a warm beverage, and indulge in these delectable mini loaves! Share them with friends, savor them during a quiet moment, or enjoy them at your brunch gatherings. Whatever you do, remember that kitchen adventures are always best when shared.
Thanks for joining me on this culinary journey, and happy baking! Feel free to drop me a comment below with your thoughts or any twists you try—I always love hearing from my fellow foodies!
Print
Cinnamon Swirl Pumpkin Bread Minis
- Total Time: 45 minutes
- Yield: 12 mini loaves 1x
- Diet: Vegetarian
Description
Delightful mini loaves of pumpkin bread infused with cinnamon swirl, perfect for cozy afternoons or brunch gatherings.
Ingredients
- 1 cup pure pumpkin puree
- 1/2 cup granulated sugar
- 1/2 cup brown sugar
- 1/2 cup vegetable oil
- 2 large eggs
- 1 teaspoon vanilla extract
- 1 1/2 cups all-purpose flour
- 1 teaspoon baking soda
- 1/2 teaspoon baking powder
- 1 teaspoon pumpkin pie spice
- 1/2 teaspoon ground cinnamon
- 1/4 cup sugar (for cinnamon swirl)
- 1 teaspoon ground cinnamon (for cinnamon swirl)
Instructions
- Preheat your oven to 350°F (175°C).
- Grease your mini loaf pans with oil or non-stick spray.
- Mix together the pumpkin puree, granulated sugar, brown sugar, and vegetable oil in a large bowl.
- Add the eggs and vanilla extract, mixing until well blended.
- Whisk together the all-purpose flour, baking soda, baking powder, pumpkin pie spice, ground cinnamon, and salt in another bowl.
- Gradually add the dry ingredients to the wet mixture, stirring gently until just combined.
- Mix the swirl sugar and cinnamon together in a small bowl.
- Fold about 1/3 of the batter into the cinnamon-sugar mixture for the swirl.
- Pour the batter into prepared loaf pans, filling each about 2/3 full, and swirl more cinnamon-sugar on top.
- Bake for about 25–30 minutes, or until a toothpick comes out clean.
- Cool in pans for 10 minutes, then turn out onto a wire rack to cool completely.
Notes
For a healthier version, substitute coconut sugar for granulated sugar and use applesauce instead of vegetable oil.
- Prep Time: 15 minutes
- Cook Time: 30 minutes
- Category: Dessert
- Method: Baking
- Cuisine: American
Nutrition
- Serving Size: 1 mini loaf
- Calories: 175
- Sugar: 10g
- Sodium: 200mg
- Fat: 8g
- Saturated Fat: 1g
- Unsaturated Fat: 7g
- Trans Fat: 0g
- Carbohydrates: 24g
- Fiber: 2g
- Protein: 2g
- Cholesterol: 30mg
Keywords: pumpkin bread, fall baking, cinnamon swirl bread, mini loaves, cozy treats
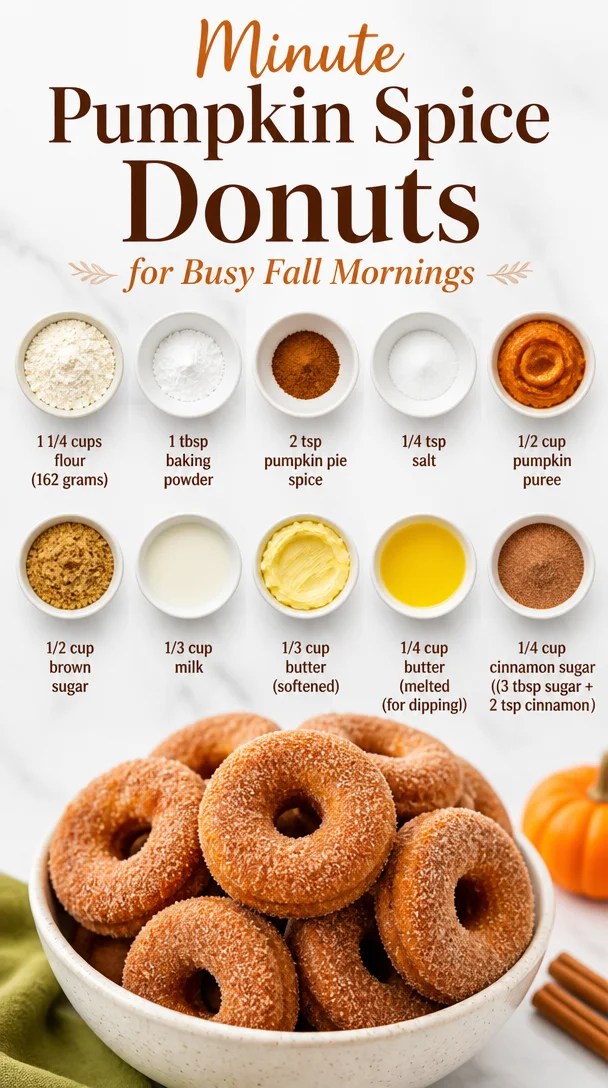
Minute Pumpkin Spice Donuts for Busy Fall Mornings
Pumpkin Spice Donuts: A Cozy Fall Treat
Hey there, fellow foodies! Welcome back to Feastical, where the kitchen is always buzzing with good vibes and even better food. Today, we’re diving into a delightful fall treat that’s sure to make your taste buds dance—Pumpkin Spice Donuts! Imagine biting into a soft, fluffy donut that perfectly captures the essence of autumn: warm spices, sweet pumpkin, and that comforting, homemade goodness. Whether you’re whisking up a storm on a cozy weekend or looking to impress friends with a sweet treat at a gathering, these donuts have got you covered.
A Taste of Nostalgia
Let me share a little story that always warms my heart. It was autumn years ago, and the leaves were turning those beautiful shades of gold and crimson. I was visiting my grandmother in her quaint little cottage, where she always had a pot of spiced cider simmering on the stove. On one particularly chilly afternoon, I remember walking into her cozy kitchen, the aroma of cinnamon and nutmeg enveloping me like a warm blanket. She was whipping up a batch of her famous pumpkin spice donuts, and the anticipation was almost magical.
As we rolled out the dough together, we shared stories and laughter, and I learned not just how to bake but also the joy of bringing people together through food. Those donuts were a staple in her kitchen, much like they have become in mine. Now, every time I create these treats, I feel her spirit encouraging me to embrace the love and warmth that comes from cooking. So, let’s recreate those magical moments and make our very own pumpkin spice donuts!
Ingredients You’ll Need
Here’s what you’ll need to get started on this delicious journey:
-
1 1/4 cups all-purpose flour (162 grams)
Flour is the backbone of any donut! For a healthier twist, you can swap in whole wheat flour, though the texture will be a bit denser. -
1 tablespoon baking powder
This is your secret leavening agent! Without it, your donuts would end up dense and flat. Make sure it’s fresh for the best rise. -
2 teaspoons pumpkin pie spice
A spice blend that screams fall, made up of cinnamon, nutmeg, ginger, and allspice. If you’re feeling adventurous, you can make your own blend! -
1/4 teaspoon salt
A pinch of salt enhances all the flavors, balancing the sweetness of the donuts. -
1/2 cup pumpkin puree
Pure pumpkin adds moisture and that signature fall flavor. Make sure to use pure pumpkin puree, not pumpkin pie filling, which is loaded with added sugar. -
1/2 cup brown sugar
This gives your donuts that rich, caramel-like sweetness. If you’re looking for a lighter option, coconut sugar works beautifully too. -
1/3 cup milk
Milk adds moisture. You can use almond milk or oat milk for a dairy-free version! -
1/3 cup softened butter
I always prefer real butter for that rich flavor, but coconut oil or vegan butter can be a fantastic substitute. -
1/4 cup melted butter (for dipping!)
This is where the magic happens! The warm melted butter makes for a perfectly sticky layer before dipping in cinnamon sugar. -
1/4 cup cinnamon sugar (3 tablespoons sugar + 2 teaspoons cinnamon)
A blend of sugar and cinnamon, this adds the finishing touch that makes these donuts simply irresistible!
Step-by-Step Instructions
Now, let’s get our hands dirty and dive into the fun part—making these delightful donuts!
-
Preheat the Oven:
Preheat your oven to 350°F (175°C). This step is crucial because you want those donuts to cook evenly as soon as they hit the hot oven. -
Prepare the Pan:
Grease your donut pan generously! This will help the donuts slide out easily once they’re baked. If you don’t have a donut pan, you could also use a muffin tin for a fun twist! -
Mix Dry Ingredients:
In a large bowl, whisk together the flour, baking powder, pumpkin pie spice, and salt. Make sure they’re well combined. You want all that spicy goodness evenly mixed for maximum flavor. -
Combine Wet Ingredients:
In another bowl, mix the pumpkin puree, brown sugar, milk, and softened butter until smooth. You can use a whisk or a hand mixer; just make sure everything is mixed together nicely. -
Combine Wet and Dry Ingredients:
Gradually add the dry mixture into the wet mixture, folding gently with a spatula. Be careful not to overmix—just combine until you see no more flour streaks. Overmixing can lead to tough donuts, and we want them soft and fluffy. -
Fill the Donut Pan:
Using a piping bag or a spoon, fill each donut cavity about 2/3 full. This will allow them to rise without spilling over. If you’re using a piping bag, it makes for a mess-free fill! -
Bake:
Place the pan in the preheated oven and bake for 10–12 minutes, or until a toothpick inserted comes out clean. Your kitchen will soon be filled with that dreamy pumpkin spice aroma! -
Cool Down:
Let the donuts cool in the pan for a few minutes before transferring them to a wire rack. This helps them set perfectly without getting soggy. -
Melted Butter and Cinnamon Sugar:
While those donuts are cooling, melt about 1/4 cup of butter in a small bowl. In another bowl, mix the cinnamon and sugar together. When the donuts are cool enough to handle, dip the tops in melted butter and then in the cinnamon sugar. Get ready for that crunchy, sweet exterior!
Serving Suggestions
Once your donuts are beautifully coated in cinnamon sugar, it’s time to serve them up! Arrange them on a pretty platter—perhaps with a cozy throw nearby for that fall ambiance. You could drizzle some maple glaze over the top for an extra touch of sweetness or serve with a side of warm apple cider for the full autumn experience. These donuts pair perfectly with a cup of coffee or tea, making them a fantastic treat for brunch gatherings or a cozy afternoon snack!
Recipe Variations
Now that you have the classic recipe down, let’s shake things up with a few creative twists:
-
Chocolate Pumpkin Donuts:
Add 1/4 cup of cocoa powder to the dry ingredients for a luscious chocolatey flavor that complements the pumpkin perfectly. -
Maple Glazed Donuts:
Instead of cinnamon sugar, drizzle a simple maple glaze made with powdered sugar and maple syrup over the tops for a sweet finish. -
Pecan-Crusted Donuts:
After dunking in melted butter, roll the donuts in finely chopped pecans instead of cinnamon sugar for a crunchy nutty flavor. -
Gluten-Free Version:
Substitute regular flour with a 1:1 gluten-free blend, ensuring you still get that fluffy texture without the gluten. -
Spicy Pumpkin Donuts:
Add a hint of cayenne pepper to the spice mixture for a surprising kick that balances the sweetness of the donuts.
Chef’s Notes
As with any recipe, there’s always room for a little creativity! Since I first made these donuts with my grandmother, I’ve experimented with various flavors and coatings. One of my favorite iterations involved incorporating a touch of fresh grated ginger into the batter, which brought a whole new layer of warmth that I just loved. Remember, cooking is all about having fun and making it your own—so don’t hesitate to play around!
FAQs and Troubleshooting
1. My donuts turned out dense—what went wrong?
Most likely, the batter was overmixed or you might have used too much flour. Make sure to gently fold the ingredients together until just combined!
2. Can I use pumpkin pie filling instead of puree?
It’s best to stick with pure pumpkin puree for this recipe, as pumpkin pie filling contains added sugars and spices that could alter the taste and texture of your donuts.
3. How can I store leftovers?
Store leftover donuts in an airtight container at room temperature for up to two days. You can refrigerate them to extend freshness but note they might lose a bit of that soft texture.
4. Can I freeze these donuts?
Absolutely! Freeze the donuts in a single layer on a baking sheet, then store in a freezer-safe bag for up to three months. When you’re ready to enjoy, just thaw them at room temperature and warm them for a few seconds in the microwave.
Nutritional Info
For each donut (assuming this recipe makes about 12), you’re looking at approximately:
- Calories: 150
- Fat: 6g
- Carbohydrates: 21g
- Fiber: 1g
- Sugar: 6g
- Protein: 1g
This is a delightful treat that can fit into a balanced diet, especially when enjoyed in moderation. Pairing it with a healthy breakfast or snack can make it even more satisfying!
Final Thoughts
There you have it—your very own pumpkin spice donuts that are as heartwarming as they are delicious! Whether you’re enjoying them warm from the oven or sharing them with friends and family, these donuts are sure to become a cherished addition to your fall recipes. Remember, cooking doesn’t have to be perfect; it just needs to be made with love. So, roll up those sleeves, let your creativity shine, and bake up a batch of these irresistible goodies. Happy cooking, and don’t forget to savor each delightful bite!
Print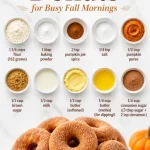
Pumpkin Spice Donuts
- Total Time: 27
- Yield: 12 servings 1x
- Diet: Vegetarian
Description
Delightful pumpkin spice donuts that capture the essence of autumn with warm spices and sweet pumpkin.
Ingredients
- 1 1/4 cups all-purpose flour (162 grams)
- 1 tablespoon baking powder
- 2 teaspoons pumpkin pie spice
- 1/4 teaspoon salt
- 1/2 cup pumpkin puree
- 1/2 cup brown sugar
- 1/3 cup milk
- 1/3 cup softened butter
- 1/4 cup melted butter (for dipping)
- 1/4 cup cinnamon sugar (3 tablespoons sugar + 2 teaspoons cinnamon)
Instructions
- Preheat your oven to 350°F (175°C).
- Grease your donut pan generously.
- Mix the flour, baking powder, pumpkin pie spice, and salt in a large bowl.
- Combine the pumpkin puree, brown sugar, milk, and softened butter in another bowl until smooth.
- Fold the dry mixture into the wet mixture gently.
- Fill each donut cavity about 2/3 full.
- Bake for 10–12 minutes, or until a toothpick comes out clean.
- Cool the donuts in the pan for a few minutes before transferring them to a wire rack.
- Melt about 1/4 cup of butter and mix the cinnamon and sugar together.
- Dip the tops of the donuts in melted butter and then in the cinnamon sugar.
Notes
Store leftovers in an airtight container for up to two days, or freeze for up to three months.
- Prep Time: 15
- Cook Time: 12
- Category: Desserts
- Method: Baking
- Cuisine: American
Nutrition
- Serving Size: 1 donut
- Calories: 150
- Sugar: 6g
- Sodium: 100mg
- Fat: 6g
- Saturated Fat: 3g
- Unsaturated Fat: 2g
- Trans Fat: 0g
- Carbohydrates: 21g
- Fiber: 1g
- Protein: 1g
- Cholesterol: 15mg
Keywords: pumpkin spice, donuts, fall treat, autumn recipe, baked donuts