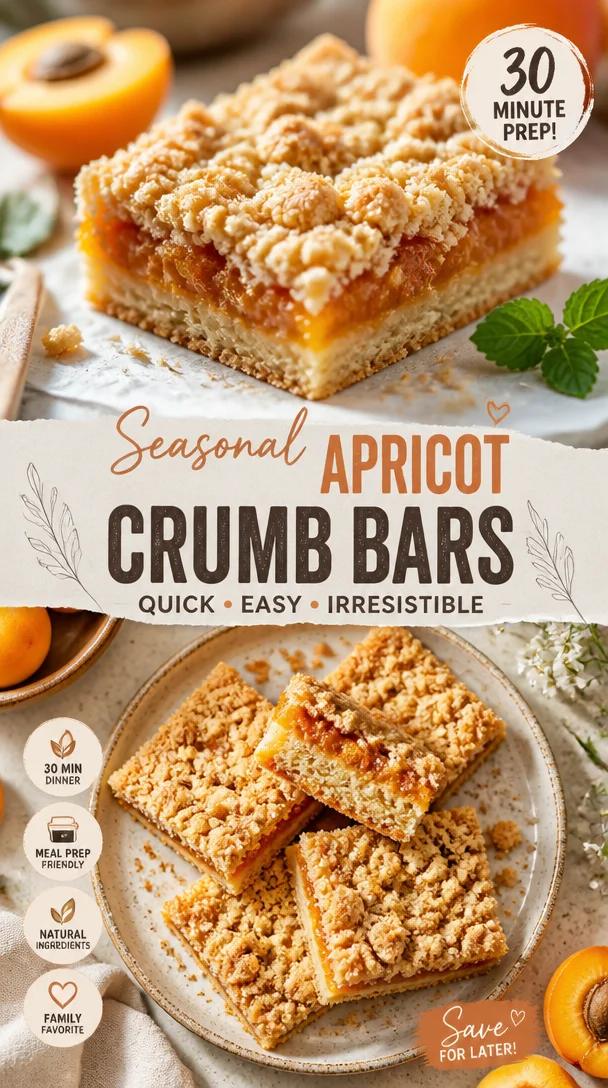
Seasonal Apricot Crumb Bars: Quick 30-Minute Prep Recipe
Apricot Crumb Bars: A Slice of Sunshine in Your Day
Hey there, friends! If you’re looking for a treat that brings a burst of sunshine into your kitchen, you’ve just hit the jackpot! Apricot crumb bars are the perfect blend of sweet, tart, and buttery goodness, offering a delightful way to enjoy one of summer’s brightest fruits all year round. I can just picture these bars on a sunny picnic blanket, or served warm with a scoop of vanilla ice cream as the sun sets. So, buckle up as we dive deep into creating these incredible bars together!
A Little Nostalgia
Let’s take a stroll down memory lane for a moment, shall we? I remember my grandmother’s garden filled with the sweetest apricot trees. In the late summer, when the fruits were ready for picking, it felt like we had stumbled onto nature’s candy store. The warm sun on our backs and the scent of ripe apricots was absolutely intoxicating! One warm afternoon, we gathered in her kitchen, apricots littering the counters, and decided to bake our very first batch of apricot crumb bars. I was her little sous-chef, learning to slice fruits and mix the crumb topping. It was messy, it was sweet, and trust me, we devoured those bars before they even cooled down! That experience not only sparked my love for baking but also ingrained a deep appreciation for using fresh, seasonal ingredients. Each time I bake these crumb bars now, that memory comes rushing back, and I can’t help but feel grateful.
Ingredients
Before we start whipping up a storm in the kitchen, let’s gather our ingredients. Here’s what you’ll need for these scrumptious apricot crumb bars:
-
2 cups all-purpose flour
A versatile staple that forms the base of our crumb bars. If you’re looking for a healthier option, you could swap it out for whole wheat flour. -
1 cup rolled oats
Adds texture and a delightful chewiness. If you’re gluten-free, make sure to use certified gluten-free oats! -
1 cup brown sugar
Bring in that rich, caramel-like sweetness. If you’re short on brown sugar, just mix granulated sugar with a tablespoon of molasses as a quick substitute. -
1/2 cup granulated sugar
A bit of sweetness to balance the tartness of our apricots. If you’re watching your sugar intake, you can reduce this to 1/4 cup. -
1 cup unsalted butter, melted
This makes our crumbly topping irresistibly buttery. If you need a dairy-free option, coconut oil can step in nicely! -
1/2 teaspoon baking powder
Helps the bars rise just slightly, creating a lovely texture. -
1/4 teaspoon salt
A pinch of salt enhances all the flavors. Don’t skip this step! -
2 cups fresh apricots, pitted and sliced
The star of the show! Feel free to mix in other fruits like peaches or nectarines if you can’t find apricots. -
1 tablespoon lemon juice
Brightens the flavor of the apricots and adds a wonderful twist. Lime juice works too if you’re in a pinch. -
1/4 cup sliced almonds
Adds a nutty crunch on top. You can easily swap it with chopped walnuts or pecans for a different bite!
Step-by-Step Instructions
Alright, let’s get down to business! Grab your apron and let’s get baking!
-
Preheat Your Oven
Preheat that oven of yours to 350°F (175°C). Trust me; you want to start with a warm oven for those crumb bars! -
Prepare Your Baking Dish
Grab a 9×13-inch baking dish and line it with parchment paper, leaving a bit of an overhang. This will make it super easy to lift out the bars once they’re done! -
Mix the Dry Ingredients
In a large bowl, combine the flour, oats, brown sugar, granulated sugar, baking powder, and salt. Give it a good mix to ensure everything is well combined. A whisk works wonders here! -
Add the Melted Butter
Pour in that melted butter, stirring until you’ve got a crumbly mixture. It should resemble sand with tiny pebbles, and that’s just the way we want it. Reserve about 1 cup of this mixture for the topping! -
Prep the Apricots
In another bowl, toss your sliced apricots with the lemon juice. This will not only enhance the flavor but also help keep them vibrant and fresh. -
Assemble the Bars
Press the crumb mixture evenly into the bottom of your prepared baking dish. Don’t worry about perfection; it doesn’t have to be too neat! -
Add the Apricots
Distribute the sliced apricots over the crumb base, making sure to spread them out evenly for a slice of fruit in every bite. -
Top It Off
Sprinkle the reserved crumb mixture over the apricots. Don’t forget to sprinkle those sliced almonds on top for a nutty crunch! -
Bake to Perfection
Place the dish in the preheated oven and bake for about 30-35 minutes until the top is golden and the apricots are bubbling. Your kitchen will smell heavenly! -
Cool and Slice
Once baked, allow the bars to cool in the baking dish for about 10-15 minutes before using the parchment to lift them out. Slice them into squares and serve at room temperature—or slightly warm, if you can’t resist!
Serving Suggestions
The beauty of these apricot crumb bars is in their versatility. You can enjoy them straight from the pan or dress them up for a proper dessert. Here’s how I love to serve them:
- With a dollop of whipped cream: A light, airy topping beautifully complements the fruit and crumb.
- A scoop of vanilla ice cream: Because who doesn’t love warm desserts with ice cream on top? It’s pure indulgence!
- Garnished with fresh mint leaves: Adds a pop of color and a hint of freshness when serving at gatherings.
- Drizzled with caramel sauce: If you want to take it up a notch, a sweet drizzle can elevate these bars to gourmet status!
Recipe Variations
Let’s get creative, shall we? Here are a few ways to twist this recipe to keep things exciting:
-
Peach and Apricot Mix: Combine fresh apricots with peaches for a blend of flavors that’ll take you straight to summer.
-
Coconut Crust: Add shredded coconut to the crumb mixture for a tropical vibe.
-
Spiced Crumb Bars: Add a pinch of cinnamon or vanilla extract to your crumb mixture for that playful, aromatic note.
-
Nut-Free Version: Omit the almonds and replace them with more oats for crunch or just keep the crumb topping nut-free.
-
Vegan Option: Substitute the butter with coconut oil and replace the eggs with a flax egg or applesauce for a healthier twist.
Chef’s Notes
Let me tell you, these apricot crumb bars have a special place in my heart. Over the years, I’ve tried countless variations and tweaks, but there’s something magical about the classic recipe. My grandmother always said, “Recipes are just guidelines; the secret ingredient is love.” So, make this your own, and don’t be afraid to experiment. Your kitchen is a playground, so grab those apricots and let the magic happen!
FAQs and Troubleshooting
Here are some common questions I get, along with helpful solutions:
-
Why are my crumb bars falling apart?
Make sure you’re using enough melted butter! It binds the crumb. If they still crumble, you’re likely cutting them while they’re still warm—let them cool enough to hold their shape. -
Can I use dried apricots instead of fresh?
Absolutely! But remember, dried apricots are much sweeter, so adjust the sugar down a bit to prevent it from getting overly sweet. -
How can I store leftover bars?
Store them in an airtight container at room temperature for up to a week. They also freeze beautifully—just wrap them in plastic wrap and pop them in a freezer bag! -
What can I do if I don’t like nuts?
Simply omit the almonds! The bars will still be delicious on their own, or you can replace the nuts with more oats or granola for that extra crunch.
Nutritional Info
These apricot crumb bars are perfect for sharing blissful moments, but they’re also a delightful indulgence. Each serving offers a burst of vitamins and fiber thanks to the fresh apricots and oats. While I don’t have exact nutritional figures on hand, here’s a quick breakdown of what’s good in them:
- Apricots: Rich in Vitamin A and C, making your skin glow and your immune system strong.
- Oats: A great source of fiber, perfect for keeping you satisfied and aiding digestion.
- Butter: In moderation, adds heart-healthy fats.
Just remember to enjoy these bars in moderation, and they’ll fit nicely into a balanced diet!
Final Thoughts
And there you have it, my dear foodie friends! Apricot crumb bars that are not only delicious but also filled with fond memories and warm encounters. These bars are perfect any time—whether for a casual dessert, a picnic snack, or even a comforting breakfast treat. Just remember, the joy of cooking comes from sharing, so whip up a batch, gather your loved ones, and create your own beautiful memories.
Until next time, keep spreading the love through your food and happy baking!
Print
Apricot Crumb Bars
- Total Time: 50 minutes
- Yield: 12 servings 1x
- Diet: Vegetarian
Description
Delightful apricot crumb bars that perfectly blend sweet, tart, and buttery goodness, embodying the essence of summer.
Ingredients
- 2 cups all-purpose flour
- 1 cup rolled oats
- 1 cup brown sugar
- 1/2 cup granulated sugar
- 1 cup unsalted butter, melted
- 1/2 teaspoon baking powder
- 1/4 teaspoon salt
- 2 cups fresh apricots, pitted and sliced
- 1 tablespoon lemon juice
- 1/4 cup sliced almonds
Instructions
- Preheat your oven to 350°F (175°C).
- Prepare a 9×13-inch baking dish lined with parchment paper.
- Mix the flour, oats, brown sugar, granulated sugar, baking powder, and salt in a large bowl.
- Add the melted butter and stir until crumbly, reserving about 1 cup for topping.
- Prep the sliced apricots with lemon juice in another bowl.
- Assemble by pressing the crumb mixture into the baking dish.
- Add the apricots over the crumb base.
- Top with reserved crumb mixture and sliced almonds.
- Bake for 30-35 minutes until golden.
- Cool for 10-15 minutes, then slice and serve.
Notes
These bars can be enjoyed plain, with whipped cream, or vanilla ice cream. Experiment with fruits and toppings!
- Prep Time: 15 minutes
- Cook Time: 35 minutes
- Category: Dessert
- Method: Baking
- Cuisine: American
Nutrition
- Serving Size: 1 bar
- Calories: 270
- Sugar: 15g
- Sodium: 150mg
- Fat: 12g
- Saturated Fat: 7g
- Unsaturated Fat: 4g
- Trans Fat: 0g
- Carbohydrates: 38g
- Fiber: 2g
- Protein: 4g
- Cholesterol: 30mg
Keywords: apricot crumb bars, dessert, baking, summer treats, fruit desserts
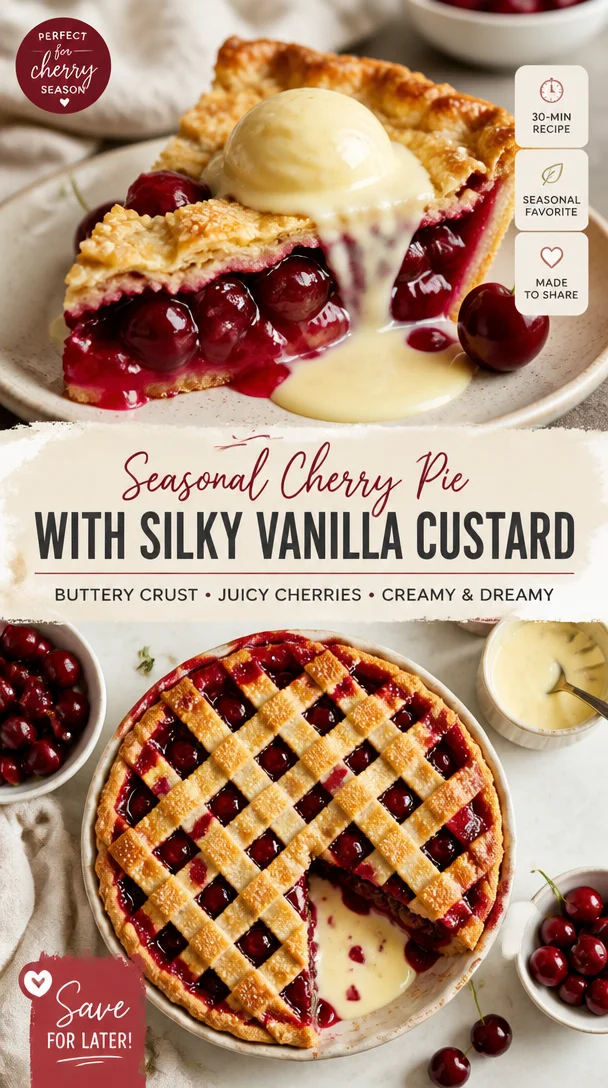
Seasonal Cherry Pie with Silky Vanilla Custard Recipe
Cherry Pie with Vanilla Custard: A Slice of Nostalgia
Hey there, fellow foodies! I’m so glad you’re here at Feastical, where we celebrate feel-good food that’s bound to make your heart sing. Today, we’re whipping up something truly special: a vibrant Cherry Pie with Vanilla Custard. Believe me when I say, this dish is more than just a dessert—it’s a warm hug served on a plate.
Picture this: It’s a sunny afternoon, and the air is filled with the sweet scent of cherries ripening on the tree. Growing up, summer meant a trip to my grandparents’ farm where we’d pick fresh fruit, and nothing was more exciting than those bright red cherries. They were so sweet, just waiting to be turned into something delicious. When the cherries came rolling in, my grandma would roll out the dough, and the whole kitchen would be filled with laughter and the clinking of measuring cups as we prepared one of her famous cherry pies. It wasn’t just about the food; it was about the memories made—a tradition that I cherish dearly.
This recipe brings that nostalgia to your kitchen—it’s straightforward, delicious, and perfect for impressing family and friends. With juicy sour cherries complemented by a silky vanilla custard, this pie is a heavenly blend of tart and sweet that will leave everyone clamoring for seconds. So grab your apron, and let’s dive into the wonderful world of cherry pie-making!
Personal Story
Ah, cherry pie! Just the thought of it takes me back to my childhood summers spent at my grandparents’ house, where the cherry tree in the yard was a staple. I still remember the way the branches would bend under the weight of those plump, red gems. My siblings and I would race to see who could fill their bucket first, our laughter echoing through the orchard as we fought over that last cherry.
Once we had gathered enough cherries, it was time for the real fun: working in the kitchen with Grandma. I can still hear her humming softly as she rolled out the dough, my job was to "help" by munching on some cherries and sneaking bites of sugar. Grandma taught me the secret to a perfect cherry filling—harmony between sugar, cornstarch, and a squeeze of lemon juice to balance the flavors. While the pie baked, the kitchen filled with a warm, inviting aroma that wrapped around me like a blanket. It was in those moments that I learned not just how to bake, but how to create memories.
Now, as I make this cherry pie for you, I hope you’ll feel inspired to create your own sweet memories. Let’s cherish those small moments that turn into cherished traditions, all while enjoying a slice of this heavenly pie!
Ingredients
-
2 cups sour cherries (pitted)
Fresh or frozen sour cherries work beautifully here. If fresh cherries aren’t available, thaw any frozen cherries, and make sure you drain them well before using. -
1 cup sugar
Granulated sugar brings a sweet balance to the tart cherries. For a twist, you can use brown sugar for a hint of caramel flavor or coconut sugar for a lower glycemic option. -
2 tablespoons cornstarch
This thickening agent ensures your cherry filling isn’t too runny. If you’re looking for a gluten-free alternative, you could also use arrowroot powder. -
1 tablespoon lemon juice
This zesty note brightens the flavors of the cherries. If you’re fresh out of lemons, white vinegar can serve as a substitute in a pinch! -
1 teaspoon vanilla extract
A touch of vanilla enhances the pie’s sweetness and adds depth to the filling. If you want to kick it up a notch, try using almond extract instead for a lovely nutty note. -
1 pre-made shortcrust pastry
To keep things simple, a store-bought shortcrust pastry saves time. Feel free to use a homemade pastry if you’re up for the challenge! -
1 cup vanilla quark (or vanilla pudding)
This creamy element adds richness to the pie. Yogurt can be used if you’re looking for something lighter, or you can opt for a dairy-free pudding if needed. -
1 egg (for egg wash)
Beaten egg gives your pie that luscious golden finish. If you prefer not to use eggs, a splash of milk or a dairy-free alternative can work just as well. -
Powdered sugar (for dusting, optional)
A light dusting of powdered sugar right before serving makes the pie look extra special!
Step-by-Step Instructions
-
Prepare the Cherries
Start by washing, pitting, and draining your cherries (if using frozen). Ensure they’re as dry as possible to prevent excess moisture in your pie. This is the moment to taste a cherry or two—it’s crucial work, trust me! -
Make the Cherry Filling
In a mixing bowl, combine the pitted cherries, sugar, cornstarch, lemon juice, and vanilla extract. Toss everything together gently with a spatula until the cherries are well-coated. Let this mixture sit for about 15 minutes to allow the flavors to meld and the sugar to draw out the juices. Oh, the anticipation! -
Preheat the Oven
Preheat your oven to 425°F (220°C). A hot oven means a beautifully baked pie with crisp crust and bubbling filling. -
Roll Out the Pastry
If you’re using a homemade pie crust, roll out your shortcrust pastry until it’s about ¼ inch thick. Fit it into your pie pan, making sure to leave a little overhang to seal the top. -
Add the Filling
Pour the cherry mixture into the prepared pastry shell. Speaking of which, take a moment to admire those vibrant cherries—they should look like a dazzling red jewel treasure trove! -
Prepare the Top Layer
If you’re going with a lattice top or want to create a full crust, it’s time to roll out the second piece of pastry. Roll it out, drape it over the filling, and make slits for ventilation or cut decorative shapes (you know I’m a sucker for making it pretty!). -
Seal and Brush the Pie
If using a full crust, gently tuck the overhang underneath, create a nice border to seal in the filling, and make some slits on top to allow steam to escape. Brush the top crust with the beaten egg for that golden finish. It’s your pie, make it shine! -
Bake
Pop your pie in the preheated oven and let it bake for about 20-25 minutes. You’re looking for the crust to be golden brown and the filling to be bubbling. My kitchen timer is usually my unofficial assistant—set it and get ready to drool! -
Cool and Prepare the Custard
After the pie is done, let it cool on the counter for at least 20 minutes. This helps set the filling. Now while it cools, whip up that vanilla custard (or grab your ready-made vanilla pudding). I like to fold in a little whipped cream for a fluffy texture! -
Serve
Slice the pie and serve with a generous dollop of vanilla custard. Take a moment to appreciate the beautiful juxtaposition of colors, textures, and flavors—life is beautiful, isn’t it?
Serving Suggestions
To plate your cherry pie, I recommend a simple yet elegant presentation. Start with a slice on a dessert plate and pour a generous amount of vanilla custard around it. You can use a tablespoon to create little pools artfully. For an extra special touch, garnish with a sprig of mint—its bright green adds a lovely contrast with the vibrant red of the cherries. If you’re feeling indulgent, why not add a scoop of vanilla ice cream on the side? This classic pairing is sure to make everyone’s hearts—and stomachs—happy!
Recipe Variations
Now, let’s get a little creative with our cherry pie! Here are some fun variations to consider:
-
Lattice-Topped Cherry Pie: Instead of a full top crust, weave strips of pastry together for a charming lattice to show off that beautiful filling underneath.
-
Almond Cherry Pie: Add a teaspoon of almond extract to the cherry filling for a delicious nutty twist.
-
Bourbon Cherry Pie: For the adults in the house, a splash of bourbon in the filling elevates the flavor, giving it a rich, deep profile.
-
Coconut Vanilla Custard: Swap out part of the vanilla quark for coconut creme. This tropical twist is perfect for summer!
-
Gluten-Free Version: Use a gluten-free shortcrust pastry. Substitute cornstarch with arrowroot for the filling if needed.
Chef’s Notes
One of my favorite things about this cherry pie recipe is how it has evolved over the years. What started as a simple summer tradition has grown into a family favorite that’s made its way onto our holiday table as well. Sometimes, I catch my kids sneaking bites of the filling before it hits the crust, and it reminds me of those carefree days with my grandma.
Another funny kitchen story comes from the first time I tried to make this recipe without the egg wash. Let’s just say it turned out looking like a pie that was afraid of getting baked! The crust didn’t have that glorious sheen, and while it still tasted amazing, it lacked that beautiful finish. Never again, dear friends!
FAQs and Troubleshooting
Q: Why is my pie filling runny?
A: This can happen if you didn’t let the mixture sit long enough for the cornstarch to activate, or if you used too much liquid from the cherries. Aim to soak up excess moisture, and don’t skimp on the cornstarch!
Q: Can I use sweet cherries instead?
A: While sour cherries are the star of this recipe, sweet cherries can work too! You may want to reduce the sugar a bit since they are already quite sweet.
Q: How do I know when my pie is done?
A: Look for a golden-brown crust and bubbling filling! If you notice the edges browning too quickly, cover them with strips of aluminum foil.
Q: Can I make this ahead of time?
A: Absolutely! You can bake the pie a day in advance. Just allow it to cool completely before storing it in the fridge. Condiments like the vanilla custard can also be made ahead and stored separately!
Nutritional Info
Let’s talk nutrition! While this cherry pie is undoubtedly a dessert treat, it does offer some merits. Sour cherries are packed with antioxidants and have anti-inflammatory properties, which may help in supporting your immune health.
On average, each slice of this pie contains roughly 350 calories, depending on the specific ingredients used and portion sizes. To lighten it up, consider reducing sugar and opting for a lighter custard or ice cream option.
Here’s the general nutrient breakdown for one slice of this pie:
- Calories: 350
- Carbohydrates: 54g
- Protein: 3g
- Fat: 15g
- Fiber: 2g
Keep in mind: desserts are meant to be enjoyed, so indulge wisely!
Final Thoughts
And there you have it—a delightful Cherry Pie with Vanilla Custard that’s bursting with flavor and packed with memories! I hope this recipe inspires you to create your own traditions and share your love for cooking with those around you. Remember, the kitchen is the heart of the home, where stories are shared, and memories are made.
So, whether you’re hosting a family gathering or just baking for yourself, don’t forget to savor every moment. Happy cooking, and may your kitchen always be filled with the warmth of good food and laughter! If you try this recipe, I’d love to hear how it turned out for you. Feel free to drop your comments and share your kitchen stories with me. Now, let’s make some cherry pie magic! 🍒✨
Print
Cherry Pie with Vanilla Custard
- Total Time: 40 minutes
- Yield: 8 servings 1x
- Diet: Vegetarian
Description
A vibrant Cherry Pie with silky Vanilla Custard, perfect for evoking sweet summer memories.
Ingredients
- 2 cups sour cherries (pitted)
- 1 cup sugar
- 2 tablespoons cornstarch
- 1 tablespoon lemon juice
- 1 teaspoon vanilla extract
- 1 pre-made shortcrust pastry
- 1 cup vanilla quark (or vanilla pudding)
- 1 egg (for egg wash)
- Powdered sugar (for dusting, optional)
Instructions
- Prepare the cherries by washing, pitting, and draining them. Ensure they’re dry.
- Make the cherry filling by combining cherries, sugar, cornstarch, lemon juice, and vanilla extract in a bowl.
- Preheat your oven to 425°F (220°C).
- Roll out the pastry if homemade and fit it into your pie pan.
- Add the cherry mixture into the prepared pastry shell.
- Prepare the top layer by rolling out another piece of pastry and placing it over the filling.
- Seal the pie and brush the top crust with the beaten egg.
- Bake in the preheated oven for about 20-25 minutes.
- Cool the pie on the counter for at least 20 minutes before serving.
- Slice and serve with a generous dollop of vanilla custard.
Notes
Feel free to use fresh or frozen cherries; if fresh aren’t available, make sure to drain frozen cherries well.
- Prep Time: 15 minutes
- Cook Time: 25 minutes
- Category: Dessert
- Method: Baking
- Cuisine: American
Nutrition
- Serving Size: 1 slice
- Calories: 350
- Sugar: 22g
- Sodium: 150mg
- Fat: 15g
- Saturated Fat: 6g
- Unsaturated Fat: 6g
- Trans Fat: 0g
- Carbohydrates: 54g
- Fiber: 2g
- Protein: 3g
- Cholesterol: 40mg
Keywords: cherry pie, vanilla custard, dessert, summer recipe, nostalgic cooking
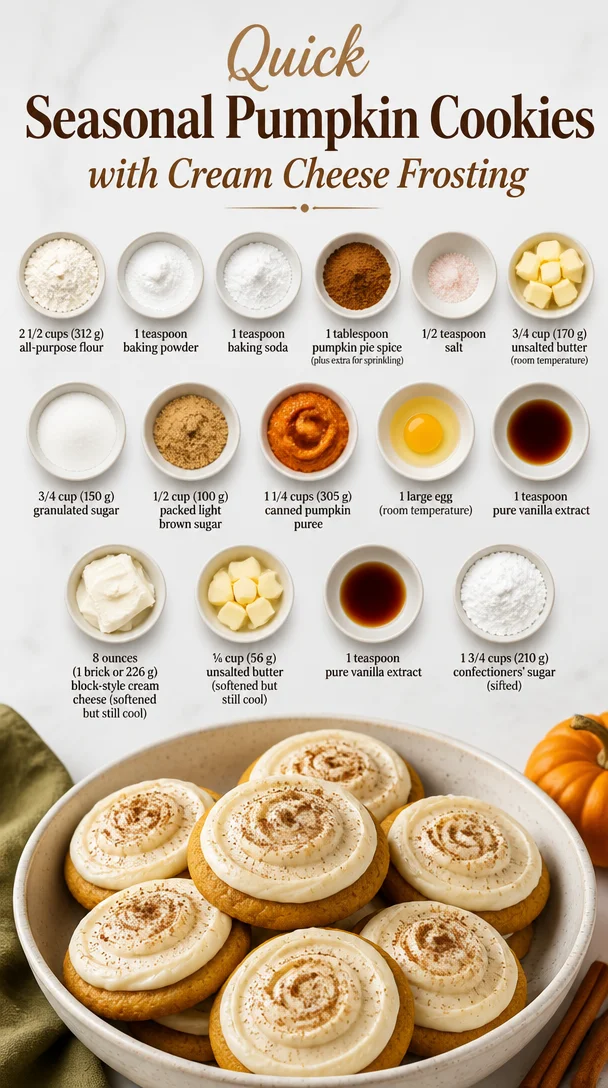
Quick Seasonal Pumpkin Cookies with Cream Cheese Frosting
Pumpkin Cookies with Cream Cheese Frosting: The Ultimate Fall Indulgence
Hey there, fellow food lovers! Welcome back to Feastical, where we whip up delightful dishes that warm both our hearts and our homes. As the air turns crisp and the leaves wear their beautiful autumn coats, there’s nothing quite like the scent of pumpkin baking in the oven to fill your kitchen with cozy vibes. Today, we’re diving into the world of Pumpkin Cookies with Cream Cheese Frosting—a recipe that’s like a warm hug wrapped in deliciousness and nostalgia.
The Comfort of Fall Flavors
Pumpkin cookies have a special place in my heart, and I’m sure they will in yours too after you make them! I remember the first time I baked these cookies—it was a blustery October afternoon, and I was rained in. The storm outside was so loud that it seemed only the rhythmic mixing of ingredients could drown it out. I had cans of pumpkin and bags of flour lying around from an earlier baking frenzy, so I decided to throw together a batch of these cookies.
The aroma started wafting through my home, enticing friends and family to gather in the kitchen. There’s something magical about fall baking—the anticipation, the flavors, the memories. When those cookies emerged from the oven, golden and soft, topped with velvety cream cheese frosting, smiles spread across everyone’s faces. It was a pure celebration of all things cozy and comforting!
So, let’s gather our ingredients and create some delightful pumpkin cookies that will surely make your home a happier place.
Ingredients
Here’s what you’ll need to make these fabulous pumpkin cookies:
-
2 1/2 cups (312 g) all-purpose flour
A standard in most baking recipes, this flour gives structure to your cookies. For a gluten-free alternative, try using an all-purpose gluten-free flour blend, but be sure to check if it contains xanthan gum for better texture. -
1 teaspoon baking powder
This helps the cookies rise and gives them a fluffy texture. If you’re out, you can substitute it with 1/4 teaspoon of baking soda combined with 1/2 teaspoon of lemon juice or vinegar. -
1 teaspoon baking soda
Essential for the perfect chewiness, baking soda activates when it meets acidity, like pumpkin. If you run out, simply double the baking powder—though the texture might vary slightly. -
1 tablespoon pumpkin pie spice (plus extra for sprinkling)
This mix usually includes cinnamon, nutmeg, ginger, and cloves, capturing the essence of fall in every bite. No pumpkin pie spice? No problem! Just mix equal parts cinnamon and nutmeg, and a pinch of ginger. -
1/2 teaspoon salt
Balances the sweetness. If you’re watching your sodium intake, feel free to reduce or omit the salt—the cookies will still be great! -
3/4 cup (170 g) unsalted butter (room temperature)
Butter adds richness and flavor. For a dairy-free option, try using coconut oil or vegan butter. Just let it soften to room temperature for best results. -
3/4 cup (150 g) granulated sugar
Sweetness galore! You can substitute a portion with coconut sugar for a deeper flavor, although the texture might change a touch. -
1/2 cup (100 g) packed light brown sugar
Adds moisture and a hint of caramel flavor. Dark brown sugar works too, giving a richer flavor if that’s what you prefer. -
1 1/4 cups (305 g) canned pumpkin puree
The star of the show! Make sure you get pure pumpkin puree, not pumpkin pie filling. If you want a fresher flavor, roast and blend fresh pumpkin. -
1 large egg (room temperature)
Helps bind everything together. Aquafaba (chickpea liquid) can replace this for a vegan option—just use 3 tablespoons! -
1 teaspoon pure vanilla extract
An aromatic touch that elevates flavors. Always opt for pure vanilla for the best taste.
For the Cream Cheese Frosting:
-
8 ounces (1 brick or 226 g) block-style cream cheese (softened but still cool)
This will give you that perfect creamy frosting. Forgetting to soften it? A quick 15-second zap in the microwave works wonders—just don’t melt it! -
1/4 cup (56 g) unsalted butter (softened but still cool)
Adds smoothness and some lusciousness to the frosting. You can use vegan butter here as well for a dairy-free frosting. -
1 teaspoon pure vanilla extract
Same deal as before—pure is best! It captures that warm, comforting aroma. -
1 3/4 cups (210 g) confectioners’ sugar (sifted)
To sweeten the deal! Sifting helps avoid lumps, which means a smoother frosting.
Step-by-Step Instructions
Now that we have all our goodies, let’s get cooking! Follow these steps for cookie perfection:
-
Preheat Your Oven: Start by preheating your oven to 350°F (175°C). This ensures your cookies bake evenly and gives them that perfect chewy texture.
-
Prepare Your Baking Sheets: Line two baking sheets with parchment paper. You want to be able to easily slide those cookies off once they’re baked—trust me, no one wants to wrestle with a cookie!
-
Mix the Dry Ingredients: In a bowl, whisk together the flour, baking powder, baking soda, pumpkin pie spice, and salt. This step is super important! Whisking helps evenly distribute the leavening agents and spices so that every cookie is perfectly flavored.
-
Cream the Butter and Sugars: In another bowl, beat the softened unsalted butter, granulated sugar, and brown sugar together until the mixture is light and fluffy—about 3-4 minutes. This infusion of air is what gives the cookies their wonderful texture. If you don’t have a mixer, don’t worry! You can use a whisk and some good ol’ elbow grease.
-
Add the Pumpkin, Egg, and Vanilla: Mix in the pumpkin puree, egg, and vanilla extract until fully combined. This will be a bit thick, and it’s okay! We’re diving into creamy goodness.
-
Combine Wet and Dry Ingredients: Gradually add the dry mixture to the wet mixture. Gently fold it in until just combined—be careful not to overmix, or we’ll lose that tender texture we’re aiming for!
-
Scoop and Shape: Use a cookie scoop or two tablespoons to drop the dough onto your prepared baking sheets. Make sure to leave some space between each one, as they will spread a little while baking. Sprinkle with extra pumpkin pie spice for that aromatic touch!
-
Bake the Cookies: Pop them into the oven for 10-12 minutes or until the edges are lightly golden. They may look slightly underbaked in the center; that’s perfect! Let them cool on the baking sheet for a few minutes before transferring them to a wire rack to cool completely.
-
Make the Frosting: While those cookies cool, let’s whip up the frosting! In a mixing bowl, beat the softened cream cheese and butter until creamy. Add that sweet vanilla and sifted confectioners’ sugar. Mix until smooth and fluffy. If it’s too thick, add a teaspoon of milk.
-
Frost Away: Once your cookies are completely cooled, spread that luscious frosting over the tops. Get all fancy, or go for a rustic smear—whatever feels good to you!
Serving Suggestions
These pumpkin cookies are a perfect treat for any occasion, whether it’s a cozy family gathering, a festive potluck, or just a personal indulgence. For a lovely presentation, stack them on a cute platter and sprinkle a bit of extra pumpkin pie spice or even some chopped pecans on top for a bit of crunch. You could also pair them with a warm cup of spiced chai or a classic pumpkin spice latte. Oh, the possibilities!
Recipe Variations
Now, let’s get creative! Here are some variations you might enjoy:
-
Chocolate Chip Pumpkin Cookies: Fold in a cup of semi-sweet chocolate chips at the end of the mixing process for a sweet surprise in every bite.
-
Nutty Delight: Add a half-cup of finely chopped walnuts or pecans to the dough for an extra crunch and nutty flavor.
-
Maple Cream Cheese Frosting: Instead of using vanilla extract, try maple syrup in your frosting for a delicious twist on flavor!
-
Vegan Version: Substitute the cream cheese with a vegan cream cheese alternative and use flax eggs in place of the regular egg.
-
Spiced-Up Cookies: Add a teaspoon of ground ginger or a sprinkle of cayenne pepper to the dough for a warming kick!
Chef’s Notes
Over the years, I’ve tinkered with this recipe, swaying between using more pumpkin or incorporating additional spices. I’ve observed that letting your dough chill for about 30 minutes really enhances the flavors and leads to a thicker cookie. Additionally, doubling the recipe just means more cookies to share (or hoard, no judgment here)!
FAQs and Troubleshooting
-
Why did my cookies spread too much?
If your cookies spread excessively, it might be because the butter was too warm. Always ensure the butter is softened but still cool before mixing. -
Can I freeze the dough?
Absolutely! If you’re not ready to bake them all, scoop the dough onto a baking sheet and freeze. Once firm, transfer to a freezer bag and store for up to three months. When you’re ready, bake directly from frozen—just add a couple of extra minutes to the baking time. -
How can I avoid a dense cookie?
Be cautious not to overmix after adding the flour; overmixing can lead to tougher cookies. Also, make sure your baking powder and baking soda are fresh. -
What can I do if my frosting is too runny?
If your frosting is too thin, try adding a bit more sifted confectioners’ sugar until it reaches a spreadable consistency.
Nutritional Info
Each cookie has approximately 120-150 calories, depending on your precise measurements and whether you’ve added any variations. They pack a delicious punch of carbohydrates and fats, primarily because of the sugars and butter. Looking for comfort? These will hit the spot! They also provide some dietary fiber from the pumpkin, making them a touch healthier. Enjoy them in moderation, and don’t forget—a little indulgence goes a long way!
Final Thoughts
Baking these Pumpkin Cookies with Cream Cheese Frosting isn’t just about the cookies themselves—it’s about creating an experience, sparking joy, and fostering connection through food. Whether you’re sharing these cookies with friends or savoring them solo, I hope you take a moment to enjoy the process and the delicious results.
So what are you waiting for? Grab that apron, preheat your oven, and let’s make some cookie magic happen! Don’t forget to share your creations—tag me at Feastical so I can see all your delicious masterpieces. Happy baking, everyone!
Print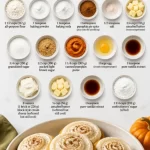
Pumpkin Cookies with Cream Cheese Frosting
- Total Time: 27 minutes
- Yield: 24 servings 1x
- Diet: Vegetarian
Description
Delightful pumpkin cookies topped with creamy cream cheese frosting, perfect for fall indulgence.
Ingredients
- 2 1/2 cups (312 g) all-purpose flour
- 1 teaspoon baking powder
- 1 teaspoon baking soda
- 1 tablespoon pumpkin pie spice (plus extra for sprinkling)
- 1/2 teaspoon salt
- 3/4 cup (170 g) unsalted butter (room temperature)
- 3/4 cup (150 g) granulated sugar
- 1/2 cup (100 g) packed light brown sugar
- 1 1/4 cups (305 g) canned pumpkin puree
- 1 large egg (room temperature)
- 1 teaspoon pure vanilla extract
- 8 ounces (226 g) block-style cream cheese (softened but still cool)
- 1/4 cup (56 g) unsalted butter (softened but still cool)
- 1 teaspoon pure vanilla extract
- 1 3/4 cups (210 g) confectioners’ sugar (sifted)
Instructions
- Preheat your oven to 350°F (175°C).
- Prepare your baking sheets by lining them with parchment paper.
- Mix the dry ingredients: whisk together the flour, baking powder, baking soda, pumpkin pie spice, and salt.
- Cream the butter, granulated sugar, and brown sugar until light and fluffy (about 3-4 minutes).
- Add the pumpkin puree, egg, and vanilla extract; mix until fully combined.
- Combine the wet and dry mixtures gradually, folding until just combined.
- Scoop and shape the dough onto baking sheets, spacing them out.
- Bake in the oven for 10-12 minutes until edges are lightly golden.
- Make the frosting by beating together cream cheese and butter until creamy, then mix in vanilla and sifted confectioners’ sugar.
- Frost the cooled cookies with the cream cheese frosting.
Notes
Chilling the dough for 30 minutes enhances flavors and texture; cookies can also be frozen before baking.
- Prep Time: 15 minutes
- Cook Time: 12 minutes
- Category: Dessert
- Method: Baking
- Cuisine: American
Nutrition
- Serving Size: 1 cookie
- Calories: 150
- Sugar: 10g
- Sodium: 100mg
- Fat: 7g
- Saturated Fat: 4g
- Unsaturated Fat: 3g
- Trans Fat: 0g
- Carbohydrates: 22g
- Fiber: 1g
- Protein: 2g
- Cholesterol: 20mg
Keywords: pumpkin cookies, cream cheese frosting, fall desserts, autumn baking, cozy treats