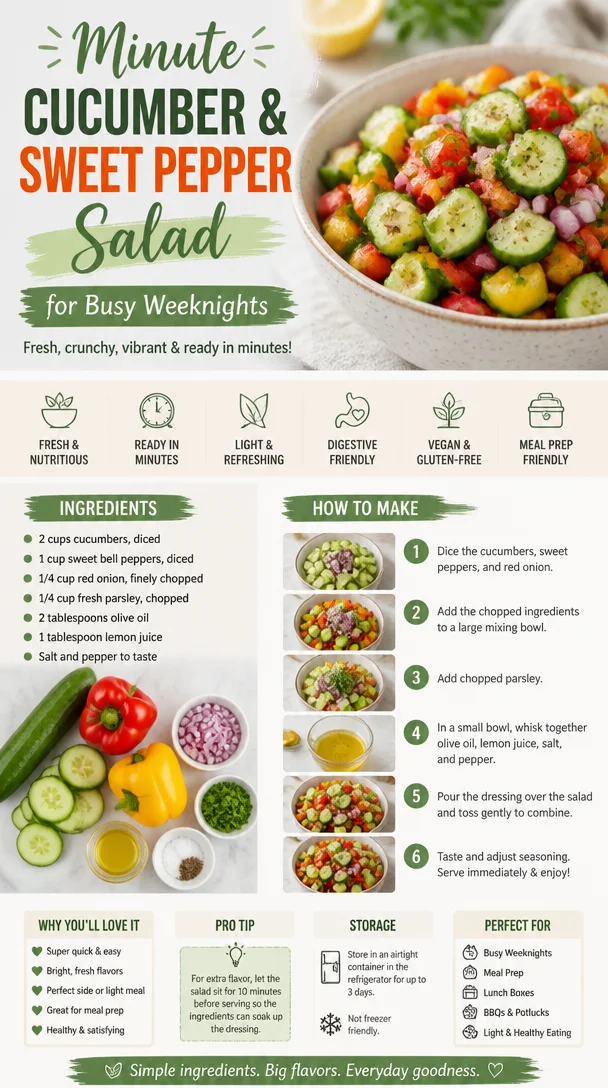
Minute Cucumber & Sweet Pepper Salad for Busy Weeknights
Cucumber Sweet Pepper Salad: A Refreshing Delight for Every Occasion
Hey there, food lovers! Beau Collier here, and today we’re diving into a dish that’s as colorful as it is crunchy – the Cucumber Sweet Pepper Salad. This vibrant salad is the ultimate fresh addition to your plate, whether it’s a sunny picnic, a potluck, or just a cozy dinner at home. We’re talking about a medley of crisp vegetables tossed with a zesty dressing that will have you coming back for seconds (or even thirds). So, if you’re ready to get your chop on, let’s dig into this delightful recipe!
A Salad for Every Mood
Cucumber Sweet Pepper Salad is more than just a dish; it’s a celebration of flavors and textures! This salad holds a special place in my heart, not just because of how refreshing and easy it is, but due to the sweet memories I have associated with it. Picture this: I’m about ten years old, hanging out in my grandmother’s kitchen during summertime. The sun shines through the window, illuminating the bright colors of the vegetables laid out on the counter. Grandma would let us help, with our little hands chopping cucumbers and peeling bell peppers, her laughter filling the air as she praised our efforts.
One day, she taught me a little trick – always choose the freshest ingredients you can find! She said it’s all about quality, and she was absolutely right. After we tossed this salad together, we’d sit outside, enjoying the simple pleasure of good food and great company. To this day, whenever I make a Cucumber Sweet Pepper Salad, I think back to those sunny afternoons spent with her, filled with love, laughter, and, of course, delicious food.
Ingredients
Let’s gather our ingredients, shall we? Here’s what you’ll need to make this refreshing Cucumber Sweet Pepper Salad:
-
2 cups cucumbers, diced: Pick firm, fresh cucumbers. If you want to switch it up, try English cucumbers – they have fewer seeds and a thinner skin!
-
1 cup sweet bell peppers, diced: A mix of colors (red, yellow, and orange) not only looks beautiful but also adds a variety of flavors to the salad.
-
1/4 cup red onion, finely chopped: Red onions offer a milder taste compared to yellow onions. If you’re not a fan, you can swap in green onions for a softer flavor.
-
1/4 cup fresh parsley, chopped: This adds a fresh herbaceous note. Don’t have parsley? Try cilantro for a different twist!
-
2 tablespoons olive oil: A good quality extra-virgin olive oil enhances flavor. If you’re looking for a lighter option, avocado oil works well too.
-
1 tablespoon lemon juice: Freshly squeezed is always best! If lemons aren’t available, vinegar (like apple cider or white wine) can serve as a substitute.
-
Salt and pepper to taste: Always season to your liking, as these simple ingredients elevate the flavors.
Step-by-Step Instructions
Now, let’s get cooking! Follow these steps for a perfect Cucumber Sweet Pepper Salad:
-
Prep Your Veggies: Grab a sharp chef’s knife and cutting board. Start by washing the cucumbers and sweet bell peppers under cold running water. Dice the cucumbers and peppers into bite-sized pieces and place them in a large mixing bowl. Chef tip: Use a serrated knife for the cucumbers; it helps slice through the skin with ease!
-
Chop the Onion: Finely chop the red onion. If you have sensitive eyes (like mine), soak the onion in cold water for a few minutes before chopping to reduce tears. Add to the mixing bowl with your diced veggies.
-
Toss in the Parsley: Chop your fresh parsley. It’s a great way to infuse an herbal note into the salad. Sprinkle the chopped parsley into the bowl; it’s like confetti for your salad!
-
Make the Dressing: In a small bowl, whisk together the olive oil and lemon juice. Season with salt and pepper. I love using a mason jar, so I can give it a good shake. The mix of oil and acidity really brings the salad to life!
-
Combine Everything: Pour the dressing over your chopped veggies. Use a wooden spoon to gently toss everything together until evenly coated. Be careful not to squish those delicate veggies!
-
Taste Test: Here’s the fun part! Taste the salad and adjust the seasoning as needed. This is your creation, so make it as zesty or mild as you like!
-
Chill & Serve: For the best flavor, let the salad chill in the fridge for about 30 minutes. This allows the flavors to meld beautifully. You can serve it as a side dish or a light lunch.
Serving Suggestions
Plating this salad can be a wonderful way to showcase its vibrant colors. Try serving it in a beautiful glass bowl to let the hues shine through! You can also consider these serving options:
- As a Side Dish: Pair it with grilled chicken or fish for a colorful and tasty accompaniment.
- Topped on Toast: Spoon it over crispy toasted bread for a crunchy starter or appetizer.
- In Lettuce Wraps: Use large lettuce leaves to create refreshing wraps for a fun, handheld meal.
Recipe Variations
Want to put your own spin on this salad? Here are some creative ideas to inspire your culinary creativity:
-
Feta Cheese Addition: Crumble some feta cheese on top for a creamy, tangy taste that pairs wonderfully with the freshness of the veggies.
-
Add Avocado: Toss in some diced avocado for a creamy texture and richness that complements the crunch of the cucumbers.
-
Make it Spicy: Add in diced jalapeños or a dash of red pepper flakes for a spicy kick.
-
Quinoa Booster: Amp up the protein content by mixing in cooked quinoa before serving. This makes it a filling meal on its own!
-
Fruit Fusion: For a sweet twist, try adding diced mango or peach for a fruity flavor that sings!
Chef’s Notes
Making this Cucumber Sweet Pepper Salad has always been one of my favorite things. It reminds me of those sunny days spent with Grandma, but I’ve also created it for countless gatherings since. This recipe has evolved over the years as I’ve experimented with flavors and ingredients, keeping the essence of refreshing simplicity at its core. Plus, it’s perfect for summer barbecues or backyard parties when veggies are in abundance!
FAQs and Troubleshooting
Q: Can I make this salad ahead of time?
A: Absolutely! It actually tastes even better after sitting for a while as the flavors meld. Just keep it covered in the fridge.
Q: My salad seems too watery. What can I do?
A: If you find that your salad is a bit watery, it may be due to excess moisture from the veggies. Make sure to pat them dry after washing. You can also drain off any liquid before serving.
Q: How long will leftovers last?
A: Store leftover salad in an airtight container in the fridge for up to 2 days. However, keep in mind that the cucumbers may soften over time.
Q: Can I add other vegetables?
A: Definitely! Feel free to mix in grated carrots, diced radishes, or even cherry tomatoes for added variety and flavor.
Nutritional Info
Now, let’s talk nourishment! This Cucumber Sweet Pepper Salad is packed with vitamins and minerals:
- Low-Calorie: Each serving is low in calories but high in flavor.
- Hydrating: With cucumbers being 95% water, they’re perfect for hydration.
- Nutrient-Rich: Bell peppers are high in Vitamin C, while parsley offers an array of essential nutrients and antioxidants.
Each ingredient contributes to a balanced dish that’s not only delicious but does wonders for your body!
Final Thoughts
Just like every great recipe, this Cucumber Sweet Pepper Salad is about connection – with food, memories, and the people we share it with. So grab your ingredients, make some memories in the kitchen, and savor every bite of this refreshing dish. Let it remind you of warmer days, simple joys, and the sweet flavor of togetherness. Thanks for joining me today at Feastical! Keep cooking and sharing the love, foodies!
PrintCucumber Sweet Pepper Salad
- Total Time: 30 minutes
- Yield: 4 servings 1x
- Diet: Vegetarian
Description
A vibrant salad with crisp cucumbers and sweet bell peppers, tossed in a zesty dressing. Perfect for any occasion!
Ingredients
- 2 cups cucumbers, diced
- 1 cup sweet bell peppers, diced
- 1/4 cup red onion, finely chopped
- 1/4 cup fresh parsley, chopped
- 2 tablespoons olive oil
- 1 tablespoon lemon juice
- Salt and pepper to taste
Instructions
- Prep Your Veggies: Wash the cucumbers and sweet bell peppers, then dice them and place in a large mixing bowl.
- Chop the Onion: Finely chop the red onion and add it to the bowl.
- Toss in the Parsley: Sprinkle the chopped parsley into the bowl.
- Make the Dressing: Whisk together olive oil and lemon juice, seasoning with salt and pepper.
- Combine Everything: Pour dressing over veggies and toss gently.
- Taste Test: Adjust seasoning as needed.
- Chill & Serve: Let salad chill in the fridge for about 30 minutes before serving.
Notes
This salad gets better as it sits, making it perfect for meal prep or gatherings.
- Prep Time: 15 minutes
- Cook Time: 0 minutes
- Category: Salad
- Method: Mixing
- Cuisine: Mediterranean
Nutrition
- Serving Size: 1 serving
- Calories: 120
- Sugar: 3g
- Sodium: 200mg
- Fat: 9g
- Saturated Fat: 1g
- Unsaturated Fat: 8g
- Trans Fat: 0g
- Carbohydrates: 10g
- Fiber: 3g
- Protein: 2g
- Cholesterol: 0mg
Keywords: salad, cucumber, bell peppers, healthy recipe, refreshing salad, summer dish
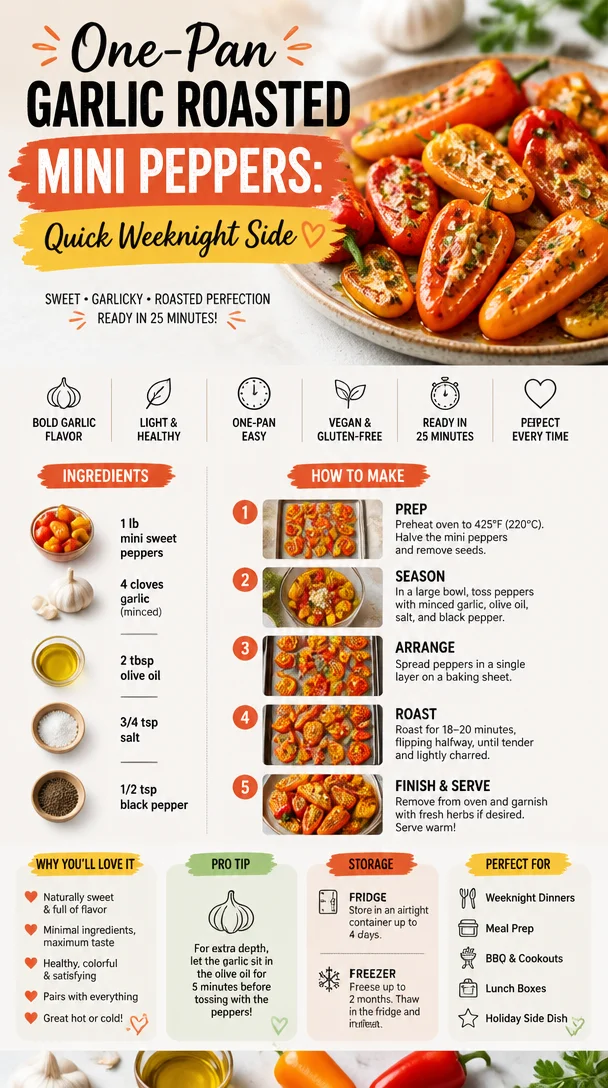
One-Pan Garlic Roasted Mini Peppers: Quick Weeknight Side
Garlic Roasted Mini Peppers: A Flavorful Delight
Hey there, fellow food lovers! I’m Beau Collier, and today we’re diving into a colorful, vibrant dish that’s guaranteed to brighten your day and your table: Garlic Roasted Mini Peppers. These little gems pack a punch of flavor and are super easy to whip up. Whether you’re looking for a zesty side dish, a party starter, or a simple snack to munch on, you’ve hit the jackpot with these beauties!
Introduction
Let’s be honest: everyone loves a good roasted pepper. They’re sweet, tender, and can elevate any dish from mundane to magnificent in just a matter of minutes. But what’s the secret? It’s all about roasting them to that perfect level of caramelization, infusing them with garlic goodness that’s simply irresistible.
Now, I can vividly remember my first encounter with mini peppers. I was at a local farmer’s market, and they caught my eye with their vibrant reds, yellows, and oranges. I couldn’t resist loading my basket full of these bite-sized beauties. Fast forward a few weekends later, and I found myself experimenting with different flavors and cooking methods. My kitchen transformed into a mini pepper paradise, and every time I roasted a batch, I was transported back to that sunny market day.
The great thing about garlic roasted mini peppers is they’re not just beautiful—they’re delicious! The creamy texture paired with the slight crunch makes every bite a burst of flavor. Plus, you’ll love the aroma that fills your kitchen as they roast. It’s like a warm hug welcomed by your senses, making this simple dish part of your comfort food repertoire.
As we cook together today, I want you to enjoy every step of the process. Embrace the smell of garlic wafting through your kitchen and the vibrant colors of these mini peppers. So, grab your favorite apron, crank up that oven, and let’s get cooking!
Personal Story
I still remember the summer of my culinary awakening. One beautiful Saturday, I invited a few close friends over for a backyard BBQ. Of course, I went a little overboard planning the menu—it’s just how I roll! Amidst the marinated meats and scrumptious salads, I wanted something unique to wow my guests.
That’s when I remembered those mini peppers. I quickly roasted a tray, drizzling them with olive oil, sea salt, and plenty of garlic. As they baked away, the anticipation built in the air. Once they were done, the vibrant colors and those savory smells brought everyone rushing over to the table.
The moment they took their first bite, I was flooded with compliments. People went back for more, and those mini peppers quickly became the star of the meal. Everyone loved how easy they were to make and how they complemented the barbecue spread perfectly. It was a small moment, but I realized how food brings people together and creates lasting memories. Whenever I make garlic roasted mini peppers now, I’m transported back to that summer BBQ, surrounded by laughter and good company.
Ingredients
To make these delectable Garlic Roasted Mini Peppers, you’ll need the following ingredients:
-
Mini Sweet Peppers: These bite-sized beauties come in a variety of colors and have a sweet, mild flavor. You can use red, yellow, or orange ones, or a mix for a colorful presentation. If you can’t find mini sweet peppers, feel free to use regular bell peppers, though you may need to adjust the roasting time.
-
Garlic: Fresh garlic is a game-changer in this recipe. It adds depth and aromatic flavor. You can substitute it with garlic powder in a pinch, though fresh will always yield the best results. Mince it finely or thinly slice it to achieve different flavor levels.
-
Olive Oil: A good quality extra virgin olive oil enhances the dish’s richness. It’s perfect for roasting and adds a wonderful flavor. If you’re looking for a lighter option, you can use avocado oil or a bit of melted butter instead.
-
Salt: A sprinkling of sea salt enhances all the natural flavors. If you want to experiment, consider using smoked salt for an added depth of flavor, or keep it simple with table salt.
-
Pepper: Freshly cracked black pepper is key to balancing the sweetness of the peppers. You can use white pepper for a different taste or even a pinch of cayenne for a little kick.
Step-by-Step Instructions
Now that we’ve gathered our ingredients, let’s dive into the cooking process. It’s time to transform those vibrant mini peppers into a mouthwatering dish.
-
Preheat Your Oven
Start by preheating your oven to 425°F (220°C). This high temperature will help caramelize the peppers, bringing out their natural sweetness. -
Prepare the Peppers
Rinse your mini sweet peppers under cold water and pat them dry with a clean kitchen towel. Slice each pepper in half lengthwise and remove the seeds. Feel free to leave the stems on for presentation—just a little more rustic and charming! -
Mince Garlic
While your oven heats up, let’s prep the garlic! Peel the garlic cloves and mince them finely. If you love a stronger garlic flavor, don’t be shy—add more! Just be aware that this recipe is all about balance, so taste as you go. -
Toss with Oil and Seasoning
In a large bowl, combine the halved peppers, minced garlic, olive oil, salt, and pepper. Use your hands to toss everything together until the peppers are well-coated. This is where the magic begins; the oil carries the flavors and helps them roast to perfection. -
Spread on a Baking Sheet
Arrange the seasoned peppers in a single layer on a baking sheet. Make sure they have some space between them—crowding the pan will lead to steaming rather than roasting, and we want those lovely browned edges! -
Roast in the Oven
Now’s the fun part! Place the baking sheet in the preheated oven and roast for about 20–25 minutes. The sweet smell of garlic will fill your kitchen—absolutely delightful! Give them a little toss halfway through to ensure even cooking. -
Check for Doneness
You’ll know they’re done when the peppers are tender and slightly charred around the edges. Keep an eye on them during the last few minutes—they can go from perfectly roasted to burnt pretty quickly! -
Taste and Adjust Seasoning
Once they’re ready, take them out of the oven and allow them to cool for a few minutes. Taste one pepper and see if it needs more salt or pepper. That’s the beauty of cooking—you get to personalize your dish! -
Serve and Enjoy!
Transfer the roasted mini peppers to a serving platter. They can be served warm or at room temperature, depending on your preference.
Serving Suggestions
When plating your garlic roasted mini peppers, think about how to enhance their presentation and flavor. A simple serving suggestion is to position them on a beautiful platter, and drizzle a little extra olive oil on top for sheen.
For an extra visual punch, consider adding fresh herbs like parsley or basil on top—their bright green colors will contrast beautifully with the vibrant peppers. You can also offer a bowl of feta cheese or goat cheese on the side for a creamy finish that complements the sweetness of the peppers.
These mini peppers can stand alone as a side dish, but they’re also wonderful as part of a charcuterie board or a tasty addition to salads. Serve them alongside some crusty bread for dipping, or toss them into pasta for an added twist.
Recipe Variations
Now that you’ve mastered the basic garlic roasted mini peppers, let’s have some fun with variations! Here are a few creative twists to try:
-
Honey Balsamic Glaze: Drizzle some honey balsamic reduction over the roasted peppers for a sweet-tangy finish.
-
Spicy Sriracha Kick: Add a splash of sriracha sauce into the oil mixture before roasting for a spicy punch.
-
Cheesy Delight: Top the peppers with shredded cheese (like mozzarella or parmesan) during the last 5 minutes of cooking for a melty finish.
-
Mediterranean Flair: Toss some olives and sun-dried tomatoes in with the peppers pre-roast for a Mediterranean twist.
-
Herb-Infused Oil: Instead of plain olive oil, blend in some fresh herbs like oregano or thyme with the oil for extra flavor.
Chef’s Notes
This recipe has become one of my go-to favorites over the years. It’s versatile, forgiving, and can be adapted to whatever you have on hand. The first time I made these, I overdid it on the garlic—who knew that much could be overwhelming? After some trial and error, I found the right balance that pleases most palates.
The best part is that garlic roasted mini peppers always bring smiles and satisfaction. Whenever friends come over for dinner, I know I can count on these lovely little bites to steal the show. Plus, they make a killer leftovers snack—if you have any left, that is!
FAQs and Troubleshooting
-
Why are my peppers not browning?
Make sure your oven is preheated and that you’re using high heat. Give the peppers space on the baking sheet to roast properly. -
Can I use frozen mini peppers?
While fresh is best, you can use frozen mini peppers. Just be sure to thaw and drain any excess water before tossing them with oil and seasoning. -
What can I do with leftovers?
Leftover roasted peppers are great in salads, on sandwiches, or blended into a pesto. They also freeze well for future meals! -
How do I know when the peppers are done?
They should be tender to the fork and have slightly charred edges. Keep an eye on them to avoid overcooking!
Nutritional Info
While garlic roasted mini peppers are a treat, they’re also packed with nutritional goodness! Mini sweet peppers are low in calories, making them a guilt-free addition to any meal. They’re rich in vitamins A and C, helping to boost your immune system and keep your skin glowing.
Olive oil, the base of our recipe, is known for its heart-healthy monounsaturated fats, which can help lower bad cholesterol. Plus, garlic has antioxidant properties and has been linked to various health benefits, including improved heart health. So, you can enjoy this dish knowing you’re also treating your body well!
Final Thoughts
So, there you have it—garlic roasted mini peppers that are bound to become a staple in your kitchen. They’re simple, satisfying, and downright delicious!
As you gather around the table with friends and family, remember that the best part of cooking is not just the end result but the experience—and the memories made together through good food. So the next time you find yourself at the grocery store, don’t forget to snag those little sweet peppers.
I can’t wait to hear how your garlic roasted mini peppers turn out. Let’s keep this culinary journey going—next up, I might just share my secret to a creamy garlic dip that pairs perfectly with these beauties. Happy cooking, and eat with joy!
PrintGarlic Roasted Mini Peppers
- Total Time: 35 minutes
- Yield: 4 servings 1x
- Diet: Vegetarian
Description
A colorful and flavorful dish of garlic roasted mini peppers, perfect as a side or snack.
Ingredients
- 1 pound Mini Sweet Peppers
- 4 cloves Garlic, minced
- 2 tablespoons Olive Oil
- 1 teaspoon Sea Salt
- 1/2 teaspoon Freshly Cracked Black Pepper
Instructions
- Preheat your oven to 425°F (220°C).
- Rinse the mini sweet peppers under cold water and pat them dry. Slice each pepper in half lengthwise and remove the seeds.
- Mince the garlic cloves finely.
- Combine the halved peppers, minced garlic, olive oil, salt, and pepper in a large bowl and toss until well coated.
- Arrange the seasoned peppers in a single layer on a baking sheet.
- Roast in the oven for about 20–25 minutes, tossing halfway through for even cooking.
- Check for doneness; they should be tender and slightly charred.
- Taste and adjust seasoning as needed.
- Serve the roasted mini peppers warm or at room temperature.
Notes
For a colorful presentation, use a mix of red, yellow, and orange mini peppers. Optionally, drizzle with extra olive oil and garnish with fresh herbs before serving.
- Prep Time: 10 minutes
- Cook Time: 25 minutes
- Category: Side Dish
- Method: Roasting
- Cuisine: Mediterranean
Nutrition
- Serving Size: 1 serving
- Calories: 150
- Sugar: 3g
- Sodium: 200mg
- Fat: 10g
- Saturated Fat: 1.5g
- Unsaturated Fat: 8g
- Trans Fat: 0g
- Carbohydrates: 15g
- Fiber: 4g
- Protein: 2g
- Cholesterol: 0mg
Keywords: mini peppers, roasted peppers, garlic, healthy side dish, easy recipes, Mediterranean
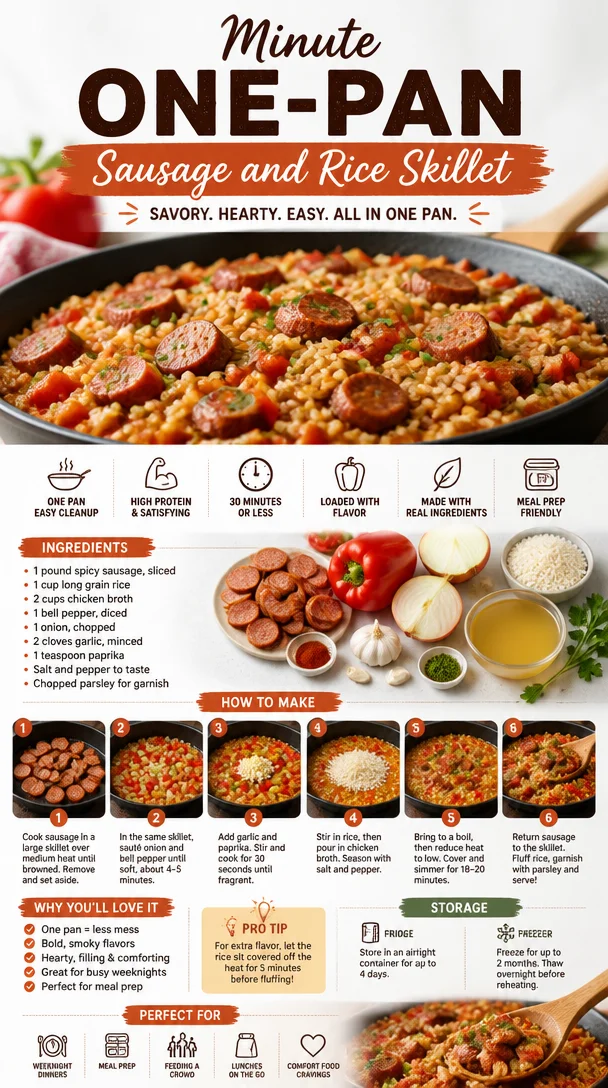
Minute One-Pan Sausage and Rice Skillet
Welcome to My Kitchen: A Flavorful Journey with Sausage and Rice Skillet!
Hey there, it’s Beau Collier! Today we’re diving into one of my absolute favorite comfort food dishes: the Sausage and Rice Skillet. This dish isn’t just about filling your belly; it’s about bringing warmth and family vibes right into your kitchen. There’s something about a skillet meal that feels cozy, right? It’s like a big hug with every bite!
When I think of the Sausage and Rice Skillet, I’m flooded with memories of cooking side by side with my family, always laughing, always dancing to some upbeat tunes while we chopped and sautéed. The aroma of spicy sausage sizzling in the pan mixed with the sweetness of the bell peppers and the savory garlic filled the air, creating anticipation that drew everyone into the kitchen. This dish embodies my philosophy that good food creates good times, whether it’s a weeknight meal or a weekend gathering with friends.
So, if you’re craving something hearty and delicious that’s packed with flavor yet simple enough for any cook, stick around! Let’s whip up this sensational Sausage and Rice Skillet that’ll leave you and your loved ones begging for seconds.
A Slice of My Kitchen Memory
Years ago, I decided to host friends for a cozy get-together at my place. I wanted to bring some warmth to what I thought would be a dreary night, so I made my beloved Sausage and Rice Skillet. I remember the laughter filling my tiny kitchen as we prepped the ingredients together. The banter was as hearty as the dish itself!
One of my friends was a vegetarian, so we had a little fun improvising with plant-based sausage, and somehow, it sparked an impromptu cooking class—with everyone’s knives clattering, bell peppers flying, and spices wafting in the air. By the end of the night, we not only relished our meal together but also created deeper connections. That night, amidst food and laughter, we forged beautiful memories and realizations: food is not just about eating; it’s about sharing, connecting, and simply celebrating life.
So let’s keep that spirit alive today and jump right into cooking our Sausage and Rice Skillet!
Ingredients
Before we sauté our hearts out, let’s gather the beautiful ingredients that will elevate our dish:
-
1 Pound Spicy Sausage, Sliced
Opt for your favorite sausage—Italian, Spanish, or any variant that tickles your taste buds! If you’re in the mood for lighter fare, turkey or chicken sausage works great too. -
1 Cup Long Grain Rice
This type of rice cooks up perfectly for skillet meals, but feel free to switch it up with brown rice for a nutty flavor and extra fiber—just adjust your cooking time accordingly! -
2 Cups Chicken Broth
The flavor enhancer! Use low-sodium broth to control the saltiness. For a vegetarian twist, opt for vegetable broth which will also lend a different depth to the dish. -
1 Bell Pepper, Diced
Any color works! Red, green, or yellow all offer their own unique sweetness and color pop. You could also substitute with other veggies like zucchini or even corn. -
1 Onion, Chopped
Onions are like the flavor base for almost any dish. I usually stick to yellow or white for their balance of sweetness and sharpness. Shallots can make a gourmet replacement if you’re feeling fancy! -
2 Cloves Garlic, Minced
Garlic provides that pungent kick that rounds everything out. If you’re a fellow garlic-lover, feel free to add more; it’s hard to go wrong here. -
1 Teaspoon Paprika
Paprika adds a smokiness and slight warmth to the dish. For an extra punch, consider using smoked paprika! -
Salt and Pepper to Taste
These classic add-ins will elevate your dish even further. Just remember to taste along the way so you can find that perfect seasoning balance. -
Chopped Parsley for Garnish
A sprinkle of fresh parsley not only adds color but a burst of freshness on top of the warm, hearty meal. If you like other herbs, cilantro or basil can bring unique flavors to the table too.
Step-by-Step Instructions
Alright, fellow food lovers, let’s get cooking! If you follow these steps, you’ll have a vibrant and flavor-packed Sausage and Rice Skillet in no time!
-
Sizzle the Sausage
In a large skillet, heat a drizzle of oil over medium heat. Add the sliced sausage and allow it to brown for about 5–7 minutes. You want it to get that nice crispy edge. This is the flavor foundation, folks! Pro tip: Don’t rush this process; a little caramelization can brighten the taste sky-high. -
Sauté the Veggies
Add the chopped onion and diced bell pepper to the skillet with the sausage. Sauté until they’re softened—about 3–4 minutes. This is where the aromas start to dance in your kitchen! -
Add Garlic
Toss in the minced garlic and paprika, cooking for an additional minute. Garlic burns quickly, so don’t stroll away—keep an eye on it! -
Stir in the Rice
Add the uncooked rice to the pan, stirring to coat it in all those juicy flavors. Allow it to toast for about 2 minutes. This step infuses the rice with lovely undertones right from the start. -
Pour in the Broth
Gradually add the chicken broth, stirring everything together. Bring it to a gentle boil. Once bubbling, reduce the heat to low, cover, and let it simmer. Cook until the rice is tender and has absorbed most of the liquid—about 15–20 minutes. Remember not to peek too often; we want that steam to work its magic! -
Season and Serve
Once the rice is fluffy and cooked through, taste and adjust seasoning with salt and pepper as necessary. Add chopped parsley for a fresh finish. Serve it warm straight from the skillet to your plates.
A little chef hack: You can keep the skillet warm on a low setting while you set the table!
Serving Suggestions
This Sausage and Rice Skillet is all about simplicity and flavor. For an inviting presentation, serve it straight from the skillet for that rustic charm. Here are a few serving ideas to elevate the experience:
- Garnish generously with extra parsley or even a sprinkle of red pepper flakes for an added kick.
- Pair it with a side salad—something fresh and crunchy, like a classic Caesar or a simple arugula salad with lemon vinaigrette will do wonders to balance the dish’s richness.
- You could also consider some warm, crusty bread on the side. It’s perfect for scooping up those last delicious bits of sausage and rice.
Recipe Variations
One of the beauties of this dish lies in its flexibility! Here are some fun variations you can play around with:
-
Vegetarian Twist
Swap out the sausage for plant-based options and use vegetable broth instead of chicken broth. -
Spicy Kick
Incorporate diced jalapeños or sprinkle in some cayenne pepper to take the heat up a notch! -
Cheesy Goodness
For the cheese lovers, stir in a generous handful of shredded cheese right before serving. Cheddar or pepper jack works wonders! -
Adding More Veggies
Mix in some spinach, kale, or even frozen peas during the last few minutes of cooking for added nutrition and color. -
Zesty Lemon Drizzle
A squeeze of fresh lemon juice over the finished dish will brighten it up beautifully.
Chef’s Notes
As with every recipe I share, the Sausage and Rice Skillet has evolved over time. I remember my early attempts at making it—so eager but perhaps a little too overzealous with spices! I learned that the balance of flavors is key. Now, I aim for simplicity and heartiness, which creates the perfect atmosphere most home cooks crave.
One warm memory I have of this dish is trying it out during my college years with a group of fellow aspiring chefs. Let’s just say there were some experimental results, but every mishap led to laughter and delicious conversations about what makes food memorable.
FAQs and Troubleshooting
Here are a few common questions you might have while whipping up this delight:
-
What if my rice is still crunchy?
If the rice isn’t tender yet after the recommended cooking time, add a splash more broth or water and cover the skillet to allow it to steam a bit longer. -
Can I use brown rice instead?
Absolutely! Just keep in mind that brown rice has a longer cooking time—about 40–45 minutes. -
How can I store leftovers?
Let the skillet cool completely, then transfer it into an airtight container. It’ll keep nicely in the fridge for about 3–4 days. -
Can I freeze this dish?
Yes! This meal freezes well for up to 3 months. To reheat, you can simply warm it on the stove with a splash of broth.
Nutritional Info
If you’re interested in the nutritional aspect, here’s a rough estimate per serving (includes 4 servings total):
- Calories: Approx. 450
- Protein: 22g
- Fat: 22g
- Carbohydrates: 46g
- Fiber: 2g
- Sodium: 600mg (depending on broth content)
For more specific dietary needs, feel free to adjust ingredients—switch to low-fat sausage, reduce sodium in broth, or increase veggies for a fiber boost!
Final Thoughts
And there you have it—the delectable Sausage and Rice Skillet! This is more than just a recipe; it’s a journey filled with memories, flavors, and fellowship. Each time I make it, I’m reminded of those cherished moments in my kitchen with family and friends. You can make this dish as simple or as adventurous as you like, yet it’s bound to please at any table.
So, what are you waiting for? Gather your ingredients, tie on that apron, and let’s create some delicious memories together! Bon appétit!
PrintSausage and Rice Skillet
- Total Time: 35 minutes
- Yield: 4 servings 1x
- Diet: Paleo
Description
A hearty Sausage and Rice Skillet packed with flavor, perfect for weeknight meals or gatherings with friends.
Ingredients
- 1 Pound Spicy Sausage, Sliced
- 1 Cup Long Grain Rice
- 2 Cups Chicken Broth
- 1 Bell Pepper, Diced
- 1 Onion, Chopped
- 2 Cloves Garlic, Minced
- 1 Teaspoon Paprika
- Salt and Pepper to Taste
- Chopped Parsley for Garnish
Instructions
- Sizzle the sausage in a large skillet over medium heat until browned, about 5–7 minutes.
- Sauté the onion and bell pepper until softened, about 3–4 minutes.
- Add minced garlic and paprika, cooking for 1 minute.
- Stir in uncooked rice and toast for 2 minutes.
- Pour in broth, bring to a boil, then cover and simmer until rice is tender, about 15–20 minutes.
- Season with salt and pepper, then add chopped parsley before serving.
Notes
For a vegetarian option, use plant-based sausage and vegetable broth. Adjust cooking times for brown rice.
- Prep Time: 10 minutes
- Cook Time: 25 minutes
- Category: Main Course
- Method: Sautéing
- Cuisine: American
Nutrition
- Serving Size: 1 serving
- Calories: 450
- Sugar: 3g
- Sodium: 600mg
- Fat: 22g
- Saturated Fat: 8g
- Unsaturated Fat: 10g
- Trans Fat: 0g
- Carbohydrates: 46g
- Fiber: 2g
- Protein: 22g
- Cholesterol: 60mg
Keywords: sausage, rice, skillet, comfort food, easy dinner
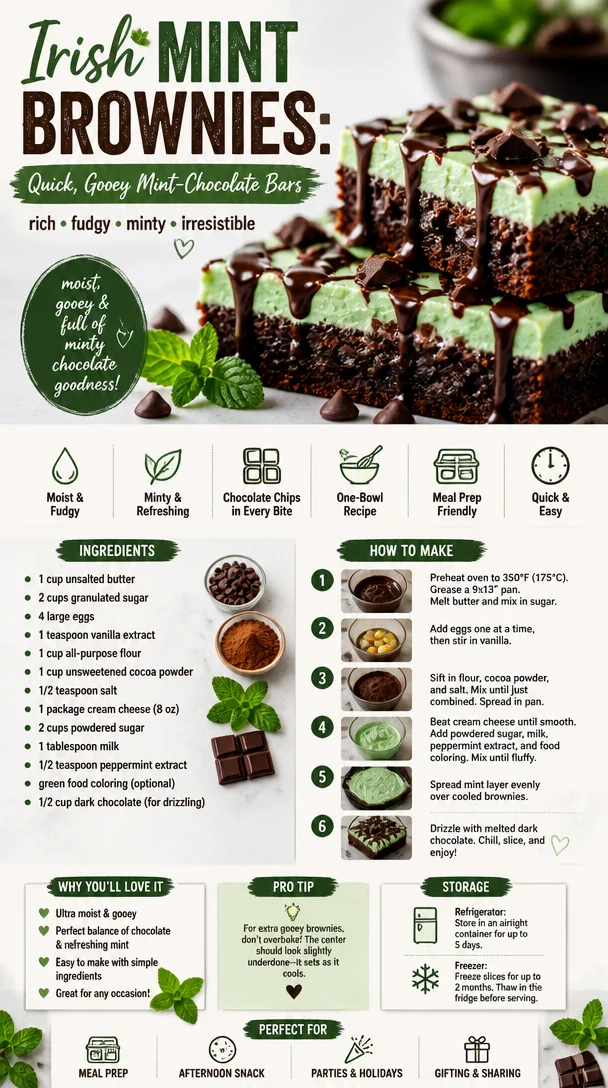
Irish Mint Brownies: Quick, Gooey Mint-Chocolate Bars
Indulge in the Luck of the Irish: Irish Mint Brownies
Hey there, friends! I’m Beau Collier, and today, I’m inviting you into my kitchen for a delicious journey inspired by my love for food and a touch of Irish charm! If you’re ready to indulge in something sweet, rich, and bursting with flavor, you’ve landed in the perfect spot—because we’re making Irish Mint Brownies!
These brownies are no ordinary dessert; they’re a divine combination of fudgy chocolate with a cool mint twist, satisfying both your sweet tooth and your craving for comfort food. Just picture it—a plate of these luscious brownies on your table, a cup of steaming coffee by your side, and the laughter of friends and family filling the air. Trust me, there’s something magical about sharing food that brings us all together.
Now, why Irish Mint Brownies, you ask? Well, first off, they’re absolutely delightful. But there’s a sprinkle of nostalgia too. Growing up, my Irish grandmother (who could whip up the most amazing treats) would always bake brownies for family gatherings. She had this secret little touch of mint that made her brownies unforgettable. Those memories of licking the spoon, waiting impatiently for them to cool, and devouring the fudgy squares with loved ones inspired me to create my twist on her classic recipe, adding that refreshing minty flair I adore.
So roll up your sleeves, grab your apron, and let’s dive into the wonderful world of Irish Mint Brownies!
A Taste of Nostalgia: My Connection to Brownies
Growing up in a bustling household, my kitchen was always a hub of activity and laughter, especially when it was brownie day. My grandmother’s brownies were legendary—rich, gooey, and absolutely packed with chocolate goodness. I remember standing on my tiptoes to peek into the mixing bowl, inhaling the comforting scent of melted butter and cocoa powder wafting through the air.
One particular memory sticks out: the day my grandma decided to try something new by adding mint extract to her brownie batter. I was curious and a bit skeptical; could chocolate and mint really work together? But after the first heavenly bite, I was a convert! The cool mintiness danced with the fudgy chocolate in a way that made every nibble feel like a party in my mouth. That first experience inspired my creation of Irish Mint Brownies, merging cherished family traditions with a playful twist.
So let’s recreate that moment—imagine yourself stirring together the flavors of nostalgia and getting ready to impress your loved ones. Trust me; they’ll be begging for seconds!
Ingredients for Heavenly Irish Mint Brownies
Ready to gather your ingredients? Here’s what you’ll need to make these scrumptious Irish Mint Brownies:
-
1 cup unsalted butter
This is the base of our brownies and brings richness to every bite. For a lighter option, you could try using applesauce or coconut oil, although the texture may vary slightly. -
2 cups granulated sugar
Sweetness is key! Substitute with brown sugar for a touch of caramel flavor or a sugar alternative to make them lower-calorie. -
4 large eggs
Eggs provide structure and moisture. If you’re vegan, you can use flax eggs (1 tablespoon ground flaxseed + 2.5 tablespoons water per egg) as a substitute! -
1 teaspoon vanilla extract
A pantry staple that enhances the warm flavors. Feel free to experiment with almond or mint extract for added depth! -
1 cup all-purpose flour
This helps to hold everything together. For a gluten-free option, you could use a gluten-free flour blend. -
1 cup unsweetened cocoa powder
The heart and soul of our brownies—look for high-quality cocoa for the best flavor. Dutch-processed cocoa will give a deeper chocolate taste. -
1/2 teaspoon salt
A pinch of salt balances out the sweetness—don’t skip it! You can use sea salt for a hint of crunch. -
1 package cream cheese (8 oz)
This creamy layer adds moisture and a rich texture to the mint filling. Try a vegan cream cheese for a dairy-free version. -
2 cups powdered sugar
Sweetens that luscious cream cheese layer perfectly. For a sugar-free option, there are powdered erythritol blends that work wonders. -
1 tablespoon milk
Just a splash will make the cream cheese layer smooth and spreadable. Almond or oat milk can be used for a dairy-free alternative. -
1/2 teaspoon peppermint extract
This is the star in our minty cream cheese filling—adjust to taste if you like it mintier or less intense! -
Green food coloring (optional)
Just for fun! If you want a festive, vibrant touch, go ahead and add a few drops. -
1/2 cup dark chocolate (for drizzling)
Melt it to drizzle on top of the finished brownies for that perfect finishing touch! Use semi-sweet or even white chocolate for a twist.
Let’s Bake: Step-by-Step Instructions
Alright, my fellow food enthusiasts, let’s roll up our sleeves and get cracking on these Irish Mint Brownies! Here’s how you can whip them up in no time:
-
Preheat Your Oven:
Set your oven to 350°F (175°C). Preheating is crucial for the even baking of your brownies. -
Prepare Your Pan:
Grease a 9×13-inch baking pan with butter or line it with parchment paper for easy removal. Lining it also makes cleanup a breeze! -
Melt the Butter:
In a medium saucepan, melt the butter over low heat. Stir it occasionally until it’s completely melted. This step is fragrant, so take a moment to enjoy the aroma! -
Mix Sugar and Eggs:
Once melted, remove the saucepan from the heat. Whisk in the granulated sugar until combined. Then, mix in the eggs, one at a time, ensuring each is fully incorporated before adding the next. Don’t be afraid to whisk vigorously! This step helps create a fudgier texture. -
Add Vanilla Extract:
Stir in the vanilla extract. Can you smell that? It’s a delightful prelude to the heavenly goodness about to unfold! -
Combine Dry Ingredients:
In another bowl, whisk together the flour, cocoa powder, and salt. Slowly add this dry mixture to the wet ingredients, folding gently until just combined. Be careful not to overmix—lumps are welcome here! -
Pour Batter into Pan:
Spread the brownie batter evenly into your prepared pan. It’s thick, luscious, and oh-so tempting—resist the urge to lick that spatula just yet! -
Bake:
Place in the preheated oven and bake for about 25-30 minutes. Keep an eye on them; you want a toothpick to come out with moist crumbs, not completely clean, for that perfect fudgy finish. -
Cool:
Allow brownies to cool in the pan for about 30 minutes before frosting. Patience, my friend! -
Prepare the Mint Layer:
In a medium bowl, beat together the softened cream cheese and powdered sugar. Add the milk, peppermint extract, and a few drops of food coloring (if you’re using it). Blend until smooth and creamy. -
Spread the Mint Layer:
Carefully spread the minty cream cheese over the cooled brownies for a pretty, even layer. -
Chill:
If you can, pop the brownies back in the fridge for about an hour to set the cream cheese layer. (It’s worth the wait!) -
Melt Dark Chocolate:
While the brownies chill, melt the dark chocolate in a microwave or a double boiler. Drizzle it over the mint layer for that gorgeous finishing touch. -
Slice and Serve:
Once set, slice these beautiful brownies into squares and serve. And yes, this is definitely the moment to indulge!
Serving Suggestions: Make It Special
Now that you’ve worked your magic in the kitchen, it’s time to show off those Irish Mint Brownies! Presentation can elevate your dessert game, so try these serving ideas:
-
Chocolate Drizzle: Spruce up each brownie square with an extra chocolate drizzle for visual appeal and an extra dose of decadence.
-
Mint Garnish: Add a sprig of fresh mint on each serving plate for a pop of color and freshness. It’s all about those visual cues!
-
Pair with Ice Cream: A scoop of vanilla or mint chocolate chip ice cream on the side makes for a delightful contrast in temperature.
-
Dust with Powdered Sugar: A light dusting of powdered sugar adds a touch of elegance and extra sweetness.
Serve them up at parties, or enjoy them in your pajamas on a cozy night in. Either way, they’ll make anyone who tries them feel like they’ve just received a warm hug.
Recipe Variations: Fun Twists to Try
These Irish Mint Brownies are already divine, but if you’re feeling adventurous, why not tweak them? Here are some fun variations you can try:
-
Nutty Bliss: Stir in a cup of chopped nuts (like walnuts or pecans) to the brownie batter for added crunch!
-
Mint Chocolate Chip Swirl: Sprinkle mini chocolate chips into the cream cheese layer before spreading for an extra chocolatey mint explosion.
-
Irish Cream Infusion: Add a splash of Irish cream liqueur to the brownie batter for an adult twist (perfect for St. Patrick’s Day!).
-
Fudgy Peppermint Bark Topper: Instead of a chocolate drizzle, top with crushed peppermint bark for an extra festive touch.
-
Lavender Mint Brownies: Infuse your mint layer with a pinch of culinary lavender for a unique floral note that pairs beautifully with the chocolate.
Feel free to mix and match to create your perfect brownie bliss!
Chef’s Notes: This Recipe’s Journey
Every recipe has a story, right? This one’s no different! My Irish Mint Brownies have evolved over time from my grandmother’s classic brownie recipe. With a few tweaks here and there—primarily the mint infusion and cream cheese layer—I feel like I’ve struck the perfect balance between nostalgia and innovation.
And here’s a fun kitchen mishap! Once, I accidentally added way too much peppermint extract—let’s just say it was minty enough to clear sinuses! But that little mistake taught me the importance of flavor balance, and now I always advise a taste test along the way.
Every time I create these brownies, I’m reminded of those cozy family gatherings where laughter and love were in abundance. It’s more than just a dessert; it’s a connection to my roots, and I hope it becomes a cherished recipe in your home too!
FAQs and Troubleshooting
Now you might have some questions or run into a few hiccups. No worries, let’s tackle them together!
-
Why are my brownies dry?
Overbaking is usually to blame! Stick to the suggested baking time and check with a toothpick. If it comes out with moist crumbs, they’re perfect! -
How do I store leftover brownies?
Store them in an airtight container at room temperature for about 3-4 days. To keep them fresh longer, place them in the fridge. -
Can I freeze these brownies?
Absolutely! Once cooled, wrap them tightly in plastic wrap and store in a freezer-safe container for up to 3 months. Just thaw in the fridge before serving. -
How can I adjust the mint flavor?
If you want a more pronounced mint flavor, consider adding a bit more peppermint extract (always start with small amounts to avoid overpowering!). You can also mix in crushed mint candies if you’d like some texture.
Nutritional Info: Indulging Wisely
Let’s talk about nutrition! While these Irish Mint Brownies are definitely a treat, here’s a rough breakdown for one brownie (based on 24 servings):
- Calories: 250
- Total Fat: 12g
- Saturated Fat: 7g
- Cholesterol: 50mg
- Sodium: 70mg
- Total Carbohydrates: 33g
- Dietary Fiber: 1g
- Sugars: 20g
- Protein: 2g
Keep in mind, these are decadent treats! Moderation is key, so enjoy your indulgence and savor every bite.
Final Thoughts: Let’s Bake Some Memories
So here we are, friends, at the end of this brownie adventure. I hope you’re feeling inspired to bake a batch of Irish Mint Brownies that will fill your kitchen with warmth and smiles. Remember, cooking is about connection, creativity, and a sprinkle of love! Share these goodies with family and friends, or keep them all to yourself for a cozy night in (no judgment here!).
Every time I whip these up, I’m reminded of laughter, love, and the magic that happens when we gather around the table. So go on, grab your apron, fondly think of family memories, and embrace your inner chef. The world deserves a little more sweet and minty joy, don’t you think?
Happy baking, and remember, good food leads to great memories. Now, let’s dig in!
PrintIrish Mint Brownies
- Total Time: 45 minutes
- Yield: 24 servings 1x
- Diet: Vegetarian
Description
Delicious fudgy chocolate brownies with a refreshing mint twist, inspired by family traditions.
Ingredients
- 1 cup unsalted butter
- 2 cups granulated sugar
- 4 large eggs
- 1 teaspoon vanilla extract
- 1 cup all-purpose flour
- 1 cup unsweetened cocoa powder
- 1/2 teaspoon salt
- 1 package cream cheese (8 oz)
- 2 cups powdered sugar
- 1 tablespoon milk
- 1/2 teaspoon peppermint extract
- Green food coloring (optional)
- 1/2 cup dark chocolate (for drizzling)
Instructions
- Preheat your oven to 350°F (175°C).
- Prepare a 9×13-inch baking pan with butter or parchment paper.
- Melt the butter over low heat in a medium saucepan.
- Mix the melted butter with the granulated sugar until fully combined.
- Add the eggs one at a time, mixing well after each addition.
- Stir in the vanilla extract.
- Combine the flour, cocoa powder, and salt in a separate bowl, then fold into the wet mixture.
- Pour the brownie batter into your prepared pan, spreading it evenly.
- Bake for about 25-30 minutes until a toothpick comes out with moist crumbs.
- Cool in the pan for 30 minutes.
- Prepare the mint layer by beating cream cheese, powdered sugar, milk, and peppermint extract until smooth.
- Spread the mint layer evenly on the cooled brownies.
- Chill in the fridge for about an hour to set.
- Melt the dark chocolate and drizzle over the mint layer.
- Slice and serve your delicious brownies!
Notes
For variations, consider adding nuts or chocolate chips to the batter.
- Prep Time: 15 minutes
- Cook Time: 30 minutes
- Category: Dessert
- Method: Baking
- Cuisine: Irish
Nutrition
- Serving Size: 1 brownie
- Calories: 250
- Sugar: 20g
- Sodium: 70mg
- Fat: 12g
- Saturated Fat: 7g
- Unsaturated Fat: 4g
- Trans Fat: 0g
- Carbohydrates: 33g
- Fiber: 1g
- Protein: 2g
- Cholesterol: 50mg
Keywords: brownies, dessert, mint chocolate, Irish recipes, sweet treats
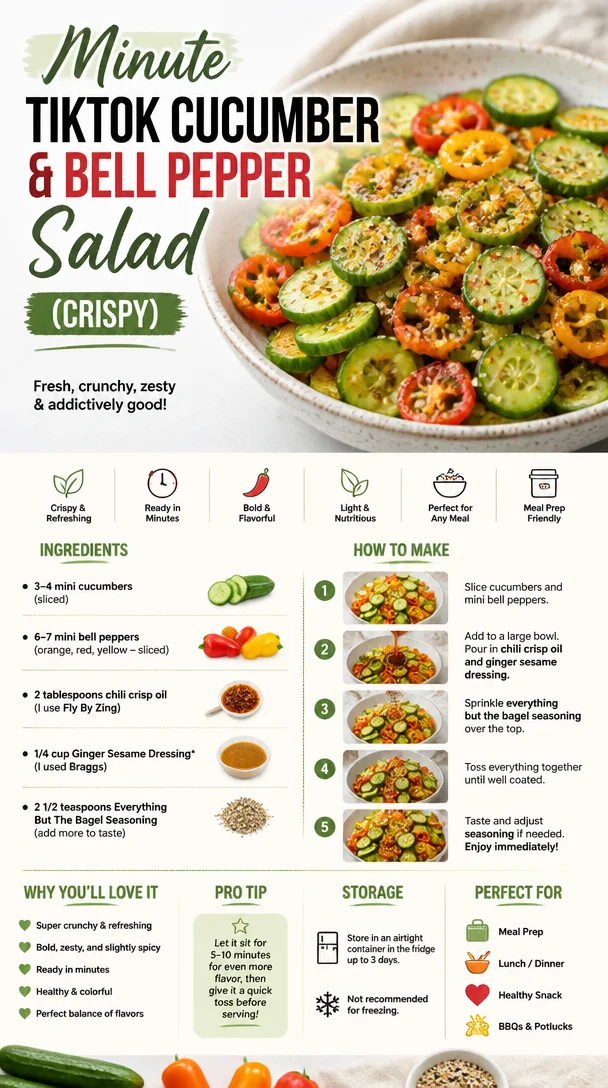
Minute TikTok Cucumber & Bell Pepper Salad (Crispy)
The Refreshing Delight of TikTok Cucumber & Bell Pepper Salad
Hey there, food lovers! Welcome back to Feastical, where we’re diving into a fresh, refreshing dish that’s taken TikTok by storm—Cucumber & Bell Pepper Salad with a touch of that oh-so-satisfying chili crisp oil. This salad speaks to the essence of what we love at Feastical: simple, bold flavors that make your taste buds dance and your kitchen feel oh-so-inviting!
If you’re tired of the same old greens or need a pop of color and crunch on your plate, this salad is just what you need. Picture this: crispy cucumbers paired with vibrant bell peppers, all drenched in a zingy Ginger Sesame Dressing, and topped off with a drizzle of chili crisp oil. It’s like a party for your mouth, and trust me, you’re going to want to show up hungry!
A Bite of Nostalgia
Let me take you back to a warm summer evening at my grandmother’s house. Her backyard was a melting pot of colors—flowers in full bloom and vegetables ripening in her lovingly tended garden. I remember her whipping up a simple, yet delightful salad much like this one. She’d pull cucumbers straight from the vine and gather bell peppers while we sat on the porch, chatting and laughing under the setting sun.
Those memories are what inspire this salad. It’s not just a dish; it’s a reminder of the joy that comes from simple, fresh ingredients and the love that binds us together. As a child, I’d tear into those crunchy bites of cucumbers and peppers, savoring every mouthful as if it were the most decadent treat. Now, as an adult, it gives me pure joy to recreate that magic, and share it with all of you!
Ingredients
Let’s gather our ingredients for this colorful salad:
-
3-4 mini cucumbers (sliced)
Crisp, refreshing, and hydrating! Mini cucumbers pack all the crunch without being too watery. Don’t have minis? Regular cucumbers work just fine; just peel them for easier slicing. -
6-7 mini bell peppers (orange, red, yellow; sliced)
A rainbow of flavors! These mini bell peppers are sweet and vibrant, making the dish pop visually and tastewise. Feel free to use any color combination you prefer, or switch to regular bell peppers if that’s what you have on hand. -
2 tablespoons chili crisp oil (I use Fly By Zing)
This is where the magic begins! The chili crisp oil adds a lovely depth of flavor and a bit of heat. If you’re looking for a milder option, olive oil combined with a sprinkle of red pepper flakes is a great substitute. -
1/4 cup Ginger Sesame Dressing
I swear by Bragg’s for a quick and flavorful touch. This dressing enhances the crisp veggies beautifully. If you’re feeling adventurous, you can whip up a homemade version using sesame oil, ginger, and rice vinegar. -
2 1/2 teaspoons Everything But The Bagel Seasoning
This seasoning mix adds that extra umami and toasty crunch we all love. Feel free to go heavier if you’re a fan of that robust flavor!
Step-by-Step Instructions
Now that we have our ingredients ready, let’s get cooking! Here’s how to bring this fabulous salad to life:
-
Slice the Cucumbers
Start by washing your mini cucumbers thoroughly. Slice them thinly to maximize crunch! If you prefer them a bit thicker, go ahead; just note that this could affect the refreshing bite. Arrange them in a medium-sized bowl and set aside. -
Prep the Bell Peppers
Next, take your mini bell peppers and slice them in half, removing any seeds. Then, cut them into good-sized strips or bite-sized pieces—whatever your heart desires! Add these colorful beauties to the bowl with the cucumbers.Chef’s Tip: The more varied your color palette, the more enticing your salad will be!
-
Drizzle the Dressings
Pour in the Ginger Sesame Dressing and chili crisp oil over the cucumber and pepper mixture. The flavors will mingle beautifully. Give everything a gentle toss with your hands or a spatula, ensuring every piece is coated in the zesty goodness. -
Season to Taste
Here’s where the magic happens! Sprinkle in the Everything But The Bagel Seasoning, starting with 2 1/2 teaspoons. Toss the salad again, and then taste. Adjust the seasoning as needed—don’t be shy! If you like more spice, feel free to throw in an extra splash of chili oil or additional seasoning. -
Chill It Out
For the best flavor, let your salad sit in the fridge for at least 10-15 minutes. This allows the vegetables to soak up those delicious dressings. Plus, it makes the salad refreshing and cool, perfect for those hot summer days!
Serving Suggestions
Plating is where you can really let your creativity shine. Grab your favorite serving bowl or a large platter to display this colorful salad. For an extra touch of presentation, you can garnish with a sprinkle of sesame seeds or some additional Everything But The Bagel Seasoning on top.
Serve it as a delightful side dish to grilled meats, or make it the star of a light lunch spread. Pour yourself a glass of something bubbly or iced tea, and enjoy the company of friends or family while you savor every crunchy bite!
Recipe Variations
Feeling creative? Here are a few variations to explore with this salad:
- Add Protein: Toss in some cooked shrimp, grilled chicken, or chickpeas to make it a heartier meal.
- Herb It Up: Chop fresh herbs like cilantro, mint, or parsley for an added freshness. Each herb will give a different twist, so pick what’s best for your taste buds.
- Fruit Twist: For a sweet surprise, toss in some diced mango or pineapple! The sweetness pairs excellently with the chili crisp oil.
- Noodle Addition: Love a crunchier texture? Add some cooked ramen noodles, chilled, or soba noodles to the mix.
- Dress It Differently: Swap the Ginger Sesame Dressing for a Tahini Dressing for a nutty flavor or a simple vinaigrette for lighter notes.
Chef’s Notes
One of my favorite things about this salad is how adaptable it is. Over the years, I’ve swapped ingredients based on what’s in season or what’s hanging out in my fridge. Experimenting is the heart of cooking!
I remember a summer where I had an abundance of zucchini. I decided to toss in some spiralized zucchini alongside my cucumbers and bell peppers. What was initially a salad turned into a veggie extravaganza that had friends raving. Kitchen adventures like these are what make cooking so much fun!
FAQs and Troubleshooting
Q: Can I make this salad ahead of time?
A: Absolutely! You can prep the veggies and keep them in an airtight container for a day. Just wait to add the dressing until you’re ready to serve to keep everything crunchy.
Q: What if I don’t have mini bell peppers?
A: No worries! Regular bell peppers will work just as well. Just make sure to cut them into bite-sized pieces!
Q: How spicy is this salad?
A: The spice level can be adjusted based on how much chili crisp oil you add. Start with a small amount and taste as you go along.
Q: Can I use another dressing?
A: For sure! Any vinaigrette or creamy dressing you enjoy could be a great base. Just remember to balance it with the chili crisp oil for that added kick!
Nutritional Info
This TikTok Cucumber & Bell Pepper Salad is not only delicious but also packed with nutrients. Each serving is low in calories and high in vitamins—perfect for a healthy snack or side dish!
- Calories: Around 60 per serving
- Protein: 1g
- Carbohydrates: 8g
- Dietary Fiber: 2g
- Fat: 3g
- Vitamin C: A hearty boost thanks to the peppers!
Feel free to adjust components based on your dietary preferences—this salad is great for various diets, including vegan and gluten-free!
Final Thoughts
There you have it, folks—my take on the viral TikTok Cucumber & Bell Pepper Salad! This dish embodies everything we love about cooking: simplicity, joy, and the ability to share delightful moments with others. As you dive into your next kitchen adventure, don’t forget that food is more than just sustenance; it’s a way to connect, celebrate, and create lasting memories.
So grab your spatula, pull up a chair, and let’s make cooking a joyous celebration. Here’s to fresh ingredients, vibrant flavors, and the delightful experience of creating something beautiful in the kitchen. Happy cooking, and until next time!
PrintRefreshing Cucumber & Bell Pepper Salad
- Total Time: 15 minutes
- Yield: 4 servings 1x
- Diet: Vegan
Description
A vibrant salad featuring crispy cucumbers and sweet bell peppers, drizzled with zesty Ginger Sesame Dressing and a touch of chili crisp oil.
Ingredients
- 3–4 mini cucumbers, sliced
- 6–7 mini bell peppers (orange, red, yellow), sliced
- 2 tablespoons chili crisp oil
- 1/4 cup Ginger Sesame Dressing
- 2 1/2 teaspoons Everything But The Bagel Seasoning
Instructions
- Slice the cucumbers. Wash and slice thinly; arrange in a bowl.
- Prep the bell peppers. Cut in half, remove seeds, and slice into strips. Add to the bowl.
- Drizzle the dressings. Pour the Ginger Sesame Dressing and chili crisp oil over veggies and toss gently.
- Season to taste. Add Everything But The Bagel Seasoning, adjust seasoning as desired.
- Chill it out. Let the salad sit in the fridge for 10-15 minutes for best flavor.
Notes
This adaptable salad can be customized with different veggies or proteins based on personal preference.
- Prep Time: 15 minutes
- Cook Time: 0 minutes
- Category: Salad
- Method: Mixing
- Cuisine: American
Nutrition
- Serving Size: 1 serving
- Calories: 60
- Sugar: 3g
- Sodium: 200mg
- Fat: 3g
- Saturated Fat: 0g
- Unsaturated Fat: 2g
- Trans Fat: 0g
- Carbohydrates: 8g
- Fiber: 2g
- Protein: 1g
- Cholesterol: 0mg
Keywords: cucumber salad, bell pepper salad, TikTok recipe, refreshing salad, healthy salad
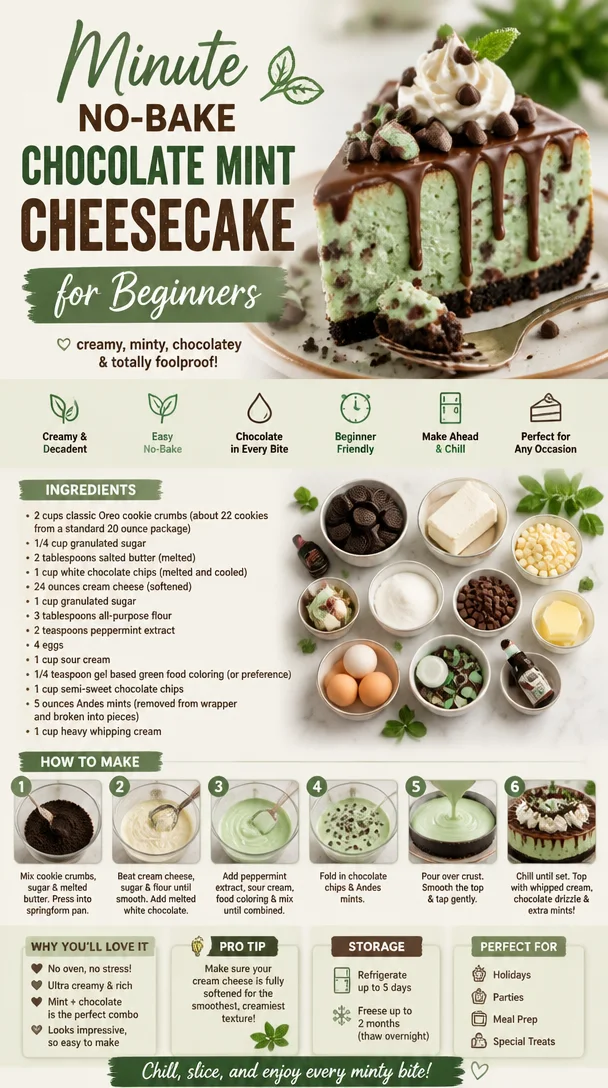
Minute No-Bake Chocolate Mint Cheesecake for Beginners
Chocolate Mint Cheesecake: A Decadent Delight
Hey there, fellow food lover! If you’re looking to bring a little indulgence into your life, then you’ve hit the jackpot with this Chocolate Mint Cheesecake recipe. Whether it’s for a holiday celebration, a birthday bash, or just because you deserve a treat (and trust me, you absolutely do!), this cheesecake is a showstopper. With its creamy layers, chocolatey goodness, and a refreshing hint of mint, this dessert will wow your friends, family, and, most importantly, you!
Personal Story
Let me take you back to my childhood for a moment. Imagine a warm summer evening, the scent of fresh mint wafting through the air, accompanied by laughter and the clinking of glasses. It was at my grandmother’s house, where family gatherings meant an abundance of food and love. One of her unforgettable creations was a minty chocolate dessert that she would whip up every year for our summer BBQs. The way it melted in your mouth was simply magic. Fast forward years later, and those memories inspire me whenever I create a chocolate mint dish, especially this cheesecake.
Remembering how my family couldn’t get enough of Grandma’s minty delight, I set out to craft a recipe that marries velvety cream cheese with the nostalgic flavors I once cherished. So, roll up those sleeves, and let’s make your kitchen the heart of your home, just like my grandma’s was!
Ingredients
Let’s get down to business, shall we? Here’s what you’ll need to make this show-stopping Chocolate Mint Cheesecake:
-
2 cups classic Oreo cookie crumbs (about 22 cookies from a standard 20-ounce package)
These delicious crumbs form the base of your cheesecake, providing a rich, chocolatey flavor and contrasting texture. You can substitute with chocolate graham cracker crumbs if you’re feeling adventurous! -
1/4 cup granulated sugar
This little bit of sugar enhances the sweetness of the crust. Feel free to swap it with coconut sugar for a different twist. -
2 tablespoons salted butter (melted)
Butter brings everything together in that crust and gives it that irresistible richness. Unsalted butter works too if you’re watching your sodium intake! -
1 cup white chocolate chips (melted and cooled)
White chocolate adds a creamy sweetness that complements the cheesecake perfectly. If you prefer, dark chocolate can give it a bolder flavor. -
24 ounces cream cheese (softened)
Cream cheese is the star of your cheesecake show—smooth and creamy! Make sure it’s softened to room temperature for easy mixing. -
1 cup granulated sugar
Just like the crust, this sugar sweetens your filling. Again, feel free to explore with alternatives like agave nectar. -
3 tablespoons all-purpose flour
This will stabilize the filling and keep it from cracking. For a gluten-free option, use almond flour or gluten-free flour blends. -
2 teaspoons peppermint extract
This is where your chocolate mint magic happens! If you’re not a fan of peppermint, try vanilla extract instead for a unique flavor. -
4 large eggs
Eggs help bind everything together and give that lovely cheesecake texture. You can use flax eggs for a vegan option. -
1 cup sour cream
Sour cream adds tanginess and creaminess, elevating the cheesecake to divine levels. Greek yogurt is a great substitute here, too! -
1/4 teaspoon gel-based green food coloring (or to your preference)
This is completely optional but makes for a lovely presentation! If you’re feeling natural, consider spirulina powder for a green hue. -
1 cup semi-sweet chocolate chips
These will take your cheesecake to another level of chocolaty goodness. Dark chocolate can be a rich alternative if you want to amp up the flavor. -
5 ounces Andes mints (removed from wrappers and broken into pieces)
The crushed mints add bursts of minty flavor throughout the cheesecake. If you can’t find them, peppermint candies work just as well! -
1 cup heavy whipping cream
To elevate this dessert with a light and fluffy whipped topping, heavy cream is your best friend! You can use coconut cream for a dairy-free twist.
Step-by-Step Instructions
Ready to bring this delicious cheesecake to life? Let’s dive into the fun part—cooking!
-
Preheat Your Oven
Set your oven to 325°F (160°C). Preheating ensures an evenly baked cheesecake, so don’t skip this step! -
Prepare the Crust
In a medium bowl, combine the Oreo crumbs, granulated sugar, and melted butter. Mix until everything is well combined and resembles wet sand. Now, pack this mixture tightly into the bottom of a 9-inch springform pan. I like to use the bottom of a measuring cup to press down evenly. Bake for 10 minutes, then let it cool while you prep the filling. This helps create a perfect foundation for your cheesecake. -
Make the Filling
In a large bowl, beat the softened cream cheese with an electric mixer until it’s smooth and creamy—about 2-3 minutes. Add in the granulated sugar, flour, and melted white chocolate, continuing to beat until everything is fully incorporated. -
Add the Eggs
Add the eggs one at a time, mixing on low speed after each addition just until blended. Remember, you want to avoid overmixing at this stage to keep your cheesecake nice and dense instead of airy. -
Flavors Galore!
Drizzle in the peppermint extract, sour cream, and the gel-based food coloring if using. Blend until everything is well combined and luscious. -
Incorporate the Minty Goodness
Gently fold in the semi-sweet chocolate chips and broken Andes mints. This is where the magic happens, as you create that delightful combination of chocolate and mint! -
Pour and Bake
Pour this dreamy filling over your cooled crust. Spread evenly with a spatula and bake in the preheated oven for about 50-60 minutes, or until the center is set but still slightly wobbly. You can tell it’s done when a gentle jiggle remains in the center—this helps ensure that your cheesecake won’t crack! -
Cool Down
After baking, turn off the oven and let the cheesecake cool in the oven with the door slightly ajar for about 1 hour. This gradual cooling helps prevent cracking. Then, remove it from the oven and cool to room temperature before refrigerating for at least 4 hours (or overnight, if you can resist!). This allows the flavors to meld perfectly. -
Whip Up the Topping
When you’re ready to serve, whip that heavy cream until stiff peaks form—about 3-5 minutes with an electric mixer. Spread or pipe it generously over the cheesecake. You can even sprinkle additional crushed Andes mints on top for that extra flair!
Serving Suggestions
When it comes to serving this Chocolate Mint Cheesecake, let’s elevate the experience! Here’s how to plate it beautifully:
- Carefully remove the sides of the springform pan and place the cheesecake on a flattering cake stand or a decorative plate.
- Slice your cheesecake with a hot, dry knife for nice clean cuts—just run it under hot water, wipe it clean, and cut.
- For an added flourish, top each slice with a dollop of whipped cream and a sprig of fresh mint. A drizzle of chocolate sauce could also give it that “wow” factor!
- Pair it with a scoop of vanilla ice cream or a steaming cup of coffee for a delightful treat!
Recipe Variations
Let’s get creative! Here are some fun variations you can try with this recipe:
- Chocolate Hazelnut Cheesecake: Swap out the mint extract for hazelnut syrup and add chopped hazelnuts for a delightful twist!
- Peanut Butter Swirl: Add dollops of creamy peanut butter into the cheesecake filling and use a knife to create swirls before baking.
- Nut-Free Option: Omit all mint candy and use cacao nibs instead for a crunch, or add a touch of orange zest for a citrusy contrast.
- Vegan Cheesecake: Substitute cream cheese with a vegan alternative, use aquafaba instead of eggs, and coconut cream for the topping for a luscious treat everyone can enjoy.
- Flavor Enhancements: Add chocolate or coffee liqueur to the filling for adults-only cheesecake. Just be mindful of the overall liquid content!
Chef’s Notes
This Chocolate Mint Cheesecake has become a staple in my dessert repertoire over the years. It’s evolved as I’ve experimented with different crusts and fillings, but the essence remains the same: comfort and joy. I remember once, during a particularly busy holiday season, I whipped up four of these cakes just to satisfy my friends’ cravings! They brought everyone together around the table, and there were smiles all around.
Oh, and one funny kitchen moment: I once forgot to add the eggs, and while it tasted good, let’s just say the texture was more reminiscent of fudge than cheesecake. We all had a good laugh about that one!
FAQs and Troubleshooting
-
Why did my cheesecake crack?
Cracking can occur due to rapid temperature changes. Allow your cheesecake to cool slowly in the oven and refrigerate it if possible to help maintain its creaminess. -
How do I know when my cheesecake is done baking?
The cheesecake should look set but still slightly jiggly in the center when you remove it from the oven. If it appears too jiggly, give it a few more minutes. -
Can I freeze my cheesecake?
Absolutely! Once it’s fully set, wrap it tightly in plastic wrap and foil and store it in the freezer for up to 3 months. Thaw it in the fridge overnight before serving. -
What if my filling is too runny?
This may happen if it’s not baked long enough or if too much mixing has occurred after adding the eggs. Leaving it in the oven longer (but not too long!) may help, or you can always try adding a little extra flour or cornstarch in future attempts.
Nutritional Info
Before diving into dessert, it’s always good to have a little nutritional perspective! Per slice (assuming 12 slices), this Chocolate Mint Cheesecake clocks in at approximately:
- Calories: 450
- Total Fat: 30g
- Saturated Fat: 18g
- Cholesterol: 105mg
- Sodium: 320mg
- Total Carbohydrates: 40g
- Fiber: 2g
- Sugars: 30g
- Protein: 6g
Keep in mind, these numbers can vary based on your specific ingredients and portion sizes, but they give you a ballpark idea of the deliciousness you’re indulging in!
Final Thoughts
So there you have it! A Chocolate Mint Cheesecake that not only satisfies your sweet tooth but also creates sweet memories in your kitchen. Baking is such a joyful experience, and sharing that with loved ones is what it’s all about. Whether you’re serving this to guests or treating yourself—because you absolutely deserve it—know that you’re creating a piece of happiness, bite by scrumptious bite.
Now, go ahead, gather those ingredients, and let’s start baking your delicious Chocolate Mint Cheesecake. Good luck, and happy baking! 🍰
PrintChocolate Mint Cheesecake
- Total Time: 90 minutes + 4 hours chilling
- Yield: 12 servings 1x
- Diet: Vegetarian
Description
A decadent chocolate mint cheesecake with creamy layers and a refreshing hint of mint, perfect for any celebration or indulgence.
Ingredients
- 2 cups classic Oreo cookie crumbs (about 22 cookies)
- 1/4 cup granulated sugar
- 2 tablespoons salted butter (melted)
- 1 cup white chocolate chips (melted and cooled)
- 24 ounces cream cheese (softened)
- 1 cup granulated sugar
- 3 tablespoons all-purpose flour
- 2 teaspoons peppermint extract
- 4 large eggs
- 1 cup sour cream
- 1/4 teaspoon gel-based green food coloring (optional)
- 1 cup semi-sweet chocolate chips
- 5 ounces Andes mints (broken into pieces)
- 1 cup heavy whipping cream
Instructions
- Preheat your oven to 325°F (160°C).
- Prepare the crust by combining the Oreo crumbs, granulated sugar, and melted butter in a bowl. Pack this mixture into the bottom of a 9-inch springform pan and bake for 10 minutes, then let it cool.
- Make the filling by beating the softened cream cheese on medium speed until smooth. Add in the granulated sugar, flour, and melted white chocolate, and mix until fully incorporated.
- Add the eggs one at a time, mixing on low speed after each addition.
- Drizzle in the peppermint extract, sour cream, and food coloring (if using), then blend until well combined.
- Fold in the semi-sweet chocolate chips and broken Andes mints gently.
- Pour the filling over the cooled crust and spread it evenly. Bake for 50-60 minutes, or until the center is set but still slightly wobbly.
- Cool the cheesecake in the oven with the door slightly ajar for 1 hour. Then remove and cool to room temperature before refrigerating for at least 4 hours or overnight.
- Whip the heavy cream until stiff peaks form. Spread or pipe it over the cheesecake and garnish with additional crushed Andes mints if desired.
Notes
For a different flavor, swap peppermint extract for vanilla extract. Make sure to let the cheesecake cool slowly to avoid cracking.
- Prep Time: 30 minutes
- Cook Time: 60 minutes
- Category: Dessert
- Method: Baking
- Cuisine: American
Nutrition
- Serving Size: 1 slice
- Calories: 450
- Sugar: 30g
- Sodium: 320mg
- Fat: 30g
- Saturated Fat: 18g
- Unsaturated Fat: 10g
- Trans Fat: 0g
- Carbohydrates: 40g
- Fiber: 2g
- Protein: 6g
- Cholesterol: 105mg
Keywords: chocolate cheesecake, mint dessert, creamy cheesecake
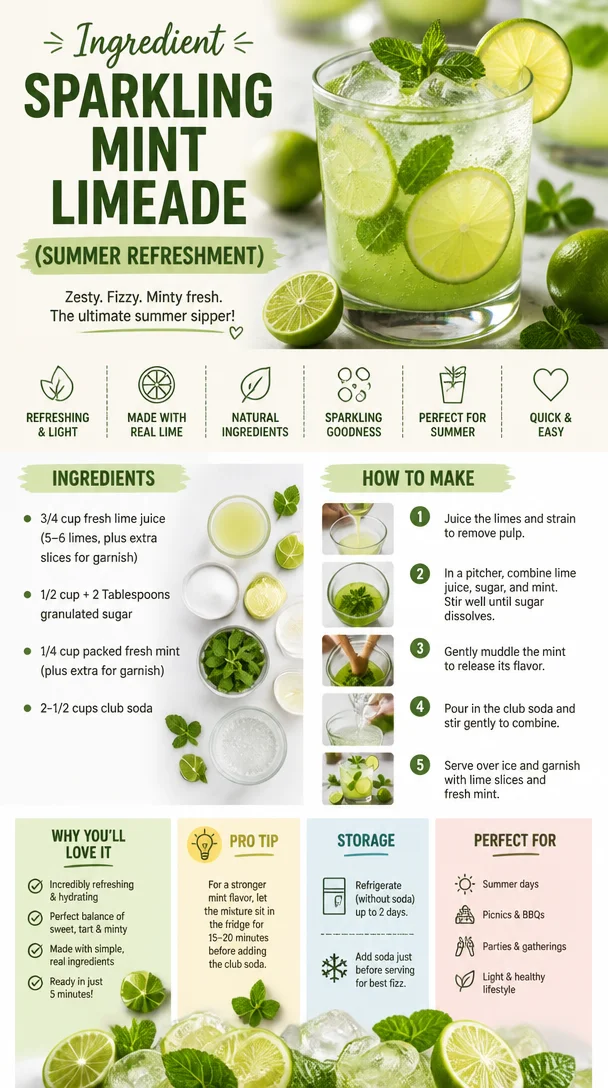
Ingredient Sparkling Mint Limeade (Summer Refreshment)
Sparkling Mint Limeade: A Refreshing Twist on a Classic Drink
Hey food enthusiasts! Let’s gather around the kitchen, dust off those cocktail glasses (or mason jars—no judgment here!), and whip up a thirst-quenching drink that screams summer: Sparkling Mint Limeade! This vibrant concoction is not just a drink; it’s a nostalgia bomb that brings back sun-soaked afternoons and laughter-filled gatherings. With zesty lime, fresh mint, and a delightful fizz, it’s the perfect way to cool down when the heat is on!
A Taste of Nostalgia
Let me take you back to my childhood, a time when the simple joys of life were embodied in lazy days spent outdoors. Picture this: my family’s backyard, adorned with colorful kites flying high against a bright blue sky, and laughter ringing out like music. The highlight of those afternoons? My grandmother’s famous limeade.
Every summer, she would gather us around the kitchen counter, the air thick with excitement and a hint of lime. As she fussed over fresh limes and mint leaves, we would eagerly await our turn for a taste test. The vibrant green of the mint mingled perfectly with the tangy lime, while the bubbles from the soda danced enthusiastically in our cups. It was infectious! We learned to mix, taste, and adjust until it was just right. This sparkling mint limeade wasn’t just a drink; it was a celebration of togetherness and creativity. Fast forward to today, and I still find myself reminiscing while sipping this refreshing drink. Let’s recreate that magic together!
Ingredients
Here’s what you’ll need for the ultimate Sparkling Mint Limeade:
-
3/4 cup fresh lime juice (about 5-6 limes)
- Fresh lime juice is the star of the show! For a sweeter kick, use an extra lime or two (and save some slices for garnish).
-
1/2 cup + 2 tablespoons granulated sugar
- This sugar helps balance out the tartness of the limes. For a healthier alternative, feel free to use honey or agave syrup. Start with a bit less if you’re watching sugar intake!
-
1/4 cup packed fresh mint (plus extra for garnish)
- Fresh mint is essential for that aromatic freshness. Dried mint can be used in a pinch, but nothing beats the vibrancy of fresh leaves.
-
2-1/2 cups club soda
- The bubbly base! Club soda adds that fantastic fizz we all love. For a fruitier variation, swap with flavored sparkling water (like lime or mint).
Step-by-Step Instructions
Ready to get mixing? Here’s how to make this refreshing treat, step by step:
-
Juicing the Limes:
- Start by rolling the limes on the counter to break down the membranes—this helps them release more juice. Cut them in half and juice them into a measuring cup, removing any seeds. Aim for about 3/4 cup of juice. If you find some extra limes lying around, go ahead and juice a couple more for an extra zing!
-
Mint Magic:
- While you’re juicing, grab your mint. Pile those leafy green wonders into your palm, and give them a gentle slap (yes, you heard that right!). This “bruising” releases the essential oils, boosting the minty flavor. Chop it roughly and set aside some leaves for garnish.
-
Mixing it Up:
- In a medium saucepan, combine the fresh lime juice, sugar, and chopped mint. Heat it on low, stirring until the sugar is fully dissolved. Don’t let it boil; we just want to create a flavorful syrup. This should take about 2-3 minutes. Once dissolved, let it cool slightly before moving to the next step.
-
Combine and Chill:
- In a large pitcher, combine your mint-lime syrup with the remaining club soda. Give it a gentle stir to mix everything together. Taste and adjust! Want more sweetness? Add a bit more sugar! Need more fizz? Top it off with additional club soda.
-
Serve it Up:
- Now, add ice cubes to your serving glasses, and pour the sparkling mint limeade over the ice. Garnish with a slice of lime and a sprig of mint for that picture-perfect finish. Trust me, your friends will be impressed!
Serving Suggestions
Presentation is key! Here’s how to serve your sparkling mint limeade like a pro:
-
Glassware: Use tall, clear glassware to showcase the vibrant green color—that first glimpse is a feast for the eyes! Mason jars are also a fun, rustic option.
-
Garnishes: Add extra lime slices and mint leaves for a pop of color. For an extra touch of whimsy, you can even rim the glasses with sugar!
-
Straws: Tie a simple paper straw to a sprig of mint or a lime wedge for a charming touch.
Pair this refreshing drink with light snacks, such as fresh fruit skewers, savory mini quiches, or a crunchy veggie platter. It’s a hit at summer parties, picnics, or just kicking back on your patio!
Recipe Variations
Want to mix things up? Here are a few creative twists on this classic drink:
-
Berry Burst: Add muddled berries (like strawberries or raspberries) to your limeade for a fruity explosion. Use about 1 cup of your preferred berries in the mixing stage!
-
Spicy Mint Limeade: Give it a kick by muddling a few slices of jalapeño along with the mint. It adds a surprising layer of flavor!
-
Coconut Limeade: Swap half of the club soda for coconut water. This tropical twist is both refreshing and hydrating.
-
Extra Citrus: Enhance the flavor by adding a splash of orange or grapefruit juice to the mixture. This often complements the lime beautifully.
Chef’s Notes
Here’s a little secret for you: experimentation is half the fun! Over the years, I’ve played around with countless variations. From swapping mint for basil one summer to adding a hint of lavender another, I’ve seen how versatile this drink can be. Each twist brings back old memories while creating new ones—just like my grandma did.
Oh, and the next time you have a bit of leftover syrup, drizzle it over vanilla ice cream for an unexpected but delightful dessert!
FAQs and Troubleshooting
Q: I can’t find fresh mint. Can I use dried mint?
A: Absolutely! Dried mint can be a great alternative, but use only about 1-2 tablespoons as it’s more potent. To release its flavor, steep the dried mint in the hot lime mixture.
Q: My limeade turned out too tart. What can I do?
A: Don’t worry! Just sweeten it up a bit. Mix in more sugar or a splash of simple syrup. You can also dilute with extra club soda to balance it out.
Q: How can I make this a cocktail?
A: Add a splash of your favorite spirit, like rum or vodka, to turn this refreshing drink into a bubbly cocktail. Mmm, cheers to that!
Q: How long does this last in the fridge?
A: It’s best served fresh, but it can generally last 1-2 days in the fridge. If you’re storing, keep it in an airtight container; just remember to stir gently before serving!
Nutritional Info
Let’s break down the nutrition a bit! While I love to emphasize using fresh ingredients, I know many of you might be curious about the nutritional aspect of this refreshing drink.
Nutritional Breakdown (per serving):
- Calories: Approximately 100 kcal, depending on the sugar used.
- Sugar: Roughly 22g (this can vary if you alter the sugar content).
- Vitamin C: You’ll get a good dose from the fresh lime!
Feel free to reduce the sugar to meet your dietary needs. Remember, the freshest ingredients always lead to the best results!
Final Thoughts
And there you have it, my fellow food lovers! Our Sparkling Mint Limeade isn’t just a drink; it’s a vibrant experience filled with flavor, joy, and a touch of nostalgia. Whether you sip it solo or share it with friends, it’s the ultimate refreshment for any occasion.
So, before summer slips away, grab those limes, muddle that mint, and embrace the sparkle that this drink brings. Here’s to good times, delicious flavors, and the fun that happens when we gather around great food. Let’s keep the kitchen magical together, one sip at a time!
Remember, whenever you feel that summer heat creeping in, this minty delight is here to cool you down. Happy sipping—and don’t forget to share your mint limeade stories with me!
PrintSparkling Mint Limeade
- Total Time: 15 minutes
- Yield: 4 servings 1x
- Diet: Vegan
Description
A refreshing and zesty drink featuring lime, fresh mint, and a delightful fizz—perfect for summer gatherings.
Ingredients
- 3/4 cup fresh lime juice (about 5–6 limes)
- 1/2 cup + 2 tablespoons granulated sugar
- 1/4 cup packed fresh mint (plus extra for garnish)
- 2–1/2 cups club soda
Instructions
- Start by rolling the limes on the counter to break down the membranes—this helps them release more juice. Cut them in half and juice them into a measuring cup, removing any seeds.
- Grab your mint, pile those leafy green wonders into your palm, and give them a gentle slap to release the essential oils.
- Combine the fresh lime juice, sugar, and chopped mint in a medium saucepan. Heat on low, stirring until the sugar is dissolved, about 2-3 minutes.
- In a large pitcher, combine your mint-lime syrup with the remaining club soda. Stir gently to mix.
- Add ice cubes to your serving glasses, and pour the sparkling mint limeade over the ice. Garnish with a slice of lime and a sprig of mint for a picture-perfect finish.
Notes
Experiment with variations like adding muddled berries or a splash of orange juice. Best served fresh, but can last 1-2 days refrigerated.
- Prep Time: 10 minutes
- Cook Time: 5 minutes
- Category: Beverage
- Method: Mixing
- Cuisine: American
Nutrition
- Serving Size: 1 serving
- Calories: 100
- Sugar: 22g
- Sodium: 5mg
- Fat: 0g
- Saturated Fat: 0g
- Unsaturated Fat: 0g
- Trans Fat: 0g
- Carbohydrates: 26g
- Fiber: 0g
- Protein: 0g
- Cholesterol: 0mg
Keywords: mint, limeade, refreshing drink, summer, beverage
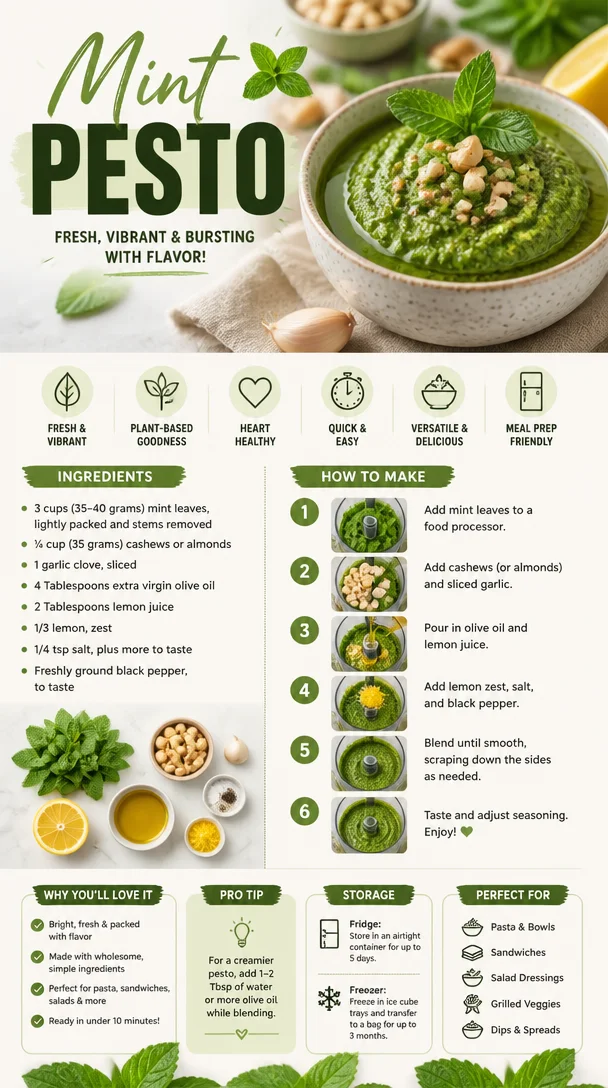
Mint Pesto
Mint Pesto: A Fresh Twist on a Classic
Hey food lovers! Welcome back to Feastical, where we whip up delicious dishes that nourish the soul and ignite the taste buds. Today, we’re diving into a delightful and vibrant recipe that puts a fun spin on a classic: Mint Pesto! While traditional basil pesto has stolen the spotlight for years with its rich, nutty flavor, mint pesto brings a refreshing twist that’s perfect for summer picnics, quick weeknight dinners, or simply elevating your everyday meals. Are you ready to discover why mint is not just an afterthought in the kitchen? Let’s dig right in!
A Whiff of Nostalgia
Let me take you back to a sun-soaked summer afternoon at my grandmother’s house when the mint plant in her garden was bursting with life. I remember running my fingers across the leaves, releasing that unmistakable aroma, and my grandmother, with a twinkle in her eye, decided it was time to make her famous mint pesto. It was a simple affair, but the way she combined fresh mint with good olive oil and nuts was pure magic.
Back then, I was still figuring out the finer points of cooking, but the excitement of watching her transform a handful of fresh ingredients into a gorgeous green sauce was captivating. We spread that mint pesto on everything—pasta, bread, even grilled chicken—and trust me, it didn’t take long for it to become a family favorite. Each bite was a burst of freshness that made our taste buds sing, and I couldn’t help but think, ‘Why doesn’t everyone have a go-to mint pesto recipe?’
Now, I want to share that same love and nostalgia with you through this recipe. Let’s take those fresh mint leaves from the market or your garden and turn them into a vibrant dip, a pasta sauce, or a delicious marinade. With mint pesto, you’re not just making a dish; you’re creating memories. Ready to get started? Let’s gather our ingredients!
Ingredients
-
3 cups (35-40 grams) mint leaves, lightly packed and stems removed
Mint is the star of this dish! Make sure to use fresh leaves for that bright, aromatic flavor. If you’re in a pinch, you can substitute with cilantro or basil, but you might lose that signature minty freshness. -
¼ cup (35 grams) cashews or almonds
Nuts add a lovely creaminess and richness to the pesto. Cashews blend beautifully for a smoother texture, while almonds provide a slightly crunchy bite. Feel free to experiment, or go nut-free by using sunflower seeds. -
1 garlic clove, sliced
Garlic enhances the flavor and adds a savory element to the pesto. If you prefer a milder taste, try using roasted garlic instead! -
4 Tablespoons extra virgin olive oil
High-quality olive oil is key here! It enriches the pesto and makes it silky. Swap with avocado oil if you’re looking for something with a high smoke point or a neutral taste. -
2 Tablespoons lemon juice
Fresh lemon juice adds zest and balances the flavors perfectly. You can use lime if you’re feeling adventurous! -
1/3 lemon, zest
Zest amplifies the lemony kick. Just a little bit goes a long way! If you don’t have a fresh lemon, bottled lemon juice will work, but fresh is always best. -
1/4 tsp salt, plus more to taste
Salt enhances flavors, so feel free to adjust as you blend. Consider using sea salt or Himalayan pink salt for a bit of extra flavor. -
Freshly ground black pepper, to taste
A pinch of black pepper can elevate the overall dining experience. If you want a different kick, try red pepper flakes or even a dash of cayenne for some heat!
Step-by-Step Instructions
-
Prep Your Ingredients
Start by washing your mint leaves thoroughly under cold water. This helps remove any dirt or little critters that might be hiding. Pat them dry with a clean kitchen towel or use a salad spinner if you’ve got one. -
Toast the Nuts (Optional)
If you’re looking to enhance the flavor of your nuts, toasting them is a fantastic hack! Just pop them in a dry skillet over medium heat for 5-7 minutes, stirring frequently until they’re golden and fragrant. Let them cool slightly before blending. -
Blend the Ingredients
In your food processor, combine the mint leaves, nuts, sliced garlic, lemon juice, and lemon zest. Pulse to chop everything into small pieces. This is where the magic begins, so don’t skip this step! You can also use a mortar and pestle for a more traditional approach. -
Slowly Add Olive Oil
With the processor running, drizzle in the olive oil gradually until the mixture becomes a smooth, vibrant green paste. If it’s too thick, don’t hesitate to add a little more olive oil to reach your desired consistency. -
Season with Salt and Pepper
Once blended, taste your pesto and add the salt and freshly ground black pepper according to your preference. Blend again to incorporate. -
Store or Serve!
If you’re not using the pesto immediately, transfer it to a jar and pour a thin layer of olive oil on top to keep it from oxidizing. Cover with a lid and store in the fridge for up to a week. If you find it too thick when you take it out, add a splash of water or olive oil to loosen it up.
Serving Suggestions
Mint pesto is incredibly versatile. You can toss it with warm pasta for a fresh weeknight dinner, use it as a spread on sandwiches, or drizzle it over grilled vegetables for a refreshing summer dish. A dollop on your favorite fish or chicken can elevate your meal to something spectacular, while it works wonders as a dipping sauce for fresh bread or crudités.
To plate, simply twirl the pasta into nests on a large serving dish, drizzle with that lovely green mint pesto, and sprinkle some toasted nuts or parmesan on top for a presentation that looks like you spent hours in the kitchen (even if it only took you 30 minutes!).
Recipe Variations
-
Mint and Pea Pesto: Add in a cup of blanched peas for a burst of sweetness and extra nutrients. This is a delightful twist that infuses an even richer green hue.
-
Spicy Mint Pesto: Toss in some red pepper flakes or a small jalapeño while blending if you want to kick up the heat a notch.
-
Nut-Free Mint Pesto: Swap out the nuts with nutritional yeast for a creaminess without the added fat—great for vegan diets!
-
Lemon-Mint Pesto: For an extra citrusy punch, incorporate the zest and juice of an additional lemon and reduce the amount of olive oil a bit.
-
Mediterranean Flair: Mix in a few sun-dried tomatoes for a vibrant flavor kick and a beautiful color contrast.
Chef’s Notes
Cooking is like a journey; it evolves with every meal you make. When I first started making mint pesto, I used to stick rigidly to my grandmother’s recipe, but over time I’ve loved experimenting to find my personal touch. Nowadays, I often keep it in my fridge as an easy way to jazz up a snack or main dish, and I love adding unique twists based on what I have on hand.
Every batch tells a little story of how I’ve changed as a cook—each one teaching me more about the balance of flavors and bringing back those cherished memories of summers with my grandmother. Plus, it’s always fun to see the look on someone’s face when they taste that first spoonful!
FAQs and Troubleshooting
-
Can I freeze mint pesto?
Absolutely! Just make sure to store it in an airtight container. It can last up to three months in the freezer. You can also freeze it in ice cube trays for easy portioning. -
Why did my pesto turn brown?
Pesto will oxidize and brown when exposed to air. To keep it bright green, ensure you cover it tightly with olive oil or plastic wrap pressed directly onto the surface, limiting air contact. -
How do I make my pesto more creamy?
If you find your pesto too thin, add a bit more nuts or even a spoonful of Greek yogurt for extra creaminess without compromising flavor. -
It tastes too salty! What can I do?
If you find your pesto is overly salty, balance it out by adding more nuts or a squeeze of lemon juice to brighten the flavor up.
Nutritional Info
Making mint pesto at home is not only simple but also a great way to boost your meal’s nutritional value. Mint leaves are rich in antioxidants, vitamins A and C, and have anti-inflammatory properties. Nuts provide healthy fats and protein, while olive oil adds monounsaturated fats that are heart-healthy. The vibrant garlic brings both flavor and a host of additional health benefits.
Just remember, portion control is key! This recipe serves about 4-6 people, depending on how you use it. Enjoy the burst of flavor without guilt—after all, it’s all about balance!
Final Thoughts
Mint pesto is a delightful recipe that brings freshness into your kitchen and enhances your meals with a pop of flavor. Whether slathered on bread, tossed with pasta, or drizzled over grilled veggies, it’s a versatile sauce that can change the way you think about mint. And remember, the heart of cooking is sharing; so gather your friends and family, and experience the joy of mint pesto together!
I hope you give this recipe a try and fall in love with mint in a whole new way! I can’t wait to hear how your pesto adventures go. Until next time, happy cooking, my foodie friends!
PrintMint Pesto: A Fresh Twist on a Classic
- Total Time: 20 minutes
- Yield: 4-6 servings 1x
- Diet: Vegetarian
Description
A vibrant and refreshing twist on traditional pesto, perfect for summer picnics or elevating any meal.
Ingredients
- 3 cups (35–40 grams) fresh mint leaves, lightly packed and stems removed
- ¼ cup (35 grams) cashews or almonds
- 1 garlic clove, sliced
- 4 tablespoons extra virgin olive oil
- 2 tablespoons lemon juice
- 1/3 lemon, zest
- ¼ teaspoon salt, plus more to taste
- Freshly ground black pepper, to taste
Instructions
- Prep your ingredients by washing mint leaves thoroughly under cold water and patting them dry.
- Toast the nuts (optional) in a dry skillet over medium heat for 5-7 minutes until golden and fragrant.
- Blend the mint leaves, nuts, sliced garlic, lemon juice, and lemon zest in a food processor until small pieces form.
- Slowly add olive oil while the processor is running until you reach a smooth paste.
- Season with salt and black pepper, blending again to incorporate.
- Store or serve by transferring to a jar with a layer of olive oil on top if not using immediately.
Notes
Mint pesto can be tossed with warm pasta, used as a spread on sandwiches, or as a dipping sauce for bread and vegetables.
- Prep Time: 10 minutes
- Cook Time: 10 minutes
- Category: Sauce
- Method: Blending
- Cuisine: Mediterranean
Nutrition
- Serving Size: 1 serving
- Calories: 200
- Sugar: 1g
- Sodium: 100mg
- Fat: 18g
- Saturated Fat: 2g
- Unsaturated Fat: 16g
- Trans Fat: 0g
- Carbohydrates: 5g
- Fiber: 1g
- Protein: 3g
- Cholesterol: 0mg
Keywords: mint pesto, fresh mint, summer recipes, vegan sauce
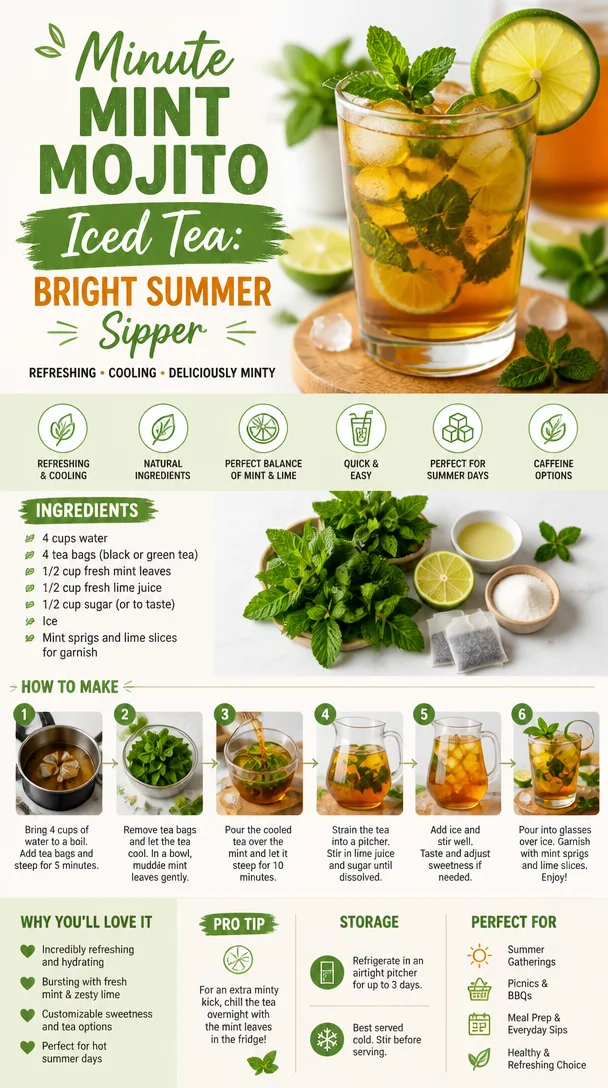
Minute Mint Mojito Iced Tea: Bright Summer Sipper
Refreshing Mint Mojito Iced Tea: A Perfect Sipper for Any Occasion
Hey there, food lovers and fellow kitchen adventurers! It’s Beau here, and today I have a refreshing treat that’s just begging to be sipped on a sunny afternoon or during a cozy get-together. If you’re looking to elevate your summer drink game while keeping it simple yet delicious, I present to you: Mint Mojito Iced Tea! Think of it as a delightful twist on your classic iced tea, but with the zesty flair of mojito vibes.
Imagine this: a warm summer day, the sun is shining, and you’re lounging on your porch or at a picnic park with friends. You reach for a glass filled with this vibrant Madagascar amber, and as you take that first sip, the coolness of the fresh mint and the zing of lime instantly transport you to paradise. This isn’t just a drink; it’s a hug in a glass!
Not only is this Mint Mojito Iced Tea incredibly refreshing, but it also packs a punch of flavor that’ll have your taste buds dancing. Plus, making it is a breeze – perfect for those of us who like to keep it low-key in the kitchen while still impressing our guests. Whether you’re hosting a gathering or just treating yourself, this drink is sure to be a crowd-pleaser.
So grab your mixing pitcher, and let’s dive into the world of minty goodness. We’re about to make a drink that’s not only delightful but one you’ll want to keep in your recipe book forever!
Personal Story
Ah, the memories of summer gatherings and the clinking of ice in glasses bring a smile to my face! My first encounter with mojitos was a family barbecue at my uncle’s house when I was around 10 years old. While the adults were savoring their cocktails, I was on a mission to make my own non-alcoholic version that still felt fancy and fun. Armed with my trusty muddler and whatever I could find from the herb garden, I scrounged together mint leaves and limes and mixed them with some lemonade.
To my surprise, the drink turned out so delicious that even the adults were stealing sips from my glass! That moment sparked my love for creating non-alcoholic cocktails, paving the way for all sorts of refreshing concoctions, including this Mint Mojito Iced Tea. Every time I make it now, I’m transported back to that summer day filled with laughter, sunshine, and the joyous spirit of family and friendship – all bundled up in a glass.
Ingredients
Let’s get into the fun part: the ingredients! Here’s what you’ll need to create this refreshing Mint Mojito Iced Tea:
-
4 cups water
The base for our tea. Any good-quality filtered water will do the trick, but feel free to replace some with sparkling water for an extra fizzy kick! -
4 tea bags (black or green tea)
Choose your favorite kind; black tea adds depth, while green tea keeps it light. For caffeine-free options, try herbal tea bags like chamomile or rooibos. -
1/2 cup fresh mint leaves
Mint is the star of the show here! The fresher, the better. You can also use peppermint or spearmint based on your preference. Don’t have fresh mint? Try a few drops of mint extract (but go easy!). -
1/2 cup fresh lime juice
The tartness of lime is key to brightening the drink. Freshly squeezed is best, but bottled lime juice can work in a pinch. For a twist, you could use lemon juice as well. -
1/2 cup sugar (or to taste)
Sweeten to your liking! Feel free to swap with honey, agave syrup, or even a sugar substitute if that’s your jam. -
Ice
Lots of it! This drink deserves to be chilled to perfection. -
Mint sprigs and lime slices for garnish
These are optional, but trust me, they make your drink look extra fab and festive!
Step-by-Step Instructions
Now that we have our ingredients, it’s time to bring our Mint Mojito Iced Tea to life! Follow these easy steps for a delightful drink:
-
Boil the Water
Start by bringing 4 cups of water to a near boil in a pot or kettle. This is where the magic begins, as you infuse flavor into your tea! -
Steep the Tea
Once the water is boiling, remove it from heat and add the tea bags. Let them steep for about 5-7 minutes. The longer you steep, the stronger your tea; so, adjust it according to your taste. -
Add the Mint
After steeping, it’s time to introduce the fresh mint leaves! Add them to the pot and allow them to sit in the warm tea for about 5 minutes. This will help release their delightful oils, infusing the tea with minty goodness. (A little pro tip: Gently muddle the mint leaves with a wooden spoon to release even more flavor.) -
Sweeten it Up
Remove the tea bags and mint leaves using a slotted spoon. While the tea is still warm, stir in your sugar or sweetener until it’s completely dissolved. Taste your concoction! If you like it sweeter, feel free to add a bit more. -
Add Lime Juice
Once sweetened, mix in the fresh lime juice. This adds that vibrant, zesty kick we absolutely love! Give it another taste – it should be a harmonious blend of sweet, tart, and refreshing! -
Chill
Let your tea cool down to room temperature, then transfer it to a pitcher and refrigerate for at least an hour. The longer it chills, the better it’ll taste. -
Serve Over Ice
Fill glasses with ice and pour the chilled Mint Mojito Iced Tea over the top. This is where peachy moments happen! Garnish with additional mint sprigs and lime slices for that gorgeous presentation.
And there you have it! Each step is simple, flowing, and fun—just like the drink itself!
Serving Suggestions
When it comes to serving your Mint Mojito Iced Tea, presentation is key! Here are a few ideas to make your drink not only delicious but also visually stunning:
-
Chic Glassware: Use mason jars for a rustic vibe, or fancy glassware for a more elegant affair. Feel free to mix and match!
-
Garnish Game: Add a couple of vibrant mint sprigs and a slice of lime on the rim of your glass. A splash of color can elevate your drink’s appeal.
-
Minty Ice Cubes: For added charm, freeze a few mint leaves and lime slices in your ice cubes beforehand! As they melt, they’ll infuse even more flavor while looking gorgeous.
-
Themed Parties: If you’re hosting a summer backyard bash or a mojito-themed evening, set up a self-serve drink station! Let guests add their garnishes – think fresh fruit, berries, or coconut if you’re in the tropical mood.
Recipe Variations
Want to switch it up? Here are some creative twists and ideas for different flavors:
-
Berry Mojito Iced Tea: Add muddled berries like raspberries or strawberries for a fruity explosion. They pair wonderfully with the mint and lime!
-
Coconut Mojito Iced Tea: For a tropical twist, incorporate coconut water instead of some of the regular water. You can also sprinkle some shredded coconut on top for style!
-
Ginger Mint Mojito Iced Tea: Slice some fresh ginger and let it steep with your tea. It adds a gentle spiciness that complements the mint beautifully.
-
Cucumber Cooler: Throw in a few slices of cucumber for an ultra-refreshing feel, especially on hot days.
-
Herbal Twist: Replace lime with lemon, and experiment with different herbs like basil or thyme. They can add a lovely aromatic scent and flavor.
Chef’s Notes
I absolutely love how this Mint Mojito Iced Tea has evolved over the years! Initially, I would make it with just the basics, but now I dabble in different combinations and flavors depending on the season or mood. Sometimes on a particularly hot day, I’ll even blend some of the tea with ice in a blender for a frosty smoothie-style drink—so chill and refreshing!
And let me tell you about that time I accidentally added way too much lime, turning my drink into a puckery paradise! Instead of sulking, I embraced it, calling it my “Mint Lime Loca.” Now, as it turns out, my friends loved it! So remember, the kitchen is about having fun, trying new things, and maybe embracing a few ‘oops’ moments—we chefs love them!
FAQs and Troubleshooting
Here are some common questions I receive, along with helpful answers to keep you on track:
-
Can I use bottled lime juice?
Absolutely! While fresh lime juice gives the best flavor, bottled juice works just fine. Focus on getting the balance right with sweetness to still enjoy the drink. -
What if my drink is too sweet?
If you find it a bit too sweet, add more lime juice or even a splash of additional water to cut the sweetness down. -
How long does this drink last in the fridge?
It can last for about 3-5 days in the fridge if stored in an airtight container. However, I recommend making fresh batches to keep that minty flavor vibrant! -
Can I make this drink ahead of time?
Definitely! Prepare the tea beforehand and store it in the fridge. Add ice and garnishes only when serving, ensuring your drink stays fresh and crisp.
Nutritional Info
Now, let’s talk numbers! This Mint Mojito Iced Tea is not just delicious, but also relatively low in calories, especially if you adjust the sugar. One serving (about 8 ounces) comes in at roughly:
- Calories: 70-100 (depending on sugar used)
- Fat: 0g
- Carbohydrates: 18g
- Sugars: 16g (again, depending on sugar used)
- Protein: 0g
Feel free to swap out sugar for your preferred sweetener; many sugar substitutes contain fewer calories and carbs, allowing you to enjoy this drink guilt-free!
Final Thoughts
So there you have it, friends! This Mint Mojito Iced Tea is not just a beverage, but a true experience, stirring up joyful memories and brightening your days. It’s versatile, easy to make, and offers countless variations to keep things exciting. Remember, cooking is about sharing love and collecting moments, and what better way to do that than with a refreshing drink that brings us all together?
I can’t wait for you to try your hand at this recipe. It’s perfect for any occasion, be it a summer BBQ, a garden party, or simply a cozy evening on the sofa. So gather your ingredients, get that pitcher ready, and let’s make some minty magic happen!
Cheers to delicious sips and happy times ahead! 🍃✨
Mint Mojito Iced Tea
- Total Time: 20 minutes
- Yield: 4 servings 1x
- Diet: Vegetarian
Description
A refreshing twist on classic iced tea with mint and lime flavors, perfect for summer gatherings.
Ingredients
- 4 cups water
- 4 tea bags (black or green tea)
- 1/2 cup fresh mint leaves
- 1/2 cup fresh lime juice
- 1/2 cup sugar (or to taste)
- Ice (as needed)
- Mint sprigs and lime slices for garnish
Instructions
- Boil the water by bringing it to a near boil in a pot or kettle.
- Steep the tea by adding the tea bags to the hot water and letting them steep for 5-7 minutes.
- Add the mint leaves to the tea and let sit for about 5 minutes.
- Sweeten the mixture by removing the tea bags and mint leaves, then stir in sugar until dissolved.
- Add lime juice to the sweetened tea, blending well.
- Chill the tea until it cools to room temperature, then refrigerate for at least an hour.
- Serve over ice and garnish with mint sprigs and lime slices.
Notes
This drink can be made ahead of time and stored in the fridge for 3-5 days. Adjust sweetness according to taste.
- Prep Time: 10 minutes
- Cook Time: 10 minutes
- Category: Beverage
- Method: Chilling
- Cuisine: American
Nutrition
- Serving Size: 1 serving
- Calories: 100
- Sugar: 16g
- Sodium: 5mg
- Fat: 0g
- Saturated Fat: 0g
- Unsaturated Fat: 0g
- Trans Fat: 0g
- Carbohydrates: 18g
- Fiber: 0g
- Protein: 0g
- Cholesterol: 0mg
Keywords: mojito, iced tea, mint, summer drink, refreshing beverage
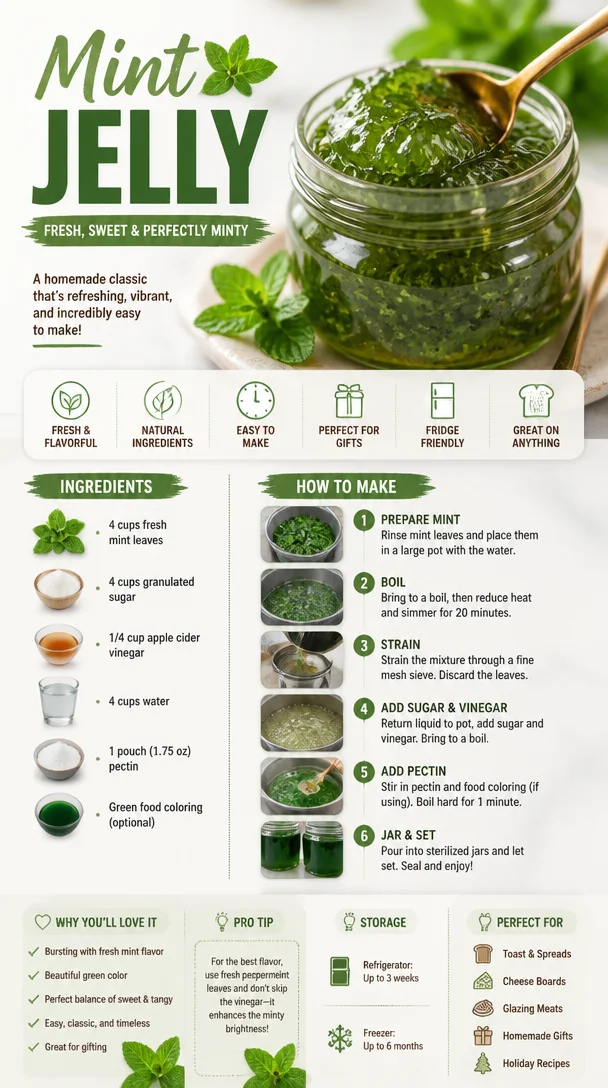
Mint Jelly
The Fresh and Fun World of Mint Jelly
Hey there, fellow foodies! I’m Beau Collier, your kitchen companion and culinary storyteller at Feastical, and today we’re diving into a delightful, vibrant dish that can add a pop of flavor to your meals—Mint Jelly!
You might be thinking of mint jelly as that jarred condiment that sits next to the cranberry sauce during the holidays, right? But oh, my friends, there’s so much more than that! This sweet and zesty creation not only pairs wonderfully with lamb but also makes for a unique twist in various desserts and cocktails. If you’ve ever had a dish that came to life with a hint of mint, you know what I’m talking about. So, buckle up, because we’re about to embark on a minty journey where earthy freshness meets cottage charm!
A Whiff of Nostalgia
Let me whisk you back to my grandma’s kitchen. Every summer, when the garden was bursting with fresh mint leaves, she would invite me to join her in making mint jelly. We’d giggle as we plucked the leaves, and she would share stories from her childhood about how her own mother made it. Those moments, steeped in love, laughter, and wonderfully fragrant mint, are some of my most cherished memories.
My grandma had this magical ability to make everything feel special—each jar of mint jelly was like treasure, and it graced our holiday tables like a crown jewel. We’d slather it over roasted lamb or pour it over a creamy cheesecake for a burst of freshness. The vibrant green color always caught everyone’s eye, sparking curious conversations and joyful taste-testing.
And you know, mint jelly is more than a dip; it’s a conversation starter, a bridge in the world of cuisines, and a testament to the bond of family and heritage. So let’s get started creating our own delicious memories, shall we?
Ingredients for Mint Jelly
Here’s what you’ll need to make your very own mint jelly:
-
Fresh Mint Leaves: The star of the show! Pick those vibrant green leaves; they’ll provide that refreshing flavor. If you can’t find fresh mint, you could substitute with peppermint extract (but go easy on it!).
-
Sugar: This will sweeten the mixture. You can use granulated sugar, brown sugar for a deeper flavor, or even honey for a more natural option.
-
Apple Cider Vinegar: This is key for balancing out the sweetness and adding a tangy punch. If you’re not keen on vinegar, white vinegar can work too, but it won’t add that lovely apple flavor.
-
Water: Essential for boiling the mint leaves to extract the flavor. Use filtered water if you want to be extra fresh.
-
Pectin: This ingredient is crucial for helping your jelly set beautifully. If you prefer a sugar-free option, there are low-sugar pectins available.
-
Green Food Coloring (optional): If you want that vibrant minty green hue, a drop or two of green food coloring will do the trick! But remember, the flavor comes first—not the color!
Step-by-Step Instructions
Alright, culinary adventurers, let’s get those hands busy! Here’s how to whip up your mint jelly:
-
Prepare the Mint Leaves: Start by rinsing about two cups of fresh mint leaves under cold water to remove any dirt and debris. Gently pat them dry with a kitchen towel. Tear the leaves into smaller pieces; this will help to release more flavor.
-
Boil the Water: In a medium saucepan, bring two cups of water to a boil. This is where the magic begins!
-
Steep the Mint: Once the water is boiling, add the torn mint leaves. Remove from heat and let it steep for about 10-15 minutes. This will create a fragrant mint infusion, so try not to sneak too many leaves before we’re done!
-
Strain the Mixture: After steeping, strain the mint leaves through a fine mesh sieve into a large bowl or measuring jug. Press the leaves with the back of a spoon to extract all the minty goodness. Discard the solids (or toss them in a salad for a minty kick!).
-
Combine Ingredients: In the same saucepan, combine your mint infusion, 2 cups of sugar, and 1/2 cup of apple cider vinegar. Stir over medium heat until the sugar dissolves completely. This is where you let that sweet mint aroma fill your kitchen!
-
Add Pectin: Once the sugar is dissolved, add your pectin according to the package instructions, stirring well. Bring the mixture back to a rolling boil for a minute or two until it thickens slightly.
-
Test for Setting: To check if your mint jelly is ready, drop a spoonful on a cold plate. If it holds its shape after cooling for a moment, you’re good to go! If not, give it a little more cooking time.
-
Jar It Up: Carefully pour the hot mint jelly into sterilized jars (leave some space at the top), seal tightly, and allow to cool. You’ll hear that delightful ‘pop’ as they seal—trust me, it’s one of life’s little joys!
Serving Suggestions
Now that you have your stunning homemade mint jelly, how should you serve it? Here are my favorite ways to present this delightful creation:
-
As a Glorious Condiment: Serve it alongside roasted lamb or grilled meats. A dollop on the side is sure to impress your guests, putting a zesty spin on classic dishes.
-
Dessert Drizzle: Drizzle some of the mint jelly over vanilla ice cream or cheesecake for a minty surprise that will elevate your dessert game to new heights.
-
Cheesy Companionship: Pair it with a cheese board—nothing beats mint jelly on sharp cheddar or creamy goat cheese.
-
Creative Cocktails: Mix a spoonful of mint jelly into a refreshing cocktail for a memorable twist. Think mojitos or even a mint-flavored martini!
Recipe Variations
Let’s get creative, shall we? Here are a few variations to keep your mint jelly fresh and exciting:
-
Chili Mint Jelly: Add a pinch of red pepper flakes when boiling your mint for a spicy kick. Perfect for those who like their snack with a bit of heat!
-
Honey Mint Jelly: Substitute sugar with honey for a more complex flavor. This adds a floral note that beautifully complements the mint.
-
Citrus Burst: Add the zest of a lemon or lime to your mint infusion for an extra layer of brightness. Citrus and mint are a match made in heaven!
-
Herbal Infusion: Experiment by adding other herbs like basil or thyme alongside mint for a unique, fragrant jelly.
-
Green Tea Mint Jelly: Instead of just plain water, use brewed green tea for a deep flavor that boasts both earthiness and mint’s refreshing notes. Perfect for tea lovers!
Chef’s Notes
As I stand here reminiscing, I cannot help but think about how over the years, this humble recipe has evolved in my family. My grandma often played with flavors, and she was the queen of improvisation—for example, adding cardamom to her mint jelly. Those spontaneous touch-ups never failed to impress us!
Food is a journey, and each recipe tells a story. My mint jelly is a reminder of the love and laughter shared in a kitchen, making each jar feel like a hug from the past. And just like any good story, it deserves to be shared and enjoyed.
FAQs and Troubleshooting
Here are answers to some of the common questions I hear when it comes to making mint jelly:
-
Why is my jelly too runny?
- Don’t panic! If your jelly didn’t set, it might need more pectin. Simply reheat it gently, stir in some more pectin, and boil for another minute or two.
-
Can I reduce the sugar?
- You can! Just remember that this might alter the setting properties, so you may need to adjust the amount of pectin accordingly.
-
How long does mint jelly last?
- If properly sealed, your mint jelly can last up to a year in a cool, dark place. Once opened, store it in the refrigerator, where it should stay good for about a month.
-
Can I make this in advance?
- Absolutely! Mint jelly can be made weeks, or even months, in advance. Just make sure to store it properly!
Nutritional Info
Mint jelly, while delicious, is also quite the sugar bomb. Here’s a quick nutritional overview per tablespoon (depending on recipe specifics):
- Calories: ~50
- Sugars: ~13g
- Carbohydrates: ~14g
- Fat: 0g
- Fiber: 0g
While it’s not the healthiest option, a swipe of mint jelly can brighten up a meal and is generally enjoyed in moderation!
Final Thoughts
Making mint jelly is more than just a recipe; it’s a celebration of flavor and memories. Whether you’re serving it at a festive gathering or just spreading a bit on your morning toast, remember that the magic of food lies in the bonds we forge and the stories we share.
So grab that fresh mint, channel your inner chef, and let’s create some delicious memories together with mint jelly. Until next time, keep your spatulas raised high, and your love for food even higher! Happy cooking!
PrintMint Jelly
- Total Time: 35 minutes
- Yield: 4 cups 1x
- Diet: Vegetarian
Description
A delightful and vibrant mint jelly perfect for pairing with meats, desserts, and creative cocktails.
Ingredients
- 2 cups Fresh Mint Leaves
- 2 cups Sugar
- 1/2 cup Apple Cider Vinegar
- 2 cups Water
- Pectin (according to package instructions)
- Green Food Coloring (optional)
Instructions
- Prepare the Mint Leaves by rinsing and drying them, then tearing them into pieces.
- Boil the Water in a medium saucepan.
- Steep the Mint by adding the torn leaves to the boiling water and let them steep for 10-15 minutes.
- Strain the Mixture through a fine mesh sieve to extract the mint infusion.
- Combine Ingredients by mixing the mint infusion, sugar, and vinegar in the saucepan and heat until dissolved.
- Add Pectin according to package instructions and boil for a minute to thicken.
- Test for Setting by dropping a spoonful on a cold plate.
- Jar It Up by pouring the mint jelly into sterilized jars and seal tightly.
Notes
Mint jelly can be served with roasted lamb, on desserts, or as a unique cocktail ingredient. It can be made ahead and stored properly for months.
- Prep Time: 15 minutes
- Cook Time: 20 minutes
- Category: Condiment
- Method: Baking
- Cuisine: American
Nutrition
- Serving Size: 1 tablespoon
- Calories: 50
- Sugar: 13g
- Sodium: 0mg
- Fat: 0g
- Saturated Fat: 0g
- Unsaturated Fat: 0g
- Trans Fat: 0g
- Carbohydrates: 14g
- Fiber: 0g
- Protein: 0g
- Cholesterol: 0mg
Keywords: mint jelly, condiment, dessert topping, cocktail ingredient, homemade jelly