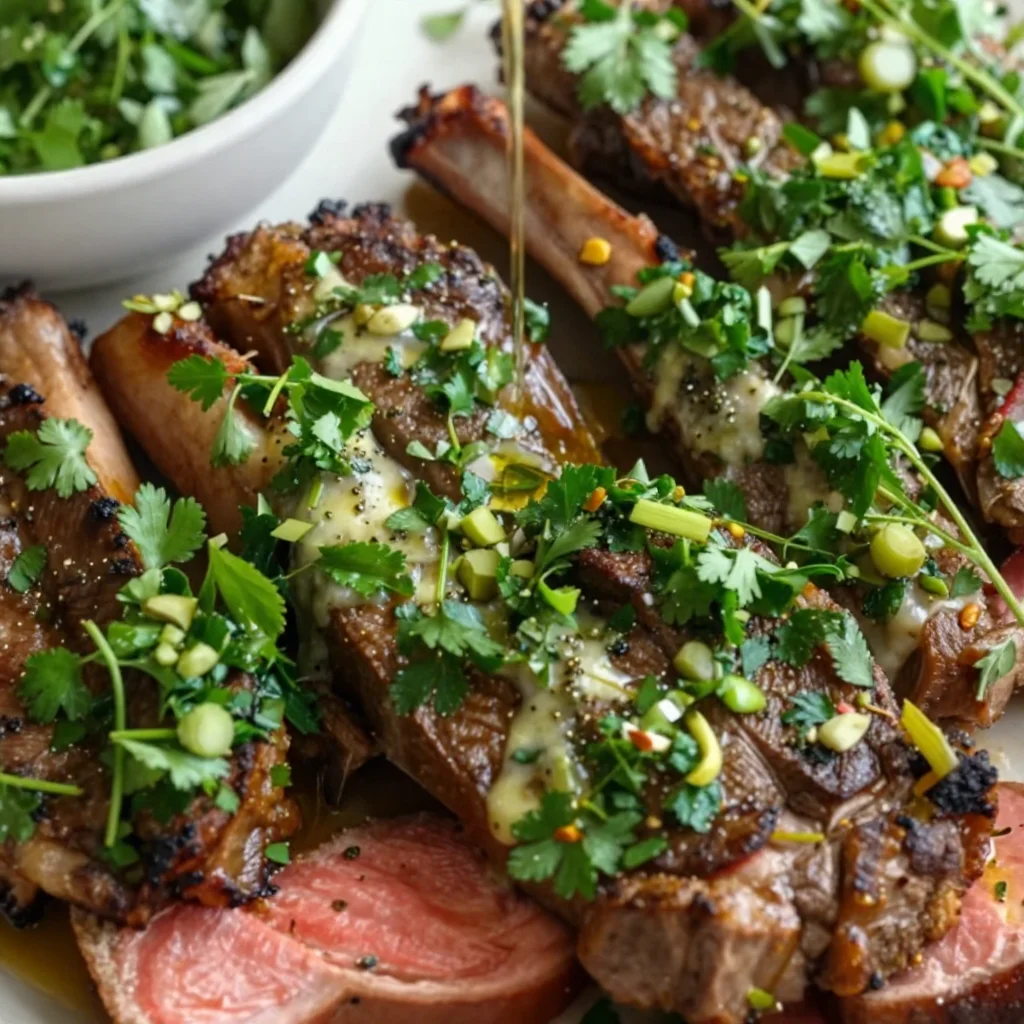
One-Pan Chimichurri Steak in 20 Minutes for Weeknights
Sizzling Up the Flavors: Chimichurri Steak to Warm Your Soul
Hey there, fellow food lovers! Today, I’m excited to take you on a culinary journey filled with vibrant flavors and nostalgia as we whip up a fantastic Chimichurri Steak. If you’ve never experienced the magic of chimichurri, let me tell you—it’s like a party for your taste buds! This zesty sauce hails from Argentina, and it has a charm all its own. Trust me, once you’ve tasted it with a perfectly cooked steak, you’ll want it on everything!
A Journey Down Memory Lane
Growing up, my family had a little tradition every summer: fire up the grill, gather around with loved ones, and savor the delicious aroma of steak sizzling away. The heart of these gatherings was always the chimichurri sauce, a recipe passed down through generations of my family. I recall my grandmother meticulously chopping fresh parsley from her garden, the fragrant herbs dancing in the air.
Those were moments filled with laughter, stories, and of course—great food. As the sun set, illuminating a golden path across our backyard, we’d serve the juicy steaks drizzled with that vibrant chimichurri. Each bite was a kiss of flavor that made our summer nights feel magical. Today, every time I make chimichurri steak, I’m transported back to those cozy evenings filled with love and laughter. So let’s get cooking, shall we?
Ingredients
Here’s what you’ll need to create your own chimichurri delight:
-
2 ribeye or New York strip steaks (about 1.5 inches thick)
Think about the cut here! Ribeyes are incredibly juicy with rich marbling, while New York strips offer a balanced bite. Either one will give your dish that restaurant-quality flair. -
2 tbsp olive oil
This will help in sealing the flavors into your steaks and prevent sticking on the grill. Feel free to substitute with avocado oil if you’re looking for a higher smoke point! -
Salt and freshly ground black pepper, to taste
Simple yet essential! High-quality sea salt and freshly ground pepper can elevate your dish, so skip the pre-ground stuff when possible. -
1 cup fresh parsley leaves, finely chopped
The star of your chimichurri! Fresh parsley adds brightness and color. If you need a substitute, cilantro can add a different yet enjoyable flavor twist! -
3 garlic cloves, minced
More garlic equals more flavor! You can use less or even garlic powder if you’re in a pinch, but fresh is always best. -
2 tbsp fresh oregano leaves, finely chopped (or 1 tbsp dried oregano)
Fresh oregano has a more robust taste. If you only have dried, adjust quantities as dried herbs are usually more concentrated (and potent!). -
1/2 cup extra virgin olive oil
This luxurious oil is crucial for that luscious texture in the chimichurri. If you’re into it, a flavored olive oil can add extra depth! -
2 tbsp red wine vinegar
It brings acidity and brightness to the sauce. Don’t have any? Apple cider vinegar can be a decent substitute! -
1/2 tsp red pepper flakes
For those of you who like a little kick! You can adjust based on personal preference or even skip it if you prefer a milder flavor. -
1/2 tsp salt, or to taste
Remember to taste as you go. We want to enhance those flavors without making it too salty! -
1/4 tsp freshly ground black pepper
This helps round out the flavors beautifully.
Now that you have all your ingredients ready, let’s dive into the fun part—the cooking!
Step-by-Step Instructions
-
Prepare the Chimichurri Sauce
In a medium bowl, mix together the finely chopped parsley, minced garlic, oregano, red pepper flakes, salt, black pepper, red wine vinegar, and the ½ cup of extra virgin olive oil. Stir well to combine—this sauce should have a vibrant green color and that unmistakable aroma. Pro tip: Make it in advance and let it sit at room temperature to allow the flavors to meld together; it gets even better over time! -
Season the Steaks
While your chimichurri is resting, let’s give our steaks some love! Take your 2 ribeye or New York strip steaks and rub them generously with olive oil, then season both sides with salt and freshly ground black pepper. Don’t be shy; this step is important for packing flavor! -
Heat Your Grill or Skillet
Preheat your grill to high heat, or if you prefer, heat a cast-iron skillet on the stovetop until it’s screaming hot. Here’s the chef hack: a hot surface will give those lovely grill marks and a fantastic crust. -
Cook the Steaks
When the grill or skillet is ready, place your steaks on the cooking surface and let them sear for about 4-5 minutes on one side without moving them! This allows them to develop a beautiful crust that seals in the juices. Flip them over and cook for an additional 3-5 minutes for a medium-rare finish. Always use a meat thermometer; about 130°F should do for medium-rare! -
Let it Rest
Once your steaks are cooked to perfections, let them rest for about 5-10 minutes. This is crucial! It redistributes the juices and avoids dry bites. Take this time to bask in the mouthwatering aroma wafting through your kitchen! -
Serve and Enjoy
Slice your rested steaks against the grain and drizzle generously with the homemade chimichurri sauce. Take a moment to enjoy; the vibrant colors are a feast for the eyes before they hit your taste buds!
Serving Suggestions
To present your chimichurri steak beautifully, I like to serve it on a large wooden cutting board or a white platter—simple and rustic at the same time. You can garnish with extra parsley or even a few lemon wedges for that added zesty flair. Pair it with roasted vegetables or a fresh green salad for a well-rounded meal! Oh, and don’t forget the crusty bread—perfect for soaking up any leftover chimichurri sauce sitting on the plate!
Recipe Variations
Ready to switch it up? Here are some delicious variations to keep your meals exciting:
-
Grilled Vegetables
Throw some veggies on the grill alongside your steaks. Zucchini, bell peppers, or asparagus take on such delightful flavors that pair wonderfully with chimichurri. -
Chimichurri Marinade
Marinate the steaks in chimichurri for a few hours before grilling. It infuses extra flavor and tenderness into your meat! -
Spicy Kick
Add whole jalapeños to your chimichurri for a spicy version! The heat will blend beautifully with that fresh taste of parsley and garlic. -
Citrusy Twist
Add some freshly squeezed lime juice or orange zest into the chimichurri for a refreshing citrus note. It’s a bright addition that lends a new dimension to this classic dish. -
Vegan Version
Swap out the steak for grilled Portobello mushrooms. They soak up the chimichurri beautifully and provide a meaty texture without the meat!
Chef’s Notes
Over the years, my chimichurri recipe has traveled far and wide. I started making it with just a handful of ingredients, but as I grew and experimented, I began to understand the importance of balance in flavors. If there’s one thing I’ve learned in the kitchen, it’s that cooking is about passion and experimenting until you find what makes your heart sing!
FAQs and Troubleshooting
Q: How do I know when my steak is done?
A: Using a meat thermometer is your best bet! For medium-rare, look for about 130-135°F inside. Pull it a little earlier; it’ll continue to cook while resting!
Q: Why is my chimichurri bitter?
A: If you’ve used any stems from the parsley or added too much oregano, it can make the chimichurri bitter. Ensure you’re using just the leaves for a fresh taste!
Q: Can I make chimichurri ahead?
A: Absolutely! Chimichurri is best after sitting for a bit, so feel free to make it a day in advance. Just store it in an airtight container in the fridge.
Q: What if my steak is overcooked?
A: Oops! If you find yourself in this predicament, slice the steak thin and serve it with a generous drizzle of chimichurri—it’ll help keep things tasty!
Nutritional Info
Chimichurri steak packs quite the flavor punch while offering a good balance of protein and healthy fats from the olive oil. Here’s a quick breakdown for a single serving (assuming the recipe serves four):
- Calories: Approximately 500-700, depending on steak cut and size
- Protein: 45-50g
- Fat: 40-50g, mostly healthy fats
- Carbohydrates: Minimal
- Fiber: 1-2g
This dish is not just delicious—it can be a part of a balanced diet when served with plenty of veggies!
Final Thoughts
There you have it—a delightful chimichurri steak recipe that’s sure to impress your family and friends! Cooking is not just about the food; it’s about the moments shared around the table, the laughter, and the warmth that fills your heart and home. I hope this recipe inspires you to gather those you love and create your own memories in the kitchen. So fire up that grill or hit the stovetop, because a flavor-packed meal awaits, and I can’t wait for you to dig in! Enjoy every bite, my friends!
Print
Chimichurri Steak
- Total Time: 30 minutes
- Yield: 4 servings 1x
- Diet: Paleo
Description
A vibrant and flavorful chimichurri steak recipe that brings together the rich tastes of Argentina.
Ingredients
- 2 ribeye or New York strip steaks (about 1.5 inches thick)
- 2 tbsp olive oil
- Salt and freshly ground black pepper, to taste
- 1 cup fresh parsley leaves, finely chopped
- 3 garlic cloves, minced
- 2 tbsp fresh oregano leaves, finely chopped (or 1 tbsp dried oregano)
- 1/2 cup extra virgin olive oil
- 2 tbsp red wine vinegar
- 1/2 tsp red pepper flakes
- 1/2 tsp salt, or to taste
- 1/4 tsp freshly ground black pepper
Instructions
- Prepare the Chimichurri Sauce: In a medium bowl, mix together the finely chopped parsley, minced garlic, oregano, red pepper flakes, salt, black pepper, red wine vinegar, and the ½ cup of extra virgin olive oil. Stir well to combine and let it sit.
- Season the Steaks: Rub your steaks generously with olive oil, then season both sides with salt and freshly ground black pepper.
- Heat Your Grill or Skillet: Preheat your grill to high heat or heat a cast-iron skillet on the stovetop until it’s very hot.
- Cook the Steaks: Place your steaks on the cooking surface and sear for 4-5 minutes on one side, then flip and cook for an additional 3-5 minutes for medium-rare.
- Let it Rest: Allow your cooked steaks to rest for 5-10 minutes.
- Serve and Enjoy: Slice your steaks against the grain and drizzle generously with the chimichurri sauce.
Notes
Serve on a rustic board or white platter, garnished with extra parsley or lemon wedges. Pairs well with roasted vegetables or a fresh salad.
- Prep Time: 15 minutes
- Cook Time: 15 minutes
- Category: Main Course
- Method: Grilling
- Cuisine: Argentinian
Nutrition
- Serving Size: 1 steak
- Calories: 600
- Sugar: 1g
- Sodium: 200mg
- Fat: 45g
- Saturated Fat: 10g
- Unsaturated Fat: 30g
- Trans Fat: 0g
- Carbohydrates: 2g
- Fiber: 1g
- Protein: 50g
- Cholesterol: 120mg
Keywords: chimichurri, steak, grilling, Argentinian cuisine, summer recipe
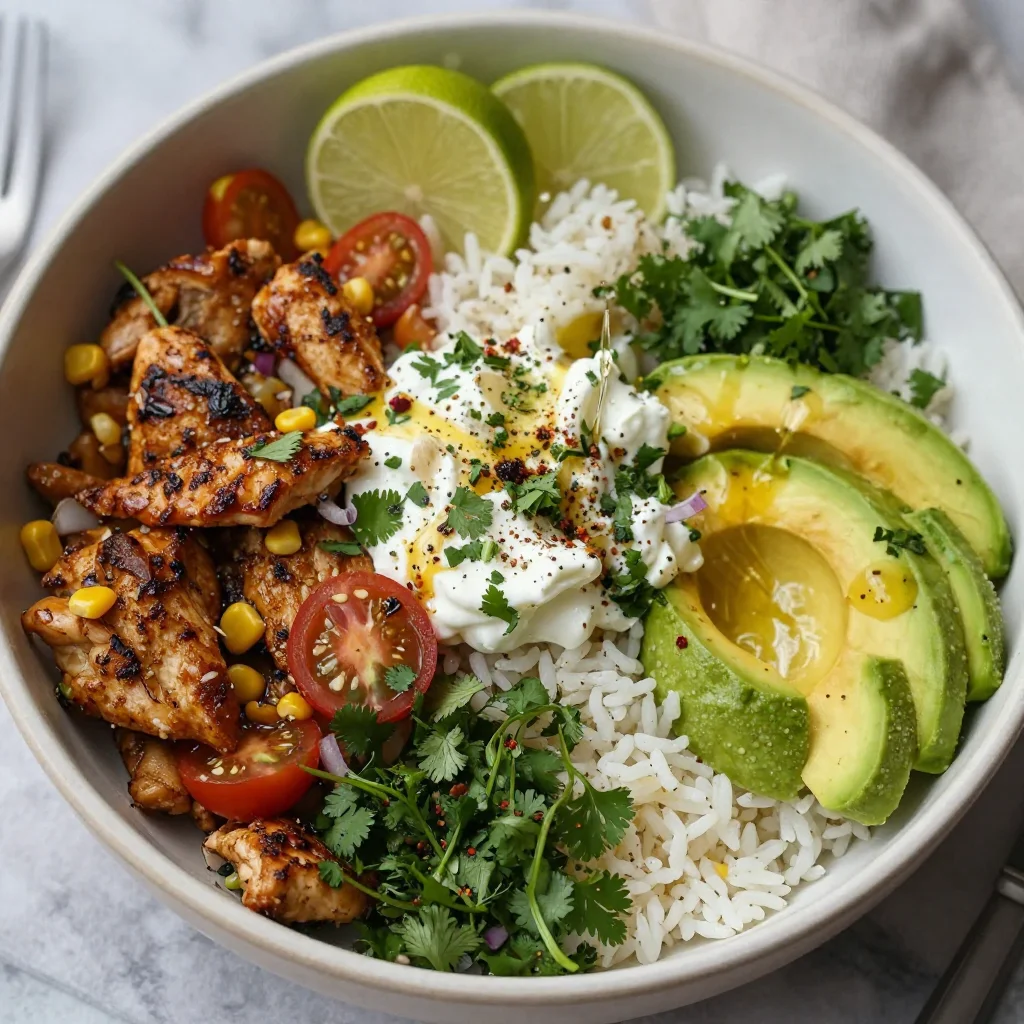
Minute High-Protein Honey-Lime Chicken & Avocado Rice Bowl
Honey Lime Chicken & Avocado Rice Bowl – High Protein Healthy Dinner Idea
Hey there! I’m Beau Collier, and today I want to share a recipe that’s not just packed with flavor but also full of love and nostalgia – my Honey Lime Chicken & Avocado Rice Bowl. If you’re looking for a high-protein, healthy dinner option that’s as vibrant as it is delicious, you’re in the right spot. Grab a fork (or your favorite mug), and let’s dig in!
Introduction
As we drift into the hustle and bustle of everyday life, sometimes we lose sight of what matters most—sharing good food with the ones we love. Food isn’t just fuel; it’s a way to express love, create memories, and share stories. That’s what Feastical is all about!
Imagine walking into a sunlit kitchen, the vibrant smell of zesty lime and kissed honey wafting through the air. This dish, my Honey Lime Chicken & Avocado Rice Bowl, does just that—it pulls you in and wraps you up in a warm embrace. It’s simple yet so satisfying, making it perfect for a weeknight dinner that feels a bit special without the fuss.
This recipe is perfect for anyone who might think healthy means bland. Armed with succulent chicken breasts marinated in a tangy honey lime glaze, fluffy rice, and creamy avocado, this bowl is a party for your taste buds. The colorful veggies add a crunchy surprise and a burst of freshness that will have you reaching for seconds (or thirds!).
Plus, it’s a great high-protein option to keep your energy levels up. Whether you’re a gym-goer, busy parent, or just someone who loves tasty food, this dish checks all the boxes. Stick around, and I’ll walk you through every step of making this delightful meal that will have your family coming back to the table time and again!
Personal Story
This Honey Lime Chicken & Avocado Rice Bowl has a special place in my heart, not just for its delicious flavors but also for the family moments it embodies. I remember the first time I made it—I was trying to impress my then-girlfriend (now wife) by whipping up something fresh and flavorful for dinner. With a bit of inspiration from our recent trip to a local farmer’s market, I threw together what was pantry-friendly and seasonal.
As we sat down and took our first bites, the tangy sweetness of the honey paired beautifully with the zest of the lime. I looked up at her, and there was that familiar glimmer in her eyes; we both knew we weren’t just enjoying a meal—but creating memories. That night kicked off a series of kitchen experiments—trying out variations of the recipe, incorporating new ingredients, and laughing together as we tasted our creations.
Now, this bowl is a regular in our household. It’s become a tradition to make it on busy weekdays when we need something wholesome and hearty, yet quick to whip up. It’s a simple reminder that great meals don’t have to be complicated, and they always taste better when shared with someone special.
Ingredients
Let’s dive into the ingredients that make this dish sing. Each element plays a role in developing those vibrant flavors and textures.
-
2 large chicken breasts (about 400g): The star of the dish! Chicken breasts are packed with lean protein and take on flavors beautifully. If you want a lower-fat option, go skinless. For a twist, try this recipe with turkey or tofu.
-
2 tablespoons honey: This natural sweetener adds a hint of sweetness that complements the tangy lime. If you’re vegan, you can substitute it with maple syrup or agave nectar.
-
3 tablespoons fresh lime juice: Freshly squeezed juice gives the best flavor! You can also opt for lemon juice if you’re in a pinch, but lime truly brings that zing.
-
1 teaspoon lime zest: Zest is where a lot of the lime’s essential oils are concentrated. If you’re short on limes, lemon zest works here too!
-
3 cloves garlic, minced: Garlic adds a warm depth to the dish. Consider using roasted garlic for a little sweetness, or if you’re pressed for time, garlic powder can work.
-
2 tablespoons olive oil: This healthy fat enhances the marinade and keeps the chicken moist. Avocado oil or melted coconut oil are great alternatives too.
-
1 tablespoon soy sauce: This adds a savory umami touch. For a gluten-free option, you can use tamari.
-
1/2 teaspoon salt: Enhances flavors in the dish. Feel free to adjust according to your taste preferences.
-
1/4 teaspoon black pepper: A dash of black pepper adds a little heat. You can use white pepper for a subtle flavor as well.
-
3 cups cooked white or brown rice: The base of the bowl. Both options are healthy, but brown rice has more fiber. Quinoa can also be a fantastic substitute if you’re looking to boost protein.
-
2 ripe avocados, sliced: Creamy avocado provides a buttery texture and healthy fats. If you want extra flavor, sprinkle them with a bit of lime juice!
-
1 cup cherry tomatoes, halved: These sweet little gems add color and freshness. You could swap these for diced bell peppers for a different crunch.
-
1 cup corn kernels: You can use fresh, canned, or frozen corn—whatever you have on hand! For a twist, try adding black beans for a hearty protein boost.
-
1/4 cup red onion, sliced: Sharp with just the right amount of bite. You can caramelize it for a milder flavor or use scallions if you want something tempered.
-
3 tablespoons fresh cilantro, chopped: This aromatic herb brightens up the dish! If you’re not a fan of cilantro, parsley or basil could easily step in.
-
1/2 cup Greek yogurt or sour cream (optional): A cool and creamy addition to drizzle on top. You can also use dairy-free yogurt for a vegan twist.
-
1/2 teaspoon chili flakes (optional): A little kick for those who love spice. If you really want to amp it up, go for fresh jalapeños!
Step-by-Step Instructions
Now that we’ve gathered our ingredients, let’s get to the fun part—cooking! Follow these steps, and you’ll be enjoying this beautiful bowl in no time.
-
Marinade the Chicken: In a bowl, mix together the honey, lime juice, lime zest, minced garlic, olive oil, soy sauce, salt, and black pepper. This marinade is the magic sauce—it’ll infuse your chicken with bold flavors! Add the chicken breasts, making sure they’re fully coated. Cover the bowl and let it marinate in the refrigerator for at least 30 minutes—this is my favorite part; the longer, the better!
-
Prepare the Rice: If you’re starting with uncooked rice, prepare according to package instructions, using either white or brown rice. For a flavor-packed boost, cook it in vegetable or chicken broth instead of water. If you have leftover rice, this makes the bowl even quicker to prepare—just warm it up before serving!
-
Cook the Chicken: Preheat your grill, skillet, or oven. If you’re grilling, preheat to medium-high heat. If using a skillet, heat a splash of olive oil over medium heat. Remove the chicken from the marinade (but save the leftover marinade) and place it on the grill or in the skillet. Cook for about 6-7 minutes per side until the chicken is brown and cooked through (internal temperature should reach 165°F or 75°C). If baking, place it in the oven at 400°F (200°C) for about 25-30 minutes, or until fully cooked.
-
Glaze for Flavor: While the chicken is cooking, take the leftover marinade and bring it to a boil in a small saucepan. Let it simmer for about 5 minutes until slightly thickened—a quick glaze to brush over your chicken just before finishing the cooking process for added flavor!
-
Slice and Assemble: Once cooked, let the chicken rest for a few minutes before slicing it thickly. This ensures it remains juicy! Meanwhile, in a large bowl or on a large platter, start layering your base: place the warm rice down first, then arrange the sliced chicken on top.
-
Add the Goodies: Next, adorn your bowl with the sliced avocados, halved cherry tomatoes, corn kernels, and sliced red onion. Don’t forget to sprinkle fresh cilantro over everything to give it that pop of freshness.
-
Creamy Drizzle: If you’re using Greek yogurt or sour cream, drizzle it over the top (or for fun, plop a dollop on the side). Finally, sprinkle a pinch of chili flakes if you’re feeling spicy!
Serving Suggestions
When it comes to serving, you can’t go wrong! This Honey Lime Chicken & Avocado Rice Bowl is perfect as it is, but here are a few additional ideas to elevate the experience:
-
Family Style: Serve everything in the center of the table and allow everyone to build their own bowl with the toppings they love!
-
Colorful Plates: If you want to impress your guests, use large individual bowls and arrange the ingredients in sections for a visually stunning presentation.
-
Extra Crunch: Add crushed tortilla chips or crispy fried onions on top for an unexpected crunch!
-
Dressing it Up: A drizzle of additional lime juice or a bright vinaigrette can take the flavor to new heights!
Recipe Variations
Here are a few fun twists you can try if you’re feeling adventurous:
-
Taco Twist: Add taco seasoning to the marinade and serve in corn tortillas instead of rice for a fun taco night. Top with your favorite taco toppings!
-
Mediterranean Flare: Swap out the ingredients for some Mediterranean vibes—use couscous instead of rice, add olives, feta, and roast the chicken with oregano and lemon.
-
Shrimp Swaps: If poultry isn’t your jam, try grilled shrimp with the same marinade for a fresh seafood twist. They cook up in just minutes and are bursting with flavor!
-
Vegan Style: For a vegan version, replace the chicken with marinated grilled tempeh or chickpeas to pack in that protein. Use dairy-free yogurt for a creamy drizzle.
-
Spicy Sriracha: Kick things up a notch by adding sriracha to your yogurt drizzle or mixing some into the marinade for a spicy kick.
Chef’s Notes
Over the years, my Honey Lime Chicken & Avocado Rice Bowl has witnessed some heartwarming moments—from family gatherings to late dinners after a long day. Each dish seems to evolve a little more each time—I’ve experimented with different grains, colorful veggies, and exciting spices. One thing remains constant, though: it always brings smiles to the dinner table!
I remember a time my cousin made this recipe with her kids, and they decided to make it a “build-your-own-bowl” dinner night. The giggles and cheer that filled the kitchen made the meal even more memorable. That’s the beauty of food—it’s a medium for connection.
FAQs and Troubleshooting
Q: My chicken turned out dry. What happened?
A: Overcooking is often the culprit. Be sure to use a meat thermometer for precise cooking—165°F is your friend! Also, resting the chicken after cooking helps redistribute the juices.
Q: How can I make this recipe quicker?
A: Marinate the chicken in advance and store it in the fridge overnight. On a busy night, it’ll cut down your prep time drastically! Alternatively, use pre-cooked rice to speed things up.
Q: Can I freeze the leftovers?
A: Absolutely! Just store them in an airtight container. To reheat, thaw overnight in the fridge and warm it gently on the stovetop or microwave.
Q: What can I use if I don’t have fresh lime juice?
A: While fresh is best, if you have bottled lime juice, that can work in a pinch! Just adjust the amount to taste, as bottled juices can sometimes be more concentrated.
Nutritional Info
This Hearty Honey Lime Chicken & Avocado Rice Bowl is not only flavorful but also a nutrition powerhouse. Each serving is rich in protein and healthy fats, making it a great choice for a balanced diet. Here’s a quick look at the nutrition facts per serving:
- Calories: Approximately 550-600 kcal
- Protein: 40-45g (great for muscle repair and recovery)
- Carbohydrates: 60-70g (fueling your body for the day)
- Fiber: 8-10g (essential for digestive health)
- Fats: 15-20g (healthy fats from avocado and olive oil)
This dish is not only satisfying and delicious but it also provides a good balance of nutrients to keep your energy levels high!
Final Thoughts
So there you have it—a hearty and delicious Honey Lime Chicken & Avocado Rice Bowl that’s more than just a meal; it’s a celebration of flavors, memories, and the simple joys of cooking. Whether you’re preparing it for yourself or sharing it with family, I hope this recipe brings you as much happiness as it brings me.
Don’t forget to experiment and make it your own! The kitchen is a place for creativity, and this bowl is the perfect canvas for your imagination. Enjoy this wonder of a dish, and as always, let me know how it turns out! Happy cooking, friends! 🍽️
Print
Honey Lime Chicken & Avocado Rice Bowl
- Total Time: 60 minutes
- Yield: 4 servings 1x
- Diet: High Protein
Description
A high-protein, healthy dinner option featuring marinated chicken, fluffy rice, and creamy avocado with a burst of fresh flavors.
Ingredients
- 2 large chicken breasts (about 400g)
- 2 tablespoons honey
- 3 tablespoons fresh lime juice
- 1 teaspoon lime zest
- 3 cloves garlic, minced
- 2 tablespoons olive oil
- 1 tablespoon soy sauce
- 1/2 teaspoon salt
- 1/4 teaspoon black pepper
- 3 cups cooked white or brown rice
- 2 ripe avocados, sliced
- 1 cup cherry tomatoes, halved
- 1 cup corn kernels
- 1/4 cup red onion, sliced
- 3 tablespoons fresh cilantro, chopped
- 1/2 cup Greek yogurt or sour cream (optional)
- 1/2 teaspoon chili flakes (optional)
Instructions
- Marinade the Chicken: In a bowl, mix together the honey, lime juice, lime zest, minced garlic, olive oil, soy sauce, salt, and black pepper. Add the chicken breasts, ensuring they’re fully coated. Cover and let marinate in the refrigerator for at least 30 minutes.
- Prepare the Rice: Cook according to package instructions using either white or brown rice. For extra flavor, cook in vegetable or chicken broth instead of water.
- Cook the Chicken: Preheat your grill, skillet, or oven. If grilling, preheat to medium-high; if using a skillet, heat a splash of olive oil. Cook the chicken for about 6-7 minutes per side until cooked through (internal temperature should reach 165°F/75°C).
- Glaze for Flavor: Bring the leftover marinade to a boil in a saucepan and let simmer for about 5 minutes until slightly thickened. Brush over the chicken just before it’s finished cooking.
- Slice and Assemble: Let the chicken rest for a few minutes before slicing. Layer the warm rice in a bowl, then arrange the sliced chicken on top.
- Add the Goodies: Top the bowl with sliced avocados, halved cherry tomatoes, corn, and red onion. Sprinkle fresh cilantro over everything.
- Creamy Drizzle: If using, drizzle Greek yogurt or sour cream on top and a pinch of chili flakes for spice.
Notes
For a quicker meal, marinate the chicken in advance and store overnight. You can also use pre-cooked rice.
- Prep Time: 30 minutes
- Cook Time: 30 minutes
- Category: Main Course
- Method: Grilling
- Cuisine: Mexican
Nutrition
- Serving Size: 1 bowl
- Calories: 600
- Sugar: 12g
- Sodium: 600mg
- Fat: 18g
- Saturated Fat: 4g
- Unsaturated Fat: 10g
- Trans Fat: 0g
- Carbohydrates: 65g
- Fiber: 10g
- Protein: 40g
- Cholesterol: 90mg
Keywords: honey lime chicken, avocado rice bowl, healthy dinner, high protein meal, easy recipes
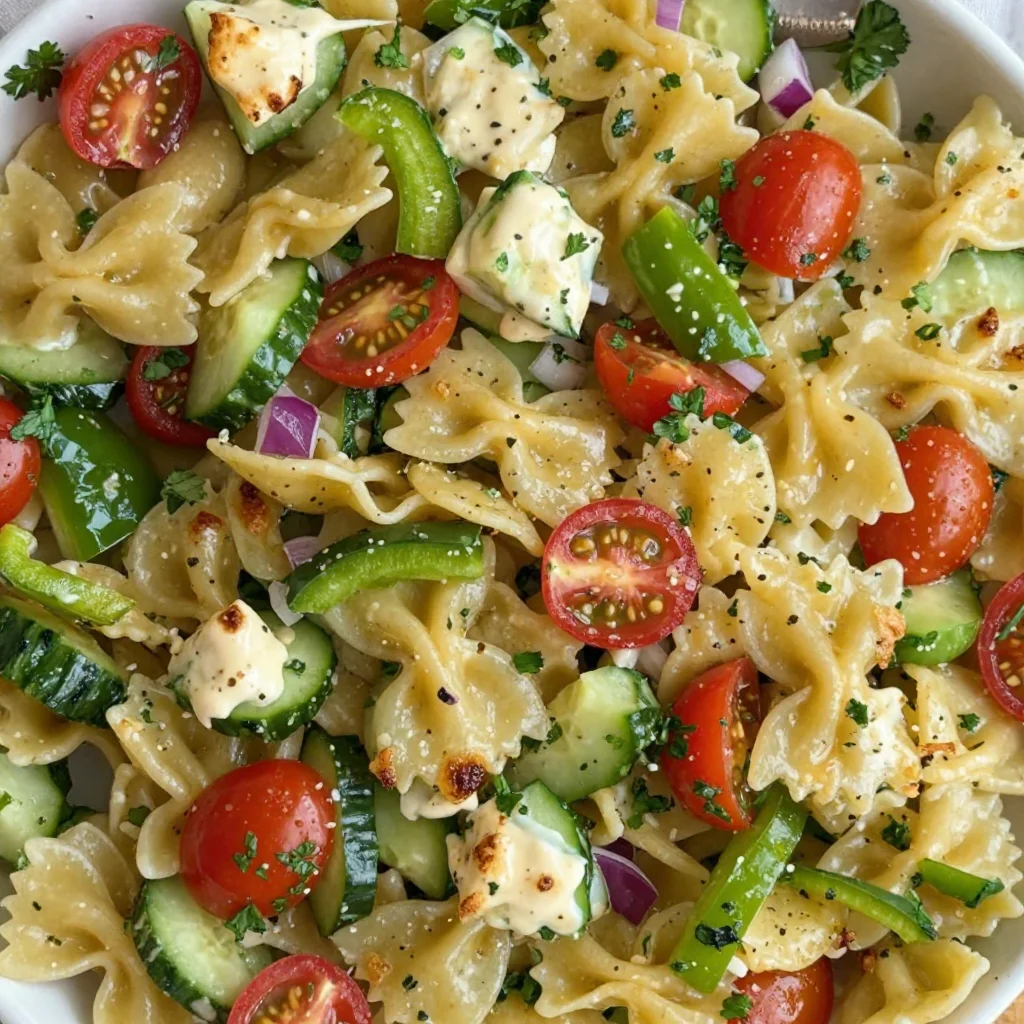
Minute Bow Tie Pasta Salad for Quick Weeknight Meal Prep
Colorful Bow Tie Pasta Salad: A Feast of Flavors!
Hey there, fellow food lovers! Welcome back to Feastical! Today, we’re diving into a dish that’s as delightful to make as it is to eat: the Colorful Bow Tie Pasta Salad. This vibrant pasta salad is perfect for those sunny picnic days, summer barbecues, or even a casual weeknight dinner when you want something quick yet satisfying.
This salad is not just visually appealing; it’s a burst of flavors and textures in every bite. The combination of fresh veggies, tangy Italian dressing, and bow tie pasta makes it a crowd-pleaser for both kids and adults alike. Plus, the best part? It’s so easy to whip up that even the most novice chef can tackle it with confidence. Whether you’re serving it as a side dish or as the star of your meal, you’re going to love how this salad brightens up your dining experience.
So, grab your apron, put on your favorite tunes, and let’s get started! I can already feel the joyful spirit of community that food brings us, and I can’t wait to share this incredible recipe with you.
A Personal Slice of Inspiration
Let me take you back to one of my favorite summer memories. It was a balmy afternoon at my grandmother’s house, and we were preparing for our annual family reunion. The smell of grilled burgers wafted through the air, mingling with the sweet aroma of my aunt’s homemade desserts. I was in the kitchen, my little hands busy with a mountain of ingredients, getting ready to make my very first pasta salad with a bit of help from Grandma.
Her hands, worn from years of lovingly creating meals for family, guided me through the steps. We tossed in rainbow bell peppers, juicy cherry tomatoes, and crunchy cucumbers, and I felt like a chef working on a masterpiece. The satisfaction that followed when we served it up—seeing my family’s eyes light up at the first taste—was something that sealed my love for cooking.
That childhood experience taught me that food really does have the power to bring people together. And every time I make this Colorful Bow Tie Pasta Salad, it takes me back to that sunny day, reminding me of those loved ones gathered around a table, sharing laughter and love over delicious food. It’s not just a recipe; it’s a tradition that connects loyalty to flavors and family!
Ingredients
Let’s talk ingredients! Here’s what you’ll need for our vibrant Colorful Bow Tie Pasta Salad:
-
8 oz bow tie pasta: The star of our dish! Bow tie pasta (or farfalle) adds a playful character, and its unique shape holds onto the dressing beautifully. You can swap it out for any small pasta you have on hand, like fusilli or rotini, but I personally find the bow ties so fun!
-
1 cup cherry tomatoes, halved: These little gems add sweetness and a pop of color. Feel free to use grape tomatoes for a different shape or even sun-dried tomatoes if you want a more robust flavor.
-
1 cup cucumber, diced: Crunchy and refreshing, cucumbers are a must! If you want a sweeter bite, consider using a diced bell pepper instead. You can use English cucumbers or even zucchini if you’re feeling adventurous.
-
1 bell pepper, diced: Any color works wonders—red, yellow, or green all contribute different sweetness levels. Switch it up with roasted red peppers for a smoky twist!
-
1/2 cup red onion, diced: It adds a zesty kick! If red onion feels too strong for you, try a milder onion or even green onions for a subtler flavor.
-
1 cup Italian dressing: This tangy dressing is like a party for your taste buds! You can make your own at home or reach for a store-bought option (just make sure it’s your favorite!). For a lighter version, go for vinaigrettes or yogurt-based dressings.
-
Salt and pepper to taste: Always a classic! Season to your heart’s desire, but remember that salty flavors can balance the salad’s natural sweetness.
-
Fresh parsley for garnish (optional): A sprinkle of parsley not only brightens the dish visually but also adds that fresh flavor. You can swap it with basil or even a squeeze of lemon if you’re feeling zesty!
Step-by-Step Instructions
Alright, my culinary comrades, let’s tackle this splendid pasta salad together! Follow these steps, and I promise you’ll whip up something incredible.
First Things First: Cook the Pasta
-
Bring a large pot of salted water to a boil. Use enough salt—about a tablespoon per pot of water—so the pasta can absorb that flavor while cooking. It’s like a secret flavor boost in every bite!
-
Add the bow tie pasta to the boiling water. Cook it according to the package instructions (usually around 8-10 minutes), stirring occasionally to keep those bow ties dancing in the pot. You want them al dente, which means they should still have a slight bite to them.
-
Drain the pasta and rinse it under cold water. This process stops the cooking and cools down the pasta so that it doesn’t turn mushy. Plus, it makes mixing it with the veggies later a breeze!
Chop Those Veggies
- While your pasta is cooking, get your chopping game on! Dice up your cucumber, bell pepper, and onion into bite-sized pieces. Cherry tomatoes should be halved—don’t worry; it’ll only take a minute!
Combine and Dress It Up
-
In a large bowl, combine the cooled pasta with the chopped veggies. Toss everything gently so that the veggies can mingle evenly with the pasta.
-
Pour in the Italian dressing. Start with about 3/4 of a cup—start slow; you can always add more! Stir everything gently to combine, ensuring each nook and cranny of pasta is coated in that delicious dressing.
Finish It Off
-
Taste the salad and season it with salt and pepper to your liking. I love to let mine marinate for a bit—chilling in the fridge for at least 30 minutes lets the flavors meld beautifully!
-
Serve it up! Just before serving, give it a final gentle stir and garnish with parsley (if using) to give it that fresh pop!
Ready to dive in? Oh, I can already hear the delightful crunch of fresh veggies and the melody of flavors coming together. You’ve just made a show-stopping dish that’s bound to impress!
Serving Suggestions
When it comes to plating, the presentation makes a big difference! Here are a few ideas to elevate your serving game:
-
Use a vibrant platter: Consider serving your colorful pasta salad in a big, colorful bowl or platter that complements the veggies’ hues. It creates an inviting visual presentation!
-
Layer beautifully: For a buffet, layer the pasta salad with some leafy greens like spinach or arugula underneath. It’s not just visually enticing but adds an extra nutritious punch too!
-
Add some protein: For a heartier meal, serve it alongside grilled chicken, shrimp, or even chickpeas to boost the protein content.
-
Caprese twist: Layer the salad with slices of mozzarella or sprinkle feta on top for an Italian flair that will leave your taste buds singing!
Recipe Variations
Time to get creative! Here are some fun variations you can try with your Colorful Bow Tie Pasta Salad:
-
Mediterranean Twist: Swap the Italian dressing for a homemade lemon-olive oil vinaigrette, and add in Kalamata olives, artichoke hearts, and crumbled feta cheese for a refreshing Mediterranean kick!
-
Beachy BBQ Style: Toss in grilled corn, black beans, and lime juice for a fiesta-inspired flavor. Perfect for those summer BBQs!
-
Pesto Perfection: Instead of Italian dressing, use pesto sauce for a basil-forward salad. Add sun-dried tomatoes for extra depth, and you’ll be transported straight to an Italian café.
-
Veggie Overload: Pack in even more nutrients by adding shredded carrots, snap peas, or even roasted vegetables for a colorful medley.
-
Protein-Packed: Add diced salami or pepperoni, or even some chickpeas for a vegetarian option that makes this salad even more filling.
Mix and match these ideas until you find your favorite combo! The beauty of cooking is experimentation, so don’t be afraid to follow your taste buds!
Chef’s Notes
As my culinary journey grew, so did my love for this pasta salad. I’ve made countless tweaks over the years, depending on what I had lurking in my fridge or the seasons. A little hint for you: during winter months, roasted vegetables can take this dish next level, giving it warmth and a cozy feel that contrasts beautifully with a chilled, refreshing salad.
Don’t forget—making mistakes in the kitchen is just another recipe for success! The most memorable meals sometimes come from trying new things and learning as we go. So, if one carrot finds its way into the mix or you’ve gone a bit heavy on the dressing, embrace it! Every kitchen experiment makes you a better cook.
FAQs and Troubleshooting
Q1: My pasta is too sticky! What did I do wrong?
A: No worries! This can happen if the pasta is overcooked or wasn’t rinsed properly. Always rinse under cold water after draining to stop the cooking process. If it does get sticky, a splash of olive oil can help break it apart.
Q2: Can I make this ahead of time?
A: Absolutely! This salad is great for meal prep. Just keep it in an airtight container in the fridge for up to three days. The flavors will develop even more!
Q3: How can I store leftovers?
A: Store any remaining salad in the fridge in a tightly sealed container. The pasta might soak up the dressing over time, so you may want to adjust the seasoning and add a little extra dressing before serving.
Q4: Can I use whole grain or gluten-free pasta?
A: Definitely! Whole grain pasta adds a nutty flavor, while gluten-free options will work just as well. Just make sure to adjust the cooking time based on the type of pasta you choose!
Nutritional Info
This Colorful Bow Tie Pasta Salad is not just a feast for the eyes; it’s a wholesome addition to your meal!
- Calories: Approximately 300 per serving (this can vary based on the dressing and additional proteins added).
- Carbohydrates: Around 40g (perfect for fueling those summer activities).
- Protein: About 7g if you stick to veggies; it can increase significantly with added proteins.
- Fats: Typically around 12g, depending on the dressing and any cheese you add.
- Fiber: Approximately 3g from all those wholesome veggies, helping keep your digestive system happy.
- Vitamins: A good source of Vitamin C and K, particularly from the bell peppers and parsley.
This salad packs a nutritional punch while remaining low in calories, making it a wonderful choice for a light lunch or side dish!
Final Thoughts
There you have it! The Colorful Bow Tie Pasta Salad isn’t just a salad; it’s a celebration of the flavors and feelings that food can evoke. Its versatility allows you to make it your own, customize it to your taste, and share it with your loved ones—just like I did many summers ago in my grandmother’s kitchen.
So, gather around that dining table, share those hearty laughs, and dig into the colorful creation you’ve just made! At the end of the day, it’s not just about the food itself; it’s about the people you meet and the memories you make along the way.
Happy cooking, my friends! Let’s dig in! 🥳✨
Print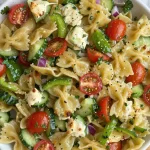
Colorful Bow Tie Pasta Salad
- Total Time: 25 minutes
- Yield: 4 servings 1x
- Diet: Vegetarian
Description
A vibrant and delicious pasta salad perfect for picnics, barbecues, or casual dinners, featuring fresh veggies and tangy Italian dressing.
Ingredients
- 8 oz bow tie pasta
- 1 cup cherry tomatoes, halved
- 1 cup cucumber, diced
- 1 bell pepper, diced
- 1/2 cup red onion, diced
- 1 cup Italian dressing
- Salt and pepper to taste
- Fresh parsley for garnish (optional)
Instructions
- Bring a large pot of salted water to a boil.
- Add the bow tie pasta and cook according to package instructions (about 8-10 minutes) until al dente.
- Drain the pasta and rinse under cold water.
- Dice the cucumber, bell pepper, and onion into bite-sized pieces and halve the cherry tomatoes.
- Combine the cooled pasta with the chopped veggies in a large bowl.
- Pour in the Italian dressing and stir gently to combine.
- Taste and season with salt and pepper as desired.
- Chill in the fridge for at least 30 minutes before serving.
- Garnish with parsley just before serving.
Notes
This salad is great for meal prep and can be stored in an airtight container in the fridge for up to three days.
- Prep Time: 15 minutes
- Cook Time: 10 minutes
- Category: Salad
- Method: Mixing
- Cuisine: Italian
Nutrition
- Serving Size: 1 serving
- Calories: 300
- Sugar: 5g
- Sodium: 450mg
- Fat: 12g
- Saturated Fat: 1g
- Unsaturated Fat: 9g
- Trans Fat: 0g
- Carbohydrates: 40g
- Fiber: 3g
- Protein: 7g
- Cholesterol: 0mg
Keywords: pasta salad, colorful salad, vegetarian recipe, Italian dressing, summer meals
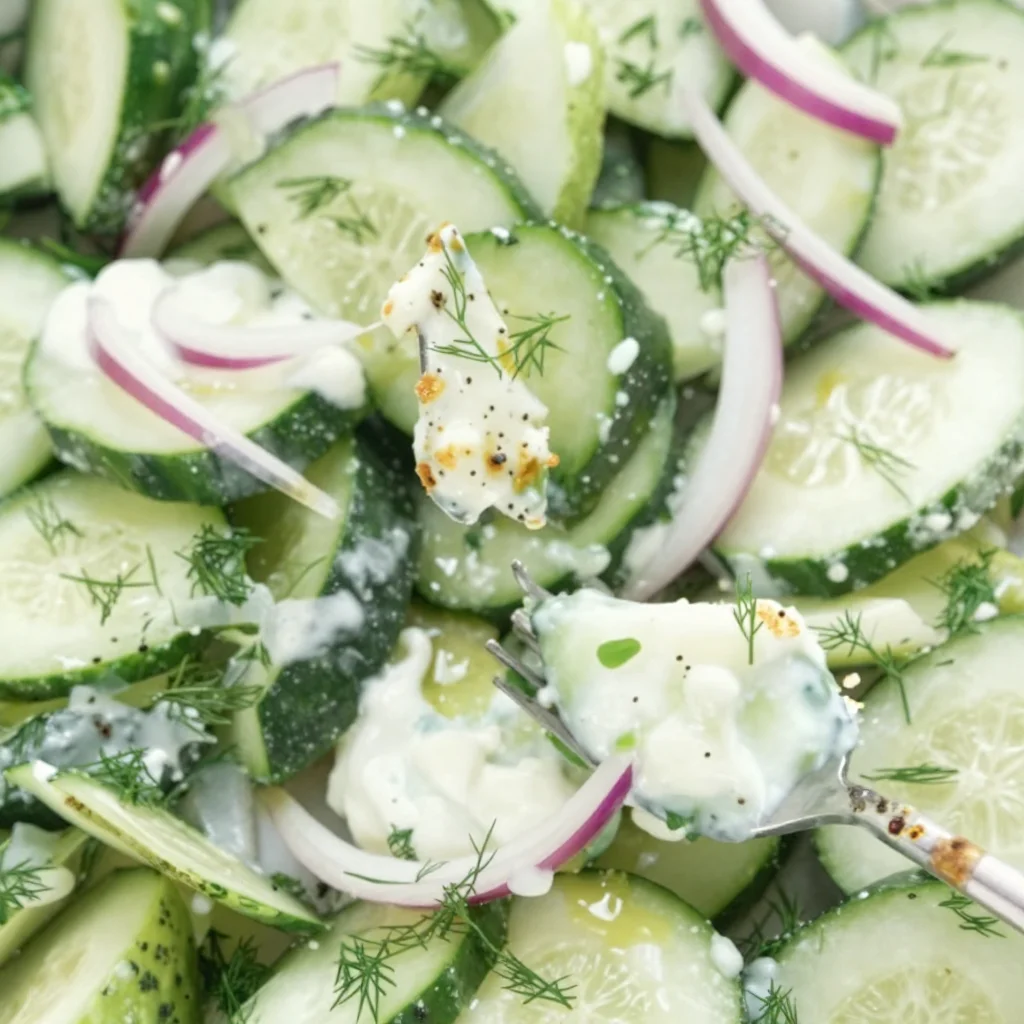
Minute Cucumber Dill Salad: Fresh, Crunchy, Summer Side
Cucumber Dill Salad: A Refreshing Delight for Every Occasion
Hey there, fellow food lovers! Beau Collier here, and today we’re diving into a dish that’s as delightful as a sunny picnic in the park—Cucumber Dill Salad. This fantastically refreshing side dish is perfect for summer barbecues, a light lunch, or even as a zesty topping on grilled meats. But don’t get me wrong; this salad can shine any time of the year! Let’s get those taste buds tingling.
Why do I love this dish? It’s simple, crisp, and bursting with fresh flavors. Plus, it’s a celebration of ingredients that are easy to find and even easier to prepare. With creamy Greek yogurt, the crunch of cucumbers, and the vibrant taste of dill, this salad checks all the boxes for a feel-good dish that packs a punch!
Imagine a warm afternoon where you’ve just come in from the garden, and you want something quick yet satisfying to whip up. This salad has your back! Picture the sound of cucumbers being sliced, the zing of fresh lemon juice, and the aroma of fragrant dill wafting through the air. Now that’s what I call culinary bliss!
As we venture through this recipe together, I’ll share a few kitchen secrets, stories that give this dish its heart, and variations to keep your meals exciting. Don’t be surprised if you find yourself making this salad on repeat. So, grab a cutting board, your knife, and let’s make some salad magic!
A Wholesome Memory
Let me take you back to one of my favorite sunny afternoons in the kitchen with my grandmother. She had this incredible knack for turning the simplest ingredients into meals that felt like pure love. I remember her making a basic cucumber salad and tossing it together with fresh dill from her little herb garden. The smell was enchanting!
As a young boy, I would watch in awe as she deftly sliced cucumbers, occasionally stealing a piece here and there to munch on. She’d giggle and say, “The secret to cooking is to enjoy every bite along the way!” Those afternoons with her inspired my passion for cooking and showed me that food truly can connect us all.
Fast forward a couple of decades, and now I’m in my own kitchen, channeling her love for fresh flavors in this Cucumber Dill Salad. Every time I make it, I’m reminded of those warm afternoons, and it always makes my heart feel full. Food, after all, is about memories, and my goal here is to help you create some of your own!
Ingredients
Here’s what you’ll need to whip up this delightful dish:
-
¾ cup (150 grams) Greek yogurt or plain full-fat yogurt
Greek yogurt adds a nice creaminess and tanginess to the salad. If you prefer a lighter version, use low-fat yogurt or substitute it with dairy-free yogurt. -
1 ½ tablespoon extra virgin olive oil
This adds richness without being heavy. Try avocado oil for a different flavor profile or for something lighter, you can skip it altogether. -
1 ½ tablespoon fresh lemon juice
The bright acidity of lemon juice lifts the salad and balances out the creaminess. If you’re feeling adventurous, lime juice works beautifully too! -
¼ teaspoon garlic, grated
Garlic gives a hint of spice. If you prefer a milder approach, you can omit it or use garlic powder instead. -
½ teaspoon fine salt
Essential for bringing out the flavors. You can use kosher salt or sea salt as alternatives, just keep in mind that different salts vary in saltiness. -
⅕ teaspoon black pepper
A dash of black pepper lends a subtle kick. Experiment with freshly cracked black pepper for a delightful pop of heat. -
1 ½ lb (670 grams) cucumbers, sliced
I love using English cucumbers for their crunchy texture and lower seeds. However, any cucumber works, just be sure to slice them thin for nice bite-sized pieces! -
½ red onion, finely sliced
Red onions add a sweet bite and beautiful color. If they’re too potent for your taste, soak them in cold water for a few minutes to mellow out their flavor. -
¼ cup fresh dill, chopped
Ah, the star of the show! Dill enhances the freshness of the cucumbers. If you can’t find fresh dill, dried dill works in a pinch—just use about one tablespoon.
Step-by-Step Instructions
Alright, folks! Let’s get cooking. Here’s a step-by-step guide to making this Cucumber Dill Salad:
-
Prep Your Workspace:
Start by gathering all your ingredients. A tidy workspace makes cooking so much more enjoyable! Wash your cucumbers and fresh herbs, and get your cutting board ready. -
Slice the Cucumbers:
With a sharp knife, slice your cucumbers into thin rounds. You want them crispy and refreshing! If you’re using English cucumbers, there’s no need to peel them—just wash and slice. Pay attention to the thickness; aim for about 1/8 inch so they soak up all the dressing.Chef Hack: If you want even more crunch, sprinkle salt on the slices and let them sit for 10 minutes. This will draw out excess water before mixing them into the salad.
-
Finely Slice the Red Onion:
Grab your red onion and cut it in half. Trim the ends, and slice it thinly. As mentioned, if the flavor feels too strong, give them a soak in cold water for about 5-10 minutes before adding them to your bowl. Trust me, it’ll mellow that zestiness down. -
Chop the Fresh Dill:
Roll your fresh dill into a tight bunch and slice it finely. This fragrance takes the dish to another level—stop and take a whiff! -
Mix the Dressing:
In a large bowl, combine the Greek yogurt, olive oil, lemon juice, grated garlic, salt, and pepper. Use a whisk to ensure everyone is blended nicely together—this will be the creamy base for your salad.Tip: Adjust the dressing to your preference! Love it lemony? Go ahead and add more juice. Seeking extra creaminess? Don’t hesitate to add a tad more yogurt.
-
Combine Ingredients:
Toss the sliced cucumbers, red onion, and chopped dill into your bowl of dressing. Gently mix everything together until all the pieces are coated with that creamy goodness. -
Chill and Serve:
For the best flavor, let the salad chill in the refrigerator for at least 30 minutes. This process allows all those flavors to mingle and intensify—plus, it’s refreshing to serve cold!Chef Tip: This salad can actually be made a day in advance. Just keep it in an airtight container, and it will still taste wonderful the next day—it’s handy for meal prep!
Serving Suggestions
Now that your Cucumber Dill Salad is all prepped and chilling, let’s think about how to serve it up! You can plate it in various ways:
-
Chic Serving Bowls:
Grab your fanciest serving bowl and pile in the salad. The bright green and white colors pop—perfect for impressing guests. -
Individual Portions:
For a more personal touch, serve in individual small bowls. It adds a nice touch for gatherings and allows everyone to dig in at their own pace. -
On the Side:
This salad pairs beautifully alongside grilled chicken, fish, or even hearty sandwiches. Place a generous scoop beside your main dish to brighten up your plate! -
Garnish with Extra Dill:
Sprinkle a few extra sprigs of fresh dill on top right before serving for a lovely aromatic finish. It looks beautiful and adds an extra punch of freshness.
Recipe Variations
I love improvising in the kitchen, and this Cucumber Dill Salad can be easily modified! Here are some fun twists you might explore:
-
Add Avocado:
Dice up an avocado and fold it gently into the salad. It adds creaminess and a lovely buttery flavor! -
Feta Cheese:
Crumbled feta provides a salty contrast to the cool cucumbers. It’s a match made in heaven—just remember to balance the dressing accordingly! -
Spicy Kick:
Throw in a pinch of crushed red pepper flakes or diced jalapeños to your dressing for a zesty surprise. A little heat can take this dish up a notch! -
Replace Dill with Mint:
If you’re not a fan of dill, fresh mint works wonderfully and gives the salad a cool twist. This combination is especially refreshing! -
Add Cherry Tomatoes:
Slice some cherry tomatoes in half and toss them in for added sweetness and color. The juicy bursts of tomatoes pair nicely with the crunchy cucumbers.
Chef’s Notes
This Cucumber Dill Salad has evolved along the years in my kitchen! I went from using just basic ingredients to getting adventurous with flavors and textures. I must say, every time I switch it up, it always feels like discovering something new!
And here’s a funny little kitchen story: I once made this salad for a summer potluck and forgot to bring the dressing with me. Imagine: a bowl full of gorgeous cucumbers and herbs staring at me, waiting to be devoured! I quickly whipped up a new dressing using random ingredients found in the host’s pantry. It turned out delicious, and I named it “Potluck Surprise”—now that’s about improvisation!
FAQs and Troubleshooting
Here are a few common questions I often receive about this recipe:
1. Can I make this salad ahead of time?
Absolutely! It’s best to let flavors meld together, but I wouldn’t recommend more than a day in advance. Keep it stored in your fridge in an airtight container to maintain its crunch.
2. How do I make this a main dish?
It’s simple! Add some protein like grilled chicken, chickpeas, or even shrimp to turn it into a satisfying main dish.
3. What other herbs can I use?
While dill is the star here, you can experiment with parsley, basil, or tarragon for a different flavor profile. Each herb brings its personality to the dish!
4. What if I don’t have cucumbers?
Use zucchini or even radish for a crunchy bite in place of cucumbers. Just be sure to cut them thin for the best texture!
Nutritional Info
For those keeping an eye on their nutritional intake, here’s a quick rundown:
- Calories: About 120 calories per serving (based on 1/2 cup serving size)
- Protein: 5 grams from the yogurt and cucumber
- Healthy Fats: 7 grams from the olive oil
- Carbohydrates: 9 grams mainly from cucumbers and onions
- Fiber: 1.5 grams—great for digestion!
This salad is rich in vitamins, such as Vitamin C from the cucumbers, and contains probiotics from the yogurt, making it not only a tasty choice but a healthy one too!
Final Thoughts
Cucumber Dill Salad is a great dish to have in your repertoire, bringing joy and freshness to your meals with minimal effort. With each spoonful, you’re not just enjoying a salad—you’re sharing a piece of heartfelt tradition.
So next time you’re looking for something to brighten your table, remember this easy, feel-good recipe. And don’t hesitate to play around with the ingredients; that’s what cooking is all about.
Gather your loved ones, serve up this salad, and enjoy some quality time over good food. Remember, food isn’t just about fuel; it’s about creating beautiful memories and sharing delicious experiences. Now get cooking, and let’s make some culinary magic together!
Print
Cucumber Dill Salad
- Total Time: 40 minutes
- Yield: 4 servings 1x
- Diet: Vegetarian
Description
A refreshing and simple Cucumber Dill Salad perfect for any occasion, bursting with fresh flavors.
Ingredients
- ¾ cup (150 grams) Greek yogurt or plain full-fat yogurt
- 1 ½ tablespoon extra virgin olive oil
- 1 ½ tablespoon fresh lemon juice
- ¼ teaspoon garlic, grated
- ½ teaspoon fine salt
- ⅕ teaspoon black pepper
- 1 ½ lb (670 grams) cucumbers, sliced
- ½ red onion, finely sliced
- ¼ cup fresh dill, chopped
Instructions
- Prep Your Workspace: Start by gathering all your ingredients. Wash your cucumbers and fresh herbs, and get your cutting board ready.
- Slice the Cucumbers: With a sharp knife, slice your cucumbers into thin rounds.
- Finely Slice the Red Onion: Grab your red onion and cut it in half. Trim the ends, and slice it thinly.
- Chop the Fresh Dill: Roll your fresh dill into a tight bunch and slice it finely.
- Mix the Dressing: In a large bowl, combine Greek yogurt, olive oil, lemon juice, grated garlic, salt, and pepper. Whisk until blended.
- Combine Ingredients: Toss the sliced cucumbers, red onion, and chopped dill into your bowl of dressing and mix gently until everything is coated.
- Chill and Serve: Let the salad chill in the refrigerator for at least 30 minutes before serving.
Notes
Can be made a day in advance. Serve with grilled meats or as a refreshing side dish.
- Prep Time: 10 minutes
- Cook Time: 0 minutes
- Category: Salad
- Method: Mixing
- Cuisine: Mediterranean
Nutrition
- Serving Size: 1/2 cup
- Calories: 120
- Sugar: 3g
- Sodium: 300mg
- Fat: 7g
- Saturated Fat: 1g
- Unsaturated Fat: 6g
- Trans Fat: 0g
- Carbohydrates: 9g
- Fiber: 1.5g
- Protein: 5g
- Cholesterol: 10mg
Keywords: salad, cucumber, dill, healthy, quick meal, summer dish, refreshing
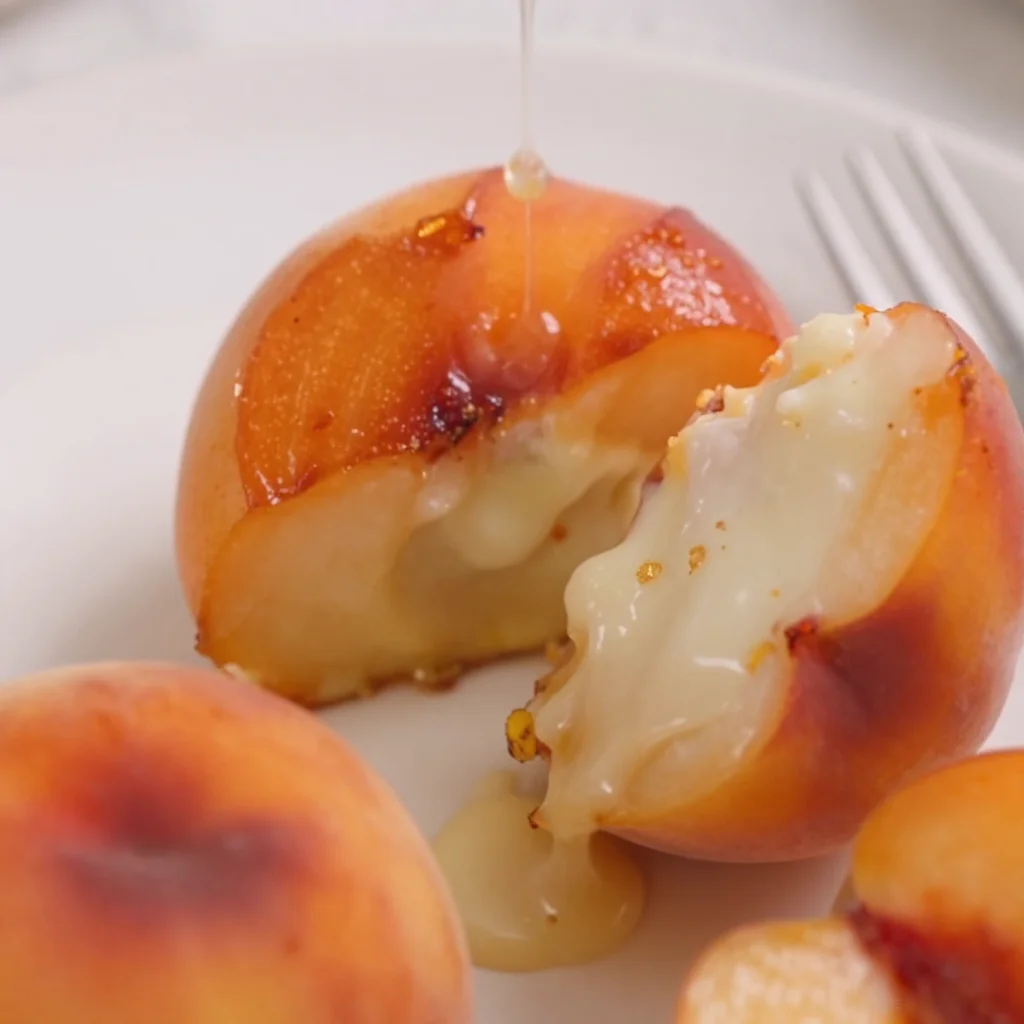
Quick Peach Upside-Down Mini Cakes: 30-Minute Summer Treat
Peach Upside Down Mini Cakes: A Slice of Summer Nostalgia
Hey there, food lovers! Today, I’m thrilled to share with you a delightful dessert that’ll make your taste buds sing and your heart soar: Peach Upside Down Mini Cakes! When summer rolls around, there’s nothing quite like the sweet, juicy essence of fresh peaches. And believe me, when you flip these little beauties upside down, you’re in for a delicious surprise.
Let’s be honest. There’s something utterly charming about mini cakes. They’re like little bundles of joy that remind you of childhood delights—perfect for sharing (or not, no judgment here!). As I prepare to share this recipe, I’m grinning just thinking about those sun-kissed evenings spent on the porch, surrounded by family, savoring dessert and delightful conversation. So, whether you’re celebrating a special occasion or simply treating yourself on a casual Wednesday, these mini cakes are sure to brighten your day!
Personal Story
Growing up, my grandma always had a knack for transforming simple ingredients into magical moments. One summer, she decided to experiment with peaches from our backyard tree. I can’t recall the exact day, but I remember the warm sun filtering through the leaves, the sweet aroma wafting from the kitchen, and the sound of my grandma humming softly as she worked her magic.
That day, she pulled out a cast iron skillet and started caramelizing those peaches with a bit of butter and brown sugar, a process that felt like watching a beautiful dance unfold in front of my eyes. When she poured the cake batter over those glorious peaches and turned it upside down just out of the oven, it was like unwrapping a present—an explosion of warm, gooey, peachy goodness that took my little foodie heart straight to cloud nine.
These Peach Upside Down Mini Cakes are my homage to that unforgettable summer memory. I hope they inspire similar heartwarming moments in your kitchen too!
Ingredients
To make these Peach Upside Down Mini Cakes, gather the following ingredients:
-
Non-stick cooking spray
A kitchen lifesaver! This ensures our mini cakes pop out effortlessly. Go for coconut oil spray for an extra hint of flavor! -
1 tablespoon unsalted butter (cold)
This is for greasing the muffin tin. Cold butter helps to create that luscious caramel layer. -
6 teaspoons light brown sugar
The secret to that rich, caramel flavor! You can substitute with coconut sugar for a more natural twist. -
3 fresh peaches (Note 1)
The star of the show! Feel free to swap them out for nectarines or even pears when peaches aren’t in season. -
1 ½ cups all-purpose flour
The foundation of our cake. Whole wheat flour can be used for a healthier spin, but it may yield a denser cake. -
1 teaspoon baking powder
This adds fluffy lift! Always fresh is best—check that expiration date. -
½ teaspoon baking soda
Works in tandem with the baking powder for extra lightness. Don’t skip this, or your cakes won’t rise as they should! -
¼ teaspoon salt
Just a pinch! It enhances all the flavors, bringing everything together harmoniously. -
2/3 cup granulated sugar
Regular ol’ sugar for sweetness! You could use a sugar substitute like erythritol if you want to cut down on calories. -
1/3 cup unsalted butter (at room temperature)
This whipped into sugar creates a light and airy texture. Always allow it to sit out for a bit to soften! -
1 large egg (at room temperature)
Helps with binding and adds moisture to our cakes. Don’t forget to let it sit for a while in warm water if you left it in the fridge! -
1 teaspoon pure vanilla extract
Because vanilla makes everything better! Choose pure over imitation for a richer flavor. -
½ cup buttermilk (at room temperature) (Note 2)
This gives our cakes a tender crumb. No buttermilk? You can make a substitute by mixing milk with a teaspoon of vinegar or lemon juice and letting it sit for 5 minutes.
Step-by-Step Instructions
Alright, let’s dive into the delightful adventure of making our Peach Upside Down Mini Cakes!
-
Preheat Your Oven
Preheat your oven to 350°F (175°C). This ensures that your mini cakes get that lovely golden exterior, caramelizing the peaches perfectly. -
Prepare the Muffin Tin
Grab a 12-cup muffin tin and spray each cup generously with non-stick cooking spray. Then, place 1 tablespoon of cold butter in each cup and pop it in the oven for just a few minutes until melted. After a minute, sprinkle 6 teaspoons of light brown sugar evenly across the melted butter. This will create your gooey topping! -
Slice the Peaches
While the butter and sugar are melting, wash and slice your fresh peaches. You want thin wedges to ensure they cook evenly and caramelize beautifully. -
Arrange the Peaches
Once the butter-sugar mixture is ready, carefully remove the muffin tin from the oven (watch out, it’s hot!). Arrange the peach slices on top of the brown sugar and butter mixture, making them as pretty as you like. This is your opportunity to show off your artistic flair! -
Mix the Dry Ingredients
In a medium bowl, whisk together the flour, baking powder, baking soda, and salt. Set it aside for now. -
Cream the Butter and Sugar
In another large bowl, beat the granulated sugar and room-temperature butter together until light and fluffy—about 2 to 3 minutes. This is where the magic happens, so don’t rush this step! -
Add the Egg and Vanilla
Next, add in the egg and pure vanilla extract. Beat until everything is combined. You’ll notice a luscious, creamy texture forming! -
Combine the Mixtures
Gradually add the dry ingredients to the wet mixture, alternating with the buttermilk. Start and end with the dry ingredients. Mix until just combined; don’t overdo it, or your cakes might turn out dense. -
Spoon the Batter
Carefully spoon the batter over the arranged peaches in each muffin cup, filling each cup about 2/3 full. -
Bake
Pop the muffin tin into the oven and let them bake for about 20 to 25 minutes, or until a toothpick inserted into the center comes out clean. Your kitchen will smell absolutely heavenly during this time! -
Cool and Flip
Once done, allow the cakes to cool in the tin for about 5 minutes. Then, using a butter knife, gently loosen the edges of each cake, flip them onto a wire rack, and then onto a serving platter. You might want to do this over a baking sheet just in case of any caramel drips!
Serving Suggestions
Now that your Peach Upside Down Mini Cakes are fully baked and cooled, it’s time to serve them up! For a classic presentation, simply place them on a beautiful platter with the peach side facing up.
For an extra touch of indulgence, top them with a dollop of freshly whipped cream or a scoop of vanilla ice cream while they’re still warm. The cold cream melting into the warm cake is pure bliss! You could also garnish with crushed nuts or a sprig of mint for that added pop of color. These little touches turn the humble mini cakes into a show-stopping dessert!
Recipe Variations
Want to shake things up a bit? Here are some fun variations to try:
-
Berry Bliss: Swap out the peaches for a medley of fresh berries like blueberries, raspberries, or strawberries. The result will be a tart and sweet delight!
-
Nutty Twist: Add chopped nuts like pecans or walnuts into the batter for an earthy crunch that complements the sweetness of the peaches.
-
Spiced Delights: Incorporate warm spices like cinnamon or nutmeg into the cake batter for added depth and complexity—perfect for fall!
-
Gluten-Free Goodness: Substitute all-purpose flour with a gluten-free blend to cater to gluten-sensitive friends while keeping all the deliciousness intact.
-
Coconut Dream: Use coconut milk instead of buttermilk and add shredded coconut to the batter for a tropical twist!
Chef’s Notes
Ah, the beauty of recipes! As I’ve experimented with these little cakes over the years, I’ve come to realize they’re incredibly forgiving. Not only that, but they can evolve with your pantry and seasonal produce. One time, I had a few leftover apricots and pecans, and let me tell you—the flavors worked like a charm!
Another fun story: during a cooking class, someone accidentally swapped out the peaches for plums and used lemon juice instead of buttermilk. I was skeptical at first, but it turned into one of my favorite variations! Sometimes the kitchen is a magical place—embrace the surprises!
FAQs and Troubleshooting
Q1: What if my cakes stick to the tin?
Make sure to generously spray the muffin tin with non-stick cooking spray. If they still stick, gently run a pair of kitchen tongs around the edges before flipping.
Q2: Can I use canned peaches?
Absolutely! Just be sure to drain and pat them dry thoroughly before using. Canned peaches can be a bit softer, so handle them carefully.
Q3: My cakes are dense. What happened?
This likely means the batter was over-mixed. For the fluffiest mini cakes, mix just until combined after adding the dry ingredients.
Q4: Can I freeze these mini cakes?
Yes! Once cooled, wrap them tightly in plastic wrap and store them in an airtight container. They’ll keep for up to 3 months. When ready to eat, simply thaw and warm them up!
Nutritional Info
When you’re indulging in desserts, you might wonder about the nutritional breakdown. Here’s a rough estimate per mini cake (based on standard servings):
- Calories: 180
- Total Fat: 7g
- Saturated Fat: 4g
- Cholesterol: 35mg
- Sodium: 150mg
- Total Carbohydrates: 27g
- Dietary Fiber: 1g
- Sugars: 12g
- Protein: 2g
Of course, these will vary based on your specific ingredients and portion sizes. That said, it’s always good to indulge in moderation!
Final Thoughts
And there you have it! A recipe filled with heart, flavor, and memories that will surely become a staple in your home. Peach Upside Down Mini Cakes are not just a treat; they’re an experience.
Next time you take a bite, think of the sunny days, the laughter shared, and the memories yet to come. So pop into the kitchen, gather those ingredients, and create your own little piece of summer magic. Enjoy every last crumb, and as always, happy cooking from your favorite foodie friend here at Feastical! 🍑✨
Print
Peach Upside Down Mini Cakes
- Total Time: 40 minutes
- Yield: 12 mini cakes 1x
- Diet: Vegetarian
Description
Delightful mini cakes featuring fresh peaches caramelized to perfection, capturing the essence of summer nostalgia.
Ingredients
- Non-stick cooking spray
- 1 tablespoon unsalted butter (cold)
- 6 teaspoons light brown sugar
- 3 fresh peaches
- 1 ½ cups all-purpose flour
- 1 teaspoon baking powder
- ½ teaspoon baking soda
- ¼ teaspoon salt
- 2/3 cup granulated sugar
- 1/3 cup unsalted butter (at room temperature)
- 1 large egg (at room temperature)
- 1 teaspoon pure vanilla extract
- ½ cup buttermilk (at room temperature)
Instructions
- Preheat your oven to 350°F (175°C).
- Prepare the muffin tin by spraying each cup with non-stick cooking spray.
- Place 1 tablespoon of cold butter in each cup and melt in the oven.
- Sprinkle 6 teaspoons of light brown sugar over the melted butter.
- Slice the fresh peaches into thin wedges.
- Arrange the peach slices on top of the butter-sugar mixture.
- Mix the dry ingredients: flour, baking powder, baking soda, and salt.
- Cream the granulated sugar and room-temperature butter until light and fluffy.
- Add the egg and pure vanilla extract, mixing until combined.
- Combine the dry ingredients with the wet mixture, alternating with buttermilk.
- Spoon the batter over the arranged peaches, filling each cup about 2/3 full.
- Bake for 20 to 25 minutes, until a toothpick comes out clean.
- Cool the cakes for 5 minutes before flipping them onto a wire rack.
Notes
Serve with whipped cream or vanilla ice cream for an extra touch of indulgence. These mini cakes can be frozen for up to 3 months.
- Prep Time: 15 minutes
- Cook Time: 25 minutes
- Category: Dessert
- Method: Baking
- Cuisine: American
Nutrition
- Serving Size: 1 mini cake
- Calories: 180
- Sugar: 12g
- Sodium: 150mg
- Fat: 7g
- Saturated Fat: 4g
- Unsaturated Fat: 3g
- Trans Fat: 0g
- Carbohydrates: 27g
- Fiber: 1g
- Protein: 2g
- Cholesterol: 35mg
Keywords: Peach cake, mini cakes, summer dessert, upside down cake

Cinnamon-Sugar Air Fryer Banana Chips: Quick Crispy Snack
Quick & Easy Cinnamon-Sugar Air Fryer Banana Chips – Crispy Sweet Snack
Introduction
Hey there, fellow food lovers! It’s Beau Collier here, and today, we’re diving into the delicious world of crunchy snacks with a twist – or should I say, a crunch! If you’ve got a sweet tooth and a love for the crispy things in life, you’re going to adore these Quick & Easy Cinnamon-Sugar Air Fryer Banana Chips.
Bananas have always held a special place in my heart. I can remember summer days as a kid, running around with friends and enjoying the sun, while my mom would whip up snacks that made us feel like we were indulging in something special. Among those snacks were her delightful banana creations, but I wanted to give it a modern twist. Enter the air fryer—my kitchen superhero! It offers a fast and healthy way to get that satisfying crunch we all crave.
So why make your own banana chips? For starters, they eliminate the store-bought version’s additives and preservatives. Not only can you control the sugar (because let’s face it, we all know it’s easy to overdo it), but you can also customize them to fit your taste buds. Plus, these cinnamon-sugar delights are perfect for satisfying your sweet cravings guilt-free. Whether you’re snacking solo or sharing with friends and family, these chips are bound to be a hit at any gathering.
Are you ready to transform those humble bananas into crispy nuggets of joy? Let’s get munching by gathering our ingredients and diving into this fun recipe together!
Personal Story
Growing up, my family had a tradition of visiting the local farmer’s market every Saturday morning. It was an adventure where the vivid colors of fresh produce and the air filled with scents of herbs and spices awoke my culinary curiosity. My mom would always bring home a bunch of bananas, which we’d devour throughout the week. But often, there were a few lingering, perfectly ripe bananas left as the week came to an end.
One day, instead of making my usual banana bread (which I still adore), I decided to slice them up and toss them into the air fryer after being inspired by a cooking show. When those chips emerged, golden and crispy, I thought I’d struck gold in the kitchen! The aroma of cinnamon and sugar filling the air? Oh my goodness, it was pure bliss! That satisfying crunch followed by a sweet explosion in your mouth became an instant hit. Now, I find myself whipping up a batch regularly—not only for my family but also for spontaneous get-togethers. It’s amazing how a simple recipe can carry so much nostalgia and joy!
Ingredients
For our Cinnamon-Sugar Air Fryer Banana Chips, you’ll need:
-
2 firm, ripe bananas: The key here is to use bananas that are ripe but still firm enough to hold their shape during slicing. Overripe bananas may become mushy instead of crispy. If you only have overripe bananas, consider making banana bread or smoothies instead!
-
1 tbsp coconut oil (or melted butter): Coconut oil brings a hint of tropical flavor to these chips. You can substitute with melted butter if you prefer. Just remember, using butter will give it a different rich flavor.
-
1 tbsp granulated sugar (or coconut sugar): Regular granulated sugar works perfectly for a classic sweet touch. If you’re aiming for a less-refined sugar option, coconut sugar is a fantastic alternative, bringing a subtle caramel flavor.
-
½ tsp ground cinnamon: This spice adds warmth and sweetness. I like to use Ceylon cinnamon for its unique taste and health benefits, but any variety will work. Want to kick it up a notch? Try adding nutmeg for a little extra flair!
Step-by-Step Instructions
-
Preheat the Air Fryer: Before you dive into slicing bananas, let’s get that air fryer warmed up. Preheat it to 350°F (175°C) while you prep the bananas. A hot air fryer is your best friend for getting those crunchy chips just right!
-
Slice the Bananas: Peel your bananas and slice them into thin rounds. Aim for about 1/8 to 1/4 inches thick. Go too thick, and they won’t crisp up; too thin, and they might burn. If you’re unsure, err on the thinner side—better crispy than soggy!
-
Toss with Oil and Sugar: In a mixing bowl, combine banana slices with coconut oil (or melted butter), granulated sugar (or coconut sugar), and ground cinnamon. Toss until the banana slices are evenly coated. This step is crucial as it ensures every slice gets that delightful flavor and crunch!
-
Arrange in the Air Fryer: Lay the banana slices in a single layer in the air fryer basket. Avoid overcrowding! If necessary, work in batches to give each slice its moment to shine and crisp up beautifully.
-
Air Fry the Bananas: Cook for about 10 minutes, turning them halfway through. Keep an eye on them as cooking times may vary depending on your air fryer model. They should come out golden brown and crisp; take them out before they start to burn!
-
Cool and Crisp Up: Transfer the chips to a wire rack or a plate to cool. They will crisp up even more as they cool down, so resist the urge to munch immediately—well, for a minute or two, at least!
Serving Suggestions
Once cooled, it’s time to serve these crunchy delights! I love to arrange my crispy banana chips on a rustic wooden platter—it’s all about that presentation, folks! Drizzle with a bit of extra cinnamon sugar for a touch of glam or pair them with a side of creamy yogurt for dipping. They also make a fantastic addition to oatmeal or a crunchy topping on your favorite desserts.
For a fun twist, you can snack on them while catching up with friends or while binge-watching your favorite series. They even work as a healthier alternative to chips at parties—everyone will appreciate the effort!
Recipe Variations
Here are a few creative ideas to elevate your banana chips game:
-
Chocolate Drizzle: Once cooled, drizzle melted dark chocolate over your banana chips for a decadent treat that’s sure to impress!
-
Chili-Lime Twist: For a savory kick, sprinkle lime juice and chili powder over the banana slices before air frying. This tangy twist will surprise your taste buds!
-
Nutty Banana Chips: Add chopped nuts, like almonds or pecans, to the bowl for an added crunch and flavor. This makes for a more filling snack!
-
Caramelized Chips: Dip the banana slices in a mixture of brown sugar and butter before air frying for an indulgent caramelized flavor.
-
Coconut Flakes: Want to enhance that tropical vibe? Toss in some unsweetened shredded coconut with the bananas for that extra crunch and flavor.
Chef’s Notes
As with many recipes, I’ve found ways to adapt and grow this one. The first time I made these chips, they were a little too sweet for my taste, so I dialed back the sugar. Playing with flavors and experimenting is part of the fun, so don’t hesitate to make this recipe your own!
A funny moment happened the first time I served these banana chips to my friends. They ended up snagging the whole batch before I could get any! Lesson learned: always make extra for sharing—or don’t share at all!
FAQs and Troubleshooting
1. My banana chips turned out soggy. What went wrong?
If your banana chips are soggy, they might have been sliced too thick or packed too tightly in the air fryer. Make sure to slice them thinly and arrange them in a single layer during cooking.
2. Can I use frozen bananas for this recipe?
I wouldn’t recommend it! Frozen bananas tend to become mushy when thawed, so stick with fresh bananas for the best texture.
3. How do I store leftover banana chips?
If you have any leftovers (which is rare!), store them in an airtight container at room temperature. They’re best enjoyed within a couple of days for optimum crunch.
4. Can I make these in the oven instead?
Absolutely! Spread the banana slices on a baking sheet lined with parchment paper and bake at 175°F (80°C) for about 2-3 hours, flipping halfway through. Just know that it will take longer than in the air fryer!
Nutritional Info
Now, let’s chat nutrition! While these cinnamon-sugar air fryer banana chips are a tasty snack, they also bring along nutritional benefits of bananas, such as potassium and fiber, essential for heart health and digestion.
Depending on your ingredient swaps, one serving of these delightful snacks can be around 110 calories. That’s just enough to satisfy your snack cravings without the guilt!
And with the coconut oil, you’re also getting healthy fats while keeping it light and wonderful—just the way we love our snacks!
Final Thoughts
And there you have it, friends—your go-to recipe for Quick & Easy Cinnamon-Sugar Air Fryer Banana Chips! These delightful bites are not just a treat for the taste buds but bring back warm memories and a dash of creativity. Whether you enjoy them on a lazy afternoon or impress guests at your next gathering, I’m sure they will become a staple in your kitchen.
So, gather those ripe bananas, fire up that air fryer, and get ready to crunch your way through this delicious snack. Don’t forget to share your creations and thoughts with me; I love hearing your kitchen adventures!
Happy cooking, and see you next time at Feastical!
Print
Quick & Easy Cinnamon-Sugar Air Fryer Banana Chips
- Total Time: 20 minutes
- Yield: 2 servings 1x
- Diet: Vegan
Description
Deliciously crispy and sweet banana chips made easily in an air fryer, perfect for satisfying snack cravings.
Ingredients
- 2 firm, ripe bananas
- 1 tbsp coconut oil (or melted butter)
- 1 tbsp granulated sugar (or coconut sugar)
- ½ tsp ground cinnamon
Instructions
- Preheat the Air Fryer: Preheat it to 350°F (175°C).
- Slice the Bananas: Peel and slice bananas into thin rounds.
- Toss with Oil and Sugar: Combine banana slices with oil, sugar, and cinnamon, and toss.
- Arrange in the Air Fryer: Lay the slices in a single layer in the basket.
- Air Fry the Bananas: Cook for about 10 minutes, turning halfway through.
- Cool and Crisp Up: Transfer to a wire rack to cool and crisp up.
Notes
For variations, try chocolate drizzle, chili-lime twist, or adding nuts for extra crunch.
- Prep Time: 10 minutes
- Cook Time: 10 minutes
- Category: Snack
- Method: Air Frying
- Cuisine: American
Nutrition
- Serving Size: 1 serving
- Calories: 110
- Sugar: 5g
- Sodium: 0mg
- Fat: 6g
- Saturated Fat: 5g
- Unsaturated Fat: 1g
- Trans Fat: 0g
- Carbohydrates: 15g
- Fiber: 2g
- Protein: 1g
- Cholesterol: 0mg
Keywords: banana chips, air fryer snacks, cinnamon sugar, healthy snacks, vegan snacks

Minute Crispy Cheesy Roll-Ups for Busy Weeknights
Crispy Cheesy Roll Ups: A Comfort Food Classic with a Twist
Hey there, food lovers! If you’re on a quest for the ultimate comfort food that’s crispy on the outside and ooey-gooey cheesy on the inside, then you’ve struck gold with my Crispy Cheesy Roll Ups. These delightful little bundles of joy not only hit the spot but also bring back sweet memories of childhood snacking and magic in the kitchen. Whether you’re whipping these up for a cozy night in or a gathering with friends, get ready to indulge in a dish that’s loved by both kids and adults alike!
A Cheesy Childhood Memory
Growing up, my kitchen was always a hub of bubbling pots and mouthwatering aromas. One of my fondest memories is of my grandmother, a culinary wizard, showing me how to make her cheesy roll-ups on a rainy Sunday afternoon. The rain tapped softly against the window as we huddled around the kitchen table, a pile of sliced bread, cheese, and a stick of butter in front of us. As my grandmother spread butter on every piece of bread with a dollop of love, I watched in awe as she transformed simple ingredients into something magical.
These roll-ups were our go-to snack, often eaten with a steaming bowl of tomato soup—a classic pairing that warmed our spirits. As we devoured these crispy delights, we shared stories, laughter, and the joy of good food. Fast forward to today, and I’m excited to share this treasured recipe with you all. So, let’s roll up our sleeves and dive in!
Ingredients
Here’s what you’ll need to create these crispy, cheesy morsels:
-
Sliced Bread
- Why: Any type of bread will work, but I love using white or whole grain for that soft, pillowy texture.
- Substitution Tip: If you want a gluten-free option, just grab a gluten-free bread that you love.
-
Cheese (cheddar, mozzarella, or your choice)
- Why: Cheese is the star of this dish! Cheddar brings sharpness while mozzarella adds that irresistible stretch.
- Substitution Tip: Feel free to mix and match your cheeses. Pepper jack for a spicy kick? Yes, please!
-
Butter (for spreading)
- Why: Butter adds a rich flavor and ensures that our roll-ups get that perfect crispness.
- Substitution Tip: You can use vegan butter or olive oil for a lighter option.
-
Tomato soup or marinara sauce (for dipping)
- Why: A warm bowl of tomato soup or zesty marinara brings a lovely acidity that complements the richness of the roll-ups.
- Substitution Tip: You can make a homemade dip by blending canned tomatoes, herbs, and spices or try basil pesto for something different!
Step-by-Step Instructions
-
Preheat Your Oven
- Start by preheating your oven to 400°F (200°C). This is crucial for getting that crispy texture we’re all after!
-
Prepare Your Bread
- Take your slices of bread and lay them flat on a clean countertop. If you’re feeling adventurous, use a rolling pin to flatten each slice slightly. This will allow you to roll up the bread easily, creating more surface area for that cheesy goodness!
-
Spread the Butter
- Generously spread a layer of butter on one side of each slice. Don’t be shy! A good butter coating is what gives you that golden crust when baking.
-
Add the Cheese
- Now, it’s time to layer on the cheese. Place a generous handful of shredded cheese on the unbuttered side of each slice. Remember, the more cheese, the merrier—so go wild!
-
Roll It Up
- Carefully roll each slice of bread starting from one end. Make sure to roll tightly to keep the cheese from spilling out during baking. If you have toothpicks on hand, go ahead and secure each roll with one.
-
Arrange on a Baking Sheet
- Place the roll-ups seam side down on a lightly greased baking sheet. Make sure they aren’t touching too much; we want them to crisp up nicely.
-
Bake
- Slide those cheesy rolls into the oven and bake for about 15-20 minutes or until they turn a lovely golden brown. Halfway through, you might want to flip them for a more even crisp.
-
Serve with Dipping Sauce
- Once they are crispy and delicious, serve them hot alongside your favorite dipping sauce. If you’re indulging in tomato soup, make sure it’s warm and comforting!
Serving Suggestions
When it comes to serving these crispy cheesy roll-ups, let your creativity shine! Arrange the roll-ups on a large platter, letting them cascade like a cheesy waterfall. Drizzle a little olive oil or sprinkle some fresh herbs on top for that burst of color.
You can present them with a cute little bowl of tomato soup or marinara for dipping, making it both functional and visually appealing. Want to jazz it up? Add some fresh basil leaves around the plate for a pop of green! And don’t forget—these roll-ups are delicious served with a side of crunchy veggies like carrot sticks or a fresh salad to balance that cheesiness.
Recipe Variations
Now that you’ve mastered the basics, let’s explore some fun twists you can make with these roll-ups!
- Spicy Kick: Add jalapeños or crushed red pepper flakes to the cheese before rolling for an extra spicy surprise!
- Herb Infusion: Mix fresh herbs like basil, cilantro, or thyme into your cheese filling for added flavor and freshness.
- Sweet and Savory: Swap traditional cheese for cream cheese with a touch of honey or jam, and serve with a fruity dipping sauce for a sweet treat.
- Veggie Delight: Sprinkle in some sautéed spinach, mushrooms, or bell peppers into the cheese before rolling for a delicious veggie-packed version.
- Savory Breakfast Roll-Up: Incorporate scrambled eggs and crispy bacon pieces for an indulgent breakfast twist!
Chef’s Notes
Here’s a little secret from my kitchen. I tend to make a bit more than I need because these roll-ups disappear faster than you can say "crispy." Friends and family absolutely love them, and every gathering turns into a mini feast with these crispy bites around. Plus, they’re super adaptable! Once, I made a mistake and added too much cheese. Instead of crying over spilled milk, I embraced the cheesy overflow and called it my "extra cheesy surprise." It turned out to be a crowd favorite!
FAQs and Troubleshooting
-
Why did my roll-ups not get crispy?
- Make sure you’re using enough butter and spacing them out on the baking sheet. If they’re too close together, they’ll steam instead of crisp!
-
Can I make these ahead of time?
- Absolutely! Assemble them ahead of time and keep them covered in the fridge until you’re ready to bake. Just add a few extra minutes to the baking time if they’re cold.
-
What if I don’t have an oven?
- No problem! You can cook them in a skillet over medium heat. Just keep an eye on them and flip them until they’re golden brown and crispy.
Nutritional Info
While these roll-ups are definitely a treat, if you’re counting calories, here’s a rough breakdown of nutritional information for one roll-up, making them a lovely guilty pleasure:
- Calories: Approximately 120
- Fat: 7g
- Carbohydrates: 10g
- Protein: 4g
The nutritional stats can vary based on the type of bread and cheese you choose, but they’re a hit when you’re looking for comfort and indulgence!
Final Thoughts
In the world of food, it’s all about what warms your heart and tickles your taste buds. My Crispy Cheesy Roll Ups may be simple, but they hold a wealth of memories and giggles—something every meal should have! Whether you savor them during a casual night with friends, celebrate a special occasion, or cozy up with a bowl of soup on a rainy day, each crunchy bite is full of love and nostalgia.
So, grab your ingredients, gather your friends or family, and let’s create something delightful together. The kitchen is more than just a place to cook; it’s where love is stirred, laughter is shared, and delicious memories are formed. Happy cooking, and may your roll-ups be forever crispy!
Print
Crispy Cheesy Roll Ups
- Total Time: 30 minutes
- Yield: 4 servings
- Diet: Vegetarian
Description
Delicious, crispy roll-ups filled with gooey cheese, perfect for a comfort food experience loved by all ages.
Ingredients
- Sliced Bread
- Cheese (cheddar, mozzarella, or your choice)
- Butter (for spreading)
- Tomato soup or marinara sauce (for dipping)
Instructions
- Preheat your oven to 400°F (200°C).
- Prepare your slices of bread and flatten them slightly if desired.
- Spread a generous layer of butter on one side of each slice.
- Add a generous handful of shredded cheese on the unbuttered side.
- Roll each slice tightly and secure with toothpicks if needed.
- Arrange on a greased baking sheet.
- Bake for about 15-20 minutes until golden brown, flipping halfway.
- Serve hot with your choice of dipping sauce.
Notes
You can make these roll-ups ahead of time and keep them in the fridge before baking. Perfect for gatherings!
- Prep Time: 10 minutes
- Cook Time: 20 minutes
- Category: Snack
- Method: Baking
- Cuisine: American
Nutrition
- Serving Size: 1 roll-up
- Calories: 120
- Sugar: 1g
- Sodium: 250mg
- Fat: 7g
- Saturated Fat: 4g
- Unsaturated Fat: 3g
- Trans Fat: 0g
- Carbohydrates: 10g
- Fiber: 1g
- Protein: 4g
- Cholesterol: 20mg
Keywords: crispy, cheesy, roll up, snack, comfort food, easy recipe

Pioneer Woman Peach Preserves Recipe: Quick Batch Today
The Sweetest Tale: Crafting Pioneer Woman Peach Preserves
Hey there, food lovers! Welcome back to Feastical, where we dive into delicious recipes that remind us why we love food in the first place. Today, we’re tackling something that feels like a hug wrapped in sweetness: Pioneer Woman Peach Preserves.
Now, whether you’ve got a basket of juicy peaches from the farmers’ market or you just happened to snag some from the grocery store without a plan (hey, it happens!), making peach preserves is a delightful experience that doesn’t require a degree in culinary arts. It’s simple, fun, and oh-so-satisfying when you seal up those jars and pop them into your pantry.
A Bite of Nostalgia
Let me whisk you away to my childhood for a second. Picture this: summer days filled with laughter, the scent of sun-warmed peaches wafting through the air, and my grandma in her kitchen, bustling around with jars, boiling water, and a big pot full of sweet fruity goodness. She was the queen of preserves, and her homemade peaches were legendary. I remember the first time I “helped” her. I was probably more of a hindrance at age eight, trying to sneak bites of sticky peach slices while she expertly mixed sugar and lemon juice.
As the kitchen filled with bubbling joy, her special secret was the generous squeeze of lemon juice—she’d say it didn’t just help with preservation; it was the magic touch that brightened the flavor of everything! Fast forward to today, and I find such joy in preserving the flavors of summer. It’s a tradition that keeps family memories alive, and I can’t wait to share it with you.
So, let’s grab those peaches and get started on a journey that’s sure to make your taste buds sing!
Fresh Ingredients to Scoop Up
To make the most luscious peach preserves, here’s what you’ll need:
-
11 lbs peaches, rinsed (about 5 kg)
Look for peaches that are ripe but still firm. They should yield slightly to gentle pressure. If they’re too soft, they might turn mushy during cooking. -
3 ½ to 4 cups white sugar (840-960 ml)
Sugar is essential for sweetness and preservation. If you want to reduce sugar, you can use honey, but keep in mind that it may alter the flavor profile. -
Juice of 1 medium lemon (about 2 tablespoons or 30 ml)
Lemon juice is the secret weapon here! Not only does it enhance flavor, but it also helps to prevent browning. If you don’t have fresh lemon, bottled juice works, but fresh is always best. -
5-6 pint-sized jars with lids
Make sure these are clean and sterile. You can run them through the dishwasher or boil them to keep your preserves fresh and safe.
Step-by-Step Instructions
Ready to make some magic happen? Here’s how you whip up those delicious peach preserves.
-
Prep the Peaches
Start by washing your peaches thoroughly. This removes any dirt or residues. Next, peel them—if you want to channel your inner chef, use a paring knife for precision or opt for a peeler if that suits you better. Cut each peach in half, remove the pit, and dice the fruit into bite-sized pieces. Pro tip: To make peeling easier, blanch them in hot water for about 30 seconds, then transfer them to cold water. -
Mix with Sugar
In a large bowl, combine your diced peaches and sugar. Stir gently to ensure the sugar coats every peach piece. Let this mixture sit for about an hour. This process is called maceration, and it helps the fruit release its natural juices. You’ll see those beautiful syrupy juices forming—trust me, your kitchen will smell divine! -
Juice It Up
After an hour, transfer the peach and sugar mixture to a large pot. Now, add that tangy lemon juice. Stir everything together. The combination of the sweet peaches and zesty lemon is going to create a symphony in your mouth. -
Cook
Place the pot over medium heat until it starts to boil. This is where the magic happens! Simmer it gently, stirring occasionally. You want to break down those peach pieces but also let it bubble away until it thickens. This could take anywhere from 20 to 40 minutes. You’ll know it’s ready when the preserves coat the back of a spoon. Keep an eye on it—nobody likes burnt preserves! -
Fill the Jars
Once thickened, remove from heat. Using a ladle (and some care—it’s hot!), funnel the peach preserves into your clean, sterilized jars, leaving about a quarter inch of space at the top. Chef’s hack: Wipe the rims of the jars with a clean cloth to remove any drips—it’s crucial for sealing! -
Seal ‘Em Up
Place the lids on the jars while the preserves are still hot. If you’re ready to dig in and don’t need long-term storage, you can let them cool and pop them in the fridge. Otherwise, process them in a boiling water bath for about 10 minutes to seal for longer storage.
Serving Suggestions
Now you’ve got those luscious peach preserves ready to go! Whether you’re slathering them on toast, spooning them over pancakes, or dolloping them on vanilla ice cream, these preserves are versatile and delightful. For a special brunch, serve them alongside a cheese board with brie and crusty bread. A little bit of sweetness balances the richness beautifully!
Recipe Variations
Feeling adventurous? Here are a few twists you can try with your peach preserves:
-
Spicy Peach Preserves: Add a little kick by including chopped jalapeños or a pinch of cayenne pepper to the mix. It’s a delightful contrast that will surprise your taste buds!
-
Vanilla Infusion: Stir in a teaspoon of vanilla extract just before you start cooking. The warm vanilla notes add a creamy depth to the sweetness.
-
Herb-Infused Preserves: Try infusing your preserves with fresh herbs like basil or rosemary. Just toss a few sprigs in while cooking, then strain them out before jar filling!
-
Berry Peach Combo: Mix in some fresh blueberries or raspberries during the cooking process for a berry-peach twist—delicious with a scone!
-
Alcohol-Enhanced: A splash of bourbon or rum can add an adult twist that adds another layer of flavor. Just remember to add it gradually and adjust to your taste.
Chef’s Notes
As I mentioned earlier, my love affair with peach preserves is nostalgic. It’s evolved with time as I’ve tried different variations. One time, I added a few sprigs of thyme on a whim, and it turned out to be an exquisite enhancement! Every jar you seal can capture a moment in your life or a flavor journey.
Remember, don’t stress too much about the process. Mistakes can turn into beautiful discoveries. Every batch you make is a chance to experiment—just like my grandma taught me.
FAQs and Troubleshooting
-
What if my preserves didn’t thicken?
If your peach preserves didn’t set up, don’t fret! You can always cook them a bit longer until they thicken. Just keep stirring to avoid burning. -
How long will my preserves last?
If properly sealed and stored in a cool, dark place, your peach preserves can last up to a year. Once opened, try to consume within a few weeks. -
Can I use frozen peaches for this recipe?
Absolutely! Just thaw them completely and drain any excess liquid before using. The taste may differ slightly, but they still make delicious preserves. -
What if I didn’t have enough peach juice?
You can always add a bit of water or additional lemon juice to make up for it. Just remember, it may slightly alter the flavor.
Nutritional Info
While I’ve not gone into all the nitty-gritty details of nutritional data, here’s a quick overview: When made with the ingredients above, peach preserves are primarily made of sugars and naturally occurring fruit carbs. A tablespoon could have around 40-50 calories, largely from sugars. Keep this in mind especially if you’re watching your sugar intake!
However, they’re also a source of vitamins A and C, thanks to those beautiful peaches, making them a tasty addition to your diet when consumed in moderation.
Final Thoughts
Making Pioneer Woman’s peach preserves is not just a delightful culinary experience; it’s a heartwarming time that connects us to tradition and family. Whether you’re keeping the flavors close to your heart or sharing them with loved ones, there’s something truly special about homemade preserves.
So, what are you waiting for? Grab those juicy peaches, and let’s get preserving! As usual, I can’t wait to hear about your kitchen adventures. Share your stories with me in the comments below or tag me on social media with your beautiful peach preserves! Until next time, stay hungry and keep those ovens warm! Bon appétit!
Print
Pioneer Woman Peach Preserves
- Total Time: 70 minutes
- Yield: 6 pint-sized jars 1x
- Diet: Vegetarian
Description
A delightful recipe for homemade peach preserves that captures the sweetness of summer and family traditions.
Ingredients
- 11 lbs peaches, rinsed (about 5 kg)
- 3 ½ to 4 cups white sugar (840–960 ml)
- Juice of 1 medium lemon (about 2 tablespoons or 30 ml)
- 5–6 pint-sized jars with lids
Instructions
- Prep the peaches by washing, peeling, and dicing them into bite-sized pieces.
- Mix the diced peaches with sugar in a large bowl and let sit for about an hour.
- Juice the mixture by transferring to a pot and adding lemon juice, stirring well.
- Cook over medium heat, stirring occasionally until it thickens (20 to 40 minutes).
- Fill the sterilized jars with hot preserves, leaving space at the top.
- Seal the jars while hot or process in a boiling water bath for 10 minutes for long-term storage.
Notes
For additional flavors, consider infusing with herbs, spices, or berries. Adjust sugar levels according to taste.
- Prep Time: 30 minutes
- Cook Time: 40 minutes
- Category: Preserves
- Method: Canning
- Cuisine: American
Nutrition
- Serving Size: 1 tablespoon
- Calories: 45
- Sugar: 12g
- Sodium: 1mg
- Fat: 0g
- Saturated Fat: 0g
- Unsaturated Fat: 0g
- Trans Fat: 0g
- Carbohydrates: 12g
- Fiber: 1g
- Protein: 0g
- Cholesterol: 0mg
Keywords: peach preserves, homemade jam, canning recipe, summer treats, fruit preserves
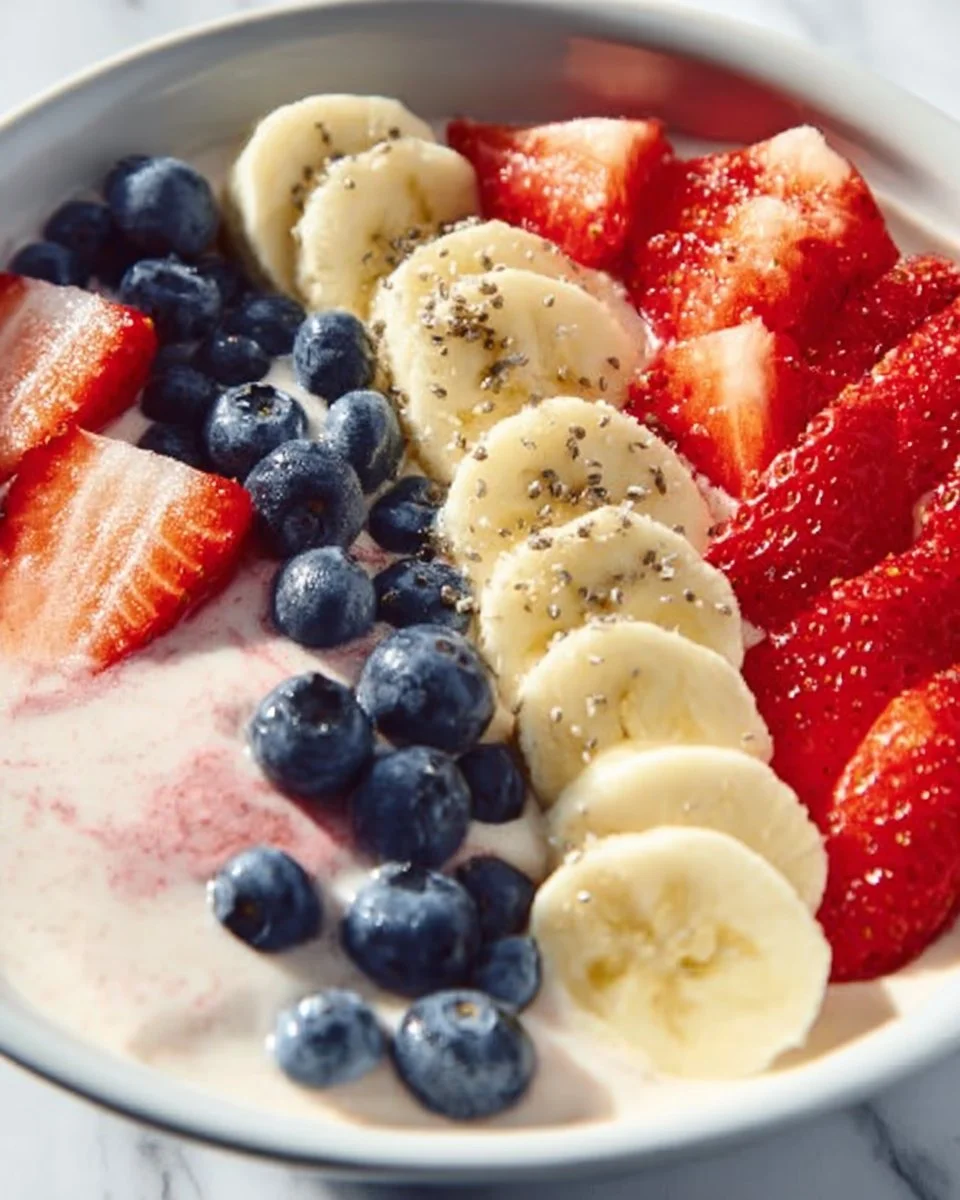
5-Minute Fruit Smoothie Bowl (with Greek Yogurt)
Welcome to the Bright and Flavorful World of 5-Minute Fruit Smoothie Bowls!
Hey there, foodies! Beau Collier here from Feastical, and today we’re diving into a burst of sunshine that’ll make your mornings sparkle like a fresh day. I’m talking about the delightful and incredibly versatile 5-Minute Fruit Smoothie Bowl! 🌞 If you’re anything like me, you occasionally stand in front of the fridge, hoping the contents of it will transform into a gourmet meal without much effort. Well, you’re in luck—this smoothie bowl is so simple, so delicious, and oh-so-good for you, it practically makes itself!
Imagine waking up and whipping up a breakfast that not only tastes heavenly but also looks like a work of art! The bright colors of fruits, the creaminess of Greek yogurt, and the crunchy toppings combine to create a dish that feels indulgent while keeping things on the healthy side. Whether you’re rushing to work, have kids to feed, or just want to treat yourself to something special, this smoothie bowl is exactly what you need. Plus, we’ll sprinkle in some little chef tips and stories along the way because what’s cooking without a little flavor?
So, grab your blender, and let’s dive into the delightful world of smoothie bowls that’ll have you feeling like a breakfast champion! This recipe is not just about filling up your stomach but feeding your soul.
A Slice of Nostalgia
Let me take you back to a sun-kissed morning years ago. I was visiting my favorite aunt who lived by the coast, and every morning, she had this delightful ritual. She would rise before everyone else, tiptoe into the kitchen, and whip up these amazing smoothie bowls that made our hearts skip a beat. The kitchen would fill with laughter as we all gathered around the table, each of us trying to outdo the other with the most extravagant toppings on our smoothie bowls.
I remember one specific morning: my aunt let me pick the ingredients. I was all about a crazy mix of frozen berries—because let’s face it, who can resist those vibrant colors? She showed me how to layer each ingredient with care, almost like painting a canvas. I can still feel the sun on my face and hear the waves crashing in the distance as we savored those vibrant creations together.
Fast forward to today, I find that same joy each time I whip up a smoothie bowl, turning a simple meal into a delightful experience. It’s all about those precious moments spent in the kitchen, gathering around to share stories, laughter, and, of course, scrumptious food!
Ingredients
Now, let’s talk about what you’ll need to create your smoothie bowl masterpiece. Here’s a handy list of ingredients, and I’ll drop in a chef insight or substitution tip for each:
-
1 Banana: The creamy base of your smoothie. If you’re out of bananas, try using avocado for a similar texture with a hint of nuttiness.
-
1 Cup Frozen Strawberries: Adds sweetness and a vibrant red color. Fresh strawberries work too, but you might want to add some ice to cool things down.
-
1/3 Cup Frozen Pineapple Chunks: A tropical twist! This gives your smoothie that refreshing zing. Canned pineapple can substitute, but drain it well.
-
1/2 Cup Vanilla Greek Yogurt: Creamy goodness plus protein! Can’t find vanilla? Regular Greek yogurt will do, and you can add a splash of vanilla extract instead.
-
Sliced Strawberries: For topping, they add freshness and a pop of color. Other berries work great too—experiment with what’s in season!
-
Sliced Bananas: More freshness on top. Again, swap with kiwis or mango if you’re feeling adventurous!
-
Fresh Blueberries: Bursting with flavor and nutrients. If fresh blueberries are unavailable, frozen ones can work nicely.
-
Granola: For that satisfying crunch. Look for nut-free or gluten-free options if you have dietary restrictions.
-
Shredded Coconut: Adds a tropical flair. Unsweetened is best for a healthier twist, but sweetened can take it to dessert level.
-
Slivered Almonds: For a little extra crunch and protein. Walnuts can be used instead for an earthier flavor.
-
Chopped Walnuts: Perfect for texture! You can swap these for pecans, which offer a slightly sweeter taste.
-
Chia Seeds: Packed with nutrients and a great thickening agent! Flaxseeds can be a substitute if you prefer those instead.
-
Sunflower Seeds: Adds a nutty crunch without allergies. Raw pumpkin seeds are also a fantastic swap.
Step-by-Step Instructions
Let’s get to the fun part—making your smoothie bowl! Grab your blender, and let’s make some magic happen.
-
Prep Your Ingredients: Start with peeling your banana and measuring out your frozen fruits and yogurt. If you’re using fresh fruits, make sure they’re washed and ready to go. Prep work is key! The less time you spend looking for things, the more time you have to enjoy your delicious creation.
-
Blend It Up: Toss the banana, frozen strawberries, frozen pineapple, and Greek yogurt into the blender. Blend on high until smooth and creamy. If your blender is struggling, you can add a splash of water or almond milk to help loosen it up. The goal is a thick, creamy texture, not a thin smoothie, so keep an eye on it!
-
Taste Test: Here’s where we get to be chefs! Taste your smoothie before pouring it out. If you want it sweeter, feel free to add a drizzle of honey or agave syrup. You can also add a little more Greek yogurt if you want a richer body.
-
Pour and Decorate: Now, pour the creamy goodness into your favorite bowl. This is where you can unleash your inner artist! Start by placing sliced strawberries and sliced bananas in a beautiful design on top of the smoothie.
-
Add Crunch and Flavor: Sprinkle granola, shredded coconut, slivered almonds, and chopped walnuts on top. Make it rain toppings! You want it to look as good as it tastes, so go wild here.
-
Final Touches: Scatter some fresh blueberries and a few chia seeds over the top. A drizzle of honey can also be a lovely finishing touch if you fancy a bit more sweetness.
Serving Suggestions
Serving your smoothie bowl is an art in itself! Personally, I love to grab a bright, colorful bowl that makes the fruits pop. Arrange those toppings thoughtfully, and don’t be afraid to pile them high! Use a spoon or a little slotted spatula to create heights and depth with the granola and fruits—this gives that gorgeous Instagram-worthy look.
For a special touch, you could even serve it with a cute little side of extra toppings, so folks can customize their bowls at the table. A refreshing glass of orange juice or a hot cup of herbal tea can make for a delightful breakfast spread that looks good and feels good!
Recipe Variations
Here are a few creative twists you can try with your smoothie bowl:
-
Tropical Paradise Bowl: Swap out the strawberries for mango and add a splash of coconut milk for that ultimate vacation vibe!
-
Green Goddess Bowl: Add a handful of spinach or kale for a nutrient boost. You won’t even taste it, and your smoothie will be a beautiful shade of green!
-
Chocolate Lover’s Delight: Mix in a tablespoon of cocoa powder or top with chocolate granola for a decadent spin. Dark chocolate shavings can take it to the next level!
-
Nut Butter Bliss: Swirl in a tablespoon of your favorite nut butter into the blend for added flavor—think almond or peanut butter. It adds richness and creaminess that’s absolutely divine.
-
Superfood Special: Incorporate acai powder or spirulina for extra superfood goodness! You might change the color slightly, but the flavor game is still strong.
Chef’s Notes
This recipe has traveled with me through the years, evolving with each new ingredient I discover. I remember when I first attempted to make it while on vacation—I didn’t have a blender, so I mashed everything up with a fork! It turned into a chunky smoothie bowl, and although it wasn’t the prettiest, it was tasty and sparked so much laughter.
I also love how this recipe encourages experimentation. Some days I throw in whatever fruit is about to go bad—no waste here! And honestly? It’s led to some delightful surprises!
FAQs and Troubleshooting
Q: My smoothie turned out too thick; what do I do?
A: No worries! Just add a splash of water or your favorite milk and blend again until you achieve that creamy texture.
Q: Can I make this ahead of time?
A: Sure! You can prep the ingredients the night before and store them in the fridge. Just blend in the morning and garnish your way!
Q: How do I make it dairy-free?
A: Simply swap out Greek yogurt for a plant-based yogurt. Almond or coconut yogurt works just as well!
Q: My toppings keep sinking; how can I fix this?
A: Make sure your smoothie is thick when pouring it into the bowl. You can also put a layer of granola as the base and then add fruit on top for better support!
Nutritional Info
Let’s talk about the health benefits of this smoothie bowl! This delicious creation is packed with nutrients.
- Protein: Thanks to Greek yogurt, you’re getting a protein boost to start the day right.
- Fiber: Fruits like bananas, strawberries, and chia seeds provide a great source of fiber, keeping you full for longer.
- Antioxidants: The vibrant colors of your fruits mean they’re loaded with essential vitamins and antioxidants.
- Healthy Fats: Toppings such as nuts and seeds bring in those healthy fats, perfect for brain function and overall wellbeing!
This smoothie bowl is not just a feast for the eyes—it’s a wholesome meal that fuels your body!
Final Thoughts
And there you have it, folks! The 5-Minute Fruit Smoothie Bowl is as quick and easy as it is delightful. It’s a canvas for your creativity and a hearty start to your day. Whether you whip it up for yourself on a busy morning or create a colorful breakfast spread for friends and family, this recipe will serve as the foundation for many delicious memories.
So, what are you waiting for? Get blending, and let your smoothie bowl journey begin! Remember, cooking is about joy and sharing. Each bowl tells a story, so let yours be filled with love and laughter. Until next time, keep exploring the flavors of life—one delicious dish at a time!
Print
5-Minute Fruit Smoothie Bowl
- Total Time: 5 minutes
- Yield: 2 servings 1x
- Diet: Vegetarian
Description
A colorful and nutritious smoothie bowl that comes together in just five minutes, perfect for a quick breakfast or a healthy treat.
Ingredients
- 1 Banana
- 1 Cup Frozen Strawberries
- 1/3 Cup Frozen Pineapple Chunks
- 1/2 Cup Vanilla Greek Yogurt
- Sliced Strawberries (for topping)
- Sliced Bananas (for topping)
- Fresh Blueberries (for topping)
- Granola (for topping)
- Shredded Coconut (for topping)
- Slivered Almonds (for topping)
- Chopped Walnuts (for topping)
- Chia Seeds (for topping)
- Sunflower Seeds (for topping)
Instructions
- Prep Your Ingredients: Start with peeling your banana and measuring out your frozen fruits and yogurt.
- Blend It Up: Toss the banana, frozen strawberries, frozen pineapple, and Greek yogurt into the blender. Blend until smooth and creamy.
- Taste Test: Adjust sweetness by adding honey or more Greek yogurt as desired.
- Pour and Decorate: Pour the smoothie into a bowl and arrange the sliced strawberries and bananas creatively on top.
- Add Crunch and Flavor: Sprinkle granola, shredded coconut, slivered almonds, and chopped walnuts over the top.
- Final Touches: Scatter fresh blueberries and chia seeds on top, adding a drizzle of honey if desired.
Notes
Feel free to mix and match fruits and toppings to suit your preferences. This recipe encourages creativity!
- Prep Time: 5 minutes
- Cook Time: 0 minutes
- Category: Breakfast
- Method: Blending
- Cuisine: American
Nutrition
- Serving Size: 1 bowl
- Calories: 300
- Sugar: 20g
- Sodium: 50mg
- Fat: 10g
- Saturated Fat: 2g
- Unsaturated Fat: 8g
- Trans Fat: 0g
- Carbohydrates: 45g
- Fiber: 6g
- Protein: 9g
- Cholesterol: 10mg
Keywords: smoothie bowl, healthy breakfast, quick recipe, fruit smoothie, nutritious bowl
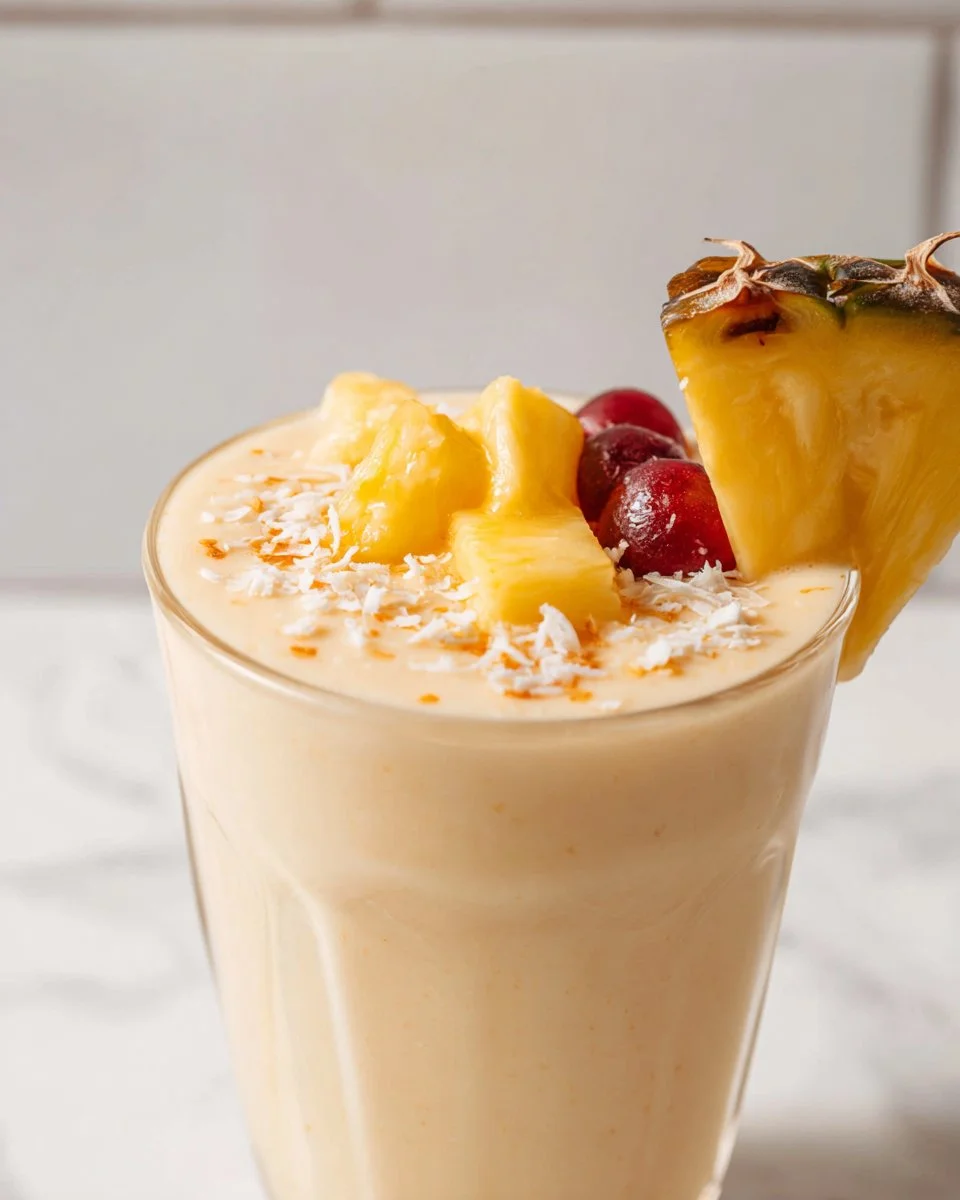
5-Minute Piña Colada Breakfast Smoothie
5-Minute Piña Colada Breakfast Smoothie
Hey there, smoothie lovers! If you’re dreaming of sandy beaches and sun-soaked days but stuck in the hustle and bustle of daily life, I’ve got just the remedy for you—a refreshing and tropical Piña Colada Breakfast Smoothie! This quick and easy recipe is like a vacation in a glass and takes only five minutes to whip up. So grab your blender, and let’s get started on creating something delicious that’ll have you feeling like you’ve just taken a sip of sunshine!
Imagine waking up to a thick, creamy smoothie that tastes just like a piña colada but is packed with goodness for your morning. With a base of coconut milk, frozen pineapple, and a touch of yogurt, we’re building a flavor bomb that’s not only satisfying but also incredibly nutritious. And the best part? You can make it while finishing your morning scroll through social media. It’s a win-win!
Nothing beats the aroma of coconut as it fills your kitchen, instantly transporting you to a tropical paradise—a little hack I learned during my culinary journey is to connect your recipes with memories. They say food is a love language, and I couldn’t agree more! Back in college, my friends and I would gather every weekend, binge-watching movies with our homemade versions of tropical drinks. One fateful movie night, we decided to use leftover coconut milk and frozen pineapple we had on hand to create a smoothie. Laughter ensued, along with a ton of vibrant colors and even a few blender mishaps! Little did we know that we were onto something so delicious and easy. And that, my friends, is how my love for smoothies blossomed!
Now, let’s get this dreamy Piña Colada Breakfast Smoothie blending!
Ingredients
Here’s what you’re going to need to bring this creamy concoction to life:
-
1 ½ cups coconut milk
- This forms the luxurious base of your smoothie. Light coconut milk works great too if you want to cut some calories without losing flavor.
-
3 cups frozen pineapple chunks
- The star of the show! Frozen fruit is not only convenient but helps to create a frosty texture. You can substitute fresh pineapple and add ice if you prefer, but you’ll lose that creaminess.
-
½ cup plain or vanilla Greek yogurt
- This adds protein and creaminess, making your smoothie more filling. You can swap it for dairy-free yogurt if you’re avoiding animal products or lactose.
-
1 cup ice
- This is optional, depending on how frosty you want your smoothie! If using fresh pineapple, I’d definitely recommend adding some ice.
-
Optional toppings:
- Slice of fresh pineapple – For that extra tropical flair!
- Maraschino cherries – These add a pop of color and a sweet touch.
- Coconut flakes – Toasted or plain, they’ll bring a crunchy element and enhance that coconut flavor.
Step-by-Step Instructions
Alright, friend! Let’s blend together this magical smoothie with just a few simple steps:
-
Gather Your Ingredients: Before you start, make sure everything is within reach. You’ll feel like a professional chef! It’s a game changer to have everything prepped.
-
Add Coconut Milk to the Blender: Pour in your coconut milk first. This helps the blades work smoothly and ensures that everything mixes well. If you’re using canned coconut milk, give it a good shake before opening for a consistent texture!
-
Toss in the Frozen Pineapple: Next, add the frozen pineapple chunks. I recommend this part because frozen fruit really helps achieve that thick shake-like consistency. Plus, it keeps your smoothie cold without needing too much ice!
-
Spoon in the Yogurt: Next up, add the Greek yogurt. If you’re feeling adventurous, experiment with flavored yogurts—vanilla is a crowd-pleaser, but I love trying out tropical flavors like pineapple or coconut too.
-
Add the Ice: If you love your smoothies icy and refreshing, toss in the cup of ice. It’s not necessary if you’re already using frozen pineapple, but hey, more frosty goodness never hurt anyone!
-
Blend Until Smooth: Pop the lid on your blender (don’t forget this step; trust me, I’ve learned the hard way!). Start blending at a low speed, then gradually increase to high. Blend until everything is smooth and creamy—about 30 seconds to a minute. If it seems too thick, feel free to add a splash of coconut water or regular water to thin it out just a bit.
-
Taste and Adjust: Once blended, give it a taste. Do you want it sweeter? Add a drizzle of honey or some agave syrup. Want it more coconutty? A splash of coconut extract can work wonders!
-
Pour and Serve: Now it’s time to pour your creation into a chilled glass. You can also use a mason jar for that rustic vibe.
Serving Suggestions
Presentation makes everything more appealing! I like to top my Piña Colada Breakfast Smoothie with a slice of fresh pineapple perched on the rim of the glass and a maraschino cherry on top. Sprinkle a few coconut flakes over the top for that extra hint of tropical charm. If you’re feeling fancy, serve it with a cocktail umbrella—you know, for those at-home beach vibes!
To enhance the experience, consider serving it alongside a simple breakfast. Think warm toast with nut butter, or some tropical overnight oats. It makes for a perfectly balanced breakfast that’s still uplifting and a little indulgent!
Recipe Variations
Ready to get creative with your smoothie? Here are a few delicious variations to mix things up:
-
Green Piña Colada Smoothie: Add a handful of spinach or kale for a nutrient boost! The sweetness of the pineapple will mask the green flavor, and you’ll hardly notice it.
-
Mango Piña Colada: Swap out half of the pineapple for frozen mango to give a different tropical twist. The mango adds a delightful sweetness that pairs beautifully.
-
Chia Seed Boost: Add a tablespoon of chia seeds for some added fiber and omega-3 fatty acids. The seeds will absorb water and thicken the smoothie, so be mindful of that!
-
Nutty Flavor: Add a tablespoon of almond or cashew butter for a creamy, nutty flavor that also amps up the protein in your breakfast.
-
Coconut Cream Delight: For an extra rich treat, top your smoothie with a dollop of whipped coconut cream. Ah, the decadence!
Chef’s Notes
I have to tell you—this recipe has gone through a few iterations. In the early days, I would whip up these smoothies with whatever fruit I had on hand, and the flavor would always change. Pineapple and coconut, however, remained my true north, a classic combination that never gets old.
I also experimented with adding rum when I wanted it more of an adult beverage—don’t judge! It’s like having my cake and eating it too. Maybe that’s why I fell in love with this smoothie; it feels celebratory at any time of day.
FAQs and Troubleshooting
1. Can I use fresh fruit instead of frozen?
Absolutely! If you don’t have frozen pineapple, you can use fresh. Just add some ice to keep it cool and thick.
2. My smoothie is too thick; what do I do?
If it’s too thick, add a splash of coconut milk or water and blend again until you reach your desired consistency.
3. What if I want to make this dairy-free?
No problem! Substitute the Greek yogurt with a plant-based yogurt (coconut or almond yogurt works great). Also, make sure your coconut milk is dairy-free, though most brands are!
4. Can I make this ahead of time?
Smoothies are best enjoyed fresh, but if you must prep ahead, you can store it in an airtight container in the fridge for up to 24 hours. Give it a good shake before drinking!
Nutritional Info
Now let’s dive a bit into what’s in a glass of this Piña Colada Breakfast Smoothie! This delightful drink not only satisfies your taste buds but also provides great nutritional benefits:
- Calories: Around 300-350, depending on whether you use flavored yogurt and any added sweeteners.
- Protein: Roughly 10-15 grams from Greek yogurt.
- Fiber: About 4 grams, especially if you include chia seeds or enjoy alongside high-fiber foods.
- Vitamins & Minerals: Packed with vitamin C from the pineapple and healthy fats from coconut!
Keep in mind that nutritional values may vary based on specific brands and portion sizes you use.
Final Thoughts
And there you have it—your ultimate guide to crafting a sensational Piña Colada Breakfast Smoothie in just five minutes! This recipe is all about balancing flavor and nutrition, taking you on a mini tropical getaway right from your kitchen.
So next time you’re feeling the morning grind, remember that a little bit of creativity can turn an ordinary breakfast into an extraordinary experience. Enjoy every sip, share it with your friends, or make it just for yourself—it’s a wonderful way to treat your taste buds while kickstarting your day.
Let’s raise our glasses and toast to sunny mornings, good food, and great friends! Happy blending, folks!
Print
5-Minute Piña Colada Breakfast Smoothie
- Total Time: 5 minutes
- Yield: 2 servings 1x
- Diet: Dairy-Free
Description
A refreshing and tropical breakfast smoothie that tastes just like a piña colada, packed with nutritious ingredients for a delicious start to your day.
Ingredients
- 1 ½ cups coconut milk
- 3 cups frozen pineapple chunks
- ½ cup plain or vanilla Greek yogurt
- 1 cup ice
- Optional toppings: slice of fresh pineapple, maraschino cherries, coconut flakes
Instructions
- Gather your ingredients: Before you start, make sure everything is within reach.
- Add coconut milk to the blender: Pour in your coconut milk first.
- Toss in the frozen pineapple: Next, add the frozen pineapple chunks.
- Spoon in the yogurt: Add the Greek yogurt.
- Add the ice: If you love your smoothies icy, toss in the cup of ice.
- Blend until smooth: Blend until everything is smooth and creamy—about 30 seconds to a minute.
- Taste and adjust: Once blended, give it a taste and adjust sweetness if needed.
- Pour and serve: Pour your creation into a chilled glass.
Notes
For added creativity, try different variations like adding spinach for a green smoothie or swapping pineapple with mango.
- Prep Time: 5 minutes
- Cook Time: 0 minutes
- Category: Breakfast
- Method: Blending
- Cuisine: Tropical
Nutrition
- Serving Size: 1 serving
- Calories: 325
- Sugar: 28g
- Sodium: 100mg
- Fat: 12g
- Saturated Fat: 10g
- Unsaturated Fat: 2g
- Trans Fat: 0g
- Carbohydrates: 42g
- Fiber: 4g
- Protein: 12g
- Cholesterol: 5mg
Keywords: smoothie, breakfast, piña colada, tropical, healthy