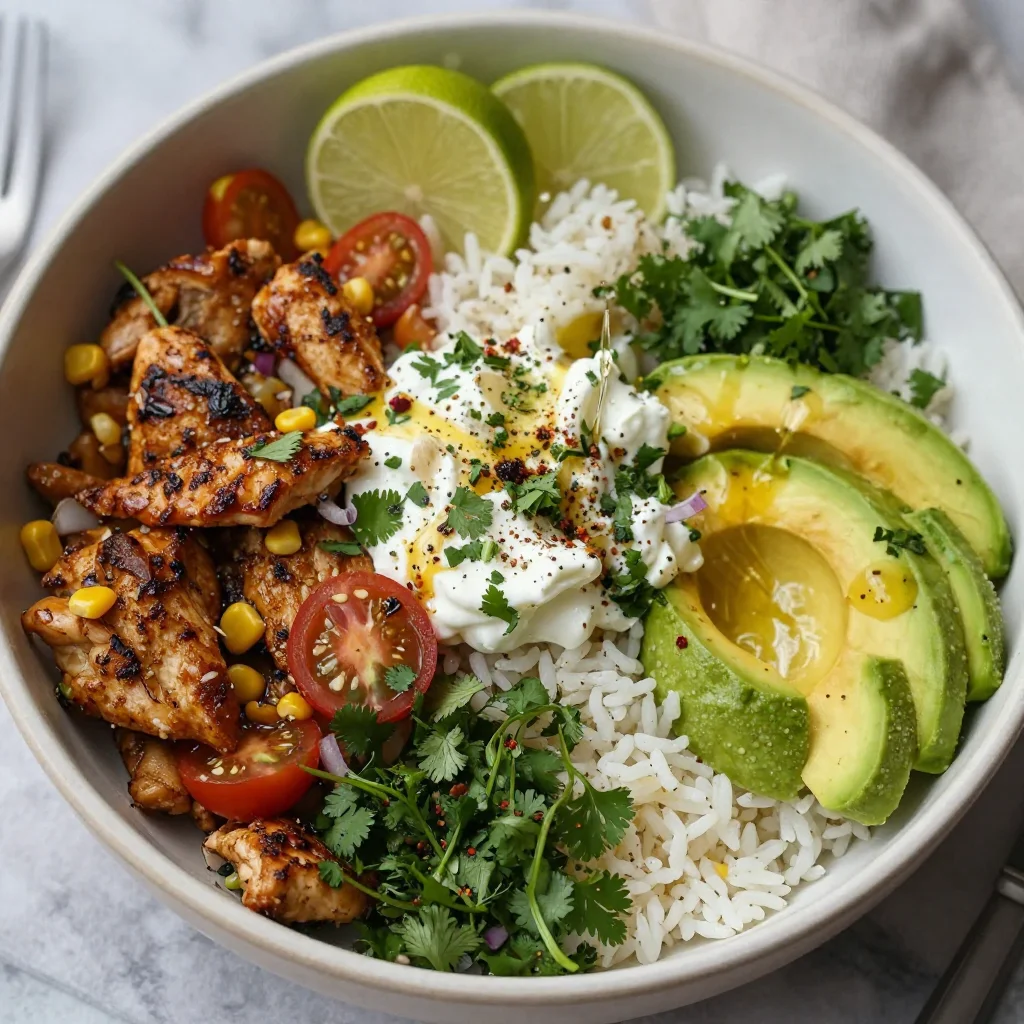
Minute High-Protein Honey-Lime Chicken & Avocado Rice Bowl
Honey Lime Chicken & Avocado Rice Bowl – High Protein Healthy Dinner Idea
Hey there! I’m Beau Collier, and today I want to share a recipe that’s not just packed with flavor but also full of love and nostalgia – my Honey Lime Chicken & Avocado Rice Bowl. If you’re looking for a high-protein, healthy dinner option that’s as vibrant as it is delicious, you’re in the right spot. Grab a fork (or your favorite mug), and let’s dig in!
Introduction
As we drift into the hustle and bustle of everyday life, sometimes we lose sight of what matters most—sharing good food with the ones we love. Food isn’t just fuel; it’s a way to express love, create memories, and share stories. That’s what Feastical is all about!
Imagine walking into a sunlit kitchen, the vibrant smell of zesty lime and kissed honey wafting through the air. This dish, my Honey Lime Chicken & Avocado Rice Bowl, does just that—it pulls you in and wraps you up in a warm embrace. It’s simple yet so satisfying, making it perfect for a weeknight dinner that feels a bit special without the fuss.
This recipe is perfect for anyone who might think healthy means bland. Armed with succulent chicken breasts marinated in a tangy honey lime glaze, fluffy rice, and creamy avocado, this bowl is a party for your taste buds. The colorful veggies add a crunchy surprise and a burst of freshness that will have you reaching for seconds (or thirds!).
Plus, it’s a great high-protein option to keep your energy levels up. Whether you’re a gym-goer, busy parent, or just someone who loves tasty food, this dish checks all the boxes. Stick around, and I’ll walk you through every step of making this delightful meal that will have your family coming back to the table time and again!
Personal Story
This Honey Lime Chicken & Avocado Rice Bowl has a special place in my heart, not just for its delicious flavors but also for the family moments it embodies. I remember the first time I made it—I was trying to impress my then-girlfriend (now wife) by whipping up something fresh and flavorful for dinner. With a bit of inspiration from our recent trip to a local farmer’s market, I threw together what was pantry-friendly and seasonal.
As we sat down and took our first bites, the tangy sweetness of the honey paired beautifully with the zest of the lime. I looked up at her, and there was that familiar glimmer in her eyes; we both knew we weren’t just enjoying a meal—but creating memories. That night kicked off a series of kitchen experiments—trying out variations of the recipe, incorporating new ingredients, and laughing together as we tasted our creations.
Now, this bowl is a regular in our household. It’s become a tradition to make it on busy weekdays when we need something wholesome and hearty, yet quick to whip up. It’s a simple reminder that great meals don’t have to be complicated, and they always taste better when shared with someone special.
Ingredients
Let’s dive into the ingredients that make this dish sing. Each element plays a role in developing those vibrant flavors and textures.
-
2 large chicken breasts (about 400g): The star of the dish! Chicken breasts are packed with lean protein and take on flavors beautifully. If you want a lower-fat option, go skinless. For a twist, try this recipe with turkey or tofu.
-
2 tablespoons honey: This natural sweetener adds a hint of sweetness that complements the tangy lime. If you’re vegan, you can substitute it with maple syrup or agave nectar.
-
3 tablespoons fresh lime juice: Freshly squeezed juice gives the best flavor! You can also opt for lemon juice if you’re in a pinch, but lime truly brings that zing.
-
1 teaspoon lime zest: Zest is where a lot of the lime’s essential oils are concentrated. If you’re short on limes, lemon zest works here too!
-
3 cloves garlic, minced: Garlic adds a warm depth to the dish. Consider using roasted garlic for a little sweetness, or if you’re pressed for time, garlic powder can work.
-
2 tablespoons olive oil: This healthy fat enhances the marinade and keeps the chicken moist. Avocado oil or melted coconut oil are great alternatives too.
-
1 tablespoon soy sauce: This adds a savory umami touch. For a gluten-free option, you can use tamari.
-
1/2 teaspoon salt: Enhances flavors in the dish. Feel free to adjust according to your taste preferences.
-
1/4 teaspoon black pepper: A dash of black pepper adds a little heat. You can use white pepper for a subtle flavor as well.
-
3 cups cooked white or brown rice: The base of the bowl. Both options are healthy, but brown rice has more fiber. Quinoa can also be a fantastic substitute if you’re looking to boost protein.
-
2 ripe avocados, sliced: Creamy avocado provides a buttery texture and healthy fats. If you want extra flavor, sprinkle them with a bit of lime juice!
-
1 cup cherry tomatoes, halved: These sweet little gems add color and freshness. You could swap these for diced bell peppers for a different crunch.
-
1 cup corn kernels: You can use fresh, canned, or frozen corn—whatever you have on hand! For a twist, try adding black beans for a hearty protein boost.
-
1/4 cup red onion, sliced: Sharp with just the right amount of bite. You can caramelize it for a milder flavor or use scallions if you want something tempered.
-
3 tablespoons fresh cilantro, chopped: This aromatic herb brightens up the dish! If you’re not a fan of cilantro, parsley or basil could easily step in.
-
1/2 cup Greek yogurt or sour cream (optional): A cool and creamy addition to drizzle on top. You can also use dairy-free yogurt for a vegan twist.
-
1/2 teaspoon chili flakes (optional): A little kick for those who love spice. If you really want to amp it up, go for fresh jalapeños!
Step-by-Step Instructions
Now that we’ve gathered our ingredients, let’s get to the fun part—cooking! Follow these steps, and you’ll be enjoying this beautiful bowl in no time.
-
Marinade the Chicken: In a bowl, mix together the honey, lime juice, lime zest, minced garlic, olive oil, soy sauce, salt, and black pepper. This marinade is the magic sauce—it’ll infuse your chicken with bold flavors! Add the chicken breasts, making sure they’re fully coated. Cover the bowl and let it marinate in the refrigerator for at least 30 minutes—this is my favorite part; the longer, the better!
-
Prepare the Rice: If you’re starting with uncooked rice, prepare according to package instructions, using either white or brown rice. For a flavor-packed boost, cook it in vegetable or chicken broth instead of water. If you have leftover rice, this makes the bowl even quicker to prepare—just warm it up before serving!
-
Cook the Chicken: Preheat your grill, skillet, or oven. If you’re grilling, preheat to medium-high heat. If using a skillet, heat a splash of olive oil over medium heat. Remove the chicken from the marinade (but save the leftover marinade) and place it on the grill or in the skillet. Cook for about 6-7 minutes per side until the chicken is brown and cooked through (internal temperature should reach 165°F or 75°C). If baking, place it in the oven at 400°F (200°C) for about 25-30 minutes, or until fully cooked.
-
Glaze for Flavor: While the chicken is cooking, take the leftover marinade and bring it to a boil in a small saucepan. Let it simmer for about 5 minutes until slightly thickened—a quick glaze to brush over your chicken just before finishing the cooking process for added flavor!
-
Slice and Assemble: Once cooked, let the chicken rest for a few minutes before slicing it thickly. This ensures it remains juicy! Meanwhile, in a large bowl or on a large platter, start layering your base: place the warm rice down first, then arrange the sliced chicken on top.
-
Add the Goodies: Next, adorn your bowl with the sliced avocados, halved cherry tomatoes, corn kernels, and sliced red onion. Don’t forget to sprinkle fresh cilantro over everything to give it that pop of freshness.
-
Creamy Drizzle: If you’re using Greek yogurt or sour cream, drizzle it over the top (or for fun, plop a dollop on the side). Finally, sprinkle a pinch of chili flakes if you’re feeling spicy!
Serving Suggestions
When it comes to serving, you can’t go wrong! This Honey Lime Chicken & Avocado Rice Bowl is perfect as it is, but here are a few additional ideas to elevate the experience:
-
Family Style: Serve everything in the center of the table and allow everyone to build their own bowl with the toppings they love!
-
Colorful Plates: If you want to impress your guests, use large individual bowls and arrange the ingredients in sections for a visually stunning presentation.
-
Extra Crunch: Add crushed tortilla chips or crispy fried onions on top for an unexpected crunch!
-
Dressing it Up: A drizzle of additional lime juice or a bright vinaigrette can take the flavor to new heights!
Recipe Variations
Here are a few fun twists you can try if you’re feeling adventurous:
-
Taco Twist: Add taco seasoning to the marinade and serve in corn tortillas instead of rice for a fun taco night. Top with your favorite taco toppings!
-
Mediterranean Flare: Swap out the ingredients for some Mediterranean vibes—use couscous instead of rice, add olives, feta, and roast the chicken with oregano and lemon.
-
Shrimp Swaps: If poultry isn’t your jam, try grilled shrimp with the same marinade for a fresh seafood twist. They cook up in just minutes and are bursting with flavor!
-
Vegan Style: For a vegan version, replace the chicken with marinated grilled tempeh or chickpeas to pack in that protein. Use dairy-free yogurt for a creamy drizzle.
-
Spicy Sriracha: Kick things up a notch by adding sriracha to your yogurt drizzle or mixing some into the marinade for a spicy kick.
Chef’s Notes
Over the years, my Honey Lime Chicken & Avocado Rice Bowl has witnessed some heartwarming moments—from family gatherings to late dinners after a long day. Each dish seems to evolve a little more each time—I’ve experimented with different grains, colorful veggies, and exciting spices. One thing remains constant, though: it always brings smiles to the dinner table!
I remember a time my cousin made this recipe with her kids, and they decided to make it a “build-your-own-bowl” dinner night. The giggles and cheer that filled the kitchen made the meal even more memorable. That’s the beauty of food—it’s a medium for connection.
FAQs and Troubleshooting
Q: My chicken turned out dry. What happened?
A: Overcooking is often the culprit. Be sure to use a meat thermometer for precise cooking—165°F is your friend! Also, resting the chicken after cooking helps redistribute the juices.
Q: How can I make this recipe quicker?
A: Marinate the chicken in advance and store it in the fridge overnight. On a busy night, it’ll cut down your prep time drastically! Alternatively, use pre-cooked rice to speed things up.
Q: Can I freeze the leftovers?
A: Absolutely! Just store them in an airtight container. To reheat, thaw overnight in the fridge and warm it gently on the stovetop or microwave.
Q: What can I use if I don’t have fresh lime juice?
A: While fresh is best, if you have bottled lime juice, that can work in a pinch! Just adjust the amount to taste, as bottled juices can sometimes be more concentrated.
Nutritional Info
This Hearty Honey Lime Chicken & Avocado Rice Bowl is not only flavorful but also a nutrition powerhouse. Each serving is rich in protein and healthy fats, making it a great choice for a balanced diet. Here’s a quick look at the nutrition facts per serving:
- Calories: Approximately 550-600 kcal
- Protein: 40-45g (great for muscle repair and recovery)
- Carbohydrates: 60-70g (fueling your body for the day)
- Fiber: 8-10g (essential for digestive health)
- Fats: 15-20g (healthy fats from avocado and olive oil)
This dish is not only satisfying and delicious but it also provides a good balance of nutrients to keep your energy levels high!
Final Thoughts
So there you have it—a hearty and delicious Honey Lime Chicken & Avocado Rice Bowl that’s more than just a meal; it’s a celebration of flavors, memories, and the simple joys of cooking. Whether you’re preparing it for yourself or sharing it with family, I hope this recipe brings you as much happiness as it brings me.
Don’t forget to experiment and make it your own! The kitchen is a place for creativity, and this bowl is the perfect canvas for your imagination. Enjoy this wonder of a dish, and as always, let me know how it turns out! Happy cooking, friends! 🍽️
Print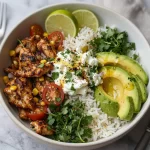
Honey Lime Chicken & Avocado Rice Bowl
- Total Time: 60 minutes
- Yield: 4 servings 1x
- Diet: High Protein
Description
A high-protein, healthy dinner option featuring marinated chicken, fluffy rice, and creamy avocado with a burst of fresh flavors.
Ingredients
- 2 large chicken breasts (about 400g)
- 2 tablespoons honey
- 3 tablespoons fresh lime juice
- 1 teaspoon lime zest
- 3 cloves garlic, minced
- 2 tablespoons olive oil
- 1 tablespoon soy sauce
- 1/2 teaspoon salt
- 1/4 teaspoon black pepper
- 3 cups cooked white or brown rice
- 2 ripe avocados, sliced
- 1 cup cherry tomatoes, halved
- 1 cup corn kernels
- 1/4 cup red onion, sliced
- 3 tablespoons fresh cilantro, chopped
- 1/2 cup Greek yogurt or sour cream (optional)
- 1/2 teaspoon chili flakes (optional)
Instructions
- Marinade the Chicken: In a bowl, mix together the honey, lime juice, lime zest, minced garlic, olive oil, soy sauce, salt, and black pepper. Add the chicken breasts, ensuring they’re fully coated. Cover and let marinate in the refrigerator for at least 30 minutes.
- Prepare the Rice: Cook according to package instructions using either white or brown rice. For extra flavor, cook in vegetable or chicken broth instead of water.
- Cook the Chicken: Preheat your grill, skillet, or oven. If grilling, preheat to medium-high; if using a skillet, heat a splash of olive oil. Cook the chicken for about 6-7 minutes per side until cooked through (internal temperature should reach 165°F/75°C).
- Glaze for Flavor: Bring the leftover marinade to a boil in a saucepan and let simmer for about 5 minutes until slightly thickened. Brush over the chicken just before it’s finished cooking.
- Slice and Assemble: Let the chicken rest for a few minutes before slicing. Layer the warm rice in a bowl, then arrange the sliced chicken on top.
- Add the Goodies: Top the bowl with sliced avocados, halved cherry tomatoes, corn, and red onion. Sprinkle fresh cilantro over everything.
- Creamy Drizzle: If using, drizzle Greek yogurt or sour cream on top and a pinch of chili flakes for spice.
Notes
For a quicker meal, marinate the chicken in advance and store overnight. You can also use pre-cooked rice.
- Prep Time: 30 minutes
- Cook Time: 30 minutes
- Category: Main Course
- Method: Grilling
- Cuisine: Mexican
Nutrition
- Serving Size: 1 bowl
- Calories: 600
- Sugar: 12g
- Sodium: 600mg
- Fat: 18g
- Saturated Fat: 4g
- Unsaturated Fat: 10g
- Trans Fat: 0g
- Carbohydrates: 65g
- Fiber: 10g
- Protein: 40g
- Cholesterol: 90mg
Keywords: honey lime chicken, avocado rice bowl, healthy dinner, high protein meal, easy recipes

High Protein Freezer Friendly Breakfast Bowls
High Protein Freezer Friendly Breakfast Bowls
Hey there, fellow foodies! I’m Beau Collier, and today we’re diving into the world of high-protein breakfast bowls that are not only tasty but also incredibly practical. I mean, who doesn’t want to kickstart their day with a meal that makes you feel like a superstar, right?
Imagine waking up on a chilly morning, the sun peeking through your window, and all you want is something warm, hearty, and full of flavor. But wait—who has the time to whip up a full-blown breakfast during the week? Enter the high-protein freezer-friendly breakfast bowl! These beauties are not just delicious; they’re a life-saver for those hectic mornings when you’re racing against the clock.
The great thing about these breakfast bowls is the versatility. You can customize them to fit your taste buds, throw in whatever veggies are cluttering up your fridge, and protein choices to keep it exciting. Plus, they’re super easy to make in bulk and freeze for later. Talk about a win-win!
In this blog post, I’ll guide you through my favorite recipe for high-protein breakfast bowls that’ll keep you satisfied and energized throughout your morning. This recipe packs a punch with six eggs, lean protein, and vibrant veggies that will make you feel like a breakfast champion! Ready? Let’s dive right into the magic of meal prep, where your future self will thank you for putting in a little love today!
Personal Story
One of my fondest breakfast memories centers around my grandmother, who had a knack for turning simple ingredients into soul-warming meals that filled our home with love and laughter. I still remember her bustling around the kitchen, her apron adorned with flour and a smile brightening the room. She introduced me to the concept of hearty breakfast bowls before I even knew what they were.
Her breakfast always included a hodgepodge of whatever leftovers were lying around. Leftover chicken? Toss it in! Morning vegetables? Absolutely! I recall her laughter as she proclaimed, “Food should be an adventure, not a chore!” It was in those moments—wafting aromas, sizzling pans, and her infectious giggle—that I learned the importance of improvisation in the kitchen.
Though her recipes weren’t always exact, they sparked creativity! My high-protein breakfast bowls today are a tribute to her spirit and a wonderful way to carry on the legacy of cooking with love, imagination, and of course, lots of flavor! So, let’s channel a bit of that kitchen magic as we prepare our own breakfast bowls that your future self will absolutely adore.
Ingredients
Here’s what you’ll need to whip up these flavor-packed breakfast bowls:
-
6 Eggs
- Tip: Eggs are a powerhouse of protein, and they add richness to your dish. If you’re looking for a vegan option, substitute with flax eggs or chickpea flour to keep the protein up.
-
1 cup cooked lean protein (chicken, turkey, or tofu)
- Chef Insight: Whatever you have on hand works! Rotisserie chicken, leftover turkey from Thanksgiving, or even pre-cooked tofu are all excellent options. If you plan ahead, you can batch-cook proteins for the week.
-
1 cup mixed veggies (spinach, bell peppers, onions, etc.)
- Substitution tip: Fresh or frozen veggies work beautifully! If you’re running low on fresh ones, frozen veggies can be a huge time saver and are just as nutritious.
-
Salt and pepper to taste
- Quick tip: Proper seasoning makes all the difference. Start light and adjust to your preference. It’s a balancing act!
-
1 teaspoon garlic powder
- Commentary: Garlic adds a lovely depth of flavor. Feel free to swap it for fresh minced garlic if you’re feeling fancy!
-
1 teaspoon paprika
- Insight: Paprika not only provides a lovely warm color but also a sweet smokiness. Experiment with smoked or sweet paprika depending on your mood!
-
Optional: cheese or hot sauce for serving
- Personal touch: Cheese can add creaminess, while hot sauce provides a kick! I personally love a splash of sriracha for that extra zing!
Step-by-Step Instructions
Step 1: Prepping the Ingredients
Start by gathering all your ingredients. Pre-cook your protein and veggies if they aren’t already done. While eggs provide the base of our bowls, remember that uniform-sized veggies cook more evenly—chop everything into bite-sized pieces.
Step 2: Whisk the Eggs
In a large bowl, crack the eggs and whisk them until they’re nicely beaten. Add a touch of salt, pepper, garlic powder, and paprika to incorporate some seasoning. Pro tip: a splash of milk or cream in the eggs will make them even fluffier!
Step 3: Cook the Eggs
In a non-stick skillet, add a drizzle of olive oil over medium heat, ensuring it gets nice and hot. Pour in the beaten egg mixture and gently stir as they cook. This helps prevent large curds and results in a fluffier texture. Cook until the eggs are just set, removing from heat as they’ll continue to cook in residual heat.
Step 4: Mix in the Protein and Veggies
Once your eggs are cooked to soft perfection, fold in your cooked protein and mixed veggies. Stir gently to combine all the flavors without breaking the eggs too much. This little dance of ingredients is where the magic happens—look at those vibrant colors!
Step 5: Portion and Cool
After everything is combined, it’s time to portion out your breakfast bowls! Use meal prep containers for easy freezing. Each portion should look colorful and inviting. Allow them to cool completely before placing them in the freezer; this will prevent ice crystals from forming.
Step 6: Freezing and Storing
Once cooled, cover each bowl tightly and place them in the freezer. Make sure to label them with the date! These bowls can last up to three months in the freezer—which is awesome when you’re rushed in the morning.
Step 7: Reheating Your Bowls
When you’re ready for breakfast, grab a bowl from the freezer and either defrost overnight in the refrigerator or microwave it straight from frozen for 2–3 minutes. If you’re reheating in the microwave, be sure to use a microwave-safe cover to prevent splatters.
Ta-da! Your high-protein breakfast bowl is ready. Add cheese or hot sauce at this stage if desired, and enjoy your warm morning hug of a meal!
Serving Suggestions
Now that your breakfast bowls are on the plate, let’s talk about how to serve them up. For an appealing presentation, I recommend layering the eggs, protein, and veggies to capture that rainbow of colors.
Top with a sprinkle of cheese or a drizzle of your favorite hot sauce. If you’re feeling extra fancy, a dollop of avocado or a sprinkle of fresh herbs, like cilantro or chives, can make a beautiful garnish. You can also pair your bowls with a side of fresh fruit or a piece of whole grain toast—keeps the vibe casual and beautiful!
Serve them warm, and watch everyone gather around the table with excitement. These breakfast bowls aren’t just meals; they’re invitations to begin your day with intention and flavor.
Recipe Variations
Here are a few creative twists to keep your breakfast bowls fresh and exciting:
-
Mediterranean Bowl: Swap out the chicken for feta and add olives and sun-dried tomatoes. Top with tzatziki for a zesty touch!
-
Southwestern Bowl: Use black beans instead of the lean protein, and fold in corn and diced tomatoes. Avocado and salsa make a fabulous final addition!
-
Italian Flavor: Substitute spinach for kale, add Italian sausage, and finish with freshly grated Parmesan. A touch of marinara sauce on top will take you to flavor town!
-
Vegan Delight: Replace eggs with chickpea flour to create a vegan scramble, and use avocado for creaminess. This bowl is all about plant protein goodness!
-
Spicy Sriracha Bowl: Add diced jalapeños or your choice of chili pepper for a heat boost! Finish with a generous drizzle of sriracha for those spice lovers.
Chef’s Notes
As a chef, I love how recipes evolve over time. This breakfast bowl idea started simply as a way to use up leftovers from my fridge! It’s how you can get creative and experiment while cooking that keeps things fun. I’ve had my share of breakfast fails too—like when I accidentally grabbed cayenne instead of paprika—but those “gourmet disasters” often lead to the best new creations. Cooking is about learning, having fun, and sharing delicious moments around the table.
FAQs and Troubleshooting
Q: Can I make these bowls vegetarian?
Absolutely! Just skip the meat altogether, using beans, legumes, or tofu as your protein source instead.
Q: How do I prevent eggs from becoming rubbery?
Make sure to cook the eggs on lower heat and remove them from the skillet when they’re still slightly undercooked. They’ll firm up as they cool.
Q: Can I freeze whole bowls?
Yes! Just ensure everything is cooked beforehand and allow complete cooling before sealing the containers. They’ll last up to three months, so you’ve got plenty of time to love them!
Q: How can I enhance the flavors?
Experiment with different seasonings! Fresh herbs and spices can do wonders to elevate your base recipe. Don’t be afraid to play around!
Nutritional Info
These high-protein breakfast bowls are a fantastic way to fuel your day. Each bowl contains approximately:
- Calories: 300-400 (can vary based on protein choice and additions)
- Protein: 30-40g (thanks to the eggs and lean protein)
- Carbohydrates: 30g (depending on added vegetables)
- Healthy Fats: 10g (from protein sources and optional toppings)
- Fiber: 5g (if you include veggies and optional sides)
These bowls keep you feeling satisfied while providing essential nutrients to kickstart your day!
Final Thoughts
So there you have it, my high-protein freezer-friendly breakfast bowls—your new favorite morning solution! They’re simple to make, downright delicious, and filled with the goodness of real food. You can whip up a whole batch, store them away, and when you’re racing out the door, you’ll feel like a breakfast rockstar!
Cooking isn’t just about the end result; it’s about the stories, the memories, and the love that goes into each dish. I hope you give these bowls a try and maybe even make them your own!
Remember, the kitchen is your playground, so have fun with it. Now, go out there and unleash your culinary creativity! Grab your fork, dig in, and enjoy every scrumptious bite of your breakfast bowl—your future self will be forever grateful!
Print
High Protein Freezer Friendly Breakfast Bowls
- Total Time: 35 minutes
- Yield: 4 servings 1x
- Diet: High Protein
Description
A versatile, high-protein breakfast bowl that can be made in bulk and frozen for busy mornings.
Ingredients
- 6 Eggs
- 1 cup cooked lean protein (chicken, turkey, or tofu)
- 1 cup mixed veggies (spinach, bell peppers, onions, etc.)
- Salt and pepper to taste
- 1 teaspoon garlic powder
- 1 teaspoon paprika
- Optional: cheese or hot sauce for serving
Instructions
- Start by gathering all your ingredients. Pre-cook your protein and veggies if they aren’t already done.
- Whisk the eggs in a large bowl, adding salt, pepper, garlic powder, and paprika.
- Cook the eggs in a non-stick skillet with olive oil over medium heat until just set.
- Fold in your cooked protein and mixed veggies gently.
- Portion out the mixture into meal prep containers.
- Cover and place in the freezer to store.
- Reheat bowls as needed, either overnight in the fridge or microwave for 2-3 minutes from frozen.
Notes
You can customize these bowls with different proteins and veggies to fit your taste.
- Prep Time: 15 minutes
- Cook Time: 20 minutes
- Category: Breakfast
- Method: Freezing
- Cuisine: American
Nutrition
- Serving Size: 1 bowl
- Calories: 350
- Sugar: 2g
- Sodium: 300mg
- Fat: 10g
- Saturated Fat: 3g
- Unsaturated Fat: 4g
- Trans Fat: 0g
- Carbohydrates: 30g
- Fiber: 5g
- Protein: 35g
- Cholesterol: 200mg
Keywords: protein breakfast, freezer meal, meal prep, healthy breakfast

Cottage Cheese Egg Bites
Cottage Cheese Egg Bites: The Ultimate Comfort Food!
Hey, foodies! Welcome back to Feastical, where we blend deliciousness with a dash of love for the kitchen. Today, I’m thrilled to dive into a recipe that’s as versatile as it is satisfying: Cottage Cheese Egg Bites! This dish isn’t just your average egg scramble; it’s a delightful fusion that incorporates healthy cottage cheese, eggs, and your favorite add-ins into perfect little bites of joy.
Why am I so passionate about this recipe? Well, imagine biting into a fluffy, cheesy morsel that brings together the nutritious goodness of cottage cheese with the comfort of eggs. These egg bites are great for breakfast, brunch, or even a snack, and they’re packed with protein, making them a fantastic choice for any meal. Whether you’re running out the door or having a leisurely Sunday brunch, these bites are here to save the day.
We’ll explore how this humble dish can be jazzed up with your favorite veggies, spices, and cheeses. Plus, I’ll share some kitchen hacks that will guarantee your egg bites come out perfectly every time. So, grab your mixing bowl and let’s make some kitchen magic happen with these Cottage Cheese Egg Bites that promise a warm hug in every bite!
Personal Story
You know, every great recipe has a story behind it. For me, Cottage Cheese Egg Bites evoke memories of lazy Sunday mornings spent with my family. My mom used to whip them up for us as a quick breakfast before we raced off to soccer games or art classes. I remember the aromatic scent wafting through our small kitchen, and how we’d eagerly huddle around the table, forks poised and ready to dig in.
Years later, I attempted to recreate those delightful bites in my college apartment, trying to reproduce that same comfort so intricately tied to my childhood. Armed with a few kitchen gadgets and my trusty stoneware muffin pan, I began experimenting. Armed with enthusiasm and a need for a shortcut breakfast option, I learned that adding things like spinach or bell peppers was not only delicious but full of color and variety—just like those mornings with the family.
So, every time I make these Cottage Cheese Egg Bites, it feels like a warm embrace from the past, bringing back those cozy mornings and the love we shared over tasty food. Now, let’s get our ingredients together and create our own memories!
Ingredients
Here’s what you’ll need to whip up a batch of these scrumptious Cottage Cheese Egg Bites. I’ve included some substitutions and chef’s insights with each ingredient to make sure you can customize your bites just the way you like them!
-
1 cup cottage cheese
A superstar ingredient that brings moisture and a creamy texture to the bites. You can use low-fat or even dairy-free versions made from almond or soy milk if you’re looking for lighter alternatives! -
6 large eggs
These are the backbone of our recipe, providing essential protein and structure. For an egg-free option, you can try using flaxseed meal (1 tbsp flaxseed meal + 2.5 tbsp water = 1 egg). -
1/2 cup shredded cheese (cheddar or your choice)
Go for sharp cheddar for a kick, or mozzarella if you want something mild. Feel free to use dairy-free cheese alternatives for a lactose-free option. -
1/2 cup spinach (optional)
Fresh or frozen, spinach adds both a pop of color and vital nutrients. If you don’t have spinach, try kale or some finely diced broccoli instead! -
1/2 cup diced bell peppers (optional)
These add a sweet crunch and vibrant colors. Mix it up with red, yellow, or orange peppers, and if you’re adventurous, throw in some jalapeños for a spicy twist! -
Salt and pepper to taste
Essential for bringing all flavors alive! Be sure to season generously, as these egg bites can be a blank canvas for flavors.
Picking out the right ingredients is fundamental in cooking, and I can’t stress enough how using fresh, high-quality options makes a world of difference in taste!
Step-by-Step Instructions
Now that we’ve got our ingredients ready, let’s jump right into the cooking process. Don’t worry; I’ll keep it simple, and you’ll have these bites in no time!
-
Preheat the Oven: Start by preheating your oven to 350°F (175°C). This is crucial! A hot oven ensures that your egg bites rise beautifully and develop a lovely golden top.
-
Prepare Your Muffin Pan: Grease a standard-sized muffin tin with cooking spray or olive oil. This step is essential so that your egg bites release easily when they’re done baking. Alternatively, you could also use silicone muffin cups for easy removal.
-
Mix the Eggs and Cottage Cheese: In a large mixing bowl, whisk together the eggs and cottage cheese until well combined. You want to achieve a smooth consistency, so take your time here. The cottage cheese should break down just a bit but still provide those delightful curds for texture.
-
Add in the Cheese and Veggies: Fold in your shredded cheese, spinach, and diced bell peppers (if using). For added flavor, you can sprinkle in some garlic powder or herbs like dill or chives. This is the point where you can really make it your own!
-
Season Generously: Don’t forget to sprinkle in some salt and pepper! A good rule of thumb is about 1/2 teaspoon of salt and a few cracks of black pepper, but try to taste it to find your sweet spot.
-
Pour the Mixture into the Muffin Tin: Use a ladle or measuring cup to pour the mixture into the prepared muffin tin, filling each cup about 3/4 full. This is when the excitement builds as you watch your creations take shape!
-
Bake: Pop your muffin tin into the preheated oven and let them bake for 20-25 minutes. Keep an eye on them after the 20-minute mark! They should look puffed up and golden, with a slight jiggle in the center. If they look too wet, give them a few more minutes.
-
Cool and Serve: Once done, let your egg bites cool in the pan for about 5 minutes before carefully removing them. They’re a bit delicate right out of the oven, so be gentle!
-
Enjoy: Now the best part! You can enjoy them warm, or let them chill and store them in the fridge for later. Reheat in the microwave for a quick snack!
Serving Suggestions
So, how do we serve these beauties? Here are a few delightful ideas to elevate your brunch experience:
-
On a Platter: Arrange the egg bites on a colorful platter, garnished with fresh herbs such as parsley or cilantro. Pair it with a side of sliced avocado and fresh fruit for a complete and eye-catching spread.
-
With Dipping Sauces: Provide an array of dipping sauces! Think sriracha for the spice lovers, and a cool ranch or yogurt sauce for a creamy counterpart. This adds a fun interactive element to your meal!
-
As Part of a Breakfast Bowl: Create a desayuno bowl by tossing your egg bites with sautéed veggies, grains like quinoa or brown rice, and a squeeze of lemon for that zesty kick.
The way you serve your egg bites can turn a simple meal into a delightful feast!
Recipe Variations
Let’s shake things up! Here are some fun ideas for personalizing your Cottage Cheese Egg Bites:
-
Southwestern Style: Add black beans, corn, and taco seasoning. Serve with salsa and avocado for a fiesta in your mouth!
-
Mediterranean Delight: Mix in feta cheese, chopped sun-dried tomatoes, and olives. Serve with a drizzle of olive oil and a side of pita bread.
-
Herbed Mushroom Medley: Sauté some mushrooms and fresh herbs like thyme or rosemary, then fold into your base mixture for an earthy flavor explosion.
-
Savory Breakfast Casserole: Instead of muffin tin, pour into a baking dish, layer with crusty bread, and bake for a delightful brunch casserole.
-
Sweet Breakfast Option: For a sweet spin, mix in some cinnamon and berries and opt for sweet cheese like ricotta instead of cottage cheese! Top with a dollop of yogurt for a delightful breakfast treat.
With these variations, you’ll never get tired of the same old egg bites, and they can easily suit any taste!
Chef’s Notes
Oh, the memories I have of experimenting with this recipe! I’ve tried countless combinations, once mistakenly tossing in nutmeg instead of salt—which was a culinary disaster, let me tell you. But it was during one of those trials that I discovered just how versatile these egg bites are. My friends thought they wouldn’t love cottage cheese, yet they were converted after just one bite!
Every time I revisit this recipe, I’m amazed at how it adapts to my mood, the season, or even what’s leftover in my fridge. Whether I’m feeling vibrant with spring veggies or cozy with hearty cheddar and bacon, there’s always a way to fuse flavors and create something both nourishing and joyful.
FAQs and Troubleshooting
1. Can I make these egg bites ahead of time?
Absolutely! They store beautifully in the fridge for up to 4 days. Simply reheat in the microwave for quick breakfasts!
2. What can I do if my egg bites are soggy?
Make sure you’re not overloading on veggies that release too much moisture. If they still turn out soggy, try reducing your baking time, or cooking them a bit longer if needed.
3. Can I freeze these?
Yes! They freeze very well. Just wrap them individually in plastic wrap, and pop them in the freezer. They can last up to a month. To reheat, let them thaw in the fridge overnight before warming them in the microwave.
4. Can I bake it in a different pan?
Absolutely! You can use any oven-safe dish; just check the cooking time as it may vary depending on the size and shape of your pan.
Nutritional Info
A delicious boost of energy, here’s what you can expect per egg bite (with standard ingredients):
- Calories: 80
- Protein: 7g
- Fat: 5g
- Carbohydrates: 2g
- Fiber: 0g
- Sugar: 2g
These bites are not just tasty; they pack a nutritional punch, especially with the addition of veggies and diverse proteins!
Final Thoughts
There you have it, friends—your go-to recipe for Cottage Cheese Egg Bites! Easy to make, dreamy to eat, and endlessly versatile. Whether you enjoy them for breakfast, as an afternoon snack, or at brunch with friends, they have a unique charm that brings comfort to any table.
Let the scent of these pastries waft through your home as you share not just a meal, but a memory. Each bite is a chance to savor life’s moments, big and small. So, roll up those sleeves and get cooking! I’m sure you’ll find your own twists along the way that make this recipe even more special.
Remember, cooking is more than just a task; it’s an experience to relish. Let’s keep celebrating food that lifts our spirits and brings joy to our gatherings because, after all, nothing unites people quite like delicious food. Happy cooking, and until next time—stay hungry for flavor!
Print
Cottage Cheese Egg Bites
- Total Time: 35 minutes
- Yield: 12 servings 1x
- Diet: Vegetarian
Description
Delicious and versatile Cottage Cheese Egg Bites perfect for breakfast, brunch, or a snack, packed with protein and customizable with your favorite add-ins.
Ingredients
- 1 cup cottage cheese
- 6 large eggs
- 1/2 cup shredded cheese (cheddar or your choice)
- 1/2 cup spinach (optional)
- 1/2 cup diced bell peppers (optional)
- Salt and pepper to taste
Instructions
- Preheat the Oven: Start by preheating your oven to 350°F (175°C).
- Prepare Your Muffin Pan: Grease a standard-sized muffin tin with cooking spray or olive oil.
- Mix the Eggs and Cottage Cheese: In a large mixing bowl, whisk together the eggs and cottage cheese until well combined.
- Add in the Cheese and Veggies: Fold in your shredded cheese, spinach, and diced bell peppers (if using).
- Season Generously: Sprinkle in some salt and pepper.
- Pour the Mixture into the Muffin Tin: Fill each cup about 3/4 full.
- Bake: Bake for 20-25 minutes until puffed up and golden.
- Cool and Serve: Let your egg bites cool in the pan for about 5 minutes before removing them.
- Enjoy: Serve warm or store in the fridge for later.
Notes
These bites can be customized with different veggies and cheese to suit your taste. They can also be made ahead and stored in the fridge for easy reheating.
- Prep Time: 10 minutes
- Cook Time: 25 minutes
- Category: Breakfast
- Method: Baking
- Cuisine: American
Nutrition
- Serving Size: 1 serving
- Calories: 80
- Sugar: 2g
- Sodium: 200mg
- Fat: 5g
- Saturated Fat: 2g
- Unsaturated Fat: 3g
- Trans Fat: 0g
- Carbohydrates: 2g
- Fiber: 0g
- Protein: 7g
- Cholesterol: 186mg
Keywords: Cottage Cheese, Egg Bites, Breakfast, Healthy Snacks, Comfort Food