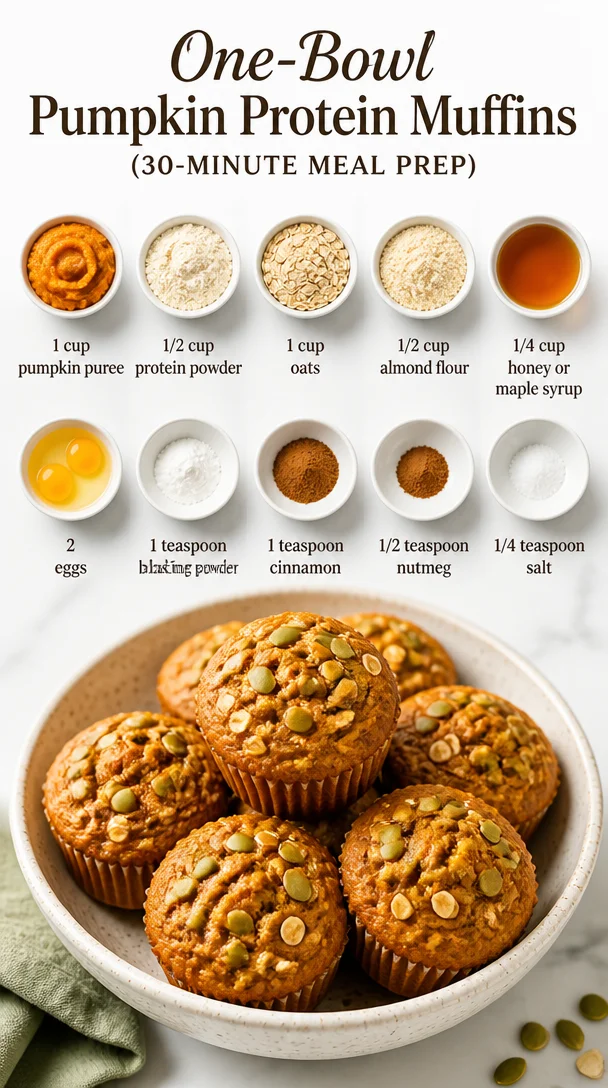
One-Bowl Pumpkin Protein Muffins (30-Minute Meal Prep)
Pumpkin Protein Muffins: A Cozy Culinary Journey to Deliciousness
Hey there, food enthusiasts! It’s Beau Collier, your friendly kitchen buddy with a knack for whipping up comfort food that’s not just satisfying but also good for you. Today, we’re diving into the world of Pumpkin Protein Muffins—a scrumptious treat that’s perfect for breakfast, a snack, or even a post-workout boost.
As the leaves begin to turn and pumpkin-flavored everything floods our favorite cafes, it’s time to embrace something homemade that captures all the warm, cozy vibes of the season—without forgetting our health goals! By melding wholesome ingredients with that lovely pumpkin goodness, we can create delightful muffins that are perfect for the entire family. Ready to roll up your sleeves and bake some goodness? Let’s get started!
A Dash of Nostalgia: My Pumpkin Muffin Memory
Picture this: it’s a crisp autumn morning, and the air is filled with the scent of cinnamon and nutmeg. My grandma, a true kitchen guru, would spend weekends crafting her famous pumpkin muffins, filling our home with a cozy aroma that made even the grumpiest of souls smile. She was a true believer that food brings family together, and her secret ingredient was always a generous helping of love mixed with laughter.
I’ll never forget the way she taught me to stir the batter with a flick of the wrist while shaking her head at my clumsy juggling of flour containers. Those muffins were more than just a snack; they symbolized togetherness and the warmth of family tradition. Fast forward to today, and I’ve taken that cherished recipe and added a fun twist—more protein and wholesome elements to fuel our busy lives!
So, grab your apron as we explore the comforting world of Pumpkin Protein Muffins. Trust me, your kitchen will be the next cozy corner of fall magic!
Ingredients: The Building Blocks of Deliciousness
Let’s gather our ingredients! These muffins are packed with nutrients while still delivering on flavor. Here’s what you’ll need:
-
1 cup pumpkin puree: You can use canned or homemade. If using fresh, ensure it’s well-cooked and blended until smooth. Don’t worry; a little extra pumpkin won’t hurt! This ingredient is key for moisture and that wonderful fall flavor.
-
1/2 cup protein powder: I favor a vanilla or chocolate plant-based powder, but your preference will work just fine. Feel free to use whey or pea protein too! It’s a fantastic way to boost the protein content without compromising on taste.
-
1 cup oats: Rolled oats add texture and heartiness. If you’re gluten-sensitive, opt for certified gluten-free oats. You can even pulse them in a blender to create oat flour if you fancy a smoother texture.
-
1/2 cup almond flour: This lends a nutty flavor and moistness. Can’t find almond flour? Substitutes include coconut flour (but use less, as it’s super absorbent) or whole wheat flour for a heartier muffin.
-
1/4 cup honey or maple syrup: Choose your sweetener! Honey gives a floral sweetness, while maple syrup infuses a uniquely rich flavor. If you’d rather skip the sweet stuff, you could use mashed bananas or applesauce as natural sweeteners.
-
2 eggs: They bind our mixture and add fluffiness. You can replace them with flax eggs (1 tablespoon of ground flaxseed mixed with 2.5 tablespoons of water per egg) for a vegan option.
-
1 teaspoon baking powder: Essential for rising! Make sure it’s fresh for maximum fluffiness.
-
1 teaspoon cinnamon: The warming spice we all adore. You can also experiment with pumpkin pie spice blends for an extra kick.
-
1/2 teaspoon nutmeg: A little pep in your step! Nutmeg offers an earthy warmth and a flavor boost.
-
1/4 teaspoon salt: Balances the flavors and enhances the sweetness.
Let’s gather these beautiful ingredients together and create some muffin magic!
Step-by-Step Instructions: Baking with Love
Now that we have our ingredients in check, it’s time to turn our kitchen into a muffin-making paradise! Here are the steps to create your delicious Pumpkin Protein Muffins:
-
Preheat your oven: Start by preheating your oven to 350°F (175°C). This ensures a beautifully even bake!
-
Prepare the muffin tin: Grab your muffin tin and either grease it with cooking spray or line it with paper liners. Greasing helps them pop out easily, while liners make for a fun presentation!
-
Mix the dry ingredients: In a large mixing bowl, whisk together the oats, almond flour, protein powder, baking powder, cinnamon, nutmeg, and salt. This step is essential to distribute all those lovely spices evenly.
-
Combine the wet ingredients: In a separate bowl, mix the pumpkin puree, honey (or maple syrup), and eggs until smooth. You want the mixture to be creamy and comforting. The pumpkin here adds so much flavor and moisture!
-
Blend the ingredients: Pour the wet ingredients into the dry mixture, gently folding it together with a spatula. Be careful not to over-mix; we want fluffy muffins, not tough ones! If the batter seems too thick, add a splash of almond milk or water to loosen it.
-
Scoop your batter: Using a scoop or spoon, evenly distribute the batter into the muffin tins, filling each cup about ¾ full. You can even sprinkle a few oats on top for added texture!
-
Bake to perfection: Slide your muffin tin into the oven and bake for 20–25 minutes, or until a toothpick inserted into the center comes out clean. The scent wafting through your kitchen will make it hard to wait patiently!
-
Cool and enjoy: Once baked, remove the muffins from the oven and let them cool in the pan for 5 minutes, then transfer them to a wire rack to cool completely. If you can resist, let them cool a bit—trust me, it’ll be worth it!
And just like that, your kitchen is filled with the delicious aroma of Pumpkin Protein Muffins! Each muffin is a cozy bite of happiness that nourishes both body and soul.
Serving Suggestions: Mmm, Muffin Time!
Once you’ve baked your muffins to golden perfection, it’s time to dig in! Serve them still warm, perhaps with a little smear of almond butter or a dollop of Greek yogurt for added creaminess. You can also dust them lightly with powdered sugar for a touch of elegance.
For a fun twist, turn your muffin time into a mini brunch gathering. Arrange the muffins on a platter with an assortment of spreads like honey, a drizzle of maple syrup, and even a selection of fresh fruits. Think sliced strawberries, bananas, or a sprinkle of walnuts for that crunchy texture.
Enjoy them fresh out of the oven, or wrap them up for a tasty on-the-go option! Trust me; they make for a delightful snack that you won’t want to miss!
Recipe Variations: Spice it Up
Now that you’ve mastered the classic Pumpkin Protein Muffins, let’s explore a few fun variations to keep things fresh and exciting in your kitchen:
-
Chocolate Chip Pumpkin Protein Muffins: Fold in a handful of dark chocolate chips for a sweet surprise! It’s a delightful combination that will satisfy your sweet tooth while keeping the nutritious profile.
-
Nutty Pumpkin Muffins: Add a handful of chopped walnuts or pecans for a crunchy twist. You could even swap out some of the almond flour for peanut butter to add that delightful nutty flavor!
-
Cranberry Pumpkin Muffins: Toss in some dried cranberries to give that tart sweetness contrasting with the pumpkin’s richness. It adds a pop of color and flavor that’s simply delightful.
-
Spiced Pumpkin Muffins: Double down on your spices! Add some ginger or allspice to amp up the warmth and fall flavors.
-
Gluten-Free Version: Substitute the oats and almond flour for a gluten-free blend, and use flax eggs instead of regular eggs for a vegan take.
The beauty of these muffins is their versatility—mix it, match it, make it your own!
Chef’s Notes: A Recipe for Traditions
As I like to think, every recipe tells a story! My journey with pumpkin muffins started in my grandma’s cozy kitchen, but it has evolved beautifully over the years. I experimented with healthier options to fit my lifestyle and also wanted to introduce a few fun twists inspired by my kitchen adventures.
Every time I whip up these muffins, I’m reminded of family gatherings and laughter, the joy each bite brings, and it fuels my mission at Feastical. Baking is about connecting with others, sharing our wins (and mishaps!), and spreading joy one muffin at a time.
And hey, if the batter seems a little thick or your muffins aren’t rising as fantastically as you’d hoped, don’t fret! Sometimes a touch of extra baking powder or fine-tuning your oven’s temperature can bring those muffins to life.
FAQs and Troubleshooting
-
Why are my muffins dense?
- A common culprit is over-mixing the batter, which can lead to tough muffins. Stick to gentle folds when combining wet and dry ingredients!
-
Can I use an egg substitute?
- Absolutely! Try a flax egg or a chia egg for a vegan alternative. Just mix 1 tablespoon of ground flaxseed or chia seeds with 2.5 tablespoons of water and let it sit for 5 minutes before adding it to the mixture.
-
How do I store leftover muffins?
- Once cooled, store them in an airtight container at room temperature for 2-3 days or in the refrigerator for up to a week. You can also freeze them for up to 3 months—simply thaw and enjoy!
-
How do I know when the muffins are done?
- Stick a toothpick in the center of a muffin; if it comes out clean or with only a few crumbs attached, they’re ready to be devoured!
Nutritional Info: Health Meets Happiness
These Pumpkin Protein Muffins are designed for nourishing your body while providing that cozy comfort we all love!
Approximate Nutrition Values per Muffin (based on 12 servings):
- Calories: 150
- Protein: 7g
- Carbohydrates: 20g
- Fiber: 3g
- Sugar: 5g
- Fat: 5g
With wholesome ingredients like pumpkin puree and oats, plus protein powder, these muffins are an excellent source of energy—perfect for fueling your morning, afternoon pick-me-up, or post-workout snack!
Final Thoughts: Bake Some Joy!
As we wrap up our adventure into the world of Pumpkin Protein Muffins, I invite you to bring a little joy into your kitchen. You don’t need to be a professional chef to create something delectable—it’s about the love you put into each bite!
So, gather your ingredients, invite a friend to join, and share some laughs as you bake together. These muffins are more than just a recipe; they’re an experience, a hug in muffin form!
Now that the fall season is upon us, make these muffins your go-to treat, and don’t hesitate to experiment with new flavors. Remember, cooking is all about creativity, so let your culinary spirit shine!
Can’t wait to hear how your baking adventure goes! Happy baking, friends! 🍂💛
Print
Pumpkin Protein Muffins
- Total Time: 40 minutes
- Yield: 12 muffins 1x
- Diet: Vegetarian
Description
Delicious and nutritious pumpkin muffins packed with protein, perfect for breakfast or a snack.
Ingredients
- 1 cup pumpkin puree
- 1/2 cup protein powder
- 1 cup oats
- 1/2 cup almond flour
- 1/4 cup honey or maple syrup
- 2 eggs
- 1 teaspoon baking powder
- 1 teaspoon cinnamon
- 1/2 teaspoon nutmeg
- 1/4 teaspoon salt
Instructions
- Preheat your oven to 350°F (175°C).
- Prepare the muffin tin by greasing it or lining it with paper liners.
- Mix the dry ingredients: whisk oats, almond flour, protein powder, baking powder, cinnamon, nutmeg, and salt in a large bowl.
- Combine the wet ingredients: mix pumpkin puree, honey (or maple syrup), and eggs in a separate bowl until smooth.
- Blend the wet and dry ingredients together, folding gently to avoid over-mixing.
- Scoop the batter into the muffin tins, filling each cup about ¾ full.
- Bake for 20–25 minutes, or until a toothpick inserted comes out clean.
- Cool for 5 minutes in the pan, then transfer to a wire rack to cool completely.
Notes
For variations, try adding chocolate chips, nuts, or dried cranberries.
- Prep Time: 15 minutes
- Cook Time: 25 minutes
- Category: Snack
- Method: Baking
- Cuisine: American
Nutrition
- Serving Size: 1 muffin
- Calories: 150
- Sugar: 5g
- Sodium: 150mg
- Fat: 5g
- Saturated Fat: 0.5g
- Unsaturated Fat: 4.5g
- Trans Fat: 0g
- Carbohydrates: 20g
- Fiber: 3g
- Protein: 7g
- Cholesterol: 30mg
Keywords: pumpkin muffins, protein muffins, healthy snacks
Burger Bowls
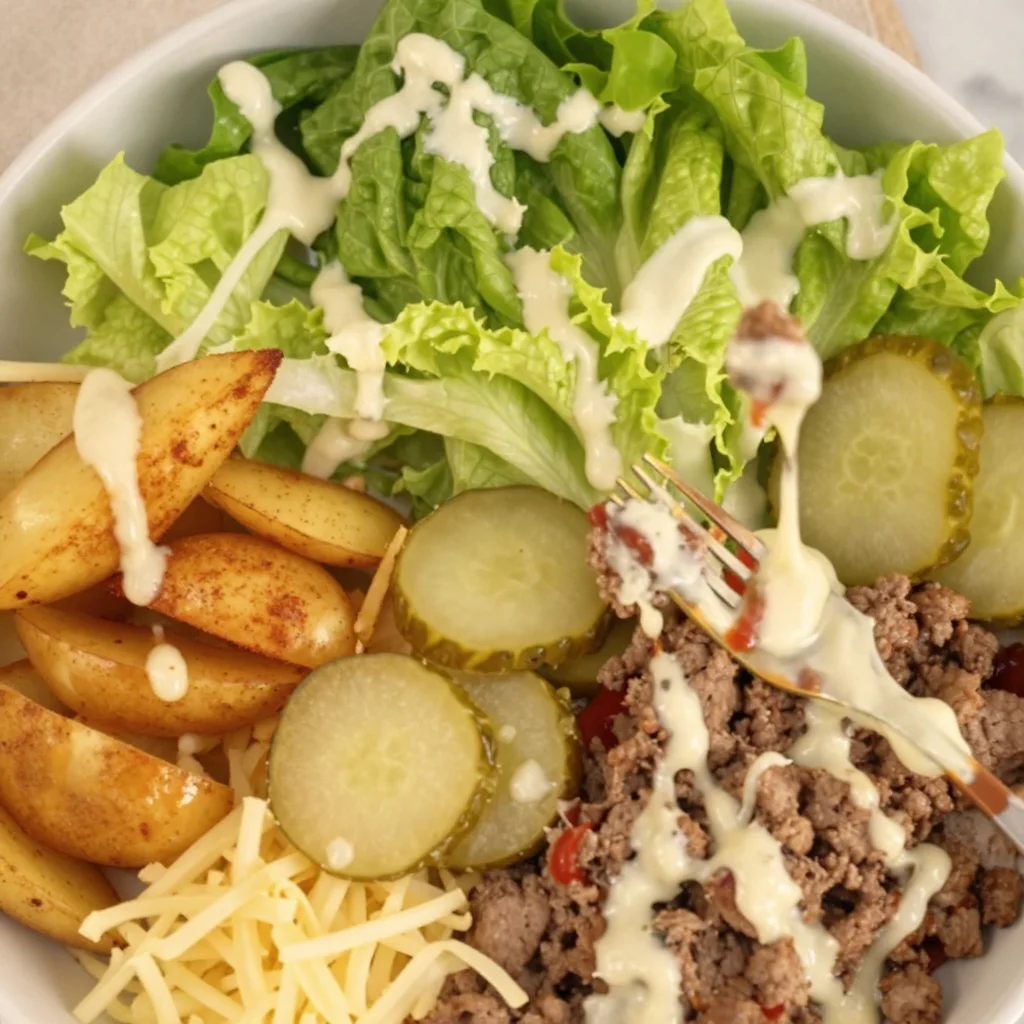
A Delicious Twist on Tradition: Burger Bowls
Hey friends! Welcome back to Feastical, where we’re all about celebrating the joy of cooking and sharing dishes that feel like home. Today, I’m super excited to dive into a fun culinary twist that’s not only satisfying but also packs a punch of flavor—yep, you guessed it, it’s Burger Bowls! Let’s fall in love with the classic burger experience but in a fresh, health-conscious bowl format that’s as customizable as your favorite toppings.
You may be wondering, why burger bowls? Well, aside from the fact that they’re totally Instagram-worthy, they allow you to indulge in all the flavors of a burger without the heaviness of a traditional bun. It’s like you’re having a backyard BBQ but in a fun new format. Plus, who doesn’t love a one-bowl meal? It’s all about convenience, and we’re turning your kitchen into a flavor-packed assembly line!
Now, before we jump into the nitty-gritty of how to master these burger bowls, let me share a little personal story that truly captures why burgers hold such a special place in my heart…
A Bite of Nostalgia
Growing up, burgers were a staple at our family gatherings. My dad was the grill master of the family; nothing made him happier than firing up the grill on a sunny Saturday afternoon, with the sweet scent of sizzling patties wafting through the air. I remember standing by his side, a spatula in hand, feeling like a true culinary apprentice. We’d laugh, share stories, and even try to come up with the next “must-try” topping combo.
One of my fondest memories revolves around a particularly adventurous summer evening when my dad decided to try out a new spice mix. He called it “Magic Dust,” and he had no clue what was in it—just a hodgepodge of spices from our pantry. Fast forward to dinner, and those burgers were the talk of the town, the kids clamoring for seconds and thirds! It was in those simple moments that I discovered how food brings people together.
Fast forward to now, and I’m here to share that spirit with you through these delightful burger bowls! They’re all about keeping the joy alive while giving you the freedom to mix and match flavors. Let’s get started!
Ingredients
Here’s what you’ll need to bring your burger bowls to life. Each ingredient not only adds a unique flavor but also elevates the dish to new heights.
- 1 ½ teaspoons smoked paprika: This spice adds a rich, smoky flavor that invokes that grilled burger experience. If you don’t have smoked paprika, regular paprika works, but you may want to add a little extra in the way of chipotle for that smokiness.
- 1 teaspoon garlic powder: Perfect for that savory depth! Fresh minced garlic can be substituted, but it may alter the cooking time slightly.
- 1 teaspoon onion powder: This adds a subtle sweetness. If you want a stronger onion flavor, feel free to use finely chopped fresh onion.
- 1 teaspoon dried oregano or mixed herbs: Either will add an aromatic freshness. For fresh herbs, use three times the amount—fresh is always a winner!
- ½ teaspoon salt: Essential for enhancing all the flavors! Adjust this to taste—some folks prefer less salt, especially if they’re mindful of sodium intake.
- ¼ teaspoon black pepper: Adds just the right amount of kick! Consider white pepper for a different flavor profile.
- 2-3 medium potatoes: These will be our tasty base, baked until golden and crispy. Sweet potatoes are also a great option for a sweeter, healthier alternative.
- 2 tablespoons olive oil (divided): Essential for roasting our potatoes. Avocado oil can be used if you want a neutral flavor with a high smoke point.
- 500 grams lean beef mince: The star protein of our burger bowl! You can swap this for turkey, chicken, or even plant-based mince if you want a lighter or vegetarian option.
- Lettuce (shredded): Adds a refreshing crunch. You can go bold and use kale or a mix of greens!
- Cheese (dairy-free or regular): Because who doesn’t love cheese? Use your favorite type—cheddar, mozzarella, or dairy-free options will all be delicious.
- Pickle slices: These add that tangy, crunchy brightness we crave. If you’re not a fan of pickles, consider using jalapeños for a spicy kick.
- 4 tablespoons mayonnaise: For that creamy goodness! You can also use Greek yogurt or a dairy-free mayo for a lighter swap.
- 1 tablespoon ketchup: Essential for that classic burger flavor. Try mixing it with sriracha for a zesty spin!
- 1 teaspoon mustard (Dijon or yellow): Adds a tang! You can also use horseradish for a bit more punch.
- 1 teaspoon pickle juice (from the jar of pickles): Adds a nice zing to our sauce! Feel free to adjust based on your taste preference.
- ½ teaspoon garlic powder and ½ teaspoon smoked paprika: These will be used again in the sauce for that burger bite!
Step-by-Step Instructions
Are you ready to get your hands a little dirty? Let’s cook! Here’s how to bring these burger bowls to life:
1. Preheat the Oven:
Preheat your oven to 425°F (220°C). This ensures your potato base will come out perfectly crispy.
2. Prep the Potatoes:
While the oven is heating, wash and dice your potatoes into bite-sized pieces. Toss them with one tablespoon of olive oil, smoked paprika, salt, and a sprinkle of black pepper. This simple seasoning gives them a hearty flavor.
3. Roast the Potatoes:
Spread the seasoned potatoes evenly on a baking sheet. Bake for about 25-30 minutes, flipping halfway through until they’re golden brown and crispy. Don’t overcrowd the pan—give them space to crisp up!
4. Cook the Beef:
In a large skillet over medium heat, add the remaining tablespoon of olive oil and pack in that 500 grams of beef mince. Allow it to brown for about 5-7 minutes but don’t rush it; great flavor comes from not being afraid of a little caramelization. Stir in garlic powder, onion powder, oregano, and more smoked paprika. Cook until the beef is cooked through and flavorful, and then set aside.
5. Mix the Sauce:
In a small bowl, whisk together mayonnaise, ketchup, mustard, pickle juice, and a hint of garlic powder and smoked paprika. Taste it—does it need more salt? A bit of heat? Adjust to your palate!
6. Assemble the Bowls:
Grab your favorite serving bowls and start layering! Start with a generous scoop of those roasted potatoes. Next, add a hefty portion of the cooked beef, followed by a bed of shredded lettuce, sprinkle on the cheese, and top with pickle slices.
7. Drizzle with Sauce:
Finish it off with a generous drizzle of your zesty sauce. You can always put extra sauce on the table for those who like it saucy!
8. Serve and Enjoy!
Your burger bowls are ready! Serve with a side of extra pickle slices and maybe even some tortilla chips for crunch. Enjoy them with your friends and family—trust me, this is one meal that everyone will want to dig into!
Serving Suggestions
Plating is an art, and your burger bowls deserve a bit of flair! Here are my favorite ways to serve:
- Colorful Layers: When layering your bowl, make it a rainbow feast! Start with a bottom layer of crispy potatoes, followed by a hearty mound of seasoned beef. Add a vibrant layer of greens and sprinkle generously with cheese, making sure to place everything in full view for visual delight!
- Creative Container: Consider serving these in a hollowed-out bell pepper or a tortilla bowl for a fun, interactive touch. Anything that invites your guests to dive into this deliciousness is a win!
- Garnish with Flair: Don’t hold back on garnishing! Fresh chopped parsley or chives can add that touch of freshness, or even some chili flakes if you want to spice things up!
Recipe Variations
The beauty of these burger bowls is their versatility. Here are some fun ways to switch it up:
- BBQ Burgers: Swap the regular spices for BBQ seasoning and serve with a smoky BBQ sauce instead of mayonnaise.
- Mediterranean Spin: Use lamb mince, and top with tzatziki, feta cheese, and olives for a refreshing twist.
- Caprese Burger Bowl: Use the classic tomato, basil, and mozzarella combo by adding fresh basil leaves, cherry tomatoes, and mozzarella balls with balsamic drizzle.
- Vegan-Friendly: Substitute the beef with lentils or chickpeas, and use cashew cream in place of mayo for a rich flavor.
- Breakfast Bowl: Add some scrambled eggs on top with a sprinkle of cheese for a delightful breakfast twist!
Chef’s Notes
Let me tell you, I’ve had my fair share of burger flops and lightbulb moments in the kitchen! I remember the first time I tried to make a veggie burger from scratch. Let’s just say it ended up in the bin (RIP). But after a little trial and error, learning from my mistakes, I’ve perfected this easy recipe! Always remember—the magic happens in a relaxed kitchen. Don’t stress about perfection, just enjoy the process of cooking!
FAQs and Troubleshooting
-
Why didn’t my potatoes get crispy?
If your potatoes didn’t crisp up, you likely overcrowded the baking sheet. Spread them out in a single layer, and give them enough room to breathe! -
Can I use ground turkey instead of beef?
Absolutely! Ground turkey will work beautifully and is a leaner option. Just adjust the cooking time slightly, as turkey can cook faster than beef. -
What if I don’t like pickles?
No worries! You can substitute pickles with other toppings you love, such as jalapeños, roasted red peppers, or even avocado for creaminess. -
How can I make this gluten-free?
This recipe is already gluten-free! Just make sure your sauces (like ketchup and mustard) are gluten-free, and you’re good to go.
Nutritional Info
Here’s the breakdown of the nutritional goodness in our burger bowls (per serving, roughly calculated):
- Calories: 500-600 calories (depending on toppings and portion sizes)
- Protein: 35-40g (thanks to the lean beef)
- Carbohydrates: 45-50g (mostly from potatoes)
- Fat: 20-30g (depending on cheese and mayo used)
- Fiber: 5-7g (especially if you include more veggies)
Feel free to adjust the quantities, especially if you’re watching your macros or have specific dietary needs!
Final Thoughts
So there you have it—delicious burger bowls that bring the nostalgia and cozy vibes of backyard grilling right to your table. Whether you’re a busy parent, a culinary novice, or an experienced chef, I hope these bowls become a staple in your kitchen.
Remember, cooking is about improvisation and fun! Switch things up as you see fit, and don’t forget to invite your friends and family to join in on the fun. I can’t wait to see your creations and hear your stories—after all, every bowl has a story to tell!
Until next time, keep it simple, soulful, and always satisfying! Grab your fork (or that favorite mug), and let’s feast together! 🥳
Print
Burger Bowls
- Total Time: 45 minutes
- Yield: 4 servings 1x
- Diet: Gluten-Free
Description
A fun twist on classic burgers, these burger bowls offer all the flavors without the heaviness of a bun, making for a customizable and satisfying meal.
Ingredients
- 1 ½ teaspoons smoked paprika
- 1 teaspoon garlic powder
- 1 teaspoon onion powder
- 1 teaspoon dried oregano or mixed herbs
- ½ teaspoon salt
- ¼ teaspoon black pepper
- 2–3 medium potatoes, diced
- 2 tablespoons olive oil (divided)
- 500 grams lean beef mince
- Lettuce (shredded)
- Cheese (dairy-free or regular)
- Pickle slices
- 4 tablespoons mayonnaise
- 1 tablespoon ketchup
- 1 teaspoon mustard (Dijon or yellow)
- 1 teaspoon pickle juice
- ½ teaspoon garlic powder
- ½ teaspoon smoked paprika
Instructions
- Preheat your oven to 425°F (220°C).
- Wash and dice your potatoes into bite-sized pieces. Toss them with one tablespoon of olive oil, smoked paprika, salt, and a sprinkle of black pepper.
- Spread the seasoned potatoes evenly on a baking sheet and bake for about 25-30 minutes, flipping halfway through.
- Add the remaining tablespoon of olive oil to a large skillet over medium heat, then pack in the beef mince. Allow it to brown for about 5-7 minutes.
- Stir in garlic powder, onion powder, oregano, and more smoked paprika. Cook until the beef is cooked through.
- Whisk together mayonnaise, ketchup, mustard, pickle juice, and more garlic powder and smoked paprika in a small bowl.
- Layer in bowls with roasted potatoes, cooked beef, shredded lettuce, cheese, and pickle slices.
- Drizzle with the sauce and serve with extra pickle slices.
Notes
For extra flavor, experiment with different toppings like jalapeños or avocado as based on your preferences.
- Prep Time: 15 minutes
- Cook Time: 30 minutes
- Category: Main Course
- Method: Baking
- Cuisine: American
Nutrition
- Serving Size: 1 serving
- Calories: 500
- Sugar: 5g
- Sodium: 600mg
- Fat: 25g
- Saturated Fat: 8g
- Unsaturated Fat: 15g
- Trans Fat: 0g
- Carbohydrates: 45g
- Fiber: 6g
- Protein: 35g
- Cholesterol: 75mg
Keywords: burger bowls, healthy burger, customizable meal, gluten-free dinner
Minute Summer Kale Salad: Quick Weeknight Meal Prep
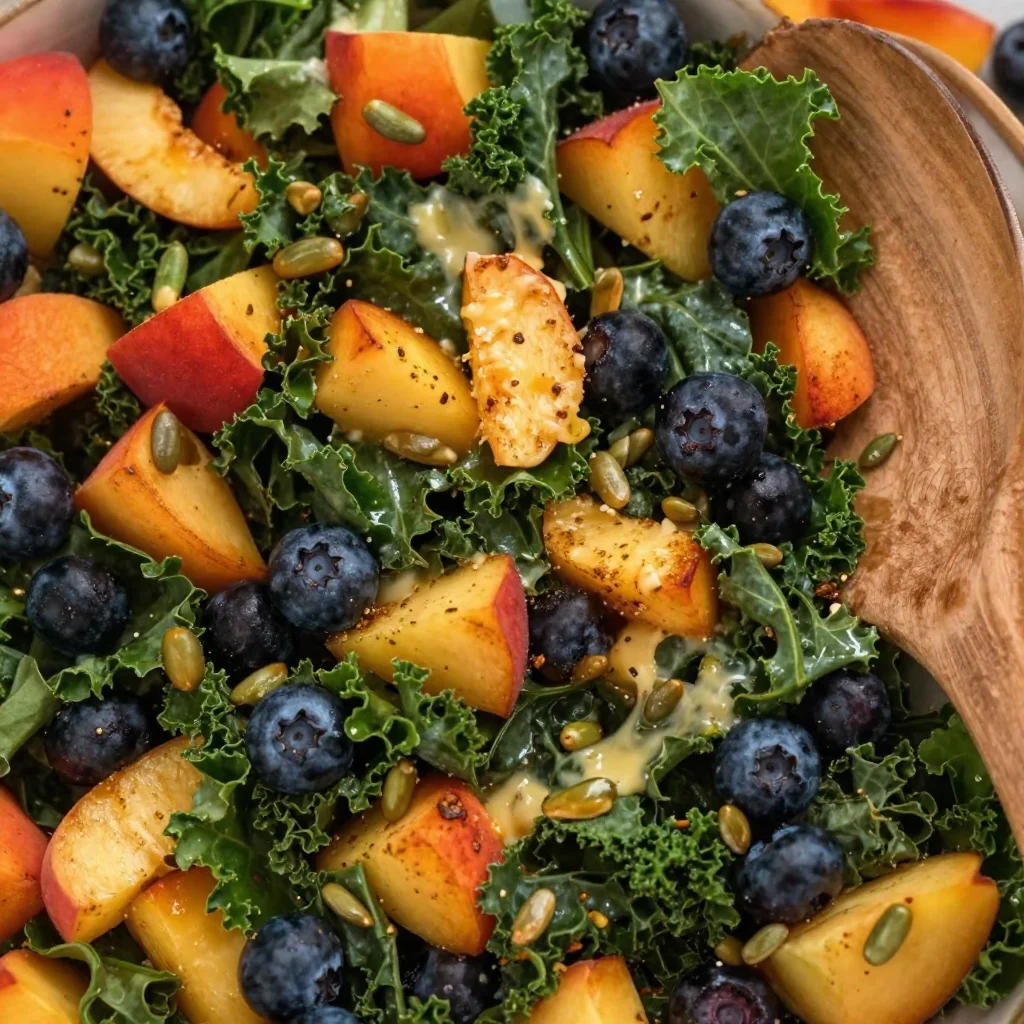
Summer Kale Salad: A Deliciously Vibrant Take on Fresh Ingredients
Hey there, food lovers! Summer is just around the corner, and you know what that means—the sunny skies, the laid-back vibes, and of course, the abundant fresh produce just begging to be transformed into something downright delicious. Today, I’m beyond excited to share with you one of my all-time favorite go-to dishes: Summer Kale Salad. Trust me, once you sink your teeth into this delightful bowl of greens and fruits, it’ll have you doing a happy dance in the kitchen!
What I love about this salad is that it perfectly captures the essence of summer. We’ve got vibrant green kale, sweet juicy peaches, plump blueberries, and a dressing that’s as refreshing as a light summer rain. It’s nutritious, colorful, and, most importantly, oh-so-tasty! Plus, this salad is super easy to make—everyone from the novice cook to the seasoned pro can whip this up in no time.
As you gather around the table—whether it’s a sunny backyard barbecue, a casual picnic, or just a cozy dinner at home—you’ll find that this Summer Kale Salad isn’t just a dish; it’s a celebration of the season. So grab your favorite cutting board, put on some upbeat tunes, and let’s dive into the delightful world of summer flavors!
A Slice of My Life: The Memory Behind the Salad
Let me take you back to one blissful afternoon at my grandmother’s house. It was a classic summer day; the kind where the sun shines brightly, and the air is filled with the sweet scent of blooming flowers. My grandmother, a culinary wizard in her own right, decided it was the perfect day to host a family picnic in her vibrant garden. The kids giggled, the adults chatted, and of course, the food was a feast worthy of an invitation to the most discerning palate.
That day, she introduced the family to her signature summer kale salad. I had never seen greens look so inviting, adorned with slices of juicy peaches that glistened like sunshine and blueberries dancing playfully across the leaves. I remember watching her mix the dressing—simple yet flavorful, a perfect balance of sweetness and zest. When she served it, the whole table lit up. Everyone raved about the unique flavors and refreshing crunch. It was a dish that not only nourished but also connected us all.
Years later, as I started my own cooking journey, I found myself recreating that salad in my own kitchen. It wasn’t just about the ingredients; it was about the memories and the laughter shared over that meal. Today, I’m thrilled to pass that joyous recipe along to you, so you can create your own beautiful moments around the dining table!
Ingredients: What You’ll Need
Here’s a breakdown of the ingredients for our Summer Kale Salad. Each component brings something special to the table, so let’s discuss why they matter and how they can be tweaked:
-
Green Kale: This leafy green is the superstar of the salad. It’s packed with nutrients and offers a hearty base. If kale isn’t your jam, spinach or Swiss chard can work as great alternatives—just keep in mind that they have a milder flavor.
-
Fresh Juicy Peaches: Peaches bring a soft, sweet element that contrasts beautifully with the kale. If you can’t find peaches, nectarines or even mangos can do the trick!
-
Sweet Blueberries: These little gems are bursting with antioxidants and create a lovely pop of sweetness. Don’t have blueberries? Feel free to swap in blackberries or strawberries for a different berry flavor.
-
Honey: A touch of sweetness in the dressing really elevates the salad. For a vegan option, agave syrup or maple syrup works just as well.
-
Lemon Juice: The acidity of fresh lemon juice brightens up the salad and balances out the sweetness of the fruits. If you’re out of lemons, lime juice can offer a similar zesty kick.
-
Olive Oil: A good quality olive oil is essential for dressing the salad. If you’re in the mood for something different, try avocado oil for a creamy finish, or even a flavored oil like basil to enhance the taste.
-
Salt: Just a pinch of salt is needed to bring all the flavors together. Sea salt or kosher salt works best.
-
Pepitas: These crunchy pumpkin seeds add a toasty flavor and satisfyingly crunchy texture. Sunflower seeds could make a fantastic substitute if you’re in a pinch.
Step-by-Step Instructions: Let’s Make It!
Now that we’ve gathered all our ingredients, let’s jump into the cooking part. This salad is super easy to whip up—perfect for a busy summer day!
-
Prepare the Kale: Start by rinsing your kale leaves under cool running water. Pat them dry gently with a clean kitchen towel. Next, remove the tough stems by running your knife along the sides of the stem and tearing the leaves into bite-sized pieces. Don’t toss the stems! They can be added to smoothies or chopped up and thrown into stir-fries.
-
Massage the Kale: This might sound a bit odd, but hear me out! Place your torn kale in a large mixing bowl and drizzle a tablespoon of olive oil over it. Now, get in there with your hands and massage the kale for about 2–3 minutes. This helps break down the cell walls and makes the leaves tender and less bitter. Plus, it’s oddly therapeutic!
-
Mix the Dressing: In a small bowl, whisk together 2 tablespoons of honey, the juice of one lemon, and the remaining olive oil (about 3 tablespoons). This combo will serve as the dressing that ties everything together. If you’re feeling adventurous, toss in a pinch of black pepper or even some finely chopped herbs for added flavor.
-
Slice the Peaches: While you’re letting the kale soak up that yummy olive oil goodness, slice your peaches. Cut them in halves, remove the pits, and then slice them into wedges. The juiciness of the peaches is what makes this salad sing!
-
Prepare the Blueberries: Give your blueberries a gentle rinse and pat them dry. If you’re using them straight from the fridge, let them come to room temperature for a bit. This enhances their sweetness!
-
Combine: Now, using your hands or a wooden spoon, toss the massage kale with the juicy slices of peaches and blueberries. Drizzle the dressing over the top and give it another gentle toss, ensuring everything is coated.
-
Serve and Garnish: Transfer the kale salad to a beautiful serving bowl or a large platter. Sprinkle the pepitas on top for that satisfying crunch, and maybe a few more blueberries and peach slices for a stunning presentation!
Serving Suggestions: How to Plate It Up
When it comes to serving this Summer Kale Salad, you want to make it as inviting as possible! I recommend presenting the salad on a large platter, allowing everyone to help themselves. For added flair, garnish with extra blueberries and a few peach slices perched on top like they’re waving hello!
If you’re serving a crowd, consider pairing the salad with some grilled chicken or shrimp for a heartier meal. This salad also goes beautifully with crusty artisan bread or alongside a refreshing drink, like lemonade or iced tea. And let me tell you, sharing this dish is always a hit, especially when friends gather around and ooh and aah over its vibrant colors!
Recipe Variations: Get Creative!
While I adore the original Summer Kale Salad, it’s always fun to mix things up! Here are some of my favorite variations to keep things exciting in the kitchen:
-
Grilled Peach Kale Salad: Fire up the grill and grill your peach slices for extra flavor. The smokiness pairs beautifully with the fresh greens!
-
Crispy Chickpeas Twist: For added protein and crunch, toss in some roasted chickpeas. Just sprinkle them with your favorite spices and roast until crispy!
-
Feta Cheese Delight: Crumbled feta cheese adds a salty, creamy contrast that elevates the dish.
-
Add Quinoa: For a more filling salad, mix in some cooked quinoa. It adds a nutty flavor and makes for a more substantial meal.
-
Vegan Delight: Swap the honey for maple syrup and use a nut-based cheese to make this salad completely plant-based without losing any flavor!
Chef’s Notes: A Journey Through Flavors
I’ve made this Summer Kale Salad countless times over the years, each time adjusting it a little based on what I have on hand, the season’s offerings, and my whims in the kitchen. I recall once when I swapped out the honey for agave, not realizing how different the flavors would play together—it turned out scrumptious!
Funny enough, I once tried to impress some friends by adding poached eggs as a topping. Let’s just say that experiment turned into a fun inside joke for us, as instead of a fancy brunch, I made a beautiful kale salad with a touch of egg disaster!
What’s beautiful about this salad is how adaptable it is—just like life, it can change and still turn out fabulous, no matter the tweaks you make.
FAQs and Troubleshooting
Got questions? Let’s dive into some common ones!
1. How can I store leftovers?
You can store leftover salad in an airtight container in the fridge for about 1–2 days. Keep the dressing stored separately to maintain the freshness of the kale.
2. What’s the best way to clean kale?
A good rinse under cold water will do the trick! Ensure all dirt is washed off, and always pat the kale dry for better dressing application.
3. How can I make this salad vegan?
Swap out honey for maple syrup in the dressing, and use plant-based cheese instead of feta!
4. What if my kale is too tough?
If your kale is particularly robust or tough, try soaking it in a bowl with cold water for about 10 minutes before preparing. It can help soften the leaves!
Nutritional Info
Now, let’s chat about the health benefits of this Summer Kale Salad! This dish is a nutrient powerhouse. Kale is loaded with vitamins (A, C, and K), fiber, and antioxidants. Fresh peaches and blueberries not only add bright flavors but also provide vitamins, minerals, and a healthy dose of hydration!
The healthy fats from olive oil and the crunch from pepitas incorporate protein and good fats, keeping you fuller longer. Plus, this salad is low in calories, making it an excellent option if you’re looking to maintain a balanced diet without skimping on taste!
Final Thoughts
So there you have it, my summertime gift to you: a vibrant, delicious, and oh-so-refreshing Summer Kale Salad! I hope this dish fills your kitchen with joy, laughter, and scrumptious flavors. Whether you’re enjoying it solo, sharing it with family, or taking it to a backyard barbecue, it’s a testament to the sunny spirit of summer.
Remember, cooking is all about enjoying the process and sharing with others. Don’t hesitate to play around with the ingredients, get creative, and make this recipe your own! I can’t wait for you to try it and hear your stories in the kitchen. Here’s to creating delicious memories—one salad at a time!
Now go on, gather your ingredients, and let the summer salad party begin!
Print
Summer Kale Salad
- Total Time: 15 minutes
- Yield: 4 servings 1x
- Diet: Vegetarian
Description
A deliciously vibrant salad featuring fresh kale, juicy peaches, and sweet blueberries, perfect for summer gatherings.
Ingredients
- 4 cups Green Kale, rinsed and chopped
- 2 Fresh Juicy Peaches, sliced
- 1 cup Sweet Blueberries
- 2 tablespoons Honey
- 3 tablespoons Lemon Juice
- 4 tablespoons Olive Oil
- Salt, to taste
- 1/4 cup Pepitas, for garnish
Instructions
- Prepare the Kale: Rinse and dry the kale, remove tough stems, and tear into bite-sized pieces.
- Massage the Kale: Drizzle olive oil over the kale and massage for 2–3 minutes until tender.
- Mix the Dressing: Whisk together honey, lemon juice, and remaining olive oil.
- Slice the Peaches: Cut peaches into wedges, removing pits.
- Prepare the Blueberries: Rinse and dry the blueberries.
- Combine: Toss the kale with peaches and blueberries, then drizzle with dressing.
- Serve and Garnish: Transfer to a serving bowl and sprinkle with pepitas.
Notes
For a vegan option, replace honey with maple syrup. Leftovers can be stored for 1–2 days.
- Prep Time: 15 minutes
- Cook Time: 0 minutes
- Category: Salad
- Method: Mixing
- Cuisine: American
Nutrition
- Serving Size: 1 serving
- Calories: 250
- Sugar: 15g
- Sodium: 60mg
- Fat: 15g
- Saturated Fat: 2g
- Unsaturated Fat: 10g
- Trans Fat: 0g
- Carbohydrates: 30g
- Fiber: 4g
- Protein: 5g
- Cholesterol: 0mg
Keywords: summer salad, kale salad, healthy recipes, vegetarian salad, fresh ingredients
Minute Bow Tie Pasta Salad for Quick Weeknight Meal Prep
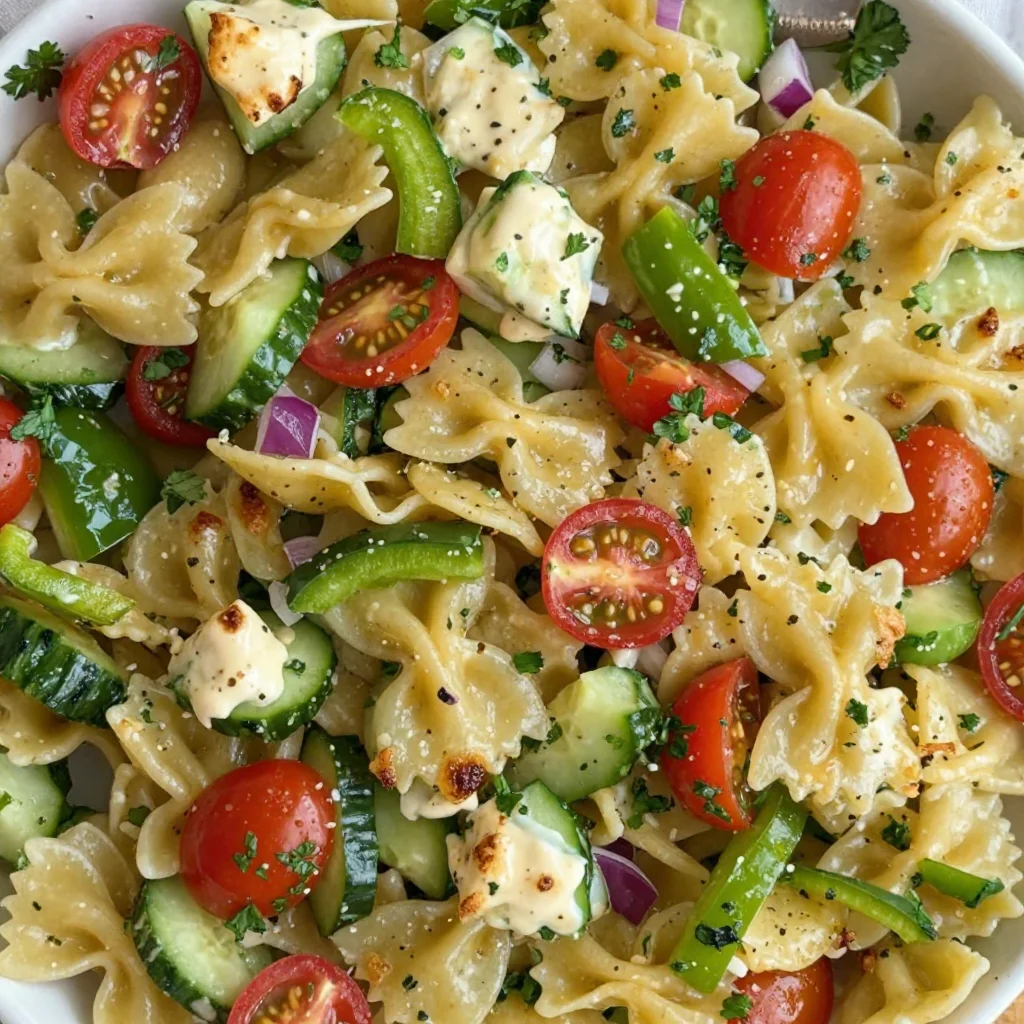
Colorful Bow Tie Pasta Salad: A Feast of Flavors!
Hey there, fellow food lovers! Welcome back to Feastical! Today, we’re diving into a dish that’s as delightful to make as it is to eat: the Colorful Bow Tie Pasta Salad. This vibrant pasta salad is perfect for those sunny picnic days, summer barbecues, or even a casual weeknight dinner when you want something quick yet satisfying.
This salad is not just visually appealing; it’s a burst of flavors and textures in every bite. The combination of fresh veggies, tangy Italian dressing, and bow tie pasta makes it a crowd-pleaser for both kids and adults alike. Plus, the best part? It’s so easy to whip up that even the most novice chef can tackle it with confidence. Whether you’re serving it as a side dish or as the star of your meal, you’re going to love how this salad brightens up your dining experience.
So, grab your apron, put on your favorite tunes, and let’s get started! I can already feel the joyful spirit of community that food brings us, and I can’t wait to share this incredible recipe with you.
A Personal Slice of Inspiration
Let me take you back to one of my favorite summer memories. It was a balmy afternoon at my grandmother’s house, and we were preparing for our annual family reunion. The smell of grilled burgers wafted through the air, mingling with the sweet aroma of my aunt’s homemade desserts. I was in the kitchen, my little hands busy with a mountain of ingredients, getting ready to make my very first pasta salad with a bit of help from Grandma.
Her hands, worn from years of lovingly creating meals for family, guided me through the steps. We tossed in rainbow bell peppers, juicy cherry tomatoes, and crunchy cucumbers, and I felt like a chef working on a masterpiece. The satisfaction that followed when we served it up—seeing my family’s eyes light up at the first taste—was something that sealed my love for cooking.
That childhood experience taught me that food really does have the power to bring people together. And every time I make this Colorful Bow Tie Pasta Salad, it takes me back to that sunny day, reminding me of those loved ones gathered around a table, sharing laughter and love over delicious food. It’s not just a recipe; it’s a tradition that connects loyalty to flavors and family!
Ingredients
Let’s talk ingredients! Here’s what you’ll need for our vibrant Colorful Bow Tie Pasta Salad:
-
8 oz bow tie pasta: The star of our dish! Bow tie pasta (or farfalle) adds a playful character, and its unique shape holds onto the dressing beautifully. You can swap it out for any small pasta you have on hand, like fusilli or rotini, but I personally find the bow ties so fun!
-
1 cup cherry tomatoes, halved: These little gems add sweetness and a pop of color. Feel free to use grape tomatoes for a different shape or even sun-dried tomatoes if you want a more robust flavor.
-
1 cup cucumber, diced: Crunchy and refreshing, cucumbers are a must! If you want a sweeter bite, consider using a diced bell pepper instead. You can use English cucumbers or even zucchini if you’re feeling adventurous.
-
1 bell pepper, diced: Any color works wonders—red, yellow, or green all contribute different sweetness levels. Switch it up with roasted red peppers for a smoky twist!
-
1/2 cup red onion, diced: It adds a zesty kick! If red onion feels too strong for you, try a milder onion or even green onions for a subtler flavor.
-
1 cup Italian dressing: This tangy dressing is like a party for your taste buds! You can make your own at home or reach for a store-bought option (just make sure it’s your favorite!). For a lighter version, go for vinaigrettes or yogurt-based dressings.
-
Salt and pepper to taste: Always a classic! Season to your heart’s desire, but remember that salty flavors can balance the salad’s natural sweetness.
-
Fresh parsley for garnish (optional): A sprinkle of parsley not only brightens the dish visually but also adds that fresh flavor. You can swap it with basil or even a squeeze of lemon if you’re feeling zesty!
Step-by-Step Instructions
Alright, my culinary comrades, let’s tackle this splendid pasta salad together! Follow these steps, and I promise you’ll whip up something incredible.
First Things First: Cook the Pasta
-
Bring a large pot of salted water to a boil. Use enough salt—about a tablespoon per pot of water—so the pasta can absorb that flavor while cooking. It’s like a secret flavor boost in every bite!
-
Add the bow tie pasta to the boiling water. Cook it according to the package instructions (usually around 8-10 minutes), stirring occasionally to keep those bow ties dancing in the pot. You want them al dente, which means they should still have a slight bite to them.
-
Drain the pasta and rinse it under cold water. This process stops the cooking and cools down the pasta so that it doesn’t turn mushy. Plus, it makes mixing it with the veggies later a breeze!
Chop Those Veggies
- While your pasta is cooking, get your chopping game on! Dice up your cucumber, bell pepper, and onion into bite-sized pieces. Cherry tomatoes should be halved—don’t worry; it’ll only take a minute!
Combine and Dress It Up
-
In a large bowl, combine the cooled pasta with the chopped veggies. Toss everything gently so that the veggies can mingle evenly with the pasta.
-
Pour in the Italian dressing. Start with about 3/4 of a cup—start slow; you can always add more! Stir everything gently to combine, ensuring each nook and cranny of pasta is coated in that delicious dressing.
Finish It Off
-
Taste the salad and season it with salt and pepper to your liking. I love to let mine marinate for a bit—chilling in the fridge for at least 30 minutes lets the flavors meld beautifully!
-
Serve it up! Just before serving, give it a final gentle stir and garnish with parsley (if using) to give it that fresh pop!
Ready to dive in? Oh, I can already hear the delightful crunch of fresh veggies and the melody of flavors coming together. You’ve just made a show-stopping dish that’s bound to impress!
Serving Suggestions
When it comes to plating, the presentation makes a big difference! Here are a few ideas to elevate your serving game:
-
Use a vibrant platter: Consider serving your colorful pasta salad in a big, colorful bowl or platter that complements the veggies’ hues. It creates an inviting visual presentation!
-
Layer beautifully: For a buffet, layer the pasta salad with some leafy greens like spinach or arugula underneath. It’s not just visually enticing but adds an extra nutritious punch too!
-
Add some protein: For a heartier meal, serve it alongside grilled chicken, shrimp, or even chickpeas to boost the protein content.
-
Caprese twist: Layer the salad with slices of mozzarella or sprinkle feta on top for an Italian flair that will leave your taste buds singing!
Recipe Variations
Time to get creative! Here are some fun variations you can try with your Colorful Bow Tie Pasta Salad:
-
Mediterranean Twist: Swap the Italian dressing for a homemade lemon-olive oil vinaigrette, and add in Kalamata olives, artichoke hearts, and crumbled feta cheese for a refreshing Mediterranean kick!
-
Beachy BBQ Style: Toss in grilled corn, black beans, and lime juice for a fiesta-inspired flavor. Perfect for those summer BBQs!
-
Pesto Perfection: Instead of Italian dressing, use pesto sauce for a basil-forward salad. Add sun-dried tomatoes for extra depth, and you’ll be transported straight to an Italian café.
-
Veggie Overload: Pack in even more nutrients by adding shredded carrots, snap peas, or even roasted vegetables for a colorful medley.
-
Protein-Packed: Add diced salami or pepperoni, or even some chickpeas for a vegetarian option that makes this salad even more filling.
Mix and match these ideas until you find your favorite combo! The beauty of cooking is experimentation, so don’t be afraid to follow your taste buds!
Chef’s Notes
As my culinary journey grew, so did my love for this pasta salad. I’ve made countless tweaks over the years, depending on what I had lurking in my fridge or the seasons. A little hint for you: during winter months, roasted vegetables can take this dish next level, giving it warmth and a cozy feel that contrasts beautifully with a chilled, refreshing salad.
Don’t forget—making mistakes in the kitchen is just another recipe for success! The most memorable meals sometimes come from trying new things and learning as we go. So, if one carrot finds its way into the mix or you’ve gone a bit heavy on the dressing, embrace it! Every kitchen experiment makes you a better cook.
FAQs and Troubleshooting
Q1: My pasta is too sticky! What did I do wrong?
A: No worries! This can happen if the pasta is overcooked or wasn’t rinsed properly. Always rinse under cold water after draining to stop the cooking process. If it does get sticky, a splash of olive oil can help break it apart.
Q2: Can I make this ahead of time?
A: Absolutely! This salad is great for meal prep. Just keep it in an airtight container in the fridge for up to three days. The flavors will develop even more!
Q3: How can I store leftovers?
A: Store any remaining salad in the fridge in a tightly sealed container. The pasta might soak up the dressing over time, so you may want to adjust the seasoning and add a little extra dressing before serving.
Q4: Can I use whole grain or gluten-free pasta?
A: Definitely! Whole grain pasta adds a nutty flavor, while gluten-free options will work just as well. Just make sure to adjust the cooking time based on the type of pasta you choose!
Nutritional Info
This Colorful Bow Tie Pasta Salad is not just a feast for the eyes; it’s a wholesome addition to your meal!
- Calories: Approximately 300 per serving (this can vary based on the dressing and additional proteins added).
- Carbohydrates: Around 40g (perfect for fueling those summer activities).
- Protein: About 7g if you stick to veggies; it can increase significantly with added proteins.
- Fats: Typically around 12g, depending on the dressing and any cheese you add.
- Fiber: Approximately 3g from all those wholesome veggies, helping keep your digestive system happy.
- Vitamins: A good source of Vitamin C and K, particularly from the bell peppers and parsley.
This salad packs a nutritional punch while remaining low in calories, making it a wonderful choice for a light lunch or side dish!
Final Thoughts
There you have it! The Colorful Bow Tie Pasta Salad isn’t just a salad; it’s a celebration of the flavors and feelings that food can evoke. Its versatility allows you to make it your own, customize it to your taste, and share it with your loved ones—just like I did many summers ago in my grandmother’s kitchen.
So, gather around that dining table, share those hearty laughs, and dig into the colorful creation you’ve just made! At the end of the day, it’s not just about the food itself; it’s about the people you meet and the memories you make along the way.
Happy cooking, my friends! Let’s dig in! 🥳✨
Print
Colorful Bow Tie Pasta Salad
- Total Time: 25 minutes
- Yield: 4 servings 1x
- Diet: Vegetarian
Description
A vibrant and delicious pasta salad perfect for picnics, barbecues, or casual dinners, featuring fresh veggies and tangy Italian dressing.
Ingredients
- 8 oz bow tie pasta
- 1 cup cherry tomatoes, halved
- 1 cup cucumber, diced
- 1 bell pepper, diced
- 1/2 cup red onion, diced
- 1 cup Italian dressing
- Salt and pepper to taste
- Fresh parsley for garnish (optional)
Instructions
- Bring a large pot of salted water to a boil.
- Add the bow tie pasta and cook according to package instructions (about 8-10 minutes) until al dente.
- Drain the pasta and rinse under cold water.
- Dice the cucumber, bell pepper, and onion into bite-sized pieces and halve the cherry tomatoes.
- Combine the cooled pasta with the chopped veggies in a large bowl.
- Pour in the Italian dressing and stir gently to combine.
- Taste and season with salt and pepper as desired.
- Chill in the fridge for at least 30 minutes before serving.
- Garnish with parsley just before serving.
Notes
This salad is great for meal prep and can be stored in an airtight container in the fridge for up to three days.
- Prep Time: 15 minutes
- Cook Time: 10 minutes
- Category: Salad
- Method: Mixing
- Cuisine: Italian
Nutrition
- Serving Size: 1 serving
- Calories: 300
- Sugar: 5g
- Sodium: 450mg
- Fat: 12g
- Saturated Fat: 1g
- Unsaturated Fat: 9g
- Trans Fat: 0g
- Carbohydrates: 40g
- Fiber: 3g
- Protein: 7g
- Cholesterol: 0mg
Keywords: pasta salad, colorful salad, vegetarian recipe, Italian dressing, summer meals
Minute Chickpea Feta Avocado Salad for Meal Prep Bowls
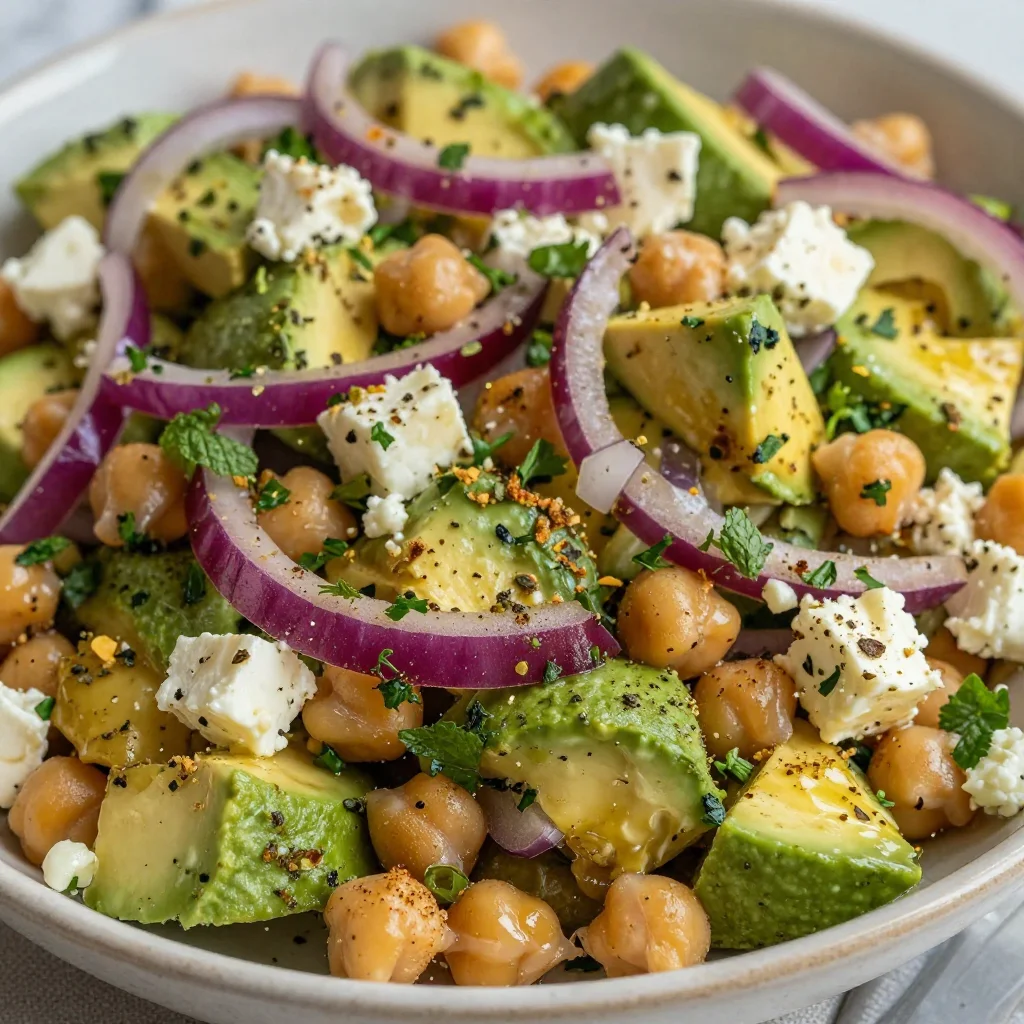
Chickpea Feta Avocado Salad: A Flavorful Medley That’s Always in Season
Hey there, food lovers! Welcome back to Feastical, where we whip up good vibes and tasty bites. Today, we’re diving into the world of fresh, vibrant flavors with a dish that’s both delightful and nutritious – the Chickpea Feta Avocado Salad! Whether you’re prepping for a cozy dinner, or looking for a quick lunch, this salad has your back.
Imagine a warm day, the sun shining bright, and you’re sitting at a picnic table. This Chickpea Feta Avocado Salad is like a burst of sunshine on your plate. Packed with fresh ingredients and zesty flavors, it’s one of those recipes that brings people together. And trust me, it’s so easy to whip up; you’ll find yourself making it on repeat!
A Personal Touch: Memories of Summer Picnics
Let me take you back a few summers ago. My family and I decided to have a grand picnic at the local park, complete with blankets, games, and of course, an overflowing picnic basket. As we set up in a sunny spot under a sprawling oak tree, I pulled out this salad, the star of our feast. The vibrant greens and creamy avocado made everyone’s eyes light up, and I’ll never forget the sight of my little niece stealing bites of feta while her father tried to sneak in enough for his own plate.
That moment was pure joy! As we munched on the salad, I felt the warm embrace of family and friendship. It reminded me that food is more than just sustenance; it’s about making connections, sharing stories, and creating memories around the table.
Ingredients
Here’s what you’ll need for this refreshing Chickpea Feta Avocado Salad:
-
1 (15-ounce/425g) can chickpeas, drained and rinsed
Chickpeas are the heart of this salad! They’re packed with protein and fiber, giving you that satisfying bite. If you want a different texture, you can substitute with cooked lentils. -
1 avocado, pitted and diced
Who can resist creamy avocado? It adds a luscious texture and healthy fats. If avocados are hard to find, you can use cubed mango for a fruity twist! -
4 ounces/115g feta cheese, crumbled
Feta brings the tangy flavor that ties everything together. If you’re dairy-free, try a vegan feta or omit it entirely. -
1/2 cup/75g red onion, thinly sliced
Red onion adds a nice crunch and a mild bite. Soaking the slices in cold water for about 10 minutes helps mellow the flavor if it’s too strong! -
1/2 cup/50g fresh parsley, chopped
This herb adds a fresh, grassy note. Feel free to swap it for cilantro or basil if you want a different flavor profile. -
1/4 cup/25g fresh mint, chopped
Mint adds a refreshing zing—perfect for summer. If you’re not a fan, omit it or use green onions for some sharpness. -
3 tablespoons/45ml olive oil
A good-quality olive oil adds depth and richness. For a nutty flavor, try substituting with avocado oil. -
2 tablespoons/30ml lemon juice, freshly squeezed
Bright and zesty, lemon juice brings everything to life. If you don’t have lemons, lime juice works great too! -
1 clove garlic, minced
Garlic is the secret ingredient for soulful flavor. If you want a milder taste, roast the garlic first or omit it entirely. -
1/2 teaspoon/2.5ml dried oregano
This herb adds an earthy vibe to your salad. Fresh oregano is great too, but you’ll need three times the amount! -
Salt and pepper to taste
Seasoning is key, so don’t be shy with the salt and pepper!
Step-by-Step Instructions
Now that we’ve rounded up all our ingredients, let’s get cooking! This Chickpea Feta Avocado Salad is as simple as 1-2-3, so grab your chopping board and let’s roll!
-
Prepare the Chickpeas
Start by draining and rinsing the chickpeas in a colander. This step is crucial – it removes excess sodium and any residue from the canning process. If you prefer, you can use cooked dried chickpeas; just make sure they’re tender! -
Chop Your Veggies
Dice the avocado, slice the red onion, and chop the parsley and mint. Keep your veggies bite-sized for easy eating. Pro tip: If you want to prevent your avocado from browning, sprinkle a bit of lemon juice on it right after cutting. -
Crumble the Feta
Next, take your feta cheese and crumble it into a medium bowl. Use your hands or a fork for this. The crumbles will mix beautifully with all the other ingredients. -
Combine Everything
In a large bowl, add the rinsed chickpeas, chopped avocado, diced red onion, parsley, and mint. Toss gently to combine. Be careful not to mash the avocado; we want those creamy chunks to shine! -
Create the Dressing
In a separate small bowl, whisk together olive oil, lemon juice, minced garlic, and dried oregano. Season with salt and pepper to taste. This dressing is your flavor bomb, so taste it as you go and adjust for tanginess! -
Dress the Salad
Drizzle the dressing over the salad mixture and toss again gently until everything is well-coated. Allow it to sit for about 10 minutes for the flavors to meld together beautifully. -
Serve It Up!
Spoon the salad into bowls or onto a platter. If you want to impress your guests, garnish with extra herbs on top for a pop of color!
Serving Suggestions
This Chickpea Feta Avocado Salad is versatile enough to stand alone or be served alongside your favorite grilled meats, fish, or even a stunning veggie burger. For an appealing presentation, layer the salad in a glass bowl to showcase those beautiful colors!
Want to elevate this dish even further? Serve it with crusty bread or pita chips for dipping. And if you really want to take it to the next level, drizzle a balsamic reduction on top for an extra touch of sweetness.
Recipe Variations
Want to switch things up? Here are a few creative ideas:
- Mediterranean Twist: Add some sun-dried tomatoes and Kalamata olives for a burst of Mediterranean flavor.
- Southwestern Flair: Toss in some corn, black beans, and diced jalapeños for a zesty, southwestern-inspired dish.
- Vegan Version: Replace feta cheese with a homemade cashew cheese or nutritional yeast to keep it creamy but plant-based.
- Grain Bowl: Serve the salad over a bed of quinoa or farro for a filling meal that packs extra nutrients.
- Spicy Kick: Add a sprinkle of red pepper flakes or diced jalapeños to the dressing for a fiery twist!
Chef’s Notes
Over the years, this Chickpea Feta Avocado Salad has seen a few transformations in my kitchen. I’ve played with different herbs and spices, and I love experimenting with what’s in season! Each version brings a new life to the dish. It’s also worth mentioning that this salad tastes even better the next day, so feel free to whip up a big batch for meal prep!
And for a little funny story: One time, I was so excited to share this salad at a BBQ that I accidentally grabbed the bowl of garlic and mixed it in with the dessert instead of the salad. Let’s just say that chocolate and garlic do NOT make a great pair!
FAQs and Troubleshooting
1. How can I make this salad ahead of time?
You can prep all your ingredients and store them separately in the fridge. Just combine and dress them right before serving to keep the avocado fresh and the salad crisp.
2. What if my chickpeas are too salty?
If you find your chickpeas are too salty (especially from canned varieties), try soaking them in cold water for an hour before using them. Rinsing thoroughly helps too!
3. How can I store leftovers?
This salad is best enjoyed fresh, but if you have leftovers, transfer them to an airtight container and keep them in the fridge for up to two days. Note that the avocado may brown, but the flavor will still be delicious!
4. Can I use dried herbs instead of fresh?
Absolutely! Just remember that dried herbs are more concentrated than fresh, so use about one-third of the amount when substituting.
Nutritional Info
This Chickpea Feta Avocado Salad is not only delicious but also packed with nutrients. Here’s a quick breakdown (per serving, assuming four servings):
- Calories: ~300
- Protein: 10g
- Carbohydrates: 20g
- Fat: 22g
- Fiber: 8g
- Sodium: 300mg (varies based on feta and chickpeas)
Chickpeas provide protein and fiber to keep you full, while avocados offer healthy fats. Feta adds calcium (if you’re including cheese!), making this salad a powerhouse of good nutrition.
Final Thoughts
So there you have it – a vibrant, zesty, and utterly scrumptious Chickpea Feta Avocado Salad that’s ready to shine on your table. Remember, cooking is all about playing, experimenting, and sharing with those you love. I hope this recipe sparks joy and invites laughter around your kitchen table, just as it did for me.
Give this salad a whirl, and let me know how it goes! Share your own stories and variations in the comments below. Until next time, keep cooking with love and spreading the good vibes. Get your forks ready – happy feasting!
Print
Chickpea Feta Avocado Salad
- Total Time: 15 minutes
- Yield: 4 servings 1x
- Diet: Vegetarian
Description
A refreshing and nutritious Chickpea Feta Avocado Salad that brings vibrant flavors and is perfect for any occasion.
Ingredients
- 1 (15-ounce/425g) can chickpeas, drained and rinsed
- 1 avocado, pitted and diced
- 4 ounces/115g feta cheese, crumbled
- 1/2 cup/75g red onion, thinly sliced
- 1/2 cup/50g fresh parsley, chopped
- 1/4 cup/25g fresh mint, chopped
- 3 tablespoons/45ml olive oil
- 2 tablespoons/30ml lemon juice, freshly squeezed
- 1 clove garlic, minced
- 1/2 teaspoon/2.5ml dried oregano
- Salt and pepper to taste
Instructions
- Prepare the chickpeas by draining and rinsing them in a colander.
- Chop your veggies: dice the avocado, slice the red onion, and chop the parsley and mint.
- Crumble the feta cheese into a medium bowl.
- Combine everything in a large bowl, adding the chickpeas, avocado, red onion, parsley, and mint.
- Create the dressing by whisking together olive oil, lemon juice, garlic, and oregano in a small bowl.
- Dress the salad by drizzling the dressing over the mixture and tossing gently.
- Serve it up in bowls, garnished with extra herbs if desired.
Notes
This salad is best enjoyed fresh but can be prepped ahead of time by storing ingredients separately.
- Prep Time: 15 minutes
- Cook Time: 0 minutes
- Category: Salad
- Method: No-cook
- Cuisine: Mediterranean
Nutrition
- Serving Size: 1 serving
- Calories: 300
- Sugar: 2g
- Sodium: 300mg
- Fat: 22g
- Saturated Fat: 4g
- Unsaturated Fat: 16g
- Trans Fat: 0g
- Carbohydrates: 20g
- Fiber: 8g
- Protein: 10g
- Cholesterol: 15mg
Keywords: salad, chickpeas, avocado, feta, healthy, vegetarian, Mediterranean

Minute High-Protein Breakfast Bowl: Meal-Prep Ready
High Protein Breakfast Bowl: Kick-Start Your Day with Energy!
Hey there, foodie friends! Beau Collier here, and today I’m super excited to share one of my absolute favorite dishes that’s perfect for those busy mornings when you need a breakfast that keeps you fueled and satisfied. We’re talking about the High Protein Breakfast Bowl! Now, I know what you might be thinking: a breakfast bowl? How exciting can that be? But trust me, this bowl is a flavor explosion waiting to happen!
Imagine starting your day with a warm, hearty blend of ground turkey, fluffy eggs, creamy cottage cheese, and crispy potatoes, all generously drizzled with a splash of olive oil and topped with your favorite fixings. Yum, right? What I love about this dish is that it’s not just about filling your belly; it’s about nourishing your body. Plus, it’s ridiculously easy to whip up! You don’t need a degree from culinary school to nail this one.
But beyond just being a fantastic dish, this breakfast bowl holds a special place in my heart. It’s a recipe that reminds me of lazy Sunday mornings spent with family, chatting over a strong cup of coffee and watching the sunlight dance through the kitchen windows. Food has this magical way of bringing us together, and that’s exactly what I aim to capture in every recipe I share with you. Alright, let’s get our cooking shoes on and dive into this high-protein delight!
A Nostalgic Culinary Journey
Growing up, Sunday mornings were a big deal in my house. My family had a special tradition where we would gather around the table for breakfast, sharing stories and laughter over steaming plates of food. My mom was known for her hearty breakfasts that could feed an army, and one of her go-to recipes was a breakfast bowl that looked very much like the one we’re preparing today.
I remember one particular Sunday when I was about eight years old. My mom was bustling around the kitchen, and the tantalizing smell of seasoned ground turkey wafted through the air, making my tummy rumble in anticipation. We all took part in assembling our breakfast bowls, creating our personalized masterpieces with eggs, creamy cheese, and whatever toppings we had on hand. As we ate, we recounted our wild dreams and silly kid stories, soaking in the warmth of family love.
Now, every time I make this breakfast bowl, those cherished memories flood back. It’s more than just a meal; it’s a connection to family, tradition, and the simple joys of life. So whether you’re cooking solo or shared with friends, let’s make this breakfast bowl a delicious canvas for your memories!
Ingredients
Here’s what you’ll need to create this scrumptious High Protein Breakfast Bowl:
-
2 tablespoons olive oil (divided)
- Chef’s Tip: This heart-healthy fat not only helps with cooking but also adds a rich flavor. You can also substitute with avocado oil for a different taste, or flavored oils for an extra kick.
-
1/2 lb ground turkey
- Substitution: Ground chicken or beef work great, too. Just remember, different meats can bring their own unique flavor to the dish.
-
1.5 tablespoons taco seasoning
- Insider Insight: Feel free to use store-bought seasoning or whip up your own mix! Cumin, paprika, and garlic powder create a perfect blend for that taco flair.
-
Salt and pepper (to taste)
- Don’t skip these! They’re essential for bringing out the flavors in each ingredient.
-
3-4 large eggs
- Quick Cook’s Tip: For a fluffier texture, whisk the eggs with a splash of milk before cooking. This small addition makes a world of difference!
-
1/4 cup cottage cheese (2%-4%)
- An excellent source of protein that adds creaminess and helps the bowl feel indulgent. You could swap this for Greek yogurt if you prefer!
-
1 tablespoon butter
- Flavor Boost: A touch of butter gives the dish an irresistible richness. If you’re watching your butter intake, feel free to omit it or use a dairy-free alternative.
-
1 cup shredded potatoes (like Simply Potatoes)
- Crisping up shredded potatoes adds a beautiful texture to the bowl. If you want to cut carbs, try substituting with riced cauliflower!
-
Optional toppings:
- Chopped fresh herbs like chives or parsley
- Avocado slices
- Mexican shredded cheese
- Chopped tomatoes or salsa
- Chef’s Note: These toppings add layers of flavor and visual appeal, so mix and match based on what you have or love!
Step-by-Step Instructions
Now, let’s get down to business! Here’s how to bring your High Protein Breakfast Bowl to life:
-
Prepare Your Ingredients:
- Before you start cooking, gather all your ingredients and have them ready. This makes for a seamless cooking experience where you’re not running around like a headless chicken. I always say, "Mise en place" is the secret to kitchen success!
-
Cook the Ground Turkey:
- In a large skillet, heat 1 tablespoon of olive oil over medium heat.
- Once hot, add the ground turkey, breaking it apart with a spatula.
- Sprinkle in the taco seasoning, along with a pinch of salt and pepper.
- Cook for about 6–8 minutes until it’s no longer pink and fully cooked.
- Chef Hack: Don’t forget to stir occasionally! You want that turkey to soak up all those wonderful taco spices evenly.
-
Crisp the Potatoes:
- In another skillet, or after removing the turkey, add the remaining 1 tablespoon of olive oil along with the butter.
- Once melted and bubbly, add the shredded potatoes.
- Spread them in an even layer and let them cook untouched for about 5 minutes for extra crispiness.
- Give them a gentle stir and let them cook for an additional 4–5 minutes until golden brown and crispy.
- Tip: If you like your potatoes spicier, toss in some chili powder or paprika while they cook!
-
Scramble the Eggs:
- In a separate bowl, whisk the eggs with a splash of milk (if using) until fully blended.
- Season with salt and pepper.
- In a non-stick skillet, melt a little butter (or use cooking spray) over medium-low heat.
- Pour in the eggs and let them sit for a few seconds.
- Gently stir with a spatula, folding the eggs until they’re scrambled to your desired doneness, about 4 minutes. They should be fluffy and soft—don’t overcook them!
-
Assemble the Bowl:
- It’s time to layer! Start with a generous scoop of crispy potatoes at the bottom of your bowl.
- Next, add the seasoned ground turkey and top it with scrambled eggs.
- Finally, dollop the cottage cheese on top. If you make it this far, you’re already killing it!
-
Add Toppings:
- Now for the fun part! Top your bowl with fresh herbs, slices of avocado, a sprinkle of cheese, and your favorite salsa or chopped tomatoes.
- Take a step back and admire your creation before diving in—a feast for the eyes!
Serving Suggestions
Serve this High Protein Breakfast Bowl warm, preferably with a side of fresh fruit or a slice of whole-grain toast to balance it out. If you’re feeling extra cozy, how about pairing it with a steaming cup of your favorite coffee? For a family brunch feel, consider setting up a breakfast bar where everyone can customize their own bowls with different toppings. This way, it becomes a shared experience filled with laughter and creativity!
Recipe Variations
Here are a few creative twists and variations to keep things fresh and exciting:
-
Mediterranean Bowl: Swap the taco seasoning for a dash of oregano and basil, then top with feta cheese, olives, and diced cucumbers for a Mediterranean flair.
-
Southwestern Style: Add black beans into the ground turkey mix and top with fresh corn, diced jalapeños, and spicy salsa.
-
Sweet & Savory: For a unique twist, replace cottage cheese with plain Greek yogurt and add some sliced peaches or berries.
-
Veggie-Packed: Sauté spinach, bell peppers, and onions with the turkey for an extra serving of veggies right from the get-go.
-
Egg White Bowl: If you’re looking to reduce the calories, use egg whites instead of whole eggs and increase the amount of turkey or cottage cheese for extra protein.
Chef’s Notes
This High Protein Breakfast Bowl continues to evolve every time I make it. I used to stick strictly to the traditional recipe, but as my cooking journey has unfolded, I’ve discovered that this dish is an incredible blank canvas! Sometimes, I find myself cranking up the spice level or switching up the cheeses based on what I have on hand. Each twist brings its own charm, keeping this bowl fun and versatile.
And let me tell you, there’s nothing like a bit of improvisation in the kitchen! I remember one time running low on turkey but having an abundance of mushrooms—so, I threw those in, along with some extra spices. What a delightful surprise that was! The key is to enjoy the process and get a little creative.
FAQs and Troubleshooting
1. Can I make this ahead of time?
Absolutely! You can prep the turkey, scramble the eggs, and even cook the potatoes in advance. Just store them separately in the fridge and reheat in the morning for a quick assembly.
2. What if my eggs turn out rubbery?
Oh no! This can happen if you cook them on too high of a temperature. Always keep your heat on medium-low and stir gently for soft, creamy eggs.
3. How do I ensure my potatoes are crispy?
The trick is to let them sit undisturbed for the initial frying time. Avoid overcrowding the pan and use enough oil to help them get golden and crispy!
4. Can I freeze any leftovers?
Yes, you can freeze leftover cooked turkey and potatoes. Just make sure to portion them out and store them in airtight containers. The eggs, however, are best enjoyed fresh, as they can become watery after freezing.
Nutritional Info
While I won’t get too bogged down in numbers—food is about enjoyment, after all—here’s a quick breakdown of the nutritional highlights of this High Protein Breakfast Bowl:
- Calories: Approximately 450 per serving (without toppings)
- Protein: A whopping 36-40 grams, thanks to the turkey, eggs, and cottage cheese
- Fat: Around 24 grams, predominantly from healthy olive oil
- Carbohydrates: Roughly 30 grams, mainly from the shredded potatoes
These values can vary depending on your specific ingredients and substitutions, but this bowl is a fantastic high-protein, well-rounded meal to kick-start your day or power you through your busy schedule!
Final Thoughts
There you have it, friends—a High Protein Breakfast Bowl that’s not only about great taste but also about creating memories around the kitchen table. It’s a dish perfect for sharing with loved ones or savoring during your quiet ‘me time’.
As you explore the various ingredients and toppings, remember that food is meant to be celebrated and enjoyed. So whether you like it spicy, cheesy, or packed with veggies, make this recipe your own. Now, who’s ready to whip up a bowl of happiness? Grab those forks or spoons, and let’s dig in!
Until next time, keep it flavorful and keep it real! 🥄❤️
Print
High Protein Breakfast Bowl
- Total Time: 45 minutes
- Yield: 4 servings 1x
- Diet: High Protein
Description
A hearty breakfast bowl filled with ground turkey, fluffy eggs, creamy cottage cheese, and crispy potatoes, topped with olive oil and your favorite fixings.
Ingredients
- 2 tablespoons olive oil (divided)
- 1/2 lb ground turkey
- 1.5 tablespoons taco seasoning
- Salt and pepper (to taste)
- 3–4 large eggs
- 1/4 cup cottage cheese (2%-4%)
- 1 tablespoon butter
- 1 cup shredded potatoes
- Optional toppings: chopped fresh herbs, avocado slices, Mexican shredded cheese, chopped tomatoes or salsa
Instructions
- Prepare your ingredients by gathering all the items you need.
- Cook the ground turkey in a skillet with olive oil, taco seasoning, salt, and pepper for about 6-8 minutes.
- Crisp the potatoes in another skillet with olive oil and butter until golden brown, about 9-10 minutes.
- Scramble the eggs in a non-stick skillet until fluffy and cooked to your liking.
- Assemble the bowl starting with crispy potatoes, followed by ground turkey, scrambled eggs, and cottage cheese.
- Add toppings like fresh herbs, avocado, cheese, and salsa as desired.
Notes
Prep ingredients in advance for a quicker cooking experience. Customize with your favorite toppings.
- Prep Time: 15 minutes
- Cook Time: 30 minutes
- Category: Breakfast
- Method: Skillet Cooking
- Cuisine: American
Nutrition
- Serving Size: 1 bowl
- Calories: 450
- Sugar: 4g
- Sodium: 600mg
- Fat: 24g
- Saturated Fat: 8g
- Unsaturated Fat: 10g
- Trans Fat: 0g
- Carbohydrates: 30g
- Fiber: 3g
- Protein: 36g
- Cholesterol: 300mg
Keywords: breakfast, high protein, healthy bowl, turkey, eggs, vegetarian option
Minute No-Bake Granola Bars for Busy Weekday Meal-Prep
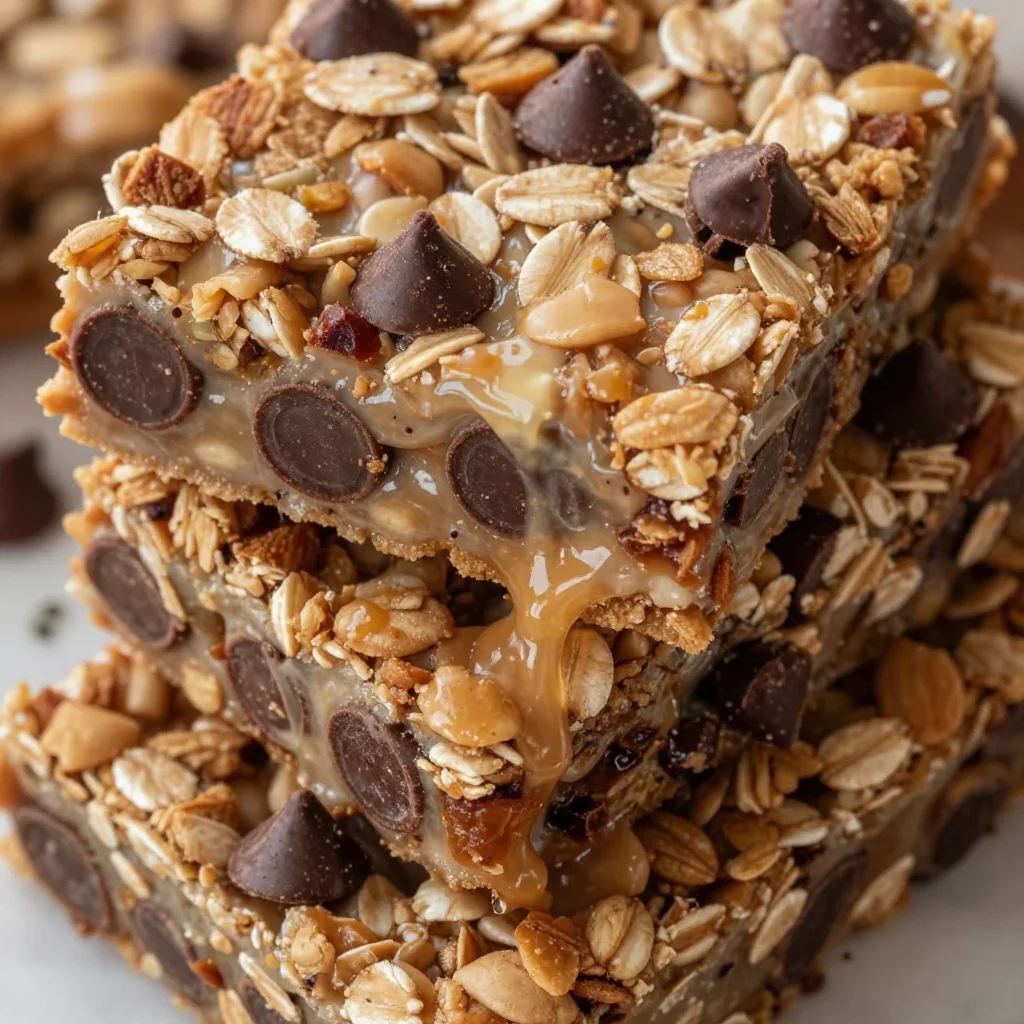
No-Bake Granola Bars: Your New Go-To Snack!
Hey there, fellow food lover! I’m Beau Collier, and today we’re diving into a kitchen adventure that’s as easy as pie—well, no-bake pie, that is. If you’re on the lookout for a delicious snack that not only satisfies but also gives you a warm, cozy feeling of home, then you’re in for a treat. We’re whipping up some Homemade No-Bake Granola Bars! These delightful munchies are perfect for when you need a quick pick-me-up, a healthy lunchbox addition, or a grab-and-go breakfast.
Now, let’s be real—life can get busy, and sometimes, who has the time to bake an entire batch of cookies or muffins? Not to mention, the cleanup can turn the kitchen into a battlefield! But that’s why no-bake recipes are my jam. They’re quick, easy, and oh-so-satisfying. Plus, kids and adults alike will enjoy these chewy, nutty, and utterly delicious granola bars.
As we walk through this recipe, I’ll sprinkle in some handy tips, little anecdotes, and personal touches that make this dish come alive. I invite you to put on your apron, grab your favorite mug, and let’s get cooking—no baking required!
A Granola Bar Trip Down Memory Lane
You know how certain smells and tastes can transport you back in time? That’s what homemade granola bars do for me. I remember sitting at the kitchen counter as a kid while my mom experimented with all sorts of snacks to fill our lunchboxes. She would blend oats, honey, and whatever nuts or fruits we had on hand, all while I eagerly awaited the final product. There was something so magical about watching her create perfection with just a few simple ingredients.
One of my favorite memories is when she made her first-ever batch of no-bake granola bars. As the mixture came together, we laughed about how messy the kitchen was getting—there was peanut butter everywhere, and I had Froot Loops in my hair from breakfast! But when we finally sunk our teeth into those chewy bars, it was like instant happiness. The satisfaction of knowing we’d helped make our own snacks amplified the fun, and from that day on, granola bars became a staple in our household.
Fast forward a few years, and I find myself in my own kitchen, trying to recreate that same sense of joy and nostalgia. And guess what? I think I’ve found the perfect no-bake granola bar recipe that captures all of those cherished memories. Best part? You can customize it just the way you like!
Ingredients
Let’s check out the lineup of ingredients you’ll need to craft these no-bake granola bars. Each one plays a key role in the texture and flavor, and I’ve got some great tips for you along the way!
-
2 cups oats
Rolled oats are the backbone of this recipe, providing texture and fiber. For a gluten-free option, just grab certified gluten-free oats! -
1 cup nut butter (peanut butter or almond butter)
This acts as the glue that holds everything together. Prefer a nut-free version? No problem! Sunflower seed butter or soy nut butter work wonderfully too. -
1/2 cup honey or maple syrup
Both sweeteners give this recipe a delightful sweetness and help bind the oats together. If you want a vegan alternative, maple syrup is your best bet! -
1/2 cup chocolate chips (optional)
Who can say no to a little chocolate? Dark, semi-sweet, or even dairy-free versions all work. To keep it healthy, consider swapping them for cacao nibs. -
1/2 cup dried fruits (optional)
Raisins, cranberries, or even chopped apricots add a lovely chewiness. Fresh fruits won’t work here since they can add too much moisture, but feel free to get creative with dried options! -
1/4 cup seeds (optional)
Think sunflower seeds, chia seeds, or pumpkin seeds. They add extra nutrition and a delightful crunch! You can skip these if you’re nut-free and want to lighten things up.
Step-by-Step Instructions
Now that we have our ingredients ready, let’s jump into some straightforward, fun, no-fuss steps to bring your granola bars to life. Each step will include tips and tricks that’ll make you feel like a pro chef in no time!
-
Gather Your Gear
Grab a large mixing bowl and a spatula for stirring. We’ll also need an 8×8 inch baking dish lined with parchment paper to make removal easy. -
Mix the Dry Ingredients
Start by pouring the oats into the mixing bowl. If you want a bit more flavor, give them a quick toast in a dry skillet over low heat for 5 minutes until lightly golden. It’ll enhance the nuttiness and aroma! Once ready, add any seeds and dried fruits you’re using. -
Heat the Nut Butter and Sweetener
In a small saucepan, combine the nut butter and honey (or maple syrup) over low heat, stirring continuously until smooth and warm. This is where the magic happens! The warmth makes it easier to blend with the oats. Just don’t let it come to a boil; we want to keep that creamy texture. -
Combine Everything Together
Pour the warm nut butter mixture over the dry ingredients. Now, grab that spatula and mix like your life depends on it! Make sure all the oats are coated evenly. If you’re adding chocolate chips, wait until the mixture has cooled slightly before folding them in to avoid melting them completely. -
Press It Down
Transfer the mixture into your lined baking dish. Use a second piece of parchment paper or your hands (which will likely get a bit sticky) to press it firmly and evenly into the dish. This step is crucial! The more compact it is, the better it will hold together once cut. -
Chill and Set
Place the dish in the refrigerator for at least 1-2 hours to set. This gives the mixture time to firm up, making it easier to slice into bars. If you’re in a rush, popping them in the freezer for 30 minutes does the trick too! -
Slice and Serve
Once set, remove the parchment paper and slice into your desired bar sizes. I usually aim for about 10-12 bars, but you do you! Store them in an airtight container in the fridge for up to a week (if they last that long).
Serving Suggestions
When it comes to serving these no-bake granola bars, there’s no wrong way! However, if you want to impress your friends or family, try bundling them up in wax paper and tying them with a cute kitchen twine for that homemade touch.
Pair them with a cup of coffee or a smoothie for breakfast on-the-go. Need a snack? These bars are just perfect for a quick energy boost between meals. Kids can take them to school, or you can enjoy them during your next hike. You might even crumble them over yogurt for a delicious parfait!
Recipe Variations
Now, let’s get creative! The beauty of no-bake granola bars is that they are truly customizable. Here are some flavorful variations to spice things up:
-
Tropical Twist: Swap out the dried fruits for shredded coconut and diced dried pineapple for a tropical vibe.
-
Chocolate Peanut Butter: Add cocoa powder to the nut butter mixture and increase the chocolate chips for an indulgent treat.
-
Protein Power-Up: Stir in a scoop of your favorite protein powder to the dry mix for a post-workout boost!
-
Trail Mix Style: Add your favorite nuts and seeds—think cashews, walnuts, or flaxseeds—for that crunchy trail mix feeling.
-
Pumpkin Spice Delight: For a seasonal treat, add pumpkin puree, pumpkin spice, and a few chocolate chips to turn these bars into a fall favorite!
Chef’s Notes
Over the years, I’ve tinkered with this recipe quite a bit. Initially, it was a straightforward combination of oats and peanut butter, but I discovered adding a mix of textures and flavors made all the difference. Funny enough, my first attempt at adding chia seeds turned into a gooey mess because I forgot they expand in moisture! Lesson learned, right?
This recipe has evolved to embrace various flavors and dietary preferences, ensuring everyone can enjoy a tasty snack. Plus, every twist adds a delightful surprise, making these bars a family favorite.
FAQs and Troubleshooting
-
Why are my granola bars falling apart?
This could be due to not pressing the mixture firmly enough or having too many add-ins. Ensure it’s compact in the dish before chilling! -
How do I store them?
These bars can be stored in an airtight container in the fridge for up to a week. If you need to extend their life, you can freeze them for up to three months. -
Can I use quick oats instead of rolled oats?
Absolutely! Quick oats will work, but keep in mind that the texture might be a bit different—less chewy and more crumbly. -
What if I want to make these chocolate-free?
No problem! Just skip over the chocolate chips. You could add extra dried fruit or nuts in place of them for added flavor and texture.
Nutritional Info
While homemade no-bake granola bars can vary in nutrition based on ingredients, here’s a rough estimate per bar (assuming you make 12 from the recipe):
- Calories: 150–180
- Protein: 5g
- Carbs: 22g
- Fats: 7g
- Fiber: 3g
These bars provide a great balance of healthy fats, fiber, and protein, making them a wholesome choice for a snack. Plus, you know exactly what’s in them—no preservatives or mystery ingredients!
Final Thoughts
There you have it—your new favorite go-to recipe for Homemade No-Bake Granola Bars! Not only are they delicious and easy to make, but they also carry a little bit of nostalgia that’ll warm your heart. I hope you enjoy making these as much as I do and that they bring a smile to your face with every bite.
Remember, the kitchen is a place for creativity, so don’t hesitate to play around with this recipe. Share your creations, or even your kitchen mishaps with me—I would love to hear your stories! Now grab your apron, get busy in the kitchen, and let’s get snacking. Happy cooking!
Print
No-Bake Granola Bars
- Total Time: 120 minutes
- Yield: 12 servings 1x
- Diet: Vegetarian
Description
Delicious and chewy no-bake granola bars that are easy to make and perfect for snacks, lunchboxes, or breakfast.
Ingredients
- 2 cups rolled oats
- 1 cup nut butter (peanut butter or almond butter)
- 1/2 cup honey or maple syrup
- 1/2 cup chocolate chips (optional)
- 1/2 cup dried fruits (optional)
- 1/4 cup seeds (optional)
Instructions
- Gather your gear: a large mixing bowl, a spatula, and an 8×8 inch baking dish lined with parchment paper.
- Mix the dry ingredients by pouring the oats into the bowl and adding any seeds and dried fruits.
- Heat the nut butter and sweetener in a saucepan over low heat until smooth and warm.
- Combine everything together by pouring the warm mixture over the dry ingredients and mixing thoroughly.
- Press the mixture into the lined baking dish using parchment paper or your hands.
- Chill in the refrigerator for at least 1-2 hours to set.
- Slice into bars and enjoy!
Notes
These bars can be customized with various add-ins like coconut, protein powder or pumpkin spice for seasonal flavors.
- Prep Time: 15 minutes
- Cook Time: 0 minutes
- Category: Snack
- Method: No-Bake
- Cuisine: American
Nutrition
- Serving Size: 1 bar
- Calories: 165
- Sugar: 8g
- Sodium: 50mg
- Fat: 7g
- Saturated Fat: 1g
- Unsaturated Fat: 6g
- Trans Fat: 0g
- Carbohydrates: 22g
- Fiber: 3g
- Protein: 5g
- Cholesterol: 0mg
Keywords: granola bars, no-bake, healthy snacks, easy recipes, homemade snacks
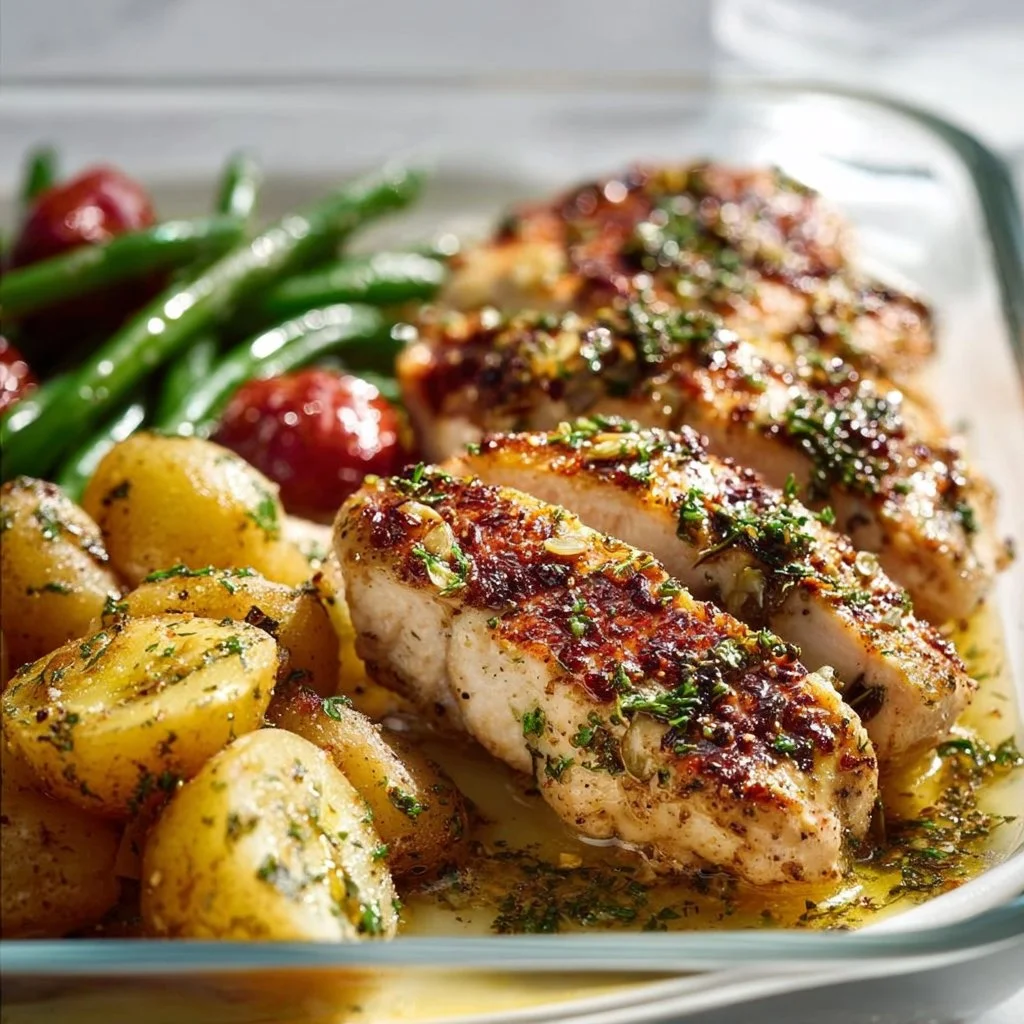
Lemon Garlic Chicken Meal Prep
Lemon Garlic Chicken Meal Prep: A Flavorful Journey in Your Kitchen
Hey food lovers, and welcome back to Feastical, where we whip up flavor-packed meals that feed not just your body, but also your soul! Today, I’m thrilled to take you on a culinary adventure with my Lemon Garlic Chicken Meal Prep. This dish is a crowd-pleaser that’s bound to become a staple in your weekly meal rotation, whether you’re fueling up for a busy week ahead or prepping food for your friends and family.
Imagine the bright zesty flavors of lemon mingling with the aromatic warmth of garlic, all perfectly combining with juicy chicken and crisp veggies. This recipe is incredibly simple but bursting with vibrant tastes. Plus, it’s made with ingredients you might already have lying around! You’ll love how easy it is to make, not to mention how delicious it smells while cooking. But this isn’t just about throwing some food together; it’s about creating a nourishing meal that brings the comfort of home straight to your table.
Join me as we dive deep into this recipe that’s not only delicious but also packed with nutrition and love. And let’s be honest, nothing beats feeling good about what you eat. So, grab your apron and let’s embrace our inner chefs together, because it’s time to zest things up with Lemon Garlic Chicken Meal Prep!
Personal Story
This recipe holds a special place in my heart. I remember the first time I made Lemon Garlic Chicken for my family. It was a typical Sunday afternoon, and I was tasked with preparing dinner for a chaotic family gathering. You know how it goes—everyone is bustling about, catching up, and the kitchen becomes a whirlwind of activity. As our old family recipes settled in the air like a comforting hug, I wanted to bring something new to the table.
Feeling a little experimental, I rummaged through my pantry and pulled out some chicken, lemons, and garlic. The moment I squeezed that fresh lemon juice and minced the garlic, the kitchen was filled with a heavenly aroma, and my family’s curious heads started peeking in. I panicked for a minute, questioning if this would be a hit or a miss. But once I plated that vibrant meal and served it up, the smiles said it all.
They went for seconds, and the compliments came pouring in! That was a pivotal moment in my cooking journey—a reminder that food truly creates connections and memories. It transformed into a go-to meal prep option, because not only is it delicious, but it also sets the stage for tender family moments shared over a good meal. Now, I want to share this story and this dish with you so you can savor the same warmth and delight!
Ingredients
Here’s what you’ll need for this zesty and savory Lemon Garlic Chicken Meal Prep:
For the Chicken Marinade:
-
¼ cup fresh lemon juice: The star of the show! Fresh lemon juice brightens the dish and adds acidity. If you’re in a pinch, bottled lemon juice can work, but nothing beats that fresh flavor.
-
2 tablespoons olive oil: This helps keep the chicken moist and adds richness. Feel free to swap it with avocado oil if you prefer a higher smoke point.
-
2 cloves garlic, minced: Garlic adds depth and aroma. Not a fan? You can use garlic powder in its place, but fresh garlic is always best!
-
2 teaspoons dried oregano: A Mediterranean herb that complements the chicken perfectly. You can substitute it with thyme or Italian seasoning for a similar effect.
-
½ teaspoon paprika: This adds a subtle smokiness. If you like a kick, try smoked paprika!
-
½ teaspoon salt: Enhances all the flavors. You can adjust this to your taste or use sea salt for a cleaner taste.
-
½ teaspoon black pepper: For a little heat. White pepper can also be used for a milder flavor.
-
24 ounces boneless, skinless chicken breasts: Chicken breasts are lean and perfect for meal prep. Thighs are an excellent swap if you prefer a richer taste.
For the Vegetables:
-
1.5 pounds yellow potatoes, cut into 1-inch pieces: These yummy spuds soak up all the flavors. You can switch them out with sweet potatoes if you’re feeling adventurous!
-
1 tablespoon olive oil: Drizzled on the potatoes to enhance their natural flavor and crunch.
-
1 teaspoon garlic powder: A great addition to pack in even more garlicky goodness! Again, fresh garlic works, but the powder helps with even cooking.
-
1 teaspoon salt (plus more to taste): Balances the flavors of the potatoes. Adjust as needed!
-
1 teaspoon black pepper (plus more to taste): Feel free to amp up the pepper if you love that extra kick.
-
4 small zucchinis, sliced into 1-inch pieces: These delicate beauties add color and nutrition. You can swap them for bell peppers or asparagus, depending on your season!
Step-by-Step Instructions
Let’s get cooking! Follow these easy steps, and take a scoop of joy with every bite:
1. Prepare the Marinade:
In a bowl, whisk together the fresh lemon juice, olive oil, minced garlic, oregano, paprika, salt, and black pepper. The aroma will hit you—that’s the goodness we’re after!
2. Marinate the Chicken:
Place the chicken breasts in a resealable bag or shallow dish. Pour the marinade over the chicken, ensuring it’s well-coated. Don’t be shy; give it a little massage! Seal the bag or cover the dish and let it marinate in the fridge for at least 30 minutes, or up to 4 hours for maximum flavor. (I usually start prepping my veggies while I let it marinate.)
3. Preheat Your Oven:
While your chicken is soaking up all that love, preheat your oven to 400°F (200°C). This will give us that perfect roast!
4. Prepare the Veggies:
In a large bowl, toss the yellow potatoes with olive oil, garlic powder, salt, and black pepper. Spread them in an even layer on a large baking sheet. Chef hack: Line the baking sheet with parchment paper for easy cleanup!
5. Roast the Potatoes:
Pop the baking sheet into the oven and roast the potatoes for 15 minutes, giving them time to get crispy and golden.
6. Add the Chicken:
After 15 minutes, take the potatoes out and make some space on the baking sheet. Add the marinated chicken breasts to the sheet. There’s no need to overcrowd; if you need more space, use a second sheet!
7. Roast Again:
Return the baking sheet to the oven and roast everything for an additional 20-25 minutes. The internal temperature of the chicken should reach 165°F (75°C). Use a meat thermometer if you have one; it’s a handy tool!
8. Toss in the Zucchini:
About 10 minutes before the chicken is done, toss the zucchini pieces onto the baking sheet. They’ll cook quickly and soak up all the tasty juices from the chicken.
9. Rest and Serve:
Once everything is beautifully roasted, take it out of the oven and let it rest for about 5 minutes before serving. This allows the juices to settle back into the chicken, making every bite more succulent!
10. Meal Prep:
To store for meal prep, divide the chicken, potatoes, and zucchini into airtight containers. You can pop these into the fridge for up to 4 days, or they can be frozen for up to 3 months. Simply reheat when you’re ready to feast!
Serving Suggestions
When it comes to serving, presentation is key! For a beautiful plate, arrange a chicken breast in the center and surround it with a colorful bed of potatoes and zucchini. Drizzle a little extra lemon juice on top for that extra zing.
For an added boost, sprinkle fresh parsley or basil over the top. Serve it with a side of greens—like a spinny salad or sautéed spinach— for a beautiful finish. Your friends and family will appreciate the effort, and it’ll look like you spent hours in the kitchen!
Recipe Variations
One of the best things about this Lemon Garlic Chicken Meal Prep is its versatility. Here are a few creative twists you can try:
-
Herb Variations: Swap out the oregano for rosemary or thyme to give it a completely different flavor profile. Each herb brings its own unique taste!
-
Citrus Twist: For a touch of sweetness, add orange juice to the marinade instead of lemon or blend juices for a delightful citrus medley.
-
Spicy Kick: Want some heat? Add a pinch of red pepper flakes or a drizzle of sriracha to the marinade for a spicy twist.
-
Grains Galore: Serve it over quinoa or brown rice for a heartier meal. The grains will soak up all that yummy lemon-garlic goodness!
-
Keto Friendly: For a low-carb meal prep, skip the potatoes and use broccoli or cauliflower instead. They roast beautifully and pair perfectly with chicken.
Chef’s Notes
I initially stumbled upon this recipe when I was trying to impress my friends during Friendsgiving. They were all raving about how juicy the chicken was, and I just couldn’t stop smiling! Over the years, I’ve refined it to make it simpler while still keeping all those amazing flavors.
One of my favorite kitchen blunders happened the first time I made it—I accidentally used lime juice instead of lemon. While it was a totally different dish, it came out delicious! So don’t hesitate to play around and experiment a little; food is all about creativity!
FAQs and Troubleshooting
-
Can I use chicken thighs instead of breasts?
Absolutely! Chicken thighs are juicier and have more flavor. Just ensure to adjust the cooking time, as thighs may take a little longer to cook. -
What if my chicken isn’t fully cooked?
No worries! If you run into this situation, simply pop it back into the oven for another 5-10 minutes, checking the internal temperature frequently. -
My potatoes are not crispy. What can I do?
If they’re not crispy enough, try giving them a bit more space on the baking sheet. Overcrowding can cause them to steam rather than roast. -
Can I meal prep this if my meal plans change?
Totally! This dish holds up beautifully in the fridge or can be frozen. Just remember to reheat thoroughly!
Nutritional Info
This Lemon Garlic Chicken Meal Prep is not just delicious; it’s nutritious, too! Here’s a quick breakdown per serving (based on 4 servings):
- Calories: Approximately 400
- Protein: 30g
- Fat: 15g
- Carbohydrates: 35g
- Fiber: 5g
- Sugar: 2g
Rich in protein and fiber while packing in vitamins from the veggies, this dish keeps you satisfied without weighing you down. The lemon juice and garlic give a healthy kick of antioxidants, making it a well-rounded meal option!
Final Thoughts
And there you have it—a cheerful, vibrant journey through my Lemon Garlic Chicken Meal Prep! It’s an express ticket to flavor town that guarantees warm, fulfilling meals throughout your busy week.
Don’t forget, cooking should be fun and just a bit messy sometimes! So go ahead and give this recipe a try. Whether you’re cooking for yourself, family, or friends, remember that every meal is an opportunity to create new memories that last a lifetime!
If you make this recipe, I’d love to hear about it! Tag me in your photos, share your kitchen stories, and let’s build a vibrant food community together. Happy cooking, and remember, food is best enjoyed together! Now go out there and feast on life! 🍽️
Print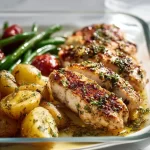
Lemon Garlic Chicken Meal Prep
- Total Time: 70 minutes
- Yield: 4 servings 1x
- Diet: Paleo
Description
A zesty and savory meal prep dish featuring marinated chicken breasts and roasted vegetables, perfect for a busy week.
Ingredients
- ¼ cup fresh lemon juice
- 2 tablespoons olive oil (plus 1 tablespoon for potatoes)
- 2 cloves garlic, minced
- 2 teaspoons dried oregano
- ½ teaspoon paprika
- ½ teaspoon salt
- ½ teaspoon black pepper
- 24 ounces boneless, skinless chicken breasts
- 1.5 pounds yellow potatoes, cut into 1-inch pieces
- 1 teaspoon garlic powder
- 1 teaspoon salt (plus more to taste)
- 1 teaspoon black pepper (plus more to taste)
- 4 small zucchinis, sliced into 1-inch pieces
Instructions
- Prepare the Marinade: In a bowl, whisk together the fresh lemon juice, olive oil, minced garlic, oregano, paprika, salt, and black pepper.
- Marinate the Chicken: Place the chicken breasts in a resealable bag or shallow dish. Pour the marinade over the chicken and let it marinate in the fridge for at least 30 minutes, or up to 4 hours.
- Preheat Your Oven: Preheat the oven to 400°F (200°C).
- Prepare the Veggies: In a bowl, toss the yellow potatoes with olive oil, garlic powder, salt, and black pepper. Spread them on a baking sheet.
- Roast the Potatoes: Bake in the oven for 15 minutes.
- Add the Chicken: Add the marinated chicken breasts to the baking sheet with the potatoes.
- Roast Again: Return to the oven for an additional 20-25 minutes, until the chicken reaches an internal temperature of 165°F (75°C).
- Toss in the Zucchini: About 10 minutes before the chicken is done, add the zucchini to the baking sheet.
- Rest and Serve: Let the dish rest for 5 minutes before serving.
- Meal Prep: Divide into airtight containers for storage. They can be kept in the fridge for up to 4 days or frozen for up to 3 months.
Notes
Feel free to experiment with herbs and vegetables in this meal prep recipe, and adjust seasoning to taste.
- Prep Time: 30 minutes
- Cook Time: 40 minutes
- Category: Main Course
- Method: Roasting
- Cuisine: Mediterranean
Nutrition
- Serving Size: 1 serving
- Calories: 400
- Sugar: 2g
- Sodium: 500mg
- Fat: 15g
- Saturated Fat: 2g
- Unsaturated Fat: 10g
- Trans Fat: 0g
- Carbohydrates: 35g
- Fiber: 5g
- Protein: 30g
- Cholesterol: 65mg
Keywords: chicken meal prep, lemon garlic chicken, healthy meal prep
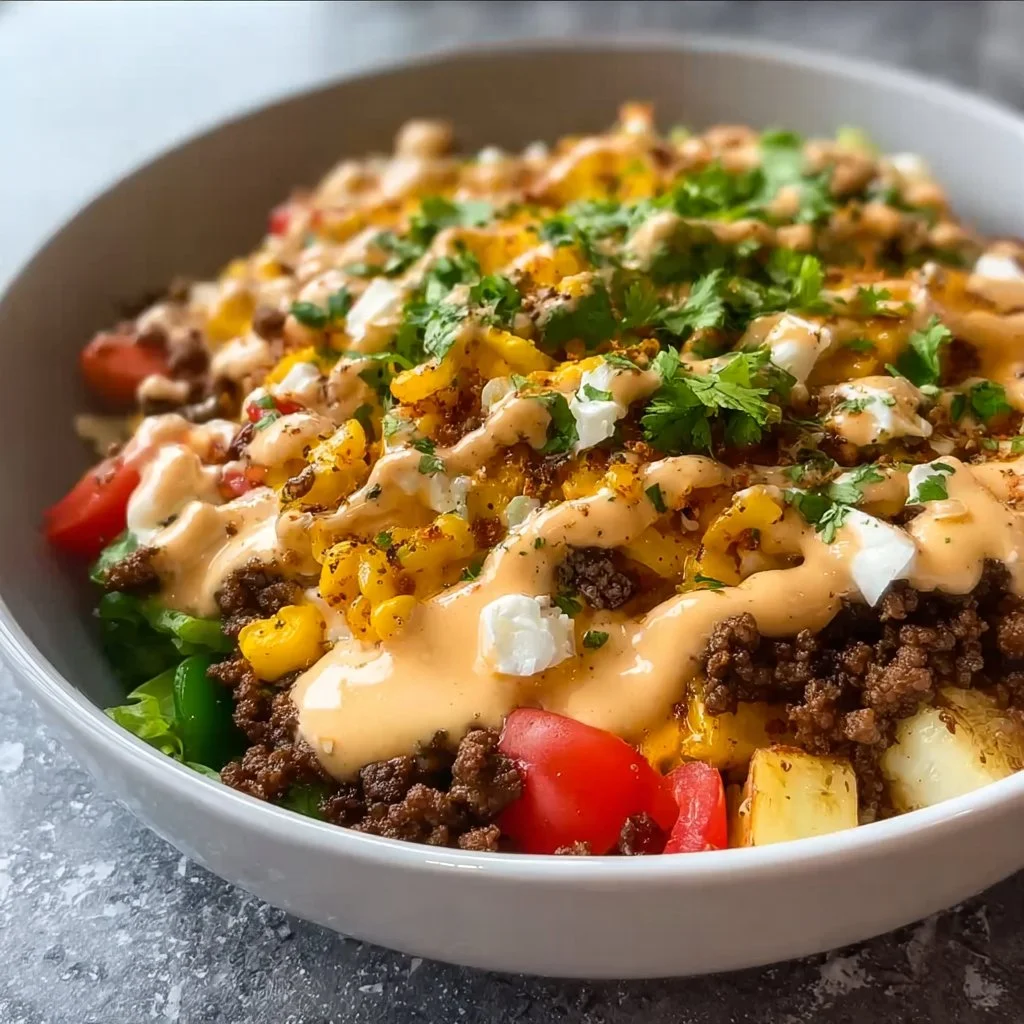
Healthy Burger Bowl
Dive into Flavor: Satisfy Your Cravings with a Healthy Burger Bowl
Hey foodies! 🌟 Today, we’re diving into a delicious and wholesome meal that beautifully marries convenience with comfort – the Healthy Burger Bowl! Imagine all the best flavors of a classic burger but with a fun, nutritious twist that’s packed in a bowl. This dish has become one of my all-time favorites, and I can’t wait to share it with you.
Now, if you’re wondering why I’m so excited about a burger bowl, let me paint a picture for you. It’s all about that fresh crunch of chopped lettuce mingling with juicy, seasoned ground beef, the zing of vibrant fresh tomatoes, and the delightful softness of boiled and sautéed potatoes. And don’t get me started on the homemade cheddar sauce that ties it all together! It’s the food equivalent of a warm hug, reminding you that comfort doesn’t have to come in a bun, and healthy can be absolutely scrumptious. It’s the kind of meal that makes my heart sing and my belly happy, which is precisely what we’re all about here at Feastical.
Now, let’s take a moment to think about how this burger bowl came into my life. It began on a summer evening with friends gathered in my backyard for a cookout. After a hearty weekend of indulgence, we were all craving something lighter yet satisfying. I decided to experiment a little, tossing together some of my favorite burger ingredients in a bowl rather than the usual bread. The applause was immediate, and I knew I struck pure culinary gold! This Healthy Burger Bowl captures that fun spirit and makes it easy for anyone to enjoy the beloved flavors of a burger, guilt-free.
So grab an apron, roll up those sleeves, and let’s jump into this delightful recipe together!
Personal Story
Ah, the burger. Is there anything quite as iconic when it comes to hearty meals? I have fond memories of weekends spent at my grandparents’ farm, where the aroma of sizzling burgers would drift through the air, beckoning us from the garden. There was something magical about those summer evenings, with laughter surrounding the grill, the sparkle of fireflies, and the promise of deliciousness ahead.
One particular summer, my grandfather decided to host a “burger night,” a tradition he started when my dad was young. It became an event, drawing the whole family together. It involved everyone from the kids running wild in the yard to the older folks debating the best burger toppings. That night, I took a few creative liberties—mixing flavors and textures, trying out combinations that made my taste buds rejoice.
This led to a revelation: burgers don’t need to fit into a bun to be special. So, although I later went on to create many iterations of this dish, that summer night sparked the inspiration for this Healthy Burger Bowl. It’s a tribute to those nights filled with laughter and love, and it beautifully represents that balance of taste, memory, and a sprinkle of innovation.
Ingredients
Here’s what you’ll need to whip up your own Healthy Burger Bowl. Don’t fret if you don’t have everything—there are plenty of substitutions available to keep the flavor train rolling!
-
Chopped Lettuce
Use romaine or iceberg for a refreshing crunch. If you’re feeling adventurous, try kale or spinach for added nutrients. Just chop it up and toss it in fresh! -
Fresh Tomatoes
I recommend using ripe Roma or vine tomatoes, but feel free to swap in cherry tomatoes for a sweet pop. Dice them for that perfect burst of juiciness! -
Seasoned Ground Beef
Lean ground beef is a classic, but don’t hesitate to switch it up with turkey or even plant-based alternatives like lentils or tofu for a vegan option—just add your favorite seasonings for flavor! -
Pickles
You can’t have a burger without some crunch! Dill pickles are traditional, but bread and butter pickles lend a sweetness that’s delightful. Try to make your own if you’re feeling crafty! -
Boiled and Sautéed Potatoes
We’re adding heartiness to this bowl with small diced potatoes! You can swap them for sweet potatoes or even zoodles (zucchini noodles) for a low-carb option. -
Homemade Cheddar Sauce
This sauce is easy to prepare and is the star of the show! Use sharp or mild cheddar, depending on your taste. Swap for a vegan cheese if you’re keeping it plant-based!
Step-by-Step Instructions
Alright, now that we have all our fabulous ingredients ready, let’s get cooking! Follow these straightforward steps to whip up your Healthy Burger Bowl, and remember to embrace your inner chef along the way!
-
Prepare the Potatoes
- Start by peeling and dicing your potatoes into small cubes (about an inch thick).
- Boil them in salted water for about 10 minutes until they’re tender but not mushy. Drain and set aside. Chef’s Tip: For extra flavor, you can throw in some garlic cloves into the boiling water. They’ll infuse the potatoes beautifully!
-
Sauté the Potatoes
- In a large skillet, heat a drizzle of olive oil over medium heat.
- Add the boiled potatoes, seasoning them with salt and pepper. Sauté for about 5-7 minutes until they get that lovely golden-brown crisp. Chef Hack: For an extra touch, sprinkle some smoked paprika while sautéing for a beautiful flavor boost!
-
Cook the Ground Beef
- In another skillet, add a touch of olive oil and heat over medium-high. Add your seasoned ground beef, breaking it down with a wooden spoon.
- Cook it until it’s browned and cooked through (about 8-10 minutes). Be sure to season with salt, pepper, and any other spices you love—paprika and garlic powder work wonders! Pro Tip: Drain excess fat for a leaner dish.
-
Prepare the Cheddar Sauce
- In a small saucepan, melt about 2 tablespoons of butter over medium heat.
- Whisk in 2 tablespoons of flour to create a roux, stirring for about 2 minutes. Gradually whisk in 1 cup of milk, stirring constantly until thickened.
- Add 1 cup of shredded cheddar cheese and stir well until melted. Season with salt, pepper, and a hint of mustard for that classic burger taste! Secret Hack: For a spicy kick, toss in a pinch of cayenne!
-
Assemble the Bowl
- Grab a large bowl (or two, if you’re feeling generous!). Start by layering a generous handful of chopped lettuce.
- Next, add your sautéed potatoes and ground beef. Top with diced fresh tomatoes and a few pickles. Finally, drizzle your luscious cheddar sauce over the top. Plating Tip: Fancy it up with a sprinkle of chopped fresh herbs like parsley or basil!
Serving Suggestions
When it comes to serving, let’s kick it up a notch! Each bowl should feel like a delightful surprise—your friends and family should see depth and color that makes their mouths water. Get creative!
I love to serve my Healthy Burger Bowl with a side of garlic bread or corn on the cob for a touch of nostalgia. Alternatively, for a lighter option, a side salad dressed simply with lemon vinaigrette pairs beautifully without overpowering the flavors of the bowl. And remember, presentation is key—consider layering ingredients for a stunning look, or allow diners to build their bowls, letting them decide how much of each component they want to dig into.
Recipe Variations
The beauty of the Healthy Burger Bowl lies in its versatility! Here are a few variations to shake things up:
-
Tex-Mex Twist: Add black beans, corn, and a dollop of guacamole for a delicious Mexican flair! Consider swapping the cheddar sauce for a zesty avocado dressing.
-
BBQ Burger Bowl: Mix in BBQ sauce with the ground beef for a smoky taste. Complement with coleslaw and diced cucumbers on top for that crunchy freshness.
-
Mediterranean Style: Use lamb or beef kofta seasoned with cumin and coriander. Swap the cheddar sauce for tzatziki, and top with feta cheese and olives.
-
Asian-Inspired: Stir-fry the ground beef with ginger, garlic, and soy sauce and top with sesame seeds and sliced green onions. Serve with cauliflower rice for a lighter option!
-
Vegan Delight: Use plant-based ground beef, and add sautéed mushrooms for that umami flavor. Swap cheddar sauce for a creamy cashew sauce for a nutty spin.
Chef’s Notes
I’ve been tinkering with this recipe for a while now, just like any good chef should! Over the years, I’ve added, subtracted, and experimented with an array of ingredients. But the quintessential comfort comes from those foundational flavors—a hearty mix that sets the stage for creativity.
One of my favorite kitchen stories involves my nephew, who once took a handful of fresh spinach and declared it “burger lettuce.” I had to chuckle because, well, who doesn’t love a spontaneous creation? When cooking, always allow yourself the space to be creative and perhaps a little messy! That’s where the best dishes are born!
FAQs and Troubleshooting
Q: Can I prep this dish in advance?
Absolutely! You can prepare the components ahead of time. Store your cooked beef, sautéed potatoes, and cheddar sauce separately. Just heat everything up before serving for a quick meal!
Q: My cheddar sauce isn’t thickening; what did I do wrong?
You may not have cooked the roux long enough. Be patient, whisk constantly, and don’t rush the process. If it’s still not thick after adding milk, a little cornstarch slurry (cornstarch mixed with water) can help.
Q: How do I spice things up?
If you’re looking for flavor, think beyond salt and pepper! Adding spices like cayenne pepper, chili powder, or even a splash of hot sauce in the beef will do wonders.
Q: Can I freeze leftovers?
Certainly! Store the components in airtight containers. The ingredients can last in the freezer for up to 2 months. Just remember to thaw before reheating.
Nutritional Info
This Healthy Burger Bowl balances flavor and nutrition! Here are a few highlights per serving (based on standard ingredients):
- Calories: ~500
- Protein: ~30g
- Carbohydrates: ~35g
- Fat: ~30g
- Fiber: ~5g
For those keeping an eye on their macros, this bowl is rich in protein and can fit seamlessly into a balanced meal plan. Plus, the variety of vegetables ensures you’re getting those essential vitamins and minerals!
Final Thoughts
And there you have it! This Healthy Burger Bowl reflects the joyful spirit of cooking—combining comfort with creativity and vibrant flavors that speak to the heart and soul. Whether you’re gathered around the dinner table with family or enjoying a cozy night in, this bowl is sure to warm your spirit.
I hope you give this recipe a try and invite your loved ones to join in the fun of cooking and feasting together! Don’t forget to share your creations—tag me on social media so I can celebrate your culinary masterpieces. Until next time, keep exploring the wonderful world of flavors, and remember that each bite should always taste like a warm hug! Happy cooking, friends! 🍽️❤️
Print
Healthy Burger Bowl
- Total Time: 45 minutes
- Yield: 4 servings 1x
- Diet: Gluten-Free
Description
A nutritious twist on classic burgers, this Healthy Burger Bowl features seasoned ground beef, fresh vegetables, and a homemade cheddar sauce, all in a delightful bowl.
Ingredients
- 1 head chopped romaine or iceberg lettuce
- 2 ripe tomatoes, diced
- 1 lb seasoned ground beef
- 1 cup dill or bread and butter pickles
- 2 cups boiled and sautéed potatoes
- 1 cup homemade cheddar sauce
Instructions
- Prepare the potatoes: Peel and dice into cubes, boil in salted water for 10 minutes, and drain.
- Sauté the potatoes: Heat olive oil in a skillet and sauté for 5-7 minutes until golden-brown.
- Cook the ground beef: Heat olive oil, add ground beef, season, and cook for 8-10 minutes.
- Prepare the cheddar sauce: Melt butter, create a roux with flour, whisk in milk and cheese until thick.
- Assemble the bowl: Layer lettuce, potatoes, beef, tomatoes, pickles and drizzle with cheddar sauce.
Notes
This recipe is versatile; feel free to replace ingredients to suit your preferences. Presentation is key—consider layering for an appealing look!
- Prep Time: 15 minutes
- Cook Time: 30 minutes
- Category: Main Course
- Method: Sautéing
- Cuisine: American
Nutrition
- Serving Size: 1 bowl
- Calories: 500
- Sugar: 6g
- Sodium: 600mg
- Fat: 30g
- Saturated Fat: 12g
- Unsaturated Fat: 15g
- Trans Fat: 0g
- Carbohydrates: 35g
- Fiber: 5g
- Protein: 30g
- Cholesterol: 80mg
Keywords: burger bowl, healthy recipe, comfort food
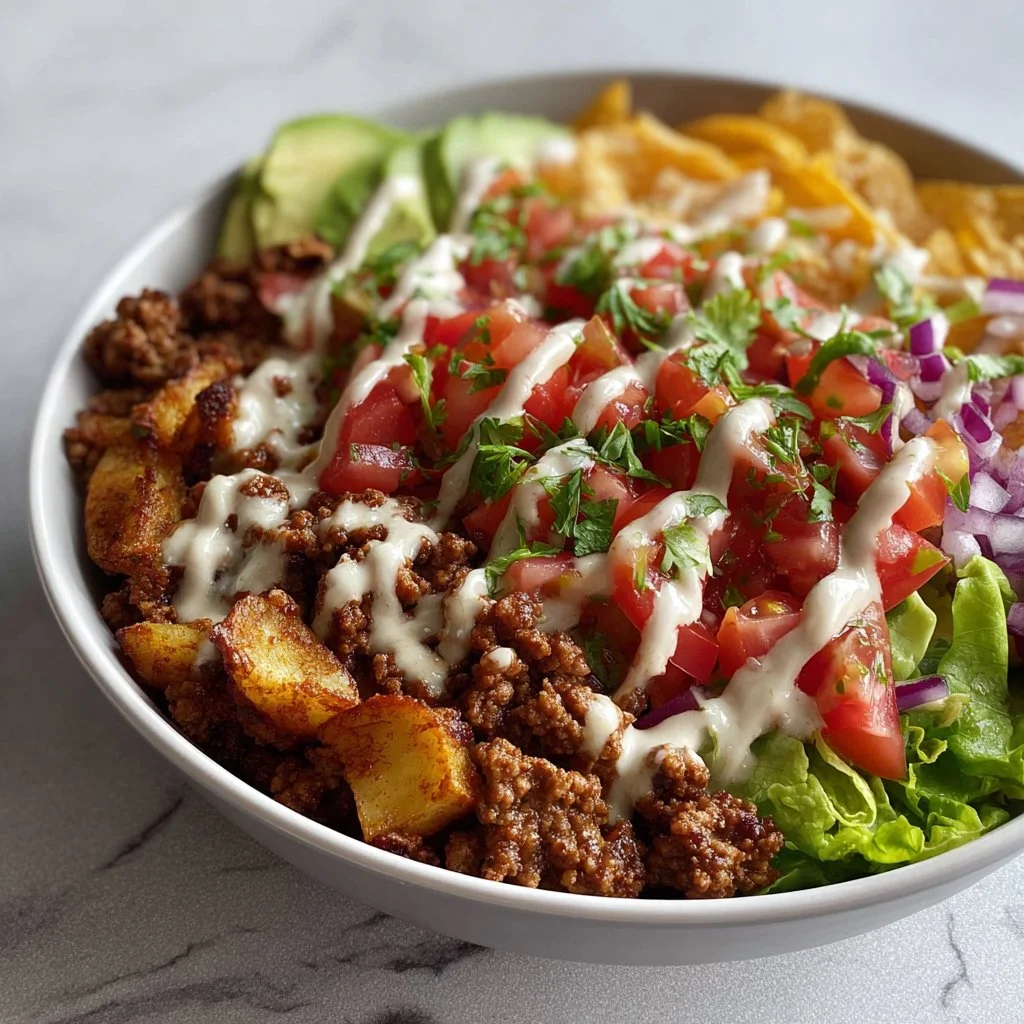
High Protein Taco Bowl
Dive into Flavor: High Protein Taco Bowl Recipe
Hey there, food lovers! I’m so excited to share one of my all-time favorite recipes with you today – the High Protein Taco Bowl! If you’ve been looking for a dish that’s not only packed with flavor but also satisfies your comfort food cravings, you’re in for a treat. Picture this: layers of seasoned ground beef, crispy potatoes, fresh pico de gallo, and creamy avocado, all sitting in a cozy bowl, just waiting to be devoured. Trust me, this bowl is like a fiesta in your mouth!
Now, taco bowls are all the rage right now, and for good reason. They are incredibly versatile and perfect for those busy weeknights when you want something wholesome yet quick. Plus, it’s a delightful social dish – everyone can customize their bowls just how they like it! Ready to whip up some magic in the kitchen? Let’s get this taco party started!
A Tasty Memory
Thinking back on my taco experiences, there’s one occasion that really lights up my culinary memories. It was a warm summer evening during my college days, when I invited a few friends over to celebrate the end of our finals. I wanted to make something special that was both filling and fun – a taco night! We set up an assembly line in the kitchen, with bowls of seasoned ground beef, fresh vegetables, and various toppings. As we built our taco creations, laughter filled the air, and each bite was an explosion of flavor. Those students’ faces lit up with each spoonful, showcasing a blend of joy and satisfaction that I’ll always cherish.
That’s what food does – brings people together, creating lasting memories with every bite. And now, I get to share my Taco Bowl with you, so let’s recreate that magic!
Ingredients
Here’s what you’ll need to conjure up this delightful High Protein Taco Bowl:
-
Ground Beef: The star of the dish! I recommend using lean ground beef for a healthier option. You can also substitute with turkey or plant-based protein for a lighter twist.
-
Potatoes: I love using diced potatoes for their crispy texture. Sweet potatoes can be a great alternative for a touch of sweetness and extra nutrients.
-
Pico de Gallo: A fresh blend of diced tomatoes, onions, cilantro, lime juice, and a hint of chili. If you’re short on time, store-bought salsa also works well.
-
Avocado: Creamy and nutritious, it adds a rich texture to your bowl. If you’re out of avocado, you can use guacamole or Greek yogurt for creaminess.
-
Taco Sauce: A must-have for that authentic flavor! You can whip up your own or grab your favorite from the store.
-
Salt and Pepper: Basic seasonings that elevate your dish. I always recommend fresh cracked pepper for an extra kick!
-
Olive Oil: Perfect for sautéing your ingredients and adding richness. Avocado oil can be a great swap.
-
Favorite Toppings: Get creative! Cheese, beans, corn, jalapeños, or fresh herbs are all fantastic ways to customize your taco bowl.
With these ingredients in hand, you’re set to create a deliciously satisfying meal!
Step-by-Step Instructions
Ready to get cooking? Let’s dive into the taco bowl bliss!
-
Prep Your Ingredients: Start by washing and dicing your potatoes into small cubes. You want them to be bite-sized so they can cook evenly. For added flavor, you could toss them in a bit of olive oil, salt, and pepper before cooking.
-
Cook the Potatoes: Heat a tablespoon of olive oil in a large skillet over medium heat. Add your diced potatoes and cook until they are golden brown and crispy, about 15–20 minutes. Here’s a little chef hack: cover the skillet for the first 10 minutes to steam them slightly, ensuring they cook through!
-
Sauté the Ground Beef: In the same skillet, push the potatoes to one side and add a little more olive oil if needed. Add the ground beef, breaking it up with a spatula. Season with salt and pepper, and cook for about 5–7 minutes until browned, stirring occasionally. Make sure to drain excess fat if necessary.
-
Add Flavor: Once the beef is cooked, stir in your taco sauce. Let it simmer for an additional 2 minutes to allow all those flavors to meld together. You can adjust the seasoning here to suit your taste. Want a kick? Toss in some chili powder or cayenne pepper!
-
Build Your Bowl: Grab your favorite serving bowls and start layering! Start with a hearty base of crispy potatoes, followed by a generous scoop of seasoned ground beef.
-
Top It Off: Add a heap of fresh pico de gallo on top, followed by sliced avocado. Drizzle with extra taco sauce to add that zesty flair.
-
Personalize: Don’t forget your favorite toppings! A sprinkle of cheese or a dollop of sour cream always elevates the flavors. Get creative here – corn, jalapeños, or even a handful of leafy greens work wonders too!
And voilà! You have yourself a delicious High Protein Taco Bowl ready to please any crowd (or just yourself, no judgment here!).
Serving Suggestions
Now that everything is all layered and beautifully displayed, let’s talk presentation. Here are a couple of serving ideas to make your taco bowl really pop:
-
Colorful Bowls: Use clear or colorful bowls to showcase the vibrant layers of your taco bowl. The various colors of the ingredients from the green avocado to the red pico de gallo create a feast for the eyes!
-
Garnishes Galore: Finish plating with freshly chopped cilantro or green onions for a touch of freshness. A few slices of lime on the side not only look good but also allows everyone to add a zest of flavor to their bowls if they desire.
-
Make it Shareable: If you’re hosting a gathering, consider serving the taco contents on a large platter, letting everyone build their own bowl. It sparks creativity and can lead to fun flavor pairings!
Recipe Variations
Here are some fun twists to keep things fresh every time you make your Taco Bowl!
-
Fiesta Chicken Bowl: Swap out the ground beef for shredded chicken marinated in taco spices for a deliciously different version.
-
Cali Style: Add a layer of cilantro lime rice instead of potatoes for a California-inspired taco bowl. Yum!
-
Veggie Lovers Delight: For plant-based options, try using lentils or cooked quinoa. You’ll get a great texture with a protein punch!
-
Southwestern Flair: Toss in some black beans and corn for an extra heartiness. They also contribute a lovely sweetness!
-
Spice it Up: If you’re feeling adventurous, add some chipotle sauce or chopped green chilies for a smoky flavor.
Chef’s Notes
Every recipe tells a story, and this taco bowl has certainly evolved over the years. I started out using pre-packaged taco seasoning when I was a newbie in the kitchen – can you relate? As I experimented with spices, I discovered the beauty of making my own blends. Now, I love adding a bit of cumin and smoked paprika for a unique twist.
And let me tell you, there’s nothing quite as satisfying as hearing your family or friends rave about a meal you made. I’ve had taco bowls turn into surprise dish battles at gatherings – who can come up with the best topping combo? That laughter, those moments, all tied together with food. That’s what really makes this dish special to me.
FAQs and Troubleshooting
Here are some common questions you might have while making your High Protein Taco Bowl:
Q1: What if I don’t have ground beef?
No worries! Ground turkey, chicken or a plant-based substitute (like tempeh or chickpeas) work just as well.
Q2: How do I keep my potatoes crispy?
Make sure to not overcrowd the pan while cooking the potatoes. Giving them space allows for optimal browning.
Q3: I’m not a fan of pico de gallo. What can I use instead?
No problem! You can substitute with your favorite salsa, or even experiment with roasted vegetables for added texture!
Q4: How can I store leftovers?
Store your bowl components separately in airtight containers in the fridge. They’ll last about 3-4 days. Reheat the beef and potatoes before assembling your bowl to keep everything fresh.
Nutritional Info
Let’s chat a bit about that nutrition aspect! With high-protein ground beef and healthy fats from avocado, this taco bowl is balanced and filling.
For one serving, you’ll typically find:
- Calories: ~600-700 kcal (depending on toppings)
- Protein: ~40g (thank you, ground beef!)
- Carbohydrates: ~45g (from potatoes)
- Fat: ~30g (healthy fats from avocado and olive oil)
Of course, the nutrition will vary based on your choices for toppings and any substitutions made.
Final Thoughts
In closing, the High Protein Taco Bowl is more than just a meal — it’s a delightful experience filled with flavor, creativity, and love. Whether you’re serving it up solo or sharing it with loved ones, remember, it’s all about enjoying the process of cooking, tasting, and, most importantly, making bond-worthy memories around the table.
So, go ahead, get your taco vibe on! I’m so excited for you to create this dish. Don’t forget to leave me a comment with your thoughts or your own taco bowl spins. Happy cooking, my foodie friends – let’s keep the kitchen magic alive!
Let’s dig in! 🎉
Print
High Protein Taco Bowl
- Total Time: 35 minutes
- Yield: 4 servings 1x
- Diet: High Protein
Description
A deliciously satisfying taco bowl packed with seasoned ground beef, crispy potatoes, fresh pico de gallo, and creamy avocado.
Ingredients
- 1 lb ground beef (or turkey/plant-based substitute)
- 2 cups diced potatoes (or sweet potatoes)
- 1 cup pico de gallo
- 1 avocado, sliced
- 1/2 cup taco sauce
- Salt and pepper to taste
- 2 tbsp olive oil
- Favorite toppings: cheese, beans, corn, jalapeños, fresh herbs
Instructions
- Prep your ingredients: Wash and dice your potatoes into small cubes.
- Cook the potatoes: Heat olive oil in a large skillet over medium heat and add diced potatoes, cooking until golden brown and crispy (15–20 minutes).
- Sauté the ground beef: Push the potatoes to one side, add more oil if needed, and cook ground beef for about 5–7 minutes until browned.
- Add flavor: Stir in taco sauce and let it simmer for 2 minutes.
- Build your bowl: Layer crispy potatoes at the bottom, followed by seasoned ground beef.
- Top it off: Add pico de gallo and sliced avocado, then drizzle with extra taco sauce.
- Personalize: Add your favorite toppings like cheese or sour cream.
Notes
For a lighter version, use ground turkey or plant-based protein. Store leftovers separately in airtight containers.
- Prep Time: 10 minutes
- Cook Time: 25 minutes
- Category: Main Course
- Method: Sautéing
- Cuisine: Mexican
Nutrition
- Serving Size: 1 bowl
- Calories: 600
- Sugar: 4g
- Sodium: 600mg
- Fat: 30g
- Saturated Fat: 10g
- Unsaturated Fat: 15g
- Trans Fat: 0g
- Carbohydrates: 45g
- Fiber: 5g
- Protein: 40g
- Cholesterol: 105mg
Keywords: taco bowl, high protein, healthy dinner, customizable meal, Mexican food