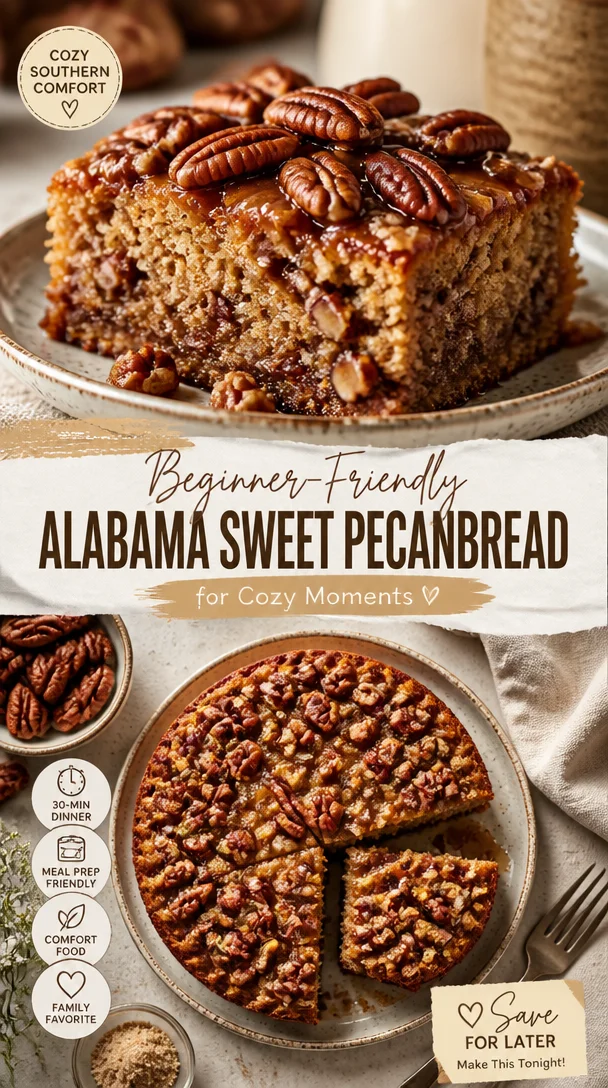
Beginner-Friendly Alabama Sweet Pecanbread for Cozy Moments
Irresistible Sweet Alabama Pecanbread for Cozy Moments
Hey there, fellow food lovers! I’m Beau Collier, and I’m thrilled to welcome you back to Feastical, your friendly space for all things delicious and comforting. Today, I’m about to take you on a cozy ride through a recipe that’s close to my heart and sure to warm your soul: Sweet Alabama Pecanbread. This delightful treat is perfect for those lazy Sunday mornings or any time you need a bit of comfort food that feels like a hug.
Introduction
Now, picture this: a chilly afternoon, the scent of something buttery and sweet wafting through the air, and a cozy kitchen filled with laughter and chatter. Sounds nice, right? That’s exactly the vibe I’m aiming for with Sweet Alabama Pecanbread! This recipe has become a staple in my kitchen, embodying everything I love about food—it’s simple to make, seriously delicious, and has the magical ability to bring people together.
Sweet Alabama Pecanbread is more than just your average quick bread; it’s a recipe packed with richness from sugars, nuttiness from pecans, and that all-important touch of love baked right in. Whether you’re enjoying a slice with your morning coffee, serving it as an afternoon snack, or bringing it to a gathering, this pecanbread will steal the spotlight.
And guess what? It’s incredibly easy to whip up! With just a handful of ingredients that you likely have on hand, you’ll be amazed at how quickly and effortlessly you can create this masterpiece. So don your apron, roll up your sleeves, and let’s get to baking!
Personal Story
Let me share a little story with you about how Sweet Alabama Pecanbread entered my life. I was visiting my beloved aunt in Alabama during the summer, the kind of sultry summer that makes you seek refuge in air conditioning while sipping on iced tea. She welcomed me with open arms and treated me to her renowned pecanbread—a recipe handed down through generations in her family.
The moment I took the first bite, I was transported to memories of my childhood, sitting on the porch, listening to the cicadas while enjoying a fresh slice of pecanbread slathered with butter. That first mouthful was pure magic! The moist, sweet bread combined with the crunchy pecans created a symphony of flavors and textures that I couldn’t resist.
From then on, every visit to Auntie’s house included a fresh batch of this delightful treat. So, in homage to those heartfelt moments, I had to adapt her beloved recipe, infusing my voice and flair, and now, I’m excited to share it with all of you!
Ingredients
Let’s dive into the deliciousness that is Sweet Alabama Pecanbread! Here’s what you’ll need:
-
1 cup Granulated Sugar
A classic sweetener that adds that irresistible sweetness. For a deeper flavor, you can swap this for brown sugar—trust me, it’s worth it! -
1/2 cup Brown Sugar
Optional but highly recommended! It brings out that rich, caramel-like flavor and adds moisture. Plus, who doesn’t love the richness of brown sugar? -
1/2 cup Vegetable Oil or Melted Butter
This is essential for adding that lovely moisture to your bread. If you’re feeling fancy, go for melted butter for a buttery taste! -
2 large Eggs
Make sure they’re at room temperature to help with a smooth batter. Fresh eggs equal a fluffier texture! -
2 cups All-Purpose Flour
Spoon and level this to avoid excess. This is the backbone of your bread; it soaks up all the goodness. -
2 teaspoons Baking Powder
This little powerhouse acts as a leavening agent, making your pecanbread nice and fluffy. -
1/2 teaspoon Salt
A tiny pinch goes a long way in balancing the flavors! Don’t skip it! -
1 teaspoon Vanilla Extract
This infuses warmth and depth. Go for pure vanilla extract if you can; it really makes a difference. -
1 cup Chopped Pecans
Toasting them beforehand unlocks even more flavor! You’ll love that crunch against the soft bread.
Step-by-Step Instructions
Alright, my kitchen friends, time to get down to business and make this pecanbread! Follow these easy steps, and I promise you’ll create something special.
-
Preheat the Oven
Begin by preheating your oven to 350°F (175°C). This is crucial; a well-preheated oven ensures your bread bakes evenly. -
Mix the Sugars and Wet Ingredients
In a large mixing bowl, combine the granulated sugar and brown sugar. Add in the vegetable oil (or melted butter) and whisk until combined. Make sure to mix well to incorporate air; this will help with fluffiness! -
Add the Eggs
Crack the eggs into the bowl and whisk them in thoroughly. The mixture should become a nice, smooth batter. Pro tip: if your eggs are cold from the fridge, you can place them in warm water for a few minutes to bring them to room temp! -
Combine the Dry Ingredients
In another bowl, whisk together the all-purpose flour, baking powder, and salt. This helps evenly distribute the baking powder throughout the flour, preventing lumps. Slowly add this to your wet ingredients, stirring gently until just combined. Don’t overmix; a few lumps are perfectly okay! -
Add the Vanilla and Pecans
Stir in the vanilla extract and chopped pecans until they’re distributed evenly in the batter. If you want an extra layer of flavor, toast your pecans in a dry skillet over medium heat for about 5 minutes before adding them in. Simply delightful! -
Prepare the Baking Pan
Grease a loaf pan (9 x 5 inches) or line it with parchment paper for easy removal. Pour the batter into the prepared pan and smooth the top with a spatula. -
Bake It Up
Place the pan in your preheated oven and bake for 55-65 minutes, or until a toothpick inserted into the center comes out clean. Keep an eye on it towards the last 15 minutes—if the top starts browning too much, just tent it with foil to prevent burning. -
Cool and Serve
Once baked, allow the pecanbread to cool in the pan for about 10 minutes before transferring it to a wire rack. Let it cool completely before slicing. I know this part is tough, but trust me, the texture is worth the wait!
Serving Suggestions
Now that your Sweet Alabama Pecanbread is ready, how do you plan to enjoy it? Slice it thick and serve it with a melting pat of butter on top, or maybe a drizzle of honey for some pizzazz. You can also pair it with a cup of coffee or tea—perfect for those slow, quiet mornings. Feeling a bit more adventurous? Toast the slices in a skillet or toaster for a crispy outside, and serve it with a side of cream cheese or whipped cream for a little indulgence!
Recipe Variations
Let’s get creative! Here are some fun variations you can try to give your Sweet Alabama Pecanbread a twist:
-
Chocolate Chip Pecanbread: Add a cup of semi-sweet chocolate chips for a rich, decadent treat. Chocolate and pecans are a match made in heaven!
-
Banana Pecanbread: Incorporate mashed bananas into the batter for a moist and fruity flavor. Just use one cup of ripe mashed bananas, and reduce the oil slightly.
-
Spiced Pecanbread: Add a teaspoon of cinnamon and a pinch of nutmeg to your dry ingredients for a warm, spicy kick. This is especially cozy in the fall!
-
Coconut Pecanbread: Toss in half a cup of shredded coconut for a tropical flair. Toasted coconut on top for garnish? Count me in!
-
Gluten-Free Option: Substitute the all-purpose flour with a 1:1 gluten-free baking mix to accommodate your gluten-free friends without sacrificing flavor.
Chef’s Notes
Let’s chat for a moment about the beauty of this recipe’s evolution. I’ve played around with different sugar combinations and really honed in on the perfect balance of moistness and flavor. You can say I’ve “set the bar” for the bread world—pun intended! Just the other day, I had a friend tell me they added a hint of maple syrup, and honestly, I can’t wait to try that next time!
A little secret? I love this pecanbread for breakfast, but I have also indulged in it as a late-night snack—that’s what makes it irresistible!
FAQs and Troubleshooting
Q: My pecanbread turned out dense; what did I do wrong?
A: Denseness often comes from overmixing the batter or using too much flour. Remember, gently fold the dry ingredients into the wet until just combined!
Q: Can I freeze the pecanbread?
A: Absolutely! Slice the bread and wrap it tightly in plastic wrap or aluminum foil, then place it in an airtight container. It can last for up to three months in the freezer.
Q: What if I don’t have pecans? Can I use other nuts?
A: Of course! Walnuts or hazelnuts are great substitutes. Just ensure you adjust the chopping size accordingly.
Q: How do I know when it’s done baking?
A: A toothpick inserted in the center should come out clean or with just a few moist crumbs. If you notice it browning too quickly, cover it with foil for the last few minutes!
Nutritional Info
Eating nourishing food doesn’t have to feel heavy, and this Sweet Alabama Pecanbread manages to strike that balance. Each slice (roughly 1 inch thick) contains approximately:
- Calories: 170
- Total Fat: 7g
- Saturated Fat: 1g
- Cholesterol: 30mg
- Sodium: 150mg
- Total Carbohydrates: 25g
- Dietary Fiber: 1g
- Sugars: 12g
- Protein: 3g
It’s a treat that’s indulgent yet satisfying, and it’s perfect for sharing or keeping all to yourself. Just remember, moderation is key!
Final Thoughts
I hope you loved this journey into the world of Sweet Alabama Pecanbread! It’s more than just a recipe; it’s a way to cherish the little moments in life, filled with flavor and warmth. The heart of a good dish lies not just in its ingredients, but the love and memories created around it.
So, gather your family and friends, and dig in together. Share a slice, tell a story, and make new memories. Whether it’s the charming aroma that fills your kitchen or the laughter shared over a sweet treat, may this pecanbread bring you as much joy as it has brought me. Until next time, keep cooking, keep creating, and always remember: good food is about good company! Happy baking!
Print
Sweet Alabama Pecanbread
- Total Time: 70 minutes
- Yield: 8 servings 1x
- Diet: Vegetarian
Description
A delightful quick bread packed with sweetness and nuttiness, perfect for cozy moments.
Ingredients
- 1 cup Granulated Sugar
- 1/2 cup Brown Sugar
- 1/2 cup Vegetable Oil or Melted Butter
- 2 large Eggs
- 2 cups All-Purpose Flour
- 2 teaspoons Baking Powder
- 1/2 teaspoon Salt
- 1 teaspoon Vanilla Extract
- 1 cup Chopped Pecans
Instructions
- Preheat the oven to 350°F (175°C).
- Mix the granulated sugar and brown sugar in a large mixing bowl. Add vegetable oil (or melted butter) and whisk until combined.
- Add the eggs into the bowl and whisk thoroughly to create a smooth batter.
- Combine the all-purpose flour, baking powder, and salt in another bowl. Gradually add to wet ingredients and stir gently until just combined.
- Add the vanilla extract and chopped pecans, stirring to distribute evenly.
- Prepare a greased loaf pan (9 x 5 inches) or line with parchment paper. Pour the batter into the pan and smooth the top.
- Bake for 55-65 minutes, or until a toothpick inserted into the center comes out clean.
- Cool in the pan for 10 minutes, then transfer to a wire rack to cool completely before slicing.
Notes
Serve with butter or honey, and try toasting slices for added texture.
- Prep Time: 10 minutes
- Cook Time: 60 minutes
- Category: Dessert
- Method: Baking
- Cuisine: American
Nutrition
- Serving Size: 1 slice
- Calories: 170
- Sugar: 12g
- Sodium: 150mg
- Fat: 7g
- Saturated Fat: 1g
- Unsaturated Fat: 4g
- Trans Fat: 0g
- Carbohydrates: 25g
- Fiber: 1g
- Protein: 3g
- Cholesterol: 30mg
Keywords: pecan bread, sweet bread, comfort food, baking, dessert
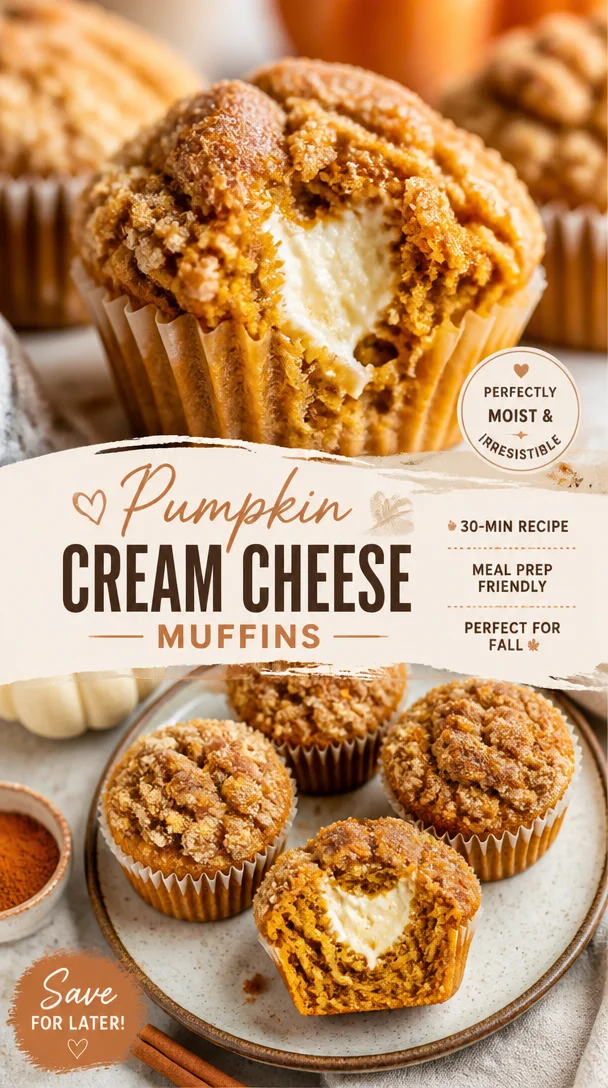
Pumpkin Cream Cheese Muffins
Deliciously Cozy Pumpkin Cream Cheese Muffins
Hey there, fellow foodies! Today, I’m super excited to share with you a recipe that makes my heart do a little happy dance—Pumpkin Cream Cheese Muffins. As the weather cools and leaves begin to turn orange and gold, there’s nothing more comforting than filling your kitchen with the aroma of warm spices and sweet pumpkin. These muffins are like a warm hug on a chilly morning, and they have a delightful surprise hidden in the middle: a creamy, tangy cream cheese filling that elevates them from ordinary to extraordinary.
These muffins are great for a weekend breakfast, a cozy afternoon snack, or even a tempting treat to share with friends. Plus, with pumpkin being so versatile, this recipe is perfect not only for fall but year-round if you want that comforting taste. So, whether you have a meticulous baking routine or you’re just getting back in the kitchen after a long hiatus, I’ve got you covered! Let’s dig in and whip up some magic!
A Slice of My Pumpkin Memories
The mere thought of pumpkin treats transports me back to my childhood kitchen, where my mom and I would bake together every autumn. Our kitchen was a whirlwind of flour, laughter, and the sweet scent of spices. One year, we decided to host a cozy pumpkin-themed gathering, and we invited friends for a fall brunch. I still remember the look in my friend’s eyes as they bit into their first pumpkin muffin—pure bliss enveloped them.
We spent hours in the kitchen, mixing up a variety of pumpkin delights, but it was the cream cheese muffins that stole the show. Mom’s secret? A generous dollop of homemade cream cheese filling that made every bite feel decadent. That day inspired my lifelong love for baking, and I knew that I wanted to carry on that pumpkin magic in my own kitchen someday.
When I first made these Pumpkin Cream Cheese Muffins on my own, I channeled those cozy memories, and each bite reminded me of home. Let’s create some of those beautiful memories together with this delightful recipe!
Ingredients
Here’s what you’ll need to create these unforgettable muffins:
-
15 ounce can pumpkin puree: This is the heart of our muffins! A canned pumpkin puree is great for convenience and consistency. If you want to use fresh pumpkin, roast it, scoop out the flesh, and puree. Just ensure it’s well-drained to avoid excess moisture!
-
2 large eggs: They’re essential for binding the ingredients and adding richness. If you’re vegan or have allergies, you can substitute each egg with 1/4 cup unsweetened applesauce or a flaxseed egg (1 tablespoon ground flaxseed mixed with 2.5 tablespoons water).
-
1 1/2 cups light brown sugar: This adds a lovely caramel flavor to our muffins. You can easily swap this with coconut sugar for a healthier alternative that still provides great taste!
-
1/2 cup oil: I recommend vegetable oil for its neutral flavor and moistness, but you can also use melted coconut oil or even applesauce for a lower-fat option.
-
3/4 cup sour cream: This adds moisture and a lovely tang. You can substitute with Greek yogurt for a high-protein alternative or dairy-free yogurt if you’re keeping it vegan.
-
1 tbsp vanilla extract: Real vanilla adds warmth and enhances all the flavors. Always go for the pure extract instead of imitation—it truly makes a difference!
-
1 tbsp pumpkin pie spice: This spice blend gives our muffins that quintessential pumpkin flavor. If you don’t have pumpkin pie spice, you can mix together cinnamon, nutmeg, and ginger for a quick substitute!
-
2 cups all-purpose flour: The base of our muffins! If you need a gluten-free option, use a 1:1 gluten-free flour blend.
-
1 tsp baking powder and 1 tsp baking soda: The dynamic duo that provides lift and fluffiness. Make sure they’re fresh for the best result!
-
1/2 tsp salt: Enhances the sweetness and flavors. You might be tempted to skip it, but trust me—salt is essential!
-
1 large egg for the cream cheese filling: This helps set the filling for a perfect creamy texture.
-
8 ounces cream cheese, softened: The star of the filling! Make sure it’s fully softened for easy mixing. You can use vegan cream cheese if you want to keep it dairy-free.
-
1/4 cup granulated sugar: This will sweeten our cream cheese filling. You can cut back on sugar if you prefer a tangier filling or use a sugar substitute if desired.
-
1 tsp vanilla for the filling, to bring it all together!
Step-by-Step Instructions
Now that we have our ingredients lined up, it’s time to get our hands dirty and start cooking! Here’s how to bring these delightful muffins to life:
-
Preheat Your Oven: Start by preheating your oven to 350°F (175°C). This is crucial because you want a hot oven to give the muffins a perfect rise.
-
Prepare Your Muffin Tin: Line a standard muffin tin with paper liners or grease with non-stick spray. This will help with easy removal and clean-up!
-
Mix the Muffin Batter: In a large bowl, whisk together the pumpkin puree, eggs, light brown sugar, oil, sour cream, and vanilla extract until well combined. You want this to be smooth and creamy, with no lumps. This could be a great moment to revisit those childhood kitchen memories!
-
Combine Dry Ingredients: In another bowl, combine the all-purpose flour, baking powder, baking soda, pumpkin pie spice, and salt. Whisk these dry ingredients together until evenly combined. The more air you incorporate, the fluffier the muffins will be!
-
Blend Wet and Dry: Gradually add the dry ingredients to the wet ingredients, mixing until just combined. Be careful not to overmix; a few lumps are perfectly fine!
-
Make the Cream Cheese Filling: In a separate bowl, beat together the softened cream cheese, egg, granulated sugar, and vanilla extract using a hand mixer or a whisk until smooth and creamy. Make sure there are no lumps!
-
Fill the Muffin Cups: Fill each muffin cup halfway with the pumpkin batter and then add a generous dollop (about a tablespoon) of cream cheese filling right in the center. Top each muffin with more pumpkin batter until the cups are about 3/4 full. You want to make sure that filling is nestled snugly!
-
Bake: Pop the muffin tin in the preheated oven and bake for about 18-22 minutes, or until a toothpick inserted into the pumpkin muffin (avoiding the filling) comes out clean. The edges should look golden and slightly springy to the touch.
-
Cool: Once out of the oven, allow the muffins to cool in the pan for 5-10 minutes, then transfer them to a wire rack to cool completely. Resist the temptation to dig in right away—it’s worth the wait!
Serving Suggestions
Serving these pumpkin cream cheese muffins is as fun as making them! Here are a few ideas:
-
Sprinkle with Powdered Sugar: For a touch of sweetness and an elegant look, dust the tops with powdered sugar just before serving.
-
Pair with Coffee or Spiced Tea: These muffins are delicious alongside your favorite warm beverage! The spices in the muffin complement a nice cup of coffee, chai, or herbal tea beautifully.
-
Serve Warm: Nothing compares to a warm muffin! If you have leftovers, warm them in the microwave for about 10-15 seconds before enjoying—trust me, it’s like having them fresh-baked again.
-
Garnish: Consider serving them with a dollop of whipped cream or a scoop of vanilla ice cream for an indulgent dessert twist!
Recipe Variations
Why stop at just one version of these delightful muffins? Here are some creative twists you can try:
-
Chocolate Chip Pumpkin Muffins: Toss in 1 cup of chocolate chips into the batter for an extra sweet treat! It’s a great way to combine flavors that everyone loves.
-
Nutty Twist: Add 1/2 cup of chopped walnuts or pecans for some nuttiness and crunch. They make such a delightful contrast to the soft muffin texture.
-
Spiced Up: Want a little more kick? Add a pinch of cayenne pepper to the batter. It creates a fantastic sweet and spicy combo that’s sure to impress!
-
Cranberry Cream Cheese Muffins: Mix in 1/2 cup of dried cranberries for a tartness that balances the sweetness of the pumpkin beautifully.
-
Vegan Option: Use a flaxseed egg, substitute the sour cream with dairy-free yogurt, and opt for vegan cream cheese. You won’t miss a beat with this delicious, plant-based rendition!
Chef’s Notes
I love how recipes evolve over time. This one, especially, has a sentimental tie. Remembering those crisp autumn days in the kitchen with my mom makes every bite of these muffins special. I’ve always found joy in sharing this recipe with friends and family, and each time I make them, I think of new ways to enhance this classic treat. You might even catch some variations popping up in my kitchen experiments!
And let me tell you—on more than one occasion, I’ve been known to make these muffins for no special reason, simply because the craving strikes. When that happens, I find myself baking at odd hours, enjoying the process like it’s a dance. Just remember—baking should be fun, not stressful!
FAQs and Troubleshooting
1. Why are my muffins dense?
This could be due to overmixing the batter. Be gentle with the mixing—just combine until everything is moistened.
2. Can I freeze these muffins?
Absolutely! Once cooled, store them in an airtight container or a ziplock bag. They can be frozen for up to 3 months. Thaw them overnight in the fridge, or pop one in the microwave for a quick treat.
3. Why did my cream cheese filling sink?
If the mixture is too runny or the batter is too thin, it can cause the filling to sink. Ensure your cream cheese is properly softened, and don’t skip on flour measurements!
4. How do I know when my muffins are done?
The toothpick test is your best friend here! Insert it into the center of a muffin (avoiding the filling) and if it comes out clean or with just a few moist crumbs, they’re good to go.
Nutritional Info
These pumpkin cream cheese muffins are not only delicious but are also packed with nutrients! Here’s a breakdown of the nutritional content per muffin (based on a recipe yielding 12 muffins):
- Calories: Approximately 210
- Protein: 4g
- Fat: 10g
- Carbohydrates: 28g
- Fiber: 1g
- Sugar: 12g
Of course, these numbers will vary based on ingredients used and the size of your muffins. Always consider substituting with healthier options to fit your dietary preferences—like using whole wheat flour or reducing sugar.
Final Thoughts
So there you have it—my recipe for heartwarming Pumpkin Cream Cheese Muffins that are sure to become a beloved staple in your kitchen! Whether it’s a chilly autumn morning or anytime you need a little comfort, these muffins wrap you in warmth and goodness.
I hope you enjoy making (and munching!) on them as much as I do. Don’t forget to share your cozy moments and kitchen experiments with me. Happy baking, and may your kitchen always smell like a pumpkin patch! 🧡🍂🍰
With love from your friendly kitchen buddy, Beau Collier.
Print
Deliciously Cozy Pumpkin Cream Cheese Muffins
- Total Time: 37 minutes
- Yield: 12 muffins 1x
- Diet: Vegetarian
Description
These pumpkin cream cheese muffins are a delightful treat with a creamy filling that makes them perfect for any season.
Ingredients
- 1 (15 ounce) can pumpkin puree
- 2 large eggs
- 1 1/2 cups light brown sugar
- 1/2 cup vegetable oil
- 3/4 cup sour cream
- 1 tbsp vanilla extract
- 1 tbsp pumpkin pie spice
- 2 cups all-purpose flour
- 1 tsp baking powder
- 1 tsp baking soda
- 1/2 tsp salt
- 1 large egg (for cream cheese filling)
- 8 ounces cream cheese, softened
- 1/4 cup granulated sugar
- 1 tsp vanilla extract (for filling)
Instructions
- Preheat your oven to 350°F (175°C).
- Prepare your muffin tin by lining with paper liners or greasing with non-stick spray.
- Mix together the pumpkin puree, eggs, light brown sugar, oil, sour cream, and vanilla extract until smooth.
- Combine the flour, baking powder, baking soda, pumpkin pie spice, and salt in another bowl.
- Blend the dry ingredients into the wet ingredients until just combined.
- Make the cream cheese filling by beating together cream cheese, egg, granulated sugar, and vanilla extract until creamy.
- Fill muffin cups halfway with the pumpkin batter, then add a dollop of cream cheese filling and top with more pumpkin batter.
- Bake for 18-22 minutes or until a toothpick comes out clean.
- Cool in the pan for 5-10 minutes before transferring to a wire rack.
Notes
These muffins can be frozen for up to 3 months. Reheat in the microwave for a quick treat.
- Prep Time: 15 minutes
- Cook Time: 22 minutes
- Category: Breakfast
- Method: Baking
- Cuisine: American
Nutrition
- Serving Size: 1 muffin
- Calories: 210
- Sugar: 12g
- Sodium: 200mg
- Fat: 10g
- Saturated Fat: 3g
- Unsaturated Fat: 7g
- Trans Fat: 0g
- Carbohydrates: 28g
- Fiber: 1g
- Protein: 4g
- Cholesterol: 40mg
Keywords: pumpkin muffins, cream cheese, fall baking, cozy recipes, breakfast muffins
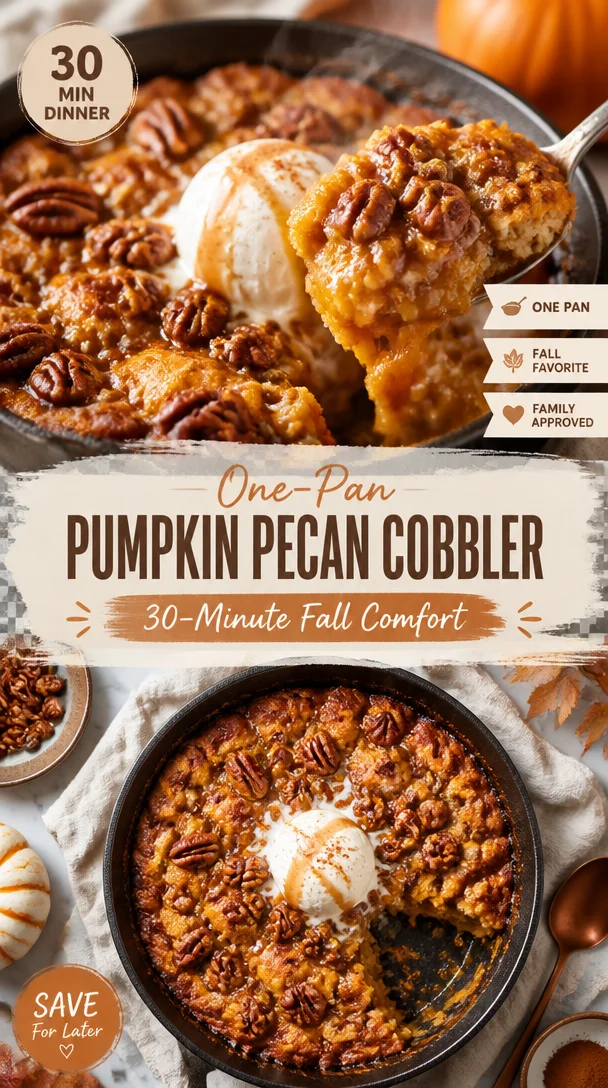
One-Pan Pumpkin Pecan Cobbler (30-Minute Fall Comfort)
Pumpkin Pecan Cobbler: A Cozy Autumn Delight
Hey there, food enthusiasts! I’m Beau Collier, and today we’re diving into a recipe that captures the essence of fall: Pumpkin Pecan Cobbler. It’s the kind of dish that makes you feel all warm and fuzzy inside, like wrapping up in your favorite sweater on a crisp autumn evening. Picture this: golden leaves falling, a gentle breeze rustling through the trees, and the sweet aroma of pumpkin wafting through your kitchen. It’s not just dessert; it’s a celebration of flavors that brings friends and family together!
I began my love affair with pumpkin desserts at a young age. My grandmother was a baking wizard, always experimenting with seasonal ingredients. One of my favorite memories is standing on a stool next to her as she whipped up her famous pumpkin pie. I remember the way she’d sprinkle cinnamon and nutmeg with a flourish, and the laughter we shared while tasting the pumpkin filling straight from the bowl. Those sweet moments inspired me to play with flavors and create my own recipes that keep those cherished memories alive.
At Feastical.com, we believe that cooking should be a joyful experience, and this Pumpkin Pecan Cobbler embodies that spirit. With its comforting combination of pumpkin, warm spices, and crunchy pecans, this dish is sure to become a go-to in your kitchen. So, let’s gather our ingredients and get started!
Ingredients
Here’s what you’ll need to make this delightful Pumpkin Pecan Cobbler:
-
1 cup + 3 tablespoons all-purpose flour
This forms the base of your cobbler. You can substitute with gluten-free flour if you want a gluten-free option, just ensure it’s a 1:1 blend! -
2 teaspoons baking powder
This little magic dust helps your cobbler rise and creates that beautiful, fluffy texture. -
1/2 teaspoon salt
Salt enhances the flavors beautifully; don’t skip this step! -
3/4 cup granulated sugar
The sweetener that balances the warm spices and pumpkin’s earthiness. You could also use coconut sugar for a lower glycemic option. -
1 teaspoon cinnamon
The quintessential fall spice! If you want to spice things up, try using a pumpkin pie spice blend for added warmth. -
1/2 teaspoon nutmeg
Nutmeg adds a lovely aromatic flavor that pairs perfectly with pumpkin. -
1/2 teaspoon cloves
Just a hint! Cloves can be powerful, so a little goes a long way in this cobbler. -
1/2 cup pumpkin puree
The heart of our dish! You can use homemade pumpkin puree, but make sure it’s pure without any added sugars or spices. -
1/4 cup milk
This adds moisture; feel free to swap with almond milk or oat milk for a dairy-free option. -
1/4 cup melted butter or vegetable oil
Butter adds richness, while vegetable oil maintains moisture. Choose what suits your taste! -
1 1/2 teaspoons vanilla extract
Add a splash of warmth and sweetness; it’s like a hug for your taste buds! -
1/2 cup granulated sugar (for the topping)
This gets caramelized on top to create that perfect crust. -
1/2 cup brown sugar
Brown sugar adds richness and depth; you can substitute with light or dark depending on your preference. -
1/4 cup chopped pecans
These add a crunchy texture. You can swap with walnuts or omit completely if nuts aren’t your thing. -
1 1/2 cups very hot water
This step is crucial; it helps create that gooey bottom layer that you’ll just love.
Step-by-Step Instructions
Alright, let’s roll up our sleeves and get into the nitty-gritty of making this glorious Pumpkin Pecan Cobbler!
-
Preheat your oven
Start by preheating your oven to 350°F (175°C). This is essential for ensuring your cobbler bakes evenly and comes out golden brown. -
Prepare the baking dish
Grab a medium-sized baking dish (a 9×9 square works perfectly). You can grease it lightly with butter or cooking spray to prevent sticking. -
Mix the dry ingredients
In a large bowl, combine the flour, baking powder, salt, granulated sugar, cinnamon, nutmeg, and cloves. Whisk them together until well blended. This mixes the dry ingredients evenly, ensuring that every bite has that delicious spice. -
Combine wet ingredients
In another bowl, mix together the pumpkin puree, milk, melted butter (or oil), and vanilla extract. Give it a good stir until it’s smooth and creamy. This combo brings richness to your cobbler. -
Combine wet and dry mixtures
Gradually add the wet ingredients into the dry mixture, stirring until just combined. Over-mixing can lead to a dense cobbler, so stop as soon as no dry flour is visible! -
Pour the batter into the baking dish
Spread the batter evenly in your prepared baking dish. It doesn’t have to be perfect; a few lumps are totally fine. -
Sprinkle the toppings
In a separate bowl, mix the granulated sugar, brown sugar, and chopped pecans. Sprinkle this mixture generously over the batter. This is where the magic happens, forming that crunchy topping! -
Add hot water
Slowly pour the very hot water over the top of the batter. It may look a little strange, but trust me – this will create that wonderful gooey bottom layer that balances the crunchy topping. -
Bake
Now, pop it in the oven and let it bake for about 40–45 minutes. You’ll know it’s done when the top is golden and the cobbler is bubbling at the edges. Your kitchen will smell like a glorious autumn festival! -
Cool and serve
Let your cobbler cool for about 10-15 minutes before serving. This allows the flavors to settle and makes it easier to scoop!
Serving Suggestions
When it comes to serving this Pumpkin Pecan Cobbler, there are endless possibilities to make it even more delightful. You can serve it warm right from the oven in generous scoops. I love adding a dollop of whipped cream or a scoop of vanilla ice cream on top, allowing it to melt into the warm cobbler. If you want to get a bit fancy, drizzle some caramel sauce over the top or sprinkle with additional chopped pecans for crunch.
Place it on a rustic wooden board or in a warm dish to preserve its cozy vibe. Trust me, your friends and family will be raving about it even before they take a bite!
Recipe Variations
I’m a firm believer that recipes are meant to be played with, so here are a few variations you can try with this Pumpkin Pecan Cobbler:
-
Pumpkin Spice Swap: Replace the spices with your favorite pumpkin spice blend for a quick shortcut. It’s all about convenience!
-
Add Chocolate: For a flavor explosion, add a handful of chocolate chips to the batter before pouring it into the baking dish. Chocolate and pumpkin are a match made in heaven!
-
Dairy-Free Delight: Substitute almond milk for regular milk and use coconut oil instead of butter to make this cobbler dairy-free. You won’t miss the creaminess one bit!
-
Apple-Pecan Twist: Mix in some diced apples with the pumpkin for an extra layer of texture and flavor. This gives it a fun twist and makes it a bit more festive.
-
Pumpkin Cheesecake Cobbler: Swirl in some cream cheese or mascarpone into the pumpkin mixture before pouring it into the dish. This ups the creaminess game and creates a rich flavor profile!
Chef’s Notes
As I’ve played with this recipe over the years, it has evolved beautifully, gathering inspiration from all my culinary adventures. Once upon a time, I accidentally forgot the pecans! It turned out so deliciously soft and custardy that I just had to embrace the accident. Now, I often create a nut-free version for friends with allergies. Funny enough, that day in the kitchen led to an “accidental favorite”!
And there’s truly nothing like sharing this cobbler with loved ones. Whether it’s holiday gatherings, potlucks, or just a cozy night in, it feels like a hug in a dish.
FAQs and Troubleshooting
Let’s tackle some common questions and potential pitfalls when making your Pumpkin Pecan Cobbler:
-
Why did my cobbler turn out too dense?
This could be due to over-mixing the batter. Make sure to mix until just combined to keep it light and fluffy! -
Can I use fresh pumpkin puree?
Absolutely! Just make sure to cook and puree your pumpkin until smooth. Avoid any added sugars or spices unless you want to adjust the recipe accordingly. -
How do I know when the cobbler is done?
Look for a golden-brown top and bubbling edges. You can also test with a toothpick; it should come out clean if poked in the center. -
What if the topping is too crunchy?
If your cobbler topping feels overly crunchy, it could be due to too much sugar or long baking time. Keep an eye on it towards the end of baking, and reduce the sugar if needed.
Nutritional Info
You may be wondering about the nutritional content of this delicious Pumpkin Pecan Cobbler. While it might not be the lightest dessert, moderation is key! Here’s a rough estimation per serving (based on an 8-serving dish):
- Calories: Approximately 300–350
- Total Fat: 12–15g
- Sugars: 20–25g
- Fiber: 2g
- Protein: 3g
Feel free to adjust the sugar content or swap ingredients depending on your dietary needs. Remember that this cobbler is best enjoyed with a sprinkle of mindfulness and a generous helping of love!
Final Thoughts
There you have it, friends! This Pumpkin Pecan Cobbler is a delightful concoction that embodies all that is cozy and comforting about fall. It’s not just about filling your belly; it’s about making memories, sharing laughs, and celebrating the flavors of the season.
So, grab your ingredients, crank up your favorite tunes, and have fun with it! I can’t wait to hear all about your cobbler-making adventures, the tweaks you made, and the laughter shared around the table. Remember, at Feastical, we’re all about the joy of cooking and connecting through food. Happy baking!
Print
Pumpkin Pecan Cobbler
- Total Time: 60 minutes
- Yield: 8 servings 1x
- Diet: Vegetarian
Description
A cozy autumn dessert that combines pumpkin, warm spices, and crunchy pecans for a delightful treat.
Ingredients
- 1 cup + 3 tablespoons all-purpose flour
- 2 teaspoons baking powder
- 1/2 teaspoon salt
- 3/4 cup granulated sugar
- 1 teaspoon cinnamon
- 1/2 teaspoon nutmeg
- 1/2 teaspoon cloves
- 1/2 cup pumpkin puree
- 1/4 cup milk
- 1/4 cup melted butter or vegetable oil
- 1 1/2 teaspoons vanilla extract
- 1/2 cup granulated sugar (for topping)
- 1/2 cup brown sugar
- 1/4 cup chopped pecans
- 1 1/2 cups very hot water
Instructions
- Preheat your oven to 350°F (175°C).
- Prepare a medium-sized baking dish by greasing it lightly with butter or cooking spray.
- Mix the dry ingredients in a large bowl: flour, baking powder, salt, granulated sugar, cinnamon, nutmeg, and cloves.
- Combine the wet ingredients in another bowl: pumpkin puree, milk, melted butter (or oil), and vanilla extract.
- Combine the wet and dry mixtures, stirring until just combined.
- Pour the batter into the prepared baking dish.
- Sprinkle the topping mixture of granulated sugar, brown sugar, and chopped pecans over the batter.
- Add the very hot water over the top of the batter.
- Bake for 40–45 minutes or until golden and bubbling.
- Cool for about 10-15 minutes before serving.
Notes
For a twist, try adding chocolate chips or swapping in a pumpkin spice blend.
- Prep Time: 15 minutes
- Cook Time: 45 minutes
- Category: Dessert
- Method: Baking
- Cuisine: American
Nutrition
- Serving Size: 1 serving
- Calories: 325
- Sugar: 22g
- Sodium: 360mg
- Fat: 14g
- Saturated Fat: 7g
- Unsaturated Fat: 5g
- Trans Fat: 0g
- Carbohydrates: 45g
- Fiber: 3g
- Protein: 4g
- Cholesterol: 30mg
Keywords: pumpkin dessert, fall dessert, cobbler, pecan cobbler, cozy recipe

One-Pot 30-Minute Greek Lemon Chicken Soup for Weeknights
Deliciously Comforting Greek Lemon Chicken Soup Recipe
Hey there, fellow food enthusiast! If you’re looking for a dish that’s as warm and inviting as a hug on a chilly day, then you’ve landed on the right recipe. Today, let’s dive into the vibrant world of Greek cuisine with a classic dish that combines rich flavors and comforting ingredients—Greek Lemon Chicken Soup. This delightful soup, known as “Avgolemono,” is a staple in many Greek households, and once you taste it, you’ll understand why. Trust me; this recipe is like a sunbeam on a cloudy day!
A Whiff of Nostalgia
I’ll never forget the first time my grandmother made this soup for me in her tiny kitchen filled with the fragrant aroma of simmering chicken and fresh herbs. I was around eight years old, a restless kid constantly exploring the nooks and crannies of her home, but as soon as I caught a whiff of that lemony goodness, I was glued to the kitchen floor like a moth to a flame.
With the warmth of her smile, she taught me the art of creating this soup. She’d always say, “Cooking is like life, my dear; it’s all about the balance of flavors.” The way she whisked those egg yolks with lemon juice until they were as smooth as silk is forever etched in my memory. And her secret? A sprinkle of fresh dill from her garden! Every spoonful was a comforting reminder of family, love, and tradition. That’s why I’m so excited to share this recipe with you—because it’s more than just food; it’s a journey back to those cherished moments.
So, gather your ingredients, roll up those sleeves, and let’s whip up this heartwarming Greek Lemon Chicken Soup together!
Ingredients
Here’s what you’ll need to create this delightful soup:
-
1 tablespoon olive oil (good quality extra virgin)
A drizzle of good olive oil adds depth to the dish. You can use sunflower oil in a pinch, but high-quality olive oil brings the authentic flavor. -
1 medium onion (diced)
Onions bring sweetness and a savory base to the soup. If you’re not an onion fan, try leeks for a milder flavor! -
1 medium carrot (diced)
Carrots add a touch of sweetness and color. Baby carrots work just as well—just chop them up! -
2-3 stalks celery (diced)
Celery offers a wonderful crunch and depth. If you can’t find celery, feel free to use fennel for a unique flavor twist. -
2-3 cloves garlic (finely chopped)
Garlic is essential for that aromatic fragrance. You can use garlic powder in a pinch—just go easy! -
2 bay leaves
These leaves infuse a subtle earthiness. Don’t forget to remove them before serving! -
2 chicken breasts (about 12 oz / 350 g total)
Opt for boneless, skinless chicken breasts for ease. You could also use thighs for more richness. -
6 cups chicken stock (1.5 liters, good quality, flavorful)
Quality stock makes all the difference! Go for homemade if you can, but store-bought is fine too. -
3/4 cup orzo (175 g)
Orzo is cute little pasta that adds heartiness! If you’re gluten-free, use brown rice or quinoa. -
1 lemon (juice of, fresh)
Fresh lemon juice is pivotal for that zing! Bottled juice just doesn’t cut it. -
2 egg yolks
Yolks help create that silky texture. For a lighter version, you can skip the eggs—you’ll still have a delicious soup. -
A handful fresh dill
Fresh dill adds a kick of flavor! If you can’t find it, parsley or thyme will do the trick. -
Salt and freshly ground black pepper (to taste)
Season to your liking. Remember, you can always add more, but you can’t take it out!
Step-by-Step Instructions
-
Heat the Olive Oil
In a large pot or Dutch oven, heat the tablespoon of olive oil over medium heat. The pot should be nice and warm but not smoking. This is where the magic begins! -
Sauté the Vegetables
Toss in the diced onion, carrot, and celery. Sauté these for about 5-7 minutes, or until the onion is translucent and the veggies are tender. Don’t rush this step—let those flavors mingle! -
Add Garlic and Seasonings
Stir in the finely chopped garlic and bay leaves, letting them cook for an additional 2-3 minutes until fragrant. The kitchen should smell like pure heaven at this point! -
Introduce the Chicken
Time to add the chicken breasts to the pot. Pour in the chicken stock, making sure the chicken is fully submerged, then bring the mixture to a gentle boil. Cover the pot, reduce the heat to a simmer, and cook for about 20-25 minutes until the chicken is cooked through. Check for doneness using a meat thermometer (it should read 165°F or 74°C). -
Prepare the Orzo
While the chicken is simmering, cook the orzo separately according to the package instructions in a pot of salted boiling water. Drain and set aside. This helps prevent the pasta from becoming mushy if left in the soup. -
Shred the Chicken
Once the chicken is cooked, remove it from the pot and set it on a cutting board. Let it cool for a few minutes before shredding it into bite-sized pieces. You can also chop it if you prefer larger chunks. -
Combine it All
Return the shredded chicken to the soup pot and stir in the cooked orzo. Allow the soup to simmer for another 5 minutes, letting those flavors meld together beautifully. -
Whisk Up the Lemon and Egg Mixture
In a separate bowl, whisk together the egg yolks and fresh lemon juice until creamy. To temper the mixture and avoid cooking the eggs, slowly ladle a cup of the hot soup into the egg mixture while whisking continuously. This will warm the eggs without scrambling them. -
Finish the Soup
Slowly pour the tempered egg mixture back into the pot while stirring the soup. This will give the soup a rich and creamy texture. Add in the fresh dill and season with salt and pepper to taste. Enjoy the delightful transformation! -
Serve and Bask in the Flavor
Ladle the soup into bowls and garnish with extra dill or a lemon wedge if you’d like.
Serving Suggestions
Serving your Greek Lemon Chicken Soup can be just as fun as making it! A simple bowl will do, but why not dress it up a bit? You can sprinkle some freshly chopped dill on top and add a thin slice of lemon for a splash of brightness. Serve with warm, crusty bread or a fresh Greek salad on the side for the ultimate comforting meal. This soup is perfect for lunch or as a starter for dinner and is sure to impress your guests.
Recipe Variations
-
Mediterranean Twist: Toss in some baby spinach or kale for a pop of green and extra nutrition. The added greens will wilt beautifully into the soup!
-
Spicy Kick: Love a bit of heat? Try adding a pinch of red pepper flakes or a diced jalapeño to the sautéing veggies for a spicy version.
-
Savory Swap: Experiment with using turkey in place of chicken—great for those Thanksgiving leftovers!
-
Herby Delight: Mix it up with different herbs! Try tarragon or parsley for a fresh aroma that brings a unique flair.
-
Creamy Comfort: For those who love an extra creamy soup, add in a splash of heavy cream right before serving. It elevates the dish to new heights!
Chef’s Notes
You know, every time I make this soup, I’m reminded of my grandmother’s little kitchen and her endless wisdom. I’ve adjusted the recipe over the years, adding a little more lemon here and a touch of dill there, but the essence remains the same. Every family has its twist on Avgolemono, and that’s what makes it such a cherished dish! Try it out and feel free to make it your own. Food is all about love and connection, after all!
FAQs and Troubleshooting
1. My soup is too thick! What do I do?
No worries! Add a splash of chicken stock or water to thin it out until you reach the desired consistency.
2. What if my soup curdled when adding the egg mixture?
It can be tricky! Make sure to temper the egg yolks with hot soup first before adding them back in. If it curdles, the flavor is still there; just blend it for a smoother consistency.
3. I’m vegetarian; can I still enjoy this soup?
Absolutely! Substitute chicken with tofu or chickpeas and use vegetable stock. You’ll still get the heartwarming flavors!
4. How do I store leftovers?
Store any leftovers in an airtight container in the fridge for up to 3 days. You can also freeze it, but the orzo may become mushy when reheated, so consider adding it fresh each time.
Nutritional Info
While the exact nutritional information can vary based on your specific ingredients and serving sizes, here’s a rough estimate per serving (considering 6 servings for this recipe):
- Calories: 320
- Protein: 20g
- Carbohydrates: 25g
- Fat: 10g
- Fiber: 2g
This soup is a well-balanced dish providing hearty protein from the chicken, carbs from the orzo, and an abundance of vitamins from the veggies.
Final Thoughts
And there you have it! A heartwarming bowl of Greek Lemon Chicken Soup that’ll fill your home with love and joy. Whether you’re cozying up on the couch, hosting a gathering, or simply nourishing your body with good food, this recipe has got you covered. So grab that spoon, dig in, and share it with the ones you love. After all, the best meals are the ones that bring people together! Enjoy, my dear friend! 🍋🍲
Print
Deliciously Comforting Greek Lemon Chicken Soup
- Total Time: 45 minutes
- Yield: 6 servings 1x
- Diet: Non-Vegetarian
Description
A heartwarming Greek lemon chicken soup, known as Avgolemono, that combines rich flavors and comforting ingredients.
Ingredients
- 1 tablespoon olive oil
- 1 medium onion (diced)
- 1 medium carrot (diced)
- 2–3 stalks celery (diced)
- 2–3 cloves garlic (finely chopped)
- 2 bay leaves
- 2 chicken breasts (about 12 oz / 350 g total)
- 6 cups chicken stock (1.5 liters)
- 3/4 cup orzo (175 g)
- 1 lemon (juice of, fresh)
- 2 egg yolks
- A handful fresh dill
- Salt and freshly ground black pepper (to taste)
Instructions
- Heat the olive oil in a large pot or Dutch oven over medium heat.
- Sauté the diced onion, carrot, and celery for about 5-7 minutes.
- Add the finely chopped garlic and bay leaves, and cook for 2-3 minutes.
- Introduce the chicken breasts and pour in the chicken stock, bringing it to a gentle boil.
- Prepare the orzo according to package instructions in a pot of salted boiling water.
- Shred the chicken into bite-sized pieces.
- Combine the shredded chicken and cooked orzo into the soup pot.
- Whisk together the egg yolks and fresh lemon juice until creamy.
- Finish the soup by adding the tempered egg mixture back in.
- Serve the soup garnished with dill or a lemon wedge.
Notes
Serve with warm crusty bread or a fresh Greek salad. Can add greens or spices for variations.
- Prep Time: 15 minutes
- Cook Time: 30 minutes
- Category: Soup
- Method: Stovetop
- Cuisine: Greek
Nutrition
- Serving Size: 1 serving
- Calories: 320
- Sugar: 3g
- Sodium: 800mg
- Fat: 10g
- Saturated Fat: 1.5g
- Unsaturated Fat: 5g
- Trans Fat: 0g
- Carbohydrates: 25g
- Fiber: 2g
- Protein: 20g
- Cholesterol: 100mg
Keywords: Greek lemon chicken soup, Avgolemono, comfort food, chicken soup
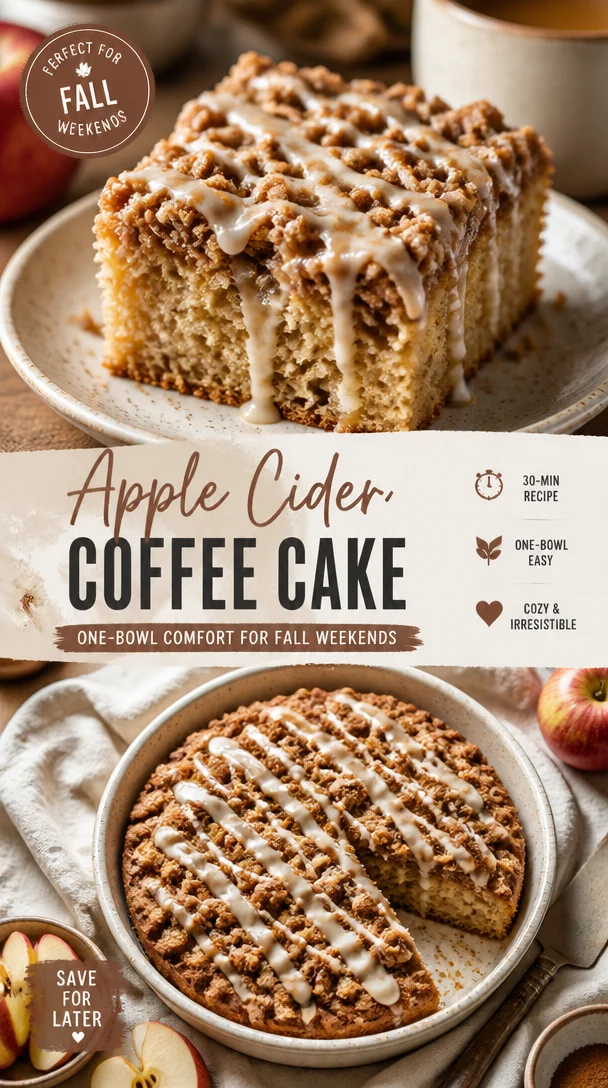
Apple Cider Coffee Cake: One-Bowl Comfort for Fall Weekends
A Slice of Nostalgia: Apple Cider Coffee Cake
Hey there, fellow food lovers! Today, I’m excited to whisk you away into the cozy world of autumn baking with a delightful and comforting recipe: Apple Cider Coffee Cake. There’s something incredibly inviting about the aroma of cinnamon and apples wafting through the kitchen. It’s like a warm hug after a brisk fall walk. So grab your favorite apron, and let’s put a delicious spin on a classic!
A Whiff of Memories
You know, as a kid, nothing quite topped the joy of returning home after a day of apple-picking. The air would be crisp, and the sunlight would dance through the golden leaves, making everything feel magical. One particular outing with my family led to a long afternoon in the kitchen, crafting the most divine apple cider coffee cake. I remember my mom standing by the counter, expertly mixing batter while my dad would lounge in the living room, eyeing the day’s haul of freshly picked apples.
It was more than just a recipe; it was a family tradition, a bonding experience where laughter and love intertwined with every stir and sprinkle. I’ll never forget the first slice we pulled from the oven—the crust was perfectly golden, and as we cut into it, the spiced apple filling revealed itself like a treasure inside. It became our go-to dish for chilly weekends, family gatherings, and those simple weekday mornings when a little warmth was all we needed.
Now that I’m sharing this homage to my childhood with you, I hope it evokes the same sense of comfort and joy. Let’s create some delicious memories together!
Ingredients
Here’s what you’ll need to create this scrumptious Apple Cider Coffee Cake.
-
1 cup fresh apple cider
The star of our cake! You can substitute with apple juice in a pinch, but the cider provides a richer flavor. -
2 cups all-purpose flour
This is your foundation! You can swap it with gluten-free flour if needed; just ensure it has a binding agent like xanthan gum. -
1 teaspoon baking powder
This helps the cake rise. Ensure it’s fresh, as old baking powder can lead to a dense cake. -
1/2 teaspoon baking soda
Paired with the acidic components (like cider), it gives extra lift. Again, freshness is key! -
1/2 teaspoon salt
Enhances all the flavors in this cake. Try using flaky sea salt for a gourmet touch. -
1/2 cup unsalted butter, softened
Adds moisture and richness. If you’re dairy-free, you can use coconut oil or a vegan butter substitute. -
3/4 cup granulated sugar
Sweetness is essential! For a deeper flavor, try substituting half for coconut sugar. -
2 large eggs
They bind everything together and provide structure. For a vegan option, you can use 1/2 cup of unsweetened applesauce. -
1/2 cup sour cream
This adds moisture and a hint of tang. Greek yogurt works well too if you’re watching the calories. -
1 teaspoon vanilla extract
A little splash of happiness! Make sure you’re using pure vanilla extract for the best flavor. -
1 cup peeled and diced apples
Go for a tart variety like Granny Smith for a nice balance against the sweetness. -
1/2 cup brown sugar
Adds a caramel-like flavor to our streusel topping. If you’re out, you can use granulated sugar in a pinch. -
1/4 cup all-purpose flour for streusel
Almost like creating a topping blanket; this helps achieve that crumbly texture. -
1 teaspoon ground cinnamon
The quintessential fall spice! If you’re feeling adventurous, try cardamom for a unique twist. -
2 tablespoons cold unsalted butter
Chill it for a crumbly streusel topping. Cold butter is key!
Step-by-Step Instructions
Let’s get to the fun part—mixing, baking, and waiting for that cake to fill the house with its heavenly scent!
-
Preheat your oven to 350°F (175°C)
Prepping your oven ahead of time ensures your cake bakes evenly. Set it to the correct temperature, then pop in your favorite playlist to get in the baking mood! -
Prepare the pan
Grease a 9×13 baking dish and lightly flour it. You can also use parchment paper for a fuss-free removal. -
Mix dry ingredients
In a medium bowl, whisk together the flour, baking powder, baking soda, salt, and cinnamon. Make sure there are no lumps. A light sift can also help! -
Cream the butter and sugar
In a large bowl, using an electric mixer, cream the softened butter and granulated sugar until it’s light and fluffy—about 3-4 minutes. The air you beat in will lend fluffiness to your cake. -
Beat in the eggs
Add in the eggs, one at a time, ensuring each is well incorporated before adding the next. This step is crucial for a fluffy texture. -
Incorporate the sour cream and cider
Stir in the sour cream and vanilla extract. Then, add the apple cider, mixing until just combined. Don’t over-mix; we want that tender crumb! -
Fold in the diced apples
With a spatula, gently fold in those crispy apple chunks, making sure they’re evenly distributed throughout the batter. -
Combine the dry with the wet
Gradually add the dry mixture to the wet ingredients. This is where the magic happens! Mix just until incorporated—again, don’t overdo it! -
Prepare the streusel topping
In a small bowl, combine the brown sugar, 1/4 cup flour, ground cinnamon, and the cold butter. Using your fingers (yep, this is where you get to be a kid again!), rub the butter into the sugar and flour mixture until it resembles coarse crumbs. -
Pour the batter into the prepared pan
Spread it out evenly with a spatula, then top generously with that delicious streusel mixture. It should look inviting—like a cozy blanket of sweetness! -
Bake and enjoy the smell
Pop your creation in the oven and bake for about 35-40 minutes, or until a toothpick inserted into the center comes out clean. Trust me, the aroma will have you dancing around the kitchen! -
Cool it down
Once it’s baked, allow it to cool in the pan for about 10 minutes before transferring it to a wire rack. Try not to slice it too soon; the flavors need a moment to settle.
Serving Suggestions
Now for the best part—serving your lovely cake! Allow it to cool completely if you’re planning to frost it for a more indulgent twist, but if you want it simple, just dust a little powdered sugar on top.
Slice it into squares and serve with a dollop of whipped cream or a scoop of vanilla ice cream for a luxurious treat. Pair it with a cup of freshly brewed coffee or some hot apple cider to really embrace the season!
Recipe Variations
Want to keep things interesting? Here’s how you can give this classic a fun twist:
-
Nutty Delight: Add 1/2 cup of chopped walnuts or pecans to the batter for a delightful crunch. Toasting them lightly beforehand really brings out their flavor!
-
Spice It Up: Try adding a pinch of nutmeg or ginger for extra warmth. This is a fun way to customize it according to your seasonal wish!
-
Chocolate Swirl: Feeling indulgent? Fold in some mini chocolate chips to the batter or layer them in before the streusel for a sweet surprise.
-
Fruity Twist: Mix in 1/2 cup of dried cranberries or raisins. These not only add flavor but a beautiful pop of color.
-
Gluten-Free Option: Swap in a 1:1 gluten-free baking flour mix, and make sure your apple cider is entirely gluten-free.
Chef’s Notes
Every time I whip up this cake, I’m reminded of those lovely fall evenings spent with family. Over the years, I’ve played around with this recipe, swapping in different fruits and types of sugar. Each variation adds a new layer of warmth and memory.
One amusing kitchen memory? I once got carried away with the streusel, and it ended up being a mountain on top! My family was skeptical, but once we tasted it, we decided that a little more of the good stuff never hurt anyone!
FAQs and Troubleshooting
-
Why is my cake dense?
Make sure you’re using fresh baking powder and baking soda. Over-mixing can also lead to a dense texture, so mix just until combined. -
Can I use store-bought apple cider?
Absolutely! Just look for a high-quality brand without additives. Homemade is always great, but we need convenience sometimes, too! -
How do I store leftovers?
Place them in an airtight container at room temperature for up to 3 days, or refrigerate for a week. You can freeze slices in a freezer-safe bag for up to 3 months. -
What if my streusel is too dry?
If it doesn’t clump together, add a bit more cold butter and mix gently until it forms crumbs. Don’t be shy about getting your hands in there!
Nutritional Info
While this Apple Cider Coffee Cake is a treat to savor, here’s a rough estimate of its nutritional profile per slice (based on a 12-slice cake):
- Calories: 220
- Total Fat: 10g
- Saturated Fat: 5g
- Cholesterol: 40mg
- Sodium: 180mg
- Carbohydrates: 32g
- Dietary Fiber: 1g
- Sugars: 14g
- Protein: 2g
It’s a delightful treat, but try to enjoy it in moderation. After all, balance is key in any diet!
Final Thoughts
There you have it—my heartwarming recipe for Apple Cider Coffee Cake! I hope it brings as much joy to your kitchen as it has to mine. Whether you’re sharing it during a family gathering or enjoying it solo with a warm cup of coffee, I’m certain that this cake will leave you feeling cozy and content.
Happy baking, and may your kitchen always be filled with good food and great memories! Don’t forget to share the love and let me know how yours turns out. Until next time, keep that oven warm and your spirits higher! 🍏☕️✨
Print
Apple Cider Coffee Cake
- Total Time: 55 minutes
- Yield: 12 servings 1x
- Diet: Vegetarian
Description
A delightful and comforting recipe for Apple Cider Coffee Cake, filled with the warm aromas of cinnamon and apples.
Ingredients
- 1 cup fresh apple cider
- 2 cups all-purpose flour
- 1 teaspoon baking powder
- 1/2 teaspoon baking soda
- 1/2 teaspoon salt
- 1/2 cup unsalted butter, softened
- 3/4 cup granulated sugar
- 2 large eggs
- 1/2 cup sour cream
- 1 teaspoon vanilla extract
- 1 cup peeled and diced apples
- 1/2 cup brown sugar
- 1/4 cup all-purpose flour for streusel
- 1 teaspoon ground cinnamon
- 2 tablespoons cold unsalted butter
Instructions
- Preheat your oven to 350°F (175°C).
- Prepare the pan by greasing a 9×13 baking dish and lightly flouring it.
- Mix dry ingredients in a medium bowl: whisk together flour, baking powder, baking soda, salt, and cinnamon.
- Cream the butter and sugar in a large bowl until light and fluffy, about 3-4 minutes.
- Beat in the eggs, one at a time, ensuring each is well incorporated.
- Incorporate the sour cream and vanilla extract, then add the apple cider, mixing until just combined.
- Fold in the diced apples until evenly distributed in the batter.
- Combine the dry mixture with the wet ingredients, mixing just until incorporated.
- Prepare the streusel topping by combining brown sugar, 1/4 cup flour, ground cinnamon, and cold butter. Rub until coarse crumbs form.
- Pour the batter into the prepared pan, spreading evenly and topping with the streusel mixture.
- Bake for about 35-40 minutes, or until a toothpick inserted comes out clean.
- Cool in the pan for about 10 minutes before transferring to a wire rack.
Notes
Serve with powdered sugar, whipped cream, or vanilla ice cream. Enjoy with coffee or hot apple cider.
- Prep Time: 15 minutes
- Cook Time: 40 minutes
- Category: Dessert
- Method: Baking
- Cuisine: American
Nutrition
- Serving Size: 1 slice
- Calories: 220
- Sugar: 14g
- Sodium: 180mg
- Fat: 10g
- Saturated Fat: 5g
- Unsaturated Fat: 4g
- Trans Fat: 0g
- Carbohydrates: 32g
- Fiber: 1g
- Protein: 2g
- Cholesterol: 40mg
Keywords: apple, coffee cake, fall baking, dessert, cinnamon

Weeknight Comfort: Creamy Slow Cooker Chicken Parmesan Soup
Crockpot Chicken Parmesan Soup: A Cozy Comfort
Hey there, food lovers! Today, we’re diving into a bowl of comfort that’s sure to warm your heart and soul—Crockpot Chicken Parmesan Soup. If you’re like me, there’s nothing quite like coming home to the aroma of deliciousness wafting through the kitchen after a long day. This soup is not only heartwarming but also straightforward to make, allowing you to get more time to kick back with your favorite people.
As I stand here in my kitchen, the light streaming in through the window, I can’t help but think of the many chilly evenings spent gathered around the table with family, slurping down comforting bowls of soup. My love for hearty, flavorful dishes started at a young age when my grandma would whip up her special chicken dishes. One memory that stands out is the time she made chicken parmesan for us all. She prepared it with love, layering bubbly cheese over crunchy fried chicken, and served it with pasta that clung to the sauce like it was meant to be there. It was a masterpiece!
But let’s face it, who has the time to fry up chicken and make elaborate sauces every day? That’s why I created this easy Crockpot version. It brings all those delicious flavors together with minimum fuss, making it the perfect dish for busy weeknights or lazy Sundays. So, grab your favorite apron, and let’s get started on this heavenly journey that will have your family asking for seconds!
A Heartfelt Memory
There’s something magical about the way certain foods can transport you back in time. For me, chicken parmesan was that dish. I remember huddling around the dining table with my siblings, our plates piled high with pasta and baked chicken, bubbling hot with layers of gooey cheese. My grandma would tell us that cooking was like telling a story—a blend of love, happiness, and sometimes even a pinch of sadness when someone had to love and leave the plate empty.
One night, after a particularly tough week, Grandma realized we all needed that comfort, so she rolled up her sleeves and crafted her famous chicken parmesan soup in the crockpot. As the meal simmered throughout the day, the aroma filled our house, drawing us together with anticipation. When we finally sat down to eat, it was as if every spoonful hugged us warmly from the inside. That soup was more than a meal; it was a reminder of home. And that’s exactly what I want to recreate for you with this easy Crockpot Chicken Parmesan Soup—comfort food that brings warmth to your home and smiles to your table.
Ingredients
Here’s what you’ll need to bring this delicious soup to life:
-
1.5 lb boneless skinless chicken breasts: The star of the dish! These cook down beautifully, making for tender chicken throughout. If you prefer dark meat, feel free to swap in boneless thighs instead.
-
1 can (28 oz) crushed tomatoes: This will be your flavorful base, packed with rich tomato goodness. You can swap this for fire-roasted tomatoes if you like a bit of smoky flavor.
-
1 can (14.5 oz) diced tomatoes: These add texture and an extra burst of tomato flavor. If you love a bit of heat, try using diced tomatoes with green chilies.
-
3 cups chicken broth: It’s the liquid gold of your soup! Not only does it infuse flavor, but it also keeps everything extra cozy. Homemade broth is always best, but store-bought works just fine too.
-
1 small onion, diced: Sautéing onions is a great way to build flavor right from the start. You might also use shallots for a milder taste.
-
4 cloves garlic, minced: The more, the merrier when it comes to garlic! It adds that fragrant zing. Use garlic powder if you’re out of fresh.
-
1 tsp dried basil: An aromatic herb that screams Italian cuisine. If you have fresh basil, go ahead and use it—just increase the amount!
-
1 tsp dried oregano: This trusty herb enhances the flavors of your other ingredients.
-
0.5 tsp red pepper flakes: Adds a touch of heat! Feel free to adjust this based on your spice tolerance.
-
1 tsp salt: Balances all the flavors. Always taste before serving to adjust to your liking.
-
0.5 tsp black pepper: For a little kick; you can use white pepper if you prefer something milder.
-
2 cups penne pasta, cooked separately: This gives the soup a comforting, hearty texture. You can substitute with any pasta shape you love—just be sure to adjust the cooking time accordingly.
-
1 cup shredded mozzarella cheese: Melty, cheesy goodness! If you’re feeling adventurous, mix in some provolone or fontina.
-
0.5 cup grated Parmesan cheese: A must for that classic chicken parmesan flavor. Nutritional yeast is a great dairy-free alternative.
-
0.5 cup Italian breadcrumbs, toasted in butter: This adds a delightful crunch to the dish. You can make your own gluten-free breadcrumbs if needed.
-
Fresh basil for garnish: Because we eat with our eyes first! It brightens up the plate and adds freshness.
Step-by-Step Instructions
Ready to make some magic in your kitchen? Let’s roll up those sleeves and get going!
-
Prep the Ingredients: Start by gathering all your ingredients. Dice the onion, mince the garlic, and measure out the spices. When everything is prepped, cooking becomes a breeze. Tip: Keep your workspace organized. It’s amazing how much smoother the cooking process will go!
-
Layer the Chicken: Place your boneless, skinless chicken breasts at the bottom of the crockpot. This is crucial as it keeps the chicken juicy and allows it to soak up all that tomato goodness. Chef Hack: If you’re short on time, you can use rotisserie chicken; just add it later on to heat through.
-
Add the Tomato Goodness: Pour in the crushed tomatoes and diced tomatoes, followed by the chicken broth. This is where the flavor base comes alive! Pro Tip: If you have any leftover wine, toss a splash in for depth of flavor.
-
Sprinkle in the Aromatics: Add the diced onion and minced garlic next. Then season your mixture with basil, oregano, red pepper flakes, salt, and pepper. Give it a gentle stir—it should look like a big hug waiting to happen. Keep in mind: You can adjust the spices to match your palate. More heat? Toss in more crushed red pepper!
-
Cover and Cook: Set your crockpot on low for about 6-7 hours or high for 3–4 hours. Let it do its magic! During this time, all the flavors meld together beautifully. Here’s the best part: you can just walk away and let the crockpot do the work! Check it around the halfway point to give it a stir and make sure everything is cooking evenly.
-
Cook the Pasta: About 30 minutes before you’re ready to eat, get your penne cooking separately. You’ll want it al dente, as it will absorb some soup as it sits in the bowl. Remember: Add the pasta to the soup just before serving to keep it from getting overly soggy.
-
Finish with Cheese: When the cooking time is up, shred the chicken using two forks right in the crockpot. It should fall apart beautifully. Now, stir in the mozzarella and Parmesan cheese, letting them melt into the soup. It’s the best cheesy moment! For an extra cheesy experience, feel free to top the soup with more cheese right before serving.
-
Add the Cooked Pasta: Once the pasta is ready, stir it into the soup to combine everything. It’s essential to have that pasta soak up all that delicious flavor!
-
Serve and Garnish: Ladle the soup into bowls and sprinkle with toasted breadcrumbs and fresh basil. If you really want to impress, you can drizzle a little olive oil on top for that gourmet touch.
Serving Suggestions
Dish up your Crockpot Chicken Parmesan Soup in rustic bowls for that cozy vibe! Sprinkle on the crispy toasted breadcrumbs—nothing like that crunch against the creamy soup. You can even go the extra mile and top it off with a bit more shredded mozzarella and fresh basil for an Instagram-worthy finish.
Serve it alongside some crusty garlic bread or a simple green salad to round out the meal. This soup can hold its ground as the star of your dinner table, but it appreciates a supporting cast too!
Recipe Variations
Let’s get creative! Here are a few twists and variations you might enjoy:
-
Veggie-Loaded Variation: Toss in some chopped zucchini, bell peppers, or even spinach for an extra serving of vegetables.
-
Spicy Kick: Want to turn up the heat? Add jalapeños or a splash of hot sauce for a fiery bowl that’ll get your taste buds dancing.
-
Creamy Twist: For a creamier soup, stir in some heavy cream or cream cheese just before serving for a dreamy bowl of comfort.
-
Lentil Version: Swap the chicken for lentils for a vegetarian option. Increase the broth slightly, as lentils may absorb more liquid.
-
Pasta Swap: Try using gluten-free pasta if you’re avoiding gluten.
Chef’s Notes
As with most recipes, feel free to let your creativity shine! The beauty of cooking in a crockpot is that it’s almost impossible to mess it up. Don’t be afraid to taste along the way; you’ll find your rhythm and adjust the spices and ingredients to fit what your taste buds crave.
I’ve evolved this dish many times over the years, and I still love experimenting with what I have on hand. One memorable night, all I had left were a few random vegetables, some chicken, and a half-used can of pumpkin puree. Sounds strange? But it turned into an adventure worth savoring, resulting in an entirely new soup that became a family favorite.
FAQs and Troubleshooting
Q: Can I use frozen chicken?
A: Yes, you can! Just ensure it cooks for a few extra hours if it’s frozen solid.
Q: What if my soup is too thick?
A: No worries! Just add more chicken broth or water to loosen it up. Stir it in gradually until it reaches your desired consistency.
Q: Can I make this ahead of time?
A: Absolutely! You can assemble it a day in advance and store it in the fridge until you’re ready to cook.
Q: What should I do with leftovers?
A: Store them in an airtight container in the fridge for up to three days. Reheat gently on the stovetop or microwave!
Nutritional Info
This Crockpot Chicken Parmesan Soup is not only delicious but provides a nice variety of nutrients:
- Calories: Approximately 400 calories per serving (without added pasta)
- Protein: Chicken adds a hefty protein punch, making it ideal for muscle recovery.
- Carbohydrates: With pasta, you’ll get a satisfying energy source, but you can always adjust the amount or add veggies for a lower-carb option.
- Fats: With cheese included and a little olive oil on top, you’ll get healthy fats beneficial for overall health.
Always keep in mind that ingredient choices will affect final nutritional values. Making swaps can help accommodate dietary needs.
Final Thoughts
I truly hope this Crockpot Chicken Parmesan Soup brings warmth and love to your kitchen, just like it did in mine. It’s a recipe filled with nostalgic memories and the promise of good times shared with family and friends. Cooking shouldn’t be about perfection; it’s about creating moments that matter.
So gather around the table, ladle out those warm bowls, and dig into a supper that feels like home. Each spoonful is a reminder that food brings us together, forging connections that last long after the last drop is enjoyed. Here’s to many more meals shared! Bon appétit!
Print
Crockpot Chicken Parmesan Soup
- Total Time: 255 minutes
- Yield: 6 servings 1x
- Diet: Gluten-Free Options
Description
A comforting and easy Crockpot Chicken Parmesan Soup that brings together all the delicious flavors of classic chicken parmesan with minimal fuss.
Ingredients
- 1.5 lb boneless skinless chicken breasts
- 1 can (28 oz) crushed tomatoes
- 1 can (14.5 oz) diced tomatoes
- 3 cups chicken broth
- 1 small onion, diced
- 4 cloves garlic, minced
- 1 tsp dried basil
- 1 tsp dried oregano
- 0.5 tsp red pepper flakes
- 1 tsp salt
- 0.5 tsp black pepper
- 2 cups penne pasta, cooked separately
- 1 cup shredded mozzarella cheese
- 0.5 cup grated Parmesan cheese
- 0.5 cup Italian breadcrumbs, toasted in butter
- Fresh basil for garnish
Instructions
- Prep the ingredients: Gather and prepare all your ingredients.
- Layer the chicken: Place the chicken breasts at the bottom of the crockpot.
- Add the tomato goodness: Pour in crushed tomatoes, diced tomatoes, and chicken broth.
- Sprinkle in the aromatics: Add diced onion, minced garlic, basil, oregano, red pepper flakes, salt, and pepper.
- Cover and cook: Set the crockpot on low for 6-7 hours or high for 3-4 hours.
- Cook the pasta: About 30 minutes before serving, cook the penne pasta separately.
- Finish with cheese: Shred the chicken in the crockpot and stir in mozzarella and Parmesan cheese.
- Add the cooked pasta: Stir the pasta into the soup.
- Serve and garnish: Ladle soup into bowls, topping with breadcrumbs and fresh basil.
Notes
Feel free to adjust spices to your taste and experiment with different ingredients.
- Prep Time: 15 minutes
- Cook Time: 240 minutes
- Category: Soup
- Method: Crockpot
- Cuisine: Italian
Nutrition
- Serving Size: 1 serving
- Calories: 400
- Sugar: 8g
- Sodium: 800mg
- Fat: 20g
- Saturated Fat: 9g
- Unsaturated Fat: 7g
- Trans Fat: 0g
- Carbohydrates: 35g
- Fiber: 4g
- Protein: 30g
- Cholesterol: 70mg
Keywords: chicken soup, crockpot, comfort food, chicken parmesan, Italian soup

One-Pan Fall Dinner: Quick, Cozy Skillet for Busy Weeknights
The Cozy Fall Dinner Dad Throws on One Pan for You!
Hey there, foodies! As the leaves start to change and the air gets that crisp, cozy feel, there’s nothing like curling up with a warm, hearty meal. Today, I’m excited to share a one-pan dish that will not only fill your belly but also warm your heart. It’s the kind of recipe my dad used to whip up when the cooler months rolled in, and let me tell you, it’s still a favorite around here. So, grab your favorite apron and let’s dive into this cozy fall dinner featuring succulent chicken thighs, vibrant Brussels sprouts, sweet potatoes, and all the yummy seasonings!
A Trip Down Memory Lane
Growing up, my dad was the king of comfort food—seriously, he had a magical way of turning everyday ingredients into something extraordinary. I’ll never forget those crisp autumn evenings where the whole family would gather around the table, the smell of roasted chicken and sweet potatoes wafting through the house. My dad always said that food brings people together, and he was absolutely right.
One specific evening sticks in my memory: Dad was in the kitchen, sleeves rolled up, prepping this one-pan masterpiece. The Brussels sprouts sizzled in the oven while he cracked jokes and recounted stories from his childhood. I remember laughing so hard I nearly cried, all while the golden-brown chicken thighs roasted to perfection. Once we all sat down, the warmth of the food coupled with our laughter made for the coziest dinner imaginable.
That’s what I want you to capture with this dish. It’s not just about the food; it’s about the experience, the memories, and the love that goes into each bite. Ready to make your own magic? Let’s gather our ingredients!
Ingredients
Here’s what you’ll need to whip up this cozy fall dinner. Each ingredient plays a special role in creating the wholesome flavors you’re going to love:
-
1 lb chicken thighs
These juicy cuts are perfect for roasting. They hold moisture well and become incredibly tender. If you’re looking for a leaner option, you can swap them for chicken breasts, but be careful not to overcook them! -
2 cups Brussels sprouts, halved
These little green gems not only add color but also a beautiful, nutty flavor. If Brussels sprouts aren’t your jam, feel free to use green beans or broccoli instead. -
2 cups sweet potatoes, diced
Sweet potatoes bring a delightful sweetness and are packed with nutrients. They can be swapped with regular potatoes or butternut squash if you prefer. -
1 red onion, sliced
Red onions add a subtle sweetness and balance the dish beautifully. Yellow or white onions work well too! -
3 cloves garlic, minced
Garlic is the hero of many dishes, adding depth and flavor. If you want a milder taste, you can use garlic powder. -
2 tbsp olive oil
This helps everything roast nicely and adds healthy fats. You can replace olive oil with avocado oil if you prefer. -
1 tsp dried thyme
A classic herb for fall dishes. Fresh thyme is fantastic, too—just double the amount if using fresh! -
1 tsp paprika
This adds warmth and a touch of smokiness to the dish. Feel free to use smoked paprika for an even deeper flavor! -
Salt and pepper to taste
Essential for enhancing all the wonderful flavors in the dish. Always season to your liking!
Step-by-Step Instructions
Now that we have our ingredients lined up, let’s get to the part where the magic happens! Here’s how to prepare this cozy fall dinner:
-
Preheat Your Oven
Start by preheating your oven to 400°F (200°C). This ensures everything roasts evenly and gets that gorgeous golden-brown color. -
Prepare the Veggies
Grab a large mixing bowl and toss the halved Brussels sprouts, diced sweet potatoes, and sliced red onion together. Don’t worry if they look a little crowded—once they roast, they’ll shrink down! -
Season the Vegetables
Drizzle your veggies with olive oil, sprinkle in the minced garlic, thyme, paprika, salt, and pepper. Give everything a good toss until all the vegetables are well coated in those spices. Pro tip: Use your hands for this! It’s a great way to ensure every piece gets love. -
Arrange on the Baking Sheet
Spread the seasoned veggies on one side of a large baking sheet. Don’t overcrowd them, or they’ll steam instead of roast. On the other side, place the chicken thighs skin-side up. Drizzle them with a little more olive oil, and season with salt, pepper, and a sprinkle of paprika for that extra oomph. -
Time to Roast
Pop the baking sheet into your preheated oven and roast for about 30-35 minutes. You want the chicken to be cooked through and the vegetables to be tender and caramelized. The skin on the chicken should be crispy and golden, just like those good memories from your childhood! -
Check for Doneness
Use a meat thermometer to ensure your chicken thighs have reached an internal temperature of 165°F (74°C). If they’re not there yet, give them a few extra minutes! -
Let It Rest
Once everything is out of the oven, let it sit for about 5 minutes before serving. This allows the juices to redistribute in the chicken, making it tender and juicy.
Serving Suggestions
Now, let’s talk presentation! Serve the chicken thighs nestled among the roasted Brussels sprouts and sweet potatoes. Don’t forget to drizzle any delicious juices left on the baking sheet over everything for added flavor. A sprinkle of fresh herbs like parsley or thyme on top adds a lovely touch. If you’re feeling extra fancy, a squeeze of lemon juice over the top brightens the whole dish beautifully!
Recipe Variations
Want to switch it up? Here are a few creative twists you can try:
-
Herb Swap: Substitute thyme with rosemary or sage for a different flavor profile. Both herbs scream fall!
-
Add Protein: Want to bulk it up? Toss in some cooked sausage or chickpeas for extra protein and heartiness.
-
Spicy Kick: Add a pinch of cayenne pepper or crushed red pepper flakes to the mix for a bit of heat.
-
Vegan Option: Try swapping the chicken for tofu or tempeh, and use vegetable broth instead of olive oil for seasoning (make sure to cook the tofu beforehand for the best texture).
-
Cranberry Flair: Toss a handful of dried cranberries or pomegranate seeds into the veggies in the last few minutes of roasting for a sweet-tart twist.
Chef’s Notes
Over the years, this recipe has evolved along with my cooking style. I remember the first time I made this myself; it felt like a rite of passage. My dad was there, guiding me through each step with patience and a few well-timed dad jokes! This recipe captures not only the essence of cozy comfort food but also the spirit of cooking together and making lasting memories with loved ones.
FAQs and Troubleshooting
-
Why are my chicken thighs not crispy?
Ensure you’re using skin-on chicken thighs and that your oven is properly preheated. A crowded pan can also cause steaming rather than roasting, so keep space between your ingredients. -
What if my veggies are burning?
If you notice your vegetables browning too quickly, try lowering the oven temperature a bit and checking for doneness more frequently. -
Can I make this ahead?
Absolutely! You can prep the ingredients and store them in the fridge, then roast them when it’s time to eat. -
How do I store leftovers?
Store any leftovers in an airtight container in the fridge for up to 3 days. Reheat gently in the microwave or oven to avoid drying out the chicken.
Nutritional Info
This cozy one-pan meal is not only delicious but also nutritious! Here’s a quick breakdown per serving:
- Calories: Approximately 450
- Protein: 35g
- Carbohydrates: 30g
- Fat: 20g
- Fiber: 7g
It’s packed with protein from the chicken and fiber from the veggies, giving you a balanced meal that fuels your body and keeps you satisfied. Plus, the vitamins from the sweet potatoes and Brussels sprouts are an added bonus!
Final Thoughts
Take a moment to step back and appreciate this hearty meal you’ve created. Cooking is more than just following a recipe; it’s about love, family, and making connections. So, gather around the table, share stories, and create memories—you’re bound to have a special moment with each bite.
Thank you for joining me on this cozy fall culinary journey! I hope this one-pan chicken and veggie dish warms your heart and home just like it did for me growing up. Happy cooking, and I can’t wait to hear how it turns out for you!
Print
Cozy One-Pan Chicken Dinner
- Total Time: 50 minutes
- Yield: 4 servings 1x
- Diet: Gluten-Free
Description
A warm, hearty one-pan meal featuring roasted chicken thighs, Brussels sprouts, and sweet potatoes, perfect for cozy fall evenings.
Ingredients
- 1 lb chicken thighs
- 2 cups Brussels sprouts, halved
- 2 cups sweet potatoes, diced
- 1 red onion, sliced
- 3 cloves garlic, minced
- 2 tbsp olive oil
- 1 tsp dried thyme
- 1 tsp paprika
- Salt and pepper to taste
Instructions
- Preheat your oven to 400°F (200°C).
- Prepare a large mixing bowl and toss the halved Brussels sprouts, diced sweet potatoes, and sliced red onion together.
- Season the vegetables with olive oil, minced garlic, thyme, paprika, salt, and pepper.
- Arrange the seasoned veggies on one side of a large baking sheet, and on the other side, place the chicken thighs skin-side up.
- Drizzle the chicken with more olive oil and season with salt, pepper, and paprika.
- Roast in the preheated oven for 30-35 minutes until the chicken is cooked through and the vegetables are tender.
- Check the chicken’s internal temperature to ensure it reaches 165°F (74°C).
- Let it sit for about 5 minutes before serving.
Notes
For variations, consider swapping herbs or adding extra protein. Store leftovers in an airtight container for up to 3 days.
- Prep Time: 15 minutes
- Cook Time: 35 minutes
- Category: Main Course
- Method: Baking
- Cuisine: American
Nutrition
- Serving Size: 1 serving
- Calories: 450
- Sugar: 6g
- Sodium: 500mg
- Fat: 20g
- Saturated Fat: 5g
- Unsaturated Fat: 10g
- Trans Fat: 0g
- Carbohydrates: 30g
- Fiber: 7g
- Protein: 35g
- Cholesterol: 80mg
Keywords: cozy dinner, one-pan meal, fall recipes, chicken dinner, vegetable roast
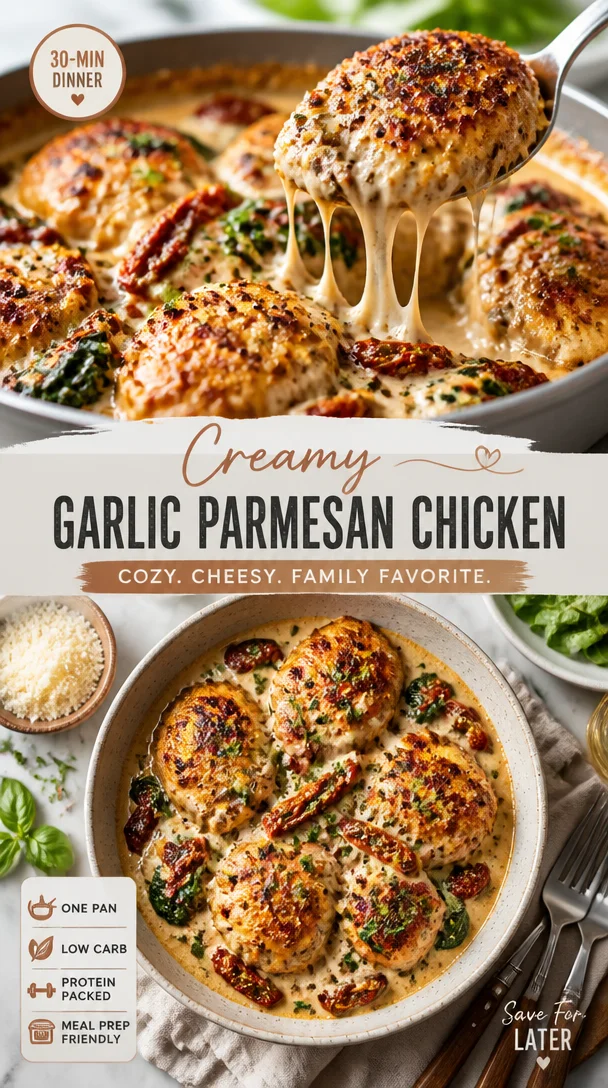
This Fall Dinner: A Cozy, Family-Approved Weeknight Favorite
The Fall Dinner Everyone Looks Forward to Every Year Awaits!
Ah, fall—the season that wraps you in its cozy embrace and invites you to indulge in the warm flavors of comfort food. As the leaves turn golden and the air becomes crisp, there’s one dinner that everyone eagerly anticipates year after year. Yes, you guessed it—it’s the beloved Thanksgiving feast!
There’s something magical about gathering around a table overflowing with delicious dishes, laughter, and cherished memories. Whether you’re a seasoned chef or just dipping your toes into the culinary waters, this is the time when everyone becomes an avid cook. It’s a culinary stage where everyone shines, from Grandma’s secret stuffing recipe to that pumpkin pie that makes the world go ’round.
So, grab your apron, and let’s dive into this year’s Thanksgiving dinner that will have everyone begging for seconds—and maybe even thirds! With the perfect turkey at its center, accompanied by rich stuffing, creamy mashed potatoes, crisp green beans, tangy cranberry sauce, and a slice of heavenly pumpkin pie, this meal is as much about the food as it is about the love it brings to our hearts.
This blog post will take you through the steps of preparing this stunning spread, share my personal memories tied to these dishes, offer some clever kitchen tips, and explore variations that will keep things exciting. Together, we’ll turn this fall dinner into an unforgettable experience loved by all.
Personal Story
I still remember the first Thanksgiving I ever helped cook. I was around 10 years old, standing on a stool to reach the counter, excitement bubbling in my chest. My mom had decided this was my year to learn how to prepare the turkey—our family’s centerpiece dish. I can still see her guiding my hands, showing me how to carefully rub the bird with spices, introducing flavors that would dance together in the oven.
As the turkey roasted, the tantalizing aroma filled our home, wrapping us in warmth and comfort. We played games in the living room while sneaking bites of stuffing, our giggles mingling with the sizzling sounds from the kitchen. Once dinner was served, the table was breathtaking: a feast fit for kings and queens!
That year, I learned not just how to cook a meal, but created a rhythm of family gatherings that I carry into my own home today. Those meals were not just about food, but shared joy, love, and the wonderful connections that come from sitting around the dinner table. That experience ignited my passion for cooking and made me realize that food is not just sustenance; it’s an experience, a story, and a hug in the form of deliciousness. So, let’s carry this tradition into our own kitchens!
Ingredients
To recreate the Thanksgiving classic that everyone dreams about, here’s what you’ll need:
-
2 lbs of turkey: The star of the show! Choose a fresh turkey if possible, which tends to be juicier than frozen. If you’re serving a smaller gathering, feel free to adjust the size accordingly, usually about 1 pound per person is a safe bet.
-
1 cup of stuffing: You can opt for store-bought or make your own from bread, herbs, and vegetables. Bread cubes such as sourdough or whole wheat add depth. If you prefer gluten-free, substitute with gluten-free breadcrumbs or quinoa.
-
4 cups of mashed potatoes: Creamy and buttery, these are the ultimate comfort food. Use russet or Yukon Gold potatoes for the best texture. For a twist, try substituting some of the butter with sour cream or buttermilk for extra creaminess.
-
2 cups of green beans: Fresh green beans bring a vibrant pop of color and crunch. Snap off the ends before cooking. Want a gourmet touch? Blanch them lightly before sautéing with garlic and olive oil.
-
1 cup of cranberry sauce: A tart and sweet counterpoint to the savory dishes. You can certainly buy a can of it, but homemade is always a delightful surprise. For a twist, try adding orange zest or a splash of balsamic vinegar.
-
1 pumpkin pie: The iconic Thanksgiving dessert! You can make it from scratch using fresh or canned pumpkin, or quickly whip up a store-bought version (no judgment here!). Add a dollop of whipped cream for the perfect finish!
Step-by-Step Instructions
Now that you have your ingredients, let’s break this down into simple, easy-to-follow steps!
Preparing the Turkey
-
Preheat the Oven: Start by preheating your oven to 325°F (165°C). Setting the stage for that beautiful golden bird!
-
Prep the Turkey: Gently pat your turkey dry with paper towels to help crisp the skin. Rub a generous amount of salt and pepper all over the turkey, including the cavity. This will enhance the flavor tremendously!
-
Seasoning: For an extra special touch, add herbs like rosemary, thyme, and sage under the skin and in the cavity. These flavors will perfume the meat as it roasts, creating a sensational aroma.
-
Stuff the Turkey: If you’re using stuffing, fill the cavity of the turkey, but don’t pack it too tightly. The stuffing needs room to expand as it cooks (and trust me, it will soak up those turkey juices like a sponge).
-
Roasting: Place the turkey breast side up on a roasting pan. Pour a bit of broth or water into the pan to keep the environment humid (which equals juicy turkey!). Roast for about 13-15 minutes per pound. A meat thermometer inserted into the thickest part of the thigh should read 165°F (74°C).
-
Baste: Halfway through cooking, baste the turkey with the pan juices. This helps to keep the meat moist and gives it that perfect golden brown color.
-
Resting: Once done, let the turkey rest for at least 20-30 minutes before carving. This step is crucial! Resting allows the juices to redistribute throughout the meat.
Making the Mashed Potatoes
-
Prep and Boil: Peel the potatoes and cut them into similar-sized chunks for even cooking. Place them in a pot, cover with cold water, salt, and boil until fork-tender (about 15-20 minutes).
-
Draining: Once cooked, drain the potatoes well and return them to the pot. This helps steam evaporate, preventing watery mashed potatoes!
-
Mashing: Add a generous scoop of butter, a splash of milk, and a pinch of salt and pepper before mashing away. For added creaminess, consider using sour cream or cream cheese. Mash until smooth and creamy, but don’t overdo it—lumpy is part of the charm!
Cooking the Green Beans
-
Prep: Wash and trim the ends off your green beans.
-
Sautéing: Heat a tablespoon of olive oil in a skillet over medium heat. Add minced garlic (if using), and sauté until fragrant. Toss your green beans in and cook until they’re just tender, about 5-7 minutes. Season with salt and pepper to taste.
Assembling your Feast
-
Cranberry Sauce: If making homemade cranberry sauce, simmer fresh cranberries with sugar and water for about 10-15 minutes until they burst and create a thickened sauce. Let cool before serving.
-
Pumpkin Pie: If you’re baking your pumpkin pie, follow the recipe on the pie crust or pumpkin filling carefully. Let it chill in the fridge for a couple of hours—this improves the flavor and texture.
-
Plating: Now, for the grand finale! Carve the turkey and arrange the slices beautifully on a large platter. Next, scoop generous servings of mashed potatoes, stuffing, and green beans around the turkey. Don’t forget a bowl of cranberry sauce and a beautiful slice of pumpkin pie to complete the table!
Serving Suggestions
Your Thanksgiving table should be a feast for the eyes as well as the stomach! Arrange the turkey in the center, with colorful sides cascading around it. Consider garnishing the turkey platter with fresh herbs or fruit slices for an eye-pleasing arrangement.
For serving utensil suggestions, use large serving spoons for mashed potatoes, and a ladle for your cranberry sauce—because nobody wants a messy serving experience! Encourage your guests to build their own plates, creating the perfect combination of savory and sweet that suits their taste buds.
Recipe Variations
-
Flavorful Stuffing: Swap out traditional bread stuffing for cornbread or wild rice stuffing. You can even add in sautéed apples or cranberries for a sweet twist.
-
Savory Mashed Potatoes: Experiment with garlic or roasted cauliflower added to your mashed potatoes. For an indulgent twist, try adding truffle oil or cheese!
-
Green Bean Almondine: Add toasted almonds to your green beans for a delightful crunch and a flavor upgrade.
-
Zesty Cranberry Sauce: Add jalapeños for a spicy kick or orange zest and ginger for a citrusy flair to your cranberry sauce.
-
Pumpkin Cheesecake: For a twist on the traditional pumpkin pie, whip up a rich pumpkin cheesecake topped with whipped cream. Your guests will love it!
Chef’s Notes
Over the years, this Thanksgiving recipe has come to resemble a family tradition and it has evolved beautifully. My mom’s original turkey recipe inspired my adjustments. I had fun experimenting with different flavor profiles, added spices, and butter tricks until I found the balance everyone loves today.
Sometimes, the cooking process has its silly moments, like the time my dog stole a chunk of turkey while my back was turned. But those funny moments in the kitchen are what make the experience unforgettable. I encourage you to embrace imperfection in your cooking—those moments become cherished stories and laughs during the holiday gatherings!
FAQs and Troubleshooting
-
What if my turkey is undercooked?: If you find your turkey isn’t at the right internal temperature when you’re ready to serve, quickly return it to the oven, tent with foil, and keep an eye on it until cooked through.
-
How do I fix gluey mashed potatoes?: If you find yourself with gluey potatoes, it’s likely they were over-mashed or overcooked. Unfortunately, there’s no totally foolproof fix, but try adding sour cream or crème fraîche to lighten the texture.
-
What’s the best way to reheat leftovers?: The best way to reheat turkey is to slice it and place it in a baking dish with a little broth, covering it with foil to keep moisture in. For mashed potatoes, stir in a splash of milk and reheat in the oven or on the stovetop to revive creaminess.
-
Can I prepare dishes ahead of time?: Absolutely! You can prep the stuffing days in advance and store it in the fridge until it’s time to bake. For the mashed potatoes, consider making them the day before, storing in an airtight container, and reheating on the day of.
Nutritional Info
Thanksgiving dinner is often indulgent, but you can balance your plate for a healthier twist! Here’s a rough estimate of nutritional information per serving (assuming 1/6 of a turkey and respective sides):
- Calories: 900-1200 (depending largely on portion and added ingredients)
- Protein: 50-60g (from turkey, stuffing, and any added proteins)
- Carbohydrates: 70-90g (primarily from potatoes and stuffing)
- Fat: 40-50g (largely from the turkey skin, butter, and creamy sides)
- Fiber: 5-7g (thanks to those green beans and whole grains in stuffing)
Remember, this meal is meant to be enjoyed! With balance and moderation, you can savor every delicious bite.
Final Thoughts
Thanksgiving dinner is more than just a meal; it’s an experience steeped in love, laughter, and tradition. As a friendly reminder, allow yourself to enjoy the cooking process just as much as the meal itself. Burnt edges and overcooked vegetables are all part of the journey!
In gathering around the table with your family and friends, you’re not just filling bellies—you’re creating lasting memories that will be shared for years to come. From my kitchen to yours, I hope this guide inspires you to create a fall feast that is cherished by all. Happy cooking and happy eating!
Print
Thanksgiving Dinner
- Total Time: 180 minutes
- Yield: 6 servings 1x
- Diet: None
Description
A classic Thanksgiving feast featuring turkey, stuffing, mashed potatoes, green beans, cranberry sauce, and pumpkin pie.
Ingredients
- 2 lbs of turkey
- 1 cup of stuffing
- 4 cups of mashed potatoes
- 2 cups of green beans
- 1 cup of cranberry sauce
- 1 pumpkin pie
Instructions
- Preheat the oven to 325°F (165°C).
- Prep the turkey by patting it dry and rubbing it with salt and pepper.
- Season with herbs like rosemary, thyme, and sage.
- Stuff the turkey with stuffing if using.
- Roast the turkey for 13-15 minutes per pound until it reaches 165°F (74°C).
- Baste halfway through cooking with pan juices.
- Rest the turkey for 20-30 minutes before carving.
- Prep the potatoes by peeling and cutting them into chunks.
- Boil the potatoes until fork-tender, about 15-20 minutes.
- Drain and return the potatoes to the pot, then mash with butter and milk.
- Wash and trim the green beans.
- Sauté green beans with garlic in olive oil until just tender, about 5-7 minutes.
- Prepare homemade cranberry sauce if desired.
- Bake the pumpkin pie following recipe instructions.
- Plate the turkey and side dishes on a serving platter for the grand finale.
Notes
Feel free to add your own favorite sides or variations!
- Prep Time: 60 minutes
- Cook Time: 120 minutes
- Category: Main Course
- Method: Roasting
- Cuisine: American
Nutrition
- Serving Size: 1 serving
- Calories: 1000
- Sugar: 20g
- Sodium: 600mg
- Fat: 50g
- Saturated Fat: 20g
- Unsaturated Fat: 25g
- Trans Fat: 0g
- Carbohydrates: 90g
- Fiber: 7g
- Protein: 60g
- Cholesterol: 120mg
Keywords: Thanksgiving, turkey, stuffing, mashed potatoes, pumpkin pie

Fall Brown Butter Maple Sweet Potato Quick Bread (One-Bowl)
Fall Brown Butter Maple Sweet Potato Bread
Introduction
Hey there, food lovers! As the leaves start to change and there’s a crispness in the air, it’s the perfect time to cozy up in the kitchen and whip up something that fills your home with warmth and delightful aromas. Welcome to my blog, where today we’re diving headfirst into a mouthwatering Fall Brown Butter Maple Sweet Potato Bread. Yes, you heard that right! This isn’t just any bread; it’s a slice of autumn perfection!
Imagine the rich, nutty flavor of brown butter, the comforting sweetness of maple, and the delightful earthiness of sweet potatoes all wrapped up in one delicious loaf. This recipe is not only super easy to make, but it also screams comfort and nostalgia, making it a must-have for your fall baking repertoire. And you know what’s even better? It fills your kitchen with the heavenly scent of baking that’s so inviting, your loved ones will flock to the kitchen like bees to honey.
This sweet potato bread is perfect for breakfast, an afternoon snack, or even as a dessert. Whether you’re enjoying it plain or slathered with a little butter, each bite will evoke warm memories of fall festivities. So, go ahead, grab your apron and let’s get this bread rising with a sprinkle of love and a dash of fun!
Personal Story
As I reminisce about my childhood, one vibrant memory floods my mind: Thanksgiving mornings spent in my grandmother’s cozy kitchen, where the anticipation of the feast filled the air. I can almost hear the soft crackling of the wood fireplace and the clanking of pots and pans, paired with laughter echoing around the family table. It was during one of those mornings that I tasted my first sweet potato bread. Grandma had perfected her recipe over the years, and as I sat there, a slice in hand, I couldn’t help but smile. The warm sweetness wrapped around my taste buds, and I was smitten!
Now, every time I bake sweet potato bread, I feel that same warmth wash over me. It reminds me of family, love, and the simple joy of sharing food. This particular recipe, featuring brown butter and maple syrup, took years to perfect, but it’s worth every trial and error. Just like those early mornings with Grandma, I believe cooking is about creating memories, and I hope this bread brings a little magic into your kitchen!
Ingredients
-
1 cup (240 ml) sweet potato puree
Sweet potatoes are the star of this bread, bringing natural sweetness and moisture. You can use store-bought puree or roast and blend fresh sweet potatoes for an extra flavor boost. -
6 tablespoons (85 g) brown butter
Brown butter adds a rich, nutty depth that elevates the entire loaf. To brown butter, simply heat unsalted butter in a pan until it melts and turns golden brown. Watch closely to avoid burning! -
1/3 cup (80 ml) maple syrup
Pure maple syrup is a must for that signature fall flavor. If you’re in a pinch, you can substitute with agave or honey, but the maple has a unique taste that’s hard to replace. -
1 3/4 cups (220 g) all-purpose flour
The base of your loaf, all-purpose flour provides the structure. For a gluten-free option, try a 1:1 gluten-free flour blend. -
1 teaspoon baking soda
Baking soda works as a leavening agent, helping your bread rise and become fluffy. Make sure it’s fresh for the best results. -
1 teaspoon ground cinnamon
Cinnamon is a must-have for this recipe! Its warm, sweet aroma is like a hug in spice form—perfect for fall. -
1/4 teaspoon ground nutmeg
Just a dash of nutmeg adds a hint of complexity. If you don’t have it, feel free to leave it out, but it does bring an extra layer of flavor. -
1/2 teaspoon salt
A little salt enhances all the flavors in the bread, balancing the sweetness and creating a rounded taste. -
2 large eggs
Eggs provide moisture and help bind the ingredients together. You can substitute them with flax eggs for a vegan option. -
1 teaspoon vanilla extract
A splash of vanilla adds warmth and richness. Choose pure vanilla extract for the best flavor—it really makes a difference!
Step-by-Step Instructions
-
Preheat Your Oven: Start by preheating your oven to 350°F (175°C) and grease a 9×5 inch loaf pan. This ensures that your bread doesn’t stick, giving you a beautiful release when it’s done baking.
-
Brown the Butter: In a medium saucepan, melt the butter over medium heat, stirring frequently. Keep an eye on it as it transforms from a liquid to a foamy state, and then to a golden color with nutty aromas. The whole process takes about 5-7 minutes, and trust me, it’s worth the wait!
-
Mix the Wet Ingredients: In a large mixing bowl, combine the sweet potato puree, brown butter (let it cool slightly first), maple syrup, eggs, and vanilla extract. Whisk until everything is well combined, inviting all those flavors to unite.
-
Combine Dry Ingredients: In another bowl, whisk together the flour, baking soda, cinnamon, nutmeg, and salt. This helps to ensure that the leavening agent is evenly distributed throughout the flour.
-
Mix It All Together: Gradually add the dry ingredients to the wet ingredients, mixing until just combined. Be careful not to overmix! It’s totally cool if a few lumps remain; they’ll bake out in the oven.
-
Pour and Smooth: Pour the batter into your prepared loaf pan and smooth the top with a spatula. This helps to create an even bake. Plus, it’s super satisfying to make everything neat and tidy!
-
Bake Away: Bake for about 55-60 minutes or until a toothpick inserted into the center comes out clean. Your kitchen will smell heavenly! If the top is browning too quickly, you can tent it with aluminum foil midway through baking.
-
Cool This Beauty Down: Once baked, allow your bread to cool in the pan for about 10 minutes before transferring it to a wire rack. Try not to slice into it while it’s still warm, although I know it’ll be tempting!
Serving Suggestions
When it comes to serving your Fall Brown Butter Maple Sweet Potato Bread, think cozy and charming. Slice thick pieces (or thin if you’re feeling fancy!) and plate them with a pat of softened butter that melts right into the warm bread. You could also drizzle a little extra maple syrup or honey on top for a sweet touch.
For a delightful brunch, serve alongside fresh fruit, yogurt, or a warm latte. You can also toast the slices for a little extra crunch; trust me, that golden, crispy edge goes perfectly with the soft interior!
For those dinner parties or holiday gatherings, a slice of this bread alongside a scoop of creamy vanilla ice cream or a dollop of whipped cream can turn it into a lovely dessert.
Recipe Variations
-
Nutty Delight: Toss in some chopped walnuts or pecans for a little crunch and added flavor. Just be sure to toast them first for that extra nutty aroma!
-
Pumpkin Spice Fusion: If you want to switch things up, substitute the sweet potato puree with pumpkin puree and add a teaspoon of pumpkin pie spice instead of cinnamon and nutmeg.
-
Choco-Berry Bliss: Fold in chocolate chips and dried cranberries to give a sweet and tart burst in every bite. Who doesn’t love a surprise treat?
-
Cinnamon Swirl: Before pouring the batter into the pan, sprinkle a mixture of cinnamon and sugar in the middle of the batter for a delightful cinnamon swirl bread.
-
Vegan-Friendly: Swap out the eggs with flax eggs (1 tablespoon flaxseed meal mixed with 2.5 tablespoons water per egg) and use almond milk instead of butter.
Chef’s Notes
As with any recipe, this one has evolved over the years. I’ve experimented with different sweeteners, flours, and even added ingredients. I remember the first time I tried adding brown butter; it felt like an epiphany! The flavor it lent to the bread was transformative.
And hey, if you ever have leftover sweet potato puree (which you totally should because it’s delicious), feel free to throw it into pancakes, smoothies, or even mac and cheese. Waste not, want not, am I right?
A funny little story: one time, I was so excited about this recipe that I forgot to add the eggs and didn’t realize until the batter was in the oven. Miraculously, it still turned out tasty, but it was a heavy, dense bread! You bet I learned to double-check my ingredients after that!
FAQs and Troubleshooting
-
Why did my bread come out too dense?
It’s likely due to overmixing or excessive flour. Make sure to mix until just combined and use the spoon-and-level method for measuring flour. -
Can I use canned sweet potato puree?
Yes! Just ensure you’re using plain, unsweetened puree for the best flavor. -
How can I tell if my bread is done?
Use a toothpick! Insert it into the center, and if it comes out clean or with a few crumbs, it’s done. If it’s wet with batter, give it more time. -
What should I do if my bread is browning too quickly?
If you find that the top is getting too dark before the inside is fully baked, simply cover it loosely with aluminum foil and continue baking.
Nutritional Info
Let’s talk numbers! Each slice of this delightful Fall Brown Butter Maple Sweet Potato Bread has an estimated nutritional breakdown that goes something like this:
- Calories: About 180 calories
- Carbohydrates: Approximately 28g
- Protein: Around 3g
- Fat: About 7g
- Fiber: Roughly 2g
These values can vary based on portion size and specific ingredients used, but it gives you a general idea to feel good about this tasty treat packed with wholesome ingredients!
Final Thoughts
Embracing the flavors of fall with this Fall Brown Butter Maple Sweet Potato Bread is bound to become a cherished tradition in your household. Whether you’re baking for family, friends, or just that wonderful inner foodie spirit, this recipe is sure to be a hit. Remember, cooking is about the love and joy we put into it, and this bread is a perfect canvas for sharing that warmth with others.
So, what are you waiting for? Head to the kitchen and let’s bake up some memories together! And as always, I can’t wait to see how your bread turns out. Drop me a comment or tag me on social media with your baking adventures. Happy baking, foodies!
Print
Fall Brown Butter Maple Sweet Potato Bread
- Total Time: 75 minutes
- Yield: 12 slices 1x
- Diet: Vegetarian
Description
A warm, comforting loaf of bread featuring the rich flavors of brown butter, maple, and sweet potatoes, perfect for fall.
Ingredients
- 1 cup (240 ml) sweet potato puree
- 6 tablespoons (85 g) brown butter
- 1/3 cup (80 ml) maple syrup
- 1 3/4 cups (220 g) all-purpose flour
- 1 teaspoon baking soda
- 1 teaspoon ground cinnamon
- 1/4 teaspoon ground nutmeg
- 1/2 teaspoon salt
- 2 large eggs
- 1 teaspoon vanilla extract
Instructions
- Preheat your oven to 350°F (175°C) and grease a 9×5 inch loaf pan.
- Brown the butter in a medium saucepan over medium heat, stirring frequently for about 5-7 minutes until golden and nutty.
- Mix the sweet potato puree, brown butter (slightly cooled), maple syrup, eggs, and vanilla extract in a large bowl.
- Combine the flour, baking soda, cinnamon, nutmeg, and salt in another bowl.
- Mix the dry ingredients into the wet ingredients until just combined.
- Pour the batter into the prepared loaf pan and smooth the top.
- Bake for about 55-60 minutes or until a toothpick inserted in the center comes out clean.
- Cool the bread in the pan for 10 minutes before transferring to a wire rack.
Notes
Serve warm with butter or maple syrup. Perfect for breakfast, snacks, or dessert.
- Prep Time: 15 minutes
- Cook Time: 60 minutes
- Category: Dessert
- Method: Baking
- Cuisine: American
Nutrition
- Serving Size: 1 slice
- Calories: 180
- Sugar: 10g
- Sodium: 150mg
- Fat: 7g
- Saturated Fat: 4g
- Unsaturated Fat: 3g
- Trans Fat: 0g
- Carbohydrates: 28g
- Fiber: 2g
- Protein: 3g
- Cholesterol: 60mg
Keywords: fall bread, sweet potato bread, maple bread, autumn baking

One-Pan Maple Bourbon Pecan Chicken for Busy Weeknights
Maple Bourbon Pecan Chicken: A Delicious Journey of Flavors
Hey foodies! Beau Collier here, and I’m super excited to invite you into my kitchen to whip up something seriously delightful: Maple Bourbon Pecan Chicken. If you’re looking for a dish that’s packed with flavor and a touch of sophistication (but still feels comforting), then you’ve hit the jackpot! This recipe marries the sweet notes of maple syrup with the smoky warmth of bourbon, all coated over juicy, tender chicken thighs and crunchy pecans. It’s a culinary love story that’s waiting to happen in your kitchen, and I promise it’s easier than it sounds!
When I think about Maple Bourbon Pecan Chicken, I can’t help but reminisce about the first time I made it at a family gathering. It was one of those crisp autumn evenings, and we had gathered around for a cozy dinner after a long day of apple picking. I wanted to impress everyone with something special, yet easy enough to keep me out of the kitchen as much as possible. I opted for this dish, and the moment that sweet aroma of maple and bourbon wafted through the air, everyone started flocking to the kitchen like moths to a flame. The result? An absolutely delicious meal and a collection of belly-full, happy family members. And trust me, if I can do it, so can you!
So, roll up your sleeves, take off that apron you’ve been waiting to break in, and let’s dive into this recipe together!
Ingredients
Here’s what you’ll need to recreate this delicious Maple Bourbon Pecan Chicken:
-
1-1/4 lbs boneless, skinless chicken thighs
Why thighs, you ask? They’re juicy, forgiving, and will stay tender even if you forget them a sec on the heat! If you prefer chicken breasts or even turkey thighs, feel free to swap them out! -
1/2 cup gluten-free flour
Perfect for creating that crispy coating! If gluten isn’t an issue for you, regular all-purpose flour works just as well, and if you’re in a pinch, cornstarch can give you a delightful crunch too. -
Salt and pepper (to taste)
The building blocks of flavor. Don’t skimp! Seasoning generously makes all the difference. I like to use coarse sea salt for that robust burst of flavor. -
2 Tablespoons extra virgin olive oil
This is your cooking oil. It adds richness and helps crisp up the chicken. Avocado oil makes a great substitute because it has a high smoke point. -
2 Tablespoons bourbon (Maker’s Mark recommended)
This ingredient is what takes this dish to the next level! You can use other types of bourbon or even whiskey, if you’re in a bind, but I love the subtle sweetness of Maker’s Mark. -
1 cup chicken broth
This adds depth to your sauce. Homemade is best, but store-bought is a totally legit shortcut! -
1/4 cup pecans (chopped)
These nutty gems add that crunchy finish! If you’re not a fan of pecans, walnuts are a great alternative. -
3 Tablespoons pure maple syrup (not pancake syrup)
Maple syrup is the star here, providing that sweet, caramel-like essence. Trust me, go for the pure stuff—it’s a game changer! -
1 Tablespoon Dijon mustard
This adds a zingy kick and balances the sweetness of the maple syrup perfectly. However, if you’ve got other mustards at hand, like honey mustard or spicy brown, they can work too! -
1 Tablespoon apple cider vinegar
Acidity is critical for balance. If you don’t have apple cider vinegar, white wine vinegar or champagne vinegar will do the trick! -
2 teaspoons gluten-free reduced-sodium Tamari (or soy sauce if not GF)
A little umami boost! Regular soy sauce works for non-GF, and you could even use coconut aminos for a sweeter, soy-free twist. -
1/4 teaspoon dried rosemary (crushed between your fingers)
This adds a fragrant earthiness to the dish. If you have fresh rosemary, use that instead; just double the amount as fresh herbs are less potent.
Step-by-Step Instructions
Alright, let’s get down to the nitty-gritty! Here’s how to create your Maple Bourbon Pecan Chicken step by step:
-
Prep your chicken: Start by giving those chicken thighs a good rinse and pat them dry with paper towels. This helps the seasoning adhere better and gives you a lovely browning. Season the chicken with salt and pepper generously on both sides.
-
Flour it up: In a shallow dish, add the gluten-free flour. Dredge each chicken thigh in the flour, coating them evenly. Tap off any excess to avoid a floury mess in the pan. I like to keep one hand for the flour to avoid a sticky situation with both hands covered in the stuff!
-
Heat the pan: Grab a large skillet and drizzle in the olive oil. Heat it over medium-high heat until it shimmers but doesn’t smoke—this ensures a beautiful sear!
-
Sear the chicken: Place the floured chicken thighs in the hot skillet, spaced out so they aren’t overcrowded. Sear for about 5–7 minutes on each side until golden brown. Don’t move them around; let that lovely caramelization happen! This is where you can channel your inner chef and enjoy the sizzle!
-
Make the sauce: Once the chicken is browned, remove it from the skillet and set it aside on a plate. In the same pan, add the bourbon (WATCH OUT for that flame!), followed by the chicken broth, maple syrup, Dijon mustard, apple cider vinegar, Tamari, and the crushed rosemary. Give it a good stir, scraping any tasty bits off the bottom of the pan.
-
Return the chicken: Nestle those seared chicken thighs back into the skillet, coating them in the flavorful sauce. Bring it to a simmer, then cover the skillet and let it cook for about 20-25 minutes until the chicken is cooked through—juicy and tender.
-
Add pecans: Five minutes before serving, toss in the chopped pecans. Let them get all cozy in the pan, soaking up that tangy, sweet sauce!
-
Serve it up: Once the chicken is fully cooked, remove it from the skillet and let it rest for a couple of minutes. This allows all those juices to redistribute. Look at that beautiful sauce you’ve created—such a work of art!
Serving Suggestions
There’s nothing quite like presenting a dish that looks as good as it tastes! Here are some serving suggestions for your Maple Bourbon Pecan Chicken:
-
Plating: Arrange the chicken thighs on a large, rustic serving platter or individual plates. Drizzle the sauce generously over the chicken, and sprinkle with extra chopped pecans for that inviting crunch.
-
Sides: Pair it with creamy mashed potatoes or fluffy rice to soak up that addictive sauce, or roast some seasonal veggies like Brussels sprouts and carrots for a colorful, nutritious side.
-
Garnish: A sprig of fresh rosemary or parsley on top adds a vibrant pop of color and a touch of freshness!
Recipe Variations
Let’s get creative, shall we? Here are a few fun twists to give your Maple Bourbon Pecan Chicken a whole new flavor profile:
-
Maple Mustard Glaze: Instead of using mustard in the sauce, try blending more maple syrup with whole-grain mustard. It brings in a whole new depth of sweetness and tang!
-
Spicy Kick: Add a pinch of cayenne pepper to the flour mixture or stir in some red pepper flakes into the sauce for those who like it hot!
-
Fruit Fusion: Toss in some diced apples or pears into the sauce while it simmers for that sweet autumnal twist. They’ll caramelize beautifully and add freshness.
-
Herbicious Upgrade: Mix in a bit of fresh thyme or sage for a herby twist that complements the chicken and sauce perfectly.
-
Nut-Free Option: If you’re nut-sensitive or just not a fan, you can omit the pecans without losing the essence of the dish! Consider adding in sunflower seeds for a delightful crunch instead.
Chef’s Notes
Now, here’s a fun little tidbit from my kitchen adventures! I initially stumbled upon this recipe by accident when I realized I had bourbon and maple syrup just hanging out in my pantry. Feeling crafty and a bit hungry, I threw together what ended up being a family favorite. Over the years, I’ve experimented with different nuts and herbs, but the beauty of this dish is its simplicity and ability to adapt. You can bring your unique touch to it every time!
FAQs and Troubleshooting
1. Is it okay to use chicken breasts instead of thighs?
Absolutely! Just keep an eye on the cooking time as breasts can dry out rather quickly. Aim for an internal temperature of 165°F (75°C) to ensure they are perfectly cooked.
2. What if my sauce is too thick?
If you find the sauce has thickened too much, just add a little extra chicken broth or water until you reach your desired consistency.
3. Can I make this dish ahead of time?
You bet! This dish reheats beautifully. Just store the cooked chicken and sauce in an airtight container in the fridge for up to three days. Reheat on the stove over low heat, adding a splash of water or broth to loosen it up again.
4. What sides pair well with this dish?
Think comfort! Mashed potatoes, green beans, or a simple salad with a tangy vinaigrette serve beautifully alongside.
Nutritional Info
Here’s a quick overview of the nutritional content for one serving of Maple Bourbon Pecan Chicken (based on 4 servings):
- Calories: Approximately 325
- Protein: 28g
- Carbohydrates: 12g
- Fat: 18g (mostly unsaturated from olive oil and pecans)
- Sodium: 415mg
- Fiber: 1.5g
Of course, these values will vary based on specific brands and ingredients you use, so always feel free to adjust to meet your dietary needs!
Final Thoughts
And there you have it, my deliciously satisfying Maple Bourbon Pecan Chicken that’s destined to be the star of your weeknight dinners! Cooking doesn’t have to be an overwhelming task—it’s all about enjoyment, creativity, and a sprinkle of love. I hope this dish becomes a new staple in your kitchen and that it sparks some fun family gatherings and heartwarming memories, just like it did for me. So, put on your favorite playlist, unleash your inner chef, and let the culinary magic unfold. Happy cooking, friends!
Print
Maple Bourbon Pecan Chicken
- Total Time: 45 minutes
- Yield: 4 servings 1x
- Diet: Gluten-Free
Description
A delicious dish of chicken thighs coated in a sweet maple bourbon sauce, enhanced with crunchy pecans.
Ingredients
- 1–1/4 lbs boneless, skinless chicken thighs
- 1/2 cup gluten-free flour
- Salt and pepper (to taste)
- 2 Tablespoons extra virgin olive oil
- 2 Tablespoons bourbon (Maker’s Mark recommended)
- 1 cup chicken broth
- 1/4 cup pecans (chopped)
- 3 Tablespoons pure maple syrup (not pancake syrup)
- 1 Tablespoon Dijon mustard
- 1 Tablespoon apple cider vinegar
- 2 teaspoons gluten-free reduced-sodium Tamari (or soy sauce if not GF)
- 1/4 teaspoon dried rosemary (crushed)
Instructions
- Prep your chicken: Start by giving those chicken thighs a good rinse and pat them dry with paper towels. Season generously with salt and pepper.
- Flour it up: In a shallow dish, add the gluten-free flour. Dredge each chicken thigh in the flour, coating evenly.
- Heat the pan: Drizzle olive oil in a large skillet and heat over medium-high until shimmering.
- Sear the chicken: Place chicken thighs in the hot skillet and sear for about 5–7 minutes on each side until golden brown.
- Make the sauce: Remove chicken and add the bourbon, chicken broth, maple syrup, Dijon mustard, apple cider vinegar, Tamari, and crushed rosemary to the pan.
- Return the chicken: Nestle the chicken back into the skillet, coating it in the sauce. Bring to a simmer and cover, cooking for about 20-25 minutes.
- Add pecans: Five minutes before serving, stir in the chopped pecans.
- Serve it up: Remove chicken from skillet and let it rest for a few minutes before serving.
Notes
Consider pairing with creamy mashed potatoes or roasted veggies for a complete meal.
- Prep Time: 15 minutes
- Cook Time: 30 minutes
- Category: Main Course
- Method: Pan-Searing
- Cuisine: American
Nutrition
- Serving Size: 1 serving
- Calories: 325
- Sugar: 8g
- Sodium: 415mg
- Fat: 18g
- Saturated Fat: 3g
- Unsaturated Fat: 15g
- Trans Fat: 0g
- Carbohydrates: 12g
- Fiber: 1.5g
- Protein: 28g
- Cholesterol: 100mg
Keywords: chicken, maple syrup, bourbon, pecans, gluten-free