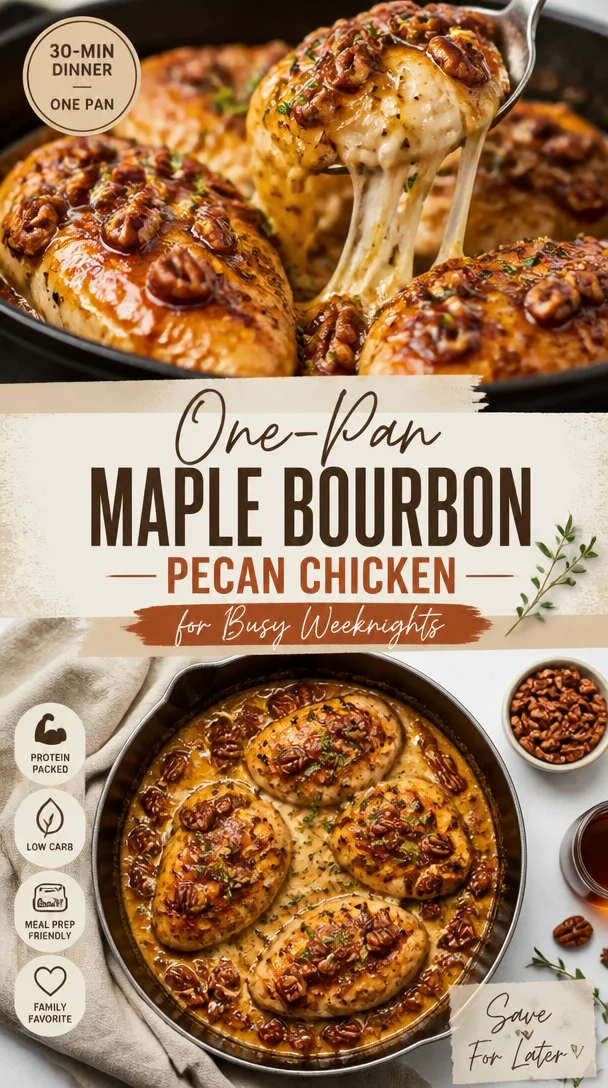
One-Pan Maple Bourbon Pecan Chicken for Busy Weeknights
Maple Bourbon Pecan Chicken: A Delicious Journey of Flavors
Hey foodies! Beau Collier here, and I’m super excited to invite you into my kitchen to whip up something seriously delightful: Maple Bourbon Pecan Chicken. If you’re looking for a dish that’s packed with flavor and a touch of sophistication (but still feels comforting), then you’ve hit the jackpot! This recipe marries the sweet notes of maple syrup with the smoky warmth of bourbon, all coated over juicy, tender chicken thighs and crunchy pecans. It’s a culinary love story that’s waiting to happen in your kitchen, and I promise it’s easier than it sounds!
When I think about Maple Bourbon Pecan Chicken, I can’t help but reminisce about the first time I made it at a family gathering. It was one of those crisp autumn evenings, and we had gathered around for a cozy dinner after a long day of apple picking. I wanted to impress everyone with something special, yet easy enough to keep me out of the kitchen as much as possible. I opted for this dish, and the moment that sweet aroma of maple and bourbon wafted through the air, everyone started flocking to the kitchen like moths to a flame. The result? An absolutely delicious meal and a collection of belly-full, happy family members. And trust me, if I can do it, so can you!
So, roll up your sleeves, take off that apron you’ve been waiting to break in, and let’s dive into this recipe together!
Ingredients
Here’s what you’ll need to recreate this delicious Maple Bourbon Pecan Chicken:
-
1-1/4 lbs boneless, skinless chicken thighs
Why thighs, you ask? They’re juicy, forgiving, and will stay tender even if you forget them a sec on the heat! If you prefer chicken breasts or even turkey thighs, feel free to swap them out! -
1/2 cup gluten-free flour
Perfect for creating that crispy coating! If gluten isn’t an issue for you, regular all-purpose flour works just as well, and if you’re in a pinch, cornstarch can give you a delightful crunch too. -
Salt and pepper (to taste)
The building blocks of flavor. Don’t skimp! Seasoning generously makes all the difference. I like to use coarse sea salt for that robust burst of flavor. -
2 Tablespoons extra virgin olive oil
This is your cooking oil. It adds richness and helps crisp up the chicken. Avocado oil makes a great substitute because it has a high smoke point. -
2 Tablespoons bourbon (Maker’s Mark recommended)
This ingredient is what takes this dish to the next level! You can use other types of bourbon or even whiskey, if you’re in a bind, but I love the subtle sweetness of Maker’s Mark. -
1 cup chicken broth
This adds depth to your sauce. Homemade is best, but store-bought is a totally legit shortcut! -
1/4 cup pecans (chopped)
These nutty gems add that crunchy finish! If you’re not a fan of pecans, walnuts are a great alternative. -
3 Tablespoons pure maple syrup (not pancake syrup)
Maple syrup is the star here, providing that sweet, caramel-like essence. Trust me, go for the pure stuff—it’s a game changer! -
1 Tablespoon Dijon mustard
This adds a zingy kick and balances the sweetness of the maple syrup perfectly. However, if you’ve got other mustards at hand, like honey mustard or spicy brown, they can work too! -
1 Tablespoon apple cider vinegar
Acidity is critical for balance. If you don’t have apple cider vinegar, white wine vinegar or champagne vinegar will do the trick! -
2 teaspoons gluten-free reduced-sodium Tamari (or soy sauce if not GF)
A little umami boost! Regular soy sauce works for non-GF, and you could even use coconut aminos for a sweeter, soy-free twist. -
1/4 teaspoon dried rosemary (crushed between your fingers)
This adds a fragrant earthiness to the dish. If you have fresh rosemary, use that instead; just double the amount as fresh herbs are less potent.
Step-by-Step Instructions
Alright, let’s get down to the nitty-gritty! Here’s how to create your Maple Bourbon Pecan Chicken step by step:
-
Prep your chicken: Start by giving those chicken thighs a good rinse and pat them dry with paper towels. This helps the seasoning adhere better and gives you a lovely browning. Season the chicken with salt and pepper generously on both sides.
-
Flour it up: In a shallow dish, add the gluten-free flour. Dredge each chicken thigh in the flour, coating them evenly. Tap off any excess to avoid a floury mess in the pan. I like to keep one hand for the flour to avoid a sticky situation with both hands covered in the stuff!
-
Heat the pan: Grab a large skillet and drizzle in the olive oil. Heat it over medium-high heat until it shimmers but doesn’t smoke—this ensures a beautiful sear!
-
Sear the chicken: Place the floured chicken thighs in the hot skillet, spaced out so they aren’t overcrowded. Sear for about 5–7 minutes on each side until golden brown. Don’t move them around; let that lovely caramelization happen! This is where you can channel your inner chef and enjoy the sizzle!
-
Make the sauce: Once the chicken is browned, remove it from the skillet and set it aside on a plate. In the same pan, add the bourbon (WATCH OUT for that flame!), followed by the chicken broth, maple syrup, Dijon mustard, apple cider vinegar, Tamari, and the crushed rosemary. Give it a good stir, scraping any tasty bits off the bottom of the pan.
-
Return the chicken: Nestle those seared chicken thighs back into the skillet, coating them in the flavorful sauce. Bring it to a simmer, then cover the skillet and let it cook for about 20-25 minutes until the chicken is cooked through—juicy and tender.
-
Add pecans: Five minutes before serving, toss in the chopped pecans. Let them get all cozy in the pan, soaking up that tangy, sweet sauce!
-
Serve it up: Once the chicken is fully cooked, remove it from the skillet and let it rest for a couple of minutes. This allows all those juices to redistribute. Look at that beautiful sauce you’ve created—such a work of art!
Serving Suggestions
There’s nothing quite like presenting a dish that looks as good as it tastes! Here are some serving suggestions for your Maple Bourbon Pecan Chicken:
-
Plating: Arrange the chicken thighs on a large, rustic serving platter or individual plates. Drizzle the sauce generously over the chicken, and sprinkle with extra chopped pecans for that inviting crunch.
-
Sides: Pair it with creamy mashed potatoes or fluffy rice to soak up that addictive sauce, or roast some seasonal veggies like Brussels sprouts and carrots for a colorful, nutritious side.
-
Garnish: A sprig of fresh rosemary or parsley on top adds a vibrant pop of color and a touch of freshness!
Recipe Variations
Let’s get creative, shall we? Here are a few fun twists to give your Maple Bourbon Pecan Chicken a whole new flavor profile:
-
Maple Mustard Glaze: Instead of using mustard in the sauce, try blending more maple syrup with whole-grain mustard. It brings in a whole new depth of sweetness and tang!
-
Spicy Kick: Add a pinch of cayenne pepper to the flour mixture or stir in some red pepper flakes into the sauce for those who like it hot!
-
Fruit Fusion: Toss in some diced apples or pears into the sauce while it simmers for that sweet autumnal twist. They’ll caramelize beautifully and add freshness.
-
Herbicious Upgrade: Mix in a bit of fresh thyme or sage for a herby twist that complements the chicken and sauce perfectly.
-
Nut-Free Option: If you’re nut-sensitive or just not a fan, you can omit the pecans without losing the essence of the dish! Consider adding in sunflower seeds for a delightful crunch instead.
Chef’s Notes
Now, here’s a fun little tidbit from my kitchen adventures! I initially stumbled upon this recipe by accident when I realized I had bourbon and maple syrup just hanging out in my pantry. Feeling crafty and a bit hungry, I threw together what ended up being a family favorite. Over the years, I’ve experimented with different nuts and herbs, but the beauty of this dish is its simplicity and ability to adapt. You can bring your unique touch to it every time!
FAQs and Troubleshooting
1. Is it okay to use chicken breasts instead of thighs?
Absolutely! Just keep an eye on the cooking time as breasts can dry out rather quickly. Aim for an internal temperature of 165°F (75°C) to ensure they are perfectly cooked.
2. What if my sauce is too thick?
If you find the sauce has thickened too much, just add a little extra chicken broth or water until you reach your desired consistency.
3. Can I make this dish ahead of time?
You bet! This dish reheats beautifully. Just store the cooked chicken and sauce in an airtight container in the fridge for up to three days. Reheat on the stove over low heat, adding a splash of water or broth to loosen it up again.
4. What sides pair well with this dish?
Think comfort! Mashed potatoes, green beans, or a simple salad with a tangy vinaigrette serve beautifully alongside.
Nutritional Info
Here’s a quick overview of the nutritional content for one serving of Maple Bourbon Pecan Chicken (based on 4 servings):
- Calories: Approximately 325
- Protein: 28g
- Carbohydrates: 12g
- Fat: 18g (mostly unsaturated from olive oil and pecans)
- Sodium: 415mg
- Fiber: 1.5g
Of course, these values will vary based on specific brands and ingredients you use, so always feel free to adjust to meet your dietary needs!
Final Thoughts
And there you have it, my deliciously satisfying Maple Bourbon Pecan Chicken that’s destined to be the star of your weeknight dinners! Cooking doesn’t have to be an overwhelming task—it’s all about enjoyment, creativity, and a sprinkle of love. I hope this dish becomes a new staple in your kitchen and that it sparks some fun family gatherings and heartwarming memories, just like it did for me. So, put on your favorite playlist, unleash your inner chef, and let the culinary magic unfold. Happy cooking, friends!
Print
Maple Bourbon Pecan Chicken
- Total Time: 45 minutes
- Yield: 4 servings 1x
- Diet: Gluten-Free
Description
A delicious dish of chicken thighs coated in a sweet maple bourbon sauce, enhanced with crunchy pecans.
Ingredients
- 1–1/4 lbs boneless, skinless chicken thighs
- 1/2 cup gluten-free flour
- Salt and pepper (to taste)
- 2 Tablespoons extra virgin olive oil
- 2 Tablespoons bourbon (Maker’s Mark recommended)
- 1 cup chicken broth
- 1/4 cup pecans (chopped)
- 3 Tablespoons pure maple syrup (not pancake syrup)
- 1 Tablespoon Dijon mustard
- 1 Tablespoon apple cider vinegar
- 2 teaspoons gluten-free reduced-sodium Tamari (or soy sauce if not GF)
- 1/4 teaspoon dried rosemary (crushed)
Instructions
- Prep your chicken: Start by giving those chicken thighs a good rinse and pat them dry with paper towels. Season generously with salt and pepper.
- Flour it up: In a shallow dish, add the gluten-free flour. Dredge each chicken thigh in the flour, coating evenly.
- Heat the pan: Drizzle olive oil in a large skillet and heat over medium-high until shimmering.
- Sear the chicken: Place chicken thighs in the hot skillet and sear for about 5–7 minutes on each side until golden brown.
- Make the sauce: Remove chicken and add the bourbon, chicken broth, maple syrup, Dijon mustard, apple cider vinegar, Tamari, and crushed rosemary to the pan.
- Return the chicken: Nestle the chicken back into the skillet, coating it in the sauce. Bring to a simmer and cover, cooking for about 20-25 minutes.
- Add pecans: Five minutes before serving, stir in the chopped pecans.
- Serve it up: Remove chicken from skillet and let it rest for a few minutes before serving.
Notes
Consider pairing with creamy mashed potatoes or roasted veggies for a complete meal.
- Prep Time: 15 minutes
- Cook Time: 30 minutes
- Category: Main Course
- Method: Pan-Searing
- Cuisine: American
Nutrition
- Serving Size: 1 serving
- Calories: 325
- Sugar: 8g
- Sodium: 415mg
- Fat: 18g
- Saturated Fat: 3g
- Unsaturated Fat: 15g
- Trans Fat: 0g
- Carbohydrates: 12g
- Fiber: 1.5g
- Protein: 28g
- Cholesterol: 100mg
Keywords: chicken, maple syrup, bourbon, pecans, gluten-free
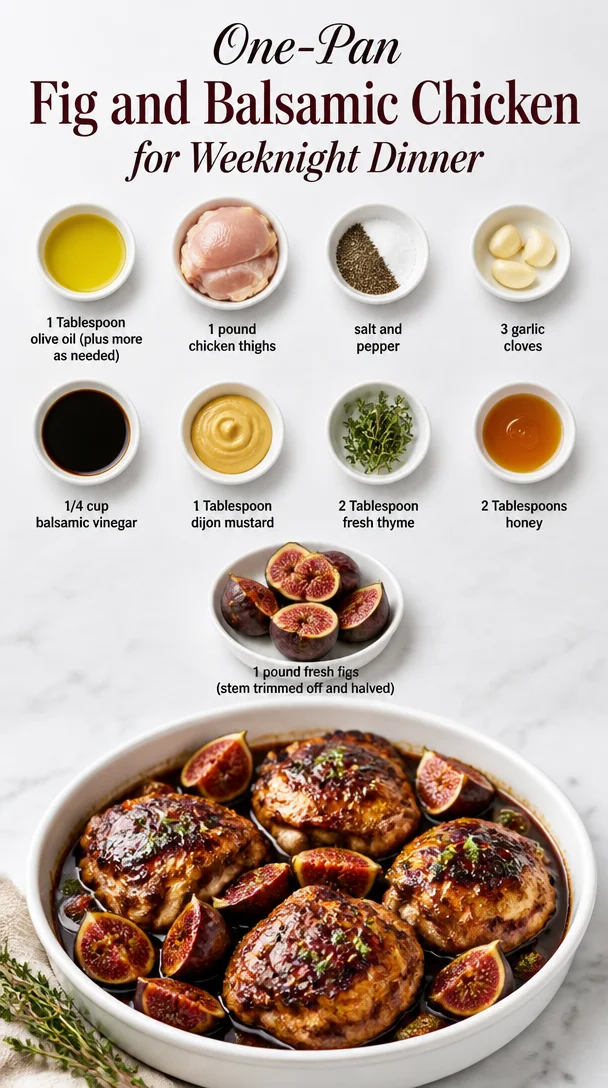
One-Pan Fig and Balsamic Chicken for Weeknight Dinner
Fig and Balsamic Chicken: A Dish to Fall For
Hey there, fellow food lovers! Today we’re diving into a dish that brings together the delicious sweetness of fresh figs and the tangy depth of balsamic vinegar – Fig and Balsamic Chicken! This recipe is not just about cooking; it’s about crafting nourishment that warms the soul and brings people together around the dinner table.
I love how this dish surprises people; many folks think of chicken as basic and simple, but with a few special ingredients, it transforms into something remarkable! Honestly, there’s nothing better than that sweet and savory combination of flavors, and trust me, the figs are the star of the show here. You’ll find that this dish is not only uncomplicated but also incredibly satisfying.
When I first experimented with this recipe, I had a bag of fresh figs sitting in my kitchen, and I was in the mood for some kitchen creativity. I whipped up this simple marinade with balsamic vinegar, honey, and a splash of dijon, and the outcome was divine. The chicken turned out succulent, with a glaze that was both sticky and punchy. I plated it all up with a bed of mashed potatoes, and I was instantly back in my grandma’s kitchen, where sharing a meal was pure joy. Let’s recreate that experience together!
Ready to embark on this culinary journey? Grab your apron, and let’s get cooking!
Personal Story
Growing up, my family had a huge backyard filled with fruit trees, and figs were always in abundance during the late summer months. I remember those days under the sun with my siblings, climbing the trees and plucking juicy figs to enjoy right there and then – there’s something almost magical about fresh fruit straight from the branch. Those sweet, sticky treats have a flavor that simply cannot be replicated by the store-bought varieties.
One hot afternoon, my mom decided to make a fig cake, and our entire home smelled of warm spices and sweet figs. Friends and family always gathered when she baked – laughing, chatting, and indulging in that heavenly aroma. It was during those gatherings that I learned the power of food, the way it connects us and fills our hearts with fond memories. So for me, making Fig and Balsamic Chicken isn’t just about satisfying hunger; it’s about reliving those sweet moments and sharing a bit of love through food.
Ingredients
Let’s gather our stars for this dish! Below is what you need to make Fig and Balsamic Chicken:
-
1 Tablespoon Olive Oil: A must-have for cooking, olive oil adds richness and helps in achieving the perfect sear. Extra virgin is great here, but any light olive oil will do. If you’re concerned about calories or want a lighter option, feel free to use a cooking spray.
-
1 Pound Chicken Thighs: I love using chicken thighs for their tenderness and flavor. If you prefer chicken breasts, go for it! Just keep an eye on the cooking time, as they cook a bit faster.
-
Salt and Pepper: Essential for seasoning, these classic ingredients help enhance the flavors of the dish. Don’t be shy about seasoning; a little salt goes a long way!
-
3 Garlic Cloves: Garlic adds a delicious aroma and depth of flavor. If fresh garlic isn’t available, you can use about half a teaspoon of garlic powder as a substitute.
-
1/4 Cup Balsamic Vinegar: This tangy vinegar is what gives our dish its character. If you find balsamic vinegar a bit too sharp, aged balsamic is a sweeter, more rounded option.
-
1 Tablespoon Dijon Mustard: This adds a tangy kick and helps emulsify the marinade. If you’re not a mustard fan, you can swap it with a bit of apple cider vinegar for a similar acidic punch.
-
2 Tablespoons Fresh Thyme: Thyme infuses the dish with a delightful earthy flavor. Dried thyme works too; just use about one teaspoon.
-
2 Tablespoons Honey: This balances the acidity with a touch of sweetness. If you’re looking for alternatives, maple syrup or agave nectar can serve as great substitutes.
-
1 Pound Fresh Figs: The star of our dish! Figs are sweet, juicy, and versatile. If fresh figs aren’t available, dried figs can be used—just soak them in warm water before adding.
Step-by-Step Instructions
-
Prep the Chicken: Start by patting your chicken thighs dry with a paper towel. This is crucial for achieving a nice sear! Season both sides generously with salt and pepper. Don’t skimp on this—the seasoning is where your flavor starts!
-
Heat the Oil: In a large skillet, heat that tablespoon of olive oil over medium-high heat. The oil is ready when it shimmers slightly. You want a nice sizzle when the chicken hits the pan!
-
Sear the Chicken: Add your chicken thighs, skin-side down first, and cook them for about 5-7 minutes until they’re golden brown. Resist the urge to crowd the pan; you want that beautiful sear. After 5-7 minutes, flip them over and cook for another 5 minutes.
-
Garlic Time!: Once your chicken is beautifully golden, add the minced garlic and sauté for about 30 seconds until fragrant. Keep an eye on it; burnt garlic is no bueno!
-
Prepare the Marinade: In a small bowl, whisk together the balsamic vinegar, Dijon mustard, thyme, and honey until it’s nicely combined. This mixture will glaze our chicken beautifully!
-
Add the Marinade: Pour the balsamic mixture over the chicken. Hear that sizzle? That’s the sound of flavor building! Let the chicken simmer in the marinade for about 5-8 minutes, occasionally spooning the sauce over the top. This will keep your chicken super moist!
-
Figs In: Once the chicken is almost cooked through, add the halved figs to the pan. They’ll soften and soak up all that delicious sauce. Cook everything together for another 5 minutes, allowing the figs to release their juices, mingling them with the chicken.
-
Check for Doneness: Make sure your chicken has reached an internal temperature of 165°F (75°C). If the chicken starts to look a bit dry, add a splash of water or chicken broth to the pan.
-
Serve it Up: Once everything is cooked, remove it from heat and let the dish rest for a couple of minutes. This lets all those juices redistribute and makes for a juicier bite.
Serving Suggestions
Now that you’ve crafted this delightful dish, let’s talk presentation! Transfer the chicken thighs onto a rustic wooden board or a beautiful serving platter. Ladle over a generous spoonful of the luscious balsamic glaze and figs. You could garnish it with a sprinkle of fresh thyme leaves for a vibrant pop of color.
Pair your Fig and Balsamic Chicken with creamy mashed potatoes, fluffy couscous, or a light arugula salad dressed in olive oil and lemon—something fresh to cut through the richness. And of course, don’t forget a crusty loaf of bread to soak up that delicious balsamic sauce. Trust me; your guests will be coming back for seconds!
Recipe Variations
-
Sweet and Spicy: Add a pinch of red pepper flakes to the marinade for a spicy kick!
-
Herbal Infusion: Swap out thyme for rosemary or sage for a different herbal twist.
-
Citrusy Flair: Mix in a tablespoon of orange juice or lemon juice into your marinade for a citrusy brightness that complements the figs beautifully.
-
Vegetable Medley: Toss in some sliced bell peppers or onions along with the figs to create a colorful veggie-studded dish.
-
Whole30 Approved: Use coconut aminos instead of balsamic vinegar for a soy sauce alternative for those following the Whole30 diet.
Chef’s Notes
Every time I make Fig and Balsamic Chicken, I love how it reminds me of those warm days spent around the family dinner table, sharing stories and laughter. It’s funny how a dish can evoke such nostalgia and happiness, right? Over time, I’ve swapped in different ingredients, but the core of this recipe has remained the same. The beauty of cooking is in the ability to create and adapt.
The first time I tried this recipe on my friends, their faces lit up with every bite. They were skeptical at first, but by the end, they were asking for the recipe! It’s these moments in the kitchen that are priceless—they remind us why we cook in the first place.
FAQs and Troubleshooting
1. What if I can’t find figs?
No problem! You can replace fresh figs with pears or even peaches, both of which will caramelize beautifully in the balsamic sauce.
2. How can I make this dish in advance?
You can marinate the chicken up to 24 hours in advance; just keep it covered in the fridge. Then, follow the cooking instructions when you’re ready to enjoy.
3. What should I serve with this dish?
It pairs wonderfully with a variety of sides! Consider mashed potatoes, rice, or a simple green salad to complement the flavors.
4. My chicken is dry! What went wrong?
Overcooking is usually the culprit. Make sure to use a meat thermometer to check the temperature, aiming for 165°F (75°C).
Nutritional Info
While indulging in a delightful dish like Fig and Balsamic Chicken, let’s also consider the nutritional value! This dish is a great source of protein, making it filling and satisfying. The figs offer dietary fiber, antioxidants, and vitamins, supporting digestion and boosting overall health. Olive oil adds those good fats we often hear about, which are heart-healthy!
Just remember to keep an eye on portion sizes, especially if you’re watching your sugar intake from honey and figs. Pairing it with fresh veggies and whole grains can help balance your meal.
Final Thoughts
And there you have it, my friend! Fig and Balsamic Chicken is a dish that is as approachable as it is delicious. Simple steps lead to incredible flavors, bringing a touch of gourmet romance to your weeknight dinner. Remember, the key is to savor every bite and enjoy the process!
Thank you for cooking alongside me today. I hope you enjoy making this dish as much as I love sharing it with you. Now, go forth and share your culinary magic! Get ready to impress your loved ones with this sweet and savory gem that will have everyone asking for seconds. Happy cooking! 🍽️
Print
Fig and Balsamic Chicken
- Total Time: 45 minutes
- Yield: 4 servings 1x
- Diet: Gluten-Free
Description
A delightful dish that combines the sweet flavors of fresh figs with the tangy essence of balsamic vinegar, creating a sumptuous chicken meal perfect for sharing.
Ingredients
- 1 Tablespoon Olive Oil
- 1 Pound Chicken Thighs
- Salt and Pepper
- 3 Garlic Cloves
- 1/4 Cup Balsamic Vinegar
- 1 Tablespoon Dijon Mustard
- 2 Tablespoons Fresh Thyme
- 2 Tablespoons Honey
- 1 Pound Fresh Figs
Instructions
- Prep the Chicken: Start by patting your chicken thighs dry with a paper towel. Season both sides generously with salt and pepper.
- Heat the Oil: In a large skillet, heat the olive oil over medium-high heat.
- Sear the Chicken: Add your chicken thighs, skin-side down first, and cook for about 5-7 minutes until golden brown.
- Garlic Time!: Add the minced garlic and sauté for about 30 seconds until fragrant.
- Prepare the Marinade: In a small bowl, whisk together the balsamic vinegar, Dijon mustard, thyme, and honey.
- Add the Marinade: Pour the balsamic mixture over the chicken and let it simmer for about 5-8 minutes.
- Figs In: Once the chicken is almost cooked through, add the halved figs to the pan and let everything cook together for another 5 minutes.
- Check for Doneness: Make sure your chicken has reached an internal temperature of 165°F (75°C).
- Serve it Up: Remove from heat and let the dish rest for a couple of minutes before serving.
Notes
Serve with mashed potatoes, couscous, or a light salad. Enjoy the succulent flavors of figs and chicken together.
- Prep Time: 15 minutes
- Cook Time: 30 minutes
- Category: Main Course
- Method: Searing
- Cuisine: Mediterranean
Nutrition
- Serving Size: 1 serving
- Calories: 420
- Sugar: 10g
- Sodium: 350mg
- Fat: 15g
- Saturated Fat: 3g
- Unsaturated Fat: 10g
- Trans Fat: 0g
- Carbohydrates: 30g
- Fiber: 4g
- Protein: 30g
- Cholesterol: 100mg
Keywords: fig chicken, balsamic chicken, sweet savory recipes, Mediterranean chicken dish
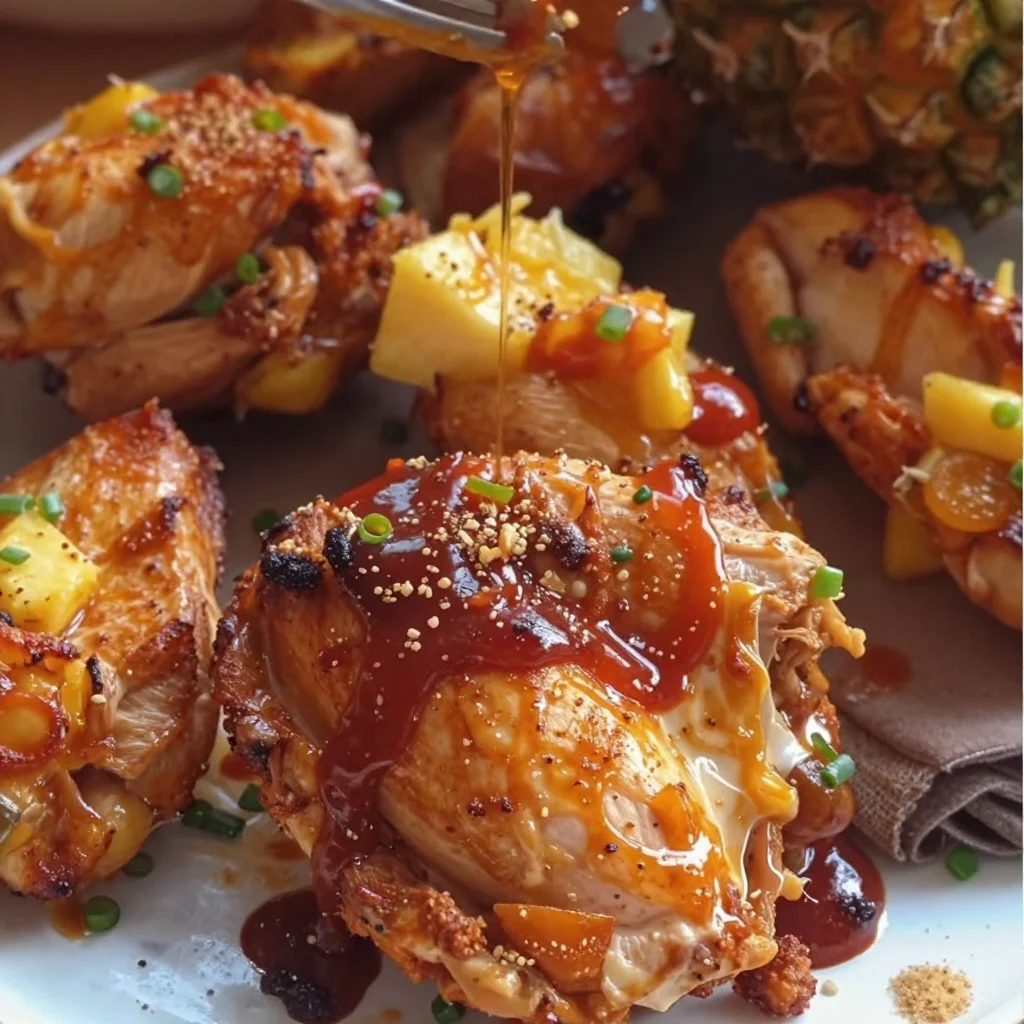
Slow Cooker Hawaiian Chicken: 4-Ingredient Weeknight Dinner
Sweet Hawaiian Crock Pot Chicken: A Flavorful Journey in Every Bite
Hey there, food lovers! I’m Beau Collier, your friendly neighborhood chef, and I’m thrilled to take you on a culinary adventure today. If you love feel-good meals that’ll wrap you in a warm embrace, you’re in for a treat with my Sweet Hawaiian Crock Pot Chicken! This dish is all about flavor and ease, combining the tropical sweetness of pineapple with the savory goodness of chicken that’ll have your whole family begging for seconds.
Let’s kick things off right. Imagine it’s the weekend, and the sun is shining through your kitchen window. The sweet aroma of garlic and ginger wafting through the air, mixing with the luscious scent of pineapple… Can you picture it? That’s the essence of what we’re about to create. This dish is perfect for those laid-back days when you want to spend more time with family or friends and less time cooking.
The beauty of this recipe lies in its simplicity. Toss your ingredients into the slow cooker in the morning, let it work its magic all day, and by dinnertime, you’ll have a delicious and soul-satisfying meal that’s ready to impress! And the best part? You won’t have to slave away in the kitchen.
So grab your favorite mug (maybe fill it with some of that delightful pineapple juice if you’re feeling it), and let’s dive into the flavorful world of Sweet Hawaiian Crock Pot Chicken!
Personal Story: A Taste of Home
Growing up, Sundays were a sacred time at my house, and they always revolved around one glorious dish: my mom’s pineapple chicken. She’d throw everything into a pot in the morning and leave it to simmer all day. I remember coming home from school, bursting with curiosity about what delightful creation awaited me in the kitchen. The moment I walked in the door, I was enveloped by the mouthwatering aroma that made my tummy rumble.
As the years went by, cooking became my way of connecting with that nostalgia. No matter where life took me, the essence of that pineapple chicken kept me grounded. It wasn’t just about the food; it was about love, warmth, and the comfort of home. That’s why I chose to perfect this Sweet Hawaiian Crock Pot Chicken recipe — to share that warmth and love with you all and to remind us of the beautiful moments made around the dinner table.
Ingredients
Let’s gather our ingredients! Here’s what you’ll need for this scrumptious Sweet Hawaiian Crock Pot Chicken:
-
4 boneless, skinless chicken breasts
A versatile protein that’s perfect for absorbing all those flavorful juices! If you don’t have chicken breasts, thighs work wonderfully too! -
1 cup pineapple chunks (fresh or canned)
Sweet, juicy, and full of tropical vibes! If you want to amp up the freshness, go for fresh pineapple! Canned works just as well — just make sure it’s in juice, not syrup. -
1/2 cup soy sauce
Adds that rich, savory flavor. If you’re looking for a gluten-free option, feel free to use tamari! -
1/2 cup brown sugar
This will bring that sweet caramelization — an essential ingredient to balance out the savory notes. For less sugar, coconut sugar can be a fantastic substitute. -
1/4 cup ketchup
Sounds simple, but it adds a nice tang! You can use a low-sugar option if you want to keep it healthier. -
1 teaspoon garlic powder
Because garlic makes everything better! Fresh minced garlic is a wonderful alternative if you prefer a more robust flavor. -
1 teaspoon ginger (fresh or ground)
Ginger adds that lovely warmth and spice. Fresh grated ginger packs more punch, but ground ginger is perfectly fine if that’s what you have on hand. -
Salt and pepper to taste
Always a culinary must-have! You can adjust to your preference. -
Chopped green onions (for garnish)
Bring in some color and freshness to your dish.
Now that we have our lineup ready, let’s move on to the cooking magic!
Step-by-Step Instructions
1. Prep the Chicken
Place the chicken breasts in your slow cooker first. Season them lightly with salt and pepper. This base will ensure they’re flavorful from the get-go. Pro tip: if you have a few extra minutes, searing your chicken in a pan before slow cooking adds a beautiful depth of flavor!
2. Add the Pineapple and Liquids
Next, pour in those luscious pineapple chunks right on top of the chicken. Now, let’s layer in the sweetness — add the soy sauce, brown sugar, and ketchup. Honestly, watching that brown sugar dissolve into the mix is satisfying. I always take a moment to enjoy the beautiful colors blending in the pot!
3. Spice It Up!
Sprinkle in the garlic powder and ginger. Don’t be shy; this is where the magic happens! The combination of these spices really brings out the flavor, turning the chicken into a tropical treat. Give it a gentle stir with a wooden spoon to marry all those glorious ingredients together.
4. Set It and Forget It
Cover the slow cooker with its lid, set it to low for 6-8 hours (or high for 3-4 hours if you’re short on time), and let it work its magic. This is the part where you can kick back and enjoy the day!
5. Shred and Serve
Once the time is up, and you can barely control your excitement (trust me, the aroma is incredible!), take a fork and shred the chicken right in the slow cooker. It should fall apart easily and get coated in that delicious sauce. Mix everything together so every piece of chicken is well-glazed.
6. Garnish
Finally, don’t forget to sprinkle those lovely green onions on top before serving. They add a pop of color and a hint of freshness that elevates this dish even further.
Serving Suggestions
When it comes to serving this Sweet Hawaiian Crock Pot Chicken, the options are limitless! For a satisfying meal, I love to serve it over fluffy white rice or quinoa. The grains soak up that sweet and savory sauce beautifully, creating a mouthwatering experience in every bite.
You can also make sliders by serving the chicken on small rolls with a touch of coleslaw for added crunch and color. If you’re feeling adventurous, serve it in lettuce wraps for a light and refreshing twist.
To complete the meal, pair it with some sautéed veggies or a tropical salad. Think flavored cucumbers, peppers, and maybe even some avocado — the freshness complements the chicken incredibly well!
Recipe Variations
Here are a few fun variations to shake things up:
-
Spicy Hawaiian Chicken: Add some heat by tossing in a teaspoon of red pepper flakes or Sriracha sauce to the mix. The spicy-sweet combination is absolutely delightful!
-
Pineapple Salsa Chicken: Just before serving, mix in a handful of fresh diced tomatoes, jalapeños, and cilantro for a salsa twist. It’s a party on your plate!
-
Teriyaki Twist: Substitute the soy sauce with teriyaki sauce for an even richer flavor. Add some sesame seeds on top before serving for that extra crunch and presentation!
-
Gluten-Free Option: Use tamari instead of soy sauce, and make sure your ketchup is gluten-free.
-
Pineapple Coconut Bliss: Replace some or all the brown sugar with coconut sugar and mix in a splash of coconut milk for a creamy, tropical vibe.
Chef’s Notes
When I first developed this recipe, it took a few trial-and-error rounds to balance the sweetness with the savory notes. One time, I accidentally added too much brown sugar — my family dubbed it “dessert chicken,” but hey, it was still delicious! Over the years, I’ve learned to embrace those little mishaps because they often lead to the most incredible flavor discoveries.
Cooking is all about experimentation, and that’s what makes it so much fun! So don’t hesitate to play around with this recipe until it’s just the way you like it.
FAQs and Troubleshooting
1. Can I use frozen chicken breasts?
Absolutely! Just remember, you may need to extend the cooking time by an hour or so to ensure they’re thoroughly cooked.
2. What if I don’t have a crock pot?
No worries! You can easily make this dish on the stovetop. Just simmer it in a large pot on low heat for about an hour, adding a bit of water if needed to prevent sticking.
3. How can I store leftovers?
If you happen to have any leftovers (highly unlikely!), let the chicken cool completely, then place it in an airtight container. It’ll keep in the fridge for about 3-4 days. You can also freeze it for up to 3 months!
4. My sauce turned out too thin; what can I do?
If your sauce is thinner than you’d like, simply transfer it to a saucepan and simmer it on the stove until it thickens a bit. Don’t forget to stir to prevent burning!
Nutritional Info
Now, I know some of us are mindful of our nutritional intake, so here’s a rough breakdown per serving based on the ingredients:
- Calories: Approximately 350
- Protein: 35g
- Carbohydrates: 50g
- Fat: 5g
- Fiber: 1g
- Sugar: 15g
Nutritional content may vary based on exact ingredients used and portion sizes; always check the labels of your specific ingredients for the most accurate information.
Final Thoughts
And there you have it — a delightful journey through my Sweet Hawaiian Crock Pot Chicken! This recipe brings the lush flavors of the tropics right into your kitchen. It’s more than just a meal; it’s an experience that invites warmth, love, and togetherness.
So the next time you’re wondering what to prepare for dinner, don’t stress! This dish is a surefire winner that will both impress and comfort your guests. Let this recipe inspire you to create memories, share meals, and find joy in the simplicity of good food.
Grab your spatula, gather those ingredients, and let’s bring some sunshine into your kitchen with every bite! Happy cooking!
Print
Sweet Hawaiian Crock Pot Chicken
- Total Time: 375 minutes
- Yield: 4 servings 1x
- Diet: Gluten-Free (if using gluten-free soy sauce)
Description
A flavorful dish combining tropical sweetness and savory goodness that’s perfect for family meals.
Ingredients
- 4 boneless, skinless chicken breasts
- 1 cup pineapple chunks (fresh or canned)
- 1/2 cup soy sauce
- 1/2 cup brown sugar
- 1/4 cup ketchup
- 1 teaspoon garlic powder
- 1 teaspoon ginger (fresh or ground)
- Salt and pepper to taste
- Chopped green onions (for garnish)
Instructions
- Prep the chicken. Place the chicken breasts in your slow cooker first. Season lightly with salt and pepper.
- Add the pineapple and liquids. Pour in the pineapple chunks, soy sauce, brown sugar, and ketchup.
- Spice it up! Sprinkle in the garlic powder and ginger, then gently stir with a wooden spoon.
- Set it and forget it. Cover the slow cooker, set to low for 6-8 hours (or high for 3-4 hours), and let it cook.
- Shred and serve. Once done, shred the chicken right in the slow cooker and mix until well-coated.
- Garnish with green onions before serving.
Notes
For extra flavor, consider searing the chicken before cooking. This dish pairs wonderfully with rice, quinoa, or in sliders.
- Prep Time: 15 minutes
- Cook Time: 360 minutes
- Category: Main Course
- Method: Slow Cooking
- Cuisine: Tropical
Nutrition
- Serving Size: 1 serving
- Calories: 350
- Sugar: 15g
- Sodium: 800mg
- Fat: 5g
- Saturated Fat: 1g
- Unsaturated Fat: 4g
- Trans Fat: 0g
- Carbohydrates: 50g
- Fiber: 1g
- Protein: 35g
- Cholesterol: 75mg
Keywords: Hawaiian chicken, crock pot chicken, easy chicken recipes, slow cooker recipes, tropical chicken

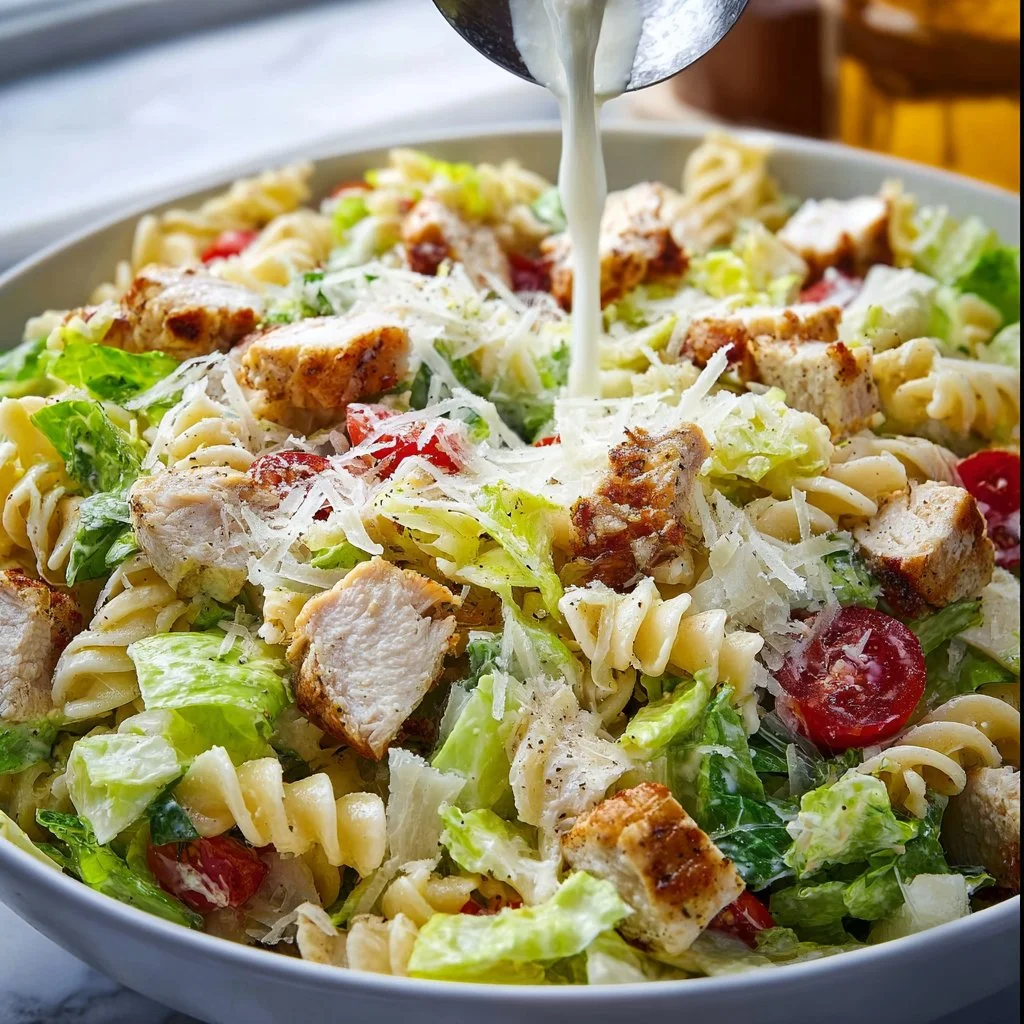
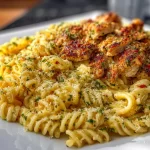
Chicken Caesar Pasta Salad
The Ultimate Chicken Caesar Pasta Salad: A Flavorful Toss of Comfort and Freshness
Hey there, food lovers! Welcome back to the virtual kitchen here at Feastical! Today, I’m thrilled to share one of my all-time favorite recipes: Chicken Caesar Pasta Salad. It’s easy to whip up, packed with flavor, and brings a delightful twist to the classic Caesar salad. Whether you’re hosting a summer cookout, packing lunch for work, or just craving a salad that feels like a meal, you’re in for a treat!
Imagine this: It’s a sunny Sunday afternoon, the kind of day that beckons you outside. The grill is sizzling with juicy chicken, the laughter of friends fills the air, and there’s a spread of vibrant dishes all around. We’re talking colorful salads, warm, crusty bread, and sweet treats—in short, a feast of epic proportions! It’s in moments like these that I find cooking, and sharing food, is not just a necessity but a way to connect with those we care about.
Today, I’m excited to combine two favorites—pasta and Caesar salad—into one irresistible dish. Chicken Caesar Pasta Salad perfectly marries the hearty fullness of pasta with the classic, creamy Caesar dressing and the crunch of fresh veggies. Whether you’re a kitchen pro or a newbie just figuring out the difference between a spatula and a ladle, this dish is approachable, fun to make, and delightful to devour. Plus, it’s a total crowd-pleaser!
So, grab your apron, let’s dive into this deliciously easy recipe, and create a bowl of Chicken Caesar Pasta Salad that’ll have everyone asking for seconds. Ready? Let’s dig in!
Personal Story
This recipe holds a special place in my heart. I remember the first time I made it for my family picnic— a hazy summer day filled with sunshine and laughter. It was my unofficial debut as a "chef," and I definitely had my fair share of kitchen mishaps leading up to that moment!
I learned by watching my grandmother whip up her famous Caesar salad with just the right amount of anchovies and lemon, making it burst with flavor. One day, I thought, “Why not take it up a notch and toss in some pasta?” I rushed to the kitchen, tossing ingredients together like I was preparing for a cooking competition. My excitement morphed into panic when I discovered I didn’t have anchovies in the fridge (oops!). But, thankfully, the Caesar dressing I had saved the day, and my Chicken Caesar Pasta Salad was born!
Everyone at the picnic couldn’t stop complimenting me (which was a huge confidence boost!), and I knew I had created something special. Every bite brought the nostalgic taste of summer gatherings and made memories that I cherish. This dish is not just a recipe; it’s a delicious memory that I love to re-create and share with friends, old and new!
Ingredients
Gathering ingredients for Chicken Caesar Pasta Salad is half the fun! Here’s what you’ll need:
-
8 oz of pasta (rotini or fusilli): These shapes hold the dressing well and give a delightful bite. Feel free to swap with gluten-free pasta or whole wheat for a healthier option!
-
2 cups cooked chicken breast, diced: A great way to use leftover chicken! For an exotic twist, try grilled or lemon pepper chicken.
-
1 cup romaine lettuce, chopped: Adds crunch and freshness. If you’re feeling adventurous, toss in some spinach or kale for added nutrients!
-
1/2 cup cherry tomatoes, halved: These little gems add a burst of sweetness. You can also use sun-dried tomatoes or roasted peppers if you prefer a different flavor profile.
-
1/4 cup Parmesan cheese, grated: The traditionally paired cheese with Caesar. For a dairy-free option, try nutritional yeast or leave it out entirely!
-
1/2 cup Caesar dressing: You can go store-bought or homemade. If you’re short on time, grab your favorite brand—just make sure it’s creamy!
-
Salt and pepper to taste: Essential seasonings! Always taste your dish as you go to find that perfect balance.
In my cookbook, I always note that choosing good ingredients can transform an ordinary dish into something extraordinary. So, don’t hesitate to seek fresh, high-quality products for the best results.
Step-by-Step Instructions
Let’s get cooking! Here’s how to make your Chicken Caesar Pasta Salad:
-
Cook the Pasta:
- Bring a large pot of salted water to a boil. Once boiling, add the rotini or fusilli pasta. Cook according to the package instructions, usually around 8-10 minutes for al dente.
- Chef Tip: The key here is to avoid overcooking. You want that perfect chewy bite! Once cooked, drain the pasta and rinse under cold water to halt the cooking process. This also helps prevent it from sticking together.
-
Prepare the Chicken:
- While the pasta is cooking, dice your cooked chicken breast into bite-sized pieces. If you’re using leftover chicken, be sure it’s thoroughly heated (but not dry!).
- Chef Hack: For an extra layer of flavor, toss the chicken with a splash of lemon juice or a sprinkle of garlic powder before adding it to the salad!
-
Chop the Veggies:
- Take your fresh romaine lettuce and chop it into bite-sized pieces. Slice your cherry tomatoes in half to release their juices and sweetness.
- Pro Tip: A sharp knife is your best friend in the kitchen—not only is it safer to use, but you’ll also create even bites.
-
Mix It All Together:
- In a large mixing bowl, combine the cooked pasta, diced chicken, chopped romaine, and halved cherry tomatoes.
- In a separate bowl, whisk together the Caesar dressing and a pinch of salt and pepper to taste. Don’t skip this step! This allows you to control the dressing’s flavor and consistency.
-
Toss and Garnish:
- Pour the creamy dressing over the pasta mixture and toss gently until everything is well-coated with that luscious, garlicky, tangy goodness.
- Finally, sprinkle the grated Parmesan cheese over the top and give one last gentle toss.
- Cooking Hack: If you like a cheesy bite, reserve a little Parmesan for garnishing before serving!
And there you have it! A colorful, hearty Chicken Caesar Pasta Salad ready to impress!
Serving Suggestions
Now, let’s talk about how to present this vibrant dish. Visual appeal is key, after all!
-
Plating: Transfer the salad to a large serving bowl and garnish with additional Parmesan cheese, fresh herbs (like parsley or basil), and if you’re fancy, a sprinkle of black pepper or a drizzle of olive oil for extra shine.
-
Individual Portions: Serve in clear mason jars for a fun, portable option! Layering the ingredients adds a pop of color and makes for a cute picnic or lunch presentation.
-
Sides: Pair your Chicken Caesar Pasta Salad with some crusty garlic bread or chips for a delightful crunch. A cold beverage like lemonade or iced tea rounds out the meal beautifully.
Recipe Variations
Feeling adventurous? Here are a few creative twists you can try for your Chicken Caesar Pasta Salad:
-
Spicy Kick: Add a pinch of red pepper flakes to your Caesar dressing or toss in some sliced jalapeños for a spicy twist!
-
Mediterranean Flair: Swap out the chicken for grilled shrimp and mix in Kalamata olives and feta cheese for a Mediterranean-inspired salad.
-
Veggie Delight: For a vegetarian version, replace chicken with roasted chickpeas and add bell peppers, cucumbers, and any of your favorite veggies!
-
Grain Swap: Use quinoa or farro instead of pasta for a healthful alternative that’s high in protein and fiber.
-
Dressing Switch-Up: Experiment with different dressings—how about ranch, blue cheese, or a zesty vinaigrette? The possibilities are endless!
Chef’s Notes
This Chicken Caesar Pasta Salad has evolved over the years in my kitchen. I started with the basic elements, but every time I make it, I’m inspired to add something fresh or seasonal. One of my funniest kitchen moments happened when I realized I’d forgotten to buy salad dressing! With a few pantry staples, I mixed up a quick homemade version, and it ended up becoming a staple in my house ever since.
It’s funny how cooking can lead to unexpected creations—sometimes, those happy accidents become your favorites! Now, I love to keep experimenting with flavors. Cooking should be fun, so don’t hesitate to embrace your inner chef and get creative!
FAQs and Troubleshooting
Q1: What if my pasta is too sticky?
A: Toss it with a drizzle of olive oil after draining and rinsing. This will help separate the pasta and add a nice flavor!
Q2: Can I make this salad ahead of time?
A: Absolutely! Prepare the ingredients separately, then combine them before serving. This keeps the lettuce crisp and prevents sogginess.
Q3: How can I make this gluten-free?
A: Simply use gluten-free pasta and ensure your dressing is also gluten-free. Many brands offer fantastic options that keep the flavor intact.
Q4: My dressing was too thick; how can I fix it?
A: You can thin out your dressing by whisking in a touch of water, lemon juice, or extra olive oil. This’ll give you that perfect pourable consistency!
Nutritional Info
While exact nutritional values can vary based on the specific ingredients and portion sizes you choose, here’s a general idea of what you’re getting with this Chicken Caesar Pasta Salad:
- Calories: Approximately 350 per serving (for a serving of about 1.5 cups)
- Protein: Around 30g, thanks primarily to the chicken
- Carbs: Roughly 40g—mainly from pasta and veggies
- Fat: About 15g, including the healthy fats from the dressing and cheese
- Vitamins & Minerals: A good source of vitamin A, vitamin C, calcium, and iron from fresh veggies and cheese.
Feel free to modify your ingredient choices to adjust this to your dietary preferences!
Final Thoughts
I hope you’re as excited to dive into this Chicken Caesar Pasta Salad as I am! It’s a versatile dish that embraces the heart of home cooking—comforting, flavorful, and always made with love. With every bite, you’ll taste the warmth of good times shared around the table.
If you try this recipe (and I hope you do!), be sure to take a picture and tag me on social media—I’d love to see your creations! Now get out there, gather your ingredients, channel your inner chef, and make your kitchen the heart of your home. Until next time, happy cooking, and remember: food tastes better when shared with the people you love. 🍽️💖
So, are you ready to share some tasty memories? Let’s get cooking! 🥗✨
Print
Chicken Caesar Pasta Salad
- Total Time: 25 minutes
- Yield: 4 servings 1x
- Diet: Balanced
Description
A delightful twist on the classic Caesar salad, this Chicken Caesar Pasta Salad combines hearty pasta with fresh veggies and creamy dressing, perfect for summer cookouts or lunch.
Ingredients
- 8 oz rotini or fusilli pasta
- 2 cups cooked chicken breast, diced
- 1 cup romaine lettuce, chopped
- 1/2 cup cherry tomatoes, halved
- 1/4 cup grated Parmesan cheese
- 1/2 cup Caesar dressing
- Salt and pepper to taste
Instructions
- Cook the pasta: Bring a large pot of salted water to a boil. Add the pasta and cook according to package instructions (8-10 minutes for al dente). Drain and rinse under cold water.
- Prepare the chicken: Dice cooked chicken breast into bite-sized pieces. If using leftover chicken, ensure it’s heated.
- Chop the veggies: Chop romaine lettuce and halve cherry tomatoes.
- Mix it all together: In a large bowl, combine cooked pasta, chicken, lettuce, and tomatoes. In a separate bowl, whisk Caesar dressing with a pinch of salt and pepper, then pour over the pasta mixture.
- Toss and garnish: Toss gently to coat, then sprinkle grated Parmesan on top and toss again.
Notes
For added flavor, toss the chicken with lemon juice or garlic powder before mixing. You can also add red pepper flakes for a spicy kick.
- Prep Time: 15 minutes
- Cook Time: 10 minutes
- Category: Salad
- Method: Mixing
- Cuisine: American
Nutrition
- Serving Size: 1 serving
- Calories: 350
- Sugar: 5g
- Sodium: 400mg
- Fat: 15g
- Saturated Fat: 5g
- Unsaturated Fat: 8g
- Trans Fat: 0g
- Carbohydrates: 40g
- Fiber: 3g
- Protein: 30g
- Cholesterol: 70mg
Keywords: pasta salad, chicken salad, Caesar salad, summer salad, easy recipe
Chicken Caesar Pasta Salad
Chicken Caesar Pasta Salad: A Wholesome Twist on a Classic Favorite
Introduction
Hey there, food lovers! Welcome back to Feastical, where we whip up delightful dishes that make your taste buds dance and your soul sing. Today, I’m super excited to share with you a personal favorite: Chicken Caesar Pasta Salad. This delectable dish is not just a salad; it’s a vibrant melody of flavors that combines the essence of a classic Caesar salad with the heartiness of pasta. Perfect for summer picnics or cozy family dinners, this recipe will surely become a staple in your kitchen.
Let’s face it, when it comes to satisfying hunger, few things do it better than pasta. And when you throw in juicy chicken, crisp romaine, and that creamy, tangy Caesar dressing, you’re in for a treat that’s easy to whip up and oh-so-satisfying. So, gather your forks and let’s embark on this culinary journey together—whether you’re at home or a picnic in the park, this dish is bound to be a hit.
If you’ve ever had a moment where you craved something light yet filling, this pasta salad is your answer! The rich flavors of Caesar dressing meld beautifully with the tender pasta, and it’s absolutely customizable based on your mood or what’s in your fridge. Trust me; once you get a taste of this Chicken Caesar Pasta Salad, you’ll want to keep this recipe close at hand. Let’s jump in and explore the ingredients, the cooking process, and some fun variations.
Personal Story
Ah, pasta salad! It’s a dish that brings back delightful memories from my childhood. I remember hot summer afternoons at my Aunt Marlene’s backyard barbecue, where the whole family gathered to feast, laugh, and enjoy the sun. Aunt Marlene was known for her killer cooking skills; she could whip up a spread that left mouths watering.
One particular dish that always stood out? Her creamy Chicken Caesar Pasta Salad. As a kid, I’d literally “volunteer” to help her in the kitchen—mostly because I wanted to sneak bites of that tantalizing salad! I can still feel the fun of tossing the ingredients together with a vivid mix of laughter and chatter surrounding us.
As we dug into our plates, my cousins and I would race to gobble up every last bite. The flavors danced on our tongues, and the simple joy of being together made that pasta salad unforgettable. Those moments taught me that cooking is not just about feeding your body; it’s about nourishing your soul and creating connections that last a lifetime. Now, I carry on that spirit through my own cooking—bringing warmth, laughter, and love to every recipe I share.
Ingredients
Here’s what you’ll need for the ultimate Chicken Caesar Pasta Salad:
-
8 oz rotini pasta
A twisty pasta shape that holds onto the creamy dressing beautifully. Feel free to swap it with penne or farfalle if you want a change of pace. -
1 cup cooked chicken, diced
Leftover rotisserie chicken works wonders here! If you’re vegetarian, cooked chickpeas or grilled tofu can be lovely substitutes. -
1 cup romaine lettuce, chopped
Crisp and refreshing! You can use other greens like spinach or kale for a slightly different vibe. -
1/2 cup cherry tomatoes, halved
For a burst of sweetness and a pop of color. Any diced tomato will work, or try roasted tomatoes for a smoky twist. -
1/4 cup grated Parmesan cheese
Adds a savory richness. If you’re avoiding dairy, nutritional yeast is a fantastic alternative. -
1/4 cup Caesar dressing
Creamy, zesty goodness! You could whip up your own homemade dressing if you’re feeling adventurous. -
Salt and pepper to taste
Essential for enhancing flavors. Don’t be shy—season to your heart’s desire! -
Optional: croutons for topping
Because let’s be real, who doesn’t love a little crunch on their salad? You can toss in store-bought or make your own from leftover bread.
Step-by-Step Instructions
-
Cook the Pasta:
Start by boiling a pot of water and seasoning it with a good pinch of salt. Once it’s bubbling, toss in the rotini pasta. Cook according to package instructions until al dente, which usually means around 7-9 minutes. My pro tip? Stir occasionally to keep the pasta from sticking together. Remember, you want it to have a nice bite! -
Prepare the Dressing:
If you’re using store-bought Caesar dressing, you can skip ahead! But if you’re crafting it from scratch, combine garlic, lemon juice, Dijon mustard, Worcestershire sauce, and olive oil in a bowl. Whisk everything together until smooth. A little trick I learned? You can add a splash of milk for a thinner consistency if you prefer. -
Chop the Chicken and Veggies:
While your pasta cooks, grab your cooked chicken and chop it into bite-sized pieces. Then, rinse and chop the romaine lettuce and slice your cherry tomatoes in half. As you chop, take a moment to breathe in those lovely fresh scents; cooking is all about enjoying the process! -
Drain the Pasta:
Once the pasta is perfectly cooked, drain it in a colander. Rinse it under cold water for a minute to stop the cooking process and cool it down for your salad. This little step ensures that you won’t end up with mushy pasta! -
Combine the Ingredients:
In a large bowl, combine the cooled pasta, diced chicken, chopped romaine, halved cherry tomatoes, and grated Parmesan. Pour that delicious Caesar dressing over the top. Toss everything gently but thoroughly—it’s like a flavorful dance party in your bowl! -
Season to Taste:
This is where you can add a pinch of salt and a little freshly cracked black pepper. Give it a final toss. Trust me, tasting as you go is an essential part of the cooking process! -
Serve it Up:
Let the salad sit for about 10 minutes to allow the flavors to meld together. When you’re ready to serve, throw on some crunchy croutons, if using, and get ready for compliments!
Serving Suggestions
Plating this mouthwatering salad is all about showcasing those vibrant colors. Use a large, shallow serving dish or individual bowls. If you’re feeling fancy, you can drizzle a bit of extra Caesar dressing on top for presentation.
Garnish with additional grated Parmesan and maybe even a sprinkle of fresh herbs like basil or parsley for a pop of green. Serve immediately, or chill it in the fridge for a couple of hours to let those flavors develop even further. This dish can be a light lunch, or you can make it a star of your dinner party. Either way, your guests will be begging for the recipe!
Recipe Variations
This dish is incredibly versatile! Here are a few tasty twists you can try:
-
Mediterranean Caesar Pasta Salad: Swap out the chicken for sliced cucumbers, black olives, and feta cheese. Add a splash of lemon juice and some oregano for a taste of the Mediterranean!
-
Spicy Buffalo Chicken Salad: Toss in shredded buffalo chicken instead of plain chicken. Use Greek yogurt mixed with ranch for a zesty dressing that packs a punch!
-
Vegan Caesar Pasta Salad: Use chickpeas or grilled tempeh for protein and substitute the dressing with a homemade avocado-based dressing. It’s creamy, dreamy, and totally plant-based!
-
Pesto Twist: Instead of Caesar dressing, use fresh basil pesto for a twist that’s fragrant and delightful. Pair with sun-dried tomatoes for an added layer of flavor.
-
Grilled Veggie Delight: Load it up with grilled zucchini, bell peppers, and asparagus for a colorful and nutritious spin that’s perfect for summer BBQs.
Chef’s Notes
This Chicken Caesar Pasta Salad recipe has evolved over the years. I started with classic ingredients, but as my cooking adventures took me around the world, I began playing with new flavors and textures. It turns out that pasta salads are like blank canvases just waiting for your creative touch!
One time, at a potluck, I experimented with adding crispy bacon, and it was an instant success. I love how there’s always room for experimentation in the kitchen—after all, cooking should be joyful and adventurous. So don’t hesitate to make this recipe your own!
FAQs and Troubleshooting
-
Can I make this salad ahead of time?
Absolutely! It holds well in the fridge for 2-3 days. Just keep the croutons separate until serving to maintain their crunch. -
What if my dressing is too thick?
Simply thin it out with a splash of water or milk until you reach your desired consistency. -
How can I keep my chicken from getting dry?
Use leftover rotisserie chicken or poach your chicken breasts gently. Cooking them in broth can keep them moist and flavorful! -
Can I add nuts for extra crunch?
Yes! Toasted pine nuts or walnuts can add an exciting crunch and great flavor. Just make sure to add them right before serving!
Nutritional Info
This Chicken Caesar Pasta Salad is not only delicious but also a balanced meal. Let’s break it down for you:
- Calories: Approximately 350 per serving (based on 4 servings).
- Protein: 25 grams (thanks to the chicken!).
- Carbohydrates: 45 grams.
- Fat: 10 grams (mostly from the dressing and cheese).
- Fiber: 3 grams (from the veggies and whole grain pasta).
Feel free to mix and match ingredients to make it fit your dietary needs!
Final Thoughts
There you have it, my foodie friends—a scrumptious Chicken Caesar Pasta Salad that’s not only easy to make but also brings friends and family together, just like those sunny afternoons of my childhood. It’s always an adventure to bring flavors from past memories into my kitchen, and this dish is a perfect reminder of how food can create connections that last long after the meal is over.
So next time you’re planning a meal, remember this simple recipe, and feel free to get creative with it! Mix, match, and enjoy the journey of cooking. Let’s celebrate the joy of food and all the amazing moments it brings into our lives. Thanks for hanging out with me today, and cheers to delicious eating! Now grab your forks, and let’s dig in!
Until next time, happy cooking! 🍴✨
Print
Chicken Caesar Pasta Salad
- Total Time: 25 minutes
- Yield: 4 servings 1x
- Diet: None
Description
A delicious blend of classic Caesar salad and hearty pasta, perfect for summer picnics and family dinners.
Ingredients
- 8 oz rotini pasta
- 1 cup cooked chicken, diced
- 1 cup romaine lettuce, chopped
- 1/2 cup cherry tomatoes, halved
- 1/4 cup grated Parmesan cheese
- 1/4 cup Caesar dressing
- Salt and pepper to taste
- Optional: croutons for topping
Instructions
- Cook the pasta: Boil water with salt, add rotini, and cook for 7-9 minutes until al dente.
- Prepare the dressing: If using homemade, whisk garlic, lemon juice, mustard, Worcestershire sauce, and olive oil in a bowl.
- Chop the chicken and veggies: Cut chicken into bite-sized pieces, rinse and chop lettuce, and halve the cherry tomatoes.
- Drain the pasta: Once cooked, rinse under cold water to stop the cooking process.
- Combine the ingredients: In a large bowl, mix cooled pasta, chicken, romaine, tomatoes, and Parmesan. Add Caesar dressing and toss gently.
- Season to taste: Add salt and pepper, and toss again.
- Serve it up: Let the salad sit for 10 minutes before serving with croutons if desired.
Notes
This salad holds well in the fridge for 2-3 days. Keep croutons separate until serving to maintain crunch.
- Prep Time: 15 minutes
- Cook Time: 10 minutes
- Category: Salad
- Method: Mixing
- Cuisine: American
Nutrition
- Serving Size: 1 serving
- Calories: 350
- Sugar: 5g
- Sodium: 400mg
- Fat: 10g
- Saturated Fat: 4g
- Unsaturated Fat: 6g
- Trans Fat: 0g
- Carbohydrates: 45g
- Fiber: 3g
- Protein: 25g
- Cholesterol: 30mg
Keywords: Chicken Caesar, Pasta Salad, Summer Recipe, Picnic Recipe, Easy Salad

The Ultimate Creamy Garlic Parmesan Chicken Pasta You’ll Crave Every Week
The Ultimate Creamy Garlic Parmesan Chicken Pasta You’ll Crave Every Week
Hey there, food lovers! I’m super excited to share with you one of my all-time favorite recipes that will have your taste buds doing a happy dance—Creamy Garlic Parmesan Chicken Pasta. Imagine a bowl of twirly pasta enveloped in a luscious cream sauce, studded with tender chicken and punched up with the fresh zests of garlic and herbs. It’s comfort food at its finest and utterly satisfying!
Now, I don’t know about you, but there are days when all I want to do after a long day is curl up on the couch with something warm and cheesy—preferably in a giant bowl. This dish is perfect for those days. Plus, it’s easy to whip up, and the elegance of garlic and Parmesan makes it feel like a gourmet meal without the fuss. You could even impress your dinner guests with it!
So whether you’re cooking for family, friends, or just treating yourself to a special meal, you’ll want to hang around for the next couple of minutes. Grab that apron, pour yourself a glass of your favorite drink (coffee or wine, I don’t judge!), and let’s dive into this creamy goodness together.
Personal Story
Let me take you back to a chilly autumn evening when I first started experimenting in the kitchen. I had just moved out of my parents’ house, and although I was armed with a few family recipes, pasta was an uncharted territory for me. One night, I decided to cook for my then-girlfriend, hoping to impress her. I didn’t have much in the pantry, but I had some chicken, pasta, and the staple garlic and cheese—ah, the culinary dream team!
I threw everything together in a single pan, let the garlic become aromatic, and soon enough, a creamy concoction was bubbling away. The moment I plated it, the memory of my mom serving pasta at the family table came rushing back. That’s when magic happened! The combination was an instant hit, leading to a lovely dinner filled with laughter, shared stories, and my girlfriend’s delighted smiles—needless to say, the evening accelerated to all sorts of possibilities for us.
Here’s the good news: you, too, can create a moment just like that with this recipe. Trust me, this creamy garlic Parmesan chicken pasta will become a staple in your kitchen repertoire!
Ingredients
Here’s what you’ll need to craft this culinary delight:
-
Boneless, skinless chicken breast (2 large, cut into 1-inch cubes)
Chicken breast is super lean and absorbs flavor wonderfully. If you prefer something more flavorful, you can substitute it with thighs or even shrimp! -
Twisted pasta (fusilli) (1 lb / 450 g)
The twists and turns of fusilli capture the creamy sauce perfectly! If you can’t find it, penne or rotini work too—just choose your favorite! -
Unsalted butter (3 Tbsp, divided)
A must-have for sautéing the garlic and chicken. Unsalted gives you more control over the saltiness. You can swap for olive oil if you’re feeling a bit healthier! -
Fresh garlic, minced (4–5 cloves)
Garlic is the star of this dish! If you’re in a pinch, you can use garlic powder, but fresh adds an unmatched depth of flavor. -
Heavy cream (1 ½ cups)
The creaminess factor! For a lighter version, you might try using half-and-half or a non-dairy milk, although the texture may differ. -
Chicken broth (½ cup)
Use homemade if possible for more flavor! Vegetable broth can be a great substitute if you want a vegetarian twist. -
Grated Parmesan cheese (1 cup, freshly grated preferred)
Always go for fresh; it melts beautifully. If you’re in a pinch, pre-grated works too, but it won’t be as cheesy! -
Italian seasoning (1 tsp, divided)
This is a mix of herbs that brings depth to the dish. If you don’t have it, oregano, basil, and thyme alone would do just fine! -
Red pepper flakes (¼ tsp, optional)
If you like a little kick, toss this in! Otherwise, leave it out. -
Fine salt & black pepper (to taste)
Essential for bringing the flavors together. -
Fresh parsley, chopped (2 Tbsp, for garnish)
For that pop of freshness! Basil also works, and would add a lovely aroma.
Step-by-Step Instructions
Alright, let’s get cooking! Here’s how to bring this creamy pasta to life:
-
Prep Your Chicken
Start by cutting your chicken breast into bite-sized cubes (1-inch or so). This allows for even cooking and makes for easy eating. Season them generously with salt, black pepper, and half of your Italian seasoning. -
Heat the Pan
Grab a large skillet (or a deep frying pan if you have one) and place it over medium heat. Add 2 tablespoons of unsalted butter. Hear that sizzle? That’s the sound of flavor being born! -
Cook the Chicken
Once the butter is melted and bubbling, add the seasoned chicken pieces to the pan. Cook them for about 6-7 minutes until golden brown and cooked through, stirring occasionally. This is where you want to lock in that delicious, savory goodness. -
Add the Garlic
Now, here comes the miracle worker. Add your minced garlic and sauté for about 1-2 minutes until fragrant. Be careful not to burn it—the smell will be divine! -
The Creamy Base
Pour in the heavy cream and chicken broth, stirring to combine everything. Let it simmer for a few minutes until it starts to thicken—a magical transformation is happening! -
Add the Cheese
Sprinkle in your grated Parmesan cheese and stir until it melts into that beautiful creamy sauce. You should be able to see those lovely golden hues of cheese swirled throughout. -
Boil the Pasta
While the sauce is working its magic, cook your fusilli (or choice of pasta) in a large pot of boiling salted water according to package instructions, usually around 8-10 minutes for al dente. -
Combine
Drain the pasta (don’t rinse—those starchy bits help the sauce stick), and add it straight to your creamy chicken mixture. Toss everything together gently, ensuring each piece of pasta is coated. -
Final Seasoning
Taste and adjust your seasoning with more salt, black pepper, and the rest of the Italian seasoning. Remember, you can always add more but can’t take it away! -
Serve It Up
Scoop your creamy chicken pasta onto plates or in bowls. Sprinkle with freshly chopped parsley for that extra touch of color and freshness!
And just like that, you’ve created a comforting, delectable meal that’s sure to please anyone at your table.
Serving Suggestions
When serving, consider adding a simple side salad dressed with olive oil and vinegar to balance the richness of the pasta. Garlic bread is another classic pairing—what’s better than dipping a chunk of warm bread into that creamy sauce?
For a presentation that wows, you can twirl the pasta onto your plate using a fork (it looks fancy!) and garnish it with some extra grated Parmesan. Serve it family-style in a large bowl if you’re feeling communal—there’s something so warm and inviting about sharing a dish straight from the bowl, don’t you think?
Recipe Variations
Let’s talk a little about how you can play around with this recipe! Here are some creative twists:
-
Mushroom Magic: Swap in sautéed mushrooms for added earthiness. They pair beautifully with the garlic and cream!
-
Vegetable Delight: Add some steamed broccoli, spinach, or asparagus for a vibrant, nutritious boost. You might also find this makes for a great vegetarian option if you skip the chicken!
-
Spice It Up: For a Southwestern spin, toss in some diced bell peppers and a dash of taco seasoning instead of Italian herbs.
-
Lemon Burst: Add a splash of lemon juice and zest at the end for a fresh citrusy note that brightens everything up.
-
Bacon Bliss: For those who like a little indulgence, crispy bacon bits can be a delightful addition.
Chef’s Notes
Over the years, I’ve played around with this recipe a ton! In fact, the first time I made it, I used less cream and a bit of white wine. It was a happy accident that turned into a go-to dinner party dish!
Sometimes I’ll play with the textures by using different pastas; orecchiette has become a favorite because they cradle the sauce so well. Don’t forget—the best part of being in the kitchen is making the recipe your own, so have fun with it!
FAQs and Troubleshooting
-
Why did my sauce separate?
This can happen if it gets too hot too fast! Always keep a gentle simmer on the sauce. -
Can I make this ahead of time?
Absolutely! Just be aware that the pasta might absorb some sauce. You can reheat it and add a splash of cream or broth to loosen it up. -
What if my pasta is too sticky?
Stir it gently during cooking and add a touch of olive oil right after draining to help separate the noodles. -
How do I store leftovers?
Transfer to an airtight container and refrigerate for up to three days. Reheat over low heat on the stovetop, adding a little cream if needed.
Nutritional Info (if applicable)
Estimated Nutrition Info per Serving (based on 6 servings):
- Calories: 540
- Protein: 34g
- Fat: 30g
- Carbohydrates: 40g
- Fiber: 2g
- Sugar: 2g
These numbers can vary based on brands and ingredient variations, so adjust according to your specific choices!
Final Thoughts
Well, there you have it! Your kitchen is now armed with the ultimate creamy garlic Parmesan chicken pasta recipe. It’s comforting, delicious, and, most importantly, simple! Whether it’s a weeknight dinner or special occasion, this dish is sure to become a family favorite.
Don’t forget to take your own little culinary detours as you make it your own. Share your love for cooking with friends and family, keep experimenting, and remember that the best recipes come from the heart. Until next time, happy cooking, and may your plates always be full of flavor!
Cheers,
Beau
Creamy Garlic Parmesan Chicken Pasta
- Total Time: 45 minutes
- Yield: 4 servings 1x
- Diet: Non-Vegetarian
Description
A luscious, comforting pasta dish enveloped in creamy garlic sauce and tender chicken, perfect for any day of the week.
Ingredients
- 2 large Boneless, skinless chicken breasts, cut into 1-inch cubes
- 1 lb (450 g) Twisted pasta (fusilli)
- 3 Tbsp Unsalted butter, divided
- 4–5 cloves Fresh garlic, minced
- 1 ½ cups Heavy cream
- ½ cup Chicken broth
- 1 cup Grated Parmesan cheese, freshly grated preferred
- 1 tsp Italian seasoning, divided
- ¼ tsp Red pepper flakes, optional
- Fine salt & black pepper, to taste
- 2 Tbsp Fresh parsley, chopped, for garnish
Instructions
- Start by cutting your chicken breast into bite-sized cubes (1-inch or so). Season them generously with salt, black pepper, and half of your Italian seasoning.
- Grab a large skillet and place it over medium heat. Add 2 tablespoons of unsalted butter.
- Once the butter is melted and bubbling, add the seasoned chicken pieces to the pan. Cook for about 6-7 minutes until golden brown.
- Add your minced garlic and sauté for about 1-2 minutes until fragrant.
- Pour in the heavy cream and chicken broth, stirring to combine. Let it simmer for a few minutes until it starts to thicken.
- Sprinkle in your grated Parmesan cheese and stir until it melts into the creamy sauce.
- Cook your fusilli in a large pot of boiling salted water according to package instructions, usually around 8-10 minutes for al dente.
- Drain the pasta (don’t rinse) and add it straight to your creamy chicken mixture. Toss everything together gently.
- Taste and adjust seasoning with more salt, black pepper, and the rest of the Italian seasoning.
- Scoop your creamy chicken pasta onto plates or in bowls. Sprinkle with freshly chopped parsley.
Notes
For a lighter option, substitute heavy cream with half-and-half or non-dairy milk. Enhance with garlic bread or a simple side salad.
- Prep Time: 15 minutes
- Cook Time: 30 minutes
- Category: Main Course
- Method: Cooking
- Cuisine: Italian
Nutrition
- Serving Size: 1 serving
- Calories: 540
- Sugar: 2g
- Sodium: 750mg
- Fat: 30g
- Saturated Fat: 18g
- Unsaturated Fat: 10g
- Trans Fat: 0g
- Carbohydrates: 40g
- Fiber: 2g
- Protein: 34g
- Cholesterol: 120mg
Keywords: creamy pasta, garlic, chicken, quick dinner, comfort food

Easy Sesame Chicken
Easy Sesame Chicken: A Feel-Good Favorite!
Hey there, fellow food lovers! It’s Beau Collier, and I’m excited to have you here for a mouthwatering adventure in the kitchen. Today, we’re diving into a true gem of comfort food: Easy Sesame Chicken. This dish brings together tender chicken, a sweet and savory sauce, and a delightful crunch that’s perfect for a cozy weeknight dinner or a fun gathering with friends. So, if you’re craving something that feels like a warm hug on a plate, you’ve come to the right place!
Introduction: Welcome to Your New Favorite Dish
Picture this: you’ve just come home after a long day, and the last thing you want to do is spend hours in the kitchen. What if I told you that you can whip up a delicious, satisfying meal in less than an hour? Enter Easy Sesame Chicken! Not only is this dish incredibly simple to make, but it also packs a flavor punch that will make your taste buds dance with joy.
What I love about this recipe is how it brings together the nostalgic flavors of takeout with the comfort of homemade cooking. Remember those cozy nights when you’d order Chinese takeout, ready to dig in and enjoy every bite? Well, I’m here to tell you that you can recreate that magic right in your own kitchen, and it’s easier than you think!
In this blog post, I’m going to walk you through every step of making Easy Sesame Chicken, from the ingredients you need to some fun personal stories along the way. This is more than just a recipe—it’s about creating memories, laughter, and a meal you’ll want to make over and over again. So, roll up your sleeves, grab your apron, and let’s get cooking!
Personal Story: A Walk Down Memory Lane
When I think of Sesame Chicken, I’m immediately transported back to my childhood. I remember rushing home from school, excited to smell the delicious aromas coming from the kitchen. My mom had a knack for making incredible dishes, but there was something special about her Sesame Chicken that always stood out. It was sweet, slightly tangy, and had that perfect crunch.
One particularly rainy afternoon, my friends and I decided to have an impromptu hangout at my place. My mom, being the rockstar she is, decided to surprise us with her famous dish. As we sat around the table, devouring the succulent pieces of chicken and battling over the last crispy bites, I realized how much food brings people together. It was a simple evening filled with laughter and the kind of memories that warm your heart. That’s why I want to share this Easy Sesame Chicken recipe with all of you; it’s a reminder of the joy that good food can create.
Ingredients: What You Need
Alright, let’s get to the heart of the matter! Here’s what you’ll need to create this delicious Easy Sesame Chicken. I’ve included some chef insights and tips for substitutions along the way to help you customize this dish to your liking!
-
2 pounds boneless, skinless chicken thighs
Trimmed and cut into 1-inch pieces. Chicken thighs are perfect for this dish because they remain juicy and tender, but if you prefer chicken breasts, feel free to use them instead. -
¼ cup water
This will help in tenderizing the chicken and blend with the sauce. You can use chicken broth for extra flavor! -
½ teaspoon kosher salt
(If using fine salt, use a little less. It can be very powerful in smaller quantities, so season carefully!) -
½ teaspoon baking soda
This little trick will help make your chicken wonderfully crispy! It’s a chef hack that works wonders. -
2 large eggs
These are perfect for creating a light batter that will stick to the chicken and help it fry beautifully. -
½ cup cornstarch
This makes everything extra crispy! If you’re out of cornstarch, use an equal amount of flour or arrowroot powder. -
1 tablespoon oil
(Any neutral oil works great—think canola or vegetable oil. This is just to help with frying.) -
Toasted sesame seeds (for garnish)
These add that lovely nutty flavor and a beautiful presentation. You can also use crushed peanuts for a twist! -
½ cup ketchup
Surprising, right? This gives the sauce a nice balance of sweetness and tang. If you want a healthier option, you can use a low-sugar ketchup. -
½ cup water
This will help create the sauce along with the other ingredients. Again, chicken broth can be a great option here! -
½ cup granulated sugar
For that signature sweetness! If you’re looking for a lower-sugar option, consider using honey or a sugar substitute. -
2 tablespoons white vinegar
This helps balance the flavors. You can swap it out for apple cider vinegar if that’s what you have on hand. -
1 tablespoon cornstarch
This will thicken the sauce to your desired consistency. Again, flour can be used here. -
1 tablespoon soy sauce (light sodium)
This adds depth to the dish without being too salty. If you need a gluten-free alternative, use tamari! -
½ teaspoon dark soy sauce (optional)
(If you want a richer color and a touch of extra flavor, this is your go-to.) -
1 stalk green onion
(Cut into thin slices, keeping the greens and whites separate. They add a lovely crunch!) -
Oil (as needed for cooking and frying)
Use enough oil in the pan to keep the chicken from sticking. Typically, about ¼ inch deep will do it.
Step-by-Step Instructions: Let’s Get Cooking!
Now that we’ve gathered our ingredients, it’s time to roll up our sleeves and get to work! Here’s a detailed guide with tips, tricks, and chef hacks that will take your Easy Sesame Chicken to the next level.
1. Prepare the Chicken
Start by trimming the chicken thighs and cutting them into bite-sized pieces. You want them to be about 1 inch, so they cook evenly and are easy to eat.
Tip: Always cut against the grain for more tender bites!
In a medium bowl, combine the chicken with ¼ cup water, ½ teaspoon kosher salt, and ½ teaspoon baking soda. Mix well to ensure every piece is coated evenly. This mixture will help tenderize the chicken; let it sit for about 15 minutes.
2. Create the Batter
While the chicken is marinating, in another bowl, whisk together the 2 large eggs and ½ cup cornstarch until smooth. This mixture will coat the chicken and create that lovely crispy exterior once fried.
Chef Hack: If you’re feeling fancy, you can add a splash of sesame oil to the egg mixture for extra flavor!
3. Fry the Chicken
Heat a large skillet or wok over medium-high heat. Add enough oil to cover the bottom—aim for about ¼ inch. Once the oil is hot (you can test it by dropping in a small amount of batter; it should sizzle), it’s time to start frying the chicken!
Working in batches, dip the marinated chicken pieces into the cornstarch batter, making sure they are well coated. Carefully place them in the hot oil, ensuring they aren’t overcrowded. Fry for about 4-5 minutes on each side or until they are golden brown and crispy. Remove them from the oil and set them aside on a paper towel-lined plate to drain excess oil.
Tip: Keep the fried chicken warm in a low oven (around 200°F) while you fry the rest!
4. Make the Sauce
In a saucepan over medium heat, combine the ½ cup ketchup, ½ cup water, ½ cup granulated sugar, and 2 tablespoons white vinegar. Stir everything together until it’s well mixed, and bring it to a simmer.
Chef Insight: Cooking the sauce a little longer will deepen the flavors!
Add 1 tablespoon cornstarch mixed with 1 tablespoon water to the sauce as it simmers. Stir continuously until the sauce thickens to your desired consistency. For those who love a bit of color, drizzle in ½ teaspoon of dark soy sauce.
5. Combine and Toss
Once your sauce is bubbling and beautifully thickened, add the fried chicken pieces straight into the pan. Toss everything together until each piece is generously coated in that sweet and savory goodness.
Finally, sprinkle the sliced green onion tops over the chicken and give it one last gentle toss.
Pro Tip: For an extra presentation touch, sprinkle a handful of toasted sesame seeds over the top before serving!
Serving Suggestions: Plating Time!
Presentation is key, folks! To plate your Easy Sesame Chicken beautifully, consider serving it over a bed of fluffy jasmine rice or alongside steamed broccoli for a colorful and nutritious meal. You can also wrap it in fresh lettuce leaves for a fun twist!
Drizzle a bit more sauce over the top, and don’t forget to garnish with those gorgeous toasted sesame seeds and green onions. The vibrant colors and textures will make this dish look as good as it tastes!
Recipe Variations: Let’s Get Creative!
-
Spicy Sesame Chicken:
Add a tablespoon of chili paste or Sriracha to your sauce for a little kick. Adjust the heat to your taste! -
Orange Sesame Chicken:
Swap the ketchup for fresh orange juice and add a tablespoon of zest for a refreshing citrus twist! -
Baked Sesame Chicken:
For a healthier version, bake the batter-coated chicken in the oven at 400°F for about 25-30 minutes, flipping halfway through for even crispiness. -
Vegetarian Option:
Substitute the chicken with firm tofu, marinating and frying it the same way. Delicious and plant-based! -
Frozen Veggie Addition:
Toss in some frozen mixed vegetables during the sauce step. It’s an easy way to add nutrients and color to your dish!
Chef’s Notes: A Recipe’s Journey
As with most recipes, this Easy Sesame Chicken has evolved over time. Initially, it started as a takeout favorite, but with some experimenting in my own kitchen, I found ways to make it lighter and even tastier!
One of my funniest kitchen mishaps was when I accidentally added way too much sugar one evening and ended up with a dessert-like sauce! We laughed so hard about it that now, we call it "dessert chicken." That’s the beauty of cooking: it’s all about trial, error, and having a good time in the kitchen.
FAQs and Troubleshooting
1. Why is my chicken not crispy?
Ensure your oil is hot enough when frying. If it’s too cool, the chicken will absorb more oil instead of frying crispy.
2. Can I use skin-on chicken thighs?
Absolutely, just be sure to render the fat properly and adjust your frying time accordingly.
3. How do I store leftovers?
Place any leftovers in an airtight container in the fridge for up to 3 days. To reheat, do so in the oven for the best crispiness!
4. Can I make this dish gluten-free?
Yes! Simply opt for gluten-free soy sauce and ensure your cornstarch is labeled gluten-free as well.
Nutritional Info: A Little Insight
If you’re counting calories or just curious about the nutrition breakdown, here’s a general idea of what you’re getting in one serving of Easy Sesame Chicken:
- Calories: Approximately 320
- Protein: 25g
- Carbohydrates: 40g
- Fat: 10g
- Fiber: 1g
Note: These values can vary based on your specific ingredients and portion sizes. It’s always a good idea to calculate based on your recipe modifications and serving amounts.
Final Thoughts: Time to Savor!
There you have it, my friends: a comprehensive guide to creating Easy Sesame Chicken that’s sure to impress! I hope you’ve enjoyed this journey, full of nostalgia and fun. Cooking is all about love, creativity, and sharing experiences with those you cherish.
So, the next time you’re looking for a quick dinner idea or a dish that brings everyone together, remember this recipe. It’s easy, delicious, and warmens the heart just like a good hug!
I can’t wait to hear all about your versions of Easy Sesame Chicken. Don’t forget to share your creations and tag me! Keep cooking, keep smiling, and most importantly—keep feasting! 🍽️💖
Happy cooking!
Beau Collier

Easy Sesame Chicken
- Total Time: 45 minutes
- Yield: 4 servings 1x
- Diet: Gluten-Free
Description
A heartwarming and delicious take on a classic comfort food, Easy Sesame Chicken features tender chicken coated in a sweet and savory sauce with a delightful crunch.
Ingredients
- 2 pounds boneless, skinless chicken thighs, trimmed and cut into 1-inch pieces
- ¼ cup water
- ½ teaspoon kosher salt
- ½ teaspoon baking soda
- 2 large eggs
- ½ cup cornstarch
- 1 tablespoon oil (neutral oil like canola or vegetable)
- Toasted sesame seeds (for garnish)
- ½ cup ketchup
- ½ cup water
- ½ cup granulated sugar
- 2 tablespoons white vinegar
- 1 tablespoon cornstarch
- 1 tablespoon soy sauce (light sodium)
- ½ teaspoon dark soy sauce (optional)
- 1 stalk green onion, cut into thin slices
- Oil (as needed for cooking and frying)
Instructions
- Prepare the chicken by trimming it and cutting it into bite-sized pieces. Combine with water, salt, and baking soda, then let sit for 15 minutes.
- Create the batter by whisking eggs and cornstarch together until smooth.
- Fry the chicken in hot oil, working in batches, for about 4-5 minutes on each side until golden brown. Drain excess oil on a paper towel.
- Make the sauce by combining ketchup, water, sugar, and vinegar in a saucepan and bringing it to a simmer. Thicken with cornstarch mixed with water if desired.
- Combine the fried chicken with the sauce and toss until well-coated. Garnish with green onion and sesame seeds before serving.
Notes
Serve over jasmine rice or steamed broccoli for a complete meal. Consider adding chili paste for a spicy version or using tofu for a vegetarian option.
- Prep Time: 15 minutes
- Cook Time: 30 minutes
- Category: Main Course
- Method: Frying
- Cuisine: Chinese
Nutrition
- Serving Size: 1 serving
- Calories: 320
- Sugar: 22g
- Sodium: 500mg
- Fat: 10g
- Saturated Fat: 1g
- Unsaturated Fat: 8g
- Trans Fat: 0g
- Carbohydrates: 40g
- Fiber: 1g
- Protein: 25g
- Cholesterol: 200mg
Keywords: Easy Sesame Chicken, comfort food, quick dinner, Asian cuisine
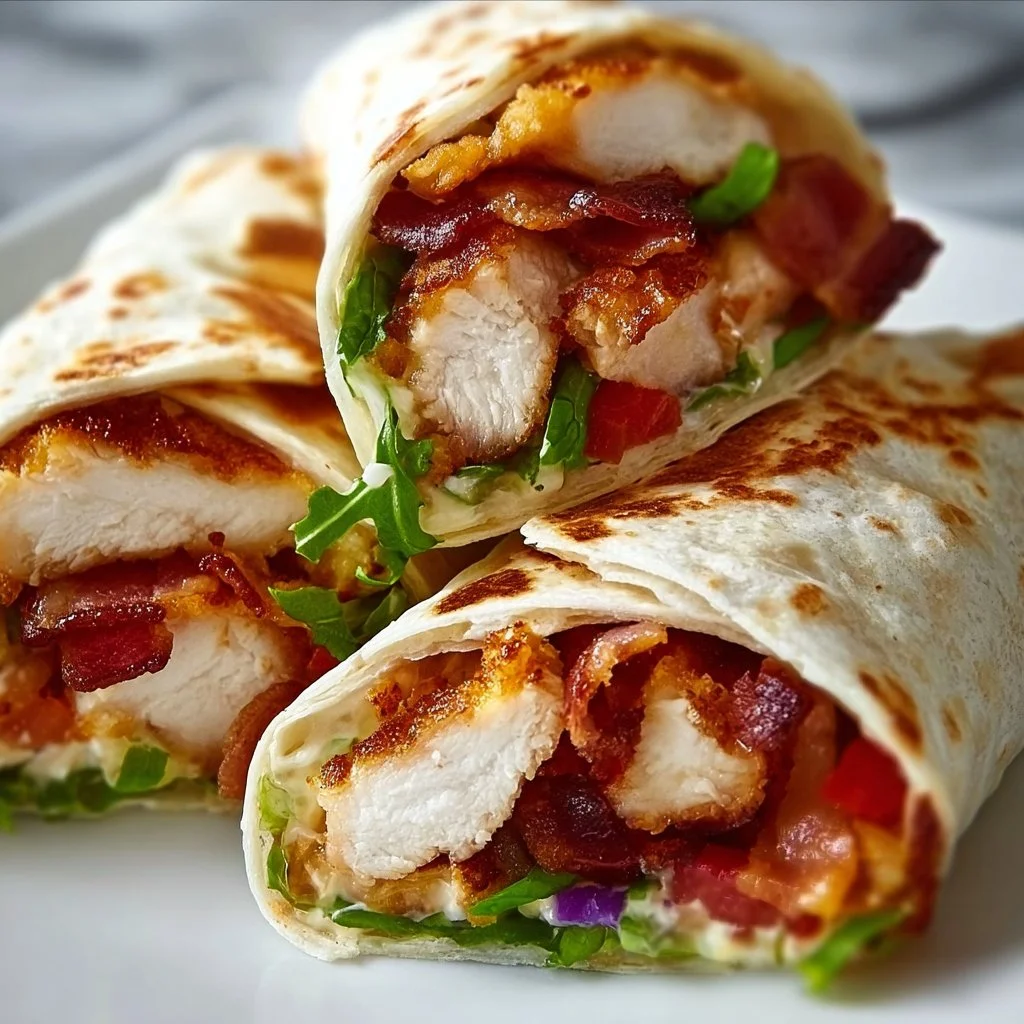
Chicken Bacon Wraps
Chicken Bacon Wraps: A Comfort Food Hero
Hey there, food lovers! Beau Collier here, and today we’re diving into a recipe that’s not only delicious but also a total crowd-pleaser: Chicken Bacon Wraps! If you’ve ever been caught in the kitchen wondering what to whip up that’s both easy and tantalizing, you’re in for a treat.
Picture this: the juicy, tender chicken breast wrapped in savory, crispy bacon, with a creamy, cheesy filling that just adds to the delight! It’s the kind of dish that brings your family together around the dinner table and keeps everyone coming back for seconds. Plus, it’s ridiculously easy to make, so even if you’ve recently discovered the location of your spatula, you can totally pull this off.
These Chicken Bacon Wraps are perfect for any occasion—weeknight dinners, game day appetizers, or even a cozy gathering with friends. They’re great for impressing guests while allowing you to enjoy the party without being stuck in the kitchen. So buckle up, my friends! Let’s roll up our sleeves and get cooking.
Personal Story
I’ll never forget the first time I experimented with Chicken Bacon Wraps. It was back in college, and I was throwing my first dinner party. You know, the kind where you invite friends over to showcase your “culinary skills” but really just hope they think you’re a total champ for cooking anything at all.
I decided to take a leap of faith and whip up these wraps. With only two burners and a toaster oven to my name, I remember wrapping those chicken breasts, liberally slathering on cream cheese, and sprinkling cheddar for good measure. The kitchen was a flurry of ingredients, and I had bacon draped over every available surface. My roommates walked in, unsure if they should be excited or worried.
When I pulled them out of the oven, the aroma filled the apartment, and I felt like a superstar. We sat together at the table, devouring the wraps, laughing, and sharing stories well into the evening. That night, I realized that food isn’t just about sustenance; it’s about connection and creating beautiful memories. Ever since then, Chicken Bacon Wraps have held a special place in my heart—and my recipe collection!
Ingredients
Let’s gather our stars of the show! Here’s what you’ll need to make these scrumptious wraps:
-
Chicken Breast: The main event! Look for boneless, skinless chicken breasts for easy handling. If you’re short on time, you can opt for pre-cooked chicken or even rotisserie chicken.
-
Bacon: The crispy, salty delight that ties everything together. Thick-cut bacon offers more flavor and crunch, but regular bacon works just as well. For a healthier twist, turkey bacon is a decent substitute.
-
Cream Cheese: This gives your wrap that luscious, creamy texture. You can mix it with herbs or spices for added flavor. If you’re dairy-free, try a plant-based cream cheese.
-
Cheddar Cheese: A classic choice that melts beautifully. Feel free to swap with pepper jack for a little kick or mozzarella for a milder flavor.
-
Black Pepper: A sprinkle of this provides a nice contrast to the richness of the cheeses. Freshly cracked is always best for maximum flavor.
-
Garlic Powder: A subtle nod to savory goodness. If you’re feeling fancy, use freshly minced garlic for a pop of zest.
-
Fresh Herbs (optional): A handful of fresh herbs like parsley or thyme can elevate your dish and add that chef-quality spin.
-
Toothpicks: These little guys help keep everything together while baking. Bamboo or wooden toothpicks work well!
With this lineup, get ready to create a masterpiece! Don’t forget, you can tweak ingredients based on what you have on hand or your dietary needs. A little improvisation just makes things more exciting, right?
Step-by-Step Instructions
Ready to roll? Let’s get cooking! Here’s how to make your Chicken Bacon Wraps, step by step:
-
Preheat the Oven: Preheat your oven to 400°F (200°C). A hot oven ensures that your wraps get nice and crispy.
-
Prepare the Chicken: Take your boneless chicken breasts and flatten them to about 1/2 inch thick. Use a meat mallet or rolling pin; this helps with even cooking. If you’re using pre-cooked chicken, skip this step!
-
Season the Chicken: Sprinkle both sides of the chicken with black pepper and garlic powder. Feel free to get creative here—add your favorite spices for a personal touch.
-
Spread the Cream Cheese: Take your cream cheese (remember to let it sit at room temperature for easier spreading) and slather a generous layer onto one side of the chicken breast. If desired, mix in some freshly chopped herbs for an extra pop of flavor.
-
Add the Cheddar: Sprinkle a handful of cheddar cheese over the cream cheese layer. Yes, you want plenty of cheesy goodness in there!
-
Wrap It Up: Now comes the fun part! Roll the chicken breast tightly, starting from the end with the cheese. The creamy filling should be nestled inside like a savory surprise.
-
Secure with Bacon: Take your bacon slices and wrap them around the chicken roll. Depending on the size of your chicken breast, 3-4 slices of bacon should do the trick. Secure each end with a toothpick to keep everything in place.
-
Prepare for Baking: Place the wrapped chicken on a baking sheet lined with parchment paper or foil (for easy cleanup!). If you’ve got any leftover bacon, feel free to drape it over the top for extra crispiness.
-
Bake: Pop the baking sheet in your preheated oven and bake for about 25-30 minutes, or until the chicken is cooked through and the bacon is crispy. Don’t be afraid to use a meat thermometer—165°F (75°C) is your magic number for chicken!
-
Rest and Serve: Once the wraps are out of the oven, let them rest for a few minutes before removing the toothpicks. This allows the juices to redistribute. Slice them into bite-sized pieces or serve them whole—totally your call!
And there you have it! Delicious Chicken Bacon Wraps, ready to impress!
Serving Suggestions
How should you present these delectable wraps? There’s nothing wrong with serving them straight off the baking sheet, but if you want to make it a bit fancier, try this:
-
Plate Them Up: Arrange the Chicken Bacon Wraps on a beautiful platter or large plate. You can drizzle some creamy ranch or spicy sriracha sauce artistically around the sides for dipping—that’ll have everyone oohing and aahing!
-
Garnish: A sprinkle of freshly chopped parsley or chives on top adds a pop of color and a hint of freshness. You could even serve them alongside a bright green salad or some crispy roasted veggies for balance.
-
Dips are Key: Consider pairing your wraps with various dips like barbecue sauce, garlic aioli, or a tangy honey mustard for guests to enjoy. It not only complements the flavors but also gives everyone something fun to interact with.
Trust me; when you plate it up with these little touches, everyone will feel like they’ve been transported to a gourmet restaurant!
Recipe Variations
Feeling adventurous? Let’s add some twists to our Chicken Bacon Wraps:
-
Spicy Southwest Bacon Wraps: Replace regular cheddar with pepper jack cheese and add a sprinkle of taco seasoning for a fiesta in every bite. Serve with guacamole for a South of the Border flare!
-
Herb & Garlic Explosion: Instead of cream cheese, use a mix of goat cheese and fresh herbs. Think basil, oregano, and a hint of lemon zest to brighten up the flavors.
-
BBQ Chicken Wraps: Before rolling the chicken, brush both sides with your favorite barbecue sauce. This gives you that smoky, sweet flavor that pairs perfectly with the crunchy bacon.
-
Mediterranean Delight: Swap in feta cheese and spinach, and drizzle with a bit of olive oil before wrapping. Serve with a side of tzatziki for a refreshing touch.
-
Breakfast Style: What’s better than savory bacon? Add some scrambled egg in the cream cheese spread for a breakfast twist! These would make for a hearty brunch or daytime gathering.
Experimenting with flavors is half the fun, so don’t hesitate to mix and match!
Chef’s Notes
One of my favorite things about these Chicken Bacon Wraps is how versatile they are. Over the years, I’ve adapted the recipe to suit various tastes, transitioning from your traditional comfort food to something with a modern twist. I once hosted a potluck where everyone brought an ingredient; let me tell you, we ended up with an outlandish mix of flavors, including some bizarre fruit toppings!
But honestly, every variation added a new dimension to the dish. It reminded me how food evolves and connects people, and how the kitchen is a great place for sharing ideas with both new and old friends—no matter what you bring to the table.
FAQs and Troubleshooting
Q: Why is my bacon not crispy?
A: If your bacon isn’t getting crispy, it might be because of the cooking temperature or time. Ensure you’re baking at 400°F, as a hotter oven helps bacon crisp up beautifully. If all else fails, you can give them a quick broil for the last few minutes, just keep an eye on them to avoid burning!
Q: Can I make these ahead of time?
A: Absolutely! You can prep the Chicken Bacon Wraps ahead of time, just store them in the fridge (unbaked) until you’re ready to pop them in the oven. Add a few extra minutes to the cooking time if they’re cold from the fridge.
Q: What sides go well with these wraps?
A: These wraps go great with a variety of sides! I recommend serving them with a fresh garden salad, roasted vegetables, or even some crispy potato wedges. They pair wonderfully with anything that adds freshness or crunch.
Q: I don’t have toothpicks; now what?
A: No toothpicks? No worries! You can just place the wraps seam-side down on your baking sheet. The bacon usually holds well through cooking, giving you a deliciously crispy result without needing any extra support.
Nutritional Info
These Chicken Bacon Wraps serve as a great protein-packed dish but are certainly indulgent with the bacon and cream cheese. Here’s a general breakdown of the nutrition per serving (one wrap):
- Calories: Approximately 320 kcal
- Protein: 30g
- Fat: 22g
- Carbohydrates: 3g
- Fiber: 0g
- Sugars: 0g
Of course, this can vary based on specific brands and ingredient choices, so adjust as needed!
Final Thoughts
There you have it—a full rundown for making Chicken Bacon Wraps that are sure to become a go-to recipe in your kitchen. I hope it inspires you to get creative, share those meals with family and friends, and build memories that will last a lifetime. Remember, whether you’re adding unexpected ingredients or sticking to the classics, the most important part is enjoying the journey of cooking and the happiness it brings.
So grab your apron, fire up that oven, and let’s get wrapping! Happy cooking, my foodie friends!
Print
Chicken Bacon Wraps
- Total Time: 45 minutes
- Yield: 4 servings 1x
- Diet: Non-Vegetarian
Description
Juicy chicken breasts wrapped in crispy bacon with a creamy cheese filling, perfect for any occasion.
Ingredients
- 4 boneless, skinless chicken breasts
- 12 slices thick-cut bacon (or turkey bacon)
- 8 oz cream cheese, softened
- 1 cup cheddar cheese, shredded
- 1 tsp black pepper
- 1 tsp garlic powder
- Fresh herbs (optional, e.g., parsley or thyme)
- Toothpicks for securing
Instructions
- Preheat your oven to 400°F (200°C).
- Prepare the chicken by flattening to 1/2 inch thick.
- Season both sides with black pepper and garlic powder.
- Spread cream cheese on one side of the chicken breast.
- Add cheddar cheese over the cream cheese layer.
- Wrap the chicken tightly, starting from the end with cheese.
- Secure with bacon slices and toothpicks.
- Prepare a baking sheet lined with parchment paper.
- Bake for 25-30 minutes until chicken is cooked through and bacon is crispy.
- Rest for a few minutes before serving.
Notes
Feel free to experiment with different cheese and herb combinations. These wraps can also be prepped in advance.
- Prep Time: 15 minutes
- Cook Time: 30 minutes
- Category: Appetizer
- Method: Baking
- Cuisine: American
Nutrition
- Serving Size: 1 wrap
- Calories: 320
- Sugar: 0g
- Sodium: 700mg
- Fat: 22g
- Saturated Fat: 9g
- Unsaturated Fat: 10g
- Trans Fat: 0g
- Carbohydrates: 3g
- Fiber: 0g
- Protein: 30g
- Cholesterol: 100mg
Keywords: Chicken Bacon Wraps, Appetizer, Easy Recipe, Comfort Food, Party Food

Crispy Chicken Caesar Sandwich
Crispy Chicken Caesar Sandwich: A Comfort Food Classic
Hey food friends! Welcome back to another delicious journey here at Feastical! Today, we’re diving into a recipe that’s not only mouthwateringly good but also super satisfying to whip up: the Crispy Chicken Caesar Sandwich. Imagine biting into a crisp, golden-brown chicken breast layered with fresh romaine lettuce, drizzled with creamy Caesar dressing, and sandwiched snugly between two slices of crusty bread. Can you feel the excitement? Trust me, this is comfort food at its absolute best!
Growing up, I was always the kid who ran to the kitchen with my heart set on a special meal. One dish that frequently made its charming appearance was, you guessed it, the classic Chicken Caesar Salad. My family would put a twist on it, turning it into sandwiches, and every bite was an adventure. The tanginess of the dressing paired with the crispy chicken made it feel like a party in my mouth—as if every bite shouted, "This is what happiness tastes like!" Today, I’m thrilled to share my take on this timeless dish, transforming it into a handheld delight perfect for lunch, dinner, or any snack attack.
Now, whether you’re cooking for a crowd or just treating yourself, this recipe is here for you. Spoiler alert: all you need is a few simple ingredients and the love to create a heartwarming meal that will bring smiles around the table. So grab your apron and let’s get cooking on this fabulous Crispy Chicken Caesar Sandwich!
Personal Story
As a kid, my favorite place to be was in the kitchen with my mom. Our family had a tradition every Sunday where we’d make a big batch of Chicken Caesar Salad. One particular Sunday, the weather turned stormy, and we found ourselves cooped up inside. Instead of our usual salad, my mom decided to get creative. We turned the salad into sandwiches, using whatever crusty bread we had and letting our taste buds guide us.
We got messy with breadcrumbs and drizzles of dressing, and I remember the laughter as we fought for the last crispy piece of chicken. My mom taught me that cooking is all about using what you have and not being afraid to get a little experimental. From that day on, I never thought of Caesar salad the same way. It became a cherished family memory that transformed into a delightful sandwich, and now, I pass that joy onto all of you with this recipe!
Ingredients
Let’s check out our ingredient lineup for this Crispy Chicken Caesar Sandwich. Here’s what you’ll need:
-
2 boneless, skinless chicken breasts
Fresh, high-quality chicken breasts are essential. For a juicier alternative, consider using thigh fillets or even tofu for a vegetarian twist. -
1 cup breadcrumbs
I recommend using Italian-seasoned breadcrumbs for extra flavor. If you’re gluten-free, try using almond flour or gluten-free breadcrumbs. -
1/2 cup grated Parmesan cheese
This adds a delightful nutty flavor to your chicken. For a dairy-free version, try using nutritional yeast for a cheesy essence! -
Salt and pepper to taste
Always taste your dish as you go! Freshly cracked pepper adds a kick, while salt enhances all the flavors. -
2 tablespoons olive oil
Perfect for pan frying and adding richness. Avocado oil is a great alternative if you’re looking for a higher smoke point. -
4 slices of crusty bread
Baguette, ciabatta, or sourdough works beautifully! Whole grain is a fabulous substitution for a healthier option. -
1 cup romaine lettuce, chopped
The crunch is key for texture! Feel free to mix it up with spinach or arugula for a pepperier taste. -
1/2 cup Caesar dressing
Homemade is always best, but store-bought is convenient! Swap it for garlic aioli for an extra punch.
Step-by-Step Instructions
Alright, let’s get cooking! Here’s how to whip up your Crispy Chicken Caesar Sandwich step by step:
Step 1: Prepare the Chicken
- Preheat your oven to 375°F (190°C). Then grab a cutting board and lay out your chicken breasts. Pat them dry with a clean towel—this helps them crisp up beautifully!
- Season the chicken breasts generously with salt and pepper on both sides. Feel free to add your favorite spices—garlic powder or paprika work wonders!
Step 2: Breading the Chicken
- Set up a breading station: You’ll need three shallow bowls. In the first, place some flour (great for a little extra crunch), in the second one, mix the breadcrumbs and Parmesan cheese, and leave the third empty for the egg wash.
- Beat 1-2 eggs in the empty bowl—this will help the breadcrumbs stick.
- Coat each chicken breast first in the flour, then the egg wash, and finally in the breadcrumb-Parmesan mixture. Press down gently, ensuring a good coating. This step is where the magic happens, so take your time!
Step 3: Cook the Chicken
- Heat the olive oil in a large skillet over medium-high heat. Once it’s shimmering (but not smoking), carefully add the breaded chicken to the pan.
- Cook for about 4-5 minutes on one side until it’s golden brown. Don’t overcrowd the pan—this might make the chicken steam instead of fry!
- Once it’s golden, flip the chicken and swap it to a baking sheet. Pop it in the preheated oven and let it bake for another 15-20 minutes until cooked through (internal temperature of 165°F).
Step 4: Toast the Bread
- As the chicken finishes baking, slice your bread into thick pieces if not pre-sliced.
- In the same skillet, toast the bread for about 1-2 minutes on each side until it’s golden and crispy. This step makes all the difference!
Step 5: Assemble the Sandwich
- Once your chicken is cooked, take it out and let it rest for a few minutes. Meanwhile, chop your romaine lettuce and get your Caesar dressing ready.
- Spread a generous amount of dressing on the bottom slice of your toasted bread.
- Layer your crispy chicken on top, followed by the chopped romaine lettuce.
- Top it off with a drizzle of more Caesar dressing and another slice of toasted bread. Cut in half for easier handling, and voilà!
Serving Suggestions
Now that you have your Crispy Chicken Caesar Sandwich all ready, it’s time to dig in! For a delightful presentation, serve your sandwich on a wooden board lined with some crunchy pickle slices and a handful of crispy potato chips or a side of sweet potato fries. You could even add a small bowl of extra Caesar dressing for dipping—because we all know that extra sauce is always a good idea!
To elevate your meal experience, set up a little outdoor picnic or gather around the dinner table with some friends and family. You’ll be the chef of the hour, and I guarantee the smiles around the table will be as bright as the flavors in this dish!
Recipe Variations
Now, let’s talk about shaking things up! Here are a few fun twists and variations for your Crispy Chicken Caesar Sandwich:
-
Buffalo Chicken Caesar: Spice things up by tossing the fried chicken in some buffalo sauce before assembling the sandwich. A drizzle of ranch dressing can also add an extra creamy touch!
-
Mediterranean Twist: Swap out the Caesar dressing for tzatziki sauce, and add some sliced cucumbers, olives, and feta cheese for a fresh Mediterranean flavor.
-
Avocado Lover’s Delight: Layer on some sliced ripe avocado before adding the mayo for added creaminess and healthy fats.
-
Chickpea Version: For a vegetarian option, you can bread and fry chickpea patties instead of chicken breasts. Season well, and you’ll have a hearty sandwich everyone will love!
-
Sourdough Spin: Use sourdough bread, and add a smear of garlic butter on the exterior for that buttery, toasted richness that complements the chicken nicely.
Chef’s Notes
I have to admit, creating this sandwich has been one of those culinary love stories that has evolved in my kitchen. Originally, it started with just a simple chicken Caesar salad, but as I experimented, I found that crispy, golden-brown chicken paired with cool, fresh toppings really elevated the whole experience. I remember one time attempting to use leftover fried chicken from a family feast; it turned out to be an absolute hit!
Every time I make this sandwich, it takes me back to those rainy Sundays creating memories with my mom. There’s something beautiful about how food can transport us back in time, isn’t there?
FAQs and Troubleshooting
Now, let’s tackle some common questions and potential pitfalls you might encounter while making this recipe:
1. Why is my chicken not crispy?
Ensure your oil is hot enough before adding the chicken. If it’s too cool, the chicken will absorb more oil and become soggy instead of crispy.
2. Can I make this sandwich ahead of time?
While it’s best enjoyed fresh, you can prep the chicken and dressing in advance. Just toast the bread just before serving!
3. How do I know when the chicken is cooked through?
Using a meat thermometer is the best way—chicken should reach an internal temperature of 165°F. If you don’t have one, you can cut the chicken in the thickest part, and the juices should run clear.
4. What if I can’t find crusty bread?
Don’t fret! Any bread you have on hand will work, but a thicker slice will hold up better with all the delicious fillings.
Nutritional Info
Here’s a quick rundown of the nutritional info for one delicious Crispy Chicken Caesar Sandwich:
- Calories: Approximately 500-600 depending on bread and toppings
- Protein: 40g (from chicken and cheese)
- Fat: 25g (primarily from olive oil and cheese)
- Carbohydrates: 45g (from bread and dressing)
- Fiber: 3g (from lettuce and bread)
Note: Nutritional values might vary based on specific brands used and portion sizes.
Final Thoughts
And there you have it, my friends—the Crispy Chicken Caesar Sandwich that warms the heart and satisfies your cravings! Cooking and sharing food should always bring joy, not stress; I hope this recipe inspires you to put on your chef hat, get creative, and share a delicious meal with the people you love.
So next time you need a comforting bite, remember this sandwich—a delightful symphony of flavors, beautiful memories, and all the love you poured into it. Don’t forget to customize it your way, and most importantly, have a blast in the kitchen. Happy cooking, and let’s feast our way into happiness! Cheers to good food and great company!
Now go hit the kitchen and make some magic happen! Bon appétit!
Print
Crispy Chicken Caesar Sandwich
- Total Time: 45 minutes
- Yield: 4 servings 1x
- Diet: Non-Vegetarian
Description
A mouthwatering Crispy Chicken Caesar Sandwich made with golden-brown chicken, fresh romaine lettuce, and creamy Caesar dressing. Perfect for any occasion!
Ingredients
- 2 boneless, skinless chicken breasts
- 1 cup breadcrumbs (Italian-seasoned preferred)
- 1/2 cup grated Parmesan cheese
- Salt and pepper to taste
- 2 tablespoons olive oil
- 4 slices of crusty bread (baguette, ciabatta, or sourdough)
- 1 cup romaine lettuce, chopped
- 1/2 cup Caesar dressing
Instructions
- Preheat your oven to 375°F (190°C) and pat dry the chicken breasts.
- Season them with salt and pepper on both sides.
- Set up a breading station with flour, breadcrumb-Parmesan mixture, and egg wash.
- Coat each chicken breast in flour, then egg, then breadcrumbs.
- Heat olive oil in a skillet over medium-high heat and cook chicken until golden brown.
- Transfer the chicken to a baking sheet and bake for 15-20 minutes.
- Slice your bread thickly and toast in the skillet.
- Assemble the sandwich with toasted bread, chicken, romaine, and Caesar dressing.
Notes
For extra flavor, consider using homemade Caesar dressing and alternative toppings like avocado or buffalo sauce.
- Prep Time: 15 minutes
- Cook Time: 30 minutes
- Category: Main Course
- Method: Baking and Frying
- Cuisine: American
Nutrition
- Serving Size: 1 sandwich
- Calories: 600
- Sugar: 3g
- Sodium: 800mg
- Fat: 25g
- Saturated Fat: 7g
- Unsaturated Fat: 12g
- Trans Fat: 0g
- Carbohydrates: 45g
- Fiber: 3g
- Protein: 40g
- Cholesterol: 90mg
Keywords: Crispy Chicken, Caesar Sandwich, Comfort Food, Easy Recipe, Family Meal
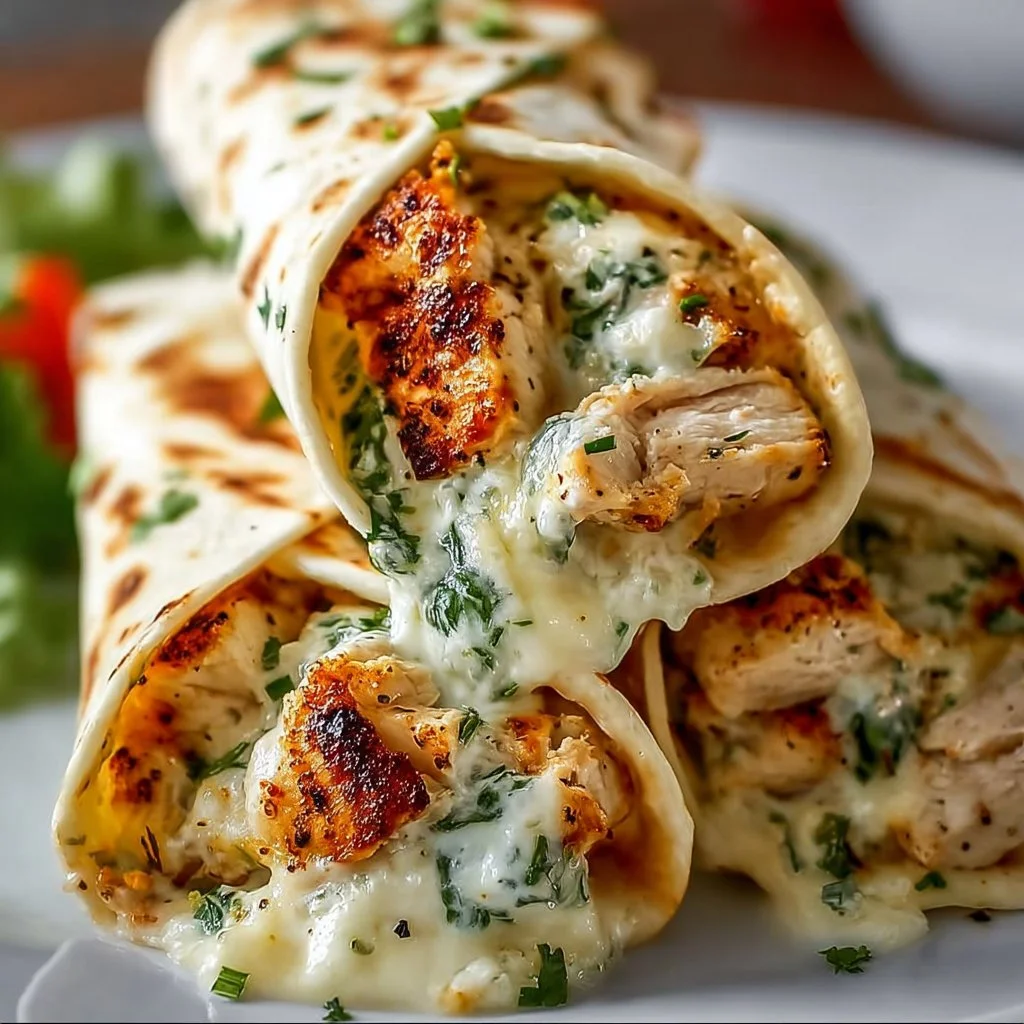
Cheesy Garlic Chicken Wraps
Cheesy Garlic Chicken Wraps: A Wholesome and Flavor-Packed Delight!
Hey there, food lovers! I’m Beau Collier — your friendly neighborhood chef. Today, we’re diving into a delicious creation that’s sure to lick all your culinary worries away: Cheesy Garlic Chicken Wraps! If you’re looking for a meal that’s not only easy to whip up but also bursting with flavor, you’re in for a treat. Grab your apron and let’s get started!
Picture this: It’s a calm weeknight, and the last thing you want to do is hover over the stove for hours. Sound familiar? We’ve all had those days when cooking feels more like a chore than a joy, and that’s why I created Feastical! Life is too short for boring food and endless clean-up. That’s where these Cheesy Garlic Chicken Wraps come in! They’re quick, scrumptious, and a delightful way to enjoy wholesome ingredients without the fuss.
These wraps are like a warm hug after a long day; they combine juicy shredded chicken, gooey melted cheese, and the aromatic allure of garlic — all enveloped in a clever lettuce leaf or wrap of your choice. The beauty of this dish is its flexibility; whether you’re low-carb, gluten-free, or just in the mood to be a bit creative in the kitchen, these wraps can fit the bill.
Let’s unleash your inner chef! I promise you this is a recipe that’s bound to become a family favorite. From meal prep to a spontaneous weeknight dinner, Cheesy Garlic Chicken Wraps are your new go-to. Now, let’s unravel the layers of flavor together!
Personal Story
Growing up, weekends meant family dinners around the table, filled with laughter, stories, and of course, delicious food. One of my fondest childhood memories revolves around my mom’s incredible chicken dishes. No matter how crazy the week had been, her cooking brought us back together. Often, she would whip up a sautéed chicken dish infused with garlic and cheese, which we would wrap in whatever we had – bread, tortillas, or even lettuce!
The smell of garlic sizzling in the pan still evokes warmth and nostalgia for me. Fast-forward to today, I’ve taken that comforting recipe and turned it into these easy, cheesy wraps. Each bite transports me back to those cherished moments — and I want you to feel that same joy when you make them!
Ingredients
-
2 cups cooked chicken, shredded
This is the star of the dish! Use rotisserie chicken for convenience, or roast your own. If you’re vegetarian, you can substitute with shredded jackfruit or tofu for a meaty texture. -
1 cup shredded cheese (cheddar or mozzarella)
Cheese adds that gooey goodness we’re all craving! Cheddar delivers rich flavor, while mozzarella gives you that stretch factor. Feel free to switch it up with pepper jack for a kick! -
4 large lettuce leaves or low carb wraps
Iceberg or romaine works perfectly for a fresh crunch. If you prefer wraps, look for whole grain or gluten-free options. Experiment with your favorite flatbreads, just make sure they’re sturdy enough to hold all that delicious filling. -
2 cloves garlic, minced
Garlic is my secret love. It elevates any dish! You can substitute with garlic powder if that’s all you have on hand—about 1 teaspoon should do the trick. -
1 tablespoon olive oil
This adds a bit of richness. If you’re keen on flavor, try infused oils, like garlic or chili oil. -
Salt and pepper to taste
These basics are essential! Adjust according to your taste — feel free to spice it up with paprika or cayenne for an extra zing! -
Optional: diced tomatoes, avocado, or your choice of veggies
Customize your wrap! Fresh veggies add crunch and color. Avocado gives that creamy texture, while diced tomatoes burst with freshness.
Remember, cooking isn’t a strict science; it’s about experimenting and making it your own!
Step-by-Step Instructions
Now, let’s bring all these glorious ingredients together! Here’s how to create your Cheesy Garlic Chicken Wraps:
Step 1: Prepare Your Chicken
If you’re using leftover cooked chicken or rotisserie chicken, shred it into bite-sized pieces. If you’re cooking from scratch, season chicken breasts with salt and pepper, then grill or bake until cooked through (about 20-30 minutes). Let it cool a bit before shredding—trust me, those fingertips will thank you!
Step 2: Sauté the Garlic
In a skillet, warm the olive oil over medium heat. Once it’s shimmering (but not smoking!), toss in the minced garlic. Cook for 1-2 minutes until it becomes fragrant—be careful not to burn it! This will create a wonderful base for the chicken.
Step 3: Add Chicken and Cheese
Now, add the shredded chicken to the skillet, stirring it to coat with that garlicky goodness. Sprinkle in half (or all!) of the shredded cheese at this point. You want it to melt and mingle well with the chicken. Cook for another 2-3 minutes — that’s right, let it ooze and combine!
Step 4: Prepare the Lettuce or Wraps
While the chicken and cheese are merging into pure bliss, prepare your lettuce or wrap. If using lettuce leaves, rinse and pat them dry. If you’re using low carb wraps, heat them slightly in a dry pan or microwave until they’re pliable.
Step 5: Assemble Your Wraps
Spoon the cheesy chicken mixture onto each lettuce leaf or wrap. Here’s the fun part: add any optional toppings like diced tomatoes, zesty avocado, or extra cheese. You want to create a festive explosion of color and flavor!
Step 6: Roll and Enjoy!
If you’ve opted for wraps, fold them up and secure with a toothpick or simply embrace the mess! If you’ve chosen lettuce leaves, fold them over and dive in. These wraps are best enjoyed fresh and warm!
Serving Suggestions
Now that you have your wraps ready, let’s talk presentation! Serve your Cheesy Garlic Chicken Wraps on a beautiful platter, garnished with fresh herbs like cilantro or parsley to add freshness. A squeeze of lemon or lime juice on top brightens the dish and adds a pop of acidity.
Pair these wraps with a crisp side salad, maybe a tangy vinaigrette dressing to complement the richness of the cheese and chicken. You could even set up a little wrap bar, allowing everyone to customize their own with their favorite toppings — how fun is that?
Recipe Variations
One of the best things about this recipe is its adaptability! Here are a few tasty twists you can try:
-
Buffalo Chicken Wraps: Add buffalo sauce to your chicken mixture for a fiery kick. Top with some crumbled blue cheese and celery sticks.
-
Mediterranean Style: Toss in some diced cucumbers, Kalamata olives, and feta cheese for a Mediterranean spin. You could also switch to pita wraps.
-
Veggie-Packed: Load it with additional veggies like bell peppers, corn, or spinach for a heartier, nutrient-focused wrap.
-
BBQ Twist: Instead of olive oil and garlic, use BBQ sauce with the chicken. Add pickles, too, for that classic BBQ chicken flavor.
-
Breakfast Wrap: Feel free to scramble some eggs and mix it into the chicken. It makes a versatile breakfast or brunch option!
Whatever your taste buds crave, these wraps are here for it!
Chef’s Notes
I’ve played around with this recipe over the years, and it’s developed into something I adore. It originally started as just a quick meal, but every time I make these wraps, I discover new ways to enjoy them. One time, I added caramelized onions, and boy, did that create a flavor explosion!
And hey, don’t sweat the small stuff in the kitchen! I once dropped an entire plate of wraps right before serving; instead of panicking, I grabbed a round casserole dish, piled everything in there, and called it a “deconstructed wrap.” It got rave reviews! Cooking is as much about creativity as it is about following a recipe.
FAQs and Troubleshooting
-
Q: What if my chicken is dry?
A: Moisture is key! If your chicken is a bit dry, try adding a splash of chicken broth or extra cheese when mixing to bring it back to life. -
Q: Can I make these ahead of time?
A: Absolutely! Just store each element in separate airtight containers in the fridge. Assemble just before serving to keep everything fresh. -
Q: What can I use instead of cheese?
A: If you’re looking to skip dairy, Daiya or other vegan cheeses work wonders. You can also opt for a creamy avocado spread. -
Q: How do I ensure my wraps don’t fall apart?
A: Here’s the chef’s secret: don’t overfill! Make sure to leave enough space to fold or roll without bursting at the seams.
Nutritional Info
Let’s break down the nutrition of these delightful wraps per serving (assuming basic ingredients):
- Calories: Approximately 320
- Protein: 30g
- Fat: 15g
- Carbohydrates: 20g (depending on the wrap used)
- Fiber: 4g
Of course, variations will change this, but you get a good pantry of protein and healthy fats. Pairing it with veggies also adds essential vitamins and minerals to the dish!
Final Thoughts
There you have it, my friends — a scrumptious, soul-satisfying recipe for Cheesy Garlic Chicken Wraps! Whether you opt for these as a solo meal or something to share with the fam, they are sure to leave you all wanting more.
Cooking doesn’t have to be complicated or time-consuming; it’s all about embracing fresh ingredients, experimenting, and ultimately enjoying the process. So, roll up your sleeves and dive into your own kitchen adventure.
I can’t wait to hear your thoughts and stories about these wraps. Remember, at Feastical, every bite should feel like a celebration! Until next time, keep cooking with love and laughter — let the culinary magic flow!
Happy cooking, and let’s keep this kitchen love rolling! 🍽️💖
Print
Cheesy Garlic Chicken Wraps
- Total Time: 25 minutes
- Yield: 4 servings 1x
- Diet: Gluten-Free
Description
Delicious and easy-to-make cheesy garlic chicken wraps, perfect for a quick weeknight meal.
Ingredients
- 2 cups cooked chicken, shredded
- 1 cup shredded cheese (cheddar or mozzarella)
- 4 large lettuce leaves or low carb wraps
- 2 cloves garlic, minced
- 1 tablespoon olive oil
- Salt and pepper to taste
- Optional: diced tomatoes, avocado, or your choice of veggies
Instructions
- Prepare your chicken by shredding it into bite-sized pieces.
- Sauté the garlic in olive oil over medium heat until fragrant.
- Add the shredded chicken and cheese to the skillet and cook until melted.
- Prepare the lettuce or wraps for assembling.
- Assemble your wraps by spooning the cheesy chicken mixture onto each leaf or wrap.
- Roll the wraps and enjoy fresh and warm!
Notes
Feel free to customize the wraps with your choice of additional toppings or variations.
- Prep Time: 10 minutes
- Cook Time: 15 minutes
- Category: Main Course
- Method: Sautéing
- Cuisine: American
Nutrition
- Serving Size: 1 wrap
- Calories: 320
- Sugar: 2g
- Sodium: 500mg
- Fat: 15g
- Saturated Fat: 6g
- Unsaturated Fat: 7g
- Trans Fat: 0g
- Carbohydrates: 20g
- Fiber: 4g
- Protein: 30g
- Cholesterol: 60mg
Keywords: cheesy wraps, garlic chicken, quick meal, easy dinner, family favorite