
One-Pan Maple Bourbon Pecan Chicken for Busy Weeknights
Maple Bourbon Pecan Chicken: A Delicious Journey of Flavors
Hey foodies! Beau Collier here, and I’m super excited to invite you into my kitchen to whip up something seriously delightful: Maple Bourbon Pecan Chicken. If you’re looking for a dish that’s packed with flavor and a touch of sophistication (but still feels comforting), then you’ve hit the jackpot! This recipe marries the sweet notes of maple syrup with the smoky warmth of bourbon, all coated over juicy, tender chicken thighs and crunchy pecans. It’s a culinary love story that’s waiting to happen in your kitchen, and I promise it’s easier than it sounds!
When I think about Maple Bourbon Pecan Chicken, I can’t help but reminisce about the first time I made it at a family gathering. It was one of those crisp autumn evenings, and we had gathered around for a cozy dinner after a long day of apple picking. I wanted to impress everyone with something special, yet easy enough to keep me out of the kitchen as much as possible. I opted for this dish, and the moment that sweet aroma of maple and bourbon wafted through the air, everyone started flocking to the kitchen like moths to a flame. The result? An absolutely delicious meal and a collection of belly-full, happy family members. And trust me, if I can do it, so can you!
So, roll up your sleeves, take off that apron you’ve been waiting to break in, and let’s dive into this recipe together!
Ingredients
Here’s what you’ll need to recreate this delicious Maple Bourbon Pecan Chicken:
-
1-1/4 lbs boneless, skinless chicken thighs
Why thighs, you ask? They’re juicy, forgiving, and will stay tender even if you forget them a sec on the heat! If you prefer chicken breasts or even turkey thighs, feel free to swap them out! -
1/2 cup gluten-free flour
Perfect for creating that crispy coating! If gluten isn’t an issue for you, regular all-purpose flour works just as well, and if you’re in a pinch, cornstarch can give you a delightful crunch too. -
Salt and pepper (to taste)
The building blocks of flavor. Don’t skimp! Seasoning generously makes all the difference. I like to use coarse sea salt for that robust burst of flavor. -
2 Tablespoons extra virgin olive oil
This is your cooking oil. It adds richness and helps crisp up the chicken. Avocado oil makes a great substitute because it has a high smoke point. -
2 Tablespoons bourbon (Maker’s Mark recommended)
This ingredient is what takes this dish to the next level! You can use other types of bourbon or even whiskey, if you’re in a bind, but I love the subtle sweetness of Maker’s Mark. -
1 cup chicken broth
This adds depth to your sauce. Homemade is best, but store-bought is a totally legit shortcut! -
1/4 cup pecans (chopped)
These nutty gems add that crunchy finish! If you’re not a fan of pecans, walnuts are a great alternative. -
3 Tablespoons pure maple syrup (not pancake syrup)
Maple syrup is the star here, providing that sweet, caramel-like essence. Trust me, go for the pure stuff—it’s a game changer! -
1 Tablespoon Dijon mustard
This adds a zingy kick and balances the sweetness of the maple syrup perfectly. However, if you’ve got other mustards at hand, like honey mustard or spicy brown, they can work too! -
1 Tablespoon apple cider vinegar
Acidity is critical for balance. If you don’t have apple cider vinegar, white wine vinegar or champagne vinegar will do the trick! -
2 teaspoons gluten-free reduced-sodium Tamari (or soy sauce if not GF)
A little umami boost! Regular soy sauce works for non-GF, and you could even use coconut aminos for a sweeter, soy-free twist. -
1/4 teaspoon dried rosemary (crushed between your fingers)
This adds a fragrant earthiness to the dish. If you have fresh rosemary, use that instead; just double the amount as fresh herbs are less potent.
Step-by-Step Instructions
Alright, let’s get down to the nitty-gritty! Here’s how to create your Maple Bourbon Pecan Chicken step by step:
-
Prep your chicken: Start by giving those chicken thighs a good rinse and pat them dry with paper towels. This helps the seasoning adhere better and gives you a lovely browning. Season the chicken with salt and pepper generously on both sides.
-
Flour it up: In a shallow dish, add the gluten-free flour. Dredge each chicken thigh in the flour, coating them evenly. Tap off any excess to avoid a floury mess in the pan. I like to keep one hand for the flour to avoid a sticky situation with both hands covered in the stuff!
-
Heat the pan: Grab a large skillet and drizzle in the olive oil. Heat it over medium-high heat until it shimmers but doesn’t smoke—this ensures a beautiful sear!
-
Sear the chicken: Place the floured chicken thighs in the hot skillet, spaced out so they aren’t overcrowded. Sear for about 5–7 minutes on each side until golden brown. Don’t move them around; let that lovely caramelization happen! This is where you can channel your inner chef and enjoy the sizzle!
-
Make the sauce: Once the chicken is browned, remove it from the skillet and set it aside on a plate. In the same pan, add the bourbon (WATCH OUT for that flame!), followed by the chicken broth, maple syrup, Dijon mustard, apple cider vinegar, Tamari, and the crushed rosemary. Give it a good stir, scraping any tasty bits off the bottom of the pan.
-
Return the chicken: Nestle those seared chicken thighs back into the skillet, coating them in the flavorful sauce. Bring it to a simmer, then cover the skillet and let it cook for about 20-25 minutes until the chicken is cooked through—juicy and tender.
-
Add pecans: Five minutes before serving, toss in the chopped pecans. Let them get all cozy in the pan, soaking up that tangy, sweet sauce!
-
Serve it up: Once the chicken is fully cooked, remove it from the skillet and let it rest for a couple of minutes. This allows all those juices to redistribute. Look at that beautiful sauce you’ve created—such a work of art!
Serving Suggestions
There’s nothing quite like presenting a dish that looks as good as it tastes! Here are some serving suggestions for your Maple Bourbon Pecan Chicken:
-
Plating: Arrange the chicken thighs on a large, rustic serving platter or individual plates. Drizzle the sauce generously over the chicken, and sprinkle with extra chopped pecans for that inviting crunch.
-
Sides: Pair it with creamy mashed potatoes or fluffy rice to soak up that addictive sauce, or roast some seasonal veggies like Brussels sprouts and carrots for a colorful, nutritious side.
-
Garnish: A sprig of fresh rosemary or parsley on top adds a vibrant pop of color and a touch of freshness!
Recipe Variations
Let’s get creative, shall we? Here are a few fun twists to give your Maple Bourbon Pecan Chicken a whole new flavor profile:
-
Maple Mustard Glaze: Instead of using mustard in the sauce, try blending more maple syrup with whole-grain mustard. It brings in a whole new depth of sweetness and tang!
-
Spicy Kick: Add a pinch of cayenne pepper to the flour mixture or stir in some red pepper flakes into the sauce for those who like it hot!
-
Fruit Fusion: Toss in some diced apples or pears into the sauce while it simmers for that sweet autumnal twist. They’ll caramelize beautifully and add freshness.
-
Herbicious Upgrade: Mix in a bit of fresh thyme or sage for a herby twist that complements the chicken and sauce perfectly.
-
Nut-Free Option: If you’re nut-sensitive or just not a fan, you can omit the pecans without losing the essence of the dish! Consider adding in sunflower seeds for a delightful crunch instead.
Chef’s Notes
Now, here’s a fun little tidbit from my kitchen adventures! I initially stumbled upon this recipe by accident when I realized I had bourbon and maple syrup just hanging out in my pantry. Feeling crafty and a bit hungry, I threw together what ended up being a family favorite. Over the years, I’ve experimented with different nuts and herbs, but the beauty of this dish is its simplicity and ability to adapt. You can bring your unique touch to it every time!
FAQs and Troubleshooting
1. Is it okay to use chicken breasts instead of thighs?
Absolutely! Just keep an eye on the cooking time as breasts can dry out rather quickly. Aim for an internal temperature of 165°F (75°C) to ensure they are perfectly cooked.
2. What if my sauce is too thick?
If you find the sauce has thickened too much, just add a little extra chicken broth or water until you reach your desired consistency.
3. Can I make this dish ahead of time?
You bet! This dish reheats beautifully. Just store the cooked chicken and sauce in an airtight container in the fridge for up to three days. Reheat on the stove over low heat, adding a splash of water or broth to loosen it up again.
4. What sides pair well with this dish?
Think comfort! Mashed potatoes, green beans, or a simple salad with a tangy vinaigrette serve beautifully alongside.
Nutritional Info
Here’s a quick overview of the nutritional content for one serving of Maple Bourbon Pecan Chicken (based on 4 servings):
- Calories: Approximately 325
- Protein: 28g
- Carbohydrates: 12g
- Fat: 18g (mostly unsaturated from olive oil and pecans)
- Sodium: 415mg
- Fiber: 1.5g
Of course, these values will vary based on specific brands and ingredients you use, so always feel free to adjust to meet your dietary needs!
Final Thoughts
And there you have it, my deliciously satisfying Maple Bourbon Pecan Chicken that’s destined to be the star of your weeknight dinners! Cooking doesn’t have to be an overwhelming task—it’s all about enjoyment, creativity, and a sprinkle of love. I hope this dish becomes a new staple in your kitchen and that it sparks some fun family gatherings and heartwarming memories, just like it did for me. So, put on your favorite playlist, unleash your inner chef, and let the culinary magic unfold. Happy cooking, friends!
Print
Maple Bourbon Pecan Chicken
- Total Time: 45 minutes
- Yield: 4 servings 1x
- Diet: Gluten-Free
Description
A delicious dish of chicken thighs coated in a sweet maple bourbon sauce, enhanced with crunchy pecans.
Ingredients
- 1–1/4 lbs boneless, skinless chicken thighs
- 1/2 cup gluten-free flour
- Salt and pepper (to taste)
- 2 Tablespoons extra virgin olive oil
- 2 Tablespoons bourbon (Maker’s Mark recommended)
- 1 cup chicken broth
- 1/4 cup pecans (chopped)
- 3 Tablespoons pure maple syrup (not pancake syrup)
- 1 Tablespoon Dijon mustard
- 1 Tablespoon apple cider vinegar
- 2 teaspoons gluten-free reduced-sodium Tamari (or soy sauce if not GF)
- 1/4 teaspoon dried rosemary (crushed)
Instructions
- Prep your chicken: Start by giving those chicken thighs a good rinse and pat them dry with paper towels. Season generously with salt and pepper.
- Flour it up: In a shallow dish, add the gluten-free flour. Dredge each chicken thigh in the flour, coating evenly.
- Heat the pan: Drizzle olive oil in a large skillet and heat over medium-high until shimmering.
- Sear the chicken: Place chicken thighs in the hot skillet and sear for about 5–7 minutes on each side until golden brown.
- Make the sauce: Remove chicken and add the bourbon, chicken broth, maple syrup, Dijon mustard, apple cider vinegar, Tamari, and crushed rosemary to the pan.
- Return the chicken: Nestle the chicken back into the skillet, coating it in the sauce. Bring to a simmer and cover, cooking for about 20-25 minutes.
- Add pecans: Five minutes before serving, stir in the chopped pecans.
- Serve it up: Remove chicken from skillet and let it rest for a few minutes before serving.
Notes
Consider pairing with creamy mashed potatoes or roasted veggies for a complete meal.
- Prep Time: 15 minutes
- Cook Time: 30 minutes
- Category: Main Course
- Method: Pan-Searing
- Cuisine: American
Nutrition
- Serving Size: 1 serving
- Calories: 325
- Sugar: 8g
- Sodium: 415mg
- Fat: 18g
- Saturated Fat: 3g
- Unsaturated Fat: 15g
- Trans Fat: 0g
- Carbohydrates: 12g
- Fiber: 1.5g
- Protein: 28g
- Cholesterol: 100mg
Keywords: chicken, maple syrup, bourbon, pecans, gluten-free
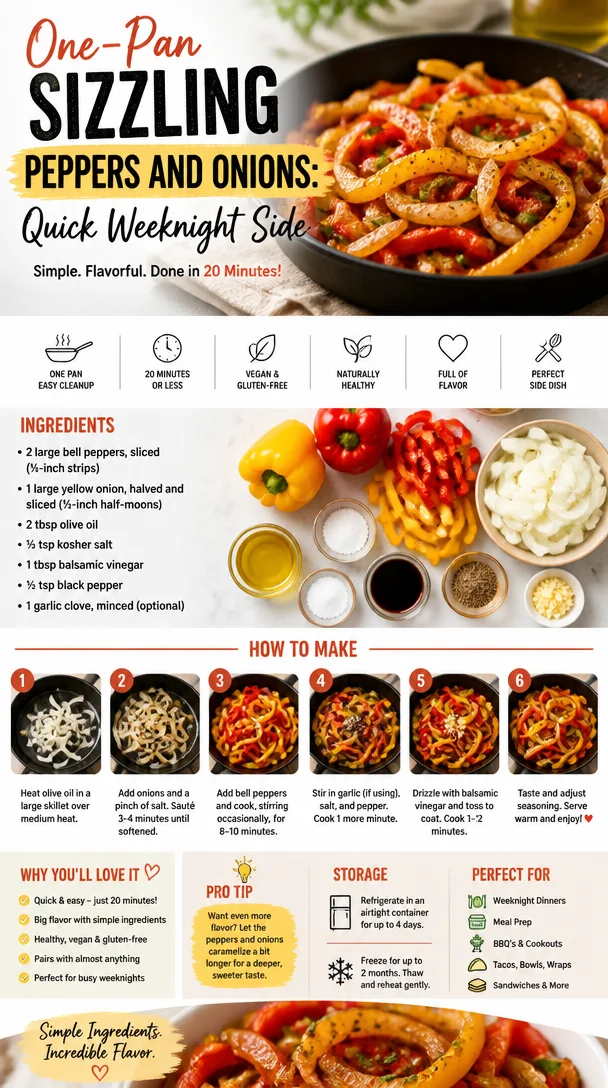
One-Pan Sizzling Peppers and Onions: Quick Weeknight Side
Sizzling Peppers and Onions Recipe – Your New Favorite Side Dish
Hey there, fellow food lovers! Today, we’re diving into a dish that’s as vibrant as it is flavorful: Sizzling Peppers and Onions. This colorful duo isn’t just a side—it’s a celebration on your plate! Trust me when I say you’re going to be snitching spoonfuls straight from the skillet before it even hits the table.
Introduction
There’s something magical about the aroma of peppers and onions sautéing in olive oil. It transports me back to my childhood kitchen, where my mom would work her culinary magic. The sizzling sound was our dinner bell, signaling that something delicious was on the way. These vibrant vegetables not only brighten up any dish but also lay the groundwork for an incredible flavor explosion!
Whether served alongside grilled chicken, tucked into a warm tortilla for fajitas, or simply enjoyed on their own, Sizzling Peppers and Onions have a knack for taking any meal to the next level. They’re the perfect side dish—versatile, quick, and oh-so-satisfying. Join me as we embark on this culinary adventure together, creating a side of sizzling goodness that will make your kitchen sing!
Personal Story
I vividly remember a summer night at my grandparents’ house, the sun setting over their backyard garden bursting with colorful produce. My grandma and I would pick peppers and onions that seemed to jump right off the vine. There was a thrill in that, the close connection to our food—knowing where it came from and how it would nourish us.
That evening, we set up shop in her cozy kitchen, pots bubbling away and the aroma of garlic filling the air. I was her sous chef, proudly wielding a cutting board and knife. As we sautéed those vibrant veggies, the sizzle combined with the laughter echoing through the small kitchen, creating a symphony of warmth that I’ll never forget.
Now, as I recreate that magic in my home, it’s not just about dinner; it’s about sharing love, joy, and fantastic flavors with those around me. And honestly? Every stir and every sprinkle of seasoning brings us back to those beautiful moments in the kitchen. Let’s create some new memories together!
Ingredients
To get started on this vibrant dish, here’s what you’ll need:
-
2 large bell peppers, sliced into ¼-inch strips
Chef Insight: Use a mix of colors—red, yellow, green—for a pop of color. If you’re in a pinch, frozen bell peppers work too! -
1 large yellow onion, halved and sliced into ½-inch half-moons
Substitution Tip: Sweet onions bring a lovely flavor, but feel free to try red or white onions if you prefer a sharper taste! -
2 tbsp olive oil
Quick Tip: Extra virgin olive oil adds a robust flavor, but you can substitute it with avocado oil for a different twist. -
½ tsp kosher salt
Chef Insight: Kosher salt is great for even distribution of flavor. If you only have table salt, use half the amount since it’s more concentrated. -
1 tbsp balsamic vinegar
Substitution Tip: For a tangier kick, swap it with apple cider vinegar or even a splash of lime juice. -
½ tsp black pepper
Chef Insight: Freshly ground black pepper elevates the flavor. Don’t skip it! -
1 garlic clove, minced (optional)
Quick Tip: If you love garlic, go for it! It adds an aromatic sweetness to the dish. If garlic isn’t your thing, feel free to leave it out.
Step-by-Step Instructions
Let’s bring those colorful ingredients together! Here’s how you can make your Sizzling Peppers and Onions step-by-step:
-
Prep Your Veggies: Start by washing your bell peppers and onions. Slice them as described above. Chef Hack: To slice the peppers easily, cut around the stem, discard the seeds, and lay the pepper halves flat for easier slicing.
-
Heat It Up: In a large skillet, heat the olive oil over medium heat. Make sure the oil is hot enough that a drop of water sizzles when sprinkled in. This step is essential for that perfect, golden-brown color we’re after.
-
Add Onions First: Toss the sliced onions into the hot skillet. Cook them for about 2-3 minutes until they start to soften. Tip: Stir occasionally to ensure they cook evenly. The goal is for them to become slightly translucent and fragrant.
-
In Come the Peppers: Next, add the bell peppers to the skillet. Cook for another 5-7 minutes, stirring often. Watch the colors become vibrant as the peppers soften and caramelize. Chef Hack: Push the veggies to one side of the skillet and let them sit for a minute to get a little char!
-
Season It Right: Sprinkle in your kosher salt, black pepper, and minced garlic (if using). Stir everything together and let those flavors mingle for an extra minute or two. Quick Tip: If any bits start to stick to the pan, that’s flavor! Just scrape it up with your spatula.
-
Finish with Balsamic: Drizzle the balsamic vinegar over the sizzling vegetables. Toss everything together and let it cook for another minute. This will add a beautiful depth of flavor and a lovely shine to your dish. Chef Insight: The vinegar will also help lift any flavors stuck to the pan!
-
Taste Test: Before serving, give your dish a taste. Adjust seasoning if needed. If you want a little kick, sprinkle some crushed red pepper flakes for extra heat.
Serving Suggestions
Now that you have your Sizzling Peppers and Onions ready, it’s time to serve them up! Here’s how I love to plate this dish:
-
On a Platter: Transfer your colorful veggies to a lovely serving platter for a pop of color at the table. Scatter some fresh herbs like cilantro or parsley over the top for a gorgeous finish!
-
Tacos and Fajitas: For a quick meal, add the sizzling mixture to warm tortillas along with some grilled chicken or steak for tasty tacos or fajitas.
-
Bowls and Salads: Serve over a bed of quinoa or mixed greens for a nutritious bowl. The heat and flavor of the peppers and onions will bring every bite to life.
-
Accompanying Protein: Pair this side with grilled fish, chicken, or even a hearty steak. It’s that perfect complement!
Recipe Variations
Feeling adventurous? Here are some fun twists on this classic dish:
-
Spicy Kick: Add chopped jalapeños or crushed red pepper flakes for a spicy version. A little heat goes a long way!
-
Herby Blend: Toss in fresh herbs like thyme or oregano in the last minute of cooking for an herby flavor infusion.
-
Smoky Flavor: Add smoked paprika or even a dash of liquid smoke for a deep, smoky depth that pairs beautifully with grilled meats.
-
Add Protein: For a heartier option, mix in black beans or chickpeas during the last few minutes of cooking. They’ll absorb all that wonderful flavor!
-
Cheesy Delight: Top the finished dish with crumbled feta or goat cheese for a creamy, tangy twist that brings everything together.
Chef’s Notes
Sizzling Peppers and Onions has evolved for me over the years. Initially, I made it just as a classic side; however, as my love for cooking grew, so did my creativity with flavors! I remember an experiment with adding pineapple once—what a treat that was! Now, I genuinely enjoy switching up the seasonings and discovering new ways to bring more life to this dish.
Oh, and let’s not forget the kitchen mishaps! One day, I got a bit too excited with the garlic and ended up with a dish that could knock your socks off! Keep an eye on that garlic, folks—it’s a flavor powerhouse, but a little goes a long way!
FAQs and Troubleshooting
1. What if my peppers and onions are burned?
If your veggies start to burn, it’s likely the heat is too high. Don’t panic—reduce the heat and add a splash of water or broth to deglaze the pan. It’ll lift those burnt flavors while keeping your dish intact!
2. Can I make this ahead of time?
Absolutely! You can sauté the peppers and onions, let them cool, and store them in an airtight container in the fridge for up to three days. Just reheat them in a skillet for a few minutes before serving.
3. How do I store leftovers?
Simply place any leftovers in an airtight container and refrigerate them. They’ll last about 3-4 days. However, I doubt there will be any leftovers—it’s that good!
4. Can I freeze this dish?
Yes, but I recommend waiting until the dish is cooled down before transferring it to a freezer-friendly bag. It’ll be good for about three months. Just be mindful that the texture of the veggies may change slightly when thawed.
Nutritional Info
While I’m no nutritionist, here’s a rough estimate of what you can expect per serving of Sizzling Peppers and Onions:
- Calories: Approximately 120
- Total fat: 7g
- Carbohydrates: 14g
- Fiber: 3g
- Sugars: 3g
- Protein: 2g
Keep in mind that these figures can vary based on the specific ingredients and quantities you use. This dish is packed with vitamins and minerals, including Vitamin C, Vitamin A, and a whole lot of antioxidants—talk about a win-win!
Final Thoughts
Whether you’re hosting a cozy dinner party or just need a pop of color on your weeknight dinner plate, Sizzling Peppers and Onions is a fabulous option! It’s easy to whip up, making it perfect for both seasoned cooks and kitchen newbies alike.
And you know what? This dish is more than just vibrant colors and delicious flavors; it’s about bringing people together. So next time you’re in the kitchen, turn up the music, let the sizzle guide you, and remember, cooking is all about heart and soul. Grab your favorite fork, take a bite, and enjoy the journey. Happy cooking, my friends—let’s make mealtime magical!
PrintSizzling Peppers and Onions
- Total Time: 25 minutes
- Yield: 4 servings 1x
- Diet: Vegan
Description
A vibrant and flavorful side dish featuring sautéed bell peppers and onions, perfect for any meal.
Ingredients
- 2 large bell peppers, sliced into ¼-inch strips
- 1 large yellow onion, halved and sliced into ½-inch half-moons
- 2 tbsp olive oil
- ½ tsp kosher salt
- 1 tbsp balsamic vinegar
- ½ tsp black pepper
- 1 garlic clove, minced (optional)
Instructions
- Prep your veggies: Start by washing your bell peppers and onions. Slice them as described above.
- Heat it up: In a large skillet, heat the olive oil over medium heat.
- Add onions first: Toss the sliced onions into the hot skillet. Cook for about 2-3 minutes until they start to soften.
- In come the peppers: Add the bell peppers to the skillet and cook for another 5-7 minutes.
- Season it right: Sprinkle in your kosher salt, black pepper, and minced garlic (if using).
- Finish with balsamic: Drizzle the balsamic vinegar over the vegetables. Cook for another minute.
- Taste test: Adjust seasoning if needed before serving.
Notes
Feel free to experiment with different color peppers or add a splash of lime for a citrus twist.
- Prep Time: 10 minutes
- Cook Time: 15 minutes
- Category: Side Dish
- Method: Sautéing
- Cuisine: American
Nutrition
- Serving Size: 1 serving
- Calories: 120
- Sugar: 3g
- Sodium: 400mg
- Fat: 7g
- Saturated Fat: 1g
- Unsaturated Fat: 6g
- Trans Fat: 0g
- Carbohydrates: 14g
- Fiber: 3g
- Protein: 2g
- Cholesterol: 0mg
Keywords: sizzling peppers, sautéed onions, side dish, colorful vegetables, easy recipe
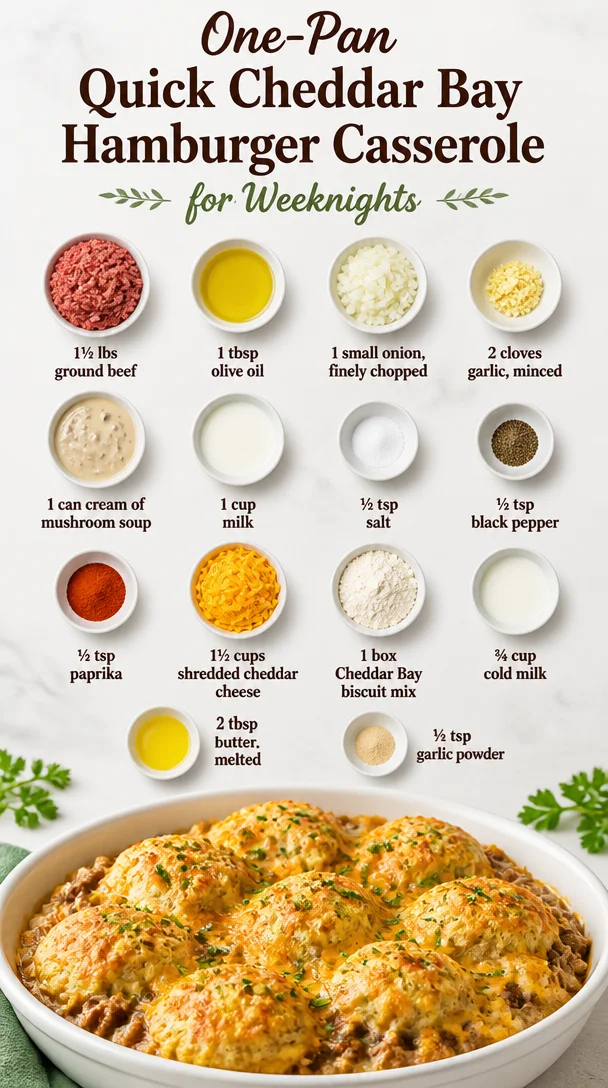
One-Pan Quick Cheddar Bay Hamburger Casserole for Weeknights
Cheddar Bay Hamburger Casserole: Easy and Quick
Hey there, fellow food lovers! Today, we’re diving into a comforting and scrumptious dish that feels like a warm hug on a chilly evening—our Cheddar Bay Hamburger Casserole. If you’ve ever craved the delicious flavors of those cheesy, garlicky biscuits paired with a hearty ground beef casserole, then you’re in for a treat! Get ready to whip up a cozy, family-friendly meal that comes together in no time. So roll up your sleeves, and let’s get started!
Personal Story
Growing up, my family had a few go-to recipes that made me excited to come home from school. One of those unforgettable meals was my mom’s cheeseburger casserole. She had a knack for turning simple ingredients into something magical. I remember one rainy Thursday afternoon after school, I stumbled into the kitchen, the smell of something incredible wafting through the air. My mom was whipping up a batch of her famous casserole, and I could hardly contain my excitement. The sizzling ground beef, the rich, creamy sauce, and the wonderful aroma reminded me of all those times we’d gather around the table, laughter and stories flowing as freely as the food.
In her typical fashion, she decided to mix it up a bit that day, tossing in some Cheddar Bay biscuit mix, which she’d recently discovered. When I took my first bite, it was like fireworks in my mouth—the creamy filling paired perfectly with the fluffy, cheesy topping. From that day on, I knew that this rendition would be a favorite. Now, as I share this Cheddar Bay Hamburger Casserole with you, I can’t help but remember those cozy moments, hoping to pass on the love and joy that this dish has always inspired.
Ingredients
Before we dive into the cooking (or the magic, as I like to call it), let’s gather everything we need. Here’s what’s on our shopping list:
-
1½ lbs ground beef
The star of our dish! Used for protein and flavor. You can substitute with ground turkey or even a plant-based alternative to suit your dietary needs. -
1 tbsp olive oil
A splash of healthy fat to help brown the beef and enhance flavor. Feel free to swap it for canola or vegetable oil. -
1 small onion, finely chopped
Adds a lovely sweetness and depth. No onion? Leave it out or use shallots for a milder flavor. -
2 cloves garlic, minced
Because garlic makes everything better! You can use powdered garlic if it’s all you have—in a pinch, about ½ teaspoon will do. -
1 can cream of mushroom soup
This is the base of our creamy goodness. If you’re not a fan of mushrooms, you can use cream of chicken soup instead. -
1 cup milk
Just a touch to thin out the soup. You can opt for a dairy-free milk alternative if necessary. -
½ tsp salt
Enhances all the flavors. Adjust based on your taste preference, especially if you’re watching your sodium intake. -
½ tsp black pepper
A little kick! You could replace this with red pepper flakes for an added twist. -
½ tsp paprika
Gives a hint of smokiness that rounds out the flavors beautifully. Smoked paprika can add even more character if that’s your jam. -
1½ cups shredded cheddar cheese
We’re all about the cheese here! Swap it for Monterey Jack or a dairy-free variety for those who need it. -
1 box Cheddar Bay biscuit mix
These are the magical little packets that bring the cheesy biscuit flavor to life. Any biscuit mix will work, but Cheddar Bay takes it next level! -
¾ cup cold milk
To mix with the biscuit dough. This can be done with any milk alternative as well. -
2 tbsp butter, melted
To brush on the tops of our biscuits for that golden finish. If you want to keep it vegan, use a plant-based butter! -
½ tsp garlic powder
A nice little punch of garlic flavor that complements the biscuits. You can also use fresh garlic; just chop it finely!
Step-by-Step Instructions
Alright, let’s put on those chef hats and make some magic in the kitchen! Here’s how to create this delightful Cheddar Bay Hamburger Casserole step-by-step:
-
Preheat the Oven
Start by preheating your oven to 375°F (190°C). This ensures your casserole will bake perfectly, giving you that wonderfully bubbly, golden top. -
Cook the Ground Beef
In a large skillet over medium heat, warm that tablespoon of olive oil. When it’s shimmering, toss in your ground beef and give it a nice brown. Cook for about 5-7 minutes until it’s no longer pink, breaking it up with a spatula. Now’s the time to season it with salt, black pepper, and paprika. Smell that? That’s your first wave of deliciousness! -
Sauté the Onions and Garlic
Add the finely chopped onion and cook for 2-3 minutes until the onions are soft and translucent. Next, stir in the minced garlic and cook for another 30 seconds. Just enough time for that garlicky goodness to fill your kitchen! -
Make the Creamy Sauce
Now, let’s mix in that can of cream of mushroom soup along with 1 cup of milk. Stir it together until well combined and creamy. This is where the magic starts to happen! Let it simmer for a couple of minutes, then remove it from heat. -
Combine the Mixture
In a large bowl, mix the ground beef mixture with the creamy sauce, stirring until everything is coated perfectly. Pour it into a greased 9×13 inch baking dish, spreading it out evenly. -
Prep the Biscuit Topping
In a separate bowl, combine the Cheddar Bay biscuit mix with ¾ cup cold milk and ½ teaspoon garlic powder. Stir just until combined—don’t overmix, or your biscuits will be tough. We want them fluffy! -
Top the Casserole
Dollop spoonfuls of the biscuit mixture over the beef mixture. You can use the back of a spoon to spread it out a little if you like a more even top. -
Add the Cheese
Sprinkle that irresistible shredded cheddar cheese over the top of your biscuit layer, because why not add more deliciousness? -
Brush with Butter
Melt your 2 tablespoons of butter and brush it over the biscuit topping. This step is key; it makes everything golden and adds an extra layer of flavor! -
Bake Away
Place your casserole in the preheated oven and bake for about 25-30 minutes, or until the biscuits are golden brown and the filling is bubbling. You want to see that lovely cheese melting and oozing! -
Cool and Serve
Once done, take your casserole out of the oven and let it cool for about 5-10 minutes. This will help everything set just a bit and make it easier to serve.
Serving Suggestions
Now comes the fun part—serving your Cheddar Bay Hamburger Casserole! I like to dish it out with a colorful side salad or some steamed veggies to balance out the richness. For presentation, you can sprinkle some fresh parsley or chives on top for a pop of color and extra flavor.
If you want to make it even cozier, serve it with a side of extra Cheddar Bay biscuits or some crusty bread to soak up all that creamy goodness. Don’t forget to have some extra cheese available—because, let’s be honest, is there ever such a thing as too much cheese?
Recipe Variations
Feeling adventurous? Let’s mix things up a bit! Here are some tasty variations you can try:
-
Spicy Southwest Version: Add some diced jalapeños or a dash of hot sauce to the ground beef for a spicy kick. Substitute cheddar cheese with pepper jack for added flavor.
-
Vegetarian Twist: Swap out the ground beef for a medley of your favorite chopped veggies (like bell peppers, mushrooms, and zucchini) or use lentils for a hearty, meatless option.
-
Loaded Baked Potato Style: Add some diced cooked potatoes to the mixture for a loaded baked potato feel. Top with extra cheese and a dollop of sour cream before serving.
-
Buffalo Chicken Casserole: Give it a twist by substituting ground beef with shredded cooked chicken and mixing in some buffalo sauce!
-
Herb Infusion: Mix in some chopped fresh herbs like parsley, thyme, or rosemary into the biscuit dough for an aromatic boost.
Chef’s Notes
Creating this dish has been such a delightful journey. Over the years, I’ve tried all sorts of variations, and it’s amazing how a simple recipe can evolve with our taste buds! There was one time, during a potluck, I accidentally used spicy biscuit mix instead of Cheddar Bay—let’s just say it turned into a fire-themed night!
I always keep it casual in my kitchen. Cooking should be fun, not a chore. I encourage everyone to play with the ingredients based on what you have. That’s where the magic lies—don’t be afraid to make it your own!
FAQs and Troubleshooting
-
Why is my casserole too watery?
If you find your casserole is too soupy, you may have added too much milk or cream soup. Next time, try using less liquid, or let it cook a bit longer to thicken. -
Can I prepare this casserole ahead of time?
Absolutely! You can assemble it ahead of time, cover it with foil, and store it in the fridge for up to 24 hours before baking. Just add a few extra minutes to the cooking time. -
What can I do if the biscuits over-brown?
If you notice the biscuits darkening too quickly, you can tent the casserole with foil for the last 10 minutes of baking to prevent them from burning. -
How do I store leftovers?
Store any leftovers in an airtight container in the refrigerator for up to 3-4 days. This casserole is great for reheating—just warm it in the oven or microwave until heated through.
Nutritional Info
Let’s talk numbers! Here’s a rough breakdown of the nutritional info per serving, keeping in mind that actual values will vary:
- Calories: Approximately 400
- Protein: 27g
- Carbohydrates: 28g
- Fat: 24g
- Fiber: 1g
- Sodium: 600mg
This casserole is a comforting option, but it’s always good to enjoy everything in moderation. Pair it with a fresh salad or steamed veggies for a more balanced meal!
Final Thoughts
There you have it, friends! Your very own Cheddar Bay Hamburger Casserole, bursting with flavor and overflowing with comfort. Whether it’s a weeknight dinner or a cozy gathering with friends, this dish is sure to please everyone at the table.
I hope you enjoy cooking it just as much as I love sharing it with you. Remember, the kitchen is a place for creativity, laughter, and making lasting memories. So put on your favorite playlist, grab some loved ones, and get cooking! Can’t wait to hear how your casserole turns out—happy feasting!
Print
Cheddar Bay Hamburger Casserole
- Total Time: 45 minutes
- Yield: 6 servings 1x
- Diet: Non-Vegetarian
Description
A comforting and scrumptious Cheddar Bay Hamburger Casserole that combines the flavors of cheesy, garlicky biscuits with a hearty ground beef filling, making it a perfect family-friendly meal.
Ingredients
- 1½ lbs ground beef
- 1 tbsp olive oil
- 1 small onion, finely chopped
- 2 cloves garlic, minced
- 1 can cream of mushroom soup
- 1 cup milk
- ½ tsp salt
- ½ tsp black pepper
- ½ tsp paprika
- 1½ cups shredded cheddar cheese
- 1 box Cheddar Bay biscuit mix
- ¾ cup cold milk
- 2 tbsp butter, melted
- ½ tsp garlic powder
Instructions
- Preheat the oven to 375°F (190°C).
- Cook the ground beef in a large skillet over medium heat with olive oil for 5-7 minutes until brown.
- Sauté the onions for 2-3 minutes, then add garlic and cook for another 30 seconds.
- Make the creamy sauce by mixing in the cream of mushroom soup and 1 cup of milk.
- Combine the beef mixture with the creamy sauce in a large bowl and pour into a greased 9×13 inch baking dish.
- Prep the biscuit topping by mixing the Cheddar Bay biscuit mix with ¾ cup cold milk and garlic powder.
- Top the casserole with spoonfuls of the biscuit mixture and spread it out.
- Add the shredded cheese over the biscuit layer.
- Brush melted butter over the biscuit topping.
- Bake for about 25-30 minutes, until biscuits are golden and filling is bubbling.
- Cool for 5-10 minutes before serving.
Notes
Serve with a side salad or steamed veggies for a balanced meal. Variations include adding jalapeños for spice or using veggies instead of beef.
- Prep Time: 15 minutes
- Cook Time: 30 minutes
- Category: Main Course
- Method: Baking
- Cuisine: American
Nutrition
- Serving Size: 1 serving
- Calories: 400
- Sugar: 5g
- Sodium: 600mg
- Fat: 24g
- Saturated Fat: 10g
- Unsaturated Fat: 8g
- Trans Fat: 1g
- Carbohydrates: 28g
- Fiber: 1g
- Protein: 27g
- Cholesterol: 80mg
Keywords: casserole, hamburger, Cheddar Bay, comfort food, family meal
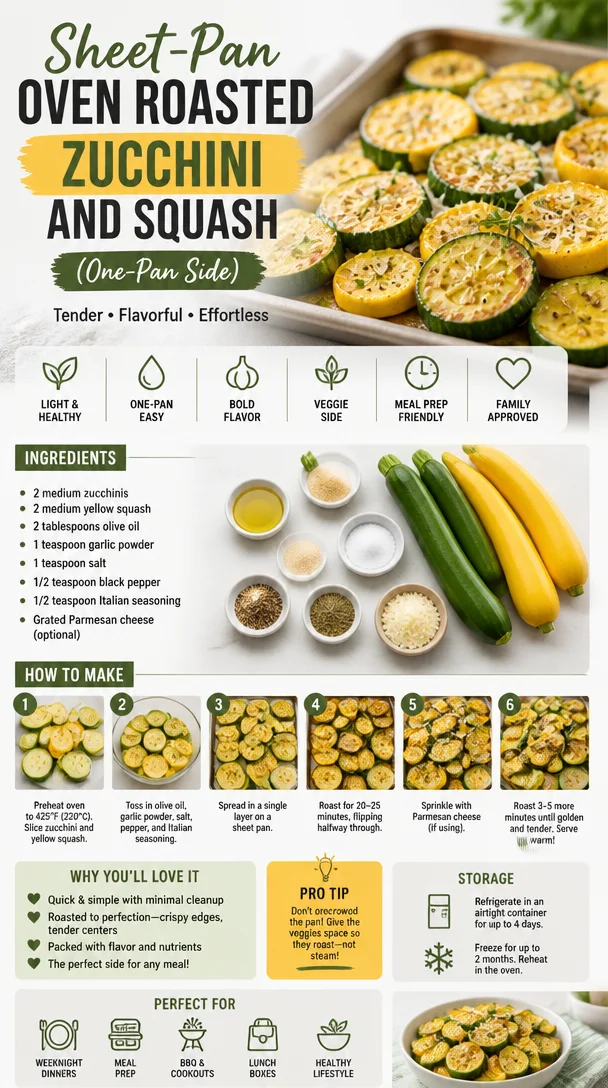
Sheet-Pan Oven Roasted Zucchini and Squash (One-Pan Side)
Oven Roasted Zucchini and Squash: A Simple Comfort Dish
Hey there, food lovers! Welcome back to Feastical, where I’m thrilled to share another delightful dish that’s not only nutritious but super easy to whip up. Today, we’re diving into the world of oven-roasted vegetables with a focus on zucchini and yellow squash. If you’re looking for a side dish that’s bursting with flavor and can accompany just about any meal, you’ve hit the jackpot! These roasted veggies are vibrant, tender, and downright delicious, making them the perfect companion for your main course, or even on their own for a light lunch.
Let me take you on a little journey—imagine walking into your kitchen, the warm aroma of garlic mingling with the earthy sweetness of vegetables wafting through the air. Let’s make this moment a reality! Roasting zucchini and squash brings out their natural sweetness while adding a touch of caramelization that’s simply irresistible. Plus, it’s a canvas for your culinary creativity—feel free to play around with spices and toppings. So grab your apron, and let’s get cozy in the kitchen together—because a good meal is always worth gathering around the table for!
Personal Story
I’ll never forget the first time I really got into cooking. I was about twelve and spent countless weekends at my grandma’s house. She had a garden that was a mini paradise—filled with zucchini, squash, tomatoes, and everything else in between. She’d hand me a basket and send me on a treasure hunt through her backyard. Zucchini seemed endless! One sunny afternoon, she taught me how to roast zucchini and squash. “Just a little olive oil and some seasoning, Beau,” she’d say, “and they’ll be perfect!”
As the smell of garlic filled the house, we laughed and chatted about everything under the sun while we waited for our vegetables to roast. Those moments were more than just about cooking; they were about connection. Fast forward to now, and I still feel that same warmth every time I prepare oven-roasted zucchini and squash. It’s a dish that’s surrounded by love, history, and a whole lot of flavor.
Ingredients
Here’s what you’ll need for the perfect oven-roasted zucchini and squash:
-
2 medium zucchinis
These beauties not only add color but also a delightful crunch. You can substitute with any kind of summer squash if you prefer! -
2 medium yellow squash
Sweet and tender, yellow squash adds a lovely bright hue to your dish. Don’t have yellow squash? No worries! Substitute with more zucchini or even eggplant. -
2 tablespoons olive oil
Heaven in a bottle! Olive oil helps to crisp up the veggies while adding a rich flavor. If you’re after a different taste, feel free to use avocado oil! -
1 teaspoon garlic powder
This is where we kick it up a notch! Garlic powder gives depth without the need for chopping fresh garlic. You can also use fresh minced garlic; just be careful not to burn it! -
1 teaspoon salt
A little salt enhances the natural flavors of your veggies. Consider using a flaky sea salt for added texture! -
1/2 teaspoon black pepper
Freshly cracked black pepper adds a subtle heat. Adjust to taste depending on your preference for spice. -
1/2 teaspoon Italian seasoning
This is a blend of dried herbs that will take your roasted veggies from good to ‘oh-my-goodness’ delicious! Replace it with fresh herbs if you have them on hand! -
Grated Parmesan cheese (optional)
Because cheese makes everything better! Sprinkle some on right before serving for an extra flavor boost.
Step-by-Step Instructions
Now, let’s get your kitchen buzzing! Here’s how to roast these lovely veggies step by step.
-
Preheat Your Oven
Preheat your oven to 400°F (200°C). This high temperature will ensure our zucchini and squash roast beautifully, getting all caramelized and golden. -
Prep Your Veggies
Grab your zucchinis and yellow squash. Rinse them under cold water to remove any dirt, then slice them into 1/4-inch thick rounds or half-moons—whichever you prefer! The key here is uniformity, so they cook evenly. -
Toss with Olive Oil and Seasonings
In a large bowl, add your sliced vegetables. Drizzle with olive oil, then sprinkle over the garlic powder, salt, black pepper, and Italian seasoning. Here’s a little chef hack: instead of using your hands to mix, try using a spatula! It avoids the slippery veggie situation some of us have encountered! -
Spread on a Baking Sheet
Line a baking sheet with parchment paper for easy clean-up (I promise you’ll thank me later). Spread your seasoned vegetables out in a single layer—crowding them will steam rather than roast. -
Roast Away!
Toss your baking sheet in the preheated oven and roast for about 20-25 minutes. Give them a little toss halfway through so they get that golden color on all sides. You know they’re done when they’re tender and have those beautiful brown edges—perfection! -
Finishing Touches
If you’re using Parmesan cheese, sprinkle it on your veggies during the last 5 minutes of roasting. Keep an eye on it to ensure it melts and doesn’t burn!
And there you have it! The aroma swirling in your kitchen should be telling you it’s almost time to dig in!
Serving Suggestions
Now that your oven-roasted zucchini and squash are ready, it’s time to think about how you’ll serve them. A simple yet elegant presentation goes a long way!
-
Plating: Transfer your roasted veggies to a serving platter while they’re still warm. Feel free to garnish with a sprinkle of fresh herbs like basil or parsley for color and an extra layer of flavor.
-
Pairing: These roasted beauties go beautifully alongside grilled chicken, fish, or even as part of a hearty grain bowl topped with feta or goat cheese. They also make a delightful addition to pasta dishes or even tucked into tacos!
-
Storing Leftovers: If, by some miracle, you have leftovers, let them cool completely before transferring to an airtight container. They’ll keep in the fridge for up to three days. Reheat them in the oven or air fryer for that fresh-out-of-the-oven taste!
Recipe Variations
Variety is the spice of life, right? Here are a few fun twists to play with your oven-roasted zucchini and squash:
-
Herbed Up: Add dried thyme, rosemary, or fresh oregano to the mix for a different herbaceous flavor.
-
Spicy Kick: Toss in some red pepper flakes or drizzle with a bit of sriracha after roasting for a spicy twist.
-
Lemony Freshness: Squeeze some fresh lemon juice over the veggies once they’re out of the oven—this brightens the whole dish!
-
Mediterranean Style: Include sliced olives, sun-dried tomatoes, or artichoke hearts for a Mediterranean spin. Serve with hummus on the side for a delightful dip!
-
Cheesy Goodness: Besides Parmesan, sprinkle some crumbled feta or shredded mozzarella for a cheesy upgrade.
Chef’s Notes
Cooking has always been an adventure for me, and this recipe holds a special place in my heart. Remember those weekends at grandma’s? I still channel her spirit every time I roast veggies. I find it fascinating how this simple process brings people together—even if it’s just for a cozy night in with a sunset as your backdrop.
And a little tip: feel free to adjust the seasoning to suit your palate! Cooking is about experimenting, and who knows? You might just create a new family favorite!
FAQs and Troubleshooting
-
What if my vegetables are soggy?
This usually happens if they’re crowded on the baking sheet or if the oven wasn’t hot enough. Make sure to keep them in a single layer and always preheat your oven! -
Can I add other vegetables?
Absolutely! Bell peppers, onions, or carrots would work wonderfully. Just cut them to a similar size so they cook evenly. -
How do I know when they are done?
Look for that lovely golden color and fork-tender texture! Don’t be shy to taste one during the roasting process. -
How can I store leftovers?
Allow them to cool completely, then store in an airtight container in the fridge for up to three days. They can be reheated in the oven, which keeps them crispy!
Nutritional Info
Oven-roasted zucchini and squash are not only bursting with flavor but also packed with nutrients:
- Calories: Approximately 90 per serving (without cheese)
- Fat: 5g (from olive oil)
- Carbohydrates: 15g (mostly fiber!)
- Protein: 2g
- Fiber: 4g (hello, digestion!)
- Vitamin A, C, and several B vitamins
With this tasty dish, you’ve got a meal that’s nutritious and satisfying without the guilt!
Final Thoughts
And there you have it—simple, wholesome, and bursting with flavor oven-roasted zucchini and squash! I hope this recipe brings you as much joy as it has brought to my kitchen over the years. Remember to keep it fun, experiment with flavors, and don’t forget to share your creations with those you love. Cooking is about more than just food; it’s about creating experiences and memories!
So what are you waiting for? Gather your ingredients and let’s get roasting! I can’t wait to see what delicious twists you come up with! Happy cooking, my foodie friends!
Print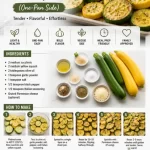
Oven Roasted Zucchini and Squash
- Total Time: 35 minutes
- Yield: 4 servings 1x
- Diet: Vegetarian
Description
A simple and delicious side dish featuring oven-roasted zucchini and yellow squash, perfect for any meal.
Ingredients
- 2 medium zucchinis
- 2 medium yellow squash
- 2 tablespoons olive oil
- 1 teaspoon garlic powder
- 1 teaspoon salt
- 1/2 teaspoon black pepper
- 1/2 teaspoon Italian seasoning
- Grated Parmesan cheese (optional)
Instructions
- Preheat your oven to 400°F (200°C).
- Prep your zucchinis and yellow squash by rinsing and slicing them into 1/4-inch thick rounds.
- Toss the sliced vegetables in a bowl with olive oil, garlic powder, salt, black pepper, and Italian seasoning.
- Spread the veggies on a lined baking sheet in a single layer.
- Roast for about 20-25 minutes, tossing halfway through until golden and tender.
- Finishing touches: Add Parmesan cheese during the last 5 minutes if desired.
Notes
Feel free to adjust seasonings and add other vegetables if desired. Pair with grilled chicken or fish for a complete meal.
- Prep Time: 10 minutes
- Cook Time: 25 minutes
- Category: Side Dish
- Method: Roasting
- Cuisine: American
Nutrition
- Serving Size: 1 serving
- Calories: 90
- Sugar: 3g
- Sodium: 300mg
- Fat: 5g
- Saturated Fat: 1g
- Unsaturated Fat: 4g
- Trans Fat: 0g
- Carbohydrates: 15g
- Fiber: 4g
- Protein: 2g
- Cholesterol: 0mg
Keywords: zucchini, squash, roasted vegetables, side dish, vegetarian recipe
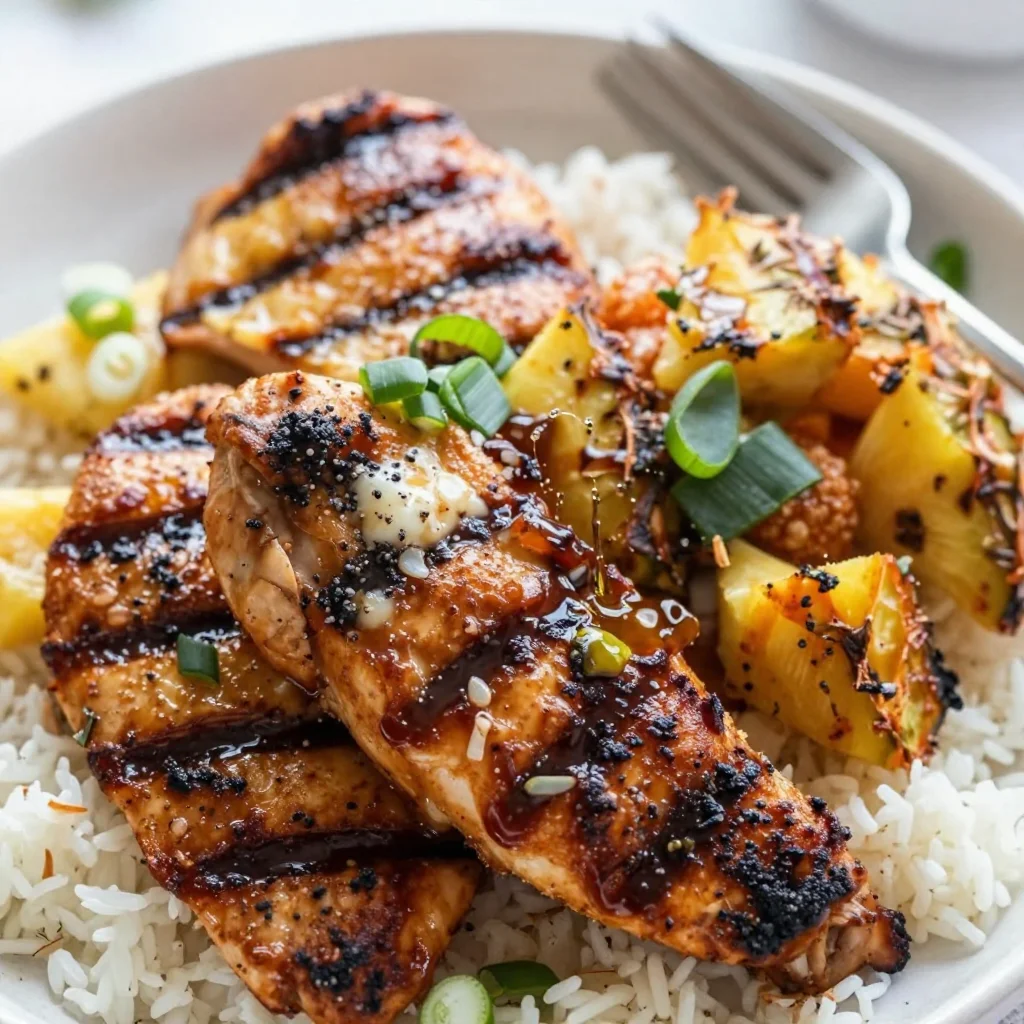
One-Pan Hawaiian Chicken: Pineapple Coconut Rice (30 Min)
Hawaiian Chicken with Pineapple and Coconut Rice: A Tropical Delight
Hey there, food lovers! I’m Beau Collier, and if there’s one thing I adore, it’s whipping up dishes that transport you straight to paradise—even if you’re just cooking in your cozy kitchen. Today, we’re putting a sunny spin on dinner with a delightful recipe for Hawaiian Chicken paired with creamy Pineapple and Coconut Rice. Trust me, whether you’re dreaming of sandy beaches or just looking for a feel-good meal, this dish will make you feel like you’re on vacation.
The Flavor of Fun
Before we dive into the recipe, let me take you back to a beautiful summer day when I first fell in love with this dish. Picture this: I was at my friend’s backyard luau party, the sun shining bright, and the sound of ukuleles filling the air. My friend’s mom was the star of the show, grilling chicken marinated in a tangy pineapple glaze, filling the space with an irresistible aroma. She served it with coconut rice that was so creamy and dreamy it felt like you were eating clouds! It was the perfect flavor explosion, combining sweet, savory, and tropical notes. That day, I vowed to recreate that magic, to bring a little taste of Hawaii into my own kitchen, and guess what? I did just that!
Ingredients
Let’s get ready to cook! Here’s what you’ll need to bring this tropical feast to life:
-
1 lb chicken breast: The star of our dish! Chicken breast is lean, tender, and perfect for soaking up all those delicious flavors. If you’re looking for a substitution, boneless thighs work fabulously too—just adjust the cooking time slightly as they tend to be juicier.
-
1 cup pineapple chunks: Fresh or canned, pineapple adds a burst of sweetness that pairs beautifully with chicken. If you’re feeling adventurous, try using mango for a twist, or toss in some diced bell peppers for added crunch!
-
1 cup coconut rice: Creamy and luxurious, coconut rice is a showstopper! To make it, just cook your rice in coconut milk or add some shredded coconut for texture. Can’t find coconut milk? Feel free to use regular milk and add a few drops of vanilla for sweetness.
-
1 tablespoon soy sauce: This umami powerhouse adds depth and enhances the flavors. For a gluten-free option, tamari works exceptionally well. You could also use coconut aminos for a sweeter twist!
-
1 tablespoon olive oil: A little fat goes a long way in cooking. Olive oil gives the chicken a beautiful golden crust. But if you prefer, avocado oil is a buttery alternative that can handle higher heat!
-
Salt and pepper to taste: The simplest yet most powerful seasonings! Adjust to your preference, but don’t skip them—they’re essential for bringing out the flavors.
-
Chopped green onions for garnish: Freshness and a pop of color! You can also swap these for fresh cilantro or toasty sesame seeds for a nuttier taste.
Step-by-Step Instructions
Alright, let’s get cooking! Follow these easy steps to whip up your Hawaiian Chicken with Pineapple and Coconut Rice:
-
Marinate the Chicken: In a bowl, combine the soy sauce, olive oil, a pinch of salt, and pepper. Add the chicken breast, ensuring it’s fully coated in this savory goodness. Let it marinate for at least 30 minutes (or longer for extra flavor if you have time—overnight in the fridge works wonders!).
-
Prepare the Coconut Rice: Rinse your rice under cold water to remove excess starch (this helps it stay fluffy). Next, in a pot, combine 1 cup of rice with 1 cup of coconut milk and a pinch of salt. Bring it to a boil, then reduce to low heat, cover it, and let it simmer for about 15-20 minutes until the rice is tender and fluffy. Once cooked, fluff it with a fork and keep it warm.
-
Cook the Chicken: Heat a grill or your trusty skillet over medium-high heat. Add a splash of olive oil to prevent sticking. Cook the marinated chicken for about 6-7 minutes on each side or until it’s cooked through and has that glorious golden brown color. The internal temperature should reach 165°F (75°C).
-
Add Pineapple: In the last few minutes of cooking, toss in the pineapple chunks around the chicken. Let them caramelize slightly for that sweet flavor boost. If you love a bit of char, feel free to grill them separately!
-
Plate It Up: On a plate, scoop a generous portion of coconut rice, top it with your deliciously cooked chicken, and drape those caramelized pineapple chunks over the top. Garnish with chopped green onions or your herb of choice.
Serving Suggestions
Now, how you serve your plates can be just as delightful as the dish itself! For this Hawaiian Chicken, I recommend making it a feast. Serve it with colorful sides like a bright green salad or steamed veggies for that extra crunch. You could even whip up a batch of crispy sweet potato fries or a fresh fruit salad for a dazzling flair. Don’t forget a tropical drink like a fruity iced tea or a coconut water!
Recipe Variations
Feeling adventurous? Here are some fun variations to make this dish your own:
-
Spicy Hawaiian Twist: Add sriracha or chili flakes to the marinade for a kick! This adds a nice contrast to the sweetness of the pineapple.
-
Tropical Quinoa Bowl: Swap out the coconut rice for quinoa for a healthier spin. Cook the quinoa in coconut milk to keep that tropical vibe!
-
Pineapple Salsa: Top your chicken with a fresh salsa made from diced tomatoes, onions, cilantro, and fresh pineapple for a zesty twist.
-
Coconut-Crusted Chicken: For a crunchy twist, coat your marinated chicken in shredded coconut before cooking! It gives an amazing texture and a beautiful golden color.
-
Vegetarian Delight: Replace the chicken with firm tofu or tempeh to create a plant-based version. Just make sure to marinate and cook them until golden!
Chef’s Notes
One of the things I love most about this recipe is its simplicity. It’s evolved over time for me—I’ve tried so many versions, and every time it comes out delicious! I once accidentally forgot to add the soy sauce while cooking (oops!), and you know what? I replaced it with a dash of balsamic vinegar! It gave a unique flavor that was surprisingly good. That’s the beauty of cooking; it’s all about experimenting and finding your flair!
FAQs and Troubleshooting
-
What if my chicken isn’t cooking evenly?
- Make sure you’re not overcrowding the pan. Cook in batches if needed for even cooking!
-
Can I use brown rice instead of white?
- Absolutely! Just remember that brown rice will need a bit more cooking time and water, so adjust accordingly.
-
How do I know when the chicken is done?
- The best way is to use a meat thermometer—165°F (75°C) is your magic number. If you don’t have one, cut into the chicken; it should be no longer pink.
-
What can I do with leftover coconut rice?
- Leftover rice can be turned into a delicious fried rice dish or used in breakfast bowls with fruit and honey.
Nutritional Info
Now let’s talk nutrition! This Hawaiian Chicken with Pineapple and Coconut Rice serves up a delightful balance of macronutrients. Each serving contains approximately:
- Calories: 420
- Protein: 30g
- Carbohydrates: 55g
- Fat: 12g
It’s a well-rounded meal packed with protein from the chicken and plenty of carbs from the rice, plus healthy fats from the olive oil. You’ll be full and satisfied without feeling heavy!
Final Thoughts
There you have it, friends—your own slice of Hawaiian paradise right at home. Cooking this Hawaiian Chicken with Pineapple and Coconut Rice is not just about the food; it’s about the joy it brings to the table, the warm memories shared over meals, and the new ones you’ll create. So gather your loved ones, bring out your best serving dishes, and let’s savor every bite together. Now go forth, sprinkle some aloha spirit in your kitchen, and enjoy this delicious recipe. Until next time, happy cooking!
Print
Hawaiian Chicken with Pineapple and Coconut Rice
- Total Time: 50 minutes
- Yield: 4 servings 1x
- Diet: Paleo
Description
A delightful recipe for Hawaiian Chicken paired with creamy Pineapple and Coconut Rice, ideal for a tropical escape at home.
Ingredients
- 1 lb chicken breast
- 1 cup pineapple chunks
- 1 cup coconut rice
- 1 tablespoon soy sauce
- 1 tablespoon olive oil
- Salt and pepper to taste
- Chopped green onions for garnish
Instructions
- Marinate the chicken: In a bowl, combine the soy sauce, olive oil, a pinch of salt, and pepper. Add the chicken breast, ensuring it’s fully coated in this savory goodness. Let it marinate for at least 30 minutes.
- Prepare the coconut rice: Rinse your rice under cold water to remove excess starch. In a pot, combine 1 cup of rice with 1 cup of coconut milk and a pinch of salt. Bring it to a boil, then reduce to low heat, cover, and let it simmer for about 15-20 minutes until the rice is tender and fluffy.
- Cook the chicken: Heat a grill or skillet over medium-high heat. Add a splash of olive oil to prevent sticking. Cook the marinated chicken for about 6-7 minutes on each side until it’s cooked through and golden brown.
- Add pineapple: In the last few minutes of cooking, toss in the pineapple chunks around the chicken to caramelize slightly for added sweetness.
- Plate it up: Scoop a generous portion of coconut rice, top it with the cooked chicken, and drape the caramelized pineapple over it. Garnish with chopped green onions.
Notes
Feel free to substitute with boneless thighs or use firm tofu for a vegetarian option.
- Prep Time: 30 minutes
- Cook Time: 20 minutes
- Category: Main Course
- Method: Grilling
- Cuisine: Hawaiian
Nutrition
- Serving Size: 1 serving
- Calories: 420
- Sugar: 10g
- Sodium: 700mg
- Fat: 12g
- Saturated Fat: 2g
- Unsaturated Fat: 8g
- Trans Fat: 0g
- Carbohydrates: 55g
- Fiber: 2g
- Protein: 30g
- Cholesterol: 70mg
Keywords: Hawaiian Chicken, Pineapple Rice, Tropical Recipe, Summer Dish
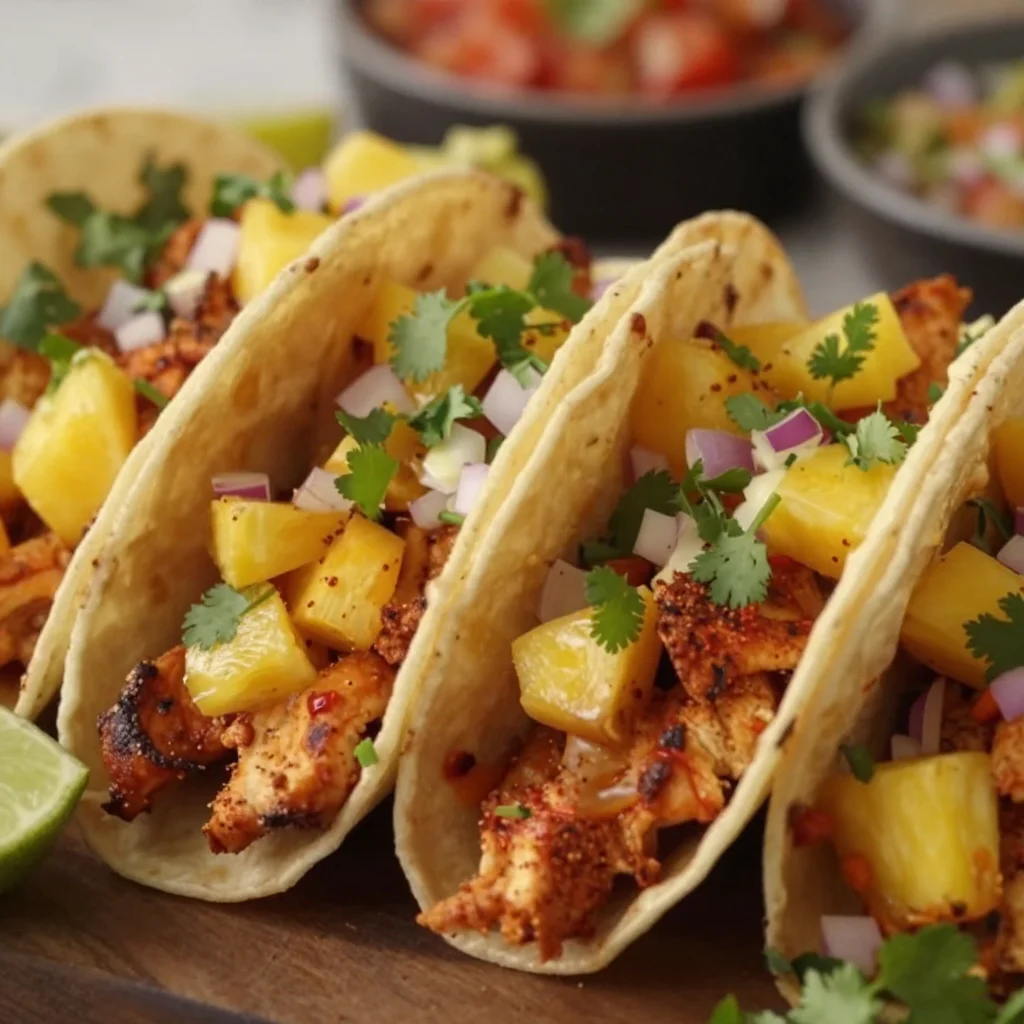
One-Pan Pineapple Chicken Tacos for Busy Weeknights
Pineapple Chicken Tacos: A Flavorful Twist on Taco Night
Hey food lovers! Welcome back to Feastical! If you’re ready to spice up your taco night with a juicy burst of flavor, you’re in for a treat with these Pineapple Chicken Tacos! Picture this: tender, marinated chicken paired with sweet, tangy pineapple, all enveloped in soft tortillas. It’s a dish designed not just to fill your belly but to warm your soul. So grab your favorite kitchen gear, and let’s dive into this deliciousness!
A Taste of Nostalgia
Growing up, taco night was a sacred family ritual in my home. My dad would handle the proteins while my mom prepared the toppings – fresh veggies, zesty sauces, you name it. One summer evening, when I was maybe ten or eleven, we decided to shake things up. My dad came home with a pineapple from the local farmer’s market, beaming with excitement about using it in our tacos. At that time, the concept of fruit in savory dishes was somewhat foreign to me, but curiosity got the best of me.
We diced the juicy pineapple and mixed it with grilled chicken, and the combination was magical! The sweetness of the pineapple danced with the spices while the chicken delivered that hearty substance we all missed. To this day, that summer taco night remains one of my fondest culinary memories. It taught me that cooking is about experimentation, joy, and gathering around the table with the people you love. Now, I can’t wait for you to experience the same exuberance with these Pineapple Chicken Tacos!
Ingredients You’ll Need
Let’s get started with what you need to make these delightful tacos. Here’s the list:
-
1 pound boneless skinless chicken breasts, diced
- These are your protein powerhouse! Boneless and skinless keeps things tender and easy. If you don’t have chicken, you can swap in shrimp or firm tofu for a great alternative.
-
1 tablespoon olive oil
- A little oil goes a long way in searing your chicken and bringing out those flavors! If you’re in a pinch, avocado oil or grapeseed oil works just as well.
-
1 teaspoon smoked paprika
- This spice adds a nice depth and smokiness! If you’re in a spice mood, you could just use regular paprika, but the smoke adds a unique flavor that’s worth the upgrade.
-
1 teaspoon chili powder
- Here comes the heat! Feel free to adjust to your taste. If you prefer it milder, you can go for a mild chili powder or even skip it entirely for a sweet flavor profile.
-
1/2 teaspoon garlic powder
- No taco is complete without garlic! You can use fresh minced garlic for a stronger flavor, just remember that one clove equals about 1/8 teaspoon of garlic powder.
-
1/2 teaspoon salt
- Salt enhances all the flavors, so don’t skip this step! Consider using sea salt or kosher salt for better texture.
-
1 cup fresh pineapple, finely diced
- The star of this show! The sweetness of the pineapple will be the perfect contrast to the savory chicken. Canned pineapple can work in a pinch, but go for fresh if you can!
-
1/4 cup red onion, finely chopped
- Adds a sweet crunch and vibrant color. If red onions are too sharp for you, use green onions or even scallions for a milder taste.
-
1/4 cup fresh cilantro, chopped
- A fresh herb that brightens the dish! If you’re not a fan of cilantro, swap it out for parsley or even mint for a different twist.
-
1 tablespoon lime juice
- To add that zesty kick! Fresh lime juice is best, but bottled lime juice is a decent substitute when you’re in a hurry.
-
8 small corn or flour tortillas
- Choose whichever you prefer! Corn tortillas have a lovely earthy flavor, while flour tortillas are soft and pliable. You can also find gluten-free options if necessary.
Let’s Cook! Step-by-Step Instructions
-
Prep Your Ingredients:
- Start by gathering all your ingredients. Chop the chicken into bite-sized pieces and set them aside. Dice your pineapple, chop the red onion, and mince the cilantro. Prepping all your components will make the cooking process a breeze!
-
Marinate the Chicken:
- In a bowl, combine the diced chicken with olive oil, smoked paprika, chili powder, garlic powder, and salt. Massage the spices into the chicken, ensuring it’s evenly coated. Let it marinate for at least 15 minutes; if you have time, letting it soak up those flavors for an hour or more is even better!
-
Cook the Chicken:
- Heat a large skillet over medium-high heat. Once hot, add the marinated chicken in a single layer. Sear for about 5-7 minutes, turning occasionally, until the chicken is golden brown and cooked through. Pro tip: use a meat thermometer—the internal temperature should reach 165°F (75°C). This ensures juicy chicken every time!
-
Add the Pineapple:
- Once your chicken is cooked, push it to one side of the skillet and add the diced pineapple to the other side. Sauté together for about 2-3 minutes until the pineapple starts to caramelize a bit. This enhances its natural sweetness and adds a lovely dimension to your tacos.
-
Mix and Combine:
- Stir everything in the skillet together! Toss the pineapple through the chicken so that every bite gets a touch of sweetness. Before removing the skillet from the heat, squeeze in lime juice and give it a final stir.
-
Warm the Tortillas:
- In another skillet or on direct flame, warm your tortillas for about 30 seconds on each side until they’re soft and pliable. This step is key for making sure your tacos don’t fall apart!
-
Assemble Your Tacos:
- Lay a few pieces of the chicken and pineapple mixture onto each tortilla. Top with red onion and fresh cilantro. Feel free to add some extra lime juice if you’re feeling zesty!
Serving Suggestions
Now that your Pineapple Chicken Tacos are ready, let’s talk presentation! Stack your tacos neatly on a vibrant plate and consider garnishing with additional lime wedges and cilantro for that pop of color. If you’re feeling fancy, a sprinkle of crumbled queso fresco or a drizzle of spicy crema (just mix sour cream with a bit of sriracha) elevates this dish even further!
Delicious Variations to Try
Here are a few fun twists to keep your taco game fresh:
-
Tropical Shrimp Tacos: Swap out the chicken for shrimp, marinated in a bit of lime juice and garlic, then quickly sauté them for a quicker seafood spin.
-
Vegetarian Delight: Replace chicken with roasted chickpeas or black beans for a hearty plant-based version! Add avocado for some creaminess.
-
Spicy Mango Salsa: Instead of pineapple, toss in some diced mango or a spicy mango salsa for another layer of sweetness with a kick!
-
Grilled Chicken Variant: Grill the chicken on an outdoor grill instead for that smokey flavor, then top with the caramelized pineapple right off the grill.
-
Crunchy Coleslaw: Add a crunch by topping your tacos with a simple slaw of cabbage, carrot, and lime juice for texture and freshness!
Chef’s Notes
As I was perfecting this recipe, I found myself reminiscing often about that magical family taco night. It reminded me of how food can tell stories. Each time I make these tacos, it feels like a celebration, a chance to gather and create new memories. Over the years, I’ve learned to tweak and adapt recipes based on what I have on hand or what mood I’m in. Feel free to experiment and find what works best for you!
FAQs and Troubleshooting
-
What if my chicken is dry?
- Overcooking is the main culprit. Always use a meat thermometer to check for doneness! If it’s too dry, consider serving it with a side of pineapple salsa.
-
Can I make these ahead of time?
- You can prep the chicken and pineapple mixture a day ahead and store it in the fridge, but warm it all up before serving to ensure freshness.
-
How do I store leftovers?
- Place any leftovers in an airtight container in the refrigerator for up to 3 days. Reheat on the stovetop before serving!
-
What can I use if I’m out of tortillas?
- Try lettuce wraps or rice bowls for a gluten-free and lower-carb option. These fillings are versatile and fit great in many bases!
Nutritional Information
Now, let’s break down what you’re getting in these delicious tacos. Each serving (2 tacos) provides roughly:
- Calories: 350
- Protein: 30g
- Carbohydrates: 30g
- Fat: 15g
Of course, nutritional values may vary based on the specific ingredients and amounts used. For a healthier touch, skip the tortillas and serve the chicken and pineapple mixture over brown rice or quinoa.
Final Thoughts
Pineapple Chicken Tacos are not just a meal but an experience – a delightful mix of flavors, colors, and textures that come together to create something truly special. I hope this recipe sparks joy in your kitchen, inspires you to gather your loved ones, and ends with smiles and full bellies. Remember, cooking should be fun, energizing, and reflective of your taste!
So, what are you waiting for? Round up your favorite people, gather around the kitchen, and whip up these incredible tacos. Don’t forget to share your culinary creations with me on social media! Happy cooking, my friends! 🍍🌮
Print
Pineapple Chicken Tacos
- Total Time: 35 minutes
- Yield: 4 servings 1x
- Diet: Gluten-Free
Description
A delicious twist on taco night featuring tender chicken and sweet pineapple, wrapped in soft tortillas.
Ingredients
- 1 pound boneless skinless chicken breasts, diced
- 1 tablespoon olive oil
- 1 teaspoon smoked paprika
- 1 teaspoon chili powder
- 1/2 teaspoon garlic powder
- 1/2 teaspoon salt
- 1 cup fresh pineapple, finely diced
- 1/4 cup red onion, finely chopped
- 1/4 cup fresh cilantro, chopped
- 1 tablespoon lime juice
- 8 small corn or flour tortillas
Instructions
- Prep your ingredients: Gather and chop the chicken, pineapple, red onion, and cilantro.
- Marinate the chicken: Combine chicken with olive oil, smoked paprika, chili powder, garlic powder, and salt. Let it marinate for at least 15 minutes.
- Cook the chicken: Heat a skillet over medium-high heat and sear the marinated chicken until cooked through.
- Add the pineapple: Push the chicken to one side and sauté the diced pineapple until caramelized.
- Mix and combine: Stir the chicken and pineapple together, then add lime juice.
- Warm the tortillas: Heat tortillas in another skillet until soft.
- Assemble your tacos: Fill each tortilla with chicken and pineapple mixture, topped with red onion and cilantro.
Notes
Serve with lime wedges and cilantro for added color. Consider adding queso fresco or spicy crema for extra flavor.
- Prep Time: 15 minutes
- Cook Time: 20 minutes
- Category: Main Course
- Method: Sautéing
- Cuisine: Mexican
Nutrition
- Serving Size: 2 tacos
- Calories: 350
- Sugar: 6g
- Sodium: 600mg
- Fat: 15g
- Saturated Fat: 2g
- Unsaturated Fat: 12g
- Trans Fat: 0g
- Carbohydrates: 30g
- Fiber: 3g
- Protein: 30g
- Cholesterol: 70mg
Keywords: Pineapple Chicken Tacos, Taco Night, Easy Tacos, Mexican Recipes, Family Recipes