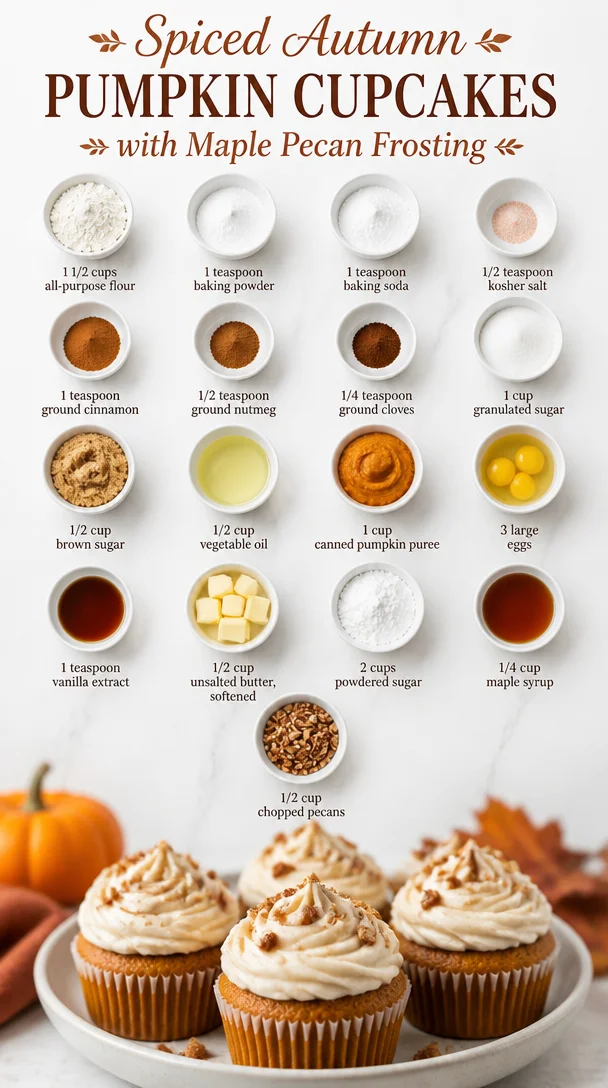
Spiced Autumn Pumpkin Cupcakes with Maple Pecan Frosting
Irresistible Pumpkin Cupcakes with Maple Pecan Frosting: A Sweet Fall Treat
Hey there, friends! It’s Beau Collier here, and I’m absolutely thrilled to share one of my most cherished fall recipes with you today: Pumpkin Cupcakes with Maple Pecan Frosting. As soon as autumn rolls around, I find myself daydreaming of those vibrant orange pumpkins, cozy sweaters, and, of course, the irresistible aroma of freshly baked pumpkin treats wafting through the kitchen. There’s something about these cupcakes that brings a warm, fuzzy feeling to my heart and a delicious smile to my face. Let’s dive into this delightful recipe that’s sure to make your kitchen smell like a slice of fall!
A Little Slice of Nostalgia
I remember the first time I made pumpkin cupcakes. It was a chilly October afternoon, and my childhood best friend, Sarah, came over for a baking session. We had our playlist blasting, the leaves were rustling outside, and there was a sense of magic in the air as we tackled our mission of creating the most delicious fall dessert imaginable. We decided on pumpkin cupcakes, inspired by our favorite coffee shop that always sold out too quickly.
As we mixed the velvety pumpkin puree with spices that smelled like autumn—cinnamon, nutmeg, and cloves—I couldn’t help but reminisce about the many family gatherings we had where dishes overflowing with pumpkin treats took center stage. The joy we felt that day was palpable, and despite a few flour fights and giggles filling the kitchen, we managed to whip up a batch of the fluffiest cupcakes topped with the silkiest maple pecan frosting.
Those cupcakes were a hit! Friends and family couldn’t get enough of them, and from that day on, they became a staple at every gathering. So, let’s recreate that joy in your kitchen and bring some of this pumpkin magic to your home!
Ingredients
Here’s what you’re going to need to whip up your scrumptious pumpkin cupcakes:
-
1 1/2 cups all-purpose flour
- Great for a classic cupcake structure! If you prefer a gluten-free option, use a 1:1 gluten-free flour blend.
-
1 teaspoon baking powder
- This is your rising agent! Ensure it’s fresh for the best puff.
-
1 teaspoon baking soda
- Another leavening hero that gives your cupcakes that airy lightness.
-
1/2 teaspoon kosher salt
- A little salt enhances all the flavors—don’t skip it!
-
1 teaspoon ground cinnamon
- The quintessential spice of fall! You can also use pumpkin pie spice if you have it handy.
-
1/2 teaspoon ground nutmeg
- Adds a warm, nutty flavor. Freshly grated nutmeg makes a world of difference!
-
1/4 teaspoon ground cloves
- Just a hint of clove lends an aromatic punch for that cozy feeling.
-
1 cup granulated sugar
- Sweetness is key! Brown sugar can give a deeper flavor if mixed half and half.
-
1/2 cup brown sugar
- For that moist texture! It also enhances the caramel notes.
-
1/2 cup vegetable oil
- Keeps these cupcakes fluffy and moist. Can be substituted with melted coconut oil for a tropical twist!
-
1 cup canned pumpkin puree
- The star of the show! Make sure it’s pure pumpkin, not pumpkin pie filling.
-
3 large eggs
- Binding and fluffing agents—room temperature eggs work best!
-
1 teaspoon vanilla extract
- A splash of vanilla elevates everything; opt for pure for more flavor.
-
1/2 cup unsalted butter, softened
- Provides creaminess to the frosting. Margarine can work in a pinch.
-
2 cups powdered sugar
- For that sweet, dreamy frosting!
-
1/4 cup maple syrup
- Adds depth and a beautiful, subtly sweet flavor to the frosting.
-
1/2 cup chopped pecans
- Toast them for an extra flavor boost! Pecans complete the frosting beautifully.
Step-by-Step Instructions
-
Preheat the Oven: Start by preheating your oven to 350°F (175°C). This way, your cupcakes will be ready to go as soon as you’re done mixing.
-
Prepare the Muffin Tin: Line a muffin tin with cupcake liners or grease it well with non-stick spray. I love the festive feel of colorful liners—pick your favorite!
-
Mix Dry Ingredients: In a medium bowl, whisk together the all-purpose flour, baking powder, baking soda, salt, cinnamon, nutmeg, and cloves. This not only combines them evenly, but also helps incorporate air for fluffier cupcakes.
-
Combine Wet Ingredients: In a large bowl, mix the granulated and brown sugars with the vegetable oil until it’s light and fluffy. Slowly add in the canned pumpkin, eggs, and vanilla extract, beating until well combined. It’s like a warm embrace for your spatula!
-
Combine the Mixtures: Gradually add the dry ingredients into the wet mixture, folding gently until just combined. Avoid overmixing, as we want these beauties to be light and airy!
-
Fill the Cupcake Liners: Fill the muffin tin about two-thirds full with the batter. Sip on your favorite beverage while it bakes; it’s time to let the oven work its magic!
-
Bake: Place your pan in the preheated oven and bake for 18-20 minutes, or until a toothpick inserted in the center comes out clean. This is the moment of truth!
-
Cool: Once baked, allow the cupcakes to cool in the pan for about 5 minutes. Then transfer them to a wire rack to cool completely before frosting.
-
Make the Frosting: In a mixing bowl, beat the softened butter and powdered sugar until fluffy. Add the maple syrup and continue to beat until smooth and creamy. For a fun challenge, try spreading the frosting with a spatula for a rustic look!
-
Frost and Garnish: Once your cupcakes are cool, slather on that velvety maple pecan frosting and sprinkle chopped pecans on top for that extra crunch.
Serving Suggestions
Time to serve up those heavenly pumpkin cupcakes! Place them on a vibrant serving platter, and if you’re feeling fancy, arrange a few additional pecans around the edges for a beautiful presentation. Pair them with a hot cup of coffee or tea for an ultimate fall treat, or serve them at gatherings for a delightful dessert. Why not take them to your next potluck? I guarantee they’ll be the star of the show!
Recipe Variations
Feel free to get creative with these pumpkin cupcakes! Here are a few ideas to spark your imagination:
-
Chocolate Chip Pumpkin Cupcakes: Fold in a cup of semi-sweet chocolate chips into the batter for a decadent twist!
-
Spiced Rum Frosting: Add a splash of spiced rum to your frosting for a grown-up flavor.
-
Gluten-Free Option: Use a gluten-free flour blend and a gluten-free baking powder for a delicious alternative.
-
Vegan Version: Replace the eggs with flax eggs (1 tablespoon ground flaxseed mixed with 2.5 tablespoons water = 1 egg) and use coconut oil instead of vegetable oil.
-
Cream Cheese Frosting: Swap in cream cheese for a tangier topping that pairs beautifully with pumpkin.
Chef’s Notes
As with all good recipes, this one has evolved over the years. I’ve played with flavors, tried different frostings, and experimented with various mix-ins. The simplest, purest version of these pumpkin cupcakes always brings me back to that cozy kitchen with Sarah. So here’s my open invitation: invite your friends or family to bake with you! It turns the task of cooking into a cherished memory—much like it did for me.
FAQs and Troubleshooting
1. Why are my cupcakes dense?
Overmixing the batter can cause this. Mix just until the dry is incorporated, and use room-temperature ingredients!
2. Can I use fresh pumpkin?
Absolutely! Just make sure it’s well-cooked and blended until smooth before using it in your mix.
3. What’s the best way to store these?
Store them in an airtight container at room temperature for up to 3 days or refrigerate for a week (if they last that long!)
4. My frosting is too runny. What can I do?
If your frosting is too runny, simply add more powdered sugar until you reach your desired consistency.
Nutritional Info
For those keeping an eye on their nutritional intake, each pumpkin cupcake with frosting is approximately:
- Calories: 250
- Total fat: 12g
- Saturated fat: 4g
- Carbohydrates: 35g
- Fiber: 1g
- Sugar: 20g
- Protein: 2g
Of course, if you make any of the variations, keep in mind that the nutrition might differ a bit—especially if you add chocolate chips or different frostings.
Final Thoughts
There you have it, my friends! These Pumpkin Cupcakes with Maple Pecan Frosting capture the essence of fall in each fluffy bite. I hope this recipe not only fills your kitchen with delectable aromas but also brings a smile to your face, just like it does for me. Don’t forget to share your cupcake creations on social media and tag me at @Feastical, because I can’t wait to see your beautiful versions!
Now, grab your apron, gather your ingredients, and start baking—your taste buds are in for a treat! Happy baking! 🍂🧁
Print
Irresistible Pumpkin Cupcakes with Maple Pecan Frosting
- Total Time: 35 minutes
- Yield: 12 servings 1x
- Diet: Vegetarian
Description
Delicious pumpkin cupcakes topped with creamy maple pecan frosting, perfect for fall celebrations.
Ingredients
- 1 1/2 cups all-purpose flour
- 1 teaspoon baking powder
- 1 teaspoon baking soda
- 1/2 teaspoon kosher salt
- 1 teaspoon ground cinnamon
- 1/2 teaspoon ground nutmeg
- 1/4 teaspoon ground cloves
- 1 cup granulated sugar
- 1/2 cup brown sugar
- 1/2 cup vegetable oil
- 1 cup canned pumpkin puree
- 3 large eggs
- 1 teaspoon vanilla extract
- 1/2 cup unsalted butter, softened
- 2 cups powdered sugar
- 1/4 cup maple syrup
- 1/2 cup chopped pecans
Instructions
- Preheat the oven to 350°F (175°C).
- Prepare a muffin tin with cupcake liners or grease it.
- Mix dry ingredients in a medium bowl: flour, baking powder, baking soda, salt, cinnamon, nutmeg, and cloves.
- Combine wet ingredients in a large bowl: sugars and vegetable oil until fluffy. Add pumpkin, eggs, and vanilla, and mix well.
- Combine the dry ingredients with the wet mixture, folding gently until just combined.
- Fill muffin tin liners about two-thirds full with batter.
- Bake for 18-20 minutes, or until a toothpick comes out clean.
- Cool cupcakes in the pan for 5 minutes, then transfer to a wire rack.
- Make the frosting by beating butter and powdered sugar until fluffy, then add maple syrup.
- Frost cooled cupcakes with maple pecan frosting and garnish with pecans.
Notes
Store cupcakes in an airtight container at room temperature for up to 3 days or refrigerate for a week.
- Prep Time: 15 minutes
- Cook Time: 20 minutes
- Category: Dessert
- Method: Baking
- Cuisine: American
Nutrition
- Serving Size: 1 cupcake
- Calories: 250
- Sugar: 20g
- Sodium: 250mg
- Fat: 12g
- Saturated Fat: 4g
- Unsaturated Fat: 6g
- Trans Fat: 0g
- Carbohydrates: 35g
- Fiber: 1g
- Protein: 2g
- Cholesterol: 30mg
Keywords: pumpkin cupcakes, fall dessert, maple pecan frosting, autumn recipes
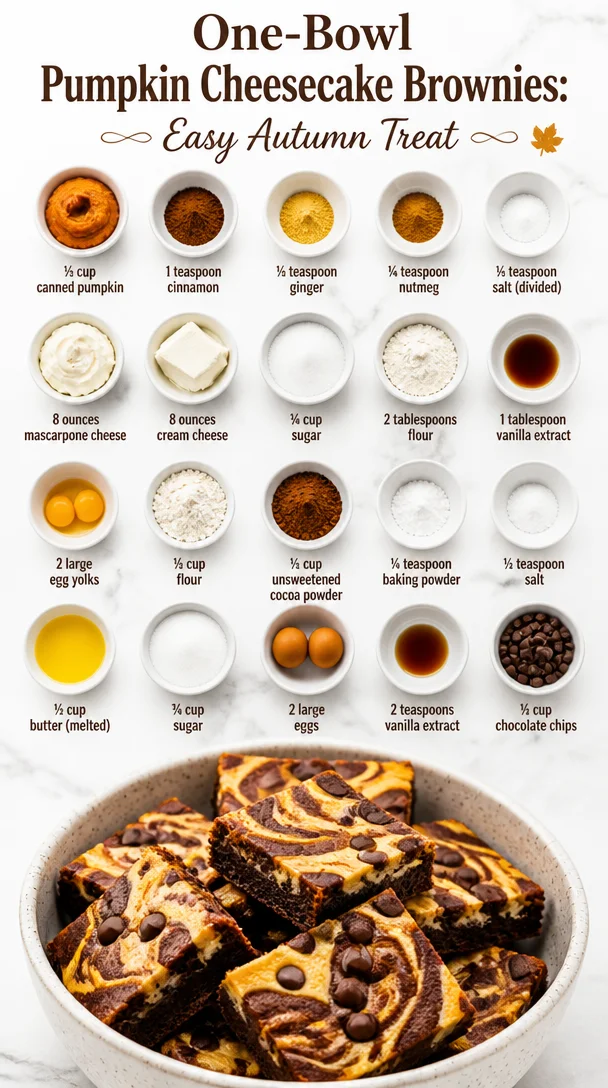
One-Bowl Pumpkin Cheesecake Brownies: Easy Autumn Treat
Indulge in Fall Bliss: Pumpkin Cheesecake Brownies
Hey there, fellow food lovers! Beau Collier here, and today we’re diving into a delightful treat that embodies the essence of fall: Pumpkin Cheesecake Brownies! Picture this: rich, fudgy brownies swirled with creamy pumpkin cheesecake—the perfect harmony of flavors that not only comforts the soul but also brings a smile to your face. Whether you’re sipping a warm beverage by the fire or gathering with family, these brownies are guaranteed to elevate the cozy vibes.
Now, I know what you’re thinking—pumpkin brownies? Aren’t they just for fall? Well, I say no way! These gooey delights are perfect for any occasion, from Sunday dinners to birthday parties, or simply a sweet treat on a Tuesday afternoon. So, let’s roll up our sleeves, grab our mixing bowls, and unleash that inner chef!
A Taste of Nostalgia
I remember the first time I made pumpkin cheesecake brownies. It was one of those rainy Sundays when nothing seemed to inspire me until I stumbled upon an old family recipe in my grandmother’s cherished cookbook. With its faint smell of vanilla and spices ingrained in the pages, it transported me back to my childhood kitchen where she would whisk up magic. The smell of cinnamon wafting through the air, the laughter shared over mixing bowls; those memories are the very heart of what I do today.
So, I decided to put my own spin on her classic, merging my love for rich brownies with that iconic pumpkin cheesecake. The result? A dessert that feels like a warm hug on a cool autumn day. These brownies became a family favorite, and I hope they’ll grace your kitchen with the same joy they’ve brought mine!
Ingredients
Gather these simple and delightful ingredients to make your own Pumpkin Cheesecake Brownies:
-
½ cup canned pumpkin: This is the star of our show! Canned pumpkin puree lends moisture and a hint of sweetness. You can substitute it with homemade pumpkin puree if you’re feeling adventurous.
-
1 teaspoon cinnamon: Adds a warm, spicy flavor that screams fall. If you want a little more warmth, add a dash more, or use pumpkin pie spice.
-
½ teaspoon ginger: This spice enhances the pumpkin’s flavor; fresh ginger can be used if you have it!
-
¼ teaspoon nutmeg: Nutmeg adds depth, making the flavors pop. If you don’t have nutmeg, you can skip it or use a bit more cinnamon.
-
½ teaspoon salt (divided): Balances sweetness and elevates flavors.
-
8 ounces mascarpone cheese: Creamy and rich, it adds a luxurious texture. You can substitute cream cheese if needed, but the flavor will slightly change.
-
8 ounces cream cheese: Rich and creamy—essential for our cheesecake layer.
-
¾ cup sugar: Sweetness to bring all the flavors together. You could swap it with coconut sugar for a more caramel-like note.
-
2 tablespoons flour: Just a bit for structure in the cheesecake filling.
-
1 tablespoon vanilla extract: Bring on that delicious aromatic note! Use high-quality vanilla for the best results.
-
2 large egg yolks: Adds richness to the cheesecake layer—don’t toss those whites; they can go into your breakfast omelet!
-
½ cup flour: For our brownie base, helping to create that delicious fudgy texture.
-
½ cup unsweetened cocoa powder: Essential for that chocolate flavor! You can use Dutch-processed cocoa powder for a deeper taste.
-
¼ teaspoon baking powder: Lightens the brownie base slightly; make sure it’s fresh for best results.
-
½ teaspoon salt: Enhances the chocolate flavor—don’t forget this essential ingredient.
-
½ cup butter (melted): The foundation of our fudgy brownie base. You can swap in coconut oil for a dairy-free option.
-
¾ cup sugar: If you’re craving that sweet brownie goodness, this is key!
-
2 large eggs: Provides moisture and binds everything together.
-
2 teaspoons vanilla extract: To up that delicious flavor profile.
-
½ cup chocolate chips: For that extra indulgence! Feel free to swap for white chocolate or butterscotch chips if that’s your jam!
Now that we’ve gathered our ingredients, let’s get cooking!
Step-by-Step Instructions
Step 1: Preheat the Oven
First things first, let’s crank that oven up to 350°F (175°C). This is key for achieving the perfect brownie texture—trust me, it makes a difference!
Step 2: Prepare Your Baking Dish
Grab an 8×8-inch baking pan and grease it lightly. You can also line it with parchment paper for easy removal after baking—this little hack makes for perfectly clean cuts when you’re ready to serve.
Step 3: Mix the Brownie Batter
In a medium bowl, combine the melted butter and sugar. Stir until you see no more sugar granules—that’s when the magic begins!
Add your eggs and vanilla extract to the mix, whisk until it’s smooth and luscious. Now, gently fold in your cocoa powder, flour, baking powder, and salt. Don’t overmix; we want that dreamy fudgy texture, not a cake!
Step 4: Spread the Brownie Base
Pour the brownie mixture into your prepared baking pan, spreading it evenly. Just let it be—don’t stress too much about getting it perfect!
Step 5: Prepare the Pumpkin Cheesecake Layer
In a separate bowl, mix your mascarpone cheese and cream cheese until it’s creamy. Add in the sugar, flour, cinnamon, ginger, nutmeg, ½ teaspoon salt, and vanilla. Now, mix in the egg yolks one at a time until everything is well combined.
Step 6: Swirl It Together
Spread the pumpkin cheesecake mixture over the brownie batter, leaving a few spoonfuls behind. With a knife or a skewer, swirl the remaining brownie batter on top of the pumpkin mixture for that signature marbled look. Each slice will reveal a delicious pattern—just like a beautiful autumn landscape!
Step 7: Bake to Perfection
Place the pan in your preheated oven and bake for 30–35 minutes. You’ll know they’re done when the cheesecake is set, and a toothpick inserted comes out with only a few moist crumbs (not wet batter!).
Step 8: Cool and Slice
Once baked, let your brownies cool in the pan before attempting to slice them. This is the hardest part, but it’s worth it! Allow at least 20-30 minutes to cool down at room temperature. Then, chill in the fridge for another hour or so for the best texture!
Serving Suggestions
When you’re ready to impress your guests (or just treat yourself), cut those brownies into generous squares—you deserve it! Feel free to dust them with powdered sugar or drizzle some caramel sauce over the top for that extra flair. Serve with a dollop of whipped cream or vanilla ice cream alongside a hot cup of your favorite drink— a cozy chai latte perhaps? It’s the perfect way to savor each bite!
Recipe Variations
-
Nutty Brownies: Fold in some chopped walnuts or pecans into the brownie batter for a lovely crunch! It plays beautifully against the creamy cheesecake.
-
Chocolate Swirls: Instead of a simple swirl, try layering chocolate ganache between the brownie and cheesecake layers for extreme chocolate satisfaction.
-
Crustless Delight: You can completely skip the brownie base and bake the pumpkin cheesecake filling on its own in a springform pan for a lighter, crustless dessert that’s equally delicious.
-
Spicy Kick: Add a pinch of cayenne or some finely chopped jalapeños for a surprising touch of heat that amplifies the sweetness in unexpected ways.
-
Vegan Version: Swap traditional ingredients with plant-based options like nut-based cream cheese, flax eggs, and coconut oil.
Chef’s Notes
This recipe has transformed over the years. Initially, I wanted to create something that kids and adults alike could enjoy, and I find it deliciously ironic that something so indulgent can have such a beautiful twist with pumpkin. These brownies are always a hit, and they never last too long! I often catch my family sneaking bites while they’re cooling because the smell fills the air like a promise of sweetness. Don’t be surprised if you find yourself making an extra batch!
FAQs and Troubleshooting
Q1: Why are my brownies dry?
A: Overbaking can lead to dryness. Use the toothpick test and remember that they will continue cooking a bit after you pull them out of the oven!
Q2: Can I use fresh pumpkin instead of canned?
A: Absolutely! Just be sure to roast and purée the pumpkin, and remove any excess moisture so your brownies don’t end up too watery.
Q3: How do I store leftover brownies?
A: Keep them in an airtight container at room temperature for a few days, or refrigerate them for a week! You can even freeze them for longer storage—just let them cool completely before wrapping them tightly.
Q4: What if my cheesecake layer doesn’t set?
A: If the cheesecake layer isn’t setting, it may need a little longer in the oven. Don’t panic, just put it back in for a few more minutes and check again!
Nutritional Info
These scrumptious Pumpkin Cheesecake Brownies are not just delicious but also relatively satisfying when it comes to balancing their indulgence with nutrition! While they’re decadent (as all good desserts should be), a single brownie packs in a good dose of flavor while providing some protein and healthy fats from the cheese.
Here’s a rough breakdown per brownie (based on 16 servings):
- Calories: 350
- Fat: 22g
- Carbohydrates: 42g
- Protein: 5g
Remember, moderation is key! Enjoy these decadent treats during your fall festivities and savor every last bite.
Final Thoughts
Well, there you have it, my friends! Your guide to whipping up the most delightful Pumpkin Cheesecake Brownies. I hope you’re feeling the spirit of fall as much as I do! This recipe isn’t just about the taste; it’s a celebration of nostalgia, family gatherings, and the warmth that good food brings into our lives. Don’t forget to share these with friends and family—for nothing brings people together quite like a delicious homemade treat! I can’t wait to hear how your brownies turn out. Until next time, keep cooking up joy and flavor—bon appétit!
Print
Pumpkin Cheesecake Brownies
- Total Time: 55 minutes
- Yield: 16 servings 1x
- Diet: Vegetarian
Description
Rich, fudgy brownies swirled with creamy pumpkin cheesecake, perfect for fall or any occasion.
Ingredients
- ½ cup canned pumpkin
- 1 teaspoon cinnamon
- ½ teaspoon ginger
- ¼ teaspoon nutmeg
- ½ teaspoon salt (divided)
- 8 ounces mascarpone cheese
- 8 ounces cream cheese
- ¾ cup sugar
- 2 tablespoons flour
- 1 tablespoon vanilla extract
- 2 large egg yolks
- ½ cup flour
- ½ cup unsweetened cocoa powder
- ¼ teaspoon baking powder
- ½ teaspoon salt
- ½ cup butter (melted)
- ¾ cup sugar
- 2 large eggs
- 2 teaspoons vanilla extract
- ½ cup chocolate chips
Instructions
- Preheat the oven to 350°F (175°C).
- Prepare an 8×8-inch baking pan and grease it lightly.
- Mix the melted butter and sugar in a medium bowl until no sugar granules remain.
- Add eggs and vanilla extract to the mix, whisk until smooth.
- Fold in cocoa powder, flour, baking powder, and salt.
- Pour the brownie mixture into the prepared baking pan.
- Mix mascarpone cheese and cream cheese in a separate bowl until creamy.
- Add sugar, flour, spices, salt, and vanilla to the cream cheese mixture.
- Mix in egg yolks one at a time until well combined.
- Spread the pumpkin cheesecake mixture over the brownie batter, swirling in some remaining brownie batter.
- Bake for 30-35 minutes, until the cheesecake is set.
- Cool in the pan before slicing into squares.
Notes
Dust with powdered sugar or drizzle caramel sauce for extra flair.
- Prep Time: 20 minutes
- Cook Time: 35 minutes
- Category: Dessert
- Method: Baking
- Cuisine: American
Nutrition
- Serving Size: 1 brownie
- Calories: 350
- Sugar: 24g
- Sodium: 320mg
- Fat: 22g
- Saturated Fat: 12g
- Unsaturated Fat: 8g
- Trans Fat: 0g
- Carbohydrates: 42g
- Fiber: 2g
- Protein: 5g
- Cholesterol: 75mg
Keywords: Pumpkin, Cheesecake, Brownies, Fall desserts, Sweet treats
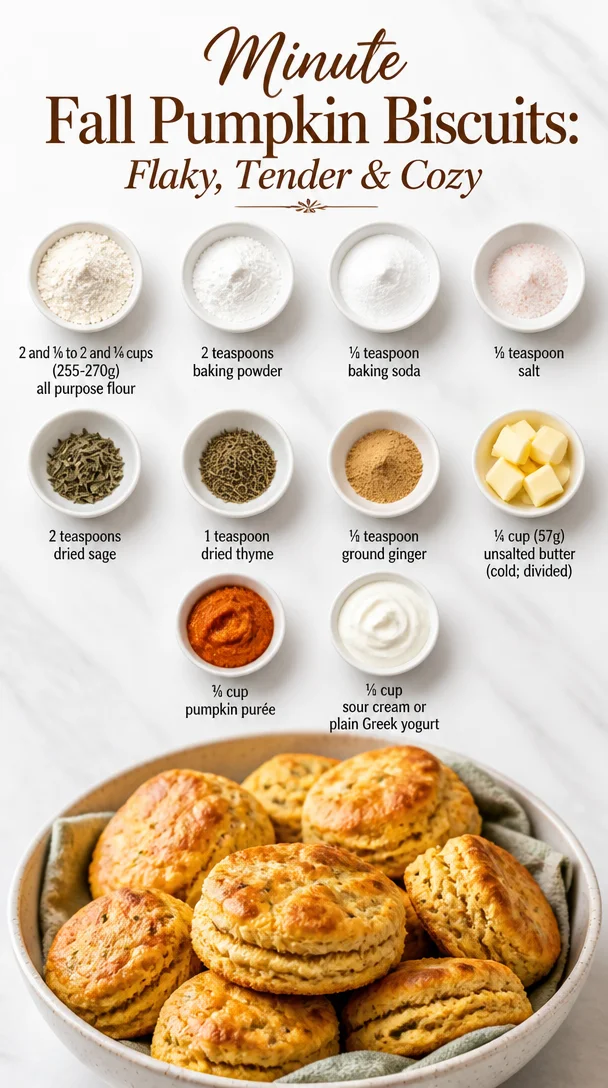
Minute Fall Pumpkin Biscuits: Flaky, Tender & Cozy
Pumpkin Biscuits: The Comfort of Fall in Every Bite
Hey there, fellow food lovers! Welcome back to Feastical, where every recipe tells a story, and every dish is an invitation to gather around the table. Today, we’re diving into a delightful recipe that perfectly captures the essence of fall—Pumpkin Biscuits! Why pumpkin, you ask? Well, there’s just something magical about this versatile ingredient that adds warmth, flavor, and just the right amount of comfort to our plates. Whether you’re looking for a cozy breakfast option or a delightful accompaniment to dinner, these biscuits will warm your heart and fill your belly.
Let me take you on a little journey back in time. I can still remember the aroma wafting through the kitchen at my grandma’s house when autumn rolled in. With leaves turning golden and the air getting crisp, she would whip up batches of her scrumptious pumpkin biscuits. Packed with savory herbs and a hint of sweetness, those biscuits were our family’s beloved tradition! Each bite felt like a soft hug, and they always paired beautifully with homemade soup or simply slathered with butter.
Now, you might be thinking, “Beau, I love a good biscuit, but can I really pull this off?” Fear not! With this ridiculously easy recipe, I’m here to guide you every step of the way. Get ready to channel your inner fall spirit!
The Ingredients: What You’ll Need
Let’s get down to business. Here are the ingredients you’ll need to create these mouthwatering pumpkin biscuits:
-
2 and ⅛ to 2 and ¼ cups (255-270g) all-purpose flour: This is your base! Feel free to substitute with whole wheat flour for a healthier twist or gluten-free flour if needed.
-
1-2 teaspoons baking powder: This is what gives our biscuits that lovely rise! Just make sure it’s fresh; old baking powder can lead to flat biscuits.
-
½ teaspoon baking soda: Works with the pumpkin puree to help the biscuits rise further and achieve a soft, fluffy texture.
-
½ teaspoon salt: A little salt enhances all the flavors and balances the sweetness of the pumpkin. You could use sea salt for a different taste.
-
2 teaspoons dried sage: The earthiness of sage pairs marvelously with pumpkin. If sage isn’t your thing, try rosemary or even Italian seasoning for a fun twist.
-
1 teaspoon dried thyme: Another herb that boosts the biscuit’s flavor. Just like with sage, if you’re running low, oregano works too!
-
½ teaspoon ground ginger: Adds a warm, spicy note! You could swap this for cinnamon if you prefer a sweeter biscuit.
-
¼ cup (57g) unsalted butter (cold; divided): Butter is key to making flaky biscuits! Preferably keep it cold and cut into small cubes for the best texture.
-
¾ cup pumpkin purée: The star of the show! You can use canned pumpkin puree or roast and mash your own pumpkin—easy-peasy!
-
½ cup sour cream or plain Greek yogurt: This adds richness and moisture. If you’re after a lighter version, use low-fat yogurt or even unsweetened applesauce.
Now that we’ve gathered our ingredients, let’s get cooking!
Step-by-Step Instructions: Let’s Make It Happen!
-
Preheat that Oven: Start by preheating your oven to 400°F (200°C). This is crucial for that golden-brown finish we all crave!
-
Mix the Dry Ingredients: In a large mixing bowl, whisk together the flour, baking powder, baking soda, salt, sage, thyme, and ground ginger. This step blends the flavors and ensures an even rise as our biscuits bake.
-
Cut in Butter: Add the cold, cubed butter to the flour mixture. Here’s the fun part—use a pastry cutter or two forks to mix until the mixture resembles coarse crumbs. If you have chilly hands, this is the time to employ them! The key is to keep the butter cold to ensure flakiness.
-
Stir in Wet Ingredients: In another bowl, combine the pumpkin purée, sour cream (or yogurt), and mix until smooth. Gradually add this mixture to your flour blend. Use a spatula to fold everything together gently—over-mixing can lead to tough biscuits!
-
Knead and Roll: Dust a clean surface with a little flour and turn out the dough. Lightly knead it just a few times—think of it as a gentle massage rather than a full workout. Roll it out to about ¾ inch thick.
-
Cut Out Your Biscuits: Use a biscuit cutter or a simple glass to punch out your biscuits. Place them on a baking sheet lined with parchment paper. Give them a little space to expand!
-
Brush with Butter: Melt a tablespoon of butter and brush it over the tops of the biscuits for that delicious golden glow.
-
Bake: Pop your biscuits in the oven for about 15-20 minutes, or until they are risen and golden brown. Keep an eye on them, as oven times can vary.
-
Cool and Enjoy: Let your biscuits cool on the baking sheet for a few minutes before transferring them to a wire rack. They’re fabulous served warm!
Tip from the Chef: For extra flavor, consider adding some grated cheese or chopped nuts right into your dough!
Serving Suggestions: How to Plate Your Biscuits
Presentation is everything, right? To serve your pumpkin biscuits, I recommend placing them in a beautiful basket lined with a clean linen napkin. This not only keeps them warm but also gives that homey vibe we all love.
Serve them alongside a steaming bowl of your favorite soup, like a creamy tomato basil or a rustic butternut squash soup. Or, go the breakfast route and whip up some scrambled eggs and crispy bacon for a hearty morning treat. Don’t forget to set out some flavored butter or homemade jams to spread onto the warm biscuits—you’ll thank me later!
Recipe Variations: Spice It Up!
Now we know classic is great, but if you’re feeling adventurous, here are a few creative twists to your pumpkin biscuits:
-
Sweet and Savory: Add a handful of chopped walnuts or pecans for texture and a bit of sweetness!
-
Herbal Delight: Swap the dried herbs for fresh ones—just double the amount for that garden-fresh taste.
-
Cheesy Pumpkin Biscuits: Mix in shredded cheese (cheddar, gouda, or even feta) for a cheesy surprise in every bite.
-
Spicy Kick: Turn up the heat by adding a pinch of cayenne pepper to the dry ingredients.
-
Gluten-Free Bliss: Use a 1:1 gluten-free flour blend in place of the all-purpose flour for a gluten-free version that still tastes fantastic!
Chef’s Notes: My Journey with Pumpkin Biscuits
Ah, pumpkin biscuits hold a special place in my heart. Over the years, I’ve played with this recipe, adding tidbits of nostalgia and experimenting with new flavors. One time, I even tried adding chocolate chips to the dough just for fun—while it was a tasty creation, I decided to keep this one classic, letting the pumpkin shine through.
A funny story: one autumn, I was hosting a brunch and forgot to buy enough pumpkin! I improvised with some sweet potato mash I had on hand, and you know what? It turned out just as delightful! This kitchen adventure taught me that cooking is all about being flexible and having fun!
FAQs and Troubleshooting: Answers to Your Questions
-
My biscuits turned out flat—what went wrong?
- Double-check your baking powder and baking soda are fresh. Also, ensure you’re measuring the flour correctly; too little can lead to flat biscuits.
-
Can I freeze the biscuits?
- Absolutely! Once baked and cooled, store them in an airtight container or freezer bag. Reheat in the oven or microwave when you’re ready to enjoy!
-
What if I don’t have sour cream?
- No problem! You can substitute with buttermilk, plain yogurt, or even unsweetened applesauce.
-
How do I know when my biscuits are done?
- Besides the lovely golden color, if you tap the bottom of a biscuit and it sounds hollow, it’s a sign they’re perfectly baked!
Nutritional Info
While the comfort of these pumpkin biscuits can’t be beat, here’s a quick overview of its nutritional aspects to keep you in the know:
- Serving Size: 1 biscuit
- Calories: Approximately 150–200 calories
- Total Fat: Around 8–10 grams
- Saturated Fat: About 4 grams (largely from the butter)
- Carbohydrates: 20–25 grams
- Fiber: 1–2 grams (thanks to the pumpkin!)
- Protein: 3–4 grams
These biscuits are a delightful way to brighten up your day without sabotaging your dietary goals!
Final Thoughts
There you have it, my friends—easy, delicious pumpkin biscuits that will undoubtedly become a staple in your kitchen this fall and beyond. Each bite captures the cozy, comforting essence of autumn, perfect for gatherings or quiet evenings at home.
I hope you enjoy making and sharing these biscuits as much as I do. Remember, cooking should always feel good! So roll up those sleeves, get your hands a little messy, and, most importantly, enjoy every moment spent in the kitchen.
Until next time, keep the good vibes and delicious food flowing! Happy baking!
Print
Pumpkin Biscuits
- Total Time: 35 minutes
- Yield: 12 biscuits 1x
- Diet: Vegetarian
Description
Delightful pumpkin biscuits that capture the essence of fall, perfect for breakfast or as an accompaniment to dinner.
Ingredients
- 2 and ⅛ to 2 and ¼ cups (255-270g) all-purpose flour
- 1–2 teaspoons baking powder
- ½ teaspoon baking soda
- ½ teaspoon salt
- 2 teaspoons dried sage
- 1 teaspoon dried thyme
- ½ teaspoon ground ginger
- ¼ cup (57g) unsalted butter (cold; divided)
- ¾ cup pumpkin purée
- ½ cup sour cream or plain Greek yogurt
Instructions
- Preheat your oven to 400°F (200°C).
- Mix the dry ingredients: In a large mixing bowl, whisk together the flour, baking powder, baking soda, salt, sage, thyme, and ground ginger.
- Cut in the cold, cubed butter until the mixture resembles coarse crumbs.
- Stir in the wet ingredients: Combine the pumpkin purée, sour cream (or yogurt), and mix until smooth.
- Knead the dough lightly on a floured surface and roll it out to about ¾ inch thick.
- Cut out biscuits using a biscuit cutter or glass.
- Brush the tops with melted butter.
- Bake for 15-20 minutes, or until risen and golden brown.
- Cool on the baking sheet for a few minutes before transferring to a wire rack.
Notes
For extra flavor, consider adding grated cheese or chopped nuts.
- Prep Time: 15 minutes
- Cook Time: 20 minutes
- Category: Baking
- Method: Baking
- Cuisine: American
Nutrition
- Serving Size: 1 biscuit
- Calories: 175
- Sugar: 3g
- Sodium: 250mg
- Fat: 8g
- Saturated Fat: 4g
- Unsaturated Fat: 3g
- Trans Fat: 0g
- Carbohydrates: 24g
- Fiber: 1g
- Protein: 4g
- Cholesterol: 15mg
Keywords: pumpkin, biscuits, fall baking, comfort food
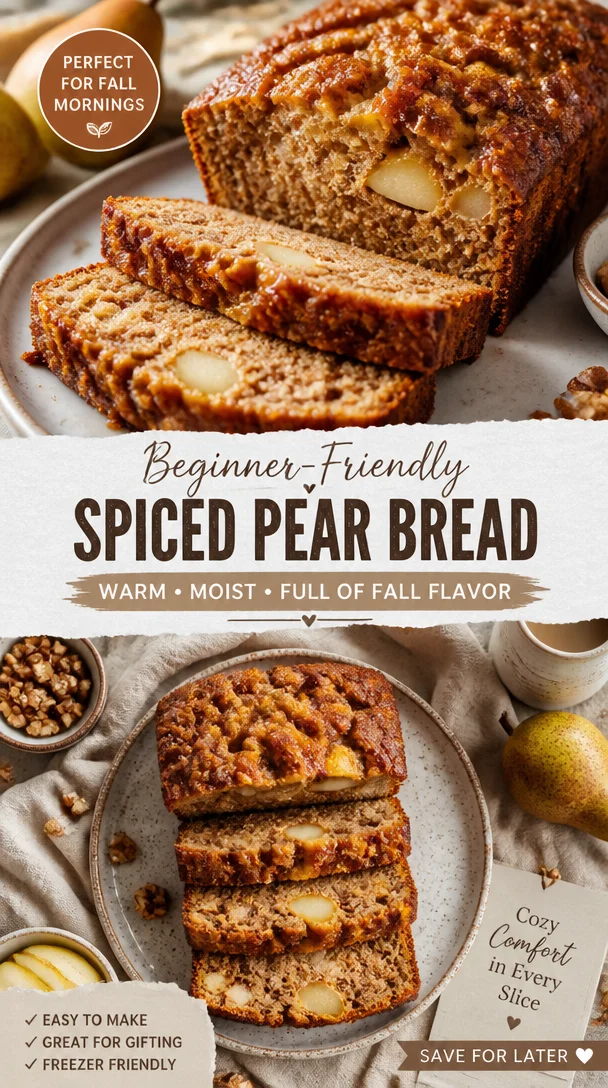
Beginner-Friendly Spiced Pear Bread for Fall Mornings
Welcome to the Sweet and Spicy Side of Baking: Spiced Pear Bread
Hey there, food lovers! It’s Beau Collier, and today we’re diving into a delightfully warm and inviting recipe that’s sure to fill your kitchen with mouthwatering aromas. Get ready for a culinary journey as we whip up Spiced Pear Bread—a comforting treat that perfectly balances sweetness with a touch of spice, making it the ideal companion for cozy evenings and lazy brunches alike.
Imagine this: It’s fall, and the leaves are swirling down in vibrant hues of amber and gold. You’ve just returned from a trip to the farmers’ market with bags overflowing with seasonal produce—pears, pumpkins, and spices that warm the soul. As you step into your kitchen, the sun filters through the window, creating a golden glow, and the sweet scent of fresh fruit fills the air. This is the moment that inspired my Spiced Pear Bread recipe.
Nothing quite compares to the feeling of nostalgia that comes with baking at home. The first time I ever made this bread was alongside my grandmother during one of our many “bake days.” We’d share stories while measuring flour, trying to beat the eggs just right, and feeling the soft texture of mashed pears as they began to blend into a luscious batter. The thrill of watching our creation rise in the oven was an experience that I’ll cherish forever.
Today, I want to share that joy with you through this simple yet soul-satisfying recipe. So grab your apron, warm up those ovens, and let’s embark on this tasty adventure together. You might want to keep your fork handy; you won’t be able to resist this sweet, spiced delight!
A Recipe Full of Memories
Let me take you back to that sunny afternoon when I first discovered the magic of spiced pear bread. I remember the wonderful aroma of cinnamon and nutmeg filling the kitchen while my grandmother and I baked together. She had an amazing ability to make any recipe feel special, infusing love and laughter into every step. As we mixed the ingredients, I would sneak tastes of the batter, with the sweetness of ripe pears bursting in each bite.
One particular moment stands out—when I accidentally spilled flour all over the countertop. My grandmother burst out laughing, her infectious chuckle echoing around the kitchen. She turned our mishap into a teaching moment, showing me that cooking isn’t always about perfection; it’s about enjoying the journey and making memories.
As we pulled our freshly baked bread from the oven, the golden brown crust beckoned us to dig in. That warm, buttery bread topped with a dusting of cinnamon sugar remains one of the coziest flavors I’ve ever encountered. It’s a recipe that has stuck with me throughout the years, and I can’t wait for you to experience the same joy it brought me!
Ingredients
Let’s gather up our ingredients. Here’s what you’ll need to make this delightful Spiced Pear Bread:
- 2 cups all-purpose flour: The base of our bread. Substitute with whole wheat flour or gluten-free all-purpose blend for a different texture.
- 1 tsp baking soda: This helps our bread rise! Be sure to check its expiration date; stale baking soda might not give you the lift you want.
- 1/2 tsp salt: A crucial component that will enhance all the flavors in your bread.
- 1 tsp ground cinnamon: The star spice of our recipe! Feel free to use freshly grated cinnamon for an extra kick.
- 1/2 tsp ground nutmeg: This adds depth and warmth; if you don’t have it, use allspice or pumpkin pie spice as substitutes.
- 1/2 cup unsalted butter, softened: Rich and creamy, this gives our bread a melt-in-your-mouth texture. You can use coconut oil as a dairy-free alternative.
- 1 cup granulated sugar: Sweetness galore! Brown sugar could be a lovely alternative for a deeper flavor.
- 2 large eggs: Binding the ingredients together, eggs also help with moisture. If you’re vegan, try using flax eggs (1 tablespoon flaxseed meal + 2.5 tablespoons water per egg).
- 1 tsp vanilla extract: It adds a lovely aroma and sweetness—go for pure extract for the best flavor.
- 1 1/2 cups mashed ripe pears (fresh or canned): The star ingredient! Using ripe, juicy pears is key, but canned pears (with no added sugar) work great in a pinch.
- Optional: cinnamon sugar streusel topping: Who doesn’t love a little crunch? Combine 1/4 cup sugar and 1 tsp cinnamon for a delicious finishing touch.
Step-by-Step Instructions
Ready to get started? Let’s break it down into some easy, fun steps:
-
Preheat Your Oven: First things first, preheat your oven to 350°F (175°C). This ensures our bread starts baking evenly from the get-go.
-
Prepare the Pan: Grease a 9×5 inch loaf pan with butter or non-stick spray. For an extra bit of flavor, dust it with flour.
-
Mix Dry Ingredients: In a medium bowl, whisk together the all-purpose flour, baking soda, salt, cinnamon, and nutmeg. This step is crucial as it ensures that our leavening agent (baking soda) is evenly distributed throughout the flour.
-
Cream Butter and Sugar: In a large bowl, take your softened butter and granulated sugar and cream them together until light and fluffy—about 3-4 minutes. This process introduces air into the mix, making our bread lighter.
-
Incorporate Eggs and Vanilla: Add the eggs one at a time, mixing well after each addition. Then stir in the vanilla extract. This will create a rich batter that’s creamy and aromatic.
-
Add the Pears: Fold in those mashed ripe pears. They add a wonderful moisture and sweetness that transforms our batter into something magical.
-
Combine Dry and Wet Ingredients: Gradually add the dry mixture into the wet mixture, stirring gently until just combined. Be careful not to overmix; we want to keep the bread tender.
-
Pour into the Prepared Pan: Scrape the batter into your prepared loaf pan, spreading it evenly with a spatula. If you’re feeling adventurous, sprinkle that optional cinnamon sugar streusel on top!
-
Bake: Pop it into the preheated oven for about 55-60 minutes. The sweet aroma will fill your kitchen—and you might find it hard to wait!
-
Check for Doneness: About 5 minutes before time’s up, do the toothpick test; if it comes out clean or with a few moist crumbs, it’s ready! If it comes out wet, give it a few more minutes.
-
Cool: Once baked, remove your bread from the oven and let it cool in the pan for about 10 minutes before transferring it to a wire rack to cool completely. Trust me, the waiting will be worth it!
Serving Suggestions
Now that you have that luscious Spiced Pear Bread cooling on the rack, let’s talk about how to serve it. Slice it up thick or thin, depending on your craving. It’s divine on its own, but here are a few serving suggestions:
- Warm with Butter: A pat of butter melting on a warm slice is just heavenly.
- Cream Cheese Spread: For an extra treat, spread a little cream cheese or mascarpone on top. The tangy creaminess complements the sweetness beautifully!
- Breakfast Toast: Try toasting a slice for breakfast and topping with fresh fruit, yogurt, or even nut butter for a hearty start to your day.
- Ice Cream Delight: Warm slices served with a scoop of vanilla ice cream make for a lovely dessert—truly indulgent!
Recipe Variations
Get ready to put your creative hat on! This Spiced Pear Bread is versatile, allowing for delightful variations to suit different tastes and dietary needs. Here are a few fun twists:
- Add Nuts: Toss in some chopped walnuts or pecans for added crunch and nuttiness.
- Dried Fruits: Mix in dried cranberries or raisins for an additional burst of flavor.
- Spice It Up: Add ginger or cloves for an extra spice kick; if you love ginger, a tablespoon of freshly grated ginger would be epic.
- Chocolate Lovers: Fold in some chocolate chips for a delightful upgrade—who wouldn’t love a sweet surprise?
- Citrus Zest: Adding a teaspoon of orange or lemon zest will bring a refreshing citrus note to the bread.
Chef’s Notes
Whenever I think about Spiced Pear Bread, I can’t help but smile at the kitchen adventures I’ve had. Over the years, I’ve played with ingredients and flavors, tweaking the recipe here and there. Each version brings back memories and teaches me something new.
I even remember the first time I experimented with adding chocolate chips! I was so nervous, thinking it might ruin the classic flavor. But as soon as I took a bite, I realized I had stumbled onto something incredible.
Baking is a journey of discovery, and that’s what makes it so special. So don’t be afraid to take some risks and make this recipe your own!
FAQs and Troubleshooting
Let’s tackle some common questions and possible pitfalls you might encounter:
-
Why is my bread too dense? This could be due to overmixing the batter. Be gentle when combining the wet and dry ingredients.
-
My bread didn’t rise! What happened? Check that your baking soda is fresh. Old baking soda can lose its potency over time.
-
What can I use if I don’t have ripe pears? If you don’t have ripe pears, applesauce works well as a substitute! You’ll miss the chunkiness of the pears, so consider adding some chopped apples instead.
-
Can I freeze this bread? Absolutely! Wrap it tightly in plastic wrap and then foil. It can last in the freezer for up to 3 months. Just thaw overnight in the fridge before enjoying!
Nutritional Info
While Spiced Pear Bread is a treat that should be enjoyed in moderation, it certainly has some perks to highlight. With the wholesome ingredients, it provides a good balance of carbs and fat, along with the fiber from the pears—especially if you use whole wheat flour. Each slice is rich in flavor but should be enjoyed as an occasional indulgence. Always consider portion sizes and toppings when assessing nutrition.
Approximate Nutritional Values (per slice, based on 12 slices):
- Calories: 180
- Total Fat: 7g
- Carbohydrates: 27g
- Fiber: 1g
- Sugar: 10g
- Protein: 2g
Final Thoughts
Baking is not just a task in the kitchen; it’s about bringing people together, tasting memories, and enjoying the simple pleasures in life. My Spiced Pear Bread is more than a recipe; it’s a tradition filled with laughter, warmth, and love.
So the next time you’re craving something sweet and comforting, I encourage you to whip up this delightful treat. Gather your loved ones, share stories, and create new memories over slices of warm Spiced Pear Bread.
Remember, the kitchen is a place of joy, so keep experimenting, keep smiling, and of course, keep indulging! If you try this recipe, I’d love to hear your stories and tweaks. Until next time, happy baking!
Print
Spiced Pear Bread
- Total Time: 75 minutes
- Yield: 12 servings 1x
- Diet: Vegetarian
Description
A comforting treat that perfectly balances sweetness with a touch of spice, making it ideal for cozy evenings and lazy brunches.
Ingredients
- 2 cups all-purpose flour
- 1 tsp baking soda
- 1/2 tsp salt
- 1 tsp ground cinnamon
- 1/2 tsp ground nutmeg
- 1/2 cup unsalted butter, softened
- 1 cup granulated sugar
- 2 large eggs
- 1 tsp vanilla extract
- 1 1/2 cups mashed ripe pears
- Optional: cinnamon sugar streusel topping
Instructions
- Preheat your oven to 350°F (175°C).
- Prepare a 9×5 inch loaf pan by greasing it with butter or non-stick spray and dusting with flour.
- Mix dry ingredients: In a medium bowl, whisk together flour, baking soda, salt, cinnamon, and nutmeg.
- Cream butter and sugar: In a large bowl, cream together the softened butter and granulated sugar until light and fluffy, about 3-4 minutes.
- Incorporate the eggs one at a time, mixing well after each addition, then stir in vanilla extract.
- Add the mashed ripe pears and fold them into the batter.
- Combine the dry mixture into the wet mixture gradually, stirring gently until just combined.
- Pour the batter into the prepared loaf pan, spreading it evenly.
- Bake for about 55-60 minutes, until the sweet aroma fills your kitchen.
- Check for doneness using the toothpick test; if it comes out clean, it’s ready!
- Cool on a wire rack for about 10 minutes before enjoying.
Notes
This recipe can be varied by adding nuts, dried fruits, or chocolate chips. Baking with love brings out the best flavors!
- Prep Time: 15 minutes
- Cook Time: 60 minutes
- Category: Dessert
- Method: Baking
- Cuisine: American
Nutrition
- Serving Size: 1 slice
- Calories: 180
- Sugar: 10g
- Sodium: 200mg
- Fat: 7g
- Saturated Fat: 4g
- Unsaturated Fat: 2g
- Trans Fat: 0g
- Carbohydrates: 27g
- Fiber: 1g
- Protein: 2g
- Cholesterol: 30mg
Keywords: spiced pear bread, fall baking, cozy recipes
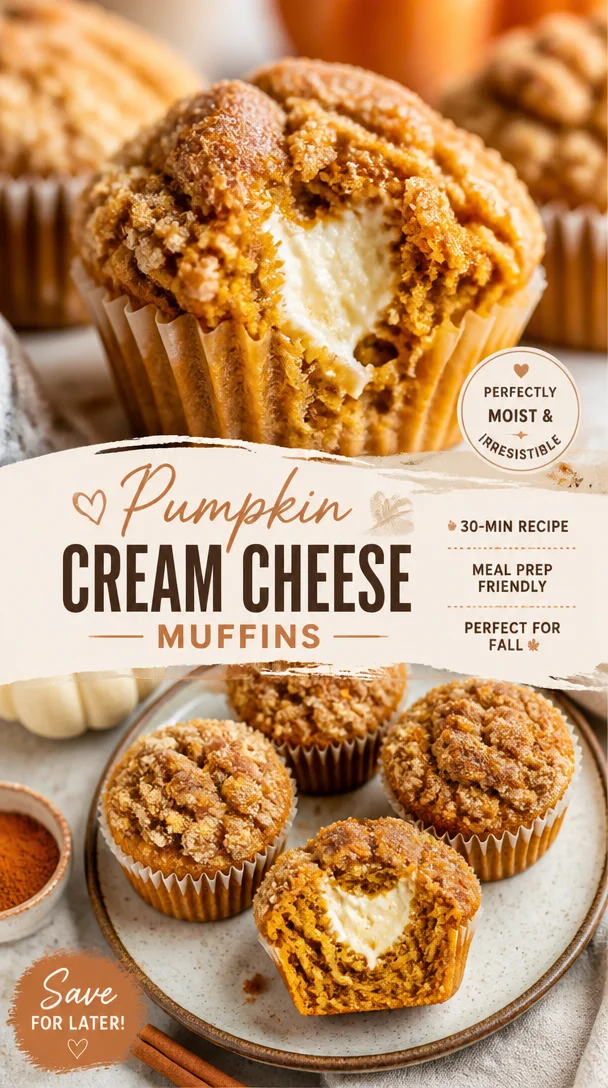
Pumpkin Cream Cheese Muffins
Deliciously Cozy Pumpkin Cream Cheese Muffins
Hey there, fellow foodies! Today, I’m super excited to share with you a recipe that makes my heart do a little happy dance—Pumpkin Cream Cheese Muffins. As the weather cools and leaves begin to turn orange and gold, there’s nothing more comforting than filling your kitchen with the aroma of warm spices and sweet pumpkin. These muffins are like a warm hug on a chilly morning, and they have a delightful surprise hidden in the middle: a creamy, tangy cream cheese filling that elevates them from ordinary to extraordinary.
These muffins are great for a weekend breakfast, a cozy afternoon snack, or even a tempting treat to share with friends. Plus, with pumpkin being so versatile, this recipe is perfect not only for fall but year-round if you want that comforting taste. So, whether you have a meticulous baking routine or you’re just getting back in the kitchen after a long hiatus, I’ve got you covered! Let’s dig in and whip up some magic!
A Slice of My Pumpkin Memories
The mere thought of pumpkin treats transports me back to my childhood kitchen, where my mom and I would bake together every autumn. Our kitchen was a whirlwind of flour, laughter, and the sweet scent of spices. One year, we decided to host a cozy pumpkin-themed gathering, and we invited friends for a fall brunch. I still remember the look in my friend’s eyes as they bit into their first pumpkin muffin—pure bliss enveloped them.
We spent hours in the kitchen, mixing up a variety of pumpkin delights, but it was the cream cheese muffins that stole the show. Mom’s secret? A generous dollop of homemade cream cheese filling that made every bite feel decadent. That day inspired my lifelong love for baking, and I knew that I wanted to carry on that pumpkin magic in my own kitchen someday.
When I first made these Pumpkin Cream Cheese Muffins on my own, I channeled those cozy memories, and each bite reminded me of home. Let’s create some of those beautiful memories together with this delightful recipe!
Ingredients
Here’s what you’ll need to create these unforgettable muffins:
-
15 ounce can pumpkin puree: This is the heart of our muffins! A canned pumpkin puree is great for convenience and consistency. If you want to use fresh pumpkin, roast it, scoop out the flesh, and puree. Just ensure it’s well-drained to avoid excess moisture!
-
2 large eggs: They’re essential for binding the ingredients and adding richness. If you’re vegan or have allergies, you can substitute each egg with 1/4 cup unsweetened applesauce or a flaxseed egg (1 tablespoon ground flaxseed mixed with 2.5 tablespoons water).
-
1 1/2 cups light brown sugar: This adds a lovely caramel flavor to our muffins. You can easily swap this with coconut sugar for a healthier alternative that still provides great taste!
-
1/2 cup oil: I recommend vegetable oil for its neutral flavor and moistness, but you can also use melted coconut oil or even applesauce for a lower-fat option.
-
3/4 cup sour cream: This adds moisture and a lovely tang. You can substitute with Greek yogurt for a high-protein alternative or dairy-free yogurt if you’re keeping it vegan.
-
1 tbsp vanilla extract: Real vanilla adds warmth and enhances all the flavors. Always go for the pure extract instead of imitation—it truly makes a difference!
-
1 tbsp pumpkin pie spice: This spice blend gives our muffins that quintessential pumpkin flavor. If you don’t have pumpkin pie spice, you can mix together cinnamon, nutmeg, and ginger for a quick substitute!
-
2 cups all-purpose flour: The base of our muffins! If you need a gluten-free option, use a 1:1 gluten-free flour blend.
-
1 tsp baking powder and 1 tsp baking soda: The dynamic duo that provides lift and fluffiness. Make sure they’re fresh for the best result!
-
1/2 tsp salt: Enhances the sweetness and flavors. You might be tempted to skip it, but trust me—salt is essential!
-
1 large egg for the cream cheese filling: This helps set the filling for a perfect creamy texture.
-
8 ounces cream cheese, softened: The star of the filling! Make sure it’s fully softened for easy mixing. You can use vegan cream cheese if you want to keep it dairy-free.
-
1/4 cup granulated sugar: This will sweeten our cream cheese filling. You can cut back on sugar if you prefer a tangier filling or use a sugar substitute if desired.
-
1 tsp vanilla for the filling, to bring it all together!
Step-by-Step Instructions
Now that we have our ingredients lined up, it’s time to get our hands dirty and start cooking! Here’s how to bring these delightful muffins to life:
-
Preheat Your Oven: Start by preheating your oven to 350°F (175°C). This is crucial because you want a hot oven to give the muffins a perfect rise.
-
Prepare Your Muffin Tin: Line a standard muffin tin with paper liners or grease with non-stick spray. This will help with easy removal and clean-up!
-
Mix the Muffin Batter: In a large bowl, whisk together the pumpkin puree, eggs, light brown sugar, oil, sour cream, and vanilla extract until well combined. You want this to be smooth and creamy, with no lumps. This could be a great moment to revisit those childhood kitchen memories!
-
Combine Dry Ingredients: In another bowl, combine the all-purpose flour, baking powder, baking soda, pumpkin pie spice, and salt. Whisk these dry ingredients together until evenly combined. The more air you incorporate, the fluffier the muffins will be!
-
Blend Wet and Dry: Gradually add the dry ingredients to the wet ingredients, mixing until just combined. Be careful not to overmix; a few lumps are perfectly fine!
-
Make the Cream Cheese Filling: In a separate bowl, beat together the softened cream cheese, egg, granulated sugar, and vanilla extract using a hand mixer or a whisk until smooth and creamy. Make sure there are no lumps!
-
Fill the Muffin Cups: Fill each muffin cup halfway with the pumpkin batter and then add a generous dollop (about a tablespoon) of cream cheese filling right in the center. Top each muffin with more pumpkin batter until the cups are about 3/4 full. You want to make sure that filling is nestled snugly!
-
Bake: Pop the muffin tin in the preheated oven and bake for about 18-22 minutes, or until a toothpick inserted into the pumpkin muffin (avoiding the filling) comes out clean. The edges should look golden and slightly springy to the touch.
-
Cool: Once out of the oven, allow the muffins to cool in the pan for 5-10 minutes, then transfer them to a wire rack to cool completely. Resist the temptation to dig in right away—it’s worth the wait!
Serving Suggestions
Serving these pumpkin cream cheese muffins is as fun as making them! Here are a few ideas:
-
Sprinkle with Powdered Sugar: For a touch of sweetness and an elegant look, dust the tops with powdered sugar just before serving.
-
Pair with Coffee or Spiced Tea: These muffins are delicious alongside your favorite warm beverage! The spices in the muffin complement a nice cup of coffee, chai, or herbal tea beautifully.
-
Serve Warm: Nothing compares to a warm muffin! If you have leftovers, warm them in the microwave for about 10-15 seconds before enjoying—trust me, it’s like having them fresh-baked again.
-
Garnish: Consider serving them with a dollop of whipped cream or a scoop of vanilla ice cream for an indulgent dessert twist!
Recipe Variations
Why stop at just one version of these delightful muffins? Here are some creative twists you can try:
-
Chocolate Chip Pumpkin Muffins: Toss in 1 cup of chocolate chips into the batter for an extra sweet treat! It’s a great way to combine flavors that everyone loves.
-
Nutty Twist: Add 1/2 cup of chopped walnuts or pecans for some nuttiness and crunch. They make such a delightful contrast to the soft muffin texture.
-
Spiced Up: Want a little more kick? Add a pinch of cayenne pepper to the batter. It creates a fantastic sweet and spicy combo that’s sure to impress!
-
Cranberry Cream Cheese Muffins: Mix in 1/2 cup of dried cranberries for a tartness that balances the sweetness of the pumpkin beautifully.
-
Vegan Option: Use a flaxseed egg, substitute the sour cream with dairy-free yogurt, and opt for vegan cream cheese. You won’t miss a beat with this delicious, plant-based rendition!
Chef’s Notes
I love how recipes evolve over time. This one, especially, has a sentimental tie. Remembering those crisp autumn days in the kitchen with my mom makes every bite of these muffins special. I’ve always found joy in sharing this recipe with friends and family, and each time I make them, I think of new ways to enhance this classic treat. You might even catch some variations popping up in my kitchen experiments!
And let me tell you—on more than one occasion, I’ve been known to make these muffins for no special reason, simply because the craving strikes. When that happens, I find myself baking at odd hours, enjoying the process like it’s a dance. Just remember—baking should be fun, not stressful!
FAQs and Troubleshooting
1. Why are my muffins dense?
This could be due to overmixing the batter. Be gentle with the mixing—just combine until everything is moistened.
2. Can I freeze these muffins?
Absolutely! Once cooled, store them in an airtight container or a ziplock bag. They can be frozen for up to 3 months. Thaw them overnight in the fridge, or pop one in the microwave for a quick treat.
3. Why did my cream cheese filling sink?
If the mixture is too runny or the batter is too thin, it can cause the filling to sink. Ensure your cream cheese is properly softened, and don’t skip on flour measurements!
4. How do I know when my muffins are done?
The toothpick test is your best friend here! Insert it into the center of a muffin (avoiding the filling) and if it comes out clean or with just a few moist crumbs, they’re good to go.
Nutritional Info
These pumpkin cream cheese muffins are not only delicious but are also packed with nutrients! Here’s a breakdown of the nutritional content per muffin (based on a recipe yielding 12 muffins):
- Calories: Approximately 210
- Protein: 4g
- Fat: 10g
- Carbohydrates: 28g
- Fiber: 1g
- Sugar: 12g
Of course, these numbers will vary based on ingredients used and the size of your muffins. Always consider substituting with healthier options to fit your dietary preferences—like using whole wheat flour or reducing sugar.
Final Thoughts
So there you have it—my recipe for heartwarming Pumpkin Cream Cheese Muffins that are sure to become a beloved staple in your kitchen! Whether it’s a chilly autumn morning or anytime you need a little comfort, these muffins wrap you in warmth and goodness.
I hope you enjoy making (and munching!) on them as much as I do. Don’t forget to share your cozy moments and kitchen experiments with me. Happy baking, and may your kitchen always smell like a pumpkin patch! 🧡🍂🍰
With love from your friendly kitchen buddy, Beau Collier.
Print
Deliciously Cozy Pumpkin Cream Cheese Muffins
- Total Time: 37 minutes
- Yield: 12 muffins 1x
- Diet: Vegetarian
Description
These pumpkin cream cheese muffins are a delightful treat with a creamy filling that makes them perfect for any season.
Ingredients
- 1 (15 ounce) can pumpkin puree
- 2 large eggs
- 1 1/2 cups light brown sugar
- 1/2 cup vegetable oil
- 3/4 cup sour cream
- 1 tbsp vanilla extract
- 1 tbsp pumpkin pie spice
- 2 cups all-purpose flour
- 1 tsp baking powder
- 1 tsp baking soda
- 1/2 tsp salt
- 1 large egg (for cream cheese filling)
- 8 ounces cream cheese, softened
- 1/4 cup granulated sugar
- 1 tsp vanilla extract (for filling)
Instructions
- Preheat your oven to 350°F (175°C).
- Prepare your muffin tin by lining with paper liners or greasing with non-stick spray.
- Mix together the pumpkin puree, eggs, light brown sugar, oil, sour cream, and vanilla extract until smooth.
- Combine the flour, baking powder, baking soda, pumpkin pie spice, and salt in another bowl.
- Blend the dry ingredients into the wet ingredients until just combined.
- Make the cream cheese filling by beating together cream cheese, egg, granulated sugar, and vanilla extract until creamy.
- Fill muffin cups halfway with the pumpkin batter, then add a dollop of cream cheese filling and top with more pumpkin batter.
- Bake for 18-22 minutes or until a toothpick comes out clean.
- Cool in the pan for 5-10 minutes before transferring to a wire rack.
Notes
These muffins can be frozen for up to 3 months. Reheat in the microwave for a quick treat.
- Prep Time: 15 minutes
- Cook Time: 22 minutes
- Category: Breakfast
- Method: Baking
- Cuisine: American
Nutrition
- Serving Size: 1 muffin
- Calories: 210
- Sugar: 12g
- Sodium: 200mg
- Fat: 10g
- Saturated Fat: 3g
- Unsaturated Fat: 7g
- Trans Fat: 0g
- Carbohydrates: 28g
- Fiber: 1g
- Protein: 4g
- Cholesterol: 40mg
Keywords: pumpkin muffins, cream cheese, fall baking, cozy recipes, breakfast muffins
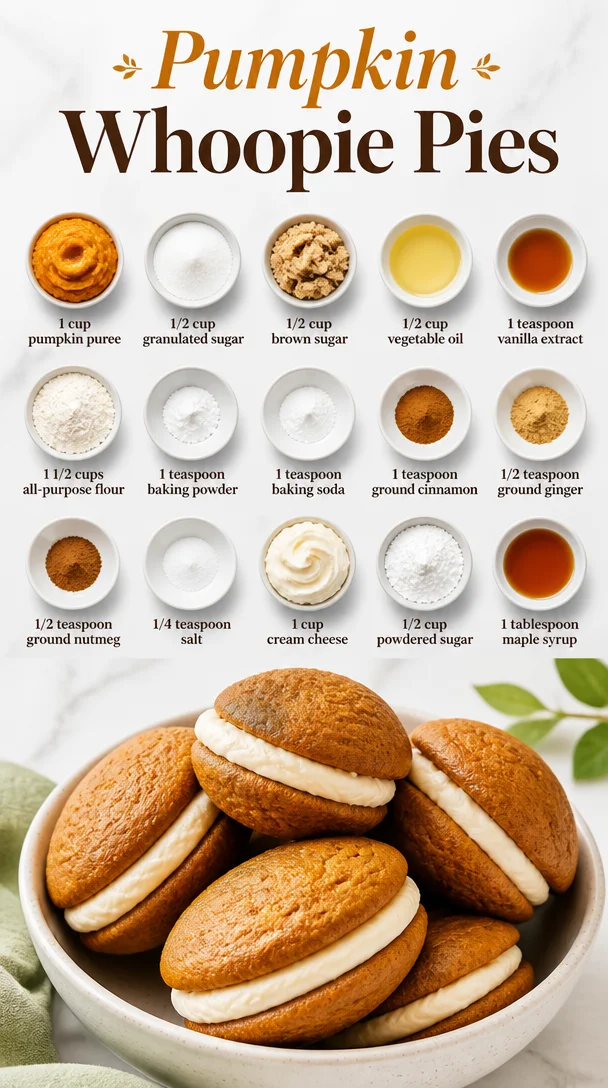
Pumpkin Whoopie Pies
A Taste of Fall: Whip Up Some Delicious Pumpkin Whoopie Pies!
Hey there, fellow food lovers! 🍂 Are you ready to fall in love with another delightful treat? Today, we’re diving into the cozy world of Pumpkin Whoopie Pies! When autumn rolls around, it seems like everything gets a little bit sweeter, and what’s better than a warm, spiced dessert to celebrate the season? Whoopie pies are like a hug in cookie form: soft, cake-like shells sandwiched with a creamy filling that will make your taste buds dance with joy!
Now, let’s set the scene. Picture this: the leaves are changing, the air is crisp, and the smell of pumpkin spice wafts through the house. It brings back those nostalgic feelings of sweater weather and gatherings with loved ones. Who doesn’t want to enjoy a delicious treat while sipping on a cup of hot apple cider or pumpkin spice latte? With these Pumpkin Whoopie Pies, you’ll create not only a tempting dessert but also warm memories that you and your family will cherish.
Don’t worry if you think baking is an overwhelming task; these flavorful pies are surprisingly easy to make! Stick with me, and I’ll walk you through every step while sharing some personal stories and chef secrets along the way. So grab your apron, gather your ingredients, and let’s make some magical pies together!
My Pumpkin Patch Memory
When I was a kid, my family had a tradition of visiting the local pumpkin patch every October. We’d wander through the fields, looking for the perfect pumpkin to carve for Halloween, munching on warm cider donuts as we went. My mom would always pick out a few extra pumpkins, insisting that they weren’t just for carving. They had to be baked into her scrumptious pies.
One year, she introduced me to the wonderful world of whoopie pies, but with a fun seasonal twist using pumpkin! It was love at first bite. I remember getting flour everywhere in the kitchen as I helped mix the batter. The thrill of taking those gooey, spiced cookies out of the oven was electric, especially when we slathered on that creamy filling. Those quiet, comfortable moments spent baking with my mom remain some of my fondest childhood memories.
Fast forward to today, and I’m thrilled to share this delightful recipe with you – one that captures the essence of those vintage pumpkin patch adventures.
Ingredients
Let’s get started with the delicious ingredients that make up these heavenly Pumpkin Whoopie Pies!
-
1 cup pumpkin puree: The star of our show! Look for pure pumpkin puree (not pumpkin pie filling). If you’re in a pinch, you can make your own by roasting and pureeing fresh pumpkin!
-
1/2 cup granulated sugar: This adds sweetness and a little crunch to the outer cookies. You can swap this with coconut sugar for a low-glycemic alternative.
-
1/2 cup brown sugar: The moisture and caramel flavor from brown sugar creates a depth that white sugar alone can’t provide. Want to add some rich molasses flavor? You can use dark brown sugar instead!
-
1/2 cup vegetable oil: Keeps the whoopie pies moist and tender. If you prefer, feel free to use melted coconut oil for a subtle tropical twist!
-
1 teaspoon vanilla extract: A must-have for boosting the flavors! You could use maple extract for a different take.
-
1 1/2 cups all-purpose flour: Provides structure to the cookies. You can try gluten-free flour if that’s your jam!
-
1 teaspoon baking powder: Ensures our pies rise to fluffy perfection. Use baking soda instead if you’re low on baking powder but make sure to add a bit of vinegar!
-
1 teaspoon baking soda: It’s the magic that gives our pies a nice lift when combined with the acidity of the pumpkin.
-
1 teaspoon ground cinnamon: This classic spice adds warmth and the fall vibe we all crave. You could also mix in some pumpkin spice blend if you have it on hand.
-
1/2 teaspoon ground ginger: A zing of spice that complements the pumpkin beautifully. Fresh ginger would be delightful too, but you might need to adjust the quantity.
-
1/2 teaspoon ground nutmeg: Adds a nutty flavor that screams autumn. Just be careful not to overdo it, as it can be quite potent.
-
1/4 teaspoon salt: A little pinch to balance the sweetness. You can use sea salt for a hint of complexity.
-
1 cup cream cheese: The rich and creamy filling that takes these whoopie pies to the next level! Full-fat or low-fat works; just be careful with the latter as it might change the consistency.
-
1/2 cup powdered sugar: This sweetens the cream cheese filling perfectly. You can sift in some cocoa powder for a chocolatey twist!
-
1 tablespoon maple syrup: Adds a hint of natural sweetness and flavor. Go for pure maple syrup to keep it authentic!
Step-by-Step Instructions
Alright, now that we have our ingredients ready, let’s get to baking! Here are the detailed steps to whip up some Pumpkin Whoopie Pies:
Step 1: Preheat the Oven
Set your oven to 350°F (175°C) so it’s nice and toasty for when your dough is ready. This ensures an even bake—trust me, your pies will go from good to great with this little step!
Step 2: Make the Batter
In a mixing bowl, combine the pumpkin puree, granulated sugar, brown sugar, vegetable oil, and vanilla extract. Mix them together until well combined. I love using a whisk for this; it gets everything blended into a smooth, velvety mixture.
Step 3: Combine the Dry Ingredients
In another bowl, sift together the flour, baking powder, baking soda, cinnamon, ginger, nutmeg, and salt. Sifting helps to aerate the flour, which will give our pies an ultra-light texture.
Step 4: Mix it All Together
Gradually add the dry mixture to the wet ingredients, mixing just until combined. Don’t overmix! It’s okay if a few lumps remain. You want light, fluffy pies—overmixing can make them tough!
Step 5: Scoop and Shape
Using a cookie scoop or a spoon, drop a heaping tablespoon of the batter onto a lined baking tray, leaving space (about 2 inches) between them. You can also use a piping bag for more uniform shapes.
Step 6: Bake!
Pop them in the oven and bake for 12-15 minutes, or until they spring back when you touch them lightly. Your kitchen will smell like autumn bliss!
Step 7: Cool Down
Once they’re done, let them cool on the tray for about 5 minutes, then transfer them to a wire rack to cool completely. Pro tip: Don’t skip the cooling—warm pies will melt your filling!
Step 8: Make the Filling
While the pies cool, beat that cream cheese with the powdered sugar and maple syrup until smooth. I recommend using a hand mixer or stand mixer for this; it makes the filling light and fluffy.
Step 9: Assemble Your Pies
Once the pies are cool, spread a generous amount of the cream cheese filling on the flat side of one cookie, then sandwich it with another cookie! This is the best part—make it as thick as you want!
Step 10: Enjoy!
These whoopie pies are best enjoyed fresh, but feel free to wrap them and save them for later. If you can resist, that is!
Serving Suggestions
To serve these irresistible Pumpkin Whoopie Pies, arrange them on a lovely cake stand or a rustic wooden platter for a homespun vibe. Dust the tops with a sprinkle of powdered sugar or even some ground cinnamon to give them an extra flair! For an autumnal touch, you could garnish the platter with mini pumpkins or colorful fall leaves.
And don’t forget about the beverages—these pies pair beautifully with a steaming cup of cocoa, cider, or even a warm chai latte. Perfect for cozy gatherings or sharing with loved ones during chilly evenings!
Recipe Variations
When it comes to whoopie pies, the possibilities are as vast as your imagination! Here are some delightful variations to consider:
-
Chocolate Pumpkin Whoopie Pies: Add cocoa powder to the batter for a rich, chocolatey twist! Adjust the flour accordingly so the texture stays just right.
-
Frosting Filling: Swap the cream cheese filling for a fluffy vanilla buttercream for a sweeter touch.
-
Gluten-Free Option: Use a gluten-free flour blend in place of all-purpose flour, and your pies will be just as glorious!
-
Spiced Rum: Add a splash of spiced rum to the filling for a fun adult-friendly dessert, perfect for holiday festivities!
-
Nutty Crunch: Fold in some finely chopped pecans or walnuts into either the batter or the cream cheese filling for a delightful crunch.
Chef’s Notes
These Pumpkin Whoopie Pies have been a crowd-pleaser in my family for years. I’ve made countless batches, modifying the recipe here and there, but one thing remains the same: they disappear like magic! I remember one holiday where I made a double batch, only to see them vanishing into thin air within minutes. The laughter and chatter around the kitchen as everyone dug in is the memory I hold dear.
FAQs and Troubleshooting
1. My whoopie pies spread too much—what happened?
If your batter spread too much and flattened out, it may be due to insufficient flour. Ensure you measure your ingredients correctly, and consider chilling the dough for a short while before baking.
2. How do I store leftovers?
Store them in an airtight container in the fridge for up to a week. These pies can also be frozen, just make sure to wrap them well!
3. Can I use fresh pumpkin instead of canned?
Absolutely! Just roast and puree your pumpkin until smooth. Avoid adding any extra liquid, as we want our whoopie pies to stay perfectly fluffy.
4. Why did my filling come out too runny?
If your cream cheese is too soft or melted, it can result in a runny filling. Ensure your cream cheese is at room temperature but not overly warm, and consider adding more powdered sugar for stabilization.
Nutritional Info
Here’s some nutritional insight for those interested in the details. Each Pumpkin Whoopie Pie (with filling included) contains approximately:
- Calories: 200-250 kcal
- Protein: 2-3g
- Carbohydrates: 30-35g
- Fat: 9-11g
- Fiber: 1g
Keep in mind that these values can vary based on your specific ingredients, serving sizes, and any variations you’re making!
Final Thoughts
Baking these Pumpkin Whoopie Pies is more than just cooking; it’s about creating memories, warming hearts, and celebrating the joys of the season. There’s nothing quite like experiencing that soft, spiced cookie with luscious cream cheese filling. Every bite is a reminder that food is best enjoyed with laughter, friends, and family gathered around.
I hope you enjoy making these delightful treats as much as I love sharing them! Can’t wait to hear about your whoopie pie adventures—happy baking, friends! 🍰
Print
Pumpkin Whoopie Pies
- Total Time: 30 minutes
- Yield: 16 servings 1x
- Diet: Vegetarian
Description
Deliciously spiced Pumpkin Whoopie Pies filled with a creamy filling, perfect for autumn gatherings.
Ingredients
- 1 cup pumpkin puree
- 1/2 cup granulated sugar
- 1/2 cup brown sugar
- 1/2 cup vegetable oil
- 1 teaspoon vanilla extract
- 1 1/2 cups all-purpose flour
- 1 teaspoon baking powder
- 1 teaspoon baking soda
- 1 teaspoon ground cinnamon
- 1/2 teaspoon ground ginger
- 1/2 teaspoon ground nutmeg
- 1/4 teaspoon salt
- 1 cup cream cheese
- 1/2 cup powdered sugar
- 1 tablespoon maple syrup
Instructions
- Preheat the oven to 350°F (175°C).
- Combine the pumpkin puree, granulated sugar, brown sugar, vegetable oil, and vanilla extract in a mixing bowl.
- Sift together the flour, baking powder, baking soda, cinnamon, ginger, nutmeg, and salt in another bowl.
- Add the dry mixture to the wet ingredients gradually and mix until just combined.
- Scoop a heaping tablespoon of batter onto a lined baking tray, leaving space between them.
- Bake for 12-15 minutes or until they spring back when touched lightly.
- Cool on the tray for about 5 minutes, then transfer to a wire rack to cool completely.
- Beat the cream cheese with the powdered sugar and maple syrup until smooth for the filling.
- Spread the cream cheese filling on the flat side of one cookie and sandwich it with another cookie.
- Enjoy your Pumpkin Whoopie Pies fresh or wrapped for later!
Notes
These whoopie pies pair wonderfully with hot apple cider or pumpkin spice lattes. For variations, consider adding cocoa powder for a chocolate twist or using gluten-free flour.
- Prep Time: 15 minutes
- Cook Time: 15 minutes
- Category: Dessert
- Method: Baking
- Cuisine: American
Nutrition
- Serving Size: 1 pie
- Calories: 225
- Sugar: 12g
- Sodium: 200mg
- Fat: 10g
- Saturated Fat: 3g
- Unsaturated Fat: 7g
- Trans Fat: 0g
- Carbohydrates: 32g
- Fiber: 1g
- Protein: 3g
- Cholesterol: 20mg
Keywords: pumpkin, whoopie pies, autumn desserts, fall baking, seasonal treats
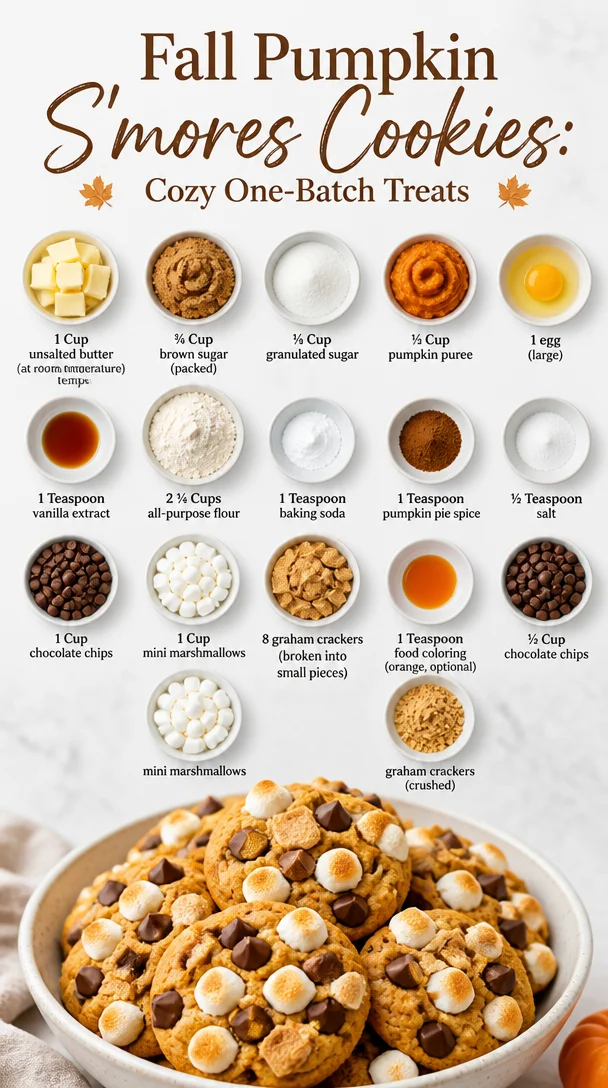
Fall Pumpkin S’mores Cookies: Cozy One-Batch Treats
Pumpkin S’mores Cookies: A Cozy Autumn Treat
Hey there, fellow food lovers! Today, I’m beyond excited to share a recipe that wraps all the warmth and comfort of fall into a cute little package: Pumpkin S’mores Cookies. Imagine sinking your teeth into a soft, chewy cookie that’s not just sweet but also packed with the flavors of spiced pumpkin and gooey marshmallows! If that doesn’t sound like a warm hug for your taste buds, I don’t know what does!
As the leaves change colors and the air turns crisp, there’s something profoundly comforting about baking with pumpkin and spices. This recipe is not just about feeding your craving; it’s a celebration of those cozy moments. The great news? These cookies are incredibly easy to make, even if you’re not exactly a baking whiz. So, whether you’re whipping them up on a chilly afternoon or preparing a batch for a get-together, I promise they’ll be the star of the show.
Now, gather your ingredients, put on your favorite playlist, and let’s get baking! You’re about to create something truly special that will not only make your kitchen smell heavenly but also have everyone asking for seconds.
My Pumpkin S’mores Journey
You know, every great recipe has a story, and this one is no exception. The inspiration for these Pumpkin S’mores Cookies came to me during a late-night conversation around a campfire with friends last autumn. Picture this: the stars twinkling overhead, laughter filling the air, and the smell of roasted marshmallows wafting through the night. We were reminiscing about our childhood camping trips, when the simple act of toasting marshmallows was like a rite of passage.
I remember my first attempt at making s’mores—things went hilariously wrong when my marshmallow caught fire! But in the end, what a treat it was! Fast forward to last fall, and I found myself playing with the idea of turning that nostalgic memory into something that could be baked instead of toasted. Combining the classic graham cracker, gooey marshmallows, and rich chocolate with the seasonal delight of pumpkin was a no-brainer. The first batch came out golden, perfectly soft, and just like the warmth of those campfire nights. Trust me, you won’t want to miss out on making this cozy treat yourself!
Ingredients
Let’s dive into what you’ll need to whip up these delightful cookies. Don’t worry if you don’t have everything on hand; I’ve included some substitution tips to keep you in the game!
-
1 Cup unsalted butter (at room temperature): Using unsalted butter allows you to control the amount of salt in your recipe. If you only have salted, just skip the additional salt in the recipe!
-
¾ Cup brown sugar (packed): Brown sugar adds a lovely moisture and richness. If you’re in a pinch, you can substitute with granulated sugar, but you might miss that caramel-like flavor.
-
¼ Cup granulated sugar: This gives your cookies a nice sweetness. You can adjust the amount based on your taste preference!
-
½ Cup pumpkin puree: Use canned pumpkin puree for convenience or roast and puree some fresh pumpkin if you’re feeling adventurous. Just make sure it’s pure pumpkin and not pumpkin pie filling for the best results.
-
1 egg (large): The egg helps bind the ingredients together. You can swap it with a flax egg (1 tablespoon ground flaxseed + 2.5 tablespoons water) for a vegan option.
-
1 Teaspoon vanilla extract: A splash of vanilla elevates the flavor! If you’re out, a teaspoon of almond extract could work, too.
-
2 ¼ Cups all-purpose flour: The backbone of your cookies! For a gluten-free option, you can use a 1:1 gluten-free flour blend.
-
1 Teaspoon baking soda: Ensures your cookies rise nicely! If you run out, baking powder can be a substitute (use 3 teaspoons of baking powder for 1 teaspoon of baking soda).
-
1 Teaspoon pumpkin pie spice: This blend adds that cozy fall flavor; this typically includes cinnamon, nutmeg, and ginger. You can always mix up your own blend if you’re missing any spices!
-
½ Teaspoon salt: Balances the sweetness. Feel free to adjust based on your taste.
-
1 Cup chocolate chips: Semi-sweet is classic, but why not get daring and use dark chocolate? If you want a dairy-free option, there are plenty of great vegan chocolate chips available.
-
1 Cup mini marshmallows: These little bursts of sweetness create the “s’mores” magic! If you can’t find minis, regular marshmallows cut in half will work, too.
-
8 graham crackers (broken into small pieces): You can use most types of graham crackers; if you’re gluten-free, look for gluten-free graham crackers instead.
-
1 Teaspoon food coloring (orange, optional): Want to give your cookies an extra pop of pumpkin color? This is optional for those extra fall vibes!
-
½ Cup chocolate chips, mini marshmallows, graham crackers (crushed): These are for topping and will really elevate your cookie game!
Now that we’ve got our ingredients in place, let’s move on to making these luscious cookies.
Step-by-Step Instructions
Alright, foodies, it’s time to roll up those sleeves and start baking! Here’s how you’ll transform those ingredients into pumpkin s’mores magic:
-
Preheat your oven to 350°F (175°C). This ensures that your cookies bake evenly and gives them that perfect golden color.
-
Cream the butter and sugars: In a large mixing bowl, combine the softened unsalted butter, brown sugar, and granulated sugar. Beat them together with a hand mixer or a sturdy wooden spoon until the mixture is light and fluffy. This should take about 2-3 minutes. The goal here is to get as much air into the mixture as possible for soft, fluffy cookies!
-
Add in the pumpkin and egg: Mix in the pumpkin puree and the large egg to the creamed mixture. Don’t forget the vanilla extract! Blend until everything is nicely combined. The pumpkin will add moisture and a beautiful color to the cookies. If the mixture looks a bit lumpy at this stage, don’t worry; that’s just the pumpkin being itself.
-
Combine the dry ingredients: In a separate bowl, whisk together the all-purpose flour, baking soda, pumpkin pie spice, and salt until evenly mixed. Gradually add this dry mixture to your wet ingredients, mixing until just combined. Overmixing here could result in tough cookies, so don’t get too carried away!
-
Fold in the goodies: Now for the fun part! Gently fold in the chocolate chips, mini marshmallows, and broken graham cracker pieces into your dough. This is where the s’mores charm really comes to life! You can reserve some of the mix-ins to sprinkle on top of the cookies later for a gorgeous presentation.
-
Scoop and bake: Use a cookie scoop or tablespoon to drop dollops of cookie dough onto a lined baking sheet, spacing them about 2 inches apart. Gently press the tops down if they look too rounded. Bake for 10-12 minutes, or until the edges are lightly golden. Your kitchen will start smelling like a cozy fall wonderland!
-
Add toppings: If you reserved any chocolate chips, mini marshmallows, or graham cracker pieces, sprinkle them on top of the cookies in the last minute of baking. This gives them that extra wow factor!
-
Cool down: Once baked, remove the cookies from the oven, and let them cool on the baking sheet for about 5 minutes before transferring them to a wire rack. This’ll help them set and stay gooey in the middle.
Serving Suggestions
Now that your decadent Pumpkin S’mores Cookies are cool, what’s next? I recommend stacking them on a pretty plate for a presentation that screams, “Please eat me!” For that extra fall flair, you can serve them alongside a warm cup of cider or your favorite herbal tea.
Want to make it a little more indulgent? Drizzle some melted chocolate over the cookies before you serve them. If you’re feeling extra festive, consider garnishing with a sprinkle of crushed graham crackers or even some pumpkin seeds for a delightful crunch!
Feel free to whip out those cute little airtight containers and gift a batch to friends or family. Just be sure to grab a few for yourself—they’ll disappear faster than you can say “Pumpkin S’mores!”
Recipe Variations
One of the best things about baking is the creativity you can unleash! Here are a few delicious twists you can try:
-
Add nuts: Chopped pecans or walnuts add great texture and nutty flavor. Just make sure to chop them finely to avoid overpowering the cookies.
-
Spice it up: If you like a kick, add a pinch of cayenne pepper or cinnamon for some heat or warmth.
-
Vegan swap: To make this recipe vegan, use coconut oil instead of butter, a flax egg instead of a regular egg, and make sure to use dairy-free chocolate chips and marshmallows.
-
Pumpkin Chocolate Chip: If you’re a chocolate lover, feel free to double the amount of chocolate chips. You can also substitute half the pumpkin with mashed bananas for a banana-pumpkin hybrid cookie.
-
Frosting drizzle: Why stop at just cookies? Make a simple cream cheese or vanilla glaze to drizzle over the top for an indulgent finish!
Chef’s Notes
As I developed this recipe, I had a blast reminiscing about those campfire nights with friends. Funny enough, I once tried adding crushed candy corn into the dough… let’s just say that attempt ended in laughter and went straight to the “not recommended” category! But that’s the beauty of cooking—it’s all about learning, experimenting, and enjoying the process.
You also might notice that these cookies surprisingly remain soft for days! But let’s be real; the only downside is that they might disappear before you even get a chance to store them!
FAQs and Troubleshooting
-
Why are my cookies spreading too much?
- This can happen if the butter is too soft or melted. Make sure your butter is just room temperature and not too gooey! Additionally, chilling the dough for about 30 minutes before baking can help prevent spreading.
-
Can I use fresh pumpkin instead of canned?
- Absolutely! Just ensure you roast and puree the pumpkin properly. Be careful not to add too much moisture as fresh pumpkin can sometimes be wetter than canned.
-
What if my cookies are too dry?
- This typically happens with overbaking. Keep an eye on your cookies towards the end of baking and remove them when they’re still a tad soft—they’ll firm up as they cool.
-
How can I make these gluten-free?
- Replace all-purpose flour with a gluten-free flour blend. I also recommend adding a few extra tablespoons of pumpkin puree if you’re using a gluten-free blend, as they can be a touch drier.
Nutritional Info
While indulging in these tasty cookies, it’s handy to know what you’re munching on! Here’s an approximate breakdown per cookie, assuming you make 24 cookies from this recipe:
- Calories: 180
- Protein: 2g
- Fat: 8g
- Carbohydrates: 25g
- Fiber: 1g
- Sugar: 12g
Keep in mind that these values can vary depending on specific ingredients, but hey, a little indulgence never hurt anyone, right?
Final Thoughts
And there you have it! Pumpkin S’mores Cookies that not only channel your inner kid at the campfire but also warm your heart with every bite. Cooking is all about creating memories, and I hope this recipe helps you craft some delicious moments in your own kitchen.
Whether you bake a batch for yourself or share them with loved ones, these cookies are bound to become a favorite. Enjoy the process, let the aroma fill your home, and remember that good food is meant to be shared. Now, go forth and bake these magical cookies; I can’t wait to hear how your baking adventures go!
Until next time, keep it delicious and stay cozy!
Print
Pumpkin S’mores Cookies
- Total Time: 27 minutes
- Yield: 24 cookies 1x
- Diet: Vegetarian
Description
Delightfully soft and chewy cookies bursting with spiced pumpkin, chocolate, and gooey marshmallows, perfect for autumn.
Ingredients
- 1 Cup unsalted butter (at room temperature)
- ¾ Cup brown sugar (packed)
- ¼ Cup granulated sugar
- ½ Cup pumpkin puree
- 1 large egg
- 1 Teaspoon vanilla extract
- 2 ¼ Cups all-purpose flour
- 1 Teaspoon baking soda
- 1 Teaspoon pumpkin pie spice
- ½ Teaspoon salt
- 1 Cup chocolate chips
- 1 Cup mini marshmallows
- 8 graham crackers (broken into small pieces)
- 1 Teaspoon food coloring (orange, optional)
- ½ Cup chocolate chips, mini marshmallows, graham crackers (crushed) for topping
Instructions
- Preheat your oven to 350°F (175°C).
- Cream the butter and sugars together until light and fluffy.
- Add in the pumpkin, egg, and vanilla extract, and blend until combined.
- Combine the dry ingredients in a separate bowl, then gradually add to the wet mixture until just combined.
- Fold in the chocolate chips, mini marshmallows, and graham cracker pieces.
- Scoop dollops of cookie dough onto a lined baking sheet, spacing them about 2 inches apart.
- Bake for 10-12 minutes or until edges are lightly golden.
- Add reserved toppings during the last minute of baking.
- Cool on a wire rack after removing from oven.
Notes
For a vegan version, substitute coconut oil for butter and a flax egg for the regular egg. To make gluten-free, use a gluten-free flour blend and consider additional pumpkin puree.
- Prep Time: 15 minutes
- Cook Time: 12 minutes
- Category: Dessert
- Method: Baking
- Cuisine: American
Nutrition
- Serving Size: 1 cookie
- Calories: 180
- Sugar: 12g
- Sodium: 100mg
- Fat: 8g
- Saturated Fat: 4g
- Unsaturated Fat: 4g
- Trans Fat: 0g
- Carbohydrates: 25g
- Fiber: 1g
- Protein: 2g
- Cholesterol: 30mg
Keywords: cookies, pumpkin, s'mores, fall, dessert
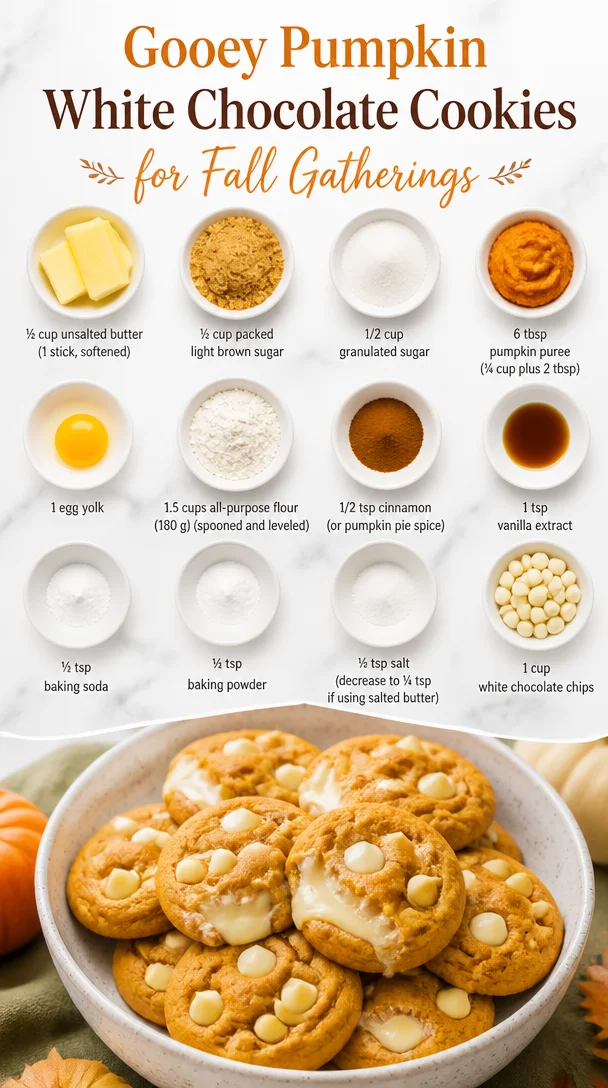
Gooey Pumpkin White Chocolate Cookies for Fall Gatherings
Pumpkin White Chocolate Chip Cookies: A Cozy Fall Favorite
Hey there, fellow foodies! If you’re anything like me, the arrival of fall means it’s time for all things pumpkin. The vibrant orange hue, the warm spices wafting through the kitchen, and the feeling of comfort that comes with every delicious bite—it’s simply the best season for baking! Today, I’m excited to share a recipe that is not only scrumptious but also gives me all the warm fuzzies of nostalgia: Pumpkin White Chocolate Chip Cookies.
These cookies are the embodiment of autumn, with the pumpkin and cinnamon elevating the cookie into something special. Every time I make them, I’m transported back to family gatherings, where everyone huddles together around a table filled with homemade treats. Imagine the scent of baked goods wafting through the air, laughter ringing out, and a communal spirit of sharing love through food. It’s hard to replicate that feeling, but I hope these cookies bring a bit of that magic to your kitchen, too.
A Whiff of Nostalgia
One specific memory stands out as I think back to my first encounter with pumpkin cookies. I was in high school, and my best friend’s mom used to whip up a batch every October when we all gathered for ‘fall festivities.’ You know the ones—apple picking, hayrides, and, of course, plenty of pumpkin-flavored everything! I remember stealing a warm cookie right from the cooling rack, the buttery aroma mixing with that of cinnamon and nutmeg. I can still feel the warmth it brought to my hands as I took that first glorious bite. The chocolate melted in my mouth like a little piece of heaven, balancing perfectly with the subtle sweetness of pumpkin. Ever since that first bite, I’ve been on a quest to perfect my own version, and I think I finally nailed it!
Ingredients That Embrace Fall
Here’s what you’ll need to bake these delightful cookies, and some tips to kick it up a notch:
-
½ cup unsalted butter (1 stick, softened): Softened butter is key for a chewy texture. If you’re in a pinch, microwave it for just 10 seconds, but avoid melting it!
-
½ cup packed light brown sugar: The molasses in brown sugar gives a deeper, richer flavor. You could use dark brown sugar for a more caramel-like taste if you’re feeling adventurous!
-
½ cup granulated sugar: Classic white sugar gives the cookies a nice crispiness around the edges. If you want to reduce sugar, feel free to cut this in half, but keep in mind the moisture balance.
-
6 tbsp pumpkin puree (¼ cup plus 2 tbsp): Canned pumpkin puree is super easy and consistent. Make sure it’s pure pumpkin and not pumpkin pie filling, which has added sugars and spices.
-
1 egg yolk: Using just the yolk enriches the dough. If you’re after a lighter cookie, feel free to add the egg white too!
-
1.5 cups all-purpose flour (180 g, spooned and leveled): Proper measuring ensures the right texture. Avoid scooping directly from the bag, as it can compact the flour.
-
½ tsp cinnamon (or pumpkin pie spice): This spice brings warmth and earthiness. A bit of nutmeg or clove can also create a cozy depth of flavor.
-
1 tsp vanilla extract: Always go for pure vanilla extract instead of imitation—it makes a huge difference in flavor!
-
½ tsp baking soda and ½ tsp baking powder: These leavening agents keep your cookies from being too dense. If you’re out of baking powder, you can substitute with an equal amount of cornstarch.
-
½ tsp salt (decrease to ¼ tsp if using salted butter): A touch of salt enhances sweetness and balances flavors. It’s essential!
-
1 cup white chocolate chips: The star of the show! They add sweetness and creaminess, perfectly complementing the pumpkin. Feel free to substitute with dark chocolate chips for a more bittersweet flavor.
Step-by-Step Instructions
Now, let’s get cooking! The process is super simple, and I’ll sprinkle in some tips along the way. Follow along, and you’ll be enjoying the best pumpkin cookies in no time!
-
Preheat the Oven: First things first, let’s get that oven heated to 350°F (175°C). Preheating is key to ensuring your cookies bake evenly.
-
Cream the Butter and Sugars: In a mixing bowl, cream together the softened butter, light brown sugar, and granulated sugar until it’s light and fluffy. This usually takes about 2-3 minutes. Here’s my chef tip: Use a hand mixer for the best results, but a whisk and a bit of elbow grease work, too!
-
Add the Pumpkin and Egg Yolk: Mix in the pumpkin puree and the egg yolk until fully combined. This is where the magic begins! The batter starts looking luscious and inviting.
-
Combine the Dry Ingredients: In a separate bowl, whisk together the all-purpose flour, cinnamon (or your choice of spices), baking soda, baking powder, and salt. This step ensures that your leavening agents are evenly distributed throughout the flour.
-
Bring It All Together: Gradually add the dry mixture to the wet mixture. Gently fold it in until no flour streaks remain—avoid over-mixing to keep those cookies nice and soft!
-
Chocolate Chip Delight: Stir in the white chocolate chips. Taste a few for good measure—quality control, right? 😊
-
Scoop Those Cookies: Use a cookie scoop or a tablespoon to drop rounded balls of dough onto a lined baking sheet, leaving about 2 inches of space between them. This gives them room to spread.
-
Bake Time: Pop them in the preheated oven and bake for about 10-12 minutes. Start watching closely after the 10-minute mark. You want them to set at the edges but still look slightly underbaked in the center for that chewy texture!
-
Cool Down: Allow the cookies to cool on the baking sheet for about 5 minutes before transferring to a wire rack. The cooling process lets them firm up and makes them easier to handle.
There you have it! Your Pumpkin White Chocolate Chip Cookies are ready to be enjoyed.
Serving Suggestions
Now, how to serve these beauties? For a perfect fall vibe, plate them up with a sprinkle of cinnamon sugar on top—just mix a bit of sugar with cinnamon, and voila! Pair them with a hot cup of apple cider or a pumpkin spice latte for the ultimate autumn experience. If you’re feeling fancy, serve them warm with a scoop of vanilla ice cream on the side. Trust me, it’s a game-changer!
Recipe Variations
Feel like mixing things up? Here are a few creative spins on this recipe:
- Nutty Twist: Add ½ cup of chopped pecans or walnuts for a crunchy texture.
- Dried Fruit Delight: Substitute with dried cranberries or raisins for a fruity surprise.
- Spicy Kick: Toss in ¼ tsp of ground ginger or allspice for a zesty punch.
- Oatmeal Cookies: Swap out ½ cup of flour with old-fashioned oats for a heartier cookie.
- Vegan Version: Replace the butter with coconut oil and the egg yolk with a flax egg (1 tbsp flaxseed meal + 2.5 tbsp water) for a plant-based treat.
Chef’s Notes
As I’ve experimented with this recipe over the years, I’ve learned that little tweaks can yield exciting results. One time, I accidentally left out the white chocolate chips and substituted them with crushed pretzels. Let me tell you—sweet and salty perfection! It’s a reminder that cooking is an adventure, so don’t be afraid to try new things and make this recipe your own!
FAQs and Troubleshooting
1. Why are my cookies spreading too much?
If they spread too much, check the amount of flour you used; it may be too little. Also, ensure your butter isn’t melted when you mix it in.
2. How can I store these cookies?
These cookies can be stored in an airtight container at room temperature for up to a week. For longer storage, freeze them in a single layer on a baking sheet, then transfer them to a zip-top bag.
3. Can I use fresh pumpkin instead of canned?
Absolutely! If you’re using fresh pumpkin, make sure to roast it first, then puree it. Just make sure to drain any excess moisture.
4. What if I don’t have all the spices?
No worries! You can use pumpkin pie spice if you have that on hand. It’s a blend of spices that usually includes cinnamon, nutmeg, ginger, and allspice.
Nutritional Info
While these cookies are a delightful treat, they do come with their share of calories. Here’s a quick nutritional breakdown per cookie (assuming 12 cookies per batch):
- Calories: Approximately 150
- Protein: 2g
- Fat: 7g
- Carbohydrates: 21g
- Fiber: 0.5g
Keep in mind that these numbers can vary based on specific ingredients, so be sure to check if you’re watching your intake!
Final Thoughts
There you have it—a pumpkin white chocolate chip cookie recipe that combines nostalgia, deliciousness, and versatility! I hope you’ll take the time to create these in your kitchen and fill your home with that warm, inviting aroma. Cooking is all about creating memories, and I can’t wait for you to make your own with these cookies. So, grab your ingredients, channel your inner baker, and let the magic happen. Happy baking, my friends! Let’s make this fall a feast of flavors, hugs, and sweet, heartfelt memories! 🍂🍪
Print
Pumpkin White Chocolate Chip Cookies
- Total Time: 27 minutes
- Yield: 12 cookies 1x
- Diet: Vegetarian
Description
Deliciously nostalgic fall cookies featuring pumpkin and white chocolate chips.
Ingredients
- ½ cup unsalted butter, softened
- ½ cup packed light brown sugar
- ½ cup granulated sugar
- 6 tbsp pumpkin puree
- 1 egg yolk
- 1.5 cups all-purpose flour
- ½ tsp cinnamon
- 1 tsp vanilla extract
- ½ tsp baking soda
- ½ tsp baking powder
- ½ tsp salt
- 1 cup white chocolate chips
Instructions
- Preheat the oven to 350°F (175°C).
- Cream together the softened butter, light brown sugar, and granulated sugar until light and fluffy.
- Add the pumpkin puree and egg yolk, mixing until combined.
- Combine the flour, cinnamon, baking soda, baking powder, and salt in a separate bowl.
- Bring the dry mixture into the wet mixture, folding gently until no flour streaks remain.
- Stir in the white chocolate chips.
- Scoop rounded balls of dough onto a lined baking sheet, leaving space between them.
- Bake for about 10-12 minutes until the edges are set but centers look slightly underbaked.
- Cool on the baking sheet for 5 minutes before transferring to a wire rack.
Notes
For a perfect fall vibe, sprinkle cinnamon sugar on top before serving. Pair with apple cider or a pumpkin spice latte.
- Prep Time: 15 minutes
- Cook Time: 12 minutes
- Category: Dessert
- Method: Baking
- Cuisine: American
Nutrition
- Serving Size: 1 cookie
- Calories: 150
- Sugar: 12g
- Sodium: 70mg
- Fat: 7g
- Saturated Fat: 4g
- Unsaturated Fat: 2g
- Trans Fat: 0g
- Carbohydrates: 21g
- Fiber: 0.5g
- Protein: 2g
- Cholesterol: 30mg
Keywords: pumpkin cookies, white chocolate, fall recipes, dessert, baking