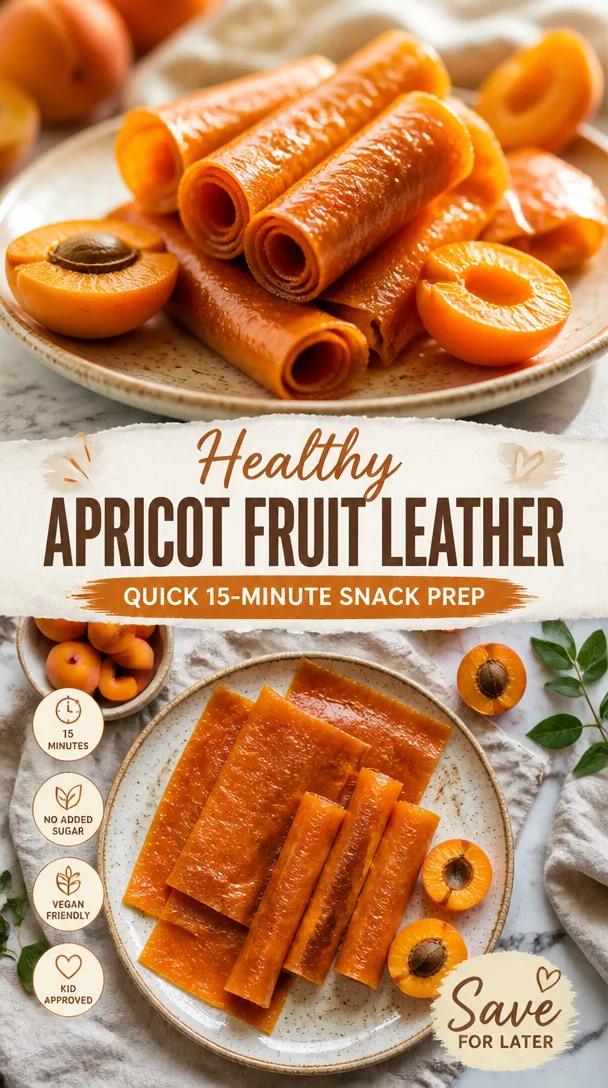
Healthy Apricot Fruit Leather: Quick 15-Minute Snack Prep
The Sweet Simplicity of Homemade Apricot Fruit Leather
Hey there, fellow foodies! Welcome back to Feastical, where we celebrate the joys of cooking in the cozy embrace of our kitchens. Today, we’re diving into a delightful recipe that’s not just delicious but also a walk down memory lane. We’re talking about homemade apricot fruit leather! If you’ve ever grabbed a pack at the store and wondered why it tasted so good yet was so boring to buy, you’re in for a treat. It’s easy, fun to make, and your kitchen is about to smell like fruity heaven!
A Journey Back to My Childhood
Let me take you on a little journey. As a kid, my summers were filled with road trips and picnics packed with homemade snacks. My mom would often whip up apricot fruit leather, and let me tell you, it was always the highlight of our travel treats. We’d open the windows wide as we sped along winding roads, the vibrant flavors of the apricot leather bursting in our mouths. It was sticky, sweet, and just a tad chewy—every bite a snapshot of sunny days spent exploring the great outdoors.
There was this one specific summer when our family decided to visit the mountains. The landscape was full of lush greenery, and we parked under a massive oak tree to have lunch. My mom handed each of us a piece of that homemade fruit leather, and as we sunk our teeth into it, our worries melted away. It became our go-to snack, bridging the gap between savory sandwiches and refreshing lemonade. It tasted like sunshine and adventure all rolled into one—and you just can’t replicate those vibes with store-bought snacks.
Ingredients You’ll Need
Now that I’ve whetted your appetite, let’s get to the good stuff! Here’s what you need to whip up your very own apricot fruit leather:
-
Dried Apricots
The star of the show! Dried apricots are naturally sweet and have a wonderful chewy texture that translates beautifully into leather. You can also substitute with other dried fruits like peaches or mangoes for different flavor profiles. -
Water
Essential for softening the dried apricots before blending. This ingredient transforms our dried fruit into a smooth, luscious purée. If you want to enhance the flavor, consider using orange juice or coconut water instead of plain water.
Step-by-Step Instructions
Ready to embark on this fruity adventure? Let’s get you geared up for the task!
-
Soak the Dried Apricots
Start by placing 2 cups of dried apricots in a bowl and covering them with water. Let them soak for at least an hour. This step is crucial as it softens the apricots, making them easier to blend into a smooth purée. Pro tip: For an extra flavor punch, mix in a splash of vanilla extract. -
Blend to Perfection
Drain the soaked apricots and transfer them to a blender or food processor. Add 1/2 cup of fresh water (or juice) to the mix. Blend until you have a smooth, creamy consistency. Don’t be shy—give it a good whirl! This is your chance to customize the sweetness; if you prefer things sweeter, toss in a bit of honey or agave syrup. -
Prepare Your Baking Sheet
Preheat your oven to a low temperature, around 170°F (77°C). Line a baking sheet with parchment paper, ensuring it goes up the sides a bit. This helps the fruit leather peel away easily once it’s done. -
Spread the Mixture
Pour the blended apricot mixture onto the lined baking sheet. With a spatula, spread it out to create an even layer about 1/8 inch thick. Aim for a smooth texture! If there are any uneven parts, your fruit leather may dry inconsistently. -
Bake, Bake, Bake
Pop your sheet in the oven and let it bake for about 6 to 8 hours. Yes, you read that right; low and slow is the name of the game! You’ll know it’s done when the leather is no longer sticky to touch and peels away from the parchment easily. Note: If you’re short on time, a dehydrator can work magic on this recipe too, and it’ll speed up the process significantly. -
Cut and Store
Once cooled, transfer the fruit leather to a cutting board. Use scissors to cut it into strips or squares, then roll them up in parchment paper for easy snacking. Store your homemade apricot fruit leather in an airtight container, and it’ll keep for about 2 weeks—if you can resist eating it all in one sitting!
Serving Suggestions
Now that you have this delicious treat ready, how should you serve it? The beauty of apricot fruit leather lies in its versatility! Serve it as an after-school snack for your kids, pack it for hiking adventures, or include it in a delightful gift basket filled with homemade goodies. You can even toss some pieces into your lunch alongside cheese and crackers for a fancy touch. The sweetness of the apricot pairs exceptionally well with a sharp cheddar or rich brie—trust me!
Recipe Variations
Ready to get creative? Here are a few twists you can experiment with when making your apricot fruit leather:
- Tropical Twist: Combine dried apricots with pineapple for a deliciously sunny fruit leather.
- Cocoa Delight: Add a tablespoon of cocoa powder in the blending step for a chocolate-infused version that makes for a unique snack.
- Spiced Up: Sprinkle some cinnamon or ginger into the blender for a warm, spicy flavor that pairs wonderfully with the sweetness of the apricots.
- Berry Boost: Toss in a cup of dried berries alongside your apricots for an extra punch of flavor and color.
Chef’s Notes
Making this fruit leather is almost like crafting a work of art; the process is filled with joy and nostalgia. Over the years, I’ve adjusted this recipe to accommodate my kids’ preferences—there are days when they want something tangy, and others when they yearn for a touch of sweetness. It’s fascinating to see how a simple recipe can evolve to reflect the taste buds in your home. Plus, every time we make it together, I get to share stories about our memorable road trips, and it’s a wonderful way to bond!
FAQs and Troubleshooting
-
Can I use fresh apricots instead of dried?
Absolutely! If you can find fresh apricots, you’ll need to cook them down first, turning them into a purée before proceeding with the rest of the steps. -
My fruit leather is too sticky. What did I do wrong?
It may need longer in the oven. Remember, it should not feel sticky when it’s done. Perhaps try checking on it every hour once you hit the 6-hour mark. -
How can I tell when my fruit leather is done?
It should peel off the parchment easily and feel slightly tacky but not sticky to the touch. Trust your instincts! -
Can I freeze fruit leather?
Yes! Just make sure to wrap them well before freezing, and they’ll keep for up to six months.
Nutritional Info
Feeling good about what you’re munching on is essential, right? Here’s a quick rundown of the nutritional benefits of apricot fruit leather. When prepared with just dried apricots and water, it’s a nutrient-dense snack!
- Calories: Approximately 40-50 calories per piece
- Fiber: Dried apricots are high in fiber, aiding digestion and keeping you feeling full.
- Vitamins: Rich in vitamins A and C, helping support healthy skin and boosting immunity.
- Potassium: Dried apricots contain potassium, which is great for heart health.
Final Thoughts
Making your own apricot fruit leather is not just a way to enjoy a tasty treat; it’s about sharing joy, love, and memories one chew at a time. Whether you’re snacking with family, packing a lunch, or simply indulging on a cozy afternoon, this recipe brings a taste of nostalgia and sweetness into your life.
So what are you waiting for? Roll up those sleeves, grab those dried apricots, and let’s create some magic! Remember, cooking is about experimenting and having fun, so don’t be afraid to add your flair. Happy cooking! 🍑
Print
Homemade Apricot Fruit Leather
- Total Time: 540 minutes
- Yield: 15 pieces 1x
- Diet: Vegetarian
Description
A nostalgic and delightful recipe for homemade apricot fruit leather, perfect for snacking and sharing.
Ingredients
- 2 cups Dried Apricots
- 1/2 cup Water (or orange juice/coconut water)
Instructions
- Soak the dried apricots in water for at least an hour.
- Drain the apricots and blend with fresh water until smooth.
- Preheat the oven to 170°F (77°C) and line a baking sheet with parchment paper.
- Pour the blended apricot mixture onto the lined baking sheet and spread it evenly.
- Bake for 6 to 8 hours until not sticky to touch.
- Cut the cooled fruit leather into strips and roll them up in parchment paper.
Notes
Store in an airtight container for up to 2 weeks. You can use variations like adding pineapple or cocoa for different flavors.
- Prep Time: 60 minutes
- Cook Time: 480 minutes
- Category: Snack
- Method: Baking
- Cuisine: American
Nutrition
- Serving Size: 1 piece
- Calories: 50
- Sugar: 12g
- Sodium: 5mg
- Fat: 0g
- Saturated Fat: 0g
- Unsaturated Fat: 0g
- Trans Fat: 0g
- Carbohydrates: 13g
- Fiber: 2g
- Protein: 1g
- Cholesterol: 0mg
Keywords: apricot, fruit leather, homemade snacks, easy recipe
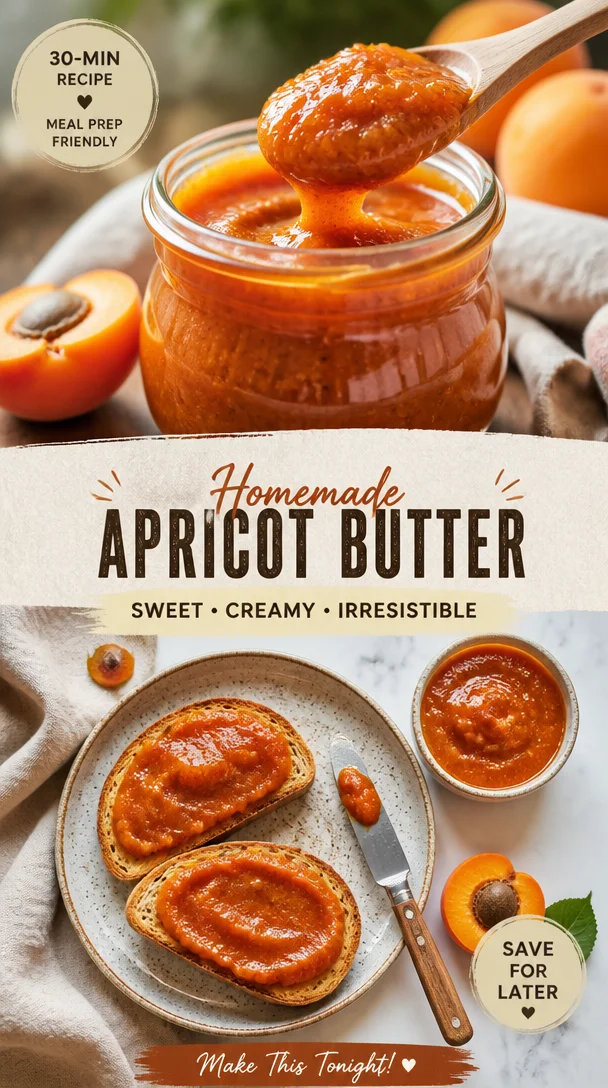
Apricot Butter
The Sweet Symphony of Apricot Butter: A Culinary Adventure
Hey there, food lovers! Whether you’re an experienced cook or still chasing down your spatula, you’ll find something delightful here at Feastical. Today, I’m thrilled to share with you a recipe that’s close to my heart—Apricot Butter. This isn’t just any spread; it’s a luscious, vibrant treat that captures the essence of summer in each velvety bite. Imagine spreading this on warm, buttery toast or dolloping it atop fresh scones as you sip your morning coffee—oh, the bliss!
A Toast to Nostalgia
Let me take you back to a warm July afternoon many years ago. Picture this: I’m standing in my grandmother’s sun-drenched kitchen, the sweet scent of ripe apricots wafting through the air. As a kid, those afternoons were magical. Grandma had this special knack for turning simple ingredients into something extraordinary. I remember her showing me how to pick the juiciest apricots from her tree, their bright orange skins glistening in the sunlight. We’d carefully pit and chop them, our hands sticky with sweet juice, laughter echoing off the walls.
She’d often pull out her trusty old pot and a wooden spoon, and together we’d transform those sun-kissed fruits into apricot butter. The bubbling concoction filled the kitchen with warmth and comfort, reminding me of the love that went into every spoonful. Fast forward to now, that cherished recipe has found a permanent place in my heart and kitchen. I invite you to join me on this flavorful journey, where we’ll recreate that same sense of joy and satisfaction.
Ingredients You’ll Need
Let’s gather our ingredients! Here’s what you’ll need to whip up this dreamy apricot butter:
-
4 cups apricots, pitted and chopped
The star of our show! Ripe apricots are crucial, as they give the butter its vibrant color and sweet-tart flavor. If you can’t find fresh apricots, feel free to use frozen ones—just make sure they’re thawed and pitted! -
1 cup sugar
This is what sweetens the deal. You can adjust the sugar based on how sweet your fruit is. For a healthier alternative, consider using honey or maple syrup—just keep in mind that it may slightly alter the final flavor. -
1/4 cup lemon juice
The zesty kick that brightens up the apricots! Freshly squeezed lemon juice really enhances the flavor of your butter, but you can use bottled juice if that’s what’s handy. -
1 teaspoon cinnamon
This aromatic spice adds warmth and depth to your apricot butter. If you’re not a huge cinnamon fan, feel free to swap it for allspice or nutmeg for a different flavor profile. -
1/2 teaspoon nutmeg
A little goes a long way! Nutmeg adds a warm, nutty flavor that complements the sweetness of apricots beautifully. If you want something a bit different, try using cardamom instead.
Step-by-Step Instructions
Now, let’s dive into the fun part—making the apricot butter! Follow these steps, and you’ll be spreading joy in no time.
-
Prepare the Apricots
Start by washing and pitting your apricots. Then, chop them into small pieces. This helps them cook down evenly. If you like a chunkier texture in your butter, feel free to leave some bigger pieces in the mix! -
Combine in a Pot
In a large saucepan, combine your chopped apricots, sugar, and lemon juice. Stir everything together, making sure the sugar is evenly distributed. Let this mixture sit for about 15-20 minutes. This step helps the apricots release their natural juices and makes for a more flavorful butter! -
Cook It Down
Place the saucepan over medium heat. Stir the mixture frequently and bring it to a gentle simmer. As it cooks, you’ll notice the apricots breaking down and forming a jam-like consistency. Keep stirring to prevent sticking—this is where the magic happens! Allow it to simmer for about 30-40 minutes, or until the butter reaches your desired thickness. -
Add the Spices
Once the mixture has thickened, add in your cinnamon and nutmeg. Give it a good stir to combine. At this stage, taste and adjust the sweetness if necessary. If you like a smoother texture, you can use an immersion blender to blend it to your desired consistency. -
Cool and Store
Remove the pot from the heat and let the apricot butter cool slightly. Transfer it to sterilized jars and store in the refrigerator. It’s that simple!
Serving Suggestions
Your apricot butter is now ready to shine! Here are a few delightful ways to serve it:
-
Spread it on Toast: A classic choice! Spread apricot butter generously on warm, toasted bread or bagels for a delicious breakfast.
-
Dollop it on Pancakes and Waffles: Elevate your breakfast game! It complements fluffy pancakes or crispy waffles beautifully.
-
Pair with Cheese: Create a stunning cheese platter with your apricot butter. It pairs wonderfully with creamy brie or sharp cheddar.
-
Use it in Baking: Add a dollop into your muffin or cake batter for a burst of flavor, or use it as a filling in pastries.
-
Gift it: Sweeten someone’s day by gifting a jar of your homemade apricot butter—they’ll love you for it!
Recipe Variations
Let’s get creative! Here are some exciting variations to shake things up:
-
Spicy Apricot Butter: Add a pinch of cayenne or some finely chopped fresh jalapeños for a sweet-spicy kick.
-
Jammy Apricot Butter: Stir in other fruits like peaches or plums for a mixed fruit version that’s bursting with flavor.
-
Vanilla Apricot Butter: Add a splash of vanilla extract during cooking for an extra layer of sweetness.
-
Herbed Apricot Butter: Incorporate fresh herbs, such as thyme or rosemary, for a unique savory twist.
-
Low-Sugar Version: Substitute with a low-sugar alternative sweetener to create a version that’s perfect for those watching their sugar intake.
Chef’s Notes
As I reflect on my journey with apricot butter, I can’t help but chuckle at the mishaps along the way! Once, I got so caught up in the cooking process that I accidentally grabbed salt instead of sugar. Let’s just say, no one wanted to taste that batch!
Over the years, I’ve experimented with different spice combinations, and I’ve come to adore the balanced warmth of cinnamon and nutmeg. Making apricot butter has also become a lovely tradition at our family summer picnics. It’s more than just a recipe; it’s a little piece of nostalgia that brings everyone together.
FAQs and Troubleshooting
1. Why is my apricot butter too runny?
If your apricot butter turned out too runny, it might need more cooking time. Just simmer it a little longer to evaporate the excess liquid. You can also mix in a small amount of cornstarch dissolved in water to thicken it up.
2. Can I can this recipe for storage?
Absolutely! If you want longer shelf life, consider canning your apricot butter in sterilized jars, making sure to follow proper canning guidelines.
3. What can I substitute for sugar?
You can replace the sugar with coconut sugar, honey, or even maple syrup. Just remember that different sweeteners may slightly change the flavor profile.
4. How long will this apricot butter last in the fridge?
When stored properly in the fridge, your apricot butter should last around 2-3 weeks. If you’ve canned it, it can last over a year in a cool, dark place.
Nutritional Info
Now, let’s break down the nutritional info! Per tablespoon of this delicious apricot butter, you can expect roughly:
- Calories: 50 calories
- Total Fat: 0g
- Sodium: 0mg
- Total Carbohydrates: 13g
- Sugars: 10g
- Protein: 0g
Final Thoughts
There you have it, food friends—your very own apricot butter! This vibrant, flavorful spread captures the essence of sunshine and love, all wrapped up in a jar. I hope this recipe fills your kitchen with warmth and sparks joy in your culinary adventures. Remember, cooking is an expression of love, so don’t be afraid to get a little creative in your kitchen!
So grab your apron, and let’s make some apricot magic. I can’t wait to hear about your own culinary journeys and stories that resonate with this recipe. Happy cooking!
Print
Apricot Butter
- Total Time: 55 minutes
- Yield: 4 servings 1x
- Diet: Vegetarian
Description
A luscious, vibrant spread that captures the essence of summer in each velvety bite, perfect for toast, pancakes, or as a gift.
Ingredients
- 4 cups apricots, pitted and chopped
- 1 cup sugar
- 1/4 cup lemon juice
- 1 teaspoon cinnamon
- 1/2 teaspoon nutmeg
Instructions
- Prepare the apricots: Wash and pit your apricots, then chop them into small pieces.
- Combine in a pot: In a large saucepan, combine chopped apricots, sugar, and lemon juice. Stir and let sit for 15-20 minutes.
- Cook it down: Place over medium heat, stirring frequently until it reaches a gentle simmer. Cook for 30-40 minutes.
- Add the spices: Once thickened, stir in cinnamon and nutmeg. Adjust sweetness if necessary.
- Cool and store: Remove from heat, let cool, then transfer to sterilized jars.
Notes
Perfect for spreading on toast, pancakes, or as a filling in pastries. Can also be canned for longer storage.
- Prep Time: 15 minutes
- Cook Time: 40 minutes
- Category: Condiment
- Method: Stovetop
- Cuisine: American
Nutrition
- Serving Size: 1 tablespoon
- Calories: 50
- Sugar: 10g
- Sodium: 0mg
- Fat: 0g
- Saturated Fat: 0g
- Unsaturated Fat: 0g
- Trans Fat: 0g
- Carbohydrates: 13g
- Fiber: 0g
- Protein: 0g
- Cholesterol: 0mg
Keywords: apricot butter, fruit spread, summer recipes, homemade condiments, easy recipes
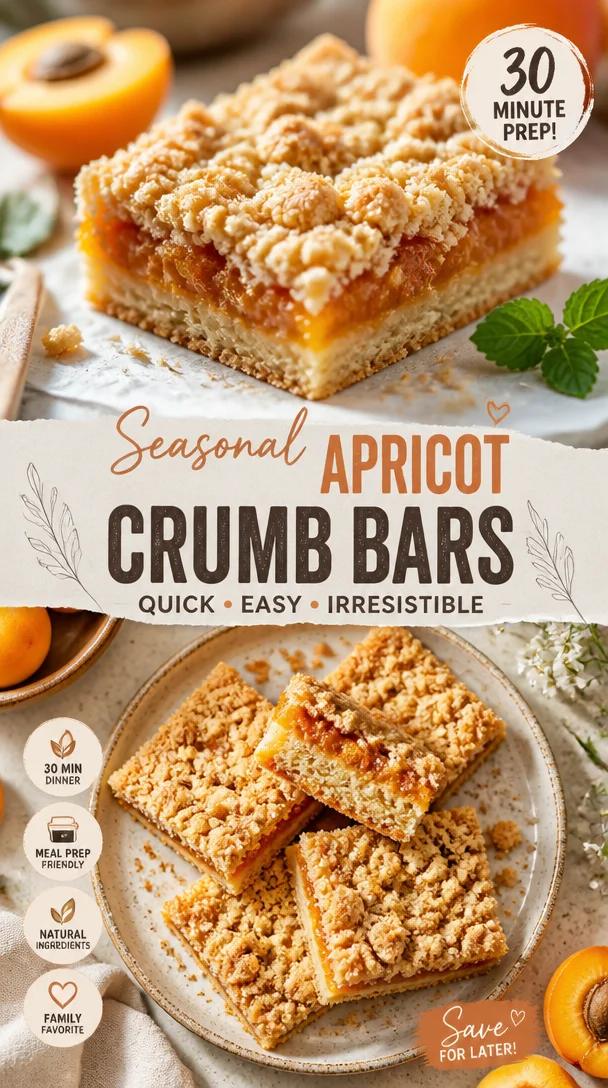
Seasonal Apricot Crumb Bars: Quick 30-Minute Prep Recipe
Apricot Crumb Bars: A Slice of Sunshine in Your Day
Hey there, friends! If you’re looking for a treat that brings a burst of sunshine into your kitchen, you’ve just hit the jackpot! Apricot crumb bars are the perfect blend of sweet, tart, and buttery goodness, offering a delightful way to enjoy one of summer’s brightest fruits all year round. I can just picture these bars on a sunny picnic blanket, or served warm with a scoop of vanilla ice cream as the sun sets. So, buckle up as we dive deep into creating these incredible bars together!
A Little Nostalgia
Let’s take a stroll down memory lane for a moment, shall we? I remember my grandmother’s garden filled with the sweetest apricot trees. In the late summer, when the fruits were ready for picking, it felt like we had stumbled onto nature’s candy store. The warm sun on our backs and the scent of ripe apricots was absolutely intoxicating! One warm afternoon, we gathered in her kitchen, apricots littering the counters, and decided to bake our very first batch of apricot crumb bars. I was her little sous-chef, learning to slice fruits and mix the crumb topping. It was messy, it was sweet, and trust me, we devoured those bars before they even cooled down! That experience not only sparked my love for baking but also ingrained a deep appreciation for using fresh, seasonal ingredients. Each time I bake these crumb bars now, that memory comes rushing back, and I can’t help but feel grateful.
Ingredients
Before we start whipping up a storm in the kitchen, let’s gather our ingredients. Here’s what you’ll need for these scrumptious apricot crumb bars:
-
2 cups all-purpose flour
A versatile staple that forms the base of our crumb bars. If you’re looking for a healthier option, you could swap it out for whole wheat flour. -
1 cup rolled oats
Adds texture and a delightful chewiness. If you’re gluten-free, make sure to use certified gluten-free oats! -
1 cup brown sugar
Bring in that rich, caramel-like sweetness. If you’re short on brown sugar, just mix granulated sugar with a tablespoon of molasses as a quick substitute. -
1/2 cup granulated sugar
A bit of sweetness to balance the tartness of our apricots. If you’re watching your sugar intake, you can reduce this to 1/4 cup. -
1 cup unsalted butter, melted
This makes our crumbly topping irresistibly buttery. If you need a dairy-free option, coconut oil can step in nicely! -
1/2 teaspoon baking powder
Helps the bars rise just slightly, creating a lovely texture. -
1/4 teaspoon salt
A pinch of salt enhances all the flavors. Don’t skip this step! -
2 cups fresh apricots, pitted and sliced
The star of the show! Feel free to mix in other fruits like peaches or nectarines if you can’t find apricots. -
1 tablespoon lemon juice
Brightens the flavor of the apricots and adds a wonderful twist. Lime juice works too if you’re in a pinch. -
1/4 cup sliced almonds
Adds a nutty crunch on top. You can easily swap it with chopped walnuts or pecans for a different bite!
Step-by-Step Instructions
Alright, let’s get down to business! Grab your apron and let’s get baking!
-
Preheat Your Oven
Preheat that oven of yours to 350°F (175°C). Trust me; you want to start with a warm oven for those crumb bars! -
Prepare Your Baking Dish
Grab a 9×13-inch baking dish and line it with parchment paper, leaving a bit of an overhang. This will make it super easy to lift out the bars once they’re done! -
Mix the Dry Ingredients
In a large bowl, combine the flour, oats, brown sugar, granulated sugar, baking powder, and salt. Give it a good mix to ensure everything is well combined. A whisk works wonders here! -
Add the Melted Butter
Pour in that melted butter, stirring until you’ve got a crumbly mixture. It should resemble sand with tiny pebbles, and that’s just the way we want it. Reserve about 1 cup of this mixture for the topping! -
Prep the Apricots
In another bowl, toss your sliced apricots with the lemon juice. This will not only enhance the flavor but also help keep them vibrant and fresh. -
Assemble the Bars
Press the crumb mixture evenly into the bottom of your prepared baking dish. Don’t worry about perfection; it doesn’t have to be too neat! -
Add the Apricots
Distribute the sliced apricots over the crumb base, making sure to spread them out evenly for a slice of fruit in every bite. -
Top It Off
Sprinkle the reserved crumb mixture over the apricots. Don’t forget to sprinkle those sliced almonds on top for a nutty crunch! -
Bake to Perfection
Place the dish in the preheated oven and bake for about 30-35 minutes until the top is golden and the apricots are bubbling. Your kitchen will smell heavenly! -
Cool and Slice
Once baked, allow the bars to cool in the baking dish for about 10-15 minutes before using the parchment to lift them out. Slice them into squares and serve at room temperature—or slightly warm, if you can’t resist!
Serving Suggestions
The beauty of these apricot crumb bars is in their versatility. You can enjoy them straight from the pan or dress them up for a proper dessert. Here’s how I love to serve them:
- With a dollop of whipped cream: A light, airy topping beautifully complements the fruit and crumb.
- A scoop of vanilla ice cream: Because who doesn’t love warm desserts with ice cream on top? It’s pure indulgence!
- Garnished with fresh mint leaves: Adds a pop of color and a hint of freshness when serving at gatherings.
- Drizzled with caramel sauce: If you want to take it up a notch, a sweet drizzle can elevate these bars to gourmet status!
Recipe Variations
Let’s get creative, shall we? Here are a few ways to twist this recipe to keep things exciting:
-
Peach and Apricot Mix: Combine fresh apricots with peaches for a blend of flavors that’ll take you straight to summer.
-
Coconut Crust: Add shredded coconut to the crumb mixture for a tropical vibe.
-
Spiced Crumb Bars: Add a pinch of cinnamon or vanilla extract to your crumb mixture for that playful, aromatic note.
-
Nut-Free Version: Omit the almonds and replace them with more oats for crunch or just keep the crumb topping nut-free.
-
Vegan Option: Substitute the butter with coconut oil and replace the eggs with a flax egg or applesauce for a healthier twist.
Chef’s Notes
Let me tell you, these apricot crumb bars have a special place in my heart. Over the years, I’ve tried countless variations and tweaks, but there’s something magical about the classic recipe. My grandmother always said, “Recipes are just guidelines; the secret ingredient is love.” So, make this your own, and don’t be afraid to experiment. Your kitchen is a playground, so grab those apricots and let the magic happen!
FAQs and Troubleshooting
Here are some common questions I get, along with helpful solutions:
-
Why are my crumb bars falling apart?
Make sure you’re using enough melted butter! It binds the crumb. If they still crumble, you’re likely cutting them while they’re still warm—let them cool enough to hold their shape. -
Can I use dried apricots instead of fresh?
Absolutely! But remember, dried apricots are much sweeter, so adjust the sugar down a bit to prevent it from getting overly sweet. -
How can I store leftover bars?
Store them in an airtight container at room temperature for up to a week. They also freeze beautifully—just wrap them in plastic wrap and pop them in a freezer bag! -
What can I do if I don’t like nuts?
Simply omit the almonds! The bars will still be delicious on their own, or you can replace the nuts with more oats or granola for that extra crunch.
Nutritional Info
These apricot crumb bars are perfect for sharing blissful moments, but they’re also a delightful indulgence. Each serving offers a burst of vitamins and fiber thanks to the fresh apricots and oats. While I don’t have exact nutritional figures on hand, here’s a quick breakdown of what’s good in them:
- Apricots: Rich in Vitamin A and C, making your skin glow and your immune system strong.
- Oats: A great source of fiber, perfect for keeping you satisfied and aiding digestion.
- Butter: In moderation, adds heart-healthy fats.
Just remember to enjoy these bars in moderation, and they’ll fit nicely into a balanced diet!
Final Thoughts
And there you have it, my dear foodie friends! Apricot crumb bars that are not only delicious but also filled with fond memories and warm encounters. These bars are perfect any time—whether for a casual dessert, a picnic snack, or even a comforting breakfast treat. Just remember, the joy of cooking comes from sharing, so whip up a batch, gather your loved ones, and create your own beautiful memories.
Until next time, keep spreading the love through your food and happy baking!
Print
Apricot Crumb Bars
- Total Time: 50 minutes
- Yield: 12 servings 1x
- Diet: Vegetarian
Description
Delightful apricot crumb bars that perfectly blend sweet, tart, and buttery goodness, embodying the essence of summer.
Ingredients
- 2 cups all-purpose flour
- 1 cup rolled oats
- 1 cup brown sugar
- 1/2 cup granulated sugar
- 1 cup unsalted butter, melted
- 1/2 teaspoon baking powder
- 1/4 teaspoon salt
- 2 cups fresh apricots, pitted and sliced
- 1 tablespoon lemon juice
- 1/4 cup sliced almonds
Instructions
- Preheat your oven to 350°F (175°C).
- Prepare a 9×13-inch baking dish lined with parchment paper.
- Mix the flour, oats, brown sugar, granulated sugar, baking powder, and salt in a large bowl.
- Add the melted butter and stir until crumbly, reserving about 1 cup for topping.
- Prep the sliced apricots with lemon juice in another bowl.
- Assemble by pressing the crumb mixture into the baking dish.
- Add the apricots over the crumb base.
- Top with reserved crumb mixture and sliced almonds.
- Bake for 30-35 minutes until golden.
- Cool for 10-15 minutes, then slice and serve.
Notes
These bars can be enjoyed plain, with whipped cream, or vanilla ice cream. Experiment with fruits and toppings!
- Prep Time: 15 minutes
- Cook Time: 35 minutes
- Category: Dessert
- Method: Baking
- Cuisine: American
Nutrition
- Serving Size: 1 bar
- Calories: 270
- Sugar: 15g
- Sodium: 150mg
- Fat: 12g
- Saturated Fat: 7g
- Unsaturated Fat: 4g
- Trans Fat: 0g
- Carbohydrates: 38g
- Fiber: 2g
- Protein: 4g
- Cholesterol: 30mg
Keywords: apricot crumb bars, dessert, baking, summer treats, fruit desserts

Beginner-Friendly Apricot Almond Cake: One-Bowl Recipe
The Delightful Journey of Apricot Almond Cake
Hey there, food lovers! It’s Beau Collier from Feastical, and today, I’m thrilled to share with you one of my all-time favorite recipes: Apricot Almond Cake. This cake embodies everything I love about cooking — simplicity, flavor, and a sprinkle of nostalgia. It’s like a warm hug on a plate, and I can’t wait for you to dig in!
Introduction
Imagine a sunny afternoon where the scent of sweet apricots fills the air, mingling with the rich aroma of almond. That, my friends, is what Apricot Almond Cake is all about. This cake is not just a dessert; it’s an experience that evokes memories of picnics in the park, cozy family gatherings, and lazy Sunday afternoons. It’s a cake that brings people together, making every bite feel like a special moment.
The first time I baked this cake, I was inspired by fresh apricots from the local farmer’s market. The moment I took a bite, I was transported back to my grandma’s kitchen, where she would whip up her famous apricot preserves. She always believed that good food speaks to the heart, and this cake certainly does that.
With its tender crumb and delightful almond flavor, this cake captures the essence of comfort food. Plus, it’s surprisingly simple to make! Whether you’re a veteran chef or just starting your culinary journey, this Apricot Almond Cake is sure to impress. So, grab your apron, and let’s bake something beautiful together!
Personal Story
Growing up, my family used to have a tradition of making desserts together during the summer months. One particular year, we decided to tackle grandma’s beloved apricot cake recipe. I remember the excitement in the kitchen, the chatter, and the sheer joy of bursting fresh apricots as we folded them into the batter. The bright orange hues of the fruit danced in the bowl, promising a tasty treat ahead.
The cake wasn’t flawless — we had a slight mishap with the oven temperature, and it came out a bit denser than intended. But when we finally sliced into it and shared it with friends and family at our summer picnic, the cake was devoured in minutes! That day taught me that it’s not about perfection; it’s about the love and joy that fills the kitchen. That’s a lesson I carry with me as I share this Apricot Almond Cake recipe with you.
Ingredients
Before we get our hands dirty, let’s gather our ingredients. Here’s what you’ll need:
-
7 ripe apricots (about 1 1/4 – 1 1/2 pounds)
Juicy, fresh apricots are key here! If apricots aren’t in season, feel free to substitute with peaches or plums for a similar juicy effect. -
⅓ cup sliced almonds
These add a lovely crunch! If you need a nut-free version, sunflower seeds can be a tasty substitute. -
1 large egg white
This helps give the cake a nice texture. If you’re vegan, you can replace this with a tablespoon of flaxseed meal mixed with three tablespoons of water. -
¼ cup sugar
A little sweetness goes a long way! You could use coconut sugar for a slight caramel flavor if desired. -
1 ½ cups all-purpose flour
The backbone of our cake! For a gluten-free option, use a 1:1 gluten-free flour blend. -
1 teaspoon baking powder
This gives our cake its rise! Be sure to check the expiration date for optimal results. -
¼ teaspoon salt
Balances the sweetness, enhancing the overall flavors. Never skip the salt! -
⅛ teaspoon vanilla powder (optional)
Adds a hint of warmth. If you don’t have it, a splash of vanilla extract works too. -
½ cup unsalted butter (at room temperature)
This contributes to the cake’s moistness. If you’re looking for a lighter option, use apple sauce or Greek yogurt in equal parts. -
1 cup sugar
More sweetness for the cake batter. You can always adjust to taste! -
1½ teaspoons almond extract
It’s the true star! If you’re not fond of almonds, feel free to use vanilla extract instead. -
3 large eggs
Essential for binding everything together. You can substitute with a commercial egg replacer for a vegan version. -
¼ cup sour cream
This adds moisture and a slight tang. Plain yogurt works as a fine substitute! -
¼ cup buttermilk
For that extra tenderness! You can make your own by mixing milk with a splash of vinegar or lemon juice.
Step-by-Step Instructions
Now that we have everything prepped, let’s dive into the fun part: baking our cake!
-
Preheat Your Oven:
Before you start mixing, preheat your oven to 350°F (175°C). This ensures your cake bakes evenly and rises beautifully. -
Prep the Pan:
Grease a 9-inch round cake pan with butter or cooking spray, and line the bottom with parchment paper for easy removal. This step is crucial to prevent your delicious cake from sticking! -
Prepare the Apricots:
Slice the apricots in half, remove the pits, and cut them into wedges or chunks depending on your preference. Toss them gently in 1/4 cup of sugar and let them sit while you mix the batter. This will draw out their natural juices and create a flavorful layer in the cake. -
Mix the Dry Ingredients:
In a bowl, whisk together the flour, baking powder, and salt. If you’re using vanilla powder, add it to this mix too. Set it aside. This helps ensure even distribution of the leavening agent. -
Cream the Butter and Sugar:
In a separate large mixing bowl, cream together the room-temperature butter and 1 cup of sugar until it’s light and fluffy. This usually takes about 3–4 minutes. Think of it as a mini workout for your arms! The sugar crystals help aerate the butter, giving a nice rise to the cake. -
Add Eggs and Flavors:
Beat in the eggs, one at a time, making sure each one is fully incorporated before adding the next. Then mix in the sour cream, buttermilk, and almond extract. The batter should begin to look smooth and creamy. -
Incorporate Dry Ingredients:
Gently fold the flour mixture into the wet mix using a spatula. Be careful not to overmix; we want a tender crumb, not a tough cake! -
Combine with Apricots:
Finally, fold in the prepared apricots, making sure they’re evenly distributed throughout the batter. At this point, you can also add half of the sliced almonds for a delightful surprise with each bite. -
Pour and Top:
Pour the batter into your prepared pan, spreading it evenly. Sprinkle the remaining sliced almonds over the top. This will give the cake a lovely, toasted top while baking. -
Bake:
Pop the cake in the oven and let it bake for about 40-45 minutes, or until a toothpick inserted into the center comes out clean. Keep an eye on it in the last few minutes — every oven behaves a bit differently. -
Cool Down:
Once baked, let the cake cool in the pan for about 10 minutes before gently transferring it to a wire rack to cool completely. This will help prevent it from becoming soggy.
Serving Suggestions
When it comes to serving your Apricot Almond Cake, the possibilities are endless! For a simple presentation, dust the cake with a light sprinkle of powdered sugar. You can also serve it with a dollop of whipped cream or a scoop of vanilla ice cream for that extra decadence.
For a touch of elegance, plate individual slices topped with a drizzle of sweet apricot glaze or a sprinkling of toasted almonds. Adding a few fresh apricot slices can elevate the visual appeal, making it perfect for special occasions or family gatherings.
Recipe Variations
Get creative! Here are a few fun twists on the classic Apricot Almond Cake:
-
Orange Zest Addition:
Add a teaspoon of freshly grated orange zest to the batter for a tangy citrus twist that pairs beautifully with the apricots. -
Mix of Fruits:
Combine apricots with peaches or berries for a mixed fruit cake. It’s a great way to use up whatever is in season! -
Chocolate Drizzle:
For the chocolate lovers out there, drizzle melted dark chocolate over the top after it’s cooled. Trust me, it’s heavenly! -
Gluten-Free Option:
Swap the all-purpose flour for a gluten-free blend and use almond milk instead of buttermilk for a gluten-free treat everyone can enjoy. -
Spiced Version:
Add a teaspoon of cinnamon or nutmeg to the batter for a warm, spice-infused flavor that’s especially lovely in the fall.
Chef’s Notes
This Apricot Almond Cake has been a staple in my baking repertoire for years, and I love how it evolves every time I make it. Sometimes, I’ll throw in a bit of fresh ginger for an unexpected kick, and at other times, I’ve swapped the apricots for fresh berries to see how the flavors dance together.
I remember one attempt where I accidentally used self-rising flour instead of all-purpose flour. The cake turned out a bit fluffier, but much to my surprise, it still tasted fantastic! So, if you ever find yourself in a pinch, don’t worry too much about perfection — embrace the happy accidents!
FAQs and Troubleshooting
-
Why is my cake dense?
If your cake turns out denser than expected, it could be due to overmixing the batter or using too much flour. Always measure your flour properly by spooning it into the measuring cup and leveling it off. -
My cake didn’t rise! What happened?
Make sure your baking powder is fresh. An expired leavening agent can lead to cakes that fall flat. Also, ensure you creamed the butter and sugar until light and fluffy for the best rise. -
Can I freeze this cake?
Absolutely! Wrap the cooled cake tightly in plastic wrap and place it in an airtight container. It can last in the freezer for up to three months. Just make sure to thaw it in the fridge overnight before serving. -
How do I store leftovers?
Keep any leftover cake in an airtight container at room temperature for up to three days or in the fridge for up to a week. If you prefer it chilled, the fridge can enhance its flavor.
Nutritional Info
Each slice of this Apricot Almond Cake (approximately 1/12 of the cake), offers a delightful balance of flavors and textures. Here’s a quick breakdown of the nutritional content you could expect:
- Calories: 290
- Total Fat: 14g
- Saturated Fat: 8g
- Cholesterol: 70mg
- Sodium: 170mg
- Total Carbohydrates: 38g
- Dietary Fiber: 1g
- Sugars: 22g
- Protein: 4g
Keep in mind that these values may vary based on specific ingredient brands and any substitutions you make.
Final Thoughts
And there you have it — your very own Apricot Almond Cake, bursting with flavor and memories! This delightful cake is a reminder that cooking is not just about following recipes; it’s about the connections we create and the love we share over food.
I hope this recipe becomes a cherished part of your kitchen repertoire, just as it has in mine. Whether it’s a sunny picnic or a cozy evening at home, this cake is sure to bring smiles to everyone around the table. So go ahead, grab your apron, and let your kitchen become a space of warmth and love. Happy baking, my friends!
Print
Apricot Almond Cake
- Total Time: 60 minutes
- Yield: 12 servings 1x
- Diet: Vegetarian
Description
A delightful Apricot Almond Cake that captures the essence of comfort food, perfect for family gatherings or sunny picnics.
Ingredients
- 7 ripe apricots (about 1 1/4 – 1 1/2 pounds)
- ⅓ cup sliced almonds
- 1 large egg white
- ¼ cup sugar
- 1 ½ cups all-purpose flour
- 1 teaspoon baking powder
- ¼ teaspoon salt
- ⅛ teaspoon vanilla powder (optional)
- ½ cup unsalted butter (at room temperature)
- 1 cup sugar
- 1½ teaspoons almond extract
- 3 large eggs
- ¼ cup sour cream
- ¼ cup buttermilk
Instructions
- Preheat your oven to 350°F (175°C).
- Grease a 9-inch round cake pan with butter or cooking spray.
- Slice the apricots in half, remove the pits, and cut them into wedges or chunks.
- Toss the apricots in 1/4 cup of sugar and let them sit.
- In a bowl, whisk together the flour, baking powder, and salt.
- Cream together the butter and 1 cup of sugar until light and fluffy.
- Beat in the eggs one at a time, then mix in the sour cream, buttermilk, and almond extract.
- Gently fold the flour mixture into the wet mix.
- Finally, fold in the prepared apricots and half of the sliced almonds.
- Pour the batter into the prepared pan and sprinkle the remaining sliced almonds on top.
- Bake for about 40-45 minutes or until a toothpick comes out clean.
- Let the cake cool in the pan for about 10 minutes before transferring it to a wire rack.
Notes
Serve with a sprinkle of powdered sugar, whipped cream, or a scoop of vanilla ice cream for added decadence.
- Prep Time: 15 minutes
- Cook Time: 45 minutes
- Category: Dessert
- Method: Baking
- Cuisine: American
Nutrition
- Serving Size: 1 slice
- Calories: 290
- Sugar: 22g
- Sodium: 170mg
- Fat: 14g
- Saturated Fat: 8g
- Unsaturated Fat: 6g
- Trans Fat: 0g
- Carbohydrates: 38g
- Fiber: 1g
- Protein: 4g
- Cholesterol: 70mg
Keywords: apricot cake, almond cake, dessert, baking, vegetarian
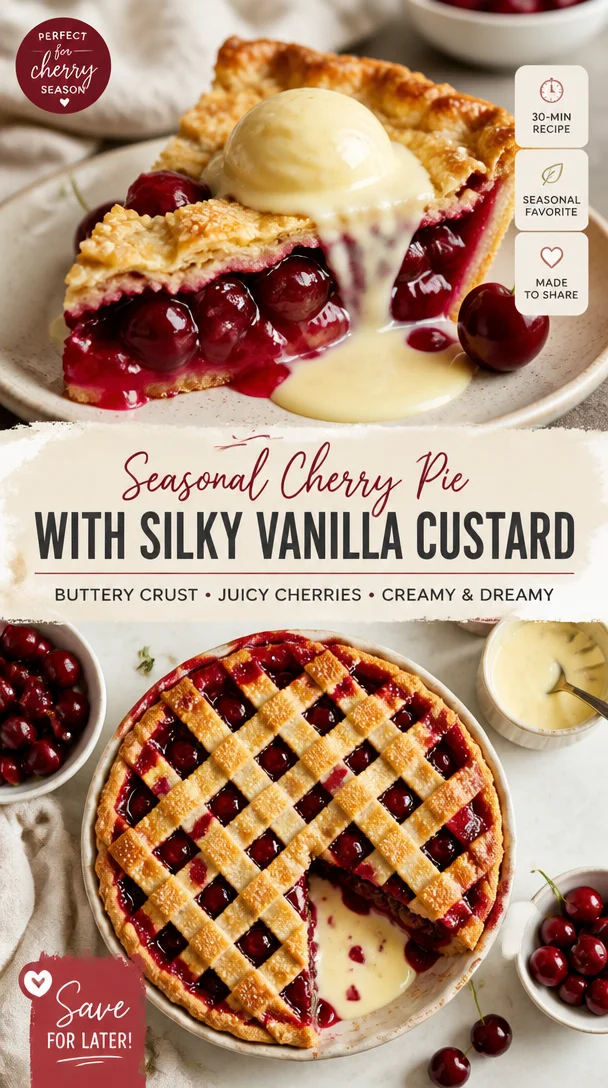
Seasonal Cherry Pie with Silky Vanilla Custard Recipe
Cherry Pie with Vanilla Custard: A Slice of Nostalgia
Hey there, fellow foodies! I’m so glad you’re here at Feastical, where we celebrate feel-good food that’s bound to make your heart sing. Today, we’re whipping up something truly special: a vibrant Cherry Pie with Vanilla Custard. Believe me when I say, this dish is more than just a dessert—it’s a warm hug served on a plate.
Picture this: It’s a sunny afternoon, and the air is filled with the sweet scent of cherries ripening on the tree. Growing up, summer meant a trip to my grandparents’ farm where we’d pick fresh fruit, and nothing was more exciting than those bright red cherries. They were so sweet, just waiting to be turned into something delicious. When the cherries came rolling in, my grandma would roll out the dough, and the whole kitchen would be filled with laughter and the clinking of measuring cups as we prepared one of her famous cherry pies. It wasn’t just about the food; it was about the memories made—a tradition that I cherish dearly.
This recipe brings that nostalgia to your kitchen—it’s straightforward, delicious, and perfect for impressing family and friends. With juicy sour cherries complemented by a silky vanilla custard, this pie is a heavenly blend of tart and sweet that will leave everyone clamoring for seconds. So grab your apron, and let’s dive into the wonderful world of cherry pie-making!
Personal Story
Ah, cherry pie! Just the thought of it takes me back to my childhood summers spent at my grandparents’ house, where the cherry tree in the yard was a staple. I still remember the way the branches would bend under the weight of those plump, red gems. My siblings and I would race to see who could fill their bucket first, our laughter echoing through the orchard as we fought over that last cherry.
Once we had gathered enough cherries, it was time for the real fun: working in the kitchen with Grandma. I can still hear her humming softly as she rolled out the dough, my job was to "help" by munching on some cherries and sneaking bites of sugar. Grandma taught me the secret to a perfect cherry filling—harmony between sugar, cornstarch, and a squeeze of lemon juice to balance the flavors. While the pie baked, the kitchen filled with a warm, inviting aroma that wrapped around me like a blanket. It was in those moments that I learned not just how to bake, but how to create memories.
Now, as I make this cherry pie for you, I hope you’ll feel inspired to create your own sweet memories. Let’s cherish those small moments that turn into cherished traditions, all while enjoying a slice of this heavenly pie!
Ingredients
-
2 cups sour cherries (pitted)
Fresh or frozen sour cherries work beautifully here. If fresh cherries aren’t available, thaw any frozen cherries, and make sure you drain them well before using. -
1 cup sugar
Granulated sugar brings a sweet balance to the tart cherries. For a twist, you can use brown sugar for a hint of caramel flavor or coconut sugar for a lower glycemic option. -
2 tablespoons cornstarch
This thickening agent ensures your cherry filling isn’t too runny. If you’re looking for a gluten-free alternative, you could also use arrowroot powder. -
1 tablespoon lemon juice
This zesty note brightens the flavors of the cherries. If you’re fresh out of lemons, white vinegar can serve as a substitute in a pinch! -
1 teaspoon vanilla extract
A touch of vanilla enhances the pie’s sweetness and adds depth to the filling. If you want to kick it up a notch, try using almond extract instead for a lovely nutty note. -
1 pre-made shortcrust pastry
To keep things simple, a store-bought shortcrust pastry saves time. Feel free to use a homemade pastry if you’re up for the challenge! -
1 cup vanilla quark (or vanilla pudding)
This creamy element adds richness to the pie. Yogurt can be used if you’re looking for something lighter, or you can opt for a dairy-free pudding if needed. -
1 egg (for egg wash)
Beaten egg gives your pie that luscious golden finish. If you prefer not to use eggs, a splash of milk or a dairy-free alternative can work just as well. -
Powdered sugar (for dusting, optional)
A light dusting of powdered sugar right before serving makes the pie look extra special!
Step-by-Step Instructions
-
Prepare the Cherries
Start by washing, pitting, and draining your cherries (if using frozen). Ensure they’re as dry as possible to prevent excess moisture in your pie. This is the moment to taste a cherry or two—it’s crucial work, trust me! -
Make the Cherry Filling
In a mixing bowl, combine the pitted cherries, sugar, cornstarch, lemon juice, and vanilla extract. Toss everything together gently with a spatula until the cherries are well-coated. Let this mixture sit for about 15 minutes to allow the flavors to meld and the sugar to draw out the juices. Oh, the anticipation! -
Preheat the Oven
Preheat your oven to 425°F (220°C). A hot oven means a beautifully baked pie with crisp crust and bubbling filling. -
Roll Out the Pastry
If you’re using a homemade pie crust, roll out your shortcrust pastry until it’s about ¼ inch thick. Fit it into your pie pan, making sure to leave a little overhang to seal the top. -
Add the Filling
Pour the cherry mixture into the prepared pastry shell. Speaking of which, take a moment to admire those vibrant cherries—they should look like a dazzling red jewel treasure trove! -
Prepare the Top Layer
If you’re going with a lattice top or want to create a full crust, it’s time to roll out the second piece of pastry. Roll it out, drape it over the filling, and make slits for ventilation or cut decorative shapes (you know I’m a sucker for making it pretty!). -
Seal and Brush the Pie
If using a full crust, gently tuck the overhang underneath, create a nice border to seal in the filling, and make some slits on top to allow steam to escape. Brush the top crust with the beaten egg for that golden finish. It’s your pie, make it shine! -
Bake
Pop your pie in the preheated oven and let it bake for about 20-25 minutes. You’re looking for the crust to be golden brown and the filling to be bubbling. My kitchen timer is usually my unofficial assistant—set it and get ready to drool! -
Cool and Prepare the Custard
After the pie is done, let it cool on the counter for at least 20 minutes. This helps set the filling. Now while it cools, whip up that vanilla custard (or grab your ready-made vanilla pudding). I like to fold in a little whipped cream for a fluffy texture! -
Serve
Slice the pie and serve with a generous dollop of vanilla custard. Take a moment to appreciate the beautiful juxtaposition of colors, textures, and flavors—life is beautiful, isn’t it?
Serving Suggestions
To plate your cherry pie, I recommend a simple yet elegant presentation. Start with a slice on a dessert plate and pour a generous amount of vanilla custard around it. You can use a tablespoon to create little pools artfully. For an extra special touch, garnish with a sprig of mint—its bright green adds a lovely contrast with the vibrant red of the cherries. If you’re feeling indulgent, why not add a scoop of vanilla ice cream on the side? This classic pairing is sure to make everyone’s hearts—and stomachs—happy!
Recipe Variations
Now, let’s get a little creative with our cherry pie! Here are some fun variations to consider:
-
Lattice-Topped Cherry Pie: Instead of a full top crust, weave strips of pastry together for a charming lattice to show off that beautiful filling underneath.
-
Almond Cherry Pie: Add a teaspoon of almond extract to the cherry filling for a delicious nutty twist.
-
Bourbon Cherry Pie: For the adults in the house, a splash of bourbon in the filling elevates the flavor, giving it a rich, deep profile.
-
Coconut Vanilla Custard: Swap out part of the vanilla quark for coconut creme. This tropical twist is perfect for summer!
-
Gluten-Free Version: Use a gluten-free shortcrust pastry. Substitute cornstarch with arrowroot for the filling if needed.
Chef’s Notes
One of my favorite things about this cherry pie recipe is how it has evolved over the years. What started as a simple summer tradition has grown into a family favorite that’s made its way onto our holiday table as well. Sometimes, I catch my kids sneaking bites of the filling before it hits the crust, and it reminds me of those carefree days with my grandma.
Another funny kitchen story comes from the first time I tried to make this recipe without the egg wash. Let’s just say it turned out looking like a pie that was afraid of getting baked! The crust didn’t have that glorious sheen, and while it still tasted amazing, it lacked that beautiful finish. Never again, dear friends!
FAQs and Troubleshooting
Q: Why is my pie filling runny?
A: This can happen if you didn’t let the mixture sit long enough for the cornstarch to activate, or if you used too much liquid from the cherries. Aim to soak up excess moisture, and don’t skimp on the cornstarch!
Q: Can I use sweet cherries instead?
A: While sour cherries are the star of this recipe, sweet cherries can work too! You may want to reduce the sugar a bit since they are already quite sweet.
Q: How do I know when my pie is done?
A: Look for a golden-brown crust and bubbling filling! If you notice the edges browning too quickly, cover them with strips of aluminum foil.
Q: Can I make this ahead of time?
A: Absolutely! You can bake the pie a day in advance. Just allow it to cool completely before storing it in the fridge. Condiments like the vanilla custard can also be made ahead and stored separately!
Nutritional Info
Let’s talk nutrition! While this cherry pie is undoubtedly a dessert treat, it does offer some merits. Sour cherries are packed with antioxidants and have anti-inflammatory properties, which may help in supporting your immune health.
On average, each slice of this pie contains roughly 350 calories, depending on the specific ingredients used and portion sizes. To lighten it up, consider reducing sugar and opting for a lighter custard or ice cream option.
Here’s the general nutrient breakdown for one slice of this pie:
- Calories: 350
- Carbohydrates: 54g
- Protein: 3g
- Fat: 15g
- Fiber: 2g
Keep in mind: desserts are meant to be enjoyed, so indulge wisely!
Final Thoughts
And there you have it—a delightful Cherry Pie with Vanilla Custard that’s bursting with flavor and packed with memories! I hope this recipe inspires you to create your own traditions and share your love for cooking with those around you. Remember, the kitchen is the heart of the home, where stories are shared, and memories are made.
So, whether you’re hosting a family gathering or just baking for yourself, don’t forget to savor every moment. Happy cooking, and may your kitchen always be filled with the warmth of good food and laughter! If you try this recipe, I’d love to hear how it turned out for you. Feel free to drop your comments and share your kitchen stories with me. Now, let’s make some cherry pie magic! 🍒✨
Print
Cherry Pie with Vanilla Custard
- Total Time: 40 minutes
- Yield: 8 servings 1x
- Diet: Vegetarian
Description
A vibrant Cherry Pie with silky Vanilla Custard, perfect for evoking sweet summer memories.
Ingredients
- 2 cups sour cherries (pitted)
- 1 cup sugar
- 2 tablespoons cornstarch
- 1 tablespoon lemon juice
- 1 teaspoon vanilla extract
- 1 pre-made shortcrust pastry
- 1 cup vanilla quark (or vanilla pudding)
- 1 egg (for egg wash)
- Powdered sugar (for dusting, optional)
Instructions
- Prepare the cherries by washing, pitting, and draining them. Ensure they’re dry.
- Make the cherry filling by combining cherries, sugar, cornstarch, lemon juice, and vanilla extract in a bowl.
- Preheat your oven to 425°F (220°C).
- Roll out the pastry if homemade and fit it into your pie pan.
- Add the cherry mixture into the prepared pastry shell.
- Prepare the top layer by rolling out another piece of pastry and placing it over the filling.
- Seal the pie and brush the top crust with the beaten egg.
- Bake in the preheated oven for about 20-25 minutes.
- Cool the pie on the counter for at least 20 minutes before serving.
- Slice and serve with a generous dollop of vanilla custard.
Notes
Feel free to use fresh or frozen cherries; if fresh aren’t available, make sure to drain frozen cherries well.
- Prep Time: 15 minutes
- Cook Time: 25 minutes
- Category: Dessert
- Method: Baking
- Cuisine: American
Nutrition
- Serving Size: 1 slice
- Calories: 350
- Sugar: 22g
- Sodium: 150mg
- Fat: 15g
- Saturated Fat: 6g
- Unsaturated Fat: 6g
- Trans Fat: 0g
- Carbohydrates: 54g
- Fiber: 2g
- Protein: 3g
- Cholesterol: 40mg
Keywords: cherry pie, vanilla custard, dessert, summer recipe, nostalgic cooking
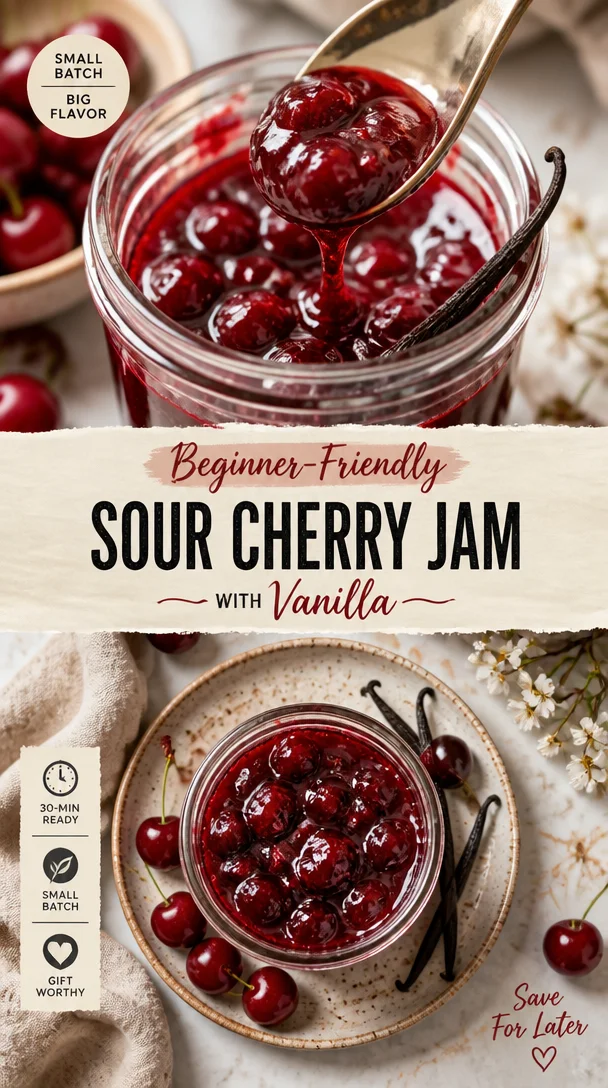
Beginner-Friendly Small-Batch Sour Cherry Jam with Vanilla
Easy Small Batch Sour Cherry Jam with Vanilla
Hey there, fellow foodies! Are you ready to embark on a delightful kitchen adventure that will bring a little sunshine into your life? Let’s be real; there’s something truly magical about homemade jam. It’s like capturing the essence of summer in a jar and spreading it on your morning toast! Today, I’m thrilled to share my Easy Small Batch Sour Cherry Jam with Vanilla recipe. This is not just any jam—it’s a flavor explosion that combines the tangy goodness of sour cherries with the warm embrace of vanilla.
Jam-making might sound like a daunting task, but trust me, it’s way simpler than it seems! Plus, this small batch recipe means you won’t need to commandeer a whole day—or your grandma’s vintage preserving pots. Just a little time and love, and you’ll be rewarded with a delicious, homemade treat that’s perfect for breakfast, snacks, desserts, or even just a spoonful right out of the jar!
Imagine waking up in the morning to the enticing aroma of freshly made jam wafting through your kitchen. Picture drizzling this luscious delight over pancakes, slathering it on a warm biscuit, or mixing it into yogurt for a quick snack. With the addition of fragrant vanilla, your sour cherry jam will take on a flavor profile that is both comforting and luxurious. So, roll up your sleeves, gather your ingredients, and let’s dive into this jam-making journey together!
Personal Story
Ah, sour cherry season! It evokes some of my fondest childhood memories. Growing up, my grandparents had a sprawling garden filled with fruit trees that were nothing short of a seasonal paradise. Whenever the sour cherries came into their prime, my family would gather for a cherry-picking extravaganza. Armed with nothing but our enthusiasm and the occasional basket, we’d traverse the branches, excitedly plucking the ruby-red gems that hung tantalizingly in the sun.
One particular summer, my grandma decided to turn our cherry bounty into homemade jam. The process felt almost magical as we watched the vibrant fruit transform into a thick, glossy concoction bubbling away on the stove. I still remember the warmth of her kitchen, bustling with the sound of laughter, the aroma of bursting cherries, and the melodic pop of the jars sealing. It was one of those beautiful family moments that made me realize how food connects us—the joy of sharing and the satisfaction of creating something delicious together.
Now, every time I whip up a batch of sour cherry jam, it brings back those cherished memories of family, fun, and flavors. That’s why I’m so excited to share this easy, small-batch recipe with you. It might just inspire a few tasty memories of your own!
Ingredients
To whip up your very own Easy Small Batch Sour Cherry Jam with Vanilla, you’ll need the following ingredients:
-
2 cups (about 300g) sour cherries, pitted and fresh or frozen
Sour cherries have a unique tartness that makes them ideal for jams. If you can’t find fresh ones, frozen sour cherries work wonderfully too! Just make sure to thaw and drain them before using. -
3/4 cup (150g) granulated sugar
Sugar is essential for sweetness and also acts as a preservative. You can substitute with other sweeteners like honey or maple syrup, but keep in mind that this might change the consistency and flavor. -
1 tablespoon (15ml) fresh lemon juice
Lemon juice helps enhance the flavors and provides pH balance for proper gel formation. If you don’t have fresh lemons, bottled lemon juice will work just as well. -
1 whole vanilla bean, split lengthwise and seeds scraped out (or 1 teaspoon pure vanilla extract)
Vanilla adds a luxurious flavor profile that complements the tart cherries beautifully. If you’re using extract, opt for pure rather than imitation for the best flavor. -
1/4 cup (60ml) water
Water helps in the cooking process, allowing the cherries to soften and release their juices. If you prefer a thicker jam, you can reduce the water slightly.
Step-by-Step Instructions
Step 1: Prep Your Ingredients
First things first, let’s get organized—grab your pitted sour cherries, sugar, lemon juice, vanilla, and water. This is where the magic begins! If you’re using frozen cherries, ensure they are thawed and drained—nobody wants excess water messing with our jam’s fabulous consistency.
Step 2: Combine the Ingredients in a Pot
In a medium-sized, heavy-bottomed pot, combine your sour cherries, granulated sugar, lemon juice, and water. Stir everything together gently to ensure the cherries are coated with sugar—this step is crucial as it helps draw out the juices from the cherries, giving your jam that lovely vibrancy!
Step 3: Cook on Medium Heat
Place your pot over medium heat and let it simmer. Occasionally stir the mixture as it heats up, keeping an eye on it to avoid any sticking. You’ll start to notice the sugar melting and the cherries softening, releasing their sweet-tart juices. Cook this mixture for about 10–15 minutes, or until the cherries are completely soft and the liquid has thickened a bit.
Step 4: Add the Vanilla
Once your cherry mixture reaches that lovely consistency, it’s time to introduce the star of the show: the vanilla! If you’re using a whole vanilla bean, add both the scraped seeds and the pod into the pot. If you’ve opted for vanilla extract, stir it in at this stage. Give everything a good stir, allowing the fragrant notes of vanilla to infuse into the jam.
Step 5: Test for Doneness
Now comes the fun part! To test if your jam is ready, grab a small plate and put it in the freezer for a few minutes. Once it’s chilled, drop a spoonful of the cherry mixture onto the plate and let it sit for about 30 seconds. Run your finger through it—if it holds its shape and doesn’t run back together, you’re all set! If it’s still too runny, continue cooking for another 5–10 minutes and test again.
Step 6: Jar It Up
When you’ve got that perfect jam consistency, remove the pot from the heat. Take out the vanilla pod if you used one. Now, carefully ladle the hot jam into clean, sterilized jars. Make sure to leave a little space at the top. Place the lids on the jars while still warm, and let them cool to room temperature. If you’re planning to eat the jam right away, it can be stored in the refrigerator.
Serving Suggestions
Now that you’ve made your delicious jam, let’s talk about how to enjoy it! Here are a few tasty ideas to get you started:
-
Spread it on Toast: The classic choice! Layer a generous spoonful on your morning toast or bagel with a bit of butter for an indulgent breakfast treat.
-
Top Your Pancakes or Waffles: Drizzle it over stacks of fluffy pancakes or crispy waffles. Add a dollop of whipped cream or yogurt on top for a scrumptious brunch dish.
-
Incorporate Into Desserts: Use this jam as a filling in pastries or as a swirl in cheesecake for a fruity twist. It also makes a lovely addition to ice cream or yogurt parfaits.
-
Pair with Cheese: A nice cheese platter isn’t complete without a fruit jam like this! Scoop it on top of creamy goat cheese or sharp cheddar for a delightful contrast of flavors.
Recipe Variations
Feeling adventurous? Here are a few creative twists and swaps that you can try with this sour cherry jam recipe:
-
Spiced Jam: Add a pinch of cinnamon or a touch of ground ginger for a warm, spiced flavor profile that complements the cherries beautifully.
-
Infused Flavors: Try mixing in some fresh herbs like thyme or mint for an earthy note. Simply stir in chopped herbs during the last few minutes of cooking for a fresh, aromatic finish.
-
Lemon Zest: For an extra citrus kick, add some fresh lemon zest along with the juice. It brightens the flavor and adds a nice texture.
-
Raspberry-Cherry Combo: Mix in some fresh raspberries for a twangy fusion. Replace half of the sour cherries with raspberries in the recipe for a mixed berry jam!
-
Reduce Sugar: If you’re looking for a healthier option, feel free to reduce the sugar. Use a sugar substitute that measures similarly, and remember, your jam might be a tad less sweet!
Chef’s Notes
As I reflect on how this recipe has evolved over time, I can’t help but chuckle at my early attempts at jam-making. I once ended up with cherry syrup instead of jam because I got a little too enthusiastic with the heat. It turns out patience really is a virtue in the kitchen!
Another tip I’ve learned along the way is to always taste as you go. Who wouldn’t want a jam that’s perfectly tailored to their palate? The beauty of cooking is that there are no hard-and-fast rules—go with your instincts, and don’t be afraid to innovate!
FAQs and Troubleshooting
Q1: My jam didn’t set! What did I do wrong?
A: This usually happens if there isn’t enough sugar or if the cooking time was too short. Make sure you followed the recipe closely. If it happens again, you can always re-cook it with a little pectin to help it set!
Q2: Can I can this jam for longer storage?
A: Absolutely! Just make sure you follow proper canning procedures by sterilizing your jars and processing them in a boiling water bath for about 10 minutes after filling.
Q3: Can I use other fruits for this recipe?
A: Yes! This method can work with a variety of fruits—think blueberries, strawberries, or even peaches. Just adjust the sugar and acid levels a bit depending on the fruit’s sweetness.
Q4: My jam is too tart. How can I fix this?
A: If your jam turned out too tart, you can balance it by adding a bit more sugar or even a hint of honey after it cools down. Remember to warm it gently if you do this!
Nutritional Info
This Easy Small Batch Sour Cherry Jam is not only delightful but also packs some nutritional benefits:
- Calories: Approximately 60 calories per tablespoon
- Sugar: 14g (from natural sources and added sugar)
- Vitamin C: Thanks to the cherries and lemon juice, which boosts your immune system!
- No preservatives: Unlike store-bought jams, this homemade version is free from preservatives and artificial flavors.
Enjoy it in moderation, and savor every scrumptious spoonful!
Final Thoughts
There you have it, friends! Your very own Easy Small Batch Sour Cherry Jam with Vanilla is just a few steps away. I hope this recipe inspires you to get creative in your kitchen, bring back cherished memories, and share your delicious creations with your loved ones.
Making jam might just be one of the simplest joys in life—what’s more satisfying than spreading homemade goodness on your favorite breakfast treats? So, gather your cherries, channel your inner chef, and enjoy a jar of happiness—one spoonful at a time!
Remember, whether you enjoy it on toast, in desserts, or right out of the jar, every bite is imbued with love and deliciousness. Happy cooking, and see you around Feastical!🌟
Print
Easy Small Batch Sour Cherry Jam with Vanilla
- Total Time: 25 minutes
- Yield: 2 servings 1x
- Diet: Vegetarian
Description
A delightful small batch sour cherry jam infused with the warm essence of vanilla, perfect for breakfasts and desserts.
Ingredients
- 2 cups (about 300g) sour cherries, pitted and fresh or frozen
- 3/4 cup (150g) granulated sugar
- 1 tablespoon (15ml) fresh lemon juice
- 1 whole vanilla bean, split lengthwise and seeds scraped out (or 1 teaspoon pure vanilla extract)
- 1/4 cup (60ml) water
Instructions
- Prep your ingredients by gathering the sour cherries, sugar, lemon juice, vanilla, and water.
- Combine the ingredients in a medium-sized pot, stirring gently to ensure the cherries are coated with sugar.
- Cook the mixture over medium heat, stirring occasionally, for about 10–15 minutes, until the cherries soften.
- Add the vanilla once the mixture has thickened, stirring to infuse the flavor.
- Test for doneness by dropping a spoonful on a chilled plate and checking if it holds its shape.
- Jar the jam into sterilized jars, leaving space at the top, and let it cool to room temperature.
Notes
For variations, consider adding spices like cinnamon or experimenting with other fruits.
- Prep Time: 10 minutes
- Cook Time: 15 minutes
- Category: Condiment
- Method: Stovetop
- Cuisine: American
Nutrition
- Serving Size: 1 tablespoon
- Calories: 60
- Sugar: 14g
- Sodium: 1mg
- Fat: 0g
- Saturated Fat: 0g
- Unsaturated Fat: 0g
- Trans Fat: 0g
- Carbohydrates: 15g
- Fiber: 1g
- Protein: 0.5g
- Cholesterol: 0mg
Keywords: sour cherry jam, homemade jam, small batch jam, vanilla jam, fruit preserves
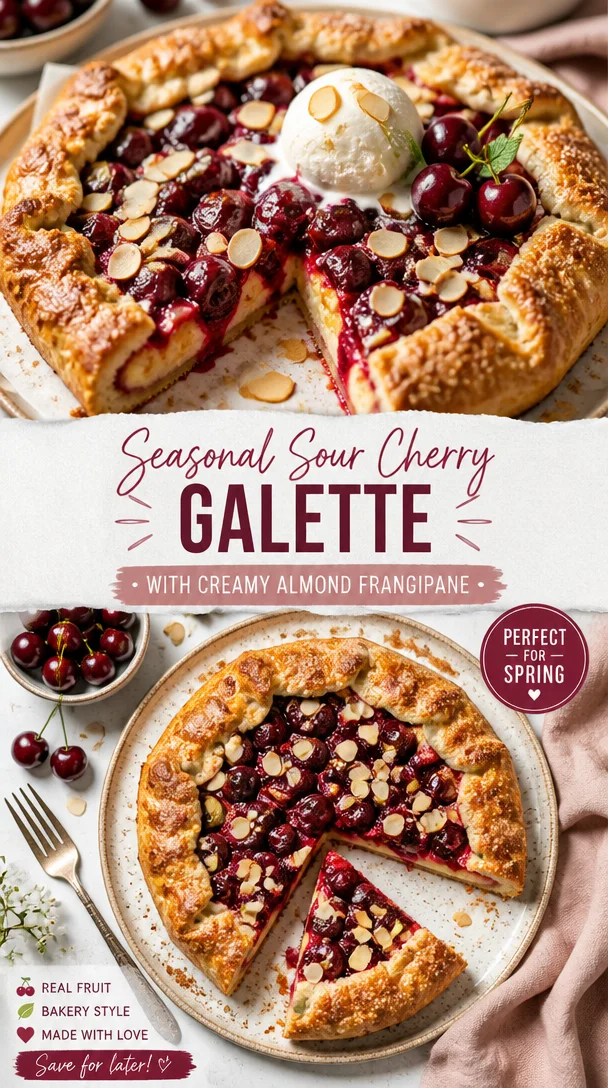
Seasonal Sour Cherry Galette with Creamy Almond Frangipane
The Perfect Sour Cherry Galette Recipe with Almond Cream
Hey there, foodies! Welcome back to Feastical, where the kitchen vibes are warm, and the recipes are bursting with flavor. Today, I’m rolling out a summery delight that’ll make your taste buds dance: the Perfect Sour Cherry Galette with Almond Cream!
Just picture this: golden crust hugging a luscious filling of tart, juicy cherries, all drizzled with that nutty oomph of almond cream. It’s rustic, it’s elegant, and it’s a stellar dessert to share (or keep all to yourself—no judgment here!). Trust me, once you make this galette, you’ll feel like a baking superstar in your own kitchen!
A Slice of Nostalgia
As a kid, summers meant my grandmother’s kitchen was always alive with the sweet smell of fresh fruits and baked goodies. One of my favorite memories is of her taking me cherry picking. We’d haul home baskets full of those vibrant red jewels, the perfect amount of tartness that made my mouth water!
After a long day of picking, we’d head back to her kitchen, where she’d whip up her famous cherry pie. The thrill of watching her work was like seeing magic unfold. I’d eagerly wait by her side, taste-testing slices of dough and sneaking bites of cherries when she wasn’t looking. The combination of those fresh sour cherries and a buttery crust became my A-list dessert hit.
Today, inspired by those cherished memories, I’m sharing my take on a cherry galette accented with almond cream. It captures the essence of those sunny afternoons with gooey cherry goodness and a creamy almond twist, making it perfect for any occasion or simply for your after-dinner treat. So, put your aprons on—let’s get to baking!
Ingredients
Here’s what you’ll need to bring this galette to life:
For the crust:
- All-purpose flour – 1 ¼ cups (150g): The base of your crust. You could swap this with a gluten-free blend if needed.
- Granulated sugar – 2 tablespoons: Just a hint of sweetness to elevate the dough.
- Salt – ¼ teaspoon: Balances the flavors and enhances the sweetness of the cherries.
- Unsalted butter – 8 tablespoons (113g), cold and cubed: Butter gives the crust its flakiness. Use cold butter for a tender texture.
- Ice water – 3 to 4 tablespoons: Helps bring the dough together. Start with less and add more as needed.
For the almond cream:
- Almond flour – ½ cup (50g): Offers a lovely nutty flavor. Substitute with regular flour for a more straightforward taste.
- Unsalted butter – 4 tablespoons (56g), softened: Gives richness to your almond cream.
- Powdered sugar – ¼ cup (30g): Sweetens the cream without the grittiness of granulated sugar.
- Egg – 1 large, room temperature: Binds the ingredients together while adding moisture.
- Vanilla extract – 1 teaspoon: An aromatic touch that complements the cherries beautifully.
- Almond extract – ¼ teaspoon (optional): If you’re a fan of almond flavor, this is a lovely addition!
For the cherry filling:
- Fresh sour cherries – 3 cups (about 450g), pitted: Tart and vibrant; if sour cherries are out of season, you can use frozen ones (just thaw and drain excess moisture).
- Granulated sugar – ⅓ cup (65g): Enhances the sweetness of the sour cherries.
- Cornstarch – 2 tablespoons: Acts as a thickening agent to prevent a watery filling.
- Lemon juice – 1 tablespoon: Adds brightness and balances the flavors.
Final touches:
- Egg wash – 1 egg yolk mixed with 1 tablespoon water: Gives the crust that beautiful, glossy finish.
- Sliced almonds – 2 tablespoons: For topping; they add crunch and elegance.
- Turbinado sugar – for sprinkling: A lovely finish that adds texture and sweetness.
Step-by-Step Instructions
-
Make the Dough: In a mixing bowl, combine the all-purpose flour, granulated sugar, and salt. Add the cold, cubed butter and use a pastry cutter or your fingers to mix until the mixture resembles coarse crumbs (think sand!). Add your ice water a tablespoon at a time, mixing until the dough just holds together. Don’t overwork it! Shape the dough into a disk, wrap it in plastic, and refrigerate for about 1 hour. (Chef hack: If you’re short on time, you can pop it in the freezer for 20 minutes.)
-
Prepare the Almond Cream: In a bowl, beat together the softened butter and powdered sugar until creamy—about 2 minutes. You want it light and fluffy! Mix in the almond flour, egg, vanilla extract, and almond extract (if using). Beat until smooth. Set aside and let those flavors mingle.
-
Prepare the Cherry Filling: In a large bowl, toss the pitted sour cherries with granulated sugar, cornstarch, and lemon juice. This fragrant concoction will soak up all the flavors, and the cornstarch will keep everything nicely thickened while baking.
-
Roll Out the Dough: After the dough has chilled, flour your surface and roll out the dough into a rough circle (about 12 inches in diameter). Remember, it doesn’t have to be perfect! Transfer it to a parchment-lined baking sheet.
-
Assemble the Galette: Spread the almond cream evenly over the rolled-out dough, leaving about a 2-inch border. Pile on the cherry filling. Fold the edges of the dough over the fruit, pleating it as you go. Don’t worry if the filling peeks through a bit—that rustic look is part of its charm!
-
Egg Wash and Bake: Brush the exposed dough with the egg wash and sprinkle sliced almonds and turbinado sugar on top for an extra crunch. Bake in a preheated oven at 375°F (190°C) for 30–35 minutes, or until the crust is golden brown and the filling is bubbling. (Tip: If the edges are browning too quickly, cover them with foil.)
-
Cool and Serve: Allow your galette to cool for at least 15 minutes before slicing. This lets the juices settle and the flavors marry beautifully!
Serving Suggestions
Now comes the fun part—serving! This galette is delightful on its own, but to elevate it to the next level, pair it with a scoop of vanilla ice cream or a dollop of freshly whipped cream. Drizzle with a little extra almond extract for a fragrant finish or sprinkle some fresh mint leaves for a pop of color!
For a beautiful presentation, serve slices on a rustic wooden board or pretty dessert plates—your guests will feel like they’re dining in a charming little café!
Recipe Variations
-
Berry Galette: If sour cherries aren’t your jam, swap them out for other fresh berries! Strawberries, blueberries, or raspberries work beautifully.
-
Nut Variations: Try using hazelnut flour instead of almond flour in the almond cream for a different twist!
-
Spice It Up: Add a pinch of cinnamon or nutmeg to the cherry filling for an unexpected warm flavor.
-
Vegan Option: You can make the crust with coconut oil instead of butter, and use a flax egg (1 tbsp ground flaxseed mixed with 3 tbsp water) for the almond cream.
-
Chocolate Lovers: Fold in some chocolate chips into the almond cream for a decadent touch!
Chef’s Notes
You know, cooking is all about embracing the little mishaps and turns it can take. I remember once, I accidentally swapped flour for powdered sugar in the crust. Oops! But, hey, that day turned into a fun learning curve about how to salvage a situation. The result? A surprisingly sweet galette that was a big hit among my friends when I had to bring dessert to a potluck.
Over the years, I’ve come to love the flexibility of this recipe. It’s evolved from a simple cherry pie to this lovingly rustic galette bursting with personality and surprising almond flavors. I hope you make it your own!
FAQs and Troubleshooting
Q: Can I use frozen cherries instead of fresh ones?
A: Absolutely! Just be sure to thaw and drain excess moisture from them to keep the filling from becoming too watery.
Q: My galette crust is tough! What went wrong?
A: The most common culprit is overworking the dough. When mixing the butter into the flour, stop once you have pea-sized pieces. Also, keep your butter cold!
Q: Can I make the dough ahead of time?
A: Yes! Prepare your dough and wrap it tightly. It can be stored in the fridge for up to 3 days or in the freezer for up to 1 month.
Q: How do I know when the galette is done?
A: Look for a beautiful golden-brown crust, and the filling should be bubbling. If it’s too golden before the filling is bubbling, cover the edges with foil!
Nutritional Info
While I believe in enjoying every bite, here’s a little breakdown for the health-conscious among us. This Sour Cherry Galette with Almond Cream offers a delightful balance of carbohydrates, fats, and proteins. It has approximately 220 calories per slice (based on an 8-slice serving). Plus, sour cherries are packed with antioxidants and vitamins, making them a healthier choice in desserts!
Final Thoughts
And there you have it, folks—the ultimate guide to making a Perfect Sour Cherry Galette with Almond Cream! I hope you enjoy making this recipe as much as I enjoyed sharing it. Remember, whether things go perfectly or a little haywire, it’s about making joyful memories in the kitchen. Enjoy those moments, and don’t forget to savor every delicious bite.
Until next time, happy baking, and keep those forks ready for the next delectable dish here at Feastical! 🍒✨
Print
Perfect Sour Cherry Galette with Almond Cream
- Total Time: 50 minutes
- Yield: 8 servings 1x
- Diet: Vegetarian
Description
A summery delight featuring a golden crust and a luscious filling of tart sour cherries drizzled with nutty almond cream.
Ingredients
- 1 ¼ cups (150g) All-purpose flour
- 2 tablespoons Granulated sugar
- ¼ teaspoon Salt
- 8 tablespoons (113g) Unsalted butter, cold and cubed
- 3 to 4 tablespoons Ice water
- ½ cup (50g) Almond flour
- 4 tablespoons (56g) Unsalted butter, softened
- ¼ cup (30g) Powdered sugar
- 1 large Egg, room temperature
- 1 teaspoon Vanilla extract
- ¼ teaspoon Almond extract (optional)
- 3 cups (about 450g) Fresh sour cherries, pitted
- ⅓ cup (65g) Granulated sugar
- 2 tablespoons Cornstarch
- 1 tablespoon Lemon juice
- 1 Egg yolk mixed with 1 tablespoon water (for egg wash)
- 2 tablespoons Sliced almonds
- Turbinado sugar (for sprinkling)
Instructions
- Make the Dough: In a mixing bowl, combine the all-purpose flour, granulated sugar, and salt. Add the cold, cubed butter and use a pastry cutter or your fingers to mix until the mixture resembles coarse crumbs. Add your ice water a tablespoon at a time, mixing until the dough just holds together. Shape the dough into a disk, wrap it in plastic, and refrigerate for about 60 minutes.
- Prepare the Almond Cream: In a bowl, beat together the softened butter and powdered sugar until creamy—about 2 minutes. Mix in the almond flour, egg, vanilla extract, and almond extract. Beat until smooth.
- Prepare the Cherry Filling: In a large bowl, toss the pitted sour cherries with granulated sugar, cornstarch, and lemon juice.
- Roll Out the Dough: After the dough has chilled, flour your surface and roll out the dough into a rough circle (about 12 inches in diameter). Transfer it to a parchment-lined baking sheet.
- Assemble the Galette: Spread the almond cream evenly over the rolled-out dough, leaving about a 2-inch border. Pile on the cherry filling. Fold the edges of the dough over the fruit, pleating it as you go.
- Egg Wash and Bake: Brush the exposed dough with the egg wash and sprinkle sliced almonds and turbinado sugar on top. Bake in a preheated oven at 375°F (190°C) for 30–35 minutes, or until the crust is golden brown and the filling is bubbling.
- Cool and Serve: Allow your galette to cool for at least 15 minutes before slicing.
Notes
Serve this galette with a scoop of vanilla ice cream or a dollop of whipped cream for a delightful treat.
- Prep Time: 15 minutes
- Cook Time: 35 minutes
- Category: Dessert
- Method: Baking
- Cuisine: French
Nutrition
- Serving Size: 1 slice
- Calories: 220
- Sugar: 10g
- Sodium: 100mg
- Fat: 11g
- Saturated Fat: 4g
- Unsaturated Fat: 7g
- Trans Fat: 0g
- Carbohydrates: 29g
- Fiber: 2g
- Protein: 3g
- Cholesterol: 30mg
Keywords: galette, cherry dessert, almond cream, summer dessert, rustic pie
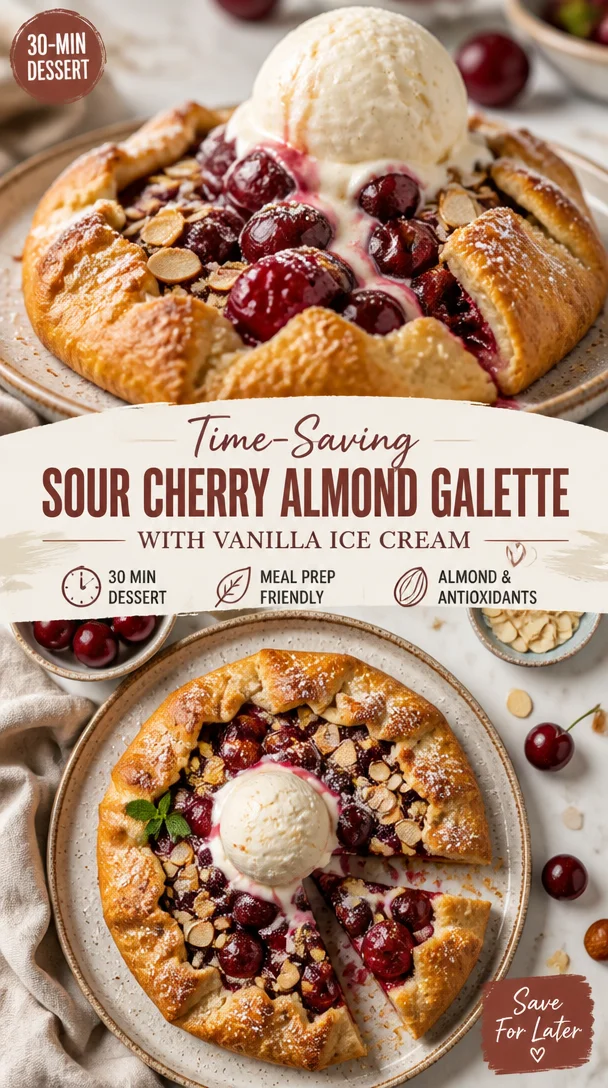
Time-Saving Sour Cherry Almond Galette with Vanilla Ice Cream
Perfect Sour Cherry Almond Galette Recipe with Easy Vanilla Ice Cream Topping
Hey there, fellow food lovers! Welcome back to the kitchen where our hearts can find joy and our taste buds come alive. Today, I’m diving headfirst into a dessert that truly captures the essence of summer— the Perfect Sour Cherry Almond Galette, topped with a scoop of Easy Vanilla Ice Cream. Now, if you’ve never had the pleasure of biting into a warm, flaky galette filled with tart, juicy cherries, then buckle up! This sweet treat is not just a pie—it’s an experience, a celebration, and a nostalgic nod to simpler times, all rolled into one delightful package.
Let’s talk about that tart cherry filling for a second. Oh, how those cherries shine! When you combine them with the nutty sweetness of almond and the gentle hug of a buttery crust, it creates a magical flavor explosion that sings harmony on your palate. Trust me—it’s an “I can’t stop at one slice” kind of dessert. And whether you’re cozying up with a good book or hosting a summer BBQ, this galette will steal the show!
But wait, there’s more! As if our homemade galette isn’t decadent enough, I’m going to share a super simple recipe for creamy vanilla ice cream that pairs perfectly with it. Imagine this: a warm slice of sour cherry galette straight from the oven, a drizzle of melted butter, and a scoop of ice cream that starts to melt into the crevices of that flaky crust. Pure bliss, my friends!
So, grab your aprons, and let’s embark on this culinary journey together. You’re going to love every minute of it, and I can’t wait to see you in the kitchen whipping up this fabulous dessert!
Personal Story
Ah, summer days of my childhood! I can still remember running through my grandmother’s backyard, dodging fireflies as I darted toward her massive cherry tree. It was a secret treasure trove filled with plump, vibrant red cherries, and as soon as those little gems began to ripen, my grandmother kept her kitchen door wide open, inviting my family to join in on the fun.
Every weekend, our house became the epicenter of cherry-picking adventures. My grandmother would set up a little table outside with buckets for us to fill and a fancy old apron she saved just for us. The sweet scent of cherries wafted through the air while laughter and stories filled the backyard. Once we gathered enough cherries, my grandmother turned those tart beauties into the most scrumptious galette! We’d help her roll out the dough and sprinkle the sugar, waiting in eager anticipation as it baked in the oven.
It was a treasured time of bonding, storytelling, and, let’s be honest, raiding the dessert table! Now, whenever I make this galette, it brings me back to those sunny afternoons, and I hope it will create similar warm memories for you and your loved ones too!
Ingredients
Here’s the rundown of the ingredients you’ll need for this fabulous Sour Cherry Almond Galette and the creamy vanilla ice cream topping. Let’s make sure you have everything ready to go!
For the Galette:
- 1 1/4 cups (160g) all-purpose flour: The backbone of your galette’s crust—use unbleached for an even richer taste.
- 1/4 cup (30g) almond flour: Adds a gentle nuttiness; if you don’t have it, just use more all-purpose flour or crushed almonds for a similar effect.
- 1/2 tsp salt: Enhances the sweetness of the dough; don’t skip it!
- 1 tbsp granulated sugar: A touch of sweet to balance the flavors of the crust.
- 8 tbsp (113g) unsalted butter, cold and cubed: The star ingredient for creating a flaky crust. Keep it cold for that perfect texture!
- 3-4 tbsp ice water: To bring the dough together; the colder, the better.
- 3/4 cup (90g) almond flour (for filling): Adds texture and flavor to the cherry filling.
- 1/3 cup (67g) granulated sugar (for filling): Sweetens up those tart cherries.
- 1 large egg (for filling): Binds the mixture and adds richness.
- 2 tbsp unsalted butter, melted and cooled (for filling): Adds depth of flavor.
- 1/2 tsp almond extract (optional): A beautiful flavor echo for the filling—you can also swap this for vanilla extract if you prefer.
- 3 cups (450g) fresh sour cherries, pitted: The star of the show! Feel free to substitute frozen cherries if fresh ones aren’t available.
- 1/3 cup (67g) granulated sugar (for cherry filling): Balances out the tartness of the cherries.
- 1 tbsp cornstarch: Helps thicken the cherry filling; can be substituted with arrowroot powder.
- 1 tsp vanilla extract (for cherry filling): Extra flavor boost; swap with almond extract if you want to stay with that nutty theme.
- Pinch of salt (for cherry filling): Enhances sweetness.
- 1 egg, beaten (for egg wash): Gives a beautiful golden color to the crust.
- Turbinado sugar or coarse sugar (for sprinkling): For that extra crunch on the crust.
For the Easy Vanilla Ice Cream:
- 2 cups (480ml) heavy cream: Creates a rich and luscious base for the ice cream.
- 1 cup (240ml) whole milk: Adds creaminess; low-fat milk is not advisable for this recipe.
- 2/3 cup (130g) granulated sugar: Sweetens up the mixture; adjust to taste if you prefer it less sweet.
- 1 tbsp pure vanilla extract: A must-have for that bold vanilla flavor.
- Pinch of salt: Balances out the sweetness.
Step-by-Step Instructions
Time to roll up those sleeves and get cooking! Follow these detailed cooking steps, and remember, I’m right here cheering you on!
Prepare the Dough
-
Mix the Dry Ingredients:
In a medium bowl, whisk together the all-purpose flour, almond flour, salt, and sugar until combined. This step is crucial for ensuring an even distribution of flavors! -
Blend in the Butter:
Add the cold, cubed butter to the flour mixture. Using a pastry cutter or your fingers, work the butter into the flour until it resembles coarse crumbs. You want those small pea-sized bits of butter to create a flaky texture once baked! -
Add the Ice Water:
Gradually drizzle in the ice water, one tablespoon at a time, mixing gently with a fork until the dough just comes together. You don’t want to overwork it—less is more here! Pack the dough into a disk, wrap it in plastic wrap, and refrigerate for at least 1 hour.
Prepare the Filling
-
Pit the Cherries:
If you’re using fresh cherries, take a moment to pit them. This can be a messy job, but it’s a labor of love. If you’ve got a cherry pitter—great! If not, you can use a knife to carefully remove the pits. These cherries will create a juicy filling that’ll have you dreaming of summer. -
Mix the Cherry Filling:
In a large bowl, combine the pitted cherries, sugar, cornstarch, vanilla extract, and a pinch of salt. Toss gently until the cherries are well-coated in the mixture. Set aside to marinate while you roll out the dough. This helps to develop their flavors!
Assemble the Galette
-
Roll Out the Dough:
Once the dough has chilled, roll it out on a floured surface into a rough circle, about 12 inches in diameter. Don’t stress too much about getting a perfect shape—rustic is the name of the game! It’s part of the charm. -
Layer the Filling:
Transfer your rolled-out dough to a parchment-lined baking sheet. Sprinkle the almond flour over the center, leaving a 2-inch border around the edges. This flour layer acts as a barrier to soak up excess juice from the cherries. -
Add the Cherries:
Spoon your cherry mixture over the almond flour. You’ll want to mound those beauties nicely in the center. -
Fold the Edges:
Carefully fold the edges of the dough over the filling, overlapping where necessary. The center will be exposed—this is what makes it a galette! -
Egg Wash:
Brush the exposed edges with the beaten egg for a glorious golden color as it bakes. Sprinkle coarse sugar on top for extra sweetness and crunch.
Bake
- Bake the Galette:
Preheat your oven to 400°F (200°C) and bake the galette for 35-40 minutes, or until the crust is golden brown and the cherries are bubbly. The aroma wafting through your kitchen will be heavenly!
Prepare the Vanilla Ice Cream
While your galette is baking, let’s make that easy vanilla ice cream!
-
Whisk:
In a mixing bowl, whisk together the heavy cream, milk, sugar, vanilla extract, and a pinch of salt until combined. You can use an electric mixer for faster results. -
Chill:
Cover the mixture and refrigerate for at least 2 hours or overnight for the best flavor. -
Churn:
Pour the mixture into an ice cream maker and churn according to the manufacturer’s instructions until it reaches a soft-serve consistency. If you don’t have an ice cream maker, pour the mixture into a shallow dish and freeze, stirring every 30 minutes until it’s firm.
Serving Suggestions
Once your galette has cooled slightly, it’s time to indulge! Here’s how to present your masterpiece:
- Slice the galette into generous wedges and arrange them on individual plates.
- Scoop a hefty serving of your homemade vanilla ice cream right on top or to the side for a classic duo—don’t hold back!
- For added flair, drizzle any leftover cherry juices from the pan over the top and sprinkle with some toasted almonds for a crunchy contrast.
- Garnish with fresh mint leaves for a pop of color and flavor.
Recipe Variations
Now, if you’re feeling adventurous or have some special dietary needs, here are a few fun variations to keep our galette fresh and exciting:
-
Different Fruits: Swap out sour cherries for other fruits like blueberries, peaches, or raspberries. Each fruit will give a unique twist to the flavor profile!
-
Spice It Up: Add a pinch of cinnamon or nutmeg to the cherry filling for a warm, spiced note. It complements the tartness beautifully.
-
Gluten-Free Option: Use a 1:1 gluten-free flour blend in place of the all-purpose flour. Your galette may be a little denser but still delicious!
-
Nutty Flavors: Instead of almond extract, try hazelnut or even a splash of bourbon for an adult twist that kicks up the flavor!
-
Small Bites: Make mini galettes for individual servings! Use small rounds of dough, and adjust the baking time to 20-25 minutes.
Chef’s Notes
I always love experimenting with flavor and textures in the kitchen! This sour cherry almond galette has come a long way since my grandmother’s version. As time has passed, I’ve played with different nut flours, fruits, and toppings, and I love how each tweak tells a new story on the plate. The marriage of flavors between cherries and almonds was inspired by so many heritage recipes, and it’s thrilling to carry that tradition into my kitchen today.
I also have to share a funny little secret: the first time I made this recipe, I forgot to add sugar to the dough. Can you imagine a galette with a salty crust? My friends had a good laugh, and I learned that even in the kitchen, you need to stick to your recipe structure—at least most of the time!
FAQs and Troubleshooting
You might have a few questions or run into some roadblocks while making your galette. Here are some common concerns and solutions:
-
Why is my galette leaking?
If you find filling leaking out, it could be that the cherries were too juicy or you didn’t use enough cornstarch. Next time, reduce the amount of liquid or add more cornstarch to help thicken it. -
The crust isn’t flaky. What did I do wrong?
Make sure the butter is very cold when you mix it into your dry ingredients. You want those butter pieces to create steam as they cook—if the butter is warm or is mixed too much into the flour, it won’t be flaky! -
How do I store leftovers?
Your galette is best enjoyed the day it’s made. However, you can store any leftovers in the refrigerator for up to 3 days. Just cover it tightly with cling wrap. -
Why does my ice cream have ice crystals?
This can happen if the mixture wasn’t cold enough before churning or wasn’t churned long enough. Make sure it’s well-chilled before you begin and keep churning until it reaches a soft-serve texture.
Nutritional Info
While I believe that dessert is about enjoyment and indulgence, it’s also good to be informed. Here’s the rough nutritional breakdown per slice of the Sour Cherry Almond Galette (without the ice cream):
- Calories: 280
- Protein: 3g
- Fat: 16g
- Carbohydrates: 32g
- Fiber: 1g
- Sugar: 6g
Note: Nutritional values may vary based on specific ingredient brands and proportions. Always consider balancing your meals with healthy choices!
Final Thoughts
There you have it, my culinary comrades! The Perfect Sour Cherry Almond Galette with an Easy Vanilla Ice Cream infusion—a timeless treat that doesn’t just satisfy your sweet tooth but also creates delightful moments with family and friends. I hope sharing this recipe inspires you to unleash your inner chef and create unforgettable memories in your kitchen.
Cooking should be a joyous, creative outlet, and what better way to spread love and laughter than through the art of baking? As you embark on your galette exploration, remember to take those moments to savor the process, taste the flavors, and share your creations with those you adore.
So, whether it’s a sunny day or a cozy night in, this galette is sure to light up the occasion. Now go grab your spatula and get baking—I can’t wait to hear about your galette adventure! Happy cooking, friends!
Print
Perfect Sour Cherry Almond Galette with Easy Vanilla Ice Cream
- Total Time: 1 hour 25 minutes
- Yield: 8 servings 1x
- Diet: Vegetarian
Description
A delightful summer dessert featuring a flaky galette filled with tart sour cherries and topped with creamy vanilla ice cream.
Ingredients
- 1 1/4 cups (160g) all-purpose flour
- 1/4 cup (30g) almond flour
- 1/2 tsp salt
- 1 tbsp granulated sugar
- 8 tbsp (113g) unsalted butter, cold and cubed
- 3–4 tbsp ice water
- 3/4 cup (90g) almond flour (for filling)
- 1/3 cup (67g) granulated sugar (for filling)
- 1 large egg (for filling)
- 2 tbsp unsalted butter, melted and cooled (for filling)
- 1/2 tsp almond extract (optional)
- 3 cups (450g) fresh sour cherries, pitted
- 1/3 cup (67g) granulated sugar (for cherry filling)
- 1 tbsp cornstarch
- 1 tsp vanilla extract (for cherry filling)
- Pinch of salt (for cherry filling)
- 1 egg, beaten (for egg wash)
- Turbinado sugar or coarse sugar (for sprinkling)
- 2 cups (480ml) heavy cream (for vanilla ice cream)
- 1 cup (240ml) whole milk (for vanilla ice cream)
- 2/3 cup (130g) granulated sugar (for vanilla ice cream)
- 1 tbsp pure vanilla extract (for vanilla ice cream)
- Pinch of salt (for vanilla ice cream)
Instructions
- Mix the Dry Ingredients: In a medium bowl, whisk together the all-purpose flour, almond flour, salt, and sugar until combined.
- Blend in the Butter: Add the cold, cubed butter to the flour mixture and work it into the flour until it resembles coarse crumbs.
- Add the Ice Water: Gradually drizzle in the ice water, mixing gently until the dough just comes together. Form the dough into a disk, wrap it in plastic, and refrigerate for at least 1 hour.
- Pit the Cherries: Pit the cherries using a cherry pitter or knife.
- Mix the Cherry Filling: In a bowl, combine the pitted cherries, sugar, cornstarch, vanilla extract, and a pinch of salt. Toss gently and set aside.
- Roll Out the Dough: Roll the chilled dough on a floured surface into a rough circle, about 12 inches in diameter.
- Layer the Filling: Transfer the dough to a parchment-lined baking sheet, sprinkle the almond flour over the center, and leave a 2-inch border.
- Add the Cherries: Spoon the cherry mixture over the almond flour.
- Fold the Edges: Carefully fold the edges of the dough over the filling, overlapping as needed.
- Brush with Egg Wash: Brush the exposed edges with the beaten egg and sprinkle with coarse sugar.
- Bake the Galette: Preheat the oven to 400°F (200°C) and bake for 35-40 minutes until golden brown.
- Whisk the Ice Cream Base: In a bowl, whisk together heavy cream, milk, sugar, vanilla extract, and a pinch of salt until combined.
- Chill the Ice Cream: Refrigerate for at least 2 hours or overnight.
- Churn the Ice Cream: Pour into an ice cream maker and churn according to manufacturer’s instructions.
Notes
Serve warm with a scoop of vanilla ice cream on the side for the perfect dessert experience.
- Prep Time: 45 minutes
- Cook Time: 40 minutes
- Category: Dessert
- Method: Baking
- Cuisine: American
Nutrition
- Serving Size: 1 slice
- Calories: 350
- Sugar: 12g
- Sodium: 200mg
- Fat: 18g
- Saturated Fat: 10g
- Unsaturated Fat: 5g
- Trans Fat: 0g
- Carbohydrates: 40g
- Fiber: 2g
- Protein: 5g
- Cholesterol: 80mg
Keywords: galette, cherry dessert, summer dessert, homemade ice cream

Minute Crispy Club Sandwich Recipe (Fast Lunch)
Crispy Club Sandwich: Quick and Easy Recipe
Hey there, fellow foodies! Today, we’re diving into one of the all-time classics: the crispy club sandwich. This beauty is not just a meal; it’s a layered masterpiece that combines flavors, textures, and a whole lot of love. Let’s be real—who doesn’t adore a sandwich that includes crispy bacon, melty cheese, fresh veggies, and a hint of tangy mustard? If you’re looking for a quick and easy dish that still packs a flavor punch, you’ve landed in the right spot.
Imagine this: You’ve just finished a long day, and all you want is a comforting meal that comes together in a flash. This crispy club sandwich is here to save the day! With its crunchy, toasted bread and savory fillings, it’s the perfect pick-me-up any time of the day, whether it’s for brunch, lunch, or even a late-night snack.
In my kitchen, the club sandwich is a go-to when I need a delicious meal without spending hours slaving away. A crispy club sandwich is like a warm embrace—nutritious and satisfying, but oh-so-simple to prepare. So grab that spatula (or maybe the bread knife), roll up your sleeves, and let’s make a sandwich that’s certain to impress. Ready? Let’s dig in!
My Personal Club Sandwich Story
Growing up, our family would gather around the table for weekend lunches, and one dish that always made an appearance was the glorious club sandwich. I remember watching my dad whip up this stack of deliciousness, carefully layering the ingredients while telling stories from his childhood. It became a tradition—one bite into that toasty goodness, and it was like being wrapped in a warm, nostalgic hug.
It was during one of those family lunches that I had my “aha” moment. I took a big bite and quite literally felt connected to everyone around the table. The laughter, the flavors, the love—it was all there between the crunchy layers of bread. To me, the club sandwich was more than just a meal; it was a way for us to bond and share stories.
Now, each time I prepare this crispy club sandwich, I’m reminded of those weekends, our family gatherings, and how food truly brings us together. So, whether you’re making this for yourself or planning a fun get-together, remember that every bite holds a memory waiting to be made!
Ingredients
Here are the simple ingredients you’ll need to whip up this crispy club sandwich. Feel free to make substitutions based on your taste or ingredients on hand!
-
3 slices thick-cut white or whole wheat sandwich bread
Whether you opt for classic white or hearty whole wheat, the choice is yours! The thickness adds a delightful crunch. No thick bread? Just use two slices and make an open-faced version! -
4 strips thick-cut bacon, cooked until crispy
Because let’s be honest, crispy bacon is where the magic happens! You can also opt for turkey bacon or even vegetarian bacon for a lighter twist. -
4 ounces thinly sliced deli turkey breast
This adds a savory depth to your sandwich. Substitute with grilled chicken or sliced roast beef if that’s more your style. -
3 ounces thinly sliced ham
Combine with turkey for that classic club flavor. Or go ham-free and double the turkey for a protein-packed option! -
2 slices sharp cheddar or Swiss cheese
Both cheeses bring creamy goodness. For a tangy twist, try pepper jack or a smoky gouda! -
Crisp Romaine or iceberg lettuce leaves, washed and dried
The crunch here is key! You can swap for spinach or arugula for a peppery kick. -
1 medium ripe tomato, sliced
Fresh and juicy! Can’t find tomatoes? Try a roasted pepper or omit for a simpler version. -
3 tablespoons mayonnaise
A classic condiment—feel free to use flavored mayo, Greek yogurt, or avocado for a healthier take. -
1 teaspoon Dijon mustard
This adds a nice pinch of zest! Spicy brown mustard works wonderfully too, or just skip it if you’re not a fan. -
Salt and pepper to taste
Basics! Adjust to make sure your flavor shines. -
Optional: pickles or avocado slices
These are my favorites for an extra kick or creaminess. Add them in for a little something special!
Step-by-Step Instructions
Alright, my fellow kitchen adventurers! Let’s dive into the how-tos of crafting your crispy club sandwich. Pay attention to these steps, as I’ve sprinkled in some handy tips to make your experience smoother!
-
Toast Your Bread
Start by toasting your bread slices. Place them in a toaster or on a grill until they’re golden brown and crisp. I like to brush the slices with a dash of olive oil before toasting for an extra layer of flavor. Plus, it helps give that perfect crispy bite! -
Cook the Bacon
While your bread is toasting, cook those bacon strips until they’re nice and crispy. (About 7-10 minutes on medium heat should do.) Pro tip: You can also bake bacon in the oven for an evenly crispy texture—simply lay the strips on a baking sheet and cook in the oven at 400°F (200°C) for about 15-20 minutes. -
Layer the Ingredients
Grab one slice of your toasted bread and start layering! Begin with the mayonnaise spread evenly over the slice. Then, add a foundation of crisp lettuce, a glorious layer of turkey, a slice of cheddar cheese, and a few slices of tomato. Don’t forget to sprinkle a pinch of salt and pepper over the tomato for enhanced flavor. -
Top It Off with Bacon and Ham
Next up, it’s bacon time! Lay down those crispy bacon strips and add the ham on top. If you’re a cheese lover, go ahead and sneak another slice of cheese in here! -
A Second Layer and More
Add another slice of toasted bread on top. Spread this layer with Dijon mustard for that extra kick! Then repeat the layering with lettuce, turkey, cheese, and slices of tomato, seasoned again with salt and pepper. -
Final Touches
Top it all off with your final slice of toasted bread. Feel free to spread a little mayonnaise or mustard on the top slice if you like. This will help hold it all together! -
Slice and Serve
Grab a sharp knife, and carefully slice your sandwich into quarters or halves, depending on how big your appetite is. If you want to make it restaurant-style, secure the halves with cocktail picks!
Serving Suggestions
When it comes to serving, presentation is key! I love to plate my crispy club sandwich with a crisp side salad or some baked potato wedges. You could also toss in some crunchy chips for that extra satisfying crunch. A simple sprig of parsley or a couple of pickle spears alongside add a lovely pop of color.
And don’t forget the condiments! A small dish of extra mayo or a zesty dipping sauce can elevate your sandwich experience to the next level. Perfect for those who crave a little dip with each bite!
Recipe Variations
Now, let’s get creative! Here are a few fun variations you can try with your club sandwich:
-
Mediterranean Twist
Swap the deli meats with sliced grilled chicken, add roasted red peppers, kalamata olives, and some hummus spread for a Mediterranean vibe. -
Veggie Delight
Keep it plant-based by using marinated grilled veggies like zucchini, eggplant, and bell peppers. Add avocado slices for creaminess! -
Spicy Kick
For those who like it hot, layer in some jalapeños or a drizzle of sriracha sauce for an extra zing. The creaminess of the cheese balances it out wonderfully! -
Breakfast Club
How about a breakfast rendition? Replace the turkey and ham with scrambled eggs, crispy bacon, and swap lettuce for arugula. -
Smoky BBQ Style
Sliced smoked turkey paired with BBQ sauce and sharp cheddar takes this sandwich to a whole new level. Top it off with crispy fried onion strings for added crunch!
Chef’s Notes
One thing I’ve learned through countless club sandwich experiments is that even the smallest ingredients can make a world of difference. For instance, going with thick-cut deli meats versus thinner slices provides a heartier bite. Try adding a bit of garlic powder to your mayonnaise, or incorporating a dash of hot sauce for extra flair!
And here’s a fun story: one time, I had a craving for a club sandwich right before a big family gathering. I ended up blending various leftovers from the fridge, creating a wild version with grilled chicken, guacamole, and even some pickled jalapeños. It was a hit! It showed me that the spirit of the club sandwich is about being creative and making it your own.
FAQs and Troubleshooting
-
Can I make this sandwich ahead of time?
You can assemble the sandwich, but it’s best to toast the bread just before serving to keep it crispy. If you must prepare ahead, store the components separately, and layer them right before you eat. -
What can I use instead of mayonnaise?
Greek yogurt is a great swap for mayo that keeps the creaminess, but adds a nice protein punch! You can also use avocado or a homemade aioli for a gourmet touch. -
My sandwich is falling apart, help!
Make sure to layer heavier ingredients (like meats and cheese) at the bottom and lighter ones (like lettuce and tomato) at the top. Using thicker bread can also help hold your layers together better. -
How can I make this sandwich gluten-free?
Simply substitute the regular bread with gluten-free bread, often available at most supermarkets. Just be cautious with the ingredients in deli meats, as some might contain gluten.
Nutritional Info
A classic club sandwich can get a bit calorie-rich, but it’s packed with protein and flavors! Here’s a rough breakdown:
- Calories: Approximately 600-800 per sandwich, depending on ingredients and portions.
- Protein: 30–40g (thanks to the turkey, ham, and cheese!)
- Carbohydrates: 40–50g
- Fats: 35–50g (mostly from bacon and cheese).
Remember, these numbers can vary, especially if you make substitutions or add extra toppings. It’s worth it to enjoy every flavorful bite!
Final Thoughts
The crispy club sandwich is more than just a meal; it’s a canvas for flavors that invites creativity and storytelling. Whether you stick to the classic ingredients or explore exciting variations, remember that the essence of good cooking is about enjoying the process and sharing it with others. As you savor each bite, think of it as building connections—just like I did with my family all those years ago.
So next time you need a quick, satisfying meal, remember this crispy club sandwich recipe. Channel your inner chef, and make it your own! Don’t forget to share your creations with me on social media. I can’t wait to see what delicious twists you come up with. Happy cooking, and see you at the table!
Print
Crispy Club Sandwich
- Total Time: 25 minutes
- Yield: 2 servings 1x
- Diet: None
Description
A quick and easy classic crispy club sandwich layered with savory fillings and served on toasted bread.
Ingredients
- 3 slices thick-cut white or whole wheat sandwich bread
- 4 strips thick-cut bacon, cooked until crispy
- 4 ounces thinly sliced deli turkey breast
- 3 ounces thinly sliced ham
- 2 slices sharp cheddar or Swiss cheese
- Crisp Romaine or iceberg lettuce leaves, washed and dried
- 1 medium ripe tomato, sliced
- 3 tablespoons mayonnaise
- 1 teaspoon Dijon mustard
- Salt and pepper to taste
- Optional: pickles or avocado slices
Instructions
- Toast your bread slices until they’re golden brown and crisp.
- Cook the bacon strips until they’re nice and crispy.
- Grab one slice of toasted bread and start layering with mayonnaise, lettuce, turkey, cheese, and tomato.
- Top it off with bacon and ham, and add another slice of bread.
- Spread Dijon mustard on the second layer and repeat with lettuce, turkey, cheese, and tomato.
- Finish with the final slice of toasted bread.
- Slice your sandwich into quarters or halves and serve.
Notes
For additional flavor, brush the bread slices with olive oil before toasting.
- Prep Time: 10 minutes
- Cook Time: 15 minutes
- Category: Sandwiches
- Method: Layering
- Cuisine: American
Nutrition
- Serving Size: 1 serving
- Calories: 600
- Sugar: 5g
- Sodium: 800mg
- Fat: 45g
- Saturated Fat: 15g
- Unsaturated Fat: 20g
- Trans Fat: 0g
- Carbohydrates: 40g
- Fiber: 3g
- Protein: 32g
- Cholesterol: 75mg
Keywords: club sandwich, crispy sandwich, easy sandwich recipe
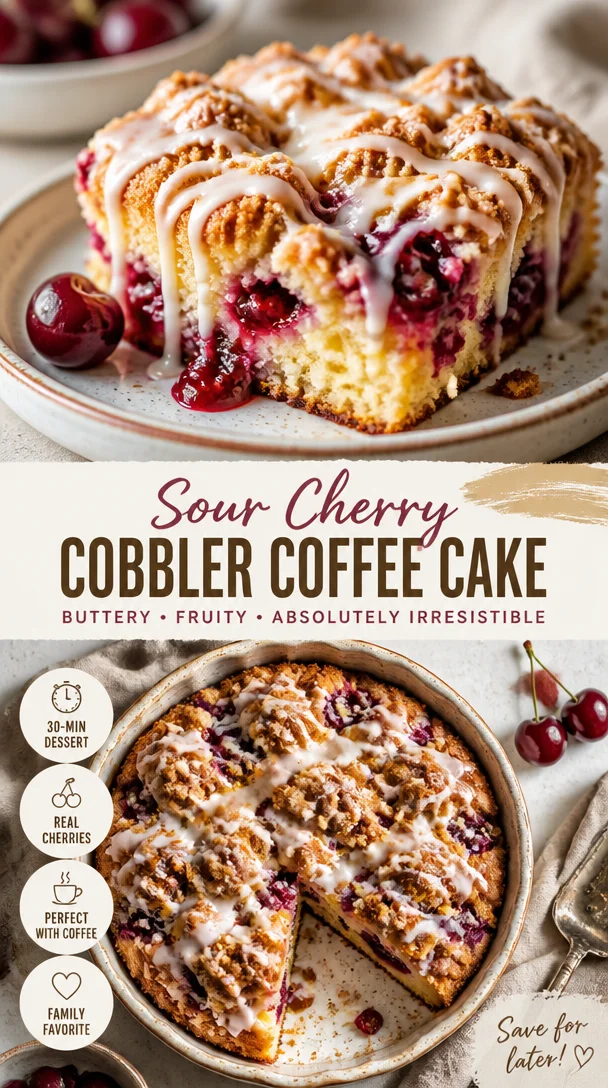
Sour Cherry Cobbler Coffee Cake
Sour Cherry Cobbler Coffee Cake: A Cozy Treat for Every Occasion
Hey there, fellow food lovers! Today we’re diving into a recipe that’s not just about satisfying your sweet tooth—it’s about creating memories and sharing a piece of culinary joy with those you love. Meet my Sour Cherry Cobbler Coffee Cake! This delightful treat brings a little twist to classic coffee cakes with a vibrant, tangy cherry filling that’s perfect for brunch, dessert, or just about any moment when you need a joy boost. So, grab your apron, and let’s create something unforgettable together!
Introduction
There’s just something magical about the warm aroma of a freshly baked cake wafting through your kitchen. It’s like a hug in the air! As the oven works its magic, the anticipation builds alongside the delicious smells that flirt with your senses. This Sour Cherry Cobbler Coffee Cake is one of those recipes that can quickly become a staple in your home, just as it has in mine.
Imagine a lazy Sunday morning—you’re sipping on your favorite coffee, sunlight streaming through the window, and this cake is sitting pretty on the counter. It’s soft, with a crumb that melts in your mouth, and the twang of the sour cherries provides a flavor explosion that will wake up any sleepy taste buds. It’s not just a cake; it’s a moment, an experience wrapped in layers of buttery goodness and a sprinkle of cinnamon that takes you back to homey kitchens and cherished family gatherings.
So how did I fall in love with this cake, you ask? Well, gather ‘round, my friends, because I’ve got a delicious story that pairs perfectly with this fantastic recipe.
Personal Story
I’ll never forget the summer when my grandmother introduced me to sour cherries. We had always spent warm, lazy afternoons in her backyard, but this particular day was a bit different; the garden was bursting with vibrant colors and the air was filled with the sweet scent of blooming flowers. That’s when she plucked a handful of bright red cherries from her tree, and my life changed forever.
“Try one, Beau! They’re a little tart, but trust me—they’re worth it,” she said with an impish grin. I hesitantly popped one into my mouth, and, oh boy! The tangy burst of flavor set my taste buds dancing. My grandmother, ever the savvy baker, transformed those little gems into a cobbler that day. As we sat on the porch, devouring dollops of cherry delight topped with homemade whipped cream, I knew I’d found my culinary muse.
Years later, as a self-proclaimed food nerd, I decided it was time to put my own spin on that childhood classic. Enter the Sour Cherry Cobbler Coffee Cake! It’s the perfect homage to those sun-kissed afternoons spent with my grandmother, and it’s been making its way into the hearts (and bellies) of my friends and family ever since. Let’s jump into the ingredients that will help us capture that nostalgia in every bite.
Ingredients
Here’s what you’ll need to whip up this crowd-pleasing coffee cake:
- 2 cups all-purpose flour: The backbone of any cake! You can swap with whole wheat for a nuttier flavor or gluten-free flour for a gluten-free version, just make sure it’s a 1:1 substitute.
- 1 cup granulated sugar: Sweetness is key! If you like it less sweet, consider reducing it by 1/4 cup, but remember, the cherries add their own tart character.
- 1/2 cup butter, softened: Butter adds richness and moisture. For a dairy-free option, feel free to use coconut oil or vegan butter.
- 2 large eggs: These lend a fluffy texture to your cake. For a vegan alternative, try using flax eggs (1 tablespoon ground flaxseed + 2.5 tablespoons water per egg).
- 1 cup sour cream: This is what gives our cake that moist crumb! You can also substitute plain yogurt if that’s what you have on hand.
- 1 teaspoon vanilla extract: A flavor enhancer that brings harmony to the recipe. I recommend using pure vanilla for the best flavor.
- 1 teaspoon baking powder: This helps our cake rise beautifully. Make sure it’s fresh to avoid a dense cake!
- 1/2 teaspoon baking soda: It works with the sour cream to provide lift.
- 1/4 teaspoon salt: A little salt goes a long way in balancing the flavors!
- 2 cups sour cherries, pitted: The star of the show! Fresh is best, but frozen or jarred work too—just drain them well if they’re in syrup.
- 1/4 cup brown sugar: This adds a delicious caramel tone to the topping. Feel free to use coconut sugar for a different flavor profile.
- 1 teaspoon ground cinnamon: A sprinkle of warmth! You could swap this for nutmeg for a different seasonal twist.
Step-by-Step Instructions
Now, let’s get cooking! Follow these simple steps to create your Sour Cherry Cobbler Coffee Cake!
-
Preheat the Oven: Start by preheating your oven to 350°F (175°C). This way, you’ll have the perfect baking environment when the batter is ready to go in.
-
Prepare Your Baking Pan: Grease a 9×13 inch baking pan with butter or cooking spray. You can also line it with parchment paper for easy removal once it’s baked—trust me, you’ll want every crumb to come out perfectly!
-
Mix the Dry Ingredients: In a medium bowl, whisk together the flour, baking powder, baking soda, and salt. This helps to evenly distribute the leavening agents throughout the flour. Set this bowl aside.
-
Cream Butter and Sugar: In a large bowl, using an electric mixer (or a good ol’ wooden spoon), cream together the softened butter and granulated sugar until it’s light and fluffy. This usually takes about 3–5 minutes. It’s an important step—this air helps the cake rise!
-
Add Eggs and Vanilla: Beat in the eggs one at a time, followed by the vanilla extract. Make sure each egg is well incorporated before adding the next. Your batter should start to look smooth and creamy at this point.
-
Incorporate Sour Cream: Next, blend in the sour cream until combined. This adds moisture that makes our cake utterly irresistible!
-
Combine Wet and Dry Ingredients: Gradually add in your dry ingredients to the wet mixture, stirring gently until just combined. Don’t overmix here; you want a tender crumb, so a few lumps are just fine!
-
Fold in the Cherries: Gently fold in the pitted sour cherries. This is where the magic happens—each bite will feature a burst of those tasty cherries!
-
Pour the Batter: Spread the batter evenly into the prepared baking pan, smoothing out the top with a spatula.
-
Prepare the Topping: In a small bowl, combine the brown sugar and cinnamon. Sprinkle this mixture evenly over the top of the batter. This will caramelize beautifully as it bakes!
-
Bake Away: Pop your cake in the preheated oven and bake for 35-40 minutes, or until a toothpick inserted into the center comes out clean. The edges should be a lovely golden brown.
-
Cool and Serve: Once baked, remove the cake from the oven and let it cool in the pan for about 10 minutes. Then, transfer it to a wire rack to cool completely. Slice into squares, plate, and enjoy!
Serving Suggestions
Now that your Sour Cherry Cobbler Coffee Cake is out of the oven and smelling divine, it’s time to serve it up! This cake is incredibly versatile in how you can enjoy it.
-
Simple Slices: Just slice into squares and serve as-is for that classic, comforting moment. Each bite will be a cozy reminder of home.
-
Fancy Brunch Tea: Elevate your serving game by doling out individual squares on dessert plates, dusting them with powdered sugar for an elegant touch. Add a dollop of whipped cream or a scoop of vanilla ice cream on the side for extra indulgence!
-
Pair with Coffee or Tea: This cake makes an excellent afternoon pick-me-up with your favorite brew. Enjoy it with a cappuccino or a refreshing iced tea for the perfect balance.
Recipe Variations
What’s great about this cake is that it’s super adaptable! Here are a few creative twists to consider:
-
Berry Medley: If sour cherries aren’t your jam, swap them for a medley of mixed berries (blueberries, raspberries, or strawberries work wonderfully) for a summer-inspired delight.
-
Nutty Crunch: Add 1/2 cup of chopped nuts (like walnuts or pecans) into the batter for added texture. This gives a fun crunch and pairs perfectly with the cherries!
-
Spiced Up: Experiment with spices! In addition to cinnamon, try adding a pinch of cardamom or ginger for a warm, fragrant twist.
-
Zesty Citrus: Add the zest of an orange or lemon to the batter for a fresh and zesty flavor that brightens each bite.
-
Gluten-Free Version: Replace the all-purpose flour with a gluten-free baking blend, and voilà! You have a gluten-free sour cherry cobbler coffee cake suitable for your gluten-sensitive friends.
Chef’s Notes
As with all recipes, this one has seen some twists and turns throughout its life! When I first started baking this coffee cake, I relied heavily on fresh sour cherries as my only fruit filling. While they’re delightful, I’ve found that experimenting with different fruits not only makes the recipe fun but also showcases the versatility of the base cake.
And let’s not forget my first few attempts, where the topping was a complete disaster. I accidentally used baking soda instead of baking powder, resulting in a cake that I jokingly called “sour cherry brick”! Better luck followed, and I realized that practice really does make perfect! The outcome was never just about how the cake turned out; it became about the laughter and joy shared in the process—something that’s now become my kitchen mantra!
FAQs and Troubleshooting
-
What if my cake is too dense?
- If your cake is dense, it’s likely due to overmixing the batter. Mix until just combined, and you’ll get that lovely fluffy texture.
-
Can I use frozen cherries?
- Absolutely! Frozen cherries work well too. Just be sure to drain any excess liquid before folding them into the batter.
-
How can I store leftovers?
- Store any leftovers in an airtight container at room temperature for up to 3 days or in the refrigerator for a little longer. You can also freeze slices for up to two months!
-
Why did my topping melt instead of staying crunchy?
- This can happen if too much moisture from the cherries seeps into the topping during baking. If your topping doesn’t crisp up, try sprinkling a bit of oats with the brown sugar and cinnamon next time for an extra crunchy texture!
Nutritional Info (if applicable)
While I’m all about indulgence (because life is too short for sad desserts!), it’s good to know where we stand nutritionally. A typical slice of this Sour Cherry Cobbler Coffee Cake is around 250 calories, with 10g of fat, 36g of carbohydrates, and about 3g of protein, depending on your toppings and any variations you use.
To make it a touch healthier, you can experiment with alternative sweeteners, replace some of the sugar with mashed bananas, or even introduce whole grains to boost its nutritional profile while still enjoying every scrumptious bite!
Final Thoughts
As we wrap up our culinary adventure with this Sour Cherry Cobbler Coffee Cake, I hope you’re feeling inspired to step into your kitchen and create something special. Food has a wonderful way of weaving memories, stories, and flavors into our lives. This cake is more than just ingredients—it’s a beautiful reminder of the connections we make through food, the laughter that fills our kitchens, and the joy that follows.
So, whether you’re making it for yourself, your family, or just to celebrate a simple Tuesday, know that you’re creating a warm hug in cake form. Keep exploring, keep tasting, and most importantly, keep sharing! Happy baking, friends! Let’s dig in!
Print
Sour Cherry Cobbler Coffee Cake
- Total Time: 55 minutes
- Yield: 12 servings 1x
- Diet: Vegetarian
Description
A delightful coffee cake featuring a vibrant, tangy sour cherry filling, perfect for brunch or dessert.
Ingredients
- 2 cups all-purpose flour
- 1 cup granulated sugar
- 1/2 cup butter, softened
- 2 large eggs
- 1 cup sour cream
- 1 teaspoon vanilla extract
- 1 teaspoon baking powder
- 1/2 teaspoon baking soda
- 1/4 teaspoon salt
- 2 cups sour cherries, pitted
- 1/4 cup brown sugar
- 1 teaspoon ground cinnamon
Instructions
- Preheat the oven to 350°F (175°C).
- Prepare a 9×13 inch baking pan by greasing it with butter or cooking spray.
- Mix the flour, baking powder, baking soda, and salt in a medium bowl; set aside.
- Cream the softened butter and granulated sugar until light and fluffy.
- Add the eggs one at a time, beating well after each addition, then add the vanilla extract.
- Incorporate the sour cream until well combined.
- Combine the dry ingredients with the wet mixture, stirring gently until just combined.
- Fold in the pitted sour cherries.
- Pour the batter into the prepared baking pan, smoothing it out.
- Prepare the topping by mixing brown sugar and cinnamon, then sprinkle it over the batter.
- Bake for 35-40 minutes, or until a toothpick comes out clean.
- Cool for about 10 minutes before transferring to a wire rack to cool completely.
Notes
For a vegan option, use flax eggs and coconut oil instead of butter. Leftovers can be stored in an airtight container for up to 3 days at room temperature.
- Prep Time: 15 minutes
- Cook Time: 40 minutes
- Category: Dessert
- Method: Baking
- Cuisine: American
Nutrition
- Serving Size: 1 slice
- Calories: 250
- Sugar: 18g
- Sodium: 205mg
- Fat: 10g
- Saturated Fat: 6g
- Unsaturated Fat: 4g
- Trans Fat: 0g
- Carbohydrates: 36g
- Fiber: 2g
- Protein: 3g
- Cholesterol: 50mg
Keywords: sour cherry, coffee cake, dessert, brunch, baking