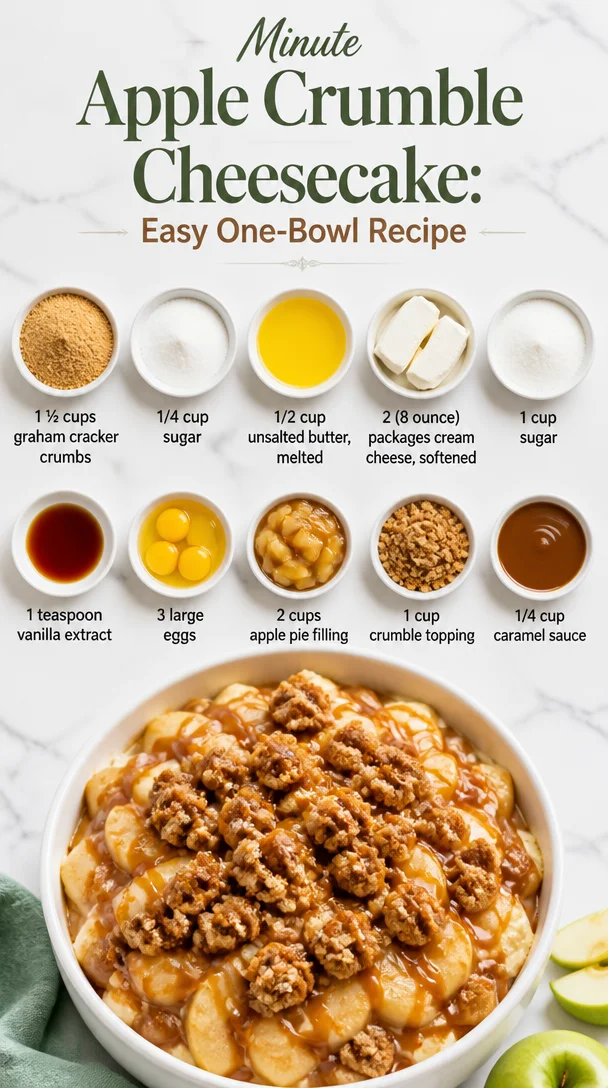
Minute Apple Crumble Cheesecake: Easy One-Bowl Recipe
The Ultimate Guide to Making an Irresistible Apple Crumble Cheesecake
Hey there, fellow foodies! I’m Beau Collier, your friendly guide to all things delicious here at Feastical! If you’ve ever found yourself longing for a dessert that combines the richness of cheesecake with the comforting crunch of apple crumble, then you’ve hit the jackpot! Today, we’re diving into the delightful world of Apple Crumble Cheesecake, a dessert that’s sure to steal the show at any gathering. Buckle up as we whip together a treat that feels like a warm hug on a plate!
Introduction: A Dessert to Remember
There’s something magical about dessert that brings people together. I can still remember the very first time I tasted an Apple Crumble Cheesecake. I was at my grandmother’s house for Thanksgiving, and the sweet aromas of cinnamon, butter, and baked apples wafted through her cozy kitchen. As we gathered around the table, she brought out this beautiful cheesecake adorned with the golden crumble topping. With whipped cream in hand, we knew we were in for something special.
Why do I love this dessert so much? It’s a beautiful fusion of textures and flavors—the creamy, smooth cheesecake perfectly complemented by the creamy apple filling and a crunchy, buttery crumble topping. It’s a classic comfort food with a twist, making it an ideal dessert for any occasion, from family gatherings to a cozy night in.
And let’s not forget the best part: it’s surprisingly simple to make! Trust me, even if you’re still trying to figure out where your spatula went, you can whip this up and impress your friends and family. So, are you ready to create a dessert that not only tastes incredible but also fills your kitchen with heavenly aromas? Let’s get started on this Apple Crumble Cheesecake!
Personal Story: A Family Tradition
Every family has its own cherished traditions, and mine certainly includes dessert. My grandmother was the queen of sweets, and gatherings at her house were always centered around her infamous cheesecake. One memorable evening, she added her own twist to the classic recipe by incorporating apple pie filling and a crumbly topping. That first bite was like a party in my mouth—a creamy cheesecake layer topped with sweet, spiced apples and finished off with the crunch of a homemade crumble.
After we demolished that cheesecake, Grandma shared her secret ingredient: love. “Everything tastes better when made with love,” she said, with a twinkle in her eye. It’s a lesson I carry with me in every dish I create, and I hope it resonates with you as we embark on this Apple Crumble Cheesecake adventure together.
Ingredients
Here’s what you’ll need to whip up this amazing dessert:
-
1 ½ cups graham cracker crumbs
Perfect for that classic cheesecake crust. You can substitute with crushed digestive biscuits for a different flavor profile. -
1/4 cup sugar
This adds sweetness to the crust. Brown sugar can be used for a deeper flavor, or you can skip it altogether if you prefer. -
1/2 cup unsalted butter, melted
Butter holds the crust together and gives it richness. If you’re looking for a dairy-free option, coconut oil works wonders! -
2 (8-ounce) packages cream cheese, softened
Cream cheese is the star of the cheesecake. For a lighter option, use Neufchâtel cheese, which has less fat but a similar taste. -
1 cup sugar
This sweetens up the filling nicely! Feel free to experiment with less sugar or even a sugar substitute like agave or honey if you’re watching calories. -
1 teaspoon vanilla extract
Vanilla adds depth and flavor to the cheesecake. Don’t skimp here—use pure vanilla for the best taste! -
3 large eggs
They help set the structure of the cheesecake. If you’re looking for an eggless version, consider using a flax egg (1 tablespoon ground flaxseed mixed with 3 tablespoons of water) for every egg. -
2 cups apple pie filling
This gives a wonderful apple flavor without the hassle of making filling from scratch! If you’re feeling adventurous, homemade filling is also an option. -
1 cup crumble topping
A delightful, crunchy layer for that extra texture. You can use store-bought crumble mix or make your own for freshness. -
1/4 cup caramel sauce
For drizzling on top! Using homemade caramel elevates this dessert, but store-bought works perfectly in a pinch.
Step-by-Step Instructions
Now that we have our ingredients ready, let’s get down to business! Here’s how to make this scrumptious Apple Crumble Cheesecake step by step.
-
Preheat the Oven:
Start by preheating your oven to 325°F (160°C). This ensures the cheesecake cooks evenly. While it heats, let’s prepare the crust! -
Make the Crust:
In a mixing bowl, combine the graham cracker crumbs, sugar, and melted butter. Mix until the crumbs are well-coated and resemble wet sand. Press this mixture firmly into the bottom of a 9-inch springform pan. Use the back of a measuring cup to pack it down for a solid base. This step is crucial for keeping the crust crunchy, so make sure it’s nice and compact! -
Bake the Crust:
Place the crust in the preheated oven for about 10 minutes. This helps to set the crust and avoid a soggy bottom. While it’s baking, let’s prepare the cheesecake filling. -
Prepare the Filling:
In a large mixing bowl, beat the softened cream cheese and sugar together until smooth and creamy. Scrape down the sides of the bowl to ensure everything is incorporated. This step is essential; it helps to avoid lumps in your cheesecake. -
Add the Eggs:
Add the eggs one at a time, mixing after each addition until just combined. Don’t overmix; you want the mixture to be smooth but not frothy. -
Add the Vanilla:
Mix in the vanilla extract. This is where that delicious flavor really starts to come through! -
Layer the Apple Filling:
Pour half of the cheesecake batter into the crust. Spread the apple pie filling evenly over it, then pour the remaining cheesecake batter on top. This layering technique creates beautiful swirls of apple goodness throughout your cheesecake. -
Add the Crumble:
Sprinkle the crumble topping over the cheesecake batter—don’t be shy, make it generous! This will bake into the top, creating that perfect crunchy finish we love. -
Bake the Cheesecake:
Place the cheesecake in the oven for about 55-60 minutes, or until the edges are set and the center is slightly jiggly. Don’t panic if it’s a tad wobbly still; it will firm up as it cools! -
Cool:
Once it’s done baking, turn off the oven and crack the door ajar. Let the cheesecake cool slowly in the oven for about an hour. This prevents cracking and helps it set perfectly. -
Chill:
After the cheesecake cools in the oven, transfer it to the fridge and chill for at least 4 hours, or overnight if you can wait that long! -
Serve with Caramel:
When you’re ready to serve, drizzle caramel sauce over the top and slice it up. Get your forks ready—it’s time to dig in!
Serving Suggestions
To wow your guests, consider serving your Apple Crumble Cheesecake with a dollop of freshly whipped cream or a scoop of vanilla ice cream on the side. You can even add a sprinkle of cinnamon for that comforting, warm aroma. If you’re feeling extra fancy, a pinch of sea salt on top of the caramel sauce elevates the flavors beautifully. Alternatively, serve it along with a hot cup of coffee or tea for the ultimate comforting experience!
Recipe Variations
While this Apple Crumble Cheesecake is divine as is, there are tons of ways to mix it up!
-
Nutty Crumble: Add chopped walnuts or pecans to the crumble topping for a delightful crunch and a burst of nutty flavor.
-
Spiced Pear: Swap the apple pie filling for spiced pear filling for a different fruity experience that’s equally comforting.
-
Chocolate Drizzle: For a twist on flavors, add a chocolate drizzle alongside the caramel for a peanut butter cup vibe.
-
Mini Cheesecakes: Want to impress at parties? Make mini cheesecakes in muffin tins! Just adjust the bake time to about 20-25 minutes.
-
Vegan Version: Use cashew cream or silken tofu blended with cocoa for a vegan-friendly cheesecake. Just make sure to substitute your sugar and crust with vegan alternatives.
Chef’s Notes
This Apple Crumble Cheesecake has been a personal favorite of mine for many years, and I love how it makes people feel! The beauty of this recipe is its versatility. I’ve often added seasonal spices or fresh fruits, depending on what I had on hand or what appealed to my mood that day. I remember one Thanksgiving where I decided to throw in some cranberries for a festive touch, and let me tell you, it was a hit! Remember, the kitchen is a place of joy and creativity. Don’t be afraid to make it your own!
FAQs and Troubleshooting
-
Why did my cheesecake crack?
Cheesecakes can be sensitive to temperature changes. Make sure you cool it gradually in the turned-off oven and avoid opening the door frequently while it bakes. -
How do I know when my cheesecake is done?
Check for a set outer edge and a slightly jiggly center. It will continue to set as it cools, so don’t over-bake! -
Can I freeze the cheesecake?
Absolutely! Wrap it tightly and freeze for up to 3 months. Just let it thaw in the fridge overnight when you’re ready to enjoy it again. -
What’s the best way to cut cheesecake?
Use a hot knife (run it under hot water and dry it) for clean slices. Wipe the knife between cuts to keep each piece looking pristine!
Nutritional Info
While it’s always tempting to dive into dessert without thinking about the nutritional aspects, it’s good to keep in mind that this Apple Crumble Cheesecake is considered a treat.
- Approximate Serving Size: 1 slice (based on 12 servings)
- Calories: 380
- Total Fat: 25g
- Saturated Fat: 15g
- Cholesterol: 90mg
- Sodium: 350mg
- Total Carbohydrates: 38g
- Dietary Fiber: 1g
- Sugars: 24g
- Protein: 5g
Remember, this dessert shines best when shared with loved ones, so enjoy every bite guilt-free!
Final Thoughts
Embarking on the journey of creating an Apple Crumble Cheesecake is not just about the destination of enjoying a delicious dessert; it’s about the joy of creating something wonderful with your own hands. Each step carries the spirit of togetherness, nostalgia, and sweetness that makes this dish a true celebration of life.
So, whether you’re sharing it at a family gathering, a friendly get-together, or a cozy evening just for yourself, I hope this cheesecake brings as much joy to your heart as it has to mine over the years. Remember, friends, cooking should be fun and filled with love, so take your time, experiment, and enjoy every moment. Happy baking, and I can’t wait to hear how your Apple Crumble Cheesecake turns out! Cheers!
Print
Apple Crumble Cheesecake
- Total Time: 80 minutes
- Yield: 12 servings 1x
- Diet: Vegetarian
Description
A delightful fusion of creamy cheesecake and crunchy apple crumble, this Apple Crumble Cheesecake is the perfect dessert for any occasion.
Ingredients
- 1 ½ cups graham cracker crumbs
- 1/4 cup sugar
- 1/2 cup unsalted butter, melted
- 2 (8-ounce) packages cream cheese, softened
- 1 cup sugar
- 1 teaspoon vanilla extract
- 3 large eggs
- 2 cups apple pie filling
- 1 cup crumble topping
- 1/4 cup caramel sauce
Instructions
- Preheat the oven to 325°F (160°C).
- Combine the graham cracker crumbs, sugar, and melted butter in a mixing bowl. Press the mixture into the bottom of a 9-inch springform pan.
- Bake the crust in the preheated oven for about 10 minutes.
- Beat the softened cream cheese and sugar together until smooth and creamy.
- Add the eggs one at a time, mixing after each addition until just combined.
- Mix in the vanilla extract.
- Pour half of the cheesecake batter into the crust and spread the apple pie filling evenly over it. Then pour the remaining cheesecake batter on top.
- Sprinkle the crumble topping over the cheesecake batter generously.
- Bake the cheesecake in the oven for about 55-60 minutes.
- Cool the cheesecake in the oven with the door ajar for about an hour before transferring it to the fridge.
- Chill for at least 4 hours, or overnight.
- Drizzle caramel sauce over the cheesecake before serving.
Notes
Serve with whipped cream or a scoop of vanilla ice cream for added indulgence.
- Prep Time: 20 minutes
- Cook Time: 60 minutes
- Category: Dessert
- Method: Baking
- Cuisine: American
Nutrition
- Serving Size: 1 slice
- Calories: 380
- Sugar: 24g
- Sodium: 350mg
- Fat: 25g
- Saturated Fat: 15g
- Unsaturated Fat: 5g
- Trans Fat: 0g
- Carbohydrates: 38g
- Fiber: 1g
- Protein: 5g
- Cholesterol: 90mg
Keywords: cheesecake, dessert, apple crumble, baking, sweet treat
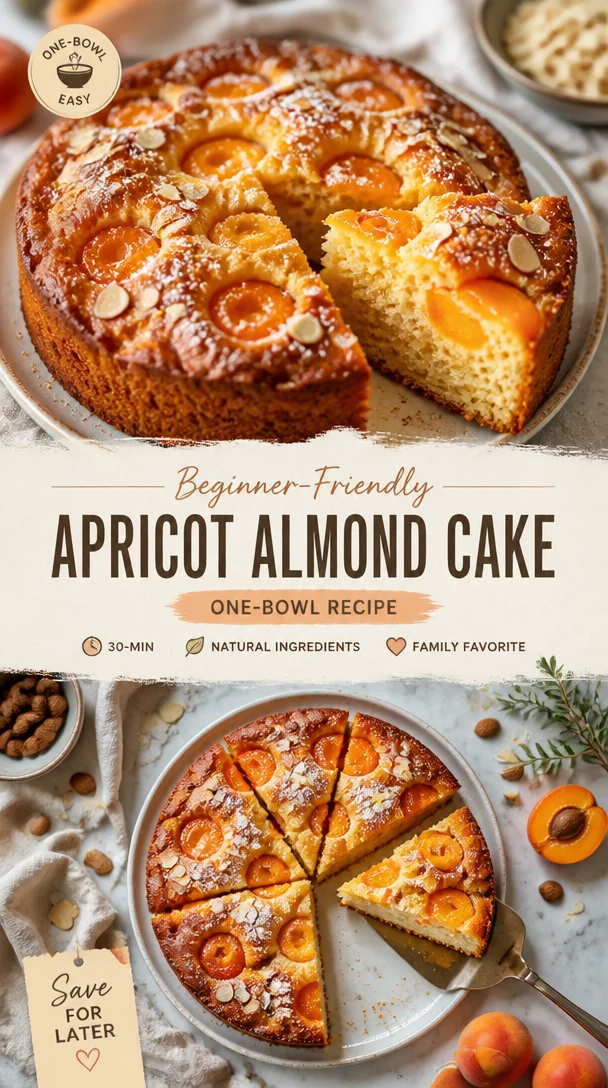
Beginner-Friendly Apricot Almond Cake: One-Bowl Recipe
The Delightful Journey of Apricot Almond Cake
Hey there, food lovers! It’s Beau Collier from Feastical, and today, I’m thrilled to share with you one of my all-time favorite recipes: Apricot Almond Cake. This cake embodies everything I love about cooking — simplicity, flavor, and a sprinkle of nostalgia. It’s like a warm hug on a plate, and I can’t wait for you to dig in!
Introduction
Imagine a sunny afternoon where the scent of sweet apricots fills the air, mingling with the rich aroma of almond. That, my friends, is what Apricot Almond Cake is all about. This cake is not just a dessert; it’s an experience that evokes memories of picnics in the park, cozy family gatherings, and lazy Sunday afternoons. It’s a cake that brings people together, making every bite feel like a special moment.
The first time I baked this cake, I was inspired by fresh apricots from the local farmer’s market. The moment I took a bite, I was transported back to my grandma’s kitchen, where she would whip up her famous apricot preserves. She always believed that good food speaks to the heart, and this cake certainly does that.
With its tender crumb and delightful almond flavor, this cake captures the essence of comfort food. Plus, it’s surprisingly simple to make! Whether you’re a veteran chef or just starting your culinary journey, this Apricot Almond Cake is sure to impress. So, grab your apron, and let’s bake something beautiful together!
Personal Story
Growing up, my family used to have a tradition of making desserts together during the summer months. One particular year, we decided to tackle grandma’s beloved apricot cake recipe. I remember the excitement in the kitchen, the chatter, and the sheer joy of bursting fresh apricots as we folded them into the batter. The bright orange hues of the fruit danced in the bowl, promising a tasty treat ahead.
The cake wasn’t flawless — we had a slight mishap with the oven temperature, and it came out a bit denser than intended. But when we finally sliced into it and shared it with friends and family at our summer picnic, the cake was devoured in minutes! That day taught me that it’s not about perfection; it’s about the love and joy that fills the kitchen. That’s a lesson I carry with me as I share this Apricot Almond Cake recipe with you.
Ingredients
Before we get our hands dirty, let’s gather our ingredients. Here’s what you’ll need:
-
7 ripe apricots (about 1 1/4 – 1 1/2 pounds)
Juicy, fresh apricots are key here! If apricots aren’t in season, feel free to substitute with peaches or plums for a similar juicy effect. -
⅓ cup sliced almonds
These add a lovely crunch! If you need a nut-free version, sunflower seeds can be a tasty substitute. -
1 large egg white
This helps give the cake a nice texture. If you’re vegan, you can replace this with a tablespoon of flaxseed meal mixed with three tablespoons of water. -
¼ cup sugar
A little sweetness goes a long way! You could use coconut sugar for a slight caramel flavor if desired. -
1 ½ cups all-purpose flour
The backbone of our cake! For a gluten-free option, use a 1:1 gluten-free flour blend. -
1 teaspoon baking powder
This gives our cake its rise! Be sure to check the expiration date for optimal results. -
¼ teaspoon salt
Balances the sweetness, enhancing the overall flavors. Never skip the salt! -
⅛ teaspoon vanilla powder (optional)
Adds a hint of warmth. If you don’t have it, a splash of vanilla extract works too. -
½ cup unsalted butter (at room temperature)
This contributes to the cake’s moistness. If you’re looking for a lighter option, use apple sauce or Greek yogurt in equal parts. -
1 cup sugar
More sweetness for the cake batter. You can always adjust to taste! -
1½ teaspoons almond extract
It’s the true star! If you’re not fond of almonds, feel free to use vanilla extract instead. -
3 large eggs
Essential for binding everything together. You can substitute with a commercial egg replacer for a vegan version. -
¼ cup sour cream
This adds moisture and a slight tang. Plain yogurt works as a fine substitute! -
¼ cup buttermilk
For that extra tenderness! You can make your own by mixing milk with a splash of vinegar or lemon juice.
Step-by-Step Instructions
Now that we have everything prepped, let’s dive into the fun part: baking our cake!
-
Preheat Your Oven:
Before you start mixing, preheat your oven to 350°F (175°C). This ensures your cake bakes evenly and rises beautifully. -
Prep the Pan:
Grease a 9-inch round cake pan with butter or cooking spray, and line the bottom with parchment paper for easy removal. This step is crucial to prevent your delicious cake from sticking! -
Prepare the Apricots:
Slice the apricots in half, remove the pits, and cut them into wedges or chunks depending on your preference. Toss them gently in 1/4 cup of sugar and let them sit while you mix the batter. This will draw out their natural juices and create a flavorful layer in the cake. -
Mix the Dry Ingredients:
In a bowl, whisk together the flour, baking powder, and salt. If you’re using vanilla powder, add it to this mix too. Set it aside. This helps ensure even distribution of the leavening agent. -
Cream the Butter and Sugar:
In a separate large mixing bowl, cream together the room-temperature butter and 1 cup of sugar until it’s light and fluffy. This usually takes about 3–4 minutes. Think of it as a mini workout for your arms! The sugar crystals help aerate the butter, giving a nice rise to the cake. -
Add Eggs and Flavors:
Beat in the eggs, one at a time, making sure each one is fully incorporated before adding the next. Then mix in the sour cream, buttermilk, and almond extract. The batter should begin to look smooth and creamy. -
Incorporate Dry Ingredients:
Gently fold the flour mixture into the wet mix using a spatula. Be careful not to overmix; we want a tender crumb, not a tough cake! -
Combine with Apricots:
Finally, fold in the prepared apricots, making sure they’re evenly distributed throughout the batter. At this point, you can also add half of the sliced almonds for a delightful surprise with each bite. -
Pour and Top:
Pour the batter into your prepared pan, spreading it evenly. Sprinkle the remaining sliced almonds over the top. This will give the cake a lovely, toasted top while baking. -
Bake:
Pop the cake in the oven and let it bake for about 40-45 minutes, or until a toothpick inserted into the center comes out clean. Keep an eye on it in the last few minutes — every oven behaves a bit differently. -
Cool Down:
Once baked, let the cake cool in the pan for about 10 minutes before gently transferring it to a wire rack to cool completely. This will help prevent it from becoming soggy.
Serving Suggestions
When it comes to serving your Apricot Almond Cake, the possibilities are endless! For a simple presentation, dust the cake with a light sprinkle of powdered sugar. You can also serve it with a dollop of whipped cream or a scoop of vanilla ice cream for that extra decadence.
For a touch of elegance, plate individual slices topped with a drizzle of sweet apricot glaze or a sprinkling of toasted almonds. Adding a few fresh apricot slices can elevate the visual appeal, making it perfect for special occasions or family gatherings.
Recipe Variations
Get creative! Here are a few fun twists on the classic Apricot Almond Cake:
-
Orange Zest Addition:
Add a teaspoon of freshly grated orange zest to the batter for a tangy citrus twist that pairs beautifully with the apricots. -
Mix of Fruits:
Combine apricots with peaches or berries for a mixed fruit cake. It’s a great way to use up whatever is in season! -
Chocolate Drizzle:
For the chocolate lovers out there, drizzle melted dark chocolate over the top after it’s cooled. Trust me, it’s heavenly! -
Gluten-Free Option:
Swap the all-purpose flour for a gluten-free blend and use almond milk instead of buttermilk for a gluten-free treat everyone can enjoy. -
Spiced Version:
Add a teaspoon of cinnamon or nutmeg to the batter for a warm, spice-infused flavor that’s especially lovely in the fall.
Chef’s Notes
This Apricot Almond Cake has been a staple in my baking repertoire for years, and I love how it evolves every time I make it. Sometimes, I’ll throw in a bit of fresh ginger for an unexpected kick, and at other times, I’ve swapped the apricots for fresh berries to see how the flavors dance together.
I remember one attempt where I accidentally used self-rising flour instead of all-purpose flour. The cake turned out a bit fluffier, but much to my surprise, it still tasted fantastic! So, if you ever find yourself in a pinch, don’t worry too much about perfection — embrace the happy accidents!
FAQs and Troubleshooting
-
Why is my cake dense?
If your cake turns out denser than expected, it could be due to overmixing the batter or using too much flour. Always measure your flour properly by spooning it into the measuring cup and leveling it off. -
My cake didn’t rise! What happened?
Make sure your baking powder is fresh. An expired leavening agent can lead to cakes that fall flat. Also, ensure you creamed the butter and sugar until light and fluffy for the best rise. -
Can I freeze this cake?
Absolutely! Wrap the cooled cake tightly in plastic wrap and place it in an airtight container. It can last in the freezer for up to three months. Just make sure to thaw it in the fridge overnight before serving. -
How do I store leftovers?
Keep any leftover cake in an airtight container at room temperature for up to three days or in the fridge for up to a week. If you prefer it chilled, the fridge can enhance its flavor.
Nutritional Info
Each slice of this Apricot Almond Cake (approximately 1/12 of the cake), offers a delightful balance of flavors and textures. Here’s a quick breakdown of the nutritional content you could expect:
- Calories: 290
- Total Fat: 14g
- Saturated Fat: 8g
- Cholesterol: 70mg
- Sodium: 170mg
- Total Carbohydrates: 38g
- Dietary Fiber: 1g
- Sugars: 22g
- Protein: 4g
Keep in mind that these values may vary based on specific ingredient brands and any substitutions you make.
Final Thoughts
And there you have it — your very own Apricot Almond Cake, bursting with flavor and memories! This delightful cake is a reminder that cooking is not just about following recipes; it’s about the connections we create and the love we share over food.
I hope this recipe becomes a cherished part of your kitchen repertoire, just as it has in mine. Whether it’s a sunny picnic or a cozy evening at home, this cake is sure to bring smiles to everyone around the table. So go ahead, grab your apron, and let your kitchen become a space of warmth and love. Happy baking, my friends!
Print
Apricot Almond Cake
- Total Time: 60 minutes
- Yield: 12 servings 1x
- Diet: Vegetarian
Description
A delightful Apricot Almond Cake that captures the essence of comfort food, perfect for family gatherings or sunny picnics.
Ingredients
- 7 ripe apricots (about 1 1/4 – 1 1/2 pounds)
- ⅓ cup sliced almonds
- 1 large egg white
- ¼ cup sugar
- 1 ½ cups all-purpose flour
- 1 teaspoon baking powder
- ¼ teaspoon salt
- ⅛ teaspoon vanilla powder (optional)
- ½ cup unsalted butter (at room temperature)
- 1 cup sugar
- 1½ teaspoons almond extract
- 3 large eggs
- ¼ cup sour cream
- ¼ cup buttermilk
Instructions
- Preheat your oven to 350°F (175°C).
- Grease a 9-inch round cake pan with butter or cooking spray.
- Slice the apricots in half, remove the pits, and cut them into wedges or chunks.
- Toss the apricots in 1/4 cup of sugar and let them sit.
- In a bowl, whisk together the flour, baking powder, and salt.
- Cream together the butter and 1 cup of sugar until light and fluffy.
- Beat in the eggs one at a time, then mix in the sour cream, buttermilk, and almond extract.
- Gently fold the flour mixture into the wet mix.
- Finally, fold in the prepared apricots and half of the sliced almonds.
- Pour the batter into the prepared pan and sprinkle the remaining sliced almonds on top.
- Bake for about 40-45 minutes or until a toothpick comes out clean.
- Let the cake cool in the pan for about 10 minutes before transferring it to a wire rack.
Notes
Serve with a sprinkle of powdered sugar, whipped cream, or a scoop of vanilla ice cream for added decadence.
- Prep Time: 15 minutes
- Cook Time: 45 minutes
- Category: Dessert
- Method: Baking
- Cuisine: American
Nutrition
- Serving Size: 1 slice
- Calories: 290
- Sugar: 22g
- Sodium: 170mg
- Fat: 14g
- Saturated Fat: 8g
- Unsaturated Fat: 6g
- Trans Fat: 0g
- Carbohydrates: 38g
- Fiber: 1g
- Protein: 4g
- Cholesterol: 70mg
Keywords: apricot cake, almond cake, dessert, baking, vegetarian
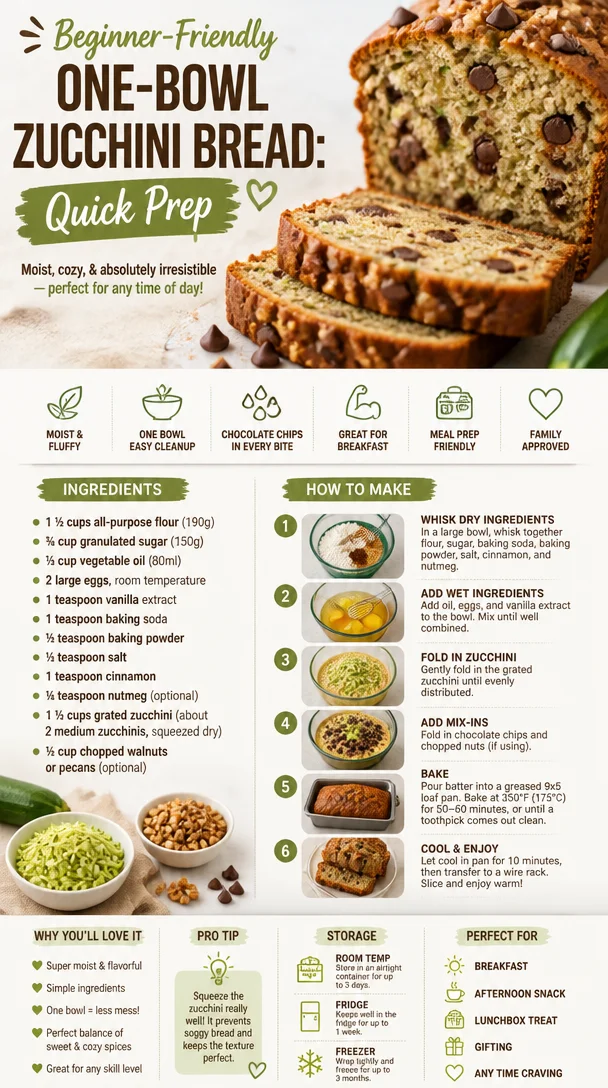
Beginner-Friendly One-Bowl Zucchini Bread: Quick Prep
Easy One-Bowl Zucchini Bread Recipe for Beginner Bakers to Perfect
Hey there, fellow food lovers! Beau Collier here, and I’m thrilled to welcome you to Feastical! Today, we’re diving into the world of vibrant flavors and homey comfort with none other than an Easy One-Bowl Zucchini Bread recipe. This delightful treat isn’t just scrumptious; it’s packed with all the feels that make you cozy up and share the love. Whether you’re an experienced baker or just figuring out how a whisk works, this is the perfect recipe to elevate your baking game without the stress. So, let’s get started and create something that will make your kitchen smell like pure joy!
Introduction: Baking with Zucchini – A Match Made in Culinary Heaven
If you’re anything like me, you probably have a basket of zucchinis sitting on your countertop, thanks to a generous neighbor or maybe your own garden adventure! Zucchinis are incredibly versatile – they can shine in savory dishes, but today we’re here to talk about how they can make your baked goods ultra-moist and flavor-packed. The beauty of zucchini bread lies in its ability to transform a vegetable into a delicious dessert or snack, maintaining a delightful balance of sweetness and a hint of spice.
It reminds me of those warm summer days when my grandmother would make her famous zucchini bread. Her kitchen was always filled with laughter, the sweet aroma of baked goods, and the lively chatter of family gathered together. Every slice was like a slice of life – filled with memorable moments and love baked right in. I can still picture her grating zucchini like a pro, her apron dusted with flour and the warm sunlight streaming through the window. That memory is not only sweet but also fondly connected to this wonderful recipe.
So, gather up your zucchini and let’s get cracking on this easy one-bowl zucchini bread recipe that’ll leave your friends asking for seconds!
Personal Story
The first time I tried my hand at zucchini bread, I was nervous. I thought, “How the heck can a vegetable turn into something so delicious?” Little did I know, it would become one of my go-to recipes! I remember spending an afternoon at my grandmother’s kitchen, where she casually tossed together her ingredients while sharing stories of her childhood in the kitchen. I was so focused on the whisking and measuring that I barely heard her give tips about patience and love being the secret ingredients.
That first bite of the fresh-out-of-the-oven zucchini bread transported me to those golden moments of family togetherness. Ever since that day, I’ve connected baking with joy, love, and creating lasting memories. Trust me, as you mix and bake this recipe, let the anticipation build; the final product will not only satisfy your taste buds but also bring a piece of nostalgia to your table. Let’s jump right into the ingredients!
Ingredients
Here’s what you’ll need to whip up this delicious zucchini bread. Don’t worry; it’s all simple stuff!
-
1 ½ cups all-purpose flour (190g): A staple in most kitchens, this flour provides the backbone for the bread. If you’re looking for an alternative, whole wheat flour can be a nutritious option—just keep an eye on the texture!
-
¾ cup granulated sugar (150g): This sugar brings sweetness to our zucchini bread! You can swap it out for coconut sugar or even honey if you like a different flavor profile—just adjust your liquid ingredients accordingly.
-
⅓ cup vegetable oil (80ml): This keeps our bread moist and tender. Feel free to use melted coconut oil or applesauce for a lower-fat option. You can also try olive oil for a little twist!
-
2 large eggs, room temperature: Eggs act as the binding agent, helping everything stick together beautifully. If you’d like an egg-free variation, try using unsweetened applesauce—about ¼ cup per egg!
-
1 teaspoon vanilla extract: This adds a lovely depth of flavor. Always opt for pure vanilla extract if you can – it makes a noticeable difference!
-
1 teaspoon baking soda: This is your leavening agent, giving the bread a lovely lift. If you run out, you can use baking powder, but you’ll need to adjust the quantity to about 2 teaspoons.
-
½ teaspoon baking powder: This works alongside baking soda to ensure your bread rises perfectly.
-
½ teaspoon salt: Salt enhances the overall flavors in baked goods.
-
1 teaspoon cinnamon: This warm spice adds a comforting aroma and flavor to our bread. You can experiment with pumpkin pie spice or even cardamom for a different twist!
-
¼ teaspoon nutmeg (optional): A touch of nutmeg gives an earthy warmth. If you’re a fan, by all means, add it in! If not, leave it out.
-
1 ½ cups grated zucchini (about 2 medium zucchinis, squeezed dry): The star of our show! Grate it, squeeze it to remove excess moisture, and watch how it transforms the bread.
-
½ cup chopped walnuts or pecans (optional): Add a delightful crunch to the bread! If you’re nut-free, sunflower seeds or chocolate chips are fantastic alternatives.
Step-by-Step Instructions
Now that we have everything lined up, let’s get to the fun part—mixing and baking our zucchini bread!
-
Preheat the Oven: Start by preheating your oven to 350°F (175°C). This step is crucial, as you don’t want to put your batter into a cold oven and alter your bread’s texture.
-
Mix Dry Ingredients: In a large mixing bowl, whisk together the flour, sugar, baking soda, baking powder, salt, cinnamon, and nutmeg (if using). A good tip is to use a whisk instead of a fork for better aeration—who doesn’t want light and fluffy bread?
-
Incorporate Wet Ingredients: Make a well in the center of your dry ingredients and add the eggs, vegetable oil, and vanilla extract. Use a spatula or a wooden spoon to mix until just combined. If it starts to look a bit lumpy, that’s perfectly fine! Overmixing will make your bread tough.
-
Add Zucchini and Nuts: Gently fold in the grated zucchini and your choice of nuts, being careful not to overwork the batter. This is where the magic happens—the zucchini adds moisture without overpowering the sweetness.
-
Prepare the Pan: Grease a loaf pan with cooking spray or line it with parchment paper for easy removal. You want a stress-free experience when it comes time to slice!
-
Pour and Bake: Transfer your batter to the prepared loaf pan. Smooth the top with a spatula and pop it into the preheated oven. Bake for 50–60 minutes, or until a toothpick inserted in the center comes out clean. The smell will be heavenly, trust me!
-
Cool Down: Once baked, remove the bread from the oven and set it on a wire rack. Allow it to cool in the pan for about 10 minutes before transferring it to the rack completely to cool. Slice it warm or let it cool completely—it’s delicious either way!
Serving Suggestions
Alright, let’s get to the fun part of enjoying your glorious zucchini bread! This lovely loaf can be served in so many delightful ways:
-
Slice it up for Breakfast: This bread pairs wonderfully with a pat of butter or a drizzle of honey. It’s perfect for a cozy breakfast or brunch spread alongside your favorite coffee or tea.
-
Snack Time Treat: Pack individual slices for a delightful afternoon snack. It travels well; just wrap in parchment paper or pop it in a sandwich bag for your on-the-go munching.
-
Toast It Up: For an easy twist, toast slices in a skillet for a crispy edge and warm center. Top with a dollop of cream cheese or ricotta for a more indulgent treat—delicious!
-
Elegant Dessert: Serve slices alongside a scoop of vanilla ice cream or a dollop of whipped cream for a no-fuss dessert that’s sure to impress at any gathering.
Recipe Variations
Let’s keep this zucchini bread exciting! Here are a few creative twists you can try:
-
Chocolate Chip Zucchini Bread: Fold in a cup of chocolate chips for a decadent spin. The chocolate adds a rich sweetness that pairs remarkably well with the zesty zucchini.
-
Spiced Zucchini Bread: Mix it up with a teaspoon of ginger or cloves for a more chai-inspired flavor, perfect for those fall days when you want to snuggle up.
-
Banana-Zucchini Bread: Substitute half of the grated zucchini with mashed bananas for a sweet combo that’s undeniably comforting.
-
Dairy-Free Option: Swap the eggs for flax eggs (1 tablespoon of ground flaxseed mixed with 2.5 tablespoons of water for each egg) and use a plant-based oil, like coconut or avocado oil, to accommodate those with dietary restrictions.
-
Add Fruit: Toss in some chopped apples or dried cranberries for a fruity twist. Not only does it brighten the flavor, but it also adds a stunning touch to the presentation!
Chef’s Notes
This recipe has followed me through countless kitchen adventures! I’ve learned over the years that patience and practice are the biggest keys to success. Don’t fret if your bread doesn’t turn out perfect the first time – that’s all part of the learning curve! Each loaf taught me something new. Remember, every kitchen disaster can become a funny story, especially when experimenting with flavors or techniques.
I once turned a loaf into zucchini pancakes—an unexpected win! So, embrace the mess; it’s all about learning and having fun in the kitchen!
FAQs and Troubleshooting
Here are some common questions I get when it comes to baking this delightful bread:
-
Why is my bread dense?
- This could be due to overmixing. Mix until just combined, and don’t be afraid of a few lumps. Also, make sure your baking soda and powder are fresh—old leavening agents won’t create the desired lift!
-
How can I tell when it’s done baking?
- A toothpick inserted into the center should come out clean or with just a few moist crumbs. If your bread is browning too quickly on top but isn’t done baking, try tenting it with aluminum foil.
-
Can I freeze zucchini bread?
- Absolutely! Let it cool completely, then wrap it well in plastic wrap and foil. It can be frozen for up to 3 months. Thaw it in the fridge overnight, and you’re good to go!
-
Can I use frozen zucchini?
- Yes! If you’ve got frozen grated zucchini, just thaw and then squeeze out excess moisture before adding it to the batter.
Nutritional Info
While I’ll always advocate for enjoying food, it’s useful to know what we’re putting in our bodies. A standard slice (about 1/12th of the loaf) contains roughly:
- Calories: 180
- Carbohydrates: 25g
- Protein: 3g
- Fat: 7g
- Fiber: 1g
- Sugars: 10g
Feel free to customize ingredients based on your dietary needs! With substitutions and variations, this bread can fit into many eating plans while still providing a delightful experience.
Final Thoughts
Baking doesn’t just fill our bellies; it fills our hearts! Sharing this Easy One-Bowl Zucchini Bread recipe with you brings back so many memories of laughter, love, and cozy moments in the kitchen. I hope you take this recipe and make it your own, adding your flair and creativity. Whether you enjoy it as breakfast, a delightful snack, or dessert, I guarantee it’ll bring a smile to your face—just as it has done for so many others.
So, gather your ingredients, whip out your mixing bowl, and let’s create a loaf of zucchini bread that will fill your kitchen with love and aroma. Remember, in the kitchen, there are no mistakes, just delicious discoveries! Happy baking, friends! 🍞❤️
Print
Easy One-Bowl Zucchini Bread
- Total Time: 75 minutes
- Yield: 12 servings 1x
- Diet: Vegetarian
Description
A delightful and moist zucchini bread recipe perfect for beginner bakers. This one-bowl method makes it easy to whip up a comforting treat.
Ingredients
- 1 ½ cups all-purpose flour (190g)
- ¾ cup granulated sugar (150g)
- ⅓ cup vegetable oil (80ml)
- 2 large eggs, room temperature
- 1 teaspoon vanilla extract
- 1 teaspoon baking soda
- ½ teaspoon baking powder
- ½ teaspoon salt
- 1 teaspoon cinnamon
- ¼ teaspoon nutmeg (optional)
- 1 ½ cups grated zucchini (about 2 medium zucchinis, squeezed dry)
- ½ cup chopped walnuts or pecans (optional)
Instructions
- Preheat the oven to 350°F (175°C).
- Mix dry ingredients in a large bowl: flour, sugar, baking soda, baking powder, salt, cinnamon, and nutmeg.
- Incorporate the wet ingredients: make a well in the center of the dry mix and add eggs, vegetable oil, and vanilla extract. Mix until just combined.
- Add grated zucchini and nuts, folding gently until combined.
- Prepare the loaf pan by greasing it with cooking spray or lining with parchment paper.
- Pour the batter into the pan and smooth the top.
- Bake for 50–60 minutes, or until a toothpick comes out clean.
- Cool the bread for about 10 minutes in the pan, then transfer to a wire rack to cool completely.
Notes
Feel free to customize by adding chocolate chips or other spices. This bread can be frozen for up to 3 months.
- Prep Time: 15 minutes
- Cook Time: 60 minutes
- Category: Dessert
- Method: Baking
- Cuisine: American
Nutrition
- Serving Size: 1 slice
- Calories: 180
- Sugar: 10g
- Sodium: 200mg
- Fat: 7g
- Saturated Fat: 1g
- Unsaturated Fat: 6g
- Trans Fat: 0g
- Carbohydrates: 25g
- Fiber: 1g
- Protein: 3g
- Cholesterol: 30mg
Keywords: zucchini bread, baking, dessert, easy recipe, one-bowl recipe, vegetarian, homemade

Raspberry Swirl Brownies: 5-Ingredient, One-Bowl Recipe
Indulgent Raspberry Brownies: A Delicious Twist on Classic Comfort
Hey there, food lovers! It’s Beau Collier here, and today we’re diving into the delightful world of Raspberry Brownies. If you’re anything like me, brownies are that quintessential comfort food that just hits the spot. Rich, chocolatey, and soul-soothing, they remind us that life’s simplest pleasures can often be the most satisfying. But let me tell you, when you throw in a burst of fresh raspberries, you elevate the whole experience to another level! So let’s roll up our sleeves and get ready to create a dessert that not only fills our tummies but warms our hearts.
Growing up, my kitchen was always the buzzing hub of creativity, where the sweet aroma of chocolate often wafted through the air. I fondly recall watching my grandma whip up her famous brownies, her laughter spilling into the mix like a pinch of salt that deepened the flavor. It was during one of those sunny afternoons, talking about life and love while stuffing our faces with gooey treats, that I realized how food truly brings people together. To me, brownies were more than just a dessert; they were memories in the making. Fast forward to today, and I’ve taken that childhood joy and infused it with my love for bold flavors. Thus, the idea of adding fresh raspberries and raspberry jam was born. It’s all about making memories, and I can’t wait to create new ones with you!
Ingredients
Let’s gather everything we need to make these scrumptious Raspberry Brownies. Here’s what you’ll need:
-
1 box brownie mix
Easy and convenient! Go for a fudgy version if you can. You can also make homemade brownies if you prefer to skip the box! Just ensure the richness complements the fruit. -
1/2 cup fresh raspberries
These little gems add a tart burst of flavor. If you can’t find fresh raspberries, frozen ones work too—just thaw them first! -
1/4 cup raspberry jam
This adds a lovely sweetness and enhances the raspberry flavor. You can substitute with strawberry or any berry jam, but trust me, raspberry elevates this recipe! -
2 large eggs
The magic binding agent! If you’re vegan, you can replace eggs with a flax egg (1 tablespoon ground flaxseed mixed with 2.5 tablespoons water). -
1/3 cup vegetable oil
This adds moisture and richness. You can use melted coconut oil or applesauce as a healthier alternative! -
1 tablespoon water
Just a splash to mix everything perfectly. You can use milk for a creamier batter.
Step-by-Step Instructions
Let’s get cooking! Follow these steps, and we’ll have a batch of delicious Raspberry Brownies in no time.
-
Preheat Your Oven:
First things first! Preheat your oven to 350°F (175°C). This is crucial for even cooking, so don’t skip this step! Once it’s nice and toasty, prepare an 8×8 inch baking pan by greasing it or lining it with parchment paper for easy brownie removal. -
Mix the Brownie Batter:
In a large mixing bowl, combine the brownie mix, eggs, vegetable oil, and water. Give it a good stir until fully incorporated. The batter should be thick and glossy—this is where the magic happens! Pro tip: using a whisk instead of a spoon can help to eliminate any lumps for a smoother final texture. -
Add in the Raspberries:
Gently fold in the fresh raspberries, being careful not to squish them. This is what will make each bite a treasure trove of fruity goodness! I find that folding in the raspberries at this stage allows for even distribution without breaking them too much. -
Layer with Raspberry Jam:
Pour half the brownie batter into the prepared pan and smooth it out. Then, dollop the raspberry jam over this layer. Use a spatula to spread it slightly, but don’t worry about making it perfect; the chaos is part of the charm! Pour the remaining brownie batter over the jam layer and smooth the top. -
Swirl it Up:
Here comes the best part! Use a knife or a skewer to make a few gentle swirls to incorporate the jam into the brownie batter. Be artistic and have fun with it! -
Bake to Perfection:
Pop your brownies into the preheated oven and let them bake for 25-30 minutes. You want a toothpick inserted into the center to come out with a few moist crumbs—no one wants dry brownies! Keep an eye on them, as oven temperatures can vary. -
Cool and Cut:
Once your house is filled with that tantalizing chocolate aroma, it’s time to remove them from the oven. Let these beauties cool in the pan for about 15-20 minutes before you try to cut them—patience is a virtue! Carefully lift them out using the parchment paper and place them on a wire rack to cool completely.
Serving Suggestions
Presentation is everything! For a beautiful serving, cut your brownies into squares and place them on a plate. You could also sprinkle them with powdered sugar for a touch of elegance. If you’re feeling fancy, drizzle some warm raspberry sauce or chocolate ganache over the top. Pair them with a scoop of vanilla ice cream for an indulgent dessert or serve them alongside whipped cream and a few extra raspberries to make it pop. Your guests (or family) will think you’ve entered gourmet territory!
Recipe Variations
While the classic Raspberry Brownies are simply divine, here are some fun twists to keep things interesting:
-
Chocolate Chip Delight: Add a handful of chocolate chips to the batter for extra melty goodness.
-
Nutty Crunch: Toss in some chopped nuts such as walnuts or pecans for a delightful crunch that balances the softness of the brownie.
-
Minty Fresh: Add a few drops of mint extract for a refreshing surprise that complements the chocolate beautifully.
-
Vegan Version: Swap the eggs for flax eggs and use a dairy-free brownie mix for a plant-based alternative that everyone will love!
Chef’s Notes
These Raspberry Brownies are a personal favorite of mine for tons of reasons. Each time I make them, I’m reminded of those carefree afternoons with grandma. I’ve played around with the recipe over the years, and I have to admit, the raspberry twist was a game-changer! It adds that little zing that makes every bite feel like pure joy. And if you have leftover brownies (unlikely, but it can happen), they store well in an airtight container for a few days—or you can freeze them for a rainy day treat!
FAQs and Troubleshooting
Can I make my brownies ahead of time?
Absolutely! These brownies last well in an airtight container at room temperature for 3-4 days. You can also freeze them for up to 3 months—just let them thaw at room temperature when you’re ready to indulge!
What if my brownies are too gooey in the middle?
If they are too gooey, they might need a few extra minutes in the oven. Remember, appliance temperatures can vary, so keep an eye on them! If you’ve overbaked, they might be a bit dry; about 1-2 minutes makes all the difference!
Can I use frozen raspberries instead of fresh?
Definitely! Just make sure to let them thaw and drain excess moisture before adding them to the batter, otherwise, they can add too much liquid.
What’s the best way to cut brownies?
To get nice clean cuts, use a sharp knife that’s been warmed under hot water. Wipe the knife clean between cuts to keep your brownie squares looking good!
Nutritional Info
For those keeping an eye on their nutrition, here’s a rough estimate of the caloric content of the Raspberry Brownies (per serving—let’s say 12 servings for your 8×8 brownie pan):
- Calories: Approximately 200
- Total fat: 9g
- Saturated fat: 1g
- Carbohydrates: 29g
- Dietary fiber: 1g
- Sugars: 16g
- Protein: 2g
Please adjust based on your specific ingredients or if you substitute things out!
Final Thoughts
And there you have it! A batch of delectable Raspberry Brownies that’s sure to become a beloved addition to your dessert repertoire. As always, cooking is about enjoying the process and infusing a bit of love into every step. Whether you’re baking these for a special occasion or simply because it’s a Tuesday, I hope they bring as much joy to your home as they do to mine.
So, grab those ingredients and let’s bake some happy memories together! Thank you for tuning in to Feastical, and I can’t wait to see you whip up these delicious treats. Happy baking, my friends!
Print
Indulgent Raspberry Brownies
- Total Time: 45 minutes
- Yield: 12 servings 1x
- Diet: Vegetarian
Description
Rich and chocolatey brownies enhanced with a burst of fresh raspberries and raspberry jam, perfect for creating sweet memories.
Ingredients
- 1 box brownie mix
- 1/2 cup fresh raspberries
- 1/4 cup raspberry jam
- 2 large eggs
- 1/3 cup vegetable oil
- 1 tablespoon water
Instructions
- Preheat your oven to 350°F (175°C) and prepare an 8×8 inch baking pan.
- Mix the brownie mix, eggs, vegetable oil, and water until well combined.
- Add in the fresh raspberries, folding gently.
- Layer half the brownie batter into the pan and spread the raspberry jam over it. Pour the remaining batter on top.
- Swirl the jam into the brownie batter with a knife.
- Bake for 25-30 minutes until a toothpick comes out with a few moist crumbs.
- Cool the brownies in the pan for 15-20 minutes before transferring to a wire rack.
Notes
For a twist, add chocolate chips or nuts to mix-ins. These brownies can be stored for 3-4 days or frozen for up to 3 months.
- Prep Time: 15 minutes
- Cook Time: 30 minutes
- Category: Dessert
- Method: Baking
- Cuisine: American
Nutrition
- Serving Size: 1 brownie
- Calories: 200
- Sugar: 16g
- Sodium: 150mg
- Fat: 9g
- Saturated Fat: 1g
- Unsaturated Fat: 8g
- Trans Fat: 0g
- Carbohydrates: 29g
- Fiber: 1g
- Protein: 2g
- Cholesterol: 30mg
Keywords: brownies, raspberry, dessert, chocolate, easy baking