
Ingredient Slow-Cooker Chicken Parmesan Soup (Weeknight)
Hearty Crockpot Chicken Parmesan Soup: A Warm Hug in a Bowl
Hey there, fellow food lovers! Welcome back to Feastical! If you’re looking for that ultimate feel-good meal that warms both your belly and your heart, you’ve stopped by the right spot. Today, we’re diving into something special: Hearty Crockpot Chicken Parmesan Soup. This dish is like a comforting blanket on a chilly evening, and trust me, it’s a bowl of goodness you’ll be grateful for!
Growing up, Sunday dinners at my grandmother’s house were always an experience. You could count on her being elbow-deep in the kitchen, whipping up something magical. I vividly remember the aroma of simmering tomatoes and garlic wafting through the air while she prepared her famous chicken Parmesan. It was a family affair, with everyone gathered around the table, laughter bubbling over like the bubbling sauce in the pot. Those memories not only define who I am as a cook but also shaped my love for sharing food with loved ones. That’s exactly how I came up with this hearty soup recipe. It’s straightforward, rich, and embodies everything we adored about her chicken Parmesan, but in a cozy soup form that’s perfect for any day of the week.
Ingredients
Let’s gather our ingredients because cooking is all about having fun and using what you love! Here’s what you’ll need for our delicious soup:
-
1.5 lbs boneless, skinless chicken breasts or thighs
(The choice is yours! Breasts are leaner, while thighs bring juicy flavor. Use shredded rotisserie chicken for a quick shortcut, too.) -
28 oz canned crushed tomatoes
(Opt for fire-roasted tomatoes for an extra depth of flavor or use fresh tomatoes when they’re in season!) -
4 cups chicken broth (preferably low-sodium)
(Homemade broth adds a personal touch, but store-bought works great. Just watch the salt levels if you’re aiming for a low-sodium option.) -
3/4 cup small pasta shapes (ditalini or small shells)
(I love small pasta for its bite! Try rice or quinoa for a gluten-free twist.) -
1/2 cup freshly grated Parmesan cheese
(There’s nothing quite like fresh cheese! It’s creamier and tastier than pre-grated. Rainy shoes can be swapped with nutritional yeast for a vegan option.) -
3-4 garlic cloves, minced
(The more, the merrier! If you’re not a garlic lover, feel free to reduce the amount.) -
1 medium onion, finely chopped
(Sweet onions add a lovely flavor. A yellow onion is a perfect substitute.) -
1 tbsp Italian seasoning (basil, oregano, thyme, and rosemary blend)
(Feel free to mix your dried herbs or even toss in some fresh herbs for a burst of flavor!) -
1/4 tsp red pepper flakes (optional)
(Skip if you’re not into the heat, but they add a wonderful kick if you are!) -
Salt and freshly ground black pepper to taste
(Always season to your liking—every palate is different!) -
2 tbsp olive oil
(A dash of flavor that helps sauté the veggies. You can use avocado oil or butter for a different twist.) -
A handful of fresh basil leaves, chopped
(This is pure heaven for the garnish! You can substitute with parsley if you prefer.) -
Fresh mozzarella, torn into small pieces (optional)
(Oh yes! It adds that quintessential cheesy goodness. Use vegan cheese for a dairy-free option.)
Step-by-Step Instructions
Ready to dive in? Here’s how we’re going to create this beautiful bowl of goodness:
-
Prep the Ingredients: Begin by chopping your onion and mincing your garlic. This step is crucial; it sets the aromatic base for your soup. Don’t be shy with the garlic—it’s the soul of the dish!
-
Sauté the Aromatics: In a skillet, heat the olive oil over medium heat. Add in the chopped onions and let them go for about 5 minutes until they’re soft and fragrant. Next, toss in the minced garlic and stir for another 30 seconds. Cooking the garlic just enough will release its oils and flavor into the soup, setting the stage for some seriously delicious bites.
-
Combine in the Crockpot: Transfer those beautiful sautéed onions and garlic into your crockpot. Layer in the chicken breasts or thighs, the crushed tomatoes, and the chicken broth. Make sure everything is well mixed.
-
Season Generously: Add in the Italian seasoning, red pepper flakes (if you want that nice warmth), and season with salt and black pepper. Honestly, tasting as you go is key! It’s all about making it just right for your taste buds.
-
Let it Simmer: Cover the crockpot and set it to cook on low for about 6 hours or high for 3-4 hours. Here’s the magic: the chicken gets ultra-tender, and every flavor melds perfectly. You can go about your day while it does its thing—works for me!
-
Cook the Pasta: About 30 minutes before your soup is done, bring a small pot of salted water to a boil and add your pasta. Cook until al dente, then drain and set it aside. This little step ensures your pasta stays perfectly cooked without being mushy when added to the soup.
-
Shred the Chicken: When your crockpot tells you it’s done (trust me, you’ll know), remove the chicken, shred it with two forks, and return it to the pot. This gives the soup that hearty texture we adore and helps every spoonful be filled with chicken goodness.
-
Finish it Off: Stir in the grated Parmesan cheese until it’s melty and lovely. Add in the freshly chopped basil and taste once more for seasoning adjustments. You’re almost there!
-
Serve it Up: Ladle the soup into bowls, top it off with some torn mozzarella cheese (if using), and maybe add another sprinkle of Parmesan. Fresh basil leaves on top give a fragrant finish. It’s all about presentation, my friends!
Serving Suggestions
Now that you’ve created a masterpiece, let’s talk about serving! This soup is super versatile, so here are a few ideas:
-
Add Crusty Bread: Serve with a warm slice of artisan bread for dunking and soaking up every delicious drop. It’s a cozy combo straight out of an Italian kitchen.
-
Garnish with Fresh Herbs: A sprinkle of fresh basil or oregano on top brings a vibrant color contrast and elevates the dish visually!
-
Use Bowls that Speak Comfort: Grab your favorite soup bowls—something rustic or vintage can make this meal feel extra special.
Recipe Variations
Want to switch things up? Here are a few fun twists to try:
-
Zesty Lemon Chicken Parmesan Soup: Add the zest of one lemon and a splash of lemon juice for a fresh zing!
-
Creamy Version: Stir in a splash of heavy cream or coconut milk at the end for a rich and creamy finish.
-
Vegetable-Packed: Toss in some chopped spinach, carrots, or zucchini for added nutrition and a pop of color.
-
Mexican Twist: Add black beans and corn with a pinch of taco seasoning for a southwest take on this comforting classic.
-
Gluten-Free Options: Swap out the pasta with quinoa or keep it carb-free by adding riced cauliflower.
Chef’s Notes
This recipe holds a special place in my heart. Over the years, I’ve tweaked it as my family has grown and preferences have changed. One winter, I found myself with an abundance of zucchini from the garden, so I tossed that in, and it was an instant hit! Those moments in the kitchen, experimenting and adjusting, always remind me of why I love cooking—there’s infinite exploration and room for creativity.
You know, one time I accidentally added way too much red pepper flakes, and let’s just say, it was a lesson learned! Now, I always start with a smaller amount. Sometimes, the little blunders lead to the most unforgettable recipes!
FAQs and Troubleshooting
Q: Can I make this soup vegetarian?
Absolutely! Substitute the chicken with lentils or chickpeas, and replace the chicken broth with vegetable broth for a delicious vegetarian version.
Q: What if my soup is too thick?
Just add a little more broth or water until you reach your desired consistency. Remember, you can always adjust!
Q: My pasta turned mushy. What’s wrong?
This usually happens when the pasta cooks too long. Always cook it separately and add it at the end to keep it al dente.
Q: Can I freeze leftovers?
Yes! Freezing soup is a fantastic way to preserve those comforting flavors. Just cool completely before placing it in an airtight container. It can keep for up to three months in the freezer!
Nutritional Info
A typical serving of Hearty Crockpot Chicken Parmesan Soup offers a balance of protein from the chicken, healthy fats from the olive oil, and essential nutrients from the tomatoes and herbs. Each bowl is enriched with vitamins and minerals while remaining comfortingly satisfying. Here’s a rough estimate:
- Calories: 320
- Protein: 28g
- Carbohydrates: 28g
- Fiber: 5g
- Fat: 10g
Final Thoughts
And that’s it, lovely folks! Your Hearty Crockpot Chicken Parmesan Soup is ready to shine! Cooking doesn’t have to be complicated; it can be an enjoyable adventure filled with delightful discoveries. I hope this recipe becomes a new classic in your home, one that you can share with your own loved ones, just like my grandmother instilled in me.
Now, tell me, how will you make this soup your own? I’d love to hear your variations or memories associated with your favorite warm dishes in the comments below! Until next time, keep spreading love through food.
Happy cooking, and grab that spoon—it’s time to dig in! 🍽️
Print
Hearty Crockpot Chicken Parmesan Soup
- Total Time: 375 minutes
- Yield: 6 servings 1x
- Diet: Gluten-Free
Description
A comforting and hearty soup that combines the classic flavors of chicken parmesan with the ease of a crockpot.
Ingredients
- 1.5 lbs boneless, skinless chicken breasts or thighs
- 28 oz canned crushed tomatoes
- 4 cups chicken broth (preferably low-sodium)
- 3/4 cup small pasta shapes (ditalini or small shells)
- 1/2 cup freshly grated Parmesan cheese
- 3–4 garlic cloves, minced
- 1 medium onion, finely chopped
- 1 tbsp Italian seasoning
- 1/4 tsp red pepper flakes (optional)
- Salt and freshly ground black pepper to taste
- 2 tbsp olive oil
- A handful of fresh basil leaves, chopped
- Fresh mozzarella, torn into small pieces (optional)
Instructions
- Prep the ingredients: Begin by chopping your onion and mincing your garlic.
- Sauté the aromatics: In a skillet, heat the olive oil over medium heat. Add the chopped onions and let them cook for about 5 minutes. Add the minced garlic and stir for another 30 seconds.
- Combine in the crockpot: Transfer the sautéed onions and garlic into your crockpot. Layer in the chicken, crushed tomatoes, and chicken broth.
- Season generously: Add the Italian seasoning, red pepper flakes, salt, and black pepper. Taste and adjust seasoning as needed.
- Let it simmer: Cover the crockpot and set it to cook on low for about 6 hours or high for 3-4 hours.
- Cook the pasta: About 30 minutes before the soup is done, cook the small pasta in a pot of salted water until al dente.
- Shred the chicken: When the cooking time is complete, remove the chicken, shred it, and return it to the pot.
- Finish it off: Stir in the grated Parmesan cheese until melted and add in the fresh basil.
- Serve it up: Ladle the soup into bowls, adding mozzarella (if using) and garnish with fresh basil.
Notes
For a vegetarian version, substitute chicken with lentils and use vegetable broth.
- Prep Time: 15 minutes
- Cook Time: 360 minutes
- Category: Soup
- Method: Slow Cooking
- Cuisine: Italian
Nutrition
- Serving Size: 1 serving
- Calories: 320
- Sugar: 6g
- Sodium: 588mg
- Fat: 10g
- Saturated Fat: 2g
- Unsaturated Fat: 8g
- Trans Fat: 0g
- Carbohydrates: 28g
- Fiber: 5g
- Protein: 28g
- Cholesterol: 90mg
Keywords: chicken soup, crockpot soup, Italian soup, comfort food, chicken parmesan

Seasonal Southern Tomato Pie: Fresh, Comforting Weeknight
Old-Fashioned Southern Tomato Pie: A Slice of Nostalgia
Hey there, food lovers! I’m Beau Collier, and today, I’m thrilled to take you on a tasty journey down memory lane with one of my all-time favorite comfort food recipes: Old-Fashioned Southern Tomato Pie. This dish embodies everything I love about cooking—simple ingredients, mouthwatering flavors, and stories that linger long after the last bite.
Picture this: summer afternoons filled with sunlight, the sweet scent of ripe tomatoes wafting through the air, and the sound of laughter echoing from the kitchen as my family gathers around the table. Tomato pie was a staple of our summer dinners, often gracing the table alongside fresh garden salads and sweet tea. In those moments, I learned that food isn’t just about nourishing the body; it’s about feeding the soul and connecting with loved ones.
For those who might be unfamiliar, Southern tomato pie is a delightful fusion of garden-fresh tomatoes, rich cheese, and creamy mayonnaise, all nestled in a flaky pie crust. It’s the kind of dish that makes you feel warm and fuzzy inside, like a hug from your grandma. So, let’s roll up our sleeves, dust off our aprons, and dive into this classic recipe that you can whip up for any occasion—trust me, your taste buds will thank you!
A Slice of My Story
Growing up in the South, I was blessed with an abundance of fresh produce, especially during the summertime. My grandmother had a garden that would make any green-thumb envious, overflowing with juicy tomatoes, fragrant basil, and vibrant peppers. One of my fondest memories is helping her pick tomatoes, our hands stained red from the sun-ripened fruit. I can still hear her voice sharing tips on how to pick the perfect tomato—“It’s all in the smell, Beau! You want that sweet aroma!”
After a day in the garden, we would gather in the kitchen, where she would start creating her famous tomato pie—always a hit at our family gatherings. The blend of creamy, cheesy goodness and the tangy sweetness of tomatoes was simply irresistible. What I didn’t realize back then was that those moments weren’t just about cooking; they were about building traditions, laughter, and love—all wrapped up in a flaky crust. Now, every time I make Southern tomato pie, I’m transported back to those blissful afternoons, and I can sense her presence in every bite.
Ingredients
Let’s gather our ingredients and get ready to make some magic happen! Here’s what you’ll need for my Old-Fashioned Southern Tomato Pie:
-
1 pie crust: A flaky, buttery crust holds everything together. You can use store-bought for convenience or whip up a homemade crust if you’re feeling adventurous. If you’re in a rush, a puff pastry will also work well!
-
2 cups garden tomatoes, sliced: Fresh, ripe tomatoes are essential here. Look for heirloom varieties or vine-ripened tomatoes for the best flavor. If you can’t get fresh tomatoes, don’t hesitate to use canned fire-roasted tomatoes—just be sure to drain them well.
-
1 cup sharp cheddar cheese, shredded: This cheese adds a wonderful sharpness to the pie. Feel free to swap with your favorite cheese, like mozzarella or pepper jack, for a twist!
-
1/2 cup mayonnaise: I swear by Duke’s mayonnaise for that perfect creamy texture. If you’re looking for a healthier option, greek yogurt works just as well and adds a nice tang.
-
1/4 cup fresh basil, chopped: Fresh basil brings a burst of flavor reminiscent of summer days. If basil isn’t available, try using fresh oregano or even a sprinkle of dried herbs.
-
1/2 teaspoon salt: This enhances the flavors, bringing everything together harmoniously.
-
1/4 teaspoon black pepper: A dash of black pepper adds an extra kick. Feel free to adjust to your taste.
-
1 teaspoon optional hot sauce: For those who like a little heat, add your favorite hot sauce for a zesty twist!
Now that we have our ingredients ready, we can dive into the cooking process.
Step-by-Step Instructions
Step 1: Preheat Your Oven
Begin by preheating your oven to 350°F (175°C). This way, as soon as our pie is assembled, it’s ready to go right into the setting heat.
Step 2: Prepare the Pie Crust
If using a store-bought pie crust, simply place it in a 9-inch pie dish. For homemade, roll out the dough and fit it into the dish. Don’t forget to prick the bottom with a fork to prevent bubbling, and you can even blind bake it for a few minutes if you want a crispier bottom.
Step 3: Layer Those Tomatoes
Next up, slice your garden tomatoes into thick rounds. Lay half of them in an even layer across the bottom of your pie crust. Sprinkle a pinch of salt and pepper on top. Quick tip: Let the tomatoes sit for about 10 minutes to release some of their moisture, or else you might end up with a soggy pie!
Step 4: Cheese It Up!
Now, it’s time to layer in that cheesy goodness. Sprinkle half of your shredded sharp cheddar cheese over the tomatoes. By adding cheese early on, you’re creating a barrier that helps soak up any extra moisture.
Step 5: Add the Creamy Layer
In a bowl, mix together the mayonnaise, chopped basil, and hot sauce (if using) until smooth. Spread this divine mixture over the cheese layer, ensuring it reaches the edges of the crust—this will create a lovely creamy topping.
Step 6: Finish Layering
Now, repeat! Lay the remaining tomato slices on top of the mayo mixture, giving your pie a beautiful rustic look. Finish with the rest of your cheddar cheese, allowing it to melt into a glorious crusty top.
Step 7: Bake to Perfection
Pop your pie into the preheated oven and bake for about 30–35 minutes, or until it’s golden brown and bubbly. The aroma that fills your kitchen will make you feel like a superstar chef! Keep an eye on it, as ovens can vary.
Step 8: Let It Rest
Once your pie is out of the oven, let it rest for about 10 minutes before slicing. This allows the layers to set a bit and makes for cleaner slices—a pro chef tip!
Serving Suggestions
Now that your Old-Fashioned Southern Tomato Pie is ready, it’s time to serve it up in style! For that picture-perfect presentation, slice the pie into wedges and serve it warm or at room temperature. For the ultimate experience, garnish with a sprinkle of fresh basil or a drizzle of balsamic reduction for a touch of flair. Pair it alongside a crisp green salad or grilled vegetables, and you’ve got a meal that’s sure to impress!
Want to elevate your serving game? Consider serving the pie in individual ramekins for a fun twist. This not only makes for an adorable presentation but also allows for easy portion control—a win-win!
Recipe Variations
Want to shake things up a bit? Here are a few creative twists to customize your tomato pie:
-
Bacon Lover’s Delight: Add a layer of crispy, crumbled bacon for that smoky goodness.
-
Mexican Flair: Incorporate diced jalapeños and change up the cheese to a blend of Monterey Jack and cheddar for a spicy kick.
-
Herbed Up: Mix in other fresh herbs like thyme or rosemary with the basil for a fragrant, garden-fresh flavor.
-
Veggie Medley: Add in sautéed onions, bell peppers, or zucchini for an extra boost of flavor and nutrition.
-
Dairy-Free Option: Swap out the cheese for a dairy-free version and use a plant-based mayo for a tasty vegan option!
Chef’s Notes
This recipe holds so much nostalgia, and over the years, I’ve had fun experimenting with it. A few years ago, while visiting a farmers’ market, I stumbled upon heirloom tomatoes in a rainbow of colors—red, yellow, and even purple! I knew I had to bring them home and create a colorful rendition of my beloved tomato pie. The result was a stunning blending of flavors!
These little moments remind me that cooking is always evolving, and there’s no right or wrong in the kitchen—just your own delicious twist.
FAQs and Troubleshooting
-
Why is my tomato pie watery?
- Too much moisture can come from the tomatoes, especially if they’re not drained or if they’re overripe. To prevent this, line the bottom of your crust with breadcrumbs or let the tomato slices drain on paper towels for a few minutes before layering.
-
Can I make this ahead of time?
- Yes! You can assemble the pie a day ahead and keep it in the fridge. Just pop it in the oven when you’re ready to enjoy!
-
What can I serve with tomato pie?
- Tomato pie pairs wonderfully with a green salad, grilled corn, or even a side of coleslaw. It’s also delightful with a glass of chilled white wine—just saying!
-
Can I freeze leftover pie?
- Absolutely! Just wrap it tightly in plastic wrap and then foil, and it can last in the freezer for about 2–3 months. Reheat in the oven to get that crust crispy again.
Nutritional Info
While I believe in enjoying food first and foremost, here’s a quick glance at the nutritional aspect of this delicious dish (per slice based on 8 slices):
- Calories: 300
- Fat: 20g
- Carbohydrates: 25g
- Protein: 8g
- Fiber: 2g
Of course, these numbers can vary based on ingredient swaps and portion sizes, but remember that it’s all about balance. Enjoy your slice (or two) guilt-free!
Final Thoughts
And there you have it, my friends! Old-Fashioned Southern Tomato Pie—simple, delicious, and oh-so-comforting. Cooking should always bring joy, and I hope this recipe brings a little slice of happiness into your kitchen as it has mine. So don’t be shy—experiment and add your own flair, just as my grandmother taught me!
Whether you’re sharing this with loved ones or indulging solo (no judgment here!), each bite should remind you of warm summer days and cherished memories. So, grab your fork, dig in, and get ready to savor every last delicious crumb!
Until next time, keep that spirit of joy alive in your kitchen, and happy cooking!
Print
Old-Fashioned Southern Tomato Pie
- Total Time: 50 minutes
- Yield: 8 servings 1x
- Diet: Vegetarian
Description
A nostalgic comfort food recipe featuring fresh tomatoes, cheese, and creamy mayonnaise in a flaky pie crust.
Ingredients
- 1 pie crust (store-bought or homemade)
- 2 cups garden tomatoes, sliced
- 1 cup sharp cheddar cheese, shredded
- 1/2 cup mayonnaise
- 1/4 cup fresh basil, chopped
- 1/2 teaspoon salt
- 1/4 teaspoon black pepper
- 1 teaspoon optional hot sauce
Instructions
- Preheat your oven to 350°F (175°C).
- Prepare the pie crust in a 9-inch pie dish.
- Layer half of the sliced tomatoes in the crust, seasoning with salt and pepper.
- Sprinkle half of the shredded cheddar cheese over the tomatoes.
- Mix mayonnaise, chopped basil, and hot sauce in a bowl, then spread this mixture over the cheese layer.
- Repeat the layering with the remaining tomato slices and top with the remaining cheese.
- Bake for about 30-35 minutes, until golden brown and bubbly.
- Let it rest for 10 minutes before slicing.
Notes
For a crispy bottom, prick the crust with a fork and consider blind baking for a few minutes before adding the filling.
- Prep Time: 15 minutes
- Cook Time: 35 minutes
- Category: Main Course
- Method: Baking
- Cuisine: Southern
Nutrition
- Serving Size: 1 slice
- Calories: 300
- Sugar: 4g
- Sodium: 500mg
- Fat: 20g
- Saturated Fat: 6g
- Unsaturated Fat: 12g
- Trans Fat: 0g
- Carbohydrates: 25g
- Fiber: 2g
- Protein: 8g
- Cholesterol: 20mg
Keywords: tomato pie, Southern recipes, comfort food

One-Pan Bacon Onion Tomato Pie: Weeknight Comfort Dinner
Discovering Comfort: Bacon Onion Tomato Pie
Hey there, fellow foodies! Let me tell you, there’s nothing quite like the aroma of bacon sizzling in the pan as it mingles with sweet, caramelized onions under the warm glow of your kitchen lights. If you’ve never had the joy of creating—or indulging in—a Bacon Onion Tomato Pie, you’re in for a treat today. This dish, a delightful mix of savory and slightly sweet, embodies everything I love about comfort food; it’s a warm hug in pie form!
Imagine this: You arrive home after a long day, and the delightful smell of bacon fills every corner of your house. You can’t help but feel a sense of joy wash over you. That’s what this Bacon Onion Tomato Pie is all about. It’s comforting, it’s satisfying, and it’s downright delicious. That’s why I started Feastical: to help you find those little pockets of happiness through food. So wash your hands, grab your favorite apron, and let’s dive into making this flavor-packed treasure!
A Slice of Nostalgia: My Kitchen Memory
Let me take you back to a sun-drenched afternoon in my grandmother’s kitchen. The door was propped open with a wooden block, and the scent of freshly baked pies floated through the air. One of my grandmother’s signature dishes was a savory pie similar to what we’re making today—a Bacon Onion Tomato Pie that had everyone coming back for seconds.
She had a knack for turning simple ingredients into something extraordinary! I remember her expertly tossing together leafy greens, juicy tomatoes, and crispy bacon, laughing while she said, “Good food is like good friends; it only gets better as you share it.” Those moments ignited a passion in me that’s blossomed into my love for cooking and feeding others. And while I wish I could replicate her magic exactly, I’ve added my own flair to her original recipe, bringing it back to life while creating new memories in my cozy kitchen.
Ingredients You’ll Need
Now, let’s gather our ingredients to kick off this delicious journey! Here’s what you’ll need for our Bacon Onion Tomato Pie:
-
1 refrigerated pie crust (9-inch)
Perfect for saving time! But feel free to make a homemade crust if you’re up for it. It adds a personal touch. -
6 strips bacon (cooked and crumbled)
The star of the show! Use thick-cut bacon for extra flavor. Can’t have bacon? Try using smoked tempeh instead for a plant-based alternative. -
1 large sweet onion (thinly sliced)
Sweet onions like Vidalia or Walla Walla work wonders here. They sweeten nicely when caramelized. Yellow onions are a solid substitute if you need to use what you have. -
3 medium ripe tomatoes (sliced, about 2 cups)
Juicy and fresh! Don’t skimp on quality here. Heirloom tomatoes really bring that garden-fresh taste, but any good ripe tomato will do. -
1 cup shredded cheddar cheese
Sharp cheddar adds a nice bite. You can mix it up with aged gouda or go for a spicy pepper jack for some heat! -
½ cup shredded mozzarella cheese
This gives that melty goodness! You can substitute with provolone or fontina for an extra layer of flavor. -
½ cup mayonnaise
Sounds odd, but it creates a creamy base that holds the pie together. Greek yogurt can make for a delicious and healthier swap. -
2 tablespoons chopped fresh basil (or 1 tsp dried)
Fresh is always best for flavor. Dried basil can work in a pinch, just be sure to adjust the quantity since it’s more concentrated. -
½ teaspoon salt
Always essential! Adjust to taste based on your other ingredients. -
¼ teaspoon black pepper
A touch of heat; feel free to add more if you like!
Step-By-Step Instructions
Alright, let’s roll up our sleeves and get cooking! Here’s how to whip up this Bacon Onion Tomato Pie:
-
Preheat your oven to 375°F (190°C).
This step is crucial! You want your pie crust to crisp up perfectly, and preheating helps achieve that beautiful golden color. -
Prepare the Pie Crust:
Unroll your refrigerated pie crust and lay it gently into a 9-inch pie pan. Press it into the sides and trim any excess hanging over. If you’re feeling fancy, you can crimp the edges for a beautiful finish. Pre-bake your crust for about 10 minutes until it’s just lightly golden. This ensures it won’t get soggy later on. -
Cook the Bacon:
In a skillet over medium heat, cook the bacon until crispy. Once it’s done, transfer it to a paper towel-lined plate to drain, keeping that savory goodness! Don’t forget to reserve some drippings in the pan for the next step—yum! -
Caramelize the Onions:
In the same skillet with leftover bacon fat (don’t you love using every bit?), add the thinly sliced onions. Sauté them on low heat, stirring frequently, for about 10-15 minutes until they are a beautiful golden brown. Patience pays off here; the longer you cook them, the sweeter they become! -
Layer the Goodness:
In a mixing bowl, combine the cooked bacon, caramelized onions, sliced tomatoes, both cheeses, mayonnaise, basil, salt, and pepper. Mix until everything is coated and well combined. You’re combining layers of flavor here! -
Fill the Pie Crust:
Pour the mixture into your pre-baked pie crust, spreading it evenly. Don’t be shy—let the ingredients pile up a bit! -
Bake the Pie:
Place your pie in the preheated oven and bake for 30-35 minutes or until it’s bubbly and golden brown on top. The aroma will fill your kitchen, and trust me, you’ll have to resist the urge to dive in right away! -
Let It Cool:
Once you pull that beauty out, let it rest for about 10 minutes before slicing. This will help it set up just right.
Serving Suggestions
Now that your Bacon Onion Tomato Pie is ready, let’s talk about how to present it! Slice it into wedges and serve warm, perhaps with a side salad for a complete meal. A simple arugula salad with a drizzle of balsamic would be fantastic to cut through the richness of the pie. Garnish each slice with some extra basil or a sprinkle of parmesan for an elegant touch. And, of course, if you’re feeling extra fabulous, serve it with a glass of chilled white wine. Cheers to that!
Recipe Variations
The beauty of this dish is its versatility! Here are a few creative twists and variations to inspire you:
-
Spicy Kick: Add some diced jalapeños or a pinch of red pepper flakes for a kick that’ll tantalize your taste buds.
-
Vegetarian Delight: Replace the bacon with mushrooms or zucchini for a delicious vegetarian option that still keeps the pie hearty.
-
Southern Style: Add a dash of hot sauce or BBQ sauce to the filling for a smoky, tangy twist.
-
Herbaceous Kick: Swap out the basil for fresh rosemary or thyme. These herbs will elevate the flavor profile significantly.
-
Dairy-Free: Use vegan mayo and dairy-free cheese alternatives for a completely dairy-free version that still packs a flavor punch!
Chef’s Notes
As I’ve perfected this recipe over the years, I’ve realized that it’s not just about the ingredients but the love and laughter that goes along with it. I recall one time when I had friends over, and I decided to throw this pie together last minute. We had a blast, with one friend getting a bit too eager with the spices! Let’s just say there was fire in our eyes—quite literally, but we ended up creating one of our most memorable evenings.
FAQs and Troubleshooting
Q1: Why did my pie crust shrink?
A: This can happen if the dough isn’t chilled enough. Make sure to refrigerate your crust before rolling it out. If it happens, no worries; just crimp the edges again after baking!
Q2: My pie is watery—what did I do wrong?
A: Tomatoes can release a lot of juices. To prevent this, you can salt your tomato slices and let them sit for about 30 minutes before building your pie. This draws out excess moisture.
Q3: Can I make this pie ahead of time?
A: Absolutely! You can prep the filling and assemble the pie without baking. Cover and refrigerate, then bake it fresh just before serving.
Q4: What should I do with leftovers?
A: This pie keeps well in the fridge for 3-4 days. Simply reheat in the microwave or oven until warmed through.
Nutritional Info
While indulgent, this Bacon Onion Tomato Pie doesn’t have to be an enemy to your health goals if enjoyed in moderation! Each slice (based on 8 servings) contains approximately:
- Calories: 350
- Protein: 12g
- Fat: 26g
- Carbohydrates: 25g
- Fiber: 2g
- Sugar: 3g
As always, you can adjust the ingredients to fit your nutritional needs better.
Final Thoughts
So there you have it, folks! A scrumptiously comforting Bacon Onion Tomato Pie ready to be enjoyed with family and friends. Cooking is not just about feeding our bodies; it’s about nourishing our souls. Whether it’s a cozy evening in with a loved one or a cheerful gathering with friends, this pie is bound to add joy and flavor to every occasion. Remember, food is as much about the experiences we create around it—so gather your favorite people, dig in, and make some memories!
Until next time, happy cooking! Keep those spatulas flying and your heart full!
Print
Bacon Onion Tomato Pie
- Total Time: 50 minutes
- Yield: 8 servings 1x
- Diet: Omnivore
Description
A delightful blend of savory bacon, caramelized onions, and fresh tomatoes, all baked in a crispy pie crust for a comforting meal.
Ingredients
- 1 refrigerated pie crust (9-inch)
- 6 strips bacon (cooked and crumbled)
- 1 large sweet onion (thinly sliced)
- 3 medium ripe tomatoes (sliced, about 2 cups)
- 1 cup shredded cheddar cheese
- ½ cup shredded mozzarella cheese
- ½ cup mayonnaise
- 2 tablespoons chopped fresh basil (or 1 tsp dried)
- ½ teaspoon salt
- ¼ teaspoon black pepper
Instructions
- Preheat your oven to 375°F (190°C).
- Prepare the Pie Crust: Unroll your refrigerated pie crust and lay it gently into a 9-inch pie pan. Pre-bake for about 10 minutes.
- Cook the Bacon: In a skillet over medium heat, cook the bacon until crispy. Reserve some drippings.
- Caramelize the Onions: Sauté thinly sliced onions in the same skillet with bacon fat for about 10-15 minutes.
- Layer the Goodness: In a bowl, combine bacon, onions, tomatoes, cheeses, mayonnaise, basil, salt, and pepper. Mix well.
- Fill the Pie Crust: Pour the mixture into your pre-baked pie crust, spreading it evenly.
- Bake the Pie: Place in the oven and bake for 30-35 minutes until bubbly and golden brown.
- Let It Cool: Allow to rest for about 10 minutes before slicing.
Notes
Serve warm with a side salad or garnish with fresh basil and parmesan.
- Prep Time: 15 minutes
- Cook Time: 35 minutes
- Category: Main Course
- Method: Baking
- Cuisine: American
Nutrition
- Serving Size: 1 slice
- Calories: 350
- Sugar: 3g
- Sodium: 600mg
- Fat: 26g
- Saturated Fat: 9g
- Unsaturated Fat: 15g
- Trans Fat: 0g
- Carbohydrates: 25g
- Fiber: 2g
- Protein: 12g
- Cholesterol: 30mg
Keywords: bacon pie, tomato pie, comfort food, savory pie, easy recipe

Minute Banana Cream Cheese Cobbler: Quick Comfort Dessert
Banana Cream Cheese Cobbler: A Recipe That’s a Slice of Sunshine
Hey there, food lovers! Beau Collier here, and today we’re diving into a comforting dessert that’s sure to warm your heart and tickle your taste buds—Banana Cream Cheese Cobbler! Sounds intriguing, right? If the very thought of juicy bananas nestled in a creamy, dreamy custard with a buttery cobbler crust makes you smile, then you’ve just stumbled onto a delicious treasure.
You know, cooking is about more than just the food; it’s about the memories we create in the kitchen and the people we get to share our culinary creations with. When I first whipped up this delightful cobbler, I was reminded of my grandmother’s cozy kitchen, where she’d serve up her famous banana pudding after family dinners. That sheer joy of sharing something so delicious and nostalgic is why I want to bring this recipe to you today.
So grab your favorite apron, roll up those sleeves, and let’s get baking together! This cobbler is not just a dish—it’s a journey down memory lane wrapped in flavor. Ready? Let’s do this!
A Sweet Memory
Growing up, my home was always filled with the luscious scent of baked goods. My grandmother, a self-taught dessert connoisseur, had this magical ability to transform simple, everyday ingredients into extravagant desserts that had everyone begging for seconds. One of her signature dishes was a classic banana pudding, layered high with Nilla wafers, fresh whipped cream, and, of course, the beloved bananas.
I remember the first time I tried to make her banana pudding. I was probably ten, with flour in my hair and a spatula that seemed bigger than my little hands. But the pride I felt when I presented my creation to my family was palpable! They loved it—well, after they stopped laughing at my flour-covered face, that is.
Years later, as I experimented with combining traditional flavors into new creations, I wanted to capture that same nostalgia but with a twist. That’s when the idea of Banana Cream Cheese Cobbler was born. It’s a heartfelt tribute to my grandmother, celebrating the unbeatable combination of bananas and cream cheese in a whole new light.
Ingredients
Let’s get down to the nitty-gritty of what you’ll need for this delicious cobbler! Here’s a complete list of ingredients:
-
4 ripe bananas, sliced: The riper, the better! Overripe bananas bring out that lovely sweetness and rich flavor. Can’t find ripe ones? Try leaving them in a paper bag for a day or two, or bake unpeeled bananas at 300°F (150°C) for 15-20 minutes until they’re soft and caramelized.
-
8 oz cream cheese, softened: This creamy delight adds richness and texture. If you’re dairy-free, try a vegan cream cheese alternative like cashew or tofu-based spreads.
-
1 cup all-purpose flour: The backbone of our cobbler—gluten-free flour like almond or oat can work in a pinch, but be aware that the texture will change.
-
1 cup granulated sugar: Just regular white sugar gives the best sweetness hit. Brown sugar can add a deeper caramel flavor, so feel free to swap!
-
½ cup unsalted butter, melted: The butter brings in that lovely fat flavor. You could also use coconut oil for a light coconut twist.
-
1 cup milk: Whole milk is best for that creamy custard texture, but you can also use almond milk or oat milk for a lighter alternative.
-
2 large eggs: The eggs provide the structure—flax eggs or applesauce can do the trick if you’re looking for an eggless recipe.
-
1 tablespoon baking powder: Our leavening agent that makes the cobbler rise beautifully.
-
1 teaspoon vanilla extract: This little splash of flavor is a must! For a twist, use almond extract instead for a nutty profile.
-
½ teaspoon salt: A pinch of salt balances out the sweetness; don’t skip it!
-
½ teaspoon ground cinnamon: This will make everything smell and taste like a cozy hug.
-
Powdered sugar, for dusting (optional): A light dusting of powdered sugar gives a finishing touch that elevates your cobbler—perfect for those Instagram-worthy shots!
Step-by-Step Instructions
Alright, let’s get that oven preheated to 350°F (175°C) and set the stage for baking success. Follow my step-by-step guide for making this scrumptious Banana Cream Cheese Cobbler:
-
Prepare Your Dish: Lightly grease a 9×13-inch baking dish with non-stick spray or butter. This ensures that our glorious cobbler comes out without a hitch and lets every bite shine.
-
Mix the Cream Cheese Layer: In a mixing bowl, whisk together the softened cream cheese, half of the granulated sugar (½ cup), and the vanilla extract until smooth and creamy. If you have an electric mixer, now’s the time to use it! This creates a tender, luscious layer that will be the star of your cobbler.
-
Beat the Eggs: In a separate bowl, beat the eggs until fluffy. Then, slowly add the remaining sugar (½ cup) and continue mixing until combined. You want to incorporate a bit of air here for a light texture.
-
Combine Wet Ingredients: Gradually add the melted butter and milk to the egg mixture, stirring gently. I always say to take your time with this step. It’s all about building layers of flavor!
-
Mix the Dry Ingredients: In another bowl, whisk together the flour, baking powder, salt, and ground cinnamon. This is where you bring in the cozy, comforting vibes. Slowly integrate the dry mix into the wet mixture until just combined, but don’t overmix—you want it to be soft and fluffy!
-
Add the Bananas: Gently fold in those luscious banana slices. You want to distribute them evenly without bruising them too much. This caramelizes during baking, creating pockets of sweetness throughout the cobbler.
-
Assemble: Pour the batter into the greased baking dish, ensuring it’s spread evenly. Then dollop spoonfuls of the cream cheese mixture over the batter. Use a knife or toothpick to swirl them nice and gently; this adds a beautiful marbled effect.
-
Bake: Pop your masterpiece into the preheated oven and bake for about 35-40 minutes, or until a toothpick inserted in the center comes out clean. The top should be golden brown, and the aroma? Well, it’ll make your whole kitchen smell like heaven.
-
Cool and Dust: Once out of the oven, let it cool slightly before dusting with powdered sugar, if using. Trust me, this added touch will make your banana cobbler look like something straight out of a bakery!
Serving Suggestions
Now that you’ve got this beautiful Banana Cream Cheese Cobbler proudly sitting on your counter, it’s time to serve! Here are a few ideas to elevate the dessert for your friends and family:
-
Serve Warm: Cut into generous squares and dish it up warm. The cream cheese layer will still be gooey and sumptuous.
-
Top it Off: Consider serving a scoop of vanilla ice cream or a dollop of whipped cream on top for an indulgent treat. The cold cream balances the warm cobbler perfectly.
-
Garnish: Add fresh banana slices or a sprinkle of cinnamon on top for an eye-catching finish.
-
Personal Touch: Drizzle a bit of caramel sauce over the top for that extra flair. Who doesn’t love a bit of indulgence?
Recipe Variations
Feeling creative? Here are a few fun twists and variations to try:
-
Nutty Addition: Add a cup of chopped pecans or walnuts in with the bananas for a crunchy texture contrast.
-
Chocolate Lovers: Incorporate half a cup of chocolate chips into the batter for a decadent chocolate-banana combo.
-
Tropical Twist: Mix in some shredded coconut or chopped pineapple for a tropical flavor journey.
-
Spiced Up: Add a dash of nutmeg along with the cinnamon for a spicier backdrop that complements the bananas beautifully.
-
Vegan Version: Substitute eggs with flaxseed meal mixed with water (1 tablespoon flaxseed meal + 2.5 tablespoons water = 1 egg) and use a non-dairy cream cheese option. Use almond or coconut milk, and you’re in business!
Chef’s Notes
You know, this Banana Cream Cheese Cobbler has quite a journey. It started as an afternoon experiment, and I honestly had no idea it would become such a family favorite! My niece, who claims to "not like bananas," begs for seconds every time I make it. I’ve learned to keep my baking skills sharp, especially with little critics around. It truly brings a smile to my face when I see others enjoying something I created from scratch.
In fact, the beauty of this recipe is how adaptable it is! Each time I’ve made it, I tweak little things here and there. Sometimes I’ll add a pinch of nutmeg for warmth, other times I’ll play around with the types of bananas (the more spotted, the better). It’s all part of my cooking philosophy—get creative, have fun, and don’t be afraid to experiment!
FAQs and Troubleshooting
Have questions? Don’t worry; I’ve got your back! Here are some common reader questions and potential mistakes:
-
What if my cobbler is too dense?
This can happen if you overmix the batter. Gentle folding is key to keep that lovely airy texture. Remember, we want fluffy, not brick-like! -
Can I make this ahead of time?
Absolutely! You can prepare the batter and cream cheese mixture separately, refrigerate them, and then bake when you’re ready to serve. -
What if my bananas are under-ripe?
Aim for ripe bananas, as they bring out sweetness and flavor. If you’re in a pinch, you can still use them, but the cobbler will taste less sweet. Maybe add a tad more sugar to balance it out! -
How do I store leftovers?
If you have any leftovers (which I doubt!), keep them in an airtight container in the refrigerator for up to 3-4 days. Reheat in the microwave or oven before serving.
Nutritional Info
While I believe in enjoying good food, being mindful can be part of the joy too! Here’s a general nutritional breakdown per serving (makes about 12 servings):
- Calories: Approx. 220
- Fat: 10g
- Carbohydrates: 30g
- Fiber: 1g
- Sugar: 10g
- Protein: 3g
Of course, this will vary based on swaps and portion sizes! Remember to enjoy it in moderation, savoring each delightful bite.
Final Thoughts
As we wrap up this delicious journey into the world of Banana Cream Cheese Cobbler, I hope you’re feeling inspired to dive into the kitchen and create something beautiful. More than just a recipe, this cobbler brings the warmth of home and the joy of sharing togetherness. It’s about creating memories and indulging in the simple yet profound pleasures of life.
So, why not gather your loved ones for a cozy dessert night? Bake up this cobbler and let the sweet aroma fill your home. As you slice into that golden crust and reveal the luscious banana and cream cheese layer, you’ll be able to relive my grandmother’s kitchen with a fresh twist of your own.
Until next time, happy baking, and remember—food is better when shared! Let me know how your baking adventure goes in the comments below, and keep spreading the love with every delicious bite. Bon appétit! 🥧
Print
Banana Cream Cheese Cobbler
- Total Time: 55 minutes
- Yield: 12 servings 1x
- Diet: Vegetarian
Description
A comforting dessert that features juicy bananas in a creamy custard with a buttery cobbler crust, inspired by nostalgic flavors of banana pudding.
Ingredients
- 4 ripe bananas, sliced
- 8 oz cream cheese, softened
- 1 cup all-purpose flour
- 1 cup granulated sugar
- ½ cup unsalted butter, melted
- 1 cup milk
- 2 large eggs
- 1 tablespoon baking powder
- 1 teaspoon vanilla extract
- ½ teaspoon salt
- ½ teaspoon ground cinnamon
- Powdered sugar, for dusting (optional)
Instructions
- Preheat your oven to 350°F (175°C).
- Prepare a 9×13-inch baking dish by greasing it lightly.
- Mix the cream cheese layer by whisking together cream cheese, half of the sugar, and vanilla extract until smooth.
- Beat the eggs until fluffy, then mix in the remaining sugar.
- Combine the melted butter and milk with the egg mixture, stirring gently.
- Mix the dry ingredients in another bowl, then gradually incorporate into the wet mixture.
- Add the banana slices and fold gently.
- Assemble by pouring batter into the baking dish and swirling dollops of the cream cheese mixture on top.
- Bake for about 35-40 minutes until golden brown and a toothpick comes out clean.
- Cool slightly and dust with powdered sugar before serving.
Notes
Serve warm with vanilla ice cream or whipped cream for an indulgent treat.
- Prep Time: 15 minutes
- Cook Time: 40 minutes
- Category: Dessert
- Method: Baking
- Cuisine: American
Nutrition
- Serving Size: 1 serving
- Calories: 220
- Sugar: 10g
- Sodium: 200mg
- Fat: 10g
- Saturated Fat: 5g
- Unsaturated Fat: 4g
- Trans Fat: 0g
- Carbohydrates: 30g
- Fiber: 1g
- Protein: 3g
- Cholesterol: 50mg
Keywords: banana cobbler, dessert, comfort food, baking, family recipe
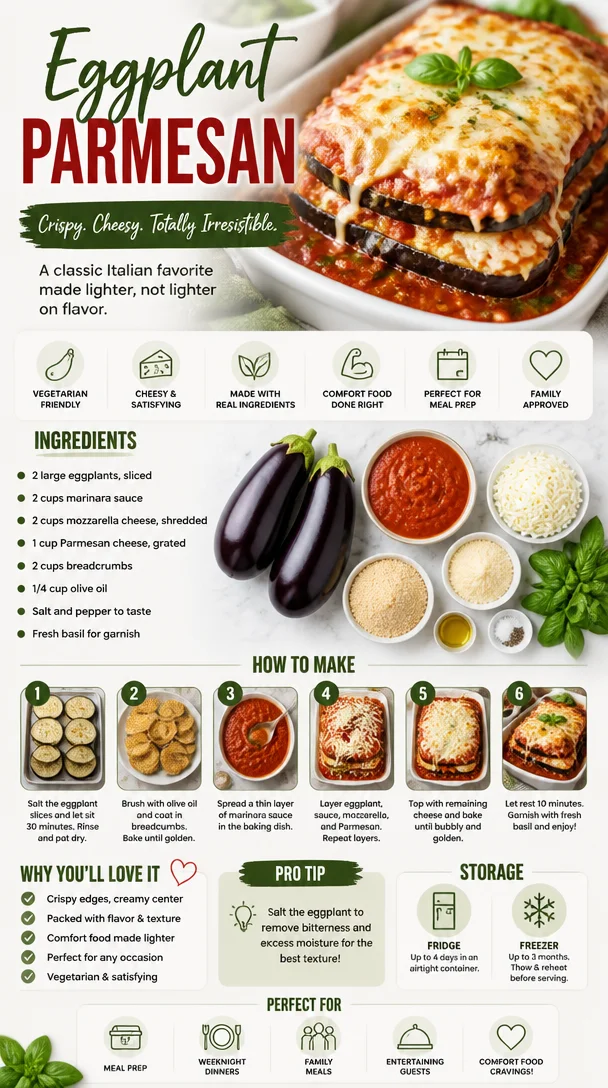
Eggplant Parmesan
Create a Cozy Kitchen Aroma with Eggplant Parmesan: A Slice of Happiness
Hey there, food friends! Welcome back to Feastical, where we whip up hearty masterpieces with love, laughter, and a dash of seasoning! Today, we’re diving into a classic that warms the heart and feeds the soul: Eggplant Parmesan. Yes, you heard it right! This dish is not just a wonderful vegetarian alternative to traditional parmesan; it’s a whole experience.
So, pull up a chair, roll up your sleeves, and let’s create something together that showcases the beauty of simplicity and flavor!
A Slice of Nostalgia
Growing up in my grandmother’s kitchen, I learned the magic of food as an emotional connector. Nothing screamed family love more than her homemade Eggplant Parmesan on Sunday nights. The delicious aroma floated through the air as we gathered around the table, laughter echoing off the walls. I can still picture the way she lovingly layered each slice of eggplant, sauce, and cheese while sharing stories of her childhood in Italy.
One particular memory stands out: I was about ten years old, desperate to help in the kitchen. I was given the task of sprinkling the breadcrumbs on top. “Just a sprinkle, sweetheart,” she’d say with a chuckle, but with each sprinkle, I would practically shower the dish in breadcrumbs. My reckless abandon made us both giggle, and in my heart, I felt like a real chef.
After what felt like an eternity of baking, we finally dug in. The cheesy, melty goodness was like a warm hug that wrapped around me, creating an everlasting association between eggplant Parmesan and love. It’s amazing how a single dish can transport you back in time and fill you with nostalgia—often the best ingredient of all!
Ingredients to Gather
Ready to roll? Here’s what you’ll need to make this divine Eggplant Parmesan:
-
2 large eggplants, sliced
The star of the show! Look for firm and glossy eggplants. If they’re a bit wrinkly, they’re past their prime. Roasting helps to enhance their flavor. If you’re looking for a lighter version, you can use zucchini instead. -
2 cups marinara sauce
A good marinara is essential! You can certainly use store-bought, but homemade is the way to go if you have time. If you want a twist, a spicy arrabbiata sauce can bring some heat! -
2 cups mozzarella cheese, shredded
This cheese melts beautifully! For a deep, sophisticated flavor, try fresh mozzarella. Lots of stores offer pre-shredded options, but be wary of the anti-caking agents used. -
1 cup Parmesan cheese, grated
Aged Parmesan packs a punch! This cheese adds a salty depth that balances out the richness of the dish. If unavailable, Pecorino Romano can be a lovely substitute for a sharper flavor. -
2 cups breadcrumbs
Use plain or seasoned breadcrumbs to create that delightful crunch. If you want to ditch the gluten, gluten-free breadcrumbs or crushed nuts are great alternatives! -
1/4 cup olive oil
This beaut will help in roasting the eggplants and add a lovely flavor to the dish. You could also use avocado oil for a different taste profile. -
Salt and pepper to taste
These are the heroes of seasoning! Always taste as you go along! -
Fresh basil for garnish
This is the finishing touch to your dish. It not only looks delightful but adds a refreshing aroma.
Step-by-Step Cooking Instructions
Let’s get cooking! Follow these steps to create your delicious Eggplant Parmesan:
-
Prepare the Eggplant
Start by slicing your eggplants into 1/4-inch rounds. Sprinkle them liberally with salt to draw out moisture and bitterness. Let them sit for about 30 minutes. Rinse and pat dry afterward, and you’ll find they’re tender and ready to devour! -
Preheat your Oven
Preheat your oven to 375°F (190°C). This is essential for that perfect bake! While waiting, this is a good time to grab your favorite kitchen tunes and dance a little! -
Roast the Eggplant
On a baking sheet, spread your eggplant rounds out evenly. Drizzle with olive oil, then bake for about 25-30 minutes, turning halfway through. You’re looking for a nice golden color and a tender texture. Pro tip: if you want extra flavor, sprinkle some Italian herbs on top before roasting! -
Layer it Up
Get ready to build your culinary masterpiece. Start with a generous layer of marinara in a baking dish, followed by a layer of roasted eggplant. Sprinkle with a layer of mozzarella and a sprinkle of Parmesan. Repeat until all ingredients are used, finishing with a light sprinkle of breadcrumbs, mozzarella, and Parmesan on top. For an extra crunch, you can add a drizzle of olive oil over the breadcrumbs! -
The Magic of Baking
Cover the baking dish with aluminum foil and bake for 30 minutes. Then remove the foil and bake for another 15-20 minutes until the cheese is bubbly and golden brown. -
Let it Rest
Once out of the oven, allow your dish to rest for about 10-15 minutes. This helps the layers set and makes for easier servings. It’s tough to wait, but trust me on this one!
Serving Suggestions
When it comes to serving up your Eggplant Parmesan, presentation is key! Use a sharp knife for slicing, and serve each piece on a warm plate. Drizzle a touch of extra marinara around the base for a pop of color, then add a generous sprinkle of grated Parmesan and a few fresh basil leaves for that beautiful gourmet finish.
Feeling extra fancy? Pair it with a side of garlic bread, a fresh salad with tangy vinaigrette, or some lightly sautéed greens to pack in those nutrients. You can’t go wrong with a glass of red wine, either!
Recipe Variations
Now for the fun part—let’s mix it up a little! Here are some delicious variations to elevate this classic recipe:
-
Spinach and Ricotta Layer: For a twist, mix some cooked spinach and ricotta cheese for a creamy layer between the eggplant layers.
-
Spicy Eggplant Parmesan: Spruce up the marinara with crushed red pepper flakes or add some sautéed jalapeños for a spicy kick.
-
Meaty Addition: If you want to make it a non-vegetarian dish, you can add cooked ground beef or sausage between the layers.
-
Herb-Infused Breadcrumbs: Mix in some fresh herbs into your breadcrumbs. Oregano, thyme, or rosemary would be excellent choices!
-
Vegan Version: Replace cheese with cashew cheese or store-bought vegan cheese along with panko breadcrumbs to keep things plant-based.
Chef’s Notes
Over the years, my Eggplant Parmesan has evolved from a family recipe to a more personalized creation inspired by many culinary influences. One funny story: I once ran out of marinara sauce and substituted with a can of diced tomatoes and some garlic, which turned out to be a fantastic accident! That’s the beauty of cooking—sometimes the little mistakes lead to delicious discoveries.
FAQs and Troubleshooting
Q: My eggplant turned out bitter; what happened?
A: If your eggplant tastes bitter, it’s likely because it wasn’t salted long enough or it wasn’t fresh. Always choose shiny, firm eggplants and salt generously before cooking.
Q: Can I make this ahead of time?
A: Absolutely! You can assemble the dish ahead of time, refrigerate it, and bake it when you’re ready. Just add a few extra minutes to the baking time.
Q: What can I do with leftovers?
A: Leftovers can be refrigerated for about 3-4 days. They also freeze beautifully! Just reheat in the oven when you’re ready to enjoy it again.
Q: Why did my cheese not melt properly?
A: Using pre-shredded cheese can sometimes lead to this. They often have anti-caking agents that prevent smooth melting. Try using fresh cheese!
Nutritional Info
Eggplant Parmesan is more than just delicious; it can be nutrient-rich! Eggplants are a great source of fiber, vitamins B1 and B6, potassium, and antioxidants. When combined with marinara sauce, mozzarella, and Parm, you’ve got a balanced meal with healthy fats, protein, and ample vitamins.
However, keep in mind that the cheese adds calories, so you may wish to adjust portions based on your dietary needs. If you’re watching calories, try reducing the amount of cheese or using lighter alternatives.
Final Thoughts
As we wrap up this Eggplant Parmesan adventure, remember that cooking is all about love, creativity, and joy. Each time you make this dish, you’re not just feeding your belly; you’re also feeding your soul. Celebrate the process, share it with friends and family, and revive those fond memories around the table!
So, what are you waiting for? Let’s get cooking and turn ordinary ingredients into something extraordinary! Dive into your kitchen—your Eggplant Parmesan awaits! Happy cooking!
PrintEggplant Parmesan
- Total Time: 85 minutes
- Yield: 4 servings 1x
- Diet: Vegetarian
Description
A classic Eggplant Parmesan recipe that warms the heart with its layers of flavorful eggplant, rich marinara, and gooey cheese.
Ingredients
- 2 large eggplants, sliced
- 2 cups marinara sauce
- 2 cups mozzarella cheese, shredded
- 1 cup Parmesan cheese, grated
- 2 cups breadcrumbs
- 1/4 cup olive oil
- Salt and pepper to taste
- Fresh basil for garnish
Instructions
- Prepare the Eggplant: Slice the eggplants into 1/4-inch rounds. Sprinkle with salt to draw out moisture, let sit for 30 minutes, then rinse and pat dry.
- Preheat your Oven: Preheat to 375°F (190°C) to ensure perfect baking.
- Roast the Eggplant: Spread eggplant rounds on a baking sheet, drizzle with olive oil, and bake for 25-30 minutes, turning halfway through.
- Layer it Up: In a baking dish, layer marinara, roasted eggplant, mozzarella, and Parmesan. Repeat the layers and finish with breadcrumbs, mozzarella, and Parmesan.
- Bake: Cover with foil and bake for 30 minutes, then remove foil and bake for another 15-20 minutes until the cheese is bubbly and golden.
- Let it Rest: Allow the dish to rest for 10-15 minutes before serving.
Notes
For a lighter version, zucchini can be used instead of eggplant. You can also add cooked ground beef or sausage for a non-vegetarian option.
- Prep Time: 30 minutes
- Cook Time: 55 minutes
- Category: Main Course
- Method: Baking
- Cuisine: Italian
Nutrition
- Serving Size: 1 serving
- Calories: 350
- Sugar: 5g
- Sodium: 400mg
- Fat: 12g
- Saturated Fat: 4g
- Unsaturated Fat: 6g
- Trans Fat: 0g
- Carbohydrates: 45g
- Fiber: 3g
- Protein: 15g
- Cholesterol: 30mg
Keywords: Eggplant Parmesan, Vegetarian, Italian Recipe, Comfort Food, Pasta Alternative
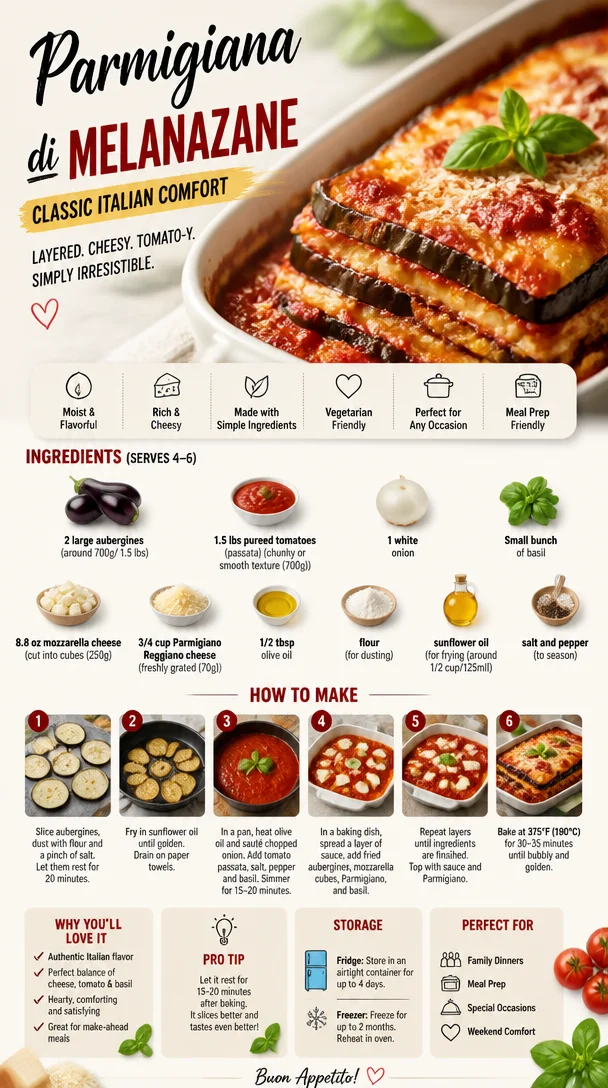
Parmigiana di Melanazane
Discovering the Deliciousness of Parmigiana di Melanzane: A Comforting Classic
Hey there, food lovers! I’m Beau Collier, your culinary companion, and I’m absolutely thrilled to dive into the world of one of Italy’s most beloved dishes—Parmigiana di Melanzane. If you’re here for a taste of something truly heartwarming, you’re in for a treat. This dish is not just a recipe; it’s a celebration of flavors, memories, and the joy that food brings to our lives.
Let’s face it: life can sometimes feel a bit hectic, and when it does, there’s nothing quite like a comforting plate of Parmigiana di Melanzane to soothe the soul. Picture layers of tender eggplant, rich tomato sauce, creamy mozzarella, and that signature sprinkle of Parmigiano Reggiano—all baked to perfection. It’s like a warm hug from your Italian grandmother, right? Whether you’re cooking for yourself after a long day, hosting friends for a cozy dinner, or simply wanting to relive cherished memories around the dinner table, this dish is your ticket to comfort.
Now, Parmigiana di Melanzane is not just a staple of Italian cuisine; it’s a canvas for creativity! You’ll find numerous variations sprinkled throughout Italy, each infused with personal touches and family secrets. So, get ready to roll up your sleeves and join me in the kitchen as we whip up this delightful recipe together!
A Nostalgic Kitchen Memory
Let me take you back to my childhood—a summer spent at my nonna’s house in the sun-kissed hills of Tuscany. The air was filled with the aroma of ripe tomatoes and fragrant basil, as she prepared her legendary Parmigiana di Melanzane. I still chuckle when I recall her meticulousness; she would proclaim it as “sacred” cooking. Her eggplants were always perfectly sliced, with just the right amount of salt to draw out the bitterness, and she’d often tell me, “Beau, cooking is all about love!”
That summer, I learned not only how to prepare this dish but also the importance of patience and teamwork. I would help her pick basil from the garden while she hummed traditional Italian songs. Each layer of eggplant, sauce, and cheese became a loving memory crafted with care.
Today, every time I make Parmigiana di Melanzane, I can’t help but feel that same warmth. It reminds me that food is not just nourishment; it’s a keeper of memories, traditions, and culture that brings us back to our roots.
Ingredients You’ll Need
Now, let’s gather our ingredients to create this mouthwatering dish. Here’s what you’ll need:
-
2 large aubergines (eggplants, around 700g/ 1.5 lbs): Choose firm, shiny eggplants. If they’re a bit bitter, salting them beforehand will help draw out excess moisture.
-
1.5 lbs pureed tomatoes (passata, chunky or smooth texture, 700g): A good quality tomato passata makes a world of difference in flavor. You can also use fresh tomatoes if you have them!
-
1 white onion: The onion adds a subtle sweetness to the sauce. Feel free to substitute with shallots or red onions for a unique twist.
-
Small bunch of basil: Fresh basil is a must for that aromatic touch. Dried basil can be used in a pinch, but you’ll miss that fresh pop of flavor.
-
8.8 oz mozzarella cheese (cut into cubes, 250g): Fresh mozzarella is ideal for its melting qualities. If you’re in a bind, pre-shredded mozzarella will work, though fresh is always best.
-
3/4 cup Parmigiano Reggiano cheese (freshly grated, 70g): This hard cheese brings depth and nuttiness. Avoid the green can—trust me!
-
1/2 tbsp olive oil: Just a splash to sauté the onion and add richness. Extra virgin olive oil is preferable for its flavor.
-
Flour (for dusting): A light dusting helps the eggplant crisp up without becoming too greasy.
-
Sunflower oil (for frying, around 1/2 cup/125ml): A neutral oil that’s ideal for frying. You could also use olive oil, though it might impart a stronger taste.
-
Salt and pepper (to season): Essential for flavoring all your ingredients. Always season to taste!
Step-by-Step Instructions
Alright! Let’s get our hands dirty and start cooking. Here’s a step-by-step guide so you can create your own Parmigiana di Melanzane masterpiece.
-
Prepare the Eggplants: Start by washing and slicing the eggplants into about ½-inch thick slices. If they’re a bit bitter, sprinkle them lightly with salt and let them sit for about 30 minutes to draw out moisture. This not only takes out bitterness but also helps in achieving that beautiful golden color when fried. After 30 minutes, rinse them under cold water and pat dry with paper towels.
-
Make the Tomato Sauce: In a large skillet, heat the olive oil over medium heat, then add the diced onion. Sauté until translucent, about 5 minutes. This is where the aroma starts to build, and your kitchen will smell heavenly. Once the onion is soft, add the pureed tomatoes. Season with salt and pepper. Let the sauce simmer for about 15–20 minutes, stirring occasionally until it thickens a bit. The flavors will meld beautifully.
-
Fry the Eggplants: While your sauce is simmering, heat the sunflower oil in a large, deep skillet over medium-high heat. Dust each slice of eggplant lightly with flour—this is key for that crispy texture! Once the oil is hot, carefully add the eggplants in batches, frying them for about 3-4 minutes on each side until golden brown. Place the fried eggplant on a plate lined with paper towels to absorb excess oil. This will help them stay crisp and not soggy.
-
Assemble the Dish: Preheat your oven to 375°F (190°C). In a baking dish, start layering your ingredients. Begin with a layer of tomato sauce at the bottom, then a layer of fried eggplant. Top with mozzarella cubes, a sprinkle of Parmigiano Reggiano, and a few basil leaves. Repeat this layering until you’ve used all the ingredients, finishing with a final layer of sauce and a generous topping of cheese. Trust me; that gooey cheesy top is what you’re living for!
-
Bake: Cover the dish with aluminum foil (to prevent excessive browning) and place it in the preheated oven for about 30 minutes. Remove the foil and bake for an additional 15–20 minutes until the top is golden and bubbly. You want that cheese to be irresistibly melted.
-
Cool and Serve: Once out of the oven, let it cool for about 10 minutes. This will help everything hold together when you cut into it. Slice, serve, and – most importantly – enjoy the fruits of your labor!
Serving Suggestions
Now that you have created this delectable dish, how do you serve it up? A few tips for the perfect presentation:
-
Plate it Simply: Serve the Parmigiana di Melanzane in the baking dish to keep it rustic and homey. You can garnish with additional fresh basil leaves for a pop of color.
-
Pair with Sides: This dish pairs beautifully with a simple arugula salad dressed with lemon and olive oil. The peppery arugula plays nicely against the richness of the eggplant.
-
Wine Pairing: A glass of Chianti or a light Pinot Grigio will complement the flavors wonderfully. Just imagine enjoying a relaxing dinner with friends, a plate of warm Parmigiana, and a glass of good wine in hand—pure bliss!
Recipe Variations
Why not switch things up? Here are some creative twists and variations to customize your Parmigiana di Melanzane:
-
Spicy Kick: Add red pepper flakes to your tomato sauce or layer in some sliced jalapeños for a spicy version.
-
Roasted Veggie Barrage: Mix in other veggies like zucchini or bell peppers for a colorful dish loaded with flavor.
-
Vegan Version: Replace cheese with vegan mozzarella and use nutritional yeast in the sauce for a cheesy flavor without dairy.
-
Herby Twist: Add some oregano or thyme into the sauce for additional depth of flavor if you’re feeling herby!
-
Baked vs. Fried: For a lighter version, roast the eggplant slices in the oven instead of frying. Toss them lightly with oil, salt, and pepper before roasting for about 25 minutes.
Chef’s Notes
Over the years, I’ve seen this dish evolve in countless ways—each version comes with its tales and trials. Once during a cooking class, I had a student accidentally grab an entire jar of dried herbs instead of salt! We ended up with a very herby version of Parmigiana that surprisingly became a crowd favorite! It taught me that sometimes kitchen blunders can lead to unexpected delights. So, embrace those moments when they happen!
FAQs and Troubleshooting
Here are some common questions or issues you might face while whipping up this delicious dish:
-
Why Is My Eggplant Soggy?
- If your eggplant ends up soggy, it’s likely due to not salting it beforehand! Salting helps to draw out moisture.
-
Can I Prepare This Ahead of Time?
- Absolutely! Assemble it up to a day in advance and keep it covered in the fridge. Just bake it fresh when ready to serve.
-
Can I Freeze Parmigiana di Melanzane?
- Yes! This dish freezes wonderfully. Just let it cool completely, wrap tightly, and freeze for up to three months. Reheat in the oven.
-
What If My Sauce Is Too Acidic?
- If you find your tomato sauce is too acidic, adding a teaspoon of sugar can help balance it out.
Nutritional Info
While this dish is best enjoyed in moderation, here’s a quick glimpse at the nutritional aspects per serving (assuming 6 servings total):
- Calories: Approximately 350
- Protein: 14g
- Fat: 21g
- Carbohydrates: 22g
- Fiber: 5g
- Sodium: 450mg
Keep in mind that these are estimates and can vary based on specific ingredients and portion sizes.
Final Thoughts
There you have it—your cozy kitchen adventure awaits with this traditional Parmigiana di Melanzane! Cooking this dish is more than just making a meal; it’s about creating memories and sharing warmth with loved ones. Next time you sit around the dinner table, let it be with plates piled high with this delightful creation.
Thanks for joining me on this culinary journey! Get ready to experience the joy each bite brings, passing it through generations and savor the comfort that food provides. Until we cook again, happy feasting, my friends!
PrintParmigiana di Melanzane
- Total Time: 80 minutes
- Yield: 6 servings 1x
- Diet: Vegetarian
Description
A comforting Italian classic featuring layers of eggplant, rich tomato sauce, and creamy cheeses baked to perfection.
Ingredients
- 2 large aubergines (eggplants, around 700g)
- 1.5 lbs pureed tomatoes (700g)
- 1 white onion
- Small bunch of basil
- 8.8 oz mozzarella cheese (250g, cut into cubes)
- 3/4 cup Parmigiano Reggiano cheese (70g, freshly grated)
- 1/2 tbsp olive oil
- Flour (for dusting)
- 1/2 cup sunflower oil (125ml, for frying)
- Salt and pepper (to season)
Instructions
- Prepare the eggplants: Wash and slice into ½-inch thick slices, sprinkle with salt, and let sit for 30 minutes to draw out moisture.
- Make the tomato sauce: Heat olive oil in a skillet, sauté the diced onion until translucent, then add pureed tomatoes and season. Simmer for 15–20 minutes.
- Fry the eggplants: Heat sunflower oil, dust eggplant slices with flour, fry until golden brown, and place on paper towels.
- Assemble the dish: Layer tomato sauce, fried eggplant, mozzarella, and Parmigiano Reggiano in a baking dish until all ingredients are used.
- Bake: Cover with aluminum foil and bake at 375°F (190°C) for 30 minutes, then remove foil and bake for an additional 15-20 minutes until golden.
- Cool and serve: Let cool for 10 minutes, slice, and enjoy!
Notes
For a lighter version, roast eggplant slices instead of frying.
- Prep Time: 30 minutes
- Cook Time: 50 minutes
- Category: Main Course
- Method: Baking
- Cuisine: Italian
Nutrition
- Serving Size: 1 serving
- Calories: 350
- Sugar: 6g
- Sodium: 450mg
- Fat: 21g
- Saturated Fat: 10g
- Unsaturated Fat: 8g
- Trans Fat: 0g
- Carbohydrates: 22g
- Fiber: 5g
- Protein: 14g
- Cholesterol: 30mg
Keywords: Italian, Comfort Food, Eggplant, Vegetarian, Bake
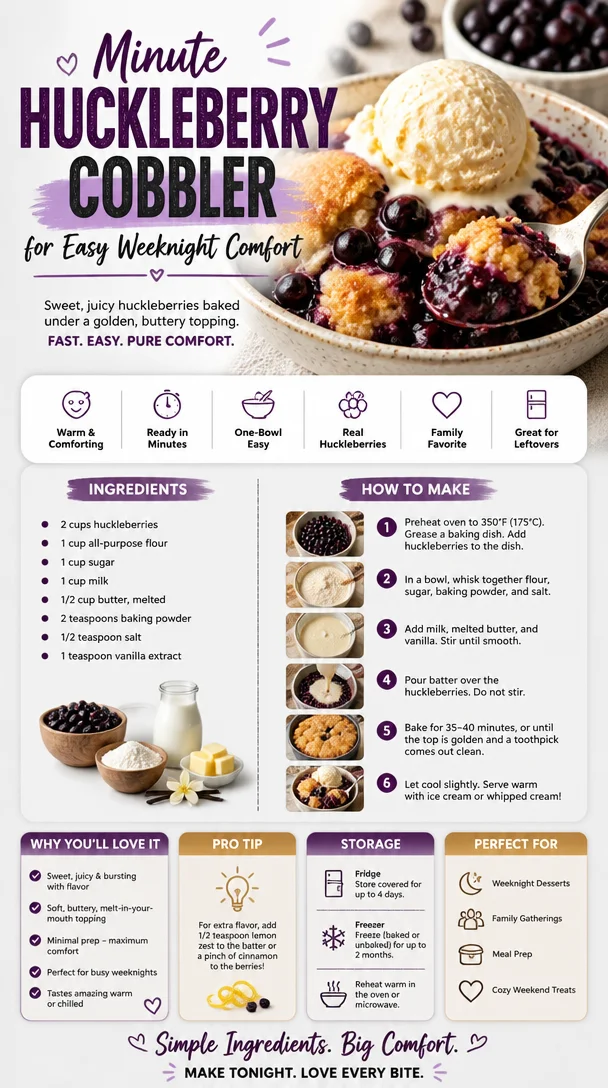
Minute Huckleberry Cobbler for Easy Weeknight Comfort
Huckleberry Cobbler: A Taste of Summer Memories
Hey there, fellow foodies! Welcome back to Feastical, where we whip up feel-good dishes that not only satisfy the palate but spark joy and nostalgia. Today, we’re diving into a classic dessert that screams summer and celebrates the wonderful huckleberry—the Huckleberry Cobbler. If you’ve never had huckleberries, you’re in for a treat. Sweet, tart, and oh-so-delicious, they transform simple ingredients into an unforgettable dessert that is both comforting and magical.
A Slice of Nostalgia: My Huckleberry Experience
Growing up, summer meant family road trips and adventures into the wild—one of my fondest memories is foraging for huckleberries with my grandma. We would hike through the dense woods, her laughter ringing out like a melody as I picked the small, juicy berries off the bushes. Each bite was a burst of sweetness followed by a mild tartness that was utterly refreshing. After a long day of berry picking, we’d head back home, arms filled with our treasure, and my grandma would whip up her famous Huckleberry Cobbler.
The smell of butter and sugar mingling with the earthiness of the huckleberries would fill the house, wrapping us all in a cozy embrace. As we gathered around the table, the cobbler would be served hot, bubbling, and golden, making our taste buds dance in delight. Those summer days were not merely about eating; they were about bonding, sharing stories, and creating a sense of family that lasted well beyond that slice of cobbler. So, are you ready to create some delicious memories? Let’s get started!
Ingredients
To make this tasty Huckleberry Cobbler, you’ll need the following ingredients:
- 2 cups huckleberries
Fresh is best, but if you can’t find huckleberries, blueberries or blackberries work great, too! - 1 cup all-purpose flour
This forms the base of the cobbler; for a gluten-free option, use almond flour or a gluten-free blend. - 1 cup sugar
A sweetener to balance the acidity of the huckleberries; you can reduce it to ¾ cup for a less sweet version. - 1 cup milk
Adds moisture; for a dairy-free option, almond milk or oat milk are excellent substitutes. - ½ cup butter, melted
This adds richness; coconut oil can be swapped in for a dairy-free option. - 2 teaspoons baking powder
Ensures the batter rises beautifully. - ½ teaspoon salt
Enhances the flavors and balances the sweetness. - 1 teaspoon vanilla extract
A flavor booster; feel free to use almond extract for a different twist.
Step-by-Step Instructions
Rolling up our sleeves? Let’s get our cobbler on!
-
Preheat the Oven
Start by preheating your oven to 350°F (175°C). This is crucial, as it helps the cobbler cook evenly and become golden on top. -
Prep the Berries
In a bowl, toss the huckleberries with a tablespoon of sugar (optional). This helps to release some of their juices and creates a lovely syrup in the cobbler. Let them sit while you prepare the batter. -
Make the Batter
In a large mixing bowl, whisk together the flour, sugar, baking powder, and salt. Create a well in the center and pour in the milk, melted butter, and vanilla extract. Mix until just combined—no one likes a tough cobbler! -
Assembly Time!
In a greased 9×13 inch baking dish, pour in the batter, spreading it out evenly. Do not fret if it looks a bit lumpy; that’s just the way cobblers roll. Next, spoon the huckleberries (and any released juice) on top of the batter. Don’t mix them in—this creates that beautiful bubbling topping! -
Bake
Place your dish in the oven and let it bake for about 35-40 minutes or until the top is golden brown and the juices are bubbling. It might be tough, but resist the urge to peek—let it do its magic! -
Cool and Serve
Once baked, remove the cobbler from the oven and let it sit for about 10 minutes (if you can wait!). This allows the juices to settle. Serve warm with a scoop of vanilla ice cream or whipped cream—heavenly!
Serving Suggestions
Plating a cobbler can be as simple or as fancy as you want! For a casual vibe, scoop out servings directly from the baking dish. However, if you’re looking to impress, try using a large spoon to serve individual portions neatly on plates. Drizzle a bit of the juices over the cobbler for an extra touch. Add a dollop of whipped cream or a generous scoop of vanilla ice cream on the side—it tastes divine and adds to the whole experience. Garnish with a few fresh huckleberries or mint leaves for that beautiful, restaurant-worthy finish!
Recipe Variations
While the classic Huckleberry Cobbler is fantastic just as it is, here are a few creative variations to shake things up:
-
Berry Medley Cobbler
Replace huckleberries with a mix of strawberries, blueberries, and raspberries for a rainbow of flavors. -
Peach-Huckleberry Cobbler
Add chopped peaches to the mix for a sweet and juicy twist. The peaches balance the tartness of the huckleberries beautifully! -
Coconut Huckleberry Cobbler
Swap out half the milk for coconut milk and sprinkle some shredded coconut on top of the batter before baking. -
Vegan Huckleberry Cobbler
Replace the milk with almond milk, the butter with coconut oil, and the egg with a flax egg for a dairy-free delight! -
Spiced Huckleberry Cobbler
Add a teaspoon of cinnamon or nutmeg to the batter for a warm, autumnal flavor twist.
Chef’s Notes
Cooking is often an adventure, an evolution, and my Huckleberry Cobbler is no different. I’ve tweaked this recipe over the years to match my taste and the ingredients available to me. What started as a simple family dessert has now become a staple at potlucks and gatherings. I love how it brings everyone together, just like those summer hikes with Grandma. Oh, and trust me when I say: do not be afraid to get creative with your huckleberries. Experimenting is half the fun!
FAQs and Troubleshooting
-
Why did my cobbler turn out soggy?
A soggy cobbler may result from too much liquid from the berries. Make sure to toss the berries with a touch of sugar as this helps to balance out the moisture! -
Can I use frozen huckleberries?
Absolutely! Frozen huckleberries can be used, but they might need a little longer to cook so expect a longer bake time. -
How do I store leftover cobbler?
Store any leftovers in an airtight container in the fridge for up to 3 days. You can reheat in the oven for a few minutes to crisp it back up. -
Can this recipe be doubled?
Yes! Just make sure to use a larger baking dish and adjust the cooking time slightly.
Nutritional Info
While comfort food isn’t always known for its health benefits, this Huckleberry Cobbler is relatively friendly compared to other desserts! Each serving is approximately 290 calories, with 12g fat, 43g carbohydrates, and 3g protein. It’s packed with antioxidants from the huckleberries, making it a tasty treat you can enjoy in moderation. Plus, when paired with fresh fruit or ice cream, the joy it brings is just unbeatable!
Final Thoughts
And there you have it—a heartwarming recipe for Huckleberry Cobbler that’s bound to fill your kitchen with delightful aromas and your hearts with joyful memories. I hope you make it your own and create beautiful moments with loved ones around the table. Whether it’s the laughter of kids, the stories of family, or simply the bliss of a delicious dessert, food is a bridge to connect us all. So gather your ingredients, embrace the messiness, and dig into this scrumptious cobbler. Until next time, happy feasting!
PrintHuckleberry Cobbler
- Total Time: 55 minutes
- Yield: 8 servings 1x
- Diet: Vegetarian
Description
A comforting and magical dessert featuring sweet and tart huckleberries, perfect for summer gatherings.
Ingredients
- 2 cups huckleberries
- 1 cup all-purpose flour
- 1 cup sugar
- 1 cup milk
- ½ cup butter, melted
- 2 teaspoons baking powder
- ½ teaspoon salt
- 1 teaspoon vanilla extract
Instructions
- Preheat the oven to 350°F (175°C).
- In a bowl, toss the huckleberries with a tablespoon of sugar (optional) and let them sit.
- Whisk together the flour, sugar, baking powder, and salt in a large mixing bowl.
- Create a well in the center and pour in the milk, melted butter, and vanilla extract. Mix until just combined.
- Pour the batter into a greased 9×13 inch baking dish and spread it evenly.
- Spoon the huckleberries on top of the batter, do not mix.
- Place the dish in the oven and bake for about 35-40 minutes, or until golden brown and bubbling.
- Remove from the oven and let it sit for about 10 minutes before serving warm.
Notes
Serve this cobbler warm with a scoop of vanilla ice cream or whipped cream for a delightful treat.
- Prep Time: 15 minutes
- Cook Time: 40 minutes
- Category: Dessert
- Method: Baking
- Cuisine: American
Nutrition
- Serving Size: 1 serving
- Calories: 290
- Sugar: 18g
- Sodium: 200mg
- Fat: 12g
- Saturated Fat: 7g
- Unsaturated Fat: 4g
- Trans Fat: 0g
- Carbohydrates: 43g
- Fiber: 3g
- Protein: 3g
- Cholesterol: 30mg
Keywords: huckleberry cobbler, summer dessert, berry dessert

One-Pot Chicken Gnocchi Soup: Olive Garden Copycat Recipe
The Cozy Comfort of Olive Garden Chicken Gnocchi Soup
Hey there, food lovers! If you’re here, it means you’re ready to dive into a bowl of pure bliss—Olive Garden Chicken Gnocchi Soup. This dish isn’t just a meal; it’s a warm hug in a bowl, a soul-soothing delight that brings memories rushing back like the aroma of home-cooked goodness. So, let’s get comfy, grab that spatula, and start stirring up some magic.
A Warm Bowl of Memories
I can still remember the first time I tasted Chicken Gnocchi Soup at Olive Garden. I was a fresh-faced college student, and dinner with friends was always a special occasion. We’d pile into the restaurant, the comforting smells wrapping around us like a cozy blanket as we ordered our usuals. But on that particular night, I ventured out of my comfort zone. I decided to try this creamy soup, and oh boy, it was a game changer!
With each spoonful, I was hit with flavors that danced across my palate—tender chicken, silky gnocchi, and vibrant veggies making for the perfect blend of heartiness and comfort! I loved how it made me feel—happy, fulfilled, and ready to take on the world (or at least get through my next exam). That moment sparked my love for cooking, inspiring me to recreate the exact magic in my own kitchen. So, here I am today, sharing this cherished recipe with you!
Ingredients You’ll Need
Let’s jump into the heart of this recipe: the ingredients. Here’s what you’ll need to create this delicious, comforting soup:
-
1 pound boneless skinless chicken breasts (cooked and shredded)
A great source of protein, pre-cooked and shredded for easy use. You can substitute rotisserie chicken for convenience! -
1 tablespoon olive oil
This adds richness and depth. If you’re out, butter can work as a substitute—just keep it classic! -
4 tablespoons butter
Ah, the magic of butter! Its creamy goodness elevates the soup. If you’re watching your dairy intake, try using vegan butter. -
1/4 cup all-purpose flour
This will help thicken our soup. For gluten-free alternatives, cornstarch can do the trick—simply mix it with a bit of water before adding it to the pot. -
1 small onion (chopped)
Onion adds a savory base flavor. Feeling adventurous? Shallots or leeks are fantastic substitutes. -
2 garlic cloves (minced)
Garlic is a flavor powerhouse! Swap in garlic powder in a pinch—1/4 teaspoon will do. -
6 cups chicken broth
A comforting base filled with flavor. Low-sodium varieties work too! Vegetable broth is a great alternative for a veggie-packed soup. -
2 cups milk
This creates the creamy texture. Use almond milk or oat milk for a dairy-free option. -
1 cup carrots (shredded)
Carrots add sweetness and color. You can use frozen shredded carrots if fresh ones aren’t available. -
2 teaspoons parsley flakes
Freshness in every bite! Feel free to substitute with thyme or basil for a different flavor profile. -
Salt and pepper for seasoning
Always essential for flavor enhancement. Adjust to your taste preferences! -
1 package (16 ounces mini potato gnocchi)
The star of the soup! If you can’t find gnocchi, consider substituting it with small pasta shapes like ditalini or orzo. -
1 cup fresh spinach (chopped)
Spinach adds nutritional value and a pop of color. Kale is a sturdy substitute, and it holds up well when cooked!
Step-by-Step Instructions to Soup Perfection
Now that we’ve gathered our ingredients, it’s time to embark on this culinary adventure! Follow these detailed steps to whip up your very own Olive Garden Chicken Gnocchi Soup:
-
Prep the Ingredients
Start by shredding your cooked chicken. This step can be done ahead of time; I often make extra chicken just for this soup! It saves time and adds an extra layer of flavor. -
Sauté the Aromatics
In a large pot, heat the olive oil over medium heat. Add the chopped onion and sauté until it becomes translucent and fragrant—about 5 minutes. Your kitchen will start smelling amazing at this point! -
Garlic Time
Stir in the minced garlic and cook for an additional minute. Remember not to overcook it; burnt garlic can ruin the flavor and we want this soup to shine! -
Make it Creamy
Now, sprinkle the flour over the onion and garlic mixture and stir constantly for about 2-3 minutes. This creates a roux that will thicken our soup. Don’t rush this step; it builds the base! -
Add the Broth and Milk
Gradually pour in the chicken broth while continuously stirring to prevent lumps. Then add the milk, and bring the mixture to a gentle simmer. This is where the magic begins to happen! -
Add the Carrots and Chicken
Toss in the shredded carrots and cooked chicken, allowing everything to meld together beautifully. Let it simmer on low for about 10-15 minutes. If you want your carrots extra tender, feel free to let it simmer a bit longer. -
Gnocchi Goes In
Add the mini potato gnocchi to the pot. They will cook quickly, so keep an eye on them! Stir gently as they settle in, and allow them to absorb all the creamy goodness—about 2-3 minutes until they float to the top. -
Flavorful Finishing Touches
Toss in the chopped spinach and parsley flakes, stirring until the spinach wilts. This adds a fresh and vibrant touch to our hearty soup. -
Season to Perfection
Give your soup a taste and add salt and pepper to your liking. Each batch is unique, so adjust these seasonings until the soup sings with flavor for you! -
Serve and Enjoy!
Your heavenly Chicken Gnocchi Soup is ready to embrace you. Ladle it into bowls, garnish with a sprinkle of fresh parsley, and serve warm with crusty bread or a side salad. Enjoy those cozy vibes!
Serving Suggestions
Presentation matters, even for comfort food! Here’s how to plate your soup for added appeal:
- Use Wide Bowls: Opt for wide, shallow bowls to showcase the soup’s vibrant colors.
- Garnish: Sprinkle with extra parsley or a drizzle of olive oil for that gourmet touch.
- Accompaniments: Serve with a slice of warm, crusty baguette or a light mixed greens salad. A sprinkle of Parmesan cheese on top doesn’t hurt either!
Recipe Variations
The beauty of this soup lies not just in its comforting nature but also in its versatility! Here are some creative variations to jazz it up:
- Creamy Mushroom Cold: Toss in sautéed mushrooms for an earthy twist.
- Spicy Kick: Add a dash of red pepper flakes for some heat—just don’t overdo it!
- Veggie-Packed Gnocchi: Add in other veggies like peas or zucchini to make it a vibrant veggie medley.
- Herbed Delight: Switch up the herbs! Thyme, rosemary, or Italian seasoning can create enticing new flavors.
- Cheesetastic: Stir in a handful of shredded cheese (like mozzarella or cheddar) just before serving for an extra cheesy experience!
Chef’s Notes
This soup has come a long way from the initial experiment in my kitchen. I remember the first time I made it; I was juggling a few pans and fretting over the ratio of chicken to gnocchi. But, with practice, I found my rhythm. I’ve even had friends suggest adding different proteins, like shrimp or sausage, and I’m here for it! Cooking should evolve as we do, bringing in new flavors and memories every time.
FAQs and Troubleshooting
Let’s tackle some of those common questions you might have:
-
Why is my soup too thick?
If you find your soup too thick, simply add a little more chicken broth or milk until it reaches your desired consistency. -
My gnocchi is mushy—what did I do wrong?
If gnocchi are overcooked, they can become mushy. Be sure to follow the cooking time closely. They should only take a few minutes in the pot! -
Can I freeze this soup?
Yes, but gnocchi can become mushy when frozen and reheated. If you want to freeze it, consider freezing the soup base without the gnocchi and adding them fresh when reheating. -
Is this soup gluten-free?
You can easily make it gluten-free by substituting the all-purpose flour with cornstarch and using gluten-free gnocchi!
Nutritional Info
Here’s a rough breakdown of the nutritional components per serving (about 1.5 cups):
- Calories: ~400
- Protein: ~30g
- Carbohydrates: ~45g
- Fat: ~15g
- Fiber: ~2g
These values may vary based on the specific brands and quantities used. No matter what, this dish is a wholesome way to enjoy a well-rounded, hearty meal.
Final Thoughts
Just like that, you’ve created a bowl of goodness that brings everyone to the table! Olive Garden Chicken Gnocchi Soup is a recipe that goes beyond just ingredients—it represents togetherness, warmth, and those unforgettable moments spent with friends and family. Whether you’re making this for a cozy night in or whipping it up for a gathering, this soup is sure to satisfy.
So, next time you find yourself feeling a little under the weather or just in need of a culinary hug, remember this recipe. Keep it simple, keep it soulful, and most importantly, keep it delicious. Happy cooking, friends!
Print
Olive Garden Chicken Gnocchi Soup
- Total Time: 45 minutes
- Yield: 4 servings 1x
- Diet: Non-Vegetarian
Description
A creamy and comforting chicken gnocchi soup that brings warmth and nostalgia in every spoonful.
Ingredients
- 1 pound boneless skinless chicken breasts (cooked and shredded)
- 1 tablespoon olive oil
- 4 tablespoons butter
- 1/4 cup all-purpose flour
- 1 small onion (chopped)
- 2 garlic cloves (minced)
- 6 cups chicken broth
- 2 cups milk
- 1 cup carrots (shredded)
- 2 teaspoons parsley flakes
- Salt and pepper for seasoning
- 1 package (16 ounces mini potato gnocchi)
- 1 cup fresh spinach (chopped)
Instructions
- Prep the ingredients by shredding your cooked chicken.
- Sauté the onion in olive oil over medium heat until translucent, about 5 minutes.
- Stir in the minced garlic, cooking for an additional minute.
- Sprinkle the flour over the mixture, stirring constantly for 2-3 minutes.
- Add the chicken broth gradually, stirring to prevent lumps, then add the milk and simmer.
- Toss in the shredded carrots and cooked chicken, simmer for 10-15 minutes.
- Add the gnocchi to the pot and cook for about 2-3 minutes until they float.
- Stir in the chopped spinach and parsley flakes until the spinach wilts.
- Season with salt and pepper to taste.
- Serve warm with garnishes and enjoy!
Notes
Consider garnishing with additional parsley or a drizzle of olive oil. Serve with bread.
- Prep Time: 15 minutes
- Cook Time: 30 minutes
- Category: Soup
- Method: Stovetop
- Cuisine: Italian
Nutrition
- Serving Size: 1.5 cups
- Calories: 400
- Sugar: 6g
- Sodium: 800mg
- Fat: 15g
- Saturated Fat: 8g
- Unsaturated Fat: 5g
- Trans Fat: 0g
- Carbohydrates: 45g
- Fiber: 2g
- Protein: 30g
- Cholesterol: 80mg
Keywords: soup, chicken, gnocchi, comfort food, creamy soup
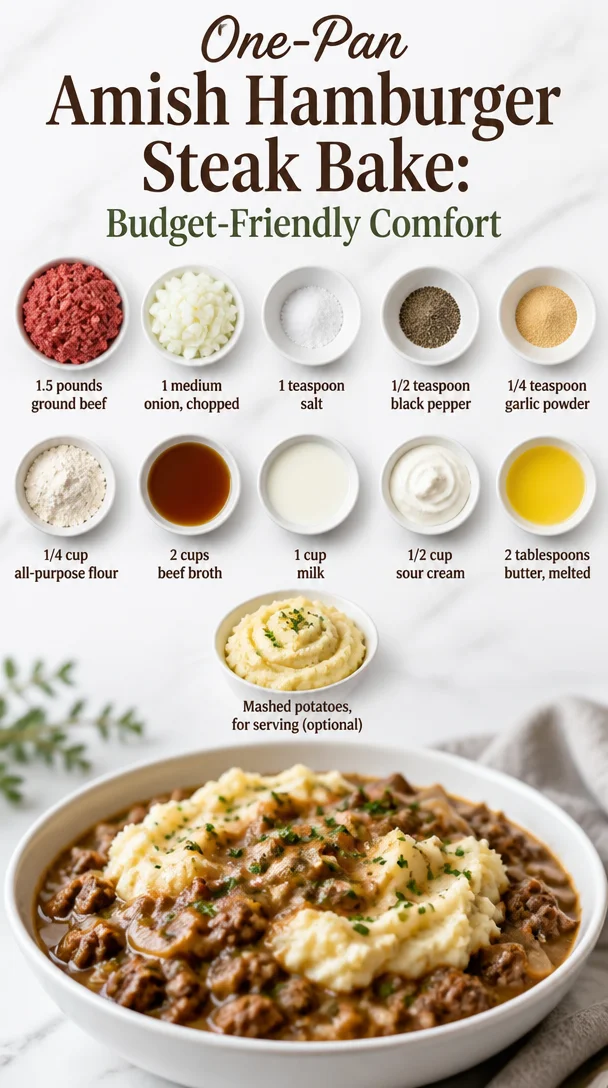
One-Pan Amish Hamburger Steak Bake: Budget-Friendly Comfort
The Ultimate Comfort Food: Amish Hamburger Steak Bake
Hey there, food lovers! I’m thrilled to have you here at Feastical, where we embark on a flavorful journey filled with warmth, nostalgia, and the joy of cooking. Today, we’re diving into a dish that promises to wrap you up in a cozy embrace—Amish Hamburger Steak Bake. Trust me; this dish is like a hug from the inside out!
As we approach dinner time, the smell of sizzling beef and onions fills the kitchen, evoking memories and stories that make every meal special. The Amish Hamburger Steak Bake is not just food; it’s an experience that brings families and friends together. So, let’s roll up our sleeves, grab our spatulas, and get into the heart of this delectable dish!
A Taste of Nostalgia
Growing up, meals were the highlight of the day. My grandmother would host weekly family dinners, where everyone would gather around a well-worn oak table with mismatched chairs, each one carrying its own unique story. One Sunday afternoon, I remember the tantalizing aroma wafting through the house, leading us to the kitchen. There, my grandma had prepared her famous Hamburger Steak Bake.
With each bite, the flavors danced on my palate. The tender beef kissed with savory herbs, the creamy sauce, and the comforting mashed potatoes on the side created pure magic. It was more than just food; it was the laughter, shared stories, and love that made those moments unforgettable. Even now, that recipe is a staple in my kitchen, reminding me of those cherished family gatherings. So, let’s make some memories of our own with this Amish Hamburger Steak Bake!
Ingredients That Bring It All Together
Here’s what you’ll need to make this comforting dish:
-
1.5 pounds ground beef
- This forms the base of our dish, providing that hearty flavor. You can swap it out for ground turkey or chicken if you’re looking for a leaner option.
-
1 medium onion, chopped
- Onions add a beautiful sweetness and depth to the dish. If you’re not an onion fan, try shallots or leeks for a milder flavor.
-
1 teaspoon salt
- A crucial seasoning that enhances every other flavor. If you’re watching sodium intake, feel free to reduce the amount or use a salt substitute.
-
1/2 teaspoon black pepper
- This adds a nice kick without overwhelming the palate. Consider using white pepper if you prefer a subtler flavor.
-
1/4 teaspoon garlic powder
- Garlic is the unsung hero of many dishes! If you have fresh garlic, feel free to use about a clove or two for a bolder flavor.
-
1/4 cup all-purpose flour
- We’ll use this to help thicken our sauce. For a gluten-free version, substitute with cornstarch or a gluten-free flour blend.
-
2 cups beef broth
- This adds tons of flavor and moisture. Vegetable broth can work well too if you prefer a lighter option.
-
1 cup milk
- The creaminess of the milk contributes to that dreamy sauce. You can substitute with almond or oat milk if you’re dairy-free.
-
1/2 cup sour cream
- This gives the dish a delicious tang. Greek yogurt is a great substitute if you’re looking for a healthier option.
-
2 tablespoons butter, melted
- Used to enrich the sauce with a luscious texture. If you’re vegan, you can opt for a plant-based butter or olive oil.
-
Mashed potatoes (for serving, optional)
- Because really, what is comfort food without mashed potatoes on the side? You can also use cauliflower mash for a low-carb option.
Step-by-Step Instructions to Create the Magic
Ready to bring this dish to life? Let’s get cooking!
-
Preheat your oven to 350°F (175°C). This ensures that your bake cooks evenly, developing that perfect golden crust.
-
Brown the beef: In a large skillet over medium heat, add your ground beef. Use a spatula to break it apart as it cooks. Stir occasionally for about 6-8 minutes until it’s browned and no longer pink. This step is crucial as it builds the foundation of flavor for our dish.
-
Sauté the onions: Add the chopped onion to the skillet during the last couple of minutes of cooking the beef. Let them soften and become translucent—about 3-4 minutes. Their sweetness pairs perfectly with the beef!
-
Season it up: Stir in the salt, black pepper, and garlic powder. This is when your kitchen will start smelling incredible.
-
Make the sauce: Sprinkle the flour over the beef mixture and stir well to coat. Cook for an additional minute to eliminate raw flour taste. Gradually whisk in the beef broth and milk, ensuring there are no lumps. Continue stirring as the mixture comes to a gentle simmer. As it heats, you’ll see it start to thicken—voilà!
-
Incorporate the sour cream: Once the sauce is nice and thick, remove the skillet from the heat and stir in the melted butter and sour cream. This will make your sauce ultra-creamy and comforting.
-
Bake it up: Pour the beef mixture into a greased 9×13-inch baking dish. It’s time for the oven magic! Bake uncovered for about 30-35 minutes, until the top is bubbly and golden brown.
-
Serve it hot: Once out of the oven, let it rest for about 5 minutes. This allows the sauce to settle and makes for easier serving.
Serving Suggestions
Now that your Amish Hamburger Steak Bake is ready, it’s time to dish it up!
-
Plating: Use a large spoon to serve a generous scoop onto plates. The creamy, savory sauce will create delightful rivulets over the dish.
-
Sides: Serve it over a mound of mashed potatoes to soak up all that sauce. Or, for a fresh spin, pair it with steamed green beans or a crisp side salad for a pop of color and crunch.
-
Garnishing: Sprinkle a bit of chopped parsley on top to add a vibrant touch. It’s all about those presentation points!
Recipe Variations to Try
Once you’ve mastered this Amish Hamburger Steak Bake, why not make it your own? Here are a few delightful variations:
-
Mushroom Madness: Sauté sliced mushrooms along with the onions for an earthy depth to your dish.
-
Spicy Kick: Add a dash of hot sauce or some jalapeños for a spicy twist.
-
Veggie Delight: Mix in some peas or corn near the end of the beef browning for added nutrition and taste.
-
Cheesy Goodness: Sprinkle shredded cheddar cheese on top during the last 5 minutes of baking for a delightful cheesy crust.
-
Herbed Infusion: Toss in dried herbs like thyme or rosemary during the cooking for a flavorful herbal note.
Chef’s Notes
Every recipe tells a story, and this one has evolved quite a bit in my kitchen. Originally a dish from my grandmother’s collection, I’ve added my own flair, swapping in ingredients that suit my family’s tastes and dietary needs over the years.
One time, I tried to make this dish for a friends’ potluck. In my hurry, I accidentally grabbed the baking soda instead of the flour! Let’s just say it was an interesting experience, but it taught me the importance of mise en place—everything in its place!
FAQs and Troubleshooting
Here are some common questions that might pop up while making your Amish Hamburger Steak Bake:
-
Why is my sauce too thin?
- If your sauce is runny, try whisking in a little cornstarch slurry (cornstarch mixed with water) while it’s simmering. This can help thicken it up.
-
Can I make this ahead of time?
- Absolutely! You can assemble the dish beforehand and store it in the fridge. Adjust baking time slightly if cooking from cold.
-
What can I serve instead of mashed potatoes?
- Besides cauliflower mash, you can serve it over rice or quinoa for a different texture and taste!
-
My beef is too greasy; how do I fix it?
- Always drain excess fat after browning the beef. If you find it greasy after baking, simply skim the fat off the top before serving.
Nutritional Info
Here’s a quick look at the nutritional info for the Amish Hamburger Steak Bake (per serving, not including mashed potatoes):
- Calories: 350
- Protein: 22g
- Carbohydrates: 20g
- Fat: 22g
- Fiber: 2g
Feel free to adjust serving sizes and ingredients according to your dietary needs!
Final Thoughts
There you have it—my take on the ultimate comfort food, the Amish Hamburger Steak Bake! Cooking is about sharing experiences and creating a connection over a warm meal. This dish is a beautiful reminder of those cozy, heartfelt memories and the delight of bringing family and friends around the table.
Remember, there’s no right or wrong way to cook; just get in that kitchen, have some fun, and don’t forget to enjoy the process. I hope you’ve enjoyed this recipe as much as I love sharing it with you! Let’s keep the love for food going—what’s your favorite comfort dish that warms your heart? Share your stories with me, and until next time, happy cooking from Feastical! 🍽️✨
Print
Amish Hamburger Steak Bake
- Total Time: 55 minutes
- Yield: 4 servings 1x
- Diet: Comfort Food
Description
A comforting dish that combines ground beef with savory spices and a creamy sauce, perfect for family gatherings.
Ingredients
- 1.5 pounds ground beef
- 1 medium onion, chopped
- 1 teaspoon salt
- 1/2 teaspoon black pepper
- 1/4 teaspoon garlic powder
- 1/4 cup all-purpose flour
- 2 cups beef broth
- 1 cup milk
- 1/2 cup sour cream
- 2 tablespoons butter, melted
- Mashed potatoes (for serving, optional)
Instructions
- Preheat your oven to 350°F (175°C).
- Brown the beef: In a large skillet over medium heat, add your ground beef. Use a spatula to break it apart as it cooks. Stir occasionally for about 6-8 minutes.
- Sauté the onions: Add the chopped onion to the skillet during the last couple of minutes of cooking the beef. Let them soften and become translucent—about 3-4 minutes.
- Season it up: Stir in the salt, black pepper, and garlic powder.
- Make the sauce: Sprinkle the flour over the beef mixture and stir well. Gradually whisk in the beef broth and milk, ensuring there are no lumps.
- Incorporate the sour cream: Once the sauce is nice and thick, remove the skillet from the heat and stir in the melted butter and sour cream.
- Bake it up: Pour the beef mixture into a greased 9×13-inch baking dish. Bake uncovered for about 30-35 minutes.
- Serve it hot: Once out of the oven, let it rest for about 5 minutes before serving.
Notes
For a lighter option, substitute ground beef with ground turkey or chicken. You can also mix in vegetables like peas or corn for added nutrition.
- Prep Time: 15 minutes
- Cook Time: 40 minutes
- Category: Main Course
- Method: Baking
- Cuisine: American
Nutrition
- Serving Size: 1 serving
- Calories: 350
- Sugar: 5g
- Sodium: 400mg
- Fat: 22g
- Saturated Fat: 10g
- Unsaturated Fat: 10g
- Trans Fat: 0g
- Carbohydrates: 20g
- Fiber: 2g
- Protein: 22g
- Cholesterol: 60mg
Keywords: comfort food, casserole, family dinner, hamburger steak, Amish recipe
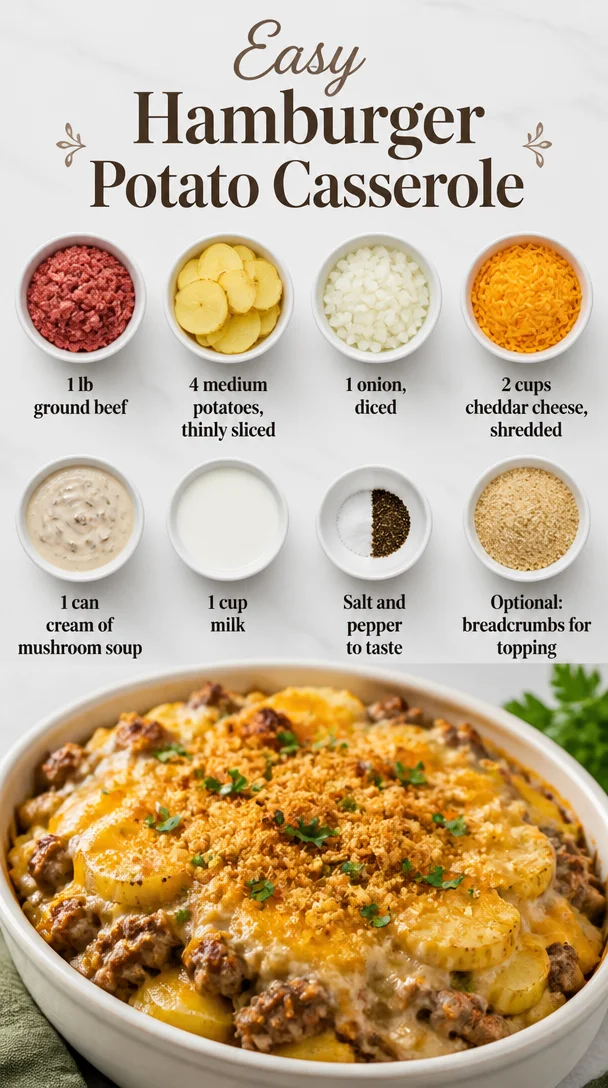
Easy Hamburger Potato Casserole
The Ultimate Easy Hamburger Potato Casserole: A Comfort Food Classic
Hey there, fellow food lovers! I’m so excited to share my latest culinary creation with you: the Easy Hamburger Potato Casserole. If you’re looking for a dish that’s not only delicious but also simple to whip up after a long day, you’ve hit the jackpot! This casserole is the epitome of comfort food, combining hearty ground beef, tender potatoes, and creamy cheese, all wrapped up in one warm, inviting dish that feels like a hug from your grandma. Grab your apron, and let’s dive into this flavor-packed experience together!
A Little Slice of Nostalgia
Growing up in my family’s kitchen, casseroles were a staple. My mom had a knack for creating meals that were both straightforward and soul-satisfying, and the Hamburger Potato Casserole was definitely at the top of her list. I remember coming home from school on chilly autumn days, the smell of bubbling cheese and simmering meat wafting through our house. It felt like my worries melted away as soon as I laid eyes on that comforting dish, bubbling away in the oven.
One particular time, I had a couple of friends over for a study session (or, more accurately, a silly hangout filled with laughter and too many snacks). With full bellies and a few minutes to spare before our next gaming adventure, Mom tossed together this casserole. While she expertly layered the ingredients in a casserole dish, I could hardly contain my excitement—but I was also slightly terrified I might ruin it by sneaking too many bites before it was done! When it finally came out of the oven, it was a glorious golden masterpiece, and there was more than enough to feed my friends and me. We savored every cheesy, meaty bite and shared stories, laughter, and friendship—a perfect recipe for unforgettable memories.
Ingredients You’ll Need
Let’s gather our ingredients! Here’s what you’ll need to make this delicious casserole:
-
1 lb ground beef
A classic choice for this dish. You can use turkey or a plant-based alternative if you prefer. Just be aware that different meats may change the flavor profile slightly! -
4 medium potatoes, thinly sliced
Yukon gold or russet potatoes work beautifully here, giving a great texture and flavor. If you’re short on time, you can use pre-packaged frozen sliced potatoes. -
1 onion, diced
Onions add depth to the flavor. If you’re not a fan, try substituting with shallots or green onions for a milder taste. -
2 cups cheddar cheese, shredded
Who doesn’t love cheese? Sharp cheddar brings a wonderful zing to the casserole, but feel free to mix it up with Monterey Jack or mozzarella for a creamier finish. -
1 can cream of mushroom soup
This is what lends that creamy goodness to the dish. If you’re looking for a healthier option, you can use a low-fat or homemade version. -
1 cup milk
This helps to thin out the soup and create a more cohesive texture. Almond milk or other plant-based milks can be used as substitutes. -
Salt and pepper to taste
Don’t skimp on seasoning! They elevate all the flavors. -
Optional: breadcrumbs for topping
For a crispy finish, sprinkle some breadcrumbs on top before baking. You could also add some grated Parmesan for an extra flavor punch.
Step-by-Step Instructions
Got everything ready? Let’s get cooking! Here’s your step-by-step guide to making the ultimate Easy Hamburger Potato Casserole:
-
Preheat Your Oven
Start by cranking up your oven to 375°F (190°C). This ensures that your casserole cooks evenly once it hits the oven! -
Brown the Beef
In a large skillet over medium-high heat, add your ground beef. Break it apart with a spatula, seasoning with salt and pepper as it cooks. You want to cook it until it’s browned and no longer pink, about 5-7 minutes. If you have excess grease, carefully drain it away to keep your casserole from becoming too greasy. -
Add Onions
Toss the diced onions into the meat mixture. Cook everything together for an additional 3-4 minutes until the onions become translucent. This will enhance the beef’s flavor while adding a lovely aroma! -
Mix Cream of Mushroom Soup and Milk
In a mixing bowl, combine the cream of mushroom soup and milk. This step blends the two together seamlessly, allowing for a creamy consistency that wraps around the potatoes beautifully. Give it a good stir, and set it aside. -
Layer It Up
Now, it’s time for the fun part! Grab a greased 9×13 inch baking dish and start layering. Begin with half of the sliced potatoes, followed by half of the beef and onion mixture. Then, pour half of the soup and milk mixture over this layer. Sprinkle with a generous amount of shredded cheddar cheese. Repeat the layers until all ingredients are used, finishing with cheese on top (we want a cheesy crust, after all!). -
Bake It
Cover the casserole with aluminum foil and pop it into the preheated oven. Bake for about 45-50 minutes. The steam will cook the potatoes perfectly, making sure they are tender and delicious. -
Get Crispy (Optional)
If you’re using breadcrumbs for an extra crunchy topping, carefully remove the foil during the last 10 minutes of baking and sprinkle the breadcrumbs on top. Pop it back in the oven until the topping is golden and crispy! -
Cool and Serve
Once it’s done, let the casserole cool for about 10-15 minutes before serving. This helps the layers set a bit, making it easier to serve. Trust me; your patience will be rewarded!
Serving Suggestions
To plate this mesmerizing dish, scoop a hearty portion onto a plate and consider topping it with fresh chopped parsley for a burst of color and flavor. You can also serve it alongside a simple green salad or some roasted veggies for a complete meal. For an extra cozy touch, why not serve it with warm, crusty bread? Guests will love it, and it balances out the hearty casserole perfectly!
Recipe Variations
Now, let’s get creative! Here are a few fun twists and adaptations to make this dish your own:
-
Mexican Twist
Add some taco seasoning to the beef and toss in some black beans and corn. Top with pepper jack cheese for a spicy finish. -
Vegetable Lover’s Delight
Layer in some steamed broccoli or sautéed bell peppers and zucchini for a healthy pop of color and flavor. -
Italian Style
Swap out the cream of mushroom soup for a marinara sauce, add Italian herbs, and use mozzarella cheese for a lasagna-style casserole. -
Breakfast Casserole
Make it a breakfast dish by adding scrambled eggs and breakfast sausage instead of ground beef. Perfect for brunch gatherings! -
Gluten-Free Option
Simply use gluten-free breadcrumbs or skip the topping altogether. This dish will still shine without it!
Chef’s Notes
As I’ve made this casserole over the years, I’ve discovered a few fun variations and personal touches that made it feel uniquely mine. One day, in a burst of creativity, I added leftover roasted veggies I had in the fridge. The result? A whole new level of flavor! I also love to experiment with different cheeses—sometimes a little feta crumbled on top adds a delightful tang. This dish, like all good comfort food, has a way of evolving based on what you have on hand and your personal flavor preferences.
FAQs and Troubleshooting
Q: My potatoes didn’t cook all the way through! What happened?
A: Make sure you’re cutting your potatoes thin enough for even cooking. Also, letting the casserole rest before serving allows it to firm up, which can help with serving.
Q: How do I make this ahead of time?
A: You can prepare everything a day ahead—just cover it and store it in the fridge. When you’re ready to bake, add about 10-15 extra minutes to the baking time.
Q: Can I freeze this casserole?
A: Absolutely! Just make sure to let it cool completely before wrapping it tightly in foil and plastic wrap. It can last in the freezer for 2-3 months, and you can thaw it in the fridge overnight before baking.
Q: What if I don’t have cream of mushroom soup?
A: You can easily substitute with cream of chicken soup or even make a homemade white sauce with butter, flour, and broth.
Nutritional Info
This Easy Hamburger Potato Casserole is comforting and hearty but also brings a satisfying balance of nutrients. Each serving contains a hefty amount of protein from the ground beef, essential vitamins and minerals from the potatoes and onions, and calcium from the cheese. To keep it on the healthier side, consider using lean ground beef, low-fat cheese, and serving it alongside a salad to round out your meal.
While I don’t specifically track the nutritional values, a typical serving should provide around:
- Calories: 450
- Protein: 30g
- Carbs: 35g
- Fat: 25g
(Do keep in mind that these numbers may vary based on the specifics of your ingredients and portion sizes!)
Final Thoughts
There you have it, my friends! The Easy Hamburger Potato Casserole—comfort food at its finest. This recipe embodies the warmth of home-cooked meals and the joyous moments shared around the dinner table. Whether it’s a weeknight dinner or a gathering with friends, this casserole always brings people together, creating memories worth savoring.
So, grab your favorite person to cook with, get those ingredients together, and let’s create some kitchen magic! I can’t wait to hear your stories and see how your casseroles turn out. And remember, cooking is all about love, a sprinkle of creativity, and, of course, enjoying the journey as you go. Happy cooking, everyone!
Print
Easy Hamburger Potato Casserole
- Total Time: 65 minutes
- Yield: 6 servings 1x
- Diet: Omnivore
Description
A delicious and comforting casserole combining ground beef, tender potatoes, and creamy cheese, perfect for a quick meal after a long day.
Ingredients
- 1 lb ground beef
- 4 medium potatoes, thinly sliced
- 1 onion, diced
- 2 cups cheddar cheese, shredded
- 1 can cream of mushroom soup
- 1 cup milk
- Salt and pepper to taste
- Optional: breadcrumbs for topping
Instructions
- Preheat your oven to 375°F (190°C).
- Brown the beef in a skillet over medium-high heat for 5-7 minutes. Drain excess grease if necessary.
- Add the diced onions and cook for an additional 3-4 minutes until translucent.
- Mix the cream of mushroom soup and milk in a bowl and set aside.
- Layer the potatoes, beef mixture, soup mixture, and cheese in a greased 9×13 inch baking dish.
- Bake covered with foil for 45-50 minutes or until potatoes are tender.
- Get crispy by removing the foil in the last 10 minutes and adding breadcrumbs if desired.
- Cool for 10-15 minutes before serving.
Notes
Can be prepared a day in advance and refrigerated. Great for freezing, just allow to cool completely before wrapping.
- Prep Time: 15 minutes
- Cook Time: 50 minutes
- Category: Main Course
- Method: Baking
- Cuisine: American
Nutrition
- Serving Size: 1 serving
- Calories: 450
- Sugar: 3g
- Sodium: 800mg
- Fat: 25g
- Saturated Fat: 12g
- Unsaturated Fat: 8g
- Trans Fat: 1g
- Carbohydrates: 35g
- Fiber: 4g
- Protein: 30g
- Cholesterol: 80mg
Keywords: casserole, comfort food, hamburger, potato, cheese, easy recipe