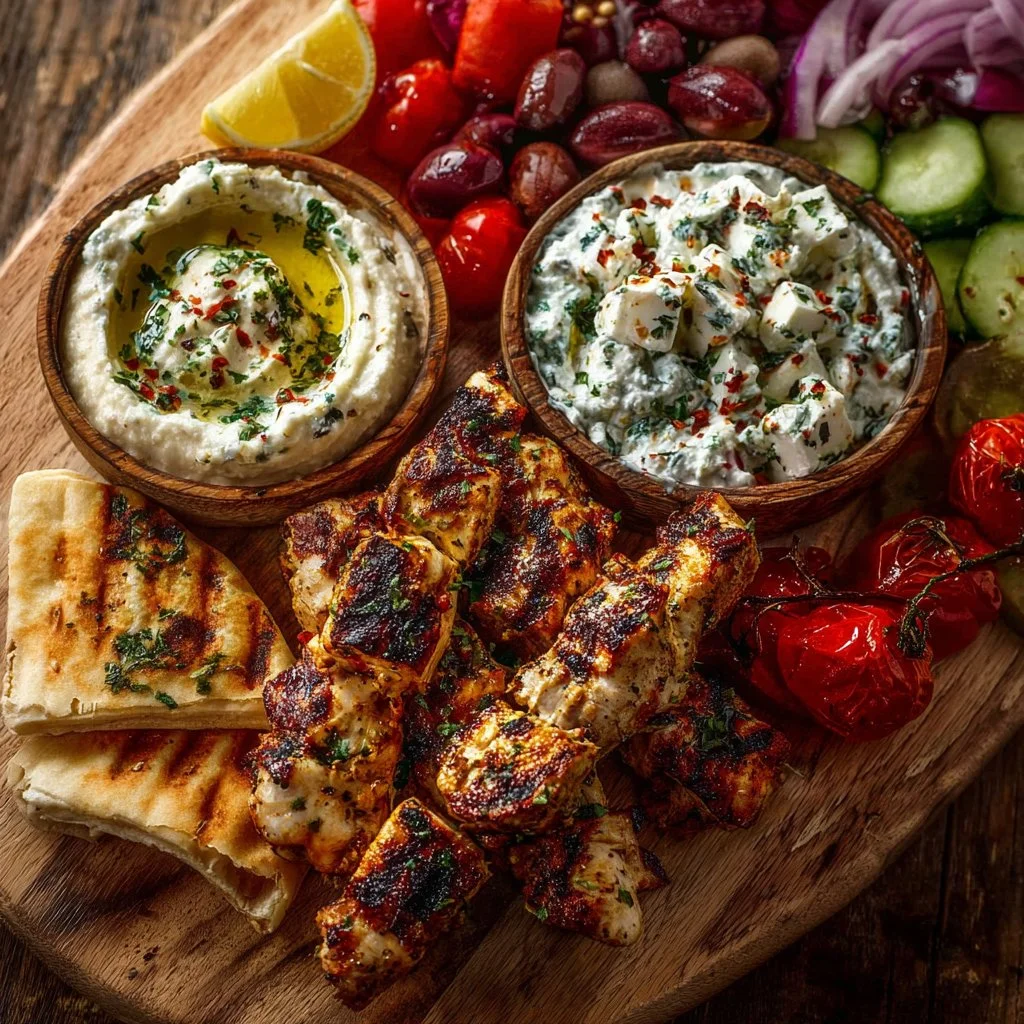
Greek Chicken Souvlaki Grazing Board with Feta Dip – A Mediterranean Feast to Share
Greek Chicken Souvlaki Grazing Board with Feta Dip – A Mediterranean Feast to Share
Hey there, food lovers! Gather ‘round because today we’re about to create something absolutely delicious: a Greek Chicken Souvlaki Grazing Board paired with a creamy feta dip that will make your taste buds dance with joy! If you’ve ever craved the vibrant, colorful flavors of Mediterranean cuisine, then you’re in for a delightful treat. Not only is this dish visually stunning, but it also brings a world of flavor and joy to the table—perfect for sharing with friends and family.
Growing up, I remember my mom whipping up skewers of souvlaki during the summer months. The smell of marinated chicken sizzling on the grill felt like an invitation—an announcement that sunshine, laughter, and togetherness were in the air. We’d gather in the backyard, sipping on lemonade while the grill worked its magic. It was these moments that formed my love for food and the joy of bringing people together around the dinner table.
This grazing board is ideal for parties, lazy weekends, or even just a cozy night in. The hearty chicken souvlaki paired with the rich feta dip will have everyone flocking to the table for a bite. Serve it up with warm pita bread, fresh veggies, and a sprinkle of herbs to take it to the next level! Grab your apron, because it’s time to dive into this Mediterranean feast. Let’s get cooking!
Personal Story
Ah, let me take you back to a sun-soaked summer day, back when I was a novice in the kitchen but an enthusiast at heart. One of my cherished memories involves a family BBQ where my cousin Nick and I decided we could take on the culinary challenge of making traditional Greek souvlaki from scratch. Armed only with a pocketful of herbs and an old, battered recipe card that my grandma had passed down, we dove headfirst into the kitchen.
Things started off pretty adventurous. Our first few attempts at skewering the chicken ended in hilarious chaos—think chicken cubes flying across the kitchen! But that day was an unforgettable bonding experience. We marinated chicken for what felt like hours, with laughter echoing every time we knocked over the spice jar. As soon as the souvlaki hit the grill, that delightful aroma wafted through the air, and I remember thinking, “This is it! This is magic!” The charred edges, the juicy bites, paired with warm pita… the taste transported us right to the Aegean coast.
Summers spent grilling with family and friends helped shape my love for Greek food, and I knew then that I wanted to share that love with others. And that brings us to today! Now, let’s put our aprons on and recreate those unforgettable flavors together.
Ingredients
Here’s everything you’ll need for this delectable Greek Chicken Souvlaki Grazing Board with Feta Dip:
For the Chicken Souvlaki:
- 1 ½ lbs boneless, skinless chicken breasts: Cut into 1-inch cubes for a perfect bite-sized treat. You can substitute with chicken thighs for a juicier flavor.
- 3 tbsp olive oil: The cornerstone of Mediterranean dishes. Extra virgin olive oil is great for flavor; you can use sunflower or canola oil if you’re in a pinch.
- 2 tbsp lemon juice: Freshly squeezed lemon juice brightens the dish. Bottled lemon juice will work, but fresh is always best.
- 2 cloves garlic, minced: Fresh garlic packs a flavor punch! If you’re in a rush, garlic powder is a handy substitute.
- 1 tsp dried oregano: This Mediterranean staple gives our chicken that classic flavor. Feel free to use Italian seasoning as a substitute.
- ½ tsp paprika: Adds a lovely smokiness, but you can omit it if you prefer a quieter flavor.
- Salt and black pepper, to taste: These are essential for seasoning; taste as you go for the best results.
- Wooden skewers, soaked in water for 30 minutes: Soaking prevents the skewers from burning on the grill.
For the Feta Dip:
- 1 cup crumbled feta cheese: The star of our dip! Cream cheese can be used for a milder flavor.
- ½ cup plain Greek yogurt: Adds creaminess and tang; you may substitute with sour cream if that’s what you have.
- 1 tbsp olive oil: Drizzle over the top for flavor!
- 1 tsp lemon zest: Brings a citrusy brightness; lime zest is a nice swap!
- 1 tbsp lemon juice: More freshness!
- 1 small clove garlic, minced: Truly elevates the dip’s flavor.
- 1 tbsp chopped fresh dill: You can omit or swap in parsley or chives!
For Serving:
- Warm pita bread, cut into triangles: A must! You can use store-bought or homemade if you’re feeling adventurous.
- Cherry tomatoes: Sweet and juicy; they make a great fresh addition!
- Sliced cucumbers: Refreshing and crisp!
- Kalamata olives: For that salty tang; green olives are a worthy alternative.
- Roasted red peppers: Add color and sweetness; fresh bell peppers work well too.
- Fresh herbs (parsley, mint, or dill): For garnish! Pick your favorite or whatever you have on hand.
Step-by-Step Instructions
Step 1: Prepare the Marinade
In a mixing bowl, combine olive oil, lemon juice, minced garlic, dried oregano, paprika, salt, and pepper. Don’t skip the tasting part! Think of it as your delicious creativity at work. The zesty aroma should start making its way through your kitchen, promising something scrumptious!
Step 2: Marinate the Chicken
Toss the chicken cubes into the marinade, ensuring each piece is well-coated. Cover the bowl and let it marinate for at least 30 minutes. If you have time, let it sit in the fridge for a few hours or overnight for max flavor—good things take time!
Step 3: Soak the Skewers
Don’t forget about those wooden skewers! Pop them into water to soak up for about 30 minutes while you wait. This helps them withstand the heat on the grill.
Step 4: Assemble Skewers
Once your chicken is marinated, thread the chicken pieces onto your soaked skewers. Keep your tips on hand: try not to overcrowd them to ensure even cooking, but don’t be shy to pack them closely enough for flavor!
Step 5: Grill the Souvlaki
Preheat your grill (or grill pan) over medium-high heat. Once hot, grill the skewers for about 10-15 minutes, turning occasionally. You want those beautiful grill marks, and when the chicken reaches 165°F (use a meat thermometer!), you’ll know it’s ready to elevate your feast!
Step 6: Make the Feta Dip
While your chicken is grilling, let’s whip together the feta dip! In a food processor (or you can mash it by hand if you feel like a workout), combine crumbled feta, Greek yogurt, olive oil, lemon zest, lemon juice, and minced garlic. Blend until creamy; add dill and give it a quick stir. Season to taste—yum!
Step 7: Serve and Assemble
Once everything is cooked and the flavors are mingling, it’s time to plate! Serve the skewers alongside a generous bowl of feta dip, warm pita, and fresh veggies. For an extra touch, arrange the tomatoes, cucumbers, olives, and roasted peppers artfully around the board. Sprinkle fresh herbs over the top for color and fragrance.
Serving Suggestions
The beauty of a grazing board is its freedom! A good way to serve it is to scatter everything artfully on a big wooden board or a large platter. Think color and texture!
- Start with the pita: Cut them into triangles and fill the center of the board.
- Add the skewers: Stand them up vertically in groups of 3-4 for a beautiful display.
- Feta dip: Place it in a bowl in a corner, making sure it’s easily accessible.
- Arrange the veggies: Cluster the cherry tomatoes and cucumbers around the pita bread and chicken. Use a small bowl for olives and peppers.
- Finish it off: Toss some fresh herbs over everything for color and aroma—it’s all about that presentation!
Recipe Variations
1. Veggie Souvlaki
For a meatless option, swap the chicken for chunks of zucchini, bell peppers, or mushrooms. Just marinate them in the same delicious mixture!
2. Spiced Up Chicken
Add some cayenne pepper or chili flakes to your marinade for a spicy twist! You can also mix in some cumin for an extra layer of flavor.
3. Herb-Infused Feta Dip
Experiment with different herbs! Try basil or cilantro for an Italian or Mexican twist, respectively.
4. Greek-Style Rice Bowl
Instead of a grazing board, serve the souvlaki over a bed of fluffy, dainty rice with a spoonful of feta dip on the side. Add a side salad for balance!
5. Dip Trio
Offer a variety of dips alongside the feta—Hummus and Tzatziki would make fabulous companions!
Chef’s Notes
Ah, the humble souvlaki—the way it brings together flavors and connections is why I absolutely adore it! This recipe has evolved in my kitchen over the years. I remember using store-bought marinades at the very start, but I quickly learned the magic of crafting my own blends instead. Cooking shouldn’t be about perfection; it should be a fun adventure! Always feel free to switch up flavors and ingredients based on what you have on hand. Remember, the best creations often come from culinary whimsy!
FAQs and Troubleshooting
Q1: Why is my chicken dry?
A: Overcooking can lead to dryness. Aim for an internal temperature of 165°F and let them rest for a few minutes before serving—this helps juices redistribute.
Q2: Can I prepare the souvlaki in advance?
A: Absolutely! You can marinate the chicken the night before—just grill them before your guests arrive for warm, juicy bites.
Q3: What if I don’t have a grill?
A: You can easily cook the skewers on a grill pan or bake them in the oven at 400°F for about 20 minutes—just flip halfway through!
Q4: How do I store leftovers?
A: Keep any leftover chicken in an airtight container in the fridge. Use it in salads, wraps, or even enjoy it cold as a snack!
Nutritional Info
Serving Size: Approximately 1 skewer with dip and veggies
- Calories: 350
- Total Fat: 22g
- Saturated Fat: 6g
- Cholesterol: 90mg
- Sodium: 560mg
- Total Carbohydrates: 14g
- Dietary Fiber: 2g
- Sugars: 3g
- Protein: 30g
This dish is packed with protein and flavors that will keep you satisfied. The combination of lean chicken and fresh veggies makes it a health-conscious option that still indulges your cravings!
Final Thoughts
And there you have it—your very own Greek Chicken Souvlaki Grazing Board with a luscious feta dip! It’s not just about the food; it’s about the experience, the laughter, and the memories you’ll create around the table. So gather your loved ones and enjoy this culinary journey together. The flavors of the Mediterranean await; every bite is a reminder of sunshine, warmth, and the joy of sharing!
Remember, the kitchen is your playground! Feel free to experiment, ask questions, and have fun with your cooking! Until next time, happy feasting!
Print
Greek Chicken Souvlaki Grazing Board with Feta Dip
- Total Time: 30 minutes
- Yield: 4 servings 1x
- Diet: Gluten-Free
Description
A delightful Mediterranean-inspired grazing board featuring marinated chicken souvlaki, creamy feta dip, and fresh veggies, perfect for sharing with family and friends.
Ingredients
- 1 ½ lbs boneless, skinless chicken breasts, cut into 1-inch cubes
- 3 tbsp olive oil
- 2 tbsp lemon juice
- 2 cloves garlic, minced
- 1 tsp dried oregano
- ½ tsp paprika
- Salt and black pepper, to taste
- Wooden skewers, soaked in water for 30 minutes
- 1 cup crumbled feta cheese
- ½ cup plain Greek yogurt
- 1 tbsp olive oil
- 1 tsp lemon zest
- 1 tbsp lemon juice
- 1 small clove garlic, minced
- 1 tbsp chopped fresh dill
- Warm pita bread, cut into triangles
- Cherry tomatoes
- Sliced cucumbers
- Kalamata olives
- Roasted red peppers
- Fresh herbs (parsley, mint, or dill)
Instructions
- Prepare the Marinade: In a mixing bowl, combine olive oil, lemon juice, minced garlic, dried oregano, paprika, salt, and pepper.
- Marinate the Chicken: Toss the chicken cubes into the marinade, ensuring each piece is well-coated. Cover and let marinate for at least 30 minutes.
- Soak the Skewers: Submerge the wooden skewers in water for about 30 minutes.
- Assemble Skewers: Thread the marinated chicken pieces onto the soaked skewers.
- Grill the Souvlaki: Preheat the grill over medium-high heat and grill the skewers for about 10-15 minutes, turning occasionally.
- Make the Feta Dip: In a food processor, combine crumbled feta, Greek yogurt, olive oil, lemon zest, lemon juice, and minced garlic until creamy.
- Serve and Assemble: Arrange the souvlaki skewers, feta dip, warm pita, and fresh vegetables beautifully on a serving board.
Notes
Allow the chicken to marinate longer for enhanced flavor. Feel free to customize with your favorite veggies and dips.
- Prep Time: 15 minutes
- Cook Time: 15 minutes
- Category: Appetizer
- Method: Grilling
- Cuisine: Mediterranean
Nutrition
- Serving Size: 1 skewer with dip and veggies
- Calories: 350
- Sugar: 3g
- Sodium: 560mg
- Fat: 22g
- Saturated Fat: 6g
- Unsaturated Fat: 16g
- Trans Fat: 0g
- Carbohydrates: 14g
- Fiber: 2g
- Protein: 30g
- Cholesterol: 90mg
Keywords: souvlaki, feta dip, Mediterranean, chicken skewers, grazing board

Simple Caramel Apple Pie Bombs
Simple Caramel Apple Pie Bombs: A Warm and Cozy Treat
Hey there, fellow foodies! If you’re in the mood for a delightful kitchen adventure, let me introduce you to a treat that’s not only fun to make but is also guaranteed to spark a big smile on your face — Caramel Apple Pie Bombs! These delectable bites are the lovechild of classic caramel apples and the nostalgia of apple pie, wrapped up in the flaky goodness of biscuit dough. Think crispy, gooey, and absolutely irresistible!
Growing up, fall was the time when everything apples reigned supreme. The orchards were bursting with crisp, juicy fruit just waiting to be picked. I remember racing my siblings through rows of trees, laughter ringing out as we fought for the biggest and juiciest apples. The spoils of our adventures would inevitably find their place in my mom’s kitchen, transforming into the most comforting apple pies and treats. And now, through the years, I’ve grown to appreciate putting a little twist on those traditional recipes.
These caramel apple pie bombs bring together the warmth of cinnamon-spiced apples, a generous drizzle of caramel, and the enchantment of flaky biscuit dough wrapped around it all. They’re ideal for sharing with family on a cozy autumn evening or serving at parties when you want to impress your friends with just how easy it is to create something delicious.
So, put on your favorite apron, preheat your oven, and let’s dive into the delightful world of these sweet treats. Get ready to experience that warm-hug-in-food-form feeling right in your kitchen!
Personal Story
Let me take you back to one of those most cherished autumn evenings. Picture this: the air was crisp outside, leaves danced in bold reds and yellows, and the scent of cinnamon wafted through our home as my mom busied herself in the kitchen. It was apple pie season, and we were all eagerly awaiting the magic that was about to happen.
One afternoon, I decided to step in and help (or, let’s be real, I was mostly there to snag a bite of whatever delicious things were coming my way). As Mom expertly peeled and sliced apples, she taught me the delicate balance of sweetness and spice — how a dash of cinnamon could transform the ordinary into the extraordinary.
Fast forward to my own kitchen filled with laughter and the chatter of friends. I found myself inspired by that memorable time. These Caramel Apple Pie Bombs are my little ode to those autumnal days spent with family. Each bite evokes that warm, cozy feeling, as if we are back in that kitchen, surrounded by love, laughter, and the delightful aroma of homemade treats.
Ingredients
Here’s a rundown of the key ingredients you’ll need to whip up these irresistible Caramel Apple Pie Bombs.
-
1 package of biscuit dough
This is the magic encasing our sweet filling! I often go for the flaky kind, but if you’re feeling adventurous, you can also try biscuit dough made from scratch! -
2 medium apples, peeled and diced
Granny Smith or Honeycrisp work wonders here! If you like a sweeter flavor, opt for Fuji apples. And if you’re looking for a lower-sugar option, consider using a tart apple like McIntosh. -
1/2 cup caramel sauce
Caramel makes everything better! You can use store-bought for convenience, but homemade will carry that special touch—because who doesn’t love fresh caramel drizzle? If you’re feeling bold, chocolate sauce could be a delicious substitute! -
1 teaspoon cinnamon
This spice adds depth and warmth to our filling. If you’re a fan of nutmeg or allspice, feel free to throw in a pinch for a unique twist on the standard recipe. -
1/4 cup sugar
Sugar enhances the apples’ sweetness and caramelizes beautifully during baking. If you prefer to reduce sugar, try using honey or maple syrup instead. -
Butter, for brushing
This step is all about achieving that golden-brown, flaky crust. Melted or softened butter works wonders here. -
Optional: whipped cream or vanilla ice cream for serving
You can’t go wrong with a dollop of whipped cream or a scoop of ice cream! They’ll add a sumptuous creaminess that perfectly balances the warm, gooey goodness of the bombs.
Step-by-Step Instructions
Alright my culinary adventurers, let’s dive into the details of making these Caramel Apple Pie Bombs! Follow along step by step, and I promise, you’ll have a delicious treat in no time.
Step 1: Preheat the Oven
First things first! Preheat your oven to 375°F (190°C). This is crucial to ensure your pie bombs cook evenly and come out golden and delicious. While you wait, grab your cookie sheet and line it with parchment paper to prevent any sticky mishaps.
Step 2: Prepare the Apples
As your oven heats up, let’s get those apples ready. Peel and dice the 2 medium apples. Aim for a uniform size to ensure even cooking. Toss them into a mixing bowl along with 1/4 cup sugar and 1 teaspoon cinnamon. Mix it up! The sugar helps draw out the natural juices from the apples, which makes for a flavorful filling.
Chef Hack: A squeeze of lemon juice will prevent your apple pieces from browning while you mix and prepare the rest of your ingredients.
Step 3: Get the Biscuit Dough Ready
Now, let’s turn our attention to the biscuit dough. Open your package and separate the biscuit rounds. You should have about 8 to 10 pieces of dough. Lightly flatten each round in your palm. We’re making little pockets for our delicious apple filling!
Step 4: Fill with Apple Mixture
Spoon a generous portion of the apple mixture into the center of each biscuit round. Don’t skimp out! These little goodies need to be full of flavor. Now, drizzle about a tablespoon of caramel sauce on top of the apple mixture. You might want to save a bit of caramel for drizzling later on top when you serve—trust me, it’s worth it!
Step 5: Seal Up Those Bombs
Now, for the fun part. Fold the edges of the biscuit dough over the filling to form a ball, ensuring it’s sealed tight. You can pinch them closed or roll them gently in your hands. This is what’ll create those delightful bursts of flavor when they bake!
Step 6: Brush and Bake
Place your filled biscuit balls onto the lined cookie sheet. Now, let’s make them shine! Brush the outside of each bomb with melted butter. This not only adds flavor but helps give that golden, crispy texture that we all crave.
Pop them into the preheated oven and bake for about 15-20 minutes or until they’re golden brown and look like little toasted treasures.
Chef Tip: Give your pie bombs some space on the baking sheet. They’ll puff up a bit, and we don’t want a sticky situation!
Step 7: Cool and Serve
Once they’re done, take them out of the oven and let them cool for a few minutes. Here’s where the smell becomes downright hypnotic! Serve these bombs warm, and don’t forget that optional drizzle of caramel sauce (or even chocolate—go wild!). Pair with whipped cream or a scoop of vanilla ice cream for a dessert that’s sure to impress.
Serving Suggestions
Serving these Caramel Apple Pie Bombs is all about the presentation, my friends! Consider plating them on a lovely platter or individual dessert plates for a more sophisticated touch.
Once baked, give each bomb a drizzle of warm caramel sauce and sprinkle with a dash of cinnamon for that delightful visual flair. If you’re feeling extra generous, you can also serve them with a dollop of whipped cream or a scoop of vanilla ice cream on the side.
Now, gather your friends and family around the table, and watch the smiles light up when they take their first bite! These sweet treasures are made for sharing.
Recipe Variations
Feeling adventurous? Here are a few fun twists on the classic Caramel Apple Pie Bombs:
-
Nutty Twist: Add some chopped pecans or walnuts to the apple filling for an extra crunch! It pairs beautifully with the caramel and adds lovely nutty flavors.
-
Spiced Up: Experiment with different spices! Try ginger or cardamom for an aromatic twist.
-
Chocolate Drizzle: For the chocolate lovers, drizzle some melted dark chocolate over the baked pie bombs for a decadent touch.
-
Salted Caramel: Sprinkle a bit of sea salt over the caramel before baking for that beautiful sweet-salty combo that’s all the rage!
-
Savory: If you want to swap sweet for savory, try filling them with caramelized onions and goat cheese for a unique appetizer!
Chef’s Notes
Whipping up these Caramel Apple Pie Bombs has become a cherished ritual in my kitchen! I love how versatile they are—whether I’m making them for a cozy night in by the fire or taking them to a potluck gathering. The recipe has evolved with me over the years, making use of whatever apples are in season and jazzing it up with new ingredients as I go.
And let’s be honest — I can’t possibly create a dessert without sneaking a taste of the filling along the way! Who can resist a spoonful of cinnamon-sugar apples?
FAQs and Troubleshooting
Here are some frequently asked questions that might pop up while you whip up these mouth-watering pie bombs:
-
Q: My pie bombs exploded while baking! What went wrong?
A: This usually happens when the filling is overstuffed or the dough isn’t sealed properly. Make sure to pinch the edges well and keep the filling modest! -
Q: Can I prepare these ahead of time?
A: Absolutely! You can fill the biscuit dough in advance and store them in the fridge for a few hours. Just make sure to let them sit at room temperature for a bit before baking. -
Q: How do I store leftovers?
A: If you have any leftovers (which is unlikely!), store them in an airtight container in the fridge for up to 2 days. Simply reheat before serving. -
Q: Can I use store-bought caramel sauce?
A: Yes, it’s a time-saver! However, making your caramel sauce is so easy. A simple mix of sugar, butter, and cream tends to blow store-bought varieties out of the water!
Nutritional Info
While the Caramel Apple Pie Bombs are an indulgent treat, let’s break down the nutritional value:
- Calories: Approximately 200-300 (depending on the size and ingredients)
- Fat: 9g (mostly from the biscuit dough and butter)
- Carbohydrates: 35g (from the biscuit dough and sugars)
- Sugars: About 10-15g (natural sugars from apples and added sugar)
- Protein: 2g
Remember, moderation is key when indulging in sweet treats! You can also try using lower-calorie ingredients or sugar substitutes to make a lighter version of these delicious bites.
Final Thoughts
And there you have it! Your very own homemade Caramel Apple Pie Bombs ready to warm the hearts of those you hold dear. These little bites embody all that is cozy and comforting about food. Perfect for chilly evenings or as a special treat on lazy weekends, they bridge the gap between simple and indulgent, making them a must-try in any home.
So, my kitchen companions, embrace your inner chef, let that creativity flow, and whip up a batch (or two!). You never know, these may just become a new family favorite—infusing your world with all the warmth of home and nostalgia just like my family did for me many moons ago.
Remember, good food brings people together and creates memories that last a lifetime. Happy cooking, and I can’t wait to hear how your pie bombs turn out! Cheers to making delicious moments in the kitchen and savoring every blissful bite!
Print
Caramel Apple Pie Bombs
- Total Time: 35 minutes
- Yield: 8 servings 1x
- Diet: Vegetarian
Description
Delightful bites that combine caramel apples and apple pie, wrapped in flaky biscuit dough.
Ingredients
- 1 package of biscuit dough
- 2 medium apples, peeled and diced
- 1/2 cup caramel sauce
- 1 teaspoon cinnamon
- 1/4 cup sugar
- Butter, for brushing
- Optional: whipped cream or vanilla ice cream for serving
Instructions
- Preheat your oven to 375°F (190°C) and line a cookie sheet with parchment paper.
- Prepare the apples by peeling and dicing them, then mixing with sugar and cinnamon.
- Get the biscuit dough ready by separating and flattening each round.
- Fill each biscuit round with a portion of the apple mixture and drizzle caramel on top.
- Seal the biscuit dough over the filling to form a ball.
- Brush the outside of each bomb with melted butter and place them on the cookie sheet.
- Bake for 15-20 minutes or until golden brown and serve warm.
Notes
A squeeze of lemon juice can prevent the apples from browning. Serve with whipped cream or ice cream for added deliciousness.
- Prep Time: 15 minutes
- Cook Time: 20 minutes
- Category: Dessert
- Method: Baking
- Cuisine: American
Nutrition
- Serving Size: 1 bomb
- Calories: 250
- Sugar: 10g
- Sodium: 350mg
- Fat: 9g
- Saturated Fat: 4g
- Unsaturated Fat: 4g
- Trans Fat: 0g
- Carbohydrates: 35g
- Fiber: 2g
- Protein: 2g
- Cholesterol: 15mg
Keywords: Caramel Apple, Pie Bombs, Fall Dessert, Cozy Treat, Baking

Mini Corndogs
Mini Corndogs Recipe: A Nostalgic Treat for All Ages!
Hey there, fellow food lovers! Welcome back to Feastical, your go-to destination for feel-good food and kitchen magic. Today, we’re diving into a recipe that’s bound to bring a smile to your face and a warm tingle to your belly: Mini Corndogs! These little bite-sized gems of deliciousness are perfect for game days, parties, or just a cozy night in. With a crispy cornmeal batter that hugs juicy hot dogs, they’ll have you reliving those carnival vibes right from the comfort of your own kitchen. So grab your apron, put on your favorite tunes, and let’s get cooking!
Personal Story: Carnival Memories and Kitchen Joy
Ah, the sweet nostalgia of summer fairs and vibrant carnivals! I can still remember the first time I indulged in a corndog. I was just a kid, standing in front of a colorful vendor stall, the smell of fried food wafting through the air. The sunlight glittered off a sea of laughter and excitement. I remember clutching that corndog, the hot dog encased in a golden-brown batter, and taking my first big bite. The contrast of the warm, savory hot dog and the crispy, slightly sweet outside was pure magic.
Fast forward a few years, and I found myself in the kitchen, inspired by those memories. It was time to recreate that carnival classic in a mini version! Mini corndogs not only capture the essence of what made the originals so special, but they also add a fun twist that makes them perfect for sharing. Plus, they’re a hit among both kids and adults—really, who can resist a mini corndog? So let’s stroll down memory lane as we whip up these delightful snacks together!
Ingredients: The Building Blocks of Delicious Mini Corndogs
Before we jump into the cooking process, let’s gather our ingredients. Here’s what you’ll need to bring these mini delights to life:
-
1 cup cornmeal: This provides that classic texture! If you’re looking for a gluten-free option, you can substitute with corn flour or a gluten-free all-purpose flour blend.
-
1 cup all-purpose flour: This helps bind everything together. If you’re going gluten-free, follow the tip above!
-
1 tablespoon baking powder: This is our trusty leavening agent that gives the batter some fluffiness. Ensure it’s fresh for the best rise.
-
1 tablespoon sugar: This little addition balances the savory flavor and adds a hint of sweetness to the batter. You could swap this for honey for a natural sweetener.
-
1/2 teaspoon salt: Essential for enhancing all our flavors. Not a fan of table salt? Sea salt works well too!
-
1 cup milk: This moistens the batter. For a dairy-free option, you can use almond milk or soy milk—just make sure to opt for unsweetened.
-
1 large egg: This acts as a binder, adding richness. If you’re looking to keep it vegan, a flaxseed egg (1 tablespoon ground flaxseed + 2.5 tablespoons water, let it sit for a few) works wonders!
-
1 package hot dogs: Feel free to select your favorites—beef, turkey, or even plant-based. There are so many tasty options these days!
-
Wooden skewers: These are perfect for holding up your mini corndogs. Soak them in water for about 30 minutes before using to prevent burning.
-
Oil for frying: Vegetable oil or canola oil works best for frying, but you can use any oil with a high smoke point.
Now that we have our ingredients ready, let’s move on to the fun part—cooking!
Step-by-Step Instructions: Let’s Get Cooking!
-
Prepare Your Station: Before you dive in, let’s get everything prepped. Set up a frying station with a large pot or deep skillet. Pour in enough oil for frying, about 2-3 inches deep, and heat it on medium-high. You want it to reach about 350°F (175°C). Use a thermometer to keep track!
-
Mix Your Dry Ingredients: In a large mixing bowl, combine the cornmeal, all-purpose flour, baking powder, sugar, and salt. Whisk these dry ingredients together until they’re well incorporated. This ensures an even distribution of flavors and leavening.
-
Whisk the Wet Ingredients: In another bowl, beat the egg and then add the milk. Mix well until they’re combined. Now, pour this egg-milk mixture into the bowl with the dry ingredients. Stir until just combined—don’t overmix! We want a few lumps for that fluffy texture.
-
Skewer the Hot Dogs: Take your hot dogs and cut them into halves or thirds, depending on how mini you want them. Skewer each piece with a wooden stick. This step makes them easy to dip into the batter and fry!
-
Coat the Hot Dogs: Dip each skewer of hot dog into the batter. Make sure it’s well-coated but not dripping. That’s the secret to a perfect corndog: a good batter-to-dog ratio!
-
Fry ‘Em Up: Carefully place the skewered hot dogs into the hot oil, frying in batches to avoid overcrowding. Fry for about 3-4 minutes, turning occasionally until they’re golden brown and crispy. Use a slotted spoon to flip them halfway through.
-
Drain and Cool: Transfer your cooked mini corndogs to a plate lined with paper towels. This will help soak up any excess oil, keeping them crispy.
-
Repeat: Keep frying in batches until all your batter and hot dogs are transformed into crispy, golden deliciousness!
Serving Suggestions: Time to Enjoy!
Once your mini corndogs have cooled just enough to touch, it’s time to serve! I love plating them up on a rustic wooden board, surrounded by a variety of dipping sauces. Your guests can choose their favorites, whether it’s classic mustard, tangy ketchup, or even a zesty ranch dressing.
Feel free to add in some crunchy veggies like carrot sticks or cucumber slices on the side for color and freshness! You can also garnish with fresh parsley or cilantro for that pop of color. Trust me, presentation matters!
Recipe Variations: A Twist on Tradition
Now, let’s talk about how you can get creative with these mini corndogs! Here are a few variations that could put a fun spin on the classic recipe:
-
Cheesy Corndogs: Add shredded cheese (cheddar or pepper jack) to the batter for a melty surprise inside!
-
Spicy Twist: Mix in some diced jalapeños or a pinch of cayenne pepper for those who love a kick of heat.
-
Herbed Corndogs: Incorporate fresh herbs like chopped chives or dill into your batter for an aromatic flavor.
-
Sweet Cornbatter: Add a bit of creamed corn into the batter for a pop of sweetness and moisture.
-
Vegan Delight: Using plant-based hot dogs and substituting the egg and milk will give you a delicious vegan version!
Chef’s Notes: More than Just a Recipe
This mini corndog recipe is so close to my heart! It has evolved over the years as I played with flavors and ingredients in the kitchen. One time, I even had a kitchen disaster—let’s just say the batter consistency was off, and I ended up with corndog balls instead of mini corndogs! But hey, embrace those happy accidents; they sometimes lead to the best kitchen stories.
I love making these with my kids—they turn frying into a game, and their laughter makes the whole experience even more enjoyable. So, grab your loved ones, chat, and share stories while cooking; that’s what it’s all about!
FAQs and Troubleshooting
1. Why does my batter seem too thick?
If your batter is too thick, simply add a little more milk, one tablespoon at a time, until you reach the desired consistency. Think pancake batter!
2. What should I do if my corndogs are cooking too fast?
If they’re browning too quickly, it could mean your oil is too hot. Lower the heat slightly and allow them to cook a bit longer to ensure the insides heat through without burning the outside.
3. Can I bake these instead of frying?
Absolutely! Preheat your oven to 400°F (200°C), place the coated hot dogs on a lined baking sheet, and spray them lightly with cooking spray. Bake for about 20 minutes, flipping halfway through, until golden brown. (Though, let’s be real—it won’t have that same crunchy texture as frying!)
4. How can I store leftovers?
Store any leftovers in an airtight container in the fridge for up to 3 days. Reheat in an air fryer or oven for a few minutes to restore some of that crispiness!
Nutritional Info: What’s in a Mini Corndog?
While these mini corndogs are definitely a treat, it’s good to know what you’re indulging in! Each mini corndog (depends on size) approximately contains:
- Calories: 120 kcal
- Protein: 4g
- Carbohydrates: 14g
- Fat: 5g
- Sugars: 1g
With protein-rich hot dogs, these mini corndogs pack a bit of a punch in terms of flavor and satisfaction while keeping the indulgence low-key. Just remember, moderation is key!
Final Thoughts: Let’s Keep Cooking Together!
And there you have it, my friends—deliciously crispy, bite-sized mini corndogs that are sure to be a hit at any gathering or simply as a weekday treat with the family. I hope this recipe inspires you to embrace your kitchen creativity and brings back some nostalgic moments from those carefree days at the fair.
So go ahead, whip these up for your next gathering or just to satisfy your cravings—because, at the end of the day, food is all about joy, connection, and love. Stay tuned for more fun recipes from Feastical, and keep sharing your kitchen adventures with me! Happy cooking, everyone!
Print
Mini Corndogs
- Total Time: 35 minutes
- Yield: 6 servings 1x
- Diet: Non-Vegetarian
Description
Deliciously crispy, bite-sized mini corndogs that are perfect for game days, parties, or cozy nights in.
Ingredients
- 1 cup cornmeal
- 1 cup all-purpose flour
- 1 tablespoon baking powder
- 1 tablespoon sugar
- 1/2 teaspoon salt
- 1 cup milk
- 1 large egg
- 1 package hot dogs
- Wooden skewers
- Oil for frying
Instructions
- Prepare Your Station: Set up a frying station with a large pot or deep skillet. Pour in enough oil for frying, about 2-3 inches deep, and heat it on medium-high to 350°F (175°C).
- Mix Your Dry Ingredients: In a bowl, combine the cornmeal, all-purpose flour, baking powder, sugar, and salt.
- Whisk the Wet Ingredients: In another bowl, beat the egg and mix it with the milk. Combine with the dry ingredients.
- Skewer the Hot Dogs: Cut hot dogs into halves or thirds and skewer each piece with wooden sticks.
- Coat the Hot Dogs: Dip each hot dog skewer into the batter, ensuring it’s well-coated.
- Fry ‘Em Up: Place the skewered hot dogs into the hot oil, frying in batches for about 3-4 minutes until golden brown.
- Drain and Cool: Transfer the cooked mini corndogs to a plate lined with paper towels to soak up excess oil.
- Repeat: Continue frying in batches until all are cooked.
Notes
Serve mini corndogs with a variety of dipping sauces and garnished with fresh veggies for added color and nutrition.
- Prep Time: 15 minutes
- Cook Time: 20 minutes
- Category: Snack
- Method: Frying
- Cuisine: American
Nutrition
- Serving Size: 1 mini corndog
- Calories: 120
- Sugar: 1g
- Sodium: 400mg
- Fat: 5g
- Saturated Fat: 1g
- Unsaturated Fat: 4g
- Trans Fat: 0g
- Carbohydrates: 14g
- Fiber: 1g
- Protein: 4g
- Cholesterol: 25mg
Keywords: mini corndogs, snack, party food, game day, nostalgic recipe

Cheese Garlic Rolls
# Cheese Garlic Rolls: A Comforting Kitchen Hug

## Introduction

Hey there, fellow food lovers! Welcome to Feastical, your go-to spot for delicious recipes that bring a little sunshine into your kitchen. Today, I'm excited to share a recipe that’ll wrap your taste buds in a warm, cheesy embrace: Cheese Garlic Rolls! Picture this: fluffy, golden-brown rolls, oozing with melted cheese and subtle hints of garlic. There's something about the aroma wafting through your kitchen that instantly makes everyone feel at home—it's like a warm hug for your senses!

Now, before you think these rolls are just another side dish, let me assure you: they have personality! Whether you're preparing for game day, hosting a cozy dinner, or just craving something comforting, these rolls fit the bill perfectly. Plus, they’re incredibly fun to make! It's a great dish to whip up with family or friends, and everyone loves getting their hands doughy and sticky—trust me!

But what really gets me excited about these Cheese Garlic Rolls is the nostalgia they bring. They remind me of family dinners at my grandma’s house, where we’d gather around the table, the rolls freshly baked, and everyone diving in with the same eager enthusiasm. I can still hear the laughter and the clinking of forks over delicious plates. That’s the beauty of food: it connects us.

So, put on your apron, gather your ingredients, and let’s create some memories together with these irresistible Cheese Garlic Rolls!

## Personal Story

Ah, the memories of my childhood kitchen are both vivid and comforting. I recall one chilly Sunday afternoon when my family decided to gather for a potluck-style meal. My grandma had announced that she would be making her famous Cheese Garlic Rolls, a recipe she learned from her mother, and it instantly became the star of the show.

I watched as grandma expertly kneaded the dough, her hands dusted with flour and radiating warmth, similar to the rolls she was crafting. The mingling scents of garlic, melted cheese, and a hint of parsley filled the air. I was tasked with grating the cheese, and let me tell you, the thrill of watching that cheesy goodness transform into something magical was unreal! When those rolls finally emerged from the oven—golden, fluffy, with cheese bubbling out of the tops—it felt like the kitchen had transformed into a fragrant paradise.

As we sat around the table, rolling our eyes at overstuffed plates and stealing bites from one another, all while sharing stories and laughter, I knew these rolls were more than just a dish—they were an experience, a tradition, a reminder that food is best enjoyed together.

And now, I want to bring a piece of that joy into your kitchen with my Cheese Garlic Rolls!

## Ingredients

### For the Dough

- **2 cups all-purpose flour**
  The foundation of our rolls! All-purpose flour gives our dough the right balance of structure and tenderness. If needed, you can substitute it with bread flour for extra chewiness.

- **1 packet (2 1/4 teaspoons) active dry yeast**
  This little packet of magic is what makes our rolls rise. Make sure your water is warm (not hot!) to activate the yeast—too hot, and it’ll kill it!

- **1 tablespoon sugar**
  A little sweetness to help activate the yeast and balance out the flavors. You can swap it for honey or agave syrup if that's what you have on hand.

- **1 teaspoon salt**
  Essential for flavor! Salt enhances the taste of the dough. If you’re cutting back on sodium, feel free to reduce it slightly.

- **3/4 cup warm water**
  This helps ‘wake up’ the yeast. It should feel warm to the touch, like a cozy bath—perfect for our yeast friends!

- **2 tablespoons olive oil**
  Adds moisture and a lovely richness to the dough. Feel free to use melted butter instead for an extra buttery flavor.

### For the Filling

- **1 cup shredded cheese (e.g., mozzarella or cheddar)**
  Choose your cheese adventure! Mozzarella creates a gooey stretch, while cheddar adds a sharp kick. Mix and match or get creative—feta or pepper jack could also be delightful!

- **2 cloves garlic, minced**
  Fresh garlic adds a flavorful punch. If you fancy a milder flavor, roasted garlic is a sweet alternative that gives the rolls a lovely depth.

- **1 teaspoon dried oregano**
  A herby touch uplifts our rolls. Italian seasoning or even fresh herbs like parsley can add a beautiful twist.

- **1/4 cup melted butter**
  For brushing on top before baking—this gives our rolls a beautiful golden sheen! Try using garlic-infused butter for an added flavor boost.

## Step-by-Step Instructions

1. **Prep the Yeast**
   In a small bowl, mix the warm water with the sugar and yeast. Let it sit for about 5-10 minutes until it becomes foamy and bubbly—this means the yeast is alive!

2. **Combine Dry Ingredients**
   In a large mixing bowl, combine the flour and salt. Make a well in the center.

3. **Mix It Up!**
   Pour the foamy yeast mixture into the well, along with the olive oil. Stir gently until the dough starts to come together.

4. **Knead It Out**
   Sprinkle some flour on your work surface and turn out the dough. Knead for about 5-7 minutes until it’s smooth and elastic. Trust me, this is where the magic happens! If the dough is too sticky, sprinkle a bit more flour while kneading.

5. **Let It Rise**
   Place your dough in a greased bowl, cover it with a damp kitchen towel, and let it rise in a warm place until it doubles in size (about 1 hour). This is the perfect time to clean up and maybe sneak a snack!

6. **Prepare the Filling**
   While the dough is rising, mix your shredded cheese, minced garlic, and oregano in a bowl. Can you smell it already? Heaven!

7. **Shape the Rolls**
   Once your dough has risen beautifully, punch it down to release those air bubbles. Divide it into 12 equal pieces (or more if you want mini rolls).

8. **Fill ‘er Up**
   Flatten each dough piece into a disc, add a spoonful of the cheese-garlic mixture in the center, then fold the edges over to seal it like a tiny pocket. Roll it between your palms to create a smooth ball.

9. **Second Rise**
   Place the filled rolls seam-side down on a baking sheet lined with parchment paper. Cover them again and let them rise for another 30 minutes.

10. **Butter Them Up**
    Preheat your oven to 375°F (190°C). Brush the tops of the rolls with melted butter; this is where we bring the golden brown loveliness to life!

11. **Bake to Perfection**
    Bake in the preheated oven for about 15-20 minutes or until they are golden brown and your kitchen smells incredible!

12. **Cool and Serve**
    Once out of the oven, let them cool slightly, then dive in! Serve warm and watch your loved ones smile with each cheesy bite.

## Serving Suggestions

These Cheese Garlic Rolls are delicious on their own, but why not elevate the experience? Here are a few serving suggestions:

- **Dip-Dive Delight**: Serve them alongside marinara sauce or garlic butter for a heavenly dipping experience.
- **Cheesy Charcuterie**: Include them in a cheese board! Pair with cured meats, olives, and your favorite spreads to make a delightful appetizer.
- **Soup and Roll Combo**: Pair these rolls with a hearty soup or salad. They’re perfect for soaking up that delicious broth!
- **Garnish with Fresh Herbs**: A sprinkle of chopped parsley or chives on top adds not only color but a fresh flavor to the rolls.

## Recipe Variations

Now, let’s shake things up a bit with some fun variations to keep your kitchen adventures alive:

- **Spinach Feta Rolls**: Add a handful of wilted spinach and crumbled feta to the cheese filling for a Mediterranean twist!
- **Spicy Pepper Jack**: Substitute cheddar for spicy pepper jack cheese and toss in some minced jalapeños for a kick.
- **Herb Parmesan**: Mix in grated Parmesan cheese and fresh herbs like rosemary and thyme for an aromatic burst of flavor.
- **Sweet Garlic Rolls**: Mix the garlic filling with cinnamon, sugar, and butter for a unique dessert-style roll—perfect for the sweet tooth!
- **Gluten-Free Version**: Swap all-purpose flour with a gluten-free flour blend for a delicious gluten-free option.

## Chef’s Notes

Creating these Cheese Garlic Rolls feels like a warm embrace from the kitchen; it’s a recipe that has evolved for me over the years. Each time I make them, I’m reminded of that chilly Sunday with my family gathered around the table. I’ve played with the recipe many times—experimenting with cheeses, adjusting spices, and sometimes even going wild with fillings!

A funny kitchen story? Once I accidentally added cayenne pepper instead of oregano. Let’s just say the rolls had a bit more heat than anyone expected! But in the end, those spicy rolls became a hit at that gathering—food has a funny way of bringing people together, even when things don’t go as planned!

## FAQs and Troubleshooting

- **Why aren’t my rolls rising?**
  Make sure your yeast is fresh and your water isn’t too hot—check those temp settings! If they’re rising slowly, try placing them in a warmer spot.

- **What if I forgot to add salt?**
  No worries! If you’ve already baked them, you can brush some garlic butter mixed with salt on top right after they come out of the oven for a flavorful touch!

- **How can I store leftover rolls?**
  Place them in an airtight container at room temperature for 2-3 days, or freeze them for longer storage. Reheat in the oven for the best results!

- **Can I prepare these ahead of time?**
  Absolutely! You can prepare the dough, shape the rolls, and refrigerate them overnight. When you’re ready, let them rise at room temperature before baking.

## Nutritional Info

While Cheese Garlic Rolls are comfort food at its finest, let’s talk nutritional info to keep everything balanced!

Each roll (based on 12 servings) roughly contains:
- **Calories**: 180
- **Carbohydrates**: 24g
- **Protein**: 6g
- **Fat**: 7g
- **Fiber**: 1g

Enjoy them in moderation as part of a balanced meal, and don't forget, indulging in your favorite treats is all about those happy moments in the kitchen!

## Final Thoughts

And there you have it—my beloved Cheese Garlic Rolls straight from my heart to your kitchen! Each tender bite carries with it a story, a memory, and a whole lot of flavor. I hope this recipe brings joy to your dining table just as it has to mine.

So as you dive into these delicious rolls, don’t just savor the taste—celebrate the moments shared around the table, the laughter, and the memories created. That’s what food is truly about: connection, love, and feeling good.

Thank you for joining me today! I can't wait to hear how your Cheese Garlic Rolls turn out. Share your experiences, adaptations, and fun moments in the kitchen, and let’s keep this delicious journey going together. Happy cooking, my friends!

Cheese Garlic Rolls
- Total Time: 60 minutes
- Yield: 12 servings 1x
- Diet: Vegetarian
Description
Fluffy, golden-brown rolls oozing with melted cheese and hints of garlic, perfect for any gathering.
Ingredients
- 2 cups all-purpose flour
- 1 packet (2 1/4 teaspoons) active dry yeast
- 1 tablespoon sugar
- 1 teaspoon salt
- 3/4 cup warm water
- 2 tablespoons olive oil
- 1 cup shredded cheese (e.g., mozzarella or cheddar)
- 2 cloves garlic, minced
- 1 teaspoon dried oregano
- 1/4 cup melted butter
Instructions
- Prep the yeast: In a small bowl, mix warm water with sugar and yeast. Let it sit for about 5-10 minutes until foamy.
- Combine dry ingredients: In a large mixing bowl, combine flour and salt. Make a well in the center.
- Mix it up: Pour the foamy yeast mixture into the well along with olive oil. Stir until the dough starts to come together.
- Knead it out: Sprinkle flour on your work surface and turn out the dough. Knead for about 5-7 minutes until smooth and elastic.
- Let it rise: Place dough in a greased bowl, cover with a damp towel, and let it rise until doubled in size (about 1 hour).
- Prepare the filling: Mix shredded cheese, minced garlic, and oregano in a bowl.
- Shape the rolls: Punch down the risen dough, divide into 12 pieces, and flatten each into a disc.
- Fill ‘er up: Add a spoonful of the cheese-garlic mixture in each disc and fold the edges to seal.
- Second rise: Place filled rolls seam-side down on a baking sheet. Cover and let rise for another 30 minutes.
- Butter them up: Preheat oven to 375°F (190°C). Brush the rolls with melted butter.
- Bake to perfection: Bake for about 15-20 minutes until golden brown.
- Cool and serve: Let cool slightly, then serve warm.
Notes
Serve with marinara sauce or garlic butter for dipping. Great with soups or as part of a cheese board.
- Prep Time: 15 minutes
- Cook Time: 20 minutes
- Category: Appetizer
- Method: Baking
- Cuisine: Italian
Nutrition
- Serving Size: 1 roll
- Calories: 180
- Sugar: 1g
- Sodium: 250mg
- Fat: 7g
- Saturated Fat: 4g
- Unsaturated Fat: 2g
- Trans Fat: 0g
- Carbohydrates: 24g
- Fiber: 1g
- Protein: 6g
- Cholesterol: 20mg
Keywords: cheesy rolls, garlic rolls, comfort food, baking, appetizer
Stuffed Pasta Shells
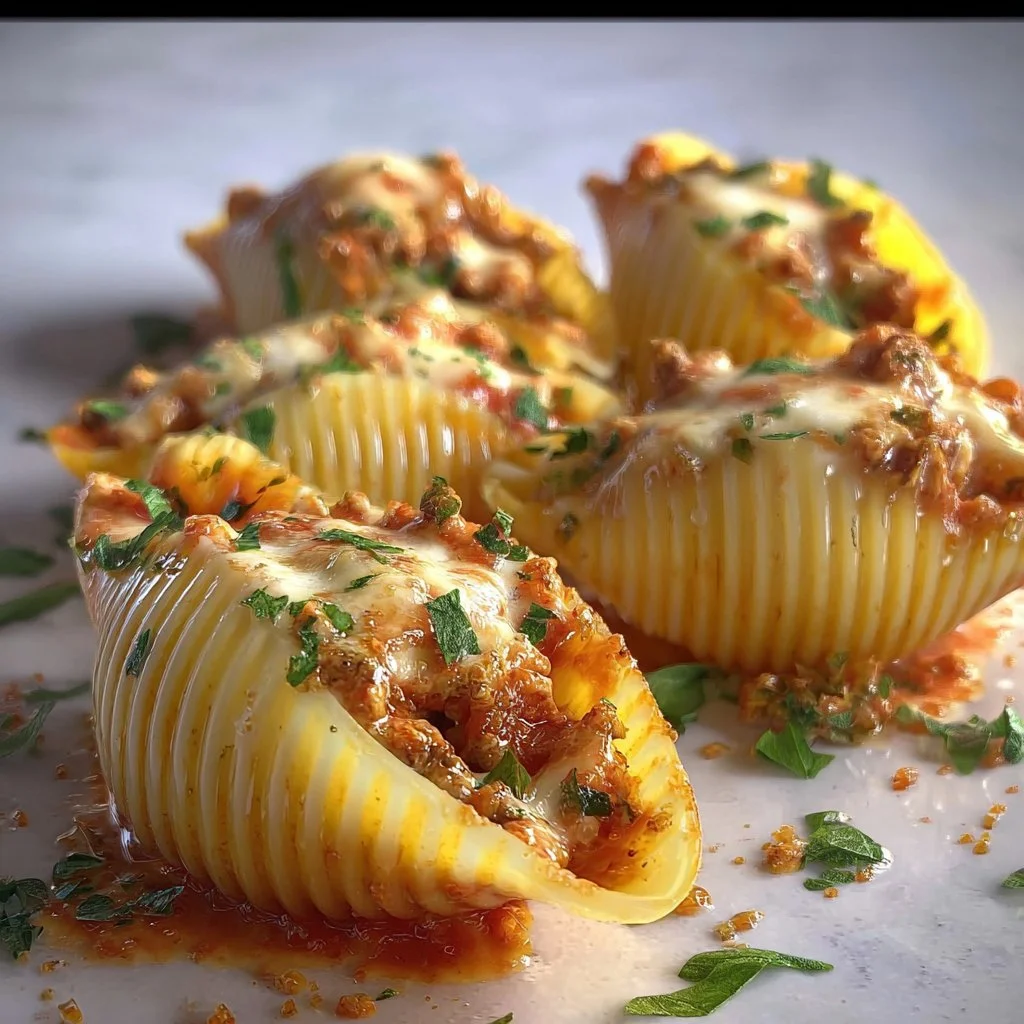
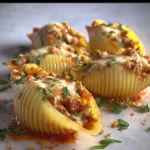
# Dive into Deliciousness: Stuffed Pasta Shells Recipe

## Introduction

Hey there, fellow food lovers! It’s Beau Collier here, and today we’re diving into the heart of comfort food with my all-time favorite: **Stuffed Pasta Shells**. This dish isn’t just a staple in my kitchen; it’s a heartwarming meal that brings people together. Picture this: you’ve had a long day, and all you want is to whip up something cozy that smells divine in your home. Well, these stuffed shells are just the ticket!

What I love most about stuffed pasta shells is their versatility. You can customize them to your liking, and they still come out tasting fantastic. Think of them as an edible hug, filled to the brim with savory goodness! You can impress family, friends, or even yourself with this dish—you might find your kitchen smelling like an Italian trattoria in no time!

Now, you might be wondering why I’m so passionate about these shells. Let me take you back for a moment. Growing up, my family would have “pasta night” every Sunday. It was our time to reconnect, share stories, and indulge in heaping plates of deliciousness. My mom had a knack for stuffing those pasta shells to perfection, and I can still hear her laughter mingling with the bubbling sauce as we gathered around the table.

Whether you’re a culinary whiz or a kitchen newbie, you’ll find this recipe easy to follow and, most importantly, utterly satisfying. So grab your apron, roll up those sleeves, and let’s make some comforting, cheesy, and delicious stuffed pasta shells together!

---

## Personal Story

One of my fondest memories in the kitchen revolves around making stuffed pasta shells with my grandma. I remember bustling around her kitchen, which always smelled like a combination of garlic and warm bread. We would open up a can of rich, zesty marinara sauce and gaze into the pot, mesmerized as it bubbled away.

The highlight, of course, was the stuffing process. We made a mess, flour everywhere, ricotta smeared across the countertop. Grandma would chuckle and say, “A little mess means a lot of love!” She taught me the importance of enjoying the process and making meals that bring people together. Those pasta shells became our love letters to family, and every bite was filled with a blend of flavors and laughter.

Fast forward a few years, and I find myself recreating those magical moments in my kitchen, sharing the same recipe with friends and family. Each time I pull together those ingredients, it feels like a time capsule, taking me back to those Sunday evenings filled with joy and connection.

---

## Ingredients

Let's talk about the stars of our show! Here’s how to make your stuffed pasta shells sing with flavor:

- **12 Jumbo Pasta Shells**
  Try to find the largest you can! If you can't get jumbo shells, conchiglie (shell pasta) work too but will change the overall feel a bit.

- **1 Pound Ground Beef**
  You can substitute ground turkey, chicken, or even plant-based meat if you prefer a lighter or vegetarian option.

- **1 Cup Ricotta Cheese**
  A creamy filling that’s essential for that classic texture. For a twist, try blending in cottage cheese or even goat cheese!

- **1 Cup Shredded Mozzarella Cheese**
  Melty and bubbly goodness! You could swap this for provolone or fontina for a different flavor profile.

- **2 Cups Marinara Sauce**
  Store-bought or homemade – no one’s judging! If you want to play with flavors, opt for arrabbiata for a spicy kick.

- **1/2 Cup Grated Parmesan Cheese**
  Adds a salty depth. If you prefer dairy-free, there are excellent vegan Parmesan options out there.

- **1 Egg**
  Helps hold the filling together. If you’re going vegan, a flax egg works great!

- **1 Teaspoon Italian Seasoning**
  A robust blend of herbs that compliments the dish beautifully. If you’ve got the individual spices on hand, a mix of oregano and thyme will suffice.

- **Salt and Pepper to Taste**
  Essential in every kitchen. Always adjust to your palate!

- **Fresh Basil for Garnish (optional)**
  This adds a lovely touch of freshness. Feel free to skip it, but it really brightens up the meal!

---

## Step-by-Step Instructions

Alright, let’s get cooking! Follow these steps to create a plate of joyous stuffed pasta shells:

### Step 1: Preheat the Oven
Start by preheating your oven to 375°F (190°C). This ensures it’s nice and toasty by the time your delicious shells are ready to bake.

### Step 2: Cook the Pasta Shells
Bring a large pot of salted water to boil. Once it’s bubbling away, add the jumbo pasta shells. Cook until they are al dente—about 8-10 minutes. We want them to be firm since they’ll continue cooking in the oven. Once done, drain them and rinse with cold water to stop the cooking process. Set aside, and admire your handiwork!

### Tip:
Add a drizzle of olive oil to keep them from sticking together while they cool.

### Step 3: Prepare the Filling
In a large mixing bowl, combine your ground beef (or your chosen protein), ricotta cheese, half of the mozzarella cheese, egg, Italian seasoning, salt, and pepper. Mix until everything is well incorporated.

### Tip:
Taste a tiny spoonful of the mixture before adding salt to ensure you get the seasoning just right.

### Step 4: Fill the Shells
Grab a spoon (or a sturdy piping bag if you’re feeling fancy) and begin stuffing each pasta shell with the filling mixture. You want them generously filled but not burst at the seams. Place each filled shell in a baking dish.

### Step 5: Assemble the Dish
Once all your shells are filled, pour the marinara sauce evenly over the top, making sure each shell has a little sauce love. Sprinkle the remaining mozzarella cheese and the Parmesan over the top so that it’s all bubbly and golden when baked.

### Step 6: Bake Your Creation
Cover the baking dish with aluminum foil and pop it in the oven for 25 minutes. This helps steam the shells and meld those luscious flavors. After 25 minutes, remove the foil and let it bake for another 10 minutes, or until the cheese is melted and slightly browned.

### Step 7: Garnish and Serve
Take it out, let it cool for a minute (if you can!), and sprinkle with fresh basil. Now it’s time to dig in!

---

## Serving Suggestions

When it comes to plating, let’s keep it rustic yet elegant. Serve these stuffed pasta shells on a large platter, drizzled with a bit more marinara for that vibrant color. Pair with a side of garlic bread to soak up every bit of that saucy goodness.

For a touch of freshness, add a simple salad—think arugula with a squeeze of lemon and some cherry tomatoes. Perfect to balance out those cheesy, hearty shells!

---

## Recipe Variations

Now, let’s talk about getting creative! Here are a few fun twists you can try with your stuffed pasta shells:

1. **Spinach and Ricotta:** Mix in some sautéed spinach with your ricotta for a pop of color and added nutrients.

2. **Mexican Twist:** Use taco seasoning instead of Italian seasoning and fill with a mix of seasoned ground beef, black beans, and corn. Top with salsa and cheese!

3. **Sweet Potato Swirl:** Swap half of the ricotta for mashed sweet potatoes for a slight sweetness and creamy consistency.

4. **Seafood Delight:** Try stuffing your shells with a mix of shrimp and crabmeat for a coastal vibe. Use a white sauce instead of marinara to complement the seafood flavors.

5. **Vegan Option:** Use lentils or chickpeas with Italian herbs as stuffing. Replace cheeses with cashew cheese or nutritional yeast for a cheesy taste.

---

## Chef’s Notes

This recipe has come a long way since my grandma made it. I’ve found that the key to perfect stuffed shells lies in how you balance the flavors in the filling. My initial attempts often resulted in a lack of seasoning, but now I encourage experimentation! Each time I make this dish, I think back to the laughter in my grandma’s kitchen and realize that the love you put into cooking is what makes the difference.

So don’t stress perfection—embrace the chaos and enjoy the kitchen dance!

---

## FAQs and Troubleshooting

**1. Can I freeze the stuffed shells?**
Absolutely! Just prepare up until the baking step, then cover tightly and freeze. When you’re ready to eat, just thaw overnight in the fridge and bake without needing to adjust the cooking time too much.

**2. My filling is too runny!**
If your filling seems too wet, consider draining the ricotta or adding more cheese. Sometimes moisture from the meat can affect it, too. A tablespoon of breadcrumbs can help absorb excess moisture as well!

**3. What if my pasta shells break?**
This can happen! Just layer them in the dish with a bit more sauce—broken shells still taste divine!

**4. How long do leftovers last?**
They’ll keep in the fridge for about 3-4 days. Just reheat gently in the oven or microwave.

---

## Nutritional Info

Each serving of these stuffed pasta shells is not just hearty and comforting, but they also pack a nutritional punch:

- **Calories:** ~350 (depends on filling and sauce variety)
- **Protein:** 24g (from beef and cheese)
- **Carbohydrates:** 33g (wonderfully filling!)
- **Fat:** 18g (thanks to the cheeses)
- **Fiber:** 2g (from pasta and added veggies)

Stuffed shells are a delightful way to enjoy a meal that covers the bases of taste, comfort, and nutrition.

---

## Final Thoughts

There you have it, my dear food friends—a mouthwatering journey into the world of stuffed pasta shells! This dish embodies the essence of comforting cooking, bringing with it a flurry of flavors and memories that tantalize the senses.

So the next time you're in need of a warm hug from your kitchen, remember this recipe. It’s not just about filling pasta; it’s about sharing joy and experiences, just like my grandma did all those years ago. Don’t hesitate to put your spin on it and explore endless possibilities—cooking should be fun, after all!

Happy cooking, and I can’t wait to hear about your adventures in making these stuffed shells!
Stuffed Pasta Shells
- Total Time: 55 minutes
- Yield: 4 servings 1x
- Diet: Omnivore
Description
A heartwarming dish featuring jumbo pasta shells stuffed with a savory filling of ground beef, ricotta, and mozzarella, baked in marinara sauce.
Ingredients
- 12 Jumbo Pasta Shells
- 1 Pound Ground Beef
- 1 Cup Ricotta Cheese
- 1 Cup Shredded Mozzarella Cheese
- 2 Cups Marinara Sauce
- 1/2 Cup Grated Parmesan Cheese
- 1 Egg
- 1 Teaspoon Italian Seasoning
- Salt and Pepper to Taste
- Fresh Basil for Garnish (optional)
Instructions
- Preheat the oven to 375°F (190°C).
- Cook the pasta shells in boiling salted water until al dente, about 8-10 minutes, then drain and rinse.
- Prepare the filling by mixing ground beef, ricotta, half of the mozzarella, egg, Italian seasoning, salt, and pepper in a bowl.
- Fill each shell generously with the mixture and place them in a baking dish.
- Assemble the dish by pouring marinara sauce over the shells and sprinkling the remaining mozzarella and Parmesan on top.
- Bake covered with foil for 25 minutes, then uncovered for an additional 10 minutes until cheese is bubbly.
- Garnish with fresh basil before serving.
Notes
Customize the filling with different proteins or add vegetables for variety. Freezes well before baking.
- Prep Time: 15 minutes
- Cook Time: 40 minutes
- Category: Main Course
- Method: Baking
- Cuisine: Italian
Nutrition
- Serving Size: 1 serving
- Calories: 350
- Sugar: 5g
- Sodium: 400mg
- Fat: 18g
- Saturated Fat: 10g
- Unsaturated Fat: 6g
- Trans Fat: 0g
- Carbohydrates: 33g
- Fiber: 2g
- Protein: 24g
- Cholesterol: 70mg
Keywords: stuffed pasta shells, Italian recipe, comfort food
No Bake Oreo Cheesecake Cups
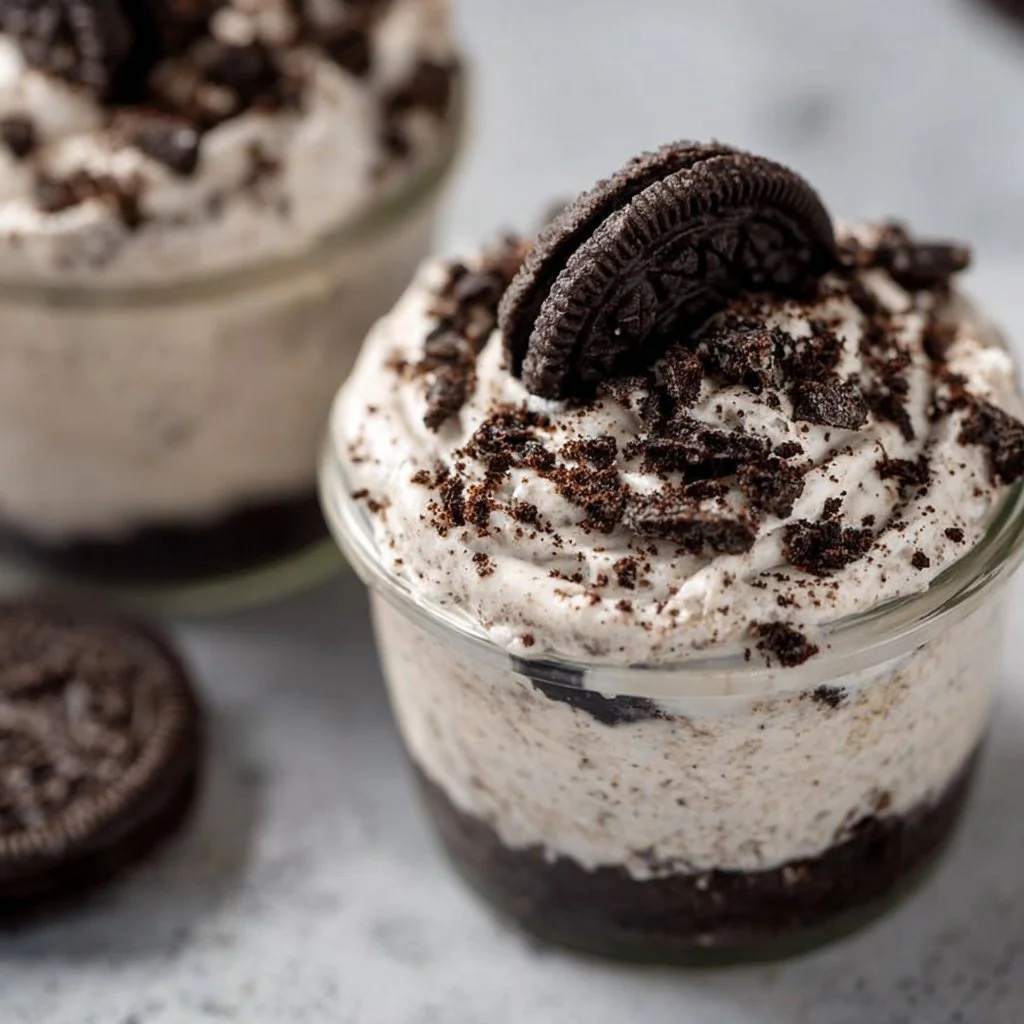
No-Bake Oreo Cheesecake Cups: A Delicious Journey to Sweetness
Hey there, fellow foodies! Are you ready to embark on a culinary adventure that requires zero baking and promises loads of flavor? Let me introduce you to the ultimate dessert: No-Bake Oreo Cheesecake Cups. These little jars of joy are not just about the creamy, dreamy cheesecake filling and the crunchy Oreo crust but also about the memories they create. Trust me, each spoonful is like unwrapping a present filled with sweetness and nostalgia.
As a chef who loves to whip up comforting treats, I can attest that the best recipes don’t always come from the oven. Sometimes, they come from moments shared around a table, laughter echoing in the air, and the sweet aroma of desserts tempting your taste buds. Whether it’s for a backyard barbecue, a movie night with friends, or simply a treat for yourself (hey, you deserve it!), these No-Bake Oreo Cheesecake Cups are the cherry on top of any gathering.
In this blog post, I’ll share how you can make these delightful cups easily at home. With just a handful of ingredients and a bit of love, you’ll be crafting a dessert that’ll leave everyone asking for seconds. So, grab your favorite mixing bowl, and let’s dive into this delicious recipe!
Personal Story
I still remember the summer I discovered my love for cheesecakes. It was a sun-drenched afternoon, and my grandma had decided it was the perfect day to teach me how to make her famous cheesecake. There were no fancy ingredients or complicated methods; just the simple joy of mixing cream cheese, sugar, and love in a bowl. She always had a way of turning ordinary days into memorable ones.
Fast forward a few years, and I found myself experimenting with different variations to keep the flavor alive. That’s when I stumbled upon the right twist: Oreo cookies! Combining my grandma’s classic recipe with these chocolatey delights created something magical. Every time I make these No-Bake Oreo Cheesecake Cups, I’m reminded of my grandma’s warm kitchen and the way she made cooking feel like a celebration. Each cup is a tribute to her legacy, bridging the gap between the past and the present, and reminding me of how food can connect us to our roots.
Ingredients
Here’s what you’ll need to whip up these scrumptious No-Bake Oreo Cheesecake Cups:
-
1 package Oreo cookies (about 15 cookies)
These iconic cookies will serve as the crunchy base. If you’re feeling fancy, you can use any brand of chocolate sandwich cookies or gluten-free versions for a dietary swap. -
8 oz cream cheese, softened
Cream cheese is the star of the show, giving the cheesecake its luscious texture. To lighten it up, try using Neufchâtel cheese, which has less fat but still gives you that creamy goodness. -
1/2 cup powdered sugar
This sweetener gives the filling that nice, smooth sweetness without any graininess. Feel free to use coconut sugar or a sugar substitute if you’re looking for a healthier option. -
1 cup whipped topping
This ingredient is what makes our cheesecake light and fluffy. You can substitute it with freshly whipped cream for a more homemade feel. Just make sure to sweeten it to your liking! -
1/2 cup chocolate chips (optional for garnish)
These are for those who crave an extra layer of chocolaty goodness. If you’re feeling adventurous, you might even use white chocolate or butterscotch chips instead.
Step-by-Step Instructions
Ready to create some magic? Follow my step-by-step guide to make these No-Bake Oreo Cheesecake Cups, and get ready to impress your friends and family!
-
Prepare Your Ingredients
Make sure your cream cheese is softened to room temperature. If time is short, you can microwave it for about 10-15 seconds—just be careful not to melt it! -
Crush the Oreo Cookies
In a zip-top bag, throw in the Oreo cookies, seal it tight, and use a rolling pin or your hands to crush them into fine crumbs. Aim for a texture similar to sand—some larger chunks will add a delightful crunch later! -
Make the Cookie Crust
In a mixing bowl, take about 3/4 of the crushed Oreos and mix them with 2 tablespoons of melted butter until combined. This will create your crust. Spoon a generous amount into the bottom of your serving cups and press it down with the back of a spoon to form an even base. -
Prepare the Cheesecake Filling
In another bowl, beat the softened cream cheese with an electric mixer until it’s nice and smooth. Gradually add in the powdered sugar and beat until well combined. -
Add the Whipped Topping
Gently fold in the whipped topping into the cream cheese mixture. Take your time—this step is crucial for creating that fluffy texture, so be gentle to keep the air in. -
Layer It Up
Spoon the cheesecake filling over the cookie crust in your cups—aim for about an inch-layer. Shake it a little to settle, and don’t worry if it gets a bit messy; that’s part of the fun! -
Top It Off
Sprinkle the remaining crushed Oreos on top of your cheesecake filling for that delicious finishing touch. If you’re using chocolate chips, now’s the time to add those too! -
Chill Out
Place your filled cups in the fridge for at least two hours (or overnight for maximum flavor infusion!). The longer, the better! -
Serve and Enjoy!
When you’re ready to serve, take them out, and if desired, add a dollop of whipped cream on top for that extra flair. Enjoy your creation, and don’t forget to share (or not!).
Serving Suggestions
The beauty of these No-Bake Oreo Cheesecake Cups is their versatility! Here are a few ideas on how to plate or serve them:
-
Individual Cups: Keep them in their cute little cups for a cozy, personal touch. It’s perfect for parties, picnics, or simply enjoying on your own.
-
Garnishing Goodness: Consider adding fresh raspberries or strawberries on top for a pop of color and flavor contrast. They not only look stunning but also add a refreshing zing to each bite.
-
Chocolate Drizzle: A drizzle of chocolate sauce can elevate the look and taste. Just warm some chocolate in the microwave and let it drizzle artistically over the top.
-
Layer Presentation: For a family gathering, consider using a large glass dish to show off layered beauty. Just alternate the layers of crust and cheesecake filling, finishing with crushed Oreos and chocolate chips.
Recipe Variations
Feeling adventurous? Here are a few creative twists and variations you can try:
-
Mint Chocolate Oreo Cheesecake: Use mint-flavored Oreo cookies for a refreshing minty twist!
-
Peanut Butter Delight: Add 1/3 cup of creamy peanut butter to the cheesecake filling for a nutty flavor explosion.
-
Caramel Sauce Swirl: Drizzle caramel sauce into the cheesecake filling before layering it over the crust for a sweeter variation.
-
Fruit-Infused: Mix in some pureed strawberries or blueberry puree into your filling. This will give a fruity essence and a burst of color!
-
Vegan Version: Substitute the cream cheese with a vegan cream cheese alternative and the whipped topping with coconut whipped cream for a delightful dairy-free treat.
Chef’s Notes
Bringing this No-Bake Oreo Cheesecake Cups recipe to life has been a joy! Over the years, I’ve played with various flavors, and the joy of seeing my friends’ faces when they take that first bite is priceless. I remember one time—trying to impress my date—I added a dash of espresso powder for an extra kick. Let’s just say it didn’t go exactly as planned, and I ended up with a rather awake evening! But, hey, each kitchen mishap teaches you something, right?
FAQs and Troubleshooting
1. Why is my cheesecake filling too runny?
If your filling is too runny, your cream cheese might not have been fully softened or beaten enough. Make sure to mix until completely smooth without lumps.
2. Can I make this dessert ahead of time?
Absolutely! These cups are great for prepping a day in advance. Just keep them covered in the fridge until you’re ready to serve.
3. My crust looks too dry/crumbly. What do I do?
If your Oreo crust is too crumbly, try adding a bit more melted butter. A moist crumb will help it stick together.
4. How long will these keep in the fridge?
They’ll stay fresh for about 3–5 days in the fridge. Just make sure they are covered properly!
Nutritional Info
While these delightful No-Bake Oreo Cheesecake Cups are a treat, they’re also a dessert to savor. Let’s break down the nutritional information per cup (this can vary based on exact ingredients and serving sizes):
- Calories: 300
- Total Fat: 16g
- Saturated Fat: 8g
- Cholesterol: 40mg
- Sodium: 190mg
- Total Carbohydrates: 34g
- Dietary Fiber: 1g
- Sugars: 20g
- Protein: 4g
These cups are rich and indulgent, so enjoy them as an occasional treat rather than a daily habit!
Final Thoughts
There you have it! A no-fuss, deliciously satisfying dessert that’s perfect for every occasion. My journey creating these No-Bake Oreo Cheesecake Cups has not only filled my kitchen with delightful aromas but also enriched my soul with love and laughter shared around the table.
Remember, cooking is as much about the process as it is about the outcome. Whether it’s a kitchen disaster or a stunning success, enjoy every moment and don’t forget to make it your own! I can’t wait for you to try this recipe and share your own stories and memories that come along with it.
Until next time, keep cooking, keep exploring, and keep feasting with joy! Bon appétit! 🍰
Print
No-Bake Oreo Cheesecake Cups
- Total Time: 120 minutes
- Yield: 4 servings 1x
- Diet: Vegetarian
Description
Delicious No-Bake Oreo Cheesecake Cups featuring a creamy cheesecake filling and crunchy Oreo crust, perfect for any occasion.
Ingredients
- 1 package Oreo cookies (about 15 cookies)
- 8 oz cream cheese, softened
- 1/2 cup powdered sugar
- 1 cup whipped topping
- 1/2 cup chocolate chips (optional for garnish)
Instructions
- Prepare Your Ingredients: Make sure your cream cheese is softened to room temperature. If time is short, you can microwave it for about 10-15 seconds—just be careful not to melt it!
- Crush the Oreo Cookies: In a zip-top bag, throw in the Oreo cookies, seal it tight, and use a rolling pin or your hands to crush them into fine crumbs.
- Make the Cookie Crust: In a mixing bowl, take about 3/4 of the crushed Oreos and mix them with 2 tablespoons of melted butter until combined. Spoon into the bottom of your cups to form an even base.
- Prepare the Cheesecake Filling: Beat softened cream cheese with an electric mixer until smooth. Gradually add in the powdered sugar and beat until well combined.
- Add the Whipped Topping: Gently fold in the whipped topping into the cream cheese mixture.
- Layer It Up: Spoon the cheesecake filling over the cookie crust in your cups.
- Top It Off: Sprinkle the remaining crushed Oreos on top of your cheesecake filling and optionally add chocolate chips.
- Chill Out: Place your filled cups in the fridge for at least 120 minutes (or overnight for maximum flavor infusion!).
- Serve and Enjoy: Add a dollop of whipped cream on top before serving if desired.
Notes
These cups can be made a day in advance and stored in the fridge. Enjoy them cold!
- Prep Time: 15 minutes
- Cook Time: 0 minutes
- Category: Dessert
- Method: No-Bake
- Cuisine: American
Nutrition
- Serving Size: 1 cup
- Calories: 300
- Sugar: 20g
- Sodium: 190mg
- Fat: 16g
- Saturated Fat: 8g
- Unsaturated Fat: 0g
- Trans Fat: 0g
- Carbohydrates: 34g
- Fiber: 1g
- Protein: 4g
- Cholesterol: 40mg
Keywords: no-bake, cheesecake, Oreo, dessert, easy recipe
Cajun Sausage Pasta
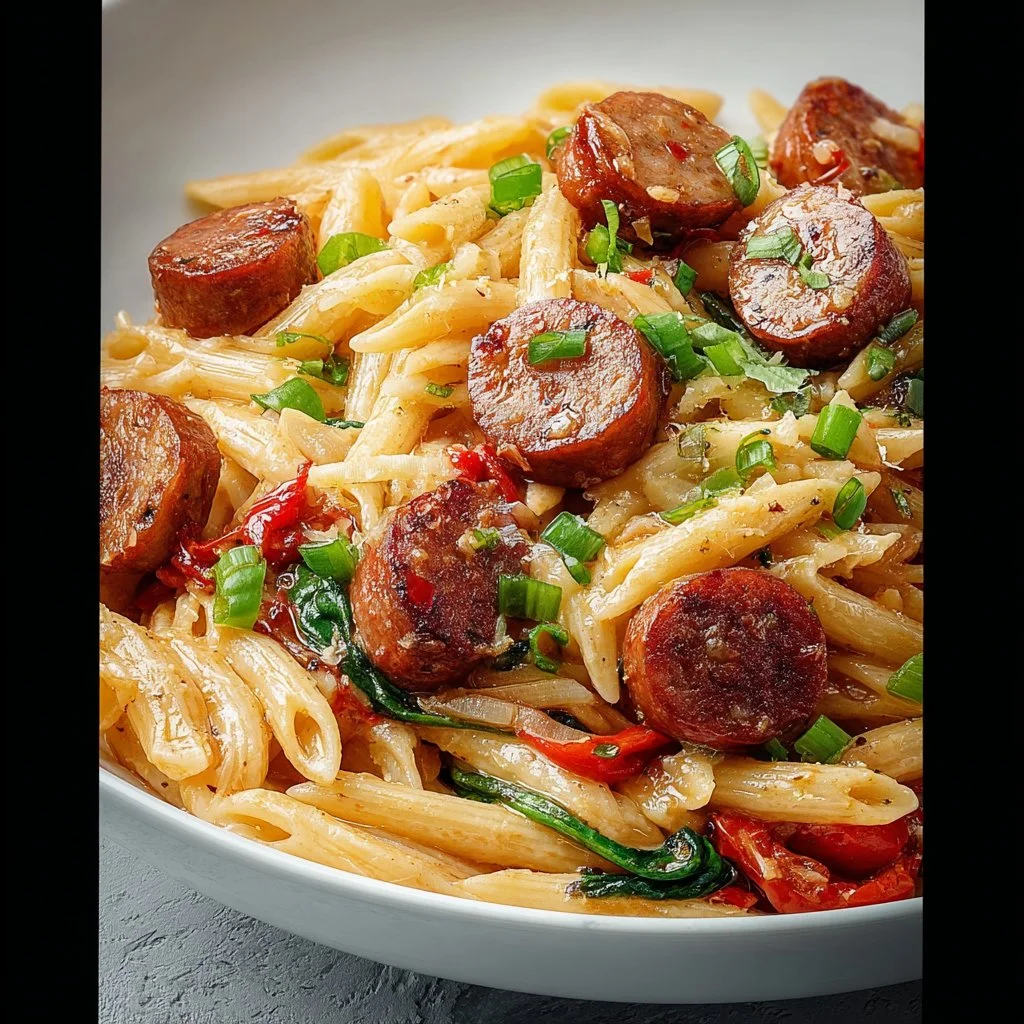
Cajun Sausage Pasta: A Flavorful Adventure in Every Bite!
Hey there, fellow foodies! Welcome to the warm and savory world of Cajun Sausage Pasta—a dish that dances on your palate and wraps you in a cozy embrace of flavors. If you’re looking for a dinner recipe that’s easy enough to whip up on a busy weeknight yet impressive enough for a weekend gathering, you’ve just struck gold!
Now, let me take you back in time, to that wondrous moment when I first discovered the vibrant, bold flavors of Cajun cuisine— a delicious blend of spices that just sings in your mouth! I remember the first time I encountered it at a local food festival; the aroma wafted through the air, pulling me towards the lively stall with an enticing menu. I was handed a heaping plate of pasta, bursting with smoky sausage, fresh peppers, and creamy goodness. It wasn’t just a meal—it was an experience!
That day sparked a creative journey in my kitchen. I started experimenting, riffing off classic recipes and adding my personal touch, which eventually led me to develop this Cajun Sausage Pasta masterpiece. So, whether you’re sitting at your cozy kitchen table, ready to dive into a bowl of heartwarming pasta, or just browsing for your next culinary adventure, you’re going to absolutely love what’s coming up next!
Join me as we dive into this flavorful recipe that combines the silky smoothness of heavy cream with the spicy kick of Cajun seasoning. Let’s get started, shall we?
Personal Story
Ah, the memories of my first culinary experiment with Cajun flavors still make me smile! It was a rainy Saturday afternoon, and I was flipping through cookbooks looking for inspiration. My eyes landed on a classic pasta dish, and suddenly, I was craving something so flavorful it could practically dance off the plate!
I rummaged through my pantry, pulling out ingredients that sang that Cajun tune. As I sliced the sausage and seared it in the pan, the aroma filled the air, transporting me to a bustling New Orleans kitchen, where laughter mingle d with the sizzle of expertly crafted dishes. I dashed to the fridge for bell peppers and garlic and threw everything together with a splash of cream—and oh boy, did it come together beautifully!
That day, I not only made a delicious meal, but I also created a tradition that I still cherish; this dish became a staple for gatherings with family and friends. Piling bowls high, sharing stories, and relishing the burst of flavors created a symphony of joy. It’s those heartfelt moments that make cooking so special—an interconnectedness through culinary love. And I can’t wait for you to create your own memories with this dish!
Ingredients
Alright, my culinary friends, let’s gather our star players for this Cajun Sausage Pasta. Here’s what you’ll need:
- 8 oz pasta (penne or fettuccine): Choose whichever you fancy! Penne scoops up all that creamy goodness perfectly, while fettuccine gives you those lovely ribbons of flavor.
- 12 oz smoked sausage (sliced): This is where the magic happens! The smokiness adds depth—feel free to substitute with chorizo or turkey sausage if you need a lighter option.
- 1 onion (chopped): A classic flavor base. Sweet or yellow onions work well; red onions can offer a unique twist with extra sweetness!
- 1 bell pepper (chopped): Choose your favorite—red, green, or yellow. Each brings its own flavor palette, and it makes the dish pop with color!
- 3 cloves garlic (minced): A must-have! Garlic brings an aromatic punch to the dish. Fresh is always best—if you’re in a pinch, garlic powder works too.
- 1 can (14.5 oz) diced tomatoes (with juices): They add acidity and brightness; the juices also help create the sauce. Look for fire-roasted tomatoes for an extra touch of flavor!
- 1 cup heavy cream: This adds a luxurious richness. You can swap it for half-and-half for a lighter version, but hey, we’re living a little here, right?
- 1 cup shredded cheese (cheddar or mozzarella): Cheese makes everything better! Cheddar adds a bit of sharpness, while mozzarella offers a gooey texture.
- 2 tsp Cajun seasoning: The star of the show! Feel free to use store-bought or whip up your own with paprika, cayenne, thyme, and oregano.
- Salt and pepper to taste: Always season to make those flavors shine!
- Olive oil for cooking: A drizzle of quality extra virgin is all you need to get started.
- Fresh parsley (for garnish): Not just for looks, it adds a pop of freshness that balances the richness.
Now that we’ve got our ingredient lineup, let’s get cooking and create this culinary masterpiece!
Step-by-Step Instructions
Step 1: Boil Your Pasta
First things first, bring a large pot of salted water to a boil. Add your chosen pasta and cook according to package instructions until al dente. Give it a good stir to prevent sticking, and don’t forget to reserve about a cup of pasta water before draining! The starchy water can help thicken our sauce later if needed.
Step 2: Sauté the Sausage
In a large skillet or pot, heat a drizzle of olive oil over medium heat. Add the sliced smoked sausage and sauté for about 5 minutes, or until golden brown and fragrant. This step is crucial—it caramelizes the sausage, giving an outstanding depth to the final dish. Once nicely browned, remove the sausage from the skillet and set it aside.
Step 3: Cook the Veggies
In the same skillet, add the chopped onion and bell pepper. Sauté these beauties until they’re soft and translucent—about 4-5 minutes. The fond (those little brown bits left from the sausage) will add extra flavor to the vegetables as they cook. Toss in the minced garlic and sauté for another minute until it’s aromatic—oh, that smell is simply heavenly!
Step 4: Add Tomatoes and Cream
Pour in the can of diced tomatoes along with their juices. Stir it all together, scraping any leftover bits from the bottom of the pan. Let this simmer for about 3 minutes. Then, reduce the heat and add the heavy cream, continuously stirring to combine. If that sauce looks too thick, here’s where we can add just a bit of reserved pasta water to achieve the consistency you crave.
Step 5: Season and Combine
Now it’s time to bring in the flavors! Add the Cajun seasoning, salt, and pepper to taste. Stir in the sautéed sausage; let it cook together for another 3-4 minutes on low heat, allowing all those flavors to marry beautifully. Don’t be afraid to taste as you go—you want this dish to sing in harmony!
Step 6: Mix in Pasta & Cheese
Finally, add the drained pasta to the skillet. Toss everything together until the pasta is well coated in that creamy, spicy sauce. Then, stir in the shredded cheese until melted—this is the moment where you’ll start drooling! If needed, you can add a splash more of pasta water to get everything just right.
Step 7: Garnish and Serve
Plate your Cajun sausage pasta, garnishing generously with fresh parsley and maybe an extra sprinkle of cheese on top. Feel free to serve it hot alongside a crisp green salad or some crusty garlic bread for a complete meal.
Serving Suggestions
When it comes to serving Cajun Sausage Pasta, presentation can elevate your dish into a whole new realm of deliciousness! Here are some serving tips to make your dish pop:
- Use Wide Bowls: Serving pasta in wide, shallow bowls allows the vibrant colors and textures to shine through while keeping the dish casual.
- Add a Crusty Side: Pair it with some garlic bread or warm baguette slices to mop up every last bite of that delicious sauce.
- Fresh Herbs for Flair: Besides parsley, consider topping it with fresh basil or striking green onions for added flavor and color.
- Grated Parmesan: A sprinkle of freshly grated Parmesan or Pecorino Romano adds a briny touch that beautifully complements the creamy sauce.
With every perfect bite, your dinner table will surely sing with joy!
Recipe Variations
The beauty of Cajun Sausage Pasta lies in its versatility—don’t hesitate to get creative! Here are some variations to consider:
-
Vegetable Twist: Add in your favorite veggies such as spinach, zucchini, or mushrooms. Simply sauté them with the onion and bell pepper for added nutrition!
-
Heat it Up: For a spicier kick, toss in chopped jalapeños or an extra dash of cayenne to elevate that Cajun heat!
-
Protein Swap: Try chicken, shrimp, or even a plant-based sausage alternative to match your dietary preferences.
-
Creamy Options: Substitute heavy cream with a dairy-free option such as coconut cream, or make it lighter using Greek yogurt for a tangy twist.
-
Herb Boost: Fresh thyme or oregano can elevate the dish further with delightful aromatic notes that pair wonderfully with Cajun seasoning.
The possibilities are endless; let your creativity run wild!
Chef’s Notes
I have to confess—this recipe has evolved over time. Initially, I stuck strictly to the classic ingredients, but as I experimented and played around, I found that diverse flavors truly enrich this dish. Sometimes I throw in leftovers, be it chicken or veggies, and it always turns into a flavorful feast.
One fun story—once while preparing this dish, I accidentally spilled an entire jar of Cajun seasoning while trying to shake it into the pot. Instead of panicking, I embraced it and added a bit more cream to balance it out, creating a spicier version that became an instant favorite among friends! Those kitchen mishaps that turn into delicious surprises are what cooking is all about!
FAQs and Troubleshooting
1. My sauce is too thick; what should I do?
Don’t worry! A splash of reserved pasta water or a bit more cream can help loosen up that sauce and bring it back to a creamy consistency.
2. How do I store leftovers?
Store any leftover Cajun Sausage Pasta in an airtight container in the fridge for up to 3 days. Reheat on the stove or in a microwave, adding a splash of cream or broth to bring it back to life!
3. Can I freeze this dish?
Absolutely! To freeze, place cooled pasta in an airtight container or freezer bag, where it can stay fresh for up to 3 months. Just remember, the texture may slightly change upon thawing.
4. What if I don’t have Cajun seasoning?
No worries! You can create your own mix using paprika, cayenne pepper, oregano, and thyme—adjusting to your preferred spice level.
Nutritional Info
While Cajun Sausage Pasta is undeniably delicious, it’s also important to consider the nutritional aspects. Here’s a general breakdown per serving (based on typical ingredients):
- Calories: Approx. 550
- Protein: 25g
- Carbohydrates: 40g
- Fat: 30g (mostly from cream and cheese)
- Fiber: 3g
Keep in mind that variations and substitutions will alter the nutritional values, so feel free to customize it according to your dietary needs!
Final Thoughts
There you have it—a delightful and comforting bowl of Cajun Sausage Pasta that you can whip up with ease and finesse! Cooking shouldn’t be a chore; it’s a joyful adventure, a chance to combine flavors, share experiences, and create lasting memories around the dinner table.
So next time you’re yearning for something delicious that packs a flavorful punch, give this recipe a try! I can guarantee it will bring smiles, laughter, and perhaps a little dancing in the kitchen. Remember, the best part of any meal is the love you share with those around you. Now, grab your apron, put on some tunes, and let’s get cooking together! Happy feasting!
Print
Cajun Sausage Pasta
- Total Time: 35 minutes
- Yield: 4 servings 1x
- Diet: None
Description
A delightful and savory Cajun sausage pasta dish that combines bold flavors with creamy goodness. Perfect for a weeknight dinner or a weekend gathering!
Ingredients
- 8 oz pasta (penne or fettuccine)
- 12 oz smoked sausage (sliced)
- 1 onion (chopped)
- 1 bell pepper (chopped)
- 3 cloves garlic (minced)
- 1 can (14.5 oz) diced tomatoes (with juices)
- 1 cup heavy cream
- 1 cup shredded cheese (cheddar or mozzarella)
- 2 tsp Cajun seasoning
- Salt and pepper to taste
- Olive oil for cooking
- Fresh parsley (for garnish)
Instructions
- Bring a large pot of salted water to a boil. Add your chosen pasta and cook according to package instructions until al dente. Reserve about a cup of pasta water before draining.
- Heat olive oil in a large skillet over medium heat. Add the sliced smoked sausage and sauté for about 5 minutes, or until golden brown.
- In the same skillet, add the chopped onion and bell pepper. Sauté until soft and translucent—about 4-5 minutes. Add minced garlic and sauté for another minute.
- Pour in the diced tomatoes along with their juices. Let this simmer for about 3 minutes. Reduce heat and add the heavy cream, stirring continuously.
- Add Cajun seasoning, salt, and pepper to taste. Stir in the sautéed sausage and let it cook for another 3-4 minutes.
- Mix in the drained pasta, tossing everything together until well coated in the creamy sauce. Stir in the shredded cheese until melted.
- Plate your pasta, garnishing with fresh parsley and an extra sprinkle of cheese. Serve hot with your favorite sides.
Notes
Feel free to add your favorite vegetables or adjust the spice level to your liking. This dish is versatile and can easily be customized!
- Prep Time: 10 minutes
- Cook Time: 25 minutes
- Category: Main Course
- Method: Stovetop
- Cuisine: Cajun
Nutrition
- Serving Size: 1 serving
- Calories: 550
- Sugar: 5g
- Sodium: 800mg
- Fat: 30g
- Saturated Fat: 15g
- Unsaturated Fat: 10g
- Trans Fat: 0g
- Carbohydrates: 40g
- Fiber: 3g
- Protein: 25g
- Cholesterol: 100mg
Keywords: Cajun, pasta, sausage, comfort food, quick dinner

Honey BBQ Chicken and Garlic Parmesan Potatoes
The Sweet and Savory Symphony: Honey BBQ Chicken and Garlic Parmesan Potatoes
Hey there, fellow foodies! If you’re like me and believe that cooking should be as enjoyable as eating, then you’re in the right place. Today, we’re diving into a heartwarming, flavor-packed dish that’s perfect for those days when you want comfort food without the fuss—Honey BBQ Chicken and Garlic Parmesan Potatoes. Trust me, this meal is not just a feast for your taste buds; it’s a whole experience that can bring people together around the dinner table.
Imagine succulent chicken slathered in a sweet and tangy honey BBQ sauce, paired harmoniously with crispy baby potatoes coated in a velvety garlic Parmesan mixture. Whether you’re hosting friends, cooking for family, or just treating yourself on a lovely Wednesday evening, this dish is sure to put a smile on your face and a satisfied rumble in your tummy.
Now, you might be thinking about how these soulful flavors come together. The beauty is in the simplicity! With just a handful of ingredients and a few steps, you can whip up a meal that feels restaurant-worthy without breaking a sweat. Plus, the aromas wafting through your kitchen—oh boy, you’ll have your loved ones lining up for seconds before you even serve the first plate!
Gather your utensils, preheat your ovens, and let’s embark on this delightful culinary journey together! Grab your fork, or better yet, that favorite mug of yours filled to the brim with something cozy, and let’s dig in!
Personal Story
Growing up, food was the heartbeat of my home. My mom had this magical ability to turn everyday ingredients into something extraordinary, and one of her signature dishes was a BBQ chicken that could make anyone forget their troubles. I can still remember sitting around our wooden dinner table, the smell of sweet and sticky BBQ sauce permeating the air as the evening sun began to fade. She would serve it with crispy roasted potatoes, and we’d dive in as a family, laughing and reminiscing about our day.
Those moments inspired my love for cooking, especially dishes that bring families together. Each bite of that honey BBQ chicken transported me back to simpler times, filled with laughter and love. Today, as I recreate that beloved dish with my own twist, I can’t help but feel grateful for the memories and the warmth that cooking brings. So, let’s grab those ingredients and make some memories of our own!
Ingredients
Here’s what you’ll need to create this mouthwatering dish. Feel free to make substitutions based on what you have on hand or your dietary preferences!
-
4 boneless chicken breasts
The star of the show! Boneless chicken breasts are easy to cook and absorb flavors well. If you’re feeling adventurous, swap them out for thighs for a juicier texture! -
1 cup honey BBQ sauce
Sweet, sticky, and full of flavor! You can use store-bought or make your own. If you want a little heat, add some hot sauce or chili powder! -
2 pounds baby potatoes
These little gems are perfect for roasting—crispy on the outside and fluffy on the inside. You can use other types of potatoes, but adjust the cooking time accordingly! -
1 cup grated Parmesan cheese
Cheesy goodness alert! Parmesan adds a savory punch to the potatoes. If you’re dairy-free, nutritional yeast offers a similar cheesy flavor! -
4 cloves garlic, minced
Garlic elevates flavor to a whole new level. Love garlic? Feel free to add more. If you want a milder taste, roasted garlic is a great alternative! -
2 tablespoons olive oil
For roasting the potatoes to crispy perfection. Canola or avocado oil makes a great substitute if olive oil isn’t your jam! -
Salt and pepper to taste
Essential for bringing out the flavors in your dish. Don’t be afraid to season generously! -
Fresh parsley for garnish
It’s more than just a garnish! Chopped fresh parsley adds a pop of color and a refreshing flavor. Feel free to use other herbs like chives or thyme!
Step-by-Step Instructions
Let’s get cooking! Follow these detailed steps, and feel free to sprinkle in your own flair:
-
Preheat Your Oven
Start by preheating your oven to 400°F (200°C). It’s crucial to have a hot oven for crispy potatoes and perfectly cooked chicken! -
Prep the Chicken
While the oven is heating up, rinse your chicken breasts and pat them dry with a paper towel. This helps the BBQ sauce stick better. Season both sides with salt and pepper. -
Coat with BBQ Sauce
Place the chicken in a large bowl or directly in a baking dish and pour the honey BBQ sauce all over. Give it a good toss to ensure each piece is coated evenly. Let it marinate for a few minutes while you prepare the potatoes—this extra time enhances the flavor! -
Prepare the Potatoes
Next, wash the baby potatoes and cut them in half or quarters, depending on their size. Place them in a large mixing bowl, drizzle with olive oil, and sprinkle with salt, pepper, minced garlic, and half of the grated Parmesan cheese. Toss until each potato is coated in garlicky goodness. -
Bake, Bake, Bake!
Spread the potatoes on one side of a lined baking sheet and place the chicken breasts on the other side. This way, everything bakes together, and mingles those tasty flavors! Bake in the preheated oven for 25-30 minutes, or until the chicken is cooked through and has reached an internal temperature of 165°F (75°C). The potatoes should be golden and crispy, so if they need more time, you can remove the chicken first and let the potatoes roast a little longer! -
Finish with Parmesan
Once everything is nearly done, sprinkle the remaining Parmesan cheese on the potatoes and put them back in the oven for another 5 minutes. You want that cheese melted and slightly golden! -
Garnish and Serve
When everything is finished, take it out of the oven, and let it rest for a couple of minutes. This helps redistribute the juices in the chicken. Serve on a family-style platter, garnishing with fresh parsley for that lovely green pop!
Serving Suggestions
Now that your kitchen smells heavenly, let’s dress up your plate! When serving, you can go buffet-style or plate up individual servings. For a family-style feast, arrange the chicken and potatoes on a large platter, with sprigs of parsley for an elegant touch.
Pair this dish with a refreshing salad featuring mixed greens, cherry tomatoes, and a light vinaigrette. And let’s not forget a crusty loaf of bread to mop up any leftover sauce! Place everything on the table and let your loved ones dig in. Trust me, there will be smiles all around!
Recipe Variations
Feeling adventurous? Here are some creative twists and variations to consider:
- Honey Mustard Twist: Swap out the honey BBQ sauce for honey mustard for a tangy spin!
- Herbed Potatoes: Add fresh herbs like rosemary or thyme to the potato mix for an aromatic flare.
- Spicy Kick: Mix in some cayenne pepper or sliced jalapeños with the potatoes to crank up the heat.
- Mediterranean Style: Substitute the Parmesan with feta cheese and add olives and sun-dried tomatoes to the potatoes for a Mediterranean twist.
- Veggie Add-in: Toss in some bell peppers or carrots along with the potatoes for extra color and nutrients!
Chef’s Notes
Now, before we wrap this up, let me share a little kitchen story. The first time I made this dish, I was a nervous wreck! I didn’t have enough honey BBQ sauce, so I improvised with some ketchup and a dash of mustard. Surprisingly, it was a hit! It taught me that cooking is all about creativity. So if you’re short on something, don’t stress—adapt, experiment, and make it yours!
Over the years, this recipe has evolved in my kitchen, but the heart of it remains the same—simple ingredients that sing with flavor and nourish the spirit.
FAQs and Troubleshooting
-
What if my chicken is dry?
Ensure it’s not overcooked! Use a meat thermometer to check for doneness. If you pick it up on a busy day, consider marinating it in the BBQ sauce longer for extra moisture! -
How can I make this gluten-free?
As long as your BBQ sauce is gluten-free, this recipe is naturally gluten-free. Make sure to check the labels! -
Can I use different types of potatoes?
Absolutely! You can even use sweet potatoes for a healthier take! Just adjust the cooking time depending on their size. -
What side dishes work well with this meal?
Roasted veggies, corn on the cob, or a creamy coleslaw make excellent companions to this hearty dish!
Nutritional Info
This Honey BBQ Chicken and Garlic Parmesan Potatoes dish is not only delicious but also packed with essential nutrients. Here’s a rough nutritional breakdown per serving:
- Calories: 450
- Protein: 35g
- Carbohydrates: 45g
- Fats: 15g
- Fiber: 5g
It balances protein from the chicken with carbohydrates from the potatoes, providing a satisfying meal that fuels your day.
Final Thoughts
There you have it, friends! A delightful dish of Honey BBQ Chicken and Garlic Parmesan Potatoes that’s bound to make your kitchen the heart of family gatherings and cherished moments. Whether it’s a weeknight dinner or a weekend feast, this recipe is sure to become a staple in your home. Don’t forget to take the time to savor every bite and share the love with those around you. Cooking brings us together, and every meal tells a story—what will yours be?
So get cooking, share your creations, and let’s keep spreading that love, one plate at a time. Until next time, happy cooking, and may your days be filled with flavor and joy!
Print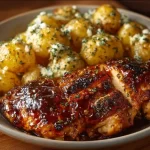
Honey BBQ Chicken and Garlic Parmesan Potatoes
- Total Time: 45 minutes
- Yield: 4 servings 1x
- Diet: Gluten-Free
Description
A heartwarming dish featuring succulent honey BBQ chicken paired with crispy garlic Parmesan potatoes, perfect for family gatherings.
Ingredients
- 4 boneless chicken breasts
- 1 cup honey BBQ sauce
- 2 pounds baby potatoes
- 1 cup grated Parmesan cheese
- 4 cloves garlic, minced
- 2 tablespoons olive oil
- Salt and pepper to taste
- Fresh parsley for garnish
Instructions
- Preheat your oven to 400°F (200°C).
- Rinse the chicken breasts and pat them dry with a paper towel. Season with salt and pepper.
- Place the chicken in a large bowl and pour the honey BBQ sauce over it. Toss to coat.
- Wash the baby potatoes and cut them in halves or quarters. Place them in a bowl with olive oil, garlic, salt, pepper, and half of the Parmesan cheese. Toss to coat.
- Spread the potatoes on one side of a lined baking sheet and place the chicken on the other side. Bake for 25-30 minutes.
- Once nearly done, sprinkle the remaining Parmesan on the potatoes and bake for an additional 5 minutes.
- Serve on a platter and garnish with fresh parsley.
Notes
Feel free to customize the recipe with variations such as honey mustard sauce or adding vegetables.
- Prep Time: 15 minutes
- Cook Time: 30 minutes
- Category: Main Course
- Method: Baking
- Cuisine: American
Nutrition
- Serving Size: 1 serving
- Calories: 450
- Sugar: 15g
- Sodium: 600mg
- Fat: 15g
- Saturated Fat: 6g
- Unsaturated Fat: 8g
- Trans Fat: 0g
- Carbohydrates: 45g
- Fiber: 5g
- Protein: 35g
- Cholesterol: 90mg
Keywords: honey BBQ chicken, garlic Parmesan potatoes, comfort food, easy dinner, family recipe

Grilled Cheese Burrito
Grilled Cheese Burrito: Comfort Food with a Twist
Hey there, fellow food lovers! Welcome back to Feastical, where we whip up delicious dishes that are as comforting as a hug on a rainy day. Today, I’m extra excited because we’re diving into a delightful concoction that blends the best of two worlds: the classic grilled cheese sandwich and the beloved burrito. Yep, you heard me right! We’re making a Grilled Cheese Burrito.
Picture this: crispy, golden tortillas wrapped around a melty, gooey cheese filling, with the added option of savory extras to elevate the flavor profile. This dish is perfect for any occasion—whether it’s a busy weeknight, a lazy Sunday brunch, or a fun gathering with friends. You can even customize it to your heart’s content, so everyone at the table is satisfied.
Now, if you’re anything like me, you have a special connection to food—each dish tells a story, evokes a memory, or gets you feeling all warm and fuzzy inside. So grab a seat, a fork, and maybe a napkin (because things might get a little cheesy), and let’s embark on this culinary adventure together!
Personal Story
Ah, grilled cheese—the ultimate comfort food! If you ask me, the heart behind a great meal often lies in the memories it evokes. My fondest recollection of grilled cheese takes me back to childhood summers spent at my grandparents’ house. I can still hear the sizzle of butter in the skillet as my grandmother expertly flipped those golden slices of bread. Like magic, she’d craft a sandwich that never failed to warm my heart and satisfy my never-ending appetite.
During one sunny afternoon, we decided to spice things up and made a version with our favorite ingredients—think sharp cheddar, juicy tomatoes, and crispy bacon. My grandpa, ever the grill master, transformed those sandwiches into burritos, wrapping them in soft tortillas instead of bread. You can imagine my delight as he called it a “Cheesy Burrito Surprise.” That day marked the birth of my love for grilled cheese burritos, elevating an already beloved dish into something extraordinary! The excitement of discovering a new twist on an old favorite is something I want to replicate for you.
Now that you know the origin of this delightful dish, let’s get into what you’ll need to whip up this cheesy goodness in your own kitchen!
Ingredients
To create your Grilled Cheese Burrito, gather the following ingredients:
-
4 large tortillas: Flour tortillas are typically used, but you can use whole wheat or corn tortillas for a twist. They’re your blank canvas, so choose what fits your style!
-
2 cups shredded cheese: Cheddar, mozzarella, or a mix of both works wonders here. Feel free to experiment with other cheeses like pepper jack for a little zing or gouda for a smoky flavor!
-
1 tablespoon butter: This is the secret to achieving that crispy, golden crust. You can swap it out for olive oil or even a vegan butter substitute if you’d prefer a lighter alternative.
-
Optional: Cooked meats: Chicken, bacon, or even your leftover pulled pork can take this burrito over the top. Use what you have on hand or try a plant-based protein option for a vegetarian take.
-
Optional: Vegetables: Bell peppers, onions, or even spinach are great additions for a burst of color and flavor. Sauté them up beforehand to enhance their sweetness and make them extra tasty.
With these ingredients handy, you’re well on your way to creating a culinary masterpiece that will impress everyone at the dinner table!
Step-by-Step Instructions
Alright, my fellow culinary adventurers, let’s roll up our sleeves and get cooking! Here’s how to make the perfect Grilled Cheese Burrito:
-
Prep Your Ingredients:
Start by shredding your cheese and chopping any vegetables or cooked meats you’d like to incorporate. Having everything ready to go makes the cooking process smooth sailing. Plus, it’s like having your own little mise en place! -
Heat the Skillet:
Grab a large skillet and place it over medium heat. Add about a tablespoon of butter and let it melt completely, swirling it to cover the surface of the pan. -
Assemble Your Burrito:
Lay one tortilla flat on a plate. Layer it generously with cheese (about half a cup), placing any optional ingredients you desire on top. Think of it as building a layered cheesy wonderland! -
Roll It Up:
Here’s where it gets fun! Fold in the sides of the tortilla, then roll it up from the bottom to the top, ensuring all that cheesy goodness is tucked neatly within. Don’t be afraid to roll it tightly; you want it to keep your filling inside and stay intact! -
Place It in the Skillet:
Once your burrito is securely rolled, place it seam-side down in the skillet. Let it cook for about 3-4 minutes or until the bottom is golden brown. Pro tip: Press it down gently with a spatula to really achieve that crispy, crunchy crust. -
Flip It:
When the first side is beautifully browned, it’s time to flip! Carefully turn the burrito over, adding a bit more butter to the pan if it’s looking dry. You’ll want to cook this side for another 3-4 minutes until it’s just as deliciously golden as the first. -
Let’s Cheese It Up:
At this point, you can take a peek inside. If you love that ooey-gooey cheese texture, you might want to let it cook for an extra minute or two—just until everything is melted and comforting. -
Slice and Serve:
When you’re satisfied with the color and texture, carefully transfer the burrito to a cutting board. Let it sit for a minute (this helps the cheese set a bit), then cut it in half for your Instagram-worthy presentation.
And just like that, you’re ready to enjoy your divine creation. The aroma is already enough to make your mouth water. You can almost hear your foodie friends cheering you on from the sidelines!
Serving Suggestions
Now that you have your Grilled Cheese Burrito crowned with that lovely golden crust, it’s time to think about presentation.
I love to serve mine straight from the skillet onto a rustic wooden board for that homey feel. Pair it with a fresh side salad bursting with greens, or some crispy tortilla chips and salsa for dipping. A scoop of flavorful guacamole or sour cream on the side also brings a zesty twist that complements the cheesy interior beautifully.
Feel free to sprinkle some freshly chopped cilantro or a few slices of jalapeño on top for extra flavor and a pop of color! Your guests will swoon, and you’ll feel like the kitchen champion you truly are!
Recipe Variations
The Grilled Cheese Burrito is already a knockout, but if you’re feeling adventurous, here are some variations to consider:
-
BBQ Chicken Burrito: Swap in cooked, shredded BBQ chicken for a tangy take that’ll have your taste buds dancing. Add some coleslaw inside for an added crunch.
-
Vegetarian Delight: Load up on sautéed mushrooms, zucchini, and spinach for a hearty meatless option. The depth of flavors will surely wow both vegetarians and meat-lovers alike!
-
Mexican Fiesta: Add black beans, corn, and taco seasoning to your cheese for a flavorful twist. Serve with a side of pico de gallo to amp up those Mexican flavors!
-
Spicy Jalapeño: For those who crave a kick, toss in some pickled jalapeños or a drizzle of hot sauce before rolling. The spice elevates the entire experience!
-
Breakfast Burrito: Transform this dish into a breakfast sensation. Incorporate scrambled eggs, sausage, and avocado for a delightful morning treat.
No matter how you choose to jazz it up, these variations ensure you’ll never get bored of this incredible dish!
Chef’s Notes
Here’s an exciting tidbit: this recipe has evolved for me over the years! Initially, it started as an attempt to combine my two favorite quick meals—grilled cheese and burritos—during those busy weeknights when I wanted something comforting without spending hours in the kitchen.
I began sharing it with my friends, and I quickly learned that there are endless possibilities when it comes to fillings. From using leftover pizza toppings to even experimenting with different cheeses, it became a creative outlet for everyone involved. My favorite kitchen stories always revolve around mishaps—like the time I added way too much cheese and had a molten lava situation in the skillet. But hey, that’s what makes cooking fun and keeps us on our toes!
FAQs and Troubleshooting
-
Q: What should I do if my burrito is falling apart?
A: If your burrito isn’t holding together, ensure that you’re rolling it tightly and tucking in the sides while you roll. You can also wrap it in foil for a few minutes to help it set. -
Q: How do I know when my cheese is fully melted?
A: The best way to check is to peek inside once you’ve flipped the burrito. If you see gooey cheese pulling apart when you cut it, you’re golden! If not, let it cook for an extra minute or two. -
Q: Can I make this burrito ahead of time?
A: Absolutely! You can prep the fillings and even roll the burritos ahead of time. Just store them tightly wrapped in plastic wrap in the fridge. When you’re ready to enjoy, simply pop them in the skillet or even a microwave to heat through. -
Q: What’s the best way to reheat leftovers?
A: I suggest reheating on a skillet at a low temperature to prevent sogginess and to keep that crispy texture. You can flip it halfway through to make sure it’s evenly warmed.
Nutritional Info
If you’re wondering about the nutrition aspects of the Grilled Cheese Burrito, here’s a little breakdown. This dish is packed with protein, thanks to the cheese and any added meats. If you go easy on the butter and load up on veggies, you can keep it relatively balanced.
On average, each burrito can be around 400-600 calories, depending on the filling and cheese you choose. Consider using whole grain tortillas and plenty of veggies to enhance the fiber content. And of course, feel free to customize it to fit your dietary goals!
Final Thoughts
There you have it, my friend! The Grilled Cheese Burrito: a scrumptious combination of two classic comfort foods brought to life in your kitchen. No matter how you personalize this dish or enjoy it, I hope it brings as much joy to your table as it has to mine.
I invite you to share your own versions of this recipe! Whether it’s a fun twist, a secret ingredient, or a delicious memory that comes rushing back when you bite into your burrito, I want to hear it! Cooking is all about connection, joy, and creativity, so don’t forget to have fun in the process! Until next time, happy cooking, and may your kitchen always be filled with love and laughter.
Let’s dig in and make delicious memories together. Cheers!
Print
Grilled Cheese Burrito
- Total Time: 23 minutes
- Yield: 4 servings 1x
- Diet: Vegetarian
Description
A delightful fusion of a classic grilled cheese sandwich and a burrito, featuring crispy tortillas wrapped around a gooey cheese filling with customizable options.
Ingredients
- 4 large tortillas (flour, whole wheat, or corn)
- 2 cups shredded cheese (cheddar, mozzarella, or a mix)
- 1 tablespoon butter
- Optional: cooked meats (chicken, bacon, or pulled pork)
- Optional: vegetables (bell peppers, onions, or spinach)
Instructions
- Prep your ingredients by shredding cheese and chopping vegetables or meats.
- Heat a large skillet over medium heat and melt the butter.
- Assemble your burrito by layering cheese and optional ingredients on a tortilla.
- Roll it up tightly, tucking in the sides.
- Place the burrito seam-side down in the skillet and cook until golden brown.
- Flip the burrito and cook the other side until golden.
- Check for gooey cheese and cook longer if necessary.
- Slice and serve with desired sides.
Notes
Feel free to customize with your favorite proteins and veggies, and try different cheese combinations for varied flavors.
- Prep Time: 15 minutes
- Cook Time: 8 minutes
- Category: Main Course
- Method: Pan-frying
- Cuisine: Mexican
Nutrition
- Serving Size: 1 burrito
- Calories: 500
- Sugar: 2g
- Sodium: 550mg
- Fat: 25g
- Saturated Fat: 10g
- Unsaturated Fat: 10g
- Trans Fat: 0g
- Carbohydrates: 50g
- Fiber: 4g
- Protein: 20g
- Cholesterol: 50mg
Keywords: grilled cheese, burrito, comfort food, cheesy, easy recipe

One Pot Creamy Garlic Pasta
One Pot Creamy Garlic Pasta: A Simple, Soulful Delight
Hey there, fellow food lovers! Welcome back to Feastical! Today, I’m thrilled to share one of my absolute favorite recipes that’s been a staple in my kitchen for years: One Pot Creamy Garlic Pasta. This dish isn’t just easy to make; it’s like wrapping yourself in a cozy blanket after a long day! There’s something incredibly satisfying about cooking a whole meal in one pot, and that’s exactly what we’re diving into today.
Pasta, oh glorious pasta! It has this magical ability to bring people together, whether it’s a quiet dinner for one or a lively gathering with family and friends. And when you add creamy garlic sauce to the mix? Well, it’s game over—pure comfort food bliss! Today, we’re keeping it simple and soulful, letting the simple ingredients speak for themselves while delivering a punch of flavor that’ll have you coming back for seconds.
Why is this dish such a crowd-pleaser? For starters, it takes minimal time and effort. I mean, who doesn’t love a recipe that allows you to spend less time in the kitchen and more time enjoying your meal? And with just one pot to clean, it’s a win-win situation. This pasta is perfect for busy weeknights, lazy weekends, or whenever you find yourself craving something creamy and delicious but don’t want to deal with a mess.
So grab your favorite spatula, and let’s make some delicious memories together in the kitchen! Trust me, your taste buds are in for a treat!
Personal Story
Let me take you back to a cozy winter night a few years ago—one that still brings a smile to my face whenever I think about it. I had recently moved into my own apartment, and let me tell you, I was excited to try my hand at cooking; it felt like I had finally stepped into my own kitchen sanctuary. One chilly evening, I invited a few friends over for a movie night. Of course, I wanted to impress them with a delicious meal.
With little kitchen experience and a pantry full of barely-used ingredients, I remembered a creamy garlic pasta dish that my mom used to whip up when I was a kid. So I rolled up my sleeves, grabbed what I had, and started experimenting. The aroma of garlic filled the air, making my apartment feel warm and inviting. My friends arrived to find a bubbling pot of pasta on the stove, and after just one bite, they were hooked! We ended up laughing, sharing stories, and devouring every last drop of that creamy goodness. It was one of those nights where everything just felt right—a perfect blend of good food and great company. Since then, this One Pot Creamy Garlic Pasta has held a special place in my heart and my recipe rotation. And I can’t wait for you to create your own memories with it!
Ingredients
Before we jump into the cooking, let’s gather our ingredients! Here’s what you’ll need for this delicious One Pot Creamy Garlic Pasta:
-
8 oz pasta: Choose any shape you like—spaghetti, penne, or even bowties are great options! The rule of thumb is to pick something that will hold onto the sauce well. For a whole grain option, consider whole wheat or chickpea pasta for added fiber and protein.
-
4 cloves garlic, minced: Garlic is the star of the show here! It adds depth and flavor. If you prefer a milder taste, roasting the garlic first will give it a sweet, caramelized flavor that’s to die for.
-
2 cups milk: I recommend whole milk or 2% for a creamier texture. If you’d like to go dairy-free, oat or coconut milk can work well too—just avoid sweetened varieties!
-
1 cup grated Parmesan cheese: This is where the creaminess gets real! Freshly grated cheese melts better and has a richer flavor than pre-packaged. If you’re feeling adventurous, swap in Pecorino Romano for a sharper kick.
-
Salt and pepper, to taste: Essential for bringing those flavors to life! Remember, seasoning is key—taste as you go!
-
Fresh parsley, chopped (for garnish): Not only does it add a pop of color to your dish, but the freshness of parsley balances the richness of the pasta beautifully. Feel free to swap it out for fresh basil or even a sprinkle of red pepper flakes for a kick!
Step-by-Step Instructions
Alright, my culinary companions, let’s get cooking! Here’s how to whip up this One Pot Creamy Garlic Pasta in no time:
-
Boil the Pasta: In a large pot or skillet, add enough water to cover the pasta (about 4-5 cups) and season it generously with salt. Bring it to a rolling boil. Once boiling, add the pasta. Cook according to the package directions until al dente, usually around 8-10 minutes. Chef’s Tip: Stir occasionally to prevent sticking and to ensure even cooking!
-
Sauté the Garlic: While the pasta is cooking, grab your minced garlic. Once the pasta is cooked, let’s make it even more delicious! Before draining, reserve about 1 cup of pasta water, then drain the pasta in a colander. In the same pot, add a splash of olive oil, and return to medium heat. Toss in the minced garlic, sautéing for about 30 seconds until fragrant. Watch closely, friends! Garlic can burn quickly, and burnt garlic is bitter!
-
Create the Creamy Sauce: Pour in the milk gradually, stirring it into the sautéed garlic. Add in the reserved pasta water gradually (a little at a time) and start to mix everything together. You’ll see it begin to combine and thicken up! Hint: This is a perfect time to taste and adjust your seasoning with salt and pepper.
-
Add the Cheese: Now, sprinkle in that glorious grated Parmesan cheese. Stir it in until the cheese is melted and the sauce has become creamy. This is where the magic happens! If you find the sauce too thick, you can add a splash more of milk or pasta water until it reaches your desired consistency.
-
Combine with Pasta: Toss the pasta back into the pot, mixing it with the creamy sauce until each strand is coated in that deliciousness. There you have it—one pot of creamy garlic bliss!
-
Garnish and Serve: Remove from the heat and sprinkle freshly chopped parsley on top for that burst of freshness! Now it’s time to serve! Chef’s Hack: Drizzle with a little extra virgin olive oil or a squeeze of lemon juice right before serving for an added flavor boost!
Serving Suggestions
When it comes to serving this One Pot Creamy Garlic Pasta, let your creativity flow! Here are a few fun ideas to get you started:
-
Plating: Use shallow bowls or pasta plates. Twirl your pasta in the center and create a little nest of glory. The creamy sauce will pool around it, making it look inviting!
-
Garnishes: Top with a sprinkle of extra Parmesan for that cheesy satisfaction (because you can never have too much cheese!) and a few extra parsley leaves for visual flair.
-
Pairings: This pasta pairs beautifully with a light green salad tossed in vinaigrette to balance out the richness. Add some crusty garlic bread on the side to soak up that creamy sauce—it’s a match made in heaven!
-
Wine: Enjoy a glass of white wine, like Pinot Grigio or Sauvignon Blanc, to complement the garlic flavors.
Recipe Variations
Feeling creative? Here are some delicious variations on the One Pot Creamy Garlic Pasta:
-
Veggie Delight: Toss in some sautéed spinach, cherry tomatoes, or zucchini for added color and nutrition. You can also add roasted veggies for a hint of smokiness.
-
Protein-Packed: Add grilled chicken, shrimp, or even crispy bacon for a heartier meal. Simply cook your protein of choice separately, and toss it in right before serving.
-
Herb Infusion: Experiment with different herbs! Besides parsley, you could use thyme, basil, or even a pinch of Italian seasoning for depth.
-
Spicy Kick: Enhance your dish by adding a pinch of red pepper flakes or a drizzle of sriracha for a bit of heat.
-
Mushroom Magic: Sauté sliced mushrooms along with your garlic for an earthy flavor that pairs beautifully with creamy pasta!
Chef’s Notes
This One Pot Creamy Garlic Pasta recipe has evolved over time as I’ve made it countless times and shared it with friends. It started as a simple dish, but every time I made it, I found ways to enhance the flavors or add different ingredients. I remember one time, on a chilly evening, I had some leftover roasted vegetables that I tossed in, and it turned out to be a crowd favorite! Whether you stick to the classic version or get creative with variations, remember that cooking should always be fun and a little adventurous.
And let’s be real—nothing makes you feel like a culinary rock star quite like whipping up a delicious meal with minimal effort!
FAQs and Troubleshooting
-
Can I use a different type of pasta?
Absolutely! This recipe works with any pasta shape you love. Just keep an eye on the cooking time, as it can vary depending on the pasta. -
What if my sauce is too thick?
If your sauce is too thick, simply stir in a little more milk or reserved pasta water, a tablespoon at a time, until it reaches your desired creaminess. -
How can I make this dish vegan?
To make this dish vegan, use whole-grain or gluten-free pasta, substitute the milk with a plant-based option like almond or oat milk, and swap the Parmesan for nutritional yeast or vegan cheese. -
Can I make this ahead of time?
You can definitely prep the components in advance! Just cook the pasta and sauce separately and combine them before serving. You may need to add a splash of milk to revitalize the sauce when reheating!
Nutritional Info
Let’s talk nutrition! This One Pot Creamy Garlic Pasta is not just satisfying; it’s also packed with some great nutrients. Here’s a quick breakdown (per serving, without added protein):
- Calories: Approximately 400
- Protein: 12g
- Fat: 15g
- Carbohydrates: 51g
- Fiber: 2g
- Sodium: Varies based on added salt
Keep in mind, adding grilled chicken, veggies, or adjustments to the cheese can change the nutritional content, so feel free to experiment based on your dietary needs!
Final Thoughts
And there you have it—my beloved One Pot Creamy Garlic Pasta recipe! I truly hope you give this a try because, trust me, it’s about to become your new go-to dish. Cooking doesn’t have to be complicated to be delicious, and this creamy garlic pasta perfectly encapsulates that philosophy. Remember, food is about sharing, fun, and love, so don’t be afraid to get your hands dirty in the kitchen!
Make it for yourself, your family, or friends; I promise it’ll bring smiles and warm bellies all around. I can’t wait to hear how yours turns out! Don’t forget to share your photos and stories with me, and happy cooking, my foodie friends! Let’s dig in! 🍝✨
Print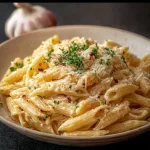
One Pot Creamy Garlic Pasta
- Total Time: 25 minutes
- Yield: 4 servings 1x
- Diet: Vegetarian
Description
A simple, soulful delight that combines pasta with a creamy garlic sauce, all cooked in one pot for easy clean-up.
Ingredients
- 8 oz pasta (spaghetti, penne, or bowties)
- 4 cloves garlic, minced
- 2 cups milk (whole or 2%)
- 1 cup grated Parmesan cheese
- Salt and pepper, to taste
- Fresh parsley, chopped (for garnish)
Instructions
- Boil the pasta in a large pot with enough salted water until al dente, about 8-10 minutes.
- Sauté the minced garlic in olive oil in the same pot for 30 seconds until fragrant.
- Create the creamy sauce by adding milk and reserved pasta water gradually.
- Add the grated Parmesan cheese and stir until melted and creamy.
- Combine the pasta back into the pot and mix well with the sauce.
- Garnish with freshly chopped parsley and serve hot.
Notes
For added flavor, drizzle with extra virgin olive oil or a squeeze of lemon juice before serving.
- Prep Time: 10 minutes
- Cook Time: 15 minutes
- Category: Main Course
- Method: Baking
- Cuisine: Italian
Nutrition
- Serving Size: 1 serving
- Calories: 400
- Sugar: 5g
- Sodium: 600mg
- Fat: 15g
- Saturated Fat: 8g
- Unsaturated Fat: 7g
- Trans Fat: 0g
- Carbohydrates: 51g
- Fiber: 2g
- Protein: 12g
- Cholesterol: 30mg
Keywords: creamy pasta, garlic pasta, one pot meals