
Coconut Cloud Cake: 5-Ingredient Fluffy Dessert Recipe
Coconut Cloud Cake Recipe: A Slice of Paradise
Hey there, food lovers! It’s Beau Collier here, and today we’re diving into the delightful world of coconut treats with a recipe that’s sure to make your taste buds do the happy dance: our Coconut Cloud Cake! This cake is not just a dessert; it’s an experience—a slice of fluffy, cloud-like bliss that brings warmth and joy wherever it’s shared.
Picture this: It’s a sunny Sunday afternoon, and I’m in the kitchen with a mix of excitement and nostalgia. The aroma of coconut, sugar, and vanilla fills the air, transporting me back to my childhood, where every family gathering was incomplete without a coconut cake on the table. My grandma, with her flowered apron and infectious laughter, would whip up her famous coconut cake, slathered in creamy frosting and topped with a generous sprinkle of toasted coconut. It was a ritual, a bonding moment we all cherished.
Those sunny afternoons shaped my love for baking, especially when it came to coconut. The texture, the flavor, and the sheer joy of creating and sharing something delicious—it’s all wrapped up in this cake. It’s a recipe that not only fills your belly but also your heart. So, are you ready to create some sweet memories in your kitchen? Let’s get started!
Personal Story
Growing up in a small town, we didn’t have fancy restaurants or trendy desserts, but what we lacked in variety, we made up for in family traditions—and coconut cake was at the top of that list! Every spring, as the flowers bloomed and cheer filled the air, my grandma would pull out her mixer and baking pans, announcing it was time for her legendary Coconut Cloud Cake.
I can still hear her humming old tunes as she worked her magic. The thrill of waiting for the cake to come out of the oven was almost unbearable. "Patience, Beau," she would chuckle. "Good things come to those who wait." And oh, how I waited! When that gorgeous, fluffy cake finally emerged, it was my job to help her layer on the frosting and sprinkle the coconut on top. Each bite was like a delicious hug, and today, I want to pass that embrace on to you through this recipe. Let’s create our own sweet memories!
Ingredients
Here’s what you’ll need to create your Coconut Cloud Cake:
For the Cake:
-
2 1/2 cups all-purpose flour
This is the backbone of our cake, providing structure. For a gluten-free version, substitute with a 1:1 gluten-free flour blend. -
2 1/2 teaspoons baking powder
This helps our cake rise! Make sure it’s fresh for the best results—old baking powder can leave you flat. -
1/2 teaspoon salt
A pinch of salt enhances the flavor. Don’t skip it! -
1 cup unsalted butter, softened
The star of the show! Butter adds richness. If you’re in a pinch, you can substitute with coconut oil for a dairy-free twist. -
2 cups granulated sugar
Sugar not only sweetens but also helps to create that fluffy texture. You could use coconut sugar for a less processed option. -
4 large eggs, room temperature
Eggs bind everything together and help lift the cake. Room temperature eggs blend more easily into the batter. -
1 teaspoon vanilla extract
Adds depth of flavor. Feel free to use a quality brand or homemade vanilla extract for a personal touch. -
1 teaspoon coconut extract
This is where the magic happens! It intensifies that heavenly coconut flavor. -
1 cup coconut milk
Adds moisture and richness. For a lighter version, you can use almond milk or even oat milk if you’re avoiding dairy.
For the Frosting:
-
1 1/2 cups heavy whipping cream
We’re going for a luscious frosting here, and heavy cream is essential. If you need a lighter option, you could use whipped topping. -
8 oz cream cheese, softened
Cream cheese gives that perfect tang to balance the sweetness. For dairy-free, try using a vegan cream cheese. -
1/2 cup powdered sugar
This helps sweeten the frosting and give it that soft finish. Sift for a smooth texture. -
1 teaspoon vanilla extract
You know the drill! It enhances the overall flavor. -
1 teaspoon coconut extract
More coconut goodness? Yes, please!
For the Topping:
- 1 cup sweetened shredded coconut (toasted or fresh)
This adds that beautiful texture and flavor to finish your creation. Toasted coconut gives a lovely crunch and a deeper flavor.
Step-by-Step Instructions
Let’s get down to business and cook up this magic!
-
Preheat Your Oven
Start by preheating your oven to 350°F (175°C). Trust me, you want your oven nice and hot when the cake batter is ready! -
Prepare Your Baking Pans
Grease and flour two 9-inch round cake pans. You can also line them with parchment paper for easier removal later. No one likes a cake that sticks! -
Mix the Dry Ingredients
In a bowl, whisk together the flour, baking powder, and salt. This helps distribute the leavening agents evenly throughout the flour. Set aside for now! -
Cream the Butter and Sugar
In a large mixing bowl, beat the softened butter and granulated sugar together until light and fluffy—about 3-5 minutes. This step is crucial for a nice texture, so don’t rush it. -
Add the Eggs
Gradually add the eggs, one at a time, mixing well after each addition. This helps to incorporate air into the batter, making it fluffier. Add the vanilla and coconut extracts, and mix until just combined. -
Combine Wet and Dry Ingredients
Alternately add the dry flour mixture and coconut milk to the butter mixture, starting and ending with the flour. Mix until just blended to avoid over-mixing, which can lead to a dense cake. -
Bake the Cakes
Divide the batter evenly between the prepared pans. Bake in the preheated oven for 25-30 minutes or until a toothpick inserted in the center comes out clean. Your kitchen should smell amazing right about now! -
Cool the Cakes
Once baked, let the cakes cool in the pans for about 10 minutes, then transfer them to a wire rack to cool completely. Cooling is key; you want fluffy frosting, not a melted mess! -
Frost the Cake
While your cakes are cooling, let’s whip up that frosting! Beat the heavy cream until it forms stiff peaks. In another bowl, combine the softened cream cheese and powdered sugar until smooth. Fold in the whipped cream gently until all is well combined. -
Assemble the Cake
Once the cakes are completely cool, it’s time to put them together. Place one cake layer on a serving plate, spread a generous amount of frosting on top, then add the second layer. Frost the top and sides of the whole cake. Don’t be shy—go for it! -
Top with Coconut
Finally, sprinkle the sweetened shredded coconut over the top. You can toast the coconut beforehand in a skillet over medium heat for a few minutes until golden, adding an extra layer of deliciousness.
Serving Suggestions
Now that your Coconut Cloud Cake looks absolutely stunning, it’s time to serve it up! Slice pieces generously and pair them with a scoop of vanilla ice cream for an extra indulgent treat. Drizzle with a bit of warm coconut milk or a light fruit compote to elevate the experience.
If you’re feeling fancy, top each slice with a maraschino cherry or a sprinkle of dark chocolate shavings—trust me, it makes a visually captivating difference! For gatherings, consider serving on a beautiful cake stand with fresh tropical fruits like mango or pineapple surrounding it. Your cake will be the life of the party!
Recipe Variations
Here are a few fun twists on the classic Coconut Cloud Cake:
-
Lemon-Coconut Cake
Add the zest of one lemon to the batter for a zesty zing. Lemon pairs beautifully with coconut! -
Chocolate-Coconut Cake
Swap out a cup of flour with cocoa powder for a rich chocolate variant. You could also swirl some melted chocolate into the batter for an extra treat. -
Pineapple Coconut Cake
Add crushed pineapple (drained) to the batter for an island-inspired delight. It adds moisture and a lovely flavor. -
Nutty Coconut Cake
Incorporate chopped macadamia nuts or almonds into the batter for extra crunch. Just be sure to account for the added mass in the wet ingredients. -
Vegan Coconut Cake
Substitute with almond milk, coconut oil, and a flaxseed mixture instead of eggs for a plant-based version without sacrificing flavor.
Chef’s Notes
Over the years, I have played around with this recipe, adding my little twists and personal touches. I remember the time I accidentally forgot to add the eggs; the cake turned out denser but still delicious! It’s amazing how a little mistake can lead to a new favorite recipe. Each version tells a story, and that’s the beauty of cooking—embracing the imperfections and celebrating each creation.
Cooking is like writing a story; each ingredient and step is a word or sentence that brings everything together. And remember, the best moments often come from experimentation and a sprinkle of love!
FAQs and Troubleshooting
1. My cake didn’t rise! What went wrong?
This can happen if your baking powder is old or if the batter was over-mixed. Always check the freshness of your leavening agents.
2. My frosting is too runny. What should I do?
Ensure the heavy cream is very cold when whipping, and that the cream cheese is fully softened. If it’s too soft, you can add more powdered sugar to thicken it.
3. How do I store leftovers?
Keep the cake in an airtight container in the refrigerator for up to a week. If you want to freeze it, wrap slices well in plastic wrap and foil.
4. Can I make this cake ahead of time?
Absolutely! You can bake the cakes a day in advance, cool them, and wrap them tightly. Frost just before serving for the freshest taste!
Nutritional Info
Each slice of Coconut Cloud Cake comes with a delightful burst of flavor! Here’s a rough estimate of nutritional information per serving (1 slice, assuming 12 servings):
- Calories: 420
- Total Fat: 28g
- Saturated Fat: 17g
- Cholesterol: 90mg
- Sodium: 180mg
- Total Carbohydrates: 43g
- Dietary Fiber: 1g
- Sugars: 24g
- Protein: 4g
Note: Nutritional content may vary based on ingredient substitutions and serving sizes.
Final Thoughts
And there you have it—your very own Coconut Cloud Cake that is not just a treat, but a heartfelt slice of joy. I hope this recipe brings as much warmth and happiness to your kitchen as it has to mine. So, next time you’re looking for a dessert that feels like a big, comforting hug, remember this Coconut Cloud Cake.
Embrace the process, share it with friends and family, and create some sweet memories together! If you try this recipe, I’d love to hear about your experiences, variations, or favorite moments in the kitchen. So grab that fork and dig in—let’s celebrate the magic of food together!
Stay delicious, and until next time, keep cooking with love!
Now, don’t forget to check out more on Feastical for tips, hacks, and other awesome recipes that will keep your culinary passions alive! Happy baking!
Print
Coconut Cloud Cake
- Total Time: 1 hour
- Yield: 12 servings 1x
- Diet: Vegetarian
Description
A fluffy, cloud-like coconut cake that brings warmth and joy, perfect for any gathering.
Ingredients
- 2 1/2 cups all-purpose flour
- 2 1/2 teaspoons baking powder
- 1/2 teaspoon salt
- 1 cup unsalted butter, softened
- 2 cups granulated sugar
- 4 large eggs, room temperature
- 1 teaspoon vanilla extract
- 1 teaspoon coconut extract
- 1 cup coconut milk
- 1 1/2 cups heavy whipping cream
- 8 oz cream cheese, softened
- 1/2 cup powdered sugar
- 1 teaspoon vanilla extract (for frosting)
- 1 teaspoon coconut extract (for frosting)
- 1 cup sweetened shredded coconut (toasted or fresh)
Instructions
- Preheat your oven to 350°F (175°C).
- Prepare two 9-inch round cake pans by greasing and flouring them.
- Mix the flour, baking powder, and salt in a bowl, then set aside.
- Cream the butter and granulated sugar together until light and fluffy.
- Add the eggs one at a time, mixing well after each addition. Mix in the vanilla and coconut extracts.
- Combine the dry ingredients and coconut milk alternately into the butter mixture.
- Bake in the preheated oven for 25-30 minutes or until a toothpick comes out clean.
- Cool the cakes in the pans for 10 minutes, then transfer to a wire rack.
- Frost the cake by beating the heavy cream until stiff peaks form and combining with softened cream cheese and powdered sugar.
- Assemble the cake by layering and frosting between the cooled cake layers.
- Top with sweetened shredded coconut.
Notes
For variations, try adding lemon zest or incorporating chocolate or pineapple into the batter.
- Prep Time: 30 minutes
- Cook Time: 30 minutes
- Category: Dessert
- Method: Baking
- Cuisine: American
Nutrition
- Serving Size: 1 slice
- Calories: 420
- Sugar: 24g
- Sodium: 180mg
- Fat: 28g
- Saturated Fat: 17g
- Unsaturated Fat: 9g
- Trans Fat: 0g
- Carbohydrates: 43g
- Fiber: 1g
- Protein: 4g
- Cholesterol: 90mg
Keywords: coconut, cake, dessert, baking, fluffy

Strawberry milkshake
Dive into Deliciousness: The Perfect Strawberry Milkshake!
Hey there, fellow foodies! 👋 I’m Beau Collier, and I’m beyond thrilled to welcome you to Feastical – your go-to spot for feel-good food! Today, we’re going to whip up a treat that’s not just a hit during sweltering summer days but also a nostalgic blast from the past: the quintessential Strawberry Milkshake! 🍓🥛
Picture this: It’s a sunny Saturday afternoon, the sun is shining, and the ice cream truck has just rolled into your neighborhood. You can hear the sweet chimes echoing down the block, beckoning you to come out and enjoy a cold, creamy delight. Memories of floating in a blissful sugar cloud, sipping on a milkshake while lounging in the shade, brings a smile to my face. It’s a tradition that unites us all, transcending age and time. Who can resist the charming, rosy-violet swirl of strawberries and creams against that cool, creamy backdrop?
This delightful drink isn’t just a treat; it’s an experience, a feeling! It’s all about blending memories with a bit of creativity while keeping it simple—and oh so satisfying. Today, we’ll concoct a strawberry milkshake that’s creamy, dreamy, and ready to become your new favorite summer staple.
Let’s gather our ingredients, dust off that blender, and get ready to explore a world of luscious flavors! 🎉
Personal Story
Growing up, my summers were often punctuated by family outings to the local diner, where I’d always order the same thing: a classic strawberry milkshake. I can still hear the sound of the blender whirring away, the scent of fresh strawberries wafting through the air, and the giddy excitement bubbling in my stomach as I waited for my frosty treat to arrive. 🍦🍓
It wasn’t just about the delicious strawberry flavor; it was the experience of sharing laughter with my family around a tall, frosty glass. I fondly remember how my little sister would try to steal sips from my shake, her tiny curly head popping up over the table like a mischievous sprite. That was the magic of those summer days—food not just as nourishment, but as a vessel for joy and connection.
Now, every time I whip up a strawberry milkshake, I’m catapulted back to those carefree days spent with loved ones. I love inviting friends over for shake parties, experimenting with variations, and creating new memories to layer on top of the fond ones I already cherish. So, let’s get started with a recipe that’s sure to make your heart—and taste buds—sing!
Ingredients
Let’s gather our ingredients! For this strawberry milkshake, you’ll need:
- 2 cups of ice cream: Vanilla is classic, but feel free to explore strawberry or even coconut for a tropical twist! Ice cream is what makes this drink ultra-creamy and delicious.
- 1 cup of frozen strawberries: Using frozen berries ensures a frosty, thick milkshake. If strawberries aren’t available, try frozen raspberries or mixed berries.
- ½ cup of cold milk: You can use regular cow’s milk or any non-dairy alternative like almond or oat milk. Adjust the amount depending on how thick you want your shake!
- Whipped cream: Always a crowd-pleaser! It adds an airy sweetness that’s irresistible. Don’t skimp out here!
- Maraschino cherries: These little beauties are the cherry on top—literally! They’re sweet, colorful, and add a nostalgic charm.
Step-by-Step Instructions
Alright, my friends! Grab your blender and put on your apron because it’s time to create this dreamy strawberry milkshake step by step!
Step 1: Gather Your Gear
Begin by gathering all your ingredients, a blender (or a milkshake maker if you’ve got one), and a tall glass to pour your gorgeous milkshake into. Trust me, this step makes everything smoother and much more enjoyable. No one likes running around looking for the spatula when creativity is flowing!
Step 2: Blend It All Together
Start by adding 2 cups of ice cream to your blender. This acts as the base and gives the milkshake its creamy texture. Then, toss in your 1 cup of frozen strawberries. The mix of salty-sweet strawberries with decadent ice cream is pure nostalgia in its best form!
Next, pour in ½ cup of cold milk. You can always adjust this amount later if you prefer a thicker or milkier shake. If you want to get fancy, you can consider vanilla almond milk or another milk substitute to add different flavors.
Step 3: Blend, Baby, Blend!
Now, secure the lid and blend it all together on high speed until it’s smooth and well-combined. You’re looking for a thick yet pourable consistency. If necessary, you can stop blending and give it a little stir with a spatula to ensure everything is nicely mixed. When that beautiful strawberry-pink color emerges, you’ll know you’re getting close! 🥤
Step 4: Check and Adjust
Take a quick taste-test! If it’s not sweet enough for your liking, feel free to add a spoonful of sugar or a drizzle of honey and blend once more. If it’s too thick, just add a splash of milk until happy with the texture!
Step 5: Serve It Up!
Once you’re satisfied with your milkshake, pour it into your favorite tall glass. Don’t be shy; fill it to the brim! Now, it’s time for the fun part—topping it off! Pile on some luscious whipped cream, and for the pièce de résistance, add a maraschino cherry on top. 🍒
For extra flair, feel free to sprinkle crushed graham crackers or drizzle chocolate syrup over the whipped cream for a delicious finish!
Serving Suggestions
Presentation is half the fun! When serving your strawberry milkshake, opt for tall glasses that showcase the creamy pink layers. A fun milkshake straw will not only add whimsy but enhance the experience.
Feel free to pair your milkshake with a slice of freshly baked strawberry shortcake or even a luscious brownie. It makes for a delightful treat that’s perfect for sharing—or not! 😉
Recipe Variations
Got a little creative flair? Here are some fun variations to jazz up your basic strawberry milkshake:
- Chocolate Strawberry Milkshake: Add two tablespoons of chocolate syrup into the blender for a rich and decadent combo.
- Strawberry Banana Milkshake: Toss in half of a ripe banana for an extra creamy texture and delicious flavor party!
- Nutty Twist: Add a tablespoon of almond or peanut butter for that nutty flavor—perfect if you want some protein in your treat.
- Dairy-Free Delight: Use coconut milk and dairy-free ice cream for a delicious vegan option!
- Strawberry Cheesecake Milkshake: Add 1-2 tablespoons of cream cheese for a cheesecake-inspired twist.
Chef’s Notes
When I first started making milkshakes, little did I know how many variations I’d stumble upon! Back in my day, we’d simply toss everything into the blender—no measurement, just a heart full of flavor. This milkshake has evolved, taking on different flavors, and is now enjoyed with friends and family.
Every time I shake things up in the kitchen, I remember how food isn’t just about sustenance—it’s a connection, a story unfolding with every sip. If you twirl a straw in the cup while reminiscing, it brings back sweet memories you didn’t even know were waiting for a moment to resurface. So let those memories flow!
FAQs and Troubleshooting
Here are some common questions and potential pitfalls you may encounter while making your strawberry milkshake:
-
Why is my milkshake too thin?
If your milkshake is runny, you can add more ice cream or frozen strawberries to thicken it up. Just blend it again until mixed! -
Can I use fresh strawberries instead of frozen?
Yes, absolutely! Just add a handful of ice cubes to maintain the shake’s frosty texture. Fresh berries can be a bit more watery, so adjust the milk accordingly. -
How long can I store leftovers?
Ideally, enjoy it fresh! But if you have leftovers, store them in an airtight container in the freezer. Just remember to let it sit out for a few minutes before trying to drink it again! -
What’s the best way to clean my blender?
Rinse the blender immediately after use; then fill it with warm water and a drop of dish soap. Blend for about 30 seconds, rinse again, and you’re done!
Nutritional Info
A classic strawberry milkshake can serve as a delightful treat, but let’s see what we’re working with. Here’s the estimated nutritional info per serving (about 1 large milkshake):
- Calories: ~450-600 (varies with ice cream type)
- Total Fat: ~20g
- Saturated Fat: ~12g
- Cholesterol: ~80mg
- Carbohydrates: ~65g
- Sugars: ~50g
- Protein: ~10g
This nutritional info can certainly vary based on your ingredient choices and any delicious variations you decide to whip up!
Final Thoughts
There you have it, friends! Your ultimate guide to whipping up a stunning Strawberry Milkshake—a beautiful blend of nostalgia, joy, and flavor that adults and kids alike can enjoy. Whether you’re sipping it solo, sharing with a friend, or serving up smiles at a summer gathering, each shake tells a story—a promise of sweetness and memories waiting to happen.
So grab that straw, dive into a glass of vintage, fruity goodness, and create your delicious moments. Remember, food should bring smiles and connection while making life a little sweeter. Until next time, happy blending and even happier eating! Cheers! 🥤❤️
Print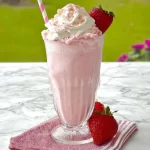
Perfect Strawberry Milkshake
- Total Time: 5 minutes
- Yield: 1 serving 1x
- Diet: Vegetarian
Description
A creamy and dreamy strawberry milkshake that brings back nostalgic summer memories.
Ingredients
- 2 cups vanilla ice cream
- 1 cup frozen strawberries
- ½ cup cold milk
- Whipped cream
- Maraschino cherries
Instructions
- Gather your gear including all ingredients, a blender, and a tall glass.
- Blend 2 cups of ice cream in the blender, then add 1 cup of frozen strawberries.
- Pour in ½ cup of cold milk and adjust to your desired thickness.
- Blend it all together until smooth and well-combined.
- Check the sweetness and adjust if needed, then blend again.
- Serve in a tall glass and top with whipped cream and a maraschino cherry.
Notes
Consider adding toppings like crushed graham crackers or drizzling chocolate syrup for extra flair.
- Prep Time: 5 minutes
- Cook Time: 0 minutes
- Category: Dessert
- Method: Blending
- Cuisine: American
Nutrition
- Serving Size: 1 large milkshake
- Calories: 500
- Sugar: 50g
- Sodium: 100mg
- Fat: 20g
- Saturated Fat: 12g
- Unsaturated Fat: 6g
- Trans Fat: 0g
- Carbohydrates: 65g
- Fiber: 1g
- Protein: 10g
- Cholesterol: 80mg
Keywords: strawberry milkshake, dessert, summer treat, nostalgic drink, creamy shake
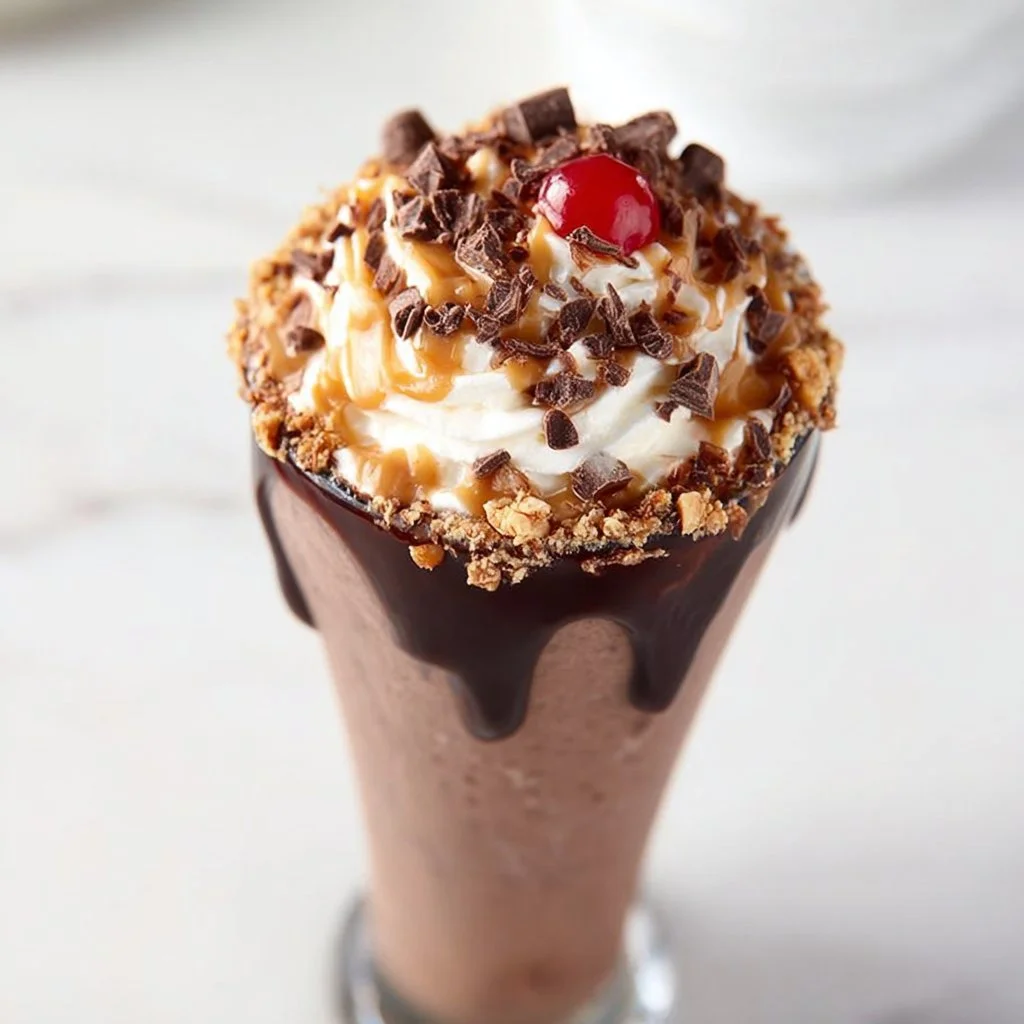
Chocolate Peanut Butter Milkshake
Decadent Chocolate Peanut Butter Milkshake: A Treat for the Sweet-Toothed!
Hey there, fellow food lovers! I’m Beau Collier, your go-to foodie pal, and today we’re diving into a lusciously creamy and utterly satisfying recipe that’s bound to become a staple in your kitchen – the Chocolate Peanut Butter Milkshake. Trust me, this classic treat is like a hug in a glass, merging the rich flavors of chocolate and peanut butter, reminding you of lazy summer afternoons and playful dessert adventures.
Who doesn’t love the combination of peanut butter and chocolate? It’s a match made in culinary heaven. Whether you’re seeking a post-dinner indulgence or just a delightful afternoon pick-me-up, this thick, frosty delight will tickle your taste buds and bring a smile to your face.
So, grab a comfy seat at your kitchen counter, flick on your favorite playlist, and let’s whip up a milkshake that’s as fun to make as it is to enjoy.
A Walk Down Memory Lane
Let’s talk memories. Whenever I think of milkshakes, I’m transported back to my childhood where summertime meant riding my bike to the local diner with friends. The air was thick with warm sunshine, and the hearty laughter of kids filled the streets. We’d each order our favorite treats, and without fail, I’d go for the classic chocolate milkshake with a twist – yes, peanut butter.
I can still picture that vintage diner booth, the vinyl seats sticking just a bit as we slid in. I’d take that first sip, a burst of rich chocolate mingling with the creamy peanut butter, and my eyes would widen in delight. To me, this was more than just a delicious drink — it was a treasured moment, a celebration of togetherness, and about the little joys in life that we often take for granted.
Now, as an adult, I love recreating that experience in my own kitchen, experimenting with flavors but always leaning back to that creamy chocolate-peanut butter combo. This milkshake is more than a recipe; it’s a nod to those sweet moments we cherish.
Ingredients
Let’s get that blender ready! Here are all the ingredients you’ll need to make this delightful Chocolate Peanut Butter Milkshake. Each component plays a vital role in creating that over-the-top deliciousness!
-
3 large scoops of chocolate ice cream
Rich and decadent, chocolate ice cream is the backbone of our milkshake. You can swap it with vanilla ice cream for a different flavor twist or go dairy-free with a coconut or almond based chocolate ice cream for a creamy option! -
3 tbsp creamy peanut butter
Nothing says comfort food like creamy peanut butter! If you’re feeling adventurous, try crunchy peanut butter for some added texture! For those with nut allergies, sunflower seed butter or almond butter can be a fantastic substitute. -
1 cup peanut butter cups (chopped)
These little chocolate treasures will add crunch and extra peanuty goodness! Feel free to use mini cups, or if you’re feeling fancy, you could chop up a chocolate bar! -
⅓ cup milk
Milk adds that silky smoothness to your shake. If you want to keep things rich, stick to whole milk. For a lighter option, try almond milk or oat milk, or even a dairy-free evaporated version for velvety thickness. -
Whipped cream
The cherry on top! You can easily make homemade whipped cream, or go for a can for convenience. Dairy-free options are readily available as well! -
Maraschino cherry
This classic touch isn’t just for looks! It adds a hit of sweetness that brings everything together.* -
Chocolate fudge sauce (see recipe below)
All great shakes need a drizzle of fudge! You can dot it around the inside of your glass before pouring in the shake for an extra treat. Store-bought works just as well if you’re short on time! -
For the chocolate fudge sauce:
-
1 ½ cups dairy-free semi-sweet chocolate (roughly chopped)
Perfect for creating that luxurious chocolate flavor. The dairy-free option ensures everyone can enjoy this shake! -
12 ounces dairy-free evaporated milk
Adds creaminess without the dairy. It’s a game-changer! -
4 tbsp dairy-free butter (melted)
This brings a richness to the fudge; you won’t even miss the dairy in this! -
1 tsp vanilla extract
A splash of vanilla complements both the chocolate and peanut flavors beautifully. -
1 ½ cups powdered sugar
Sweetening it up! Adjust according to your taste; you can always use a sugar substitute if you want a healthier spin.
-
Step-by-Step Instructions
Alright, ready to blend? Let’s break down the process into easy steps to whip up this outstanding milkshake that’ll make you feel like a star chef!
Step 1: Prepare Your Fudge Sauce
- Create the Chocolate Fudge Sauce
- In a medium saucepan over low heat, combine the chopped chocolate, dairy-free evaporated milk, melted dairy-free butter, and the vanilla extract. Stir constantly until everything is melted and combined. It’s creamy perfection, I promise!
- Remove from heat, and gradually mix in the powdered sugar until you achieve a smooth consistency. You can adjust sugar to your sweetness preference – go ahead, taste as you go! Set aside and let it cool slightly.
Step 2: Blend the Ingredients
-
Get Your Blender Ready!
- In your blender, add the scoops of chocolate ice cream, creamy peanut butter, and add the milk. Start off with the ⅓ cup; you can always add more later if you want a thinner consistency.
-
Blend It Up
- Secure the lid, and pulse until everything is combined and creamy. Keep an eye on it, and don’t blend too long, or you’ll end up with a soupy shake. We want it thick and luscious!
Step 3: Add the Crunch
- Incorporate the Peanut Butter Cups
- Once the ice cream mixture is smooth, add the chopped peanut butter cups to the blender. Give it just a few pulses to incorporate them into the shake – we want those chunks to stay chunky!
Step 4: Serve It Up
-
Drizzle Your Glass
- Before pouring in your milkshake, take your fudge sauce and drizzle it on the inside of the glass. Create swirls or lines—make it visually stunning!
-
Pour with Love
- Now, pour the milkshake mixture into the glass. Use a spatula to scrape every last bit out; we don’t want to waste this deliciousness!
Step 5: Top It Off
- Add Whipped Cream and Cherry
- Top your fabulous creation with a heaping swirl of whipped cream. Don’t be shy! Add the maraschino cherry on top, and a final drizzle of chocolate fudge sauce for good measure.
Step 6: Take a Sip!
- Time to Enjoy
- Grab a straw or a big spoon, and enjoy that beautiful concoction. Don’t forget to share with a loved one or simply savor it all by yourself – I won’t tell!
Serving Suggestions
Presentation is everything! Feel free to get creative when serving your Chocolate Peanut Butter Milkshake. Here are some ideas to elevate your shake:
-
Garnish Ideas: Sprinkle crushed peanuts or chocolate shavings on top of the whipped cream for texture and visual appeal. If you’re feeling fancy, a dusting of cocoa powder can add that café vibe.
-
Glassware: Serve it in an old-fashioned milkshake glass, mason jar, or even a quirky vintage cup to bring back those diner memories!
-
Side Treat: Pair it with chocolate chip cookies or a slice of rich peanut butter pie for a double dessert delight.
Recipe Variations
Now, let’s talk about how you can put your spin on this milkshake! Here are some enticing variations to consider:
-
Mint Chocolate Peanut Butter Shake
- Add a few drops of mint extract for a refreshing twist. It’ll be like a Girl Scout cookie in shake form!
-
Banana Peanut Butter Milkshake
- Toss in half a ripe banana before blending for an incredible creamy texture and a hint of banana flavor. It’s a classic combo!
-
Protein-Packed Version
- Add a scoop of your favorite protein powder to make it a post-workout treat! You might need to add a bit more milk to balance it out.
-
Nut-Free Version
- Replace peanut butter with sunbutter (sunflower seed butter) and use chocolate cereal for that added crunch!
-
Dairy-Free Delight
- Swap out all dairy products for their non-dairy counterparts, and enjoy a deliciously rich milkshake that everyone can enjoy!
Chef’s Notes
This milkshake has evolved over the years in my kitchen. At first, it was a simple frozen treat, and as I played with flavors, it became a family favorite. My friends loved it so much they began requesting it for every celebration! I still have that vintage glass from my childhood; it’s a lovely reminder of how something so simple can bring joy and laughter.
It’s essential to have fun with food! Don’t be afraid to experiment; every great recipe starts with a little bit of courage and a whole lot of heart.
FAQs and Troubleshooting
1. Why is my milkshake too thin?
If your milkshake is a bit too runny, blend in a few extra scoops of ice cream to thicken it up. You could also reduce the amount of milk next time.
2. Can I make this ahead of time?
Absolutely! You can prepare the chocolate fudge sauce ahead and store it in the fridge. For the shake, I recommend blending it fresh for the best texture, but you can make it an hour in advance and place it in the freezer.
3. How do I store leftovers?
If you have any leftovers (which is rare!), pour any remaining shake into a tightly sealed container and store it in the freezer. When you’re ready to enjoy it again, let it thaw a bit before blending to restore its creamy goodness.
4. Can I use different flavors of ice cream?
Yes! Get adventurous with flavors like salted caramel, vanilla bean, or mint chocolate chip to create your unique shake experience!
Nutritional Info
Let’s talk numbers! Here’s a rough breakdown per serving of this decadent milkshake:
- Calories: Approximately 600–800 calories depending on specific brands and quantities used.
- Fat: 30g (mostly from the peanut butter and ice cream)
- Carbohydrates: 70g (from sugars in ice cream and fudge)
- Protein: 12g (mostly from milk and peanut butter)
Keep in mind that these numbers can vary based on substitutions or tweaks made in the ingredients. You can always use lower-calorie options to make it a bit lighter!
Final Thoughts
And there you have it! The ultimate Chocolate Peanut Butter Milkshake that combines nostalgia, flavor, and just the right amount of indulgence. Whenever you whip this up, you’re not just making a drink; you’re creating memories, sharing joy, and bringing a piece of that wonderful diner magic right into your home.
So, next time you find yourself in need of a sweet escape, head to your kitchen and bring this recipe to life. Whether it’s a hot summer day, a cozy movie night, or just a treat for being you, this milkshake is sure to please!
Don’t forget to share your creations with me on social media — I’d love to see your delicious masterpieces! Until next time, keep cooking, keep sharing, and most importantly, keep enjoying those meals made with love. Cheers, my foodie friends! 🍫🥜🥤
Print
Decadent Chocolate Peanut Butter Milkshake
- Total Time: 25 minutes
- Yield: 2 servings 1x
- Diet: Vegetarian
Description
A lusciously creamy and satisfying chocolate peanut butter milkshake that brings back sweet childhood memories.
Ingredients
- 3 large scoops of chocolate ice cream
- 3 tbsp creamy peanut butter
- 1 cup peanut butter cups (chopped)
- ⅓ cup milk
- Whipped cream
- Maraschino cherry
- Chocolate fudge sauce (see recipe below)
- For the chocolate fudge sauce:
- 1 ½ cups dairy-free semi-sweet chocolate (roughly chopped)
- 12 ounces dairy-free evaporated milk
- 4 tbsp dairy-free butter (melted)
- 1 tsp vanilla extract
- 1 ½ cups powdered sugar
Instructions
- Create the Chocolate Fudge Sauce: In a medium saucepan over low heat, combine the chopped chocolate, dairy-free evaporated milk, melted dairy-free butter, and vanilla extract. Stir constantly until melted and combined. Gradually mix in the powdered sugar until achieving a smooth consistency. Set aside to cool slightly.
- Add the scoops of chocolate ice cream, creamy peanut butter, and milk into your blender. Start with the ⅓ cup of milk, adding more later if desired.
- Blend until everything is combined and creamy but thick. Avoid blending too long for a soupy texture.
- Add the chopped peanut butter cups and pulse a few times to incorporate.
- Drizzle fudge sauce on the inside of your glass before pouring in the milkshake mixture.
- Pour the milkshake into the glass using a spatula to scrape out all of the mixture.
- Top with whipped cream, a maraschino cherry, and a final drizzle of chocolate fudge sauce.
- Enjoy with a straw or spoon, savoring every delicious sip.
Notes
Feel free to experiment with different flavors of ice cream or toppings. This milkshake is a great way to create memories with friends and family.
- Prep Time: 15 minutes
- Cook Time: 10 minutes
- Category: Dessert
- Method: Blending
- Cuisine: American
Nutrition
- Serving Size: 1 serving
- Calories: 700
- Sugar: 60g
- Sodium: 200mg
- Fat: 30g
- Saturated Fat: 12g
- Unsaturated Fat: 18g
- Trans Fat: 0g
- Carbohydrates: 85g
- Fiber: 4g
- Protein: 12g
- Cholesterol: 15mg
Keywords: milkshake, chocolate, peanut butter, dessert, creamy, indulgent

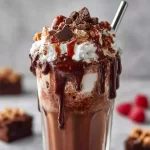
Brownie Milkshake Recipe
# Indulge in Bliss: The Ultimate Brownie Milkshake Recipe

### Introduction

Hey there, fellow food lovers! It’s your pal Beau Collier, and today I'm thrilled to share one of my ultimate guilty pleasures: the Brownie Milkshake! Trust me, this isn't just your ordinary milkshake—it’s a dessert that will make your taste buds do a happy dance. Imagine creamy vanilla ice cream blended with rich brownie chunks, swirls of velvety chocolate syrup, and a cloud of whipped cream on top. Is your mouth watering yet?

Let’s be real; we all have those moments when life throws a curveball, and you just need something sweet and satisfying to pull you back up. Whether it’s a hot summer day, a movie night, or just a cozy moment spent with friends, this brownie milkshake is your go-to. With every sip, you're not just enjoying a drink—you’re reliving a cherished memory, sharing joy, and maybe even creating new ones in the process.

When I think of milkshakes, I remember my childhood friends and I spending countless afternoons at the local soda shop, chatting away while we indulged in thick, creamy shakes. Nothing brought a smile quicker than a giant straw sticking out of a tall glass filled with the good stuff. Today, I’m about to give you a little sneak peek into not just my recipe for the dreamy brownie milkshake, but also the stories and experiences that make this treat so special. Grab your blender, and let’s whip up some nostalgia!

### Personal Story

This recipe takes me straight back to my college years, where late-night study sessions often turned into impromptu hangouts. We all gathered in my tiny kitchen, attempting to make sense of textbooks while honing our culinary skills. One particular evening, my friends and I decided to celebrate surviving finals week (barely!). With a box of brownie mix and a couple of ice cream tubs, we concocted what would become our go-to treat: the Brownie Milkshake.

As the blender whirred to life, laughter bounced off the kitchen walls, each of us taking turns at the blender while the other prepared toppings. After a flurry of brownie crumbles and whipped cream blasts, we toasted to our hard work (and the summer break ahead) with milkshakes so thick you could practically stand a spoon up in them. That night was about more than just dessert; it was about friendships, laughter, and memories made over a simple yet decadent treat. Years later, every sip of this milkshake still brings that joyful chaos back to me.

### Ingredients

Ready to get started? Here’s what you’ll need to whip up your own brownie milkshake:

- **2 cups vanilla ice cream**
  - *Why vanilla?* It’s the perfect base to complement the chocolatey richness of brownies. Feel free to substitute with chocolate ice cream if you’re feeling extra indulgent!

- **1 cup milk (whole or 2% preferred)**
  - *Chef insight:* The creaminess of whole milk makes everything richer. If you're looking for a lighter option, almond or oat milk can also work, but adjust the quantity for the desired thickness.

- **1 large brownie, plus more for garnish**
  - *Substitution tip:* You can use store-bought brownies or even those left over from a previous dessert party, but I highly recommend homemade for maximum flavor!

- **1 teaspoon vanilla extract**
  - *Why add this?* It enhances the overall flavor profile; never skip it! If you're feeling adventurous, a dash of espresso powder can also kick the chocolate flavor up a notch.

- **Whipped cream**
  - *Tip:* Store-bought is fine, but homemade whipped cream really takes it over the top! Just whip heavy cream with a little sugar and vanilla for a dreamy topping.

- **Chocolate syrup**
  - *Little hack:* Drizzle some chocolate syrup inside the glass before pouring in the shake for a professional touch!

### Step-by-Step Instructions

Now, let’s dive into the magic of blending this deliciousness together! Follow these steps, and you’ll be sipping your brownie milkshake in no time.

1. **Gather Your Tools**
   - Make sure you have a blender and a sturdy glass ready. If you want to take it to the next level, grab a large straw.

2. **Blend the Ice Cream and Milk**
   - Add the 2 cups of vanilla ice cream and 1 cup of milk into the blender. Start blending on a low setting just to combine, then increase to high until it’s smooth and creamy. *Tip: You want a thick consistency—if it’s too thick to blend, add a tad more milk.*

3. **Add the Brownie and Vanilla Extract**
   - Crumble that brownie (saving a small piece for garnish), and toss it into the blender along with the teaspoon of vanilla extract. Blend again until the brownie is well mixed but still slightly chunky. *Pro Tip: For more chocolate goodness, throw in some chocolate chips here!*

4. **Taste Test Time!**
   - Here’s where you get to be the chef! Pour a small amount into a glass for a taste test. Adjust sweetness if needed with a little sugar or more syrup.

5. **Drizzle the Glass**
   - Before pouring the whole milkshake, drizzle chocolate syrup along the sides of your glass. Not only does it look great, but it adds extra flavor! *Happy Dance Alert!*

6. **Pour and Top**
   - Pour the milkshake into the glass, filling it almost to the brim. Top generously with whipped cream. *Looks like dessert perfection!*

7. **Garnish and Serve**
   - Crumble the reserved brownie over the whipped cream, and add a final drizzle of chocolate syrup on top. Grab that straw and get ready to dive in!

### Serving Suggestions

While this milkshake is perfectly delightful on its own, there are a few ways to elevate your serving game:

- **Make it a Milkshake Bar:** Set up a fun milkshake station with various toppings like crushed nuts, sprinkles, or even a scoop of peanut butter or caramel drizzle. Let your guests customize their own!

- **Fluffy Pancake Stacks:** Pair your brownie milkshake with some chocolate chip pancakes stacked high for a brunch feast that’s sure to impress.

- **Cozy Evening Treat:** Serve it alongside warm cookies or a slice of pie for a comforting dessert spread.

### Recipe Variations

Now that you’ve got the classic brownie milkshake on lock, here are some fun variations to try out:

1. **Minty Chocolate:** Add a few mint leaves or a drop of peppermint extract for a refreshing twist. Perfect for those who love mint chocolate!

2. **Peanut Butter Bliss:** Swirl in a couple of tablespoons of peanut butter for a nutty flavor explosion. The combination with chocolate is truly divine.

3. **Cookie Crumble:** Swap the brownie for your favorite cookie, like Oreos or chocolate chip, for an equally indulgent treat.

4. **Vegan Delight:** Substitute vanilla ice cream for a dairy-free version, use plant-based milk, and opt for vegan brownies for a totally plant-based milkshake!

5. **Coffee Lover’s Dream:** Blend in a shot of espresso or strong coffee for a mocha brownie milkshake that will get you energized.

### Chef’s Notes

As I’ve perfected this recipe over the years, I’ve learned that there’s no one way to make a milkshake; it’s all about what flavors and textures you love. There was one time when I accidentally used too much milk and ended up with a more liquid dessert—instead of tossing it! I just called it “Milkshake Soup” and served it with tiny spoons. My friends loved it! That’s the beauty of cooking—don’t just follow the rules, have fun with them!

### FAQs and Troubleshooting

1. **What if my milkshake is too thin?**
   - No worries! Just add a bit more ice cream and blend again. If you had too much milk at the start, remember, it’s easy to thicken!

2. **Can I make it ahead of time?**
   - I recommend serving this fresh, but if you must, prepare the milkshake base (minus the whipped cream) and store it in the freezer. Just give it a quick blend before you’re ready to serve!

3. **How do I store leftovers?**
   - While leftover milkshake is rare, if you happen to have some, you can store it in the freezer! Just let it thaw a bit before enjoying again.

4. **Can I add alcohol?**
   - Absolutely! For an adult twist, add a shot of your favorite liqueur—like Baileys or Kahlua—for a boozy brownie treat!

### Nutritional Info

Now, I know we love our delicious treats, but it’s also good to consider what’s in them. Your brownie milkshake will have roughly:

- **Calories:** 600-800 (depends on ice cream and brownies used)
- **Fat:** 30g (saturated fat from ice cream and brownie)
- **Carbohydrates:** 80g (sugar from ice cream and brownies)
- **Protein:** 12g (from milk and ice cream)

This is definitely a treat to enjoy in moderation, but can you really put a price on happiness?

### Final Thoughts

There you have it! A classic Brownie Milkshake that’s ready to take you on a trip down memory lane, and maybe even create some new ones. So crack open your freezer, pull out that ice cream, and let’s blend our way to bliss!

Food is all about the joy it brings us, and this brownie milkshake is sure to deliver just that. Whenever I make it, I’m reminded of those sweet late-night study sessions, surrounded by good friends and laughter. I hope this recipe brings you a taste of that—whether you’re hosting a gathering or enjoying a quiet night in, do it with a brownie milkshake in hand. Cheers to delicious moments!

Now go ahead, whip one up, and let me know how it turns out! Happy blending!
Ultimate Brownie Milkshake
- Total Time: 10 minutes
- Yield: 2 servings 1x
- Diet: Vegetarian
Description
A decadent brownie milkshake blending creamy vanilla ice cream and rich brownie chunks for a delightful treat.
Ingredients
- 2 cups vanilla ice cream
- 1 cup milk (whole or 2% preferred)
- 1 large brownie, plus more for garnish
- 1 teaspoon vanilla extract
- Whipped cream
- Chocolate syrup
Instructions
- Gather Your Tools: Make sure you have a blender and a sturdy glass ready.
- Blend the Ice Cream and Milk: Add the ice cream and milk into the blender and blend until smooth and creamy.
- Add the Brownie and Vanilla Extract: Crumble the brownie into the blender along with vanilla extract and blend until mixed but slightly chunky.
- Taste Test Time: Pour a small amount into a glass for a taste test and adjust sweetness if needed.
- Drizzle the Glass: Drizzle chocolate syrup along the sides of the glass before pouring in the milkshake.
- Pour and Top: Fill the glass with the milkshake and top generously with whipped cream.
- Garnish and Serve: Crumble reserved brownie over the whipped cream and add a drizzle of chocolate syrup on top.
Notes
Customize your milkshake with different toppings and try variations like mint chocolate or peanut butter.
- Prep Time: 10 minutes
- Cook Time: 0 minutes
- Category: Dessert
- Method: Blending
- Cuisine: American
Nutrition
- Serving Size: 1 serving
- Calories: 700
- Sugar: 90g
- Sodium: 300mg
- Fat: 30g
- Saturated Fat: 15g
- Unsaturated Fat: 10g
- Trans Fat: 0g
- Carbohydrates: 80g
- Fiber: 3g
- Protein: 12g
- Cholesterol: 80mg
Keywords: brownie milkshake, dessert, chocolate shake, creamy shake, summer treat

Oreo Balls Recipe
Oreo Balls Recipe: A Sweet Delight for Every Occasion
Hey foodies, it’s Beau Collier here, and today we’re diving into the world of irresistible desserts with my crowd-pleaser recipe: Oreo Balls! If you’ve never had these sweet, bite-sized treats, buckle up, because they’re about to change your dessert game forever. Imagine the rich, chocolatey goodness of Oreos paired with creamy indulgence—no baking required. Yep, you heard that right! These little beauties are so easy to whip up; you’ll be wondering why you didn’t try making them sooner.
Now, let’s talk about the magic of Oreo Balls. Their appeal is universal, and they’ve got that perfect sweet-to-salty ratio that makes your taste buds sing. It’s incredible how something so simple can bring people together. Picture this: you’re at a family gathering, laughter fills the air, and you take a bite of these delightful morsels. Suddenly, everyone is smiling, sharing stories, and passing around the plate for "just one more." You know the feeling, right?
Living in a world where we often complicate things, I’m all about keeping it simple. My goal with Feastical is to create a warm and welcoming space for all food lovers—whether you’re a kitchen novice or a seasoned pro. In the spirit of that mission, I’m excited to share not only the recipe for these scrumptious Oreo Balls but also the quirky little stories behind them, my favorite kitchen insights, and tips to elevate them even further. Let’s get our hands dirty and roll up our sleeves because we’re about to create something deliciously unforgettable!
Personal Story
Let me take you back to one of my fondest childhood memories, a time filled with laughter and the sweet aroma of treats wafting through my family’s kitchen. Each holiday season, my mom would host a cookie-making extravaganza. Picture long tables laden with flour, sugar, and sprinkles scattered everywhere, along with my sisters and me, fully committed to turning our kitchen into a whirlwind of edible creativity.
Oreo Balls first entered my life during one of those festive gatherings when my aunt brought her “secret” dessert. The first bite was pure bliss. I remember the rich chocolate coating and the crunch of the Oreos melding with the creamy filling—it was love at first taste! At that moment, I realized that simple ingredients could create an unforgettable experience. More than just a treat, those Oreo Balls became a symbol of family togetherness. They were our little indulgence, enjoyed while we reminisced about the past and dreamed of what the future held. That love for simple, heartfelt food has stayed with me, and is what inspired me to share this recipe with all of you!
Ingredients
Here’s what you’ll need to whip up these delectable Oreo Balls:
-
30 (340g) Oreo cookies: The star of the show! Choose regular or gluten-free Oreos based on your dietary needs. For an extra crunch, try using a mix of chocolate and mint Oreos!
-
3 tablespoons (45g) unsalted butter, melted and cooled: This adds richness and helps bind everything together. If you’re dairy-free, feel free to use coconut oil as a substitute!
-
2-5 tablespoons whole milk: This is essential for achieving the right consistency. Start with 2 tablespoons and add more as necessary. You can swap it for almond milk or oat milk if you prefer a dairy-free option.
-
8 ounces (225g) dark, semi-sweet, or white chocolate, chopped: The chocolate coating is where you can really play around! Each type of chocolate brings a unique flavor profile to the Oreo Balls. Dark chocolate adds depth, while white chocolate gives a sweeter, creamier finish.
-
1 teaspoon vegetable oil (optional): If you want that silky-smooth chocolate coating, the oil is your best friend. It makes melting chocolate much easier and helps it glide onto your Oreo balls.
Step-by-Step Instructions
Ready to get rolling? Let’s make these Oreo Balls step by step!
Step 1: Crush the Oreos
Start by placing your Oreo cookies in a food processor. Blitz them until they resemble fine crumbs. If you don’t have a food processor, don’t fret—just pop them in a sealed zip-top bag and crush them with a rolling pin. It’s a great way to vent some stress, trust me!
TIP: Save a couple of Oreo crumbs for sprinkling on top later; they make for a cute finishing touch!
Step 2: Mix in the Butter and Milk
Next, pour the crushed cookies into a large mixing bowl. Add your melted butter and start mixing. At this point, the mixture will be dry and crumbly. Gradually add the whole milk, starting with 2 tablespoons, and mix until it comes together into a thick, cohesive dough. You’re looking for a texture that’s moldable and a bit sticky, so adjust the milk as needed.
CHEF HACK: Use your hands! It’s the quickest way to ensure everything is mixed evenly, and hey, this is a fun recipe, so get in there!
Step 3: Roll into Balls
Once your mixture is ready, you’re going to roll them into equal-sized balls, roughly one inch in diameter. Place them on a parchment-lined baking sheet as you go.
PRO TIP: To make rolling easier and less messy, lightly dampen your hands with water so the dough won’t stick to them!
Step 4: Chill Out
Pop the baking sheet into the freezer for about 15 to 20 minutes. This helps the balls firm up and makes the next step smoother.
Step 5: Melt the Chocolate
While the Oreo balls are chilling, it’s chocolate time! Melt your chopped chocolate (and vegetable oil, if using) using a double boiler, or in a microwave-safe bowl. If using the microwave, heat in 30-second intervals, stirring in between until fully melted and smooth.
CHEF’S TIP: Avoid overcooking the chocolate! If it starts to seize up, add a splash more oil to bring it back to life!
Step 6: Coat the Oreo Balls
Take the chilled Oreo balls out of the freezer. Using a fork, dip each ball into the melted chocolate, making sure they’re well-coated. Gently tap the fork on the side of the bowl to remove any excess chocolate before placing them back onto the parchment-lined tray.
Step 7: Add Final Touches
Before the chocolate sets, sprinkle those reserved Oreo crumbs on top of your chocolate-coated balls for that extra flair!
Step 8: Chill Again
Let the coated Oreo Balls sit at room temperature until the chocolate has completely set, or pop them back in the fridge for about 30 minutes.
Serving Suggestions
Serving these Oreo Balls is incredibly versatile! You can arrange them in a pretty box or tin for gifting, or display them on a decorative platter at a party. If you want to add a show-stopping touch, consider skewering the balls on lollipop sticks for an eye-catching dessert treat. Drizzle some extra melted chocolate in zig-zags over them for a stunning finish.
You can also serve them alongside a glass of cold milk for that classic pairing, or even a scoop of ice cream for a delightful dessert sundae. How about a fun twist? Place them on a layered dessert in a glass for a charming parlor-style presentation!
Recipe Variations
Feeling adventurous? Here are a few creative twists to elevate your Oreo Balls beyond the classic recipe:
-
Peanut Butter Oreo Balls: Swap out ¼ cup of the Oreo crumbs for ¼ cup of creamy peanut butter. This adds a nutty twist that’s superb!
-
Mint Chocolate Oreo Balls: Use mint-flavored Oreos and sprinkle crushed peppermint candies on top for a refreshing flavor change.
-
Coconut Chocolate Oreo Balls: Roll the balls in shredded coconut before or after dipping them in chocolate for a tropical vibe.
-
Cookie Dough Oreo Balls: Fold in mini chocolate chips to the mixture before rolling into balls for added texture.
-
Funfetti Oreo Balls: Toss in some colorful sprinkles just before rolling into balls for a fun celebration treat, perfect for kids’ parties!
Chef’s Notes
Oreo Balls have been a staple in my dessert arsenal for years, and they never fail to impress! Over time, I’ve experimented with different toppings and flavor combinations, creating a treasure trove of Oreo-inspired delights. The beauty of this recipe is its flexibility; I challenge you to make it your own.
Sometimes, the most memorable moments in the kitchen stem from those little accidents—like when I accidentally grabbed the cayenne instead of cinnamon for a sprinkle on top. The result was a delightful balance of heat and sweetness that made everyone curious—and bursting with laughter. If there’s anything I’ve learned, it’s to embrace those kitchen blunders; they often lead to the best discoveries!
FAQs and Troubleshooting
-
Why are my Oreo Balls falling apart?
- This usually means the mixture needs more moisture. Add a touch more milk until it holds together well.
-
How can I prevent the chocolate from cracking?
- Make sure your chocolate coating is not too thick. A thin, even layer helps prevent cracking as it sets.
-
Can I freeze Oreo Balls?
- Absolutely! These little treats freeze perfectly. Just place them in an airtight container, and they’ll be good for up to 3 months!
-
What if the chocolate is too thick to coat the balls?
- If your chocolate thickens, a splash of vegetable oil can help soften it again. Just reheat gently to combine!
Nutritional Info
While I recommend enjoying these Oreo Balls in moderation (because, let’s face it, they are pretty indulgent), here’s a rough breakdown of what you can expect from one Oreo Ball:
- Calories: Approximately 90–120 calories each (depending on chocolate and size)
- Fat: 5–7g
- Carbohydrates: 10–15g
- Protein: 1g
- Sugar: 7–10g
These values can fluctuate based on the variations you choose, so always consider your ingredient choices!
Final Thoughts
There you have it, friends—my go-to Oreo Balls recipe that’s not just easy and delicious but also a blast to make! I hope this journey through flavors and memories has inspired you to gather in your kitchen and create your own special moments. Whether it’s for a holiday gathering, a sweet snack for yourself, or a fun dessert to share with loved ones, these Oreo Balls are sure to bring joy and smiles all around.
Give yourself the gift of making something delightful today! Grab those Oreos, get mixing, and let the good times roll (literally!). Bon appétit, and make sure to share your creations with me—I’d love to see how you put your own spin on them! Happy cooking!
Print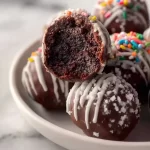
Oreo Balls
- Total Time: 45
- Yield: 24 servings 1x
- Diet: Vegetarian
Description
Delicious and easy-to-make Oreo Balls, a perfect sweet treat for any occasion.
Ingredients
- 30 (340g) Oreo cookies
- 3 tablespoons (45g) unsalted butter, melted and cooled
- 2–5 tablespoons whole milk
- 8 ounces (225g) dark, semi-sweet, or white chocolate, chopped
- 1 teaspoon vegetable oil (optional)
Instructions
- Crush the Oreos until fine crumbs.
- Mix in the melted butter and gradually add the whole milk until a thick dough forms.
- Roll into balls about one inch in diameter and place on a baking sheet.
- Chill in the freezer for 15-20 minutes.
- Melt the chocolate (and oil if using) until smooth.
- Coat each ball in melted chocolate and tap to remove excess.
- Add reserved Oreo crumbs on top before the chocolate sets.
- Chill until chocolate has set, or about 30 minutes in the fridge.
Notes
Oreo Balls can be frozen for up to 3 months. Experiment with different toppings or flavors for a unique twist!
- Prep Time: 15
- Cook Time: 30
- Category: Dessert
- Method: No-Bake
- Cuisine: American
Nutrition
- Serving Size: 1 ball
- Calories: 100
- Sugar: 8g
- Sodium: 50mg
- Fat: 5g
- Saturated Fat: 3g
- Unsaturated Fat: 1g
- Trans Fat: 0g
- Carbohydrates: 13g
- Fiber: 0g
- Protein: 1g
- Cholesterol: 10mg
Keywords: Oreo Balls, dessert, no-bake treats, easy recipes, chocolate desserts

Simple Caramel Apple Pie Bombs
Simple Caramel Apple Pie Bombs: A Warm and Cozy Treat
Hey there, fellow foodies! If you’re in the mood for a delightful kitchen adventure, let me introduce you to a treat that’s not only fun to make but is also guaranteed to spark a big smile on your face — Caramel Apple Pie Bombs! These delectable bites are the lovechild of classic caramel apples and the nostalgia of apple pie, wrapped up in the flaky goodness of biscuit dough. Think crispy, gooey, and absolutely irresistible!
Growing up, fall was the time when everything apples reigned supreme. The orchards were bursting with crisp, juicy fruit just waiting to be picked. I remember racing my siblings through rows of trees, laughter ringing out as we fought for the biggest and juiciest apples. The spoils of our adventures would inevitably find their place in my mom’s kitchen, transforming into the most comforting apple pies and treats. And now, through the years, I’ve grown to appreciate putting a little twist on those traditional recipes.
These caramel apple pie bombs bring together the warmth of cinnamon-spiced apples, a generous drizzle of caramel, and the enchantment of flaky biscuit dough wrapped around it all. They’re ideal for sharing with family on a cozy autumn evening or serving at parties when you want to impress your friends with just how easy it is to create something delicious.
So, put on your favorite apron, preheat your oven, and let’s dive into the delightful world of these sweet treats. Get ready to experience that warm-hug-in-food-form feeling right in your kitchen!
Personal Story
Let me take you back to one of those most cherished autumn evenings. Picture this: the air was crisp outside, leaves danced in bold reds and yellows, and the scent of cinnamon wafted through our home as my mom busied herself in the kitchen. It was apple pie season, and we were all eagerly awaiting the magic that was about to happen.
One afternoon, I decided to step in and help (or, let’s be real, I was mostly there to snag a bite of whatever delicious things were coming my way). As Mom expertly peeled and sliced apples, she taught me the delicate balance of sweetness and spice — how a dash of cinnamon could transform the ordinary into the extraordinary.
Fast forward to my own kitchen filled with laughter and the chatter of friends. I found myself inspired by that memorable time. These Caramel Apple Pie Bombs are my little ode to those autumnal days spent with family. Each bite evokes that warm, cozy feeling, as if we are back in that kitchen, surrounded by love, laughter, and the delightful aroma of homemade treats.
Ingredients
Here’s a rundown of the key ingredients you’ll need to whip up these irresistible Caramel Apple Pie Bombs.
-
1 package of biscuit dough
This is the magic encasing our sweet filling! I often go for the flaky kind, but if you’re feeling adventurous, you can also try biscuit dough made from scratch! -
2 medium apples, peeled and diced
Granny Smith or Honeycrisp work wonders here! If you like a sweeter flavor, opt for Fuji apples. And if you’re looking for a lower-sugar option, consider using a tart apple like McIntosh. -
1/2 cup caramel sauce
Caramel makes everything better! You can use store-bought for convenience, but homemade will carry that special touch—because who doesn’t love fresh caramel drizzle? If you’re feeling bold, chocolate sauce could be a delicious substitute! -
1 teaspoon cinnamon
This spice adds depth and warmth to our filling. If you’re a fan of nutmeg or allspice, feel free to throw in a pinch for a unique twist on the standard recipe. -
1/4 cup sugar
Sugar enhances the apples’ sweetness and caramelizes beautifully during baking. If you prefer to reduce sugar, try using honey or maple syrup instead. -
Butter, for brushing
This step is all about achieving that golden-brown, flaky crust. Melted or softened butter works wonders here. -
Optional: whipped cream or vanilla ice cream for serving
You can’t go wrong with a dollop of whipped cream or a scoop of ice cream! They’ll add a sumptuous creaminess that perfectly balances the warm, gooey goodness of the bombs.
Step-by-Step Instructions
Alright my culinary adventurers, let’s dive into the details of making these Caramel Apple Pie Bombs! Follow along step by step, and I promise, you’ll have a delicious treat in no time.
Step 1: Preheat the Oven
First things first! Preheat your oven to 375°F (190°C). This is crucial to ensure your pie bombs cook evenly and come out golden and delicious. While you wait, grab your cookie sheet and line it with parchment paper to prevent any sticky mishaps.
Step 2: Prepare the Apples
As your oven heats up, let’s get those apples ready. Peel and dice the 2 medium apples. Aim for a uniform size to ensure even cooking. Toss them into a mixing bowl along with 1/4 cup sugar and 1 teaspoon cinnamon. Mix it up! The sugar helps draw out the natural juices from the apples, which makes for a flavorful filling.
Chef Hack: A squeeze of lemon juice will prevent your apple pieces from browning while you mix and prepare the rest of your ingredients.
Step 3: Get the Biscuit Dough Ready
Now, let’s turn our attention to the biscuit dough. Open your package and separate the biscuit rounds. You should have about 8 to 10 pieces of dough. Lightly flatten each round in your palm. We’re making little pockets for our delicious apple filling!
Step 4: Fill with Apple Mixture
Spoon a generous portion of the apple mixture into the center of each biscuit round. Don’t skimp out! These little goodies need to be full of flavor. Now, drizzle about a tablespoon of caramel sauce on top of the apple mixture. You might want to save a bit of caramel for drizzling later on top when you serve—trust me, it’s worth it!
Step 5: Seal Up Those Bombs
Now, for the fun part. Fold the edges of the biscuit dough over the filling to form a ball, ensuring it’s sealed tight. You can pinch them closed or roll them gently in your hands. This is what’ll create those delightful bursts of flavor when they bake!
Step 6: Brush and Bake
Place your filled biscuit balls onto the lined cookie sheet. Now, let’s make them shine! Brush the outside of each bomb with melted butter. This not only adds flavor but helps give that golden, crispy texture that we all crave.
Pop them into the preheated oven and bake for about 15-20 minutes or until they’re golden brown and look like little toasted treasures.
Chef Tip: Give your pie bombs some space on the baking sheet. They’ll puff up a bit, and we don’t want a sticky situation!
Step 7: Cool and Serve
Once they’re done, take them out of the oven and let them cool for a few minutes. Here’s where the smell becomes downright hypnotic! Serve these bombs warm, and don’t forget that optional drizzle of caramel sauce (or even chocolate—go wild!). Pair with whipped cream or a scoop of vanilla ice cream for a dessert that’s sure to impress.
Serving Suggestions
Serving these Caramel Apple Pie Bombs is all about the presentation, my friends! Consider plating them on a lovely platter or individual dessert plates for a more sophisticated touch.
Once baked, give each bomb a drizzle of warm caramel sauce and sprinkle with a dash of cinnamon for that delightful visual flair. If you’re feeling extra generous, you can also serve them with a dollop of whipped cream or a scoop of vanilla ice cream on the side.
Now, gather your friends and family around the table, and watch the smiles light up when they take their first bite! These sweet treasures are made for sharing.
Recipe Variations
Feeling adventurous? Here are a few fun twists on the classic Caramel Apple Pie Bombs:
-
Nutty Twist: Add some chopped pecans or walnuts to the apple filling for an extra crunch! It pairs beautifully with the caramel and adds lovely nutty flavors.
-
Spiced Up: Experiment with different spices! Try ginger or cardamom for an aromatic twist.
-
Chocolate Drizzle: For the chocolate lovers, drizzle some melted dark chocolate over the baked pie bombs for a decadent touch.
-
Salted Caramel: Sprinkle a bit of sea salt over the caramel before baking for that beautiful sweet-salty combo that’s all the rage!
-
Savory: If you want to swap sweet for savory, try filling them with caramelized onions and goat cheese for a unique appetizer!
Chef’s Notes
Whipping up these Caramel Apple Pie Bombs has become a cherished ritual in my kitchen! I love how versatile they are—whether I’m making them for a cozy night in by the fire or taking them to a potluck gathering. The recipe has evolved with me over the years, making use of whatever apples are in season and jazzing it up with new ingredients as I go.
And let’s be honest — I can’t possibly create a dessert without sneaking a taste of the filling along the way! Who can resist a spoonful of cinnamon-sugar apples?
FAQs and Troubleshooting
Here are some frequently asked questions that might pop up while you whip up these mouth-watering pie bombs:
-
Q: My pie bombs exploded while baking! What went wrong?
A: This usually happens when the filling is overstuffed or the dough isn’t sealed properly. Make sure to pinch the edges well and keep the filling modest! -
Q: Can I prepare these ahead of time?
A: Absolutely! You can fill the biscuit dough in advance and store them in the fridge for a few hours. Just make sure to let them sit at room temperature for a bit before baking. -
Q: How do I store leftovers?
A: If you have any leftovers (which is unlikely!), store them in an airtight container in the fridge for up to 2 days. Simply reheat before serving. -
Q: Can I use store-bought caramel sauce?
A: Yes, it’s a time-saver! However, making your caramel sauce is so easy. A simple mix of sugar, butter, and cream tends to blow store-bought varieties out of the water!
Nutritional Info
While the Caramel Apple Pie Bombs are an indulgent treat, let’s break down the nutritional value:
- Calories: Approximately 200-300 (depending on the size and ingredients)
- Fat: 9g (mostly from the biscuit dough and butter)
- Carbohydrates: 35g (from the biscuit dough and sugars)
- Sugars: About 10-15g (natural sugars from apples and added sugar)
- Protein: 2g
Remember, moderation is key when indulging in sweet treats! You can also try using lower-calorie ingredients or sugar substitutes to make a lighter version of these delicious bites.
Final Thoughts
And there you have it! Your very own homemade Caramel Apple Pie Bombs ready to warm the hearts of those you hold dear. These little bites embody all that is cozy and comforting about food. Perfect for chilly evenings or as a special treat on lazy weekends, they bridge the gap between simple and indulgent, making them a must-try in any home.
So, my kitchen companions, embrace your inner chef, let that creativity flow, and whip up a batch (or two!). You never know, these may just become a new family favorite—infusing your world with all the warmth of home and nostalgia just like my family did for me many moons ago.
Remember, good food brings people together and creates memories that last a lifetime. Happy cooking, and I can’t wait to hear how your pie bombs turn out! Cheers to making delicious moments in the kitchen and savoring every blissful bite!
Print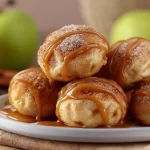
Caramel Apple Pie Bombs
- Total Time: 35 minutes
- Yield: 8 servings 1x
- Diet: Vegetarian
Description
Delightful bites that combine caramel apples and apple pie, wrapped in flaky biscuit dough.
Ingredients
- 1 package of biscuit dough
- 2 medium apples, peeled and diced
- 1/2 cup caramel sauce
- 1 teaspoon cinnamon
- 1/4 cup sugar
- Butter, for brushing
- Optional: whipped cream or vanilla ice cream for serving
Instructions
- Preheat your oven to 375°F (190°C) and line a cookie sheet with parchment paper.
- Prepare the apples by peeling and dicing them, then mixing with sugar and cinnamon.
- Get the biscuit dough ready by separating and flattening each round.
- Fill each biscuit round with a portion of the apple mixture and drizzle caramel on top.
- Seal the biscuit dough over the filling to form a ball.
- Brush the outside of each bomb with melted butter and place them on the cookie sheet.
- Bake for 15-20 minutes or until golden brown and serve warm.
Notes
A squeeze of lemon juice can prevent the apples from browning. Serve with whipped cream or ice cream for added deliciousness.
- Prep Time: 15 minutes
- Cook Time: 20 minutes
- Category: Dessert
- Method: Baking
- Cuisine: American
Nutrition
- Serving Size: 1 bomb
- Calories: 250
- Sugar: 10g
- Sodium: 350mg
- Fat: 9g
- Saturated Fat: 4g
- Unsaturated Fat: 4g
- Trans Fat: 0g
- Carbohydrates: 35g
- Fiber: 2g
- Protein: 2g
- Cholesterol: 15mg
Keywords: Caramel Apple, Pie Bombs, Fall Dessert, Cozy Treat, Baking