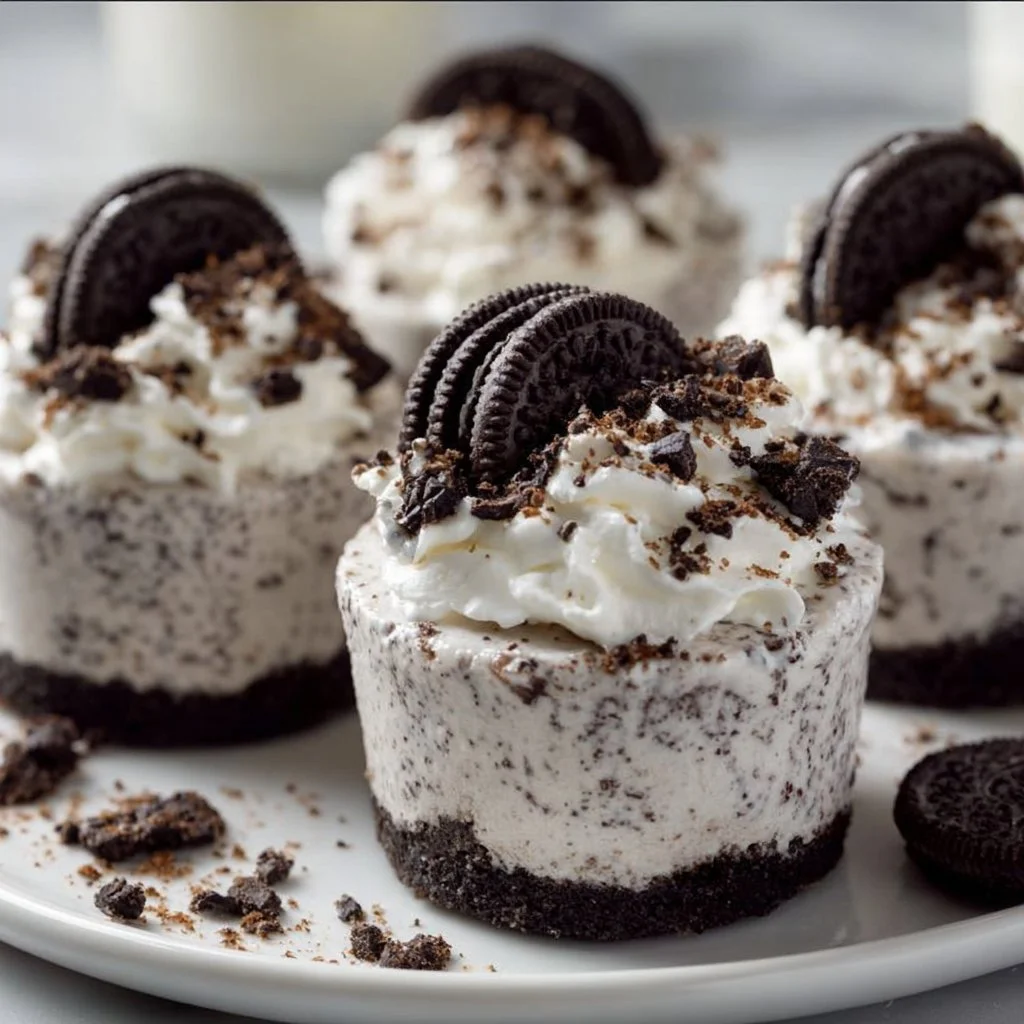
Oreo No-Bake Cheesecake Cups
Oreo No-Bake Cheesecake Cups: A Sweet Escape into Nostalgic Delights
Hey food lovers! Welcome back to Feastical, where every recipe brings a smile and every spoonful is a taste of home. Today, we’re diving into a beloved dessert that pairs the classic crunch of Oreo cookies with the creamy goodness of cheesecake. That’s right, we’re talking about Oreo No-Bake Cheesecake Cups! This dish is not just a dessert; it’s a ticket to flavor town, filled with nostalgia, warmth, and a pinch of culinary magic.
No-bake cheesecakes are truly the superheroes of the dessert world, don’t you think? They arrive with minimal fuss and maximum flavor, swooping in to save us from our midnight cravings or those impromptu dinner parties. The best part? They’re incredibly easy to whip up, meaning you can look like a seasoned chef without breaking a sweat!
My love for this particular dessert started years ago when I first visited a friend’s house for a summer barbecue. Picture this: the sun shining, laughter echoing, and then bam—she brings out a platter of no-bake cheesecake cups, each adorned with a mini Oreo on top. I swear, the moment I took a bite, it felt akin to a warm hug after a long day. It was love at first bite, and I knew I had to recreate that magic in my own kitchen. Fast forward to today, and I’ve made these little cups more times than I can count, tweaking and perfecting them along the way. Trust me; once you try them, they’ll quickly become a staple in your recipe collection too!
So, put on your apron and get ready to impress your friends or simply treat yourself to an easy yet divine dessert. Whether you’re planning an elegant gathering or just craving a simple yet indulgent treat, these Oreo No-Bake Cheesecake Cups are just what the doctor ordered. Let’s get our hands dirty and dive into the delightful world of creamy, dream-like desserts!
Personal Story
I still remember the first time I tried making these Oreo No-Bake Cheesecake Cups. I was just a teenager, trying to impress my family for a holiday dinner. With some serious determination and a hefty dose of optimism, I marched into the kitchen, armed with bags of Oreos, a block of cream cheese, and a wild culinary enthusiasm that only a teenager could possess.
As I mixed and layered, I felt like a true pastry chef in a bustling café! But let me tell you, the really funny part was when I realized I had forgotten to properly seal one of my Tupperware containers, and when I opened it the next day, half the dessert had mysteriously disappeared. A family of fruit flies had declared it their own! Nonetheless, this minor kitchen mishap didn’t deter me; rather, it became a legendary story in our family that still gets plenty of laughs to this day. After that first attempt, I learned the importance of proper storage and the magic of sharing good food!
So here we are, years later, and I still make these cups regularly. Each time, I’m reminded of that early kitchen experiment and how far I’ve come in my cooking journey. Let’s make some great memories together as we whip up these fantastic little desserts!
Ingredients
Here’s what you’ll need to create these delectable Oreo No-Bake Cheesecake Cups:
-
1 8 oz block of cream cheese, softened
- This forms the creamy base of your cheesecake! If you’re looking for a lighter option, you can substitute this with Neufchâtel cheese, which offers a similar taste with less fat.
-
1 8 oz Cool Whip or whipped topping
- A great shortcut to achieving that light, airy texture! If you prefer homemade, you can whip heavy cream with a bit of sugar until soft peaks form and fold it in magic-style!
-
2/3 cup powdered sugar
- This adds sweetness without the graininess of regular sugar. If you want a sugar-free version, powdered erythritol works like a charm!
-
1 tsp vanilla extract
- For that warm, inviting flavor! You can swap it out for almond extract for a fun nutty kick if you’re feeling adventurous.
-
24-26 Oreo cookies (more as desired)
- The star of the show! Don’t hesitate to use double-stuffed Oreos for an even creamier experience. If you need a gluten-free version, the gluten-free Oreo option will do just fine!
With these ingredients, you’re well on your way to creating a treat that’ll make your friends and family swoon with delight— and trust me, you’ll want to have some extra Oreos on hand for snacking while you cook!
Step-by-Step Instructions
Step 1: Prepare Your Ingredients
Before diving in, make sure all your ingredients are at room temperature, especially the cream cheese. This will help achieve that smooth, luscious texture we all crave!
Step 2: Beat the Cream Cheese
In a medium-sized mixing bowl, use an electric mixer to beat your softened cream cheese until creamy and smooth. This step is crucial! You want to eliminate any lumps for a luxurious finish in your cheesecake mixture. If you’re using a stand mixer, it makes this step super easy—just let it do the work for you!
Step 3: Add Sweetness and Flavor
Now, add in the powdered sugar and vanilla extract. Beat it together until it’s well combined. You should have a fluffy mixture that is pure bliss! Don’t forget to taste a spoonful (or two) to ensure it’s sweet enough for your liking—don’t worry, I won’t tell if you sneak in a few extra bites.
Step 4: Fold in the Whipped Topping
Next, it’s time to gently fold in the Cool Whip. Use a spatula to incorporate it without deflating the mixture. Fold it in until everything is just blended—this will give your cheesecake that light, airy quality that makes it so incredible!
Step 5: Crush the Oreos
Grab the Oreo cookies and throw them into a zip-top bag. If you have a rolling pin handy, it’s time to unleash your inner baker and smash those Oreos into crumbs! You could also use a food processor for a quicker result. Save a few for garnish on top later!
Step 6: Layer Your Cups
Now comes the fun part—layering! Start with a spoonful of your cheesecake mixture at the bottom of each serving cup. Follow with a layer of crushed Oreos. Repeat until you fill the cups, making sure the top layer finishes with that luscious cheesecake.
Step 7: Chill and Set
Cover your cups with plastic wrap and pop them in the fridge for at least 4 hours, but if you can resist, allowing them to chill overnight is the golden ticket to rich flavors.
Step 8: Garnish and Serve
Once they’re set, dig into your stash of reserved Oreos and crumble them over the top of each cup for extra flair. Feel free to add a dollop of whipped topping on top or a sprinkle of chocolate shavings to elevate the presentation.
And voilà! You’ve just crafted a batch of mesmerizing Oreo No-Bake Cheesecake Cups that are ready to bring smiles to your table!
Serving Suggestions
Serving is a breeze with these dessert cups! Place them on a beautiful serving platter or let each guest help themselves from a dessert station. Add in some fresh berries or mint leaves for a pop of color. If you’re feeling extra fancy, you might even consider drizzling a bit of chocolate sauce over the top to complete the look.
For an extra touch:
- Mini spoons: Consider using cute mini spoons for serving your cheesecake cups, adding a whimsical charm to the experience.
- Labeled Name Tags: If you’re having a gathering, label each cup with a name tag, including flavors or personalized messages. Your guests will love it!
Recipe Variations
Feeling adventurous? Here are some creative twists you can try with your Oreo No-Bake Cheesecake Cups:
-
Mint Chocolate Chip: Add 1-2 teaspoons of peppermint extract to the cream cheese mixture for a refreshing minty flavor—perfect for mint Oreo lovers!
-
Peanut Butter Delight: Swirl in a couple of tablespoons of creamy or crunchy peanut butter for a nutty, luscious addition that pairs delightfully with the Oreos.
-
Cheesecake Cheesecake: For a classic cheesecake flavor, swap out a few Oreos in your layers for a fresh fruit topping, like strawberries or blueberries.
-
Mocha Madness: Add a tablespoon of instant coffee granules to your cream cheese mixture for a mocha-inspired kick—you’ll be brewing up tons of compliments!
-
Nutty Crunch: Incorporate crushed nuts (like walnuts or pecans) within the layers or sprinkle them on top for a delightful crunch.
Chef’s Notes
Over the years, I’ve had plenty of fun experimenting with this recipe. I can’t tell you how many flavors and textures I’ve fallen in love with! There was that time I added orange zest, and another time I went all out with a chocolate ganache drizzle on top. With this recipe, the world is truly your oyster (or should I say Oreo?).
So don’t be afraid to get creative. Trust your instincts, and remember: cooking is all about having fun and sharing joy with others. If you have a crazy idea for a twist, give it a shot! And if it flops, laugh, learn, and try again—trust me, that’s just part of the journey.
FAQs and Troubleshooting
Q1: My cheesecake doesn’t seem to be setting. How can I fix it?
- Make sure you let these cups chill long enough—4 hours is a must, but overnight is even better. If it’s still too soft after that, adding a bit more whipped topping next time can help.
Q2: Can I use a different type of cookie?
- Absolutely! Feel free to swap in any cookie you love. Chocolate wafer cookies or even graham crackers could create exciting flavors and textures!
Q3: What if I’m short on time?
- While chilling is important for the best results, if you’re in a pinch, try placing the cups in the freezer for about 30 minutes to speed up the setting process.
Q4: How long can I keep these in the fridge?
- They’re best consumed within 3-4 days, but good luck keeping them around that long! Just ensure they’re covered well.
Nutritional Info
Each Oreo No-Bake Cheesecake Cup is a delightful balance of creamy flavors and indulgent textures. While the exact nutritional values depend on portion sizes and specific brands, here’s a rough estimate per serving:
- Calories: ~300
- Carbohydrates: ~30g
- Fat: ~18g
- Protein: ~3g
- Sugar: ~16g
Keep in mind these cups are definitely a treat, so enjoying them in moderation is key. Share them with friends or family to add to the joy!
Final Thoughts
And there you have it—a delightful recipe for Oreo No-Bake Cheesecake Cups that’s not just about taste but also about the joyful memories made while creating them. Whether you’re diving into this dessert alone or sharing it with loved ones, these cups are bound to bring smiles and sweet moments.
Remember, as you create these treats, infuse them with your personality and a sprinkle of love. That’s the secret ingredient that turns a simple dessert into something truly special. So grab your ingredients, unleash that creative spirit, and let your kitchen become a place of joy and comfort!
Happy cooking, everyone! Until next time, keep it delicious and keep it soulful here at Feastical. Can’t wait to see you back for more feel-good food adventures! 🍽️❤️
Print
Oreo No-Bake Cheesecake Cups
- Total Time: 240 minutes
- Yield: 4 servings 1x
- Diet: Vegetarian
Description
A delightful no-bake dessert combining the classic crunch of Oreo cookies with creamy cheesecake goodness.
Ingredients
- 1 8 oz block of cream cheese, softened
- 1 8 oz Cool Whip or whipped topping
- 2/3 cup powdered sugar
- 1 tsp vanilla extract
- 24–26 Oreo cookies (more as desired)
Instructions
- Prepare Your Ingredients by ensuring all are at room temperature.
- Beat the cream cheese until creamy and smooth.
- Add powdered sugar and vanilla extract, beating until well combined.
- Fold in the Cool Whip gently to maintain its airy texture.
- Crush the Oreo cookies in a zip-top bag or food processor.
- Layer your cups starting with cheesecake, followed by crushed Oreos.
- Chill in the fridge for at least 4 hours, preferably overnight.
- Garnish with reserved Oreo crumbs before serving.
Notes
These cheesecake cups can be personalized with various flavors and toppings like mint extract or chocolate sauce.
- Prep Time: 15 minutes
- Cook Time: 0 minutes
- Category: Dessert
- Method: No-Bake
- Cuisine: American
Nutrition
- Serving Size: 1 cup
- Calories: 300
- Sugar: 16g
- Sodium: 150mg
- Fat: 18g
- Saturated Fat: 10g
- Unsaturated Fat: 6g
- Trans Fat: 0g
- Carbohydrates: 30g
- Fiber: 1g
- Protein: 3g
- Cholesterol: 30mg
Keywords: no-bake, cheesecake, easy dessert, Oreo, quick recipe
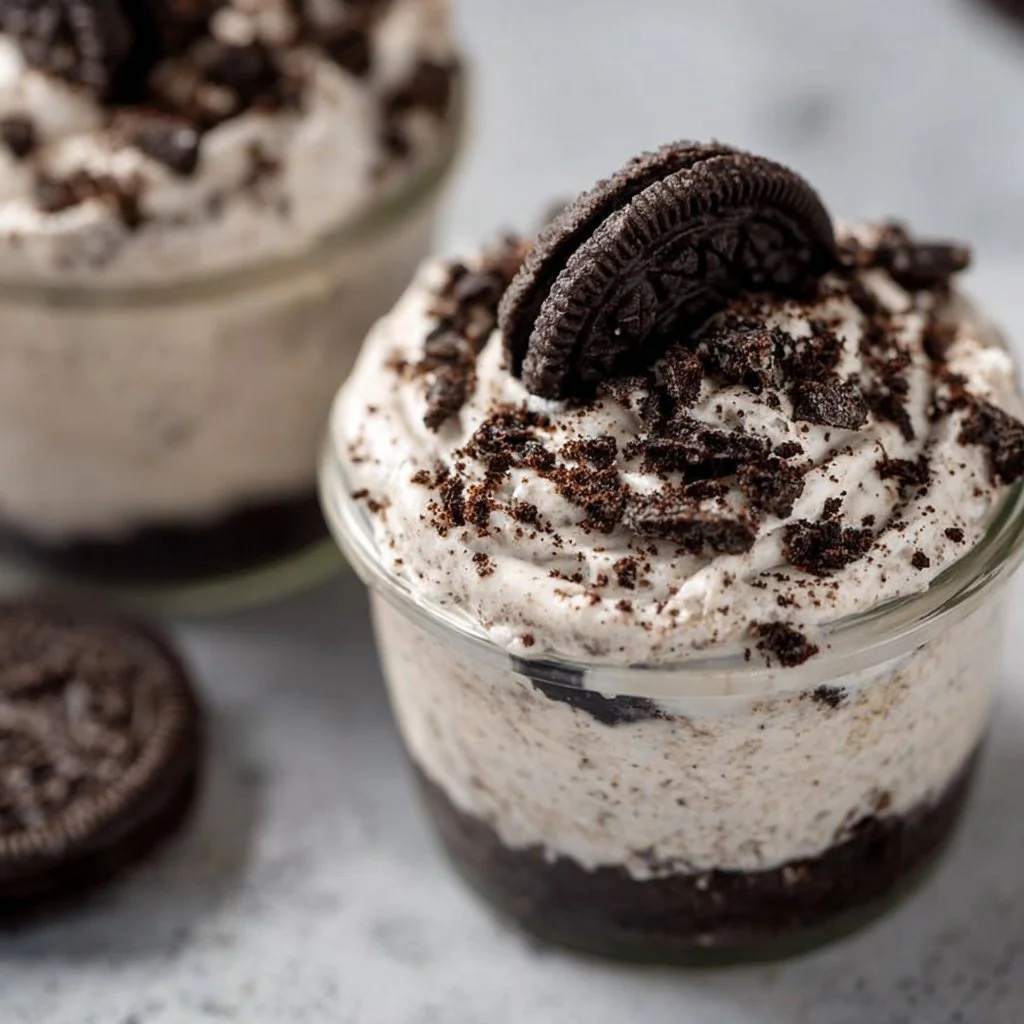
No Bake Oreo Cheesecake Cups
No-Bake Oreo Cheesecake Cups: A Delicious Journey to Sweetness
Hey there, fellow foodies! Are you ready to embark on a culinary adventure that requires zero baking and promises loads of flavor? Let me introduce you to the ultimate dessert: No-Bake Oreo Cheesecake Cups. These little jars of joy are not just about the creamy, dreamy cheesecake filling and the crunchy Oreo crust but also about the memories they create. Trust me, each spoonful is like unwrapping a present filled with sweetness and nostalgia.
As a chef who loves to whip up comforting treats, I can attest that the best recipes don’t always come from the oven. Sometimes, they come from moments shared around a table, laughter echoing in the air, and the sweet aroma of desserts tempting your taste buds. Whether it’s for a backyard barbecue, a movie night with friends, or simply a treat for yourself (hey, you deserve it!), these No-Bake Oreo Cheesecake Cups are the cherry on top of any gathering.
In this blog post, I’ll share how you can make these delightful cups easily at home. With just a handful of ingredients and a bit of love, you’ll be crafting a dessert that’ll leave everyone asking for seconds. So, grab your favorite mixing bowl, and let’s dive into this delicious recipe!
Personal Story
I still remember the summer I discovered my love for cheesecakes. It was a sun-drenched afternoon, and my grandma had decided it was the perfect day to teach me how to make her famous cheesecake. There were no fancy ingredients or complicated methods; just the simple joy of mixing cream cheese, sugar, and love in a bowl. She always had a way of turning ordinary days into memorable ones.
Fast forward a few years, and I found myself experimenting with different variations to keep the flavor alive. That’s when I stumbled upon the right twist: Oreo cookies! Combining my grandma’s classic recipe with these chocolatey delights created something magical. Every time I make these No-Bake Oreo Cheesecake Cups, I’m reminded of my grandma’s warm kitchen and the way she made cooking feel like a celebration. Each cup is a tribute to her legacy, bridging the gap between the past and the present, and reminding me of how food can connect us to our roots.
Ingredients
Here’s what you’ll need to whip up these scrumptious No-Bake Oreo Cheesecake Cups:
-
1 package Oreo cookies (about 15 cookies)
These iconic cookies will serve as the crunchy base. If you’re feeling fancy, you can use any brand of chocolate sandwich cookies or gluten-free versions for a dietary swap. -
8 oz cream cheese, softened
Cream cheese is the star of the show, giving the cheesecake its luscious texture. To lighten it up, try using Neufchâtel cheese, which has less fat but still gives you that creamy goodness. -
1/2 cup powdered sugar
This sweetener gives the filling that nice, smooth sweetness without any graininess. Feel free to use coconut sugar or a sugar substitute if you’re looking for a healthier option. -
1 cup whipped topping
This ingredient is what makes our cheesecake light and fluffy. You can substitute it with freshly whipped cream for a more homemade feel. Just make sure to sweeten it to your liking! -
1/2 cup chocolate chips (optional for garnish)
These are for those who crave an extra layer of chocolaty goodness. If you’re feeling adventurous, you might even use white chocolate or butterscotch chips instead.
Step-by-Step Instructions
Ready to create some magic? Follow my step-by-step guide to make these No-Bake Oreo Cheesecake Cups, and get ready to impress your friends and family!
-
Prepare Your Ingredients
Make sure your cream cheese is softened to room temperature. If time is short, you can microwave it for about 10-15 seconds—just be careful not to melt it! -
Crush the Oreo Cookies
In a zip-top bag, throw in the Oreo cookies, seal it tight, and use a rolling pin or your hands to crush them into fine crumbs. Aim for a texture similar to sand—some larger chunks will add a delightful crunch later! -
Make the Cookie Crust
In a mixing bowl, take about 3/4 of the crushed Oreos and mix them with 2 tablespoons of melted butter until combined. This will create your crust. Spoon a generous amount into the bottom of your serving cups and press it down with the back of a spoon to form an even base. -
Prepare the Cheesecake Filling
In another bowl, beat the softened cream cheese with an electric mixer until it’s nice and smooth. Gradually add in the powdered sugar and beat until well combined. -
Add the Whipped Topping
Gently fold in the whipped topping into the cream cheese mixture. Take your time—this step is crucial for creating that fluffy texture, so be gentle to keep the air in. -
Layer It Up
Spoon the cheesecake filling over the cookie crust in your cups—aim for about an inch-layer. Shake it a little to settle, and don’t worry if it gets a bit messy; that’s part of the fun! -
Top It Off
Sprinkle the remaining crushed Oreos on top of your cheesecake filling for that delicious finishing touch. If you’re using chocolate chips, now’s the time to add those too! -
Chill Out
Place your filled cups in the fridge for at least two hours (or overnight for maximum flavor infusion!). The longer, the better! -
Serve and Enjoy!
When you’re ready to serve, take them out, and if desired, add a dollop of whipped cream on top for that extra flair. Enjoy your creation, and don’t forget to share (or not!).
Serving Suggestions
The beauty of these No-Bake Oreo Cheesecake Cups is their versatility! Here are a few ideas on how to plate or serve them:
-
Individual Cups: Keep them in their cute little cups for a cozy, personal touch. It’s perfect for parties, picnics, or simply enjoying on your own.
-
Garnishing Goodness: Consider adding fresh raspberries or strawberries on top for a pop of color and flavor contrast. They not only look stunning but also add a refreshing zing to each bite.
-
Chocolate Drizzle: A drizzle of chocolate sauce can elevate the look and taste. Just warm some chocolate in the microwave and let it drizzle artistically over the top.
-
Layer Presentation: For a family gathering, consider using a large glass dish to show off layered beauty. Just alternate the layers of crust and cheesecake filling, finishing with crushed Oreos and chocolate chips.
Recipe Variations
Feeling adventurous? Here are a few creative twists and variations you can try:
-
Mint Chocolate Oreo Cheesecake: Use mint-flavored Oreo cookies for a refreshing minty twist!
-
Peanut Butter Delight: Add 1/3 cup of creamy peanut butter to the cheesecake filling for a nutty flavor explosion.
-
Caramel Sauce Swirl: Drizzle caramel sauce into the cheesecake filling before layering it over the crust for a sweeter variation.
-
Fruit-Infused: Mix in some pureed strawberries or blueberry puree into your filling. This will give a fruity essence and a burst of color!
-
Vegan Version: Substitute the cream cheese with a vegan cream cheese alternative and the whipped topping with coconut whipped cream for a delightful dairy-free treat.
Chef’s Notes
Bringing this No-Bake Oreo Cheesecake Cups recipe to life has been a joy! Over the years, I’ve played with various flavors, and the joy of seeing my friends’ faces when they take that first bite is priceless. I remember one time—trying to impress my date—I added a dash of espresso powder for an extra kick. Let’s just say it didn’t go exactly as planned, and I ended up with a rather awake evening! But, hey, each kitchen mishap teaches you something, right?
FAQs and Troubleshooting
1. Why is my cheesecake filling too runny?
If your filling is too runny, your cream cheese might not have been fully softened or beaten enough. Make sure to mix until completely smooth without lumps.
2. Can I make this dessert ahead of time?
Absolutely! These cups are great for prepping a day in advance. Just keep them covered in the fridge until you’re ready to serve.
3. My crust looks too dry/crumbly. What do I do?
If your Oreo crust is too crumbly, try adding a bit more melted butter. A moist crumb will help it stick together.
4. How long will these keep in the fridge?
They’ll stay fresh for about 3–5 days in the fridge. Just make sure they are covered properly!
Nutritional Info
While these delightful No-Bake Oreo Cheesecake Cups are a treat, they’re also a dessert to savor. Let’s break down the nutritional information per cup (this can vary based on exact ingredients and serving sizes):
- Calories: 300
- Total Fat: 16g
- Saturated Fat: 8g
- Cholesterol: 40mg
- Sodium: 190mg
- Total Carbohydrates: 34g
- Dietary Fiber: 1g
- Sugars: 20g
- Protein: 4g
These cups are rich and indulgent, so enjoy them as an occasional treat rather than a daily habit!
Final Thoughts
There you have it! A no-fuss, deliciously satisfying dessert that’s perfect for every occasion. My journey creating these No-Bake Oreo Cheesecake Cups has not only filled my kitchen with delightful aromas but also enriched my soul with love and laughter shared around the table.
Remember, cooking is as much about the process as it is about the outcome. Whether it’s a kitchen disaster or a stunning success, enjoy every moment and don’t forget to make it your own! I can’t wait for you to try this recipe and share your own stories and memories that come along with it.
Until next time, keep cooking, keep exploring, and keep feasting with joy! Bon appétit! 🍰
Print
No-Bake Oreo Cheesecake Cups
- Total Time: 120 minutes
- Yield: 4 servings 1x
- Diet: Vegetarian
Description
Delicious No-Bake Oreo Cheesecake Cups featuring a creamy cheesecake filling and crunchy Oreo crust, perfect for any occasion.
Ingredients
- 1 package Oreo cookies (about 15 cookies)
- 8 oz cream cheese, softened
- 1/2 cup powdered sugar
- 1 cup whipped topping
- 1/2 cup chocolate chips (optional for garnish)
Instructions
- Prepare Your Ingredients: Make sure your cream cheese is softened to room temperature. If time is short, you can microwave it for about 10-15 seconds—just be careful not to melt it!
- Crush the Oreo Cookies: In a zip-top bag, throw in the Oreo cookies, seal it tight, and use a rolling pin or your hands to crush them into fine crumbs.
- Make the Cookie Crust: In a mixing bowl, take about 3/4 of the crushed Oreos and mix them with 2 tablespoons of melted butter until combined. Spoon into the bottom of your cups to form an even base.
- Prepare the Cheesecake Filling: Beat softened cream cheese with an electric mixer until smooth. Gradually add in the powdered sugar and beat until well combined.
- Add the Whipped Topping: Gently fold in the whipped topping into the cream cheese mixture.
- Layer It Up: Spoon the cheesecake filling over the cookie crust in your cups.
- Top It Off: Sprinkle the remaining crushed Oreos on top of your cheesecake filling and optionally add chocolate chips.
- Chill Out: Place your filled cups in the fridge for at least 120 minutes (or overnight for maximum flavor infusion!).
- Serve and Enjoy: Add a dollop of whipped cream on top before serving if desired.
Notes
These cups can be made a day in advance and stored in the fridge. Enjoy them cold!
- Prep Time: 15 minutes
- Cook Time: 0 minutes
- Category: Dessert
- Method: No-Bake
- Cuisine: American
Nutrition
- Serving Size: 1 cup
- Calories: 300
- Sugar: 20g
- Sodium: 190mg
- Fat: 16g
- Saturated Fat: 8g
- Unsaturated Fat: 0g
- Trans Fat: 0g
- Carbohydrates: 34g
- Fiber: 1g
- Protein: 4g
- Cholesterol: 40mg
Keywords: no-bake, cheesecake, Oreo, dessert, easy recipe