
One-Bowl 4-Ingredient Gluten-Free Pumpkin Oatmeal Cookies
Gluten-Free Pumpkin Oatmeal Cookies: A Cozy Treat
Hey there, fellow foodies! Today, we’re whipping up a batch of delightful Gluten-Free Pumpkin Oatmeal Cookies. These little wonders are not just a treat; they’re a warm hug in cookie form, perfect for snuggling up with a cup of tea or coffee. There’s something magical about the spices, the warmth of pumpkin, and, of course, the chocolate chips that can turn any day around—trust me on this one!
As the leaves begin to turn and the air fills with that famous fall scent—think cinnamon and nutmeg—I can’t help but think of the countless afternoons I spent baking with my grandmother. You see, she had this incredible knack for making the kitchen feel like home, and her pumpkin cookies were always the highlight of our fall gatherings. They were a simple mix of ingredients but felt like a celebration, especially when shared with family and friends.
Now, let me tell you, these gluten-free cookies come together with minimal fuss and maximum flavor. If you’ve ever struggled to find a cookie that checks all the boxes—delicious, easy to make, and a healthier choice—then you’re in for a treat. Let’s roll up our sleeves, don our aprons, and dive into this delightful recipe together!
A Little Taste of My Past
One of the fondest memories I have about baking came when I was about eight years old. I can vividly remember standing on a stool, peering over the counter where my grandmother prepped her famous pumpkin cookies. She would let me mix the dough with my tiny hands (which, let me tell you, felt like an absolute privilege). The moment the dough hit the oven, the scent filled the house, and we would have to restrain ourselves from stealing the first batch before the frosting had a chance to set!
Those afternoons weren’t just about baking; they were about lessons in patience, creativity, and the joy of cooking. And now, as I craft this gluten-free version of those beloved cookies, I can’t help but feel that same warmth spreading through my heart (and home). Each bite reminds me of those simpler times and how food can create lasting memories.
Ingredients
Now, let’s gather our ingredients for these gluten-free pumpkin oatmeal cookies. Here’s what you’ll need:
-
1 cup gluten-free oats: These will give your cookies that chewy texture. If you can’t find gluten-free oats, regular rolled oats could work, but make sure they’re certified gluten-free to avoid cross-contamination.
-
3/4 cup pumpkin puree: Pure pumpkin puree is the star of the show here! You can even use homemade pumpkin puree if you’re feeling adventurous! If you happen to be out of pumpkin, unsweetened applesauce can be a nice substitute—though you’ll lose that cozy pumpkin flavor.
-
1/4 cup maple syrup: This natural sweetener adds a delightful flavor. If you’re looking for a sugar-free option, try using monk fruit sweetener or stevia; just be mindful of the measurement conversions, as they vary.
-
1/2 cup chocolate chips: Because chocolate! Dark chocolate or dairy-free chocolate chips work perfectly here. If chocolate isn’t your thing, chopped nuts or dried fruit can add a lovely crunch or sweetness.
-
1 tsp cinnamon: This warm spice elevates the pumpkin flavor. Feel free to get creative—add a pinch of nutmeg or ginger for an extra kick!
-
A dash of salt: A little salt balances the sweetness and enhances all the flavors.
Step-by-Step Instructions
Alright, my culinary comrades, it’s time to roll up our sleeves and get cooking! Here’s how you make these scrumptious cookies:
-
Preheat your oven to 350°F (175°C). This is the perfect temperature for cookies: hot enough to get them fluffy but not so hot that they’ll burn.
-
Mix the dry ingredients: In a large mixing bowl, combine the gluten-free oats, cinnamon, and a dash of salt. Give it a gentle mix with a spoon or a whisk. This might sound a bit basic, but this ensures even distribution of the cinnamon!
-
Combine the wet ingredients: In a separate bowl, blend the pumpkin puree and maple syrup. If you want to give it even more flavor depth, consider adding a splash of vanilla extract!
-
Merge the mixtures: Pour the wet ingredients into the bowl with the dry ingredients. It’s a glorious mess at this stage—get in there and mix everything until just combined! A spatula or spoon works fine, but if you’re feeling cheeky, your hands will do a fantastic job.
-
Add chocolate chips: Now for the best part! Fold in those glorious chocolate chips until they’re evenly scattered. Is it just me, or does this part always feel like the cookie equivalent of adding sprinkles to ice cream?
-
Scoop and drop: Line a baking sheet with parchment paper (trust me, your future self will thank you for this). Use a cookie scoop or just two spoons to drop tablespoon-sized balls of dough onto the sheet. Leave some space between them; they’ll spread a little while baking.
-
Bake: Pop them in the oven and bake for 10-12 minutes. Keep an eye on them; you’re looking for the edges to turn golden brown. They will continue to firm up as they cool, so don’t worry if they seem a little soft coming out.
-
Cool and enjoy: Let them cool on the baking sheet for a few minutes before transferring to a wire rack. The aroma will be irresistible—you might just find it hard to resist one (or three) straight from the oven!
Serving Suggestions
Now that our cookies are baked to perfection, let’s talk about plating! These gluten-free pumpkin oatmeal cookies are fantastic on their own but can also be served in style.
-
Cookie Platter: Arrange them on a charming wooden board or a colorful plate. Add some fall-themed decorations like mini pumpkins or cinnamon sticks for that cozy vibe.
-
With a Drink: Pair these cookies with a warm chai latte, a cup of spiced apple cider, or even a simple glass of cold almond milk. The flavors will sing together, making for a delightful snack!
-
Store in Style: If you’re not devouring them all immediately (which, let’s be honest, is a real possibility), store them in an airtight container. Toss in a slice of bread to keep them fluffy and fresh.
Recipe Variations
Now, let’s get creative! Here are a few fun variations you might want to try:
-
Nutty Cinnamon Swirl: Add 1/2 cup of chopped walnuts or pecans for extra crunch and a boost of healthy fats. It gives a rustic vibe to your cookies!
-
Spiced Up Pumpkin: Add 1/4 teaspoon of nutmeg or ginger for a little more warmth. It’ll have your taste buds dancing!
-
Nut Butter Bliss: Stir in a couple of tablespoons of almond butter or peanut butter into the wet mixture for a creamier, richer cookie. It’s an absolute game-changer!
-
Coconut Cookie: Swap half of the oats for unsweetened shredded coconut. The combination of pumpkin and coconut is simply divine!
-
Vegan-Friendly: To cater to a vegan diet, ensure that the chocolate chips are dairy-free, and you can substitute maple syrup with agave syrup.
Chef’s Notes
Ah, the beauty of cookies is their adaptability. This particular recipe has evolved over the years. Initially, I thought I could only enjoy pumpkin in pie form. But after some trial and error (and more than a few cookie failures), I realized that pumpkin flourishes in cookies, too—especially gluten-free ones!
The moment I decided to incorporate oats into my pumpkin cookies was a game changer. Not only did it add heartiness, but it gave a wonderful chewy texture that holds up with each bite. Plus, let’s be real—who doesn’t want an excuse to have cookies that feel just a tad healthier?
If you have any kitchen adventures of your own using this recipe, please share! I love hearing about your baking tales and modifications!
FAQs and Troubleshooting
-
Why are my cookies dry? If you find your cookies are coming out dry, the culprit often lies in overmixing or over-baking. Keep an eye on them in the oven and take them out while they’re still slightly underdone; they’ll firm up as they cool.
-
Can I use pumpkin pie filling instead? While you can use pumpkin pie filling, it’s best to stick to pure pumpkin puree for this recipe to maintain control over sweetness and spices. The pre-seasoned filling may throw off the cookie flavor.
-
How do I prevent my cookies from sticking? Using parchment paper or a silicone baking mat on your baking sheet works wonders for preventing stickiness. Letting cookies cool slightly before moving them is also helpful.
-
What can I do with leftover pumpkin puree? Get creative! Mix pumpkin puree into smoothies, add it to oatmeal, or make a simple pumpkin soup. It freezes well, too, if you’re not ready to use it all at once.
Nutritional Info
These cookies are not only tasty but also packed with nutritious ingredients! Here’s a rough estimate of the nutritional breakdown for one cookie (assuming the recipe makes about 12 cookies):
- Calories: 120
- Protein: 2g
- Carbohydrates: 16g
- Fat: 5g
- Fiber: 2g
- Sugar: 5g
Of course, this can vary based on the specific brands and ingredients you use, but it highlights the fact that you’re indulging in a cookie that offers some nutritional value along with its delicious taste!
Final Thoughts
There you have it, my fellow bakers! A simple yet delightful recipe for gluten-free pumpkin oatmeal cookies that evokes warmth, nostalgia, and joy. Whether you’re making them for a cozy night in, a festive gathering, or just because it’s a Tuesday, they’re sure to brighten your day. Remember, cooking should be a joy—an experience to share, to experiment, and to create memories.
I hope you loved this recipe as much as I do! Don’t forget to share your baking adventures and variations with me. Until next time, happy baking, and may your kitchen always smell like cookies!
Print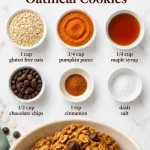
Gluten-Free Pumpkin Oatmeal Cookies
- Total Time: 27 minutes
- Yield: 12 cookies 1x
- Diet: Gluten-Free
Description
Delightful gluten-free pumpkin oatmeal cookies that evoke warmth and nostalgia, perfect for enjoying with a cup of tea or coffee.
Ingredients
- 1 cup gluten-free oats
- 3/4 cup pumpkin puree
- 1/4 cup maple syrup
- 1/2 cup chocolate chips
- 1 tsp cinnamon
- A dash of salt
Instructions
- Preheat your oven to 350°F (175°C).
- Mix the dry ingredients: In a large mixing bowl, combine the gluten-free oats, cinnamon, and a dash of salt.
- Combine the wet ingredients: In a separate bowl, blend the pumpkin puree and maple syrup.
- Merge the mixtures: Pour the wet ingredients into the bowl with the dry ingredients and mix until just combined.
- Add chocolate chips: Fold in the chocolate chips until evenly scattered.
- Scoop and drop: Line a baking sheet and drop tablespoon-sized balls of dough onto it, leaving some space.
- Bake: Pop them in the oven and bake for 10-12 minutes until edges turn golden brown.
- Cool and enjoy: Let them cool on the baking sheet for a few minutes before transferring to a wire rack.
Notes
These cookies are well enjoyed warm and can be stored in an airtight container with a slice of bread to keep them fluffy.
- Prep Time: 15 minutes
- Cook Time: 12 minutes
- Category: Dessert
- Method: Baking
- Cuisine: American
Nutrition
- Serving Size: 1 cookie
- Calories: 120
- Sugar: 5g
- Sodium: 50mg
- Fat: 5g
- Saturated Fat: 2g
- Unsaturated Fat: 3g
- Trans Fat: 0g
- Carbohydrates: 16g
- Fiber: 2g
- Protein: 2g
- Cholesterol: 0mg
Keywords: gluten-free, pumpkin cookies, oatmeal cookies, fall recipes, healthy desserts
Healthy Pumpkin Bread: 5-Ingredient Meal-Prep Recipe
Healthy Pumpkin Bread: A Cozy Fall Favorite
Hey there, my fellow food enthusiasts! Welcome to Feastical, where the flavors are warm, inviting, and downright delicious. Today, I’m beyond excited to share a standout recipe that perfectly captures the spirit of fall: Healthy Pumpkin Bread. This delightfully moist and aromatic bread is not just a treat for your taste buds, but also packs a nutritious punch. Whether you’re cozying up with a cup of tea or sharing slices with friends at a gathering, this pumpkin bread is bound to elevate your day. So, grab your aprons, let’s roll up those sleeves, and dive into the kitchen!
The Magic of Pumpkin Bread
Pumpkin bread is more than just a recipe; it’s a celebration of comfort and nostalgia. It takes me back to my childhood in the kitchen with my grandmother, where the smell of cinnamon, nutmeg, and sugar danced through the air as we mixed up a batch. I remember the way she carefully measured out the pumpkin puree and talked about the importance of quality ingredients. It was a process filled with love, laughter, and the occasional flour fight.
One particular memory stands out: the first time I made pumpkin bread solo. I was about ten years old, and I decided to surprise my family with a homemade treat. I clumsily poured pumpkin puree all over the counter, whisked eggs like a mad scientist, and somehow managed to create an epic mess. But when that loaf came out of the oven, golden and fragrant, my family’s smiles were worth every spilled drop.
Now, as a cook and recipe creator, I love sharing this warm hug of a recipe with you. With just a few simple ingredients, you can whip up a loaf that not only satisfies cravings but also nurtures your body. So, let’s get started!
Ingredients
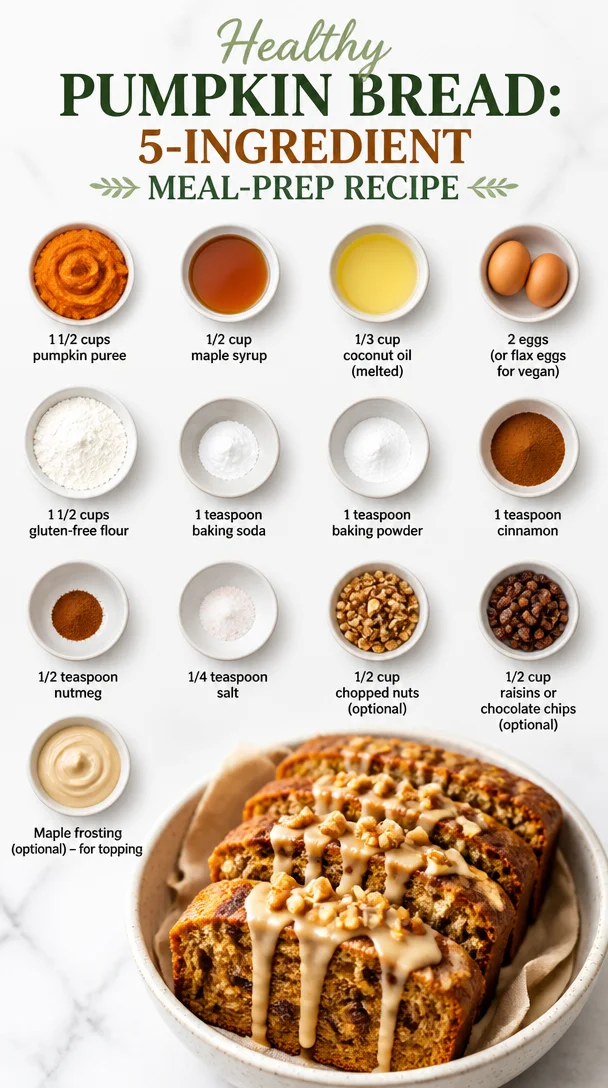
Here’s what you’ll need to make this delightful Healthy Pumpkin Bread:
-
1 1/2 cups pumpkin puree
Pumpkin is the star here! It lends moisture and a rich, earthy flavor. You can use canned pumpkin puree or make your own by roasting fresh pumpkins. Just remember to cool and blend it before using! -
1/2 cup maple syrup
Sweetener with a hint of flavor! I love using maple syrup for its unique taste, but feel free to substitute with honey or agave nectar if that’s what you have on hand. Adjust the sweetness based on your preference! -
1/3 cup coconut oil (melted)
This adds healthy fats and moisture. If you’re not a fan of coconut, you can easily replace it with olive oil or melted butter. Just make sure it’s cool before mixing! -
2 eggs (or flax eggs for vegan)
Eggs help bind everything together and keep your bread moist. If you’re going vegan, mix 2 tablespoons ground flaxseed with 6 tablespoons water and let it sit until it thickens! -
1 1/2 cups gluten-free flour
This bread is perfect for gluten-free eaters! You can use any gluten-free all-purpose flour blend. For a non-gluten-free version, just swap it with regular all-purpose flour. -
1 teaspoon baking soda
To help your bread rise and create that delightful texture. -
1 teaspoon baking powder
A must-have for extra fluffiness! -
1 teaspoon cinnamon
The essential fall spice! Feel free to experiment with pumpkin pie spice for an all-in-one flavor boost or add more cinnamon for a deeper profile. -
1/2 teaspoon nutmeg
A warm, aromatic spice that enhances the pumpkin flavor beautifully. -
1/4 teaspoon salt
A pinch of salt balances the sweetness and brings all the flavors together. -
1/2 cup chopped nuts (optional)
Walnuts or pecans add a delightful crunch! You can also leave them out if you prefer a smoother texture. -
1/2 cup raisins or chocolate chips (optional)
A fun add-in for sweetness and texture! Go with chocolate chips for a treat or raisins for a chewy bite. -
Maple frosting (optional)
Feel free to top it off with a simple maple frosting for a special touch. Mix powdered sugar with a bit of maple syrup and a splash of milk for a drizzle that takes it over the top!
Step-by-Step Instructions
Let’s transform those ingredients into something magical!
-
Preheat the Oven: First things first, preheat your oven to 350°F (175°C). This ensures it’s just the right temperature for baking your pumpkin bread to perfection.
-
Prep the Loaf Pan: Grease a loaf pan with coconut oil or line it with parchment paper. This will make it super easy to remove the bread later!
-
Mix the Wet Ingredients: In a large mixing bowl, whisk together the pumpkin puree, maple syrup, and melted coconut oil until combined. The mixture should look smooth and inviting! If you’re using eggs, add them one at a time, mixing well after each addition. If you’re using flax eggs, stir them in at this stage, too!
-
Incorporate the Dry Ingredients: In another bowl, combine the gluten-free flour, baking soda, baking powder, cinnamon, nutmeg, and salt. Mix these dry ingredients well. Then, gradually add the dry mix to the wet mixture, stirring gently until just combined. Remember, overmixing can lead to dense bread, so stir until there are no dry patches.
-
Add the Extras: If you’re using nuts, raisins, or chocolate chips, fold them into the batter now. This is where you can get creative—feel free to add extra goodies or spices.
-
Pour into the Pan: Pour the batter into your prepared loaf pan, smoothing out the top with a spatula. Don’t fret if it’s not perfect; that’s the beauty of homemade!
-
Bake: Place the loaf pan in the preheated oven and bake for about 50-60 minutes. Start checking at the 50-minute mark. Insert a toothpick into the center, and if it comes out clean or with just a few crumbs, it’s time to take it out!
-
Cool Time: Let your pumpkin bread cool in the pan for about 10 minutes before transferring it to a wire rack. This cooling step is essential; it helps the loaf set and keeps that lovely texture.
-
Serve: Once cooled, slice that beautiful loaf and serve! Whether you enjoy it plain, with a bit of butter, or drizzled with maple frosting, every bite will feel like a warm hug!
Serving Suggestions
Let’s talk about how to serve this enticing pumpkin bread! If you’re feeling extra fancy, plate your slices with a dollop of whipped cream or a smear of cream cheese. You can even get creative by adding a sprinkle of cinnamon or a drizzle of maple syrup on top. For gatherings, place the slices on a cute platter with a small bowl of chopped nuts and chocolate chips on the side, inviting everyone to top it their way!
For a cozy breakfast or brunch, serve it alongside a steaming cup of coffee or spiced chai. Trust me, the combination will feel like a moment of bliss on a chilly morning.
Recipe Variations
Let’s get those creative juices flowing! Here are a few delicious twists you can try with this pumpkin bread recipe:
-
Spiced Almond Pumpkin Bread: Swap out the regular spices for a mix of cardamom, ginger, and allspice for a different flavor profile that packs a punch!
-
Pumpkin Bread with Cream Cheese Swirl: Use cream cheese mixed with a little powdered sugar and vanilla. Swirl it into the batter right before baking for creamy, gooey goodness.
-
Gluten-Free Chocolate Chip Pumpkin Bread: Add dark chocolate chips instead of raisins or nuts for a decadent dessert version.
-
Pumpkin Banana Bread: Incorporate 1 mashed banana to add sweetness and flavor! This makes the bread extra moist and gives it a unique twist.
-
Maple Pecan Pumpkin Bread: Toss in chopped pecans and use maple syrup in the batter, and top it with a crunchy pecan streusel for added texture!
Chef’s Notes
Over the years, my pumpkin bread recipe has evolved. I started off with a heavily sweetened version but realized how wonderful it can be with less sugar. Every bite should celebrate the natural flavors of pumpkin and spices! I often find myself experimenting, tossing in what’s in my pantry, and each time someone tries my latest version, their smile is the best feedback I can get.
Oh, and let me tell you about the time I switched out the oil for applesauce in a desperate attempt to be healthier. It turned out fabulous, but my family was convinced I had a secret ingredient! Sometimes accidents in the kitchen lead to the best discoveries.
FAQs and Troubleshooting
-
Why is my pumpkin bread dense?
Overmixing can cause your bread to become dense. Be gentle when combining the wet and dry ingredients, and stop once everything is just combined. -
My bread is too dry. What happened?
This can happen if you overbaked it or if your measurements were slightly off. Make sure to check for doneness with a toothpick around the 50-minute mark! -
Can I use fresh pumpkin?
Absolutely! Just make sure to cook and puree it before using it in the recipe. Fresh pumpkin can add a wonderful texture and flavor. -
How should I store leftover pumpkin bread?
Keep it in an airtight container at room temperature for a couple of days or in the fridge for up to a week. You can also freeze slices for up to three months—just wrap them tightly!
Nutritional Info
While indulging in a cozy slice of pumpkin bread is lovely, let’s not forget the amazing nutritional benefits of our star ingredient, pumpkin! Pumpkin is loaded with vitamins A and C, fiber, and antioxidants. Plus, using maple syrup instead of refined sugar not only offers a unique flavor but also means you’re getting some essential minerals! With optional add-ins like nuts and raisins or chocolate chips, you can boost your bread with healthy fats and additional nutrients. A slice of pumpkin bread is a perfect balance of comfort and health—what could be more delightful?
Final Thoughts
And there you have it, my friends—a vibrant, Healthy Pumpkin Bread recipe that brings the essence of fall right to your kitchen. Whether you whip it up for a lazy Sunday brunch or cozy gatherings with friends, it’s bound to warm hearts and fill bellies. Remember, the best part about cooking is the memories you create—so don’t shy away from sharing a slice or two!
Make this recipe your own, and let the love you pour into it shine through every bite. Happy cooking, and as always, may your kitchen be filled with joy, laughter, and sweet aromas! Now, who’s ready to make some pumpkin bread? 🍞✨
Print
Healthy Pumpkin Bread
- Total Time: 75 minutes
- Yield: 8 servings 1x
- Diet: Vegetarian
Description
A moist and aromatic pumpkin bread that captures the spirit of fall, perfect for cozy moments and gatherings.
Ingredients
- 1 1/2 cups pumpkin puree
- 1/2 cup maple syrup
- 1/3 cup coconut oil (melted)
- 2 eggs (or flax eggs for vegan)
- 1 1/2 cups gluten-free flour
- 1 teaspoon baking soda
- 1 teaspoon baking powder
- 1 teaspoon cinnamon
- 1/2 teaspoon nutmeg
- 1/4 teaspoon salt
- 1/2 cup chopped nuts (optional)
- 1/2 cup raisins or chocolate chips (optional)
- Maple frosting (optional)
Instructions
- Preheat the oven: First things first, preheat your oven to 350°F (175°C).
- Prep the loaf pan: Grease a loaf pan with coconut oil or line it with parchment paper.
- Mix the wet ingredients: In a large mixing bowl, whisk together the pumpkin puree, maple syrup, and melted coconut oil until combined.
- Incorporate the dry ingredients: In another bowl, combine the gluten-free flour, baking soda, baking powder, cinnamon, nutmeg, and salt.
- Add the extras: Fold in nuts, raisins, or chocolate chips into the batter.
- Pour into the pan: Pour the batter into your prepared loaf pan.
- Bake: Place the loaf pan in the preheated oven and bake for about 50-60 minutes.
- Cool time: Let your pumpkin bread cool in the pan for about 10 minutes before transferring it to a wire rack.
- Serve: Once cooled, slice and serve with butter, or drizzled with maple frosting.
Notes
Feel free to experiment with add-ins like nuts and raisins or chocolate chips. This recipe is flexible for personal preferences.
- Prep Time: 15 minutes
- Cook Time: 60 minutes
- Category: Baked Goods
- Method: Baking
- Cuisine: American
Nutrition
- Serving Size: 1 slice
- Calories: 210
- Sugar: 10g
- Sodium: 200mg
- Fat: 9g
- Saturated Fat: 4g
- Unsaturated Fat: 5g
- Trans Fat: 0g
- Carbohydrates: 30g
- Fiber: 2g
- Protein: 3g
- Cholesterol: 50mg
Keywords: pumpkin bread, fall recipes, healthy baking, cozy desserts

Zucchini Pie
Zucchini Pie: A Slice of Comfort
Hey there, food lovers! Today we’re diving into a recipe that’s a true celebration of summer’s bounty: Zucchini Pie! Now, don’t let the name fool you—this isn’t your average pie with a sweet crust and fruity filling. No, my friend, this dish is a savory delight that’s truly a feast for the senses. It’s easy to make, bursting with flavor, and a wonderful way to showcase those beautiful zucchinis we all either adore or have an abundance of in our gardens.
Now, I believe every dish tells a story—each ingredient has a journey that shaped it, every spice brings along a whisper of history. For me, Zucchini Pie takes me back to those sun-soaked days when my grandmother would welcome me into her cozy kitchen, the sound of sizzling onions and the scent of fresh herbs filling the air. She had a knack for turning simple ingredients into something magical, and this pie was one of her sweet triumphs.
Whether you’re bursting with summer squash from your garden, or you’re picking up those glossy green beauties at the local market, this Zucchini Pie is your ticket to a hearty meal that feels like a hug from the inside out. Let’s roll up those sleeves and get cooking!
A Personal Story: Grandma’s Kitchen Comfort
As a child, I spent countless summers at my grandmother’s house, where the kitchen was always bustling with activity. One of my favorite memories was coming home from playing outside, my hands dusty and my cheeks flushed, only to be greeted by the intoxicating aroma of something delicious wafting from the oven. I distinctly remember the day she introduced me to Zucchini Pie.
“Watch closely, Beau,” she said, her warm smile making even the hottest days feel like a cool breeze. The way she shredded zucchini with the precision of an artist was mesmerizing. I was tasked with mixing the ingredients in a colossal bowl, my enthusiasm reining over my slight struggle to keep everything intact. It was chaotic and messy, but that’s exactly how cooking should be—a delightful adventure!
We’d sit down together, savoring that pie. Each bite was more than just food; it was love, joy, and the comfort of family. Now, every time I make Zucchini Pie, I think of Grandma and those sun-drenched afternoons. Let’s bring some of that nostalgia to your kitchen!
Ingredients
Here’s what you’ll need to create a mouthwatering Zucchini Pie. Each ingredient plays a vital role in making this dish a delightful experience.
-
2 cups shredded zucchini: These lovely green gems are the star of the show! Grate them finely to ensure they incorporate well into the pie. For a twist, you can experiment with yellow squash if you’re feeling adventurous.
-
1 cup grated Parmesan cheese: This cheesy goodness adds a savory depth and richness to your pie. Not a fan of Parmesan? Try using Gruyere or even feta for a tangy kick!
-
1 cup all-purpose flour: This acts as the glue, giving the pie its structure. If you’re looking for a gluten-free option, feel free to swap in almond flour or a gluten-free all-purpose blend.
-
3 eggs: These little marvels are your binding agents. They help hold everything together while providing a rich flavor. You could substitute with flax eggs (1 tablespoon ground flaxseed mixed with 2.5 tablespoons water per egg) for a vegan twist.
-
1/2 cup milk: This adds moisture to your pie. You can use any milk you prefer—dairy, almond, or oat milk can all work beautifully.
-
1/2 teaspoon salt: A pinch of salt enhances all the flavors and keeps everything balanced. If you’re on a low-sodium diet, consider using a salt substitute or adjusting according to your taste.
-
1/2 teaspoon black pepper: This adds a touch of warmth and complements the zucchini perfectly. Want to spice it up? Crushed red pepper or smoked paprika can give it an extra kick!
-
1 tablespoon olive oil: A drizzle of this golden elixir provides richness and helps in sautéing the onions for a wonderful depth of flavor. You could also use coconut oil or butter if you prefer.
-
1/2 cup chopped onion: Onions add sweetness and a great base flavor. Shallots or leeks are excellent substitutes if you want something a bit different.
-
1/2 teaspoon garlic powder: This is an easy way to enhance flavor without the fuss of fresh garlic. If you have fresh garlic on hand, one minced clove would work well too!
-
Fresh herbs (optional, e.g. basil or thyme): A sprinkle of your favorite herbs can elevate the flavor! Go wild with seasonal herbs and let your creativity shine.
Step-by-Step Instructions
Ready to bring this delicious Zucchini Pie to life? Let’s get started!
-
Preheat Your Oven: Set your oven to 350°F (175°C). This ensures your pie gets that golden-brown crispness we all love. Pro tip: a little pastry stone can help maintain an even heat for a perfectly baked crust—even if this isn’t a crusted pie!
-
Prepare Your Zucchini: Start by shredding the zucchini using a box grater or a food processor. After shredding, place the zucchini in a clean kitchen towel and squeeze out any excess moisture. This is crucial! Too much liquid can make your pie soggy. (And who wants soggy pie? Not me, friends!)
-
Sauté the Onions: Heat the olive oil in a skillet over medium heat. Add the chopped onions and sauté until they’re translucent and slightly caramelized, about 5–7 minutes. Keep stirring! This will enhance their flavor and sweetness, making your pie shine.
-
Combine Your Wet Ingredients: In a large bowl, whisk together the eggs and milk. This airy mixture will act as a lovely custard. It’s all about texture, baby!
-
Add in the Zucchini: Fold the shredded zucchini into the egg and milk mixture. Add the sautéed onions, garlic powder, salt, and black pepper. Mix everything thoroughly—let those flavors dance together!
-
Incorporate the Dry Ingredients: Gradually mix in the flour and Parmesan cheese until everything is well combined. You want a homogenous mixture, so there are no pockets of floury goodness left. If you’re feeling adventurous, toss in some finely chopped fresh herbs here!
-
Pour and Bake: Grease a 9-inch pie dish or casserole and pour your mixture in. Spread it evenly with a spatula. Bake in the preheated oven for 30-35 minutes, or until the top is golden and a toothpick inserted into the center comes out clean. This is what we call patience, friends!
-
Cool and Serve: Once out of the oven, allow your Zucchini Pie to cool for about 10 minutes. This gives it a chance to firm up and makes slicing easier.
Serving Suggestions
Serving this Zucchini Pie is half the fun; it’s all about presentation and comfort!
For a rustic feel, simply slice it into wedges and serve directly from the pie dish. You can garnish with a sprinkle of freshly chopped herbs or a few shavings of extra Parmesan on top—talk about a pop of flavor!
Pair this delightful dish with a light salad drizzled in balsamic vinaigrette, or fresh tomato slices with basil and mozzarella for a classic summer touch.
If you want to indulge, serve it with a dollop of sour cream or Greek yogurt on the side. It’s the creamy accent that takes it over the top!
Recipe Variations
Let’s keep that creativity flowing! Here are some fun twists to consider when making your Zucchini Pie:
-
Cheesy Spinach Zucchini Pie: Toss in a handful of chopped fresh spinach along with the zucchini for added nutrients and vibrant color.
-
Mediterranean Flare: Swap out the Parmesan for feta and add some kalamata olives and sun-dried tomatoes. You’ll get a flavor explosion that’s simply divine!
-
Herbed Delight: Experiment with your favorite herbs! Swap in dill and chives for a fresh, garden vibe that’s utterly refreshing.
-
Spicy Kick: Want to turn up the heat? Add chopped jalapeños or a sprinkle of cayenne to the mix.
-
Gluten-Free Option: As mentioned earlier, replace the all-purpose flour with almond flour or a gluten-free flour blend. Just make sure to balance the moisture, so it bakes up nicely.
Chef’s Notes
Man, there’s something special about revisiting family recipes! I started making Zucchini Pie during the summer months, and every time I do, it reminds me of Grandma’s incredible kitchen. She could whip up dishes with whatever she had on hand—no recipe required. The love was always the secret ingredient!
Over the years, I’ve played around with this recipe, and it always feels like a challenge to make it slightly different every time. Whether it’s adding different cheeses or including a variety of veggies, this Zucchini Pie lends itself beautifully to experimenting.
One time, I was in a rush and accidentally swapped the milk for yogurt—didn’t even skip a beat! It resulted in an extra tangy flavor that I ended up loving. Just goes to show—mistakes can lead to pure kitchen magic!
FAQs and Troubleshooting
1. My Zucchini Pie is too watery. What did I do wrong?
Don’t worry—it happens to the best of us! Ensure you squeeze out as much moisture from the zucchini as possible before mixing. Also, consider reducing the milk slightly next time.
2. Can I use frozen zucchini for this recipe?
Absolutely! Just be sure to thaw and thoroughly drain the frozen zucchini, as it can carry excess moisture.
3. My pie didn’t rise! Why?
This could be due to overmixing the batter or using old eggs. Make sure your ingredients are fresh, and mix just until combined for the best texture.
4. How should I store any leftovers?
Store your Zucchini Pie in an airtight container in the refrigerator for up to 3 days. You can also freeze it for up to a month. Just be sure to thaw it overnight in the fridge before reheating!
Nutritional Info
Now, let’s talk nutrition. It’s always good to have an idea of what we’re enjoying in our meals!
- Calories: Approximately 120 calories per slice (based on making eight slices).
- Protein: About 6 grams per slice, thanks to those eggs and cheese.
- Carbohydrates: Roughly 10 grams per slice; the zucchini keeps things light.
- Fats: Around 7 grams per slice, with healthy fats coming from olive oil and cheese.
- Fiber: Zucchini is a good source, offering about 1 gram—great for digestion!
Of course, these values depend on the specific ingredients you use and the serving size, but it shows that you can enjoy a delicious meal without compromising on nutrition!
Final Thoughts
There you have it—a fantastic journey into making Zucchini Pie! This savory dish not only nourishes the body but also the soul. It connects us to memories of family, laughter, and shared meals—oh, how magical food can be!
The next time you find yourself with an abundance of zucchini or just want to create a delightful meal that brings people together, remember this recipe. Enjoy every step, embrace your creativity, and share those delicious moments with loved ones.
So, grab your apron, get into that kitchen, and let your inner chef shine. Until next time, happy cooking!
Print
Zucchini Pie
- Total Time: 50 minutes
- Yield: 8 servings 1x
- Diet: Vegetarian
Description
A savory pie bursting with flavor, perfect for showcasing fresh summer zucchini.
Ingredients
- 2 cups shredded zucchini
- 1 cup grated Parmesan cheese
- 1 cup all-purpose flour
- 3 eggs
- 1/2 cup milk
- 1/2 teaspoon salt
- 1/2 teaspoon black pepper
- 1 tablespoon olive oil
- 1/2 cup chopped onion
- 1/2 teaspoon garlic powder
- Fresh herbs (optional, e.g. basil or thyme)
Instructions
- Preheat your oven to 350°F (175°C).
- Prepare the zucchini by shredding and squeezing out excess moisture.
- Sauté the onions in olive oil until translucent and caramelized, about 5–7 minutes.
- Combine eggs and milk in a large bowl, whisking to blend.
- Add the shredded zucchini to the egg mixture, then the sautéed onions, garlic powder, salt, and black pepper.
- Incorporate the flour and Parmesan cheese until well combined.
- Pour the mixture into a greased 9-inch pie dish.
- Bake for 30-35 minutes, or until golden and a toothpick comes out clean.
- Cool for about 10 minutes before serving.
Notes
Serve with a light salad or drizzle with balsamic vinaigrette for a refreshing touch.
- Prep Time: 15 minutes
- Cook Time: 35 minutes
- Category: Main Course
- Method: Baking
- Cuisine: Italian
Nutrition
- Serving Size: 1 slice
- Calories: 120
- Sugar: 2g
- Sodium: 300mg
- Fat: 7g
- Saturated Fat: 3g
- Unsaturated Fat: 4g
- Trans Fat: 0g
- Carbohydrates: 10g
- Fiber: 1g
- Protein: 6g
- Cholesterol: 80mg
Keywords: zucchini pie, summer recipe, savory pie, vegetarian dish

Low Carb (Keto-Friendly) Blueberry Butter Cake
A Slice of Joy: Low Carb (Keto-Friendly) Blueberry Butter Cake
Hey food lovers! I’m Beau Collier, and today, we’re diving headfirst into a sweet treat that’s not just delicious but also kind to your keto lifestyle. Buckle up, because this low carb blueberry butter cake is about to rock your world! It’s the perfect companion for your afternoon coffee break or a delightful dessert to cap off a cozy dinner.
You see, cake isn’t just a dessert; it’s a celebration, a memory, a moment of pure bliss. Whether it’s a birthday, a Sunday brunch, or just a Tuesday craving, having a slice of cake can brighten your day. And the best part? You won’t have to feel guilty about indulging in this deliciousness!
I remember the first time I experimented with a keto-friendly cake. I was convinced that baking without sugar and flour would lead to some sad, crumbly mess. But with a little curiosity and a journey through trial and error, I created something magical! This blueberry butter cake was born from that experience, and let me tell you—it’s been a hit with everyone I’ve shared it with, keto enthusiasts and cake lovers alike.
So, ready your mixing bowls, and let’s get this baking party started! This cake is simple to whip up, and you’ll only need a handful of ingredients. Plus, it’s gluten-free and packed with delightful blueberry goodness. Trust me, you’ll want to make this again and again!
Personal Story
Let me take you back to my childhood kitchen where the aroma of baked goods filled the air. My grandma, a self-proclaimed queen of desserts, was a master at whipping up cakes that made our mouths water. I still remember the afternoons when we’d pick fresh blueberries from the garden, their sweetness bursting under our fingers as we popped them straight into our mouths. Those moments were pure bliss, and they laid the foundation for my love of baking.
One sunny Saturday, we decided to make a cake using those freshly picked blueberries. It was a simple recipe, but the joy of mixing the batter with her was what made it memorable. The way she’d teach me to fold in the blueberries gently so they wouldn’t burst was something I cherished. That day, we whipped up a classic blueberry pound cake that is still etched in my memory.
Fast forward to today, and even though I’m living a low carb lifestyle, that memory inspired me to create a guilt-free version that still captures the essence of those sweet, sunny days. This blueberry butter cake is my modern take that promises to spark joy and bring people together, just like those memories did. So let’s roll up our sleeves and make our own delicious memories!
Ingredients
Here’s what you’ll need to create your low carb blueberry butter cake. Each ingredient has its own special place in this recipe, and I’ll share little chef insights along the way!
-
2 cups almond flour
A great gluten-free substitute for traditional flour, almond flour adds a lovely nutty flavor and keeps the cake moist. If you need a nut-free option, consider sunflower seed flour, but be aware that it may alter the color of your cake. -
1 cup fresh blueberries
*These sweet little gems are full of antioxidants and will burst with flavor in every bite! Frozen blueberries work too, but be sure to thaw and drain them to avoid excess moisture. * -
4 oz cream cheese, cubed
Cream cheese adds a rich, moist texture. If you’re dairy-free, try using a vegan cream cheese alternative. I promise it won’t compromise the cake’s integrity! -
3 large eggs
These act as binders and help give the cake its structure. For a vegan twist, you can substitute with flax eggs (1 tablespoon of ground flaxseed mixed with 3 tablespoons of water for each egg). -
1/2 cup unsalted butter, softened
Butter brings that rich taste we all love. You can swap it for coconut oil if you want a dairy-free version, but it will impart a different flavor. -
2/3 cup erythritol
This zero-calorie sweetener makes our cake keto-friendly while still adding the sweetness we crave. If you prefer, you can use another sugar substitute like monk fruit or stevia, but check their conversion guidelines as sweetness levels vary. -
1 tsp vanilla extract
A must-have for flavor! You can also experiment with almond extract for a different twist. -
1 1/2 tsp baking powder
This is the secret to our cake rising perfectly! If you’re using a self-rising almond flour blend, you can omit this. -
1 tsp lemon zest
Lemon zest brightens the flavors and elevates the cake. It pairs beautifully with the blueberries! -
1/4 tsp salt
A pinch of salt enhances sweetness and balances flavors. Don’t skip it, even in sweet recipes!
Step-by-Step Instructions
Now that we have all our ingredients ready, let’s get down to the delicious details of how to whip up this cake. You’ll be amazed at how easy it is!
-
Preheat Your Oven
Start by preheating your oven to 350°F (175°C). This step is crucial because we want our cake to bake evenly. While that’s happening, you can prepare your baking pan. Grease a 9-inch round cake pan with butter or line it with parchment paper. #ProTip: Parchment paper helps avoid sticking and makes for easy removal! -
Mix the Wet Ingredients
In a mixing bowl, cream the softened butter and erythritol together until it’s light and fluffy. This could take about 3-5 minutes. You can use a hand mixer or a stand mixer for this, but a sturdy wooden spoon works if you’re feeling old-school. Add the cubed cream cheese, and continue mixing until well combined. Finally, add in the eggs and vanilla extract, blending until smooth. Trust me; you want this mixture to be super creamy! -
Combine Dry Ingredients
In a separate bowl, whisk together the almond flour, baking powder, lemon zest, and salt. Mixing these together before adding them to the wet ingredients prevents clumps from forming. It’s like giving your ingredients a warm hug! -
Mix Everything Together
Gradually fold the dry mixture into the wet mixture. Use a spatula, and be gentle! You want to keep the batter light and fluffy. Feel free to scrape the sides of the bowl and make sure everything is combined. -
Add the Blueberries
Now it’s time for the showstopper: the blueberries! Gently fold them into the batter, being careful not to break them. This is where your cake gets its beautiful pop of color and flavor! -
Pour and Bake
Pour the batter into the prepared cake pan, smoothing out the top. Bake for 30-35 minutes or until a toothpick inserted in the center comes out clean. The smell in your kitchen at this point will have you salivating! -
Cool and Serve
Once baked, let the cake cool in the pan for about 10 minutes before transferring it to a wire rack to cool completely. This helps maintain its moistness. And here’s a little trick: don’t rush this part. The cooling process lets the flavors develop even more!
Serving Suggestions
When it comes to serving your low carb blueberry butter cake, the possibilities are as wide as your creativity! For a classic approach, slice yourself a generous piece and sprinkle a bit of powdered erythritol on top for a beautiful finish. If you’re feeling extra fancy, serve it with a dollop of whipped cream or a scoop of sugar-free vanilla ice cream.
Want to elevate that experience further? Try adding a drizzle of sugar-free lemon glaze on top, using powdered erythritol mixed with a splash of lemon juice. It’s a delightful contrast with the blueberries and truly takes it to the next level!
You can also pair it with fresh berries on the side for a pop of color and freshness. This cake not only tastes amazing but looks gorgeous on any table—a perfect centerpiece for your gatherings.
Recipe Variations
Ready for some fun twists? Here are a few flavor variations and ideas to spruce up your blueberry butter cake:
-
Lemon Blueberry Combo
Add a little extra lemon zest and a splash of lemon juice into the batter for a zesty kick. Combining the sweet blueberries with tart lemon brings a refreshing dimension! -
Chocolate Chip Surprise
Toss in a handful of sugar-free chocolate chips along with the blueberries for a decadent chocolate-blueberry experience! -
Peach Bliss
Swap out some of the blueberries for fresh diced peaches or apricots – a summer dream! They pair wonderfully with almond flour’s nuttiness. -
Nutty Crust
Blend some crushed almonds into the batter for an extra crunch. Just toss in about 1/4 cup of chopped almonds or pecans. -
Spiced Up
Add a dash of cinnamon or nutmeg to the batter for a warm, comforting flavor that’s perfect for those fall vibes!
Chef’s Notes
This blueberry butter cake is a fantastic canvas for creativity and flavor exploration! I first whipped this recipe up during a cozy evening with friends, and it was a delightful hit. We laughed, exchanged stories, and savored each bite together, reminding me exactly why I started baking in the first place.
What’s kept this recipe fresh for me is the constant play with flavors. Sometimes, I like to change things up by adding a pinch of cardamom or tossing in some nuts for that extra crunch. This cake has evolved over the years, and every new variation feels like discovering a hidden treasure.
Remember, baking is about joy, exploration, and making those cherished memories. Embrace the little mishaps along the way—they often lead to the best stories!
FAQs and Troubleshooting
Q: My cake didn’t rise—what happened?
A: This could happen if your baking powder is expired or if the batter was overmixed. Try checking your baking powder’s freshness before making it again; it’s vital for that perfect rise!
Q: Can I make this ahead of time?
A: Absolutely! Bake it a day in advance, let it cool completely, and store it in an airtight container. It can be kept on the counter for up to three days, or you can freeze it for longer storage.
Q: Why does my cake taste too eggy?
A: This can sometimes happen if the eggs are too prominent in flavor or if you added too many. Make sure to follow the recipe measurements for the best results!
Q: Can I substitute almond flour entirely for other flours?
A: Almond flour has a unique texture, so it’s best to stick with it. However, if you need to substitute, look for a keto-friendly flour blend designed for baking—just adjust the liquid as needed!
Nutritional Info
For those tracking their macros, here’s a quick breakdown of what you can expect from one slice of this low carb blueberry butter cake (based on 12 servings):
- Calories: Approximately 180 per slice
- Total Fat: 15g
- Carbohydrates: 6g
- Fiber: 2g
- Net Carbs: 4g
- Protein: 5g
- Sugar Alcohols: 2/3g
Keep in mind that the nutritional values will vary based on ingredient brands and measurements, so adjust as necessary.
Final Thoughts
Baking this low carb blueberry butter cake isn’t just about creating something delicious; it’s about reveling in the joy of cooking and the memories that come with it. Whether it’s a simple treat for yourself, or you’ve invited friends over to share in a slice or two, I hope this cake brings warmth and comfort to your kitchen.
Remember, each time you bake, you create new stories, new experiences, and new joyous connections—with yourself or with friends gathered around. So grab your spatula, preheat that oven, and get ready to create something wonderful. Can’t wait to hear about your baking adventures and what delightful twists you come up with!
Here’s to sweet memories and delicious moments—happy baking, my friends! 🍰
Print
Low Carb Blueberry Butter Cake
- Total Time: 50 minutes
- Yield: 12 servings 1x
- Diet: Keto, Gluten-Free
Description
A delightful low carb blueberry butter cake that’s perfect for your keto lifestyle, packed with sweet blueberries and rich flavors.
Ingredients
- 2 cups almond flour
- 1 cup fresh blueberries
- 4 oz cream cheese, cubed
- 3 large eggs
- 1/2 cup unsalted butter, softened
- 2/3 cup erythritol
- 1 tsp vanilla extract
- 1 1/2 tsp baking powder
- 1 tsp lemon zest
- 1/4 tsp salt
Instructions
- Preheat your oven to 350°F (175°C) and prepare a 9-inch round cake pan.
- Mix the softened butter and erythritol together until light and fluffy.
- Add the cubed cream cheese, eggs, and vanilla extract, blending until smooth.
- Combine the almond flour, baking powder, lemon zest, and salt in a separate bowl.
- Mix the dry ingredients into the wet mixture gently.
- Add the blueberries and fold them into the batter.
- Pour the batter into the prepared pan and bake for 30-35 minutes or until a toothpick comes out clean.
- Cool the cake in the pan for about 10 minutes before transferring it to a wire rack to cool completely.
Notes
Serve with powdered erythritol on top or a dollop of whipped cream. This cake is a great base for adding various flavors!
- Prep Time: 15 minutes
- Cook Time: 35 minutes
- Category: Dessert
- Method: Baking
- Cuisine: American
Nutrition
- Serving Size: 1 slice
- Calories: 180
- Sugar: 1g
- Sodium: 150mg
- Fat: 15g
- Saturated Fat: 8g
- Unsaturated Fat: 6g
- Trans Fat: 0g
- Carbohydrates: 6g
- Fiber: 2g
- Protein: 5g
- Cholesterol: 70mg
Keywords: low carb, keto, blueberry, dessert, butter cake

High Protein Greek Yogurt Bread
High Protein Greek Yogurt Bread: A Deliciously Simple Recipe
Hey there, fellow foodies! I’m Beau Collier, and I’m absolutely thrilled to welcome you to another delightful dish here at Feastical. Today, we’re diving into something warm, delicious, and packed with protein – High Protein Greek Yogurt Bread! If you love the aroma of freshly baked bread wafting through your kitchen while knowing you’re also indulging in a healthy option, then you’re in for a treat.
Baking can seem daunting, but trust me, this quick and hassle-free bread will change your mind. Greek yogurt not only gives this bread a unique moisture but also adds an incredible protein boost. Whether you slather it with butter, top it with avocado, or use it as a base for sandwiches, this bread is your new best friend in the kitchen. Plus, it’s perfect for breakfast or as an afternoon snack! So, grab your apron (or your comfiest kitchen attire), and let’s get started on this wholesome adventure!
Personal Story
I’ll never forget the first time I baked bread with my grandma. On rainy Sundays, we would cozy up in her kitchen, pouring flour and water together, hoping for some magical concoction. I remember the way her eyes lit up as the dough began to rise, and she’d whisper, “Just like us, Beau—I’ll rise too!” It took years for me to perfect my bread-making skills, but when I discovered the wonder of Greek yogurt, it felt like all my bread-baking dreams had come true!
This High Protein Greek Yogurt Bread has that nostalgic comfort baked right into it. It’s a bread that’s simple and full of love, just like those rainy Sundays with my grandma. Now, I can whip it up in no time, and the best part? I can share it with my friends and family. So, let’s roll up our sleeves, sprinkle some flour, and make this delicious bread together!
Ingredients
Here’s what you need to whip up this delightful High Protein Greek Yogurt Bread.
-
1 cup (approximately 225 grams) of unflavored, thick Greek yogurt (0–2% fat recommended):
- This creamy goodness is the star of the show! It adds moisture and a boost of protein. If you’re out of Greek yogurt, you can use regular yogurt, but keep in mind it might not hold the same thickness and flavor.
-
1 cup (around 120 grams) of self-rising flour:
- Self-rising flour is a blend of all-purpose flour, baking powder, and salt. It saves time and simplifies the process. If you don’t have self-rising flour on hand, don’t fret! You can make your own by combining 1 cup of all-purpose flour with 1.5 teaspoons of baking powder and a pinch of salt.
-
Optional: A pinch of salt and a dash of honey or sugar (for sweetness):
- While the yogurt brings its own lovely flavor, a pinch of salt can enhance the overall taste, and honey adds a hint of sweetness. Feel free to adjust these according to your palate.
With these simple ingredients, you’re well on your way to baking some incredible Greek yogurt bread that’ll have everyone saying, “More, please!”
Step-by-Step Instructions
Now let’s get to baking! Preheat that oven, and let’s make some magic happen. Here’s how to do it:
-
Preheat your oven to 350°F (175°C):
- Make sure it’s at the right temperature, so your bread starts rising as soon as it hits the oven.
-
Mix the yogurt and flour:
- In a mixing bowl, combine your Greek yogurt and self-rising flour. Use a spatula or a wooden spoon to mix until just combined.
Tip: Don’t overmix! A gentle stir should leave you with a slightly sticky dough.
- In a mixing bowl, combine your Greek yogurt and self-rising flour. Use a spatula or a wooden spoon to mix until just combined.
-
Add optional ingredients:
- If you’re opting for a pinch of salt and a dash of honey or sugar, now’s the time to add them in. This step amplifies the flavor of your bread!
Chef Insight: Taste the dough! If you feel it needs a little more sweetness or salt, don’t hesitate to adjust the seasoning to your taste.
- If you’re opting for a pinch of salt and a dash of honey or sugar, now’s the time to add them in. This step amplifies the flavor of your bread!
-
Shape the dough:
- Lightly flour your countertop and plop the dough out onto it. With floured hands, gently knead the dough for a minute or two until it holds together well.
Tip: If it’s too sticky, feel free to add a little extra flour – just don’t over-knead.
- Lightly flour your countertop and plop the dough out onto it. With floured hands, gently knead the dough for a minute or two until it holds together well.
-
Form into a loaf:
- Shape the dough into a rough loaf or ball shape, depending on your preference. You want it to be even and smooth, but no need for perfection here!
-
Transfer to a baking pan:
- Place your shaped dough onto a lined or greased baking dish. You can shape it into a round loaf or a rectangle based on your style.
Chef Hack: For a fun twist, try making small rolls instead! Just divide the dough into smaller portions before shaping.
- Place your shaped dough onto a lined or greased baking dish. You can shape it into a round loaf or a rectangle based on your style.
-
Bake:
- Slide it into the preheated oven and let it bake for 30-35 minutes, or until the top is golden brown and the bread sounds hollow when tapped.
Tip: If you’re a fan of a really crusty top, try brushing a little olive oil or melted butter on the surface before baking!
- Slide it into the preheated oven and let it bake for 30-35 minutes, or until the top is golden brown and the bread sounds hollow when tapped.
-
Cool the bread:
- Once baked, remove it from the oven and let it cool on a wire rack for at least 10-15 minutes. This allows the steam to escape and helps with the slicing.
Boom! You’ve just created a delicious High Protein Greek Yogurt Bread that’s inviting and oh-so-satisfying!
Serving Suggestions
Serving your lovely homemade bread is part of the fun! Here are some ideas that’ll make your bread a centerpiece:
-
Toast with Toppings: Slice yourself a thick piece and toast it lightly. Top it with creamy butter, a drizzle of honey, and a sprinkle of cinnamon. Divine!
-
Savory Pairing: Spread a layer of hummus, and top it with sliced cucumbers, radishes, and a sprinkle of feta cheese for a Mediterranean spin.
-
Perfect Sandwich Base: Use it as a base for sandwiches! Load it up with your favorite meats, fresh veggies, and a smear of spread.
-
Gather Around: Consider serving it warm at a family gathering or with friends paired alongside a bowl of soup or chili. Its heartiness complements such meals beautifully!
No matter how you choose to serve it, the moment it hits the table, the wow factor is guaranteed!
Recipe Variations
One of the best parts of cooking is that you can always make a recipe your own! Here are some twists for your High Protein Greek Yogurt Bread:
-
Herb-Infused Bread: Add a tablespoon of dried herbs like rosemary or thyme to the dough for an aromatic flavor boost.
-
Nutty Delight: Toss in some chopped walnuts or sunflower seeds for added crunch and healthy fats.
-
Cheese Lover’s Choice: Mix in shredded cheese like cheddar or feta for that gooey, cheesy goodness that’s hard to beat.
-
Berry Goodness: If you’re feeling adventurous, fold in some dried cranberries or blueberries into the dough for a touch of sweetness.
-
Gluten-Free Option: Swap the self-rising flour for a gluten-free blend, ensuring that it has a leavening agent included.
With these variations, every baking session can feel like a new adventure!
Chef’s Notes
As a chef, it’s all about those little stories and experiences that go along with each recipe. The High Protein Greek Yogurt Bread has definitely seen its fair share of twists in my kitchen. I still remember the first time I tried this recipe using flavored yogurt for a quirky spin. Boy, did that turn out to be an interesting experiment! The bread came out with hints of strawberry – not bad but certainly unexpected!
It’s all about having fun. Embrace those funny mishaps, and create stories you can tell while enjoying each bite of your bread.
FAQs and Troubleshooting
1. Why did my bread not rise?
- If your bread didn’t rise, it could be that your self-rising flour expired or that you didn’t mix it enough with the yogurt. Make sure to use fresh ingredients and mix them gently!
2. My bread is gummy on the inside; what went wrong?
- Gummier interiors often mean that the bread was underbaked. Ensure that your oven temperature is accurate, and if you suspect it’s baking too quickly on the outside, try lowering the temperature slightly and giving it a little more time.
3. Can I freeze this bread?
- Absolutely! Wrap your cooled bread in plastic wrap or foil and store it in the freezer. When it’s time to eat, just thaw it at room temperature or pop it in the toaster for a quick warm-up.
4. What can I do with leftovers?
- If you have leftover bread, turn it into croutons or even breadcrumbs! You can also make a delicious bread pudding with it as a fabulous dessert.
Nutritional Info
Let’s chat about how nutritious this High Protein Greek Yogurt Bread really is! Each slice packs in the goodness with:
-
Protein: One slice contains a good chunk of protein from the Greek yogurt, keeping you full and satisfied.
-
Low in Fat: With the right yogurt, you’ll find this bread to be lower in fat, making it a great option for many dietary needs.
-
Carbohydrates: The carbohydrates from the self-rising flour provide the necessary energy you need, especially if you’re active.
Note: Nutritional values may vary depending on the exact items you use, so make sure to check the labels on your ingredients for precise information!
Final Thoughts
There you have it, friends—your very own High Protein Greek Yogurt Bread! It’s not just a recipe; it’s an experience that brings warmth, love, and comfort into the kitchen. Whether you’re baking alone, with family, or for a gathering with friends, this bread is simple enough for everyone to embrace and enjoy.
So, the next time you’re feeling peckish or have a bit of time on your hands, I hope you remember this recipe and create your own memories in the kitchen. Let the smell of fresh-baked bread fill your home and your heart, and don’t forget to share it with those you love. Happy baking, and until next time, keep those spatulas and spoons at the ready—there’s always more deliciousness to come at Feastical! 🍞✨
Print
High Protein Greek Yogurt Bread
- Total Time: 45 minutes
- Yield: 8 servings 1x
- Diet: Vegetarian
Description
A deliciously simple Greek yogurt bread that is warm, healthy, and packed with protein.
Ingredients
- 1 cup (approximately 225 grams) of unflavored, thick Greek yogurt (0–2% fat recommended)
- 1 cup (around 120 grams) of self-rising flour
- Optional: A pinch of salt and a dash of honey or sugar
Instructions
- Preheat your oven to 350°F (175°C).
- Mix the yogurt and flour in a mixing bowl until just combined.
- Add optional ingredients like salt and honey or sugar to enhance flavor.
- Shape the dough on a floured countertop and knead gently.
- Form into a loaf or ball shape and transfer to a baking pan.
- Bake for 30-35 minutes or until golden brown.
- Cool on a wire rack for at least 10-15 minutes before slicing.
Notes
Try adding herbs, nuts, or cheese for variations. Perfect for breakfast or snacks!
- Prep Time: 10 minutes
- Cook Time: 35 minutes
- Category: Bread
- Method: Baking
- Cuisine: Mediterranean
Nutrition
- Serving Size: 1 slice
- Calories: 180
- Sugar: 3g
- Sodium: 150mg
- Fat: 3g
- Saturated Fat: 1g
- Unsaturated Fat: 2g
- Trans Fat: 0g
- Carbohydrates: 30g
- Fiber: 1g
- Protein: 8g
- Cholesterol: 10mg
Keywords: Greek yogurt bread, high protein bread, easy bread recipe, healthy bread

Sugar Free Yogurt Cake
Sugar-Free Yogurt Cake: A Slice of Happiness
Introduction
Hey there, fellow food lovers! Today, I’m super excited to share with you one of my absolute favorite desserts: the Sugar-Free Yogurt Cake! Now, I know what you might be thinking: “How can a cake be both delicious and sugar-free?” Well, let me tell you—this cake is not only a guilt-free indulgence, but it’s also moist, light, and utterly scrumptious. Whether you’re hosting a cozy weekend brunch, looking for the perfect dessert to share with friends, or simply treating yourself on a weekday, this cake fits the bill perfectly.
You see, desserts don’t always have to be loaded with sugar to be satisfying. I believe that food is about finding balance, joy, and love in every bite, and this yogurt cake embodies that philosophy beautifully. Made with simple, wholesome ingredients, it’s a delightful way to enjoy a sweet treat without the sugar crash that typically follows. Plus, it’s incredibly versatile, so you can dress it up or down as your taste buds desire!
Picture this: a warm slice of cake fresh out of the oven, served with a dollop of whipped cream or fresh berries. Yum! So, grab your apron and let’s dive into this scrumptious recipe that’s sure to become a staple in your kitchen!
Personal Story
This yogurt cake holds a special place in my heart. I remember the first time I decided to make it when my sister was visiting from out of town. She had been raving about healthy desserts, and I wanted to surprise her with something delightful that wouldn’t make her cringe at the thought of “healthy.” Buzzing with excitement, I rummaged through my pantry and found a few simple ingredients: Greek yogurt, eggs, and monkfruit sweetener.
As I mixed everything in my cozy little kitchen, the familiar scent of vanilla wafted through the air, and I could feel my excitement bubble over. When I pulled the cake out of the oven, it puffed up beautifully, golden and inviting. We eagerly waited for it to cool, and when it was finally ready to slice, we couldn’t resist diving in! The first bite was pure bliss. The cake was not only delightfully moist but also incredibly satisfying. My sister’s eyes lit up, and we couldn’t stop talking about how amazing it was to enjoy such a delicious dessert without the remorse of excess sugar. That day solidified my love for this yogurt cake and for the joy that homemade desserts can bring.
Ingredients
Before we get started, let’s gather all the goodies you’ll need for our Sugar-Free Yogurt Cake:
-
4 Large Eggs (separated)
Eggs provide structure and moisture, giving the cake its fluffy texture. If you’re vegan or looking for an egg substitute, you can use flax eggs (1 tablespoon of flaxseed meal mixed with 2.5 tablespoons of water per egg). -
1.5 Cups Non-Fat Greek Yogurt (350 g/12.5 oz)
Greek yogurt lends creaminess and a slight tang to the cake, which balances the sweetness beautifully. Want to add more flavor? Try using vanilla or lemon-flavored yogurt! -
⅓ Cup Monkfruit Sweetener (70 g/2.5 oz)
This natural sweetener offers a low-calorie alternative to sugar. It’s great for sugar-free baking! If you don’t have monkfruit sweetener, you could use stevia or erythritol, but make sure to adjust the quantities according to the sweetness level. -
⅓ Cup Cornstarch (40 g/1.4 oz)
Cornstarch is key for a light, fluffy texture. You can easily substitute it with arrowroot powder or even almond flour for a different flavor profile. Just be aware this might slightly adjust the texture! -
1 tsp Vanilla Extract (optional)
Vanilla extract enhances the flavors in the cake, making it taste heavenly! If you want to get a little creative, you can swap this out for almond extract or a splash of citrus juice for bright notes.
In total, these simple yet wholesome ingredients come together to create a cake that you’ll love letting melt in your mouth!
Step-by-Step Instructions
Now that we have everything ready, let’s get baking! Follow these steps, and we’ll whip up a delicious Sugar-Free Yogurt Cake.
-
Preheat Your Oven:
Start by preheating your oven to 350°F (175°C). This step ensures your cake bakes evenly and nicely. -
Prepare Your Baking Pan:
Grease a 9-inch round cake pan with a little olive oil or non-stick spray, and then line the bottom with parchment paper. This makes sure your cake comes out without a hitch! -
Separate the Eggs:
In two separate bowls, crack your eggs and separate the whites from the yolks. When beating the egg whites, you want them to whip up into soft peaks—this will help your cake rise beautifully! -
Mix the Egg Yolks and Yogurt:
In a large mixing bowl, combine the egg yolks with Greek yogurt and the monkfruit sweetener. Mix until well combined—no lumps here! This mixture will be creamy and luscious. -
Add Cornstarch and Vanilla:
Gradually add the cornstarch and vanilla extract to the yolk and yogurt mixture. Stir until fully combined. Your batter should start to come together beautifully at this stage. -
Whip the Egg Whites:
Grab a clean bowl and your electric mixer, and start whipping the egg whites until they form soft peaks. This is where the magic happens—whipped egg whites will give your cake that airy, fluffy texture! -
Fold in the Egg Whites:
Gently fold the whipped egg whites into the yogurt mixture. Do this slowly and lovingly, as you want to keep as much air in the batter as possible. You’ll see the color lighten; that’s a great sign! -
Pour the Batter into the Pan:
Transfer the batter to your prepared cake pan, spreading it evenly to level out the top. Don’t worry about perfection; it’ll all even out in the oven! -
Bake to Perfection:
Place the cake in the preheated oven and let it bake for about 30-35 minutes. You’ll know it’s done when the top is golden, and a toothpick inserted into the center comes out clean. -
Cool and Unmold:
Once baked, take it out of the oven and allow it to cool in the pan for about 15 minutes. Then, gently remove it from the pan, peel off the parchment paper, and let it cool completely on a wire rack. -
Time to Serve and Enjoy!:
Once cooled, slice it up and serve it your favorite way, whether that’s plain, with some whipped cream, or topped with fresh fruit. Let your guests marvel at your baking prowess!
Serving Suggestions
Now that your Sugar-Free Yogurt Cake is out of the oven and looking fabulous, let’s talk about how to serve it up! Here are a few of my favorite ways:
-
Classic Slice: Just serve it as is. This cake is naturally delicious and doesn’t need much dressing up. Serve slices at room temperature with a sprinkle of powdered monkfruit sweetener if you’d like, for a little extra flair!
-
Whipped Cream: Top slices with a dollop of whipped cream (or whipped coconut cream for a dairy-free option). A little cinnamon sprinkled on top adds warmth and a lovely aroma.
-
Fruit Toppings: Fresh berries such as strawberries, blueberries, or raspberries add a burst of color and flavor. Drizzle a bit of honey or a sugar-free syrup over the fruits for an extra touch.
-
Yogurt Parfait: Turn your cake into a delightful parfait! Crumble leftover cake into a glass, layer with Greek yogurt, and top with fresh fruits or a berry compote for an impressive dessert.
Recipe Variations
Feeling a little adventurous? Here are some easy twists or variations you can try with this Sugar-Free Yogurt Cake:
-
Chocolate Yogurt Cake: Add 1/3 cup of unsweetened cocoa powder to the dry ingredients for a rich chocolate flavor. Replace the vanilla extract with an espresso shot for a mocha twist!
-
Citrus Infusion: Add zest from one lemon or orange, along with a tablespoon of juice, to give your cake a bright, fresh flavor that’s especially lovely in spring or summer.
-
Nutty Crunch: Fold in a handful of chopped nuts or seeds (like almonds or walnuts) for added texture and nutritional benefits. They will add a wonderful crunch and flavor!
-
Spiced Sensation: For a warming twist, try adding a pinch of nutmeg or cinnamon to the batter. Alternatively, some ginger will give it a cozy kick!
-
Gluten-Free Option: Substitute cornstarch with a gluten-free all-purpose flour blend. Your cake will be equally marvelous for your gluten-sensitive friends!
Chef’s Notes
Over the years, this recipe has evolved to suit my taste and needs. I initially stumbled upon a similar yogurt cake recipe but quickly personalized it to make it sugar-free and lighter. It’s fun to experiment with flavors and textures, always keeping in mind the essence of comfort and joy in the kitchen. And I must share: every time I serve this cake, it prompts stories and happy memories, whether it’s from sharing slices with friends or enjoying it solo on a cozy evening.
Once, I even made it for a potluck and came back with an empty dish—that’s a sure sign of success! Remember, cooking is a journey, and this cake has been a part of mine, transforming from an experiment into a beloved staple.
FAQs and Troubleshooting
1. Why did my cake turn out dense?
If your cake came out denser than expected, it may be due to overmixing the batter after adding the egg whites. Be gentle when folding them in to keep that nice airy texture!
2. Can I use regular yogurt instead of Greek yogurt?
Absolutely! Just be aware that the texture and flavor profile might change a bit. Regular yogurt will make the cake a little less thick and creamy, but it can still be delicious!
3. How long can I store the cake?
You can store the cake in an airtight container at room temperature for up to 3 days, or refrigerate it for about a week. If you want to keep it longer, slice and freeze—thaw it out whenever you’re craving a sweet treat!
4. What if I don’t have monkfruit sweetener?
No worries! Feel free to substitute with another sugar-free sweetener, like stevia or erythritol, adjusting the amount according to sweetness levels. Just ensure it’s a one-to-one substitution if possible for best results.
Nutritional Info
Let’s break down the nutrition in a single slice of this fantastic Sugar-Free Yogurt Cake (assuming the recipe yields 12 slices):
- Calories: Approximately 80
- Protein: 6g
- Carbohydrates: 10g
- Fat: 3g
- Fiber: 1g
- Sugar: 1g (depending on your sweetener)
With a healthy protein boost from the Greek yogurt and low sugars, this cake is a great option for those looking to satisfy their sweet tooth without the guilt!
Final Thoughts
There you have it—a delicious and simple recipe for Sugar-Free Yogurt Cake that will surely put a smile on your face! Remember, the best meals are the ones shared with friends and family, bringing together laughter, memories, and, of course, fantastic food. So whether you’re making this cake for a gathering or just to treat yourself, know that you’re creating something wonderful!
As you embark on your baking journey, make sure to enjoy every moment of the process. Cooking is as much about the experience as it is about the food itself. Don’t forget to share your creation with loved ones or put your unique twist on the recipe—this is just the beginning!
Thanks for joining me in the kitchen today, and happy cooking! Until next time, keep those spatulas twirling and those taste buds tingling!
Print
Sugar-Free Yogurt Cake
- Total Time: 45 minutes
- Yield: 12 servings 1x
- Diet: Sugar-Free
Description
A delicious and moist yogurt cake that’s sugar-free, perfect for any occasion!
Ingredients
- 4 Large Eggs (separated)
- 1.5 Cups Non-Fat Greek Yogurt (350 g/12.5 oz)
- ⅓ Cup Monkfruit Sweetener (70 g/2.5 oz)
- ⅓ Cup Cornstarch (40 g/1.4 oz)
- 1 tsp Vanilla Extract (optional)
Instructions
- Preheat your oven to 350°F (175°C).
- Prepare a 9-inch round cake pan with olive oil and parchment paper.
- Separate the eggs into whites and yolks in two bowls.
- Mix egg yolks with Greek yogurt and monkfruit sweetener until creamy.
- Add cornstarch and vanilla to the mixture and stir until combined.
- Whip egg whites in a clean bowl until soft peaks form.
- Fold the whipped egg whites into the yogurt mixture gently.
- Pour the batter into the prepared cake pan, leveling the top.
- Bake for about 30-35 minutes until golden and a toothpick comes out clean.
- Cool for 15 minutes in the pan before transferring to a wire rack to cool completely.
- Serve plain, with whipped cream, or topped with fresh fruit.
Notes
This cake can be stored in an airtight container at room temperature for up to 3 days, or refrigerated for about a week. It can also be sliced and frozen for future cravings.
- Prep Time: 10 minutes
- Cook Time: 35 minutes
- Category: Dessert
- Method: Baking
- Cuisine: American
Nutrition
- Serving Size: 1 slice
- Calories: 80
- Sugar: 1g
- Sodium: 50mg
- Fat: 3g
- Saturated Fat: 1g
- Unsaturated Fat: 2g
- Trans Fat: 0g
- Carbohydrates: 10g
- Fiber: 1g
- Protein: 6g
- Cholesterol: 120mg
Keywords: sugar-free, yogurt cake, healthy dessert, light cake, guilt-free dessert

Yogurt Chocolate Chip Cookies
# The Ultimate Yogurt Chocolate Chip Cookies Recipe: Your New Favorite Treat!

## Introduction

Hey there, fellow food lovers! Welcome back to Feastical, where we transform everyday ingredients into unforgettable flavors! Today, I’m sharing a recipe that combines sweet nostalgia with a healthy twist: Yogurt Chocolate Chip Cookies. Yes, you read that right! These delightful cookies are lightened up with Greek yogurt, making them not only irresistibly tasty but also a tad healthier than your traditional cookies.

Picture this: a rainy afternoon, the scent of freshly baked cookies wafting through the kitchen, and laughter echoing as family and friends gather around the table. That’s the magic of food! Cookies have a special way of creating warm memories and bringing people together.

So grab your apron and get ready to bake some deliciousness. Whether you’re a kitchen novice or a seasoned chef, these cookies are super simple to whip up, and trust me, they’re going to melt your heart (and your taste buds!). Let’s dive into the world of Yogurt Chocolate Chip Cookies and discover how these little bites of joy can brighten your day!

## Personal Story

Ah, cookies! They remind me of my childhood, running around the kitchen while my mom baked up a storm. One of my favorite memories is making cookies with her every Sunday. We would measure out flour and sugar, sneak bites of chocolate chips, and giggle when the dough would inevitably stick to our hands.

But it wasn’t just about the cookies themselves; it was the connection we shared. Those cookies became a symbol of love, laughter, and togetherness. Fast-forward to today, and I still often find myself in the kitchen with loved ones, creating new memories while whipping up sweet treats.

One day, I decided to experiment with Greek yogurt to lighten up a classic chocolate chip cookie recipe. I was stunned by the result—chewy, rich, and just the right amount of sweetness! It reminded me of those childhood days while also allowing me to enjoy a snack that wouldn't derail my healthy eating goals. These Yogurt Chocolate Chip Cookies are now a staple in my recipe book, and I can’t wait for you to experience the same joy!

## Ingredients

Let’s gather our ingredients!

- **1 cup Greek yogurt**: This creamy ingredient gives our cookies their delightful texture and adds a protein boost. You can substitute it with regular plain yogurt, but Greek yogurt works best for that creaminess!

- **1 cup brown sugar**: This ingredient not only sweetens the deal but also keeps your cookies chewy. Feel free to swap with coconut sugar for a lower glycemic option.

- **1/2 cup butter, softened**: Butter adds richness and flavor. If you'd like to lighten it even more, you can use coconut oil or vegan butter as a substitute.

- **1 teaspoon vanilla extract**: A staple in any baking recipe, vanilla adds warmth and depth of flavor. If you have it, try using vanilla bean paste for an extra indulgent touch!

- **2 cups all-purpose flour**: This is our backbone ingredient. For a healthier spin, you could use whole wheat flour, but do keep in mind this may change the texture slightly.

- **1 teaspoon baking soda**: This helps the cookies rise perfectly. Make sure it’s fresh for the best results!

- **1/2 teaspoon salt**: Just a pinch helps to enhance all the flavors. If using salted butter, you may want to reduce this a tad.

- **1 cup chocolate chips**: The star of the show! Try dark chocolate for a richer flavor or mini chocolate chips for a fun twist.

Each ingredient here plays a crucial role in delivering that chewy, chocolatey goodness we crave in a cookie, so let's make sure we have everything prepped and ready to go!

## Step-by-Step Instructions

Okay, let’s get that oven preheated to 350°F (175°C). Your home is about to smell like a bakery!

1. **Mix the Wet Ingredients**: In a large mixing bowl, combine the Greek yogurt, softened butter, brown sugar, and vanilla extract. Using a whisk or electric mixer, blend them together until creamy and smooth. This stage is crucial! The yogurt gives our cookies a wonderful lightness, so make sure it’s fully combined.

2. **Combine Dry Ingredients**: In a separate bowl, whisk together the flour, baking soda, and salt. This helps evenly distribute the baking soda and salt, ensuring every bite has the perfect flavor balance.

3. **Combine it All**: Gradually add the dry mixture to the wet mixture—do this in batches to avoid a flour explosion! Gently fold until no streaks remain. Be careful not to overmix; we want to keep our cookies tender.

4. **Add the Chocolate Chips**: Now comes the fun part—fold in those chocolate chips! Use your spatula to mix them evenly throughout the dough. This is where you can double down and use a mix of chocolate chips if you’re feeling adventurous.

5. **Scoop and Bake**: Line a baking sheet with parchment paper and use a cookie scoop or spoon to drop rounded tablespoons of dough onto the sheet, leaving about 2 inches between each cookie. Bake in the preheated oven for about 10-12 minutes or until the edges are golden and the centers look set.

6. **Cool Down**: Once baked, let them sit on the baking sheet for about 5 minutes before transferring them to wire racks to cool completely. This step is vital; it allows them to firm up while still being ooey gooey in the center.

Baking is all about timing and patience, so enjoy your success as you watch (and smell!) the transformation.

## Serving Suggestions

The best way to serve these Yogurt Chocolate Chip Cookies is warm, of course! Pair them with a glass of cold milk or a scoop of your favorite ice cream for a treat that will take you right back to your childhood.

For a delightful twist, try sandwiching two of these cookies with a scoop of yogurt or a creamy filling for a cookie sandwich. They’re also fantastic crumbled over a bowl of vanilla ice cream or a fruit salad for an unexpected crunch.

If you’re looking to impress guests, pile them high on a pretty platter and dust with powdered sugar or serve them with fresh berries on the side. Trust me, your family and friends will be raving about these cookies long after the last crumb has been devoured!

## Recipe Variations

Feeling adventurous? Here are some fun twists to customize your Yogurt Chocolate Chip Cookies to match your cravings:

1. **Nutty Addition**: Add 1/2 cup of chopped nuts—walnuts or pecans work wonderfully—into the dough for some crunch and added health benefits.

2. **Dried Fruit Delight**: Swap out chocolate chips for dried cranberries or cherries for a tangy twist that pairs perfectly with the sweetness of the dough.

3. **Spice it Up**: Incorporate a teaspoon of cinnamon or nutmeg into the flour mix for a cozy, spiced flavor that elevates the cookies to a new level.

4. **Citrus Zest**: Add a teaspoon of orange or lemon zest for a fresh and zesty flavor that brightens up these cookies.

5. **Gluten-Free Alternative**: Use a gluten-free all-purpose flour blend in place of regular flour to make these cookies gluten-free without sacrificing flavor.

Get creative and have fun with each batch—there are no limits in the kitchen!

## Chef’s Notes

I must share that these Yogurt Chocolate Chip Cookies didn’t spring up overnight. The recipe has gone through its fair share of tests and tweaks over the years! My original version was heavy on the butter and sugar, but life happens, and we all want to enjoy treats without too much guilt, right?

One day while baking just for fun, I added Greek yogurt on a whim and boy, was I surprised! The result was so good that I’ve been making them this way ever since. I laugh at how many times I had to share them with friends just to keep my sanity (you know, ‘taste-testing’!).

These cookies are now a go-to treat for gatherings, road trips, and even a late-night snack when I need something sweet to brighten my day!

## FAQs and Troubleshooting

1. **Why are my cookies flat?**
   - If your cookies spread too much, check if your butter was too soft or melted. You want it softened but still solid. Chilling the dough for about 30 minutes can also help prevent spreading!

2. **Can I freeze these cookies?**
   - Absolutely! These cookies freeze beautifully. Just ensure they're fully cooled, and store them in an airtight container or zip-top bag. You can freeze the dough as well if you want freshly baked cookies on demand—just scoop them onto a baking sheet, freeze until solid, and then transfer them to a bag. When you're ready, bake straight from frozen, adding a couple of extra minutes to the baking time.

3. **What if my dough is too dry?**
   - If your dough feels crumbly, add a splash of milk or more yogurt to loosen it up. You want it to be soft but not sticky!

4. **Can I use flavored yogurt?**
   - While you can experiment with flavored yogurts, be mindful that this will change the overall taste of your cookies. Stick to plain yogurt for the best results!

## Nutritional Info

If you're wondering about the nutritional value of these Yogurt Chocolate Chip Cookies, here’s a quick breakdown for one cookie (based on the recipe making roughly 24 cookies):

- **Calories**: Approximately 140 kcal
- **Protein**: 2g
- **Carbohydrates**: 22g
- **Fat**: 5g
- **Fiber**: 0g
- **Sugar**: 7g

These cookies are a delightful treat that fits wonderfully into a balanced diet. Of course, moderation is key, but with added protein from the yogurt, you can feel just a tad better about indulging!

## Final Thoughts

Whether it's a rainy day, a family gathering, or just a moment for self-indulgence, these Yogurt Chocolate Chip Cookies are your new go-to comfort food. The joy of baking and sharing these treats with loved ones is what truly makes the kitchen come alive.

I hope you have as much fun making them as I did. Don’t forget to share your cookie adventures with us! Snap a picture, tag us on social media, and let the world see your delicious creations. Until next time, keep those ovens warm and your spatulas ready! Happy baking, and remember: life is too short not to enjoy a cookie (or three).

Yogurt Chocolate Chip Cookies
- Total Time: 27 minutes
- Yield: 24 servings 1x
- Diet: Vegetarian
Description
Deliciously chewy chocolate chip cookies made lighter with Greek yogurt.
Ingredients
- 1 cup Greek yogurt
- 1 cup brown sugar
- 1/2 cup butter, softened
- 1 teaspoon vanilla extract
- 2 cups all-purpose flour
- 1 teaspoon baking soda
- 1/2 teaspoon salt
- 1 cup chocolate chips
Instructions
- Mix the Wet Ingredients: In a large mixing bowl, combine the Greek yogurt, softened butter, brown sugar, and vanilla extract. Blend until creamy and smooth.
- Combine Dry Ingredients: In a separate bowl, whisk together the flour, baking soda, and salt.
- Combine it All: Gradually add the dry mixture to the wet mixture in batches and gently fold until no streaks remain.
- Add the Chocolate Chips: Fold in chocolate chips evenly throughout the dough.
- Scoop and Bake: Drop rounded tablespoons of dough onto a baking sheet, leaving about 2 inches between each cookie. Bake in a preheated oven at 350°F for about 10-12 minutes.
- Cool Down: Let them sit on the baking sheet for about 5 minutes before transferring them to wire racks to cool completely.
Notes
These cookies can be frozen for later enjoyment. Ensure they’re fully cooled before storing.
- Prep Time: 15 minutes
- Cook Time: 12 minutes
- Category: Dessert
- Method: Baking
- Cuisine: American
Nutrition
- Serving Size: 1 cookie
- Calories: 140
- Sugar: 7g
- Sodium: 100mg
- Fat: 5g
- Saturated Fat: 3g
- Unsaturated Fat: 2g
- Trans Fat: 0g
- Carbohydrates: 22g
- Fiber: 0g
- Protein: 2g
- Cholesterol: 15mg
Keywords: cookies, dessert, chocolate chip cookies, yogurt cookies, healthy baking

Low Calorie Chocolate Chip Cookies
Low-Calorie Chocolate Chip Cookies That’ll Make You Feel Good
Hey there, fellow food lovers! It’s Beau Collier from Feastical, bringing you another delightful recipe that combines comfort and health in the most delicious way possible. Today, we’re diving into the world of sweets, but with a twist that keeps you feeling fabulous—Low-Calorie Chocolate Chip Cookies! Yes, you heard that right! These little gems are packed with flavor but won’t break the calorie bank.
Cookies aren’t just a treat; they’re a hug in bite-sized form. I remember the first time I baked cookies with my grandma in her cozy kitchen. The aroma of vanilla and chocolate swirling around us was pure magic. I still recall how we’d sneak bites of the dough when we thought no one was looking. This nostalgia is what fuels my kitchen creativity today, and I love to reinterpret classic recipes into healthier versions. After all, you shouldn’t have to sacrifice flavor for health.
Get ready to whip up a batch of these delightful Low-Calorie Chocolate Chip Cookies that are perfect for snacking, sharing, or even sneaking into your lunchbox. Let’s get started!
Personal Story: A Grandma’s Love
Believe me, no cookie can ever compare to those made with love by my grandma! She’d always have a batch of freshly baked cookies waiting for us after school. I remember racing home, dropping my backpack at the door, and heading straight to the kitchen. Seeing the flour dusting her apron and the warm, golden cookies on the cooling rack was sheer bliss.
As time went on, I learned to cherish those moments, and I made it my mission to perfect her recipes. But I’ve also come to realize that with changing lifestyles and health trends, there’s room to infuse those cherished memories with a little bit of modern flair. That’s where this Low-Calorie Chocolate Chip Cookie recipe comes into play. It turns out that cookies can be both nostalgic and healthy, and I’m here to show you how to enjoy them without the guilt—because who says we can’t have our cookies and eat them too?
Ingredients
Here’s what you’ll need for these cookies—simple, wholesome, and totally guilt-free!
-
1 cup oats
Oats are not just for breakfast! They add chewy texture and are great for heart health. You can use rolled oats or quick oats—just avoid instant, as they can be overly processed. -
1 ripe banana
This banana is your natural sweetener! Mashed bananas give moisture and a lovely, subtle sweetness. No ripe bananas? No problem! Applesauce can work as a substitute. -
1/2 cup unsweetened applesauce
Another fantastic source of moisture, applesauce keeps these cookies soft. It’s also a great substitute for oil or butter in baking. If you want some extra flavor, try using cinnamon-flavored applesauce! -
1/2 cup chocolate chips
Of course, we need the star of the show! Using dark or semi-sweet chocolate chips can amp up the antioxidant factor while keeping the cookies rich. Go for dairy-free if you’re keeping it vegan! -
1/2 teaspoon vanilla extract
A splash of vanilla enhances the sweetness and rounds out all those flavors beautifully. Never skip this step! -
1/2 teaspoon baking powder
This little magic ingredient helps your cookies rise and achieve that fluffy texture. -
Pinch of salt
A tiny bit of salt elevates the sweetness and balances the flavors, making everything taste even better!
Step-by-Step Instructions
Let’s make these cookies irresistibly chewy and chocolaty! Follow these steps, and I promise you’ll have cookies to enjoy in no time.
-
Preheat Your Oven
Preheat that oven to 350°F (175°C). A well-heated oven is crucial for that perfect bake. -
Mash That Banana
In a mixing bowl, grab your ripe banana and mash it with a fork until it’s smooth and creamy. Fun tip: The riper the banana, the sweeter it will be! -
Mix the Wet Ingredients
Add the applesauce and vanilla extract to the mashed banana. Stir until everything is well combined. This mixture will be the foundation of your cookie dough! -
Combine the Dry Ingredients
In another bowl, mix your oats, baking powder, and a pinch of salt. It’s crucial to mix these together before combining with the wet ingredients to ensure even baking. -
Bring It All Together
Slowly fold the dry ingredients into the wet mixture. This is where the magic happens! Use a spatula and stir gently until fully incorporated—don’t over mix, or you’ll end up with tough cookies! -
Add Chocolate
Gently fold in the chocolate chips. Yes, this is the best part! -
Scoop and Drop
Using a spoon or cookie scoop, drop dollops of the dough onto a parchment-lined baking tray. Leave some space between the cookies, as they will spread slightly. -
Bake
Slide the tray into the oven and bake for about 12-15 minutes or until the edges are lightly golden. Keep an eye on them; overbaking can lead to dry cookies! -
Cool Down
Once baked, take them out and let them cool on the tray for about 5 minutes before transferring them to a wire rack. This helps them set and firm up!
Serving Suggestions
Now that you have your cookies all baked and cooled, how do you serve them? I love to plate them in a nice stack on a rustic wooden board, perhaps with a glass of your favorite almond milk or dairy-free beverage on the side. If you’re feeling really indulgent, serve them warm with a scoop of low-calorie ice cream on top. Yes, please! A sprinkle of sea salt or a drizzle of honey can take it over the top—seriously, it’s the gourmet touch they deserve.
Recipe Variations
Want to mix things up? Here are a few variations that you can try with this base recipe:
-
Nutty Add-in: Toss in a handful of chopped nuts like walnuts or almonds for added crunch and protein.
-
Spiced Up: Add a teaspoon of cinnamon or pumpkin spice to the dry ingredients for a warm, cozy flavor twist.
-
Fruity Treat: Throw in some dried cranberries or raisins for a fruity burst that complements the chocolate.
-
Coconut Delight: Add unsweetened shredded coconut for a tropical flair—who doesn’t love a cookie that feels like a mini-vacation?
-
Peanut Butter Swirl: Fold in a couple of tablespoons of natural peanut butter for a nutty and creamy version. Just keep in mind, this will change the calorie count!
Chef’s Notes
Here’s a little secret—these cookies can be a customizable base! You can easily adapt them based on what you have at home. I once whipped up a batch using leftover pumpkin puree and spices, and they turned out heavenly! Baking is all about creativity; don’t be afraid to experiment and make these cookies your own.
I’ve also had plenty of funny moments in the kitchen. Like that time I accidentally mistook salt for sugar and ended up with a batch of cookies that were… well, to put it lightly, a bit too seasoned! Lesson learned: always double-check your ingredients before diving in!
FAQs and Troubleshooting
-
Why are my cookies spreading too much?
If your cookies are spreading too thin, try chilling the dough for 30 minutes before baking. This helps the fats solidify and keeps your cookies fluffy! -
Can I make these vegan?
Absolutely! These cookies are naturally vegan as long as you use dairy-free chocolate chips and make sure your applesauce is free from any added sugars. -
What if my dough is too dry?
If your dough seems too dry, feel free to add a splash of almond milk or more applesauce to moisten it up. -
How do I store the cookies?
Keep your cookies in an airtight container at room temperature for about a week. They also freeze well! Just be sure to separate layers with parchment paper.
Nutritional Info
These cookies may be low-calorie, but they’re not low in satisfaction! Here’s a rough breakdown of the nutrition per cookie (based on 12 servings):
- Calories: ~80 per cookie
- Fat: 2.5g
- Carbohydrates: 14g
- Fiber: 2g
- Sugar: 3g (naturally from banana and applesauce)
- Protein: 1g
Not too shabby for a sweet treat, right?
Final Thoughts
So there you have it—my Low-Calorie Chocolate Chip Cookie recipe that’s bursting with flavor but keeps things light! I hope you find joy in every bite and that these cookies bring a wave of nostalgia and happiness to your kitchen, just like they do for me. Whether you’re sharing them with friends or enjoying them alone with a good book, these cookies are meant to make you feel good inside and out.
Feel free to share your thoughts and any variations you try. And remember, baking should always be fun! So grab that spatula and get ready to create some cookie magic. Until next time, my foodie friends—keep cooking, keep exploring, and always celebrate the magic of food! 🍪
Print
Low-Calorie Chocolate Chip Cookies
- Total Time: 25 minutes
- Yield: 12 cookies 1x
- Diet: Vegan
Description
Delicious low-calorie chocolate chip cookies that are guilt-free and packed with flavor!
Ingredients
- 1 cup oats
- 1 ripe banana
- 1/2 cup unsweetened applesauce
- 1/2 cup chocolate chips
- 1/2 teaspoon vanilla extract
- 1/2 teaspoon baking powder
- Pinch of salt
Instructions
- Preheat your oven to 350°F (175°C).
- Mash the banana in a mixing bowl until smooth and creamy.
- Add the applesauce and vanilla extract to the mashed banana; stir until combined.
- Combine oats, baking powder, and a pinch of salt in another bowl.
- Bring the dry ingredients into the wet mixture, stirring gently until incorporated.
- Add the chocolate chips and fold gently into the dough.
- Scoop dollops of dough onto a parchment-lined baking tray.
- Bake for 12-15 minutes until edges are golden.
- Cool on the tray for 5 minutes before transferring to a wire rack.
Notes
These cookies can be customized with nuts, spices, or other mix-ins to suit your taste!
- Prep Time: 10 minutes
- Cook Time: 15 minutes
- Category: Dessert
- Method: Baking
- Cuisine: American
Nutrition
- Serving Size: 1 cookie
- Calories: 80
- Sugar: 3g
- Sodium: 50mg
- Fat: 2.5g
- Saturated Fat: 0.5g
- Unsaturated Fat: 2g
- Trans Fat: 0g
- Carbohydrates: 14g
- Fiber: 2g
- Protein: 1g
- Cholesterol: 0mg
Keywords: low-calorie, chocolate chip cookies, healthy dessert
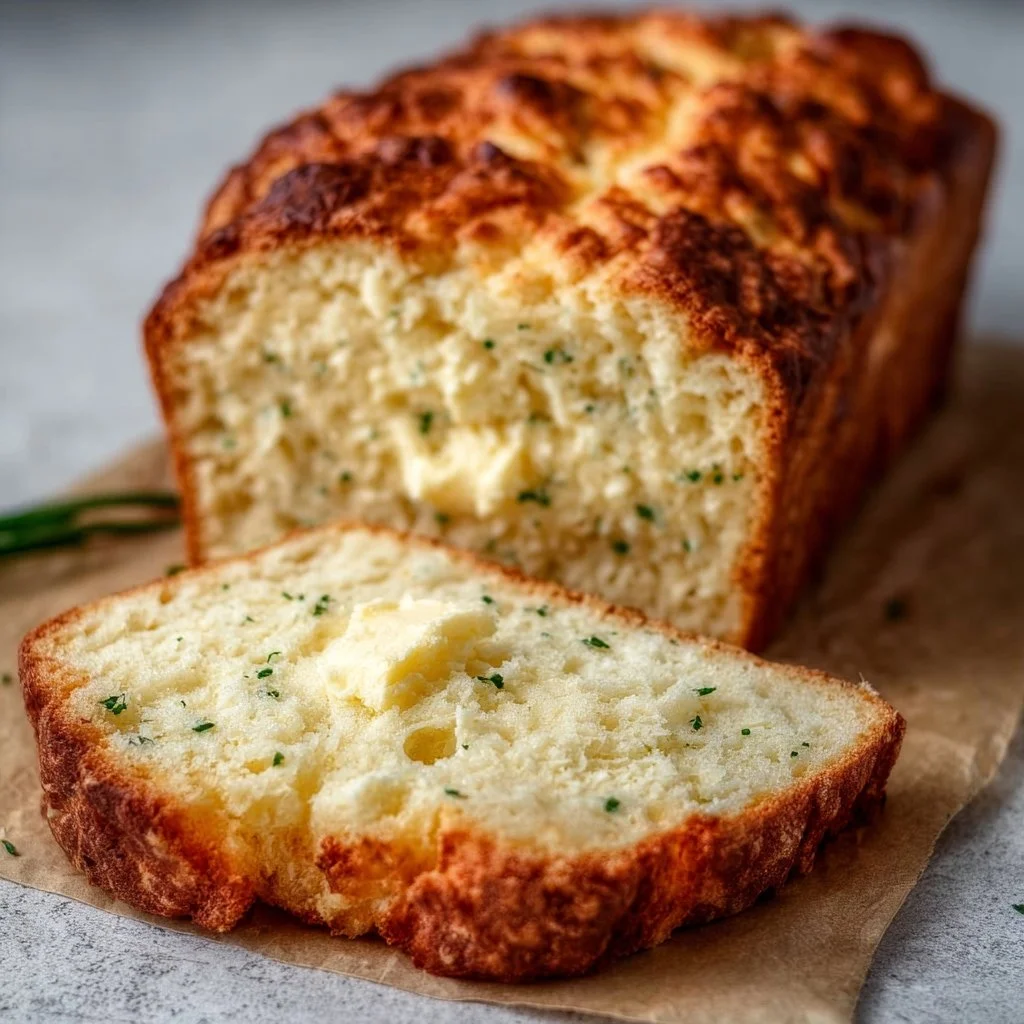
2-Ingredient Cottage Cheese Bread
The Bliss of 2-Ingredient Cottage Cheese Bread: A No-Fuss Culinary Delight
Hey there, fellow food lover! Today we’re diving into the light and fluffy world of 2-Ingredient Cottage Cheese Bread. If you’ve ever found yourself staring at a half-open jar of cottage cheese wondering what the scoop is (pun totally intended) on what to do with it, you’re in the right place! This recipe is not just easy; it’s a love letter to delicious simplicity. You see, sometimes the best things come in small packages, and this delightful bread is no exception.
Picture this: it’s a chilly Sunday morning, and the house is filled with the aroma of freshly baked bread. There’s nothing quite like sinking your teeth into a warm slice of that soft goodness, lightly toasted, topped with your favorite spread, and just the thought of it brings a smile. This cottage cheese bread isn’t just comfort food; it embodies all the warm hugs and joy that come from good cooking. Plus, it’s low-carb, gluten-free, and packed with protein—what’s not to love?
When I first stumbled upon this recipe, I was looking for a solution to use up an unusually large tub of cottage cheese (a little too much for my mac and cheese adventures!). As I often do, I wandered into the kitchen as if it were a kind of zen garden, trusting my instincts more than an elaborate method. Just mixing, baking, and a bit of tasting along the way—I came out with a creation that changed my breakfast routine forever. Not only is this bread incredibly versatile, but it also has that ‘whoa, did you actually make this?’ factor, making it perfect for impressing guests or enjoying all alone. So grab your apron; let’s get this baking party started!
Personal Story
Let me take you back to my childhood, where Sunday mornings meant family breakfasts that felt like a big affair. My mom, who was the queen of the kitchen, had a knack for turning the simplest ingredients into magical dishes. One of my favorites was her delightful, fluffy pancakes that were heavenly and never quite turned out the same twice—definitely a case of "every pancake tells a story"!
One morning, however, she had a little too much cottage cheese leftover from a lasagna she had whipped up earlier in the week. An inspired moment struck as she casually mixed it with flour and eggs, and just like that, cottage cheese pancakes were born. Talk about a game-changer; they were light, airy, and utterly delicious!
Fast forward to today, and that memory still warms my heart. I wanted to recreate that magic without needing a long list of groceries—or hours of prep time. It’s all about finding joy in the unexpected, right? That’s how I landed on this simple 2-Ingredient Cottage Cheese Bread recipe—an homage to those carefree mornings filled with laughs and love. Just like my mom’s cooking, it’s about letting goodness arise from simplicity, and trust me—you’ll want to share this recipe with everyone you know!
Ingredients
Before we roll up our sleeves and get baking, let me give you the lowdown on the star players in our 2-Ingredient Cottage Cheese Bread!
-
1 cup cottage cheese
The star ingredient! Packed with protein, creamy cottage cheese gives this bread a moist texture and lovely flavor. Did you know you can substitute it with Greek yogurt or ricotta if you’re looking for a variation? -
1 cup almond flour
Gluten-free and rich in healthy fats, almond flour is a fantastic option that adds a slight nuttiness to the bread. If you don’t have it, you could use regular flour or oat flour, but keep in mind it may change the texture a bit. -
2 eggs
These little beauties are essential for binding the ingredients together and creating the fluffy height we strive for in our bread. If you need a vegan substitute, flaxseed meal mixed with water works when you let it sit for a bit (1 tablespoon flaxseed meal + 3 tablespoons water = 1 egg). -
1 tsp baking powder
This is what gives our bread that delightful lift! Baking powder is a leavening agent that works wonders when it comes to lightening up baked goods. Make sure it’s fresh for the best results! -
Salt to taste
Don’t forget this happy little seasoning to bring all the flavors together. A pinch enhances the sweetness and balances the overall taste!
Step-by-Step Instructions
Okay, time to shine in the kitchen! Follow these simple steps, and you’ll have a delightful loaf of cottage cheese bread ready in no time. Let’s go!
Step 1: Preheat Your Oven
First things first: preheat your oven to 350°F (175°C). This allows your oven to be perfectly heated when you’re ready to pop in your bread, ensuring it bakes evenly and gets that lovely golden crust. While it heats up, take a moment to gather your ingredients and utensils.
Step 2: Combine the Cottage Cheese and Eggs
In a mixing bowl, toss in 1 cup of cottage cheese and 2 eggs. Use a fork or a whisk to mix them together until they’re thoroughly combined. Tip: If you want a completely smooth texture, you can blend the cottage cheese in a blender for a second before mixing it with the eggs!
Step 3: Add the Almond Flour and Baking Powder
Once your cottage cheese and eggs are mixed well, it’s time to add in 1 cup of almond flour and 1 tsp of baking powder. Mix it all together until you have a batter-like consistency. Little chef hack: A spatula works wonders here for folding and mixing without overdoing it.
Step 4: Season with Salt
This is the moment to sprinkle in a little salt! Taste the batter to see if you want a pinch more. Tip: Remember, salt enhances flavors—less is sometimes more!
Step 5: Grease the Loaf Pan
Grab a standard-sized loaf pan (about 9×5 inches) and lightly grease it with a splash of olive oil, butter, or coconut oil. This helps the bread slide out effortlessly once it’s baked. Chef’s Insight: Lining the pan with parchment paper can also make your life a whole lot easier during the extraction phase!
Step 6: Pour and Bake
Pour the mixture into the greased loaf pan, and smooth it out with your spatula. Pop it in the preheated oven and set your timer for 30-35 minutes. Chef tip: You’ll know it’s ready when the top is golden and springy to the touch!
Step 7: Cool and Enjoy
Once it’s done, take the bread out of the oven and let it cool in the pan for about 10 minutes. Then gently turn it out onto a wire rack to cool completely. Slice and serve it warm or let it sit for a bit to make lovely toast. Your kitchen will be filled with all the cozy vibes at this point!
Serving Suggestions
Here’s where you can get your creative juices flowing! This cottage cheese bread is wonderfully versatile and can be enjoyed in various ways.
-
Toast it Up: Slice a piece, toast it to crispy perfection, and spread a layer of creamy avocado or almond butter on top. You can even sprinkle some chili flakes for a tiny kick!
-
Make Sandwiches: Use this bread as a sturdy base for sandwiches. Add turkey, fresh veggies, and a smear of pesto for a delicious lunch option that packs a nutritional punch!
-
Breakfast Delight: Serve it with a drizzle of honey and fresh berries for a wholesome breakfast. It’s like a brunch dream!
-
Soup Companion: Pair it with a hearty bowl of soup for a comforting dinner. This bread makes a lovely sidekick to anything from tomato bisque to a chunky vegetable chowder!
Recipe Variations
You know I love to mix things up! Here are a few creative twists you can try with your 2-Ingredient Cottage Cheese Bread:
-
Herbed Variation: Add fresh herbs like chopped rosemary or basil right into the batter for a savory twist that will tantalize your taste buds.
-
Cheesy Goodness: Fold in ½ cup of shredded cheese—cheddar, mozzarella, or even feta can add an incredible depth of flavor to your bread!
-
Sweeten the Deal: When you’re in the mood for something sweeter, stir in a tablespoon of honey or agave syrup. You can even throw in some cinnamon for that comforting aroma!
-
Nutty Crunch: Add a handful of walnuts or pecans to the batter for delightful texture and flavor. It also amps up the healthy fat content!
-
Veggie Boost: Grate in some zucchini or carrot to sneak in extra veggies. This also adds moisture and nutrition!
Chef’s Notes
Ah, the journey to discover the perfect bread! This recipe has evolved beautifully over the years. When I first tried it, I thought, "Will this even work?"—and oh, what a pleasant surprise it was! As I played with ingredients and tweaks, I found that keeping it simple is truly the key to success.
Speaking of kitchen anecdotes, I once mistakenly knocked over an entire container of almond flour while filming a quick tutorial. Let’s just say my kitchen turned into a "snowy" scene! Amidst all the giggles and clean-up, it felt like the universe was reminding me that food is all about joy and laughter—never a chore.
Just like any recipe with a simple foundation, this bread is open to evolution. How you enjoy it is limited only by your imagination!
FAQs and Troubleshooting
1. My bread turned out dense. What went wrong?
A common culprit for dense bread is overmixing! Be sure to mix just until combined, and check that your baking powder is fresh for maximum lift.
2. Can I freeze this bread?
Absolutely! Once completely cooled, slice the bread, wrap it tightly, and store it in the freezer. It’ll last for about a month. Just pop it in the toaster straight from the freezer when you’re ready!
3. Can I use regular flour instead of almond flour?
Yes, but keep in mind that using regular flour will no longer make this bread gluten-free. Adjust the liquid slightly as all-purpose flour absorbs more moisture than almond flour.
4. What can I use if I don’t have cottage cheese?
Consider Greek yogurt or ricotta as good substitutes, but note that the flavor and texture will vary slightly.
Nutritional Info
Let’s talk nutrition! This simple cottage cheese bread is not just a treat; it’s loaded with goodness. Each slice (based on 8 slices per loaf) typically contains:
- Calories: Approximately 100 calories
- Protein: 6g
- Carbohydrates: 4g
- Fat: 6g
- Fiber: 1g
This bread is fantastic for anyone looking for a low-carb option that doesn’t skimp on flavor. Plus, it’s gluten-free, making it suitable for those with specific dietary needs. You can also tweak the recipe by swapping ingredients to align with your health goals while still enjoying a delicious homemade loaf.
Final Thoughts
There you have it, my friends! The delightful journey of crafting 2-Ingredient Cottage Cheese Bread is filled with nostalgia, creativity, and most importantly—a simple way to add some warmth to your kitchen. The best part? You don’t need to be a culinary genius to whip this up. Just a little love and a willingness to experiment, and you’re on your way to gorgeous, fluffy bread that’s sure to impress.
So next time you find yourself with some cottage cheese that needs a home, or if you’re in the mood to create something special yet simple, remember this recipe! Cooking is an adventure, and it’s all about finding joy in every bite. Can’t wait for you to try it and make your kitchen smell heavenly! Now, go on and bake up some memories!
Happy cooking! 🥖❤️
Print
2-Ingredient Cottage Cheese Bread
- Total Time: 45 minutes
- Yield: 8 slices 1x
- Diet: Gluten-Free
Description
A light and fluffy cottage cheese bread that is gluten-free, low-carb, and packed with protein. Perfect for toasting or making sandwiches!
Ingredients
- 1 cup cottage cheese
- 1 cup almond flour
- 2 eggs
- 1 tsp baking powder
- Salt to taste
Instructions
- Preheat your oven to 350°F (175°C).
- Combine 1 cup of cottage cheese and 2 eggs in a mixing bowl, mixing until thoroughly combined.
- Add 1 cup of almond flour and 1 tsp of baking powder, mixing until batter-like consistency is achieved.
- Season with salt to taste.
- Grease a standard-sized loaf pan with olive oil, butter, or coconut oil.
- Pour the mixture into the greased loaf pan and smooth it out.
- Bake in the preheated oven for 30-35 minutes until the top is golden and springy to the touch.
- Cool the bread in the pan for about 10 minutes, then turn out onto a wire rack to cool completely.
Notes
This bread is versatile and can be topped with various spreads or used in sandwiches.
- Prep Time: 10 minutes
- Cook Time: 35 minutes
- Category: Bread
- Method: Baking
- Cuisine: American
Nutrition
- Serving Size: 1 slice
- Calories: 100
- Sugar: 2g
- Sodium: 200mg
- Fat: 6g
- Saturated Fat: 1g
- Unsaturated Fat: 5g
- Trans Fat: 0g
- Carbohydrates: 4g
- Fiber: 1g
- Protein: 6g
- Cholesterol: 90mg
Keywords: cottage cheese bread, gluten-free bread, low-carb recipe, easy baking, healthy snacks