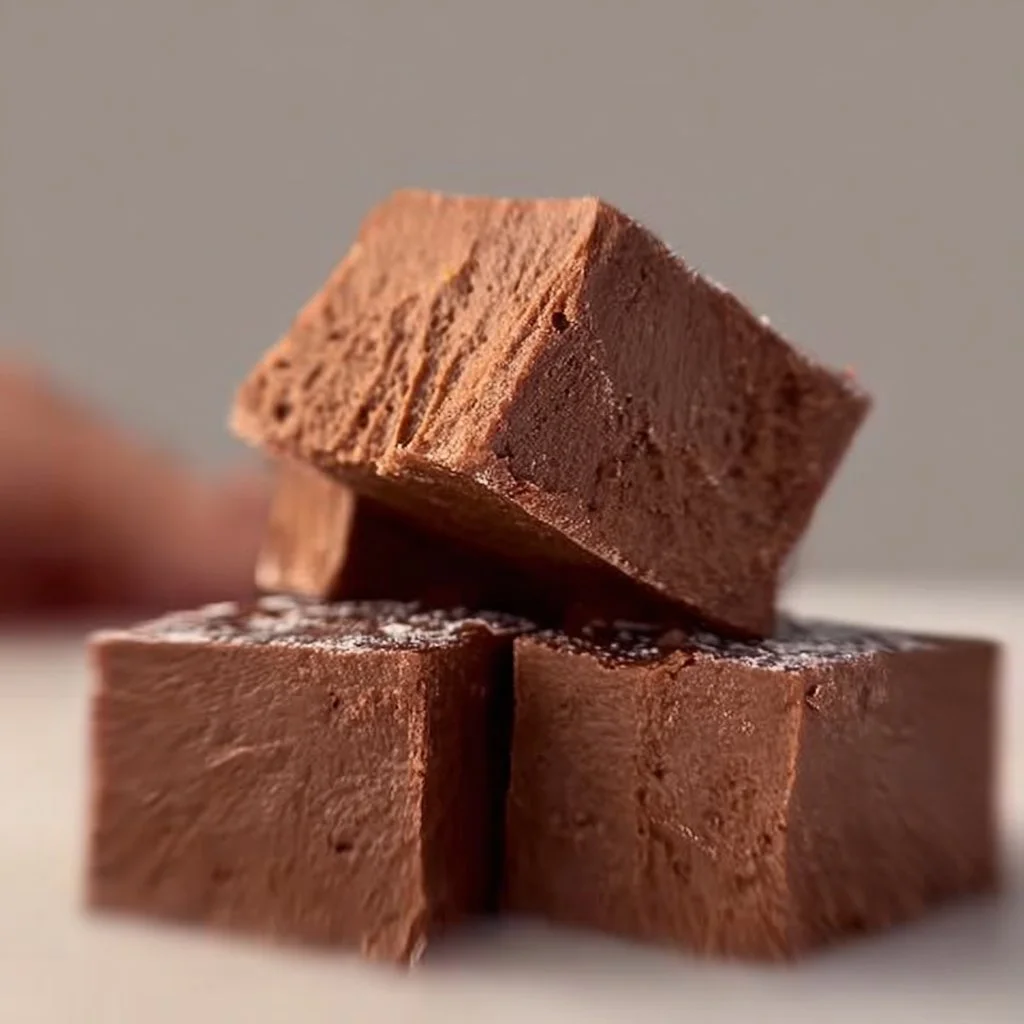
Healthy Fudge (2 ingredients)
# The Ultimate Healthy Fudge Recipe: Indulgence Made Easy!

Welcome to the cozy corner of Feastical, where we whip up delectable, feel-good recipes that not only satisfy your sweet tooth but also keep things on the healthy side! Today, I’m thrilled to share with you my go-to recipe for **Healthy Fudge** that requires just **two ingredients**. Yes, you heard me right—two! So grab your favorite mug, cozy up, and let’s dive into the chocolatey goodness.

## Introduction: Sweet Beginnings (300–400 words)

Now, I don’t know about you, but when I think of fudge, I’m instantly taken back to those chilly winter days when my family and I would gather around the kitchen table, lingering over rich chocolate treats. Fudge always felt a little magical to me: luxurious yet simple, decadent yet somehow comforting. This is what sparked my passion for desserts that are indulgent but not guilty.

Fast forward to today, and I find myself wanting the same delightful experience, but with a twist. That’s why I developed this Healthy Fudge recipe—because you can enjoy fudge without the sugar crash that often comes right after. With just **1½ cups of high-quality dark chocolate** and **¾ cup of thick coconut yogurt or Greek yogurt**, we’re crafting a delightful treat that not only delights your taste buds but also keeps things light and nourishing.

Whether you’re planning a fun girls' night, a coffee date with friends, or simply treating yourself after a long day, this fudge recipe has got you covered! And the best part? The recipe is incredibly versatile! You can personalize it to suit your taste, whether you’re into chopped nuts, dried fruits, or even a sprinkle of sea salt for a gourmet touch.

So roll up your sleeves, and let’s create something that’ll make your taste buds dance while providing your body with wholesome ingredients. We’re not just cooking here; we’re creating a little slice of joy—one bite of fudge at a time!

## Personal Story: A Taste of Nostalgia (200–250 words)

I remember the first time I attempted to make fudge—it was a chilly December day, and I was just a teenager desperate to impress my family. I had invited some friends over, and the pressure was on to whip up a dessert that would wow them. In my mind, fudge was the ticket to sweet success!

My younger self had everything laid out: chocolate, a pot, and a whisk. I embarked on the journey but failed spectacularly, sending gooey melted chocolate flying everywhere! All the while, laughter filled the air as my friends joined in on the chaos. Eventually, we salvaged enough fudge (amidst the giggles), and despite my mishap, we savored the deliciously rich result.

That memory stuck with me: food is not just about the end product, but the cherished moments we create along the way. Fast forward years later, and I’ve turned that historical fudge disaster into an. I infused it with a healthier essence that doesn’t require any more juggling of pots and pans—just pure chocolatey joy.

Now, it’s time to turn your kitchen into a fun fudge factory!

## Ingredients: The Heart of the Recipe (250–300 words)

Here’s what you’ll need for this sumptuous Healthy Fudge recipe:

- **1½ cups dark chocolate (60% cocoa or higher)**: Dark chocolate is your main star! I prefer using high-quality chocolate because it melts beautifully and offers a robust, deep flavor. If you need a dairy-free option, look for vegan chocolate varieties!

- **¾ cup thick coconut yogurt (or Greek yogurt)**: This silky goodness adds creaminess to our fudge! I like to use **unsweetened vanilla** for that extra flavor kick. Greek yogurt is a great alternative—rich in protein and also deliciously creamy. If you’re dairy-free, coconut yogurt is the way to go!

- **Pinch of sea salt**: Adding a pinch of sea salt enhances the sweetness and depth of flavors in the fudge. Feel free to adjust this according to your taste.

- **1 tsp vanilla extract**: Vanilla is the magic ingredient that elevates your fudge recipe. It adds warmth and extra richness to that luscious chocolate.

- **Chopped nuts, dried fruit, etc.**: Get creative! Walnuts, almonds, or even dried cranberries can be tossed into the mix to add texture and additional flavors. Just make sure you chop them into bite-sized pieces so they blend well!

Now that you’re equipped with the ingredients, let’s break down the step-by-step instructions to whip up this delightful fudge.

## Step-by-Step Instructions: Crafting Your Chocolate Masterpiece (400–500 words)

1. **Melt the Chocolate**: Start by breaking your dark chocolate into small, uniform pieces and placing them in a microwave-safe bowl. Heat in the microwave at 20-second intervals, stirring in between. This will prevent the chocolate from burning—trust me, nobody wants scorched chocolate! If you prefer the stovetop, heat it gently in a double boiler until melted, stirring until smooth.

2. **Combine the Ingredients**: Once the chocolate is fully melted and glossy, add in your coconut yogurt (or Greek yogurt). Stir until they’re combined and form a smooth, creamy mixture. Here’s a little chef hack: make sure the yogurt is at room temperature to ensure it blends seamlessly with the warm chocolate.

3. **Add the Vanilla and Salt**: Sprinkle in your pinch of sea salt and the vanilla extract. These ingredients will incorporate beautifully into the fudge mixture, elevating its flavor.

4. **Mix in Add-Ins**: If you’re opting for nuts or dried fruit, fold them into the mixture at this stage. Be gentle to ensure everything is evenly distributed without overmixing, which might cause the fudge to texture the wrong way.

5. **Transfer to the Pan**: Line a square or rectangular baking dish (about 8x8 inches) with parchment paper for easy removal. Pour the fudge mixture into the pan and spread it out evenly using a spatula.

6. **Chill Out**: Now here comes the hardest part—waiting! Place your fudge into the refrigerator for about 2-3 hours (or until set). If you’re in a hurry, feel free to place it in the freezer for about 30-45 minutes!

7. **Slice and Serve**: Once set, lift the fudge out of the pan using the parchment paper and slice it into squares. I recommend using a sharp knife for cleaner cuts!

## Serving Suggestions: A Feast for the Eyes (200–300 words)

Presentation is key when it comes to serving this Healthy Fudge. Here’s how to plate it up for maximum impact:

- **Simple & Sweet**: Place your fudge squares on a beautiful serving platter. You can add a sprig of mint or a sprinkle of cocoa powder for an elegant touch!

- **Parfait Style**: Crumble a couple of fudge squares in a glass and layer with yogurt or whipped coconut cream. It’s an indulgent yet healthy dessert parfait that’s sure to impress!

- **Fudge Cups**: If you want to get a little fancy, you could create individual fudge cups by scooping the fudge mixture into silicone muffin cups before chilling. This way, each portion is perfectly pre-portioned!

- **Gift It**: Wrap some fudge squares in a lovely box tied with twine for a thoughtful homemade gift. Everyone loves receiving delicious treats!

## Recipe Variations: Get Creative! (200–300 words)

Feeling adventurous? Here are a few fun twists on the Healthy Fudge recipe:

1. **Peanut Butter Swirl**: Add a few spoonfuls of creamy peanut butter into the chocolate mixture before mixing in the yogurt. Swirl for a marbled effect—delicious!

2. **Mint Chocolate**: Toss in a few drops of peppermint essential oil (or mint extract), and you’ve got yourself a refreshing mint chocolate fudge!

3. **Choco-Coconut Dream**: Add unsweetened shredded coconut for a tropical twist. It increases not only the flavor but also the texture!

4. **Fruit Fusion**: Swap out chopped nuts for dried fruits like apricots or figs for chewier bites. It’s like a tour of flavors in each bite!

5. **Spiced Fudge**: Sprinkle in a touch of cinnamon or chili powder for a spiced flavor. You’d be surprised how well chocolate pairs with a little heat!

## Chef’s Notes: A Dash of Personality (150–200 words)

I have to admit, this fudge has evolved into a family staple over the years. It began with my craving for dessert and a desire for something healthier. As I mentioned previously, fudge was always a family effort, and now it's my go-to treat for gatherings!

I also love experimenting with what I have at hand. One night, we made a “leftover fudge” with bits of candy from the pantry, creating a magical concoction! Food doesn’t have to be perfect; it just needs to be made with love.

Another funny little tidbit—I may have ended up face-first in a bowl of chocolate once, simply because I couldn't resist. So remember, it’s okay to indulge every now and then. Get messy, have fun, and cherish the moments you spend whipping up something sweet!

## FAQs and Troubleshooting: Common Questions Answered (200–300 words)

- **Can I use milk chocolate instead?**
  You can, but it will change both the flavor and sugar content significantly. If using milk chocolate, consider reducing the amount of yogurt to balance the sweetness.

- **What if my fudge doesn’t set?**
  It might be a bit warm or your yogurt could be too thin. Try chilling it for longer, or you could add a bit more melted chocolate and chill it again.

- **How do I store leftovers?**
  Store your fudge in an airtight container in the fridge for up to a week, or the freezer for extended shelf life (up to 2 months). Just be sure to let it thaw slightly before enjoying!

- **Can I make this vegan?**
  Absolutely! Just make sure to use vegan chocolate and coconut yogurt to keep it dairy-free.

## Nutritional Info (if applicable): Satisfying Your Cravings (200–300 words)

Now, let’s talk about why this Healthy Fudge is a fantastic choice. With the main players being dark chocolate and yogurt, you’re not just indulging; you’re also getting some nutritional benefits.

- **Dark Chocolate**: Rich in antioxidants, minerals, and even has mood-enhancing properties. One serving can help boost your energy levels and improve cognitive function.
- **Coconut Yogurt**: Packed with probiotics, which are essential for gut health, and it’s a wonderful source of healthy fats. Plus, it’s great for your skin!
- **Nuts and Fruits**: If you add them, you’re getting diverse nutrients from healthy fats to fiber, vitamins, and minerals.

While it's important to practice moderation (because, let's be real—too much fudge can still lead to a sugar rush!), this recipe offers healthier indulgence without skimping on flavor.

## Final Thoughts: Your New Favorite Recipe Awaits! (200–300 words)

There you have it—a delightful, indulgent recipe that’s not only simple but also packed with feel-good ingredients! This Healthy Fudge is perfect for satisfying those chocolate cravings without the guilt. Whether it’s for a family gathering, a cozy movie night, or just to keep your sweet tooth in check, it’s sure to be a hit!

Cooking is an adventure, and with this recipe, you’re well on your way to crafting something wonderfully delectable. Don’t hesitate to share your twists and variations with me; I love seeing how fellow foodies express their creativity in the kitchen.

Now, go grab your spatula, get your fudge on, and remember: life is too short for boring food! Stay sweet until next time, friends!

Healthy Fudge
- Total Time: 180 minutes
- Yield: 16 servings 1x
- Diet: Vegetarian
Description
This ultimate Healthy Fudge recipe requires just two ingredients and delivers chocolatey goodness without the sugar crash.
Ingredients
- 1½ cups dark chocolate (60% cocoa or higher)
- ¾ cup thick coconut yogurt (or Greek yogurt)
- Pinch of sea salt
- 1 tsp vanilla extract
- Chopped nuts, dried fruit, etc. (optional)
Instructions
- Melt the chocolate by breaking it into small pieces and microwaving at 20-second intervals until smooth.
- Combine the melted chocolate with coconut yogurt, stirring until a creamy mixture forms.
- Add the vanilla extract and pinch of sea salt for enhanced flavor.
- Mix in any chopped nuts or dried fruit if desired.
- Transfer the mixture into a lined baking dish and spread it evenly.
- Chill in the refrigerator for 2-3 hours until set, or freeze for 30-45 minutes if short on time.
- Slice into squares and enjoy!
Notes
For a vegan version, ensure to use vegan chocolate and coconut yogurt. Feel free to customize with different mix-ins!
- Prep Time: 10 minutes
- Cook Time: 2 minutes
- Category: Dessert
- Method: Freezing
- Cuisine: American
Nutrition
- Serving Size: 1 square
- Calories: 200
- Sugar: 5g
- Sodium: 10mg
- Fat: 15g
- Saturated Fat: 8g
- Unsaturated Fat: 5g
- Trans Fat: 0g
- Carbohydrates: 20g
- Fiber: 3g
- Protein: 3g
- Cholesterol: 0mg
Keywords: healthy fudge, easy dessert, chocolate, dairy-free, coconut yogurt
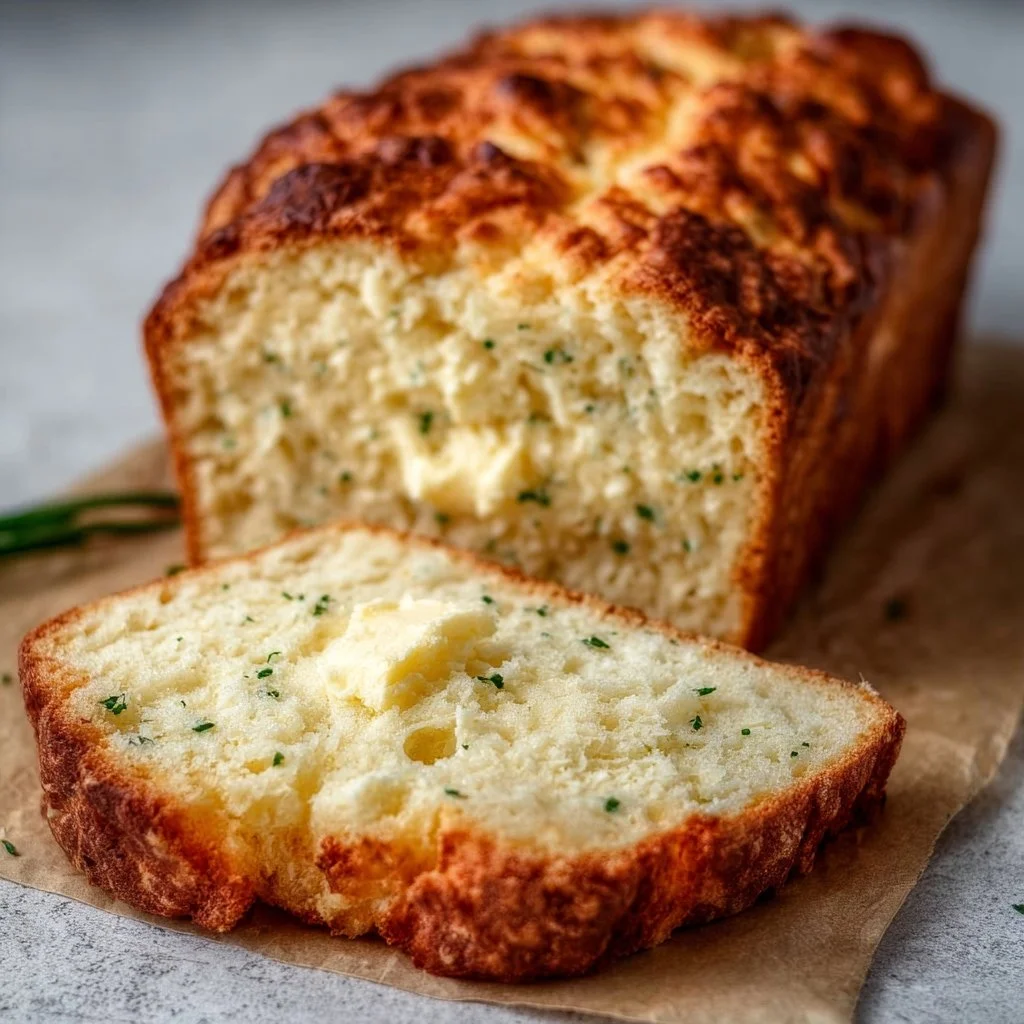
2-Ingredient Cottage Cheese Bread
The Bliss of 2-Ingredient Cottage Cheese Bread: A No-Fuss Culinary Delight
Hey there, fellow food lover! Today we’re diving into the light and fluffy world of 2-Ingredient Cottage Cheese Bread. If you’ve ever found yourself staring at a half-open jar of cottage cheese wondering what the scoop is (pun totally intended) on what to do with it, you’re in the right place! This recipe is not just easy; it’s a love letter to delicious simplicity. You see, sometimes the best things come in small packages, and this delightful bread is no exception.
Picture this: it’s a chilly Sunday morning, and the house is filled with the aroma of freshly baked bread. There’s nothing quite like sinking your teeth into a warm slice of that soft goodness, lightly toasted, topped with your favorite spread, and just the thought of it brings a smile. This cottage cheese bread isn’t just comfort food; it embodies all the warm hugs and joy that come from good cooking. Plus, it’s low-carb, gluten-free, and packed with protein—what’s not to love?
When I first stumbled upon this recipe, I was looking for a solution to use up an unusually large tub of cottage cheese (a little too much for my mac and cheese adventures!). As I often do, I wandered into the kitchen as if it were a kind of zen garden, trusting my instincts more than an elaborate method. Just mixing, baking, and a bit of tasting along the way—I came out with a creation that changed my breakfast routine forever. Not only is this bread incredibly versatile, but it also has that ‘whoa, did you actually make this?’ factor, making it perfect for impressing guests or enjoying all alone. So grab your apron; let’s get this baking party started!
Personal Story
Let me take you back to my childhood, where Sunday mornings meant family breakfasts that felt like a big affair. My mom, who was the queen of the kitchen, had a knack for turning the simplest ingredients into magical dishes. One of my favorites was her delightful, fluffy pancakes that were heavenly and never quite turned out the same twice—definitely a case of "every pancake tells a story"!
One morning, however, she had a little too much cottage cheese leftover from a lasagna she had whipped up earlier in the week. An inspired moment struck as she casually mixed it with flour and eggs, and just like that, cottage cheese pancakes were born. Talk about a game-changer; they were light, airy, and utterly delicious!
Fast forward to today, and that memory still warms my heart. I wanted to recreate that magic without needing a long list of groceries—or hours of prep time. It’s all about finding joy in the unexpected, right? That’s how I landed on this simple 2-Ingredient Cottage Cheese Bread recipe—an homage to those carefree mornings filled with laughs and love. Just like my mom’s cooking, it’s about letting goodness arise from simplicity, and trust me—you’ll want to share this recipe with everyone you know!
Ingredients
Before we roll up our sleeves and get baking, let me give you the lowdown on the star players in our 2-Ingredient Cottage Cheese Bread!
-
1 cup cottage cheese
The star ingredient! Packed with protein, creamy cottage cheese gives this bread a moist texture and lovely flavor. Did you know you can substitute it with Greek yogurt or ricotta if you’re looking for a variation? -
1 cup almond flour
Gluten-free and rich in healthy fats, almond flour is a fantastic option that adds a slight nuttiness to the bread. If you don’t have it, you could use regular flour or oat flour, but keep in mind it may change the texture a bit. -
2 eggs
These little beauties are essential for binding the ingredients together and creating the fluffy height we strive for in our bread. If you need a vegan substitute, flaxseed meal mixed with water works when you let it sit for a bit (1 tablespoon flaxseed meal + 3 tablespoons water = 1 egg). -
1 tsp baking powder
This is what gives our bread that delightful lift! Baking powder is a leavening agent that works wonders when it comes to lightening up baked goods. Make sure it’s fresh for the best results! -
Salt to taste
Don’t forget this happy little seasoning to bring all the flavors together. A pinch enhances the sweetness and balances the overall taste!
Step-by-Step Instructions
Okay, time to shine in the kitchen! Follow these simple steps, and you’ll have a delightful loaf of cottage cheese bread ready in no time. Let’s go!
Step 1: Preheat Your Oven
First things first: preheat your oven to 350°F (175°C). This allows your oven to be perfectly heated when you’re ready to pop in your bread, ensuring it bakes evenly and gets that lovely golden crust. While it heats up, take a moment to gather your ingredients and utensils.
Step 2: Combine the Cottage Cheese and Eggs
In a mixing bowl, toss in 1 cup of cottage cheese and 2 eggs. Use a fork or a whisk to mix them together until they’re thoroughly combined. Tip: If you want a completely smooth texture, you can blend the cottage cheese in a blender for a second before mixing it with the eggs!
Step 3: Add the Almond Flour and Baking Powder
Once your cottage cheese and eggs are mixed well, it’s time to add in 1 cup of almond flour and 1 tsp of baking powder. Mix it all together until you have a batter-like consistency. Little chef hack: A spatula works wonders here for folding and mixing without overdoing it.
Step 4: Season with Salt
This is the moment to sprinkle in a little salt! Taste the batter to see if you want a pinch more. Tip: Remember, salt enhances flavors—less is sometimes more!
Step 5: Grease the Loaf Pan
Grab a standard-sized loaf pan (about 9×5 inches) and lightly grease it with a splash of olive oil, butter, or coconut oil. This helps the bread slide out effortlessly once it’s baked. Chef’s Insight: Lining the pan with parchment paper can also make your life a whole lot easier during the extraction phase!
Step 6: Pour and Bake
Pour the mixture into the greased loaf pan, and smooth it out with your spatula. Pop it in the preheated oven and set your timer for 30-35 minutes. Chef tip: You’ll know it’s ready when the top is golden and springy to the touch!
Step 7: Cool and Enjoy
Once it’s done, take the bread out of the oven and let it cool in the pan for about 10 minutes. Then gently turn it out onto a wire rack to cool completely. Slice and serve it warm or let it sit for a bit to make lovely toast. Your kitchen will be filled with all the cozy vibes at this point!
Serving Suggestions
Here’s where you can get your creative juices flowing! This cottage cheese bread is wonderfully versatile and can be enjoyed in various ways.
-
Toast it Up: Slice a piece, toast it to crispy perfection, and spread a layer of creamy avocado or almond butter on top. You can even sprinkle some chili flakes for a tiny kick!
-
Make Sandwiches: Use this bread as a sturdy base for sandwiches. Add turkey, fresh veggies, and a smear of pesto for a delicious lunch option that packs a nutritional punch!
-
Breakfast Delight: Serve it with a drizzle of honey and fresh berries for a wholesome breakfast. It’s like a brunch dream!
-
Soup Companion: Pair it with a hearty bowl of soup for a comforting dinner. This bread makes a lovely sidekick to anything from tomato bisque to a chunky vegetable chowder!
Recipe Variations
You know I love to mix things up! Here are a few creative twists you can try with your 2-Ingredient Cottage Cheese Bread:
-
Herbed Variation: Add fresh herbs like chopped rosemary or basil right into the batter for a savory twist that will tantalize your taste buds.
-
Cheesy Goodness: Fold in ½ cup of shredded cheese—cheddar, mozzarella, or even feta can add an incredible depth of flavor to your bread!
-
Sweeten the Deal: When you’re in the mood for something sweeter, stir in a tablespoon of honey or agave syrup. You can even throw in some cinnamon for that comforting aroma!
-
Nutty Crunch: Add a handful of walnuts or pecans to the batter for delightful texture and flavor. It also amps up the healthy fat content!
-
Veggie Boost: Grate in some zucchini or carrot to sneak in extra veggies. This also adds moisture and nutrition!
Chef’s Notes
Ah, the journey to discover the perfect bread! This recipe has evolved beautifully over the years. When I first tried it, I thought, "Will this even work?"—and oh, what a pleasant surprise it was! As I played with ingredients and tweaks, I found that keeping it simple is truly the key to success.
Speaking of kitchen anecdotes, I once mistakenly knocked over an entire container of almond flour while filming a quick tutorial. Let’s just say my kitchen turned into a "snowy" scene! Amidst all the giggles and clean-up, it felt like the universe was reminding me that food is all about joy and laughter—never a chore.
Just like any recipe with a simple foundation, this bread is open to evolution. How you enjoy it is limited only by your imagination!
FAQs and Troubleshooting
1. My bread turned out dense. What went wrong?
A common culprit for dense bread is overmixing! Be sure to mix just until combined, and check that your baking powder is fresh for maximum lift.
2. Can I freeze this bread?
Absolutely! Once completely cooled, slice the bread, wrap it tightly, and store it in the freezer. It’ll last for about a month. Just pop it in the toaster straight from the freezer when you’re ready!
3. Can I use regular flour instead of almond flour?
Yes, but keep in mind that using regular flour will no longer make this bread gluten-free. Adjust the liquid slightly as all-purpose flour absorbs more moisture than almond flour.
4. What can I use if I don’t have cottage cheese?
Consider Greek yogurt or ricotta as good substitutes, but note that the flavor and texture will vary slightly.
Nutritional Info
Let’s talk nutrition! This simple cottage cheese bread is not just a treat; it’s loaded with goodness. Each slice (based on 8 slices per loaf) typically contains:
- Calories: Approximately 100 calories
- Protein: 6g
- Carbohydrates: 4g
- Fat: 6g
- Fiber: 1g
This bread is fantastic for anyone looking for a low-carb option that doesn’t skimp on flavor. Plus, it’s gluten-free, making it suitable for those with specific dietary needs. You can also tweak the recipe by swapping ingredients to align with your health goals while still enjoying a delicious homemade loaf.
Final Thoughts
There you have it, my friends! The delightful journey of crafting 2-Ingredient Cottage Cheese Bread is filled with nostalgia, creativity, and most importantly—a simple way to add some warmth to your kitchen. The best part? You don’t need to be a culinary genius to whip this up. Just a little love and a willingness to experiment, and you’re on your way to gorgeous, fluffy bread that’s sure to impress.
So next time you find yourself with some cottage cheese that needs a home, or if you’re in the mood to create something special yet simple, remember this recipe! Cooking is an adventure, and it’s all about finding joy in every bite. Can’t wait for you to try it and make your kitchen smell heavenly! Now, go on and bake up some memories!
Happy cooking! 🥖❤️
Print
2-Ingredient Cottage Cheese Bread
- Total Time: 45 minutes
- Yield: 8 slices 1x
- Diet: Gluten-Free
Description
A light and fluffy cottage cheese bread that is gluten-free, low-carb, and packed with protein. Perfect for toasting or making sandwiches!
Ingredients
- 1 cup cottage cheese
- 1 cup almond flour
- 2 eggs
- 1 tsp baking powder
- Salt to taste
Instructions
- Preheat your oven to 350°F (175°C).
- Combine 1 cup of cottage cheese and 2 eggs in a mixing bowl, mixing until thoroughly combined.
- Add 1 cup of almond flour and 1 tsp of baking powder, mixing until batter-like consistency is achieved.
- Season with salt to taste.
- Grease a standard-sized loaf pan with olive oil, butter, or coconut oil.
- Pour the mixture into the greased loaf pan and smooth it out.
- Bake in the preheated oven for 30-35 minutes until the top is golden and springy to the touch.
- Cool the bread in the pan for about 10 minutes, then turn out onto a wire rack to cool completely.
Notes
This bread is versatile and can be topped with various spreads or used in sandwiches.
- Prep Time: 10 minutes
- Cook Time: 35 minutes
- Category: Bread
- Method: Baking
- Cuisine: American
Nutrition
- Serving Size: 1 slice
- Calories: 100
- Sugar: 2g
- Sodium: 200mg
- Fat: 6g
- Saturated Fat: 1g
- Unsaturated Fat: 5g
- Trans Fat: 0g
- Carbohydrates: 4g
- Fiber: 1g
- Protein: 6g
- Cholesterol: 90mg
Keywords: cottage cheese bread, gluten-free bread, low-carb recipe, easy baking, healthy snacks