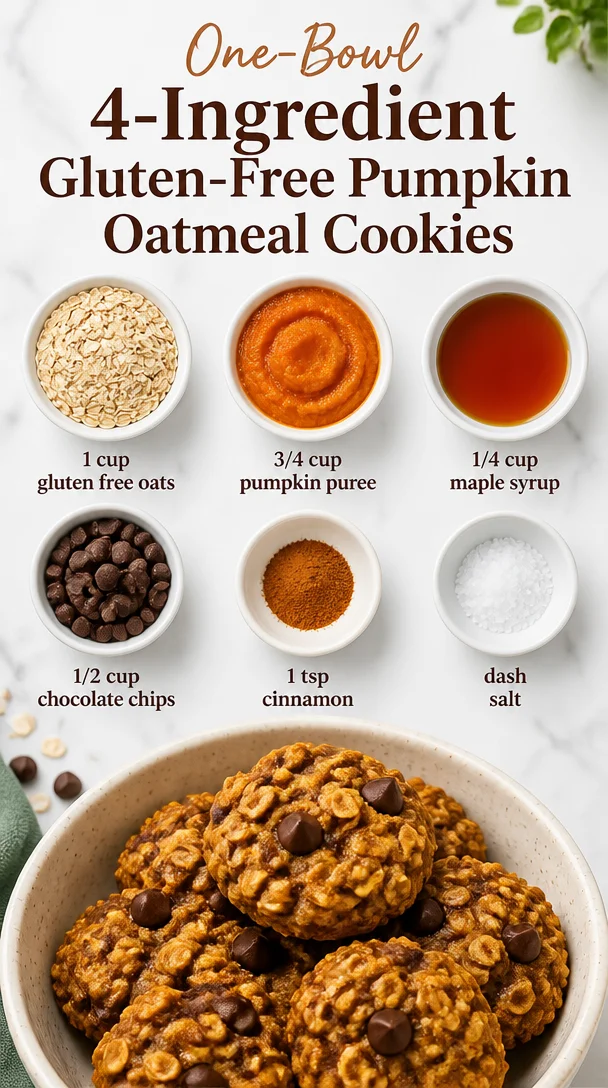
One-Bowl 4-Ingredient Gluten-Free Pumpkin Oatmeal Cookies
Gluten-Free Pumpkin Oatmeal Cookies: A Cozy Treat
Hey there, fellow foodies! Today, we’re whipping up a batch of delightful Gluten-Free Pumpkin Oatmeal Cookies. These little wonders are not just a treat; they’re a warm hug in cookie form, perfect for snuggling up with a cup of tea or coffee. There’s something magical about the spices, the warmth of pumpkin, and, of course, the chocolate chips that can turn any day around—trust me on this one!
As the leaves begin to turn and the air fills with that famous fall scent—think cinnamon and nutmeg—I can’t help but think of the countless afternoons I spent baking with my grandmother. You see, she had this incredible knack for making the kitchen feel like home, and her pumpkin cookies were always the highlight of our fall gatherings. They were a simple mix of ingredients but felt like a celebration, especially when shared with family and friends.
Now, let me tell you, these gluten-free cookies come together with minimal fuss and maximum flavor. If you’ve ever struggled to find a cookie that checks all the boxes—delicious, easy to make, and a healthier choice—then you’re in for a treat. Let’s roll up our sleeves, don our aprons, and dive into this delightful recipe together!
A Little Taste of My Past
One of the fondest memories I have about baking came when I was about eight years old. I can vividly remember standing on a stool, peering over the counter where my grandmother prepped her famous pumpkin cookies. She would let me mix the dough with my tiny hands (which, let me tell you, felt like an absolute privilege). The moment the dough hit the oven, the scent filled the house, and we would have to restrain ourselves from stealing the first batch before the frosting had a chance to set!
Those afternoons weren’t just about baking; they were about lessons in patience, creativity, and the joy of cooking. And now, as I craft this gluten-free version of those beloved cookies, I can’t help but feel that same warmth spreading through my heart (and home). Each bite reminds me of those simpler times and how food can create lasting memories.
Ingredients
Now, let’s gather our ingredients for these gluten-free pumpkin oatmeal cookies. Here’s what you’ll need:
-
1 cup gluten-free oats: These will give your cookies that chewy texture. If you can’t find gluten-free oats, regular rolled oats could work, but make sure they’re certified gluten-free to avoid cross-contamination.
-
3/4 cup pumpkin puree: Pure pumpkin puree is the star of the show here! You can even use homemade pumpkin puree if you’re feeling adventurous! If you happen to be out of pumpkin, unsweetened applesauce can be a nice substitute—though you’ll lose that cozy pumpkin flavor.
-
1/4 cup maple syrup: This natural sweetener adds a delightful flavor. If you’re looking for a sugar-free option, try using monk fruit sweetener or stevia; just be mindful of the measurement conversions, as they vary.
-
1/2 cup chocolate chips: Because chocolate! Dark chocolate or dairy-free chocolate chips work perfectly here. If chocolate isn’t your thing, chopped nuts or dried fruit can add a lovely crunch or sweetness.
-
1 tsp cinnamon: This warm spice elevates the pumpkin flavor. Feel free to get creative—add a pinch of nutmeg or ginger for an extra kick!
-
A dash of salt: A little salt balances the sweetness and enhances all the flavors.
Step-by-Step Instructions
Alright, my culinary comrades, it’s time to roll up our sleeves and get cooking! Here’s how you make these scrumptious cookies:
-
Preheat your oven to 350°F (175°C). This is the perfect temperature for cookies: hot enough to get them fluffy but not so hot that they’ll burn.
-
Mix the dry ingredients: In a large mixing bowl, combine the gluten-free oats, cinnamon, and a dash of salt. Give it a gentle mix with a spoon or a whisk. This might sound a bit basic, but this ensures even distribution of the cinnamon!
-
Combine the wet ingredients: In a separate bowl, blend the pumpkin puree and maple syrup. If you want to give it even more flavor depth, consider adding a splash of vanilla extract!
-
Merge the mixtures: Pour the wet ingredients into the bowl with the dry ingredients. It’s a glorious mess at this stage—get in there and mix everything until just combined! A spatula or spoon works fine, but if you’re feeling cheeky, your hands will do a fantastic job.
-
Add chocolate chips: Now for the best part! Fold in those glorious chocolate chips until they’re evenly scattered. Is it just me, or does this part always feel like the cookie equivalent of adding sprinkles to ice cream?
-
Scoop and drop: Line a baking sheet with parchment paper (trust me, your future self will thank you for this). Use a cookie scoop or just two spoons to drop tablespoon-sized balls of dough onto the sheet. Leave some space between them; they’ll spread a little while baking.
-
Bake: Pop them in the oven and bake for 10-12 minutes. Keep an eye on them; you’re looking for the edges to turn golden brown. They will continue to firm up as they cool, so don’t worry if they seem a little soft coming out.
-
Cool and enjoy: Let them cool on the baking sheet for a few minutes before transferring to a wire rack. The aroma will be irresistible—you might just find it hard to resist one (or three) straight from the oven!
Serving Suggestions
Now that our cookies are baked to perfection, let’s talk about plating! These gluten-free pumpkin oatmeal cookies are fantastic on their own but can also be served in style.
-
Cookie Platter: Arrange them on a charming wooden board or a colorful plate. Add some fall-themed decorations like mini pumpkins or cinnamon sticks for that cozy vibe.
-
With a Drink: Pair these cookies with a warm chai latte, a cup of spiced apple cider, or even a simple glass of cold almond milk. The flavors will sing together, making for a delightful snack!
-
Store in Style: If you’re not devouring them all immediately (which, let’s be honest, is a real possibility), store them in an airtight container. Toss in a slice of bread to keep them fluffy and fresh.
Recipe Variations
Now, let’s get creative! Here are a few fun variations you might want to try:
-
Nutty Cinnamon Swirl: Add 1/2 cup of chopped walnuts or pecans for extra crunch and a boost of healthy fats. It gives a rustic vibe to your cookies!
-
Spiced Up Pumpkin: Add 1/4 teaspoon of nutmeg or ginger for a little more warmth. It’ll have your taste buds dancing!
-
Nut Butter Bliss: Stir in a couple of tablespoons of almond butter or peanut butter into the wet mixture for a creamier, richer cookie. It’s an absolute game-changer!
-
Coconut Cookie: Swap half of the oats for unsweetened shredded coconut. The combination of pumpkin and coconut is simply divine!
-
Vegan-Friendly: To cater to a vegan diet, ensure that the chocolate chips are dairy-free, and you can substitute maple syrup with agave syrup.
Chef’s Notes
Ah, the beauty of cookies is their adaptability. This particular recipe has evolved over the years. Initially, I thought I could only enjoy pumpkin in pie form. But after some trial and error (and more than a few cookie failures), I realized that pumpkin flourishes in cookies, too—especially gluten-free ones!
The moment I decided to incorporate oats into my pumpkin cookies was a game changer. Not only did it add heartiness, but it gave a wonderful chewy texture that holds up with each bite. Plus, let’s be real—who doesn’t want an excuse to have cookies that feel just a tad healthier?
If you have any kitchen adventures of your own using this recipe, please share! I love hearing about your baking tales and modifications!
FAQs and Troubleshooting
-
Why are my cookies dry? If you find your cookies are coming out dry, the culprit often lies in overmixing or over-baking. Keep an eye on them in the oven and take them out while they’re still slightly underdone; they’ll firm up as they cool.
-
Can I use pumpkin pie filling instead? While you can use pumpkin pie filling, it’s best to stick to pure pumpkin puree for this recipe to maintain control over sweetness and spices. The pre-seasoned filling may throw off the cookie flavor.
-
How do I prevent my cookies from sticking? Using parchment paper or a silicone baking mat on your baking sheet works wonders for preventing stickiness. Letting cookies cool slightly before moving them is also helpful.
-
What can I do with leftover pumpkin puree? Get creative! Mix pumpkin puree into smoothies, add it to oatmeal, or make a simple pumpkin soup. It freezes well, too, if you’re not ready to use it all at once.
Nutritional Info
These cookies are not only tasty but also packed with nutritious ingredients! Here’s a rough estimate of the nutritional breakdown for one cookie (assuming the recipe makes about 12 cookies):
- Calories: 120
- Protein: 2g
- Carbohydrates: 16g
- Fat: 5g
- Fiber: 2g
- Sugar: 5g
Of course, this can vary based on the specific brands and ingredients you use, but it highlights the fact that you’re indulging in a cookie that offers some nutritional value along with its delicious taste!
Final Thoughts
There you have it, my fellow bakers! A simple yet delightful recipe for gluten-free pumpkin oatmeal cookies that evokes warmth, nostalgia, and joy. Whether you’re making them for a cozy night in, a festive gathering, or just because it’s a Tuesday, they’re sure to brighten your day. Remember, cooking should be a joy—an experience to share, to experiment, and to create memories.
I hope you loved this recipe as much as I do! Don’t forget to share your baking adventures and variations with me. Until next time, happy baking, and may your kitchen always smell like cookies!
Print
Gluten-Free Pumpkin Oatmeal Cookies
- Total Time: 27 minutes
- Yield: 12 cookies 1x
- Diet: Gluten-Free
Description
Delightful gluten-free pumpkin oatmeal cookies that evoke warmth and nostalgia, perfect for enjoying with a cup of tea or coffee.
Ingredients
- 1 cup gluten-free oats
- 3/4 cup pumpkin puree
- 1/4 cup maple syrup
- 1/2 cup chocolate chips
- 1 tsp cinnamon
- A dash of salt
Instructions
- Preheat your oven to 350°F (175°C).
- Mix the dry ingredients: In a large mixing bowl, combine the gluten-free oats, cinnamon, and a dash of salt.
- Combine the wet ingredients: In a separate bowl, blend the pumpkin puree and maple syrup.
- Merge the mixtures: Pour the wet ingredients into the bowl with the dry ingredients and mix until just combined.
- Add chocolate chips: Fold in the chocolate chips until evenly scattered.
- Scoop and drop: Line a baking sheet and drop tablespoon-sized balls of dough onto it, leaving some space.
- Bake: Pop them in the oven and bake for 10-12 minutes until edges turn golden brown.
- Cool and enjoy: Let them cool on the baking sheet for a few minutes before transferring to a wire rack.
Notes
These cookies are well enjoyed warm and can be stored in an airtight container with a slice of bread to keep them fluffy.
- Prep Time: 15 minutes
- Cook Time: 12 minutes
- Category: Dessert
- Method: Baking
- Cuisine: American
Nutrition
- Serving Size: 1 cookie
- Calories: 120
- Sugar: 5g
- Sodium: 50mg
- Fat: 5g
- Saturated Fat: 2g
- Unsaturated Fat: 3g
- Trans Fat: 0g
- Carbohydrates: 16g
- Fiber: 2g
- Protein: 2g
- Cholesterol: 0mg
Keywords: gluten-free, pumpkin cookies, oatmeal cookies, fall recipes, healthy desserts
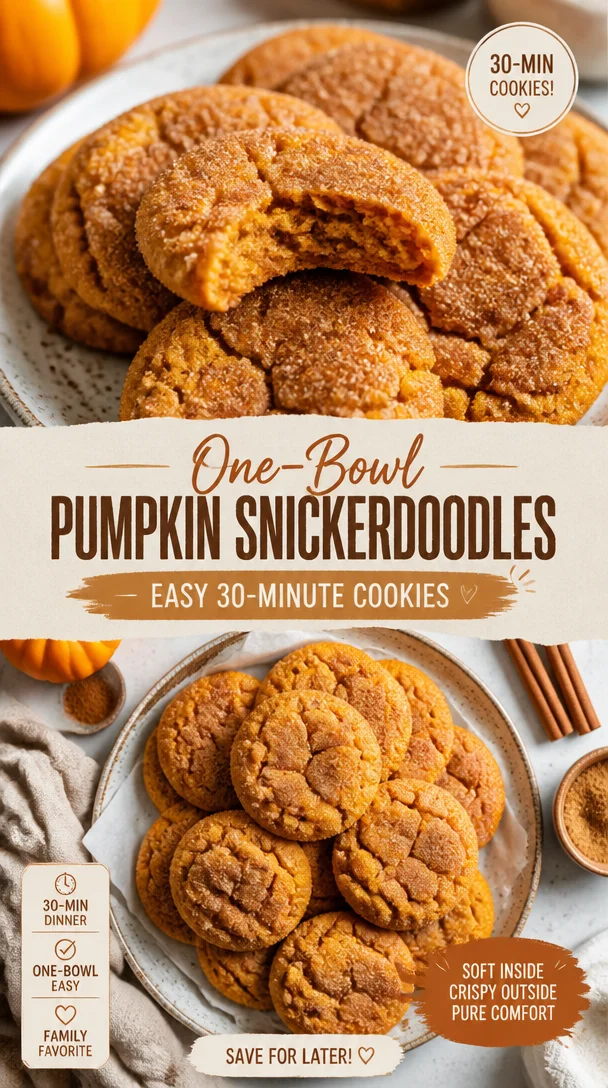
One-Bowl Pumpkin Snickerdoodles: Easy 30-Minute Cookies
Dive Into Autumn Bliss with Pumpkin Snickerdoodles!
Hey there, fellow food lovers! It’s Beau Collier, your go-to guide for all things delicious here at Feastical. Today, we’re diving headfirst into a recipe that perfectly captures the spirit of fall—the delightful and ridiculously comforting Pumpkin Snickerdoodles. If you’re looking to elevate your taste buds while filling your kitchen with sweet, spicy aromas, you’ve landed in the right spot!
Why Pumpkin Snickerdoodles? Well, you might be wondering how the classic snickerdoodle got a pumpkin make-over. Honestly, it’s a match made in heaven! We’ve got the chewy, cinnamon-sugar goodness of a traditional snickerdoodle but with a cozy twist that adds depth and warmth. Each bite is like a warm hug, and they’ll have your family and friends asking for seconds—and maybe even thirds.
With the days getting shorter and the air becoming crisp, there’s nothing better than baking up a batch of these lovely cookies. Plus, they’re super easy to whip up, whether you’re a kitchen whiz or just getting your feet wet. The recipe is simple, and trust me, you’ll be feeling like the superstar chef of your household in no time!
So roll up your sleeves and get ready to create some magic in the kitchen. Let’s dive in!
A Sweet Memory: Baking with Grandma
Let me take you on a little journey back to my childhood. Picture this: it’s a chilly October afternoon, and I’m at my grandma’s house. The scent of cinnamon and sugar fills the air, mixing perfectly with the rich aroma of freshly baked pumpkin treats. My grandma had a way of making everything feel special—especially when it came to her kitchen.
One day, she handed me a giant bowl filled with colorful leaves and a few tiny pumpkins she grew in her garden. “We’re baking today!” she exclaimed with a twinkle in her eye. We decided to make a tribute to the changing seasons and concocted our very own pumpkin snickerdoodle recipe. The kitchen was filled with laughter and flour as we danced around to our favorite tunes.
Those cookies turned out to be a hit, and ever since then, pumpkin snickerdoodles have been a staple in my baking repertoire. Granny’s spirit lives on every time I whip up this recipe—it’s not just about the cookies; it’s about the memories and the love we shared. So, grab your loved ones, and let’s make some new memories with this comforting treat!
Gather Your Ingredients
Alright, it’s time to gather your ingredients! Here’s what you’ll need for these amazing Pumpkin Snickerdoodles:
-
2.75 cups all-purpose flour
- This is your base ingredient! Flour gives the cookies structure. You can substitute with a gluten-free blend if needed, but the texture might vary slightly.
-
2 teaspoons cream of tartar
- This is the secret weapon! It gives the cookies that classic snickerdoodle tang. If you’re in a pinch, you can substitute it with an equal amount of baking powder—but you’ll lose some of that unique flavor.
-
1 teaspoon baking soda
- This helps the cookies rise and gives them that chewy texture we love. Baking powder can be an alternative, but adjust the quantity down to 1.5 teaspoons.
-
0.5 teaspoon salt
- Essential for balancing the sweetness. It enhances the flavors. If you’re watching your sodium intake, consider using a low-sodium option.
-
1 teaspoon ground cinnamon
- A must-have for that warm, spicy flavor! Feel free to experiment with more or less depending on your cinnamon love.
-
0.5 teaspoon ground nutmeg
- This spice adds depth and warmth. Nutmeg can be potent, so you can cut this by half if you prefer a milder taste.
-
0.5 cup unsalted butter, softened
- This rich, creamy goodness creates a tender cookie. If you’re vegan or dairy-free, coconut oil can be a good substitute, but it may change the flavor slightly.
-
0.5 cup granulated sugar
- Classic cookie sweetness! You can use coconut sugar for a healthier twist, but it may darken the cookies.
-
0.5 cup brown sugar, packed
- Brown sugar brings moisture and a hint of caramel flavor. Use light brown for a subtle taste or dark brown for a richer flavor.
-
1 cup pumpkin puree (not pumpkin pie filling)
- This is the true star of the show! It adds moisture and flavor. If you’re in a bind, homemade pumpkin puree is a great option.
-
1 large egg
- This binds everything together! If you’re following a vegan diet, flaxseed meal mixed with water can serve as a substitute.
-
1 teaspoon vanilla extract
- The dreamy flavor booster! Swap with almond extract for a unique twist.
-
0.25 cup granulated sugar (for rolling)
- This adds that sugary crust that makes each bite delightful!
-
2 teaspoons ground cinnamon (for rolling)
- Because cinnamon/sugar coating never hurts, right?
Time to Bake: Step-by-Step Instructions
Alright, my friends, let’s get down to the nitty-gritty! Here’s how to whip up these scrumptious cookies:
-
Preheat Your Oven: Preheat your oven to 350°F (175°C). A hot oven is essential for that perfect bake!
-
Prepare Your Baking Sheets: Line a couple of baking sheets with parchment paper for easy clean-up and to prevent sticking. No one likes cookies that won’t come off the tray, right?
-
Mix the Dry Ingredients: In a large mixing bowl, whisk together the flour, cream of tartar, baking soda, salt, cinnamon, and nutmeg. This step is crucial; combining the dry ingredients first ensures that your leavening agents distribute evenly throughout the dough.
-
Cream the Butter and Sugars: In another large bowl, combine your softened butter, granulated sugar, and brown sugar using a hand mixer or stand mixer. Cream until light and fluffy—this process incorporates air and will help create a tender cookie. Seriously, don’t skip this step!
-
Add the Pumpkin: Next, beat in the pumpkin puree, egg, and vanilla extract. Mix until combined. You’ll instantly notice that luxurious orange color taking over—oh so inviting!
-
Combine Wet and Dry Mixtures: Gradually add your dry mixture to the wet mixture. Mix until just combined, being careful not to overmix. It’s okay if the dough looks a little thicker than you’d expect; it should hold its shape nicely.
-
Prepare the Cinnamon-Sugar Mix: In a small bowl, combine the granulated sugar and ground cinnamon for rolling. Set this aside because we’re about to dive into the fun part!
-
Scoop and Roll the Dough: Use a cookie scoop or your hands to form balls of dough (about 1.5 inches in diameter). Roll each ball in the cinnamon-sugar mixture until thoroughly coated. Not only does this make them look adorable, but it also gives that delightful crunch we crave!
-
Bake the Cookies: Place the sugar-coated dough balls on the prepared baking sheets, spacing them about 2 inches apart. Bake for about 10-12 minutes, or until the edges are slightly golden. Don’t worry if they appear a little soft in the middle; they’ll firm up as they cool!
-
Cooling Time: Let the cookies cool on the baking sheet for about 5 minutes before transferring them to a wire rack. When they come out of the oven, they’ll be perfect for indulging—just be careful to resist eating the whole batch at once!
Serving Suggestions
Now that your kitchen smells like a cozy autumn bakery, it’s time to serve these babies up! Here are a few fun ideas:
-
On a Platter: Arrange your fresh-baked cookies on a beautiful platter. You can garnish with a sprinkle of extra cinnamon or even a few tiny pumpkins for that festive touch.
-
With Milk or Coffee: Pair your cookies with a cold glass of milk or a steaming cup of coffee. The warmth from the coffee and the soft chewiness of the cookies create an irresistible combo!
-
Cookie Sandwiches: Feeling adventurous? Slather a bit of cream cheese frosting between two cookies for an indulgent cookie sandwich!
Recipe Variations
Here are a few creative twists you can explore with your Pumpkin Snickerdoodles:
-
Spiced Up: Add a pinch of ground ginger or cloves to the dough for an extra autumnal kick.
-
Chocolate Chip Delight: Throw in some chocolate chips for a decadent twist!
-
Nutty Crunch: Stir in some crushed walnuts or pecans to the dough for added texture.
-
Maple Sweetness: Swap the granulated sugar for maple sugar for a uniquely sweet twist.
-
Gluten-Free: Use a gluten-free flour blend to make these cookies accessible for everyone while keeping that comforting taste!
Chef’s Notes
This Pumpkin Snickerdoodle recipe has a special place in my heart. Over the years, I’ve had the chance to tweak it based on what I’ve learned in the kitchen and from the wonderful folks who’ve shared their own variations with me. Whenever I make these cookies, I can’t help but think of my grandma and the love that goes into each batch. It’s a reminder that food is more than just sustenance; it’s about sharing moments and memories with the people we love. Keep experimenting, and let your creativity shine too!
FAQs and Troubleshooting
Q1: Why are my cookies spreading too much?
If your cookies are spreading a lot, it may be that your butter was too soft. Ensure that your butter is softened, but not melted!
Q2: How do I know if my cookies are done?
When the edges are starting to turn golden brown but the center still appears a bit soft, that’s your cue! They will continue to set as they cool.
Q3: Can I freeze the dough?
Absolutely! You can freeze the dough balls before rolling in the cinnamon-sugar mixture. Just take them out whenever you’re feeling cookie cravings and bake them fresh!
Q4: What can I do if my dough is too sticky?
If your dough feels overly sticky, try adding a little extra flour, a tablespoon at a time. But be careful not to add too much, or the cookies could turn out dry.
Nutritional Info
A single Pumpkin Snickerdoodle packs in approximately:
- Calories: 120
- Fat: 5g
- Carbohydrates: 19g
- Protein: 1.5g
- Fiber: 0.5g
- Sugar: 8g
Keep in mind that these values can vary based on specific brands and measurement accuracy, but they will give you a ballpark figure to help satisfy your cravings while keeping an eye on your dietary goals!
Final Thoughts
There you have it, folks! A foolproof guide to making mouthwatering Pumpkin Snickerdoodles that’ll bring joy to your home. With every bite, you’re not just enjoying a cookie; you’re creating sweet memories that you’ll cherish for years to come. Baking is, at its core, an expression of love—and these cookies are the perfect medium for sharing that warmth.
So, gather your ingredients, call your loved ones into the kitchen, and let’s bake some happiness! Don’t forget to share the love—invite your friends over to taste your creations, or package some up as thoughtful gifts. Until next time, keep it cozy and delicious, my friends. Happy baking! 🍪✨
Print
Pumpkin Snickerdoodles
- Total Time: 27 minutes
- Yield: 24 servings 1x
- Diet: Vegetarian
Description
A delightful twist on the classic snickerdoodle featuring pumpkin for a cozy, autumnal treat.
Ingredients
- 2.75 cups all-purpose flour
- 2 teaspoons cream of tartar
- 1 teaspoon baking soda
- 0.5 teaspoon salt
- 1 teaspoon ground cinnamon
- 0.5 teaspoon ground nutmeg
- 0.5 cup unsalted butter, softened
- 0.5 cup granulated sugar
- 0.5 cup brown sugar, packed
- 1 cup pumpkin puree (not pumpkin pie filling)
- 1 large egg
- 1 teaspoon vanilla extract
- 0.25 cup granulated sugar (for rolling)
- 2 teaspoons ground cinnamon (for rolling)
Instructions
- Preheat your oven to 350°F (175°C).
- Prepare your baking sheets by lining them with parchment paper.
- Mix the dry ingredients: In a large mixing bowl, whisk together the flour, cream of tartar, baking soda, salt, cinnamon, and nutmeg.
- Cream the butter and sugars: In another large bowl, combine softened butter, granulated sugar, and brown sugar, and cream until light and fluffy.
- Add the pumpkin: Beat in the pumpkin puree, egg, and vanilla until combined.
- Combine wet and dry mixtures: Gradually add dry mixture to wet mixture, mixing until just combined.
- Prepare the cinnamon-sugar mix: In a small bowl, combine granulated sugar and ground cinnamon for rolling.
- Scoop and roll the dough: Form balls of dough and roll in the cinnamon-sugar mixture.
- Bake the cookies: Place dough balls on baking sheets and bake for 10-12 minutes or until edges are slightly golden.
- Cool the cookies: Let cool on the baking sheet for 5 minutes before transferring to a wire rack.
Notes
For a twist, try adding chocolate chips or nuts, or use a gluten-free flour blend to make it accessible for everyone.
- Prep Time: 15 minutes
- Cook Time: 12 minutes
- Category: Dessert
- Method: Baking
- Cuisine: American
Nutrition
- Serving Size: 1 cookie
- Calories: 120
- Sugar: 8g
- Sodium: 100mg
- Fat: 5g
- Saturated Fat: 3g
- Unsaturated Fat: 2g
- Trans Fat: 0g
- Carbohydrates: 19g
- Fiber: 0.5g
- Protein: 1.5g
- Cholesterol: 20mg
Keywords: pumpkin, snickerdoodles, cookies, autumn, fall baking, dessert
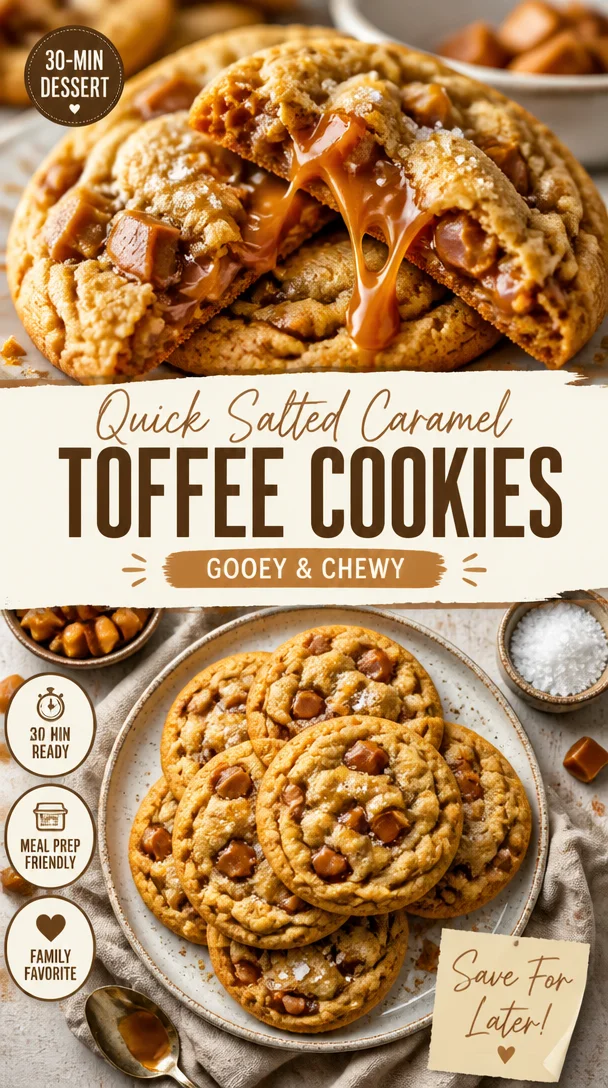
Quick Salted Caramel Toffee Cookies: Gooey & Chewy
The Sweet Sensation of Salted Caramel Toffee Cookies
Hey there, fellow food lovers! Today, we’re diving into a sweet treat that’s sure to make your heart sing and your taste buds dance – Salted Caramel Toffee Cookies! Whether you’re a seasoned baker or someone just starting out in the kitchen, these cookies are a delightful blend of rich caramel and crunchy toffee, all wrapped up in a soft, chewy cookie. Who doesn’t love a little sweet indulgence?
Imagine walking through your kitchen, and the comforting scent of freshly baked cookies fills the air. It’s that warm and inviting aroma that takes you back to your childhood, where every bite makes you feel at home. The best part? These cookies are incredibly easy to whip up and can be made in no time, allowing you to savor the sweet moments without any stress. So, if you’re ready to create something wonderfully delicious, put on your apron, and let’s get started on these irresistible Salted Caramel Toffee Cookies!
A Memory Wrapped in Cookies
Before we get into the nitty-gritty of the recipe, I’ve got to share a personal story that makes these cookies even more special to me. Growing up, my grandmother was known for her baking skills. Her kitchen was a magical place filled with the aroma of cinnamon and sugar, and she always had a batch of cookies ready to share with family and friends. I remember the first time I watched her make cookies from scratch. There was flour everywhere, and let’s just say most of it ended up on the floor rather than in the bowl!
One of her most beloved creations was her version of caramel cookies, but she had a secret ingredient – toffee bits. Every Sunday, we’d gather around her kitchen island, our hands sticky and our grins wide, as we tasted her warm creations straight from the oven. It was those moments, friendships formed over baked goods, that planted the seed for my love of baking. That’s the soul of Feastical! I wanted to create those same moments, and what better way than through these Salted Caramel Toffee Cookies?
Ingredients You’ll Need
Now, let’s get down to business and gather our ingredients! Here’s what you’ll need for these delectable cookies:
-
1/2 cup unsalted butter (softened to room temperature)
- The star of the show! Unsalted butter is key here, allowing us to control the saltiness of the cookies. If you’re in a pinch, you can use salted butter—just omit the additional salt in the recipe.
-
1 cup packed light brown sugar
- This adds a beautiful depth of flavor and a hint of molasses sweetness to our cookies. Dark brown sugar works too if you prefer a more pronounced flavor.
-
1 egg
- Eggs help bind our ingredients together and create a tender texture. For a vegan option, you can substitute with a flax egg (1 tablespoon of ground flaxseed mixed with 3 tablespoons of water).
-
1 teaspoon pure vanilla extract
- Vanilla is a must for enhancing the flavors in baking! Make sure to use pure extract for the best flavor.
-
1 1/2 cups unbleached flour
- Unbleached flour is ideal for a tender cookie texture. If you’d like to make these gluten-free, you can use a 1-to-1 gluten-free baking flour.
-
1/2 teaspoon baking powder
- This is our leavening agent that will help the cookies rise a little.
-
1/4 teaspoon baking soda
- Baking soda also helps our cookies to spread and gives them a bit of chewiness.
-
1/4 teaspoon salt
- Just enough to balance the sweet flavors. If you’re using salted butter, reduce this to an 1/8 teaspoon.
-
1 cup caramel pieces (divided)
- Feel free to chop up your favorite caramel candies if you can’t find caramel pieces.
-
1/2 cup toffee pieces (divided)
- These add that beloved crunch! If you can’t find toffee bits, crushed graham crackers or even chopped pecans can work as a fantastic alternative.
-
Sea Salt (optional for topping)
- A sprinkle of flaky sea salt right before baking elevates the flavor and gives that sweet-and-salty contrast we all love.
Step-by-Step Instructions
Now, let’s get into the fun part—baking these amazing cookies! Follow these simple steps, and I promise you’ll have a batch of salted caramel toffee cookies that’s bound to impress.
-
Preheat Your Oven
Preheat your oven to 350°F (175°C). This step is crucial because it ensures your cookies bake evenly. -
Prepare Your Baking Sheet
Line a baking sheet with parchment paper. This not only helps prevent sticking but makes cleanup a breeze! -
Cream the Butter and Sugar
In a mixing bowl, beat together the softened butter and packed brown sugar until it’s light and fluffy. This should take about 2-3 minutes. Pro tip: don’t rush this step! Creaming the butter and sugar properly incorporates air, leading to softer cookies. -
Add the Egg and Vanilla
Mix in the egg and vanilla extract until well blended. Don’t be afraid to scrape down the sides of the bowl a couple of times to make sure everything is super well combined. -
Mix the Dry Ingredients
In another bowl, whisk together the flour, baking powder, baking soda, and salt. Incorporating the dry ingredients separately avoids any clumps later on. -
Combine the Mixtures
Gradually add the dry ingredients to the wet mixture. Use a spatula or wooden spoon to mix until just combined. Be careful not to overmix—this keeps our cookies soft and chewy! -
Fold in the Goodies
Gently fold in ¾ of your caramel pieces and toffee bits. Save the rest for placing on top of the cookies. -
Scoop and Shape
Using a cookie scoop or two spoons, drop rounded tablespoons of dough onto your prepared baking sheet, spaced about 2 inches apart. If you like those chunky bites, be generous with each scoop! -
Top Off with Treats
Gently press a few extra caramel and toffee bits into the tops of the dough balls, and if you’re feeling fancy, sprinkle a pinch of sea salt on each cookie. -
Bake
Place the baking sheet in your preheated oven and bake for 10-12 minutes, or until the edges are lightly golden. Remember—these cookies will continue to cook a bit on the baking sheet after you pull them out. -
Cooling Time
Let the cookies cool on the baking sheet for 5 minutes before transferring them to a wire rack to cool completely. This helps them set while still being soft in the center!
Serving Suggestions
Now that your cookies are out of the oven and ever-so-yummy, how do you serve them up? One of the best ways is to create a delightful cookie platter! Arrange the cookies on a beautiful plate, dust them with a little extra sea salt for that Instagram-worthy touch, and maybe add a side of warm caramel or chocolate sauce for dipping.
Pair your cookies with a tall glass of milk or a steaming cup of coffee for the ultimate comfort snack. For a dinner party, throw in some fresh fruit or cheese for a fun contrast that’ll impress your guests. Don’t forget to grab your favorite mug while you’re at it—staying cozy while enjoying these cookies is a must!
Recipe Variations
Want to switch things up? Here are some creative variations that’ll keep your cookie game fresh and exciting:
-
Nutty Delight: Add ½ cup of chopped walnuts or pecans for some extra crunch and nuttiness!
-
Chocolate Twist: Swap half the caramel pieces for chocolate chips. The combination of chocolate and caramel is a match made in heaven!
-
Spiced Cookies: Add 1 teaspoon of cinnamon or a pinch of nutmeg to the dry ingredients for a warm, spiced flavor. Perfect for the fall season!
-
Coconut Crunch: Toss in ½ cup of shredded coconut to give your cookies a tropical flair.
-
Dairy-Free Option: Use coconut oil instead of butter and dairy-free chocolate/caramel chips for a vegan twist!
Chef’s Notes
This recipe has evolved over time as I’ve gathered tips and tricks from fellow bakers. It started as a simple caramel cookie recipe but then morphed into this decadent delight with the addition of toffee! The first time I made these for a gathering, I could hardly keep my hands off them—seriously, I had to remind myself to share!
One funny mishap to mention: I once forgot to add the sugar (yes, really!) and ended up with the most perplexing cookies. They looked great but tasted like a sad, dry breadcrumb. Learn from my mistakes, friends!
FAQs and Troubleshooting
Q: My cookies spread too much in the oven. What went wrong?
A: This can happen for a few reasons—either your butter was too warm or the dough wasn’t chilled enough. Try chilling the dough for 30 minutes before baking next time!
Q: Can I make the dough ahead of time?
A: Absolutely! You can prepare the dough, roll it into balls, and freeze them. Just add an extra minute or two to the baking time when you bake them straight from the freezer.
Q: Why are my cookies tough instead of soft?
A: Overmixing your dough or using too much flour can lead to tough cookies. Stick to the “just mixed” rule and measure your flour carefully!
Nutritional Information
While indulging in cookies should be all about enjoyment, it’s good to know what’s going into your treats! Here’s a rough estimate per cookie if you make about 24:
- Calories: 130
- Total Fat: 6g
- Saturated Fat: 4g
- Cholesterol: 15mg
- Sodium: 80mg
- Total Carbohydrates: 18g
- Dietary Fiber: 0g
- Sugars: 9g
- Protein: 1g
(Note: Nutritional values can vary based on ingredient brands and exact measurements.)
Final Thoughts
So there you have it—the ultimate recipe for Salted Caramel Toffee Cookies that’ll make you feel all warm inside! These cookies capture the essence of comfort food and perfectly blend nostalgic flavors with a modern twist.
Remember, the kitchen is all about creating memories, sharing stories, and bonding over delicious food. So whether you’re baking these cookies for a special occasion or simply indulging in a sweet treat on a Wednesday, I hope it brings joy to you and your loved ones just like it does for me.
Now go on, preheat that oven, gather your ingredients, and let’s get baking! Cookies like this are meant to be shared, so consider this your invitation to whip up a batch and share a few smiles along the way. Happy baking!
Print
Salted Caramel Toffee Cookies
- Total Time: 27 minutes
- Yield: 24 cookies 1x
- Diet: Vegetarian
Description
A delightful blend of rich caramel and crunchy toffee wrapped in a soft, chewy cookie.
Ingredients
- 1/2 cup unsalted butter (softened to room temperature)
- 1 cup packed light brown sugar
- 1 egg
- 1 teaspoon pure vanilla extract
- 1 1/2 cups unbleached flour
- 1/2 teaspoon baking powder
- 1/4 teaspoon baking soda
- 1/4 teaspoon salt
- 1 cup caramel pieces (divided)
- 1/2 cup toffee pieces (divided)
- Sea salt (optional for topping)
Instructions
- Preheat your oven to 350°F (175°C).
- Prepare a baking sheet with parchment paper.
- Cream the butter and brown sugar together until light and fluffy.
- Add the egg and vanilla extract and mix until well combined.
- Mix the dry ingredients (flour, baking powder, baking soda, and salt) in a separate bowl.
- Combine the dry ingredients with the wet ingredients until just mixed.
- Fold in ¾ of the caramel and toffee pieces.
- Scoop rounded tablespoons of dough onto the baking sheet.
- Top with extra caramel, toffee bits, and a sprinkle of sea salt.
- Bake for 10-12 minutes or until edges are golden.
- Cool on the baking sheet for 5 minutes before transferring to a wire rack.
Notes
Chill the dough for 30 minutes to prevent spreading.
- Prep Time: 15 minutes
- Cook Time: 12 minutes
- Category: Dessert
- Method: Baking
- Cuisine: American
Nutrition
- Serving Size: 1 cookie
- Calories: 130
- Sugar: 9g
- Sodium: 80mg
- Fat: 6g
- Saturated Fat: 4g
- Unsaturated Fat: 2g
- Trans Fat: 0g
- Carbohydrates: 18g
- Fiber: 0g
- Protein: 1g
- Cholesterol: 15mg
Keywords: cookies, salted caramel, toffee, dessert, baking

Ingredient Coconut Macaroon Cookies (No-Bake & Easy)
Coconut Macaroon Cookies: A Sweet Journey into Nostalgia
Hey there, lovely foodies! If there’s one treat that wraps you in warm memories and satisfies that sweet tooth, it’s got to be coconut macaroons. These delightful little cookies are more than just a simple dessert; they are pockets of nostalgia and joy. Today, I’m excited to share with you my go-to recipe for Coconut Macaroon Cookies, which not only taste like sunshine but also come with a heap of cherished stories.
A Sweet Personal Story
Let me take you back to a kitchen filled with laughter, flour-dusted countertops, and the sweet aroma of coconut. Many years ago, I experienced my first taste of coconut macaroons in my grandmother’s cozy kitchen. It was a magical Saturday afternoon, and grandma was busy whipping up her legendary cookies. She had a knack for turning ordinary ingredients into extraordinary moments.
I remember peeking over the counter, fascinated as she mixed sweetened shredded coconut, sugar, and egg whites, almost as if she were conducting a symphony. The best part? She always let me dip my fingers in the batter and sneak a bite! Those simple, crunchy-on-the-outside and chewy-on-the-inside cookies were always a hit, especially when we dipped them in melted dark chocolate. Every bite took me on a trip down memory lane, filled with warmth, love, and the best hugs from grandma. It’s this memory that inspires me to share my version of coconut macaroons. Let’s create some sweet kitchen magic together!
Ingredients
Here’s what you’ll need to whip up these irresistible Coconut Macaroon Cookies. Get ready—it’s a short but sweet list!
-
2 2/3 cups sweetened shredded coconut
This is the star of the show! Sweetened shredded coconut gives the macaroons their lovely chewiness and natural sweetness. If you’re looking for a healthier option, feel free to use unsweetened coconut, but you may need to increase the sugar a bit. -
1/2 cup granulated sugar
Just enough to add that perfect sweetness! You can substitute coconut sugar for a deeper flavor, or even use a sugar substitute for a lower-calorie version—just check the conversion ratio! -
2 egg whites
These little beauties act as the binding agent, giving the cookies their iconic structure. Don’t throw away those yolks; they’re great for making custard or adding to your breakfast omelet! -
1/4 teaspoon salt
A pinch of salt is essential! It enhances all the sweet flavors in the cookies and makes them so much more delicious. You could use sea salt for a more gourmet touch. -
1 teaspoon vanilla extract
This adds warmth and a hint of sophistication. Feel free to experiment with almond extract for a nutty twist on flavor!
Step-by-Step Instructions
Alright, kitchen warriors, let’s dive into the magic of creating our Coconut Macaroon Cookies! Follow these steps, and soon you’ll have a plate of these sweet treasures ready to enjoy.
-
Preheat Your Oven:
Preheat your oven to 325°F (160°C). This ensures that when you pop those cookies in, they’ll bake evenly and turn golden brown. Pro tip: Make sure your oven is fully preheated. It can make a world of difference in baking! -
Prepare Your Baking Sheet:
Line a baking sheet with parchment paper. This keeps your cookies from sticking and makes for an easy clean-up. If you don’t have parchment, a lightly greased baking sheet will do the trick too. -
Mix Dry Ingredients:
In a large bowl, combine the sweetened shredded coconut, granulated sugar, and salt. Stir them together until they’re well blended, and you see that lovely coconut fluff starting to form. I always love the texture of the coconut and sugar together; it’s the little things that make the process enjoyable! -
Add Wet Ingredients:
In a separate bowl, whisk the egg whites and vanilla extract until frothy but not peaked. You’re looking for a soft froth that will create the perfect binding mixture. Pour this frothy goodness into the dry mixture and mix well until everything is combined. Remember, it should be a little sticky! -
Shape the Cookies:
Using a tablespoon or a small ice cream scooper, scoop the mixture onto your prepared baking sheet. Keep them about 2 inches apart, as they will spread slightly. You can use your fingers to shape them into small mountain-like piles; this gives them that artisanal look! -
Bake:
Bake in your preheated oven for 20-25 minutes or until the tops are golden brown. Keep an eye on them; ovens can vary, and we want them perfectly baked, not burnt! Pro tip: Rotating the baking sheet halfway through can help ensure even baking. -
Cool Down:
Once baked, allow the cookies to cool on the baking sheet for about 10 minutes before transferring them to a wire rack. This helps them firm up a bit and makes them easier to move without crumbling.
Serving Suggestions
Now that your Coconut Macaroon Cookies are all baked and cooled, it’s time to celebrate! Here are some fun ways to serve them:
-
Platter Display: Arrange them on a beautiful platter, perhaps garnished with some fresh mint leaves or a sprinkle of shredded coconut for that extra flair.
-
Dipping Delight: Melt some dark or semi-sweet chocolate and dip half of each macaroon in it, then let them set on parchment. This adds a luxurious touch to the cookies!
-
Dessert Trio: Pair them with a scoop of vanilla ice cream and a drizzle of chocolate syrup for an indulgent dessert experience. Heaven in every bite!
Recipe Variations
Looking to shake things up a bit? Here are some fun twists and variations you can try with your coconut macaroons:
-
Chocolate Chip Surprise: Add 1/2 cup of mini chocolate chips to the mixture for a melty chocolate surprise within each cookie.
-
Nutty Coconut: Incorporate some chopped almonds or pecans into the mixture for added crunch and flavor.
-
Tropical Zest: Add the zest of one lime or orange to the mixture for a refreshing citrusy kick that pairs wonderfully with the coconut.
-
Coffee Lover’s Dream: Stir in 1 tablespoon of instant coffee granules for a delicious mocha flavor.
-
Gluten-Free Option: This recipe is already gluten-free, but you can also substitute some of the sugar with a low-carb sweetener for a keto-friendly version!
Chef’s Notes
Over the years, my coconut macaroon recipe has gone through some delightful tweaks and variations. I remember the first time I dared to dip them in chocolate—what a game changer! I’ve also experimented with different types of coconut, from finely shredded to even toasted, which adds a different dimension to the flavor.
One time, I cooked up a batch for a friend’s wedding, and it became the highlight of the dessert table. Watching everyone enjoy those cookies reminded me of my grandma’s kitchen and her joy in bringing people together through food. What a beautiful connection food creates!
FAQs and Troubleshooting
Here are some common questions you might have as you bake these delicious treats:
-
Why are my macaroons too dry?
If your batter seems dry before baking, it may need a bit more moisture. Consider adding an extra egg white or a splash of coconut milk for that perfect sticky texture. -
Can I freeze these cookies?
Absolutely! Once cooled, you can freeze them in an airtight container for up to three months. Just thaw them at room temperature when you’re ready to indulge. -
How can I make them crispier?
For crispier edges, bake them a few minutes longer until they are a deeper golden brown. Just be careful not to overdo it! -
What should I do if they spread too much?
If your coconut macaroons spread too much, it could be because you didn’t let the egg whites froth enough or the oven wasn’t hot enough. Make sure to follow the instructions closely for that perfect shape.
Nutritional Info
While these delightful cookies are a treat, it’s always good to know what you’re indulging in! Each macaroon is packed with the goodness of coconut and has approximately:
- Calories: 80-90
- Fat: 4g
- Carbohydrates: 10g
- Sugar: 7g
- Protein: 1g
As always, these figures can vary based on specific brands and portions used, but you can enjoy these little bites of joy guilt-free!
Final Thoughts
I hope you feel inspired to bake up a batch of Coconut Macaroon Cookies! There’s something truly special about creating something delicious from scratch, and sharing it with loved ones only makes it sweeter. So why wait? Grab those ingredients, and let’s create some memorable moments together in the kitchen!
Remember, cooking is all about joy, creativity, and togetherness. Let the warmth of those coconut macaroons embrace you, just like grandma’s hugs did. Until next time, happy baking and keep feeding your foodie soul! 🍪🥥
Print
Coconut Macaroon Cookies
- Total Time: 35 minutes
- Yield: 20 servings 1x
- Diet: Gluten-Free
Description
Delightful coconut macaroons that are crunchy on the outside and chewy on the inside, perfect for sweet nostalgia.
Ingredients
- 2 2/3 cups sweetened shredded coconut
- 1/2 cup granulated sugar
- 2 egg whites
- 1/4 teaspoon salt
- 1 teaspoon vanilla extract
Instructions
- Preheat your oven to 325°F (160°C).
- Line a baking sheet with parchment paper.
- Combine the sweetened shredded coconut, granulated sugar, and salt in a large bowl.
- Whisk the egg whites and vanilla extract in a separate bowl until frothy.
- Pour the egg white mixture into the dry ingredients and mix well until combined.
- Scoop the mixture onto the prepared baking sheet, keeping them about 2 inches apart.
- Bake for 20-25 minutes or until golden brown.
- Cool on the baking sheet for about 10 minutes before transferring to a wire rack.
Notes
Try dipping the macaroons in melted dark chocolate for a luxurious touch!
- Prep Time: 10 minutes
- Cook Time: 25 minutes
- Category: Dessert
- Method: Baking
- Cuisine: American
Nutrition
- Serving Size: 1 cookie
- Calories: 85
- Sugar: 7g
- Sodium: 100mg
- Fat: 4g
- Saturated Fat: 3g
- Unsaturated Fat: 1g
- Trans Fat: 0g
- Carbohydrates: 10g
- Fiber: 1g
- Protein: 1g
- Cholesterol: 0mg
Keywords: coconut macaroons, cookies, dessert, gluten-free, sweet treats

These banana oatmeal cookies are easy to make with a few simple ingredients in 20 … | Banana oatmeal cookies, Banana oatmeal cookies healthy, Healthy sweets recipes
Delightful Banana Oatmeal Cookies: A Simple Recipe for Sweet Moments
Hey there, fellow food enthusiasts! I’m Beau Collier, and I’m absolutely thrilled to share one of my all-time favorite treats with you – banana oatmeal cookies. Trust me; these beauties are the epitome of feel-good food! Not only are they a wonderfully satisfying snack, but they also happen to be a breeze to whip up with just a handful of ingredients.
Now, I know what you might be thinking: "Cookies? Easy peasy? Are you sure?" Absolutely! This recipe is all about simple, wholesome ingredients that come together in a flash. So, whether you’re whipping them up for an afternoon treat, school lunches, or simply to enjoy with your favorite cup of coffee, you’re in for a delightful experience.
Banana oatmeal cookies not only offer delightful flavor but also provide a wholesome twist, making them a healthier alternative to traditional cookies. Plus, they’re perfect for those ripe bananas that seem to be begging for a purpose. So, let’s dive in, grab those bananas, and let our baking adventure begin.
By the end of this blog post, you’ll be inspired, informed, and ready to bake a batch of these divine cookies that taste like home and happiness. So grab your apron, and let’s make some magic happen in the kitchen!
Personal Story
Growing up, cookies were always a family staple in our house. My mom had a special knack for baking desserts that could turn even the dreariest of days into something bright and beautiful. But there’s one specific memory that stands out, like it was just yesterday.
I remember a rainy Sunday afternoon, the kind where you’d find me curled up with a book in one hand and a warm cookie in the other. Mom decided it was the perfect time to experiment in the kitchen, and before I knew it, the smell of bananas and oats wafted through our home. She had a few overly ripe bananas lying around, and with her magical touch, we transformed them into the most delightful banana oatmeal cookies.
I stood beside her, eagerly measuring ingredients, my little hands trying to keep up with her expert movements. As we mixed, we shared stories, laughed, and filled our home with warmth. Those cookies didn’t just satisfy our sweet cravings; they created a cherished moment that I still hold close to my heart. Fast forward to today, and whenever I bake these cookies for my family and friends, I’m reminded of those rainy afternoons filled with laughter, learning, and love.
Ingredients
Let’s gather what we’ll need for our delectable banana oatmeal cookies. Here’s a simple list, along with some handy insights on each ingredient:
-
Ripe Bananas (2 large)
- Insight: The more speckles, the better! Riper bananas are sweeter and contribute to moister cookies. No ripe bananas? You can use applesauce as a substitute – about ½ cup will do the trick for added sweetness and moisture.
-
Old-Fashioned Oats (2 cups)
- Insight: Old-fashioned oats provide great texture and chewiness. If you’re looking for a gluten-free option, make sure to grab certified gluten-free oats.
-
Brown Sugar (½ cup)
- Insight: Brown sugar adds depth and extra moisture to the cookies. If you’re looking to cut back on sugar, feel free to reduce this to ¼ cup, or substitute with coconut sugar for a hint of caramel flavor.
-
Flour (1 cup, all-purpose or whole wheat)
- Insight: Use all-purpose for a classic cookie. Whole wheat flour provides a nuttier flavor and a nutritional boost. Coconut flour can also be used, but adjust the quantity to ⅓ cup, as it’s absorbent!
-
Cinnamon (1 teaspoon)
- Insight: This spice adds warmth and a cozy aroma, making these cookies even more irresistible. Experiment with nutmeg or pumpkin spice if you want to switch things up.
-
Baking Powder (1 teaspoon)
- Insight: This little ingredient helps provide lightness to the cookies. For a gluten-free option, you can use a gluten-free baking powder.
-
Salt (¼ teaspoon)
- Insight: Just a pinch helps balance the sweetness.
-
Vanilla Extract (1 teaspoon)
- Insight: Always go for pure vanilla extract if you can—it’s worth the investment! You can replace it with almond extract for a different flavor profile.
-
Optional Add-ins (chocolate chips, nuts, or dried fruit)
- Insight: Make these cookies your own! Chocolate chips are always a crowd-pleaser, but don’t shy away from throwing in some walnuts or dried cranberries for extra crunch and sweetness.
Step-by-Step Instructions
Are you ready to bake? I promise this will be a fun and straightforward process! Here’s how to make these delightful banana oatmeal cookies.
-
Preheat Your Oven
- Preheat your oven to 350°F (175°C). This step is essential to ensure your cookies bake evenly!
-
Mash Those Bananas
- Take your ripe bananas and put them in a mixing bowl. Using a fork or a potato masher, mash them into a smooth puree. You want to avoid lumps for the most uniform textures. Bonus: It’s a great arm workout!
-
Mix the Wet Ingredients
- To your mashed bananas, add the brown sugar, vanilla extract, and any optional add-ins (like chocolate chips or nuts if using). Stir to combine until you have a smooth, cohesive mixture.
-
Combine the Dry Ingredients
- In a separate bowl, mix together your oats, flour, baking powder, cinnamon, and salt. This helps ensure your leavening agents are evenly distributed, which is key to fluffy cookies.
-
Merge It All Together
- Gradually add the dry mixture to your wet ingredients, stirring until just combined. Don’t overmix; you want it to be a little lumpy and rustic. The dough should be thick and slightly sticky!
-
Scoop It Out
- Using a tablespoon or cookie scoop, dollop the cookie dough onto a parchment-lined baking sheet. Leave some space between each dollop, as they will spread slightly while baking.
-
Bake Time
- Pop the tray into the oven and bake for about 12-15 minutes or until the edges are golden brown. The tops might look a tad undercooked, but they will firm up as they cool.
-
Cooling Moment
- Once out of the oven, let the cookies cool on the baking sheet for 5 minutes before transferring them to a wire rack to cool completely. This step is crucial for that perfect chewy texture!
-
Enjoy Your Creation
- And there you have it! Dive into these delicious, warm banana oatmeal cookies. Trust me; they won’t last long!
Serving Suggestions
Plating and serving your banana oatmeal cookies can be just as fun as baking them! Here are some delicious ideas to elevate your cookie experience:
-
Classic Treat: Serve the cookies warm on a plate sprinkled with a bit of powdered sugar for a touch of elegance. Maybe pair them with a glass of cold milk or a steaming cup of herbal tea for a cozy afternoon.
-
Dessert Platter: Create a dessert platter by stacking the cookies high and draping them with melted chocolate. Add fresh fruits like berries and bananas, and a scoop of vanilla ice cream on the side for a mouthwatering dessert spread.
-
Cookie Sandwich: Take two cookies and sandwich a layer of cream cheese frosting or Nutella in between for an indulgent treat that will set your cookie game apart.
-
Scoop-It-Up: Crumble a cookie over a bowl of Greek yogurt and add fresh fruits for a nutritious breakfast or snack. A drizzle of honey on top will make it irresistible!
Recipe Variations
Let’s get creative with our banana oatmeal cookies! Here are some fun variations to try out:
-
Peanut Butter Banana Oatmeal Cookies:
- Add 1/3 cup of peanut butter to the wet ingredients for a nutty flavor. You’ll love that creamy texture!
-
Chocolate Chip Oatmeal Cookies:
- Fold in 1 cup of semisweet chocolate chips for a classic twist. Who can resist a chocolatey treat?
-
Coconut Oatmeal Cookies:
- Add ½ cup of shredded coconut to the mix for a tropical vibe—this is heavenly with the banana!
-
Vegan Version:
- Replace the brown sugar with maple syrup (about ⅓ cup) and use a flaxseed egg (1 tablespoon ground flaxseed mixed with 2.5 tablespoons of water) for a completely vegan cookie.
-
Spiced-Up Cookies:
- Consider adding a pinch of ginger or a hint of pumpkin spice for a seasonal twist. These flavors pair beautifully with bananas!
Chef’s Notes
These cookies are a labor of love, and every time I make them, they remind me of those cozy afternoons with my mom. The recipe has evolved over the years – I experimented with various mixes, and every iteration has brought a new flavor profile to the table.
One time, in a hilarious mishap, I accidentally grabbed salt instead of sugar. The look on my friends’ faces when they took a bite was priceless! It was a lesson learned that day: always double-check your ingredients!
But honestly, this recipe holds a special place in my heart, and I hope it brings you the same warmth and joy that it brings me every time I bake a batch.
FAQs and Troubleshooting
-
Can I freeze these cookies?
- Absolutely! Once cooled, place them in an airtight container or freezer bag, and they’ll last about 3 months. Just thaw them at room temperature, or pop them in the microwave for a few seconds for that fresh-out-of-the-oven experience.
-
Why are my cookies flat?
- Flat cookies can happen if your butter or bananas were too warm, leading to a spread. Also, make sure your baking powder is fresh, as expired leavening agents won’t give you the lift you desire!
-
Can I replace the oats with something else?
- Certainly! You can use quick oats in a pinch, though they won’t lend quite the same chewy texture. If you prefer grain-free, then almond flour or coconut flour can work as substitutes, but you may have to adjust the liquid accordingly.
-
They turned out too dry – what went wrong?
- If your cookies turned out dry, it’s likely you used too much flour. Make sure to measure correctly and avoid packing the flour into the measuring cup. A kitchen scale can be a great help to ensure accuracy!
Nutritional Info
Each banana oatmeal cookie (assuming you get about 18 cookies from this recipe) contains roughly:
- Calories: 90
- Protein: 2g
- Carbohydrates: 14g
- Fat: 2.5g
- Fiber: 1.5g
- Sugar: 5g
These numbers can vary based on your ingredient choices and additions, but overall, these cookies are a wholesome snack without the guilt!
Final Thoughts
I hope you’ve enjoyed this journey of banana oatmeal cookie-making as much as I do. This recipe is more than just a delightful treat; it’s a way to connect with loved ones in the kitchen, share memories, and create delicious moments.
So the next time you find yourself with some ripe bananas, don’t just pass them by. Embrace the joy of baking, and come back to this recipe again and again.
Share your creations with family, friends, or anyone who could use a warm hug in cookie form. Don’t forget to drop a comment if you try these out, or share your own twists and turns along the way. Happy baking, and remember—every cookie is a story waiting to be told!
Until next time, keep it cozy, keep it sweet, and most importantly, keep it delicious! 🍪✨
Print
Delightful Banana Oatmeal Cookies
- Total Time: 30 minutes
- Yield: 18 cookies 1x
- Diet: Vegetarian
Description
A simple and wholesome recipe for delicious banana oatmeal cookies that are perfect for any occasion.
Ingredients
- 2 large Ripe Bananas
- 2 cups Old-Fashioned Oats
- ½ cup Brown Sugar
- 1 cup all-purpose or whole wheat Flour
- 1 teaspoon Cinnamon
- 1 teaspoon Baking Powder
- ¼ teaspoon Salt
- 1 teaspoon Vanilla Extract
- Optional Add-ins (chocolate chips, nuts, or dried fruit)
Instructions
- Preheat your oven to 350°F (175°C).
- Mash the ripe bananas in a mixing bowl until smooth.
- Mix in the brown sugar, vanilla extract, and any optional add-ins.
- Combine the oats, flour, baking powder, cinnamon, and salt in a separate bowl.
- Merge the dry mixture into the wet ingredients until just combined.
- Scoop the dough onto a parchment-lined baking sheet.
- Bake for about 12-15 minutes or until golden brown.
- Cool on the baking sheet for 5 minutes before transferring to a wire rack.
- Enjoy your delicious cookies!
Notes
These cookies can be frozen and will last up to 3 months in an airtight container. Adjust the ingredients based on your preferences.
- Prep Time: 15 minutes
- Cook Time: 15 minutes
- Category: Dessert
- Method: Baking
- Cuisine: American
Nutrition
- Serving Size: 1 cookie
- Calories: 90
- Sugar: 5g
- Sodium: 50mg
- Fat: 2.5g
- Saturated Fat: 0.5g
- Unsaturated Fat: 2g
- Trans Fat: 0g
- Carbohydrates: 14g
- Fiber: 1.5g
- Protein: 2g
- Cholesterol: 0mg
Keywords: banana cookies, oatmeal cookies, healthy snacks, easy cookies, baking, dessert