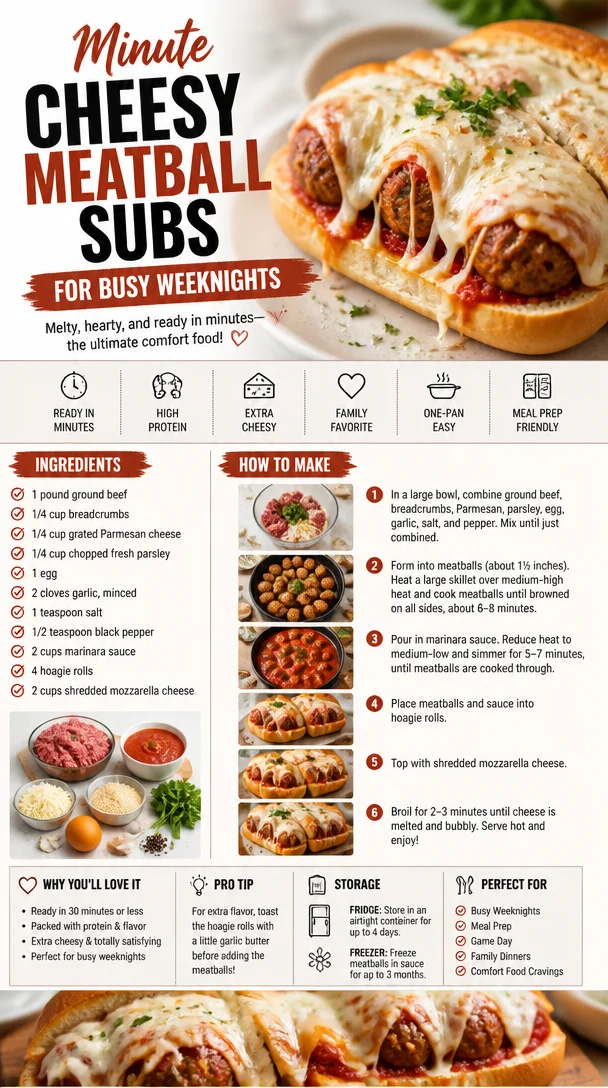
Minute Cheesy Meatball Subs for Busy Weeknights
Cheesy Meatball Subs: A Comfort Food Classic
Hey there! I’m Beau Collier, and welcome to Feastical! Today, I’m whipping up one of my all-time favorite comfort food creations: Cheesy Meatball Subs. There’s just something about a warm, gooey meatball sub that’s like a hug from the inside out. The way the meatballs bubble in marinara sauce, nestled in a hoagie roll and topped with melted mozzarella, is nothing short of magical. So, if you’re ready to roll up your sleeves, I promise you’ll want to savor every bite of these delectable sandwiches.
Like many cooking lovers, my journey began in my childhood kitchen, where my family gathered around the table for a Sunday feast. My mom always had a pot of marinara sauce simmering on the stove; its rich aroma made it impossible not to gather around. However, the star of our family meal was her meatball subs. She believed the secret ingredient was love, and her subs always tasted like it. The way she rolled those meatballs—so tender, so juicy—was an art form in itself. Fast forward a few decades later, and here I am, passing down that same joy and flavor to you. Let’s dive into this recipe and create some delicious memories together!
Ingredients
Here’s what you’ll need to bring your Cheesy Meatball Subs to life:
-
1 pound ground beef
The backbone of this recipe! You can also use a mixture of ground beef and ground pork for more flavor. For a leaner option, ground turkey or chicken works well. -
1/4 cup breadcrumbs
Ideal for that perfect meatball texture! Panko breadcrumbs are a great alternative if you want extra crunch. Gluten-free breadcrumbs are also available if you’re looking for a gluten-free option. -
1/4 cup grated Parmesan cheese
This adds a delightful umami savor to your meatballs. If you’re a fan of a stronger cheese flavor, try using Pecorino Romano instead. -
1/4 cup chopped fresh parsley
Fresh herbs elevate any dish! If parsley isn’t your thing, fresh basil or even cilantro will bring a unique flavor twist. -
1 egg
This is your binder to keep those meatballs together. You can use a flax egg (1 tablespoon ground flaxseed mixed with 2.5 tablespoons water) for a vegan option. -
2 cloves garlic, minced
Because garlic makes everything better! Use roasted garlic if you want a milder, sweeter taste. -
1 teaspoon salt
A must to enhance the flavors. Feel free to adjust for dietary needs or swap with garlic salt for an extra flavor kick. -
1/2 teaspoon black pepper
For that little punch! You can swap it with red pepper flakes for a spicy kick. -
2 cups marinara sauce
You can use homemade or store-bought. For extra depth, look for a brand with a blend of herbs. If you’re feeling adventurous, a spicy marinara adds a great twist. -
4 hoagie rolls
These are the vessel for our masterpiece! If hoagie rolls aren’t available, sub in any crusty bread or even baguettes. -
2 cups shredded mozzarella cheese
The gooey, melty star of our show! For a cheesy variation, try a blend of mozzarella and provolone cheese.
Step-by-Step Instructions
Now, let’s get cooking! Follow these easy steps for your Cheesy Meatball Subs:
-
Preheat the Oven
Preheat your oven to 375°F (190°C). This ensures that our meatballs will cook perfectly. If you have a convection oven, you can reduce the temperature by 25°F for a nice even cook. -
Prepare the Meatball Mixture
In a large mixing bowl, combine the ground beef, breadcrumbs, Parmesan cheese, chopped parsley, egg, minced garlic, salt, and black pepper. Get in there with your hands! Mixing with your hands helps you feel the texture and ensures everything is evenly combined. Pro Tip: Don’t overmix, or you’ll end up with tough meatballs. -
Shape the Meatballs
Roll the mixture into golf ball-sized meatballs – about 1 to 1.5 inches in diameter. Place them on a baking sheet lined with parchment paper. The parchment helps with easy cleanup. -
Bake the Meatballs
Pop those meatballs in the preheated oven for about 20–25 minutes, or until they’re golden brown and cooked through. You can multitask during this time—get your marinara sauce warming on low in a separate pot for an irresistible aroma. -
Simmer in Marinara Sauce
Once your meatballs are finished baking, add them to the warm marinara sauce. Let them simmer together for about 10 minutes. This step allows all those flavorful juices to mingle. -
Prepare the Rolls
While the meatballs are simmering, slice your hoagie rolls down the center, but not all the way through—think of it as creating a little pocket for the goodies! Place them on a baking tray. -
Assemble the Cheesy Subs
Spoon the meatballs and marinara sauce into each hoagie roll. Top generously with shredded mozzarella cheese. Chef Hack: If you want a delightful golden crust on the cheese, pop them under the broiler for 2-3 minutes. Just watch it—things can go from brown to burned quickly! -
Serve and Enjoy!
Once the cheese is melted and bubbly, remove the tray from the oven. Let them cool for a couple of minutes (if you can resist the smell!). Plate your subs and dive into cheesy deliciousness!
Serving Suggestions
For plating, serve your Cheesy Meatball Subs on a rustic wooden board or a simple white plate to let that gooey goodness shine. Dress it up with a sprinkle of extra parsley or basil on top for a pop of color. On the side, consider crispy, golden fries or a fresh garden salad to balance out the richness of the subs. And don’t forget a small bowl of extra marinara sauce for dipping!
Recipe Variations
Now, let’s shake things up a bit. Here are a few creative twists to make the recipe your own:
-
Spicy Meatball Subs: Add crushed red pepper flakes into the meat mixture for some heat. Serve with pickled jalapeños for an extra kick.
-
Veggie-Packed Meatballs: Swap half of the ground beef for finely grated zucchini or carrots. It adds moisture and a sneaky veggie boost!
-
Cheesy Garlic Bread Rolls: Brush the hoagie rolls with garlic butter before adding the filling for an extra layer of flavor.
-
Substitute Proteins: Use ground turkey, lamb, or even plant-based ground meat for a different flavor profile or for those following a specific diet.
-
Herbed Variations: Experiment by adding various herbs like oregano, thyme, or even a dash of Italian seasoning to the meatball mixture for a new twist on flavor.
Chef’s Notes
Every dish carries a piece of its creator’s heart, doesn’t it? This Cheesy Meatball Sub recipe is no exception. I’ve modified it over time—what started as mom’s secret sauce and infinite love has turned into a canvas for creativity. I’ve even experimented with homemade hoagie rolls; if you find yourself with some extra time, I highly recommend trying your hand at making them from scratch. The joy of biting into a chewy, fresh hoagie roll stuffed with these meatballs is simply unforgettable.
FAQs and Troubleshooting
1. Why are my meatballs falling apart?
This usually happens if there’s not enough binding agent. Make sure to use an egg and don’t skip the breadcrumbs!
2. How do I store leftovers?
Store any leftovers in an airtight container in the fridge for up to 3 days. Reheat in the oven for the best texture.
3. Can I freeze these?
Absolutely! You can freeze the uncooked meatballs on a baking tray and then transfer them to a freezer bag. They’ll keep for up to 3 months! Just thaw and bake when you’re ready.
4. What’s the best way to reheat the meatball subs?
For optimal gooeyness, reheat in the oven at 350°F (175°C) until warmed through and cheese is melted, about 10-15 minutes.
Nutritional Info
Serving size: 1 sub
- Calories: ~500
- Protein: 30g
- Fat: 25g
- Carbohydrates: 40g
- Fiber: 2g
- Sugar: 5g
(Nutritional values are estimates and may vary based on specific ingredients and serving sizes.)
Final Thoughts
There you have it, my friends! Your very own recipe for Cheesy Meatball Subs that’ll make your kitchen smell heavenly and your heart sing. It’s more than just food; it’s about gathering with friends, sharing stories, and creating memories over a dish that always brings everyone together. So, gather your ingredients, turn up your favorite playlist, and let’s get cooking. Remember, food is meant to be enjoyed, so don’t stress; have fun in the kitchen! Until next time, happy feasting!
Print
Cheesy Meatball Subs
- Total Time: 50 minutes
- Yield: 4 servings 1x
- Diet: None
Description
A comforting and delicious meatball sub recipe that features tender meatballs in marinara sauce, topped with gooey mozzarella cheese, all nestled in a warm hoagie roll.
Ingredients
- 1 pound ground beef
- 1/4 cup breadcrumbs
- 1/4 cup grated Parmesan cheese
- 1/4 cup chopped fresh parsley
- 1 egg
- 2 cloves garlic, minced
- 1 teaspoon salt
- 1/2 teaspoon black pepper
- 2 cups marinara sauce
- 4 hoagie rolls
- 2 cups shredded mozzarella cheese
Instructions
- Preheat your oven to 375°F (190°C).
- In a large mixing bowl, combine the ground beef, breadcrumbs, Parmesan cheese, chopped parsley, egg, minced garlic, salt, and black pepper.
- Roll the mixture into golf ball-sized meatballs and place them on a baking sheet lined with parchment paper.
- Pop those meatballs in the oven for about 20-25 minutes, until golden brown and cooked through.
- Once the meatballs are baked, add them to the warm marinara sauce and let them simmer for about 10 minutes.
- Slice your hoagie rolls down the center, but not all the way through.
- Spoon the meatballs and marinara into each hoagie roll and top with shredded mozzarella cheese.
- Pop them under the broiler for 2-3 minutes for a golden crust.
- Remove from the oven, let them cool for a couple of minutes, then serve and enjoy!
Notes
For variations, you can add spicy elements or swap out the ground meats, or brush the rolls with garlic butter for extra flavor.
- Prep Time: 15 minutes
- Cook Time: 35 minutes
- Category: Main Course
- Method: Baking
- Cuisine: Italian
Nutrition
- Serving Size: 1 sub
- Calories: 500
- Sugar: 5g
- Sodium: undefined
- Fat: 25g
- Saturated Fat: 10g
- Unsaturated Fat: 15g
- Trans Fat: 0g
- Carbohydrates: 40g
- Fiber: 2g
- Protein: 30g
- Cholesterol: 80mg
Keywords: meatball, sub, sandwich, comfort food, cheesy

Minute Ricotta-Stuffed Zucchini Involtini for Weeknights
Ricotta Stuffed Zucchini Involtini: A Flavorful Journey
Hey there, food lovers! Welcome back to Feastical, where I whip up delicious meals that make your kitchen feel like home! Today, we’re diving into a dish that’s as comforting as it is elegant—Ricotta Stuffed Zucchini Involtini. This delightful recipe takes humble zucchini and transforms it into tender rolls filled with creamy ricotta and fresh herbs, nestled in a warm bath of savory tomato sauce. It’s perfect for a cozy family dinner or when you want to impress friends without breaking a sweat.
Picture this: the sun-drenched afternoon of a late summer day, the garden bursting with fresh veggies, and you’re feeling inspired to cook! There’s something magical about zucchinis in July; they seem to multiply overnight. And of course, that means it’s time for some stuffed zucchini! This dish not only satisfies your cravings but also brings back memories of cooking with family and friends during those warm, carefree days. So, grab your apron, and let’s make some culinary magic happen!
Not only is this recipe a feast for the senses with its vibrant colors and heavenly aromas, but it’s also uncomplicated. If you’ve ever felt daunted by the thought of a fancy dinner, fear not! This Ricotta Stuffed Zucchini Involtini is approachable and packed with flavor. And the best part? It looks like you’ve spent hours in the kitchen, but really, it comes together in a snap! Ready to fill your home with the aroma of baked goodness? Let’s get rolling!
Personal Story
I remember the first time I made Zucchini Involtini—it was an experiment, to say the least! On a lazy Sunday, I had a bunch of zucchini that I desperately needed to use up, along with some leftover ricotta from my usual lasagna-making spree. Thinking outside the box, I decided to roll the ricotta in thinly sliced zucchini and bake them with some marinara sauce. The result was pure magic!
My family gathered around the table, and you could almost hear the taste buds dancing in delight as they took their first bites. The combination of warm, cheesy filling harmonized beautifully with the rich tomato sauce. It turned out to be one of those dishes that, after the first taste, beckons you to come back for more.
That day was a reminder that the best meals often come from using what you have on hand. Now, every time zucchini season rolls around, so does this yummy recipe, bringing back those warm family moments and laughter around the dinner table.
Ingredients
Here’s what you’ll need to create this delightful dish along with some insider tips to enhance your cooking experience:
-
4 zucchinis: Choose firm, bright green zucchinis; they hold up beautifully when rolled. If zucchinis are not available, eggplant or bell peppers can be delicious substitutes.
-
1 tbsp olive oil: A drizzle adds flavor and helps the zucchinis caramelize beautifully. You can swap it for avocado oil if you prefer a higher smoke point.
-
Pinch of salt & pepper: Essential for seasoning! Don’t skimp here. You can also use garlic salt or seasoned salt for added flavor.
-
1 cup ricotta cheese: This creamy filling is the star of the show. If you’re dairy-free, try using cashew cream instead for a similar texture.
-
1/4 cup grated parmesan cheese: Adds a lovely depth of flavor. If you prefer a vegan version, nutritional yeast is a great alternative.
-
1/4 cup chopped basil leaves: Fresh basil adds that quintessential Italian flair. You can substitute with parsley or spinach if you’re in a pinch.
-
1 garlic clove, minced: Garlic lovers, rejoice! If you’re not a fan, you can omit it or replace it with garlic powder (about 1/4 tsp).
-
Salt & pepper to taste: Taste as you go! Adding seasoning gradually lets you control the flavor.
-
1 egg: This helps bind the filling together. For a vegan option, you can use a flaxseed egg (1 tbsp flaxseed meal + 3 tbsp water, mixed and let sit).
-
1 jar of your favorite tomato sauce: Pick a sauce that you absolutely adore—homemade or store-bought will do the trick!
-
1 cup shredded mozzarella cheese: A melty topping that completes the dish. You can opt for a dairy-free cheese if you prefer.
-
Fresh basil to garnish: Because who doesn’t love a pop of green? Plus, it makes your dish visually stunning!
Step-by-Step Instructions
Follow these simple steps to create your own Ricotta Stuffed Zucchini Involtini!
-
Prep the Zucchini: Start by trimming the ends of your zucchinis. Slice them lengthwise into thin strips (about 1/4-inch thick). This is key! You want them thin enough to roll but thick enough to hold the filling. If you have a mandoline, use it for consistent slices.
-
Salt the Zucchini: Lay the zucchini strips on a paper towel and sprinkle lightly with salt. This step draws out excess moisture—helpful to prevent sogginess later on! Let them sit for about 15 minutes, then pat dry.
-
Make the Filling: In a mixing bowl, combine the ricotta cheese, grated parmesan, chopped basil, minced garlic, salt, pepper, and egg. Mix until all the ingredients are well incorporated; this will create a creamy, flavorful filling. If you find the mixture too thick, a splash of milk or extra olive oil can help thin it.
-
Prep the Sauce and Plate: Preheat your oven to 375°F (190°C). In a medium-sized baking dish, pour a layer of your favorite tomato sauce (about 1 cup)—just enough to cover the bottom. This helps the zucchini not to stick and infuses some lovely flavor!
-
Assemble the Involtini: Now, take your zucchini strips and place about a tablespoon of the ricotta mixture on one end. Gently roll it up, securing the filling in the center. Repeat with the remaining strips and filling until everything is used.
-
Arrange in the Dish: Place the rolled zucchini seam-side down in the prepared baking dish, snugly against each other. Once all rolls are in, cover them with the remaining tomato sauce, and sprinkle with shredded mozzarella on top. What a sight!
-
Bake to Perfection: Pop the dish in the oven and bake for about 25-30 minutes, or until bubbly and golden. The aroma will be utterly irresistible!
-
Serve Warm: Remove from the oven, allowing it to sit for a few minutes. Garnish with freshly torn basil leaves before serving to add a touch of elegance.
Serving Suggestions
Now that your Ricotta Stuffed Zucchini Involtini is gloriously baked to perfection, how do you serve it? It’s as simple as this:
-
Plating Style: Serve the rolls on a large platter, spoon extra sauce from the dish on top, and sprinkle with more mozzarella for that extra touch of beauty. A drizzle of olive oil over the top makes for a stunning finish!
-
Pairings: These involtini pair wonderfully with a side salad—think peppery arugula tossed with a lemon vinaigrette for a fresh balance to the rich flavors of the dish. A crusty loaf of garlic bread never hurts either!
-
Wine Pairing: If you’re in the mood for wine, a light-bodied red like Pinot Noir complements the tomato sauce beautifully. Alternatively, a crisp white like Pinot Grigio can also work well.
Recipe Variations
Feel free to get creative in the kitchen! Here are some variations to make your Ricotta Stuffed Zucchini Involtini even more exciting:
-
Mediterranean Twist: Add sun-dried tomatoes, olives, or feta cheese to the ricotta filling for a tangy Mediterranean flair!
-
Spicy Kick: If you’re feeling bold, add red pepper flakes to the sauce or filling for a generous kick of heat.
-
Herb Explosion: Swap out the basil for fresh thyme or oregano, or even try a mix of both for a flavorful herb medley.
-
Quinoa Boost: For added nutrition, mix cooked quinoa into the ricotta filling—this adds texture and lovely nutty flavor!
-
Vegan Delight: Use tofu or cashew ricotta in place of the dairy, and a chickpea flour mix to bind instead of an egg for a completely plant-based dish.
Chef’s Notes
One of the best parts about cooking is the evolution of recipes over time. My Ricotta Stuffed Zucchini Involtini has morphed through the years, often picking up hints of flavors from other cultures as I explore. I once made a version that had a hint of Indian spice—think cumin and coriander in the ricotta—that was a smash hit at a potluck!
And let me tell you, every time I roll those zucchinis, I’m reminded of all the memories tied to them: the laughter in the kitchen, the clinking of plates, the glorious feeling of sharing a delicious meal with loved ones. So, feel free to make this recipe your own!
FAQs and Troubleshooting
Here are some questions you might have as you tackle your Ricotta Stuffed Zucchini Involtini:
-
What if my zucchini strips are too thick?: Don’t worry! If they feel a bit unruly, you can gently steam them for a couple of minutes to soften them, making rolling easier.
-
How can I store leftovers?: Store any leftovers in an airtight container in the fridge for up to 3 days. Reheat gently in an oven or microwave.
-
Can I freeze these?: Absolutely! Assemble but don’t bake—just freeze until solid, then transfer to a freezer-safe container. Bake from frozen; just add 10-15 minutes to the cooking time.
-
Why did my filling get watery?: This can happen if the zucchini strips aren’t dried well enough. Additionally, if your ricotta has excess moisture, drain it in a cheesecloth before mixing to achieve a thicker filling.
Nutritional Info
For you nutrition-conscious foodies, here’s a breakdown of what’s in a serving of Ricotta Stuffed Zucchini Involtini:
- Calories: Approximately 250 per serving (2 rolls)
- Protein: 14g from ricotta and mozzarella
- Carbohydrates: 15g primarily from zucchinis and sauce
- Fat: 15g, mostly from cheese and olive oil
- Fiber: 4g from zucchini
This dish is packed with nutrients, especially fiber and protein, making it a satisfying option that won’t leave you feeling heavy. Just remember to adjust your portion sizes and ingredient quantities to fit your dietary needs!
Final Thoughts
There you have it, friends—a culinary adventure straight to Italy with a modern twist! Ricotta Stuffed Zucchini Involtini is more than just a dish; it’s an experience, a warm embrace of flavors that draws you to the table.
As you embark on this cooking journey, I encourage you to make it your own. Sprinkle in those family traditions, swap ingredients as you please, and savor every moment spent in the kitchen. Whether you’re cooking for yourself or a crowd, remember that good food brings happiness, and sharing it makes it even better.
Now, gather your ingredients and give this delightful recipe a try! I can’t wait to hear how it turns out for you. Until next time, keep spreading those positive vibes and delicious flavors. Happy cooking!
Print
Ricotta Stuffed Zucchini Involtini
- Total Time: 60 minutes
- Yield: 4 servings 1x
- Diet: Vegetarian
Description
Delicious zucchini rolls filled with creamy ricotta and fresh herbs in savory tomato sauce, perfect for dinner gatherings.
Ingredients
- 4 zucchinis
- 1 tbsp olive oil
- Pinch of salt & pepper
- 1 cup ricotta cheese
- 1/4 cup grated parmesan cheese
- 1/4 cup chopped basil leaves
- 1 garlic clove, minced
- 1 egg
- 1 jar of your favorite tomato sauce
- 1 cup shredded mozzarella cheese
- Fresh basil to garnish
Instructions
- Prep the Zucchini: Trim the ends and slice lengthwise into thin strips.
- Salt the Zucchini: Lay on paper towel, sprinkle with salt, and let sit for 15 minutes.
- Make the Filling: Combine ricotta, parmesan, basil, garlic, salt, pepper, and egg in a bowl.
- Prep the Sauce and Plate: Preheat oven to 375°F (190°C) and cover the bottom of a baking dish with tomato sauce.
- Assemble the Involtini: Place a tablespoon of filling on the zucchini strips and roll them up.
- Arrange in the Dish: Place rolls seam-side down in the baking dish and cover with more tomato sauce and mozzarella.
- Bake to Perfection: Bake for 25-30 minutes until bubbly and golden.
- Serve Warm: Garnish with fresh basil before serving.
Notes
Feel free to experiment with different herbs and spices for unique flavor profiles.
- Prep Time: 30 minutes
- Cook Time: 30 minutes
- Category: Main Course
- Method: Baking
- Cuisine: Italian
Nutrition
- Serving Size: 2 rolls
- Calories: 250
- Sugar: 5g
- Sodium: 500mg
- Fat: 15g
- Saturated Fat: 8g
- Unsaturated Fat: 4g
- Trans Fat: 0g
- Carbohydrates: 15g
- Fiber: 4g
- Protein: 14g
- Cholesterol: 50mg
Keywords: zucchini, ricotta, vegetarian, Italian, stuffed vegetables, comfort food
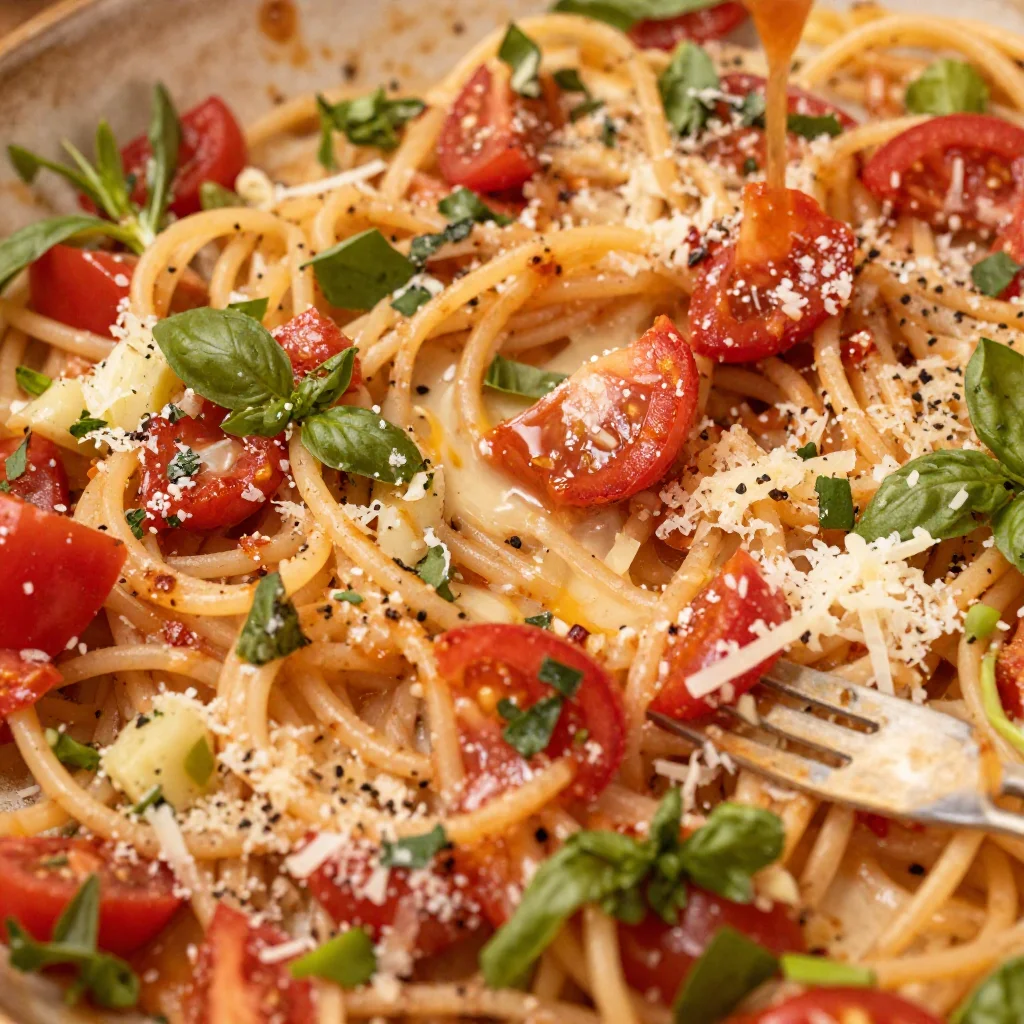
Min Tomato Basil Pasta: Fresh, Fast Weeknight Dinner
Tomato Basil Pasta: A Flavorful Embrace
Hey there, food lover! Today, we’re diving into one of the coziest, heartwarming dishes that effortlessly blends simplicity and flavor—Tomato Basil Pasta. If you’re like me, nothing says “I’ve got this cooking thing down” quite like a plate of spaghetti drenched in vibrant tomato and fresh basil. It’s comfort food at its finest, and I can promise you, it’ll tickle your taste buds in the best way possible!
A Slice of Nostalgia
Let me take you back to a sun-drenched kitchen, the kind with bright checkered curtains and the aroma of Italian herbs swirling in the air. I remember the first time I made Tomato Basil Pasta. I was just a teenager, trying to impress my friends with my supreme culinary skills (or at least my hot-off-the-press pasta creation!). My grandma had just gifted me her treasured handwritten recipe—dog-eared and splattered with evidence of years of love.
I remember the laughter echoing around the dining table, the clinking of forks against bowls, and the unanimous “Mmm” that punctuated every bite. The magic was not just in the pasta; it was in that moment of sharing, of bonding, and of flavors coming together like old friends. Fast forward to today, and I still find myself reaching for this recipe. It’s an eternal source of comfort and joy. So, are you ready to whip up some pasta magic? Let’s get cooking!
Ingredients
Here’s what you’ll need to create this fabulously simple Tomato Basil Pasta dish:
-
2 tablespoons olive oil
A key player in our flavor dance! Olive oil not only adds richness but helps to sauté and release the essential oils from our veggies. You can substitute it with avocado oil for a high smoke point or even butter if you want a creamier taste. -
1 small yellow onion, diced
Onions provide a delightful sweetness and depth of flavor. The smallest size will cook down nicely while adding just the right touch of sweetness. If you’re sensitive to onions, feel free to swap this out for leeks or chives—they bring a milder yet fragrant note! -
4 garlic cloves, minced
Garlic is the heart of Italian cuisine. It’s aromatic and naturally pairs beautifully with tomatoes. If you’re looking to make it milder, try roasting the garlic before adding it, or if you’re in a pinch, garlic powder will do, but use a little less since it’s quite concentrated. -
Salt and pepper
The simplest seasoning duo, but essential for bringing all the flavors to life! Use kosher salt for cooking, and feel free to finish with cracked black pepper for a little gourmet flair. -
1 (28-ounce) can diced tomatoes, drained
The star of this dish! Canned tomatoes are a time-saver and packed with flavor. Look for whole peeled tomatoes that you can crush by hand for a fresher taste. If you prefer fresh tomatoes, about 6 ripe ones will work too—just chop them and remove excess liquid. -
1-2 tablespoons balsamic vinegar
This little splash adds a fantastic layer of acidity and sweetness. If you’re looking for a different note, red wine vinegar or even a squeeze of lemon could do the trick! -
½-1 cup pasta water
Our secret weapon for a silky sauce! The starchy pasta water helps bind and thicken our dish. Just remember to reserve some before draining the pasta. The amount depends on how saucy you like it! -
16 ounces thin spaghetti or angel hair
This is your carb hit! You can switch it up with whole grain for a healthier twist or even spiralized zucchini or spaghetti squash for a low-carb alternative. -
½ cup basil, chopped
Fresh basil is crucial for that vibrant flavor. If you can’t find fresh, dried basil will work—just use about a third of the amount since dried is more concentrated. -
½ cup Parmesan cheese, grated
Oh, cheese—what’s life without you? The nuttiness of Parmesan sings in this dish. For dairy-free options, try nutritional yeast or a vegan cheese substitute.
Step-by-Step Instructions
Now that we’ve gathered all our ingredients, let’s get cooking! Follow these easy steps for a mouthwatering Tomato Basil Pasta that will have everyone asking for seconds!
-
Heat the Oil
In a large skillet, heat the 2 tablespoons of olive oil over medium heat. Feel the oil warming up as it coats the bottom of your pan. This is where the magic begins! -
Sauté the Onions
Next, toss in the diced onion. Stir occasionally until they become translucent—about 5 minutes. This releases the onion’s sweet aroma. If they happen to stick to the pan, don’t fret! A quick splash of water will help loosen them up without losing flavor. -
Add the Garlic
Time to add your minced garlic. Sauté for about 1-2 minutes, keeping an eye out—garlic can go from perfect to burnt in a blink! The magic moment is when you can just start to smell that glorious garlicky goodness! -
In with the Tomato
Pour in the drained diced tomatoes and mix them with the presence of your caramelized onions and garlic. Let them simmer for about 10-15 minutes. The longer it cooks, the richer the flavor. Stir occasionally and enjoy the intoxicating smell filling your kitchen! -
Season It Up
Season your tomato mixture with salt, pepper, and balsamic vinegar. Taste as you go! A little balancing act of acidity will make all the difference. Let it simmer for another 5 minutes. -
Cook the Pasta
While your sauce is bubbling away, boil a pot of salted water and cook your spaghetti or angel hair according to the package instructions. For al dente perfection, aim for a minute less than what it states. Remember to save that precious pasta water before draining! -
Combine Everything
Add your cooked pasta directly into the skillet with the sauce. If things seem a bit dry, gradually add in the reserved pasta water, a little at a time, until you achieve the desired sauce consistency. The starchiness will help marry everything together beautifully. -
Finish With Basil and Cheese
Toss in the chopped basil and grated Parmesan, giving one last stir to blend it all in. The fresh basil brings a burst of summer to the dish! Just like that, your Tomato Basil Pasta is ready to rock on your plates!
Serving Suggestions
Now it’s time to plate up your labor of love! For the ultimate serving experience, twirl your pasta onto a plate or into a shallow bowl. A sprinkle of extra Parmesan on top adds that little touch of decadence. Maybe even a few fresh basil leaves for a pop of color and a drizzle of good-quality olive oil. Pair your pasta with a crisp green salad or some crusty garlic bread, and you’ve got a meal that’s not just delicious but Instagram-ready!
Recipe Variations
If you’re feeling adventurous, here are some fun twists you can put on this Tomato Basil Pasta:
-
Add Protein: Toss in grilled chicken, sautéed shrimp, or even chickpeas for a heartier meal.
-
Veggie Boost: Toss in some spinach, zucchini, or bell peppers just before adding the pasta for extra nutrition and flavor.
-
Spicy Kick: If you love a little heat, add red pepper flakes when you cook the garlic. It’ll give your dish a delightful kick!
-
Creamy Version: Stir in a splash of heavy cream or a dollop of cream cheese for an ultra-rich sauce that’s oh-so-satisfying.
-
Herb Infusion: Experiment with different herbs like oregano, thyme, or even a hint of rosemary for a flavor profile that speaks to your palate.
Chef’s Notes
This Tomato Basil Pasta recipe has seen its fair share of modifications and love over the years. I remember a time when I added way too much balsamic vinegar and turned it into a sweet disaster (oops!). After some tweaks and plenty of taste-testing, I learned that less is more—especially when it comes to balancing flavors.
I also love to make this dish on lazy Sundays, where I can take my time, sip some wine, and immerse myself in nostalgia. For me, it’s not just about the cooking; it’s about the stories and memories we create in the kitchen!
FAQs and Troubleshooting
Here are some common questions and issues you might encounter while cooking this delicious dish:
-
Why is my sauce watery?
This could be due to excess liquid in canned tomatoes or not cooking long enough. Keep simmering to reduce the sauce and concentrate flavors. -
Can I make this ahead of time?
Yes! Prepare the sauce ahead of time and store it in the fridge. Just cook your pasta fresh for an easy, quick mealtime! -
What if my pasta is sticky?
This usually happens when pasta is overcrowded or not cooked enough. Ensure your pot is large and generously salted! -
Can I use dried herbs instead?
Absolutely! Just remember dried herbs are more potent, so go with about one-third of the fresh amount.
Nutritional Info
This Tomato Basil Pasta is not just scrumptious but packed with nutrients, too!
- Calories: Approximately 350-400 per serving (depending on additions)
- Protein: Around 12 grams per serving
- Carbohydrates: Approximately 55 grams per serving
- Fats: About 8-10 grams per serving
- Fiber: Roughly 3 grams per serving
Pair it with a protein source or side salad, and you’ve got a balanced meal any day of the week!
Final Thoughts
As we wrap up our cooking adventure, remember that cooking is about joy and connection. Whether you’re whipping this up for yourself, your family, or a group of friends, it’s about sharing love through food. Tomato Basil Pasta isn’t just a meal; it’s a hug on a plate, a reminder of simpler times, and a delicious gateway to new memories.
So grab your apron, hold that spatula like a wand, and let’s make some culinary magic happen! Bon appétit!
Print
Tomato Basil Pasta
- Total Time: 45 minutes
- Yield: 4 servings 1x
- Diet: Vegetarian
Description
A heartwarming and cozy Tomato Basil Pasta recipe that blends simplicity and flavor, perfect for any occasion.
Ingredients
- 2 tablespoons olive oil
- 1 small yellow onion, diced
- 4 garlic cloves, minced
- Salt and pepper to taste
- 1 (28-ounce) can diced tomatoes, drained
- 1–2 tablespoons balsamic vinegar
- ½–1 cup pasta water
- 16 ounces thin spaghetti or angel hair
- ½ cup basil, chopped
- ½ cup Parmesan cheese, grated
Instructions
- Heat the oil in a large skillet over medium heat.
- Sauté the diced onion until translucent, about 5 minutes.
- Add the minced garlic and sauté for 1-2 minutes.
- Pour in the drained diced tomatoes and let them simmer for about 10-15 minutes.
- Season the mixture with salt, pepper, and balsamic vinegar, and simmer for another 5 minutes.
- Cook the spaghetti or angel hair according to the package instructions.
- Combine the cooked pasta with the sauce, adding reserved pasta water as needed.
- Finish by tossing in the basil and Parmesan cheese.
Notes
For variations, consider adding protein or extra veggies, or try a creamy version with heavy cream.
- Prep Time: 15 minutes
- Cook Time: 30 minutes
- Category: Main Course
- Method: Baking
- Cuisine: Italian
Nutrition
- Serving Size: 1 serving
- Calories: 375
- Sugar: 6g
- Sodium: 420mg
- Fat: 10g
- Saturated Fat: 4g
- Unsaturated Fat: 5g
- Trans Fat: 0g
- Carbohydrates: 55g
- Fiber: 3g
- Protein: 12g
- Cholesterol: 30mg
Keywords: pasta, tomato, basil, Italian, comfort food
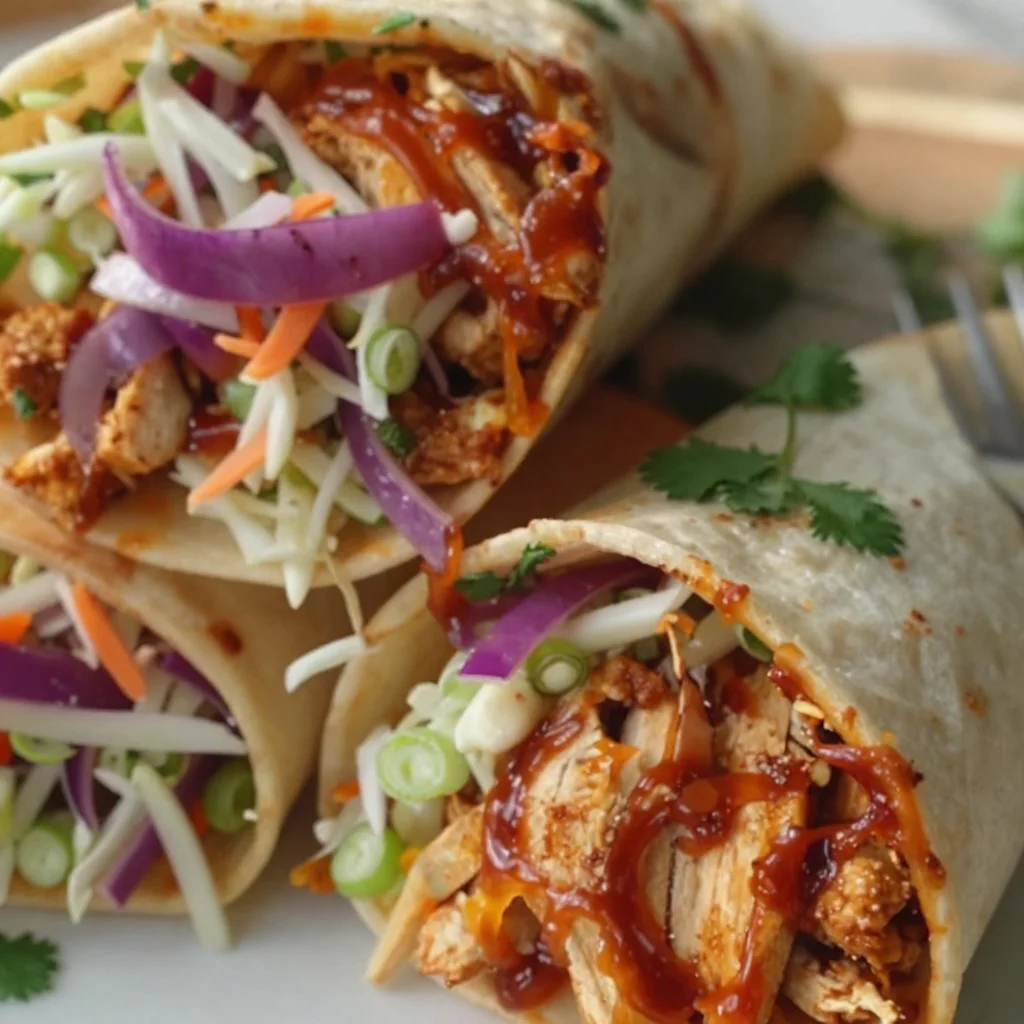
Minute BBQ Chicken Coleslaw Wraps for Busy Weeknights
BBQ Chicken Coleslaw Wraps: A Flavorful Feast!
Hey there, fellow food lovers! If you’re looking for a recipe that bursts with flavor, brings a smile to your face, and is easy to whip up—let me introduce you to my ultimate BBQ Chicken Coleslaw Wraps! These wraps perfectly blend tender, shredded chicken tossed in savory barbecue sauce with the crunch of fresh coleslaw, all wrapped snugly in a warm tortilla.
Now, I don’t know about you, but for me, the kitchen is a happy place—a space filled with good vibes, laughter, and, of course, delicious aromas. Cooking has a magical way of bringing people together, and there’s something remarkably heartwarming about gathering around a table filled with simple yet comforting food. My BBQ Chicken Coleslaw Wraps are all about that vibe: easy, fun, and downright delicious!
Let me take you back to a summer evening when my family decided to throw a backyard barbecue. Picture this: the sun is setting, the grill is sizzling, and laughter fills the air. As the family gathered around, we tossed ideas back and forth about what to make. Someone suggested wraps, and just like that, my BBQ Chicken Coleslaw Wraps were born! The vibrant colors of the coleslaw against the golden tortillas were enough to make anyone’s mouth water.
What I love about this dish is not just the flavor; it’s the memories you create while making it. The joy of putting together simple ingredients and transforming them into something everyone can enjoy fills my heart. So grab your spatula, and let’s dive into this delicious adventure!
A Nostalgic Memory
I still remember the first time I whipped up these BBQ Chicken Coleslaw Wraps for a group of friends. We were having one of those epic summer get-togethers where the food flows like the laughter and stories. I had just returned from a trip to a smoky barbecue joint, and my cravings were at an all-time high. I thought, “Why not recreate that magic?” So, I rounded up the gang, and we commandeered my kitchen together.
As we shredded chicken, mixed coleslaw, and slathered BBQ sauce, the kitchen turned into a friendly chaos. It wasn’t long before we were all hovering around the counter, piling our wraps high with toppings and arguing over whose creation was the best. The combination of smoky BBQ and crunchy, creamy coleslaw elevating the wraps made it a runaway hit!
That evening was not just about food—it was about connection, laughter, and memories made in the kitchen. I’ve made countless BBQ Chicken Coleslaw Wraps since then, yet that night remains one of my favorites. It’s a reminder that the best dishes are those that bring us together.
Ingredients
Here’s what you’ll need to create these delightful wraps:
-
2 cups cooked chicken breast, shredded: Use rotisserie chicken for convenience, or cook your chicken breast in advance. If you’re looking for a plant-based twist, try shredding jackfruit or using chickpea salad!
-
1/2 cup BBQ sauce: Choose your favorite flavor! Whether you like it tangy, smoky, or sweet, BBQ sauce is the star of the show here. If you’re feeling adventurous, make your own homemade version!
-
4 large flour tortillas: Soft flour tortillas are perfect for wrapping. You can swap them for whole wheat or corn tortillas to switch things up!
-
2 cups coleslaw mix: This mix usually contains shredded cabbage and carrots, providing color and crunch. Look for pre-packaged mixes to save time or make your own by shredding fresh vegetables. For a cauliflower-friendly swap, try using finely chopped cauliflower to mimic the crunch!
-
1/4 cup mayonnaise: This adds a creamy element to your coleslaw. If you want to lighten it up, swap it with Greek yogurt or a dairy-free alternative.
-
1 tablespoon apple cider vinegar: This balances the richness of the mayo and BBQ sauce. Feel free to use lemon juice if that’s what you have on hand!
-
1 tablespoon sugar: A hint of sweetness tames the tanginess of the vinegar. For a healthier option, try honey or maple syrup.
-
Salt and pepper to taste: These are simple yet essential seasonings. Don’t be shy; taste as you go!
-
1/4 cup chopped fresh cilantro (optional): Adds a refreshing flavor. If you’re not a fan, skip it or use parsley instead!
-
1/4 cup sliced green onions (optional): These add a nice kick! You can easily replace green onions with diced shallots for a subtler flavor.
With these ingredients, you’re just a few steps away from creating a flavor fiesta!
Step-by-Step Instructions
Now that we have our ingredients ready, let’s get right into the cooking action:
-
Prep the Chicken: If you’re using rotisserie chicken, shred it into bite-sized pieces. If you’re cooking your chicken, simply poach it in simmering water for 15-20 minutes until cooked through, then shred it. You can add a pinch of salt while cooking to infuse some flavor into the chicken.
Chef Hack: If you want maximum flavor, consider marinating the chicken in BBQ sauce for a couple of hours before cooking!
-
Mix the BBQ Sauce: In a medium bowl, mix the shredded chicken with 1/2 cup BBQ sauce until well-coated. Feel free to taste and adjust—some folks like it saucier than others.
-
Make the Coleslaw: In another bowl, combine the coleslaw mix, mayo, apple cider vinegar, sugar, salt, and pepper. Toss everything together until the veggies are evenly coated—get your hands in there if you need to!
Tip: For a zesty twist, add some diced jalapeños or a sprinkle of chili flakes to the coleslaw mix.
-
Warm the Tortillas: To make wrapping easier, warm the flour tortillas in a dry skillet over medium heat for about 20 seconds on each side, just until pliable. Don’t overdo it, or they’ll become crispy!
-
Assemble the Wraps: Lay a warm tortilla flat, spoon some BBQ chicken and top with a generous amount of coleslaw mixture. If you’re using cilantro and green onions, sprinkle them on top at this stage.
-
Wrap It Up: Fold in the sides of the tortilla and then roll it up from the bottom to the top, enclosing the filling. Tuck it in as you roll to keep things nice and snug.
Chef’s Insight: If you want to serve them as a platter, slice the wraps in half diagonally for that perfect presentation!
-
Serve & Enjoy: You can serve them as is or slice them for sharing—or not! These wraps are perfect for a casual meal or even a picnic outdoors.
Serving Suggestions
Serving food is as important as cooking it! To plate your BBQ Chicken Coleslaw Wraps, arrange them neatly on a large platter, and don’t forget to garnish. Here are a couple of serving suggestions to elevate the experience:
-
Garnish with Fresh Herbs: Add a sprinkle of chopped cilantro or parsley on top to add a pop of color.
-
** Serve with Dips:** Offer ranch dressing, extra BBQ sauce, or even hot sauce on the side for those who like a bit of extra kick.
-
Side Dishes: Pair them with crispy sweet potato fries, or serve alongside a simple fruit salad for a fresh contrast.
These wraps can also be set up as a make-your-own wrap station, allowing guests to customize their fillings. The more, the merrier!
Recipe Variations
Feeling creative? Here are a few fun twists you can try to switch up the flavors:
-
Spicy BBQ Chicken Wraps: Add diced jalapeños or a few dashes of hot sauce to the BBQ chicken mixture for some serious heat.
-
Tropical Twist: Swap the BBQ sauce for a sweet and tangy mango salsa, and add pineapple chunks to your coleslaw for a tropical flair.
-
Mediterranean Style: Use shredded rotisserie chicken tossed in garlic and herb vinaigrette, and replace the coleslaw mix with chopped cucumbers, tomatoes, and feta cheese.
-
Vegan Version: Substitute the chicken with shredded jackfruit mixed with your favorite vegan BBQ sauce and use a vegan mayo in the coleslaw.
-
Breakfast Wraps: Use scrambled eggs instead of chicken, and mix in crumbled bacon for a hearty breakfast or brunch option!
Chef’s Notes
As with any recipe, this one has evolved over time! The first iterations were simple, but as I tested different flavor profiles, I became more adventurous. Sometimes I’d add a twist like a spicy BBQ sauce or even a hint of chipotle to make it smoky! What I love most is how adaptable this recipe is. It allows for creativity, making it a dish that evolves with each gathering.
And speaking of gatherings, I always remember one instance where I accidentally overdid it on the sugar while experimenting. Instead of panicking, I decided to go with the flow. I transformed them into dessert BBQ wraps by adding some fresh fruit and whipped cream! The laughter that ensued made for a fabulous memory—proof that mistakes in the kitchen can sometimes lead to delightful discoveries!
FAQs and Troubleshooting
Here are some common questions and troubleshooting tips:
-
What if my chicken is dry?
- If you find that the chicken is a bit dry, mix in a little extra BBQ sauce. This will help moisten it up and add flavor.
-
Can I make this ahead of time?
- Definitely! You can prepare the chicken, coleslaw, and wrap components in advance. Just store them separately in the fridge. Assemble just before serving for the freshest taste.
-
How do I store leftovers?
- Wrap any leftovers tightly in plastic wrap or store them in airtight containers in the fridge. They’ll keep well for about 2-3 days.
-
Can I freeze these wraps?
- While it’s best to eat them fresh, you can freeze the unassembled wraps. Just be sure to wrap them tightly before freezing. When ready to enjoy, thaw overnight in the fridge and warm them up.
Nutritional Info
Each wrap is a balanced combination of protein from the chicken, fiber from the coleslaw, and healthy carbs from the tortillas. Here’s a rough nutritional breakdown per wrap, based on typical ingredients:
- Calories: Approximately 300-350
- Protein: 20-25g
- Carbohydrates: 30-35g
- Fat: 12-15g
- Fiber: 2-3g
Of course, this can vary based on the specific ingredients you choose, especially if you mix and match some substitutions.
Final Thoughts
There you have it! My BBQ Chicken Coleslaw Wraps—perfect for any occasion, whether you’re trying to impress guests or treating yourself to a fun meal at home. Cooking should be joyful, and with this recipe, you’ll hopefully create not just a delightful dish but also wonderful memories!
I encourage you to make these wraps, customize, and share them with friends and family. Remember, food is more than just nourishment; it’s about connection, laughter, and love. Don’t forget to share your own stories as you create these wraps. Whether for a summer picnic, a cozy weeknight dinner, or a fun gathering, I’m sure you’ll find that these wraps bring smiles all around. So, get into the kitchen, and let’s feast together!
Until next time, happy cooking!
Print
BBQ Chicken Coleslaw Wraps
- Total Time: 35 minutes
- Yield: 4 servings 1x
- Diet: Non-Vegetarian
Description
Delicious wraps filled with tender BBQ chicken and crunchy coleslaw, perfect for summer gatherings.
Ingredients
- 2 cups cooked chicken breast, shredded
- 1/2 cup BBQ sauce
- 4 large flour tortillas
- 2 cups coleslaw mix
- 1/4 cup mayonnaise
- 1 tablespoon apple cider vinegar
- 1 tablespoon sugar
- Salt and pepper to taste
- 1/4 cup chopped fresh cilantro (optional)
- 1/4 cup sliced green onions (optional)
Instructions
- Prep the Chicken: Shred cooked chicken into bite-sized pieces. If cooking, poach in simmering water for 15-20 minutes, then shred.
- Mix the BBQ Sauce: Combine shredded chicken with BBQ sauce in a bowl until well-coated.
- Make the Coleslaw: In another bowl, mix coleslaw, mayo, vinegar, sugar, salt, and pepper until veggies are coated.
- Warm the Tortillas: Heat tortillas in a skillet for 20 seconds on each side until pliable.
- Assemble the Wraps: Spoon BBQ chicken and coleslaw onto a tortilla, adding cilantro and green onions if desired.
- Wrap It Up: Fold in the sides and roll from the bottom to top, enclosing the filling.
- Serve & Enjoy: Plate the wraps and garnish with fresh herbs or serve with dips.
Notes
For extra flavor, marinate chicken in BBQ sauce before cooking. Customize with additional toppings as desired.
- Prep Time: 15 minutes
- Cook Time: 20 minutes
- Category: Main Course
- Method: Wrapping
- Cuisine: American
Nutrition
- Serving Size: 1 wrap
- Calories: 350
- Sugar: 6g
- Sodium: 800mg
- Fat: 15g
- Saturated Fat: 3g
- Unsaturated Fat: 9g
- Trans Fat: 0g
- Carbohydrates: 45g
- Fiber: 3g
- Protein: 25g
- Cholesterol: 60mg
Keywords: BBQ chicken, coleslaw wraps, summer recipes, easy meals, family gatherings
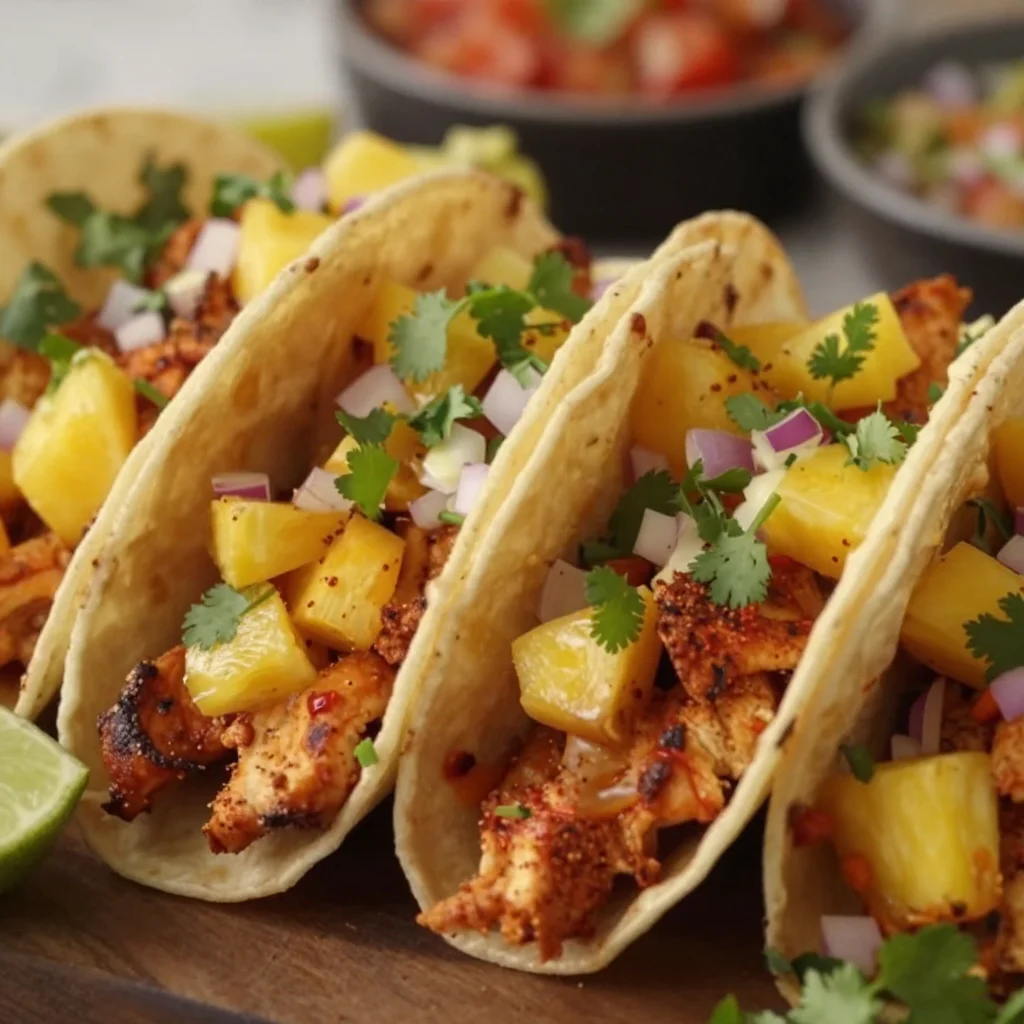
One-Pan Pineapple Chicken Tacos for Busy Weeknights
Pineapple Chicken Tacos: A Flavorful Twist on Taco Night
Hey food lovers! Welcome back to Feastical! If you’re ready to spice up your taco night with a juicy burst of flavor, you’re in for a treat with these Pineapple Chicken Tacos! Picture this: tender, marinated chicken paired with sweet, tangy pineapple, all enveloped in soft tortillas. It’s a dish designed not just to fill your belly but to warm your soul. So grab your favorite kitchen gear, and let’s dive into this deliciousness!
A Taste of Nostalgia
Growing up, taco night was a sacred family ritual in my home. My dad would handle the proteins while my mom prepared the toppings – fresh veggies, zesty sauces, you name it. One summer evening, when I was maybe ten or eleven, we decided to shake things up. My dad came home with a pineapple from the local farmer’s market, beaming with excitement about using it in our tacos. At that time, the concept of fruit in savory dishes was somewhat foreign to me, but curiosity got the best of me.
We diced the juicy pineapple and mixed it with grilled chicken, and the combination was magical! The sweetness of the pineapple danced with the spices while the chicken delivered that hearty substance we all missed. To this day, that summer taco night remains one of my fondest culinary memories. It taught me that cooking is about experimentation, joy, and gathering around the table with the people you love. Now, I can’t wait for you to experience the same exuberance with these Pineapple Chicken Tacos!
Ingredients You’ll Need
Let’s get started with what you need to make these delightful tacos. Here’s the list:
-
1 pound boneless skinless chicken breasts, diced
- These are your protein powerhouse! Boneless and skinless keeps things tender and easy. If you don’t have chicken, you can swap in shrimp or firm tofu for a great alternative.
-
1 tablespoon olive oil
- A little oil goes a long way in searing your chicken and bringing out those flavors! If you’re in a pinch, avocado oil or grapeseed oil works just as well.
-
1 teaspoon smoked paprika
- This spice adds a nice depth and smokiness! If you’re in a spice mood, you could just use regular paprika, but the smoke adds a unique flavor that’s worth the upgrade.
-
1 teaspoon chili powder
- Here comes the heat! Feel free to adjust to your taste. If you prefer it milder, you can go for a mild chili powder or even skip it entirely for a sweet flavor profile.
-
1/2 teaspoon garlic powder
- No taco is complete without garlic! You can use fresh minced garlic for a stronger flavor, just remember that one clove equals about 1/8 teaspoon of garlic powder.
-
1/2 teaspoon salt
- Salt enhances all the flavors, so don’t skip this step! Consider using sea salt or kosher salt for better texture.
-
1 cup fresh pineapple, finely diced
- The star of this show! The sweetness of the pineapple will be the perfect contrast to the savory chicken. Canned pineapple can work in a pinch, but go for fresh if you can!
-
1/4 cup red onion, finely chopped
- Adds a sweet crunch and vibrant color. If red onions are too sharp for you, use green onions or even scallions for a milder taste.
-
1/4 cup fresh cilantro, chopped
- A fresh herb that brightens the dish! If you’re not a fan of cilantro, swap it out for parsley or even mint for a different twist.
-
1 tablespoon lime juice
- To add that zesty kick! Fresh lime juice is best, but bottled lime juice is a decent substitute when you’re in a hurry.
-
8 small corn or flour tortillas
- Choose whichever you prefer! Corn tortillas have a lovely earthy flavor, while flour tortillas are soft and pliable. You can also find gluten-free options if necessary.
Let’s Cook! Step-by-Step Instructions
-
Prep Your Ingredients:
- Start by gathering all your ingredients. Chop the chicken into bite-sized pieces and set them aside. Dice your pineapple, chop the red onion, and mince the cilantro. Prepping all your components will make the cooking process a breeze!
-
Marinate the Chicken:
- In a bowl, combine the diced chicken with olive oil, smoked paprika, chili powder, garlic powder, and salt. Massage the spices into the chicken, ensuring it’s evenly coated. Let it marinate for at least 15 minutes; if you have time, letting it soak up those flavors for an hour or more is even better!
-
Cook the Chicken:
- Heat a large skillet over medium-high heat. Once hot, add the marinated chicken in a single layer. Sear for about 5-7 minutes, turning occasionally, until the chicken is golden brown and cooked through. Pro tip: use a meat thermometer—the internal temperature should reach 165°F (75°C). This ensures juicy chicken every time!
-
Add the Pineapple:
- Once your chicken is cooked, push it to one side of the skillet and add the diced pineapple to the other side. Sauté together for about 2-3 minutes until the pineapple starts to caramelize a bit. This enhances its natural sweetness and adds a lovely dimension to your tacos.
-
Mix and Combine:
- Stir everything in the skillet together! Toss the pineapple through the chicken so that every bite gets a touch of sweetness. Before removing the skillet from the heat, squeeze in lime juice and give it a final stir.
-
Warm the Tortillas:
- In another skillet or on direct flame, warm your tortillas for about 30 seconds on each side until they’re soft and pliable. This step is key for making sure your tacos don’t fall apart!
-
Assemble Your Tacos:
- Lay a few pieces of the chicken and pineapple mixture onto each tortilla. Top with red onion and fresh cilantro. Feel free to add some extra lime juice if you’re feeling zesty!
Serving Suggestions
Now that your Pineapple Chicken Tacos are ready, let’s talk presentation! Stack your tacos neatly on a vibrant plate and consider garnishing with additional lime wedges and cilantro for that pop of color. If you’re feeling fancy, a sprinkle of crumbled queso fresco or a drizzle of spicy crema (just mix sour cream with a bit of sriracha) elevates this dish even further!
Delicious Variations to Try
Here are a few fun twists to keep your taco game fresh:
-
Tropical Shrimp Tacos: Swap out the chicken for shrimp, marinated in a bit of lime juice and garlic, then quickly sauté them for a quicker seafood spin.
-
Vegetarian Delight: Replace chicken with roasted chickpeas or black beans for a hearty plant-based version! Add avocado for some creaminess.
-
Spicy Mango Salsa: Instead of pineapple, toss in some diced mango or a spicy mango salsa for another layer of sweetness with a kick!
-
Grilled Chicken Variant: Grill the chicken on an outdoor grill instead for that smokey flavor, then top with the caramelized pineapple right off the grill.
-
Crunchy Coleslaw: Add a crunch by topping your tacos with a simple slaw of cabbage, carrot, and lime juice for texture and freshness!
Chef’s Notes
As I was perfecting this recipe, I found myself reminiscing often about that magical family taco night. It reminded me of how food can tell stories. Each time I make these tacos, it feels like a celebration, a chance to gather and create new memories. Over the years, I’ve learned to tweak and adapt recipes based on what I have on hand or what mood I’m in. Feel free to experiment and find what works best for you!
FAQs and Troubleshooting
-
What if my chicken is dry?
- Overcooking is the main culprit. Always use a meat thermometer to check for doneness! If it’s too dry, consider serving it with a side of pineapple salsa.
-
Can I make these ahead of time?
- You can prep the chicken and pineapple mixture a day ahead and store it in the fridge, but warm it all up before serving to ensure freshness.
-
How do I store leftovers?
- Place any leftovers in an airtight container in the refrigerator for up to 3 days. Reheat on the stovetop before serving!
-
What can I use if I’m out of tortillas?
- Try lettuce wraps or rice bowls for a gluten-free and lower-carb option. These fillings are versatile and fit great in many bases!
Nutritional Information
Now, let’s break down what you’re getting in these delicious tacos. Each serving (2 tacos) provides roughly:
- Calories: 350
- Protein: 30g
- Carbohydrates: 30g
- Fat: 15g
Of course, nutritional values may vary based on the specific ingredients and amounts used. For a healthier touch, skip the tortillas and serve the chicken and pineapple mixture over brown rice or quinoa.
Final Thoughts
Pineapple Chicken Tacos are not just a meal but an experience – a delightful mix of flavors, colors, and textures that come together to create something truly special. I hope this recipe sparks joy in your kitchen, inspires you to gather your loved ones, and ends with smiles and full bellies. Remember, cooking should be fun, energizing, and reflective of your taste!
So, what are you waiting for? Round up your favorite people, gather around the kitchen, and whip up these incredible tacos. Don’t forget to share your culinary creations with me on social media! Happy cooking, my friends! 🍍🌮
Print
Pineapple Chicken Tacos
- Total Time: 35 minutes
- Yield: 4 servings 1x
- Diet: Gluten-Free
Description
A delicious twist on taco night featuring tender chicken and sweet pineapple, wrapped in soft tortillas.
Ingredients
- 1 pound boneless skinless chicken breasts, diced
- 1 tablespoon olive oil
- 1 teaspoon smoked paprika
- 1 teaspoon chili powder
- 1/2 teaspoon garlic powder
- 1/2 teaspoon salt
- 1 cup fresh pineapple, finely diced
- 1/4 cup red onion, finely chopped
- 1/4 cup fresh cilantro, chopped
- 1 tablespoon lime juice
- 8 small corn or flour tortillas
Instructions
- Prep your ingredients: Gather and chop the chicken, pineapple, red onion, and cilantro.
- Marinate the chicken: Combine chicken with olive oil, smoked paprika, chili powder, garlic powder, and salt. Let it marinate for at least 15 minutes.
- Cook the chicken: Heat a skillet over medium-high heat and sear the marinated chicken until cooked through.
- Add the pineapple: Push the chicken to one side and sauté the diced pineapple until caramelized.
- Mix and combine: Stir the chicken and pineapple together, then add lime juice.
- Warm the tortillas: Heat tortillas in another skillet until soft.
- Assemble your tacos: Fill each tortilla with chicken and pineapple mixture, topped with red onion and cilantro.
Notes
Serve with lime wedges and cilantro for added color. Consider adding queso fresco or spicy crema for extra flavor.
- Prep Time: 15 minutes
- Cook Time: 20 minutes
- Category: Main Course
- Method: Sautéing
- Cuisine: Mexican
Nutrition
- Serving Size: 2 tacos
- Calories: 350
- Sugar: 6g
- Sodium: 600mg
- Fat: 15g
- Saturated Fat: 2g
- Unsaturated Fat: 12g
- Trans Fat: 0g
- Carbohydrates: 30g
- Fiber: 3g
- Protein: 30g
- Cholesterol: 70mg
Keywords: Pineapple Chicken Tacos, Taco Night, Easy Tacos, Mexican Recipes, Family Recipes
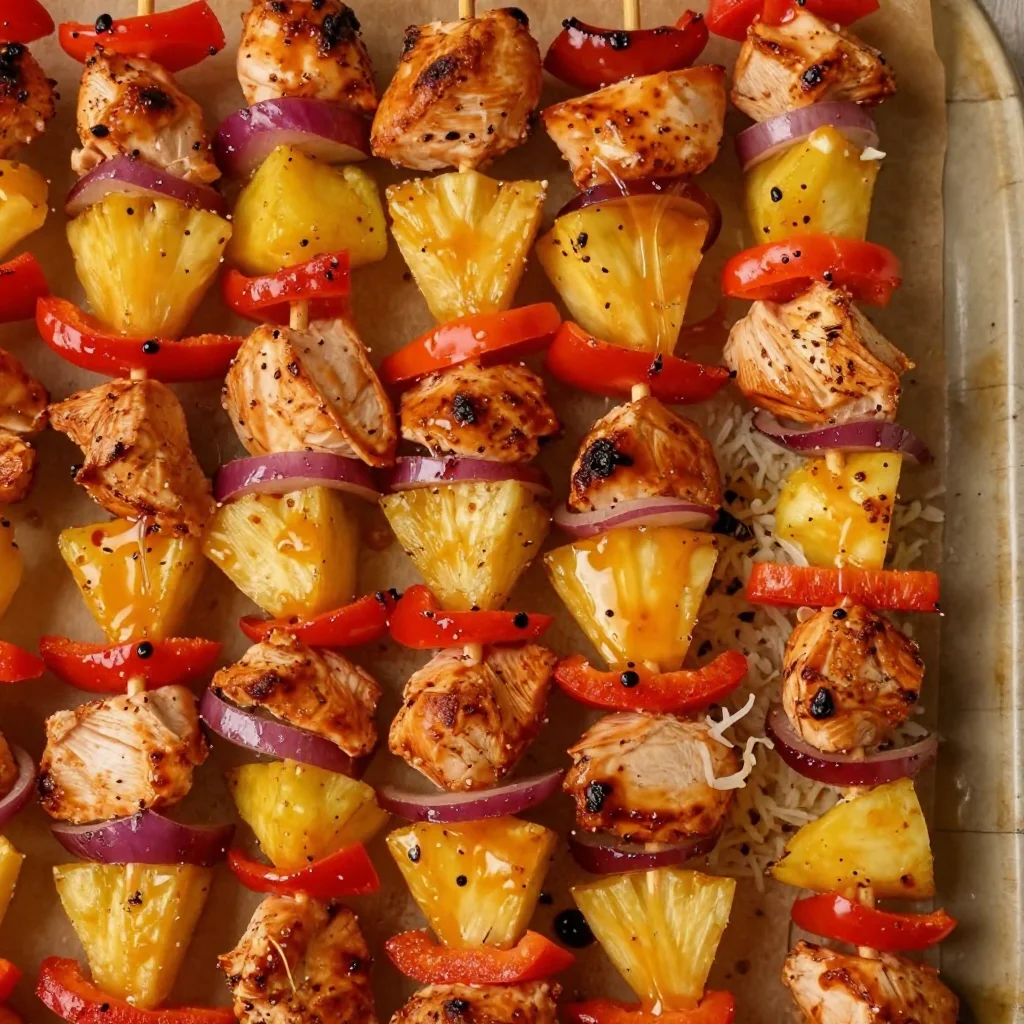
Minute Pineapple Chicken Kabobs for Weeknight Grilling
Pineapple Chicken Kabobs: A Flavorful Taste of Paradise
Hey there, fellow food lovers! Are you ready to fire up that grill and embark on a tropical getaway right in your own backyard? I’m thrilled to share one of my favorite recipes: Pineapple Chicken Kabobs! These vibrant skewers are not only delicious but also a feast for the eyes. Packed with juicy chicken, sweet pineapple, and colorful bell peppers, they’re perfect for warm summer evenings or simply when you need a little taste of sunshine on your plate.
Picture this: the sizzle of chicken on the grill, the fragrance of garlic and ginger wafting through the air, and the juicy burst of pineapple melding with savory soy sauce. It’s a party for your taste buds and a recipe that brings happiness—both in the cooking and the eating! Whether you’re hosting a barbecue or just enjoying a casual dinner at home, these kabobs are sure to steal the show.
But wait, there’s more! Not only are these kabobs super tasty, but they also remind me of a cherished memory from my childhood. I vividly remember my parents hosting summer cookouts in our backyard. The grill was fired up, laughter filled the air, and kabobs were always on the menu. My dad had this special marinade he concocted, and we’d skewer anything we could find—not just chicken but also shrimp, veggies, and yes, pineapple. Each bite was a delightful explosion of flavor and a reminder of those carefree summer days. Now, I carry on that tradition, adding my little twists and turns with ingredients while keeping the spirit of those cherished family moments alive.
So, whether you’re a kitchen novice or a seasoned pro, let’s dive into this tasty recipe and make some memories of our own!
Ingredients
Let’s make sure we have everything we need to whip up these delicious Pineapple Chicken Kabobs. Here’s what you’ll need:
-
Chicken Breast: Boneless, skinless chicken breast works best here. It’s tender and cooks quickly. You can substitute with boneless thighs for a juicier option, or even tofu for a vegetarian twist!
-
Pineapple Chunks: Fresh pineapple is ideal for a juicy, sweet flavor. Canned pineapple can be used in a pinch, but make sure to drain it well. Pro tip: if you have a pineapple corer, it’s a great tool to use for skewering!
-
Bell Peppers: I recommend using red and yellow bell peppers for the sweetness, but feel free to mix in green or orange for a burst of color. If you’re looking for a low-carb option, zucchini or mushrooms can be great substitutes.
-
Onions: Red or sweet onions add a nice bite. However, if you’re not a fan of onions, feel free to leave them out or swap for shallots, which have a milder flavor.
-
Soy Sauce: This gives the kabobs a delightful umami flavor. For a gluten-free option, you can use tamari. You could also try coconut aminos for a sweeter flavor profile.
-
Honey: Honey adds a touch of sweetness and helps to caramelize the chicken on the grill. Agave syrup or maple syrup can also work well in its place for a vegan option.
-
Garlic: Minced fresh garlic is a must for that aromatic punch. If you’re in a hurry, garlic powder can save the day; just use about a half teaspoon for the equivalent.
-
Ginger: Fresh ginger gives the dish a warm, spicy kick. If fresh isn’t available, ground ginger can work too, but use it sparingly as the flavor is more concentrated.
-
Coconut Rice: This is a delightful side for the kabobs. Made with jasmine rice, coconut milk, and a pinch of salt, it’s creamy and pairs perfectly with the tropical flavors. You can substitute it with quinoa or regular rice if you prefer.
Step-by-Step Instructions
Now, let’s get down to cooking! Follow these simple steps to create your scrumptious Pineapple Chicken Kabobs.
-
Marinate the Chicken:
- Start by slicing your chicken breast into 1-inch cubes. This size ensures they cook evenly and stay juicy. Place them in a bowl and add soy sauce, honey, minced garlic, and grated ginger. Mix it well and let the chicken marinate for at least 30 minutes. If you’ve got more time, a few hours in the fridge will deepen that flavor!
-
Prepare the Vegetables:
- While the chicken is marinating, chop your bell peppers and onions into approximately 1-inch pieces. Try to keep them roughly the same size as the chicken so everything cooks evenly. You can also soak your skewers (if using wood) in water for about 30 minutes to prevent burning on the grill.
-
Assemble the Kabobs:
- Now for the fun part! Take your marinated chicken, pineapple chunks, bell peppers, and onions, and start threading them onto the skewers. You can alternate them however you like! I love to add a pineapple chunk between each piece of chicken for that sweet burst in every bite. Leave a little space at each end of the skewer for easy handling.
-
Preheat Your Grill:
- Get your grill ready! Preheat it to medium-high heat (about 375°F to 450°F). A little oil on the grates can help prevent sticking. If you’re using a grill pan on the stove, make sure it’s hot before adding the kabobs.
-
Grill the Kabobs:
- Place your assembled kabobs on the grill. Cook for about 10-15 minutes, turning them occasionally to get those lovely char marks on all sides. Chicken is cooked through when it reaches an internal temperature of 165°F. You’ll know they’re ready when the pineapple starts getting caramelized and golden!
-
Serve with Coconut Rice:
- As your kabobs are grilling, prepare your coconut rice. Rinse 1 cup of jasmine rice and combine it in a pot with 1 cup of coconut milk and a pinch of salt. Cook it as you normally would, and you’ll have a creamy, fragrant base for your kabobs once they’re done.
Serving Suggestions
Now that your kabobs are grilled to perfection, let’s talk about how to serve this delightful dish. For a beautiful platter, arrange the kabobs diagonally across a large serving dish. A sprinkle of fresh chopped cilantro or green onions adds a pop of color and freshness. You can also serve them with lime wedges for an extra zesty drizzle.
Pair the kabobs with the fluffy coconut rice on the side, garnished with a few toasted coconut flakes for that tropical vibe. For the adventurous, a spicy dipping sauce—like sweet chili sauce or a zesty yogurt sauce—can elevate the flavor profile and keep things interesting!
Recipe Variations
Feel free to get creative with these Pineapple Chicken Kabobs! Here are some variations you might love:
-
Teriyaki Twist: Swap the marinade for a homemade teriyaki sauce by simmering soy sauce, honey, rice vinegar, and sesame oil together. Drizzle this over the kabobs before serving for an extra flavor kick!
-
Mix-It-Up Veggies: Use whatever veggies you have on hand! Cherry tomatoes, zucchini, and even mushrooms can add depth and flavor.
-
Spicy Pineapple Kabobs: Spice things up by adding chopped jalapeños or a dash of sriracha sauce to the marinade. It’s a great way to bring some heat to your feast!
-
Fruit Fusion: Try using mango, strawberries, or peaches instead of or in addition to the pineapple. The sweetness of these fruits when grilled is absolutely divine.
-
Vegan Delight: Swap the chicken for marinated tofu or tempeh. Grilled portobello mushrooms can also be a robust and satisfying alternative!
Chef’s Notes
Oh, how this recipe has evolved over time! I remember when I first started experimenting with kabobs. They would often be a hodgepodge of whatever we had at home. There were plenty of mishaps—like that time I accidentally used too much ginger and thought I’d created a new flavor explosion (it was more like flavor confusion!). But that trial and error got me to where I am today, and that’s part of the fun in the kitchen! The beauty of meal prep is that every attempt leads to delicious new memories, and Pineapple Chicken Kabobs remind me of the joy of cooking and sharing.
FAQs and Troubleshooting
-
What if my chicken is dry?
- This often happens if you cook it for too long or at too high a temperature. Make sure to watch the chicken closely and remove it from the grill once it hits 165°F.
-
Can I make these kabobs ahead of time?
- Absolutely! You can marinate the chicken a day in advance and store it in the refrigerator. Just assemble and grill when ready to serve.
-
What if I don’t have skewers?
- No worries! You can grill the chicken and vegetables directly on the grill or use a grill basket for easy handling.
-
How do I store leftovers?
- Store any leftover kabobs in an airtight container in the fridge for up to 3 days. They can be reheated in the oven or on the stovetop, but be careful not to overcook them!
Nutritional Info
These Pineapple Chicken Kabobs are not only delicious but also packed with nutrients! Here’s a quick breakdown:
- Calories: Approximately 250 per kabob (including the rice)
- Protein: 25g (thanks to the chicken!)
- Carbohydrates: 30g (from the coconut rice and veggies)
- Fat: 5g (mostly healthy fats from coconut)
They’re a great source of lean protein, vitamins, and minerals, making it a balanced meal for any time of day.
Final Thoughts
There you have it—Pineapple Chicken Kabobs that are sure to bring sunshine to your dinner table! I hope you enjoy cooking and sharing this recipe as much as I do. Remember to have fun, experiment with flavors, and most importantly, gather your loved ones around the table to share in the deliciousness.
Just like those summer cookouts from my childhood, food is about connection. So grab those skewers, fire up the grill, and let’s make some memories that are just as warm and inviting as the food itself. Now, go and create your own kabob adventures—happy cooking!
Print
Pineapple Chicken Kabobs
- Total Time: 45 minutes
- Yield: 4 servings 1x
- Diet: Gluten-Free
Description
Delicious chicken kabobs with sweet pineapple and colorful bell peppers, perfect for grilling.
Ingredients
- 1 lb Boneless, skinless chicken breast, cut into 1-inch cubes
- 1 cup Pineapple chunks (fresh or canned)
- 1 cup Bell peppers (red and yellow preferred)
- 1/2 cup Onions (red or sweet)
- 1/4 cup Soy Sauce (or tamari for gluten-free)
- 2 tbsp Honey (or agave/maple syrup for vegan)
- 3 cloves Garlic, minced
- 1 tbsp Fresh ginger, grated
- 1 cup Coconut rice (made with jasmine rice and coconut milk)
Instructions
- Marinate the chicken by mixing soy sauce, honey, garlic, and ginger. Let sit for at least 30 minutes.
- Prepare the vegetables by chopping bell peppers and onions into 1-inch pieces.
- Assemble the kabobs by threading marinated chicken, pineapple, bell peppers, and onions onto skewers.
- Preheat the grill to medium-high heat.
- Grill the kabobs for 10-15 minutes, turning occasionally until chicken is cooked to 165°F and pineapple is caramelized.
- Serve with coconut rice and optional garnishes like cilantro and lime wedges.
Notes
Feel free to substitute chicken with tofu for a vegetarian version, and experiment with different veggies and fruits.
- Prep Time: 30 minutes
- Cook Time: 15 minutes
- Category: Main Course
- Method: Grilling
- Cuisine: Tropical
Nutrition
- Serving Size: 1 skewer
- Calories: 250
- Sugar: 10g
- Sodium: 400mg
- Fat: 5g
- Saturated Fat: 3g
- Unsaturated Fat: 2g
- Trans Fat: 0g
- Carbohydrates: 30g
- Fiber: 2g
- Protein: 25g
- Cholesterol: 70mg
Keywords: kabobs, chicken, pineapple, grilling, summer recipes, tropical
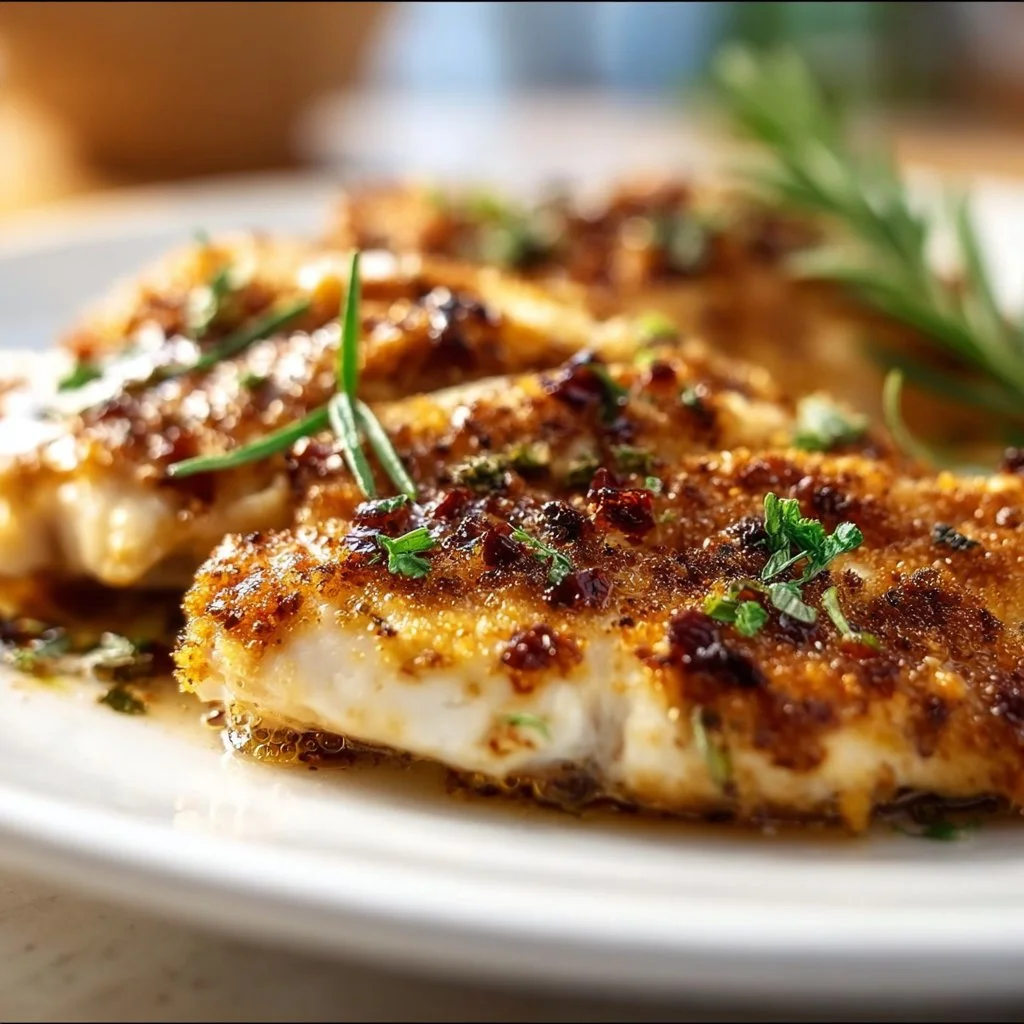
Melt-In-Your-Mouth Chicken Breast
Melt-In-Your-Mouth Chicken Breast: A Delight to Your Taste Buds
Introduction
Hey there, fellow foodies! I’m Beau Collier, your culinary buddy here at Feastical, and today we’re diving into a dish that’s as comforting as a cozy blanket on a chilly evening: Melt-In-Your-Mouth Chicken Breast! If you’re anything like me, you’ll agree that chicken is one of those ultimate blank slates in the kitchen. It’s versatile, it’s rewarding, and with the right touch, it can be downright decadent.
Picture this: succulent chicken breasts cooked to perfection, enveloped in a creamy, savory sauce that makes every bite sing with joy. This dish isn’t just about feeding your belly; it’s about sharing warmth, love, and those happy family moments around the dinner table. The beauty of this recipe lies in its simplicity and depth of flavor; it’s like inviting friends over for a casual supper, yet having them leave raving about your culinary prowess.
Whether you’re preparing a weeknight dinner or impressing some guests on the weekend, this Melt-In-Your-Mouth Chicken Breast is here to steal the show! So, get cozy, roll up those sleeves, and join me in creating something delightful. Trust me; you will want to make this dish again and again!
Personal Story
Let me take you back to a sunny summer afternoon, back when I was a sprightly teen imbued with an unapologetic zest for cooking. I remember the day vividly—my parents had decided to host a backyard barbecue. The grill was sizzling, the laughter was plentiful, but it was my special chicken dish that had everyone buzzing. I had experimented with heavy cream, garlic, and parmesan—you know, the good stuff!
As I poured the luscious sauce over the chicken breasts, I felt a mix of excitement and anxiety. What if it didn’t turn out? But oh, when I pulled that first piece from the grill, a glorious aroma swirled around us. My family was smitten; we ended up devouring every last morsel. It’s moments like these that remind me just how powerful a good meal can be—for bringing people together, for sparking joy, and for creating unforgettable memories. And that’s what inspired this recipe for Melt-In-Your-Mouth Chicken Breast!
Ingredients
Here’s what you’ll need to whip up this heavenly dish.
-
4 Chicken Breasts: The star of the show! Look for boneless, skinless chicken breasts for a melt-in-your-mouth texture. If you prefer dark meat, feel free to swap them with thighs.
-
1 Cup Heavy Cream: This is what makes the sauce rich and luxurious. For a lighter version, you can use half-and-half or even coconut cream.
-
1 Cup Grated Parmesan Cheese: It adds that delicious umami flavor. Not a fan of parmesan? Pecorino Romano or nutritional yeast can be great substitutes!
-
2 Cloves Garlic, Minced: Garlic brings depth and warmth to the dish. If you’re short on fresh garlic, garlic powder can do the trick—about half a teaspoon for each clove.
-
1 Teaspoon Onion Powder: This ingredient adds sweetness without the sharpness of fresh onions. You can substitute this with minced shallots if you prefer.
-
1 Teaspoon Garlic Powder: Adding a second layer of garlicky goodness! You can also skip it if you’re looking to reduce your garlic intake.
-
1 Teaspoon Italian Seasoning: A blend of herbs like oregano and basil enhances the flavor profile. Dried herbs will work well too, so feel free to use whatever you have on hand!
-
Salt and Pepper to Taste: These simple seasonings elevate all the flavors. Season as you like, and don’t shy away from tasting along the way!
-
Olive Oil for Greasing: Use your favorite cooking oil to coat your baking dish or skillet. Avocado oil is a great alternative!
-
Fresh Parsley for Garnish: This isn’t just for show! A sprinkle of fresh parsley brightens up the dish. Don’t have parsley? Chives or basil work wonderfully too!
Step-by-Step Instructions
Here’s how to bring this Melt-In-Your-Mouth Chicken Breast to life in your kitchen:
-
Preheat the Oven: Start by preheating your oven to 375°F (190°C). That’s the sweet spot to get perfectly cooked chicken that’s juicy on the inside!
-
Prepare the Chicken: Pat the chicken breasts dry with a paper towel. This step helps achieve that golden crust! Next, season them generously with salt, pepper, onion powder, and garlic powder on both sides. Rub those spices in for an even flavor!
-
Sear the Chicken: Heat a couple of tablespoons of olive oil in a large oven-safe skillet (cast iron works wonders here!) over medium-high heat. When the oil is shimmering, add the chicken. Sear each side for about 5-7 minutes or until they’re golden brown. Resist the urge to move them around; just let them do their thing!
-
Make the Creamy Sauce: Once the chicken is seared, remove them from the skillet and set them aside. In the same skillet, lower the heat to medium and add the minced garlic. Sauté for about 30 seconds until fragrant—don’t let it burn! Pour in the heavy cream, stirring to combine. Gradually whisk in the grated parmesan, Italian seasoning, and adjust the salt and pepper if needed.
-
Return the Chicken: Place the seared chicken breasts back in the skillet, spooning the creamy sauce over them. This heavenly mixture will infuse the chicken with flavor as it bakes.
-
Bake to Perfection: Transfer the skillet to the preheated oven and bake for about 20-25 minutes or until the internal temperature of the chicken reaches 165°F (75°C). Watch as magic happens: it becomes utterly tender and the sauce thickens beautifully.
-
Garnish and Serve: Once finished, remove the skillet from the oven (don’t forget those oven mitts!). Let it rest for a few minutes before garnishing generously with fresh parsley. Serve hot, drizzling any extra sauce over the top.
Serving Suggestions
Let’s talk presentation! You can serve this Melt-In-Your-Mouth Chicken Breast on a cozy plate surrounded by fresh roasted veggies or a side of buttery mashed potatoes—yes, please! Layer the chicken over a bed of garlic-infused rice or quinoa to soak up the creamy sauce. Don’t forget some crusty bread to mop up that luscious sauce; it’s basically a requirement! And if you’re feeling extra fancy, a side salad with tangy vinaigrette can provide a refreshing contrast.
Recipe Variations
Now, let’s jazz this dish up with some exciting variations:
-
Lemon Garlic Chicken: Add zest and juice from one lemon to the cream sauce for a zesty twist. It brightens up the dish!
-
Mushroom Medley: sauté sliced mushrooms along with the garlic for an earthy flavor. The creaminess complements the mushrooms beautifully.
-
Spicy Kick: If you’re feeling adventurous, add a pinch of red pepper flakes to the cream sauce for a delightful heat that balances with the richness.
-
Herb Infusion: Try adding fresh herbs like thyme or rosemary straight into the sauce for an aromatic flavor explosion. Strip the leaves from the stems before adding.
-
Dairy-Free Option: Swap out the heavy cream with blended cashews or coconut cream, and use a dairy-free parmesan to keep it creamy, dairy-free goodness!
Chef’s Notes
As with any recipe, I’ve tweaked and adjusted this dish over the years. One of my favorite memories was cooking this for my best friends during a cozy winter movie night. The kitchen filled with laughter and the aroma of roasting chicken! I learned to adapt as I went—there was that one time I forgot to buy cream and used sour cream instead. It turned out great! Cooking is an adventure, and sometimes, the best creations come from a little mess-up. Embrace those moments and make them your own!
FAQs and Troubleshooting
Here are a few common questions I get regarding this recipe, along with some helpful tips:
-
Why is my chicken dry? – Overcooking is often the culprit here! Use a meat thermometer to ensure you’re hitting the sweet spot at 165°F. It’s always better to err on the side of caution—checking earlier than later.
-
Can I use frozen chicken? – Absolutely! If using frozen chicken breasts, make sure to thaw them first. You may have to adjust the cooking time, so be sure to check the internal temperature.
-
Can I make this ahead of time? – Yes, you can prepare the sauce in advance and store it in the fridge. Just reheat it before adding the chicken to warm it back up!
-
What should I do if the sauce is too thin? – If you want a thicker sauce, allow it to simmer longer. You can also create a slurry with cornstarch and water to thicken it up.
Nutritional Info
Per serving (assuming 4 servings total):
- Calories: ~450
- Protein: 34g
- Fat: 30g (Saturated fat: 15g)
- Carbohydrates: 4g
- Fiber: 0g
- Sugar: 1g
This dish is a hearty protein-packed meal that satisfies with healthy fats from the cream and cheese. Enjoy it in moderation, and balance it with veggie-heavy sides for a nutritious feast!
Final Thoughts
So there you have it, friends—Melt-In-Your-Mouth Chicken Breast that’s as comforting as a family hug! I hope you feel inspired to bring this dish into your kitchen and share it with your loved ones. Remember, cooking isn’t just about the food; it’s about the love and stories we bring to the table. So keep experimenting, keep sharing, and above all, keep savoring those delicious moments!
I can’t wait to hear your stories and tweaks to this dish. Happy cooking, and until next time, keep those forks ready because we have plenty more recipes to explore together. Cheers to good food and great company!
Print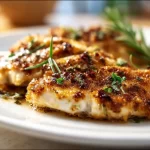
Melt-In-Your-Mouth Chicken Breast
- Total Time: 45 minutes
- Yield: 4 servings 1x
- Diet: Gluten-Free
Description
A creamy and savory chicken breast recipe that melts in your mouth, perfect for cozy dinners.
Ingredients
- 4 Chicken Breasts, boneless and skinless
- 1 Cup Heavy Cream
- 1 Cup Grated Parmesan Cheese
- 2 Cloves Garlic, minced
- 1 Teaspoon Onion Powder
- 1 Teaspoon Garlic Powder
- 1 Teaspoon Italian Seasoning
- Salt and Pepper to taste
- Olive Oil for greasing
- Fresh Parsley for garnish
Instructions
- Preheat the oven to 375°F (190°C).
- Prepare the chicken by patting it dry and seasoning with salt, pepper, onion powder, and garlic powder.
- Sear the chicken in a large oven-safe skillet over medium-high heat for 5-7 minutes on each side.
- Make the creamy sauce by sautéing minced garlic, then adding heavy cream and whisking in parmesan and seasoning.
- Return the seared chicken to the skillet and spoon the sauce over it.
- Bake in the preheated oven for 20-25 minutes, until the chicken reaches an internal temperature of 165°F (75°C).
- Garnish with fresh parsley and serve hot.
Notes
Serve with roasted veggies or mashed potatoes for a complete meal. Variations can include adding lemon or mushrooms for a twist!
- Prep Time: 15 minutes
- Cook Time: 30 minutes
- Category: Main Course
- Method: Baking
- Cuisine: American
Nutrition
- Serving Size: 1 serving
- Calories: 450
- Sugar: 1g
- Sodium: 500mg
- Fat: 30g
- Saturated Fat: 15g
- Unsaturated Fat: 15g
- Trans Fat: 0g
- Carbohydrates: 4g
- Fiber: 0g
- Protein: 34g
- Cholesterol: 120mg
Keywords: chicken, creamy sauce, comforting dish, family meal, cozy recipe
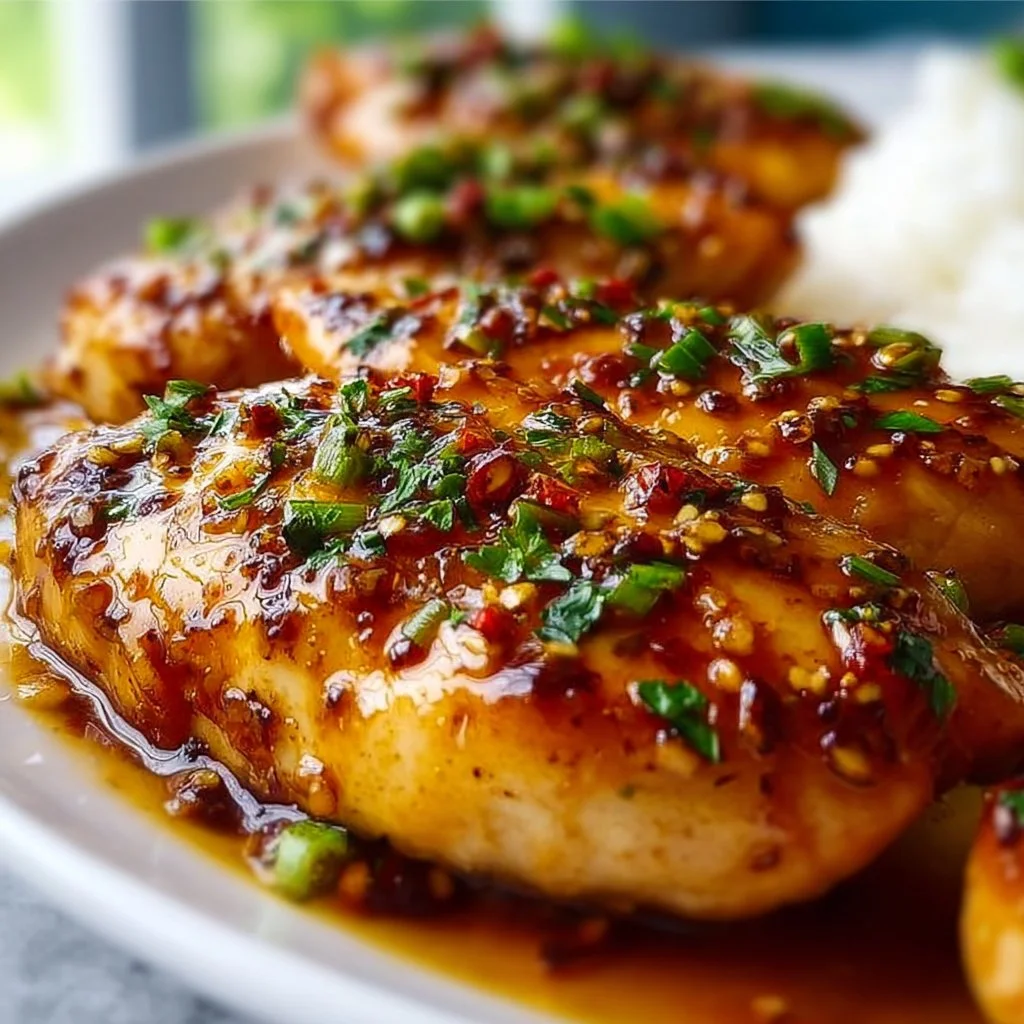
Honey Garlic Chicken Breasts
Honey Garlic Chicken Breasts: Your New Go-To Comfort Dish
Hello, culinary explorers! Beau Collier here, and today we’re diving into a dish that’s been a staple in my kitchen for years: Honey Garlic Chicken Breasts. If you’re looking for a recipe that’s not only easy to whip up but also bursting with flavor, you’re in the right place. This dish combines the sweet embrace of honey with the savory kick of garlic, all slathered over tender, juicy chicken. Grab your spatula, and let’s get cooking!
Introduction: Comfort Food at Its Best
There’s something magical about the combination of honey and garlic—it’s like they were made for each other. The sweetness of honey perfectly complements the boldness of garlic, creating a dance of flavors that will leave your taste buds singing. When I first discovered this recipe, I was on a mission to find a quick yet satisfying dish that could double as my weeknight dinner and impress my weekend guests.
Plus, let’s be honest—who doesn’t love a dish where the aromatic garlic fills your kitchen, wrapping you in warmth and comfort as it cooks? This Honey Garlic Chicken takes only about 30 minutes from start to finish, leaving you plenty of time to kick back with a glass of wine or a cozy movie. It’s perfect for busy evenings when you want a homemade meal without the fuss. So, throw on your apron and prepare for a culinary journey that will leave your family and friends begging for seconds!
Personal Story: A Memory from Mom’s Kitchen
I can still remember the first time my mom whipped up Honey Garlic Chicken in our tiny, bustling kitchen. It was one of those rainy Sunday afternoons where we always found ourselves gathered around the stove, the aroma of something delicious wafting through the house. I was about ten years old and terribly curious about what went into ‘the magic.’ As Mom stirred the sauce, she let me in on her secrets—the perfect balance of sweetness and savory flavor.
That day, not only did we enjoy a fantastic meal, but it also sparked my lifelong passion for cooking. I learned that food has an incredible power to bring people together, bridge generations, and create lasting memories. Fast forward to today, and I’m delighted to share this recipe with you, hoping it brings the same joy and flavor to your kitchen that it did to mine.
Ingredients
Here’s what you’ll need for this delightful dish:
-
4 boneless chicken breasts
Tender and juicy, boneless chicken breasts are super versatile. If you’re not a fan, feel free to swap them for thighs for a more flavorful option. -
1/2 cup honey
The star of the show! Honey adds sweetness and gloss to your chicken. If you’re looking for a fabulous alternative, try maple syrup or agave nectar for a similar texture and flavor. -
4 cloves garlic, minced
Garlic brings the punch! Freshly minced garlic is ideal, but if you’re in a pinch, pre-minced from a jar works in a cluck—but don’t tell my mom! -
1 tablespoon soy sauce
A little umami! It blends nicely with the honey and helps to enhance the flavors. For a gluten-free version, opt for tamari or coconut aminos. -
1 tablespoon olive oil
This not only helps in cooking the chicken but also adds a touch of richness. If you’re looking for a lighter alternative, avocado oil is a great choice. -
Salt and pepper to taste
Simple yet essential seasonings! Remember to season thoughtfully—salt enhances the flavors while pepper gives a little kick. -
Cooked rice or vegetables for serving
This dish pairs beautifully with fluffy rice or steamed veggies, soaking up all that sweet garlic goodness.
Step-by-Step Instructions
Ready to get started? Let’s transform those ingredients into a meal that your taste buds will never forget!
-
Prep the Chicken:
Start by placing the chicken breasts on a cutting board. Pat them dry with paper towels. This ensures a great sear. Sprinkle both sides generously with salt and pepper. Pro tip: Let the chicken sit at room temperature for about 15-20 minutes—this helps it cook evenly. -
Make the Sauce:
In a mixing bowl, whisk together the honey, minced garlic, soy sauce, and olive oil. Taste your sauce and adjust as needed. If you love a little heat, toss in a pinch of red pepper flakes. It’s amazing what a little spice can do! -
Cook the Chicken:
Heat a large skillet over medium-high heat and drizzle in some olive oil—just enough to coat the bottom. When the oil shimmers, place the chicken breasts in the skillet. Sear for about 5-7 minutes without moving them. Flip and let them cook until the internal temperature reaches 165°F (about another 5-7 minutes).Chef Hack: For extra tenderness, don’t overcook! Use a meat thermometer for precise results.
-
Glaze the Chicken:
When your chicken is nearly done, pour the honey garlic sauce over it. Baste the chicken with the sauce as it cooks for an additional minute or two, creating a beautiful glaze. Don’t let the sauce burn—or you’ll be left with an unappetizing sticky mess. Keep an eye on it! -
Rest and Serve:
Once cooked, transfer the chicken to a plate and let it rest for about 5 minutes. This is crucial for retaining juices and ensuring every bite is perfect.Serving Tip: Serve the chicken over a bed of rice or beside a colorful medley of steamed veggies. Drizzle some of that glorious sauce over everything—no need to be shy!
Serving Suggestions
Presentation is key! You want your dish to look as good as it tastes. Here are some fun ideas for plating your Honey Garlic Chicken:
-
Rice Bowl: Create a rice bowl with heaps of rice, sliced chicken, and drizzles of extra sauce. Top with sesame seeds and chopped green onions for a pop of color.
-
Plate it Up: For an elegant dinner, arrange the chicken slices on a white plate and garnish with fresh cilantro or parsley. This adds a beautiful touch and a hint of freshness.
-
Vegetable Medley: Pair it with roasted or steamed vegetables. Think broccoli, bell peppers, or snap peas. They not only complement the chicken brilliantly but also add vibrant colors to your plate!
Recipe Variations
Let’s get a bit creative! Here are some tasty twists on this classic recipe:
-
Spicy Honey Garlic Chicken: Add 1-2 tablespoons of sriracha or chili paste to the glaze for a spicy kick. This gives your dish a delightful heat that balances perfectly with the sweetness!
-
Lemon Zest: For a bright and zesty flavor, add the zest of one lemon to the honey garlic mixture. It elevates the taste and adds a refreshing note!
-
Pineapple Twist: Incorporate diced pineapples into the glaze for a tropical vibe. This adds a juicy sweetness that pairs beautifully with the savory notes.
-
Baked Version: For a healthier option, bake the chicken in the oven. Preheat to 375°F and bake for 25-30 minutes, drizzling the glaze halfway through cooking.
-
Vegetarian Option: Swap the chicken for firm tofu or tempeh for a delicious vegetarian alternative. Just ensure to press the tofu to remove excess moisture before cooking.
Chef’s Notes
This recipe has evolved over time. What started as a simple weeknight meal turned into my signature dish among friends and family. I remember one dinner party where I had an unexpected surprise guest. I had to make this dish on the fly and let me tell you, it was a hit! Everyone raved about it and demanded the recipe—what a compliment!
Cooking is an adventure, and this Honey Garlic Chicken has taught me that simplicity is key. You don’t need fancy equipment or hours in the kitchen to create greatness; just a dash of love and a sprinkle of creativity!
FAQs and Troubleshooting
-
Why is my glaze too thick?
If the glaze thickens too much while cooking, just add a splash of water or chicken broth to loosen it up. This helps maintain that saucy goodness! -
What if my chicken is dry?
Overcooking is the main culprit. Always use a meat thermometer for the best results. If you find yourself with dry chicken, slice it and serve with extra sauce to inject moisture. -
Can I make this ahead of time?
Absolutely! You can marinate the chicken in the honey garlic mixture for a few hours or overnight for more flavor. Cook it fresh when you’re ready! -
What can I serve this with?
Besides rice and veggies, feel free to serve with quinoa, naan bread, or even a fresh salad. The possibilities are endless!
Nutritional Information
Per serving (based on 4 servings):
- Calories: 290
- Protein: 29g
- Total Fat: 7g
- Saturated Fat: 1g
- Carbohydrates: 31g
- Fiber: 1g
- Sugar: 23g
This dish hits the sweet spot for satisfying flavor without packing on the extra calories—perfect for your weekly menu!
Final Thoughts
I can confidently say that Honey Garlic Chicken Breasts are a dish everyone should have in their recipe repertoire. Whether you’re cooking for yourself, your family, or a special occasion, this recipe is sure to impress! It’s a wonderful reminder that cooking doesn’t have to be complicated to be delicious.
So, what are you waiting for? Gather your ingredients, roll up your sleeves, and let’s make some magic in the kitchen! And remember, if you love this recipe, let me know! Share your creations with me on social media—I’d love to see your delicious versions!
Happy cooking, and until next time, keep spreading the joyous flavors! 🍽️
Print
Honey Garlic Chicken Breasts
- Total Time: 45 minutes
- Yield: 4 servings 1x
- Diet: Gluten-Free
Description
A quick and flavorful dish combining the sweetness of honey and the savory kick of garlic over tender chicken.
Ingredients
- 4 boneless chicken breasts
- 1/2 cup honey
- 4 cloves garlic, minced
- 1 tablespoon soy sauce
- 1 tablespoon olive oil
- Salt and pepper to taste
- Cooked rice or vegetables for serving
Instructions
- Prep the chicken: Place the chicken breasts on a cutting board and pat them dry with paper towels. Season with salt and pepper.
- Make the sauce: In a mixing bowl, whisk together honey, minced garlic, soy sauce, and olive oil.
- Cook the chicken: Heat a skillet over medium-high heat and add olive oil. Sear the chicken for 5-7 minutes on each side until cooked through.
- Glaze the chicken: Pour the honey garlic sauce over the chicken and baste for an additional couple of minutes.
- Rest and serve: Transfer the chicken to a plate and let it rest for 5 minutes before serving.
Notes
For a spicy kick, add sriracha to the glaze. You can also bake the chicken for a healthier option.
- Prep Time: 15 minutes
- Cook Time: 30 minutes
- Category: Main Course
- Method: Stovetop
- Cuisine: American
Nutrition
- Serving Size: 1 serving
- Calories: 290
- Sugar: 23g
- Sodium: 500mg
- Fat: 7g
- Saturated Fat: 1g
- Unsaturated Fat: 4g
- Trans Fat: 0g
- Carbohydrates: 31g
- Fiber: 1g
- Protein: 29g
- Cholesterol: 80mg
Keywords: honey garlic chicken, easy chicken recipe, weeknight dinner