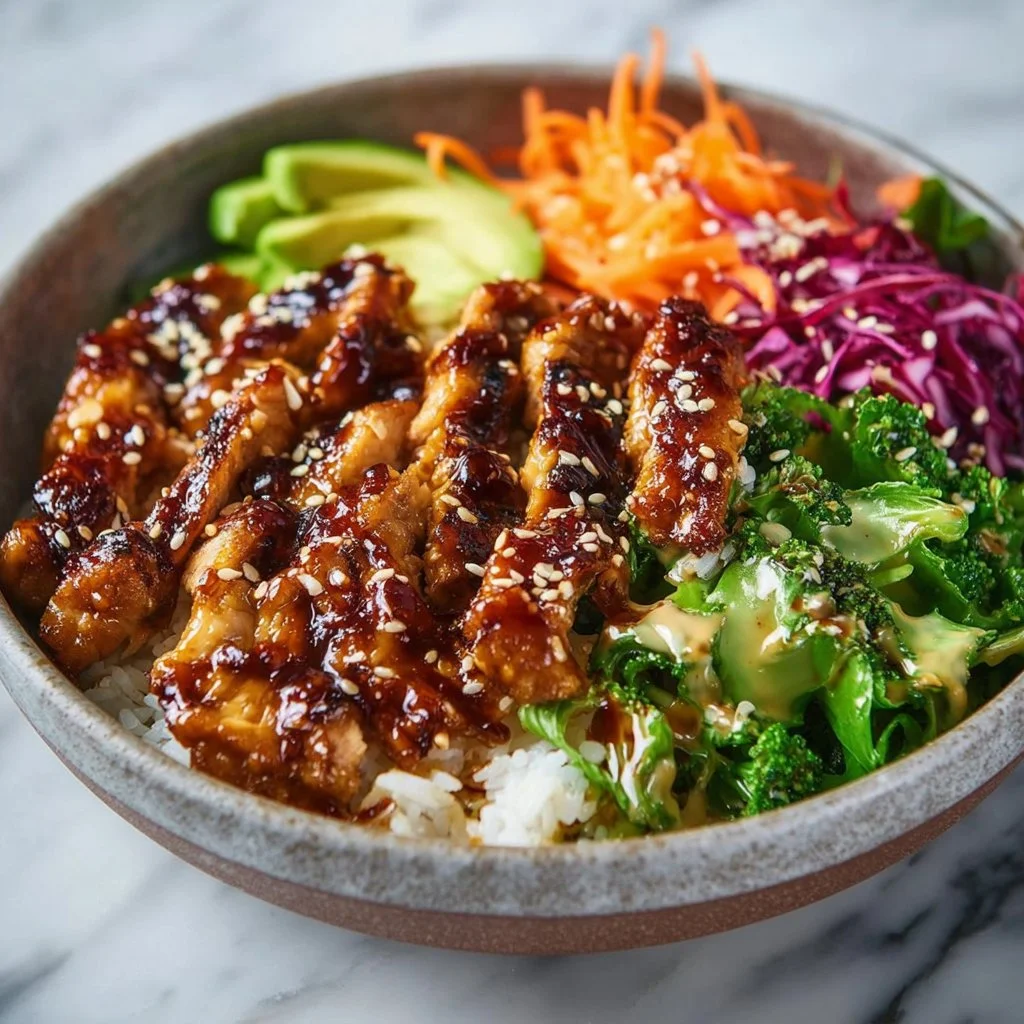
Sticky Chicken Bowls Recipe
Sticky Chicken Bowls Recipe
Hey there, food lovers! If you’re anything like me, you know that sometimes comfort food comes in a bowl—especially on those hectic weeknights when you’re craving something hearty but also crave a bit of fun in your kitchen life. That’s where my Sticky Chicken Bowls come into play! This dish is all about juicy, tender chicken coated in a tangy, sweet, and slightly spicy sauce served atop a bed of fluffy rice with vibrant broccoli. It’s not just a meal; it’s an experience that brings flavors and friends together, like a hug in a bowl!
I first stumbled upon this dish while rummaging through my grandmom’s old recipe box. I was looking for something special to make for a cozy dinner with friends. I remember finding her scribbled notes, filled with love and her classic twist on traditional Asian-inspired recipes. I decided to take that classic and put my own spin on it, making it easier and more flavorful for today’s busy kitchen warriors. Little did I know, it would become a staple that always garners oohs and aahs from my loved ones around the dinner table.
Whip out your spatula and get ready to embrace the magic that happens when juicy chicken meets a sticky sauce and delightful veggies. Don’t be surprised if you find yourself making this dish again and again—it’s simply that good!
Personal Story
Once upon a time, I had the best dinner party after I invited a group of friends over without much thought about what to serve. I went to my pantry, surveyed my fridge, and thought, "Alright, Beau, let’s make something out of nothing!" The neighbors’ aroma wafting through the air made me nostalgic for my grandmom’s kitchen—where every dish was loaded with flavor and warmth.
I decided to cook my version of a sticky chicken bowl based on the ingredients I had at hand, and let me tell you, it was a hit! My friends were eagerly waiting in the kitchen, licking their forks, and asking for the recipe before they even took a bite. That night, we showed each other our favorite music and devoured those sticky chicken bowls as if our souls depended on it—and in some ways, they did. Food is that powerful! The laughter, the flavors, and the memories made that night brought us all closer together. It was one of those “I could do this every week” kind of moments. So, if you’re looking to create your own beautiful memories, let’s get to cooking!
Ingredients
Here’s what you’re going to need to whip up these fantastic sticky chicken bowls:
-
2 cups uncooked rice
A fluffy base that soaks up all those tasty flavors! You can use jasmine rice for an aromatic touch or brown rice for a nuttier flavor and added nutrition. -
2 small heads broccoli, chopped
Fresh broccoli not only adds a beautiful pop of color but also a delightful crunch! If you don’t have broccoli handy, you can substitute it with steamed snap peas or bok choy for a different texture. -
3 large chicken breasts
The star of the dish! Choose boneless, skinless chicken for tenderness. For a twist, consider using tofu or seitan if you’re going plant-based. -
2 tbsp olive oil
For sautéing! You can substitute it with sesame oil for an extra layer of flavor, which is particularly tasty in this dish. -
1 tsp salt
Essential for enhancing flavors. Feel free to adjust based on your preference or dietary restrictions. -
1/2 tsp pepper
A staple spice! Don’t skip this to keep your dish from tasting flat. -
1 tsp chili powder
Adds a mild kick! If you’re extra spicy, switch it out for cayenne pepper. -
1 tsp smoked paprika
For that rich, smoky flavor and beautiful color. Sweet paprika works too, but you won’t get that smoky depth. -
1 tsp onion powder
A flavor powerhouse! If you have fresh onions, you could use 1 small onion instead—just sauté it until golden. -
1 tsp oregano
Gives a touch of herbaceousness. Dried thyme can make a fine substitute! -
1/2 cup soy sauce
The saltiness and umami boost hold the dish together. Use tamari sauce for a gluten-free option or coconut aminos for a sweeter profile. -
1/2 cup honey
The secret to the sticky vibe! Maple syrup or agave can be great swaps if you’re vegan. -
1/4 cup rice vinegar
Adds brightness! Apple cider vinegar is a good alternative if you don’t have rice vinegar on hand. -
3 cloves garlic, minced
Freshly minced garlic brings unforgettable aroma and flavor! Garlic powder will work too for an easier option. -
2 tbsp sriracha
To spice things up! You can reduce the quantity for a milder flavor or keep it spicy! -
2 tsp sesame oil
Drizzle this for that delicious nutty taste! Consider using a different high-heat oil if you can’t find it. -
1 tsp ground ginger
Fresh ginger would be stellar here; just grate it up finely! -
2 tsp arrowroot powder mixed with 2 tbsp water to make a slurry
This is our thickening agent! You can also use cornstarch with the same method if needed. -
1/2 cup mayo
For that creamy sauce! Swap out for Greek yogurt if you’re looking for a lighter option. -
1 tbsp sriracha
Extra kick for your mayonnaise sauce! Adjust based on your level of spice tolerance. -
2-3 tbsp water
To achieve the desired sauce consistency. -
Sesame seeds for topping
For a crunchy finish! You can roast them for an added depth of flavor.
Now that you’ve got your ingredients laid out, let’s dive into the cooking process!
Step-by-Step Instructions
Step 1: Cook the Rice
Start by rinsing your uncooked rice under cool water to remove excess starch. Toss it into a pot or rice cooker and add those magical proportions of water. The golden rule is usually a 1:1.5 rice-to-water ratio. Bring it to a gentle boil, then reduce to simmer until it’s fluffy and tender. If you’re using brown rice, it’ll take a tad longer, about 40-45 minutes. While that’s cooking, we can multitask!
Chef Tip: Give your rice an occasional stir to keep it from sticking, and fluff it with a fork at the end for that perfect loose texture.
Step 2: Prep the Chicken
While the rice is doing its magic, let’s get started on that chicken! Cut the chicken breasts into bite-sized pieces. This helps them to cook evenly and soak up the sticky sauce beautifully. Season the chicken with salt, pepper, chili powder, smoked paprika, onion powder, and oregano for that flavor-packed impact.
Step 3: Sauté the Chicken
In a sizable skillet, heat the olive oil over medium-high heat. Add your seasoned chicken and sauté, stirring occasionally, until it’s nice and golden brown (about 5-7 minutes). You want it cooked through but equally crispy on the outside. This is the moment where your kitchen will start to smell heavenly!
Chef Hack: Avoid overcrowding the skillet so that the chicken can brown properly. Cook in batches if necessary!
Step 4: Make the Sauce
In a separate bowl, whisk together the soy sauce, honey, rice vinegar, minced garlic, sriracha, sesame oil, and ground ginger. Pour this flavorful sauce over your sautéed chicken in the skillet. Let it simmer for about 5 minutes to allow those delicious flavors to meld together and thicken slightly.
Step 5: Thicken it Up
It’s time for the arrowroot slurry! Mix it in quickly to thicken up that sticky sauce, stirring for another 1-2 minutes until it coats the chicken beautifully.
Pro Tip: If you’re in a hurry, you can skip the thickening step — it’ll still be deliciously sticky sans the extra gooeyness!
Step 6: Steam the Broccoli
In the last few minutes of cooking, throw those beautiful, chopped broccoli heads into the same skillet, allowing them to steam in the leftover sauce for just a couple of minutes. They’ll become vibrantly bright green and perfectly tender-crisp!
Step 7: Assemble and Serve
It’s the moment of truth! Scoop that fluffy rice into bowls and top it generously with your sticky chicken and broccoli combo. Drizzle extra sauce over the top and finish with a sprinkle of sesame seeds for that satisfying crunch.
Serving Suggestions
For a visually appealing presentation, consider layering your sticky chicken and broccoli atop the rice in a generous mound. Play around with color; a side of pickled carrots or cucumber salad can add a refreshing touch. If you’re feeling extra, place the bowls on a rustic wooden board with colorful chopsticks and fresh herbs around for that Instagrammable moment!
Recipe Variations
- Spicy Pineapple Twist: Add chunks of fresh pineapple to the chicken during the last 5 minutes of cooking for a Hawaiian-inspired flavor.
- Mango Salsa Delight: Top your sticky chicken with a fresh mango salsa—combine diced mango, red onion, cilantro, lime juice, and a pinch of salt.
- Whole Grain Goodness: Swap out the white rice for quinoa or farro! Both options pack in extra nutrients and add a lovely chewy texture.
- Cauliflower Rice Option: For a low-carb option, try cauliflower rice instead of regular rice. Just sauté it lightly for a few minutes before serving.
- Sweet Potato Addition: Roasting some diced sweet potatoes alongside your broccoli adds a delightful sweetness that pairs well with the savory chicken.
Chef’s Notes
Food is always evolving, and this recipe is no exception. I remember the first few times I made this dish; I didn’t know a thing about balancing flavors. It took trial and error (and a few too many overly-salty mistakes!) to perfect my sauce. I’ve learned that simplicity often yields the best results. Today, I love keeping things practical, focusing on easy preparations that still make a lasting impression.
Oh, and here’s a fun kitchen story: Once, I was so busy chatting with friends while cooking, I mistook cayenne pepper for paprika (yikes!). Let’s just say that bowl of sticky chicken turned out to be a fire surprise! But hey, we all love a little unexpected twist, right?
FAQs and Troubleshooting
1. What if my sauce isn’t thickening?
If your sauce isn’t thickening as you want, ensure you’re using the correct proportions for the arrowroot slurry. Also, make sure to give it time to cook down properly; a little simmering will do wonders!
2. How do I store leftovers?
Store any leftovers in an airtight container, separated for up to 3 days in the fridge. Reheat in the microwave or in a skillet with a splash of water to keep everything moist.
3. How can I make this dish gluten-free?
Simply swap out the soy sauce for gluten-free tamari and choose rice vinegar as your acidic component. Most of the other ingredients on this list are naturally gluten-free.
4. What other veggies can I add?
You can get creative here! Bell peppers, snap peas, or even carrots would be lovely additions. Just be sure to cook them until they’re bright and tender but not mushy!
Nutritional Info
Here’s a breakdown of the nutrition you’ll get from one serving of these delicious sticky chicken bowls:
- Calories: Approximately 500 kcal
- Protein: Approximately 35 grams (thanks to the chicken!)
- Fat: 12 grams
- Carbohydrates: About 70 grams
- Fiber: 3 grams
Packed with protein and vibrant veggies, these bowls are both satisfying and nutritious!
Final Thoughts
There you have it, my friends! A delightful Sticky Chicken Bowl recipe that’s sure to have your taste buds singing and your friends craving seconds. Food is more than just nourishment; it brings joy, comfort, and connection. So next time you gather with loved ones, consider whipping up this dish and watch as smiles light up, stories flow, and laughter fills the air.
I encourage you not just to follow this recipe to the letter but to let it inspire your kitchen creativity. Who knows? Maybe you’ll create your own special twist that brings the same warm memories and happiness to your dinner table! Happy cooking, and as always, let’s dig in! 🍽️
Print
Sticky Chicken Bowls
- Total Time: 40 minutes
- Yield: 4 servings 1x
- Diet: Gluten-Free
Description
A comforting bowl of juicy chicken coated in a tangy, sweet, and slightly spicy sauce served atop rice with vibrant broccoli.
Ingredients
- 2 cups uncooked rice
- 2 small heads broccoli, chopped
- 3 large chicken breasts, cut into bite-sized pieces
- 2 tbsp olive oil
- 1 tsp salt
- 1/2 tsp pepper
- 1 tsp chili powder
- 1 tsp smoked paprika
- 1 tsp onion powder
- 1 tsp oregano
- 1/2 cup soy sauce
- 1/2 cup honey
- 1/4 cup rice vinegar
- 3 cloves garlic, minced
- 2 tbsp sriracha
- 2 tsp sesame oil
- 1 tsp ground ginger
- 2 tsp arrowroot powder mixed with 2 tbsp water to make a slurry
- 1/2 cup mayo
- 1 tbsp sriracha
- 2–3 tbsp water
- Sesame seeds for topping
Instructions
- Cook the rice by rinsing under cool water, then cook with a 1:1.5 ratio of water until fluffy.
- Prep the chicken by cutting it into bite-sized pieces and seasoning with the spices.
- Sauté the chicken in olive oil over medium-high heat until golden brown.
- Make the sauce by whisking together soy sauce, honey, rice vinegar, garlic, sriracha, sesame oil, and ginger.
- Thicken the sauce with the arrowroot slurry, stirring until it coats the chicken.
- Steam the broccoli in the skillet with the chicken for 2 minutes.
- Assemble the bowls with rice, chicken, broccoli, and drizzle with sauce, then top with sesame seeds.
Notes
For added flavor, consider different veggies or sauces based on preferences. Make sure to store leftovers properly.
- Prep Time: 10 minutes
- Cook Time: 30 minutes
- Category: Main Course
- Method: Sautéing
- Cuisine: Asian
Nutrition
- Serving Size: 1 serving
- Calories: 500
- Sugar: 30g
- Sodium: 800mg
- Fat: 12g
- Saturated Fat: 2g
- Unsaturated Fat: 7g
- Trans Fat: 0g
- Carbohydrates: 70g
- Fiber: 3g
- Protein: 35g
- Cholesterol: 90mg
Keywords: sticky chicken bowls, comfort food, weeknight dinner, Asian-inspired
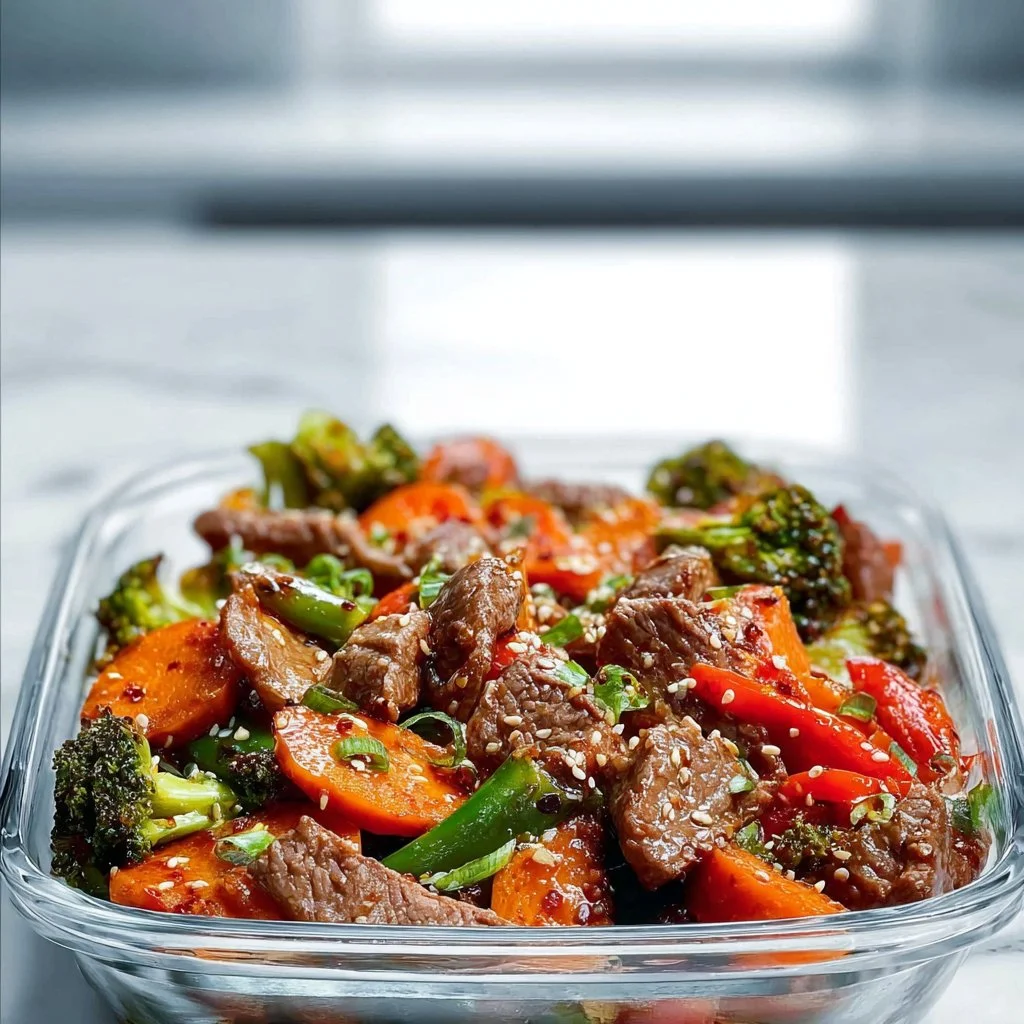
Super Easy Beef Stir Fry
Super Easy Beef Stir Fry: Your New Weeknight Wonder
Hey there, fellow food enthusiasts! It’s Beau Collier here, and I can’t wait to share a gem of a recipe that’s going to jazz up your weeknight dinners: Super Easy Beef Stir Fry. If you’re busy and looking for a dish that’s quick, delicious, and satisfies the soul, then this is it! There’s something about a sizzling stir fry that brings a burst of flavor and a sense of excitement to the dinner table, right? Let’s dive into this culinary adventure that’s not just easy on the eyes but also on your schedule.
Introduction: Sizzle and Pop in 30 Minutes or Less
Picture this: it’s a Wednesday night, and the clock is ticking. You’ve had a long day, and the last thing you want is to be in the kitchen for hours. Enter the stir fry—a magical way to transform a few fresh ingredients into a hearty meal in less than 30 minutes!
Stir frying is not only one of the quickest methods to whip up dinner, but it also allows you to play with flavors and textures to keep things interesting. That vivid, colorful plate can brighten even the gloomiest of days. Plus, with a couple of nifty tricks, anyone can master this technique—even if you think your cooking skills end at boiling water.
This recipe features tender beef sirloin paired with a medley of vibrant veggies, all coated in a savory sauce that will have your taste buds doing a happy dance. Yet, what I love most about stir fry is that it embodies comfort food without the guilt of hours spent slaving away in the kitchen. You can enjoy it from a bowl or plate, alone or with friends and family. Ready to get those chopping skills honed? Let’s do it!
Personal Story: The Family Kitchen Connection
Growing up, nothing screamed “family bonding” quite like our Sunday dinners. My mom had a magic touch with her wok, and her stir fry was legendary in our household. I remember standing on a stool beside her, eagerly watching as she tossed slices of marinated beef into that hot, sizzling pan. The aroma filled the kitchen, turning everything into a sensory playground.
We were a big family, so my mom always made a feast. The best part? Sibling rivalries over who could grab the most greens (because who doesn’t want to be a “veg champion,” right?) and the laughter that echoed as we caught up over each plate of colorful goodness. In hindsight, those meals taught me so much—about food, love, and how a simple dish could bring everyone together. It wasn’t just about eating; it was about enjoying that time together, and I hope this Super Easy Beef Stir Fry does the same for you and yours!
Ingredients: What You’ll Need and a Few Chef Tips
Here’s a sneak peek into my pantry for this stellar dish. Let’s chat through the ingredients so you know exactly what you need and some quick tips to keep in your back pocket:
-
1 lb beef sirloin, thinly sliced
Sirloin is lean and packs a great beefy flavor. If you’re looking for a budget-friendly option, flank steak or even chicken breast could be delicious substitutes. -
2 cups mixed vegetables (bell peppers, broccoli, carrots)
Mix it up! While bell peppers and broccoli are staples, feel free to add snap peas, zucchini, or bok choy for a pop of color and diversity. The more the merrier! -
2 tablespoons soy sauce
Soy sauce is your flavor king here, bringing that umami punch! Low-sodium soy sauce works great if you’re watching your salt intake; just keep an eye on the overall seasoning as you cook. -
1 tablespoon olive oil
This helps us get that sizzle going! You can always swap in sesame oil for an extra flavor kick, especially if you love that delightful nutty essence. -
1 clove garlic, minced
Garlic is the aromatic hero of many dishes. Fresh is best, but pre-minced garlic works in a pinch—just don’t tell my mom! -
1 teaspoon ginger, minced
Ginger adds a lovely zing! If you’re not a fan, you can skip it or use ginger paste as a time-saver. It’s packed with flavor and brings that refreshing warmth. -
Salt and pepper to taste
Keep it simple! You can tweak this duo to your liking, but I’d suggest starting light. You can always add more, but it’s hard to dial it back once it’s in there!
Step-by-Step Instructions: Let’s Get Cooking!
Alright, grab your favorite wok or large, sturdy skillet and let’s do this!
-
Prep Your Ingredients:
Start by slicing your beef into thin strips, about 1/4 inch thick. This will help it cook quickly and evenly. Chef tip: If your beef is slightly frozen, it will be easier to slice thinly. Just a quick 20 minutes in the freezer should do the trick! -
Heat the Wok:
Hit that burner to medium-high heat and let your wok or skillet become hot—this is key for a good stir fry. Add the olive oil, swirling it around to coat the pan. -
Cook the Beef:
Once the oil is shimmering, add the sliced beef in a single layer, and let it sear without stirring for about 1-2 minutes. This allows it to caramelize. After that, stir it every so often until it’s browned and cooked through, about 5 minutes. Chef hack: Doing this in batches can give your beef an even better texture, so if you have a lot, consider cooking it in two rounds. -
Add Aroma:
Toss in the minced garlic and ginger, stirring for about 30 seconds until fragrant (your kitchen will smell incredible!). This is the moment the dish really starts to come alive. -
Veggie Time:
Now it’s vegetable time! Add the mixed veggies to the pan, and stir them in. We want them to retain some crunch, so keep stirring for about 3-5 minutes until they’re bright and tender. -
The Sauce:
Drizzle the soy sauce over the beef and veggies, and toss everything together so each piece is coated in that yummy goodness. Cook for another minute to let the sauce glaze the ingredients. -
Taste & Adjust:
Here’s your chance! Give it a taste and see if it needs a pinch of salt or pepper. Maybe a splash more soy sauce? You’re the chef, so make it yours! -
Final Toss & Plate:
Once everything is sizzling and the colors are popping, it’s time to serve. Carefully plate your stir fry while it’s hot—let those vibrant colors shine!
Serving Suggestions: How to Present Your Creation
Plating is everything, my friends! Here are some ideas to make your stir fry look as good as it tastes:
- Rice Base: Serve your stir fry over fluffy white rice, brown rice, or even quinoa for a nutritious twist.
- Bowl It Up: Use a deep bowl if you’ll be enjoying dinner with a spoon. Garnish with sesame seeds for an elegant touch.
- Wrap It Up: Looking for a unique way to serve? Try using large lettuce leaves to create wraps. Fill ’em up with stir fry for a fun, low-carb option!
- Garnish: A sprinkle of green onions or a handful of crushed peanuts on top can elevate the dish and add extra flavor and crunch.
Recipe Variations: Switch It Up!
The beauty of stir fry is its versatility! Here are some twists to make this dish your own:
- Saucy Variation: Add a tablespoon of oyster sauce for a richer flavor profile.
- Sweet and Spicy: Toss in a teaspoon of chili paste or sriracha for a kick of heat! Balance it with a splash of honey to even things out.
- Vegetarian Delight: Swap the beef for tofu and add extra veggies like mushrooms and bok choy.
- Curry Twist: Add a splash of coconut milk and a tablespoon of curry powder for a deliciously aromatic spin on this stir fry.
- Herb Infusion: Fresh herbs like basil or cilantro can elevate the flavor profile. Add them just before serving for a refreshing touch!
Chef’s Notes: A Dish of Growth
One of the things I love most about cooking is how it allows us to grow and learn. This Super Easy Beef Stir Fry has evolved from those family dinners to being my go-to dish whenever I have hungry guests or need a quick meal fix. The method is so forgiving, and I get to play with flavors every time I make it.
Isn’t it amazing how food is more than just sustenance? It’s a way to connect, celebrate, and make memories. I still hear my mom’s laughter and feel her love every time I whip up a stir fry. Cooking is a beautiful journey, and I’m so grateful to share it with you.
FAQs and Troubleshooting
Here are some common questions I get about stir fry and a few tips on avoiding potential pitfalls:
-
Why is my stir fry watery?
Ensure you’re cooking on high heat and not overcrowding the pan! If it’s too crowded, the ingredients steam instead of sear. Consider cooking in batches. -
Can I prep this ahead of time?
Absolutely! You can slice your veggies and beef the night before. Just store them separately in the fridge to keep them fresh. -
What if my beef is tough?
When slicing, always cut against the grain. This will help keep it tender. Also, marinating your beef in soy sauce and a bit of cornstarch for 15 minutes before cooking can really help. -
How can I store leftovers?
Place any leftovers in an airtight container and refrigerate for up to 3 days. Reheat on the stove for the best texture.
Nutritional Info
While comfort food often comes laden with calories, this Super Easy Beef Stir Fry packs in the nutrition without compromising on flavor:
- Calories: Approximately 350-400 per serving (based on 4 servings)
- Protein: 30g (thanks to the beef!)
- Carbohydrates: 30g
- Fiber: 6g (varies with the type and amount of veggies)
- Fat: 15g (mostly from olive oil)
Feel free to customize to your dietary needs by swapping out proteins or adjusting the oil content!
Final Thoughts
So there you have it—a delightful journey into the world of stir fry! I hope this Super Easy Beef Stir Fry finds a special place in your kitchen and becomes your trusty weeknight go-to. Remember, cooking is all about joy, creativity, and, of course, a dash of love. Don’t shy away from experimenting, tweaking, and making this dish uniquely yours.
Now, get chopping, stir-frying, and make some memorable meals with the ones you love. I can’t wait to hear about your own culinary adventures! Until next time, happy cooking, friends! 🍽️✨
Print
Super Easy Beef Stir Fry
- Total Time: 30 minutes
- Yield: 4 servings 1x
- Diet: Low-Carb
Description
A quick and delightful beef stir fry featuring tender beef sirloin and a medley of vibrant veggies, all coated in a savory sauce.
Ingredients
- 1 lb beef sirloin, thinly sliced
- 2 cups mixed vegetables (bell peppers, broccoli, carrots)
- 2 tablespoons soy sauce
- 1 tablespoon olive oil
- 1 clove garlic, minced
- 1 teaspoon ginger, minced
- Salt and pepper to taste
Instructions
- Prep your ingredients by slicing the beef into thin strips, about 1/4 inch thick.
- Heat the wok over medium-high heat and add the olive oil.
- Cook the sliced beef in a single layer for about 1-2 minutes, then stir until browned, about 5 minutes.
- Add the minced garlic and ginger, stirring for about 30 seconds until fragrant.
- Veggie time! Add mixed veggies and stir for about 3-5 minutes until bright and tender.
- Drizzle the soy sauce over the beef and veggies, toss to coat, and cook for another minute.
- Taste the stir fry and adjust seasoning if needed before serving.
- Plate the stir fry while hot and enjoy!
Notes
Cooking in batches can improve the texture of the beef. You can personalize the stir fry with different veggies or proteins.
- Prep Time: 10 minutes
- Cook Time: 20 minutes
- Category: Main Course
- Method: Stir Fry
- Cuisine: Asian
Nutrition
- Serving Size: 1 serving
- Calories: 375
- Sugar: 5g
- Sodium: 600mg
- Fat: 15g
- Saturated Fat: 2g
- Unsaturated Fat: 10g
- Trans Fat: 0g
- Carbohydrates: 30g
- Fiber: 6g
- Protein: 30g
- Cholesterol: 70mg
Keywords: beef, stir fry, weeknight dinner, quick recipe, Asian cuisine
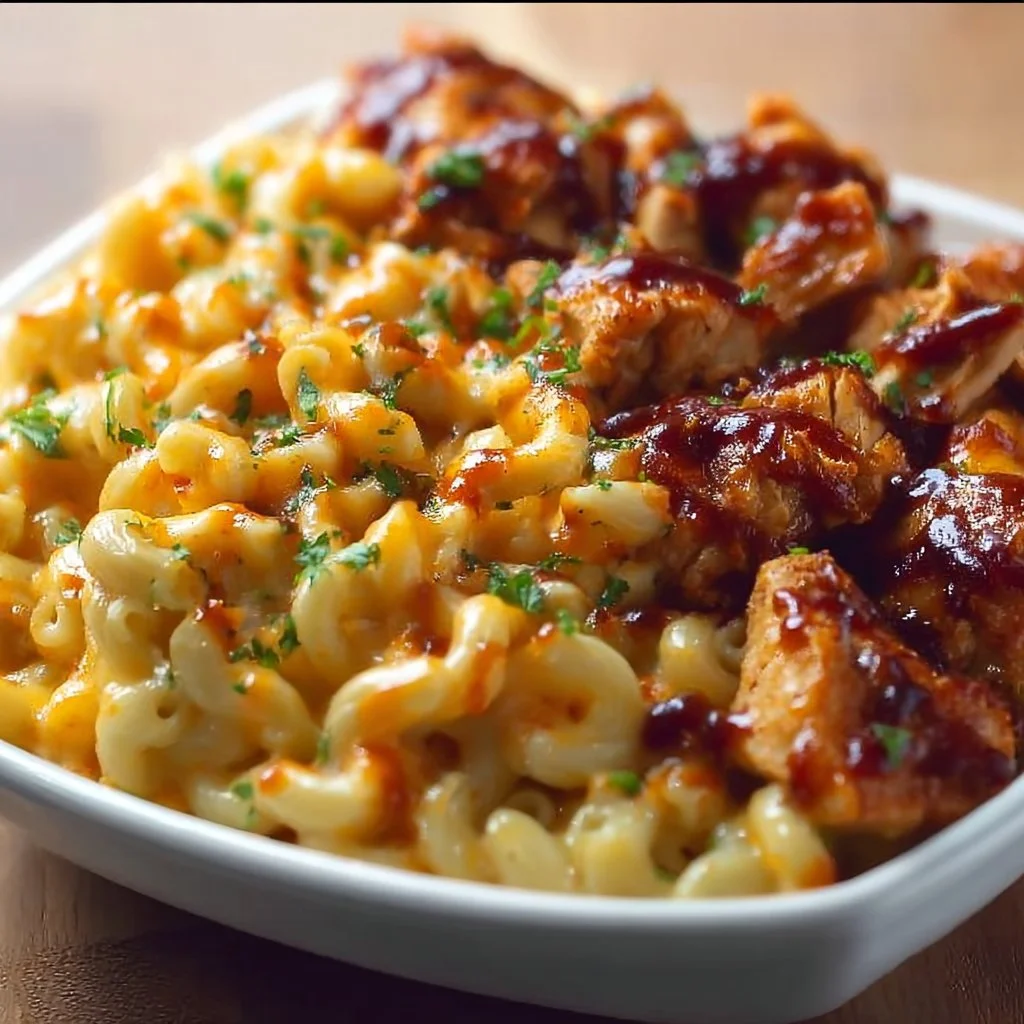
High Protein Honey BBQ Chicken Mac & Cheese Meal Prep
High Protein Honey BBQ Chicken Mac & Cheese Meal Prep: A Deliciously Cozy Dish
Hey there, food lovers! It’s your favorite kitchen companion, Beau Collier, and today we’re diving into a comfort food classic with a healthy twist—High Protein Honey BBQ Chicken Mac & Cheese! Now, if you’re like me, the thought of gooey cheese enveloping perfectly cooked pasta sparks joy like nothing else. Add in some savory chicken and a hint of sweetness from honey BBQ sauce, and you’ve got yourself a dish that not only ticks all the boxes for comfort and flavor but is also packed with protein to fuel your day.
As life gets busier and we find ourselves juggling work, family, and everything in between, meal prep has become our culinary secret weapon. This dish is not just a mouthwatering meal; it’s a smart and deliberate way to ensure that you’re eating right while making your life just a tad easier. With this recipe, you can whip up a week’s worth of lunches or dinners in one appliance—your trusty oven, stovetop, or slow cooker. So, grab your spatula and let’s get cooking!
And I promise you, this isn’t just any mac and cheese. This is a love letter to the classic family favorite, elevated with the goodness of chicken and delightful honey BBQ flavors. Whether you’re meal prepping for the week or just treating yourself after a long day, this dish is all about that warm hug you get from good food. Let’s dig in!
Personal Story
I’ll never forget the first time I made mac and cheese for my family. I was just a wide-eyed kid standing on a stool to reach the stove, decked out in my superhero apron. My mission? To recreate the cheesy magic my mom always had up her sleeve. I grabbed elbow macaroni, a couple of blocks of cheese, and way too much milk. You can guess how well that went!
Fast forward to my teenage years, and I started getting creative in the kitchen. One experimental week, I decided to add BBQ chicken, thinking, “Why not?” and it was a hit! My family devoured it, and I couldn’t believe how something as simple as mac and cheese could be so versatile. That day sparked a love for combining flavors that drove me to create the delightful, health-conscious version I’m sharing with you today. Fast forward to now, and here I am, ready to share this powerhouse dish that packs the nostalgia of childhood with the nutrition we crave as adults.
Ingredients
Here’s what you’ll need for this High Protein Honey BBQ Chicken Mac & Cheese:
-
2 cups macaroni
- Chef Insight: Macaroni is the classic choice, but feel free to swap it for whole grain or gluten-free pasta for a health boost or dietary needs.
-
1 pound chicken breast, cooked and shredded
- Substitution Tips: If you’re short on time, rotisserie chicken or canned chicken will work perfectly. Just make sure to shred it for that perfect blend with the macaroni.
-
1 cup low-fat cheese
- Quick Note: Cheddar cheese is my go-to for that classic flavor, but you can also mix it up with mozzarella or gouda for a unique twist!
-
1/2 cup BBQ sauce
- Chef’s Insight: I love a tangy sauce! If you’re looking for a different flavor profile, experiment with honey mustard or hot sauce for a kick!
-
1 tablespoon honey
- Substitution Tips: If you’re feeling adventurous, try maple syrup or agave for a different sweetness!
-
1 cup milk
- Quick Note: Almond milk or any milk alternative can replace dairy milk while maintaining creaminess.
-
Salt and pepper to taste
- Chef Insight: Always season your pasta water; it makes a world of difference in flavor!
-
Optional toppings:
- Green onions: For a fresh crunch and color.
- Extra cheese: Because who doesn’t love more cheese?
Step-by-Step Instructions
Step 1: Cook the Macaroni
Bring a large pot of salted water to a boil. Add your macaroni and cook until al dente, about 8 minutes. Chef Tip: Reserve a cup of pasta water before draining! This liquid will help create a beautiful sauce later on.
Step 2: Prepare the Chicken
While your pasta is cooking, shred your cooked chicken breast. You can do this easily with two forks or in a stand mixer—just make sure it’s all nicely shredded to mix well with the mac and cheese later. If you’re using a store-bought option, simply measure out your portion.
Step 3: Create the Sauce
In a medium saucepan over medium heat, combine the BBQ sauce, honey, and milk. Stir gently until everything is well combined and heated through. Little Chef Hack: If you want to thicken your sauce a bit, add a small cornstarch slurry (mix a tablespoon of cornstarch with a tablespoon of water) and stir until it thickens.
Step 4: Combine Everything
In a large mixing bowl, combine the drained macaroni, shredded chicken, and the luscious BBQ sauce mixture. Add in your cheese and mix everything until well coated. If your mixture seems a bit dry, don’t hesitate to add a splash of the reserved pasta water to achieve your desired creaminess.
Step 5: Bake (Optional)
Transfer your mixture to a baking dish, top with extra cheese, and bake at 350°F (175°C) for about 20 minutes, or until bubbly and golden brown. If you like a little crust, broil it for the last minute or two. Just keep an eye on it so it doesn’t burn!
Step 6: Serve and Enjoy!
Once your mac and cheese is out of the oven, let it sit for about 5 minutes. This will help the flavors meld together and make serving a breeze. Top with optional green onions or extra cheese for a delightful finishing touch before diving in!
Serving Suggestions
There are a million ways to enjoy this High Protein Honey BBQ Chicken Mac & Cheese! Serve it in a cozy bowl, garnished with green onions for a pop of color. Pair it with a fresh green salad to balance the richness, or why not throw in some steamed veggies on the side? For casual dinners, serving it in a deep dish with some crusty bread on the side makes for the perfect family feast.
If you’re meal prepping, portion it out in airtight containers for easy grab-and-go meals throughout the week. Just reheat in the microwave for a delightful lunch that makes your coworkers envious!
Recipe Variations
-
Buffalo Chicken Mac: Swap in buffalo sauce for the BBQ sauce for a spicy kick. Add a dollop of blue cheese dressing on top!
-
Vegetarian Delight: Replace chicken with roasted vegetables or protein-rich chickpeas for a vegetarian option without losing flavor.
-
Cheesy Broccoli Mac: Stir in steamed broccoli florets for an extra serving of greens, plus they add a nice crunch.
-
Tex-Mex Twist: Incorporate black beans, corn, and a sprinkle of taco seasoning for a southwest flair.
-
Pesto Bliss: Instead of BBQ sauce, mix in your favorite pesto for an Italian-inspired comfort dish.
Chef’s Notes
As with all my recipes, this one has evolved over time. I originally created it without any thought of the high protein aspect, focusing solely on comfort food. But as I started meal prepping for an active lifestyle, the need to include solid proteins became evident. It’s been a joy finding ways to enjoy classic favorites while staying true to nutritional goals. I still remember that first bite, sharing it with my family, and knowing we all found joy in the flavors. Cooking has a funny way of taking you back, doesn’t it?
FAQs and Troubleshooting
1. My mac and cheese turned out too dry. What happened?
If your dish is dry, it may be due to not enough liquid in your sauce mixture. Try adding a bit more milk or reserved pasta water next time.
2. Can I freeze leftovers?
Absolutely! This dish freezes well. Just store it in an airtight container and reheat thoroughly when you’re ready to enjoy it again.
3. How can I make it spicier?
For an added kick, toss in some diced jalapeños or a spicy BBQ sauce.
4. What if I don’t have BBQ sauce?
You can use any sauce of your choice, like teriyaki for a sweet Asian twist or even just plain tomato sauce in a pinch!
Nutritional Info
While I’m not a nutritionist, I like to think about how the ingredients come together for a wholesome meal. This High Protein Honey BBQ Chicken Mac & Cheese is loaded with lean chicken breast and a decent amount of cheese, giving you about 25g of protein per serving. Coupled with the fiber from macaroni and any veggies you throw in, this meal offers a satisfying blend of macronutrients to keep you full and energized.
Each serving generally contains:
- Calories: 450-500
- Protein: ~25g
- Carbohydrates: ~50g
- Fat: ~15-20g
Of course, numbers can vary based on ingredients and measurements, but isn’t the focus on balance rather than perfection?
Final Thoughts
Cooking is an adventure, and I hope this High Protein Honey BBQ Chicken Mac & Cheese becomes one of your go-to recipes! With its rich flavors and comforting nature, this dish embodies everything I love about food—family, togetherness, and that magical ability to make us feel at home, no matter where we are. I can’t wait for you to try it out and hear how it turns out! Whether you’re savoring it on a busy weekday, indulging in it during a cozy movie night, or prepping it for your week ahead, remember: good food should always bring a smile. So let’s keep cooking, experimenting, and sharing the love of food with one another. Happy eating!
Print
High Protein Honey BBQ Chicken Mac & Cheese
- Total Time: 45 minutes
- Yield: 4 servings 1x
- Diet: High Protein
Description
A comfort food classic elevated with protein-packed chicken and delicious honey BBQ flavors, perfect for meal prep.
Ingredients
- 2 cups macaroni
- 1 pound chicken breast, cooked and shredded
- 1 cup low-fat cheese
- 1/2 cup BBQ sauce
- 1 tablespoon honey
- 1 cup milk
- Salt and pepper to taste
- Optional toppings: Green onions, Extra cheese
Instructions
- Cook the macaroni by bringing a large pot of salted water to a boil, adding macaroni, and cooking until al dente, about 8 minutes.
- Prepare the chicken by shredding the cooked chicken breast with two forks or in a stand mixer.
- Create the sauce by combining the BBQ sauce, honey, and milk in a medium saucepan over medium heat, stirring until heated through.
- Combine everything by mixing the drained macaroni, shredded chicken, BBQ sauce mixture, and cheese in a large bowl until well coated.
- Transfer the mixture to a baking dish, top with extra cheese, and bake at 350°F (175°C) for about 20 minutes until bubbly.
- Serve and enjoy! Let it sit for about 5 minutes, then top with green onions or extra cheese if desired.
Notes
Feel free to swap the macaroni for whole grain or gluten-free pasta. For a spicy kick, substitute BBQ sauce with buffalo sauce.
- Prep Time: 15 minutes
- Cook Time: 30 minutes
- Category: Main Course
- Method: Baking
- Cuisine: American
Nutrition
- Serving Size: 1 serving
- Calories: 450
- Sugar: 10g
- Sodium: 600mg
- Fat: 18g
- Saturated Fat: 8g
- Unsaturated Fat: 8g
- Trans Fat: 0g
- Carbohydrates: 52g
- Fiber: 2g
- Protein: 25g
- Cholesterol: 60mg
Keywords: mac and cheese, meal prep, chicken, BBQ, comfort food
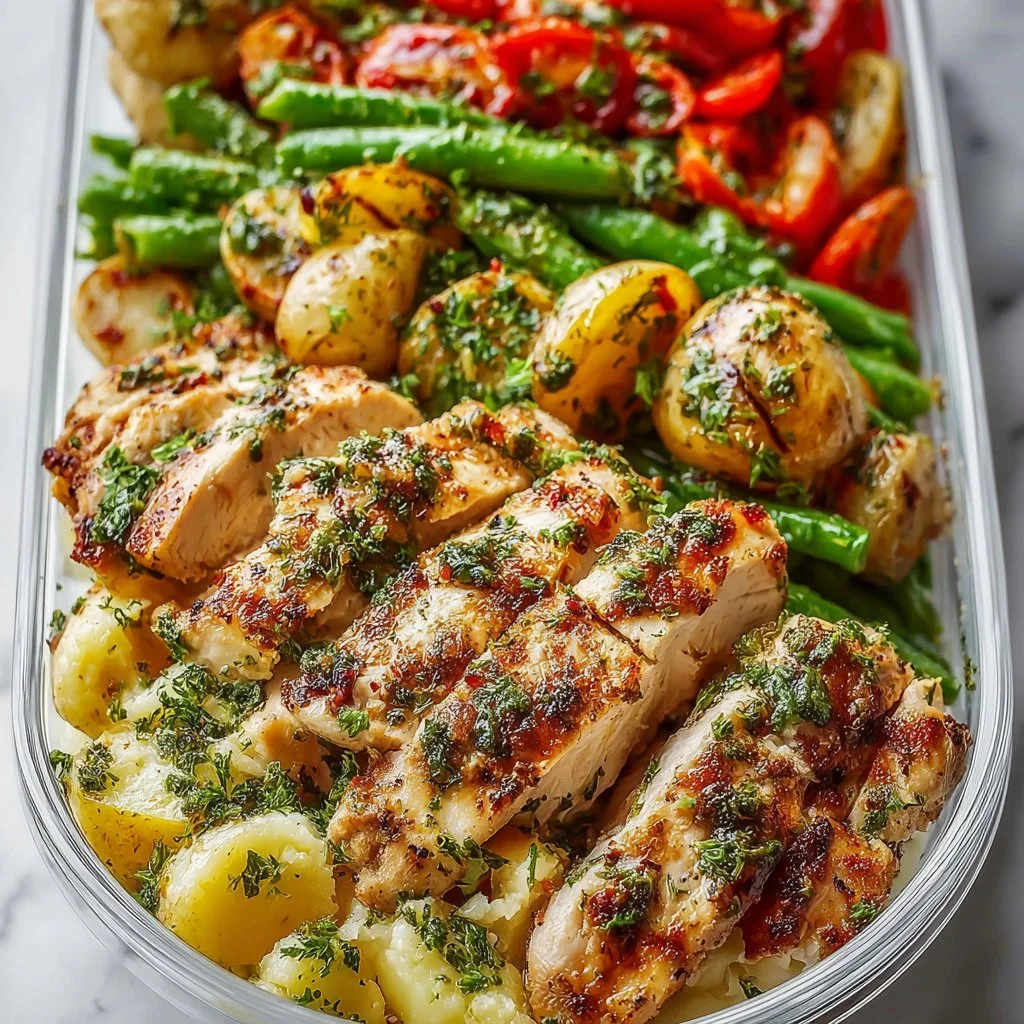
Healthy Lemon Garlic Chicken Meal Prep Bowls
Healthy Lemon Garlic Chicken Meal Prep Bowls: A Flavorful Journey!
Hey there, food enthusiasts! Welcome back to Feastical, your go-to spot for feel-good food that packs a punch. Today, I’m thrilled to share one of my absolute favorite recipes—Healthy Lemon Garlic Chicken Meal Prep Bowls! Whether you’re meal prepping for the week or just craving a delicious and nutritious dish, these bowls are not only loaded with flavor but are also super simple to whip up.
As busy as life can get, I believe that eating well shouldn’t feel like a chore. These meal prep bowls make sure you have something tasty and healthy waiting for you in the fridge at the end of a long day. Let’s dive right in, shall we? With such a zesty and fragrant combination of lemon and garlic, this dish is all about bringing joy (and nutrients) back to mealtime.
A Fun Memory with Lemon Garlic Chicken
Before we jump into the cooking bliss, let me take you on a little stroll down memory lane. A few summers ago, I found myself at my friend Jenna’s kitchen, where we decided to experiment with meal prepping—a relatively new concept to both of us at the time. She had her heart set on a lemon dish that could brighten up our week.
After some giggles and a few culinary hiccups (I still can’t believe we mistook salt for sugar in our first batch), we finally hit the jackpot with what we now affectionately call “The Lemon Garlic Chicken Saga.” As that mouth-watering aroma filled the kitchen, we knew we had something special. Jenna’s family joined us for dinner, and we all laughed, shared stories, and enjoyed the magic that can happen when food brings people together. That day, we learned that the right flavors and a sprinkle of love can turn any day into a feast.
And now, I’m sharing that same joy with you! So, let’s get started and recreate the magic in your own kitchen!
Ingredients
Here’s what you’ll need to make these mouth-watering meal prep bowls:
-
2 Chicken Breasts
A lean source of protein that’s versatile and absorbs flavors beautifully. If you’re looking for a shortcut, boneless thighs work great here too! -
2 Tablespoons Olive Oil
The heart-healthy fat that adds richness to your chicken. Avocado oil is a fantastic substitute if you prefer higher smoke points. -
4 Cloves Garlic, Minced
Garlic adds that aromatic punch we all love. If you’re in a hurry, jarred minced garlic can save you some time! -
Juice of 1 Lemon
Fresh is key here! The zesty brightness of lemon lifts all the flavors. If you’re out of lemons, a splash of vinegar can work too. -
Salt and Pepper to Taste
Essential for seasoning. I recommend sea salt and freshly cracked black pepper for the best results! -
2 Cups Cooked Quinoa
A fantastic gluten-free grain that’s high in protein. You can switch it up with brown rice or even cauliflower rice for a low-carb option. -
1 Cup Steamed Broccoli
Packed with vitamins! Fresh or frozen broccoli are both good choices. You can also add asparagus or green beans if you’re feeling adventurous! -
1 Cup Cherry Tomatoes, Halved
Their juicy sweetness makes every bite a delight. Sub with diced bell peppers for a colorful twist. -
1 Avocado, Sliced
Creamy, dreamy avocado adds a healthy fat element. If you can’t find ripe avocados, a dollop of Greek yogurt is a great alternative!
Step-by-Step Instructions
Let’s cook up some magic! Follow these detailed steps to bring your Lemon Garlic Chicken Meal Prep Bowls to life.
Step 1: Prep Your Chicken
Start by patting your chicken breasts dry with a paper towel. This helps them caramelize beautifully in the pan! Place them in a bowl and drizzle with olive oil. Add minced garlic, lemon juice, salt, and pepper. Give it a good mix! Let marinate for about 15-30 minutes if you’ve got time—trust me, the flavor will be worth it!
Step 2: Cook the Chicken
Heat a skillet over medium-high heat. When it’s hot, place your chicken breasts in the pan. Let them sear without moving them for about 6-7 minutes to get that delicious browned crust. Flip and cook for another 5 minutes until the internal temperature reaches 165°F (75°C). A handy trick—use a meat thermometer for precision!
Step 3: Quinoa Time
While your chicken is cooking, let’s get that quinoa going. Rinse the quinoa under cold water to remove any bitterness. Combine 1 cup of dry quinoa with 2 cups of water in a pot. Bring it to a boil, reduce the heat to low, cover, and let it simmer for 15 minutes. Fluff with a fork once it’s done!
Step 4: Steam the Broccoli
You can either steam broccoli in a pot or microwave it! For stovetop steaming, place a steamer basket over boiling water and let it cook for about 5-7 minutes until it’s tender but still bright green. If you’re using the microwave, place the florets in a bowl, add a splash of water, cover, and microwave for 3-4 minutes. Easy peasy!
Step 5: Slice the Chicken
Once your chicken is cooked through, remove it from the pan and let it rest for 5 minutes before slicing into strips. This resting step is crucial—it helps keep the juices sealed in, ensuring tenderness.
Step 6: Assemble Your Bowls
Alright, it’s the moment of truth—let’s assemble! In your meal prep containers, start with a base of quinoa, add steamed broccoli, and top it with those luscious slices of chicken. Finish up with halved cherry tomatoes and a few slices of avocado. You can drizzle another squeeze of lemon on top for that extra zing!
Serving Suggestions
Now that your bowls are assembled, you might be wondering how to serve them! These meal prep bowls are perfect as-is but here’s how you can get a bit fancy.
- Garnish: Add a sprinkle of fresh herbs like parsley or cilantro for a pop of color.
- Dress It Up: Drizzle a light vinaigrette or even a homemade tahini dressing for some extra flavor.
- Side Serving: Pair with whole-grain pita or a side of hummus for a little Mediterranean flair.
You can store these beauties in the fridge for up to five days—making your weeknight dinners a breeze!
Recipe Variations
Let’s get creative, shall we? Here are a few twists you can make to keep things exciting:
- Spicy Kick: Add a pinch of red pepper flakes to your marinade for some heat.
- Mediterranean Twist: Swap cherry tomatoes for diced cucumbers and sprinkle with feta cheese.
- Asian Infusion: Change up the seasoning with soy sauce and sesame oil instead of olive oil and lemon.
- Herbaceous Delight: Use fresh herbs like dill or basil in place of the lemon for a fresh flavor profile.
- Whole Grain Goodness: Try swapping quinoa for farro or barley for a heartier grain option.
Chef’s Notes
Cooking is all about experimenting and having fun! I can’t tell you how many times I’ve tried a recipe only to change it up on a whim—and that’s where the best flavors emerge. This Lemon Garlic Chicken Meal Prep Bowl has itself evolved over time, going from a simple dinner idea to a beloved staple in my kitchen.
One funny story comes to mind: I once forgot the most crucial ingredient—salt—while prepping for my family’s dinner. You can bet I learned my lesson (and a few laughs were had) when everyone sat down anticipating a flavor explosion and instead got “blah.” Lesson learned: always taste as you go!
FAQs and Troubleshooting
1. Can I use frozen chicken?
Absolutely! Just ensure to fully thaw it before marinating and cooking.
2. What can I use if I don’t have quinoa?
Brown rice, couscous, or even lentils are great substitutes!
3. My chicken is dry. What went wrong?
Overcooking can dry out chicken. Invest in a meat thermometer to cook it right to 165°F (75°C) or check for juices running clear.
4. How do I store leftovers?
Store in airtight containers in the fridge, and they should last up to five days!
Nutritional Info
This meal prep bowl is not just delicious; it’s nutritious too! Here’s a quick breakdown:
- Calories: Around 450 per serving
- Protein: Approx. 35g (thanks to the chicken and quinoa)
- Fat: Healthy fats from olive oil and avocado
- Carbohydrates: Whole grains and veggies ensure you get stable energy
- Fiber: With quinoa and veggies, you get a good dose of fiber for digestion
Each bowl is designed to keep you fueled and satisfied without sacrificing flavor!
Final Thoughts
I hope you enjoy making and eating these Healthy Lemon Garlic Chicken Meal Prep Bowls as much as I do! Cooking is a wonderful journey we can take together, and I am thrilled to share it with you. Remember, food is not just about nourishment—it’s an experience that brings joy, love, and comfort to our lives.
So grab your ingredients, put on your favorite playlist, and get ready to create a week’s worth of deliciousness. Stay inspired and keep that kitchen flowing with flavors! Until next time, happy cooking, my foodie friends! 🍽️✨
Print
Healthy Lemon Garlic Chicken Meal Prep Bowls
- Total Time: 55 minutes
- Yield: 4 servings 1x
- Diet: Gluten-Free
Description
A flavorful and nutritious meal prep bowl featuring lemon garlic chicken, quinoa, and fresh vegetables.
Ingredients
- 2 Chicken Breasts
- 2 Tablespoons Olive Oil
- 4 Cloves Garlic, Minced
- Juice of 1 Lemon
- Salt and Pepper to Taste
- 2 Cups Cooked Quinoa
- 1 Cup Steamed Broccoli
- 1 Cup Cherry Tomatoes, Halved
- 1 Avocado, Sliced
Instructions
- Pat your chicken breasts dry with a paper towel. Place them in a bowl and drizzle with olive oil. Add minced garlic, lemon juice, salt, and pepper; let marinate for 15-30 minutes.
- Heat a skillet over medium-high heat. Add chicken breasts to the pan, sear for 6-7 minutes, then flip and cook for another 5 minutes until they reach an internal temperature of 165°F (75°C).
- Rinse the quinoa under cold water, combine 1 cup of dry quinoa with 2 cups of water in a pot. Bring to boil, reduce heat, cover, and simmer for 15 minutes.
- Steam the broccoli for 5-7 minutes until tender or microwave for 3-4 minutes.
- Remove the chicken from the pan, let it rest for 5 minutes before slicing.
- Assemble the meal prep bowls: start with quinoa, add steamed broccoli, topped with chicken slices, cherry tomatoes, and avocado.
Notes
Store in the fridge for up to five days. Add fresh herbs or a light vinaigrette for extra flavor.
- Prep Time: 30 minutes
- Cook Time: 25 minutes
- Category: Meal Prep
- Method: Baking, Steaming
- Cuisine: Mediterranean
Nutrition
- Serving Size: 1 bowl
- Calories: 450
- Sugar: 4g
- Sodium: 350mg
- Fat: 20g
- Saturated Fat: 3g
- Unsaturated Fat: 15g
- Trans Fat: 0g
- Carbohydrates: 45g
- Fiber: 7g
- Protein: 35g
- Cholesterol: 70mg
Keywords: meal prep, chicken, healthy recipe, lemon garlic, quinoa, nutrition
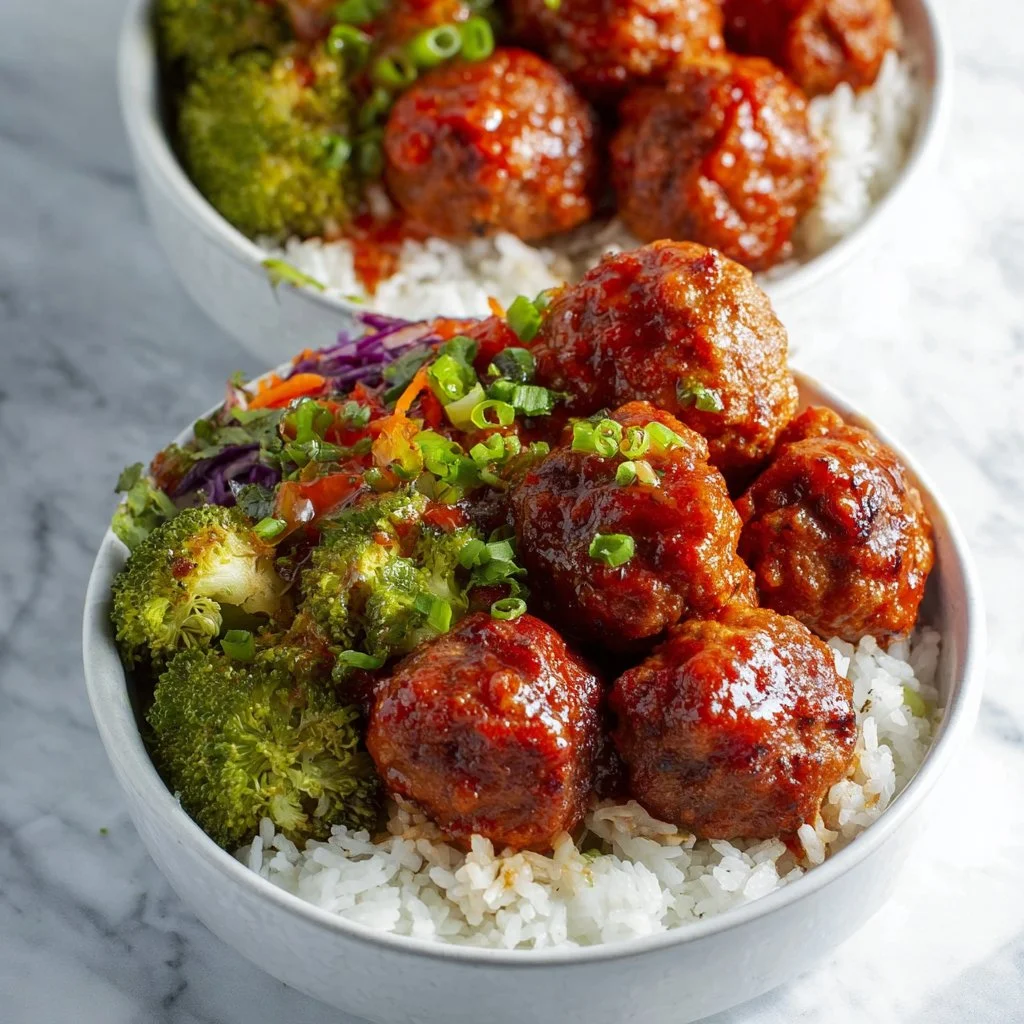
Korean Meatball Meal Prep
Korean Meatball Meal Prep: A Cozy Feast for the Busy Foodie
Hey there, foodies! 🌟 I’m Beau Collier, and I’m super excited to share a recipe that’s as vibrant and delicious as it is simple to whip up—Korean Meatball Meal Prep! If you’re anything like me, your weekdays can get a little hectic, but that doesn’t mean we have to sacrifice taste or comfort for convenience. That’s where this dish comes in!
Imagine this: juicy, flavor-packed meatballs that sneak a hint of sweetness and a kick of heat, all served up with fluffy rice and fresh broccoli. It’s a meal that not only makes your taste buds dance but also warms your heart and fills your home with delightful aromas. What’s more? Each bite of these meatballs is like a cozy hug, reminding you that good food brings people together—even if you’re just feeding your future self!
What I love about meal prepping is that you’re not just making one meal; you’re putting in a little bit of love into each container, creating a week’s worth of cozy comfort on the go. So grab your apron, make sure that kitchen playlist is bumped up, and let’s dive into this Korean Meatball adventure!
Personal Story
I remember the first time I tried a dish similar to these meatballs at a small Korean bistro in my hometown. I was a college student, utterly broke but rich in fast-food options. One chilly Friday night, my buddies and I decided to skip our usual burger joint, drawn instead by the intoxicating aroma wafting from that little bistro. As the steaming bowl of meatballs and rice was placed in front of me, my heart soared! They were perfectly seasoned, tender, and had that luscious umami flavor that just makes you want to cozy up and savor every last bite.
Fast forward to now, I’ve taken those incredible flavors and turned them into a meal-prep version that’s simple to prepare, so I can indulge in that same comforting feeling whenever the craving strikes. Plus, I love knowing that sharing recipes like these can bring you that same cozy joy, even amidst life’s chaos. So let’s channel those memories into something that’ll warm up your weekly meals!
Ingredients
Let’s gather our ingredients for this delectable meal prep! Here’s what you’ll need:
For the Meatballs
-
1 lb. Ground Pork: The star of our dish! Ground pork gives the meatballs a tender texture. If you prefer, you can substitute it with ground beef or turkey for a leaner option.
-
1 Large Egg: Acts as a binder to hold everything together. You can swap this with a flax egg (1 tbsp flaxseed meal + 2.5 tbsp water) for a vegan version!
-
1/2 Cup Cracker Crumbs or Bread Crumbs: Adds texture and helps absorb moisture. If you want to keep it gluten-free, use crushed gluten-free crackers or almond flour instead.
-
2 Tbsp. Gochujang Sauce: A sweet and spicy Korean chili paste that’s a flavor bomb! Use less for milder meatballs or try a different chili paste if you’re in a pinch.
-
1/2 tsp. Kosher Salt: Brings out the flavors in the meatballs. Don’t skimp on this one!
-
1/2 tsp. Garlic Powder: A must-have for that warm, aromatic flavor. Fresh minced garlic is even better if you have it on hand!
-
1/4 tsp. Ground Ginger: Adds a lovely zing. In case you don’t have ground ginger, fresh ginger works well too; just double the amount!
For the Side
-
1/2 lb. Fresh Broccoli Florets: The perfect veggie to balance the richness of the meatballs. You can also switch it up for green beans or snap peas if you prefer!
-
1 Tbsp. Olive Oil: For roasting the veggies. Feel free to use sesame oil for an extra layer of flavor!
-
1/2 tsp. Kosher Salt: To season the broccoli.
-
1/4 tsp. Black Pepper: A dash for added flavor.
For the Sauce
-
1 cup Uncooked Basmati Rice: Fluffy and fragrant, it’s the ideal complement to our meatballs. You can sub with brown rice or quinoa for a whole grain option.
-
2 cups Water: Just enough to cook that rice to perfection.
-
1/2 cup Gochujang Sauce: To create a spicy-sweet drizzling sauce that can double as a dipping sauce!
-
1/4 cup Soy Sauce: Introduces a savory depth. Use tamari for a gluten-free option!
-
2 tsp. Sesame Oil: Brings nuttiness to our sauce and rounds out the flavors.
-
1/2 tsp. Garlic Powder: Because garlic is the MVP, right?
-
1/4 tsp. Ground Ginger: Adds brightness to the sauce, enhancing the overall flavor profile.
-
1 1/2 Tbsp. Honey: Sweetness to balance out the spice!
Step-by-Step Instructions
Alright, my cooking friends, it’s time for the fun part—let’s cook it up! Follow these steps for the ultimate Korean meatball experience:
-
Preheat Your Oven: First things first, let’s get that oven preheated to 400°F (200°C). A hot oven means perfectly roasted veggies and meatballs.
-
Mix the Meatball Ingredients: In a large mixing bowl, combine the ground pork, egg, cracker crumbs, gochujang sauce, salt, garlic powder, and ginger. Use your hands (trust me, it’s way more fun!) to mix everything together until just combined. Don’t overmix; we want those meatballs to stay juicy!
-
Shape the Meatballs: Roll the mixture into golf ball-sized meatballs—about 1.5 inches in diameter. This step is fun and will leave you with about 20-24 meatballs. Place them evenly spaced on a baking sheet lined with parchment paper.
-
Prep the Broccoli: In a bowl, toss those fresh broccoli florets with olive oil, salt, and black pepper. Make sure they’re well-coated so they can roast up beautifully!
-
Bake the Meatballs and Broccoli: Once your oven is ready, place the meatballs and seasoned broccoli in there. Roast for about 20-25 minutes or until the meatballs are browned and cooked through. Don’t forget to give everything a little shake halfway through!
-
Cook the Rice: While everything is roasting, wash your basmati rice until the water runs clear. In a medium saucepan, add the rice and water, and bring it to a boil. Once boiling, reduce heat to low, cover, and let it simmer for 15-18 minutes until all the water is absorbed. After cooking, let it sit for 5 minutes before fluffing with a fork.
-
Whisk Up the Sauce: In a small bowl, whisk together the gochujang, soy sauce, sesame oil, garlic powder, ginger, and honey. You want it smooth and well combined—this sauce will add layers of flavor!
-
Assemble Your Meal Prep: Now it’s time to put everything together. In your meal prep containers, add a generous scoop of rice, a serving of those fabulous meatballs, and a hearty portion of roasted broccoli. Drizzle that luscious sauce over the top for added flavor.
Serving Suggestions
When it’s time to dig in, feel free to sprinkle some sesame seeds, chopped green onions, or even some crushed peanuts on top for added crunch and flavor. If you’re looking for something extra, a quick side of kimchi or pickled veggies can elevate this dish even further. Serve it hot, and I promise it’ll be a hit any day of the week!
Recipe Variations
Now, let’s get creative! Here are a few variations you can try to keep things exciting:
-
Meatballs with a Twist: Swap in beef, turkey, or even a plant-based ground meat alternative for a unique spin. Each option brings its own flavor and texture to the table!
-
Spicy Soy Glaze: For less heat, remove some gochujang and replace it with teriyaki sauce for a different flavor profile that’s still packed with umami.
-
Veggie-Packed Meatballs: Add grated zucchini or carrots into the meatball mixture for added nutrients and moisture.
-
Mediterranean Spin: Replace gochujang with harissa and serve with a tahini sauce instead of soy sauce for a Mediterranean flair.
-
Cauliflower Rice: If you’re watching carbs, try serving everything over cauliflower rice instead of basmati!
Chef’s Notes
This recipe has grown with me over the years. I remember experimenting with different spices and marinades until I struck gold with this combo! One fun story: the first time I made these for friends, I accidentally added way too much gochujang. Let’s just say they were definitely spicy! Lesson learned! Over time, I’ve perfected the balance of flavors, and now family and friends ask for them on repeat!
FAQs and Troubleshooting
1. Can I freeze these meatballs?
Absolutely! Both the meatballs and cooked rice freeze beautifully. Just store them in airtight containers. When you’re ready to enjoy, simply reheat in the oven or microwave!
2. What if my meatballs are dry?
If your meatballs turn out dry, it might be due to overcooking. Monitor their cooking time closely next time. Also, adding some moisture with extra sauce or a drizzle of olive oil during cooking can help!
3. Can I use frozen broccoli?
Yes! Just add the frozen broccoli to the baking sheet straight from the freezer. Keep in mind it may need a bit more cooking time to crisp up nicely.
4. How do I know when the meatballs are done?
Use a meat thermometer! Your meatballs are cooked through when they reach an internal temperature of 160°F (70°C). If you don’t have one, cut one open—the inside should be no longer pink!
Nutritional Info
Here’s a rough estimate of the nutritional content per serving (including meatballs, broccoli, and rice):
- Calories: 450–500
- Protein: 30g
- Carbohydrates: 50g
- Fat: 15g
- Fiber: 3g
These numbers can vary based on your specific ingredient choices, but you can easily adjust portions as necessary for your dietary needs!
Final Thoughts
And there you have it—delicious Korean Meatballs perfect for meal prepping and bringing joy to your busy week! This dish not only fills your belly but also feeds your soul. Each bite transports you to a world where comfort and flavor dance hand-in-hand, reminding you that delicious doesn’t have to be complex.
Next time life gets a bit too busy, just remember that with a little love, some quality ingredients, and a sprinkle of creativity, you can whip up meals that not only nourish but also bring a warm smile to your face. So, are you ready to take a culinary adventure? Let’s get cooking, my fellow food lover! 😊
Print
Korean Meatball Meal Prep
- Total Time: 45 minutes
- Yield: 4 servings 1x
- Diet: Paleo
Description
Juicy, flavor-packed Korean meatballs paired with fluffy rice and roasted broccoli—perfect for meal prep and busy weekdays!
Ingredients
- 1 lb. Ground Pork
- 1 Large Egg
- 1/2 Cup Cracker Crumbs or Bread Crumbs
- 2 Tbsp. Gochujang Sauce
- 1/2 tsp. Kosher Salt
- 1/2 tsp. Garlic Powder
- 1/4 tsp. Ground Ginger
- 1/2 lb. Fresh Broccoli Florets
- 1 Tbsp. Olive Oil
- 1/2 tsp. Kosher Salt
- 1/4 tsp. Black Pepper
- 1 cup Uncooked Basmati Rice
- 2 cups Water
- 1/2 cup Gochujang Sauce
- 1/4 cup Soy Sauce
- 2 tsp. Sesame Oil
- 1/2 tsp. Garlic Powder
- 1/4 tsp. Ground Ginger
- 1 1/2 Tbsp. Honey
Instructions
- Preheat your oven to 400°F (200°C).
- Mix the meatball ingredients in a large mixing bowl until just combined.
- Shape the mixture into golf ball-sized meatballs, about 1.5 inches in diameter.
- Prep the broccoli by tossing it with olive oil, salt, and black pepper.
- Bake the meatballs and broccoli for 20-25 minutes until browned and cooked through.
- Cook the basmati rice by boiling with water, then reducing to low and simmering until absorbed.
- Whisk together the sauce ingredients until smooth.
- Assemble your meal prep containers with rice, meatballs, roasted broccoli, and drizzle the sauce over the top.
Notes
You can freeze both the meatballs and cooked rice for convenient meals later.
- Prep Time: 15 minutes
- Cook Time: 30 minutes
- Category: Main Course
- Method: Baking
- Cuisine: Korean
Nutrition
- Serving Size: 1 serving
- Calories: 450
- Sugar: 10g
- Sodium: 600mg
- Fat: 15g
- Saturated Fat: 3g
- Unsaturated Fat: 8g
- Trans Fat: 0g
- Carbohydrates: 50g
- Fiber: 3g
- Protein: 30g
- Cholesterol: 70mg
Keywords: Korean Meatballs, Meal Prep, Easy Dinner, Comfort Food, Healthy Recipe
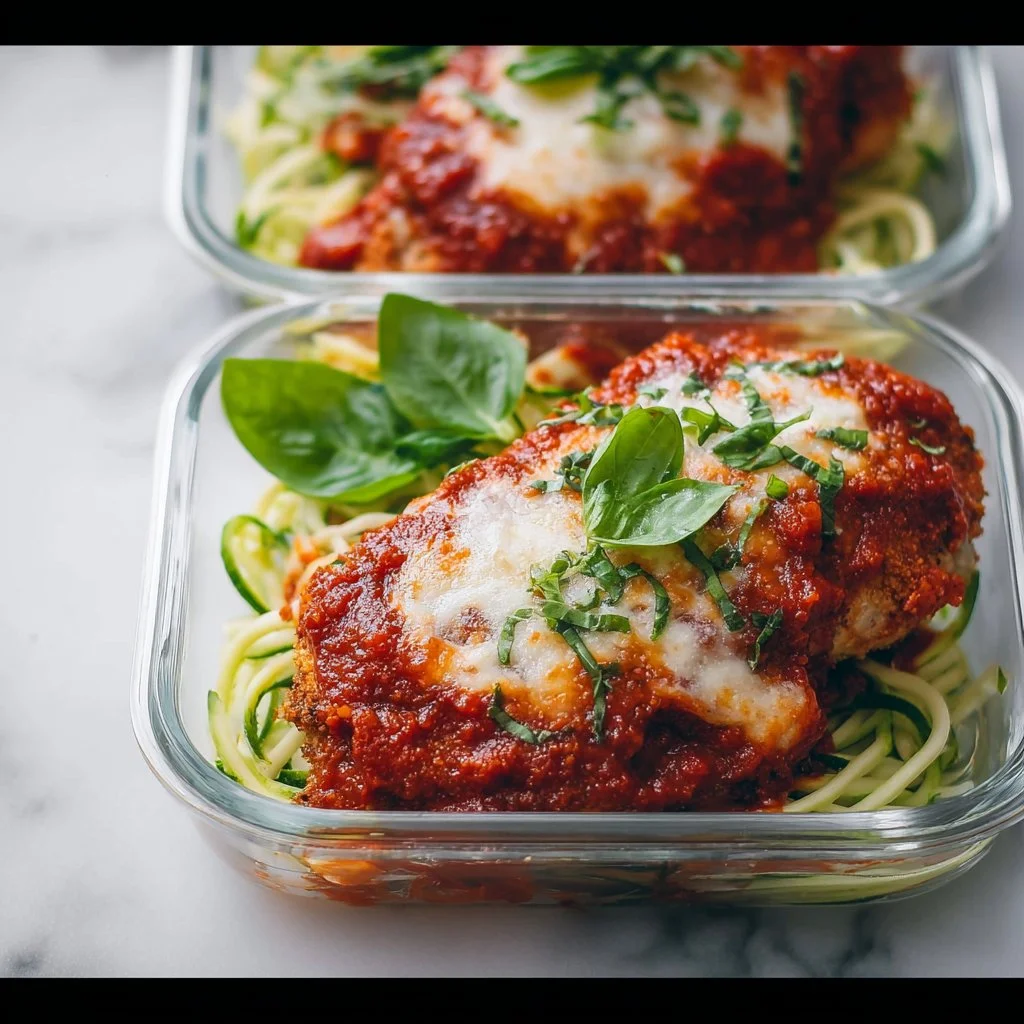
How to Meal Prep – Healthy Chicken Parmesan
How to Meal Prep: Healthy Chicken Parmesan
Hey there, fellow food lovers! I’m Beau Collier, and I’m thrilled to have you join me on this delicious journey towards mastering the art of meal prep with one of my all-time favorites: Healthy Chicken Parmesan.
Meal prepping can feel daunting, but it doesn’t have to be! Especially when you’re making a dish that’s not only nutritious but also unbelievably satisfying! Picture it: crispy, tender chicken coated in a golden crust, topped with fresh tomato sauce, and a sprinkle of cheese; it’s comfort food at its finest! And we’re doing it with a healthier twist that’s going to make your taste buds dance.
Whether you’re a busy parent trying to keep your family’s meals wholesome, a fitness enthusiast looking to stay on track, or simply someone who loves good food (who doesn’t?), this Healthy Chicken Parmesan meal prep is going to meet all your needs, and then some!
A Taste of Nostalgia
Let me take you back a bit. Growing up, Sundays at my grandmother’s house were a sacred tradition! The house would fill with simmering tomato sauce, and the aroma of cheesy goodness wafted through the air. My grandmother had a magic touch with her Chicken Parmesan. I remember standing on a stool next to her, watching those chicken breasts transform from plain to perfection as she coated them in breadcrumbs and herbs.
She always said, “Cooking is like love; it should be entered into with abandon or not at all.” And she poured every ounce of love—and garlic—into those meals. I’ve carried that spirit with me ever since. Today, we’re putting that nostalgic dish into a meal prep version, making it not just memory-worthy but also a friendlier fit for our health-conscious dinners.
Ingredients
Now let’s get into the mix. Here’s what you’re going to need for this blissful concoction:
-
4 boneless, skinless chicken breast halves
Chef Insight: Chicken breasts are lean sources of protein, perfect for meal prep. Feel free to swap in turkey cutlets if you prefer! -
1 cup almond meal
Tip: This gluten-free alternative to breadcrumbs adds a slightly nutty flavor and is a fantastic low-carb option. If you’re not gluten-sensitive, feel free to use whole wheat breadcrumbs! -
1/4 cup chickpea flour
Substitution Tip: Chickpea flour is great for adding a gluten-free crunch. You can replace it with your favorite flour or use an equal part of oat flour! -
1 tbsp dried oregano
Flavor Insight: Dried oregano brings a lovely Mediterranean touch. Fresh oregano can be substituted for a fresher taste if you have it on hand! -
1 tbsp dried basil
Fun Fact: If you throw in some fresh basil instead, you might just transport yourself back to Italy with every bite! -
1 tbsp dried thyme
Option: Feel free to swap this with Italian seasoning for an extra punch of flavor. -
2 tsp garlic powder
Chef’s Tip: Garlic powder is versatile; increase the amount if you’re like me and love that garlicky goodness! You can even use fresh minced garlic for a stronger kick. -
1 1/2 tsp sea salt
Cooking Hack: Salt enhances flavors, but don’t overdo it! It’s key when you’re coating your chicken. -
1 tsp ground black pepper
Pro Tip: Freshly ground black pepper takes the flavor to a whole new level! -
2-4 tbsp olive oil
Healthy Swap: Olive oil keeps things moist and adds a touch of healthy fat. Canola or avocado oil can work in a pinch. -
1 (25-oz) jar of tomato sauce
Advice: Choose a brand with no added sugars or make your own for a personalized touch! -
2 tbsp grated Parmesan cheese
Tip: You can use nutritional yeast for a cheesy flavor without the dairy if you’re vegan! -
4 medium zucchini
Why Zucchini? These can serve as a healthy pasta alternative, but feel free to use whole grain spaghetti if you’re not keen on zoodles! -
1 tbsp olive oil (for zoodles)
Tip: This will help roast and bring out the flavor of your zoodles! -
1/2 tsp sea salt
-
1/2 tsp black pepper
-
1/4 tsp garlic powder
And that’s the list! Gather your ingredients, and let’s turn them into something spectacular.
Step-by-Step Instructions
Ready to get cooking? Here’s how we’re going to pull this meal together!
1. Preheat Your Oven
Instructions: Preheat your oven to 400°F (200°C).
Chef Hack: This is essential! A hot oven guarantees that your chicken will cook evenly and get that perfect crispy coating we all crave.
2. Prepare the Chicken
Instructions: Place the chicken breasts between two sheets of plastic wrap and pound them gently with a meat mallet (or a rolling pin) until they’re about 1 inch thick.
Why Pound? This not only tenderizes the meat but allows for even cooking.
3. Create the Coating
Instructions: In a large bowl, mix together almond meal, chickpea flour, oregano, basil, thyme, garlic powder, salt, and black pepper.
Chef Note: You want a beautiful herb blend that sticks to your chicken and marks the beginning of its transformation.
4. Coat the Chicken
Instructions: Drag each chicken breast through the olive oil, making sure to coat it well before pressing it into the flour mixture on both sides.
Chef Tip: Don’t be shy with the coating! This is where all that flavor lies.
5. Arrange & Bake
Instructions: Place the coated chicken on a parchment-lined baking sheet and lightly drizzle with olive oil. Bake for about 20-25 minutes or until golden brown and the internal temperature reaches 165°F (75°C).
Cooking Insight: This method lets the chicken crisp up while keeping it juicy!
6. While the Chicken Bakes
Instructions: In the meantime, heat a skillet over medium heat, add more olive oil, and sauté your zucchini noodles (or whatever noodles you’re using) with salt, black pepper, and garlic powder for about 3-4 minutes or until tender.
Zucchini Hack: Don’t overcook—keep them al dente for a satisfying bite!
7. Assembly Time
Instructions: Once your chicken is perfectly baked, spread a generous layer of tomato sauce over each piece and top with Parmesan cheese. Return to the oven for an additional 5-10 minutes until the cheese is melted and bubbly.
Final Touch: You could even pop it under the broiler for a minute for that extra golden finish!
8. Serve It Up
Instructions: On a plate, serve your crispy chicken over the sautéed zucchini noodles, garnished with fresh basil if you have it.
Plating Hack: A drizzle of balsamic reduction over the top can make a fabulous, fancy presentation without much effort!
Serving Suggestions
Alright, my fellow foodies! When it comes to serving, presentation matters. You can make this meal absolutely swoon-inducing with just a few touches. Here’s how I like to serve it up:
- Color Splash: Garnish your plate with fresh basil leaves or even a sprinkle of microgreens. A pop of green brightens up the plate beautifully.
- Side Love: Serve with a side salad or some garlic bread (whole grain or gluten-free options are fantastic!) for an extra twist on the classic Italian meal.
- Meal Prep Container Tip: If you’re packing this for later, consider stacking the zoodles on the bottom, topped with the chicken parmesan. This way, the sauce adds moisture without making everything soggy.
Recipe Variations
I believe in versatility, and my kitchen is never one-note! Here are a few creative twists you might consider for your Healthy Chicken Parmesan:
-
Pesto Chicken Parmesan: Spread a layer of basil pesto over the chicken before adding the tomato sauce. It adds a fresh brightness that’s divine!
-
Spicy Variation: Toss some red pepper flakes into your almond meal mixture for an extra kick!
-
Cheesy Chicken Zucchini Bake: Instead of the layered plate, cube the chicken and mix everything in a baking dish with additional veggies like bell peppers or spinach and bake it all together.
-
No Frying, All Baking: If you’re looking to cut even more calories, omitting the almond meal coating will still yield flavorful, juicy chicken. Just roast it directly with the sauce on top!
-
Vegan Delight: For a completely plant-based twist, swap the chicken for chickpea patties or baked tofu sprinkled with nutritional yeast.
Chef’s Notes
Over the years, my recipe for Chicken Parmesan has undergone many playful transformations as my palate evolved. I’ve experimented with different coatings, vegetable pairings, and sauces. One time, I accidentally grabbed the cinnamon instead of garlic powder—it was an adventure in the kitchen, to say the least! But that’s the beauty of cooking; sometimes the “oops” moments can lead to authentic discoveries.
Why Meal Prep?
Meal prepping isn’t just about saving time; it’s about making healthier choices effortlessly. When you have a satisfying dish like this ready to go, it’s easier to skip the drive-thru. My grandmother’s Chicken Parmesan taught me that food isn’t just fuel; it’s something to be shared and celebrated, so let’s make it accessible every day.
FAQs and Troubleshooting
Let’s address a few common questions and potential hiccups you might run into while cooking up a storm:
1. Why is my chicken dry?
Cook times can vary based on the thickness of your chicken breasts. Be sure to check the internal temperature and remove it promptly from the oven when it hits 165°F (75°C). Also, let it rest for a few minutes before slicing to retain moisture!
2. Can I make this dish gluten-free?
Absolutely! With almond meal and chickpea flour, this recipe is already gluten-free. Just ensure your sauce doesn’t have any hidden gluten ingredients!
3. How long can I keep my meal prepped chicken?
Stored in an airtight container, your Chicken Parmesan will last 4-5 days in the fridge. Reheat in the oven or microwave and enjoy!
4. Can I freeze it?
Yes! You can freeze cooked chicken parmesan. It might lose a bit of its crunch upon reheating, but you’ll still have that wonderful flavor to savor later on.
Nutritional Information
Let’s talk numbers! Here’s what you’re looking at per serving for this Healthy Chicken Parmesan:
- Calories: ~350
- Protein: 38g
- Carbohydrates: 12g
- Fats: 18g
- Fiber: 3g
Keep in mind, nutrition may vary based on portion sizes and specific ingredients used!
Final Thoughts
And there you have it! A delightful, healthy twist on your beloved Chicken Parmesan—made easy for meal prep. The best part? Not only are you saving your time, but you’re also creating meals that nourish your body and warm your heart.
So, whether you’re indulging alone or sharing with loved ones, I hope this recipe brings a little joy to your table, just like my grandmother’s dishes did for me. Now, get out there, whip up some Chicken Parmesan, and let yourself bask in the warm flavors and beautiful memories that food can create!
Happy cooking, friends! Let’s feast! 🍽️
Print
Healthy Chicken Parmesan
- Total Time: 45 minutes
- Yield: 4 servings 1x
- Diet: Gluten-Free
Description
A nutritious and satisfying twist on classic Chicken Parmesan, perfect for meal prep.
Ingredients
- 4 boneless, skinless chicken breast halves
- 1 cup almond meal
- 1/4 cup chickpea flour
- 1 tbsp dried oregano
- 1 tbsp dried basil
- 1 tbsp dried thyme
- 2 tsp garlic powder
- 1 1/2 tsp sea salt
- 1 tsp ground black pepper
- 2–4 tbsp olive oil
- 1 (25-oz) jar of tomato sauce
- 2 tbsp grated Parmesan cheese
- 4 medium zucchini
- 1 tbsp olive oil (for zucchini)
- 1/2 tsp sea salt
- 1/2 tsp black pepper
- 1/4 tsp garlic powder
Instructions
- Preheat your oven to 400°F (200°C).
- Place the chicken breasts between two sheets of plastic wrap and pound them gently with a meat mallet until they’re about 1 inch thick.
- In a large bowl, mix together almond meal, chickpea flour, oregano, basil, thyme, garlic powder, salt, and black pepper.
- Drag each chicken breast through the olive oil, making sure to coat it well before pressing it into the flour mixture on both sides.
- Place the coated chicken on a parchment-lined baking sheet and lightly drizzle with olive oil. Bake for about 20-25 minutes or until golden brown and internal temperature reaches 165°F (75°C).
- In the meantime, heat a skillet over medium heat, add more olive oil, and sauté your zucchini noodles with salt, black pepper, and garlic powder for about 3-4 minutes or until tender.
- Once your chicken is perfectly baked, spread a generous layer of tomato sauce over each piece and top with Parmesan cheese. Return to the oven for an additional 5-10 minutes until the cheese is melted and bubbly.
- On a plate, serve your crispy chicken over the sautéed zucchini noodles, garnished with fresh basil if desired.
Notes
Meal prep in airtight containers can last 4-5 days in the fridge. Can also be frozen for later enjoyment.
- Prep Time: 15 minutes
- Cook Time: 30 minutes
- Category: Main Course
- Method: Baking
- Cuisine: Italian
Nutrition
- Serving Size: 1 serving
- Calories: 350
- Sugar: 4g
- Sodium: 800mg
- Fat: 18g
- Saturated Fat: 4g
- Unsaturated Fat: 10g
- Trans Fat: 0g
- Carbohydrates: 12g
- Fiber: 3g
- Protein: 38g
- Cholesterol: 70mg
Keywords: Chicken Parmesan, Meal Prep, Healthy Recipes, Italian Cuisine, Gluten-Free
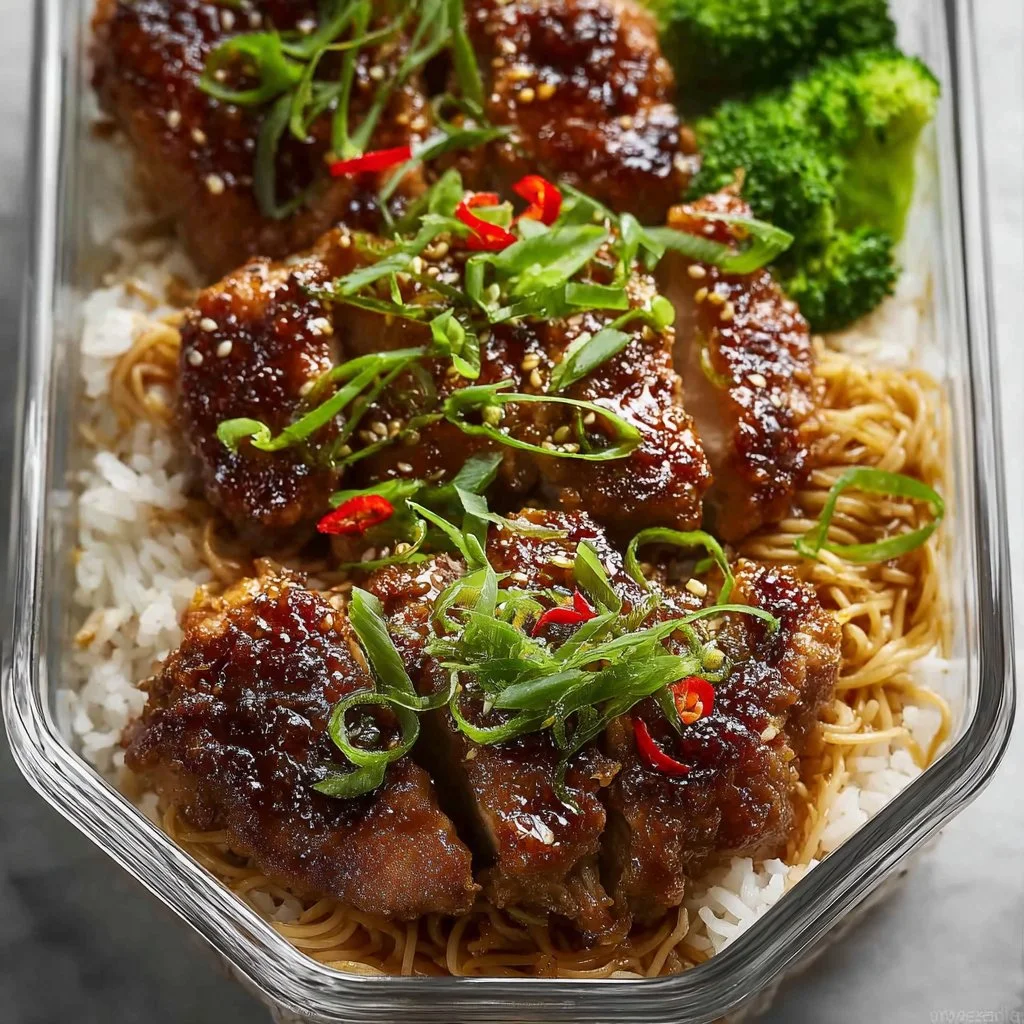
Sticky Ginger Soy Glazed Chicken Meal Prep Box
# Sticky Ginger Soy Glazed Chicken Meal Prep Box: A Feastical Favorite!

Hey there, fellow foodies! I’m Beau Collier, and I can't wait to dive into something special with you today. If you're anything like me, you love a good meal prep recipe that shines in flavor and makes your week so much easier. That’s right—I’m talking about my Sticky Ginger Soy Glazed Chicken Meal Prep Box!

This dish is not just simple to make but also bursts with Asian-inspired flavors that will have you feeling energized and satisfied all week long. Imagine juicy chicken thighs or breasts soaked in a sticky ginger and soy glaze, complemented by crisp broccoli that gives it a vibrant pop. Perfect for keeping your lunch or dinner both delicious and healthy, right?

Meal prep can feel overwhelming at times, but it doesn't have to be! You'll find that once you get into the groove of assembling these boxes, you'll appreciate the preparation just as much as the delectable bites you'll be enjoying all week. So, let’s roll up our sleeves, grab our favorite spatulas, and get started on a cooking adventure you'll keep coming back to!

## Personal Story: A Flavorful Tradition

When I think back to my childhood, the comfort of my mom's kitchen comes to mind. She had this magical ability to conjure up dishes that filled our home with warmth and love. One of my favorite memories is when she would make a similar ginger-soy chicken stir-fry on those busy weeknights after school. The sweet and savory aroma would fill the air, and I knew dinner was going to be good.

We'd huddle around the dinner table, sharing stories of our day—all while eagerly grabbing pieces of sticky chicken, diving into the vibrant greens, and savoring every last bite. It was more than just food; it was our cozy family time, punctuated with laughter and lots of "Can I have seconds?" I’ve taken that delicious nostalgic feeling and turned it into this meal prep box so that you can share similar moments with your loved ones. Let’s carry on the tradition, shall we?

## Ingredients

Here’s what you’ll need for your Sticky Ginger Soy Glazed Chicken Meal Prep Box:

- **Chicken Thighs or Breasts**
  Tender, juicy chicken thighs are perfect for this dish, but if you prefer leaner cuts, go for chicken breasts. Just keep in mind that breasts may dry out more easily, so you’ll want to monitor cooking time carefully.

- **Soy Sauce**
  This is the heart of the glaze! It adds depth and richness. For a gluten-free option, feel free to swap it with tamari. If you're watching your sodium intake, consider low-sodium soy sauce too!

- **Fresh Ginger, grated**
  Ginger is essential for that zingy flavor! Freshly grated ginger works best in this recipe, but if you’re in a pinch, ground ginger can suffice—though it won’t be quite the same.

- **Honey or Brown Sugar**
  This adds the delightful sweetness that balances the soy sauce's saltiness. If you’re looking for a vegan option, use maple syrup or agave nectar for that sticky sweetness!

- **Garlic, minced**
  Garlic is the unassuming superstar that rounds out this dish. You can use powdered garlic if you're in a hurry, but fresh is always best for that vibrant, aromatic punch.

- **Broccoli Florets**
  Broccoli gives color and crunch, making your meal-prep boxes look appealing and fresh! You can substitute it with snap peas, bell peppers, or your favorite green veggies.

- **Olive Oil**
  Just a splash for sautéing! If you prefer another oil, avocado oil or sesame oil would enhance the flavors even more.

- **Salt and Pepper**
  Essential seasoning to enhance all those delicious flavors. Don’t skip this step!

## Step-by-Step Instructions

Alright, let’s get cooking! Here’s our step-by-step guide to creating this flavorful masterpiece.

### 1. Prepare Your Chicken
Start by trimming any excess fat off your chicken thighs or breasts. Pat them dry with a paper towel; this helps the marinade adhere better! Place them in a bowl or a resealable plastic bag.

### 2. Make the Marinade
In a small bowl, mix together 1/3 cup of soy sauce, 2 tablespoons of honey (or brown sugar), 1 tablespoon of freshly grated ginger, and 2 minced garlic cloves. Stir until the honey is well mixed. Pour this luscious marinade over the chicken, ensuring each piece is covered. Let it marinate for at least 30 minutes, or overnight if you have the time—trust me, it'll be worth the wait!

### 3. Sauté the Chicken
Heat a tablespoon of olive oil in a large skillet over medium-high heat. Once the oil is shimmering, remove the chicken from the marinade (let the marinade drip off a bit) and place it in the skillet. Sauté for 5–7 minutes on each side or until the chicken reaches an internal temperature of 165°F (74°C). If you have too much marinade left, don't toss it yet! You’ll need it in a moment.

### 4. Make the Glaze
Remove the chicken once cooked and cover it loosely with foil to keep warm. In the same skillet, pour in the leftover marinade and bring it to a simmer. Let it cook for about 3–4 minutes until it thickens into a sticky glaze. This will create a final layer of flavor on your chicken!

### 5. Cook Your Broccoli
While your glaze is working its magic, steam your broccoli florets in a separate pot for about 5–7 minutes, or until tender but still bright green. The steaming method retains nutrients and gives the broccoli that lovely crunch you want!

### 6. Combine and Serve
Cut the chicken into bite-sized pieces, then add it back into the skillet with the glaze to coat. Toss the cooked broccoli in as well! Mix until everything is nicely coated, and voilà! Your meal prep base is ready to rock!

## Serving Suggestions

Now that you’ve got your Sticky Ginger Soy Glazed Chicken all prepped, it’s time to think about how to serve it! For meal prep, you can portion it out into your favorite meal prep containers. Start with a scoop of fluffy jasmine rice or quinoa for a wholesome base. Then layer on that juicy chicken and broccoli onto each container!

Garnish with sesame seeds and thinly sliced green onions for a pop of color and extra flavor. If you're feeling fancy, a drizzle of sriracha or a sprinkle of chili flakes can take it to the next level. Just make sure to keep your ingredients separated until meal time if you prefer your rice and chicken to remain distinct!

## Recipe Variations

Let’s shake things up a bit! Here are a few creative twists and variations you can try:

1. **Pineapple Ginger Glaze**: Add some crushed pineapple while making the glaze. It adds a tropical, sweet twist!

2. **Spicy Sriracha Urge**: Mix in a tablespoon of sriracha in the marinade for a spicy kick.

3. **Citrus Burst**: Add the zest and juice of one lime or orange to the marinade for a refreshing tang.

4. **Substitute Other Proteins**: Swap chicken for tofu or tempeh for a plant-based meal prep option.

5. **Mixed Veggie Delight**: Throw in a medley of bell peppers, carrots, and snap peas in addition to the broccoli for an even more colorful meal!

## Chef’s Notes

This recipe has swirled through my kitchen many times over the years, evolving and adapting with new friends, flavors, and even seasons. I've made it using every kind of protein I could think of, but the classic chicken version will always hold a soft spot in my heart.

And let me tell you—a funny mishap happened once when I accidentally added a cup of soy sauce instead of 1/3 cup. Instead of tossing it, I rolled with it, and after some adjustments, it turned out to be a deliciously tangy, sweet, sticky mess we lovingly dubbed "Ginger Explosion Chicken”! Sometimes, a kitchen flop can turn into a new family favorite!

## FAQs and Troubleshooting

**Q: What if my chicken is tough or dry?**
A: Overcooked chicken can get dry fast, so be sure to monitor the cooking closely. Use a meat thermometer to ensure it’s cooked perfectly.

**Q: How long can I keep this meal prep in the fridge?**
A: These meal prep boxes are safe to eat for up to 4 days in the fridge. Don't freeze the glazed chicken, as it may not retain its texture.

**Q: Can I make this ahead of time?**
A: Absolutely! This recipe is perfect for meal prep. Just prepare and store the components separately to maintain texture.

**Q: How do I know my broccoli is perfectly cooked?**
A: You want firm, bright green broccoli with a slight crunch. If it’s too soft or mushy, you may have cooked it too long!

## Nutritional Info

Each serving of this Sticky Ginger Soy Glazed Chicken (with broccoli and rice) provides a balanced meal packed with protein, fiber, and all those yummy flavors. Here's a quick nutritional breakdown for one meal prep box:

- **Calories**: Approx. 400–500, depending on portion sizes
- **Protein**: 30g from chicken
- **Carbohydrates**: 50g (mainly from rice)
- **Fiber**: 5–7g from broccoli and rice
- **Fats**: 8–10g from olive oil and chicken

Feel free to adjust ingredients for your dietary needs, swapping rice for cauliflower rice, or adding more veggies!

## Final Thoughts

So there you have it, folks! A delicious, easy-peasy recipe for Sticky Ginger Soy Glazed Chicken Meal Prep Box that brings back memories of cozy family dinners but makes your busy week a whole lot easier. Life gets hectic, but that doesn't mean you can't enjoy flavorful, wholesome food!

Whether you make this for yourself, your family, or your friends, I guarantee that it’ll bring smiles to the table. Remember, cooking is about joy, creativity, and sharing moments with loved ones. I can't wait to hear how your cooking adventures unfold!

So grab your spatula, and let's keep the delicious momentum going on this Feastical journey. Until next time, happy cooking, and remember – food is about love, laughter, and feeling good.
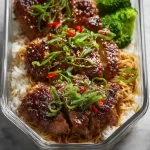
Sticky Ginger Soy Glazed Chicken Meal Prep Box
- Total Time: 50 minutes
- Yield: 4 servings
- Diet: Gluten-Free
Description
A flavorful meal prep recipe featuring sticky ginger soy glazed chicken and crisp broccoli, perfect for a healthy and satisfying week.
Ingredients
- Chicken thighs or breasts
- Soy sauce
- Fresh ginger, grated
- Honey or brown sugar
- Garlic, minced
- Broccoli florets
- Olive oil
- Salt and pepper
Instructions
- Prepare your chicken by trimming excess fat and patting dry.
- Make the marinade by mixing soy sauce, honey, ginger, and garlic.
- Sauté the chicken in a skillet for 5–7 minutes on each side.
- Make the glaze in the same skillet with leftover marinade.
- Cook the broccoli until bright green and tender.
- Combine the chicken and broccoli with the glaze and serve.
Notes
For a gluten-free option, use tamari instead of soy sauce. You can store meal prep boxes in the fridge for up to 4 days.
- Prep Time: 30 minutes
- Cook Time: 20 minutes
- Category: Main Course
- Method: Sautéing
- Cuisine: Asian
Nutrition
- Serving Size: 1 serving
- Calories: 450
- Sugar: 10g
- Sodium: 800mg
- Fat: 10g
- Saturated Fat: 2g
- Unsaturated Fat: 7g
- Trans Fat: 0g
- Carbohydrates: 50g
- Fiber: 5g
- Protein: 30g
- Cholesterol: 70mg
Keywords: meal prep, chicken recipe, ginger soy glaze, healthy lunch
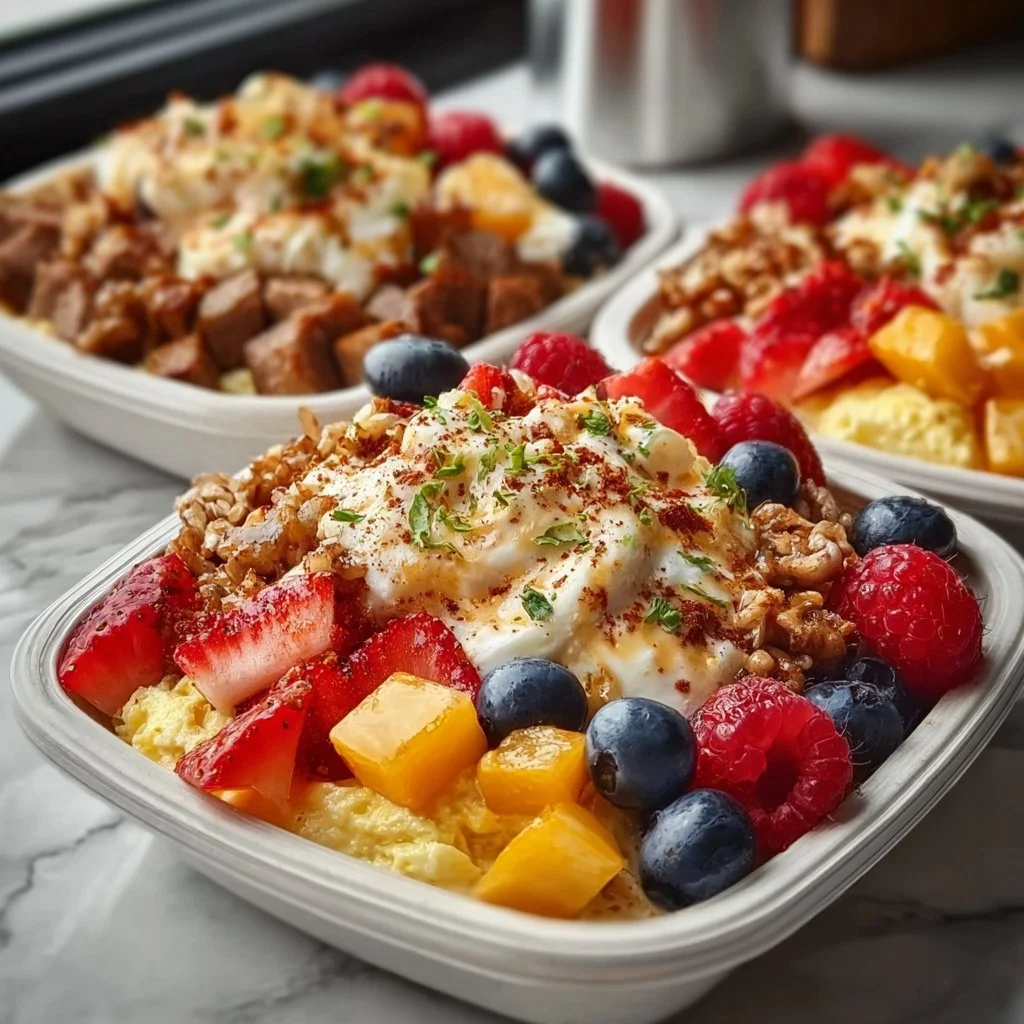
High Protein Freezer Friendly Breakfast Bowls
High Protein Freezer Friendly Breakfast Bowls
Hey there, fellow foodies! I’m Beau Collier, and today we’re diving into the world of high-protein breakfast bowls that are not only tasty but also incredibly practical. I mean, who doesn’t want to kickstart their day with a meal that makes you feel like a superstar, right?
Imagine waking up on a chilly morning, the sun peeking through your window, and all you want is something warm, hearty, and full of flavor. But wait—who has the time to whip up a full-blown breakfast during the week? Enter the high-protein freezer-friendly breakfast bowl! These beauties are not just delicious; they’re a life-saver for those hectic mornings when you’re racing against the clock.
The great thing about these breakfast bowls is the versatility. You can customize them to fit your taste buds, throw in whatever veggies are cluttering up your fridge, and protein choices to keep it exciting. Plus, they’re super easy to make in bulk and freeze for later. Talk about a win-win!
In this blog post, I’ll guide you through my favorite recipe for high-protein breakfast bowls that’ll keep you satisfied and energized throughout your morning. This recipe packs a punch with six eggs, lean protein, and vibrant veggies that will make you feel like a breakfast champion! Ready? Let’s dive right into the magic of meal prep, where your future self will thank you for putting in a little love today!
Personal Story
One of my fondest breakfast memories centers around my grandmother, who had a knack for turning simple ingredients into soul-warming meals that filled our home with love and laughter. I still remember her bustling around the kitchen, her apron adorned with flour and a smile brightening the room. She introduced me to the concept of hearty breakfast bowls before I even knew what they were.
Her breakfast always included a hodgepodge of whatever leftovers were lying around. Leftover chicken? Toss it in! Morning vegetables? Absolutely! I recall her laughter as she proclaimed, “Food should be an adventure, not a chore!” It was in those moments—wafting aromas, sizzling pans, and her infectious giggle—that I learned the importance of improvisation in the kitchen.
Though her recipes weren’t always exact, they sparked creativity! My high-protein breakfast bowls today are a tribute to her spirit and a wonderful way to carry on the legacy of cooking with love, imagination, and of course, lots of flavor! So, let’s channel a bit of that kitchen magic as we prepare our own breakfast bowls that your future self will absolutely adore.
Ingredients
Here’s what you’ll need to whip up these flavor-packed breakfast bowls:
-
6 Eggs
- Tip: Eggs are a powerhouse of protein, and they add richness to your dish. If you’re looking for a vegan option, substitute with flax eggs or chickpea flour to keep the protein up.
-
1 cup cooked lean protein (chicken, turkey, or tofu)
- Chef Insight: Whatever you have on hand works! Rotisserie chicken, leftover turkey from Thanksgiving, or even pre-cooked tofu are all excellent options. If you plan ahead, you can batch-cook proteins for the week.
-
1 cup mixed veggies (spinach, bell peppers, onions, etc.)
- Substitution tip: Fresh or frozen veggies work beautifully! If you’re running low on fresh ones, frozen veggies can be a huge time saver and are just as nutritious.
-
Salt and pepper to taste
- Quick tip: Proper seasoning makes all the difference. Start light and adjust to your preference. It’s a balancing act!
-
1 teaspoon garlic powder
- Commentary: Garlic adds a lovely depth of flavor. Feel free to swap it for fresh minced garlic if you’re feeling fancy!
-
1 teaspoon paprika
- Insight: Paprika not only provides a lovely warm color but also a sweet smokiness. Experiment with smoked or sweet paprika depending on your mood!
-
Optional: cheese or hot sauce for serving
- Personal touch: Cheese can add creaminess, while hot sauce provides a kick! I personally love a splash of sriracha for that extra zing!
Step-by-Step Instructions
Step 1: Prepping the Ingredients
Start by gathering all your ingredients. Pre-cook your protein and veggies if they aren’t already done. While eggs provide the base of our bowls, remember that uniform-sized veggies cook more evenly—chop everything into bite-sized pieces.
Step 2: Whisk the Eggs
In a large bowl, crack the eggs and whisk them until they’re nicely beaten. Add a touch of salt, pepper, garlic powder, and paprika to incorporate some seasoning. Pro tip: a splash of milk or cream in the eggs will make them even fluffier!
Step 3: Cook the Eggs
In a non-stick skillet, add a drizzle of olive oil over medium heat, ensuring it gets nice and hot. Pour in the beaten egg mixture and gently stir as they cook. This helps prevent large curds and results in a fluffier texture. Cook until the eggs are just set, removing from heat as they’ll continue to cook in residual heat.
Step 4: Mix in the Protein and Veggies
Once your eggs are cooked to soft perfection, fold in your cooked protein and mixed veggies. Stir gently to combine all the flavors without breaking the eggs too much. This little dance of ingredients is where the magic happens—look at those vibrant colors!
Step 5: Portion and Cool
After everything is combined, it’s time to portion out your breakfast bowls! Use meal prep containers for easy freezing. Each portion should look colorful and inviting. Allow them to cool completely before placing them in the freezer; this will prevent ice crystals from forming.
Step 6: Freezing and Storing
Once cooled, cover each bowl tightly and place them in the freezer. Make sure to label them with the date! These bowls can last up to three months in the freezer—which is awesome when you’re rushed in the morning.
Step 7: Reheating Your Bowls
When you’re ready for breakfast, grab a bowl from the freezer and either defrost overnight in the refrigerator or microwave it straight from frozen for 2–3 minutes. If you’re reheating in the microwave, be sure to use a microwave-safe cover to prevent splatters.
Ta-da! Your high-protein breakfast bowl is ready. Add cheese or hot sauce at this stage if desired, and enjoy your warm morning hug of a meal!
Serving Suggestions
Now that your breakfast bowls are on the plate, let’s talk about how to serve them up. For an appealing presentation, I recommend layering the eggs, protein, and veggies to capture that rainbow of colors.
Top with a sprinkle of cheese or a drizzle of your favorite hot sauce. If you’re feeling extra fancy, a dollop of avocado or a sprinkle of fresh herbs, like cilantro or chives, can make a beautiful garnish. You can also pair your bowls with a side of fresh fruit or a piece of whole grain toast—keeps the vibe casual and beautiful!
Serve them warm, and watch everyone gather around the table with excitement. These breakfast bowls aren’t just meals; they’re invitations to begin your day with intention and flavor.
Recipe Variations
Here are a few creative twists to keep your breakfast bowls fresh and exciting:
-
Mediterranean Bowl: Swap out the chicken for feta and add olives and sun-dried tomatoes. Top with tzatziki for a zesty touch!
-
Southwestern Bowl: Use black beans instead of the lean protein, and fold in corn and diced tomatoes. Avocado and salsa make a fabulous final addition!
-
Italian Flavor: Substitute spinach for kale, add Italian sausage, and finish with freshly grated Parmesan. A touch of marinara sauce on top will take you to flavor town!
-
Vegan Delight: Replace eggs with chickpea flour to create a vegan scramble, and use avocado for creaminess. This bowl is all about plant protein goodness!
-
Spicy Sriracha Bowl: Add diced jalapeños or your choice of chili pepper for a heat boost! Finish with a generous drizzle of sriracha for those spice lovers.
Chef’s Notes
As a chef, I love how recipes evolve over time. This breakfast bowl idea started simply as a way to use up leftovers from my fridge! It’s how you can get creative and experiment while cooking that keeps things fun. I’ve had my share of breakfast fails too—like when I accidentally grabbed cayenne instead of paprika—but those “gourmet disasters” often lead to the best new creations. Cooking is about learning, having fun, and sharing delicious moments around the table.
FAQs and Troubleshooting
Q: Can I make these bowls vegetarian?
Absolutely! Just skip the meat altogether, using beans, legumes, or tofu as your protein source instead.
Q: How do I prevent eggs from becoming rubbery?
Make sure to cook the eggs on lower heat and remove them from the skillet when they’re still slightly undercooked. They’ll firm up as they cool.
Q: Can I freeze whole bowls?
Yes! Just ensure everything is cooked beforehand and allow complete cooling before sealing the containers. They’ll last up to three months, so you’ve got plenty of time to love them!
Q: How can I enhance the flavors?
Experiment with different seasonings! Fresh herbs and spices can do wonders to elevate your base recipe. Don’t be afraid to play around!
Nutritional Info
These high-protein breakfast bowls are a fantastic way to fuel your day. Each bowl contains approximately:
- Calories: 300-400 (can vary based on protein choice and additions)
- Protein: 30-40g (thanks to the eggs and lean protein)
- Carbohydrates: 30g (depending on added vegetables)
- Healthy Fats: 10g (from protein sources and optional toppings)
- Fiber: 5g (if you include veggies and optional sides)
These bowls keep you feeling satisfied while providing essential nutrients to kickstart your day!
Final Thoughts
So there you have it, my high-protein freezer-friendly breakfast bowls—your new favorite morning solution! They’re simple to make, downright delicious, and filled with the goodness of real food. You can whip up a whole batch, store them away, and when you’re racing out the door, you’ll feel like a breakfast rockstar!
Cooking isn’t just about the end result; it’s about the stories, the memories, and the love that goes into each dish. I hope you give these bowls a try and maybe even make them your own!
Remember, the kitchen is your playground, so have fun with it. Now, go out there and unleash your culinary creativity! Grab your fork, dig in, and enjoy every scrumptious bite of your breakfast bowl—your future self will be forever grateful!
Print
High Protein Freezer Friendly Breakfast Bowls
- Total Time: 35 minutes
- Yield: 4 servings 1x
- Diet: High Protein
Description
A versatile, high-protein breakfast bowl that can be made in bulk and frozen for busy mornings.
Ingredients
- 6 Eggs
- 1 cup cooked lean protein (chicken, turkey, or tofu)
- 1 cup mixed veggies (spinach, bell peppers, onions, etc.)
- Salt and pepper to taste
- 1 teaspoon garlic powder
- 1 teaspoon paprika
- Optional: cheese or hot sauce for serving
Instructions
- Start by gathering all your ingredients. Pre-cook your protein and veggies if they aren’t already done.
- Whisk the eggs in a large bowl, adding salt, pepper, garlic powder, and paprika.
- Cook the eggs in a non-stick skillet with olive oil over medium heat until just set.
- Fold in your cooked protein and mixed veggies gently.
- Portion out the mixture into meal prep containers.
- Cover and place in the freezer to store.
- Reheat bowls as needed, either overnight in the fridge or microwave for 2-3 minutes from frozen.
Notes
You can customize these bowls with different proteins and veggies to fit your taste.
- Prep Time: 15 minutes
- Cook Time: 20 minutes
- Category: Breakfast
- Method: Freezing
- Cuisine: American
Nutrition
- Serving Size: 1 bowl
- Calories: 350
- Sugar: 2g
- Sodium: 300mg
- Fat: 10g
- Saturated Fat: 3g
- Unsaturated Fat: 4g
- Trans Fat: 0g
- Carbohydrates: 30g
- Fiber: 5g
- Protein: 35g
- Cholesterol: 200mg
Keywords: protein breakfast, freezer meal, meal prep, healthy breakfast
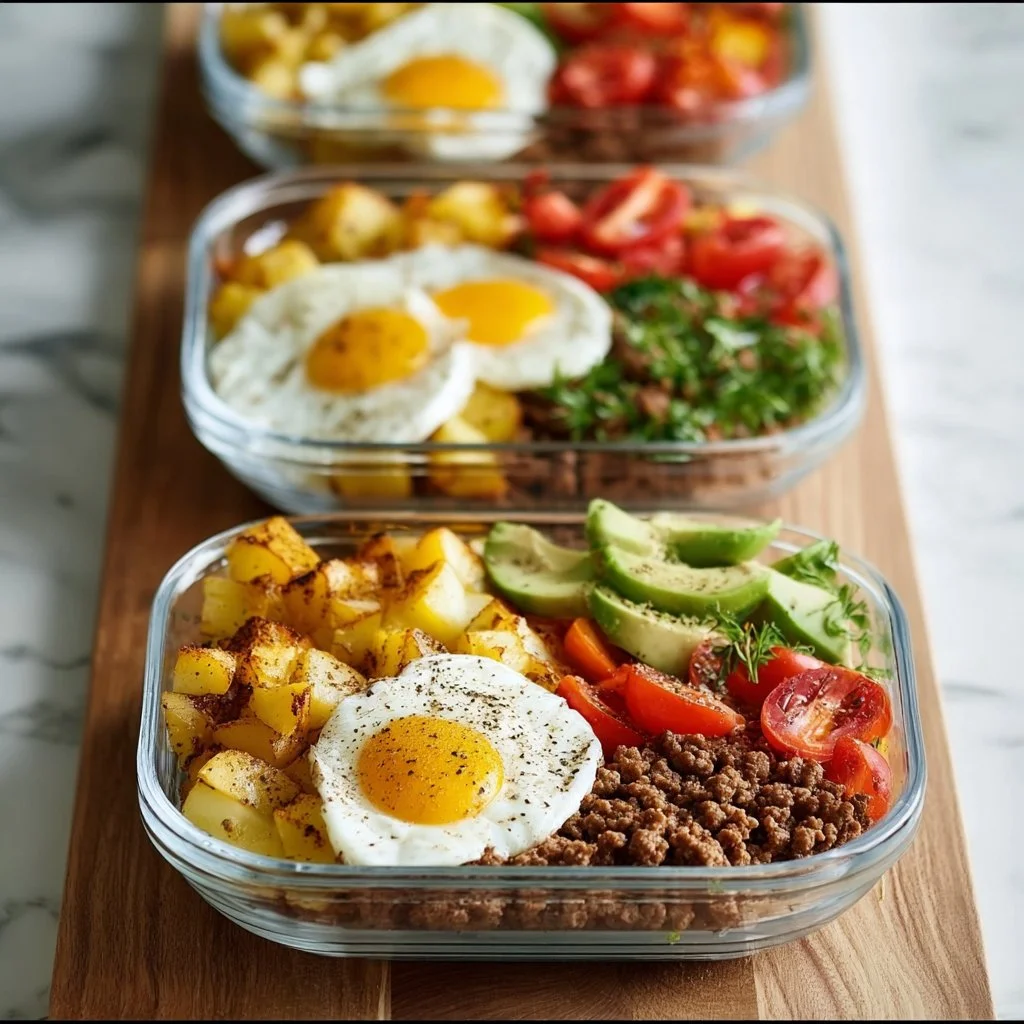
Healthy High-Protein Meal Prep Breakfast Bowls
The Ultimate Healthy High-Protein Meal Prep Breakfast Bowl
Hey there, food lovers! Welcome back to Feastical, your go-to spot for mouth-watering recipes that not only tickle your taste buds but also nourish your body. Today, I’m super excited to share one of my favorite healthy breakfast options—High-Protein Meal Prep Breakfast Bowls. With protein-packed ingredients and a variety of flavors, these bowls will have you bright-eyed and bushy-tailed, ready to take on your day. So grab your spatula, and let’s get cooking!
The Heart of the Feast: A Personal Story
Before we dive into the recipes, let me share a little backstory. Growing up, Sunday mornings were sacred in my house. My family would gather around the kitchen table, and my mom would whip up a feast that made our hearts and stomachs happy. One of the staples was her famous breakfast skillet, where she would combine whatever veggies we had in the fridge with eggs, cheese, and a protein or two. It was never the same dish twice, but it was always delicious.
When I started my own cooking journey, I carried this tradition forward but put my own twist on it. These High-Protein Meal Prep Breakfast Bowls are inspired by those nostalgic mornings. They keep me fueled throughout the day while reminding me of those cozy family breakfasts. Plus, they are super easy to prep, making them perfect for busy weekdays!
Ingredients: Let’s Gather the Goodies!
Before we start cooking, let’s take stock of what we’ll need for our scrumptious High-Protein Meal Prep Breakfast Bowls. Here’s a handy list of ingredients along with some chef insights.
-
Baby potatoes (1½ lbs, cut into small cubes): These little gems bring heartiness to your breakfast. If you’re in a rush, you can substitute them with frozen hash browns for quick cooking.
-
Olive oil (2 tbsp): A fantastic source of healthy fats, this gives our potatoes that crispy, golden-brown texture. Feel free to use avocado oil or even cook with butter for a different flavor profile.
-
Salt (1 tsp, divided): It enhances all the flavors. You can also use sea salt or Himalayan salt for a pinch of extra goodness.
-
Black pepper (½ tsp): A must-have for a little kick. If you love heat, try adding crushed red pepper for an extra zing!
-
Smoked paprika (½ tsp): This adds a delightful smokiness. Substitute with regular paprika if you prefer a more subtle flavor.
-
Garlic powder (½ tsp): It’s the secret weapon in so many savory dishes. Fresh garlic works too; just be careful not to burn it!
-
Eggs (10 large): The star of our dish! For a vegan version, swap eggs for tofu scramble or chickpea flour mixed with water.
-
Milk (¼ cup): This helps make the eggs fluffy. You can use almond milk, oat milk, or any other milk of your choice.
-
Lean ground turkey or chicken sausage (1 lb): Packed with protein! Swap for plant-based sausage to keep it vegetarian.
-
Bell peppers (1 cup, chopped): They add color and crunch. Use any color you fancy—red, yellow, or green for a pop!
-
Onion (½ cup, diced): Onions add depth and sweetness. If you’re not a fan, feel free to leave them out or use green onions instead.
-
Spinach (2 cups): This leafy green is loaded with nutrients. Kale or Swiss chard work just as well.
-
Shredded cheddar or Mexican-blend cheese (1 cup): The creamy finishing touch! Go dairy-free with nutritional yeast or vegan cheese.
Step-by-Step Instructions: Cooking Made Simple!
Alright, it’s time to bring our breakfast bowls to life! Follow these step-by-step instructions to create your own delicious masterpiece.
1. Roast the Potatoes
Tip: Preheat your oven to 425°F (220°C).
Start by tossing the cubed baby potatoes in a baking dish with 1 tablespoon of olive oil, ½ teaspoon of salt, black pepper, smoked paprika, and garlic powder. Ensure they’re evenly coated, then spread them out in a single layer. Bake for about 20–25 minutes or until they’re golden and crispy. Halfway through, give ‘em a stir to ensure they cook evenly.
2. Cook the Sausage
Chef Hack: Use a non-stick skillet or cast-iron pan!
While the potatoes are roasting, heat a skillet over medium heat and add the remaining tablespoon of olive oil. Once hot, add the ground turkey or chicken sausage. Break it up with a spatula as it cooks, about 5–7 minutes, until it’s browned and cooked through. If you’re using plant-based sausage, just follow the package instructions for cooking.
3. Sauté the Veggies
Once the sausage is browned, add the diced onion and chopped bell peppers to the pan. Sauté for 3–4 minutes until the veggies are tender. Then, toss in the fresh spinach, cooking until it wilts down—around 1–2 minutes. Add this mixture to the bowl with your sausage.
4. Whisk the Eggs
In a large bowl, beat the eggs with the milk and the remaining ½ teaspoon of salt until well combined and frothy. This step is vital for fluffy scrambled eggs.
5. Cook the Eggs
Use the same skillet again—keeping all those great sausage and veggie flavors! Pour in the egg mixture over medium-low heat. Gently stir with a spatula, scraping the bottom of the pan to create large curds until they’re just set but still soft, about 4–5 minutes.
6. Assemble the Bowls
Now comes the fun part! In meal prep containers, layer your roasted potatoes at the bottom, followed by the sausage and veggie mixture, and top it all off with the fluffy scrambled eggs. Sprinkle shredded cheese on top if you wish!
Serving Suggestions: How to Plate Your Joy
When it comes to serving your High-Protein Meal Prep Breakfast Bowls, it’s all about presentation! Here are a few my favorite ideas to make your bowls pop:
-
Colorful Layering: Use clear glass containers to showcase those vibrant layers of potatoes, eggs, and veggies. It’ll look as good as it tastes!
-
Garnish: A sprinkle of fresh herbs like parsley or chives adds a beautiful touch. You could even add sliced avocados on top for extra creaminess!
-
Meal Prep Magic: If you’re prepping for the week ahead, divide everything into individual airtight containers. These bowls are perfect for a quick grab-and-go breakfast!
Recipe Variations: Let Your Creativity Shine!
The beauty of these breakfast bowls is how easily customizable they are! Here are a few fun variations to keep your breakfasts interesting:
-
Mediterranean Twist: Swap the sausage for crumbled feta, add sun-dried tomatoes, black olives, and fresh dill. Serve with a dollop of tzatziki!
-
Spicy Southwest Delight: Add jalapeños to the mix, substitute the cheese with pepper jack, and stir in some black beans for an extra protein kick!
-
Veggie-Heavy: Amp up the veggies by adding zucchini, asparagus, or mushrooms. Go for a rainbow of colors!
-
Breakfast Burrito Bowls: Swap potatoes for brown rice or quinoa. Roll everything up in a tortilla for a delicious breakfast burrito!
-
Sweet Potato Super Bowl: Replace baby potatoes with roasted sweet potatoes for a hint of sweetness and extra nutrients.
Chef’s Notes: Reflections from My Kitchen
Over the years, I’ve had my share of breakfast bowl adventures! I still remember one time where I accidentally poured an entire container of garlic powder into the mix instead of measuring. Let’s just say, I learned the importance of careful measuring!
This recipe has evolved beautifully; I originally started with just eggs and sausage, but as I dug deeper into healthy eating, I realized how important it is to load up on veggies and protein. Now, I have a breakfast that not only feels good but also sets me up for success.
FAQs and Troubleshooting
1. Can I prepare breakfast bowls ahead of time?
Absolutely! These bowls are perfect for meal prepping. Keep them in the fridge for up to five days.
2. My eggs turned out rubbery; what did I do wrong?
This usually happens from cooking eggs at too high of a heat. Always remember—low and slow is the way to go for fluffy scrambled eggs!
3. Can I freeze these breakfast bowls?
Yes! Just make sure to leave off the cheese until you’re ready to enjoy. They can be stored in the freezer for up to a month.
4. What if I don’t like spinach?
No problem! Feel free to swap in your favorite leafy green or even skip it entirely. You can use kale, swiss chard, or even broccoli for a different texture!
Nutritional Info
These breakfast bowls pack a nutritional punch that’ll keep you energized throughout your day! Here’s a breakdown of what each serving includes (estimates may vary based on specific brands and ingredients):
- Calories: 380
- Protein: 30g
- Fat: 22g (mostly healthy fats from olive oil and cheese)
- Carbohydrates: 25g
- Fiber: 5g
- Sugar: 3g
With a healthy balance of protein, carbs, and fats, you’ll be fueled and ready to conquer anything that comes your way!
Final Thoughts
And there you have it, friends! Your complete guide to creating scrumptious High-Protein Meal Prep Breakfast Bowls that’ll not only make your mornings easier but also tastier.
With super easy steps, countless variations, and meal prep possibilities, you can enjoy these delicious bowls all week long. So, whether you’re cooking for one or for a crowd, remember that good food brings joy and connection to our daily lives.
Thanks for joining me at Feastical today! I can’t wait to hear how your breakfast bowls turn out—snap a picture and share it with me! Happy cooking, and until next time, keep stirring up love in your kitchen!
Print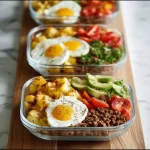
High-Protein Meal Prep Breakfast Bowls
- Total Time: 45 minutes
- Yield: 4 servings 1x
- Diet: High-Protein
Description
Enjoy a nutritious and delicious breakfast with these high-protein meal prep bowls packed with flavor and health benefits.
Ingredients
- 1½ lbs Baby potatoes, cut into small cubes
- 2 tbsp Olive oil
- 1 tsp Salt, divided
- ½ tsp Black pepper
- ½ tsp Smoked paprika
- ½ tsp Garlic powder
- 10 large Eggs
- ¼ cup Milk
- 1 lb Lean ground turkey or chicken sausage
- 1 cup Bell peppers, chopped
- ½ cup Onion, diced
- 2 cups Spinach
- 1 cup Shredded cheddar or Mexican-blend cheese
Instructions
- Preheat your oven to 425°F (220°C).
- Toss the cubed baby potatoes in a baking dish with 1 tablespoon of olive oil, ½ teaspoon of salt, black pepper, smoked paprika, and garlic powder.
- Bake for about 20–25 minutes or until golden and crispy, stirring halfway through.
- Heat a skillet over medium heat and add the remaining tablespoon of olive oil.
- Add the ground turkey or chicken sausage to the skillet and cook for about 5–7 minutes until browned.
- Sauté the diced onion and chopped bell peppers in the skillet for 3–4 minutes, then add the spinach until it wilts.
- Beat the eggs with the milk and remaining salt until frothy.
- Pour the egg mixture into the skillet over medium-low heat and cook gently for 4–5 minutes until set but still soft.
- Layer your meal prep containers with roasted potatoes, the sausage and veggie mixture, and top with fluffy scrambled eggs.
- Sprinkle shredded cheese on top before serving.
Notes
These bowls are great for meal prepping and can be stored in the fridge for up to five days. Feel free to customize with your favorite ingredients!
- Prep Time: 15 minutes
- Cook Time: 30 minutes
- Category: Breakfast
- Method: Baking
- Cuisine: American
Nutrition
- Serving Size: 1 bowl
- Calories: 380
- Sugar: 3g
- Sodium: 800mg
- Fat: 22g
- Saturated Fat: 6g
- Unsaturated Fat: 12g
- Trans Fat: 0g
- Carbohydrates: 25g
- Fiber: 5g
- Protein: 30g
- Cholesterol: 380mg
Keywords: meal prep, breakfast, high-protein, healthy bowls, savory breakfast
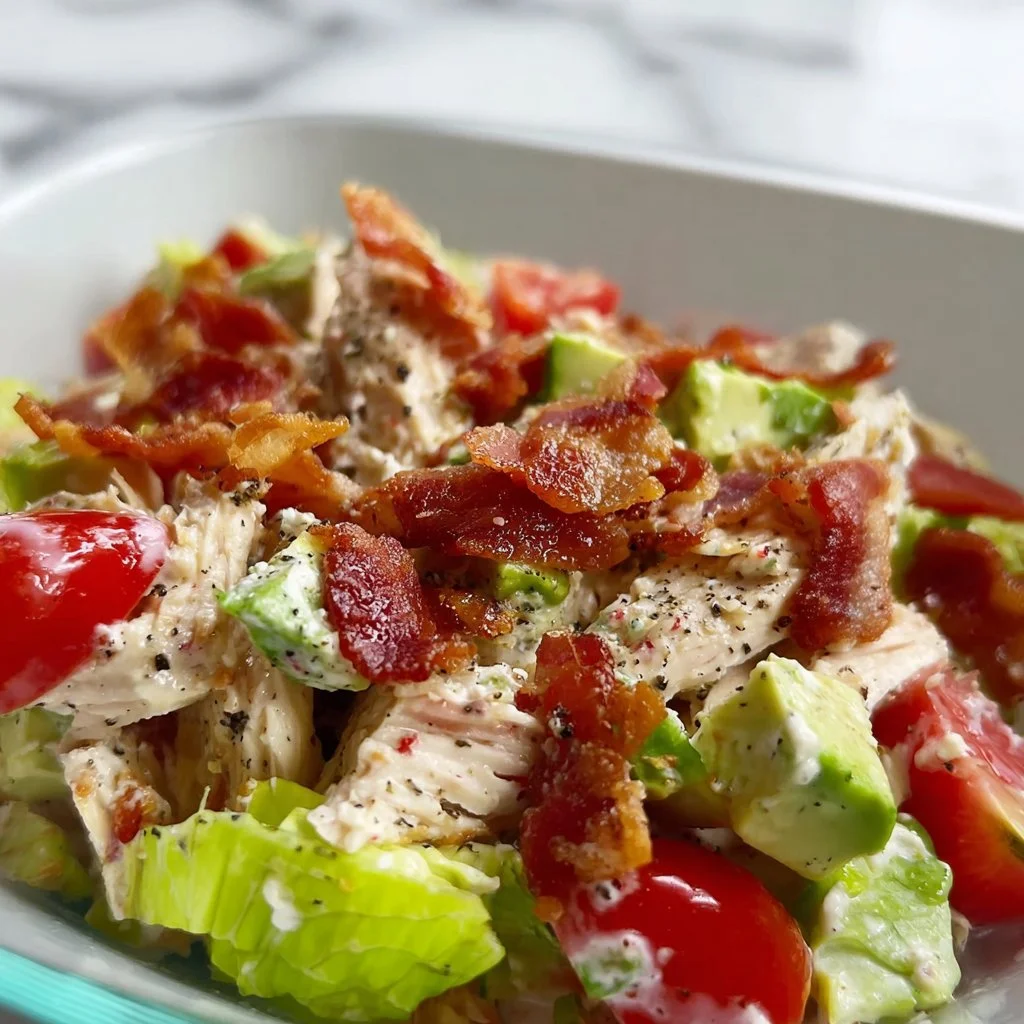
BLT Chicken Salad
BLT Chicken Salad: A Flavorful Twist on a Classic Favorite
Hey there, fellow food lovers! Today, we’re diving into a delightful dish that combines all the flavors of a classic BLT sandwich with the heartiness of a chicken salad. Yes, you guessed it—I’m talking about the scrumptious BLT Chicken Salad! This recipe is a total crowd-pleaser and is perfect for summer picnics, quick lunches, or even as a light family dinner. Trust me, it’s one of those dishes that makes everyone feel right at home.
What makes this salad so special is not just the classic combination of ingredients but the way each component comes together to create a medley of flavors that bring joy to every bite. Imagine the crunch of crispy bacon, the creaminess of avocados, and the freshness of ripe tomatoes, all enveloped in a luscious dressing. That’s pure comfort food bliss!
Now, I’ll admit—I wasn’t always this enthusiastic about chicken salad. Many years ago, I found it to be bland, uninspired, and just plain boring. That was until I decided to jazz it up with flavors reminiscent of my favorite sandwiches and, voila! A light bulb moment sparked this recipe into existence. It’s easy to make, incredibly customizable, and adds a twist to those boring lunches.
Plus, you’ll love how quickly you can whip it up—perfect for busy weeknights or spontaneous gatherings with friends. So, gather your ingredients and get ready to create something wonderfully delicious that’s bound to make your taste buds sing!
Personal Story
Let me take you back in time. Picture this: a warm summer afternoon spent in my grandmother’s cozy kitchen. The scent of bacon sizzling on the stove filled the air, and I could hardly contain my excitement. My grandma was renowned for her bacon, lettuce, and tomato sandwiches, crafted with love and a dash of magic. Each sandwich was undeniably a masterpiece, with crispy bacon, fresh romaine, and tomatoes from her garden.
As a kid, I used to sneak bites of her salad whenever she turned around. I remember one day, she showed me how to assemble her special dressing, and a light bulb went off—why not mix up the classic BLT flavors into a salad? The thought didn’t leave me, and fast forward a few years—it inspired this very recipe! So every time I whip up this BLT Chicken Salad, it takes me back to those cherished moments in the kitchen, sharing stories and laughter with my grandma.
Ingredients
Let’s break down this delicious BLT Chicken Salad. Here’s what you’ll need:
-
4 cups rotisserie chicken (shredded)
Using rotisserie chicken saves you time and adds tons of flavor. Feel free to use leftover chicken or even grilled chicken for a different twist! -
8 strips bacon (chopped, center-cut)
You can’t have a BLT without bacon! Center-cut bacon is leaner but still incredibly crispy. For a healthier option,Turkey bacon can be used instead. -
1/2 cup plain Greek yogurt
This creamy goodness adds a tangy flavor and protein. If you’re not a yogurt fan, you can skip this and use all mayonnaise! -
1/3 cup mayonnaise
A classic dressing ingredient that adds richness. For a lighter alternative, try avocado mayo or a vegan mayo. -
1 tablespoon ranch seasoning
This is where the magic happens! That ranch seasoning brings a zesty flavor kick. Store-bought is fine, or you can make your own for a fresher taste. -
1/2 tsp freshly cracked pepper
A sprinkle of freshly cracked pepper elevates the flavor profile. Adjust to taste if you prefer it spicier! -
1/3 cup green onions (diced)
Fresh and crispy green onions add a nice crunch and mild onion flavor. -
2/3 pint grape tomatoes (halved or quartered)
Sweet and juicy grape tomatoes bring freshness to every bite. Feel free to swap them with cherry tomatoes or even sun-dried tomatoes for a unique twist. -
1 avocado (diced)
Creamy avocado takes this salad to another level! If you’re not a fan, feel free to skip it or swap in diced cucumbers for some crunch.
Step-by-Step Instructions
Now, let’s get cooking! Follow these simple steps to whip up your BLT Chicken Salad:
-
Cook the Bacon:
Start by cooking the chopped bacon in a skillet over medium heat. Keep an eye on it—you want it perfectly crispy! This usually takes about 8-10 minutes. Once it’s done, transfer it to a plate lined with paper towels to soak up the grease. Don’t toss the bacon grease just yet; it can add flavor to your veggies later! -
Prepare the Chicken:
While the bacon is cooling, shred your rotisserie chicken in a large mixing bowl. It’s okay if it’s still warm; the warmth will help the flavors mix together nicely. -
Mix the Dressing:
In a medium bowl, combine your Greek yogurt, mayonnaise, and ranch seasoning. Mix until smooth, and season lightly with freshly cracked pepper. Trust me; this creamy sauce is the soul of the salad, and you’ll want every drop! -
Add the Ingredients:
Toss in the diced green onions, halved grape tomatoes, crispy bacon, and diced avocado to the shredded chicken. Drizzle your delicious dressing over the whole mixture to coat. -
Mix It Up:
Gently mix everything together with a spatula or spoon until the chicken and veggies are evenly coated in the dressing. This is where you can add more salt and pepper to taste. -
Chill (Optional):
If you have time, let the salad chill in the fridge for about 30 minutes. This allows the flavors to meld, and trust me, it’s worth the wait! -
Serve:
You’re all set to serve your BLT Chicken Salad! Plate it up or serve it in a bowl, maybe with some crispy lettuce leaves on the side or even in a wrap. Enjoy!
Serving Suggestions
Serving this BLT Chicken Salad is just as enjoyable as making it! Here are a few ideas on how to plate or serve:
-
In a Bowl:
Serve it chilled in a colorful bowl topped with a sprinkle of extra bacon bits and diced avocado. -
Lettuce Wraps:
For a low-carb option, serve the salad scooped into crisp lettuce leaves, making it easy to grab and eat! Iceberg or romaine works best for that satisfying crunch. -
On Toast:
Spread it over whole grain toast, add a slice of cheese, and pop it under the broiler for a tasty open-faced sandwich! -
On a Bed of Greens:
For a lighter lunch, serve the salad over a bed of mixed greens, topped with some additional grape tomatoes for color and flavor. -
In a Wrap:
Roll it all up in a tortilla for a delicious sandwich on the go that’s perfect for picnics or lunch boxes.
Recipe Variations
This BLT Chicken Salad is incredibly versatile—here are a few creative twists you can try:
-
Add Avocado Ranch:
Blend in some puréed avocado to the ranch dressing for a creamier texture and rich flavor. -
Spicy Kick:
Add some diced jalapeños or a few dashes of hot sauce to the mix for a spicy version that will wake up your taste buds! -
Herbinfusion:
Sprinkle in some fresh herbs, such as dill or cilantro, for an herbal flavor boost that complements the ranch dressing. -
Fruit Addition:
Toss in some sweet diced apples or berries for a fruity twist that pairs surprisingly well with the savory elements. -
Swap Out the Veggies:
Experiment with different veggies like bell peppers, corn, or cucumber for added texture and freshness.
Chef’s Notes
I’ve been cooking this BLT Chicken Salad for years, and it’s never failed to impress! One time, I put it together for a backyard BBQ, and it absolutely stole the show, leading to a flurry of requests for the recipe. It’s one of those dishes that evolves every time you make it—embrace the creativity and let your taste buds guide you!
Oh, and here’s a little secret: if you have leftovers (if you’re lucky enough to have them!), try using them as a filling for omelets or stuffing them in baked potatoes! It adds an unexpected, delightful surprise that diners won’t forget.
FAQs and Troubleshooting
-
Can I make this salad ahead of time?
Absolutely! The flavors meld beautifully, but to maintain avocado freshness, add that just before serving. -
What if I don’t have ranch seasoning?
No worries! You can make your own with a mix of dried herbs like dill, chives, garlic powder, and a touch of sea salt. -
What’s the best way to store leftovers?
Keep leftover salad in an airtight container in the fridge. It should last up to three days—though I doubt it’ll make it that long! -
Can I freeze this dish?
It’s not recommended to freeze chicken salad as the texture may be compromised after thawing. Stick to making it fresh when you can!
Nutritional Info
Per serving (approx. 1 cup):
- Calories: 355
- Protein: 27g
- Fat: 20g
- Carbohydrates: 10g
- Fiber: 3g
- Sugars: 2g
This is just a rough estimate, of course, and can vary based on specific ingredient brands. With all those healthy ingredients packed into each serving, you can enjoy this dish without any guilt!
Final Thoughts
So there you have it, my beloved foodies—an easy, delicious recipe for BLT Chicken Salad that’s perfect for any occasion. It’s creamy, crunchy, savory, and a little sweet—all the elements that make your taste buds dance!
I hope you try making this recipe for yourself—or even better, with someone you love—so you can create those happy kitchen memories just like I did with my grandma. Remember, the kitchen is all about exploring, creating, and sharing good vibes.
Now grab your apron, get cooking, and remember to share your kitchen adventures with us by tagging #Feastical! I can’t wait to see what delicious variations you come up with! Happy cooking!
Print
BLT Chicken Salad
- Total Time: 25 minutes
- Yield: 4 servings 1x
- Diet: Dairy
Description
A flavorful twist on the classic BLT sandwich transformed into a heartiness of a chicken salad, perfect for summer picnics or light dinners.
Ingredients
- 4 cups rotisserie chicken (shredded)
- 8 strips bacon (chopped, center-cut)
- 1/2 cup plain Greek yogurt
- 1/3 cup mayonnaise
- 1 tablespoon ranch seasoning
- 1/2 tsp freshly cracked pepper
- 1/3 cup green onions (diced)
- 2/3 pint grape tomatoes (halved or quartered)
- 1 avocado (diced)
Instructions
- Cook the bacon in a skillet over medium heat for 8-10 minutes until crispy.
- Transfer the cooked bacon to a plate lined with paper towels.
- Shred the rotisserie chicken in a large mixing bowl.
- Combine Greek yogurt, mayonnaise, and ranch seasoning in a medium bowl, mixing until smooth.
- Toss in diced green onions, halved grape tomatoes, crispy bacon, and diced avocado to the shredded chicken.
- Drizzle your dressing over the mixture to coat.
- Mix everything together gently.
- Chill in the fridge for about 30 minutes if time allows.
- Serve in bowls or lettuce wraps as desired.
Notes
For added flavor, use leftover chicken or grilled chicken. Customize with your favorite veggies or spices.
- Prep Time: 15 minutes
- Cook Time: 10 minutes
- Category: Salad
- Method: Mixing
- Cuisine: American
Nutrition
- Serving Size: 1 serving
- Calories: 355
- Sugar: 2g
- Sodium: 600mg
- Fat: 20g
- Saturated Fat: 6g
- Unsaturated Fat: 8g
- Trans Fat: 0g
- Carbohydrates: 10g
- Fiber: 3g
- Protein: 27g
- Cholesterol: 70mg
Keywords: BLT Chicken Salad, Chicken Salad, Summer Salad, Picnic Food, Easy Recipe