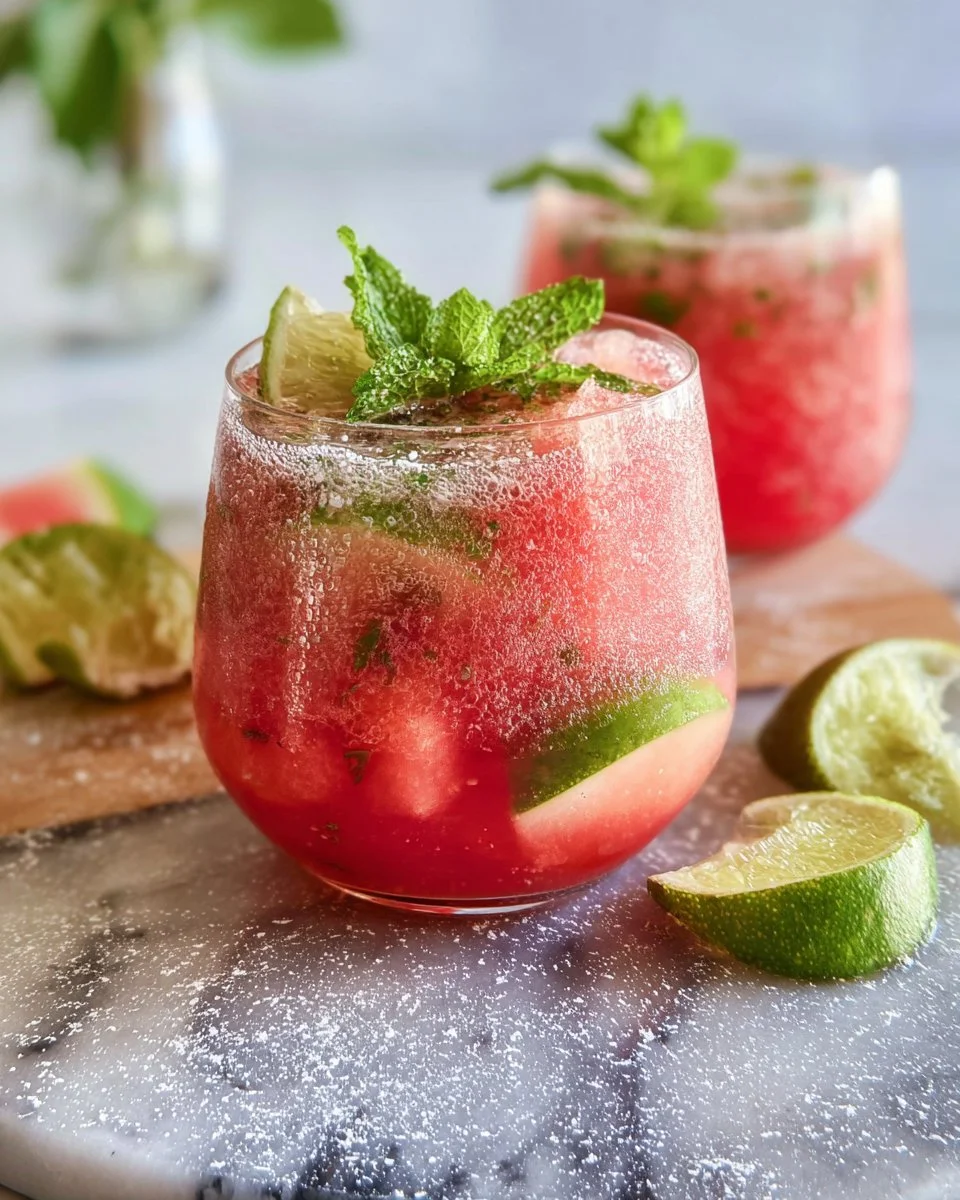
Watermelon Lime Mint Mocktails
Watermelon Lime Mint Mocktails: A Refreshing Summer Delight
Hey there, fellow food enthusiasts! It’s Beau Collier here, and today we’re diving into one of my absolute favorite summer refreshers: Watermelon Lime Mint Mocktails! When the sun is shining and the heat is on, there’s nothing quite like sipping on a cool, luscious mocktail that not only quenches your thirst but also transports your taste buds straight to a tropical paradise.
Picture this: you’re lounging in your backyard, the sound of laughter fills the air, and everyone’s gathered around, soaking up the sun. You take a sip of this vibrant concoction, and just like that, the world feels a bit brighter. This drink is not just any beverage; it’s a celebration of summer itself, bursting with fresh flavors that dance on your palate and bring a smile to your face.
The beauty of this recipe lies not only in its flavor but also in its simplicity. With just a handful of fresh ingredients, you can whip up a delightful drink that impresses your friends and family—no bartending skills required! And trust me, once you taste it, you’ll want to make it for every gathering, picnic, or even just to enjoy on a quiet afternoon. So grab your favorite mug (or, hey, a fancy glass—live it up!), and let’s get mixing!
Personal Story
Every time I make these Watermelon Lime Mint Mocktails, I think back to those sunny afternoons spent at my grandmother’s house. She had this beautiful garden bursting with fresh herbs, and I vividly remember sneaking into her mint patch, grabbing a few sprigs, and running back to the kitchen with glee. As a kid, I was always experimenting with flavors—even if it meant more mess than magic!
One sunny day, she caught me in action. Instead of scolding me, she handed me a lime and suggested I mix it with the mint and some watermelon juice. That was my first taste of this refreshing combination, and let me tell you, it was pure joy in a glass. We sat on the porch, sipping our creations, laughing about silly things, and enjoying the simple pleasure of good conversation over good food.
Fast forward to today, and this mocktail not only holds a special place in my heart but also serves as a reminder to savor the little moments. Let’s create your own memories with this easy and delicious drink that’ll keep you cool all summer long!
Ingredients
Here’s what you’ll need to create this lovely mocktail:
-
1/2 cup cubed watermelon
Fresh watermelon is the star of the show! It’s naturally sweet and hydrating, making it a perfect base for our mocktail. If watermelon isn’t in season, you can substitute with cantaloupe or honeydew for a similar fruity twist. -
2 lime wedges
Fresh lime juice adds just the right amount of acidity to balance the sweetness of the watermelon. If limes are scarce, lemons make a great substitute, but aim for a slightly more modest amount since they can be tart. -
3 mint leaves
Mint not only adds a refreshing flavor but also contributes to an aromatic experience. If you can’t find fresh mint, you might try spearmint infusion or even a few drops of mint extract, but use it sparingly! -
Ice
The ice will keep your mocktail refreshingly cold. You can use regular ice cubes or get creative and freeze some watermelon juice into ice cubes for an extra flavor boost. -
Ginger Ale (or sparkling soda)
This fizzy element provides a delightful sparkle and sweetness to the drink. Feel free to swap it with club soda or tonic water for a lighter version, but add a touch of sweetener if you miss that sugary kick. -
12 oz Cup (or larger)
You can choose your favorite glass; just make sure it’s big enough to hold all the goodness we’re about to create! -
Muddler
A muddler is a great tool to extract the flavors from the mint and lime. If you don’t have one, the back of a spoon can do the trick!
With these fresh ingredients in your arsenal, you’re all set to create a mocktail that’s not just thirst-quenching, but also bursting with joy!
Step-by-Step Instructions
-
Prepare Your Ingredients
Close your eyes, take a deep breath, and enjoy the burst of freshness from your watermelon, lime, and mint. Grab your cutting board, and chop the watermelon into cubes. They don’t have to be perfect because we’re going to muddle them anyway! -
Muddle the Watermelon
Place the cubed watermelon at the bottom of your 12 oz cup. Using your muddler (or the back of a spoon), gently press down on the watermelon cubes. You want to mush them just enough to release their juices. Don’t go overboard, though; we still want some texture! -
Add Lime Wedges
Toss in the lime wedges into the cup. Using the muddler again, press down on the lime wedges to release that zesty juice. Feel free to twist a bit; the goal is to get that full burst of citrusy goodness mixed with the watermelon. -
Introduce the Mint
Now for the magic: add the fresh mint leaves on top of the muddled watermelon and lime. Using your muddler, gently mash the mint leaves to release their essential oils. Be careful; you don’t want to shred it into tiny pieces—just enough to infuse the flavors. -
Fill with Ice
Add a generous amount of ice to your cup. This will chill your mocktail and keep it refreshing on those hot days! -
Mix with Ginger Ale
Pour the ginger ale (or sparkling soda) slowly over the ice-filled cup, allowing the bubbles to blend beautifully with the muddled mix below. You might want to give it a little stir with a straw to incorporate everything, but don’t overdo it—boozy drinks typically lose their fizziness! -
Garnish and Serve
To finish, add a sprig of mint or a slice of lime on top for a lovely garnish. Grab a seasonal straw (or go eco-friendly), and voila! You’ve created a delightful Watermelon Lime Mint Mocktail that looks as good as it tastes!
Remember, the joy of cooking lies in experimentation; feel free to tweak the measurements to match your preference and let the magic happen!
Serving Suggestions
For an added touch of flair, consider serving your mocktail in tall, clear glasses that showcase the beautiful colors of the drink. You can add extra garnishes—like skewered watermelon cubes or a twist of lime peel—to make it feel extra special.
If hosting a gathering, why not set up a mocktail bar? Lay out a variety of fresh fruits, herbs, and mixers so guests can customize their own drinks. This not only adds a fun interactive element but also allows everyone to get creative.
Want to elevate your presentation further? Serve the mocktails on a tray lined with burlap or decorative paper to add an extra rustic feel. It’s all about creating an inviting atmosphere that screams summer vibes!
Recipe Variations
-
Berry Burst
Swap in your favorite berries—strawberries, blueberries, or raspberries—alongside the watermelon for a colorful and vibrant mix. Berries can add a touch of tartness that beautifully balances the sweetness. -
Coconut Crush
Add in a splash of coconut water or coconut milk to enhance the tropical vibe. You’ll feel like you’re lounging on a beach somewhere! -
Citrus Surprise
Incorporate other citrus fruits like oranges or grapefruits along with lime for a zesty twist. The combination of flavors takes this mocktail to new tangy heights. -
Spicy Kick
For the adventurous, add a slice of jalapeño to the muddling stage. It adds a surprising and delightful punch to the drink! -
Herbal Infusion
Experience different flavor profiles by substituting mint for basil or even rosemary. These herbs introduce an unexpected twist that leaves your guests guessing!
No matter how you choose to customize your Watermelon Lime Mint Mocktails, each variation has its fun and delicious charm. Get creative and make this your own!
Chef’s Notes
As with any recipe, my Watermelon Lime Mint Mocktails have undergone a bit of evolution over the years. I love experimenting with different ingredients and flavor combinations—even as a kid, I would play around with whatever fruits and herbs I could find!
One hilarious kitchen story I remember vividly is my attempt at making this drink during a summer party a few years ago. I accidentally grabbed a bottle of tonic water instead of ginger ale! The puzzling looks on my friends’ faces when I served them the "mocktail" were priceless. They were expecting something sweet and refreshing, and instead, they got a burst of bitterness! After a quick laugh, we all embraced the mishap and turned it into a fun learning moment.
Every kitchen disaster can become a beautiful memory, and that’s what I love about cooking. So release the pressure—if things don’t go perfectly, just laugh it off! The joy is in the process and the company you keep.
FAQs and Troubleshooting
1. Why is my mocktail too sweet?
If your mocktail ends up being too sweet, consider reducing the amount of watermelon or ginger ale in your recipe. You can also squeeze in an extra lime wedge for more acidity, which will help balance the sweetness.
2. Can I make this drink ahead of time?
While it’s best enjoyed fresh, you can prepare the watermelon and mint mixture ahead of time and store it in the fridge. Just add the ice and ginger ale right before serving to keep it fizzy and refreshing!
3. What if my watermelon isn’t sweet enough?
Generally, watermelon should be sweet and ripe, but if you’re stuck with a not-so-tasty piece, consider adding a sprinkle of sugar or honey to enhance the flavor, or blending it with a ripe banana.
4. How can I make this drink more festive for a party?
Add vibrant straws, colorful drink stirrers, or even edible flowers to your garnish. You may also rim the glass with sugar or salt for added flair. For a batch drink, use a large pitcher and serve it over ice for an eye-catching centerpiece!
Nutritional Info
When it comes to this refreshing mocktail, it’s not just about flavor; it’s also about nourishing your body! Here’s a quick breakdown of the nutritional benefits of each ingredient:
- Watermelon: Low in calories, watermelon is hydrating and packed with vitamins A and C. With its natural sweetness, it makes a great low-calorie base for a drink.
- Lime: Full of vitamin C, limes have antioxidant properties and are excellent for digestion. They add a zesty kick that brings all the flavors together.
- Mint: Calorie-free and refreshing, mint aids digestion and has a cooling effect. Plus, it makes your drink smell fantastic!
- Ginger Ale (or sparkling soda): A lighter option can help reduce calories. Naturally sweet drinks can be lower in calories if tailored to your tastes!
In short, this mocktail not only supports a hot-weather hydration, but it also delivers a burst of nutrients to keep you refreshed and energized!
Final Thoughts
So there you have it—a cheerful ode to summer captured in a Glass: Watermelon Lime Mint Mocktails! These delightful drinks are perfect for enjoying with friends, sipping on a sunny afternoon, or simply treating yourself to something refreshing. Embrace the vibrant flavors, relish the memories you create, and remember that the kitchen is all about joy and creativity!
I can’t wait for you to try this recipe and make it your own. Whether you stick to the classic mix or venture into exciting variations, I promise you’ll have a delightful experience. Let me know what you think and share your own kitchen stories! Happy sipping, friends! Cheers to summer!
Print
Watermelon Lime Mint Mocktails
- Total Time: 10 minutes
- Yield: 1 serving 1x
- Diet: Vegetarian
Description
A refreshing summer mocktail that combines watermelon, lime, and mint for a deliciously cool drink.
Ingredients
- 1/2 cup cubed watermelon
- 2 lime wedges
- 3 mint leaves
- Ice
- Ginger Ale (or sparkling soda)
- 12 oz Cup (or larger)
- Muddler
Instructions
- Prepare your ingredients by chopping the watermelon into cubes.
- Muddle the cubed watermelon at the bottom of your cup.
- Add the lime wedges and press down to release the juice.
- Introduce the fresh mint leaves and gently mash to infuse the flavors.
- Fill the cup with ice to chill the mocktail.
- Mix in the ginger ale over the ice and stir gently.
- Garnish with a sprig of mint or a slice of lime and serve.
Notes
Feel free to adjust ingredients to your taste preference and get creative with add-ins like berries or coconut water!
- Prep Time: 10 minutes
- Cook Time: 0 minutes
- Category: Beverage
- Method: Mixing
- Cuisine: American
Nutrition
- Serving Size: 1 serving
- Calories: 150
- Sugar: 20g
- Sodium: 10mg
- Fat: 0g
- Saturated Fat: 0g
- Unsaturated Fat: 0g
- Trans Fat: 0g
- Carbohydrates: 38g
- Fiber: 1g
- Protein: 1g
- Cholesterol: 0mg
Keywords: mocktail, summer drink, watermelon, lime, mint
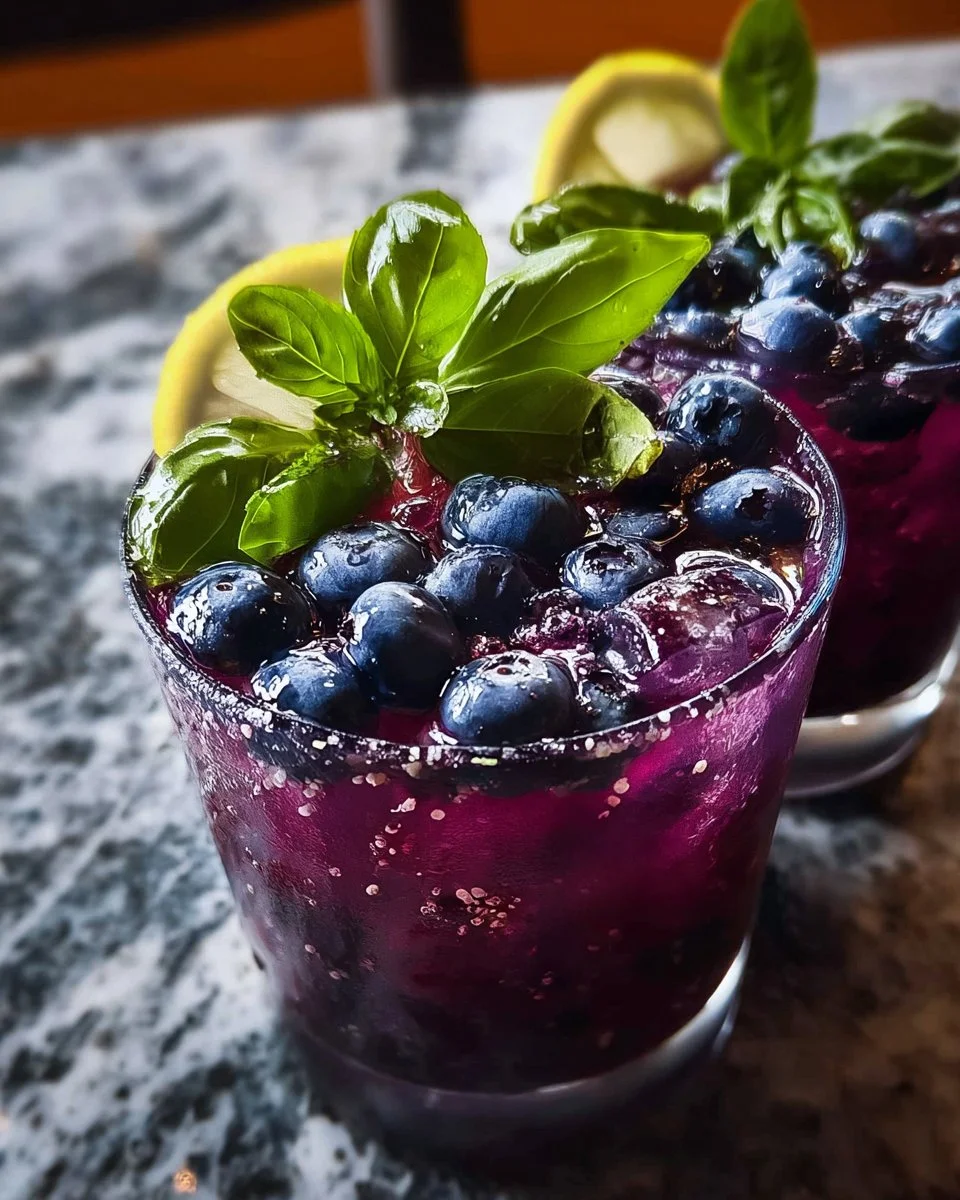
Blueberry Basil Lemon Lavender Mocktail
Refreshing Blueberry Basil Lemon Lavender Mocktail: A Sip of Summer
Welcome to the vibrant world of mixology, where we’re about to shake things up with a delightful, refreshing mocktail that will dance on your taste buds and make your heart sing! Today, we’re diving into the world of flavors with the Blueberry Basil Lemon Lavender Mocktail. This concoction is not just a drink; it’s an experience infused with freshness, nostalgia, and a touch of elegance.
Picture this: a gathering of friends on a sun-kissed afternoon, laughter dancing in the air, and the scent of blooming lavender enveloping the garden. As the sun dips lower, you decide to serve something extra special. Enter the Blueberry Basil Lemon Lavender Mocktail! This drink perfectly combines sweet and fruity notes with herbaceous undertones and floral hints, making it a standout choice for any occasion, be it a casual weekend brunch or a dinner party.
Let’s face it – mocktails don’t just serve as a great alternative to cocktails; they also allow everyone to join in on the festivities, regardless of whether they prefer to sip on something alcoholic or non-alcoholic. So grab your muddler (or a sturdy wooden spoon will do), and let’s create some kitchen magic together!
A Lazy Summer’s Afternoon
Growing up, my summers were spent under a big oak tree in my grandmother’s backyard, where we would gather as a family to escape the sweltering heat. My grandmother, a true culinary magician, would whip up cool drinks to help us beat the heat. One particular summer, she introduced us to her lavender lemonade – a refreshing treat that quickly turned into a family favorite.
One sunny afternoon, she decided to spice things up by adding fresh blueberries and basil from her garden. I watched with wide eyes as she muddled the ingredients, the aroma of basil and floral lavender bringing the whole experience to life. After that first sip, I was transported to another world filled with vibrant colors and breathtaking flavors! That memory of summer, love, and laughter stuck with me, inspiring this very mocktail recipe.
Now, every time I create this Blueberry Basil Lemon Lavender Mocktail, I’m reminded of those lazy summer afternoons spent under that oak tree, surrounded by family and fresh ingredients, and it brings a smile to my face.
Ingredients
Now let’s break down what you’ll need to whip up this delicious mocktail:
-
Fresh Blueberries: 1 pint, muddled
Blueberries add a natural sweetness and vibrant color to your mocktail. If they’re out of season, feel free to substitute with frozen blueberries! Just let them thaw and use them as is. -
Fresh Basil Leaves: 1 cup, chopped
Basil provides an aromatic touch and pairs marvelously with blueberries. If you’re feeling adventurous, try substituting with mint for a different twist! -
Fresh Lemon Juice: ½ cup (approximately the juice of 2 lemons)
Fresh lemon juice brightens the drink and balances out the sweetness. Bottled lemon juice works in a pinch, but fresh is always best for flavor. -
Lavender Simple Syrup: ¾ cup
This sweet syrup infuses the drink with lovely floral notes. You can buy it pre-made, but making it yourself is easy (and rewarding)! -
Soda Water: 1½ cups
This adds fizziness and keeps the drink light and refreshing. You can swap it out with lemon-lime soda for a touch of sweetness and extra flavor. -
Ice Cubes
To keep things cool and refreshing, add as many ice cubes as your heart desires!
Lavender Simple Syrup:
-
Sugar: 1 cup
Regular granulated sugar works perfectly. For a healthier alternative, try using honey or agave. -
Water: 1 cup
Plain ol’ water is all you need; it dissolves the sugar into a beautiful syrup. -
Lavender Buds: ½ cup (food grade)
Make sure to use culinary-grade lavender for this syrup to ensure it’s safe to consume. Dried culinary lavender can easily be found in specialty shops or online.
Step-by-Step Instructions
Alright! Let’s get our hands dirty and make this mocktail come to life. Don’t worry; I’m right here with you every step of the way!
-
Make the Lavender Simple Syrup
- In a small saucepan, combine 1 cup of sugar, 1 cup of water, and ½ cup of food-grade lavender buds.
- Place it over medium heat, stirring continuously until the sugar dissolves. Once it starts simmering, reduce the heat and let it brew for about 10 minutes, allowing those beautiful flavors to infuse.
- After 10 minutes, remove it from the heat and let it cool completely. Strain out the lavender buds using a fine-mesh sieve. This syrup can be stored in the fridge for about a month.
-
Prepare the Blueberries and Basil
- In a sturdy glass or cocktail shaker, add your pint of fresh blueberries. Muddle them gently with a muddler or the back of a spoon until they’re crushed but not completely liquefied. This releases their sweet juice.
- Add the chopped fresh basil leaves to the muddled blueberries and give them a gentle muddle—just enough to release the basil’s aromatic oils.
-
Add Lemon Juice and Lavender Syrup
- Pour in the fresh lemon juice and ¾ cup of lavender simple syrup to the muddled mixture. Stir gently to combine. The mixture will smell heavenly—trust me!
-
Combine with Soda Water
- Now, grab your favorite tall glasses and fill them halfway with ice cubes.
- Divide the blueberry-basil mixture among the glasses, then top with soda water. Give it a gentle stir to mix everything together.
-
Garnish and Serve
- For a beautiful presentation, garnish with a sprig of basil, a few whole blueberries, and, for fun, a sprinkle of lavender buds on top. Voilà! Your mocktail masterpiece is ready to enjoy!
Serving Suggestions
The way you serve a drink can elevate the entire experience! This Blueberry Basil Lemon Lavender Mocktail deserves a lovely glass to show off its vibrant colors. Use tall glasses or even mason jars for that rustic touch!
Interested in adding an extra flair? Use edible flowers like pansies or nasturtiums as garnish! Not only do they look stunning, but they also add a hint of whimsy to your drink. Serve with colorful straws or fun cocktail picks to speckle your gathering with a festive essence and let everyone dive into that delicious burst of summer.
Recipe Variations
Now that you’ve mastered the basic mocktail, let’s get creative! Here are some fun variations to try out:
-
Berry Blast: Mix in other berries like raspberries or blackberries for a berry medley mocktail! Just muddle them along with the blueberries for a fruity explosion.
-
Citrus Zing: Swap the lemon juice with fresh squeezed lime or orange juice for a citrusy twist that brings a new layer of flavor.
-
Herb Infusion: Add a sprig of rosemary or mint for a unique herbaceous twist that will add another level of warmth and zest to your drink.
-
Creamy Delight: For a creamier drink, try adding a splash of coconut milk or vanilla yogurt for a non-dairy option for a richer taste.
-
Boozy Option: If you’re feeling like you want to kick it up a notch, add a splash of gin or vodka to the mix for a delightful cocktail version!
Chef’s Notes
This mocktail has come a long way since its first iteration in my grandmother’s backyard. Back then, we added any berries we could find, and each batch brought its unique personality. Over the years, I experimented with different herbs, fruits, and syrups, but the foundational love my grandmother instilled in me holds strong.
I still remember that aromatic first sip and how it sparked joy amongst our family. This mocktail isn’t just about the flavors; it’s about the memories we create with each toast, each laughter, and each shared story. So grab your loved ones, shake things up in the kitchen, and let’s create some beautiful memories together!
FAQs and Troubleshooting
1. What if my mocktail tastes too sweet?
If you find it overly sweet, simply add a splash more lemon juice to balance out the flavors. Remember, taste as you go!
2. Can I make this mocktail in advance?
Absolutely! You can prepare the lavender syrup and muddle the blueberries and basil beforehand. Just combine it with soda water and ice when you’re ready to serve.
3. What if I don’t have fresh lavender available?
No worries! You can substitute lavender syrup with other floral syrups like rose or hibiscus if you’re short on lavender. The flavor may differ slightly, but it’ll still be delicious.
4. Can I use dried blueberries?
Fresh is best for this recipe, but if you’re in a pickle, you can use dried blueberries. Just soak them in warm water beforehand to soften them before muddling.
Nutritional Info
This Blueberry Basil Lemon Lavender Mocktail is not just delicious; it’s also packed with nutritious elements:
- Calories: Approximately 150 calories per serving (depending on how much syrup you use).
- Fresh Blueberries: Packed with antioxidants and vitamin C.
- Basil: Contains anti-inflammatory and antibacterial properties.
- Lemons: High in vitamin C; helps in boosting immunity and enhancing skin health.
- Sugar: While it does add sweetness, consider using alternatives like honey or agave for a healthier option.
Enjoying this drink can be a refreshing treat that contributes to your overall health!
Final Thoughts
The Blueberry Basil Lemon Lavender Mocktail is more than just a drink; it is a delightful reminder of summer days spent with family and the joy of sharing good food and drink with loved ones. With every sip, you’re tasting the love and memories that come from our kitchens.
As you create your own version of this refreshing mocktail, let it inspire laughter, connection, and happiness – because that’s what food is all about! So whether it’s a quiet evening on your patio or a lively gathering with friends, know this: every mocktail you create carries the spirit of togetherness and joy. Cheers to beautiful moments and delicious drinks! Enjoy!
Print
Blueberry Basil Lemon Lavender Mocktail
- Total Time: 20 minutes
- Yield: 4 servings
- Diet: Vegan
Description
A refreshing and vibrant mocktail combining sweet blueberries, aromatic basil, and floral lavender for a delightful summer sip.
Ingredients
- Fresh Blueberries: 1 pint, muddled
- Fresh Basil Leaves: 1 cup, chopped
- Fresh Lemon Juice: ½ cup (approximately the juice of 2 lemons)
- Lavender Simple Syrup: ¾ cup
- Soda Water: 1½ cups
- Ice Cubes
- Sugar: 1 cup (for lavender syrup)
- Water: 1 cup (for lavender syrup)
- Lavender Buds: ½ cup (food grade, for lavender syrup)
Instructions
- Make the Lavender Simple Syrup: In a small saucepan, combine 1 cup of sugar, 1 cup of water, and ½ cup of food-grade lavender buds. Place it over medium heat, stirring continuously until the sugar dissolves. Once it starts simmering, reduce the heat and let it brew for about 10 minutes. After 10 minutes, remove it from the heat and let it cool completely. Strain out the lavender buds using a fine-mesh sieve.
- Prepare the Blueberries and Basil: In a sturdy glass or cocktail shaker, add your pint of fresh blueberries. Muddle them gently with a muddler or the back of a spoon until they’re crushed but not completely liquefied. Add the chopped fresh basil leaves to the muddled blueberries and give them a gentle muddle.
- Add Lemon Juice and Lavender Syrup: Pour in the fresh lemon juice and ¾ cup of lavender simple syrup to the muddled mixture. Stir gently to combine.
- Combine with Soda Water: Fill tall glasses halfway with ice cubes. Divide the blueberry-basil mixture among the glasses, then top with soda water. Give it a gentle stir to mix everything together.
- Garnish and Serve: Garnish with a sprig of basil, a few whole blueberries, and a sprinkle of lavender buds on top. Serve immediately.
Notes
Feel free to substitute with mint or other berries for a twist. Add more lemon juice if the drink is too sweet.
- Prep Time: 10 minutes
- Cook Time: 10 minutes
- Category: Beverage
- Method: Mixing
- Cuisine: American
Nutrition
- Serving Size: 1 serving
- Calories: 150
- Sugar: 32g
- Sodium: 10mg
- Fat: 0g
- Saturated Fat: 0g
- Unsaturated Fat: 0g
- Trans Fat: 0g
- Carbohydrates: 40g
- Fiber: 2g
- Protein: 1g
- Cholesterol: 0mg
Keywords: mocktail, blueberry, basil, lavender, summer drink, refreshing beverage
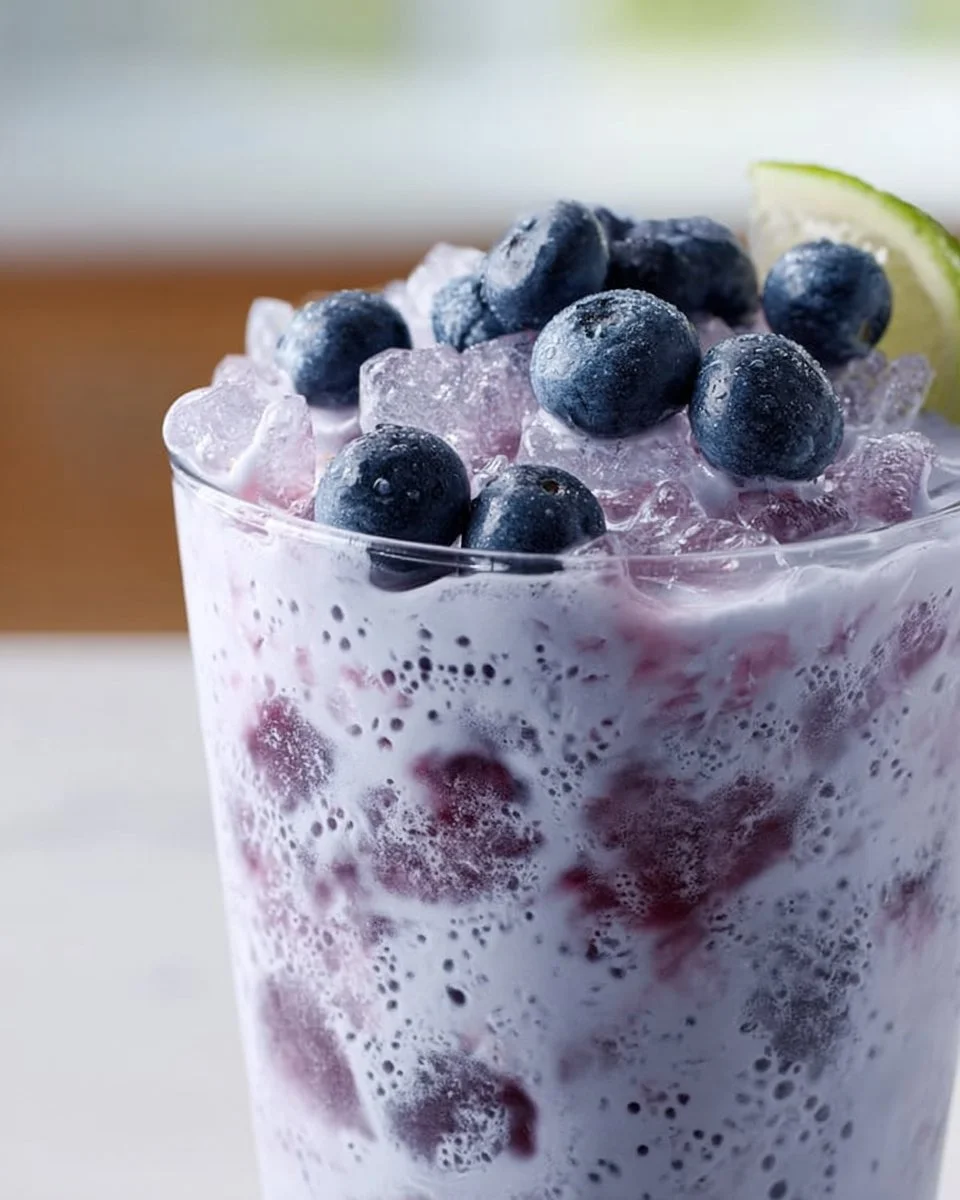
Blueberry Coconut Cooler Mocktail
Blueberry Coconut Cooler Mocktail: A Refreshing Sip of Summer
Hey there, fellow food lovers! Today, we’re diving into the delicious world of summer refreshers with one of my all-time favorites: the Blueberry Coconut Cooler Mocktail. Now, if you’re looking for a drink that’s not only refreshing but bursting with flavor, you’ve come to the right spot! Perfect for a sunny afternoon, this mocktail brings together the sweetness of fresh blueberries and the creamy goodness of coconut milk. It’s the drink that makes you feel like you’re lounging on a tropical beach, even if you’re just in your backyard.
A Toast to the Good Times
Let me take you back to a warm summer evening a few years ago. My friends and I had gathered for our first annual “Mocktail Madness” night. The idea was simple yet brilliant—each person would bring their favorite non-alcoholic beverage to share. As the sun began to set, casting a golden light over our backyard, I whipped up my Blueberry Coconut Cooler. With a delightful mix of fresh ingredients, it quickly became the star of the night!
Everyone was raving about it—eyes widening in surprise as they took their first sip. The joy on their faces was priceless! As we toasted and laughed, I knew this drink was destined for great things. More than just a refreshing beverage, it became a symbol of good times, friendships, and endless summers. Now, I can’t wait for you to experience the magic of this mocktail and create your own memories!
Ingredients
Before we start mixing and mingling, let’s gather the ingredients for our Blueberry Coconut Cooler. Here’s what you’ll need:
-
1 cup fresh blueberries
Fresh blueberries not only add a burst of flavor but also pack a punch of antioxidants! If you can’t find fresh ones, feel free to use frozen berries—just let them thaw a bit first. -
1 cup coconut milk
The creamy texture of coconut milk gives this drink a tropical flair. Unsweetened coconut milk works best to keep the sweetness just right. If you’re looking for a lighter option, you can use coconut water instead for a more refreshing twist. -
1 tablespoon honey or agave syrup (optional)
This adds a touch of sweetness, but feel free to leave it out if you prefer a more natural berry flavor. Maple syrup can be a great alternative for a unique taste! -
1 cup sparkling water
The sparkle in this mocktail is essential. It adds a fizzy kick to your drink. If you want extra flavor, try using flavored sparkling water like lemon or lime! -
Ice cubes
Because what’s a mocktail without a bit of chill? You can use regular ice cubes, or get creative and freeze some blueberries in them for an even prettier drink! -
Fresh mint leaves for garnish
A sprig of mint not only elevates the presentation but also adds a refreshing aroma when you take a sip.
Step-by-Step Instructions
Now that we have our ingredients ready, it’s time to get blending! Follow these simple steps to whip up your Blueberry Coconut Cooler.
-
Prep the Blueberries:
Start by rinsing your fresh blueberries under cool water. Give them a gentle toss to remove any dirt and ensure they’re ready for blending. Fresh blueberries should be plump and firm, so pick out any that look sad or squished. -
Blend It Up:
In a blender, combine the blueberries and coconut milk. Blend until the mixture is smooth and velvety. If you like a chunkier texture, pulse just a few times until combined, leaving some blueberry bits for character.Chef’s tip: If you want a bit more complexity in flavor, add a squeeze of lime juice to the mix while blending. It’ll bring a delightful tartness that complements the sweetness.
-
Sweeten to Taste:
Taste the blueberry-coconut blend, and if you want it sweeter, drizzle in the honey or agave syrup, then blend again until combined. Remember, you can always add more later, but you can’t take it out! -
Chill It Down:
Grab a large glass pitcher and strain the blended mixture through a fine mesh sieve to remove any pulp. You want that smooth texture for your mocktail! Press down with the back of a spoon to squeeze out every last drop. -
Add Bubbles and Ice:
Pour the blueberry coconut mixture back into the pitcher and add the sparkling water. Give it a gentle stir to mix everything together, but be careful not to lose all that lovely fizz! -
Preparation for Serving:
Fill your favorite glasses with ice cubes and pour the cooler over the ice. The contrast of the cold glass and bubbly drink is simply irresistible! -
Garnish and Enjoy:
Finish off with a sprig of fresh mint atop each glass. This not only looks beautiful but adds a wonderful aromatic hint that will bring your mocktail to life.
Serving Suggestions
Now that you have your Blueberry Coconut Cooler looking stunning, let’s talk about serving it up right! Here are a few ideas to take your presentation to the next level:
-
Glassware: Use clear glasses to show off the beautiful blue hue of the drink. Mason jars or elegant highball glasses both work wonderfully.
-
Fruit Garnish: Add a few extra blueberries on top for a pop of color. You can also place a slice of lime on the rim for a zesty look.
-
Chilled Plates: Serving your mocktail on chilled plates can keep it colder for longer, adding to the overall experience.
-
Pairing with Snacks: This drink pairs beautifully with light appetizers! Consider serving it alongside a platter of fresh fruit, cheese, or even some savory snacks like crispy veggie chips.
Recipe Variations
The Blueberry Coconut Cooler is a great base, allowing for customization to suit your taste! Here are a few creative twists you might want to try:
-
Berry Medley: Instead of just blueberries, combine raspberries or strawberries with blueberries for a delightful mixed berry experience.
-
Citrus Zing: Add a splash of orange juice or peach nectar to the mix for a refreshing citrus highlight.
-
Herbal Infusion: Incorporate fresh basil instead of mint for an herbal twist that adds a unique flavor profile.
-
Creamy Banana: Blend in half a ripe banana for a creamier texture and a hint of natural sweetness.
-
Spiced Twist: Add a pinch of ground ginger or cinnamon to the blend for a warm, spiced flavor, perfect for fall gatherings.
Chef’s Notes
As I look back on my early days experimenting in the kitchen, I can’t help but smile at how this recipe has evolved. Initially, I was just tossing a few ingredients together, but over time, I found the perfect balance that truly captures the essence of summer.
Also, it’s funny how often I misjudged the proportions when I was learning! The first time I made it too sweet, thinking more honey was better, and boy, did I learn my lesson. Since then, I’ve embraced the importance of tasting and adjusting as I go, encouraging everyone to do the same.
FAQs and Troubleshooting
Q1: Can I make this mocktail ahead of time?
Absolutely! You can prepare the blueberry coconut mixture ahead of time, but hold off on adding the sparkling water until you’re ready to serve. This keeps it nice and fizzy!
Q2: What if I can’t find fresh blueberries?
No problem! Frozen blueberries work great too. Just make sure to thaw them and drain any excess liquid before blending.
Q3: Is this mocktail okay for kids?
Yes! It’s a fun, fruity drink that kids will love. You can even let them help with the preparation!
Q4: Can I use coconut cream instead of coconut milk?
While coconut cream is thicker and richer, you can use it! Just mix it with a bit of water to achieve a pourable consistency.
Nutritional Info
Each serving of the Blueberry Coconut Cooler is not only refreshing but also packed with nutrients! Here’s a quick breakdown per serving, assuming you stick to the recipe as is:
- Calories: Around 120
- Carbohydrates: 16g
- Fiber: 2g
- Sugar: 7g (natural sugars from fruit)
- Protein: 1g
- Fat: 5g (healthy fats from coconut milk)
- Vitamins & Minerals: This drink is rich in Vitamin C, potassium, and essential nutrients from both blueberries and coconut.
Final Thoughts
As we wrap up, I hope you’re as excited as I am to try out this Blueberry Coconut Cooler Mocktail! It’s not just a drink; it’s an experience that’s meant to be shared. Whether you’re sipping it poolside, at a backyard barbecue, or simply enjoying some quiet time with a book, this mocktail adds a splash of joy to any occasion.
So grab your ingredients, gather your friends or family, and craft some beautiful memories together. And remember, when it comes to cooking and creating in the kitchen, don’t be afraid to experiment! Cheers to delicious moments ahead, and happy sipping!
Print
Blueberry Coconut Cooler Mocktail
- Total Time: 10 minutes
- Yield: 2 servings 1x
- Diet: Vegan
Description
A refreshing mocktail that combines the sweetness of fresh blueberries and the creaminess of coconut milk, perfect for summer.
Ingredients
- 1 cup fresh blueberries
- 1 cup coconut milk
- 1 tablespoon honey or agave syrup (optional)
- 1 cup sparkling water
- Ice cubes
- Fresh mint leaves for garnish
Instructions
- Prep the blueberries by rinsing them under cool water.
- Blend the blueberries and coconut milk until smooth.
- Sweeten to taste with honey or agave syrup, if desired.
- Chill the mixture by straining it through a fine mesh sieve.
- Add sparkling water and gently stir.
- Fill glasses with ice cubes and pour the mixture over the ice.
- Garnish with fresh mint leaves and enjoy!
Notes
Customize with different berries or add citrus juice for a unique twist.
- Prep Time: 10 minutes
- Cook Time: 0 minutes
- Category: Beverage
- Method: Blending
- Cuisine: American
Nutrition
- Serving Size: 1 serving
- Calories: 120
- Sugar: 7g
- Sodium: 50mg
- Fat: 5g
- Saturated Fat: 4g
- Unsaturated Fat: 1g
- Trans Fat: 0g
- Carbohydrates: 16g
- Fiber: 2g
- Protein: 1g
- Cholesterol: 0mg
Keywords: mocktail, blueberry, coconut, summer drink, refreshing beverage
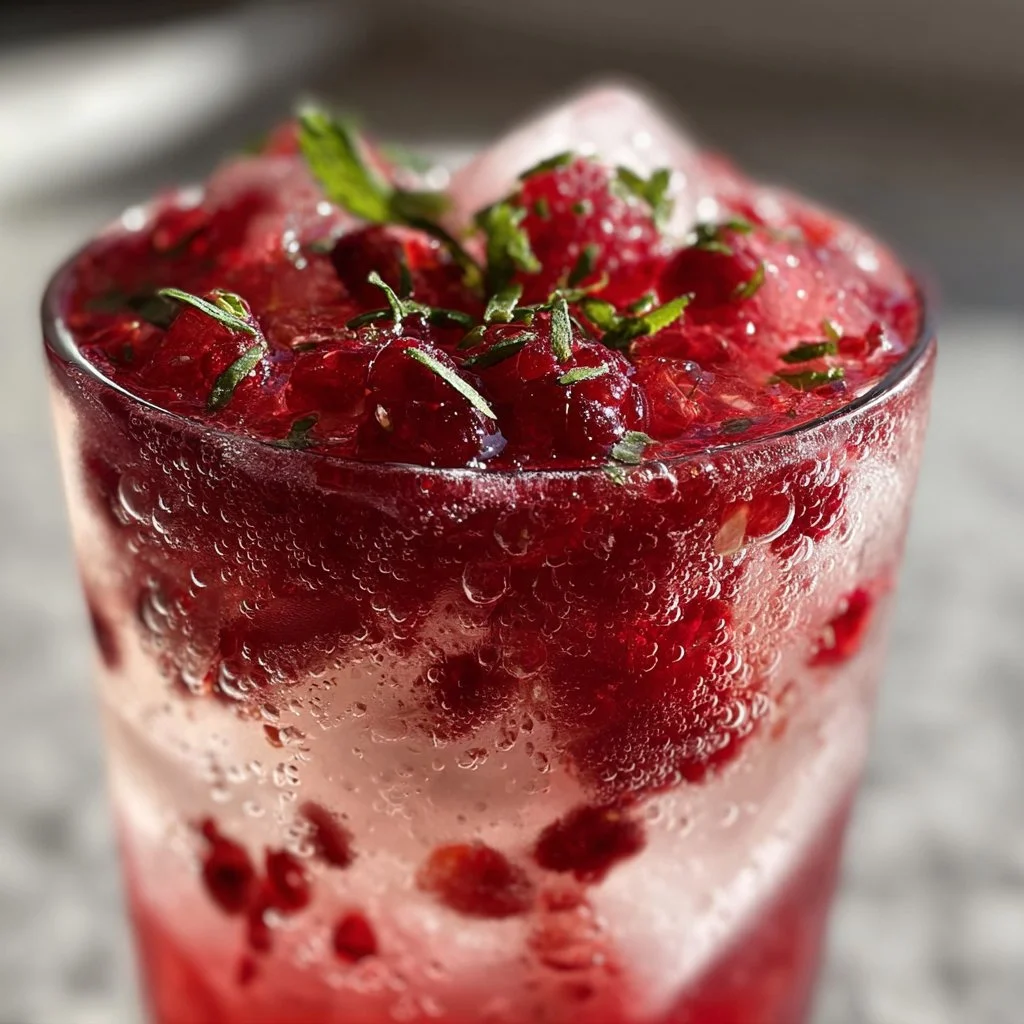
Iced Berry Lemon Spark Mocktail: 5-Minute Delight
Iced Berry Lemon Spark Mocktail: 5-Minute Delight
Hey there, fellow food lovers! If there’s one thing that can elevate any gathering, it’s a refreshing drink that looks as good as it tastes. Today, I’m excited to share a recipe for an Iced Berry Lemon Spark Mocktail that’s quick, fun, and oh-so-delicious! You can whip it up in just five minutes, and trust me, your friends will be begging for the secret to this vibrant, refreshing drink. So, grab your favorite glass, and let’s dive into this fruity elixir that’s bound to make you feel like summer’s right in your kitchen!
A Toast to Nostalgia
As a kid, I remember those hot summer days when my friends and I would run around outside until the sun started to dip below the trees. After an afternoon of tag and hide-and-seek, my mom would always make us something special to cool down. She had this magical knack for pairing fresh fruits with citrus to create refreshing drinks that felt like sunshine in a glass! One particular memory I cherish is the time she made us homemade lemonade mixed with whatever berries we could find in the backyard. We’d sit on the porch, sipping our colorful concoctions and laughing until our bellies hurt. That simple joy of vibrant flavors and chilled refreshments stuck with me over the years.
Inspired by those sun-soaked days, I created this easy Iced Berry Lemon Spark Mocktail as a nod to those childhood memories. With no fuss and plenty of flavor, it’s the perfect drink for any occasion—be it a casual brunch, a picnic in the park, or simply a cozy evening at home.
Ingredients
Here’s what you need to create this fresh and fabulous mocktail:
-
1 cup mixed berries (strawberries, blueberries, raspberries)
- Why these? They’re packed with vitamins, antioxidants, and natural sweetness! You can use fresh or frozen berries, but I recommend fresh ones for that vibrant burst of flavor.
-
1/4 cup lemon juice
- The zing factor: Nothing beats the freshness of real lemon juice. It brightens up the drink and complements the sweetness of the berries. If you’re low on fresh lemons, bottled lemon juice is a fine substitute, just keep the taste adjustments in mind.
-
2 tablespoons simple syrup (optional)
- Sweetening it up: This syrup adds a touch of sweetness. If you prefer a more natural sweetness, try maple syrup or agave. For a sugar-free option, consider stevia or erythritol.
-
1 cup sparkling water
- Fizzy fun: This is what gives our mocktail that extra sparkle! You can opt for flavored sparkling water, like lemon-lime or berry, for added flavor.
-
Ice cubes
- Chill out: Essential for keeping your drink refreshingly cool, especially on those hot days. You can even freeze your berries into ice cubes for a splash of color.
-
Fresh mint leaves for garnish (optional)
- A pop of freshness: Mint really elevates the presentation and adds an aromatic twist. If mint’s not your thing, feel free to skip it or replace it with basil for a unique flavor adventure!
Step-by-Step Instructions
Ready to get mixing? Here’s how to create your Iced Berry Lemon Spark Mocktail in just a few easy steps!
Step 1: Gather Your Ingredients
Make sure you’ve got everything prepped and ready! Rinse your mixed berries gently under cool water, drying them with a paper towel. This ensures they’re fresh and ready to pack a punch in flavor!
Step 2: Muddle the Berries
In a sturdy glass or mixing bowl, add your mixed berries. Using a muddler (or the back of a spoon if you’re like me and occasionally forget to buy kitchen gadgets), gently mash the berries until they release their juices. This should only take a minute or so—just enough to get that berry goodness shining through!
Step 3: Add Lemon Juice
Squeeze your lemon juice directly into your muddled berries. The tartness from the lemon juice combines beautifully with the sweetness of the berries. If you’re a fan of tangy flavors, add a little extra lemon juice for that zesty kick.
Step 4: Sweeten It Up
If you opted for simple syrup, now’s the time to pour it in! Give the mixture a gentle stir to blend everything together. If you prefer a less sweet mocktail, you can skip this step altogether!
Step 5: Add Sparkling Water
Time to bubble things up! Pour in the sparkling water, mixing it gently with the berry and lemon mixture. You want the fizz to stay bubbly and lively!
Step 6: Serve Over Ice
Fill your favorite glass with ice cubes and ladle the berry lemon mixture over it. For a beautiful touch, leave some space at the top — you’ll want room for garnish!
Step 7: Garnish and Enjoy!
Top your mocktail with fresh mint leaves for a pop of color and flavor. Serve it immediately to enjoy the fizz at its best. Cheers to you and your refreshing creation!
Serving Suggestions
When it comes to serving your Iced Berry Lemon Spark Mocktail, presentation is key! Use clear, tall glasses to showcase the beautiful colors of the mixed berries and the sparkles of the water. Consider serving it with colorful straws or even a fun cocktail umbrella for added flair. If you’re hosting a gathering, you can make a large batch in a pitcher; just multiply the ingredients and keep the proportions the same — it’s perfect for parties!
Pairing your mocktail with light snacks or appetizers is a fantastic way to elevate the experience. Think about serving it with a fresh fruit platter, some crispy cucumber sandwiches, or even light seafood appetizers like shrimp cocktails. Each sip and bite will harmonize, making for a delightful afternoon or evening.
Recipe Variations
Now let’s get creative! Here are some flavor twists and variations you can try:
-
Herbal Infusion: Swap out the mint for basil or thyme for a unique herbal flavor. Basil pairs especially well with strawberries and lends an aromatic touch!
-
Berry Blast: Use a range of berries for added depth—try blackberries or cranberries to make a richer, bolder drink.
-
Citrus Sensation: Mix in some orange juice for an extra citrusy burst! You can also zest some lemon or lime on top for an aromatic finish.
-
Creamy Delight: For a creamier twist, add a splash of coconut water or a tablespoon of coconut cream for a tropical vibe.
-
Spicy Twist: Add a pinch of cayenne pepper or ginger for a hint of spice that complements the berries beautifully.
Chef’s Notes
As with any recipe, it’s all about making it your own! I can remember the first time I made a mocktail — I was nervous, not knowing if the combination would be a hit or miss. The result? A total hit! This Iced Berry Lemon Spark Mocktail has evolved over time as I added little tweaks and personalized touches. It’s a crowd-pleaser at gatherings and an impressive way to impress friends who might be skeptical of non-alcoholic beverages. Always remember, it’s about enjoyment and experimentation: don’t be afraid to swap ingredients and adjust the flavors to match your personal taste!
FAQs and Troubleshooting
Q1: Can I make this mocktail in advance?
Absolutely! You can pre-muddle the berries and mix them with lemon juice and syrup. Just wait to add the sparkling water until right before serving to keep the fizz intact.
Q2: What if my drink is too tart?
If you find it too tart for your liking, simply add a bit more sweetener, be it simple syrup, honey, or agave. A little can go a long way!
Q3: Can I make this drink alcoholic?
Certainly! Simply add a splash of vodka or gin for a delightful summer cocktail version. You could even use flavored spirits!
Q4: What if I don’t have mixed berries?
No worries! You can use any type of berry you have on hand or even substitute with tropical fruits like mango or pineapple for a fruity twist.
Nutritional Info
For those counting calories or simply curious about nutrition, here’s an approximate breakdown for one serving of the Iced Berry Lemon Spark Mocktail:
- Calories: 80 (without syrup)
- Carbohydrates: 20g
- Sugars: 10g (natural sugars from fruit)
- Fiber: 2g
- Vitamin C: 45% of daily recommended intake
- Antioxidants: Provided by mixed berries
This drink is a powerhouse of nutrients suitable for most diets. Plus, it’s hydrating and a great way to cool down on a warm day!
Final Thoughts
I hope this Iced Berry Lemon Spark Mocktail shines as your go-to refreshment for sunny days or cozy gatherings. It’s easy to make, bursting with flavor, and most importantly, a whole lot of fun to enjoy! Remember to bring your own flair to the recipe, and don’t be afraid to experiment with flavors. Food is about creating memories, and every sip of this mocktail is a little piece of my childhood summer. Cheers to delicious drinks and beautiful moments shared around the table! Now, who’s ready to mix it up and raise a glass to flavor? Let’s sip, savor, and celebrate life together!
Print
Iced Berry Lemon Spark Mocktail
- Total Time: 5 minutes
- Yield: 1 serving 1x
- Diet: Vegan
Description
A refreshing and vibrant non-alcoholic mocktail made with mixed berries and fresh lemon juice, perfect for any gathering.
Ingredients
- 1 cup mixed berries (strawberries, blueberries, raspberries)
- 1/4 cup lemon juice
- 2 tablespoons simple syrup (optional)
- 1 cup sparkling water
- Ice cubes
- Fresh mint leaves for garnish (optional)
Instructions
- Gather your ingredients. Rinse mixed berries gently and dry them with a paper towel.
- Muddle the berries in a glass or mixing bowl until they release their juices.
- Add lemon juice to the muddled berries.
- Sweeten it up by pouring in simple syrup if desired.
- Add sparkling water and mix gently.
- Serve over ice in your favorite glass.
- Garnish with fresh mint leaves and enjoy!
Notes
Feel free to experiment with different berries or herbs for unique flavor combinations. This mocktail can also be made in advance without the sparkling water.
- Prep Time: 5 minutes
- Cook Time: 0 minutes
- Category: Beverage
- Method: Mixing
- Cuisine: American
Nutrition
- Serving Size: 1 serving
- Calories: 80
- Sugar: 10g
- Sodium: 5mg
- Fat: 0g
- Saturated Fat: 0g
- Unsaturated Fat: 0g
- Trans Fat: 0g
- Carbohydrates: 20g
- Fiber: 2g
- Protein: 1g
- Cholesterol: 0mg
Keywords: mocktail, berry, lemon, refreshing drink, summer drink, non-alcoholic beverage
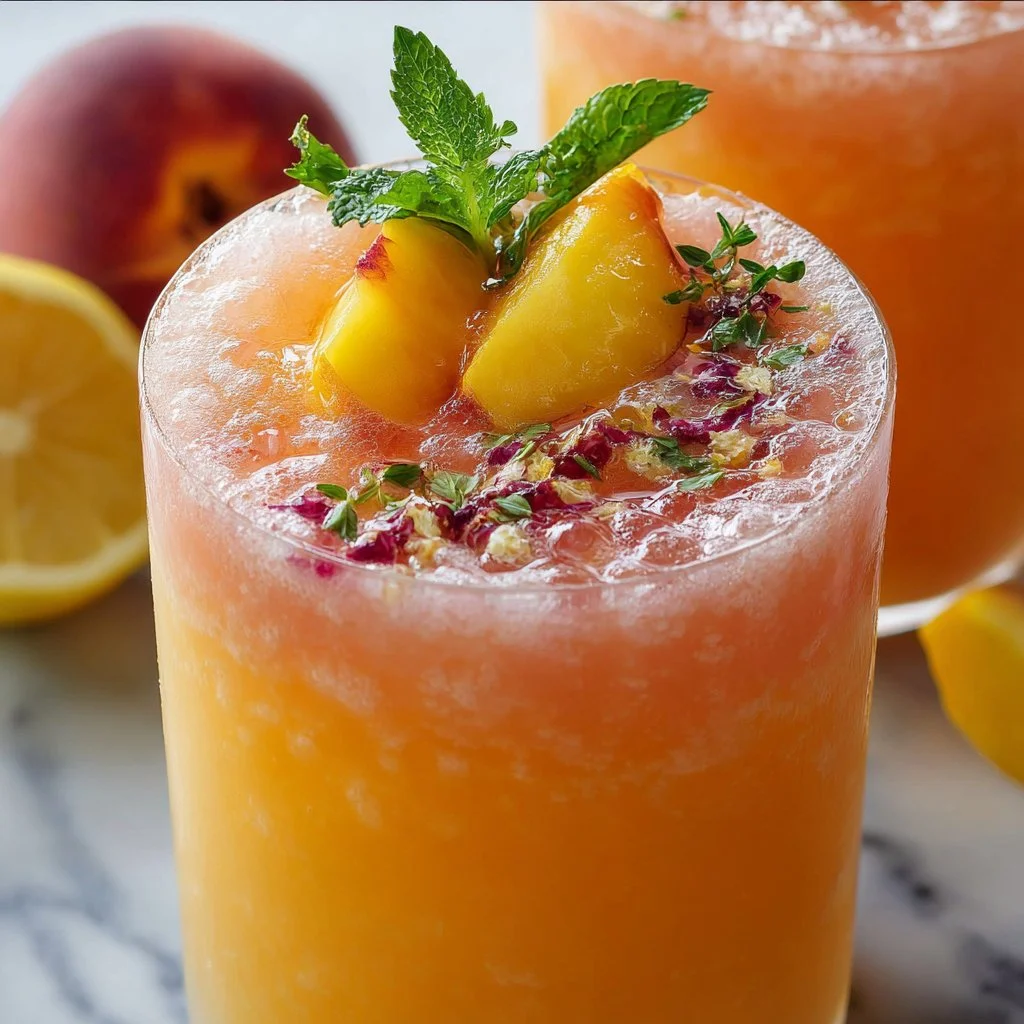
Refreshing Peach Lemonade
Refreshing Peach Lemonade: A Cool Summer Sip
Hey there, fellow food lovers! It’s Beau Collier here, and I’m so thrilled to dive into the sun-soaked world of refreshing summer drinks with you today. Nothing says summertime quite like the sweet aroma of ripe peaches and the zesty zing of fresh lemons. Today, I’m sharing my recipe for Refreshing Peach Lemonade, a delightful fusion that is not only hydrating but also bursting with flavor—a perfect match for your next picnic, backyard barbecue, or even a quiet afternoon on the porch.
What I love about this peach lemonade is that it’s not just a beverage; it carries with it a little piece of nostalgia. Picture this: warm days, sunshine kissing your skin, and laughter mingling with the sound of ice clinking in your glass. There’s something special about gathering with friends and family over delicious food and drinks, and this peach lemonade is sure to spark those cheerful connections.
This recipe is super straightforward, making it a winner for both seasoned cooks and kitchen beginners. I’ll guide you through the steps, share some quirky tips, and throw in a few kitchen hacks for good measure. So grab your favorite apron and let’s whip up a batch of this delightful drink that will keep you refreshed all summer long!
Personal Story
Ah, summer! It brings back such fond memories and delightful stories, especially those revolving around my grandma’s backyard gatherings. I remember one sweltering July afternoon, my family gathered under the big oak tree in her backyard, surrounded by laughter, sunshine, and jars brimming with her famous peach lemonade.
Grandma had this magical ability to transform simple ingredients into something extraordinary. I’d watch her slice peaches, her hands moving deftly as she added a squeeze of fresh lemon juice, all while telling stories from her childhood. The combination of sweet peaches and tart lemons made for the ultimate refreshing drink that not only quenched our thirst but also brought everyone together. Her secret? A dash of love and a pinch of patience!
As we sat there, sipping from mason jars, I knew that this drink was more than just a summertime refreshment; it was a symbol of connection, joy, and the beauty of slowing down to enjoy life’s simple pleasures. Carrying on her legacy, I created my own version of her peach lemonade that not only honors her memory but also embraces everything I love about cooking—sharing, connecting, and creating delicious moments.
Ingredients
Let’s gather up our ingredients for this Refreshing Peach Lemonade. Here’s what you’ll need:
-
6-8 ripe large peaches (about 3 pounds)
Look for peaches that are slightly soft to the touch and fragrant. If you can’t find fresh peaches, frozen peaches work wonders in a pinch! -
1/2 cup granulated sugar (for peach puree)
This sugar enhances the sweetness of the peaches. You can also substitute with honey or agave syrup if you prefer a natural sweetener! -
1/2 cup water (for peach puree)
Water helps in blending the peaches smoothly into a puree. Adjust the quantity for desired consistency! -
1 tablespoon fresh lemon juice (for peach puree)
Brightens up the peach flavor and helps keep the puree fresh. You can use bottled lemon juice, but fresh is always a better choice! -
1 1/2 cups freshly squeezed lemon juice (from 8-10 medium lemons)
Lemon juice is the backbone of this recipe—freshly squeezed gives a vibrant taste. If you’re feeling adventurous, mix in some lime juice for a zesty twist! -
1 cup granulated sugar (for simple syrup)
This is used to sweeten the lemonade, but feel free to reduce the sugar depending on your taste or substitute with a sugar alternative for a healthier option. -
1 cup water (for simple syrup)
Used to dissolve the sugar—this concoction forms the base of our lovely lemonade! -
4-6 cups cold water (for dilution)
This brings the lemonade to the perfect refreshing temperature. Adjust it to your preferred dilution! -
Fresh peach slices (for garnish)
Adds a lovely presentation element and showcases the peaches! -
Lemon wheels or wedges (for garnish)
Perfect for that refreshing zesty pop! -
Fresh mint sprigs (for garnish)
Releases a delightful aroma and adds a splash of color! -
Ice cubes
Essential for keeping that lemonade icy cold and refreshing.
Step-by-Step Instructions
Now that we have our ingredients, let’s jump right into making this Refreshing Peach Lemonade. Follow along, and I promise this is going to be super easy and, of course, super tasty!
Step 1: Prepare the Peach Puree
-
Wash and Slice
Start by washing those lovely ripe peaches under cold water. Once they’re squeaky clean, slice them in half and remove the pits. -
Puree Time
Place your peach halves in a blender along with ½ cup of granulated sugar and ½ cup of water. The sugar helps to extract the peach juices—trust me, your taste buds will thank you later! Blend until smooth. If you like a little texture, pulse gently a few times instead of blending completely. -
Add Lemon Juice
Once the mixture is smooth, add 1 tablespoon of fresh lemon juice to brighten it up a bit. Give it one last blend to mix everything together.
Step 2: Make the Simple Syrup
- Heat it Up
In a small saucepan over medium heat, combine 1 cup of granulated sugar and 1 cup of water. Stir until the sugar dissolves completely. This shouldn’t take long—just a few minutes. Once it’s all dissolved, let it cool. You can speed up the cooling process by placing it in the fridge!
Step 3: Combine the Lemonade
-
Juicing the Lemons
Squeeze those lemons until you have about 1 ½ cups of fresh lemon juice. Use a citrus juicer if you have one—this will help extract every flavorful drop! -
Bringing it All Together
In a large pitcher, combine your peach puree, freshly squeezed lemon juice, and the cooled simple syrup. Stir well to ensure an even mix. -
Dilute and Refresh
Now, it’s time to dilute your lemonade! Add in 4-6 cups of cold water (depending on how strong you like your lemonade). Taste as you go; you can always add more water if it’s too sweet or potent.
Step 4: Serve it Up
-
Chill and Serve
Pop your pitcher in the fridge to chill for at least an hour before serving. If you’re in a hurry, you can skip this step, but trust me, it’s worth the wait to let those flavors meld beautifully! -
Garnish and Enjoy
Serve over ice, and don’t forget to garnish with fresh peach slices, lemon wedges, and mint sprigs. Cheers to a refreshing summertime drink!
Serving Suggestions
For a delightful presentation, serve your Refreshing Peach Lemonade in your favorite glasses or mason jars. This gives it a rustic charm that screams summer vibes! Fill your glasses with ice cubes to keep things cool, and add those beautiful peach and lemon garnishes on top for a pop of color.
For a fancy twist, you can also create lemonade popsicles using the mixture—just pour the lemonade into molds and freeze. Perfect for a hot day, and kids love them! Or if you’re feeling adventurous, try serving it with sparkling water for a bubbly version that’s perfect for gatherings!
Recipe Variations
Want to change things up a bit? Here are some fun twists on this classic recipe to keep your taste buds intrigued:
-
Berry Fusion: Add a handful of muddled raspberries or strawberries to the peach puree for a mixed-berry twist that’s equally delicious.
-
Herbal Infusion: Instead of mint, try infusing your lemonade with basil or rosemary for an aromatic experience that adds complexity!
-
Spicy Kick: Add a pinch of cayenne pepper or sliced jalapeño to the lemonade for a fun spicy kick that plays beautifully against the sweetness.
-
Ginger Sparkle: Grate some fresh ginger into the peach puree for a warm and zesty twist. You could also substitute a portion of the simple syrup with ginger syrup!
-
Frozen Treat: Freeze the peach lemonade mixture in ice cube trays, and then blend the frozen cubes with a bit more cold water for a slushy version. Perfect for those hot summer days!
Chef’s Notes
As a chef and a passionate home cook, I love how recipes evolve over time. This peach lemonade started from my grandmother’s simple concoction and has morphed into something I can call my own. In fact, I remember the first time I attempted to make it; I accidentally added way too much lemon juice! Let’s just say it was more tart than I anticipated, but it turned out to be a great lesson in balance!
Now, I’ve fine-tuned this recipe, but what I cherish most is the comfort and joy surrounding it. Every time I make it, I’m reminded of that oak tree in my grandma’s backyard and the love that filled our family gatherings. I hope this recipe brings you as much joy as it has for me!
FAQs and Troubleshooting
1. Why does my lemonade taste too sweet?
If your peach lemonade tastes overly sweet, simply dilute it with more cold water or add a splash of fresh lemon juice to increase tartness.
2. Can I use canned peaches?
Absolutely! If peaches are out of season or you’re in a hurry, canned peaches can work too. Just make sure to drain them well before blending!
3. My puree is too thick. What can I do?
If your peach puree turns out thicker than you’d like, add a little more water while blending until you achieve your desired consistency.
4. How can I store leftover lemonade?
Store any leftover peach lemonade in an airtight container in the fridge for up to 3 days. However, it’s best enjoyed fresh, as the flavors are most vibrant!
Nutritional Info
While the precise nutritional information can vary based on the exact amounts and brands of ingredients used, here’s a general idea of what you’re looking at for a standard serving (1 cup) of this Refreshing Peach Lemonade:
- Calories: Approximately 130
- Sugar: About 28 grams (varies based on sweetness preference)
- Carbohydrates: Roughly 32 grams
- Vitamin C: A great source due to the fresh peaches and lemons, promoting a healthy immune system.
Reducing the sugar or using natural sweeteners can make this drink even healthier without sacrificing flavor!
Final Thoughts
So there you have it, folks! My beloved Refreshing Peach Lemonade recipe, infused with memories and brimming with flavor. This drink is not just about quenching thirst; it’s a celebration—a cheerful reminder to gather, share, and savor the special moments in life. Just like a warm hug, this lemonade wraps you in a cozy embrace, inviting both nostalgia and new memories.
I encourage you to give it a try, share it with loved ones, and maybe even create your own memories around this simple yet soulful drink. And remember, cooking is not just about following recipes; it’s about experimentation, connection, and most importantly, joy! So get creative, have fun, and let those summertime vibes roll! Cheers—until next time, happy sipping from your kitchen buddy, Beau Collier!
Print
Refreshing Peach Lemonade
- Total Time: 25 minutes
- Yield: 8 servings 1x
- Diet: Vegetarian
Description
A delightful fusion of sweet peaches and zesty lemons, perfect for summer picnics and gatherings.
Ingredients
- 6–8 ripe large peaches (about 3 pounds)
- 1/2 cup granulated sugar (for peach puree)
- 1/2 cup water (for peach puree)
- 1 tablespoon fresh lemon juice (for peach puree)
- 1 1/2 cups freshly squeezed lemon juice (from 8–10 medium lemons)
- 1 cup granulated sugar (for simple syrup)
- 1 cup water (for simple syrup)
- 4–6 cups cold water (for dilution)
- Fresh peach slices (for garnish)
- Lemon wheels or wedges (for garnish)
- Fresh mint sprigs (for garnish)
- Ice cubes
Instructions
- Prepare the Peach Puree: Wash and slice the peaches, then blend with sugar and water until smooth. Add lemon juice and blend again.
- Make the Simple Syrup: Heat sugar and water in a saucepan until dissolved; let cool.
- Combine the Lemonade: Mix peach puree, lemon juice, and simple syrup in a pitcher, then dilute with cold water to taste.
- Chill and Serve: Refrigerate for at least an hour. Serve over ice and garnish with peach slices, lemon wedges, and mint.
Notes
For a fun variation, try adding berries or herbs like mint, basil, or rosemary.
- Prep Time: 15 minutes
- Cook Time: 10 minutes
- Category: Beverage
- Method: Blending and Mixing
- Cuisine: American
Nutrition
- Serving Size: 1 cup
- Calories: 130
- Sugar: 28g
- Sodium: 5mg
- Fat: 0g
- Saturated Fat: 0g
- Unsaturated Fat: 0g
- Trans Fat: 0g
- Carbohydrates: 32g
- Fiber: 1g
- Protein: 1g
- Cholesterol: 0mg
Keywords: peach lemonade, summer drink, refreshing beverage
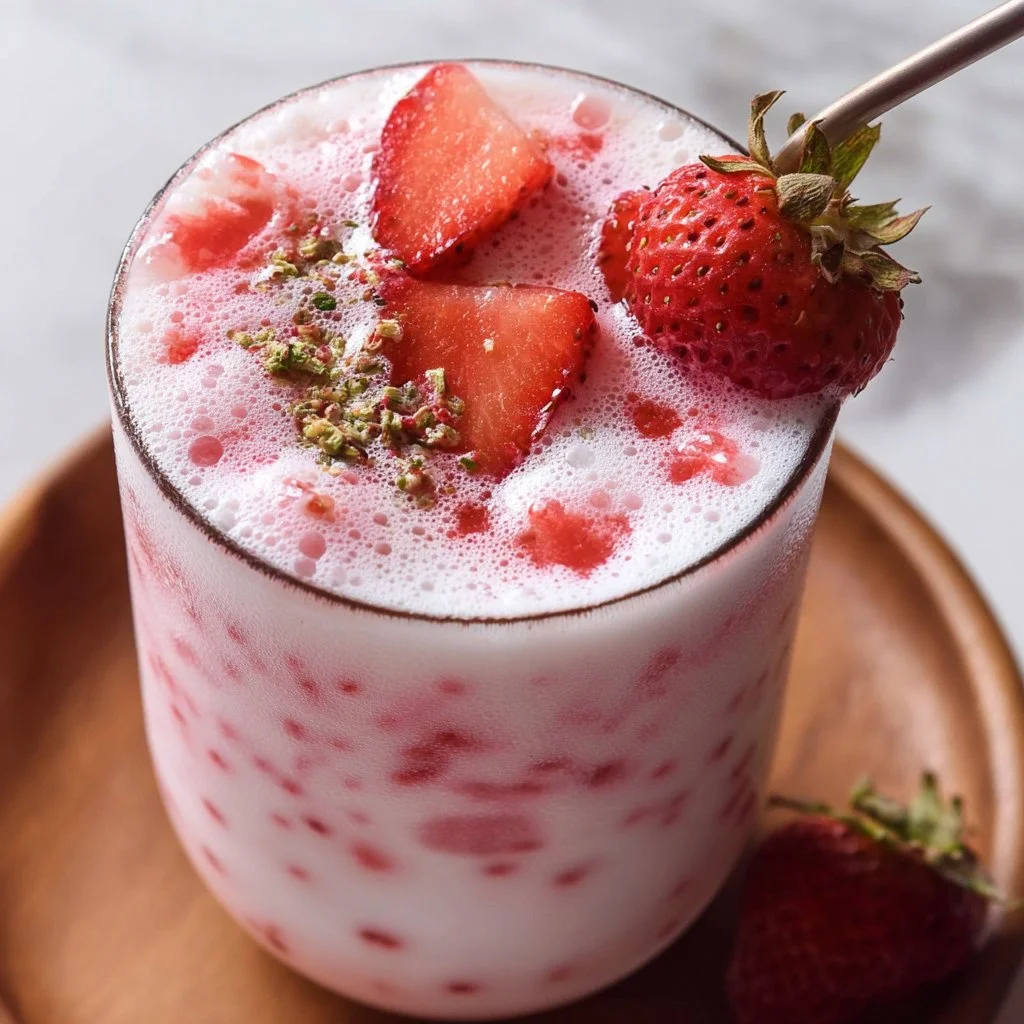
Korean Strawberry Milk
The Flavors of Nostalgia: A Deep Dive into Korean Strawberry Milk
Hey there, foodies! Today, we’re going to whip up something that not only tastes fresh and delicious but also tickles your nostalgic taste buds! If you haven’t tasted Korean strawberry milk yet, you’re in for a treat! This delightful drink is not just a hit in cafes across Korea; it’s a beautiful blend of fresh strawberries and creamy milk that’s as gorgeous as it is delectable. So, roll up your sleeves, grab your strawberries, and let’s get started on this refreshing journey!
Personal Story: The First Sip
I remember the first time I tried Korean strawberry milk. It was a sunny afternoon in Seoul, and I had just spent the morning wandering through the bustling streets, nibbling on street food and soaking in the vibrant colors around me. It was one of those perfect days that felt like it was straight out of a movie. I stumbled upon a cozy cafe filled with the sweet aroma of fresh strawberries. As I sat down, I couldn’t resist trying the drink everyone was raving about.
When the Korean strawberry milk arrived, it was like a work of art. Gorgeous pink hues swirled in the glass topped with whipped cream and a sprinkle of crushed strawberries. The first sip was like a dream – rich, sweet, creamy, and bursting with flavor. It took me back to my childhood, where I would blend strawberries with milk at home, albeit without quite the same finesse. I quickly learned that this drink was more than just a refreshment; it was a delicious hug in a glass. And from that day on, Korean strawberry milk became a staple in my culinary adventures, reminding me that sometimes, the simplest ingredients create the most unforgettable memories.
Ingredients
Now, let’s talk about what you need to create this blissful concoction!
-
Fresh Strawberries (140g/5 oz): These are the stars of our show! Look for ripe, juicy strawberries, preferably organic if you can find them. If strawberries aren’t in season, feel free to swap them for frozen ones – just make sure to let them thaw and pat them dry before using.
-
Sugar (70g/2.5 oz, raw or white): The sugar adds sweetness to our drink. You can use white sugar for a pure, classic taste or raw sugar for a bit of extra depth. If you’re feeling adventurous, try honey or maple syrup for a unique flavor twist.
-
Milk (2 cups, any type): Use your favorite milk here! Whole milk gives a rich creaminess, but you can also use almond milk, oat milk, or any lactose-free option. Go for whatever suits your taste buds or dietary needs!
-
Optional: Ice Cubes, Whipped Cream, Vanilla Extract: Add ice cubes for a chill factor or whipped cream for that ultimate decadent touch. A splash of vanilla extract can add warmth and complexity, making your strawberry milk taste like a dreamy dessert!
Step-by-Step Instructions
Alright, let’s get down to the nitty-gritty of making this incredible drink!
Step 1: Prep the Strawberries
Start by washing your fresh strawberries under cool water. Gently pat them dry with a clean kitchen towel. This step is crucial; any extra water can dilute our delightful drink. Once they’re dry, hull the strawberries (remove the green tops) and slice them in half.
Chef’s Tip: Taste one or two to check for sweetness. If they’re not quite ripe enough, you might want to add a bit more sugar to balance it out.
Step 2: Make the Strawberry Puree
In a blender, toss in those luscious sliced strawberries along with the sugar. Blend until smooth, which should take about 30 seconds. Don’t overdo it; we want a beautiful mixture without turning it into juice.
Little Chef Hack: If you’re a fan of texture, you can leave a few small chunks of strawberries for added flavor. Just pulse briefly rather than fully blending!
Step 3: Combine with Milk
In a large jug or bowl, pour in the milk. Gradually stir in the strawberry puree until fully combined. If you’re adding vanilla extract, this is the perfect time to mix it in.
Expert Insight: If you want to keep your drink cold, add ice cubes to the milk before you stir in the puree. It’ll create a refreshing summer drink that’s perfect for warm days!
Step 4: Taste and Adjust
Now comes the fun part – tasting! Take a sip to see if it meets your sweet tooth level. Adjust by adding more sugar if necessary, but remember that the flavor should shine through the sweetness!
Chef’s Note: If you’re serving kids or anyone who likes it ultra-sweet, feel free to blend in an extra teaspoon of sugar until you achieve the desired flavor balance.
Step 5: Serve It Up!
Grab your favorite glasses and pour in that beautiful pink goodness. If you want a fancy touch, add a dollop of whipped cream on top with a sprinkle of crushed strawberries.
Presentation Tip: You can also run a fresh strawberry along the rim of your glass for that café-style presentation. Your friends will be impressed!
Don’t forget to grab your favorite straws or serve it with a cute spoon for sipping!
Serving Suggestions
Korean strawberry milk is a versatile drink that fits right in at breakfast, as a midday refreshment, or even as a light dessert. Serving it alongside a light pastry or some homemade cookies can elevate your snack time. Pair it with some buttery scones for a delightful afternoon tea experience.
Fun Presentation Idea: If you’re hosting a brunch, consider serving the strawberry milk in mini mason jars, topped with whipped cream and a fresh strawberry perched on the rim. Cute and delicious – win-win!
Recipe Variations
Feeling creative? Here are some fun twists to try!
-
Berry Blitz: Combine strawberries with other berries like blueberries or raspberries for a mixed berry milk that packs a punch.
-
Minty Fresh: Add a few fresh mint leaves into the blend for a refreshing twist. It’s like summer in a glass!
-
Choco-Strawberry Delight: Drizzle some chocolate syrup into the glass before pouring in the strawberry milk for a deliciously decadent treat.
-
Coconut Cream: Swap out regular milk for coconut milk for a tropical twist that adds a lovely creaminess.
-
Protein Boost: Need extra fuel? Add a scoop of vanilla protein powder to the blender for a nourishing breakfast drink.
Chef’s Notes
I have to admit, this recipe has been a bit of an evolution for me! I started out making it with just strawberries and milk, simple as that. But over time, I realized that adding little elements like vanilla and whipped cream could elevate the entire experience. I also love how it allows me to experiment with seasonal fruits whenever they come around, turning this classic recipe into a year-round delight.
One time, I went to an artisan market and found some homegrown strawberries so sweet, they didn’t even need sugar! We went all in, and that simple variation has stuck with me ever since. It’s incredible how the quality of ingredients can truly transform a recipe.
FAQs and Troubleshooting
Q1: Why is my strawberry milk too thick?
If the strawberry puree is too thick, it could be due to using less milk or blending the strawberries for too long. Try adding a bit more milk to achieve that lovely drinkable consistency!
Q2: Can I store leftover strawberry milk?
You can store it in the fridge in an airtight container for up to 2 days, but keep in mind that the creaminess might settle. Give it a good shake before enjoying!
Q3: What can I do if my strawberries aren’t sweet enough?
If your strawberries aren’t sweet enough, don’t fret! Just add a little more sugar or honey to the mixture while blending until it tastes like sunshine in a glass.
Q4: Is it okay to use frozen strawberries?
Absolutely! Thaw them first and make sure to drain any excess moisture to keep your drink from becoming watery.
Nutritional Info
While nutritional values can vary based on the specific ingredients you use, here’s a rough estimate per serving when made with whole milk:
- Calories: 220
- Fat: 10g
- Carbohydrates: 26g
- Sugar: 18g
- Protein: 8g
It’s a delightful sugary treat, perfect for splurging once in a while! Remember, it’s all about balance, and this drink definitely deserves a spot on your special occasion menu.
Final Thoughts
So there you have it—the sweet, creamy delight that is Korean strawberry milk! I hope this bright, fruity drink takes you on a joyful journey back to your own fun summer memories or creates new ones with friends and family. Whether sipping it solo on a sunny afternoon or serving it up at a gathering, it’s sure to bring a smile to your face.
Thanks for hanging out with me in the kitchen today! Remember, cooking is all about feeling, so trust your instincts, play around with flavors, and have fun. Here’s to many more delicious moments! Until next time, keep those spatulas handy and those taste buds excited! 🥤❤️
Print
Korean Strawberry Milk
- Total Time: 10 minutes
- Yield: 4 servings
- Diet: Vegetarian
Description
A refreshing blend of fresh strawberries and creamy milk that evokes nostalgic memories.
Ingredients
- Fresh Strawberries (140g/5 oz)
- Sugar (70g/2.5 oz, raw or white)
- Milk (2 cups, any type)
- Optional: Ice Cubes, Whipped Cream, Vanilla Extract
Instructions
- Prep the strawberries by washing them under cool water, patting them dry, hulling, and slicing in half.
- Make the strawberry puree by blending the sliced strawberries with the sugar until smooth, about 30 seconds.
- Combine the milk and gradually stir in the strawberry puree until fully mixed, adding vanilla extract if desired.
- Taste the mixture and adjust sweetness by adding more sugar if necessary.
- Serve the drink in glasses, optionally topped with whipped cream and crushed strawberries.
Notes
Perfect for breakfast or as a light dessert, this milk is a delightful refreshment any time of day.
- Prep Time: 10 minutes
- Cook Time: 0 minutes
- Category: Beverage
- Method: Blending
- Cuisine: Korean
Nutrition
- Serving Size: 1 serving
- Calories: 220
- Sugar: 18g
- Sodium: 100mg
- Fat: 10g
- Saturated Fat: 6g
- Unsaturated Fat: 4g
- Trans Fat: 0g
- Carbohydrates: 26g
- Fiber: 1g
- Protein: 8g
- Cholesterol: 5mg
Keywords: Korean strawberry milk, refreshing drink, nostalgic flavors, strawberry puree, summer drink
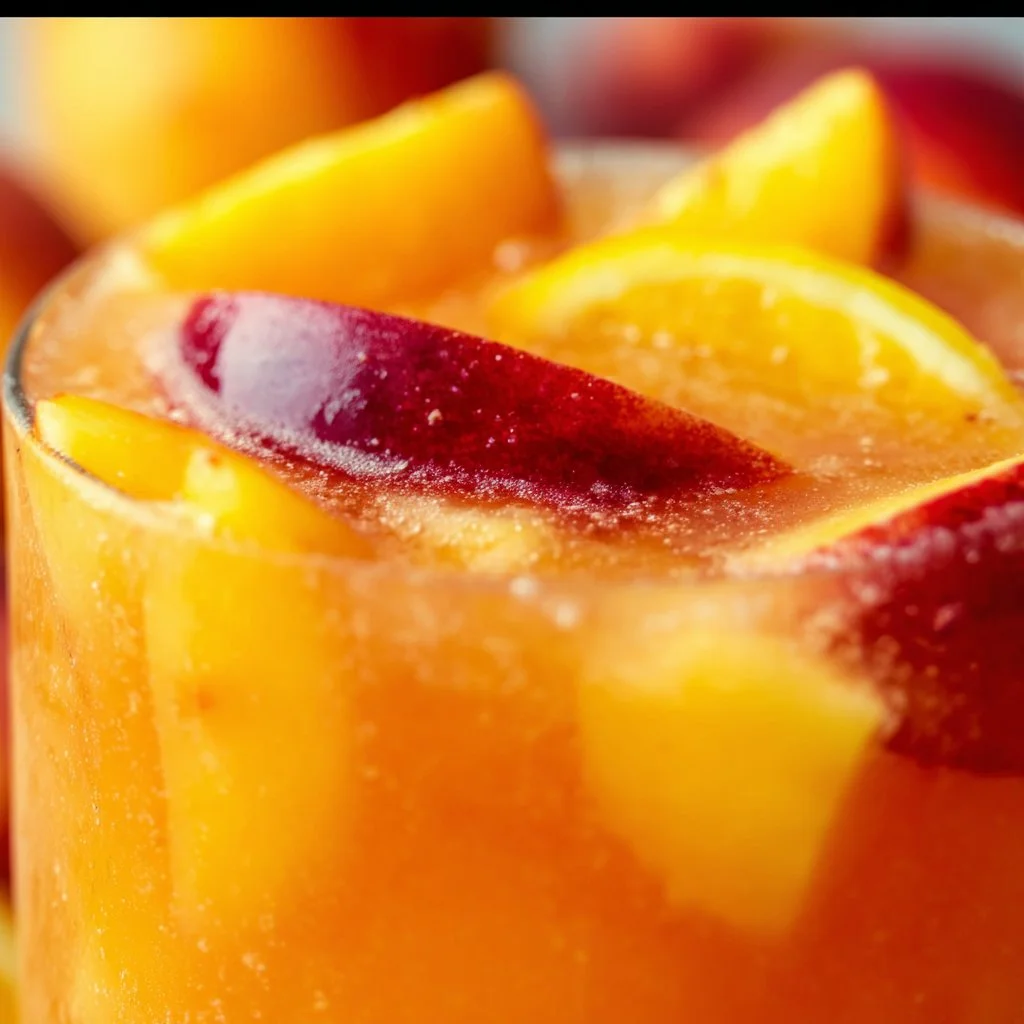
Peach Lemonade
Refreshing Peach Lemonade: A Perfect Summer Sipper!
Hey there, fellow foodies! Let’s get ready to sip on sunshine with a vibrant and refreshing recipe that’s perfect for those warm summer days—Peach Lemonade! Imagine sitting on your porch, the sun shining down, and this delightful drink in your hand, infusing your summer with sweetness and zest. A combination of juicy peaches and zesty homemade lemonade, this drink meets summertime bliss head-on.
A Taste of Nostalgia
Before we dive into the recipe, let me take you on a little stroll down memory lane! Growing up in a small town, summer meant one thing: playing outside until the sun went down. After long days at the park or bike rides on dusty roads, my friends and I would stumble home, parched and sun-kissed, eager to quench our thirst. That was when my mom would whip up her famous lemonade, the chatter in the kitchen mixing with the sound of ice clinking in a glass.
But here’s the twist: my mom’s secret ingredient was always fresh peaches from our backyard tree. We’d slice them up and toss them into the lemonade, creating a drink that was both refreshing and a reminder of the best days of summer. Each sip was a celebration of flavors—sweet, tangy, and utterly delightful!
This recipe is a homage to those carefree days of laughter, sun, and oh-so-delicious peach lemonade. So let’s head into the kitchen and make some refreshing memories together!
Ingredients
Here’s what you’ll need to whip up this luscious drink:
-
1 recipe Homemade Lemonade (or 8 cups of your favorite lemonade)
Homemade is always best! You can create a bright and zesty lemonade using freshly squeezed lemons, sugar, and water. If time is of the essence, feel free to grab your favorite store-bought lemonade. Just be sure to check for no added preservatives! -
4-5 ripe peaches
Look for peaches that are fragrant and slightly soft to the touch. Their juicy sweetness is what makes this drink sing! If peaches are out of season, nectarines can be a fantastic alternative, delivering a similarly sweet flavor. -
1 tablespoon fresh mint
Fresh mint will give a lovely aroma and a refreshing finish to your lemonade. If mint isn’t quite your thing, you can swap it out with fresh basil or even a splash of vanilla for a different twist! -
Additional mint for garnish
A few sprigs of mint on top of each glass add some beautiful color and a pop of freshness. Plus, it just looks downright fancy!
Step-by-Step Instructions
Ready to mix up this delightfully refreshing Peach Lemonade? Here’s how you do it:
-
Make the Lemonade: If you’re going the homemade route, squeeze about 1 ½ cups of fresh lemons to get that invigorating juice. Mix it with 1 cup of granulated sugar (or a sweetener of your choice) and 6 cups of water. Stir until the sugar is dissolved, and voila! A refreshing lemonade that will make you want to drink it by the gallon!
Chef’s Tip: For a more robust lemon flavor, let the lemonade chill in the fridge for about an hour before adding the peaches.
-
Prepare the Peaches: Take 4-5 ripe peaches, wash them well, and slice them into thin wedges. If you’re feeling adventurous, peel them for a smoother texture, but the skin holds a lot of flavor, so I prefer leaving it on.
Chef’s Note: If you’re using slightly under-ripe peaches, you can throw them in a bowl and add a sprinkle of sugar to help draw out their juices. Let them sit for about 15 minutes.
-
Combine Ingredients: In a large pitcher, combine your fresh lemonade with the sliced peaches. Give it a gentle stir to make sure the fruity goodness is well distributed.
-
Add Mint: Chop your tablespoon of fresh mint and add it to the pitcher. This will add a refreshing aroma that elevates the lemonade to new heights!
-
Chill & Serve: Let it sit in the fridge for about 30 minutes before serving. This helps all the flavors to marry beautifully. When you’re ready, fill glasses with ice, pour in your peach lemonade, and top with a sprig of fresh mint for that Instagram-worthy finish!
Chef’s Hack: Don’t discard those peach slices! Utilize them as a garnish in your glasses for a beautiful and inviting presentation.
Serving Suggestions
Serve the Peach Lemonade over ice in nice, tall glasses. For a festive touch, consider using mason jars or colorful cups that reflect the joyful essence of summer. Add a slice of lemon on the rim and a few peach slices floating in the drink to really showcase those beautiful, juicy fruits. Not only will it look fabulous, but every sip will also be packed with flavors!
For an extra treat, you could also pair this refreshing drink with some homemade lemon bars or a light summer salad. The lemonade’s fruity vibe would complement grilled chicken or a fresh seafood dish beautifully!
Recipe Variations
Feeling adventurous? Here are some fun twists and variations to shake things up:
-
Berry Peach Lemonade: Add a handful of fresh berries like strawberries or blueberries alongside the peaches for a mixed berry sensation.
-
Spicy Ginger Peach Lemonade: For a kick, muddle some fresh ginger with the mint before adding it to the lemonade. It’ll add a spicy zing that complements the sweetness of the peaches perfectly!
-
Sparkling Peach Lemonade: Turn your combination into a fizzy delight! Replace half of the water with sparkling water for a bubbly touch.
-
Peach Basil Lemonade: Substitute mint with fresh basil for a slightly herbal profile that pairs deliciously with the sweetness of the peaches.
-
Peach Lemonade Sangria: Got friends over? Add a splash of white wine or rosé for a peachy sangria twist. Just let it chill a little longer for the flavors to mingle.
Chef’s Notes
Creating Peach Lemonade is more than just following a recipe; it’s about celebrating the flavors of summer. When I make this drink, I often reminisce about those laid-back afternoons spent with family and friends gathered around the table, laughter ringing through the air. It’s quite simple to prepare yet so rewarding, making it the perfect refresher to please any crowd.
Over the years, I’ve tried various fruits and flavor combinations, but the classic peach and lemon blend always calls me back home. Each summer, I look forward to the moment I can step outside, pick those luscious peaches, and recreate the magic all over again.
FAQs and Troubleshooting
1. My lemonade is too sweet! What can I do?
If your lemonade has turned out sweeter than anticipated, simply add a splash more lemon juice or a little water to balance out the sweetness.
2. Can I use frozen peaches?
Absolutely! Frozen peaches can work in a pinch. They’ll give a slightly different texture but still taste fantastic. Just be sure to thaw and drain any excess liquid before adding them to the lemonade.
3. How long can I store the Peach Lemonade?
You can store it in the fridge for about 3-4 days. Just be aware that over time, the peaches might break down, so give it a quick stir before serving.
4. What if I don’t like mint?
No sweat! You can easily swap out mint for fresh basil or just omit it altogether. The lemonade will still be delightful!
Nutritional Info (per serving)
While we often discuss the deliciousness of the recipe, let’s not forget about the nutritional value! This refreshing Peach Lemonade is:
- Calories: Around 130 calories
- Fat: 0g
- Carbohydrates: 34g
- Sugars: 26g (natural sugars from peaches and added sugar in lemonade)
- Protein: 1g
Basic hydration is brought to you with a healthy dose of Vitamin C from the lemons, and the peaches contribute some dietary fiber, vitamins A and C, and antioxidants. So sip on this refreshing goodness guilt-free!
Final Thoughts
So there you have it, friends! A simple yet uplifting drink that’s perfect for those hot summer days that seem to linger just a little longer. This Peach Lemonade is not just a beverage; it’s a trip down memory lane, a reminder of joyful summer days spent with loved ones, and an invitation to create new memories.
So grab those peaches, squeeze some lemons, and pour yourself a tall glass of sunshine! Here’s to making every day a little sweeter and a whole lot brighter! Cheers! 🍑🍋✨
Happy sipping and stay tuned for more delicious adventures here at Feastical!
Print
Refreshing Peach Lemonade
- Total Time: 45 minutes
- Yield: 4 servings 1x
- Diet: Vegetarian
Description
A vibrant and refreshing Peach Lemonade that combines juicy peaches with zesty homemade lemonade, perfect for summer days.
Ingredients
- 1 recipe Homemade Lemonade (or 8 cups of your favorite lemonade)
- 4–5 ripe peaches
- 1 tablespoon fresh mint
- Additional mint for garnish
Instructions
- Make the Lemonade: If you’re going the homemade route, squeeze about 1 ½ cups of fresh lemons to get that invigorating juice. Mix it with 1 cup of granulated sugar (or a sweetener of your choice) and 6 cups of water. Stir until the sugar is dissolved, and voila!
- Prepare the Peaches: Take 4-5 ripe peaches, wash them well, and slice them into thin wedges. If you’re feeling adventurous, peel them for a smoother texture.
- Combine Ingredients: In a large pitcher, combine your fresh lemonade with the sliced peaches. Give it a gentle stir to distribute the fruity goodness.
- Add Mint: Chop your tablespoon of fresh mint and add it to the pitcher for a refreshing aroma.
- Chill & Serve: Let it sit in the fridge for about 30 minutes before serving. Fill glasses with ice, pour in your peach lemonade, and top with a sprig of mint!
Notes
For a kick, muddle some ginger with mint for Spicy Ginger Peach Lemonade. Store in the fridge for 3-4 days.
- Prep Time: 15 minutes
- Cook Time: 0 minutes
- Category: Beverage
- Method: Mixing
- Cuisine: American
Nutrition
- Serving Size: 1 serving
- Calories: 130
- Sugar: 26g
- Sodium: 0mg
- Fat: 0g
- Saturated Fat: 0g
- Unsaturated Fat: 0g
- Trans Fat: 0g
- Carbohydrates: 34g
- Fiber: 1g
- Protein: 1g
- Cholesterol: 0mg
Keywords: peach, lemonade, summer drink, refreshing beverage, homemade lemonade
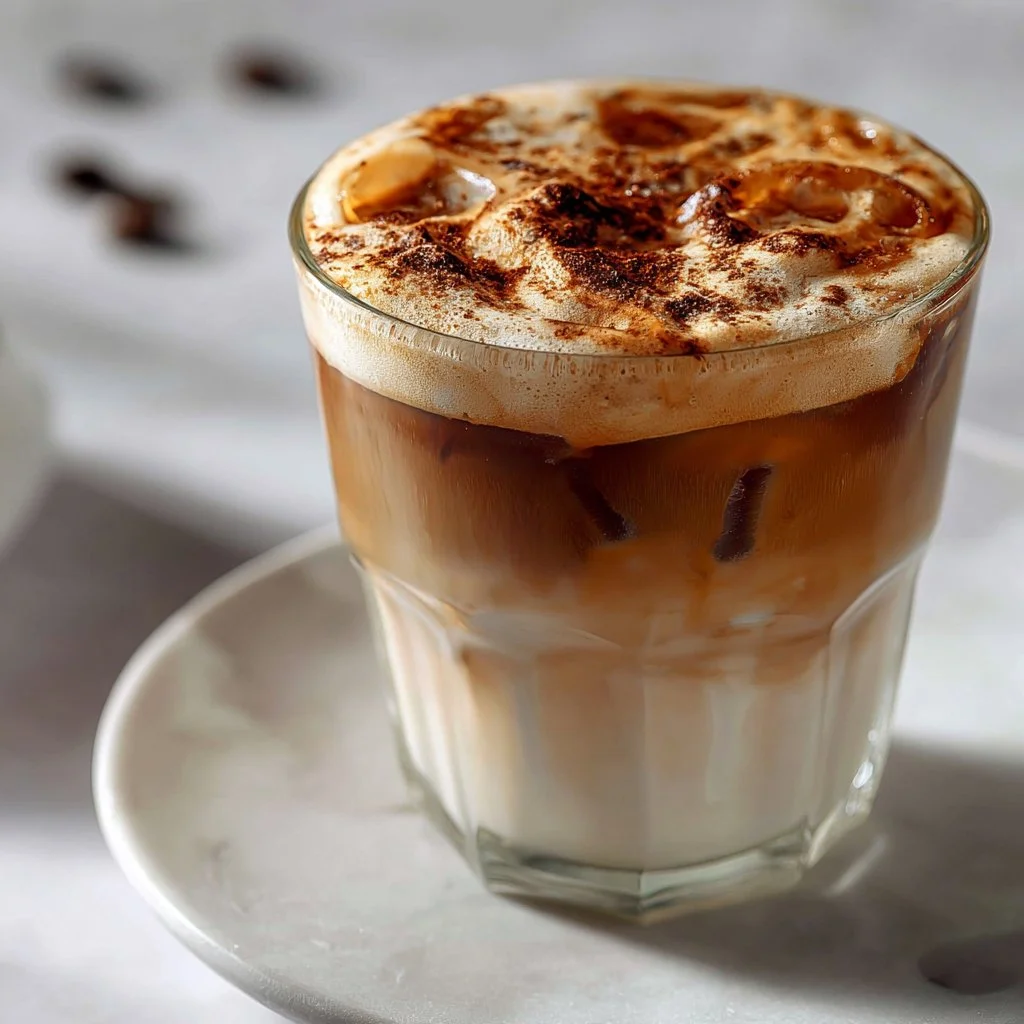
Vanilla Iced Latte Recipe
How to Make the Perfect Vanilla Iced Latte: A Cool Treat for Every Coffee Lover
Hey there, coffee lovers! 🌟 Welcome to another delicious adventure here at Feastical! If you’re anything like me, you’re always on the lookout for that perfect pick-me-up, especially during those warm, sunny days when just a hot cup of coffee doesn’t cut it. Enter the vanilla iced latte—a heavenly marriage of rich espresso, creamy milk, and a splash of sweet vanilla that’ll have you feeling refreshed and ready to conquer your day!
Why do I love vanilla iced lattes? Not only are they ridiculously easy to make, but they also deliver that perfect blend of caffeine and sweetness that we all crave. And let’s face it—there’s something downright comforting about that creamy, dreamy texture. Today, I’m here to walk you through the ins and outs of this delightful beverage, sharing stories, tips, and all my favorite kitchen hacks along the way. Grab your favorite mug or a tall glass, and let’s dive in!
As we embark on this coffee journey together, I’ll share a personal story that makes this vanilla iced latte recipe truly special to me. You see, it wasn’t just a random drink I stumbled upon one summer afternoon; it holds a beautiful memory that feeds the soul just as much as the coffee itself! So sit back, relax, and let’s whip up your new favorite beverage.
Personal Story
Let me take you back to one of my favorite summers, an unforgettable time that blossomed into a sweet tradition. I was in college, juggling classes, a part-time job, and a burgeoning passion for everything delicious. One day, my best friend Sarah and I decided that we needed a little pick-me-up. As we scoured our local coffee shop’s menu, we stumbled upon this magical drink called a vanilla iced latte.
Intrigued, we ordered two and found a cozy spot outside to soak in the sunshine. That first sip was pure bliss—the rich espresso melded with the creamy milk and the subtle hint of vanilla danced on our taste buds like a sweet serenade. We spent the afternoon sharing dreams and giggles, taking turns sipping from each other’s cups, and talking about our future adventures together.
From that day on, the vanilla iced latte became our summer ritual. We’d chase the heat with our favorite icy brews, swapping stories and plans while finding comfort in our shared love of food and drink. To this day, every time I blend up a fresh batch of vanilla iced lattes, I feel like I’m transported back to those sun-soaked afternoons, savoring each brave step into adulthood with a delicious drink in hand. And now, I can’t wait to share this recipe with all of you so you can create your own delicious memories!
Ingredients
Before we jump into making this delightful beverage, let’s gather our ingredients—these are the stars of the show! Here’s what you’ll need:
-
2 shots freshly brewed espresso
Coffee lovers rejoice! Espresso packs a rich punch with that concentrated flavor. If you don’t have an espresso machine, you can brew a strong coffee as a substitute, but espresso is the real deal! -
1 to 2 tablespoons vanilla syrup
Here’s where the magic happens! Vanilla syrup adds that sweet, aromatic touch. Feel free to go store-bought (trust me, there are tons of great options) or make your own at home with sugar, water, and vanilla extract. -
1 cup whole milk (or milk alternative)
Whole milk provides a creamy texture but don’t hesitate to swap it out for oat, almond, or soy milk if you have dietary preferences or just want to mix things up! They all have their unique charm. -
Ice cubes
Grab enough to fill a tall glass! Because who can resist that satisfying crunch of ice once you pour in that chilled latte? -
Optional: whipped cream for topping
Treat yourself a little! A dollop of whipped cream not only looks fabulous but also adds a rich and creamy finish that elevates this drink to another level.
Step-by-Step Instructions
Now that we have our ingredients ready, let’s get down to business! Here’s how to whip up your own refreshing vanilla iced latte step-by-step:
Step 1: Brew Your Espresso
- Start by brewing your 2 shots of espresso. If you have an espresso machine, this should take just a few moments! The aroma is enchanting, and I can already envision that silky texture. If you’re using a strong drip coffee instead, brew it twice as strong as your regular coffee.
Step 2: Prepare Your Glass
- While the espresso is brewing, grab a tall glass and fill it with ice cubes. This is key! The ice will keep your drink refreshingly cool. Plus, it’s a visual delight to see those cubes sparkling in the sunlight!
Step 3: Mix in Vanilla Syrup
- Once your espresso is ready, pour it directly over the ice in the glass. The heat will start melting the ice, which is perfect! Then, add in your 1 to 2 tablespoons of vanilla syrup. Start with one tablespoon, taste, and add more if you like it sweeter—everyone’s taste is different!
Step 4: Add the Milk
- Next, pour in your milk of choice! Be mindful of the proportions—we want that luscious balance between milk and espresso. A cup usually does the trick. You’ll see the beautiful colors swirling together, kind of like a tasty coffee lava lamp!
Step 5: Stir and Taste
- Give everything a gentle stir to combine the layers and let the flavors mingle. If you want, you can adjust the sweetness at this stage by tossing in a bit more vanilla syrup. Sip and smile, my friends!
Step 6: Optional Whipped Cream Topping
- If you’re feeling fancy (and who doesn’t?), top your vanilla iced latte with a generous dollop of whipped cream. It’s perfect for those Instagram moments—or just for treating yourself!
Step 7: Enjoy!
- Grab a stirring straw or just dive in with a spoon to enjoy every sip. Sit back, relax, and let yourself be transported to coffee bliss. You’ve earned this!
Serving Suggestions
Now that your delicious vanilla iced latte is ready, how do we take it to the next level? Serving it in a tall, clear glass showcases those stunning layers, making it a feast for the eyes as well! Consider garnishing with a sprinkle of cinnamon or a drizzle of caramel sauce for an extra touch of magic.
Pair your latte with a little something sweet—a cookie, scone, or even a slice of cake—and you’ve got yourself the ultimate cozy coffee break. Perfect for a lazy afternoon or as a little pick-me-up before diving into your next task. Just imagine yourself sipping this on your porch, soaking in the sunshine. Now that’s living!
Recipe Variations
Feeling adventurous? Here are some creative twists and variations to elevate your vanilla iced latte:
-
Mocha Magic: Mix in 1 tablespoon of chocolate syrup along with the vanilla syrup to create a decadent vanilla mocha iced latte that’ll make your chocolate-loving heart happy.
-
Nutty Delight: Swap out vanilla syrup for hazelnut syrup or almond syrup to add a nutty and aromatic flavor profile. You can even blend in some crushed nuts for an extra crunch!
-
Spiced Iced Latte: Add a sprinkle of ground cinnamon or nutmeg to the mix for a warm spice note that balances beautifully with the creamy vanilla.
-
Classic Caramel Twist: Drizzle caramel syrup in with the vanilla to create a luscious caramel vanilla iced latte that’s pure indulgence!
-
Dairy-Free Delights: If you’re looking for a lighter option, replace the milk with coconut milk for that breeze of tropical flavor. Not to mention, it pairs fantastically with the vanilla.
Chef’s Notes
Every recipe tells a story, and the vanilla iced latte’s story has definitely evolved over time. While I treasure my initial summer memories with Sarah, I’ve crafted different ways to enjoy this iconic drink, and it seems like every year, I discover a new twist that makes it uniquely my own. It’s amazing how a simple recipe can remind us of moments in time and inspire creativity in the kitchen. I always encourage you to play with flavors and explore what makes you happy. Remember: Cooking is all about enjoying the process and creating memories!
FAQs and Troubleshooting
Let’s tackle some common questions and potential hiccups you might encounter while making your vanilla iced latte:
-
What if my espresso is too bitter?
If your espresso is more bitter than you’d like, try adjusting the brewing time or the grind size. A fine grind can lead to over-extraction, so adjust accordingly. You can also add more milk or sweetener to balance it out. -
Can I make this latte ahead of time?
Absolutely! You can brew the espresso and store it in the fridge. When you’re ready to enjoy, just pour over ice and add your milk and vanilla syrup. Easy-peasy! -
What if I’m out of vanilla syrup?
No worries! You can easily make your own at home with equal parts sugar and water, simmered until the sugar dissolves, then mixed with a teaspoon or two of vanilla extract. Voilà—homemade vanilla syrup! -
How do I adjust the sweetness?
Simply taste as you go! Add vanilla syrup until you reach your desired flavor. You can also experiment with other sweeteners like honey or agave syrup if you prefer something different.
Nutritional Info
Alright, let’s break down the deliciousness in your vanilla iced latte. Here we go with a standard version using whole milk and 2 tablespoons of vanilla syrup (note that values may vary based on your ingredients):
- Calories: Approximately 220-270 calories
- Protein: 8-10g
- Carbohydrates: 25-30g
- Fat: 9-12g
Want to make it lighter? Opt for a milk alternative, which can lower the calories and fat content! Keep in mind that the exact values will vary depending on your choices and portion sizes.
Final Thoughts
And there you have it, my friends! Your very own delightful vanilla iced latte recipe that’s sure to become a staple in your coffee repertoire. Whether you’re sipping it solo, sharing with friends, or enjoying it during your well-deserved downtime, this treat is bound to spark joy and warmth.
So next time you’re feeling the afternoon slump or just want to treat yourself, remember this recipe! I hope it brings you comfort, coolness, and a sprinkle of joy just like it did for me. Now go forth, whip up those lattes, and create your own beautiful memories! Cheers to flavorful adventures, friends! 🥤✨
Print
Perfect Vanilla Iced Latte
- Total Time: 10 minutes
- Yield: 1 serving 1x
- Diet: Vegetarian
Description
A refreshing vanilla iced latte, a perfect blend of espresso, creamy milk, and sweet vanilla, ideal for warm days.
Ingredients
- 2 shots freshly brewed espresso
- 1 to 2 tablespoons vanilla syrup
- 1 cup whole milk (or milk alternative)
- Ice cubes
- Optional: whipped cream for topping
Instructions
- Brew your espresso by making 2 shots. If using drip coffee, brew it twice as strong.
- Prepare a tall glass filled with ice cubes to keep your drink cool.
- Pour the brewed espresso over the ice, then add vanilla syrup to taste.
- Add your milk, balancing milk and espresso for desired creaminess.
- Stir gently to mix and combine flavors; adjust sweetness if needed.
- Top with whipped cream, if desired.
- Enjoy! Dive in and savor every delicious sip!
Notes
Consider garnishing with a sprinkle of cinnamon or caramel for an extra touch. Perfect to pair with cookies or cake.
- Prep Time: 5 minutes
- Cook Time: 5 minutes
- Category: Beverage
- Method: Brewing
- Cuisine: American
Nutrition
- Serving Size: 1 serving
- Calories: 250
- Sugar: 14g
- Sodium: 100mg
- Fat: 10g
- Saturated Fat: 6g
- Unsaturated Fat: 4g
- Trans Fat: 0g
- Carbohydrates: 30g
- Fiber: 0g
- Protein: 7g
- Cholesterol: 30mg
Keywords: iced latte, coffee, vanilla, summer drink, refreshing beverage
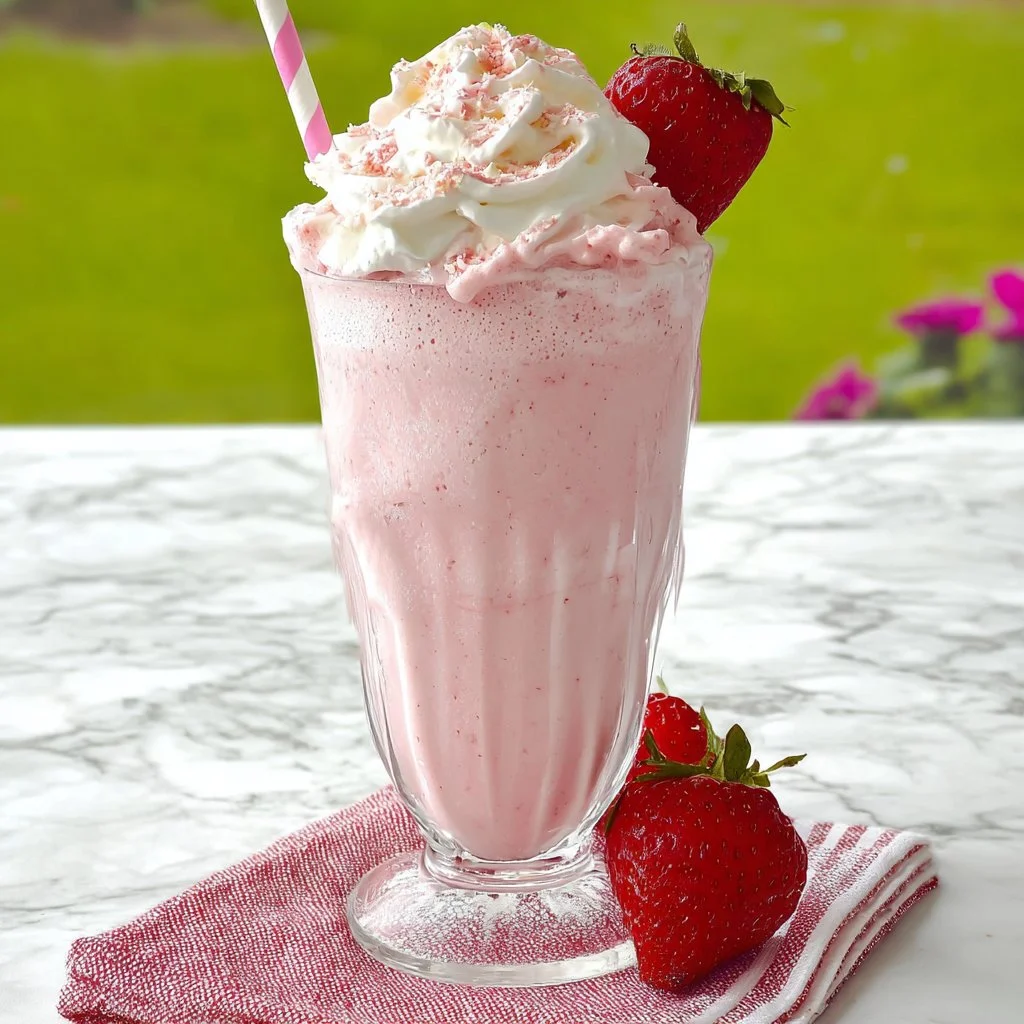
Strawberry milkshake
Dive into Deliciousness: The Perfect Strawberry Milkshake!
Hey there, fellow foodies! 👋 I’m Beau Collier, and I’m beyond thrilled to welcome you to Feastical – your go-to spot for feel-good food! Today, we’re going to whip up a treat that’s not just a hit during sweltering summer days but also a nostalgic blast from the past: the quintessential Strawberry Milkshake! 🍓🥛
Picture this: It’s a sunny Saturday afternoon, the sun is shining, and the ice cream truck has just rolled into your neighborhood. You can hear the sweet chimes echoing down the block, beckoning you to come out and enjoy a cold, creamy delight. Memories of floating in a blissful sugar cloud, sipping on a milkshake while lounging in the shade, brings a smile to my face. It’s a tradition that unites us all, transcending age and time. Who can resist the charming, rosy-violet swirl of strawberries and creams against that cool, creamy backdrop?
This delightful drink isn’t just a treat; it’s an experience, a feeling! It’s all about blending memories with a bit of creativity while keeping it simple—and oh so satisfying. Today, we’ll concoct a strawberry milkshake that’s creamy, dreamy, and ready to become your new favorite summer staple.
Let’s gather our ingredients, dust off that blender, and get ready to explore a world of luscious flavors! 🎉
Personal Story
Growing up, my summers were often punctuated by family outings to the local diner, where I’d always order the same thing: a classic strawberry milkshake. I can still hear the sound of the blender whirring away, the scent of fresh strawberries wafting through the air, and the giddy excitement bubbling in my stomach as I waited for my frosty treat to arrive. 🍦🍓
It wasn’t just about the delicious strawberry flavor; it was the experience of sharing laughter with my family around a tall, frosty glass. I fondly remember how my little sister would try to steal sips from my shake, her tiny curly head popping up over the table like a mischievous sprite. That was the magic of those summer days—food not just as nourishment, but as a vessel for joy and connection.
Now, every time I whip up a strawberry milkshake, I’m catapulted back to those carefree days spent with loved ones. I love inviting friends over for shake parties, experimenting with variations, and creating new memories to layer on top of the fond ones I already cherish. So, let’s get started with a recipe that’s sure to make your heart—and taste buds—sing!
Ingredients
Let’s gather our ingredients! For this strawberry milkshake, you’ll need:
- 2 cups of ice cream: Vanilla is classic, but feel free to explore strawberry or even coconut for a tropical twist! Ice cream is what makes this drink ultra-creamy and delicious.
- 1 cup of frozen strawberries: Using frozen berries ensures a frosty, thick milkshake. If strawberries aren’t available, try frozen raspberries or mixed berries.
- ½ cup of cold milk: You can use regular cow’s milk or any non-dairy alternative like almond or oat milk. Adjust the amount depending on how thick you want your shake!
- Whipped cream: Always a crowd-pleaser! It adds an airy sweetness that’s irresistible. Don’t skimp out here!
- Maraschino cherries: These little beauties are the cherry on top—literally! They’re sweet, colorful, and add a nostalgic charm.
Step-by-Step Instructions
Alright, my friends! Grab your blender and put on your apron because it’s time to create this dreamy strawberry milkshake step by step!
Step 1: Gather Your Gear
Begin by gathering all your ingredients, a blender (or a milkshake maker if you’ve got one), and a tall glass to pour your gorgeous milkshake into. Trust me, this step makes everything smoother and much more enjoyable. No one likes running around looking for the spatula when creativity is flowing!
Step 2: Blend It All Together
Start by adding 2 cups of ice cream to your blender. This acts as the base and gives the milkshake its creamy texture. Then, toss in your 1 cup of frozen strawberries. The mix of salty-sweet strawberries with decadent ice cream is pure nostalgia in its best form!
Next, pour in ½ cup of cold milk. You can always adjust this amount later if you prefer a thicker or milkier shake. If you want to get fancy, you can consider vanilla almond milk or another milk substitute to add different flavors.
Step 3: Blend, Baby, Blend!
Now, secure the lid and blend it all together on high speed until it’s smooth and well-combined. You’re looking for a thick yet pourable consistency. If necessary, you can stop blending and give it a little stir with a spatula to ensure everything is nicely mixed. When that beautiful strawberry-pink color emerges, you’ll know you’re getting close! 🥤
Step 4: Check and Adjust
Take a quick taste-test! If it’s not sweet enough for your liking, feel free to add a spoonful of sugar or a drizzle of honey and blend once more. If it’s too thick, just add a splash of milk until happy with the texture!
Step 5: Serve It Up!
Once you’re satisfied with your milkshake, pour it into your favorite tall glass. Don’t be shy; fill it to the brim! Now, it’s time for the fun part—topping it off! Pile on some luscious whipped cream, and for the pièce de résistance, add a maraschino cherry on top. 🍒
For extra flair, feel free to sprinkle crushed graham crackers or drizzle chocolate syrup over the whipped cream for a delicious finish!
Serving Suggestions
Presentation is half the fun! When serving your strawberry milkshake, opt for tall glasses that showcase the creamy pink layers. A fun milkshake straw will not only add whimsy but enhance the experience.
Feel free to pair your milkshake with a slice of freshly baked strawberry shortcake or even a luscious brownie. It makes for a delightful treat that’s perfect for sharing—or not! 😉
Recipe Variations
Got a little creative flair? Here are some fun variations to jazz up your basic strawberry milkshake:
- Chocolate Strawberry Milkshake: Add two tablespoons of chocolate syrup into the blender for a rich and decadent combo.
- Strawberry Banana Milkshake: Toss in half of a ripe banana for an extra creamy texture and delicious flavor party!
- Nutty Twist: Add a tablespoon of almond or peanut butter for that nutty flavor—perfect if you want some protein in your treat.
- Dairy-Free Delight: Use coconut milk and dairy-free ice cream for a delicious vegan option!
- Strawberry Cheesecake Milkshake: Add 1-2 tablespoons of cream cheese for a cheesecake-inspired twist.
Chef’s Notes
When I first started making milkshakes, little did I know how many variations I’d stumble upon! Back in my day, we’d simply toss everything into the blender—no measurement, just a heart full of flavor. This milkshake has evolved, taking on different flavors, and is now enjoyed with friends and family.
Every time I shake things up in the kitchen, I remember how food isn’t just about sustenance—it’s a connection, a story unfolding with every sip. If you twirl a straw in the cup while reminiscing, it brings back sweet memories you didn’t even know were waiting for a moment to resurface. So let those memories flow!
FAQs and Troubleshooting
Here are some common questions and potential pitfalls you may encounter while making your strawberry milkshake:
-
Why is my milkshake too thin?
If your milkshake is runny, you can add more ice cream or frozen strawberries to thicken it up. Just blend it again until mixed! -
Can I use fresh strawberries instead of frozen?
Yes, absolutely! Just add a handful of ice cubes to maintain the shake’s frosty texture. Fresh berries can be a bit more watery, so adjust the milk accordingly. -
How long can I store leftovers?
Ideally, enjoy it fresh! But if you have leftovers, store them in an airtight container in the freezer. Just remember to let it sit out for a few minutes before trying to drink it again! -
What’s the best way to clean my blender?
Rinse the blender immediately after use; then fill it with warm water and a drop of dish soap. Blend for about 30 seconds, rinse again, and you’re done!
Nutritional Info
A classic strawberry milkshake can serve as a delightful treat, but let’s see what we’re working with. Here’s the estimated nutritional info per serving (about 1 large milkshake):
- Calories: ~450-600 (varies with ice cream type)
- Total Fat: ~20g
- Saturated Fat: ~12g
- Cholesterol: ~80mg
- Carbohydrates: ~65g
- Sugars: ~50g
- Protein: ~10g
This nutritional info can certainly vary based on your ingredient choices and any delicious variations you decide to whip up!
Final Thoughts
There you have it, friends! Your ultimate guide to whipping up a stunning Strawberry Milkshake—a beautiful blend of nostalgia, joy, and flavor that adults and kids alike can enjoy. Whether you’re sipping it solo, sharing with a friend, or serving up smiles at a summer gathering, each shake tells a story—a promise of sweetness and memories waiting to happen.
So grab that straw, dive into a glass of vintage, fruity goodness, and create your delicious moments. Remember, food should bring smiles and connection while making life a little sweeter. Until next time, happy blending and even happier eating! Cheers! 🥤❤️
Print
Perfect Strawberry Milkshake
- Total Time: 5 minutes
- Yield: 1 serving 1x
- Diet: Vegetarian
Description
A creamy and dreamy strawberry milkshake that brings back nostalgic summer memories.
Ingredients
- 2 cups vanilla ice cream
- 1 cup frozen strawberries
- ½ cup cold milk
- Whipped cream
- Maraschino cherries
Instructions
- Gather your gear including all ingredients, a blender, and a tall glass.
- Blend 2 cups of ice cream in the blender, then add 1 cup of frozen strawberries.
- Pour in ½ cup of cold milk and adjust to your desired thickness.
- Blend it all together until smooth and well-combined.
- Check the sweetness and adjust if needed, then blend again.
- Serve in a tall glass and top with whipped cream and a maraschino cherry.
Notes
Consider adding toppings like crushed graham crackers or drizzling chocolate syrup for extra flair.
- Prep Time: 5 minutes
- Cook Time: 0 minutes
- Category: Dessert
- Method: Blending
- Cuisine: American
Nutrition
- Serving Size: 1 large milkshake
- Calories: 500
- Sugar: 50g
- Sodium: 100mg
- Fat: 20g
- Saturated Fat: 12g
- Unsaturated Fat: 6g
- Trans Fat: 0g
- Carbohydrates: 65g
- Fiber: 1g
- Protein: 10g
- Cholesterol: 80mg
Keywords: strawberry milkshake, dessert, summer treat, nostalgic drink, creamy shake
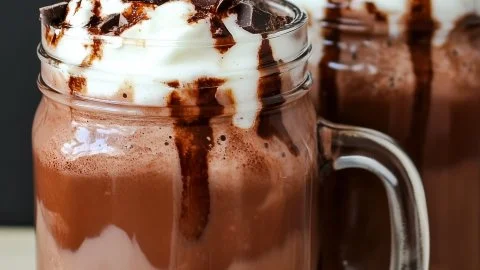
The Best Frozen Hot Chocolate
# The Best Frozen Hot Chocolate: A Chill Twist on a Classic Delight

## Introduction

Hey there, fellow foodies! If there’s one drink that perfectly bridges the gap between warmth and coolness, it has to be **frozen hot chocolate**. That magical concoction that screams indulgence is a delightful treat to sip on, regardless of the season. Today, we're diving deep into the world of this delicious drink that gives a nostalgic nod to cozy nights spent with friends, yet adds a refreshing twist perfect for sizzling summer days.

Picture this: a balmy summer evening, the sun setting in hues of pink and gold, and a group of friends gathered around, laughing animatedly. Suddenly, a tray of frozen hot chocolates appears, garnished with fluffy whipped cream and drizzled with rich chocolate syrup. There’s nothing quite like that chocolatey goodness in a chilled version to take your taste buds on a rollercoaster ride of flavors. Let’s just say, we’ve come a long way from those pesky powdered mixes we used to rely on! My mission today is to guide you through making the best frozen hot chocolate that will leave your taste buds saying, “Oh my cocoa goodness!”

No need to be a master chef here—what I love about this recipe is its simplicity. It’s all about celebrating the joy of creating something delicious, one spoonful at a time. Whether you’re looking to cool off on a hot day or whip up a fun treat for friends, this frozen hot chocolate is your ticket to dessert heaven. So, grab your blender, and let’s get to it!

---

## Personal Story

You know, I’ve always had a soft spot for hot chocolate. As a kid, nothing felt better than coming home from a chilly day outside, cheeks flushed, and sipping a warm cup of cocoa while nestled beneath a cozy blanket. Fast forward to my college years, where that same comforting drink evolved into something more adventurous. One chilly evening, my friend Jess and I had a little spontaneous gathering. Armed with a blender and a love for chocolate, we decided it was time we brought summer to winter with frozen hot chocolate.

With just a few simple ingredients, our late-night concoction transformed into a decadent dessert drink that had everyone swooning. To this day, that evening remains etched in my memory—not just because of the drink itself, but because of the laughter and joy we shared. It was a reminder of how food has the incredible power to unite us. And now, I’m thrilled to pass that joy on to you with my version of the **Best Frozen Hot Chocolate**!

---

## Ingredients

Here’s what you’ll need to whip up this frosty delight:

- **3½ cups ice**
  The backbone of your frozen drink; use crushed or cubed ice, depending on what you have on hand! Crush it up if you prefer a smoother texture.

- **2 cups milk (dairy or non-dairy)**
  Feel free to use your favorite milk—whole, almond, coconut, or oat milk work wonderfully. Each brings a different flavor, so go with what suits your taste!

- **4 packets hot cocoa mix**
  Grab your favorite brand or make homemade hot cocoa mix if you want to take it up a notch! (I’ll share a simple recipe for a DIY hot cocoa mix below!)

- **2 tablespoons chocolate syrup**
  This gives our frozen hot chocolate that irresistible chocolatey kick! Use store-bought or make your own for a richer taste.

- **2 teaspoons vanilla extract**
  A splash of vanilla brightens the flavors and takes this drink from good to phenomenal. Fresh vanilla pods work too for gourmet flair!

- **Whipped cream (for topping)**
  Because what’s a dessert drink without a cloud of whipped goodness on top? You can use store-bought or whip up your own at home.

- **Extra chocolate syrup (optional, for drizzle)**
  Go ahead and get a little extra with chocolate syrup drizzled on top of that whipped cream for an Instagram-worthy finish!

---

## Step-by-Step Instructions

Alright, let’s bring it all together! Here’s a straightforward guide to creating your **Best Frozen Hot Chocolate**.

1. **Blend the Base**
   Begin by grabbing your blender. Throw in the 3½ cups of ice, 2 cups of your chosen milk, and the 4 packets of hot cocoa mix. Don’t hold back on the blending; we’re going for a frosty, creamy consistency. Start on low and gradually increase the speed. A minute should do it, but feel free to blend longer for a smoother texture. *Chef’s hack:* If the mixture is too thick, add a splash more milk!

2. **Add in the Good Stuff**
   Next, drizzle in those 2 tablespoons of chocolate syrup and 2 teaspoons of vanilla extract. Keep blending until all the ingredients are well incorporated. You’ll notice the mixture turning smooth and velvety. *Tip:* Taste for sweetness! This is when you can adjust by adding more chocolate syrup or cocoa, depending on how rich you want it.

3. **Serve it Up**
   Grab your favorite glasses—yes, presentation matters! You can chill them in the freezer for a bit if you like. Pour the blended mixture into the glasses, filling each one to the brim. It’s fine—everyone deserves extra!

4. **The Crown Jewel: Whipped Cream**
   Top each drink with a generous swirl of whipped cream. Go wild here! The fluffier, the better! *Chef's insight:* For an extra treat, sprinkle some cocoa powder or chocolate shavings on top to jazz it up.

5. **Drizzle on Extra Chocolate**
   If you’re feeling adventurous (and I know you are!), finish off with a drizzle of chocolate syrup over the whipped cream. It’s the cherry on top for this dessert drink!

---

## Serving Suggestions

Now that your **frozen hot chocolate** is ready, it’s time to serve it up with style! You can consider these fun options:

- **Garnish with Chocolate Shavings or Sprinkles**
  Before you present these delicious drinks to your guests, adding chocolate shavings or fun sprinkles gives a delightful visual touch. Kids and adults alike go crazy for those!

- **Pair with a Side Treat**
  Serve these beauties alongside a crispy cookie or a slice of cake. Imagine dunking a buttery shortbread cookie into that chocolatey goodness—heavenly!

- **Create a Frozen Hot Chocolate Bar**
  Set up a DIY station where guests can customize their drinks with flavored syrups, crushed cookies, whipped cream, and toppings like marshmallows or caramel. This adds a fun and interactive element to your gathering!

---

## Recipe Variations

Looking to mix things up? Check out these creative twists that make this frozen hot chocolate your own:

1. **Mint Chocolate Chip**
   Add a few drops of mint extract for that peppermint flavor! This creates a festive holiday vibe that transports you to winter Wonderland—regardless of the weather!

2. **Peanut Butter Cup**
   Blend in a spoonful of creamy peanut butter to amplify that chocolaty flavor. Top off with crushed peanuts or mini Reese’s for a nutty crunch!

3. **Mexican Spiced Hot Chocolate**
   Kick it up a notch by adding a sprinkle of cinnamon and a hint of cayenne pepper. It’s a fun way to add warmth and flavor!

4. **Coffee Lover's Frappe**
   Screw in an espresso shot or a splash of brewed coffee to add an extra jolt. For coffee aficionados, this is the ultimate pick-me-up!

5. **Bananas Foster Fusion**
   Toss in a frozen banana before blending for a creamy, dreamy taste with hints of banana flavor. You can even top with caramel drizzle for that classic twist!

---

## Chef’s Notes

A little backstory on how this recipe evolved: When I first made frozen hot chocolate, it was a trial-and-error journey. I discovered through unfortunate mishaps that my original version was WAY too sweet. Over time, I adapted it by focusing on balance and using high-quality ingredients. The transformation into a silky, creamy drink packed with a flavor punch was a labor of love. Now, I can’t imagine summer without it!

Plus, this drink has been a crowd-pleaser at many of my family gatherings. Friends started requesting variations, and it quickly turned into a tradition. My only frustration? Getting the right balance of texture that’s not too icy but still a frozen treat! It’s all part of the fun of cooking, right?!

---

## FAQs and Troubleshooting

Let’s tackle some of the common questions and mistakes when making frozen hot chocolate:

1. **What if my frozen hot chocolate is too thick?**
   If your drink turns out too dense, don’t fret! Just add a splash of milk and give it another quick blend until you reach your desired consistency.

2. **Can I use homemade hot cocoa mix?**
   Absolutely! If you want to make your own hot cocoa mix, simply whisk together unsweetened cocoa powder, sugar, and a pinch of salt. Use this in place of store-bought packets for a personalized touch.

3. **How can I store leftovers?**
   If by some miracle you have leftovers, store them in an airtight container in the freezer. When you’re ready to sip again, thaw just a bit and re-blend for that fresh texture.

4. **Can I make this in advance?**
   While the frozen hot chocolate is best enjoyed fresh, you can prep your ingredients (like the cocoa mix and syrup) ahead of time. Just blend and serve when you're ready for a treat!

---

## Nutritional Info

Now, let’s chat about the nutrition aspect. A serving of this decadent frozen hot chocolate (approximately 1 cup) weighs in around:

- **Calories:** 250–350 (depending on milk choice and added toppings)
- **Fat:** 10g (can vary with milk and whipped cream)
- **Carbohydrates:** 42g
- **Protein:** 6g
- **Sugar:** 25g

Keep in mind, these numbers can shift based on your ingredient choices. Opting for a lower-calorie syrup or non-dairy milk can create a lighter version.

Whatever your preference, remember that moderation is key, and indulging occasionally keeps happiness in our lives!

---

## Final Thoughts

Well, there you have it—my take on the **Best Frozen Hot Chocolate**! You’ve got the recipe, the variations, and all the tips you need to rock this sweet temptation. I hope you’re inspired to create some wonderful memories around this drink just like I did with my friends back in the day.

So, whatever occasion you have in mind—be it a warm-weather gathering, an evening movie night, or simply a moment of self-indulgence—this frozen hot chocolate is sure to be a hit. Share it with loved ones, get creative with your toppings, and most importantly, enjoy every chocolatey sip!

Thanks for joining me in my kitchen today! Until next time, keep stirring up joy and flavor in everything you make. Cheers!
The Best Frozen Hot Chocolate
- Total Time: 10 minutes
- Yield: 4 servings 1x
- Diet: Vegetarian
Description
A refreshing twist on a classic treat, this frozen hot chocolate will indulge your taste buds and cool you down on hot days.
Ingredients
- 3½ cups ice
- 2 cups milk (dairy or non-dairy)
- 4 packets hot cocoa mix
- 2 tablespoons chocolate syrup
- 2 teaspoons vanilla extract
- Whipped cream (for topping)
- Extra chocolate syrup (optional, for drizzle)
Instructions
- Blend the base: Combine 3½ cups of ice, 2 cups of milk, and 4 packets of hot cocoa mix in a blender.
- Add in the good stuff: Drizzle in 2 tablespoons of chocolate syrup and 2 teaspoons of vanilla extract. Blend until smooth.
- Serve it up: Pour the blended mixture into chilled glasses, filling them to the brim.
- Top with whipped cream: Generously swirl whipped cream on top of each drink.
- Drizzle on extra chocolate: Finish with a drizzle of chocolate syrup over the whipped cream if desired.
Notes
For variations, consider adding mint extract, peanut butter, or even espresso for a coffee twist. Adjust sweetness to your preference.
- Prep Time: 10 minutes
- Cook Time: 0 minutes
- Category: Dessert
- Method: Blending
- Cuisine: American
Nutrition
- Serving Size: 1 serving
- Calories: 300
- Sugar: 25g
- Sodium: 150mg
- Fat: 10g
- Saturated Fat: 5g
- Unsaturated Fat: 4g
- Trans Fat: 0g
- Carbohydrates: 45g
- Fiber: 1g
- Protein: 6g
- Cholesterol: 20mg
Keywords: frozen hot chocolate, chocolate drink, summer drinks, dessert recipes