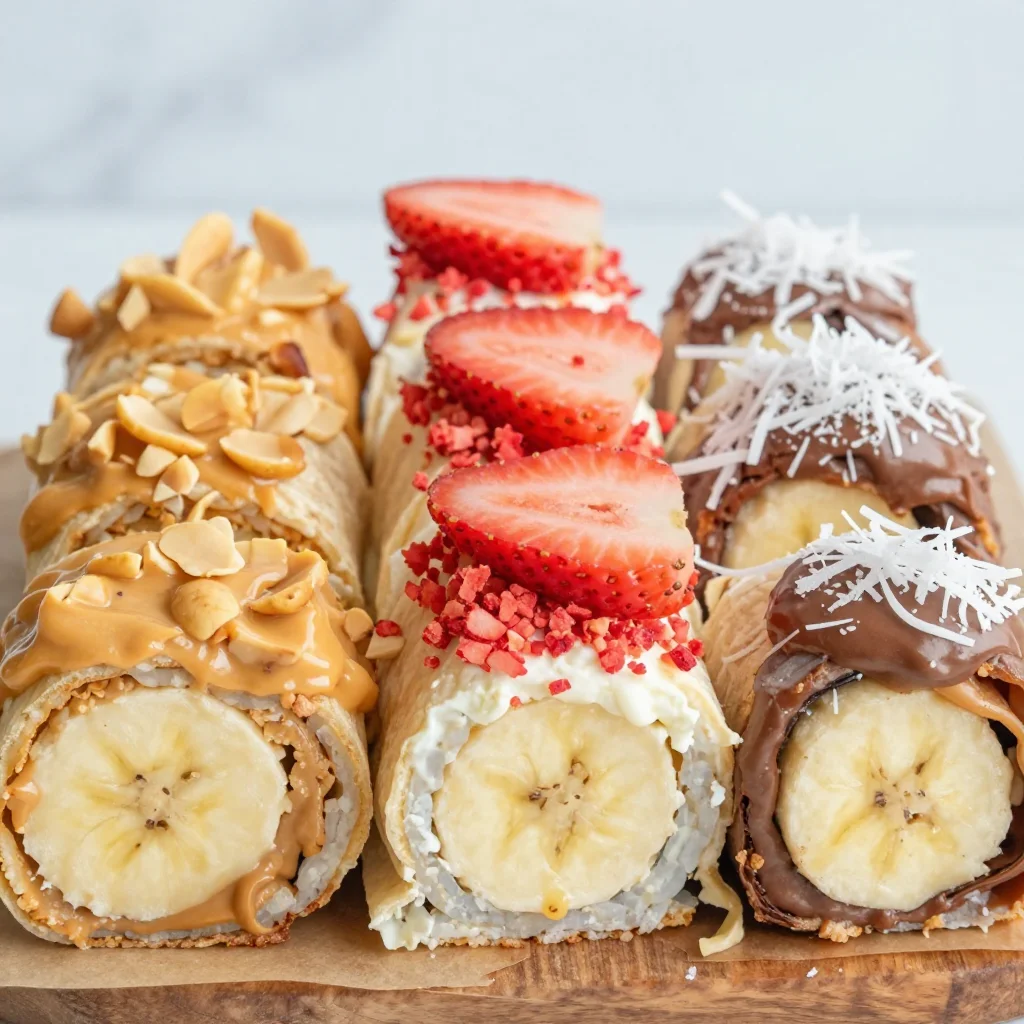
Banana Sushi
Banana Sushi: A Fun Twist on a Classic Snack!
Hey there, fellow food lovers! Welcome back to Feastical! Today, I’m thrilled to share a quirky recipe that combines two of my favorite things: bananas and sushi! Wait, wait—before you raise an eyebrow and click away, let me explain why you should keep reading. This delightful dish is a playful take on traditional sushi, and it’s perfect for a snack, a fun breakfast, or even a dessert. Trust me; it’s as tasty as it is entertaining!
Why banana sushi? Well, we all know bananas are a fantastic source of potassium and they make for an easy, healthy snack. But why stop there when we can jazz them up with a little creativity? Imagine wrapping those bananas in a tortilla and slathering them with scrumptious spreads, then rolling them up like sushi. This recipe is as simple as it sounds, and it’s a hit with both kids and adults alike. Not only is it a blast to make, but it’s also a perfect way to get picky eaters excited about fruit!
So, whether you’re a busy parent looking for creative snacks for your little ones or simply someone who loves to experiment in the kitchen, banana sushi is for you. Grab your favorite toppings, and let’s roll!
A Nostalgic Kitchen Memory
Let me take you back to my childhood for a moment. Picture this: I’m about nine years old, standing on a stool in the kitchen, playing mad scientist with my mom. We loved to create weird and wonderful food combinations. One sunny Saturday morning, when we were supposed to be making pancakes, I spied a bunch of bananas on the counter. My mind immediately went wild with ideas. “What if we rolled them up in something?” I shouted in excitement.
Mom, always the adventurous spirit, decided to go along with my crazy idea. We pulled out the tortillas and the peanut butter—it’s always peanut butter in our house! Fast forward to our first taste of the banana sushi, and it was love at first bite! The creamy peanut butter, the sweetness of the banana, and that satisfying crunch from the peanuts created a flavor explosion in my mouth! That moment sparked a tradition in our home. Whenever we were feeling creative or needed a fun snack, we went straight for the banana sushi.
As I grew older, I would show my friends this quirky dish, and every single time, it elicited gasps and giggles. The creativity and joy of wrapping up a banana in a tortilla and jazzing it up with spreads and toppings always reminded me of those carefree weekends spent in the kitchen with Mom. Join me in rediscovering this childhood favorite, and let that same joy roll into your kitchen as we make banana sushi together today!
Ingredients
Let’s gather our ingredients! This recipe is incredibly versatile, but here’s the basic lineup for your banana sushi creation:
-
1 taco-size flour tortilla: Soft and pliable; it’s the perfect base. You can also use gluten-free tortillas for a healthier option or if you’re gluten-sensitive.
-
1 ripe but firm banana: You want it ripe enough for sweetness but firm enough to hold the roll together! If it’s too ripe, it could get mushy.
-
3 tablespoons peanut butter (divided): This nutty spread is a classic choice! Don’t have peanut butter? Almond butter or any nut butter will work wonderfully.
-
½ cup chopped peanuts: The crunchy texture adds an awesome contrast. If you’re nut-free, try using crispy rice cereal for the same crunch.
-
3 tablespoons softened cream cheese (divided): Creamy and smooth; it complements the flavors beautifully. For a vegan option, go for dairy-free cream cheese.
-
2 strawberries (thinly sliced): Fresh fruit is an excellent way to add brightness to your sushi! Any berry would work; think blueberries or raspberries, too!
-
2 tablespoons crushed freeze-dried strawberries: They pack a punch of flavor and a bit of whimsy. You can swap these out for crushed nuts or granola.
-
3 tablespoons Nutella (divided): Chocolate lovers will adore this! For a twist, try using cookie butter or a caramel spread if that tickles your fancy.
-
2 tablespoons shredded coconut: A tropical touch that brings it all together! Use sweetened or unsweetened depending on your preference.
With these ingredients, the flavor combinations are endless—so don’t be afraid to mix and match!
Step-by-Step Instructions
Ready to roll? Here’s how to whip up your very own banana sushi!
-
Prepare Your Workspace: Clear a space on your kitchen counter and gather all your tools—your tortillas, spreads, toppings, and a good knife. Making sushi is more fun when everything is within reach!
-
Spread the Goodness: Take one flour tortilla and place it on a clean surface. Using a spatula, spread one tablespoon of peanut butter evenly across the tortilla. Don’t be shy—leave a little bit of room around the edges so it doesn’t ooze out when you roll it. The peanut butter acts like glue, keeping everything together.
-
Bring On the Banana: Next, grab your ripe banana. Peel it and place it roughly in the center of the tortilla. Feel free to lay it diagonally for a more appealing roll! This is your anchor, so make sure it’s stable.
-
Top It Off: If you’re making the peanut butter version, sprinkle half of your chopped peanuts over the banana. Need extra crunch? Go crazy and add sugary granola or crispy rice cereal instead!
-
Roll It Up: Now we’re getting to the fun part! To roll, fold in both edges of the tortilla, then take one end and start rolling tightly but gently over the banana. Just like rolling a burrito, but with more flair! When you reach the end, it should hold together well.
-
Slice and Serve: With a sharp knife, slice the banana sushi into rounds—about 1-inch pieces work perfectly! Arrange them beautifully on a plate. It’s like sushi, but way sweeter and way less intimidating.
-
Repeat for More Flavors: Come on, you know you want to try all the variations. Repeat steps 2 through 6 with your cream cheese and strawberry combo, and your Nutella and coconut option! Mix up the spreads and toppings for each roll—your plate will look like a work of art!
-
Taste Test Time: Now, dig in! Enjoy the gooey goodness of the peanut butter, the creaminess of the cream cheese, or the chocolate-flavor explosion from Nutella. Each different combination will tickle your taste buds!
Serving Suggestions
Serving banana sushi is an art—so let’s make it look as delicious as it tastes! Here’s how to plate up your creation:
-
Colorful Platter: Use a bright, colorful plate to make your banana sushi pop. A vibrant platter not only enhances the aesthetic but also invites you to dive in.
-
Garnish with Fresh Fruit: Surround your sushi with fresh fruit like sliced strawberries or kiwi. This adds color and freshness while complimenting the flavors beautifully.
-
Drizzle of Honey or Chocolate: For extra sweetness, drizzle honey or some melted chocolate on top of your sushi platter. This simple touch elevates the dish and provides a delightful finishing touch.
-
Fun Dipping Sauces: Serve with small bowls of yogurt, chocolate sauce, or maple syrup for an interactive experience! Who doesn’t love to dip?
-
Creative Stacking: Stack the sushi rolls high and secure them with a toothpick or small skewer. It makes for an eye-catching display at any gathering or snack time!
Recipe Variations
Now that you’ve mastered the classic banana sushi, it’s time to get creative! Here are some fun variations to try:
-
Tropical Coconut Delight: Use almond butter instead of peanut butter and top with shredded coconut and crushed pineapple for a tropical twist.
-
Chocolate Lover’s Dream: Layer Nutella on the tortilla and sprinkle mini marshmallows and graham cracker crumbles on the banana for a s’mores-style sushi!
-
Berry Blast: Swap in cream cheese for whipped cream cheese sweetened with a touch of honey, and top with a medley of mixed berries like blueberries, raspberries, and strawberries.
-
Savory Spin: If you’re feeling adventurous, try a savory version by spreading hummus on the tortilla and adding some sliced veggies like cucumber or bell peppers to the roll.
-
Nut-Free Version: If you’re looking for something nut-free, try a sun butter (sunflower seed butter) as your spread, and toss in some raisins or dried cranberries for added texture.
Chef’s Notes
This banana sushi recipe has become a staple in my house over the years. It’s fascinating to see how something so simple can bring so much joy. I often tell my friends that this dish is a reminder that food doesn’t have to be fancy to create happy moments. The laughter in the kitchen while making these sushi rolls is worth more than a Michelin star in my book!
Through the years, banana sushi has evolved for me—I’ve introduced different spreads and toppings to keep it fresh and exciting. Don’t be afraid to branch out! Get the kids involved; they’ll love the DIY aspect of it. And who knows? You might create a few new family traditions of your own!
FAQs and Troubleshooting
1. What if my banana is too ripe?
If your banana has become too soft, switch it up! Instead of rolling the banana directly, you can slice it into thick rounds and layer them on the tortilla with your spreads. It won’t hold the traditional roll shape, but it’ll still be delicious!
2. Can I use other spreads besides peanut butter or Nutella?
Absolutely! The beauty of banana sushi is its adaptability. Feel free to experiment with other spreads such as almond butter, tahini, or even yogurt. The possibilities are endless!
3. What if my tortillas are breaking while I roll?
If your tortillas are cracking, try warming them slightly in the microwave for about 10 seconds to make them more pliable. Or, look for freshly made tortillas that are softer.
4. How do I store leftovers?
If you happen to have any leftovers (a rare occurrence with this recipe!), wrap them in plastic wrap and store them in the fridge for a few hours. They’re best enjoyed fresh, so I recommend making them right before serving whenever possible.
Nutritional Info
Banana sushi can be a fun and nutritious snack or dessert. Here’s a rough estimate of the nutritional values for one roll of banana sushi (based on a recipe with a peanut butter filling):
- Calories: 280
- Protein: 8g
- Fat: 12g
- Carbohydrates: 40g
- Fiber: 5g
- Sugars: 10g
(Bear in mind that nutritional values will vary depending on the specific ingredients used.)
Final Thoughts
Banana sushi isn’t just a recipe; it’s an experience—a fun way to get creative in the kitchen and share delightful flavors with family and friends. It’s all about embracing the joy of cooking and making memories. So next time you’re craving something yummy, don’t reach for the same old snack. Instead, whip up some banana sushi!
Whether you keep it classic with peanut butter or venture into more exotic flavors, the underlying joy is what counts. Get your loved ones involved, turn on some music, and make it a little celebration in your kitchen. Remember, the best meals are made not just with ingredients but with laughter, love, and a sprinkle of creativity!
Happy sushi rolling! 🍌🍣
Print
Banana Sushi
- Total Time: 10 minutes
- Yield: 2 servings 1x
- Diet: Vegetarian
Description
A fun twist on a classic snack combining bananas and sushi, perfect for a snack, breakfast, or dessert.
Ingredients
- 1 taco-size flour tortilla
- 1 ripe but firm banana
- 3 tablespoons peanut butter (divided)
- ½ cup chopped peanuts
- 3 tablespoons softened cream cheese (divided)
- 2 strawberries (thinly sliced)
- 2 tablespoons crushed freeze-dried strawberries
- 3 tablespoons Nutella (divided)
- 2 tablespoons shredded coconut
Instructions
- Prepare Your Workspace: Clear a space on your kitchen counter and gather all your tools—your tortillas, spreads, toppings, and a good knife.
- Spread the Goodness: Take one flour tortilla and place it on a clean surface. Using a spatula, spread one tablespoon of peanut butter evenly across the tortilla.
- Bring On the Banana: Peel your ripe banana and place it roughly in the center of the tortilla.
- Top It Off: If you’re making the peanut butter version, sprinkle half of your chopped peanuts over the banana.
- Roll It Up: Fold in both edges of the tortilla, then take one end and start rolling tightly but gently over the banana.
- Slice and Serve: With a sharp knife, slice the banana sushi into rounds—about 1-inch pieces work perfectly!
- Repeat for More Flavors: Repeat steps 2 through 6 with your cream cheese and strawberry combo, and your Nutella and coconut option.
- Taste Test Time: Enjoy the gooey goodness of the peanut butter, the creaminess of the cream cheese, or the chocolate flavor explosion from Nutella.
Notes
Mix and match various spreads and toppings for endless flavor combinations.
- Prep Time: 10 minutes
- Cook Time: 0 minutes
- Category: Snack
- Method: No-Cook
- Cuisine: Fusion
Nutrition
- Serving Size: 1 roll
- Calories: 280
- Sugar: 10g
- Sodium: 200mg
- Fat: 12g
- Saturated Fat: 3g
- Unsaturated Fat: 6g
- Trans Fat: 0g
- Carbohydrates: 40g
- Fiber: 5g
- Protein: 8g
- Cholesterol: 5mg
Keywords: banana sushi, fun snacks, healthy snacks, dessert, kid-friendly recipe
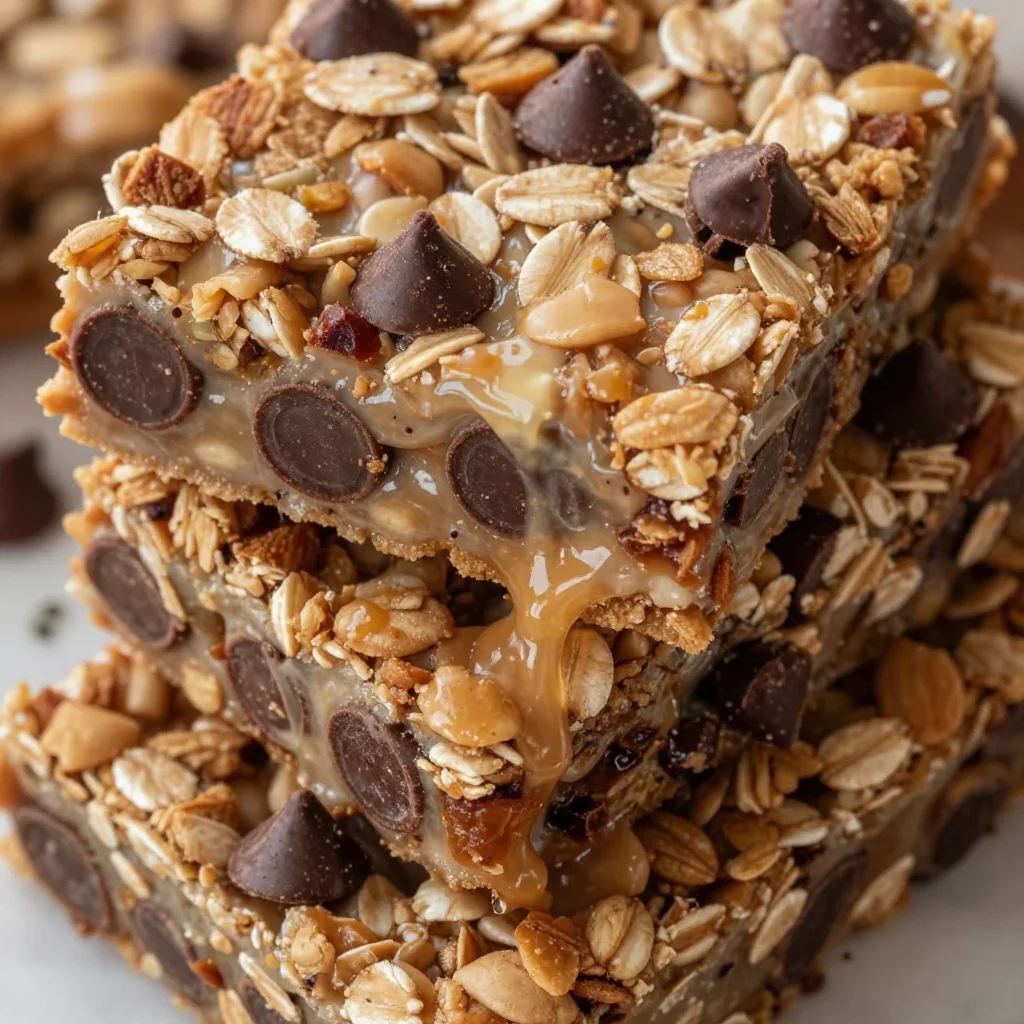
Minute No-Bake Granola Bars for Busy Weekday Meal-Prep
No-Bake Granola Bars: Your New Go-To Snack!
Hey there, fellow food lover! I’m Beau Collier, and today we’re diving into a kitchen adventure that’s as easy as pie—well, no-bake pie, that is. If you’re on the lookout for a delicious snack that not only satisfies but also gives you a warm, cozy feeling of home, then you’re in for a treat. We’re whipping up some Homemade No-Bake Granola Bars! These delightful munchies are perfect for when you need a quick pick-me-up, a healthy lunchbox addition, or a grab-and-go breakfast.
Now, let’s be real—life can get busy, and sometimes, who has the time to bake an entire batch of cookies or muffins? Not to mention, the cleanup can turn the kitchen into a battlefield! But that’s why no-bake recipes are my jam. They’re quick, easy, and oh-so-satisfying. Plus, kids and adults alike will enjoy these chewy, nutty, and utterly delicious granola bars.
As we walk through this recipe, I’ll sprinkle in some handy tips, little anecdotes, and personal touches that make this dish come alive. I invite you to put on your apron, grab your favorite mug, and let’s get cooking—no baking required!
A Granola Bar Trip Down Memory Lane
You know how certain smells and tastes can transport you back in time? That’s what homemade granola bars do for me. I remember sitting at the kitchen counter as a kid while my mom experimented with all sorts of snacks to fill our lunchboxes. She would blend oats, honey, and whatever nuts or fruits we had on hand, all while I eagerly awaited the final product. There was something so magical about watching her create perfection with just a few simple ingredients.
One of my favorite memories is when she made her first-ever batch of no-bake granola bars. As the mixture came together, we laughed about how messy the kitchen was getting—there was peanut butter everywhere, and I had Froot Loops in my hair from breakfast! But when we finally sunk our teeth into those chewy bars, it was like instant happiness. The satisfaction of knowing we’d helped make our own snacks amplified the fun, and from that day on, granola bars became a staple in our household.
Fast forward a few years, and I find myself in my own kitchen, trying to recreate that same sense of joy and nostalgia. And guess what? I think I’ve found the perfect no-bake granola bar recipe that captures all of those cherished memories. Best part? You can customize it just the way you like!
Ingredients
Let’s check out the lineup of ingredients you’ll need to craft these no-bake granola bars. Each one plays a key role in the texture and flavor, and I’ve got some great tips for you along the way!
-
2 cups oats
Rolled oats are the backbone of this recipe, providing texture and fiber. For a gluten-free option, just grab certified gluten-free oats! -
1 cup nut butter (peanut butter or almond butter)
This acts as the glue that holds everything together. Prefer a nut-free version? No problem! Sunflower seed butter or soy nut butter work wonderfully too. -
1/2 cup honey or maple syrup
Both sweeteners give this recipe a delightful sweetness and help bind the oats together. If you want a vegan alternative, maple syrup is your best bet! -
1/2 cup chocolate chips (optional)
Who can say no to a little chocolate? Dark, semi-sweet, or even dairy-free versions all work. To keep it healthy, consider swapping them for cacao nibs. -
1/2 cup dried fruits (optional)
Raisins, cranberries, or even chopped apricots add a lovely chewiness. Fresh fruits won’t work here since they can add too much moisture, but feel free to get creative with dried options! -
1/4 cup seeds (optional)
Think sunflower seeds, chia seeds, or pumpkin seeds. They add extra nutrition and a delightful crunch! You can skip these if you’re nut-free and want to lighten things up.
Step-by-Step Instructions
Now that we have our ingredients ready, let’s jump into some straightforward, fun, no-fuss steps to bring your granola bars to life. Each step will include tips and tricks that’ll make you feel like a pro chef in no time!
-
Gather Your Gear
Grab a large mixing bowl and a spatula for stirring. We’ll also need an 8×8 inch baking dish lined with parchment paper to make removal easy. -
Mix the Dry Ingredients
Start by pouring the oats into the mixing bowl. If you want a bit more flavor, give them a quick toast in a dry skillet over low heat for 5 minutes until lightly golden. It’ll enhance the nuttiness and aroma! Once ready, add any seeds and dried fruits you’re using. -
Heat the Nut Butter and Sweetener
In a small saucepan, combine the nut butter and honey (or maple syrup) over low heat, stirring continuously until smooth and warm. This is where the magic happens! The warmth makes it easier to blend with the oats. Just don’t let it come to a boil; we want to keep that creamy texture. -
Combine Everything Together
Pour the warm nut butter mixture over the dry ingredients. Now, grab that spatula and mix like your life depends on it! Make sure all the oats are coated evenly. If you’re adding chocolate chips, wait until the mixture has cooled slightly before folding them in to avoid melting them completely. -
Press It Down
Transfer the mixture into your lined baking dish. Use a second piece of parchment paper or your hands (which will likely get a bit sticky) to press it firmly and evenly into the dish. This step is crucial! The more compact it is, the better it will hold together once cut. -
Chill and Set
Place the dish in the refrigerator for at least 1-2 hours to set. This gives the mixture time to firm up, making it easier to slice into bars. If you’re in a rush, popping them in the freezer for 30 minutes does the trick too! -
Slice and Serve
Once set, remove the parchment paper and slice into your desired bar sizes. I usually aim for about 10-12 bars, but you do you! Store them in an airtight container in the fridge for up to a week (if they last that long).
Serving Suggestions
When it comes to serving these no-bake granola bars, there’s no wrong way! However, if you want to impress your friends or family, try bundling them up in wax paper and tying them with a cute kitchen twine for that homemade touch.
Pair them with a cup of coffee or a smoothie for breakfast on-the-go. Need a snack? These bars are just perfect for a quick energy boost between meals. Kids can take them to school, or you can enjoy them during your next hike. You might even crumble them over yogurt for a delicious parfait!
Recipe Variations
Now, let’s get creative! The beauty of no-bake granola bars is that they are truly customizable. Here are some flavorful variations to spice things up:
-
Tropical Twist: Swap out the dried fruits for shredded coconut and diced dried pineapple for a tropical vibe.
-
Chocolate Peanut Butter: Add cocoa powder to the nut butter mixture and increase the chocolate chips for an indulgent treat.
-
Protein Power-Up: Stir in a scoop of your favorite protein powder to the dry mix for a post-workout boost!
-
Trail Mix Style: Add your favorite nuts and seeds—think cashews, walnuts, or flaxseeds—for that crunchy trail mix feeling.
-
Pumpkin Spice Delight: For a seasonal treat, add pumpkin puree, pumpkin spice, and a few chocolate chips to turn these bars into a fall favorite!
Chef’s Notes
Over the years, I’ve tinkered with this recipe quite a bit. Initially, it was a straightforward combination of oats and peanut butter, but I discovered adding a mix of textures and flavors made all the difference. Funny enough, my first attempt at adding chia seeds turned into a gooey mess because I forgot they expand in moisture! Lesson learned, right?
This recipe has evolved to embrace various flavors and dietary preferences, ensuring everyone can enjoy a tasty snack. Plus, every twist adds a delightful surprise, making these bars a family favorite.
FAQs and Troubleshooting
-
Why are my granola bars falling apart?
This could be due to not pressing the mixture firmly enough or having too many add-ins. Ensure it’s compact in the dish before chilling! -
How do I store them?
These bars can be stored in an airtight container in the fridge for up to a week. If you need to extend their life, you can freeze them for up to three months. -
Can I use quick oats instead of rolled oats?
Absolutely! Quick oats will work, but keep in mind that the texture might be a bit different—less chewy and more crumbly. -
What if I want to make these chocolate-free?
No problem! Just skip over the chocolate chips. You could add extra dried fruit or nuts in place of them for added flavor and texture.
Nutritional Info
While homemade no-bake granola bars can vary in nutrition based on ingredients, here’s a rough estimate per bar (assuming you make 12 from the recipe):
- Calories: 150–180
- Protein: 5g
- Carbs: 22g
- Fats: 7g
- Fiber: 3g
These bars provide a great balance of healthy fats, fiber, and protein, making them a wholesome choice for a snack. Plus, you know exactly what’s in them—no preservatives or mystery ingredients!
Final Thoughts
There you have it—your new favorite go-to recipe for Homemade No-Bake Granola Bars! Not only are they delicious and easy to make, but they also carry a little bit of nostalgia that’ll warm your heart. I hope you enjoy making these as much as I do and that they bring a smile to your face with every bite.
Remember, the kitchen is a place for creativity, so don’t hesitate to play around with this recipe. Share your creations, or even your kitchen mishaps with me—I would love to hear your stories! Now grab your apron, get busy in the kitchen, and let’s get snacking. Happy cooking!
Print
No-Bake Granola Bars
- Total Time: 120 minutes
- Yield: 12 servings 1x
- Diet: Vegetarian
Description
Delicious and chewy no-bake granola bars that are easy to make and perfect for snacks, lunchboxes, or breakfast.
Ingredients
- 2 cups rolled oats
- 1 cup nut butter (peanut butter or almond butter)
- 1/2 cup honey or maple syrup
- 1/2 cup chocolate chips (optional)
- 1/2 cup dried fruits (optional)
- 1/4 cup seeds (optional)
Instructions
- Gather your gear: a large mixing bowl, a spatula, and an 8×8 inch baking dish lined with parchment paper.
- Mix the dry ingredients by pouring the oats into the bowl and adding any seeds and dried fruits.
- Heat the nut butter and sweetener in a saucepan over low heat until smooth and warm.
- Combine everything together by pouring the warm mixture over the dry ingredients and mixing thoroughly.
- Press the mixture into the lined baking dish using parchment paper or your hands.
- Chill in the refrigerator for at least 1-2 hours to set.
- Slice into bars and enjoy!
Notes
These bars can be customized with various add-ins like coconut, protein powder or pumpkin spice for seasonal flavors.
- Prep Time: 15 minutes
- Cook Time: 0 minutes
- Category: Snack
- Method: No-Bake
- Cuisine: American
Nutrition
- Serving Size: 1 bar
- Calories: 165
- Sugar: 8g
- Sodium: 50mg
- Fat: 7g
- Saturated Fat: 1g
- Unsaturated Fat: 6g
- Trans Fat: 0g
- Carbohydrates: 22g
- Fiber: 3g
- Protein: 5g
- Cholesterol: 0mg
Keywords: granola bars, no-bake, healthy snacks, easy recipes, homemade snacks
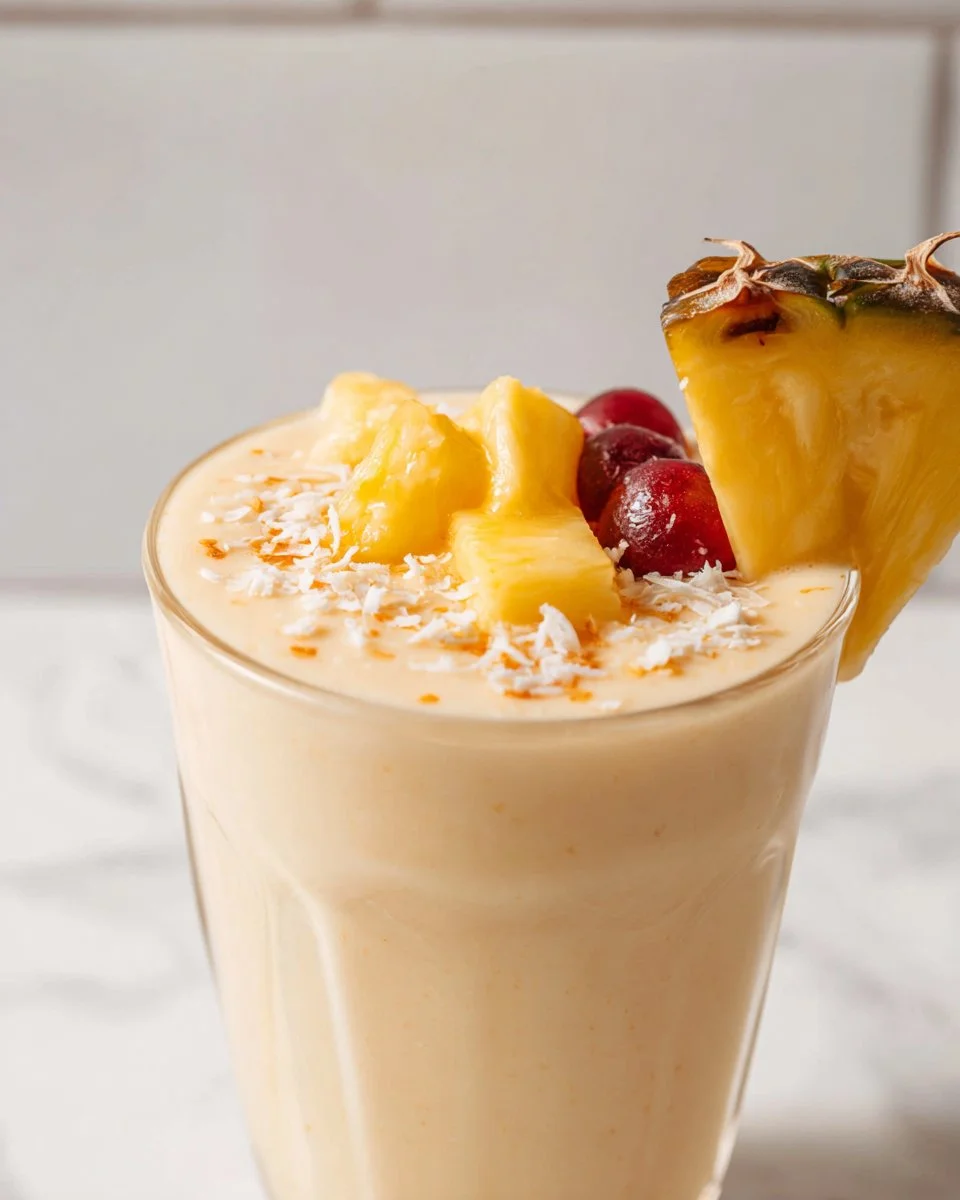
5-Minute Piña Colada Breakfast Smoothie
5-Minute Piña Colada Breakfast Smoothie
Hey there, smoothie lovers! If you’re dreaming of sandy beaches and sun-soaked days but stuck in the hustle and bustle of daily life, I’ve got just the remedy for you—a refreshing and tropical Piña Colada Breakfast Smoothie! This quick and easy recipe is like a vacation in a glass and takes only five minutes to whip up. So grab your blender, and let’s get started on creating something delicious that’ll have you feeling like you’ve just taken a sip of sunshine!
Imagine waking up to a thick, creamy smoothie that tastes just like a piña colada but is packed with goodness for your morning. With a base of coconut milk, frozen pineapple, and a touch of yogurt, we’re building a flavor bomb that’s not only satisfying but also incredibly nutritious. And the best part? You can make it while finishing your morning scroll through social media. It’s a win-win!
Nothing beats the aroma of coconut as it fills your kitchen, instantly transporting you to a tropical paradise—a little hack I learned during my culinary journey is to connect your recipes with memories. They say food is a love language, and I couldn’t agree more! Back in college, my friends and I would gather every weekend, binge-watching movies with our homemade versions of tropical drinks. One fateful movie night, we decided to use leftover coconut milk and frozen pineapple we had on hand to create a smoothie. Laughter ensued, along with a ton of vibrant colors and even a few blender mishaps! Little did we know that we were onto something so delicious and easy. And that, my friends, is how my love for smoothies blossomed!
Now, let’s get this dreamy Piña Colada Breakfast Smoothie blending!
Ingredients
Here’s what you’re going to need to bring this creamy concoction to life:
-
1 ½ cups coconut milk
- This forms the luxurious base of your smoothie. Light coconut milk works great too if you want to cut some calories without losing flavor.
-
3 cups frozen pineapple chunks
- The star of the show! Frozen fruit is not only convenient but helps to create a frosty texture. You can substitute fresh pineapple and add ice if you prefer, but you’ll lose that creaminess.
-
½ cup plain or vanilla Greek yogurt
- This adds protein and creaminess, making your smoothie more filling. You can swap it for dairy-free yogurt if you’re avoiding animal products or lactose.
-
1 cup ice
- This is optional, depending on how frosty you want your smoothie! If using fresh pineapple, I’d definitely recommend adding some ice.
-
Optional toppings:
- Slice of fresh pineapple – For that extra tropical flair!
- Maraschino cherries – These add a pop of color and a sweet touch.
- Coconut flakes – Toasted or plain, they’ll bring a crunchy element and enhance that coconut flavor.
Step-by-Step Instructions
Alright, friend! Let’s blend together this magical smoothie with just a few simple steps:
-
Gather Your Ingredients: Before you start, make sure everything is within reach. You’ll feel like a professional chef! It’s a game changer to have everything prepped.
-
Add Coconut Milk to the Blender: Pour in your coconut milk first. This helps the blades work smoothly and ensures that everything mixes well. If you’re using canned coconut milk, give it a good shake before opening for a consistent texture!
-
Toss in the Frozen Pineapple: Next, add the frozen pineapple chunks. I recommend this part because frozen fruit really helps achieve that thick shake-like consistency. Plus, it keeps your smoothie cold without needing too much ice!
-
Spoon in the Yogurt: Next up, add the Greek yogurt. If you’re feeling adventurous, experiment with flavored yogurts—vanilla is a crowd-pleaser, but I love trying out tropical flavors like pineapple or coconut too.
-
Add the Ice: If you love your smoothies icy and refreshing, toss in the cup of ice. It’s not necessary if you’re already using frozen pineapple, but hey, more frosty goodness never hurt anyone!
-
Blend Until Smooth: Pop the lid on your blender (don’t forget this step; trust me, I’ve learned the hard way!). Start blending at a low speed, then gradually increase to high. Blend until everything is smooth and creamy—about 30 seconds to a minute. If it seems too thick, feel free to add a splash of coconut water or regular water to thin it out just a bit.
-
Taste and Adjust: Once blended, give it a taste. Do you want it sweeter? Add a drizzle of honey or some agave syrup. Want it more coconutty? A splash of coconut extract can work wonders!
-
Pour and Serve: Now it’s time to pour your creation into a chilled glass. You can also use a mason jar for that rustic vibe.
Serving Suggestions
Presentation makes everything more appealing! I like to top my Piña Colada Breakfast Smoothie with a slice of fresh pineapple perched on the rim of the glass and a maraschino cherry on top. Sprinkle a few coconut flakes over the top for that extra hint of tropical charm. If you’re feeling fancy, serve it with a cocktail umbrella—you know, for those at-home beach vibes!
To enhance the experience, consider serving it alongside a simple breakfast. Think warm toast with nut butter, or some tropical overnight oats. It makes for a perfectly balanced breakfast that’s still uplifting and a little indulgent!
Recipe Variations
Ready to get creative with your smoothie? Here are a few delicious variations to mix things up:
-
Green Piña Colada Smoothie: Add a handful of spinach or kale for a nutrient boost! The sweetness of the pineapple will mask the green flavor, and you’ll hardly notice it.
-
Mango Piña Colada: Swap out half of the pineapple for frozen mango to give a different tropical twist. The mango adds a delightful sweetness that pairs beautifully.
-
Chia Seed Boost: Add a tablespoon of chia seeds for some added fiber and omega-3 fatty acids. The seeds will absorb water and thicken the smoothie, so be mindful of that!
-
Nutty Flavor: Add a tablespoon of almond or cashew butter for a creamy, nutty flavor that also amps up the protein in your breakfast.
-
Coconut Cream Delight: For an extra rich treat, top your smoothie with a dollop of whipped coconut cream. Ah, the decadence!
Chef’s Notes
I have to tell you—this recipe has gone through a few iterations. In the early days, I would whip up these smoothies with whatever fruit I had on hand, and the flavor would always change. Pineapple and coconut, however, remained my true north, a classic combination that never gets old.
I also experimented with adding rum when I wanted it more of an adult beverage—don’t judge! It’s like having my cake and eating it too. Maybe that’s why I fell in love with this smoothie; it feels celebratory at any time of day.
FAQs and Troubleshooting
1. Can I use fresh fruit instead of frozen?
Absolutely! If you don’t have frozen pineapple, you can use fresh. Just add some ice to keep it cool and thick.
2. My smoothie is too thick; what do I do?
If it’s too thick, add a splash of coconut milk or water and blend again until you reach your desired consistency.
3. What if I want to make this dairy-free?
No problem! Substitute the Greek yogurt with a plant-based yogurt (coconut or almond yogurt works great). Also, make sure your coconut milk is dairy-free, though most brands are!
4. Can I make this ahead of time?
Smoothies are best enjoyed fresh, but if you must prep ahead, you can store it in an airtight container in the fridge for up to 24 hours. Give it a good shake before drinking!
Nutritional Info
Now let’s dive a bit into what’s in a glass of this Piña Colada Breakfast Smoothie! This delightful drink not only satisfies your taste buds but also provides great nutritional benefits:
- Calories: Around 300-350, depending on whether you use flavored yogurt and any added sweeteners.
- Protein: Roughly 10-15 grams from Greek yogurt.
- Fiber: About 4 grams, especially if you include chia seeds or enjoy alongside high-fiber foods.
- Vitamins & Minerals: Packed with vitamin C from the pineapple and healthy fats from coconut!
Keep in mind that nutritional values may vary based on specific brands and portion sizes you use.
Final Thoughts
And there you have it—your ultimate guide to crafting a sensational Piña Colada Breakfast Smoothie in just five minutes! This recipe is all about balancing flavor and nutrition, taking you on a mini tropical getaway right from your kitchen.
So next time you’re feeling the morning grind, remember that a little bit of creativity can turn an ordinary breakfast into an extraordinary experience. Enjoy every sip, share it with your friends, or make it just for yourself—it’s a wonderful way to treat your taste buds while kickstarting your day.
Let’s raise our glasses and toast to sunny mornings, good food, and great friends! Happy blending, folks!
Print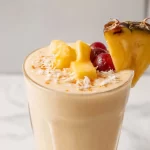
5-Minute Piña Colada Breakfast Smoothie
- Total Time: 5 minutes
- Yield: 2 servings 1x
- Diet: Dairy-Free
Description
A refreshing and tropical breakfast smoothie that tastes just like a piña colada, packed with nutritious ingredients for a delicious start to your day.
Ingredients
- 1 ½ cups coconut milk
- 3 cups frozen pineapple chunks
- ½ cup plain or vanilla Greek yogurt
- 1 cup ice
- Optional toppings: slice of fresh pineapple, maraschino cherries, coconut flakes
Instructions
- Gather your ingredients: Before you start, make sure everything is within reach.
- Add coconut milk to the blender: Pour in your coconut milk first.
- Toss in the frozen pineapple: Next, add the frozen pineapple chunks.
- Spoon in the yogurt: Add the Greek yogurt.
- Add the ice: If you love your smoothies icy, toss in the cup of ice.
- Blend until smooth: Blend until everything is smooth and creamy—about 30 seconds to a minute.
- Taste and adjust: Once blended, give it a taste and adjust sweetness if needed.
- Pour and serve: Pour your creation into a chilled glass.
Notes
For added creativity, try different variations like adding spinach for a green smoothie or swapping pineapple with mango.
- Prep Time: 5 minutes
- Cook Time: 0 minutes
- Category: Breakfast
- Method: Blending
- Cuisine: Tropical
Nutrition
- Serving Size: 1 serving
- Calories: 325
- Sugar: 28g
- Sodium: 100mg
- Fat: 12g
- Saturated Fat: 10g
- Unsaturated Fat: 2g
- Trans Fat: 0g
- Carbohydrates: 42g
- Fiber: 4g
- Protein: 12g
- Cholesterol: 5mg
Keywords: smoothie, breakfast, piña colada, tropical, healthy
Chicken Bacon Wraps
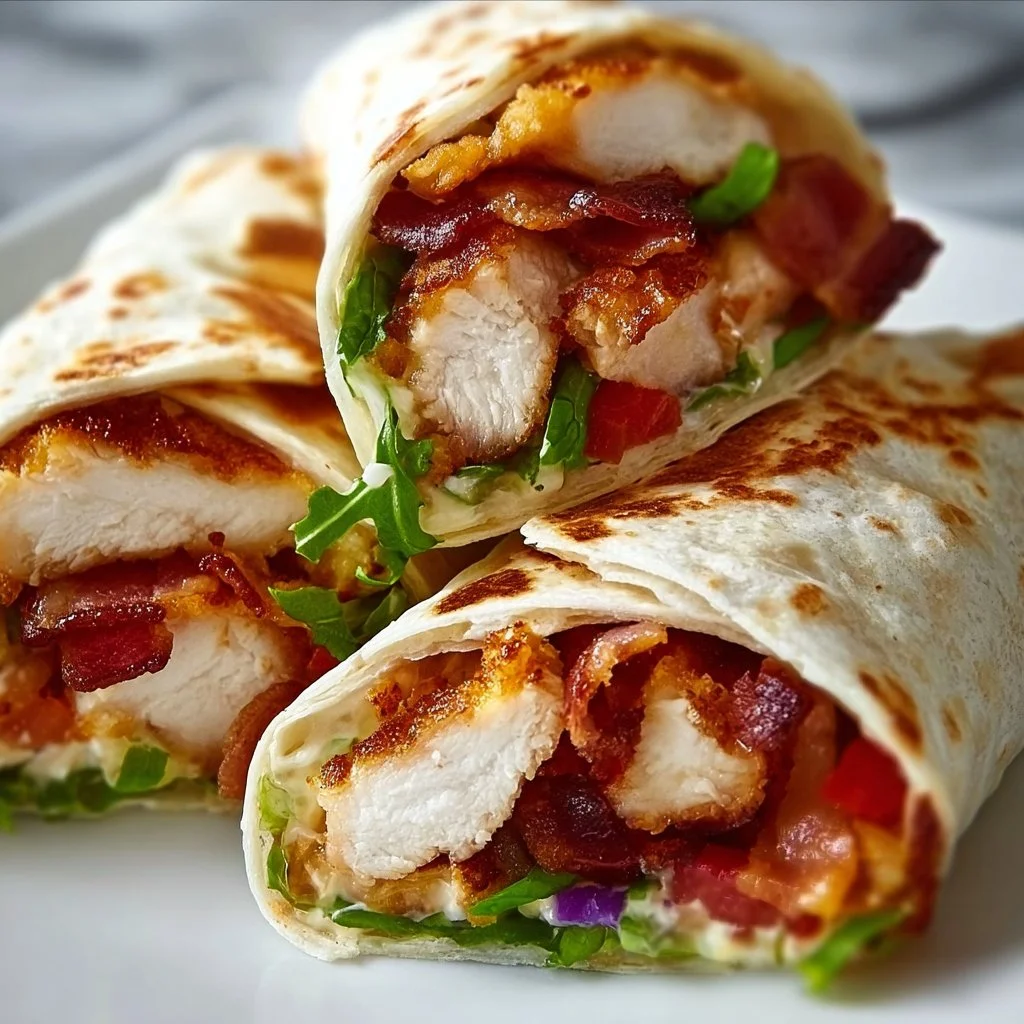
Chicken Bacon Wraps: A Comfort Food Hero
Hey there, food lovers! Beau Collier here, and today we’re diving into a recipe that’s not only delicious but also a total crowd-pleaser: Chicken Bacon Wraps! If you’ve ever been caught in the kitchen wondering what to whip up that’s both easy and tantalizing, you’re in for a treat.
Picture this: the juicy, tender chicken breast wrapped in savory, crispy bacon, with a creamy, cheesy filling that just adds to the delight! It’s the kind of dish that brings your family together around the dinner table and keeps everyone coming back for seconds. Plus, it’s ridiculously easy to make, so even if you’ve recently discovered the location of your spatula, you can totally pull this off.
These Chicken Bacon Wraps are perfect for any occasion—weeknight dinners, game day appetizers, or even a cozy gathering with friends. They’re great for impressing guests while allowing you to enjoy the party without being stuck in the kitchen. So buckle up, my friends! Let’s roll up our sleeves and get cooking.
Personal Story
I’ll never forget the first time I experimented with Chicken Bacon Wraps. It was back in college, and I was throwing my first dinner party. You know, the kind where you invite friends over to showcase your “culinary skills” but really just hope they think you’re a total champ for cooking anything at all.
I decided to take a leap of faith and whip up these wraps. With only two burners and a toaster oven to my name, I remember wrapping those chicken breasts, liberally slathering on cream cheese, and sprinkling cheddar for good measure. The kitchen was a flurry of ingredients, and I had bacon draped over every available surface. My roommates walked in, unsure if they should be excited or worried.
When I pulled them out of the oven, the aroma filled the apartment, and I felt like a superstar. We sat together at the table, devouring the wraps, laughing, and sharing stories well into the evening. That night, I realized that food isn’t just about sustenance; it’s about connection and creating beautiful memories. Ever since then, Chicken Bacon Wraps have held a special place in my heart—and my recipe collection!
Ingredients
Let’s gather our stars of the show! Here’s what you’ll need to make these scrumptious wraps:
-
Chicken Breast: The main event! Look for boneless, skinless chicken breasts for easy handling. If you’re short on time, you can opt for pre-cooked chicken or even rotisserie chicken.
-
Bacon: The crispy, salty delight that ties everything together. Thick-cut bacon offers more flavor and crunch, but regular bacon works just as well. For a healthier twist, turkey bacon is a decent substitute.
-
Cream Cheese: This gives your wrap that luscious, creamy texture. You can mix it with herbs or spices for added flavor. If you’re dairy-free, try a plant-based cream cheese.
-
Cheddar Cheese: A classic choice that melts beautifully. Feel free to swap with pepper jack for a little kick or mozzarella for a milder flavor.
-
Black Pepper: A sprinkle of this provides a nice contrast to the richness of the cheeses. Freshly cracked is always best for maximum flavor.
-
Garlic Powder: A subtle nod to savory goodness. If you’re feeling fancy, use freshly minced garlic for a pop of zest.
-
Fresh Herbs (optional): A handful of fresh herbs like parsley or thyme can elevate your dish and add that chef-quality spin.
-
Toothpicks: These little guys help keep everything together while baking. Bamboo or wooden toothpicks work well!
With this lineup, get ready to create a masterpiece! Don’t forget, you can tweak ingredients based on what you have on hand or your dietary needs. A little improvisation just makes things more exciting, right?
Step-by-Step Instructions
Ready to roll? Let’s get cooking! Here’s how to make your Chicken Bacon Wraps, step by step:
-
Preheat the Oven: Preheat your oven to 400°F (200°C). A hot oven ensures that your wraps get nice and crispy.
-
Prepare the Chicken: Take your boneless chicken breasts and flatten them to about 1/2 inch thick. Use a meat mallet or rolling pin; this helps with even cooking. If you’re using pre-cooked chicken, skip this step!
-
Season the Chicken: Sprinkle both sides of the chicken with black pepper and garlic powder. Feel free to get creative here—add your favorite spices for a personal touch.
-
Spread the Cream Cheese: Take your cream cheese (remember to let it sit at room temperature for easier spreading) and slather a generous layer onto one side of the chicken breast. If desired, mix in some freshly chopped herbs for an extra pop of flavor.
-
Add the Cheddar: Sprinkle a handful of cheddar cheese over the cream cheese layer. Yes, you want plenty of cheesy goodness in there!
-
Wrap It Up: Now comes the fun part! Roll the chicken breast tightly, starting from the end with the cheese. The creamy filling should be nestled inside like a savory surprise.
-
Secure with Bacon: Take your bacon slices and wrap them around the chicken roll. Depending on the size of your chicken breast, 3-4 slices of bacon should do the trick. Secure each end with a toothpick to keep everything in place.
-
Prepare for Baking: Place the wrapped chicken on a baking sheet lined with parchment paper or foil (for easy cleanup!). If you’ve got any leftover bacon, feel free to drape it over the top for extra crispiness.
-
Bake: Pop the baking sheet in your preheated oven and bake for about 25-30 minutes, or until the chicken is cooked through and the bacon is crispy. Don’t be afraid to use a meat thermometer—165°F (75°C) is your magic number for chicken!
-
Rest and Serve: Once the wraps are out of the oven, let them rest for a few minutes before removing the toothpicks. This allows the juices to redistribute. Slice them into bite-sized pieces or serve them whole—totally your call!
And there you have it! Delicious Chicken Bacon Wraps, ready to impress!
Serving Suggestions
How should you present these delectable wraps? There’s nothing wrong with serving them straight off the baking sheet, but if you want to make it a bit fancier, try this:
-
Plate Them Up: Arrange the Chicken Bacon Wraps on a beautiful platter or large plate. You can drizzle some creamy ranch or spicy sriracha sauce artistically around the sides for dipping—that’ll have everyone oohing and aahing!
-
Garnish: A sprinkle of freshly chopped parsley or chives on top adds a pop of color and a hint of freshness. You could even serve them alongside a bright green salad or some crispy roasted veggies for balance.
-
Dips are Key: Consider pairing your wraps with various dips like barbecue sauce, garlic aioli, or a tangy honey mustard for guests to enjoy. It not only complements the flavors but also gives everyone something fun to interact with.
Trust me; when you plate it up with these little touches, everyone will feel like they’ve been transported to a gourmet restaurant!
Recipe Variations
Feeling adventurous? Let’s add some twists to our Chicken Bacon Wraps:
-
Spicy Southwest Bacon Wraps: Replace regular cheddar with pepper jack cheese and add a sprinkle of taco seasoning for a fiesta in every bite. Serve with guacamole for a South of the Border flare!
-
Herb & Garlic Explosion: Instead of cream cheese, use a mix of goat cheese and fresh herbs. Think basil, oregano, and a hint of lemon zest to brighten up the flavors.
-
BBQ Chicken Wraps: Before rolling the chicken, brush both sides with your favorite barbecue sauce. This gives you that smoky, sweet flavor that pairs perfectly with the crunchy bacon.
-
Mediterranean Delight: Swap in feta cheese and spinach, and drizzle with a bit of olive oil before wrapping. Serve with a side of tzatziki for a refreshing touch.
-
Breakfast Style: What’s better than savory bacon? Add some scrambled egg in the cream cheese spread for a breakfast twist! These would make for a hearty brunch or daytime gathering.
Experimenting with flavors is half the fun, so don’t hesitate to mix and match!
Chef’s Notes
One of my favorite things about these Chicken Bacon Wraps is how versatile they are. Over the years, I’ve adapted the recipe to suit various tastes, transitioning from your traditional comfort food to something with a modern twist. I once hosted a potluck where everyone brought an ingredient; let me tell you, we ended up with an outlandish mix of flavors, including some bizarre fruit toppings!
But honestly, every variation added a new dimension to the dish. It reminded me how food evolves and connects people, and how the kitchen is a great place for sharing ideas with both new and old friends—no matter what you bring to the table.
FAQs and Troubleshooting
Q: Why is my bacon not crispy?
A: If your bacon isn’t getting crispy, it might be because of the cooking temperature or time. Ensure you’re baking at 400°F, as a hotter oven helps bacon crisp up beautifully. If all else fails, you can give them a quick broil for the last few minutes, just keep an eye on them to avoid burning!
Q: Can I make these ahead of time?
A: Absolutely! You can prep the Chicken Bacon Wraps ahead of time, just store them in the fridge (unbaked) until you’re ready to pop them in the oven. Add a few extra minutes to the cooking time if they’re cold from the fridge.
Q: What sides go well with these wraps?
A: These wraps go great with a variety of sides! I recommend serving them with a fresh garden salad, roasted vegetables, or even some crispy potato wedges. They pair wonderfully with anything that adds freshness or crunch.
Q: I don’t have toothpicks; now what?
A: No toothpicks? No worries! You can just place the wraps seam-side down on your baking sheet. The bacon usually holds well through cooking, giving you a deliciously crispy result without needing any extra support.
Nutritional Info
These Chicken Bacon Wraps serve as a great protein-packed dish but are certainly indulgent with the bacon and cream cheese. Here’s a general breakdown of the nutrition per serving (one wrap):
- Calories: Approximately 320 kcal
- Protein: 30g
- Fat: 22g
- Carbohydrates: 3g
- Fiber: 0g
- Sugars: 0g
Of course, this can vary based on specific brands and ingredient choices, so adjust as needed!
Final Thoughts
There you have it—a full rundown for making Chicken Bacon Wraps that are sure to become a go-to recipe in your kitchen. I hope it inspires you to get creative, share those meals with family and friends, and build memories that will last a lifetime. Remember, whether you’re adding unexpected ingredients or sticking to the classics, the most important part is enjoying the journey of cooking and the happiness it brings.
So grab your apron, fire up that oven, and let’s get wrapping! Happy cooking, my foodie friends!
Print
Chicken Bacon Wraps
- Total Time: 45 minutes
- Yield: 4 servings 1x
- Diet: Non-Vegetarian
Description
Juicy chicken breasts wrapped in crispy bacon with a creamy cheese filling, perfect for any occasion.
Ingredients
- 4 boneless, skinless chicken breasts
- 12 slices thick-cut bacon (or turkey bacon)
- 8 oz cream cheese, softened
- 1 cup cheddar cheese, shredded
- 1 tsp black pepper
- 1 tsp garlic powder
- Fresh herbs (optional, e.g., parsley or thyme)
- Toothpicks for securing
Instructions
- Preheat your oven to 400°F (200°C).
- Prepare the chicken by flattening to 1/2 inch thick.
- Season both sides with black pepper and garlic powder.
- Spread cream cheese on one side of the chicken breast.
- Add cheddar cheese over the cream cheese layer.
- Wrap the chicken tightly, starting from the end with cheese.
- Secure with bacon slices and toothpicks.
- Prepare a baking sheet lined with parchment paper.
- Bake for 25-30 minutes until chicken is cooked through and bacon is crispy.
- Rest for a few minutes before serving.
Notes
Feel free to experiment with different cheese and herb combinations. These wraps can also be prepped in advance.
- Prep Time: 15 minutes
- Cook Time: 30 minutes
- Category: Appetizer
- Method: Baking
- Cuisine: American
Nutrition
- Serving Size: 1 wrap
- Calories: 320
- Sugar: 0g
- Sodium: 700mg
- Fat: 22g
- Saturated Fat: 9g
- Unsaturated Fat: 10g
- Trans Fat: 0g
- Carbohydrates: 3g
- Fiber: 0g
- Protein: 30g
- Cholesterol: 100mg
Keywords: Chicken Bacon Wraps, Appetizer, Easy Recipe, Comfort Food, Party Food
Spicy Buffalo Chicken Wraps for Two
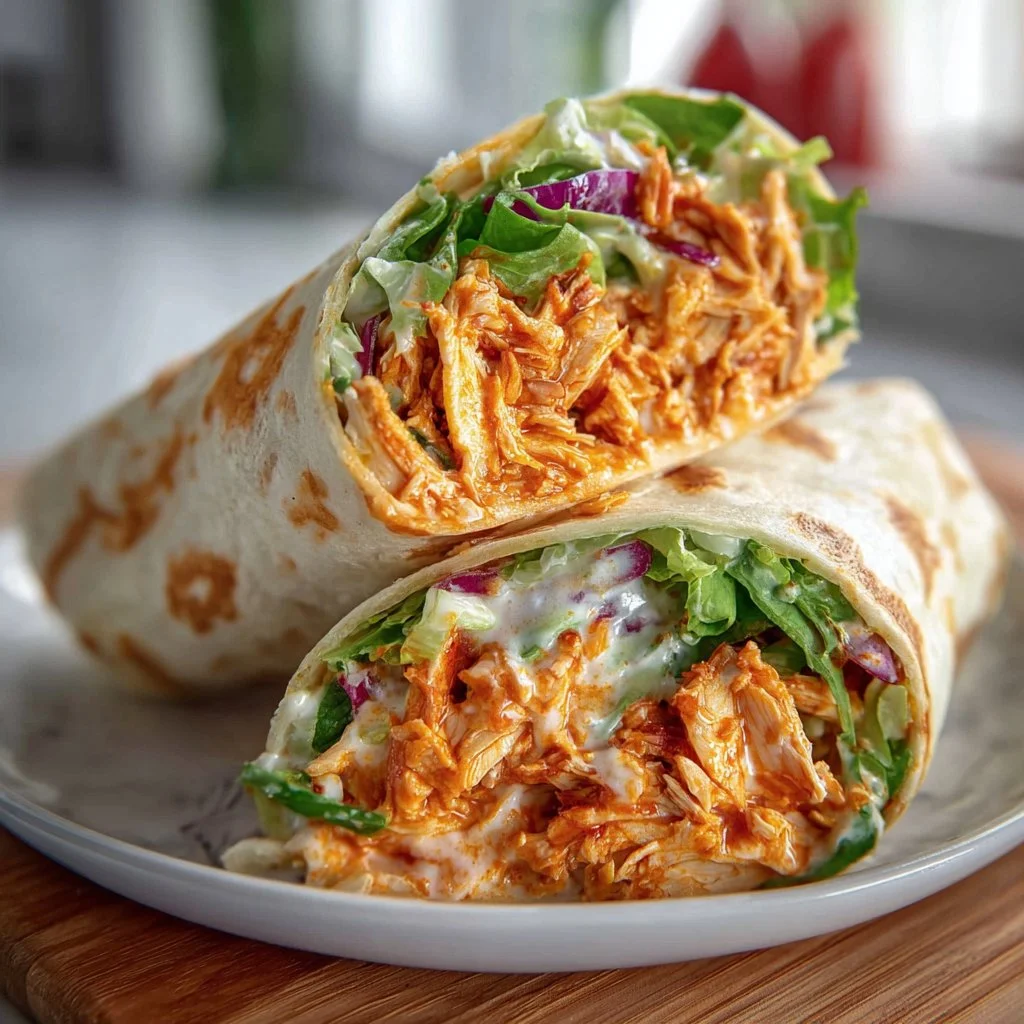
Spicy Buffalo Chicken Wraps for Two: A Flavorful Adventure
Hey there, fellow foodies! If you’re anything like me—a lover of all things delicious, quick, and satisfying—then you’re in for a treat today. Let’s take a journey to flavor town with my spicy Buffalo chicken wraps. These wraps are not just a meal; they are a celebration of bold flavors and happy memories.
You may be wondering, “Why Buffalo chicken wraps?” The answer is simple: they are the perfect blend of spicy, creamy, and crunchy flavors all cradled within a warm tortilla. Whether you’re whipping these up for a lunch date, a game day snack, or just a cozy evening at home, these wraps are easy to make and super tasty. Believe me, one bite and you’ll feel like you’re at a lively tailgate party, even if you’re just lounging on your couch!
What I love most about these wraps is their versatility—be it a casual meal for two or a larger gathering; these spices can be tweaked to your heart’s desire. Plus, this recipe takes less than 30 minutes to whip up, making it a great weeknight dinner option. So grab your spatula and maybe even a friend to help out, and let’s dive into the kick of those spicy Buffalo chicken wraps!
Personal Story
The memory that always whisks me away involves my kitchen during those lazy summer afternoons when the warmth of the sun was just as comforting as my mom’s cooking. I remember coming home from school on those hot days, dropping my backpack at the door, and sprinting into the kitchen, lured by the mouthwatering scent of Buffalo chicken simmering on the stove. My mom had a knack for creating dishes that turned our family kitchen into a haven of flavor and comfort.
One specific afternoon stands out—she was experimenting with Buffalo chicken wraps. I watched, wide-eyed, as she whisked together ingredients and rolled them into tortillas. The cool ranch dressing and crisp lettuce balanced the spicy chicken, and I couldn’t wait to dig in. We’d sit outside, share the wraps, and chat about everything under the sun. Those moments stuck with me long after the plates were empty. Fast forward to today, I’ve made it my mission to recreate that sense of comfort and togetherness in my own kitchen, and these spicy Buffalo chicken wraps are a delicious reflection of those carefree days.
Ingredients
Here’s what you’ll need to create these scrumptious spicy Buffalo chicken wraps, along with some insights and handy substitutions:
-
2 medium tortillas
- Use whole wheat or spinach tortillas for a healthier twist. Flour or corn are classic options too!
-
1 cup cooked chicken, shredded
- You can use rotisserie chicken, leftover chicken, or quickly boil and shred some fresh chicken breast.
-
1/4 cup buffalo sauce
- Feel free to tweak the heat level based on your preference. There are plenty of brands out there, or you can make your own by mixing hot sauce with melted butter.
-
1/2 cup lettuce, shredded
- Romaine or iceberg works well for that crunch! For extra flavors, try adding arugula or spinach.
-
1/4 cup shredded cheese (cheddar or blue cheese)
- Cheddar brings a mild, creamy note, while blue cheese adds a tang. Stir in some pepper jack for more heat!
-
1/4 cup ranch dressing
- Ranch and Buffalo sauce are a match made in heaven! You can swap it for Greek yogurt or a vegan alternative for lighter options.
-
Optional: sliced jalapeños or diced tomatoes for toppings
- Add some slices of fresh jalapeño for an extra kick, or toss in some juicy diced tomatoes for a burst of freshness!
Step-by-Step Instructions
Ready to embark on this culinary adventure? Let’s get started!
-
Prep the Chicken: If you’re working with a rotisserie chicken, shred the meat with a fork in a large bowl until it resembles the goodness that will soon fill your wrap. If starting from scratch, boil your chicken breasts for about 15-20 minutes, or until cooked through, and then shred them while they’re still warm. Pro tip: the warmer the chicken, the easier it is to shred.
-
Mix the Buffalo Sauce: In a mixing bowl, combine the shredded chicken with the Buffalo sauce. Make sure to mix them well—every bite should be flavorful! If you prefer milder heat, start with a tablespoon of Buffalo sauce and gradually add more until you reach your desired spice level.
-
Assemble the Wraps: Lay down a tortilla on a clean surface. Spoon a generous amount of the chicken mixture onto the center of the tortilla, leaving about an inch of space on the sides. Layer on the shredded lettuce and sprinkle the cheese atop the chicken.
-
Roll it Up: Here’s the fun part! To roll the wrap, start from the side closest to you and fold it over the filling, tucking it in gently. Fold in the sides, then keep rolling until the wrap is compact. Don’t worry if it isn’t perfect—that’s part of the charm!
-
Warm the Wraps: For a crispy finish, heat a skillet over medium heat and add a little olive oil or cooking spray. Place the wraps seam-side down in the pan and toast for about 2-4 minutes on each side, or until golden brown and crispy. This step gives your wraps an irresistible crunch!
-
Slice and Serve: Once your wraps are golden and sizzling, remove them from the skillet. Allow them to cool for a minute, then slice them diagonally on a cutting board. Plating matters! Serve them alongside extra ranch dressing for dipping, and some crunchy veggies for snacking.
Serving Suggestions
Now that your spicy Buffalo chicken wraps are ready to rock, let’s talk about how to plate them beautifully! Toasted and slightly crisp, these wraps are fantastic on their own, but you can jazz up your presentation with a few tricks:
-
Dipping Options: Serve them with a small bowl of ranch or bleu cheese dressing strategically placed alongside for that perfect dip! You might even consider a side of carrot and celery sticks for that classic Buffalo experience.
-
Garnishing: A sprinkle of fresh cilantro or sliced green onions on top can add a fresh pop of color and flavor.
-
Plating: Try layering the wraps on a serving platter, drizzling a bit of Buffalo sauce over the top to entice your guests, or displaying them in a tall glass for a fun twist!
Recipe Variations
Feeling adventurous? Here are a few creative twists to transform your spicy Buffalo chicken wraps:
-
Buffalo Cauliflower Wraps: Substitute the chicken with roasted Buffalo-style cauliflower for a delightful vegetarian option that’s just as tasty.
-
Cheesy Spinach Overload: Mix in some sautéed spinach with the chicken for added nutrition and texture.
-
Tex-Mex Fusion: Add black beans and corn to the filling for a mouthwatering twist, then top with guacamole instead of ranch dressing!
-
Asian-Inspired: Swap out the buffalo sauce with teriyaki sauce, and top with crunchy coleslaw for an Asian-inspired delight.
-
Healthy Alternative: Try using lettuce leaves instead of tortillas for a gluten-free, low-carb version. Just layer the chicken and toppings and roll it up like a burrito.
Chef’s Notes
Cooking is as much about the experience as it is about the food! I love to keep my recipes simple but laden with flavor. The beauty of these wraps is that they can be a blank canvas! You can throw in your favorite ingredients or whatever’s left in the fridge to use it up—think leftover grilled veggies or even pulled pork if you’re feeling indulgent.
And speaking of indulgence, let’s not forget the time I decided to host a Buffalo wrap party. Everything was going smoothly until my buddy accidentally spilled a whole bottle of Buffalo sauce! It turned into a hilarious culinary disaster, but we ended up laughing and making the best of it—now that’s what food is all about!
FAQs and Troubleshooting
1. What if my wraps fall apart?
Don’t fret! If you overstuff them, they’ll likely split open. Start with less filling and keep your wrapping technique tight and secure!
2. How can I make it spicier?
To amp up the heat, add sliced jalapeños or use a hotter variety of Buffalo sauce. You can also mix hot sauce directly into the ranch dressing for extra kick!
3. Can I make these ahead?
Absolutely! Prepare the filling a day before and store it in the fridge. Just assemble your wraps right before you’re ready to serve.
4. I don’t have any tortillas. Can I use something else?
Sure thing! Lettuce leaves, pita pockets, or even flatbreads are excellent substitutes for wrapping up those flavorful goodies.
Nutritional Info
Curious about the nutritional breakdown? Here’s what you’re looking at for one spicy Buffalo chicken wrap:
- Calories: Approximately 400-500 calories (this can vary based on ingredient choices)
- Protein: 30g – thanks to the chicken!
- Carbs: 35g – primarily from the tortilla.
- Fats: 20g – will vary depending on the dressings and cheeses you use.
- Fiber: 3-5g – especially if you opt for whole grain tortillas or add veggies.
Don’t forget, you can adjust portions to suit your dietary needs or aim for lighter alternatives!
Final Thoughts
There you have it—spicy Buffalo chicken wraps that are sure to bring a smile to your face and a warmth to your heart! They are quick, easy to make, and utterly delicious, perfect for gatherings, quick dinners, or even satisfying weekday lunches. Food has a remarkable way of connecting us, and nothing beats sharing great flavors with friends and family.
So, give this recipe a whirl, take some creative liberties, and make it your own! And remember, there’s no right or wrong in the kitchen—just delicious adventures waiting to happen.
Now, what are you waiting for? Grab those ingredients and let the culinary fun begin! Enjoy every bite, fellow foodies!
Print
Spicy Buffalo Chicken Wraps for Two
- Total Time: 30 minutes
- Yield: 2 servings 1x
- Diet: Non-Vegetarian
Description
A flavorful adventure in spicy Buffalo chicken wraps, perfect for casual meals or gatherings.
Ingredients
- 2 medium tortillas
- 1 cup cooked chicken, shredded
- 1/4 cup buffalo sauce
- 1/2 cup lettuce, shredded
- 1/4 cup shredded cheese (cheddar or blue cheese)
- 1/4 cup ranch dressing
- Optional: sliced jalapeños or diced tomatoes for toppings
Instructions
- Prep the chicken: Shred the meat with a fork in a large bowl or boil chicken breasts for 15-20 minutes, then shred.
- Mix the buffalo sauce: Combine shredded chicken with buffalo sauce until well coated.
- Assemble the wraps: Lay a tortilla on a surface, add chicken mixture, lettuce, and cheese.
- Roll it up: Fold and tuck the tortilla around the filling tightly.
- Warm the wraps: Toast in a skillet over medium heat with olive oil for 2-4 minutes on each side.
- Slice and serve: Remove from skillet, cool slightly, slice diagonally, and serve with ranch dressing.
Notes
Experiment with different cheeses and add toppings to boost flavor.
- Prep Time: 10 minutes
- Cook Time: 20 minutes
- Category: Main Course
- Method: Baking
- Cuisine: American
Nutrition
- Serving Size: 1 wrap
- Calories: 450
- Sugar: 3g
- Sodium: 800mg
- Fat: 20g
- Saturated Fat: 8g
- Unsaturated Fat: 8g
- Trans Fat: 0g
- Carbohydrates: 35g
- Fiber: 3g
- Protein: 30g
- Cholesterol: 50mg
Keywords: Buffalo chicken, wraps, spicy, easy dinner, comfort food

Cranberry Almond Energy Bites
# Energize Your Day with Cranberry Almond Energy Bites!

## Introduction

Hey there, food lovers! If you’re anything like me, you’ve had those days when the afternoon slump hits, and all you want is a pick-me-up. That’s where the super-simple—and oh-so-delicious—Cranberry Almond Energy Bites come into play! These little nuggets of joy not only satisfy your sweet tooth but they also pack a powerful punch of nutrition to keep you fueled throughout the day.

I created this recipe because, well, I know how chaotic life can get. Between juggling work, social obligations, and family time, it's easy to overlook healthy snacking. And let’s be honest, sometimes you just want something that feels like a treat without the guilt! These energy bites are quick to prepare, requiring no baking and minimal cleanup. Anyone can whip them up—yes, even you, if you’ve just found your spatula hiding under the kitchen sink!

Plus, these bites are completely customizable. Love things a bit sweeter? Toss in a few chocolate chips. Want a protein boost? Add some hemp seeds! Wherever your flavor cravings lead you, these bites can follow. Each mouthful provides a delightful blend of chewy cranberries, crunchy almonds, and nutty richness that’ll make you feel like you’re on a mini-vacation, even if you’re just taking a break at your home office.

So, grab your apron and let’s get this party started! Together, we’ll make these delectable energy bites that will keep you energized and smiling all day long.

---

## Personal Story

You know, I still remember the first time I ever made a version of these energy bites. It was during my college years—a chaotic time filled with late-night study sessions powered more by coffee than common sense! One evening, I was burning the midnight oil, and my stomach started growling louder than my study playlist. I rummaged through my pantry and found a motley assortment of ingredients: old oats, a forgotten jar of almond butter, and a lonely bag of dried cranberries just begging to be used.

With my buddy Kirsten by my side, we had a mini kitchen party. We tossed everything in a bowl, mixed it up, and let me tell you—it was a culinary miracle! Those energy bites kept us going straight through the night. Each bite was a perfect blend of sweet and nutty, lifting our spirits as we tackled the never-ending textbook pages. I still giggle every time I think about it—talk about a late-night snack win! Since then, I've experimented with these bites countless times, and they’ve become a staple in my kitchen, perfect for busy days or just when I'm craving something sweet.

---

## Ingredients

Let’s take a stroll through the pantry and gather our ingredients. Here’s what you’ll need for these scrumptious energy bites:

- **1 cup Oatmeal**
  Rolled oats serve as a hearty base, providing fiber and a bit of chewiness. If you want to swap in gluten-free oats, they work beautifully too!

- **1/3 cup Almonds (chopped)**
  Almonds add crunch and nuttiness. Don't have almonds on hand? No worries! Try walnuts or pecans for a twist in flavor and texture.

- **1/3 cup Sweetened Shredded Coconut**
  It brings a tropical flair! If you’re not a coconut fan, you can simply leave it out or substitute with extra oats for the same texture.

- **1 tbsp Ground Flaxseed (optional)**
  This ingredient is a nutritional powerhouse, adding omega-3 fatty acids and fiber. Got chia seeds instead? They make a great alternative!

- **1/2 cup Nut Butter** (peanut or almond are both good)
  Nut butter binds everything and provides healthy fats. If you fancy sun butter or tahini, those can be delightful substitutes too!

- **1/4 cup Honey**
  Honey gives the bites sweetness and acts as a binder. For a vegan alternative, maple syrup does an excellent job!

- **1 tbsp Chia Seeds**
  Chia seeds are loaded with nutrients and add a delightful crunch. Not in the mood for chia? You can skip them without impacting the outcome.

- **1/3 cup Dried Cranberries (roughly chopped)**
  These are the stars of our energy bites, offering a burst of sweet-tart flavor. Feel free to substitute with raisins or chopped dried apricots for a different taste!

---

## Step-by-Step Instructions

Alright, it’s time to roll up those sleeves and get cooking. Here’s how you can make your Cranberry Almond Energy Bites:

1. **Gather Your Ingredients**: Start by assembling everything on your countertop. You’ll save time and keep your mind clear!

2. **Combine Dry Ingredients**: In a large mixing bowl, toss together the rolled oats, chopped almonds, shredded coconut, ground flaxseed (if using), chia seeds, and chopped cranberries. Make sure everything is well distributed; the more mixed, the better!

3. **Mix in the Nut Butter**: Add the nut butter to the dry mixture. Use a spatula to fold it in. If your nut butter is a bit stiff, zap it in the microwave for a few seconds—it’ll blend easier!

4. **Sweeten it Up**: Drizzle in the honey, making sure to scrape it all out of the measuring cup. Now, mix everything thoroughly until it forms a sticky dough. You might be tempted to dive straight in with your hands (and who could blame you!), but hold that thought!

5. **Chill it Out**: Pop the mixture into the refrigerator for about 30 minutes. This step isn't just for aesthetics; chilling helps the mixture firm up, making it easier to shape your bites.

6. **Form the Bites**: Once chilled, scoop out tablespoon-sized amounts and roll them into balls. You can use your palms to create perfect little spheres—if they’re not all identical, that just adds character!

7. **Store for Later**: Place your energy bites in an airtight container. They’ll last about a week in the fridge or can be stored in the freezer for longer. Just be sure to separate layers with parchment paper!

8. **Enjoy**: Grab one (or three) when you need a quick snack or an energy boost. They’re perfect for pre-gym fuel or a mid-afternoon treat!

---

## Serving Suggestions

Serve your energy bites on a cute platter or in a rustic bowl, and watch the smiles light up the room. If you’re into themed gatherings, why not create a little snack station? Include a variety of energy bites alongside fresh fruit, a bowl of mixed nuts, and some dark chocolate for a bit of indulgence. Placing small labels with the ingredients adds a personal touch and can spark curiosity among your guests.

For a grab-and-go option, toss these bites into snack-size bags, perfect for your busy lifestyle. They’re an ideal answer to pre-workout snacks or a quick breakfast on the way out the door. Just don’t forget to keep a stash in your purse or car!

---

## Recipe Variations

Now that you’ve got a solid base, let’s explore some delicious variations to keep your taste buds excited:

1. **Chocolate Chip Cranberry Energy Bites**: Add 1/4 cup of dark chocolate chips to the mix for an extra dose of sweetness.

2. **Nut-Free Option**: Substitute nut butters with sunflower seed butter and skip the nuts. It’s still rich and satisfying!

3. **Spiced Up Version**: Add a pinch of cinnamon or pumpkin spice for a warming flavor that'll remind you of cozy mornings.

4. **Tropical Twist**: Substitute cranberries with dried pineapple or mango and add a splash of lime zest for an exotic flair.

5. **Protein Packed**: Mix in a scoop of your favorite protein powder if you’d like to take these bites to the next level nutritionally.

---

## Chef’s Notes

You know, I often find that recipes evolve over time, and these energy bites are no exception. My original version just had oats, nut butter, and honey. But once I started experimenting with add-ins like seeds and dried fruits, they became a family favorite! One day, I even threw in some leftover pumpkin puree, and boy, did that create a delicious twist. Each time I make these, I remember those late nights in college and the wonderful kitchen messes that turned into great company and laughter.

So go ahead, make it your own! This is a judgment-free zone, and who doesn’t love a bit of kitchen creativity?

---

## FAQs and Troubleshooting

Here are some common questions and troubleshooting tips to help you navigate the energy-bite-making process:

1. **Why are my energy bites falling apart?**
   If your mixture is too crumbly, add a bit more nut butter or honey to help it bind together better. Make sure the mixture is sticky before chilling!

2. **Can I use rolled oats instead of instant oats?**
   Absolutely! Rolled oats work wonderfully, adding a bit more texture. Just avoid using instant oats; they won’t give the same result.

3. **How do I store these bites properly?**
   Keep them in an airtight container in the fridge for a week or in the freezer for a month. Just separate layers with parchment paper if you're stacking them.

4. **Can I spice up flavors without extra ingredients?**
   Absolutely! Just add a teaspoon of vanilla or almond extract to switch things up. It’s an easy way to elevate the flavor profile!

---

## Nutritional Info

Now, let’s chat about the nutrition in these delightful bites. They’re packed with wholesome goodness, offering a balance of carbs, protein, and healthy fats. Each bite is an excellent source of energy, around 100 calories, providing fiber from the oats and protein from the nut butter. The chia and flaxseeds boost omega-3 intake, making these bites not just a sweet treat but also a satisfying snack that supports overall health.

Feel free to adjust ingredient amounts tailored to your dietary needs—perhaps you want higher protein or lower sugar. This flexibility is why they become your go-to snack in no time!

---

## Final Thoughts

There you have it, folks—Cranberry Almond Energy Bites that not only fill your stomach but also warm your heart. This kitchen adventure is all about creating something delicious that brightens your day, nourishes your body, and fosters those meaningful moments around food.

So why not give these energy bites a go? Be the rockstar of your kitchen and whip up a batch today! Remember, the best part about cooking is making it your own, and I can’t wait to hear about the creative twists you come up with.

Leave a comment below with your own variations or any fun kitchen stories. Until next time, keep the oven warm and your spirit high—happy cooking, my fellow foodies!

Cranberry Almond Energy Bites
- Total Time: 30 minutes
- Yield: 12 bites 1x
- Diet: Vegetarian
Description
Delicious and nutritious energy bites made from oats, almonds, and cranberries, perfect for a quick pick-me-up.
Ingredients
- 1 cup Rolled Oats
- 1/3 cup Chopped Almonds
- 1/3 cup Sweetened Shredded Coconut
- 1 tbsp Ground Flaxseed (optional)
- 1/2 cup Nut Butter (peanut or almond)
- 1/4 cup Honey
- 1 tbsp Chia Seeds
- 1/3 cup Chopped Dried Cranberries
Instructions
- Gather your ingredients.
- Combine dry ingredients in a large mixing bowl.
- Mix in the nut butter.
- Sweeten it up with honey.
- Chill the mixture in the refrigerator for about 30 minutes.
- Form the mixture into tablespoon-sized balls.
- Store in an airtight container.
- Enjoy your energy bites!
Notes
These energy bites are customizable; feel free to add chocolate chips or substitute ingredients.
- Prep Time: 15 minutes
- Cook Time: 0 minutes
- Category: Snack
- Method: No-Bake
- Cuisine: American
Nutrition
- Serving Size: 1 bite
- Calories: 100
- Sugar: 8g
- Sodium: 5mg
- Fat: 5g
- Saturated Fat: 1g
- Unsaturated Fat: 4g
- Trans Fat: 0g
- Carbohydrates: 12g
- Fiber: 2g
- Protein: 3g
- Cholesterol: 0mg
Keywords: energy bites, snacks, healthy snack, no-bake, quick recipes

This healthy chocolate pudding is the best healthy snack recipe (vegan) | Healthy chocolate pudding recipe, Healthy dessert recipes, Healthy sweets recipes
The Best Healthy Vegan Chocolate Pudding You’ve Ever Tried!
Hey there, fellow foodies! Welcome back to Feastical! Today, I’m thrilled to share a recipe that’s not just a treat for your taste buds but also a big hug for your health—my beloved Healthy Vegan Chocolate Pudding. I can already hear the chocolate lovers cheering, and who wouldn’t? This rich, creamy delight is proof that healthy eating doesn’t have to be boring or, dare I say, tasteless!
When I first stumbled upon this recipe, I was on a mission to satisfy my chocolate cravings without the guilt. With just a few simple ingredients, I quickly transformed my indulgent snack into a dairy-free, vegan wonder that I could whip up in no time. Trust me; once you sample this healthy chocolate pudding, you’ll wonder why you ever reached for the store-bought stuff!
Upside? You can enjoy this pudding anytime—after dinner, as a mid-afternoon pick-me-up, or even as a post-workout treat that feels akin to a decadent dessert! So, gather your kitchen tools and your favorite spoon because we’re about to embark on a delicious journey to chocolate heaven that’s both easy and oh-so-wholesome. Let’s put on our aprons and get cooking!
Personal Story
Let me take you back to when I was just a budding chef in my parents’ kitchen, probably around the age of ten. I remember a rainy Saturday afternoon when I decided to surprise my family with a chocolate dessert. Armed with a cookbook I’d borrowed from the library, I set out to create something magical. What I didn’t realize was that I had forgotten a crucial ingredient—sugar. Oops!
Instead of downtrodden, I took a leap of faith and decided to wing it by using ripe bananas instead. To my utter delight, my first-ever chocolate pudding turned out to be an unexpected hit! The flavors melded beautifully, and I learned that improvisation in the kitchen can lead to delicious discoveries. That day ignited my love for creating healthy yet satisfying desserts, and now I’m passing that wisdom onto you with this healthy vegan chocolate pudding recipe. You see, food storytelling is what brings us together, and I can’t wait for you to create your own memories in the kitchen!
Ingredients
Now, let’s talk about the marvelous ingredients that come together to create this velvety pudding:
-
Ripe Avocados
Chef Insight: The secret to the creaminess of this pudding! They provide healthy fats and a smooth texture. Feel free to swap with bananas for a twist! -
Cocoa Powder
Substitution Tip: Ensure it’s unsweetened for that rich chocolate kick. You can use raw cacao powder if you want extra health benefits and a more intense flavor. -
Maple Syrup
Flavor Note: A natural sweetener that adds depth. You can swap it out for agave nectar or even date syrup if you’re feeling adventurous! -
Almond Milk (or any plant-based milk)
Quick Tip: This helps loosen up the pudding to the right consistency. Try coconut or cashew milk for a flavor boost! -
Vanilla Extract
Insight: A splash of this fragrant extract enhances the chocolate flavor. Always opt for pure vanilla extract over imitation for that extra kick of flavor. -
Pinch of Salt
Why It’s Important: Just a little pinch will elevate all the other flavors. Don’t skip it!
Step-by-Step Instructions
Now that we have our ingredients ready, let’s dive into the cooking process! This is where the magic happens, and I’ll share my favorite tips along the way.
Step 1: Prepare the Avocado
Begin by cutting your ripe avocados in half, removing the pit, and scooping the flesh into a blender or food processor. Avocados are not only nutrient-rich but also a creamy base for our pudding. If you need a quick tip: the riper the avocado, the better. Look for one that gives slightly when you press it gently!
Step 2: Add Cocoa Powder
Next, sprinkle in a generous amount of cocoa powder. It doesn’t just provide chocolatey goodness; it also comes packed with antioxidants! Just a note: Sift your cocoa powder beforehand if you want to avoid clumps in your pudding!
Step 3: Sweeten it Up
Pour in the maple syrup! This is where you can customize how sweet you want it to be, so feel free to taste and adjust. If you do leave it a bit less sweet, the rich cocoa flavor will shine through even more.
Step 4: Pour in the Milk
Now, it’s time to add your almond milk. Start with a small amount and gradually increase until you reach your desired consistency. Are you into a thicker pudding? Use less milk; for a more liquid texture, add more! This is your delicious creation; make it suit you.
Step 5: Blend It All Together
Blend until incredibly smooth. You want a creamy, silky texture that almost feels too good to be true (thanks to those avocados!). If you’re having trouble getting everything mixed, add a little more almond milk and keep blending until you achieve pudding perfection.
Step 6: Add Vanilla and Salt
Finally, add a splash of vanilla extract and a pinch of salt. Blend again briefly to incorporate these boosts of flavor. This step is crucial because it truly elevates the entire pudding!
Step 7: Taste-Test and Adjust
Taste your pudding! This is the fun part; feel free to adjust sweetness by adding more maple syrup or enhancing the chocolate flavor with extra cocoa. Some might even enjoy a dash of cinnamon for a unique twist!
Step 8: Chill
Once you’re satisfied with the flavor, transfer the pudding into serving bowls or an airtight container. Pop it in the refrigerator for at least an hour to firm up. It’s like giving it a little spa treatment!
Serving Suggestions
Alright, it’s the moment we’ve all been waiting for—the plating! This healthy chocolate pudding isn’t only rich in flavor; it’s a treat for the eyes as well. When you’re ready to serve, scoop generous dollops into small dessert bowls, ramekins, or even mason jars for a cute presentation.
Make it Instagram-worthy by topping it with your favorite garnishes! Here are some delicious ideas:
- Fresh Berries: Strawberries or raspberries add a pop of color and freshness.
- Chopped Nuts: Almonds, walnuts, or even pecans provide a delightful crunch.
- Coconut Whipped Cream: If you’re feeling extra fancy, a dollop of coconut whipped cream takes it over the top!
- Dark Chocolate Shavings: A sprinkle of chocolate love for those die-hard chocoholics!
Recipe Variations
Now that you’ve mastered the classic healthy chocolate pudding, here are some fun twists to keep things exciting:
- Spicy Chocolate: Add a pinch of cayenne pepper for a subtle kick!
- Nutty Chocolate: Blend in some almond or peanut butter for a nutty flavor explosion.
- Mocha Delight: Mix in a bit of instant coffee or espresso powder for that coffee-chocolate combo.
- Flavor Infusion: Experiment with different extracts like almond or hazelnut for an exotic touch.
- Fruit Fusion: Blend in a ripe banana for a fruit-forward pudding with a natural sweetness.
Chef’s Notes
This recipe holds a sweet spot in my heart, and over the years, it has seen its fair share of tweaks and modifications! I recently experimented with adding silken tofu for additional protein and creaminess, which worked wonders. The luscious, silky texture keeps the essence of the original pudding while giving it a healthy protein boost!
And a funny kitchen story: one time, I was rushing to make this pudding for friends, and in my haste, I accidentally dumped in chili powder instead of cocoa! Let’s just say that evening taught me to always double-check my labels!
FAQs and Troubleshooting
Q1: Why is my pudding too runny?
A: It might need more avocado or you added too much milk. To fix it, mix in a little more cocoa powder. You can also chill it longer to help it thicken!
Q2: Can I make this in advance?
A: Absolutely! This pudding can stay fresh in the refrigerator for up to 4-5 days. Just remember to cover it with plastic wrap or store it in an airtight container.
Q3: Can I freeze this pudding?
A: Yes, while you can freeze it, the texture may change when thawed. Just mix it up again after defrosting for a smoother consistency.
Nutritional Info
While indulging in our Healthy Vegan Chocolate Pudding, you can feel good about what’s going into your body! Here’s a rough nutritional breakdown per serving (based on the ingredients provided):
- Calories: Around 140
- Fat: 9g (mostly healthy fats from avocados)
- Carbohydrates: 15g
- Fiber: 5g
- Sugar: 4g (depending on the sweetness level from maple syrup)
- Protein: 2g
Emphasizing that chocolate doesn’t have to come with a hefty price tag in terms of health, this pudding is nutrient-dense and loaded with goodies like fiber, healthy fats, and antioxidants!
Final Thoughts
There you have it—my ultimate Healthy Vegan Chocolate Pudding recipe! I truly hope this becomes a staple in your kitchen as it has in mine. It’s not just a dessert; it’s a canvas for creativity, a way to satisfy that sweet tooth, and a dream come true for anyone looking for something wholesome yet indulgent.
So next time you’re craving something chocolatey, remember that healthy treats can still be delicious and satisfying. Don’t forget to share your pudding creations with me! Let’s keep the food-loving community alive and thriving. Until next time, my fellow food adventurers—happy cooking and even happier eating! 🍫✨
Print
Healthy Vegan Chocolate Pudding
- Total Time: 15 minutes
- Yield: 4 servings 1x
- Diet: Vegan
Description
A rich and creamy vegan chocolate pudding made with healthy ingredients, perfect for satisfying sweet cravings without the guilt.
Ingredients
- 2 ripe avocados
- 1/2 cup unsweetened cocoa powder
- 1/4 cup maple syrup
- 1/2 cup almond milk (or any plant-based milk)
- 1 teaspoon pure vanilla extract
- Pinch of salt
Instructions
- Prepare the avocados by cutting in half, removing the pit, and scooping the flesh into a blender.
- Add the cocoa powder to the blender.
- Pour in the maple syrup and adjust sweetness as desired.
- Add the almond milk gradually until the desired consistency is reached.
- Blend until smooth and creamy.
- Add the vanilla extract and a pinch of salt, then blend briefly.
- Taste the pudding and adjust sweetness or cocoa as needed.
- Chill the pudding in the refrigerator for at least an hour before serving.
Notes
For a thicker pudding, use less almond milk. Garnish with fresh berries, chopped nuts, or coconut whipped cream for an extra touch.
- Prep Time: 15 minutes
- Cook Time: 0 minutes
- Category: Dessert
- Method: Blending
- Cuisine: Vegan
Nutrition
- Serving Size: 1 serving
- Calories: 140
- Sugar: 4g
- Sodium: 10mg
- Fat: 9g
- Saturated Fat: 1g
- Unsaturated Fat: 8g
- Trans Fat: 0g
- Carbohydrates: 15g
- Fiber: 5g
- Protein: 2g
- Cholesterol: 0mg
Keywords: vegan dessert, chocolate pudding, healthy dessert, avocados, dairy-free
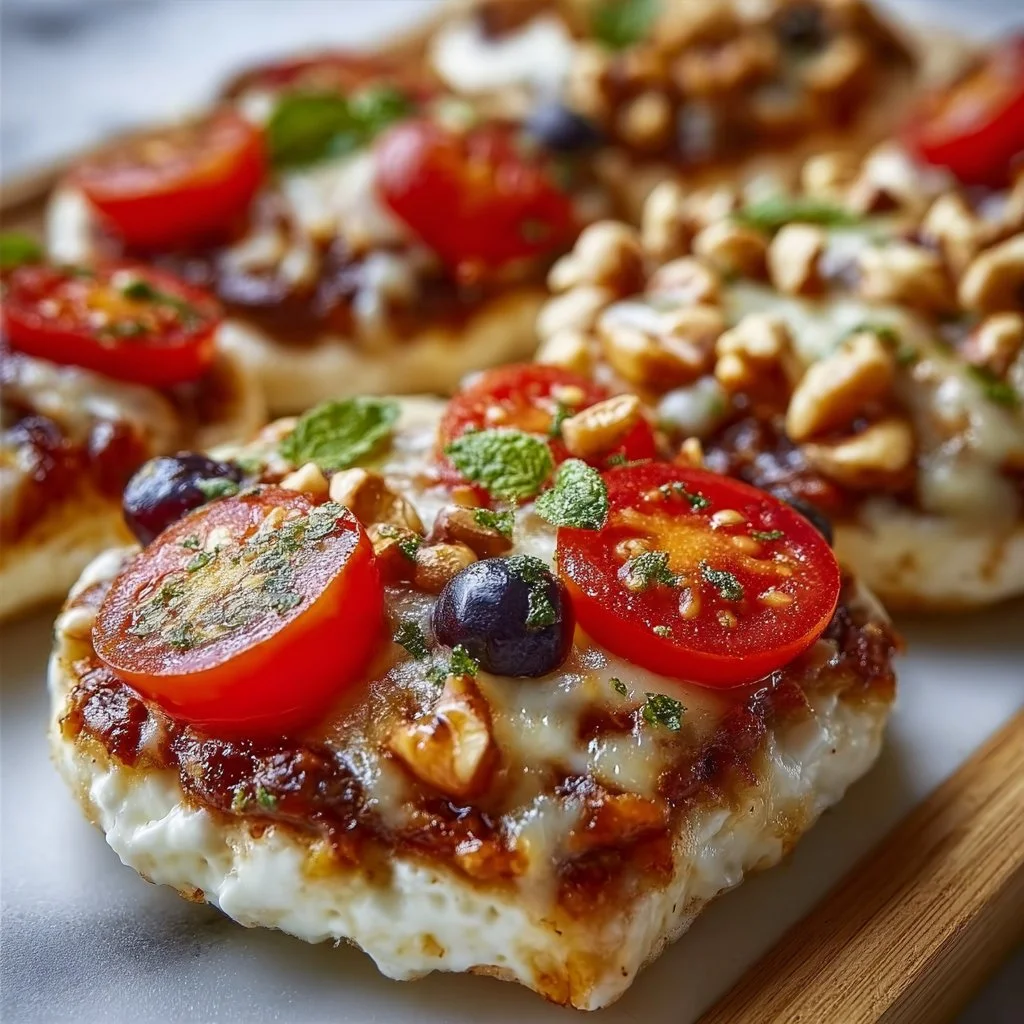
Healthy Savory Snacks
Savory Zucchini Chickpea Bites: A Healthy Snack to Savor!
Hey there, my fellow food lovers! Today, we’re diving into a delicious and healthy recipe that’s sure to tickle your taste buds and nourish your body. We’re talking about Savory Zucchini Chickpea Bites—the perfect party snack, midday pick-me-up, or a fun addition to any meal. You know how sometimes you just crave something crispy yet wholesome, something that packs a punch of flavor without overloading on guilt? Well, you’re in for a treat!
I can still remember the first time I made these savory bites. It was a sunny afternoon, and I wanted to whip up a snack that wouldn’t just fuel my body, but also remind me of the comforting flavors of my childhood. I was rummaging through the fridge and pantry, and there they were—zucchini and chickpeas calling my name! I decided to experiment, tossing in some spices and a sprinkling of parmesan for that cheesy goodness. The result? Pure magic! My kitchen smelled incredible, and one bite took me straight back to those cozy family dinners.
Food has that unique power, doesn’t it? Bringing us together, wrapping us in memories, and evoking feelings of happiness and nostalgia! That’s exactly why I started Feastical—to share my journey through the kitchen and inspire you to create your own delicious memories. So, whether you’re looking to impress friends, satisfy your snack cravings, or maintain a healthy diet, these bites are for you! Ready to let’s get cooking?
Personal Story
Let me take you back to a warm summer evening when I was a young culinary explorer, eager to learn from my mom while she whipped up her signature veggie dish in our cozy kitchen. With our small herb garden just steps away, those evenings felt like a treasure hunt! I loved how she made getting into the kitchen feel like an adventure. Together, we’d snip fresh basil, pluck ripe tomatoes, and rummage into our coolers for the freshest produce. It was during one of those adventures that I first stumbled upon zucchini and chickpea combinations. My mom was all about healthy snacking, using whatever was ripe and in-season.
One day, we decided to experiment with what we had. We turned those chunky zucchinis into little veggie balls that baked up beautifully, crisp on the outside and utterly comforting on the inside. The delight in my mom’s eyes when we pulled them out of the oven was priceless! We devoured them within minutes, and I’ve cherished that memory ever since. Today, I’m thrilled to share my revised version of those beloved bites, packed with wholesome ingredients and an extra kick of flavor!
Ingredients
Here’s everything you’ll need to create your savory zucchini chickpea bites:
-
2 medium zucchinis
These beauties give your bites moisture, making them tender and delicious! Feel free to swap with yellow squash if you want a different color. -
1 can (15 oz) chickpeas, drained and rinsed
A fantastic source of protein and fiber! If chickpeas aren’t your thing, cans of white beans work just as well! -
1 cup almond flour
This gluten-free alternative to traditional flours adds a lovely nuttiness and binds everything together perfectly. If you’re looking for a lower-calorie option, ground oats can work in a pinch! -
1 cup mixed vegetables, diced (bell peppers, onions, carrots, etc.)
Feel free to use whatever you’ve got on hand! The more colorful, the better. Plus, it adds extra nutrients and crunch. -
1 tsp smoked paprika
This spice adds a delightful smoky flavor! If you prefer less smokiness, regular paprika or even chili powder can be a fun twist! -
½ cup grated Parmesan cheese
Beautifully cheesy and addictive! To make this recipe vegan, use nutritional yeast for that cheesy flavor sans dairy! -
Salt and pepper to taste
To season those flavors perfectly! Keep it simple, or add a dash of cayenne pepper for a little heat!
With these ingredients, you’ll be on your way to crafting a pokeable pleasure of a snack!
Step-by-Step Instructions
Alright, let’s get our hands in the mix! Here’s how to make these Savory Zucchini Chickpea Bites:
Step 1: Prepare the Zucchini
Start by preheating your oven to 400°F (200°C). While that’s warming up, grab those zucchinis and give them a good wash. Grate them using a box grater or a food processor. Make sure to squeeze out excess moisture using a clean kitchen towel or cheesecloth. This step is crucial—too much water will make your bites mushy instead of delightfully crispy!
Step 2: Mash the Chickpeas
In a large mixing bowl, toss in your drained chickpeas. Use a fork or a potato masher to mash them up a bit. You’re looking for a chunky blend—some whole chickpeas add lovely texture! It’s okay to smash them a bit, but don’t go crazy; we want some bites to be a little crunchy.
Step 3: Combine the Ingredients
Add the sautéed vegetables (cooked until just soft to retain texture), grated zucchini, almond flour, grated parmesan, smoked paprika, salt, and pepper into the bowl with the chickpeas. Mix everything together with a spatula or your hands until well combined. You want a sticky blend, so it holds together when forming the patties.
Step 4: Shape the Bites
Now for the fun part! Take handfuls of the mixture and form them into small balls or patties, about the size of a golf ball or slightly bigger. You can shape them into whatever size you like—use mini sizes for party snacks, or larger shapes for a main dish!
Step 5: Bake to Crispy Perfection
Line a baking tray with parchment paper (easy cleanup is the name of the game!). Lay out the bites with a little space in between to allow for even baking. Pop them into your preheated oven and bake for 25-30 minutes, flipping halfway through. You want them golden brown, crispy on the outside, and tender on the inside. Feel free to rotate the tray halfway for an even cook!
Step 6: Enjoy the Aromatic Goodness
Once they’re out of the oven, resist the urge to dive in immediately! Allow them to rest for a few minutes; they’ll firm up as they cool. Just imagine those glorious smells wafting through your kitchen—it’s the best part! Present them with a side of your favorite dipping sauce, like tzatziki or spicy hummus, and you’re ready to serve!
Serving Suggestions
These savory bites are super versatile! Serve them warm with a sprinkle of fresh herbs like parsley or chives for a colorful touch. For a fun twist, create a platter with a variety of dips. Think garlic aioli, spicy ketchup, or classic marinara sauce!
If you want to jazz it up, try throwing a mini aperitivo party! Serve these bites alongside your favorite wine, fresh olives, and a handful of crackers. Trust me; you’ll have everyone raving about your impressive appetizer spread.
Recipe Variations
Looking to shake things up? Here are a few creative variations to try:
-
Mediterranean Twist: Fold in some chopped kalamata olives, sun-dried tomatoes, or feta cheese for a flavor boost that transports you straight to the Mediterranean.
-
Herby Delight: Add in finely chopped fresh herbs like cilantro, parsley, or basil for a burst of freshness. Choose herbs based on seasonal availability for the best flavor!
-
Spicy Kick: Toss in some diced jalapeños or a pinch of red pepper flakes for a spicy little surprise. Adjust the heat to suit your taste!
-
Cheesy Goodness: Swap the parmesan for crumbled goat cheese or cheddar for something extra cheesy and delicious.
-
Fancy Add-ins: Mix in a tablespoon of tahini or a tablespoon of nutritional yeast for that extra depth of flavor and a nutrient boost!
No matter how you switch things up, the main concept remains the same—joyful snacking at its finest!
Chef’s Notes
I’ve been tinkering with this recipe for quite some time now. What started as a simple family meal has evolved into a fun-filled party snack, and I often hear from friends and family about how much they enjoy these bites. They’ve become a staple at gatherings since everyone can enjoy them—trust me when I say the last time I made a double batch, they disappeared faster than I could serve!
More than just a recipe, I think of these Savory Zucchini Chickpea Bites as a reminder of how fun cooking can be. Experimentation is my favorite part of the journey; every new ingredient adds a twist of creativity!
FAQs and Troubleshooting
Q1: My bites fell apart while baking! What did I do wrong?
A: No worries! This can happen if there’s too much moisture in the mixture. Make sure to squeeze out excess water from your zucchini and allow your mixture to sit for a few minutes before shaping it into bites. If they still seem too loose, stir in some extra almond flour to help bind them!
Q2: Can I freeze these bites for later?
A: Absolutely! Once cooled, simply place them in a freezer-safe bag or container. They’re good for up to three months. Reheat them in the oven at 350°F (175°C) for a few minutes when you’re ready to enjoy again!
Q3: How can I make these bites spicier?
A: You can either add more smoked paprika, toss in some cayenne pepper before cooking, or serve them with a spicy dipping sauce!
Q4: Can I use other flours besides almond flour?
A: Yes! You can try oat flour, all-purpose flour, or even chickpea flour for more chickpea goodness. Just remember that the texture might slightly differ.
Nutritional Info
Each bite packs a flavorful punch while being loaded with nutrients! Here’s a rough breakdown:
- Calories: Approximately 80 cal per bite (varies with added ingredients)
- Protein: Around 3-4 grams from chickpeas and parmesan
- Fiber: 2 grams, thanks to the zucchini and chickpeas
- Fat: About 3-4 grams, depending on the type of cheese and oil used
- Vitamins & Minerals: Great sources of Vitamin C (from zucchini), iron, and potassium!
These bites are not just tasty; they’re a wholesome way to fuel your day without guilt!
Final Thoughts
And there you have it, my friends—Savory Zucchini Chickpea Bites that bring joy, flavor, and nostalgia all in one bite! Whether you’re snacking on them while binge-watching your favorite show or serving them at your next gathering, you’ll be sharing meals and memories that create smiles and warmth, much like a cozy hug.
I hope you enjoy making these as much as I do! Remember, cooking is all about creating, experimenting, and most importantly, HAVING FUN! So don your aprons, ignite those ovens, and let’s keep making food stories worth sharing. Until next time, happy cooking!
Print
Savory Zucchini Chickpea Bites
- Total Time: 45 minutes
- Yield: 4 servings 1x
- Diet: Vegetarian
Description
A delicious and healthy snack that combines zucchini and chickpeas for a crispy yet wholesome treat.
Ingredients
- 2 medium zucchinis
- 1 can (15 oz) chickpeas, drained and rinsed
- 1 cup almond flour
- 1 cup mixed vegetables, diced (bell peppers, onions, carrots, etc.)
- 1 tsp smoked paprika
- ½ cup grated Parmesan cheese
- Salt and pepper to taste
Instructions
- Preheat your oven to 400°F (200°C).
- Wash and grate the zucchinis, then squeeze out excess moisture.
- Mash the chickpeas in a large bowl until chunky.
- Combine the vegetables, grated zucchini, almond flour, Parmesan, smoked paprika, salt, and pepper with the chickpeas.
- Form small balls or patties with the mixture.
- Bake for 25-30 minutes, flipping halfway until golden brown.
- Allow to cool slightly before serving with a dipping sauce.
Notes
For a vegan version, replace Parmesan with nutritional yeast.
- Prep Time: 15 minutes
- Cook Time: 30 minutes
- Category: Snack
- Method: Baking
- Cuisine: Mediterranean
Nutrition
- Serving Size: 1 serving
- Calories: 80
- Sugar: 2g
- Sodium: 250mg
- Fat: 4g
- Saturated Fat: 1g
- Unsaturated Fat: 3g
- Trans Fat: 0g
- Carbohydrates: 9g
- Fiber: 2g
- Protein: 3g
- Cholesterol: 5mg
Keywords: snack, vegetarian, zucchini, chickpeas, healthy bites, party snack

Healthy Baked Churro Bites
Healthy Baked Churro Bites: An Irresistible Twist on a Classic Treat
Hey there, food lover! Imagine taking a bite of something warm, sweet, and spiced just right—right? I’m Beau Collier, and today we’re diving into a delightful recipe that will awaken your taste buds and add a sprinkle of joy to your day: Healthy Baked Churro Bites. Now, I know churros might sound like a guilty pleasure reserved for fairs and festivals, but I’m here to break that notion with a healthier, oven-baked version that doesn’t skimp on flavor or fun.
Churros, those crispy, sugary coils of happiness, have been a cherished treat in Spanish and Latin American cultures for generations. The scent of cinnamon wafting through the air as they fry up fresh is enough to make anyone do a little happy dance. However, thanks to our chic little recipe, you can embrace this joy in a healthier way—without guilt!
So, whether you’re gearing up for a cozy movie night, planning a festive gathering, or just whipping up a sweet snack because it’s Tuesday, this recipe is perfect for you! I promise, these bites will have you and your loved ones reaching for a second (or third) helping, minus any of that heavy feeling typical of fried treats. Let’s jump into this scrumptious journey of creating healthy baked churro bites!
A Dash of Nostalgia
Growing up, I was that kid who always wanted dessert before dinner—anyone else guilty of that? My family would frequently visit a charming little café where the churros were legendary. They came coated in cinnamon sugar, and one bite would send me straight to cloud nine. I can still hear the sizzle of the churros as they fried, the warm glow of the sun streaming through the café window, and my family laughing and sharing the treat.
One sunny afternoon, I decided to get a little adventurous. I wanted to replicate that joyous experience in my own kitchen, but with a healthier twist. The last thing I wanted was to feel weighed down from indulging in something I loved. That was the spark that ignited my creativity! I wanted to create churro bites that came together simply and without all the guilt. Fast forward to today, and I can confidently say these little bites capture that childhood joy, plus they’ll keep you feeling light and happy. That’s the kind of food magic I live for!
Ingredients
Here’s what you need to whip up these heavenly bites:
-
1 cup almond flour
A fantastic low-carb option that’s packed with fiber and protein. If you’re looking for a nut-free alternative, you can use sunflower seed flour—just be mindful of the taste difference! -
1/4 cup coconut flour
Offers a mild sweetness and is wonderfully absorbent. Swap with another gluten-free flour like oat flour if coconut isn’t your jam! -
1/4 cup sweetener
Use erythritol for a zero-calorie option, or coconut sugar for a more natural approach. Want more flavor? Brown sugar works beautifully too! -
1 tsp baking powder
A key ingredient for creating those fluffy bites—make sure it’s fresh for the best results! -
1/2 tsp cinnamon
The main spice hero of our churros! You can always amp up the cinnamon for that extra warmth and comfort. -
1/4 tsp salt
Enhances all the flavors; don’t skip it! If you’re watching sodium intake, you can reduce to a pinch. -
2 eggs
They bind everything together and make them oh-so-fluffy. If you’re vegan, replace them with flax eggs (2 tbsp ground flaxseed mixed with 6 tbsp water works like magic). -
1/4 cup melted coconut oil
This will add healthy fats and moisture. Unsalted butter or avocado oil can be substituted for a different flavor. -
1 tsp vanilla extract
A must for a well-rounded flavor. You could also try using almond extract for a unique twist. -
Cinnamon and sweetener mixture for coating
This is where the magic happens! Mix equal parts cinnamon and your sweetener choice. It adds that classic churro finish!
Step-by-Step Instructions
Preheat and Prep
-
Preheat your oven to 350°F (175°C). Getting the oven ready means that by the time your dough is ready, your baking surface is ready too!
-
Prepare a baking sheet. Line it with parchment paper for easy cleanup and to prevent sticking. Your future self will thank you for this!
Mix It Up
-
In a mixing bowl, combine the dry ingredients: almond flour, coconut flour, sweetener, baking powder, cinnamon, and salt. Whisk them together until fully mixed. This step helps all those flavors mingle well and ensures even baking.
-
In a separate bowl, whisk the wet ingredients: eggs, melted coconut oil, and vanilla extract until well combined. Incorporate all those liquid lovelies for a smooth texture.
Combine and Shape
-
Merge the wet and dry mixtures together. Stir until you have a thick dough-like consistency. It’ll be sticky, and that’s okay! You want to aim for a dough that holds together when squeezed.
-
Get your hands slightly wet (this will help with the stickiness), then scoop out a tablespoon of dough and roll it into a small ball. Place them about one inch apart on your prepared baking sheet.
Bake to Perfection
- Bake for 15-18 minutes until they’re golden brown on the edges and tender inside. Keep an eye on them after 15 minutes—oven times may vary. A toothpick inserted into the center should come out clean!
Sweet Coating Time
-
While the churro bites are baking, make your cinnamon-sugar coating by mixing equal parts cinnamon and your sweetener choice in a small bowl.
-
Once they’re out of the oven, let them cool for about 5 minutes, then gently roll them in the cinnamon-sugar mixture while they’re still warm. This will create that irresistible shell we all know and love!
Serving Suggestions
Plate those beautiful churro bites in a fun stack or a little basket. You can add a pinch of extra cinnamon sugar on top for good measure! Serve them with a side of creamy Greek yogurt or a luscious dark chocolate sauce for dipping. Imagine having these mini bites paired with a warm mug of chai or hot cocoa. Talk about a cozy combo!
Recipe Variations
Feeling adventurous? Here are a few ways to switch it up:
-
Chocolate Hazelnut Swirls: Add a spoonful of your favorite chocolate hazelnut spread right in the center before rolling into balls.
-
Coconut Churro Bites: Mix in shredded coconut into the dough for a tropical spin.
-
Nutty Crunch: Add chopped nuts (like pecans or walnuts) into the dough for a delightful crunch.
-
Spiced Churro Delight: Experiment with other spices! A bit of nutmeg or cardamom can lend a warm, unique flavor.
-
Sugar-Free Option: Use a sugar-free chocolate sauce or a drizzle of nut butter instead of the cinnamon-sugar for a different take!
Chef’s Notes
As I developed this recipe, I remembered the joy that churros brought to my family and me. It’s amazing how food can elicit such beautiful memories! Each iteration made me realize that there’s always room for improvement or a new technique to learn. I’ve swapped in different flours, played with spices, and each time, I found something delightful. Don’t be afraid to riff on this recipe—that’s where the real magic lies! Food is a celebration, so have fun with it!
FAQs and Troubleshooting
-
Why did my churro bites flatten?
Make sure you’re using freshly opened baking powder, and avoid overmixing. If the dough is too wet, add a bit more almond flour until the consistency is more dough-like. -
Can I freeze these?
Absolutely! Allow them to cool, then store them in a sealed bag in the freezer. Reheat them for a delicious snack anytime! -
What if they are too dry?
Ensure you’re measuring the flour correctly. Spoon the flour into your measuring cup, and level it off—too much flour can dry them out. -
Can I use a different sweetener?
You can use brown sugar, maple syrup, or honey. Just adjust the measurements, as liquid sweeteners may affect the dough’s consistency.
Nutritional Info
These Healthy Baked Churro Bites come in at roughly:
- Calories: 80-90 per bite
- Fat: 6g (mainly heart-healthy fats from coconut oil and almond flour)
- Carbohydrates: 5g net carbs
- Fiber: 2g
- Protein: 2g
They’re a delightful treat that fits into many dietary preferences while satisfying that sweet tooth!
Final Thoughts
And there you have it, friends! Healthy Baked Churro Bites that are easy to whip up, delicious, and full of stories waiting to be created at your dinner table. Food is all about connection—bringing people together, telling stories, and spreading joy through every bite. So, whether you’re indulging for breakfast, dessert, or a delightful snack, remember that good food doesn’t have to be complicated or heavy.
Try these out for your next gathering or, better yet, make them just for yourself! I promise they’ll warm your heart and home. Until next time, grab your spatula and let’s keep creating wholesome kitchen magic together! Happy cooking!
Print
Healthy Baked Churro Bites
- Total Time: 28 minutes
- Yield: 12 servings 1x
- Diet: Gluten-Free
Description
Delicious and guilt-free baked churro bites that capture the joy of a classic treat without the heaviness of frying.
Ingredients
- 1 cup almond flour
- 1/4 cup coconut flour
- 1/4 cup sweetener (erythritol or coconut sugar)
- 1 tsp baking powder
- 1/2 tsp cinnamon
- 1/4 tsp salt
- 2 eggs
- 1/4 cup melted coconut oil
- 1 tsp vanilla extract
- Cinnamon and sweetener mixture for coating
Instructions
- Preheat your oven to 350°F (175°C).
- Prepare a baking sheet lined with parchment paper.
- Combine the dry ingredients in a mixing bowl: almond flour, coconut flour, sweetener, baking powder, cinnamon, and salt.
- Whisk the wet ingredients: eggs, melted coconut oil, and vanilla extract until well combined.
- Merge the wet and dry mixtures together until you have a thick dough-like consistency.
- Wet your hands slightly, then scoop out a tablespoon of dough and roll it into a small ball.
- Place the dough balls about one inch apart on your prepared baking sheet.
- Bake for 15-18 minutes until golden brown on the edges.
- Mix equal parts cinnamon and your sweetener choice in a small bowl for coating.
- Once out of the oven, let cool for 5 minutes, then roll in the cinnamon-sugar mixture.
Notes
These bites are great served with Greek yogurt or dark chocolate sauce for dipping.
- Prep Time: 10 minutes
- Cook Time: 18 minutes
- Category: Dessert
- Method: Baking
- Cuisine: Spanish
Nutrition
- Serving Size: 1 bite
- Calories: 85
- Sugar: 2g
- Sodium: 100mg
- Fat: 6g
- Saturated Fat: 5g
- Unsaturated Fat: 1g
- Trans Fat: 0g
- Carbohydrates: 7g
- Fiber: 2g
- Protein: 2g
- Cholesterol: 30mg
Keywords: baked churros, healthy dessert, gluten-free, snack recipes
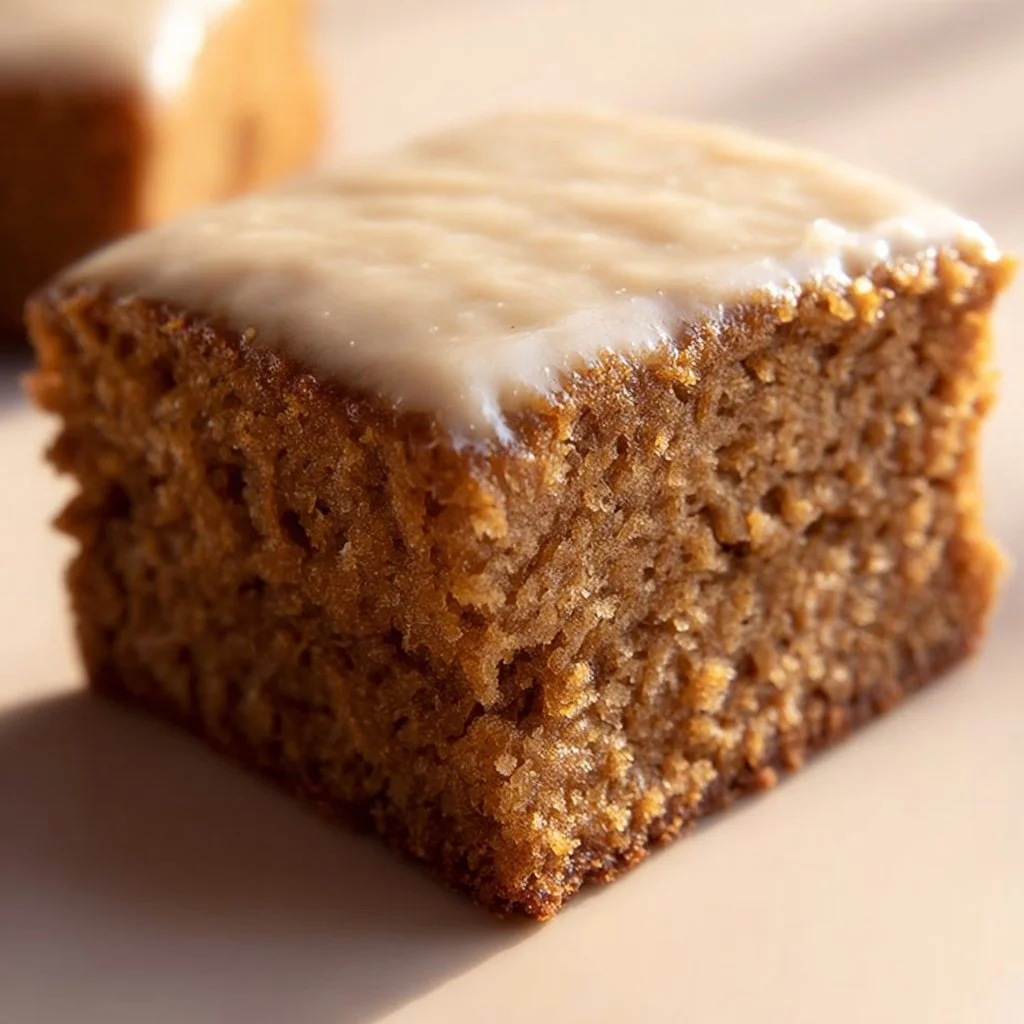
100 Calorie Applesauce Snack Cake
# The Ultimate 100 Calorie Applesauce Snack Cake

Hey, food lovers! 🌟 Today, I’m thrilled to share one of my all-time favorite recipes that hits all the right notes of deliciousness without weighing on your calorie count. It’s the **100 Calorie Applesauce Snack Cake**—a delightfully moist dessert that’s perfect for those moments when you crave something sweet but want to keep it light.

So grab your mixing bowls and your favorite whisk because we’re about to embark on a delightful culinary adventure. Let’s make some magic happen!

## Introduction

There’s something incredibly satisfying about whipping up a dish that not only tastes amazing but also gives a warm, fuzzy feeling inside. If you’re like me, many of your fondest memories are tied to food. We gather around tables, share stories, and create a delicious tapestry of flavors that linger long after the last bite. The beauty of this 100 Calorie Applesauce Snack Cake is that it embodies all of that: simplicity, warmth, and joy in every slice.

Imagine the scent of cinnamon wafting through your kitchen as this cake bakes to perfection. Made with wholesome, readily available ingredients, this snack cake is your perfect companion for afternoon tea or a cozy family gathering. Best of all? It's guilt-free! With just 100 calories per serving, you can indulge without worrying about your waistline.

Embracing a healthier lifestyle doesn’t mean sacrificing taste or comfort. This cake is proof that you can have your snack and eat it too! Plus, with the right pairings and toppings, you can elevate this dish from simple to show-stopping. Are you ready to get baking? Let’s dive into the story behind this recipe and share the joy of making something so delightful together!

## Personal Story

I still remember the first time I tasted an applesauce cake. It was at a local bake sale, standing beside my mom, who was busily chatting with a friend while I munched on that divine slice of moistness topped with a sprinkle of powdered sugar. The sweet, tangy applesauce and the warm spices danced on my taste buds like a joyful melody!

From that moment, I was hooked. I went home brimming with enthusiasm and convinced my mom to teach me her version of this fabulous cake. At that age, I didn’t realize the significance of what we were making – it was just about the excitement of stirring up ingredients and watching them transform into something oh-so-delicious.

Fast forward to today, and I’ve taken that nostalgic cake and created a healthier version that still captures the essence of my childhood flavors. Every time I bake this cake, I smile, thinking about that innocent joy and the stories we share over slices of something scrumptious.

## Ingredients

Here’s what you’ll need to whip up this delightful snack cake:

- **1 cup unsweetened applesauce**
  - Provides natural sweetness and moisture, making your cake tender. You can also use homemade applesauce if you have some on hand—a fun kitchen project!

- **1 cup whole wheat flour**
  - I love using whole wheat flour for added fiber and nutrition. If you're gluten-free, substitute with almond flour or a 1:1 gluten-free flour blend.

- **1/2 cup sugar or a sugar substitute**
  - Feel free to swap in a sugar substitute like Stevia or erythritol if you’re watching your sugar intake. Just be mindful of the conversion ratios, as they can vary.

- **1 teaspoon baking soda**
  - This is our leavening agent that'll help make the cake rise and become fluffy. Ensure it’s fresh for the best results!

- **1 teaspoon cinnamon**
  - Because, let’s get real—cinnamon makes everything better! It adds that cozy, warming flavor to our cake. Dive into a mix of nutmeg or allspice if you want to switch things up!

- **1/2 teaspoon vanilla extract**
  - A splash of vanilla gives depth to the flavor. You can also use almond extract for a slightly different vibe.

- **1/4 teaspoon salt**
  - Balances the sweetness and enhances the flavors in the cake. You won’t even notice it’s there, but it’s crucial!

- **1/2 cup unsweetened almond milk (or any plant-based milk)**
  - This keeps our cake moist. You can swap in regular milk or even oat milk depending on what you prefer.

- **1 tablespoon lemon juice**
  - A little acidity brightens up the flavors and complements the sweetness of the applesauce beautifully. If you don't have lemon, try apple cider vinegar!

Together, these ingredients create a wholesome snack cake packed with flavor and memories.

## Step-by-Step Instructions

Now that we have our ingredients lined up, let's get down to baking. Follow these steps for a cake that’ll make your taste buds dance:

1. **Preheat Your Oven**:
   - Preheat your oven to 350°F (175°C). This ensures an even bake. While the oven heats up, you can gather the ingredients and prepare your batter!

2. **Mix the Wet Ingredients**:
   - In a large mixing bowl, combine the applesauce, almond milk, lemon juice, and vanilla extract. Whisk until smooth. This is where all that beautiful moisture comes from!

3. **Combine the Dry Ingredients**:
   - In a separate bowl, whisk together whole wheat flour, sugar (or substitute), baking soda, cinnamon, and salt. This step is crucial: mixing dry ingredients before combining helps ensure an even distribution of baking soda and salt.

4. **Combine Wet and Dry**:
   - Slowly fold the dry ingredients into the wet mixture using a spatula to avoid overmixing. It's okay if there are small lumps; trust me, that’s what keeps our cake soft and fluffy!

5. **Grease the Pan**:
   - Grease an 8-inch round or square baking pan with cooking spray or a light coat of oil. You can also line it with parchment paper for an easy release.

6. **Pour the Batter**:
   - Pour the batter evenly into the prepared pan, smoothing the top with a spatula. Patience pays off here—take a moment to make sure it’s even.

7. **Bake**:
   - Pop your cake in the oven and bake for about 25-30 minutes. Keep an eye on it after 20 minutes; it's done when a toothpick inserted into the center comes out clean!

8. **Cool and Serve**:
   - Once baked, allow the cake to cool in the pan for about 10 minutes, then transfer it to a wire rack to cool completely.

9. **Slice and Enjoy**:
   - Once cooled, slice into squares or wedges.

## Serving Suggestions

Here’s where the fun really begins! Serve your 100 Calorie Applesauce Snack Cake with a light sprinkle of powdered sugar or a dollop of whipped coconut cream on top for that extra flair. You can also add fresh fruits like berries or a scoop of low-calorie vanilla ice cream—yum!

For a picnic or a potluck, consider serving it in a tiered cake stand, dressed up with seasonal fruits or alongside other healthy snacks. Trust me, it’s not just eye-catching; it’ll have everyone asking for your secret recipe.

## Recipe Variations

Feeling adventurous? Here are some creative twists you can try:

1. **Chocolate Chip Applesauce Cake**:
   - Fold in half a cup of dark chocolate chips for a decadent treat. This adds just a hint of indulgence while still keeping it light!

2. **Carrot Applesauce Cake**:
   - Incorporate a cup of finely grated carrots for a delightful twist that adds moisture and nutrition.

3. **Nutty Addition**:
   - Toss in a handful of chopped nuts like walnuts or pecans. They add a delightful crunch and elevate the cake's flavor.

4. **Spiced Version**:
   - Amp up the spices! A teaspoon of nutmeg or a hint of ginger will give this cake a warm flavor perfect for fall.

5. **Coconut Flour Swap**:
   - If you want a gluten-free version, substitute half the whole wheat flour with coconut flour. Just note: you may need to add a bit more liquid, so adjust as necessary.

## Chef’s Notes

This recipe has evolved over the years, and each iteration brings back memories of baking with my family. Sometimes, I toss in extra spices or change up the liquid base. The beauty of cooking is that it’s all about experimentation! One kitchen blunder I remember was using baking powder instead of baking soda—let’s just say the cake turned out to be a little more… "fluffy" than intended. But hey, that’s the charm of home cooking!

## FAQs and Troubleshooting

**Q: Why is my cake sinking in the middle?**
*This can happen if the oven temperature is too low or if the batter was overmixed. Make sure to preheat and mix your batter gently!*

**Q: Can I use sweetened applesauce?**
*Absolutely! Just reduce the sugar in the recipe accordingly, as sweetened applesauce will contribute additional sweetness.*

**Q: How do I store leftover cake?**
*Store it in an airtight container at room temperature, and it should stay fresh for up to three days! If you want it to last longer, pop it in the fridge.*

**Q: Can I freeze this cake?**
*Yes! Wrap it tightly in plastic wrap and then aluminum foil to avoid freezer burn. Thaw it in the fridge overnight before enjoying!*

## Nutritional Info

Each serving of this delicious 100 Calorie Applesauce Snack Cake clocks in at about 100 calories. Here’s the breakdown per serving:
- **Total Fat**: 1g
- **Sodium**: 100mg
- **Total Carbohydrates**: 21g
  - **Dietary Fiber**: 2g
  - **Sugars**: 8g
- **Protein**: 2g

This makes it a fantastic option when you're craving something sweet without overdoing it!

## Final Thoughts

There you have it, my wonderful foodie friends—your journey to creating a delectable 100 Calorie Applesauce Snack Cake. It’s more than just a recipe; it's a way to enjoy the little moments, nourish your body, and share love through food.

So, whether you bake this for a cozy night in, a rainy day treat, or to impress your friends at your next gathering, remember to enjoy every step of the process. Cooking is about the joy of discovery, and each bite carries a story—just like the first memory of my applesauce cake at that bake sale.

I can’t wait to hear how your cake turns out! Share your baking adventures and any personal twists you make. Until next time, happy baking! 🍰✨
100 Calorie Applesauce Snack Cake
- Total Time: 40 minutes
- Yield: 8 servings 1x
- Diet: Vegetarian
Description
A moist and delicious applesauce snack cake that’s only 100 calories per serving, perfect for a guilt-free treat.
Ingredients
- 1 cup unsweetened applesauce
- 1 cup whole wheat flour
- 1/2 cup sugar or a sugar substitute
- 1 teaspoon baking soda
- 1 teaspoon cinnamon
- 1/2 teaspoon vanilla extract
- 1/4 teaspoon salt
- 1/2 cup unsweetened almond milk (or any plant-based milk)
- 1 tablespoon lemon juice
Instructions
- Preheat your oven to 350°F (175°C).
- Mix the wet ingredients: combine applesauce, almond milk, lemon juice, and vanilla extract in a large bowl and whisk until smooth.
- Combine the dry ingredients in a separate bowl: whisk together whole wheat flour, sugar (or substitute), baking soda, cinnamon, and salt.
- Combine the wet and dry mixtures: slowly fold the dry ingredients into the wet mixture using a spatula.
- Grease an 8-inch round or square baking pan.
- Pour the batter evenly into the prepared pan.
- Bake for 25-30 minutes, or until a toothpick comes out clean.
- Cool the cake in the pan for 10 minutes, then transfer to a wire rack.
- Slice and enjoy!
Notes
Serve with a sprinkle of powdered sugar or a dollop of whipped coconut cream for added flavor.
- Prep Time: 10 minutes
- Cook Time: 30 minutes
- Category: Dessert
- Method: Baking
- Cuisine: American
Nutrition
- Serving Size: 1 serving
- Calories: 100
- Sugar: 8g
- Sodium: 100mg
- Fat: 1g
- Saturated Fat: 0g
- Unsaturated Fat: 1g
- Trans Fat: 0g
- Carbohydrates: 21g
- Fiber: 2g
- Protein: 2g
- Cholesterol: 0mg
Keywords: applesauce cake, healthy dessert, low calorie cake, moist snack cake, guilt-free dessert