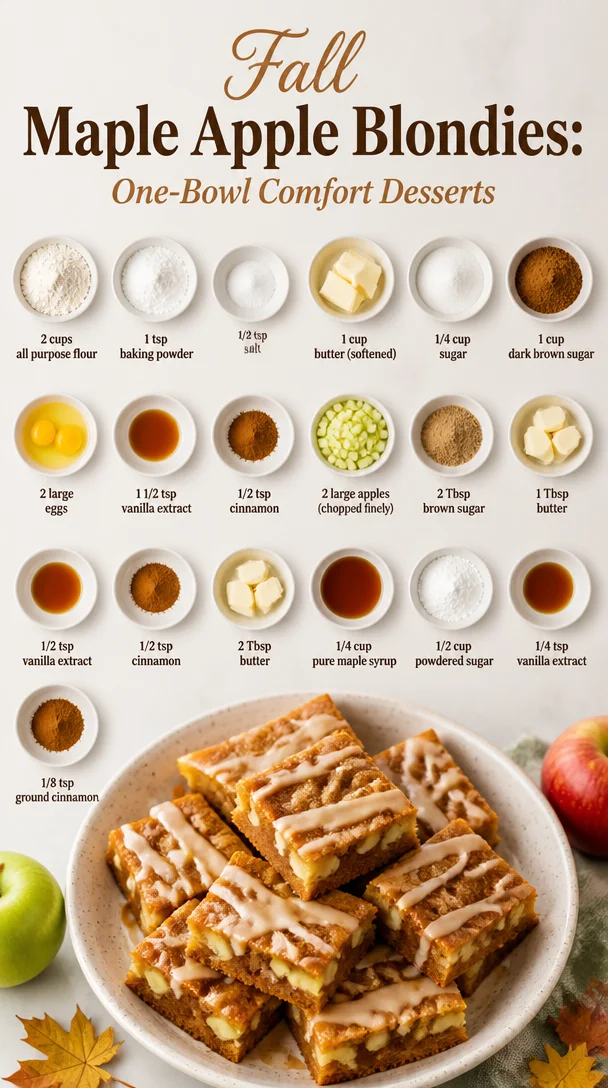
Fall Maple Apple Blondies: One-Bowl Comfort Desserts
Maple Glazed Apple Blondies: A Sweet Slice of Comfort
Hey food lovers! 🌟 It’s Beau Collier here, and I am so thrilled to share my Maple Glazed Apple Blondies with you. If there’s one thing that can instantly cozy up a kitchen, it’s the sweet, warm scent of baked apples mixed with a hint of maple syrup. These blondies are not just a dessert; they’re a delicious hug served on a plate! Now, I know what you might be thinking—“Blondies? What’s so special about that?” But let me tell you, these aren’t your ordinary blondies. We’re talking about a delightful combination of soft, chewy goodness topped with a luscious maple glaze that’ll keep you coming back for seconds (and maybe thirds).
A Sweet Slice of Nostalgia 🍏
Let me take you back to my childhood, where every fall meant one thing—apple picking season. My family would load up the car, and off we’d go to our favorite orchard. The anticipation of those ripe, juicy apples hanging off the trees was everything! I remember how my mom would fill our basket to the brim while sharing stories about which apples made the best pies or sauces.
But the real magic happened when we got home. While my dad handled the apple cider, my mom would whip up various treats, from classic apple pies to comforting apple bars. But it wasn’t until years later that I discovered the joys of blondies. My first batch was an experiment, trying to replicate the flavors of my family’s apple desserts but with a new twist. Tasting the warm, gooey center with the crunch of apples and a hint of cinnamon took me right back to autumn afternoons spent with family. That’s when I decided to create the Maple Glazed Apple Blondies—The perfect treat that combines nostalgia with a modern spin!
Ingredients 🥄
Here’s what you’ll need to whip up these delicious blondies, along with some helpful tips on substitutions and chef insights:
-
2 cups all-purpose flour: This is the base for your blondies. You can substitute with gluten-free flour if necessary; just make sure to use a blend that includes xanthan gum for structure.
-
1 tsp baking powder: This helps your blondies rise to that perfect chewy texture. Baking soda can be substituted in a pinch but adjust the quantity to 1/2 tsp.
-
1/2 tsp salt: Salt enhances flavor. Feel free to use sea salt for a bit of fancy flair!
-
1 cup butter (softened): Butter is essential for richness. If you want a lighter version, try using half butter and half applesauce.
-
1/4 cup sugar: Just a touch of white sugar brings out the sweetness! You can use coconut sugar for a deeper flavor.
-
1 cup dark brown sugar: The moisture from brown sugar creates a chewy texture. Light brown sugar works too; just keep in mind it will be slightly less flavorful.
-
2 large eggs: They bind everything together. You can replace the eggs with flax eggs (2 tbsp ground flaxseed mixed with 5 tbsp water) for a vegan version.
-
1 1/2 tsp vanilla extract: You can’t skip the vanilla—it’s the magic ingredient! Use pure vanilla for the best flavor.
-
1/2 tsp cinnamon: Perfect for that cozy autumn feel. You can add a pinch more if you’re a cinnamon lover like me!
-
2 large apples (chopped finely): Apples provide moisture and texture. Granny Smith or Honeycrisp work great, but feel free to use whatever you have on hand.
-
2 Tbsp brown sugar: This is for our apple topping, adding a caramelized, sweet finish.
-
1 Tbsp butter: A little butter goes a long way in achieving the perfect sautéed apples.
-
1/2 tsp vanilla extract (for the topping): Because more vanilla is always better!
-
1/2 tsp cinnamon (for the topping): To complement the apples.
-
2 Tbsp butter (for the glaze): It adds that extra level of richness.
-
1/4 cup pure maple syrup: The star of the glaze! Look for 100% pure maple syrup for maximum flavor.
-
1/2 cup powdered sugar: This is what makes the glaze sweet and spreadable.
-
1/4 tsp vanilla extract (for the glaze): Yep, one more dash of vanilla!
-
1/8 tsp ground cinnamon: Just a pinch to enhance the flavors of the glaze.
Step-by-Step Instructions 👨🍳
Now, let’s get our bake on! Follow these steps to create your Maple Glazed Apple Blondies. Don’t worry; I’ll sprinkle in some of my favorite chef hacks along the way!
-
Preheat your oven: Start by preheating your oven to 350°F (175°C). This step is crucial because you want your blondies to cook evenly. While the oven heats up, grab an 8×8-inch baking pan, line it with parchment paper, and lightly grease it with cooking spray or a little butter. This ensures your blondies will slide right out when they’re ready!
-
Mix your dry ingredients: In a medium bowl, whisk together the flour, baking powder, salt, and cinnamon until well combined. This step helps to distribute the baking powder evenly so your blondies rise like they should!
-
Cream the butter and sugars: In another bowl, beat together the softened butter, granulated sugar, and dark brown sugar until the mixture is light and fluffy—about 2-3 minutes. This is where the magic happens! The air you incorporate will give the blondies that nice chewy texture.
-
Add the eggs and vanilla: Beat in the eggs one at a time, followed by the vanilla extract. Make sure everything is mixed until smooth; this is your batter’s chance to come together.
-
Combine dry and wet ingredients: Gradually add your dry ingredients into the wet ingredients—mixing on low speed (or with a spatula) until just combined. Overmixing can lead to tough blondies, so once you see no flour streaks, stop!
-
Fold in the apples: Gently fold in the finely chopped apples until they are evenly distributed in the batter. And here’s a chef hack: if your apples are a little dry, you can toss them in a sprinkle of lemon juice to perk them up before adding them in!
-
Spread the batter in the pan: Pour your batter into the prepared baking pan, smoothing the top with a spatula. Bake it in your preheated oven for 25-30 minutes, or until the top is golden brown and a toothpick inserted in the center comes out with a few moist crumbs. This step is all about the perfect bake!
-
Make the apple topping: While your blondies are baking, melt 1 Tbsp of butter in a skillet over medium heat. Add the chopped apples and sprinkle 2 Tbsp of brown sugar over them, tossing to coat. Sauté until the apples are tender and caramelized, about 5-7 minutes. Set aside to cool.
-
Cool and glaze: Once your blondies are done baking, let them cool in the pan for about 10 minutes before transferring them to a wire rack. For the glaze, melt 2 Tbsp of butter in a bowl, and whisk in the maple syrup, powdered sugar, and a sprinkle of cinnamon. Drizzle it over the cooled blondies once they’re completely cool.
-
Slice and serve: Finally, cut into squares and serve those gorgeous blondies up! You can top each piece with some of those fabulous sautéed apples, and trust me, they look as good as they taste.
Serving Suggestions 🍽️
Now that you have your Maple Glazed Apple Blondies ready to go, let’s talk presentation! I love to serve these warm with a scoop of vanilla ice cream on top for that ultimate comforting dessert vibe. You can also sprinkle some crushed nuts—like walnuts or pecans—over the top for an added crunch. A dusting of powdered sugar or even a drizzle of extra maple syrup doesn’t hurt either!
For a cozy fall get-together, serve them alongside a steaming cup of coffee or a spiced apple cider. The warm flavors of apple and maple paired with the comforting spices are bound to keep everyone coming back for more!
Recipe Variations 🌈
Feeling creative? Here are a few variations you can try with this recipe:
-
Nutty Crunch: Fold in half a cup of chopped nuts like walnuts or pecans for an irresistible crunch.
-
Chocolate Chip Delight: Add a cup of semi-sweet chocolate chips to the batter for a sweet and savory combo.
-
Pumpkin Spice Twist: For a seasonal spin, substitute 1/2 cup of applesauce with pumpkin puree and add an extra teaspoon of pumpkin spice!
-
Caramel Sauce Drizzle: Instead of the maple glaze, drizzle warm caramel sauce over the blondies for a decadent dessert.
-
Vegan Version: Use flax eggs and substitute the butter with coconut oil or vegan butter for plant-based blondies!
Chef’s Notes 📝
These blondies are a personal favorite of mine, and I love that they remind me of those bustling fall days at the orchard. Fun fact: I initially made this recipe when I realized I had way too many apples from one of those picking adventures! What started as a way to use up excess fruit has turned into a household staple. Keep in mind, if you’re ever short on time, the blondies can be enjoyed without the glaze too—they’re still scrumptiously moist and packed with flavor on their own!
FAQs and Troubleshooting 🤔
-
Why are my blondies too cakey?
If your blondies are coming out cakey, it’s likely because they’ve been overmixed or overbaked. Always mix until just combined and keep an eye on them as they bake—each oven is different! -
What should I do if my blondies are dry?
If your blondies are dry, it could be a sign that you baked them too long. To fix this in the future, try reducing your baking time slightly, or add a tablespoon of applesauce for moisture. -
Can I freeze these blondies?
Absolutely! Let them cool completely, then wrap them tightly in plastic wrap before sealing them in an airtight container. They can last up to 3 months in the freezer! -
How do I know when my blondies are done?
Insert a toothpick in the center. If it comes out with a few moist crumbs, they’re perfect. If the toothpick is clean, they may be overcooked!
Nutritional Info 🥗
Here’s a sneak peek at the nutritional breakdown of each blondie (based on a 16-piece batch):
- Calories: 280
- Fat: 12g
- Carbohydrates: 40g
- Fiber: 1g
- Protein: 2g
Note that nutritional info may vary depending on ingredient brands and substitutions made. Don’t let the calories scare you; a little indulgence is all part of the fun, right?
Final Thoughts 💭
I hope you’ve enjoyed learning about my Maple Glazed Apple Blondies as much as I love making them! Remember, cooking is about more than just ingredients. It’s about the stories we share and the memories we create around the table. So next time you’re looking for a comforting dessert that evokes feelings of warmth and nostalgia, give these blondies a try. They’ll surely become a beloved recipe in your kitchen, just like they have in mine! Happy baking, everyone! 🍏✨
Print
Maple Glazed Apple Blondies
- Total Time: 45 minutes
- Yield: 16 servings 1x
- Diet: Vegetarian
Description
Delicious blondies with a soft, chewy texture, topped with a sweet maple glaze and chunks of apple, perfect for fall.
Ingredients
- 2 cups all-purpose flour
- 1 tsp baking powder
- 1/2 tsp salt
- 1 cup butter (softened)
- 1/4 cup sugar
- 1 cup dark brown sugar
- 2 large eggs
- 1 1/2 tsp vanilla extract
- 1/2 tsp cinnamon
- 2 large apples (chopped finely)
- 2 Tbsp brown sugar
- 1 Tbsp butter (for sautéing apples)
- 1/2 tsp vanilla extract (for the topping)
- 1/2 tsp cinnamon (for the topping)
- 2 Tbsp butter (for the glaze)
- 1/4 cup pure maple syrup
- 1/2 cup powdered sugar
- 1/4 tsp vanilla extract (for the glaze)
- 1/8 tsp ground cinnamon
Instructions
- Preheat your oven to 350°F (175°C) and line an 8×8-inch baking pan with parchment paper.
- Mix the flour, baking powder, salt, and cinnamon in a medium bowl.
- Cream the softened butter, granulated sugar, and dark brown sugar until light and fluffy.
- Add the eggs one at a time, followed by the vanilla extract.
- Combine the dry ingredients into the wet ingredients until just mixed.
- Fold in the chopped apples until evenly distributed.
- Spread the batter in the prepared baking pan and bake for 25-30 minutes.
- Make the apple topping by sautéing apples with brown sugar until tender.
- Cool the blondies in the pan for 10 minutes, then transfer to a wire rack.
- Glaze the cooled blondies with a mixture of melted butter, maple syrup, powdered sugar, and cinnamon.
- Slice into squares and serve.
Notes
Try serving warm with vanilla ice cream or crushed nuts for extra crunch.
- Prep Time: 15 minutes
- Cook Time: 30 minutes
- Category: Dessert
- Method: Baking
- Cuisine: American
Nutrition
- Serving Size: 1 blondie
- Calories: 280
- Sugar: 22g
- Sodium: 200mg
- Fat: 12g
- Saturated Fat: 7g
- Unsaturated Fat: 3g
- Trans Fat: 0g
- Carbohydrates: 40g
- Fiber: 1g
- Protein: 3g
- Cholesterol: 50mg
Keywords: blondies, apple dessert, fall recipes, maple glaze
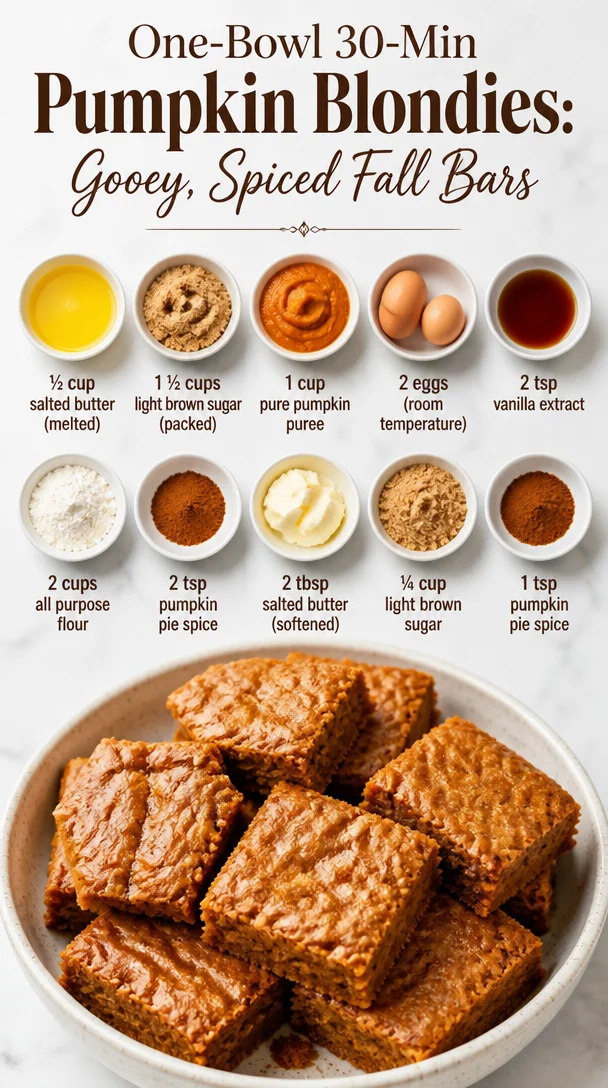
One-Bowl 30-Min Pumpkin Blondies: Gooey, Spiced Fall Bars
Pumpkin Blondies: A Cozy Fall Treat with a Twist
Hey there, friends! As the leaves turn golden and that crisp autumn breeze starts to whisper through the trees, there’s nothing quite like celebrating the season with a delicious batch of pumpkin blondies. I mean, how can you resist the warm, spicy aroma that fills your kitchen and beckons your loved ones to gather? These beauties are more than just a dessert; they’re an experience, a memory in the making, and a way to bring a little joy to your day.
A Little Slice of Nostalgia
Let me take you back to my childhood for a moment—a time filled with the warmth of my grandmother’s kitchen. Fall was always my favorite season because of the smell of pumpkin baking wafting through our house. My grandma had this magical recipe that would make even the pickiest eaters swoon. I remember sneaking into the kitchen when she wasn’t looking, stealing little spoonfuls of batter and trying not to get caught—what a thrill! It was my first taste of creating something from scratch and feeling like I was part of the kitchen magic.
These pumpkin blondies capture that same spirit! They’re rich and cozy, and every bite feels like a celebration of fall. A perfect mix of sweetness, warmth, and nostalgia all wrapped up in a chewy, delicious dessert. So, are you ready to make some memories of your own? Let’s dive right in!
Ingredients: What You’ll Need
Before we get into the good stuff, let’s gather our ingredients! Here’s what you’ll need to whip up these delightful pumpkin blondies:
-
½ cup salted butter (melted)
This adds richness and body to your blondies. You can substitute with unsalted butter if you prefer, just remember to sprinkle in a tiny pinch of salt! -
1 ½ cups light brown sugar (packed)
This gives that coveted molasses flavor and moisture. If you’re in a pinch, you can use granulated sugar, but you’ll miss that deep, sweet undertone. -
1 cup pure pumpkin puree
Make sure it’s 100% pumpkin and not the pie filling! You can make your own by roasting pumpkin, or use store-bought for convenience. -
2 eggs (room temperature)
Room temperature eggs blend better into your batter. If you’ve forgotten, place cold eggs in warm water for about 10 minutes. -
2 tsp vanilla extract
Adds a lovely depth of flavor. You could experiment with almond extract for a different twist! -
2 cups all-purpose flour
Essential for structure! For gluten-free options, consider using a 1:1 gluten-free flour blend. -
2 tsp pumpkin pie spice
This is the magic mix of cinnamon, nutmeg, and clove; you can make your own if you’re feeling adventurous or just buy a ready-mixed jar. -
2 tbsp salted butter (softened)
This will be used to enhance the topping. Soften it at room temperature or give it a quick zap in the microwave (but just enough so it’s not melted). -
¼ cup light brown sugar
For that sweet crumble on top! If you’re looking for an alternative, coconut sugar will work for a different flavor profile. -
1 tsp pumpkin pie spice for topping
Adds that final touch of warmth on top of the blondies.
Step-by-Step Instructions: Creating Your Masterpiece
Alright, folks, let’s roll up our sleeves and get cooking! Here’s how to make these sweet pumpkin blondies step by step:
-
Preheat Your Oven
First things first, let’s preheat that oven to 350°F (175°C). This is essential because we want our blondies to bake evenly and become just the right amount of gooey. -
Prepare Your Baking Dish
Grease a 9×13-inch baking dish with cooking spray or line it with parchment paper. This will help with easy removal and cleanup—trust me, you want your blondies to come out without any fuss! -
Mix the Wet Ingredients
In a large mixing bowl, whisk together the melted salted butter and light brown sugar until combined. This will take about a minute. You want the mixture to be smooth and slightly glossy. Add in the pumpkin puree, eggs, and vanilla extract. Keep whisking until everything is well combined. Don’t be shy; the more blended, the better! -
Combine the Dry Ingredients
In a separate bowl, mix the all-purpose flour, pumpkin pie spice, and any other dry ingredients you have. Now, gradually fold this dry mixture into the wet mixture using a spatula. Don’t overmix—just until you see no more flour! This keeps those blondies chewy and tender. -
Pour and Spread
Pour the batter into your prepared baking dish. Use a spatula to smooth it out evenly. This helps with even baking, and trust me, even blondies make a difference in the final presentation. -
Make the Topping
In another bowl, take the softened butter, light brown sugar, and pumpkin pie spice for the topping. Mix them until crumbly. Sprinkle this mix over your blondie batter. This will add a lovely sweet crunch to the top! -
Bake!
Pop the dish into the preheated oven and let it bake for about 25–30 minutes. Your kitchen will smell AMAZING! You’ll know they’re done when you can insert a toothpick in the center, and it comes out with just a few moist crumbs. -
Cool and Serve
Once baked, remove the blondies from the oven and let them cool in the pan for at least 10 minutes before transferring them to a wire rack. Slice them into squares, and they’re ready to delight!
Serving Suggestions
These pumpkin blondies can be served in a variety of joyful ways! For an extra-special treat, serve them warm with a scoop of vanilla ice cream on top—a match made in heaven! Drizzle some caramel sauce over, or even dust with powdered sugar for a touch of elegance.
Plating them with a side of whipped cream, or garnishing with chopped pecans or walnuts, adds that gourmet touch! You could even serve them with a warm cup of chai or spiced latte to create the ultimate cozy vibe. Trust me; your friends and family will be begging for more.
Recipe Variations
Feeling adventurous? Here are a few creative twists you can try with this pumpkin blondie recipe:
-
Chocolate Chip Pumpkin Blondies
Stir in a cup of chocolate chips for a rich, sweet contrast to the pumpkin flavor. Dark chocolate chips would add a lovely depth. -
Nutty Pumpkin Blondies
Add in chopped nuts like pecans or walnuts for extra crunch and that celebrated nutty flavor combo with pumpkin. -
Pumpkin Spice Swirl
Create a cream cheese swirl by mixing 4 oz of softened cream cheese with a bit of sugar and vanilla, then swirl it through the batter before baking. -
Maple-Infused Blondies
Replace the brown sugar with an equal amount of maple syrup for a rich maple flavor throughout. -
Dairy-Free Delight
Swap the butter for coconut oil and use a non-dairy milk option. These blondies will be just as chewy and delicious!
Chef’s Notes
Over the years, this recipe has become a staple in my kitchen, gathering charm and flavor with each adaptation! I once added a pinch of cayenne for a surprising kick, creating a delightful contrast to the sweetness—an unexpected find! Each time I make these blondies, they bring back those fond memories of baking with Grandma, and I can’t help but chuckle at the time I turned the batter into a cake! It flopped hard, but we laughed it off and made an even bigger mess in the kitchen, and what fun memories we created!
FAQs and Troubleshooting
Q1: Why did my blondies turn out too dense?
A: This can happen if you overmix the batter or if the flour is packed too tightly in the measuring cup. Remember to fold gently!
Q2: Can I make these blondies ahead of time?
A: Absolutely! You can bake them a day in advance and store them covered at room temperature, or even freeze them for longer storage. Just let them thaw before serving—if you can wait that long!
Q3: What if I don’t have pumpkin puree?
A: You might give butternut squash puree a whirl as a substitute—it works wonderfully and has a similar flavor profile.
Q4: How do I know when my blondies are done baking?
A: Look for the edges to be set and the top to be slightly golden. A toothpick inserted in the center should come out with a few moist crumbs (not wet batter).
Nutritional Info
Each serving of these delectable pumpkin blondies (assuming 16 servings per batch) contains approximately:
- Calories: 180
- Total Fat: 7g
- Saturated Fat: 4g
- Cholesterol: 35mg
- Sodium: 100mg
- Total Carbohydrates: 27g
- Dietary Fiber: 1g
- Sugars: 12g
- Protein: 2g
These are just estimates based on ingredient averages. If you’re looking to keep things lighter, reducing sugar or butter can help, and you might opt for whole wheat flour for added fiber.
Final Thoughts
And there you have it, friends! A cozy recipe that captures the essence of fall in each bite. These pumpkin blondies are perfect for gatherings, potlucks, or simply enjoying at home with a loved one. The process of crafting them becomes a lovely ritual in itself—bringing people together, sharing laughter, and creating sweet memories.
So, as you embark on this baking adventure, remember: It’s about the experience just as much as it’s about the end result. Don’t stress over perfection; every attempt teaches you something—and we’re all just trying to create a little warmth in our kitchens. Now, grab that spatula and let’s make some pumpkin blondies that will steal the show. Happy baking!
Print
Pumpkin Blondies
- Total Time: 45 minutes
- Yield: 16 servings 1x
- Diet: Vegetarian
Description
Delicious pumpkin blondies that capture the spirit of fall, rich and cozy with a delightful blend of sweetness and warmth.
Ingredients
- ½ cup salted butter (melted)
- 1 ½ cups light brown sugar (packed)
- 1 cup pure pumpkin puree
- 2 eggs (room temperature)
- 2 tsp vanilla extract
- 2 cups all-purpose flour
- 2 tsp pumpkin pie spice
- 2 tbsp salted butter (softened)
- ¼ cup light brown sugar
- 1 tsp pumpkin pie spice for topping
Instructions
- Preheat your oven to 350°F (175°C).
- Prepare a 9×13-inch baking dish by greasing it with cooking spray or lining it with parchment paper.
- Mix the melted salted butter and light brown sugar together in a large mixing bowl until smooth and glossy. Add in the pumpkin puree, eggs, and vanilla extract, whisking until well combined.
- Combine the all-purpose flour, pumpkin pie spice, and other dry ingredients in a separate bowl, then fold them into the wet mixture until just combined.
- Pour the batter into the prepared baking dish and smooth it out evenly.
- Make the topping by mixing the softened butter, light brown sugar, and pumpkin pie spice until crumbly, then sprinkle it over the batter.
- Bake for 25–30 minutes or until a toothpick inserted in the center comes out with a few moist crumbs.
- Cool in the pan for at least 10 minutes before transferring to a wire rack to slice into squares and serve.
Notes
These blondies can be served warm with ice cream or drizzled with caramel sauce for an extra special treat.
- Prep Time: 15 minutes
- Cook Time: 30 minutes
- Category: Dessert
- Method: Baking
- Cuisine: American
Nutrition
- Serving Size: 1 blondie
- Calories: 180
- Sugar: 12g
- Sodium: 100mg
- Fat: 7g
- Saturated Fat: 4g
- Unsaturated Fat: 2g
- Trans Fat: 0g
- Carbohydrates: 27g
- Fiber: 1g
- Protein: 2g
- Cholesterol: 35mg
Keywords: pumpkin, blondies, fall dessert, cozy treat, baking
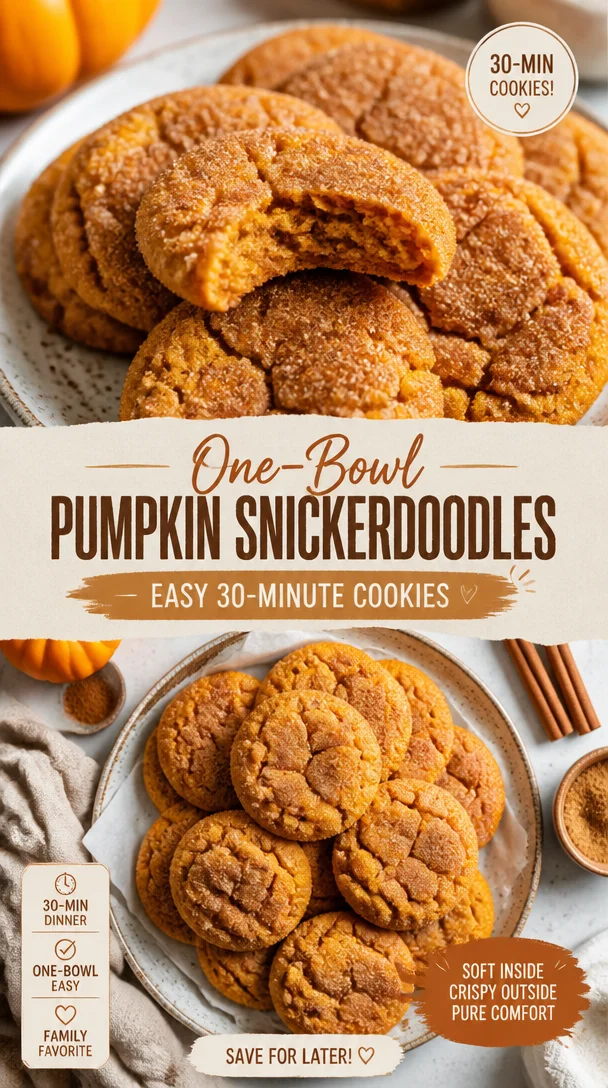
One-Bowl Pumpkin Snickerdoodles: Easy 30-Minute Cookies
Dive Into Autumn Bliss with Pumpkin Snickerdoodles!
Hey there, fellow food lovers! It’s Beau Collier, your go-to guide for all things delicious here at Feastical. Today, we’re diving headfirst into a recipe that perfectly captures the spirit of fall—the delightful and ridiculously comforting Pumpkin Snickerdoodles. If you’re looking to elevate your taste buds while filling your kitchen with sweet, spicy aromas, you’ve landed in the right spot!
Why Pumpkin Snickerdoodles? Well, you might be wondering how the classic snickerdoodle got a pumpkin make-over. Honestly, it’s a match made in heaven! We’ve got the chewy, cinnamon-sugar goodness of a traditional snickerdoodle but with a cozy twist that adds depth and warmth. Each bite is like a warm hug, and they’ll have your family and friends asking for seconds—and maybe even thirds.
With the days getting shorter and the air becoming crisp, there’s nothing better than baking up a batch of these lovely cookies. Plus, they’re super easy to whip up, whether you’re a kitchen whiz or just getting your feet wet. The recipe is simple, and trust me, you’ll be feeling like the superstar chef of your household in no time!
So roll up your sleeves and get ready to create some magic in the kitchen. Let’s dive in!
A Sweet Memory: Baking with Grandma
Let me take you on a little journey back to my childhood. Picture this: it’s a chilly October afternoon, and I’m at my grandma’s house. The scent of cinnamon and sugar fills the air, mixing perfectly with the rich aroma of freshly baked pumpkin treats. My grandma had a way of making everything feel special—especially when it came to her kitchen.
One day, she handed me a giant bowl filled with colorful leaves and a few tiny pumpkins she grew in her garden. “We’re baking today!” she exclaimed with a twinkle in her eye. We decided to make a tribute to the changing seasons and concocted our very own pumpkin snickerdoodle recipe. The kitchen was filled with laughter and flour as we danced around to our favorite tunes.
Those cookies turned out to be a hit, and ever since then, pumpkin snickerdoodles have been a staple in my baking repertoire. Granny’s spirit lives on every time I whip up this recipe—it’s not just about the cookies; it’s about the memories and the love we shared. So, grab your loved ones, and let’s make some new memories with this comforting treat!
Gather Your Ingredients
Alright, it’s time to gather your ingredients! Here’s what you’ll need for these amazing Pumpkin Snickerdoodles:
-
2.75 cups all-purpose flour
- This is your base ingredient! Flour gives the cookies structure. You can substitute with a gluten-free blend if needed, but the texture might vary slightly.
-
2 teaspoons cream of tartar
- This is the secret weapon! It gives the cookies that classic snickerdoodle tang. If you’re in a pinch, you can substitute it with an equal amount of baking powder—but you’ll lose some of that unique flavor.
-
1 teaspoon baking soda
- This helps the cookies rise and gives them that chewy texture we love. Baking powder can be an alternative, but adjust the quantity down to 1.5 teaspoons.
-
0.5 teaspoon salt
- Essential for balancing the sweetness. It enhances the flavors. If you’re watching your sodium intake, consider using a low-sodium option.
-
1 teaspoon ground cinnamon
- A must-have for that warm, spicy flavor! Feel free to experiment with more or less depending on your cinnamon love.
-
0.5 teaspoon ground nutmeg
- This spice adds depth and warmth. Nutmeg can be potent, so you can cut this by half if you prefer a milder taste.
-
0.5 cup unsalted butter, softened
- This rich, creamy goodness creates a tender cookie. If you’re vegan or dairy-free, coconut oil can be a good substitute, but it may change the flavor slightly.
-
0.5 cup granulated sugar
- Classic cookie sweetness! You can use coconut sugar for a healthier twist, but it may darken the cookies.
-
0.5 cup brown sugar, packed
- Brown sugar brings moisture and a hint of caramel flavor. Use light brown for a subtle taste or dark brown for a richer flavor.
-
1 cup pumpkin puree (not pumpkin pie filling)
- This is the true star of the show! It adds moisture and flavor. If you’re in a bind, homemade pumpkin puree is a great option.
-
1 large egg
- This binds everything together! If you’re following a vegan diet, flaxseed meal mixed with water can serve as a substitute.
-
1 teaspoon vanilla extract
- The dreamy flavor booster! Swap with almond extract for a unique twist.
-
0.25 cup granulated sugar (for rolling)
- This adds that sugary crust that makes each bite delightful!
-
2 teaspoons ground cinnamon (for rolling)
- Because cinnamon/sugar coating never hurts, right?
Time to Bake: Step-by-Step Instructions
Alright, my friends, let’s get down to the nitty-gritty! Here’s how to whip up these scrumptious cookies:
-
Preheat Your Oven: Preheat your oven to 350°F (175°C). A hot oven is essential for that perfect bake!
-
Prepare Your Baking Sheets: Line a couple of baking sheets with parchment paper for easy clean-up and to prevent sticking. No one likes cookies that won’t come off the tray, right?
-
Mix the Dry Ingredients: In a large mixing bowl, whisk together the flour, cream of tartar, baking soda, salt, cinnamon, and nutmeg. This step is crucial; combining the dry ingredients first ensures that your leavening agents distribute evenly throughout the dough.
-
Cream the Butter and Sugars: In another large bowl, combine your softened butter, granulated sugar, and brown sugar using a hand mixer or stand mixer. Cream until light and fluffy—this process incorporates air and will help create a tender cookie. Seriously, don’t skip this step!
-
Add the Pumpkin: Next, beat in the pumpkin puree, egg, and vanilla extract. Mix until combined. You’ll instantly notice that luxurious orange color taking over—oh so inviting!
-
Combine Wet and Dry Mixtures: Gradually add your dry mixture to the wet mixture. Mix until just combined, being careful not to overmix. It’s okay if the dough looks a little thicker than you’d expect; it should hold its shape nicely.
-
Prepare the Cinnamon-Sugar Mix: In a small bowl, combine the granulated sugar and ground cinnamon for rolling. Set this aside because we’re about to dive into the fun part!
-
Scoop and Roll the Dough: Use a cookie scoop or your hands to form balls of dough (about 1.5 inches in diameter). Roll each ball in the cinnamon-sugar mixture until thoroughly coated. Not only does this make them look adorable, but it also gives that delightful crunch we crave!
-
Bake the Cookies: Place the sugar-coated dough balls on the prepared baking sheets, spacing them about 2 inches apart. Bake for about 10-12 minutes, or until the edges are slightly golden. Don’t worry if they appear a little soft in the middle; they’ll firm up as they cool!
-
Cooling Time: Let the cookies cool on the baking sheet for about 5 minutes before transferring them to a wire rack. When they come out of the oven, they’ll be perfect for indulging—just be careful to resist eating the whole batch at once!
Serving Suggestions
Now that your kitchen smells like a cozy autumn bakery, it’s time to serve these babies up! Here are a few fun ideas:
-
On a Platter: Arrange your fresh-baked cookies on a beautiful platter. You can garnish with a sprinkle of extra cinnamon or even a few tiny pumpkins for that festive touch.
-
With Milk or Coffee: Pair your cookies with a cold glass of milk or a steaming cup of coffee. The warmth from the coffee and the soft chewiness of the cookies create an irresistible combo!
-
Cookie Sandwiches: Feeling adventurous? Slather a bit of cream cheese frosting between two cookies for an indulgent cookie sandwich!
Recipe Variations
Here are a few creative twists you can explore with your Pumpkin Snickerdoodles:
-
Spiced Up: Add a pinch of ground ginger or cloves to the dough for an extra autumnal kick.
-
Chocolate Chip Delight: Throw in some chocolate chips for a decadent twist!
-
Nutty Crunch: Stir in some crushed walnuts or pecans to the dough for added texture.
-
Maple Sweetness: Swap the granulated sugar for maple sugar for a uniquely sweet twist.
-
Gluten-Free: Use a gluten-free flour blend to make these cookies accessible for everyone while keeping that comforting taste!
Chef’s Notes
This Pumpkin Snickerdoodle recipe has a special place in my heart. Over the years, I’ve had the chance to tweak it based on what I’ve learned in the kitchen and from the wonderful folks who’ve shared their own variations with me. Whenever I make these cookies, I can’t help but think of my grandma and the love that goes into each batch. It’s a reminder that food is more than just sustenance; it’s about sharing moments and memories with the people we love. Keep experimenting, and let your creativity shine too!
FAQs and Troubleshooting
Q1: Why are my cookies spreading too much?
If your cookies are spreading a lot, it may be that your butter was too soft. Ensure that your butter is softened, but not melted!
Q2: How do I know if my cookies are done?
When the edges are starting to turn golden brown but the center still appears a bit soft, that’s your cue! They will continue to set as they cool.
Q3: Can I freeze the dough?
Absolutely! You can freeze the dough balls before rolling in the cinnamon-sugar mixture. Just take them out whenever you’re feeling cookie cravings and bake them fresh!
Q4: What can I do if my dough is too sticky?
If your dough feels overly sticky, try adding a little extra flour, a tablespoon at a time. But be careful not to add too much, or the cookies could turn out dry.
Nutritional Info
A single Pumpkin Snickerdoodle packs in approximately:
- Calories: 120
- Fat: 5g
- Carbohydrates: 19g
- Protein: 1.5g
- Fiber: 0.5g
- Sugar: 8g
Keep in mind that these values can vary based on specific brands and measurement accuracy, but they will give you a ballpark figure to help satisfy your cravings while keeping an eye on your dietary goals!
Final Thoughts
There you have it, folks! A foolproof guide to making mouthwatering Pumpkin Snickerdoodles that’ll bring joy to your home. With every bite, you’re not just enjoying a cookie; you’re creating sweet memories that you’ll cherish for years to come. Baking is, at its core, an expression of love—and these cookies are the perfect medium for sharing that warmth.
So, gather your ingredients, call your loved ones into the kitchen, and let’s bake some happiness! Don’t forget to share the love—invite your friends over to taste your creations, or package some up as thoughtful gifts. Until next time, keep it cozy and delicious, my friends. Happy baking! 🍪✨
Print
Pumpkin Snickerdoodles
- Total Time: 27 minutes
- Yield: 24 servings 1x
- Diet: Vegetarian
Description
A delightful twist on the classic snickerdoodle featuring pumpkin for a cozy, autumnal treat.
Ingredients
- 2.75 cups all-purpose flour
- 2 teaspoons cream of tartar
- 1 teaspoon baking soda
- 0.5 teaspoon salt
- 1 teaspoon ground cinnamon
- 0.5 teaspoon ground nutmeg
- 0.5 cup unsalted butter, softened
- 0.5 cup granulated sugar
- 0.5 cup brown sugar, packed
- 1 cup pumpkin puree (not pumpkin pie filling)
- 1 large egg
- 1 teaspoon vanilla extract
- 0.25 cup granulated sugar (for rolling)
- 2 teaspoons ground cinnamon (for rolling)
Instructions
- Preheat your oven to 350°F (175°C).
- Prepare your baking sheets by lining them with parchment paper.
- Mix the dry ingredients: In a large mixing bowl, whisk together the flour, cream of tartar, baking soda, salt, cinnamon, and nutmeg.
- Cream the butter and sugars: In another large bowl, combine softened butter, granulated sugar, and brown sugar, and cream until light and fluffy.
- Add the pumpkin: Beat in the pumpkin puree, egg, and vanilla until combined.
- Combine wet and dry mixtures: Gradually add dry mixture to wet mixture, mixing until just combined.
- Prepare the cinnamon-sugar mix: In a small bowl, combine granulated sugar and ground cinnamon for rolling.
- Scoop and roll the dough: Form balls of dough and roll in the cinnamon-sugar mixture.
- Bake the cookies: Place dough balls on baking sheets and bake for 10-12 minutes or until edges are slightly golden.
- Cool the cookies: Let cool on the baking sheet for 5 minutes before transferring to a wire rack.
Notes
For a twist, try adding chocolate chips or nuts, or use a gluten-free flour blend to make it accessible for everyone.
- Prep Time: 15 minutes
- Cook Time: 12 minutes
- Category: Dessert
- Method: Baking
- Cuisine: American
Nutrition
- Serving Size: 1 cookie
- Calories: 120
- Sugar: 8g
- Sodium: 100mg
- Fat: 5g
- Saturated Fat: 3g
- Unsaturated Fat: 2g
- Trans Fat: 0g
- Carbohydrates: 19g
- Fiber: 0.5g
- Protein: 1.5g
- Cholesterol: 20mg
Keywords: pumpkin, snickerdoodles, cookies, autumn, fall baking, dessert
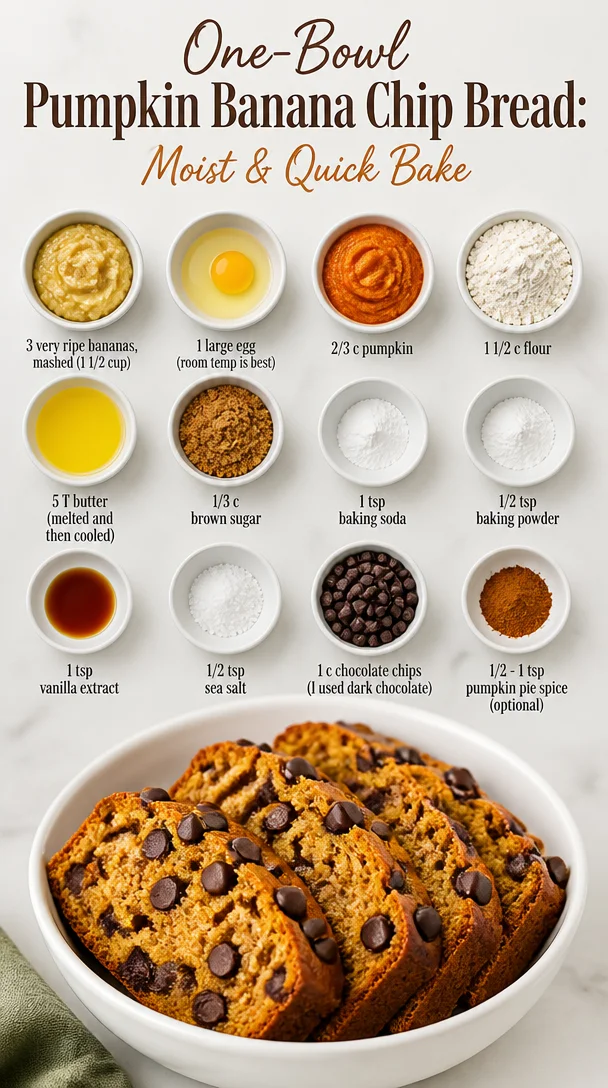
One-Bowl Pumpkin Banana Chip Bread: Moist & Quick Bake
Pumpkin Chip Banana Bread: A Slice of Comfort
Hey there, food lovers! Today, I’m bringing you a delicious, cozy recipe that is bound to wrap you in a warm hug—Pumpkin Chip Banana Bread! I don’t know about you, but I’m a firm believer that comfort food has the power to heal, celebrate, and create cherished memories. This delightful loaf does just that, combining the flavors of ripe bananas and pumpkin with a chocolatey twist that will have your taste buds singing.
Let’s dive into why this recipe is close to my heart. Growing up, my family had a special tradition of baking together every fall. As the leaves turned golden and the air crisped up, our kitchen would come alive with the sweet scents of cinnamon, nutmeg, and, of course, pumpkin. I can still picture my mom and I laughing as we mashed bananas and added spices to our batter, the sound of clinking bowls and our shared bubbly energy creating a song of its own. This Pumpkin Chip Banana Bread is more than just a recipe; it’s a snapshot of those wonderful moments. Each slice of moist, chocolate-studded goodness reminds me of the love that went into cooking and the joy of sharing food with family and friends.
So grab that mixing bowl and join me on this flavorful journey as we create a dish that’s sure to become a staple in your home!
Ingredients
Before we roll up our sleeves, let’s gather our ingredients. Each one has a special role in this recipe that makes this bread not just delicious, but also comforting and easy to whip up!
-
3 very ripe bananas, mashed (approx. 1 ½ cup): The riper the banana, the sweeter and more flavorful your bread will be. If you’re in a pinch, frozen bananas work well, too—just thaw and mash them!
-
1 large egg (room temp is best): The egg helps bind everything together and gives structure to the bread. If you’re vegan, you can substitute it with 1/4 cup of unsweetened applesauce or a flax egg (1 tablespoon ground flaxseed mixed with 2.5 tablespoons water).
-
2/3 cup pumpkin puree: This ingredient gives your bread a lovely orange hue while providing moisture and flavor. You can also use homemade pumpkin puree if you’re feeling adventurous!
-
1 ½ cups all-purpose flour: The foundation of our bread. If you want a healthier option, whole wheat flour or a gluten-free blend can work.
-
5 tablespoons butter (melted and then cooled): This adds richness and flavor to the bread. You could substitute with coconut oil or even unsweetened applesauce for a lighter option.
-
1/3 cup brown sugar: This sweetens our bread while adding a hint of molasses flavor. If you prefer, you can use coconut sugar or honey instead.
-
1 teaspoon baking soda: This is our leavening agent, helping the bread rise beautifully.
-
1/2 teaspoon baking powder: Just a little extra lift that keeps the bread fluffy.
-
1 teaspoon vanilla extract: For that ultimate flavor boost. Trust me, it makes a world of difference!
-
1/2 teaspoon sea salt: A pinch of salt balances the sweetness and enhances all the flavors.
-
1 cup chocolate chips (I used dark chocolate): These sweet morsels make every bite feel like a treat! Feel free to swap them for white chocolate, butterscotch chips, or even nuts for a nutty crunch.
-
½ – 1 teaspoon pumpkin pie spice (optional): This optional spice blend adds a cozy fall flavor perfect for the season. If you’re short on time, a sprinkle of cinnamon can suffice, but nothing beats the mix of flavors from pumpkin pie spice!
Step-by-Step Instructions
Now, let’s dig into the cooking process. This part is where the magic happens, so follow along!
-
Preheat Your Oven: Start by preheating your oven to 350°F (175°C). Preheating is essential as it helps the bread rise evenly—nothing worse than a loaf that didn’t get the memo about the party!
-
Prepare Your Baking Pan: Grab a 9×5 inch loaf pan and grease it well with butter or non-stick spray. You can also line the bottom with parchment paper for an easy removal after baking. I always say, a well-prepared pan is half the battle won!
-
Mash the Bananas: Take those peeling, ripe bananas and mash them in a mixing bowl until smooth. You want about 1 ½ cups; the riper they are, the easier (and tastier) this will be. Use a fork or a potato masher—it’s therapeutic!
-
Combine the Wet Ingredients: In the same bowl, add the melted butter, brown sugar, egg, pumpkin puree, and vanilla extract to the bananas. Mix everything until well combined. The butter should be cool, or else it’ll scramble the egg! This mix should be a beautiful, creamy blend.
-
Mix the Dry Ingredients: In another bowl, whisk together the flour, baking soda, baking powder, sea salt, and pumpkin pie spice (if using). This helps to evenly distribute the leavening agents.
-
Combine Wet and Dry Mixtures: Gradually add the dry ingredients to the wet mixture. Gently fold together using a spatula to avoid overmixing—the goal is a moist, tender bread, and overmixing can lead to a dense loaf.
-
Add the Chocolate Chips: Once the batter is combined, stir in the chocolate chips until evenly distributed. This is where the fun happens; seeing those melty morsels of chocolate get sprinkled throughout the batter is pure joy!
-
Pour and Bake: Pour the batter into your prepared loaf pan, smoothing the top with a spatula. Bake in your preheated oven for 55-60 minutes or until a toothpick inserted in the center comes out clean. Keep an eye on the bread during the last 10 minutes—if the top gets too dark, loosely cover it with tin foil.
-
Cool and Serve: Once baked, allow the bread to cool in the pan for about 10 minutes before transferring it to a wire rack to cool completely. It might be tempting to slice right away, but cooling is key to get those perfect slices.
-
Enjoy: Now, the best part! Slice your bread and dive in. It’s heavenly warm but even tastier the next day—if it lasts that long!
Serving Suggestions
Wondering how to present this delightful bread? When serving, I like to slice the loaf thick and stack the pieces on a pretty platter. A dusting of powdered sugar on top adds an elegant touch. You can also serve it with a dollop of whipped cream cheese or a smear of butter for extra indulgence.
Feeling adventurous? Toasted slices topped with a drizzle of maple syrup elevate this dish to brunch status. Whether you’re having it for breakfast, an afternoon snack, or dessert, pumpkin chip banana bread is a versatile creation that shines at any time of day.
Recipe Variations
Here are a few creative twists to this classic recipe that’ll keep things exciting in your kitchen:
-
Nuts Galore: Toss in chopped walnuts or pecans for some crunch. Nutty flavors balance well with the sweetness of chocolate and banana.
-
Cranberry Orange: Consider substituting half the chocolate chips with dried cranberries and adding a touch of orange zest for a citrusy burst. This combination is bright and festive!
-
Spiced Up: More spice, more fun! Increase the pumpkin pie spice to 1 teaspoon or add a hint of ginger and cloves for a spiced bread that’s extra cozy.
-
Fruity Surprise: Incorporate 1/2 cup of applesauce or finely diced apples into the batter for an added layer of flavor and moisture.
-
Chocolate Swap: If dark chocolate isn’t your jam, feel free to use milk or white chocolate chips instead. You can even double the amount for an extra chocolaty treat!
Chef’s Notes
Over the years, this Pumpkin Chip Banana Bread recipe has become a staple in my kitchen. Originally, I created it to use up ripe bananas, but it has now turned into a celebratory fall treat. I remember the first time I brought it to a potluck—everyone begged for the recipe! The compliments were so sweet, and that’s when I knew I had something special on my hands!
One of my favorite memories is a baking session with my niece. She took the lead on mashing the bananas, and her giggles melted my heart—not to mention the fun we had making a mess together in the kitchen. Cooking is so much more than just a task; it’s about creating memories and sharing love through food!
FAQs and Troubleshooting
1. My bread turned out too dry! What went wrong?
- Overbaking can lead to dryness. Check for doneness earlier; every oven can vary. Make sure to pull it out when a toothpick comes out with a few moist crumbs.
2. The bread sank in the middle. Why?
- If your batter is too wet or you overmixed it, it can cause sinking. Be gentle when mixing, and ensure all ingredients are measured accurately. Letting the bread cool gradually helps, too!
3. Can I freeze this bread?
- Absolutely! Wrap it tightly in plastic wrap and aluminum foil, and it’ll keep in the freezer for up to 3 months. Just thaw at room temperature when you’re ready to enjoy!
4. What if I don’t have pumpkin puree?
- You can use unsweetened applesauce as a substitute. It won’t give you that lovely pumpkin flavor, but it’ll still keep your bread moist!
Nutritional Info
While enjoying the deliciousness of this Pumpkin Chip Banana Bread, it’s always helpful to have an idea of what you’re munching on:
- Serving Size: 1 slice (1/12 of the loaf)
- Calories: Approximately 180-220 calories (depending on chocolate chips used)
- Total Fat: 8g
- Saturated Fat: 4g
- Cholesterol: 30mg
- Sodium: 170mg
- Total Carbohydrates: 29g
- Dietary Fiber: 2g
- Sugars: 10-12g
- Protein: 2g
Feel free to adjust the sugar and chocolate per your preference; this will also affect the overall nutritional values!
Final Thoughts
There you have it, my lovely foodies! A step-by-step guide to creating your very own Pumpkin Chip Banana Bread—a recipe filled with nostalgia, love, and taste. I hope that as you bake this delicious loaf, you’re reminded of all the heartwarming moments cooking can bring and the sweet joys of sharing food with those you cherish.
So, gather your ingredients, invite a friend or family member into the kitchen, and start creating some laughter and joy along with this delightful bread! It’s more than just a recipe; it’s a little slice of warmth to savor—one delicious bite at a time. Happy baking, and until next time, keep those spatulas at the ready!
Print
Pumpkin Chip Banana Bread
- Total Time: 75 minutes
- Yield: 12 slices 1x
- Diet: Vegetarian
Description
A cozy and delicious Pumpkin Chip Banana Bread that combines ripe bananas and pumpkin with a chocolatey twist.
Ingredients
- 3 very ripe bananas, mashed (approx. 1 ½ cup)
- 1 large egg (room temp is best)
- 2/3 cup pumpkin puree
- 1 ½ cups all-purpose flour
- 5 tablespoons butter (melted and then cooled)
- 1/3 cup brown sugar
- 1 teaspoon baking soda
- 1/2 teaspoon baking powder
- 1 teaspoon vanilla extract
- 1/2 teaspoon sea salt
- 1 cup chocolate chips (dark chocolate preferred)
- ½ – 1 teaspoon pumpkin pie spice (optional)
Instructions
- Preheat your oven to 350°F (175°C).
- Prepare a 9×5 inch loaf pan by greasing it well.
- Mash the bananas in a mixing bowl until smooth.
- Combine the melted butter, brown sugar, egg, pumpkin puree, and vanilla extract with the bananas.
- Mix the flour, baking soda, baking powder, sea salt, and pumpkin pie spice in another bowl.
- Combine the dry ingredients into the wet mixture gently.
- Add the chocolate chips and stir until evenly distributed.
- Pour the batter into the prepared loaf pan.
- Bake for 55-60 minutes or until a toothpick comes out clean.
- Cool in the pan for about 10 minutes, then transfer to a wire rack.
- Enjoy slices warm or cooled completely.
Notes
For extra flavor, consider adding nuts or dried fruits. The bread keeps well; it can be frozen for up to 3 months.
- Prep Time: 15 minutes
- Cook Time: 60 minutes
- Category: Dessert
- Method: Baking
- Cuisine: American
Nutrition
- Serving Size: 1 slice
- Calories: 200
- Sugar: 11g
- Sodium: 170mg
- Fat: 8g
- Saturated Fat: 4g
- Unsaturated Fat: 4g
- Trans Fat: 0g
- Carbohydrates: 29g
- Fiber: 2g
- Protein: 2g
- Cholesterol: 30mg
Keywords: pumpkin bread, banana bread, dessert recipe, fall baking, comfort food
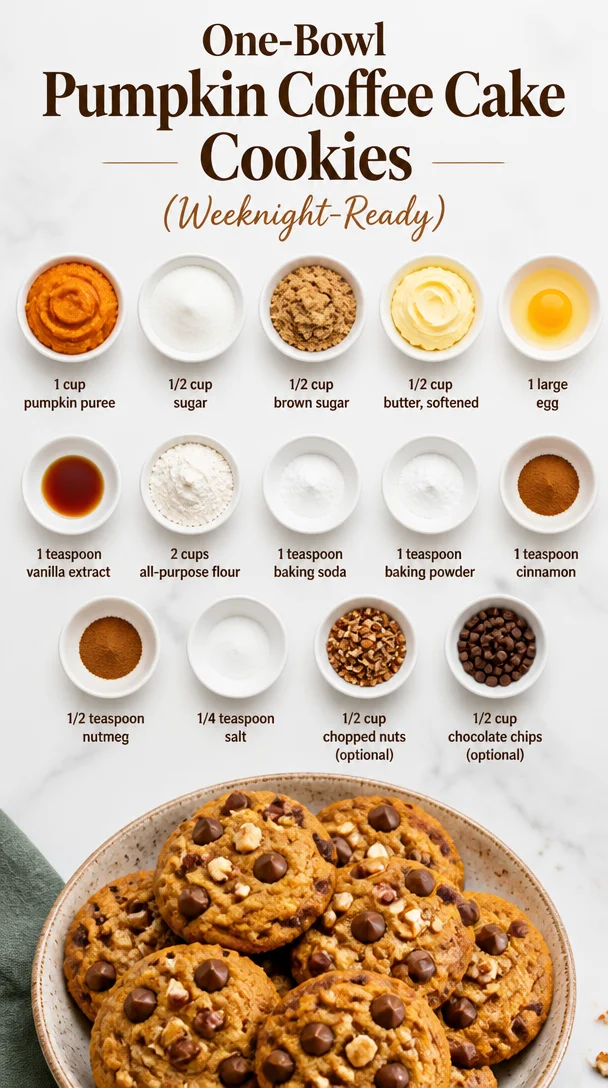
One-Bowl Pumpkin Coffee Cake Cookies (Weeknight-Ready)
Pumpkin Coffee Cake Cookies: A Slice of Autumn Bliss
Hey, food lovers! Welcome back to Feastical, where we dive into delicious recipes that warm the heart and satisfy the taste buds. Today, we’re baking up something special that’ll make your kitchen smell like a cozy autumn day—Pumpkin Coffee Cake Cookies! These little bites of heaven are the perfect blend of soft, cake-like texture, spiced autumn flavors, and just the right amount of sweetness. Trust me; you’re going to want to add these to your baking repertoire!
As we lean into the fall season, my fondness for pumpkins and all things spice reaches peak levels. I can still remember the first time I tried a pumpkin coffee cake at a family gathering. Grandma had this magical way of turning simple ingredients into something that felt like a warm hug. As I reminisce, I can practically hear the laughter echoing off the walls of her kitchen, the aroma of cinnamon and nutmeg swirling in the air, and the delighted squeals of my cousins as we dug into that first slice. It was love at first bite!
Today, I’m excited to share my twist on that cherished memory—these Pumpkin Coffee Cake Cookies. They’re easy to whip up, perfect for sharing, and absolutely delicious with a cup of coffee or tea. So, grab your apron, and let’s get baking!
My Pumpkin Coffee Cake Journey
Growing up, my family had a tradition of baking together during the autumn months. It was a wonderful way to bond, and I remember eagerly awaiting the time when we would break out the flour, sugar, and, of course, the pumpkins! One memorable year, we decided to experiment with a recipe that combined our favorite flavors. After a few trials (some of which involved smoke alarms, but that’s a story for another day), we struck gold with the Pumpkin Coffee Cake Cookies!
What makes these cookies so special is not just the delicious pumpkin flavor, but the memories tied to each batch. I remember us huddled around the oven, gazing expectantly through the window as the cookies rose and filled our kitchen with an inviting scent. Moments like that remind us how food can bring people together, creating cherished memories that last a lifetime.
Ingredients
Let’s gather the stars of our show! Here’s what you’ll need to make these scrumptious Pumpkin Coffee Cake Cookies:
-
1 cup pumpkin puree
Tip: Look for pure pumpkin puree and avoid pumpkin pie filling; it’s sweeter and already spiced. If you’re in a pinch, you can substitute with applesauce for a different flavor. -
1/2 cup sugar
This adds sweetness to our cookies, balancing the spiciness of the pumpkin. You can use coconut sugar for a more natural option. -
1/2 cup brown sugar
The molasses in brown sugar brings a rich, caramel-like flavor. Dark brown sugar will give you even more depth, but light brown works perfectly too! -
1/2 cup butter, softened
Butter is the secret to a moist cookie. If you’re dairy-free, you can use coconut oil or vegan butter. -
1 large egg
This binds everything together. For a vegan swap, you can use a flax egg (1 tablespoon flaxseed meal mixed with 2.5 tablespoons water). -
1 teaspoon vanilla extract
Vanilla complements the spices beautifully! You can opt for almond extract if you want a nutty twist. -
2 cups all-purpose flour
This is your base. If you’re going gluten-free, try using a 1-to-1 gluten-free flour blend. -
1 teaspoon baking soda
This keeps your cookies fluffy. Make sure it’s fresh for best results! -
1 teaspoon baking powder
Another leavening agent that works with baking soda to make your cookies rise. -
1 teaspoon cinnamon
Cinnamon is the heart of fall flavors—it brings warmth and comfort! Use fresh ground for a more potent flavor. -
1/2 teaspoon nutmeg
This adds that unmistakable autumn spice. Freshly grated nutmeg is a game changer! -
1/4 teaspoon salt
A pinch of salt enhances the sweetness. Don’t skip it! -
1/2 cup chopped nuts (optional)
Walnuts or pecans add a delightful crunch. If you have nut allergies, feel free to skip this! -
1/2 cup chocolate chips (optional)
Who doesn’t love a little chocolate? You can use dark, semi-sweet, or even white chocolate for a fun twist.
Step-by-Step Instructions
Now, let’s get to the fun part—baking those cookies!
Step 1: Preheat Your Oven
Preheat your oven to 350°F (175°C). This is essential for even baking, so don’t skip it! While the oven heats up, you can start preparing your dough.
Step 2: Cream Butter and Sugars
In a large bowl, cream together the softened butter, sugar, and brown sugar until it’s light and fluffy. This magical texture is what will make your cookies melt in your mouth. Use an electric mixer if you have one; it makes the job easier!
Step 3: Add Pumpkin, Egg, and Vanilla
Next, mix in the pumpkin puree, egg, and vanilla extract until fully combined. The butter and pumpkin will create a vibrant orange mixture that looks just as delightful as it smells.
Step 4: Combine Dry Ingredients
In a separate bowl, combine the all-purpose flour, baking soda, baking powder, cinnamon, nutmeg, and salt. Mixing the dry ingredients ahead ensures you avoid clumps and helps the leavening agents work their magic.
Step 5: Mix It All Together
Gradually add the dry mixture to your wet mixture, stirring gently until just combined. Tip: Be careful not to overmix; we want tender cookies, not dense ones!
Step 6: Fold in Any Extras
If you’re using nuts or chocolate chips, gently fold them into the dough at this stage. They’ll add flavor and texture to each cookie!
Step 7: Scoop and Bake
Using a cookie scoop or a tablespoon, drop the dough onto a lined baking sheet, spacing them a few inches apart. Pop them into the oven and bake for 12-15 minutes or until the edges are slightly golden. The centers might look a bit soft—that’s perfect!
Step 8: Cool Down
Once out of the oven, let the cookies cool on the baking sheet for a few minutes before transferring them to a wire rack. This cooling time allows them to firm up a bit while remaining delightfully soft.
Serving Suggestions
Now that your cookies are baked to golden perfection, it’s time to think about how to serve them! These Pumpkin Coffee Cake Cookies are delightful just as they are, but here are a few fun serving suggestions:
-
With Coffee or Tea: Serve them alongside a warm beverage. The spiced flavors pair excellently with a cup of coffee or a chai latte.
-
On a Cozy Platter: Arrange the cookies on a cute platter and dust them with powdered sugar for an elegant touch. Your guests will be so impressed!
-
With Ice Cream: Want to elevate that dessert? Serve warm cookies with a scoop of vanilla or cinnamon ice cream. Heaven, I tell you!
-
Gift Them: These cookies make fantastic homemade gifts, especially during the holiday season. Place them in a rustic tin or box with a handwritten note for that personal touch.
Recipe Variations
Feeling adventurous in the kitchen? Here are some creative twists you can explore with this recipe:
-
Maple Bourbon Glaze: Drizzle a maple bourbon glaze on top for an elevated flavor. Mix powdered sugar with a splash of bourbon and maple syrup until you reach the desired consistency.
-
Pumpkin Spice Swirl: You can swirl in some cream cheese frosting to the cookie dough before baking for a creamier texture.
-
Oatmeal Pumpkin Cookies: For a heartier cookie, replace some of the flour with oats. Think chewy and delightful!
-
Chocolate Pumpkin Cookies: Add cocoa powder to the dry ingredients for a delicious chocolatey twist that still lets the pumpkin shine through.
-
Vegan Version: Substitute egg with a flax egg, use vegan butter, and enjoy these guilt-free cookies!
Chef’s Notes
As I write this, I can’t help but smile remembering those chaotic yet joyous baking sessions in my family kitchen. This recipe has evolved over the years, influenced by my love of experimenting with flavors. I’ve traded out traditional nutty toppings for chocolate on some days or used different spices based on what I had on hand.
Cooking is all about making it your own, and I encourage you to take this base recipe and add your touch. Remember, the kitchen doesn’t have to be a place of rules—it’s a playground for creativity!
FAQs and Troubleshooting
Q: My cookies turned out too dry. What happened?
A: This could be due to overmixing the dough or not measuring the flour properly. Make sure you fluff up the flour before scooping it into the measuring cup!
Q: Can I freeze the dough?
A: Absolutely! You can shape the cookies into balls and freeze them for later. Just add a couple of extra minutes to the baking time if baking straight from the freezer.
Q: What can I do if my cookies spread too much?
A: Ensure that your butter is softened and not melted. Additionally, chilling the dough for 30 minutes can prevent excessive spreading.
Q: How can I make these cookies more cake-like?
A: Try adding an extra tablespoon of flour and reduce baking time slightly. This will help maintain that soft cake texture.
Nutritional Info
Here’s a rough estimate of the nutrition per cookie (based on 24 cookies):
- Calories: Approximately 120 kcal
- Carbohydrates: 18g
- Protein: 1g
- Fat: 5g
- Fiber: 1g
- Sugar: 7g
Keep in mind that these values can vary based on the specific ingredients you use, especially if you add nuts or chocolate chips. Enjoying treats like these in moderation is key. Remember, food is meant to be enjoyed!
Final Thoughts
There you have it, my dear foodies! Our Pumpkin Coffee Cake Cookies are more than just a recipe; they’re a way to create connections and celebrate the wonderful flavors of fall. Whether you’re sharing them with loved ones or enjoying them on a quiet afternoon with coffee in hand, these cookies are destined to become a new favorite.
So, roll up those sleeves, get cozy in your kitchen, and let the aroma of spices fill your home. I can’t wait to hear how yours turn out! Feel free to share your experiences, questions, or ideas in the comments. Until next time, keep on cooking and enjoy every delightful bite! 🍂🍪
Print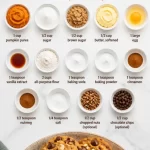
Pumpkin Coffee Cake Cookies
- Total Time: 30 minutes
- Yield: 24 cookies 1x
- Diet: Vegetarian
Description
Delicious Pumpkin Coffee Cake Cookies that blend soft, cake-like texture with spiced autumn flavors, perfect for sharing with coffee or tea.
Ingredients
- 1 cup pumpkin puree
- 1/2 cup sugar
- 1/2 cup brown sugar
- 1/2 cup butter, softened
- 1 large egg
- 1 teaspoon vanilla extract
- 2 cups all-purpose flour
- 1 teaspoon baking soda
- 1 teaspoon baking powder
- 1 teaspoon cinnamon
- 1/2 teaspoon nutmeg
- 1/4 teaspoon salt
- 1/2 cup chopped nuts (optional)
- 1/2 cup chocolate chips (optional)
Instructions
- Preheat your oven to 350°F (175°C).
- Cream together the softened butter, sugar, and brown sugar until light and fluffy.
- Add the pumpkin puree, egg, and vanilla extract until fully combined.
- Combine the all-purpose flour, baking soda, baking powder, cinnamon, nutmeg, and salt in a separate bowl.
- Mix the dry mixture into the wet mixture gently until just combined.
- Fold in any optional nuts or chocolate chips into the dough.
- Scoop the dough onto a lined baking sheet, spacing them a few inches apart.
- Bake for 12-15 minutes or until edges are slightly golden.
- Cool on the baking sheet for a few minutes before transferring to a wire rack.
Notes
For a vegan option, use a flax egg and vegan butter. For gluten-free, substitute all-purpose flour with a 1-to-1 gluten-free flour blend.
- Prep Time: 15 minutes
- Cook Time: 15 minutes
- Category: Dessert
- Method: Baking
- Cuisine: American
Nutrition
- Serving Size: 1 cookie
- Calories: 120
- Sugar: 7g
- Sodium: 150mg
- Fat: 5g
- Saturated Fat: 3g
- Unsaturated Fat: 2g
- Trans Fat: 0g
- Carbohydrates: 18g
- Fiber: 1g
- Protein: 1g
- Cholesterol: 20mg
Keywords: pumpkin cookies, fall dessert, coffee cake cookies, autumn flavors, holiday baking