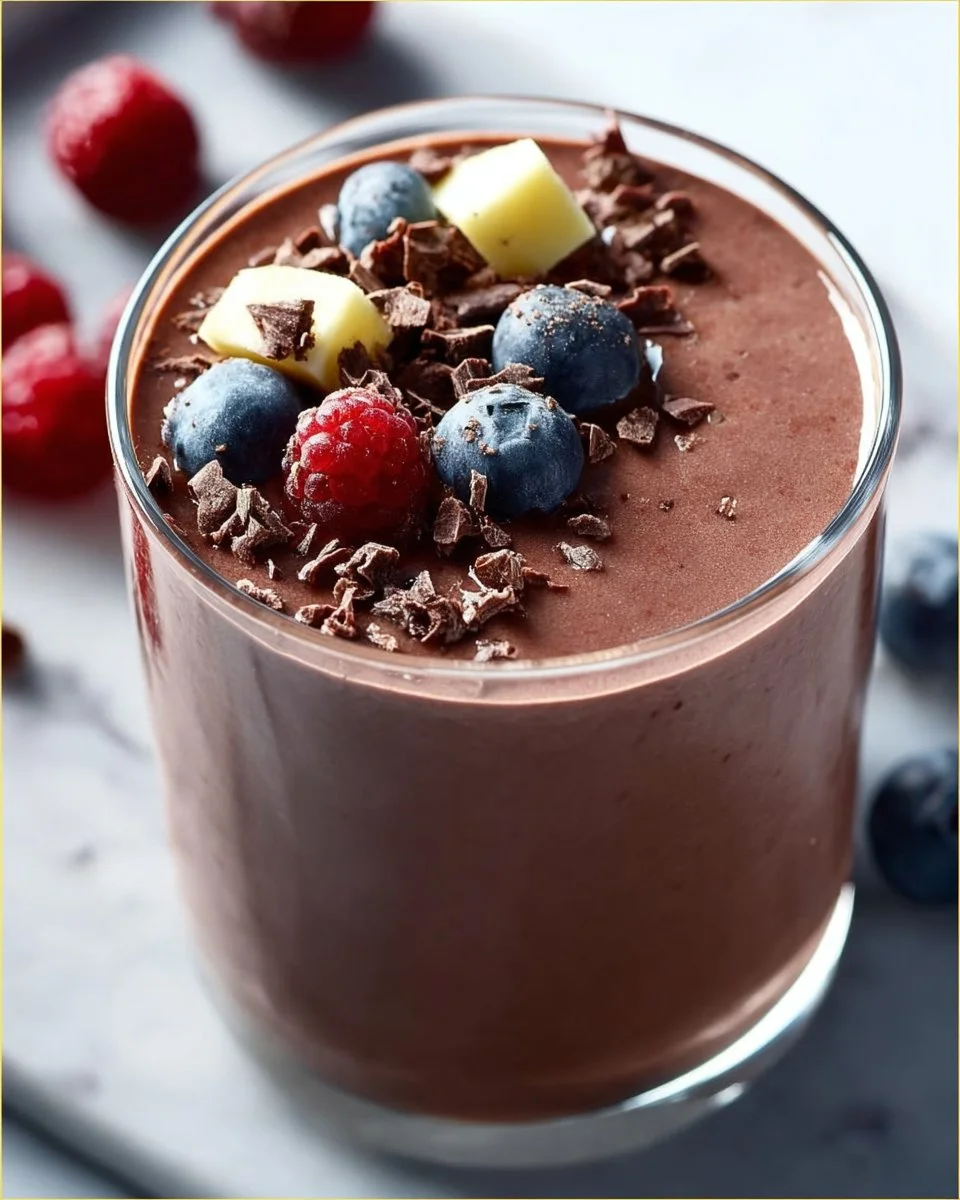
Chocolate Berry Smoothie
Chocolate Berry Smoothie: A Delightful Blend of Flavor and Nostalgia
Hey there, food lovers! Today, I’m excited to share something that’s not only delicious but also brings a wave of nostalgia every time I whip it up. Anyone who knows me knows that I have an unwavering love for smoothies—especially when they come with a twist of chocolate and a burst of berries. That’s right; we’re diving into the world of the Chocolate Berry Smoothie!
Picture this: a warm summer afternoon, and I’m at my grandmother’s house, enjoying her backyard filled with vibrant flowers and ripe fruit trees. One of my fondest memories is of her whipping up her special berry smoothie. The blender would hum a cheerful tune while she tossed in fresh berries from the garden, a scoop of cocoa powder, and her secret ingredient: a splash of love. I’d watch, wide-eyed and hungry, as the colors swirled around in the blender. The result was pure magic in a glass.
What I love most about the Chocolate Berry Smoothie is its versatility. Whether you’re looking for a quick breakfast on the go or a nutritious snack, this smoothie checks all the boxes while tasting like a decadent treat! So grab your blender because we’re about to create a masterpiece that both your taste buds and your body will be grateful for!
Personal Story
Just thinking about that summer at my grandmother’s house makes me smile! I remember chasing after my little cousins in her garden, the scent of honeysuckle filling the air as we picked berries right off the vines. Once we gathered enough, we’d head inside, and that’s when the magic happened. Grandma would shove us all around the counter, armed with wooden spoons and laughter, as she showcased her smoothie-making skills.
With the blender roaring, the kitchen would become the ultimate playground! I marveled at how a simple combination of fruits and a little cocoa could turn into something so creamy and delicious. We’d stand by as the fruits blended into a rich purple elixir, then eagerly await our turn to enjoy it. Every sip transported me back to those carefree days. The best part? Grandma always said it was "nature’s candy," so we never felt guilty about indulging!
Now, every time I sip on a Chocolate Berry Smoothie, I can’t help but reminisce about those blissful summer days. Ready to create your own memories? Let’s dive into the ingredients.
Ingredients
-
1 Banana
A classic for smoothies! Bananas add natural sweetness and creaminess. If you’re out of bananas, try ½ cup of unsweetened applesauce for a similar texture. -
1 Cup Mixed Berries (Fresh or Frozen)
You can use blueberries, strawberries, raspberries, or a mix of all three! Frozen berries are perfect for a thicker, colder smoothie. If you don’t have mixed berries, any single berry will work beautifully. -
1 Cup Almond Milk (or Milk of Choice)
Almond milk is my go-to for its nutty flavor and creaminess, but feel free to switch it up with coconut milk, regular milk, or oat milk—whatever you have on hand! -
2 Tablespoons Cocoa Powder
This ingredient is the star of the show! Cocoa powder injects that luscious chocolate flavor. If you’re feeling adventurous, try adding cacao nibs for an extra crunch or substitute with carob powder for a different taste. -
1 Tablespoon Honey or Maple Syrup (Optional)
Sweetness is key, but only if you want it! If your fruits are sweet enough, skip this altogether. If you’re vegan, stick to maple syrup. -
Ice Cubes (Optional)
The perfect way to chill and thicken your smoothie. On super hot days, don’t hold back on the ice!
Step-by-Step Instructions
-
Gather Your Ingredients:
Start by gathering all the ingredients. It’s always a good idea to have everything out and ready to go to make the blending process smoother. Trust me; you’ll thank yourself later when you’re not rummaging through the fridge with sticky hands! -
Prep the Banana:
Peel the banana and slice it into chunks. This will make blending easier and help reduce the blending time. Pro tip: If you have overripe bananas, freeze them for future smoothies! They make an excellent substitute for ice and add extra creaminess. -
Add the Mixed Berries:
Toss in your cup of mixed berries. If you’re using fresh berries, give them a quick rinse under cool water. If you’re using frozen, just add them straight to the blender. Those beauties will keep your smoothie frosty! -
Pour in the Almond Milk:
Next, pour in your almond milk (or whichever milk you chose). This will help everything blend smoothly. If you prefer a thicker smoothie, you can start with ¾ cup and add more as needed until you achieve your desired consistency. -
Scoop in the Cocoa Powder:
Add those two tablespoons of cocoa powder. Make sure to use unsweetened cocoa to keep the balance of flavors just right. If you’re feeling extra indulgent, consider adding a sprinkle of instant coffee for a mocha twist. -
Add the Sweetener (If Desired):
If you like your smoothie sweeter, now’s the time to add the honey or maple syrup. Begin with one tablespoon and adjust to your taste. Blend without it first, and taste; you might love the natural sweetness from the banana and berries! -
Throw in Ice (Optional):
If you want a chilled smoothie, toss in a handful of ice cubes. If your blender is high-powered, it should handle ice easily. Just be careful not to overload it – we don’t want any smoothie explosions! -
Blend Away:
Secure the blender lid and start blending on low speed. Gradually increase to high speed and blend until everything is creamy and smooth. If the mixture is too thick, add a splash more almond milk until you reach your ideal consistency. -
Taste and Adjust:
Here’s where the magic happens! Stop the blender and taste your smoothie. Need it a bit sweeter or more chocolatey? Adjust as you see fit, and give it another quick whirl to mix in any additions. -
Serve and Enjoy:
Pour the smoothie into your favorite glass (or mason jar if you’re on the go), and dive in!
Serving Suggestions
A smooth, rich, chocolate berry smoothie deserves a fantastic presentation! Here’s how to make your smoothie look as good as it tastes:
-
Garnish with Fresh Berries: Top your smoothie with a few fresh berries or sliced banana. Not only does this add visual appeal, but it also gives you an extra treat to enjoy while sipping.
-
Drizzle with Honey or Chocolate Syrup: A delicate drizzle of honey or syrup over the smoothie creates beautiful patterns. This little touch turns your drink into a piece of art.
-
Add Granola or Nuts on Top: For a bit of texture and extra nutrients, sprinkle some granola or crushed nuts on top. This adds a delightful crunch that pairs wonderfully with the smooth smoothie.
-
Use a Fun Straw or Spoon: Get a funky straw or a cute spoon for stirring. It elevates the experience to something special—trust me, you’ll be reaching for this one on repeat!
Recipe Variations
Let’s get creative! Here are a few variations that can add a fun twist to your Chocolate Berry Smoothie:
-
Nutty Paradise: Add a tablespoon of almond butter or peanut butter for a nutty flavor that pairs beautifully with chocolate. This will also turn it into a more filling meal replacement.
-
Tropical Escape: Switch up the berries for tropical fruits like mango and pineapple, and use coconut milk instead of almond milk to create a refreshing island vibe.
-
Green Goodness: Don’t shy away from greens! Spinach or kale can easily be blended in without altering the flavor significantly. It adds a boost of nutrients while keeping your smoothie rich and delicious.
-
Choco-Mint Delight: Add a few fresh mint leaves or a drop of peppermint extract to create a refreshing minty chocolate experience that feels like a dessert in a glass.
-
Protein Punch: Add a scoop of your favorite protein powder to turn this smoothie into a post-workout fuel. Choose chocolate-flavored powder to complement the existing flavors or vanilla for something lighter.
Chef’s Notes
Isn’t it interesting how recipes evolve over time? I started blending smoothies out of pure curiosity, but I had no idea they would morph into something so loveable! Just like that summer at Grandma’s, where each ingredient was an adventure, my Chocolate Berry Smoothie has taken on many forms in my kitchen.
When I first began crafting this smoothie, I relied heavily on whatever frozen fruit I had on hand. Today, I experiment with seasonal fruits, green additions, and even different types of milk. But no matter how it changes, the core flavors of chocolate and berry remain timeless.
And remember, the most important ingredient in any dish is your happiness. Don’t stress about getting it perfect—just enjoy every blend!
FAQs and Troubleshooting
1. My smoothie is too thick! What should I do?
If you find your smoothie is thicker than you’d like, simply add a little more milk and blend again until you achieve your desired consistency.
2. Can I use different types of berries?
Absolutely! Feel free to swap out the mixed berries for any fruit you prefer. Each berry brings its own special flavor to the party!
3. Why is my smoothie too sweet?
If your smoothie turned out sweeter than you intended, try adding a bit more cocoa powder or a splash of lemon juice to balance the sweetness.
4. Can I make this smoothie ahead of time?
While smoothies are best fresh, you can prep ingredients the night before and store them in the fridge. Just blend them in the morning for a quick breakfast! If you make it ahead, consider freezing it for a refreshing snack later.
Nutritional Info (per serving)
- Calories: Approximately 250
- Protein: 5g
- Carbohydrates: 40g
- Fat: 6g
- Fiber: 8g
- Sugar: 25g (natural sugars from the fruits)
This delicious chocolate berry smoothie packs a nutritious punch without skimping on flavor. With a perfect blend of macronutrients, it’s a fabulous choice for a pre or post-workout snack, breakfast, or a midday boost.
Final Thoughts
There you have it—a delightful journey through the world of the Chocolate Berry Smoothie, packed full of memories, flavor, and endless possibilities! Each time you press that blender’s button, imagine the laughter, the bright summer days, and the warmth of home-cooked goodness surrounding you.
Whether you’re sipping it on your patio, sharing it with loved ones, or simply reveling in a moment of indulgence, this smoothie is more than just a drink; it’s a celebration of all the joys food can bring.
So what are you waiting for? Get blending and let those good vibes flow! My kitchen is your kitchen, and I can’t wait to see how you make this smoothie your own. Keep it deliciously fun, friends!
Print
Chocolate Berry Smoothie
- Total Time: 10 minutes
- Yield: 2 servings 1x
- Diet: Vegetarian
Description
A delightful blend of chocolate and mixed berries creating a creamy and tasty smoothie that is perfect for breakfast or as a snack.
Ingredients
- 1 Banana
- 1 Cup Mixed Berries (Fresh or Frozen)
- 1 Cup Almond Milk (or Milk of Choice)
- 2 Tablespoons Cocoa Powder
- 1 Tablespoon Honey or Maple Syrup (Optional)
- Ice Cubes (Optional)
Instructions
- Gather your ingredients.
- Prep the banana by peeling and slicing it into chunks.
- Add the mixed berries to the blender.
- Pour in the almond milk.
- Scoop in the cocoa powder.
- Add the sweetener if desired.
- Throw in ice if you want a chilled smoothie.
- Blend everything until creamy and smooth.
- Taste and adjust sweetness or chocolate flavor if needed.
- Serve the smoothie in a glass and enjoy!
Notes
Feel free to customize with your favorite berries or add-ins like protein powder or nut butters.
- Prep Time: 10 minutes
- Cook Time: 0 minutes
- Category: Smoothie
- Method: Blending
- Cuisine: American
Nutrition
- Serving Size: 1 serving
- Calories: 250
- Sugar: 25g
- Sodium: 150mg
- Fat: 6g
- Saturated Fat: 1g
- Unsaturated Fat: 4g
- Trans Fat: 0g
- Carbohydrates: 40g
- Fiber: 8g
- Protein: 5g
- Cholesterol: 0mg
Keywords: smoothie, chocolate, berry, healthy, quick snack
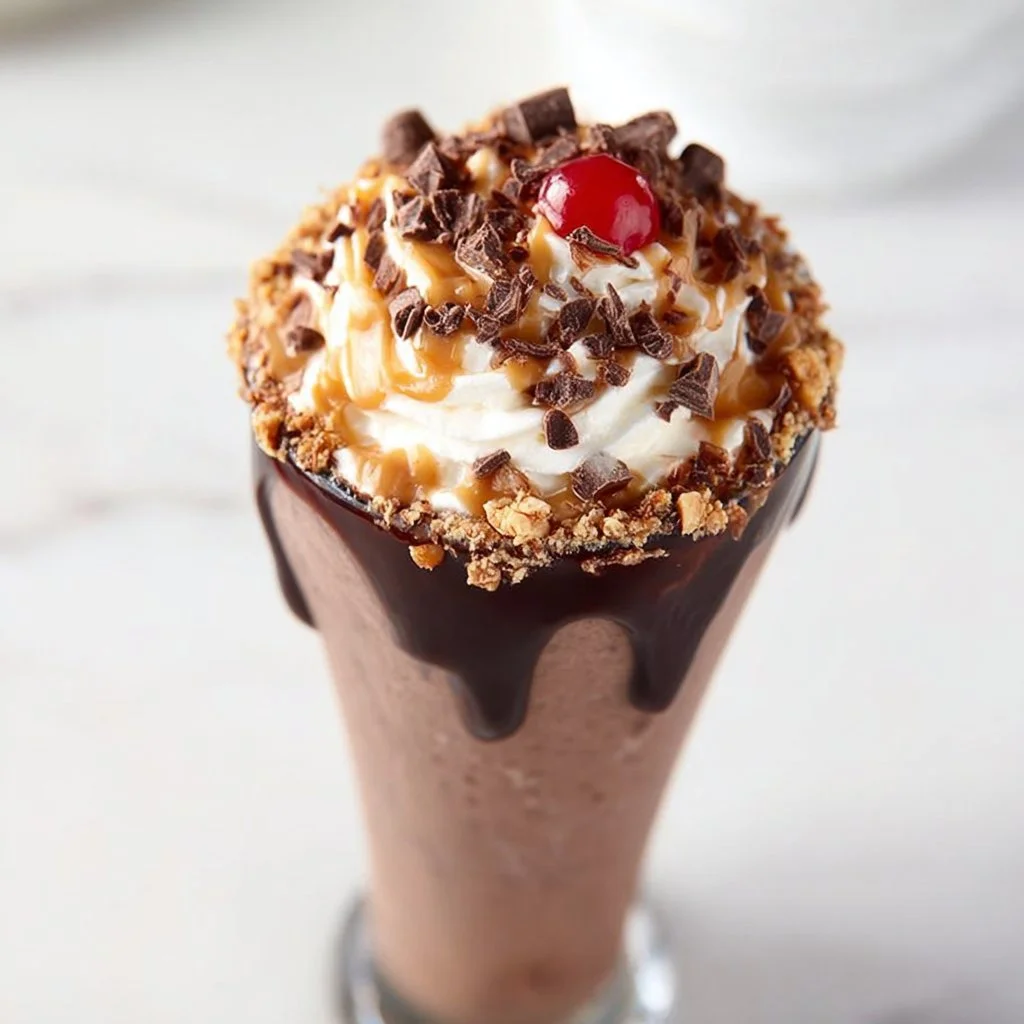
Chocolate Peanut Butter Milkshake
Decadent Chocolate Peanut Butter Milkshake: A Treat for the Sweet-Toothed!
Hey there, fellow food lovers! I’m Beau Collier, your go-to foodie pal, and today we’re diving into a lusciously creamy and utterly satisfying recipe that’s bound to become a staple in your kitchen – the Chocolate Peanut Butter Milkshake. Trust me, this classic treat is like a hug in a glass, merging the rich flavors of chocolate and peanut butter, reminding you of lazy summer afternoons and playful dessert adventures.
Who doesn’t love the combination of peanut butter and chocolate? It’s a match made in culinary heaven. Whether you’re seeking a post-dinner indulgence or just a delightful afternoon pick-me-up, this thick, frosty delight will tickle your taste buds and bring a smile to your face.
So, grab a comfy seat at your kitchen counter, flick on your favorite playlist, and let’s whip up a milkshake that’s as fun to make as it is to enjoy.
A Walk Down Memory Lane
Let’s talk memories. Whenever I think of milkshakes, I’m transported back to my childhood where summertime meant riding my bike to the local diner with friends. The air was thick with warm sunshine, and the hearty laughter of kids filled the streets. We’d each order our favorite treats, and without fail, I’d go for the classic chocolate milkshake with a twist – yes, peanut butter.
I can still picture that vintage diner booth, the vinyl seats sticking just a bit as we slid in. I’d take that first sip, a burst of rich chocolate mingling with the creamy peanut butter, and my eyes would widen in delight. To me, this was more than just a delicious drink — it was a treasured moment, a celebration of togetherness, and about the little joys in life that we often take for granted.
Now, as an adult, I love recreating that experience in my own kitchen, experimenting with flavors but always leaning back to that creamy chocolate-peanut butter combo. This milkshake is more than a recipe; it’s a nod to those sweet moments we cherish.
Ingredients
Let’s get that blender ready! Here are all the ingredients you’ll need to make this delightful Chocolate Peanut Butter Milkshake. Each component plays a vital role in creating that over-the-top deliciousness!
-
3 large scoops of chocolate ice cream
Rich and decadent, chocolate ice cream is the backbone of our milkshake. You can swap it with vanilla ice cream for a different flavor twist or go dairy-free with a coconut or almond based chocolate ice cream for a creamy option! -
3 tbsp creamy peanut butter
Nothing says comfort food like creamy peanut butter! If you’re feeling adventurous, try crunchy peanut butter for some added texture! For those with nut allergies, sunflower seed butter or almond butter can be a fantastic substitute. -
1 cup peanut butter cups (chopped)
These little chocolate treasures will add crunch and extra peanuty goodness! Feel free to use mini cups, or if you’re feeling fancy, you could chop up a chocolate bar! -
⅓ cup milk
Milk adds that silky smoothness to your shake. If you want to keep things rich, stick to whole milk. For a lighter option, try almond milk or oat milk, or even a dairy-free evaporated version for velvety thickness. -
Whipped cream
The cherry on top! You can easily make homemade whipped cream, or go for a can for convenience. Dairy-free options are readily available as well! -
Maraschino cherry
This classic touch isn’t just for looks! It adds a hit of sweetness that brings everything together.* -
Chocolate fudge sauce (see recipe below)
All great shakes need a drizzle of fudge! You can dot it around the inside of your glass before pouring in the shake for an extra treat. Store-bought works just as well if you’re short on time! -
For the chocolate fudge sauce:
-
1 ½ cups dairy-free semi-sweet chocolate (roughly chopped)
Perfect for creating that luxurious chocolate flavor. The dairy-free option ensures everyone can enjoy this shake! -
12 ounces dairy-free evaporated milk
Adds creaminess without the dairy. It’s a game-changer! -
4 tbsp dairy-free butter (melted)
This brings a richness to the fudge; you won’t even miss the dairy in this! -
1 tsp vanilla extract
A splash of vanilla complements both the chocolate and peanut flavors beautifully. -
1 ½ cups powdered sugar
Sweetening it up! Adjust according to your taste; you can always use a sugar substitute if you want a healthier spin.
-
Step-by-Step Instructions
Alright, ready to blend? Let’s break down the process into easy steps to whip up this outstanding milkshake that’ll make you feel like a star chef!
Step 1: Prepare Your Fudge Sauce
- Create the Chocolate Fudge Sauce
- In a medium saucepan over low heat, combine the chopped chocolate, dairy-free evaporated milk, melted dairy-free butter, and the vanilla extract. Stir constantly until everything is melted and combined. It’s creamy perfection, I promise!
- Remove from heat, and gradually mix in the powdered sugar until you achieve a smooth consistency. You can adjust sugar to your sweetness preference – go ahead, taste as you go! Set aside and let it cool slightly.
Step 2: Blend the Ingredients
-
Get Your Blender Ready!
- In your blender, add the scoops of chocolate ice cream, creamy peanut butter, and add the milk. Start off with the ⅓ cup; you can always add more later if you want a thinner consistency.
-
Blend It Up
- Secure the lid, and pulse until everything is combined and creamy. Keep an eye on it, and don’t blend too long, or you’ll end up with a soupy shake. We want it thick and luscious!
Step 3: Add the Crunch
- Incorporate the Peanut Butter Cups
- Once the ice cream mixture is smooth, add the chopped peanut butter cups to the blender. Give it just a few pulses to incorporate them into the shake – we want those chunks to stay chunky!
Step 4: Serve It Up
-
Drizzle Your Glass
- Before pouring in your milkshake, take your fudge sauce and drizzle it on the inside of the glass. Create swirls or lines—make it visually stunning!
-
Pour with Love
- Now, pour the milkshake mixture into the glass. Use a spatula to scrape every last bit out; we don’t want to waste this deliciousness!
Step 5: Top It Off
- Add Whipped Cream and Cherry
- Top your fabulous creation with a heaping swirl of whipped cream. Don’t be shy! Add the maraschino cherry on top, and a final drizzle of chocolate fudge sauce for good measure.
Step 6: Take a Sip!
- Time to Enjoy
- Grab a straw or a big spoon, and enjoy that beautiful concoction. Don’t forget to share with a loved one or simply savor it all by yourself – I won’t tell!
Serving Suggestions
Presentation is everything! Feel free to get creative when serving your Chocolate Peanut Butter Milkshake. Here are some ideas to elevate your shake:
-
Garnish Ideas: Sprinkle crushed peanuts or chocolate shavings on top of the whipped cream for texture and visual appeal. If you’re feeling fancy, a dusting of cocoa powder can add that café vibe.
-
Glassware: Serve it in an old-fashioned milkshake glass, mason jar, or even a quirky vintage cup to bring back those diner memories!
-
Side Treat: Pair it with chocolate chip cookies or a slice of rich peanut butter pie for a double dessert delight.
Recipe Variations
Now, let’s talk about how you can put your spin on this milkshake! Here are some enticing variations to consider:
-
Mint Chocolate Peanut Butter Shake
- Add a few drops of mint extract for a refreshing twist. It’ll be like a Girl Scout cookie in shake form!
-
Banana Peanut Butter Milkshake
- Toss in half a ripe banana before blending for an incredible creamy texture and a hint of banana flavor. It’s a classic combo!
-
Protein-Packed Version
- Add a scoop of your favorite protein powder to make it a post-workout treat! You might need to add a bit more milk to balance it out.
-
Nut-Free Version
- Replace peanut butter with sunbutter (sunflower seed butter) and use chocolate cereal for that added crunch!
-
Dairy-Free Delight
- Swap out all dairy products for their non-dairy counterparts, and enjoy a deliciously rich milkshake that everyone can enjoy!
Chef’s Notes
This milkshake has evolved over the years in my kitchen. At first, it was a simple frozen treat, and as I played with flavors, it became a family favorite. My friends loved it so much they began requesting it for every celebration! I still have that vintage glass from my childhood; it’s a lovely reminder of how something so simple can bring joy and laughter.
It’s essential to have fun with food! Don’t be afraid to experiment; every great recipe starts with a little bit of courage and a whole lot of heart.
FAQs and Troubleshooting
1. Why is my milkshake too thin?
If your milkshake is a bit too runny, blend in a few extra scoops of ice cream to thicken it up. You could also reduce the amount of milk next time.
2. Can I make this ahead of time?
Absolutely! You can prepare the chocolate fudge sauce ahead and store it in the fridge. For the shake, I recommend blending it fresh for the best texture, but you can make it an hour in advance and place it in the freezer.
3. How do I store leftovers?
If you have any leftovers (which is rare!), pour any remaining shake into a tightly sealed container and store it in the freezer. When you’re ready to enjoy it again, let it thaw a bit before blending to restore its creamy goodness.
4. Can I use different flavors of ice cream?
Yes! Get adventurous with flavors like salted caramel, vanilla bean, or mint chocolate chip to create your unique shake experience!
Nutritional Info
Let’s talk numbers! Here’s a rough breakdown per serving of this decadent milkshake:
- Calories: Approximately 600–800 calories depending on specific brands and quantities used.
- Fat: 30g (mostly from the peanut butter and ice cream)
- Carbohydrates: 70g (from sugars in ice cream and fudge)
- Protein: 12g (mostly from milk and peanut butter)
Keep in mind that these numbers can vary based on substitutions or tweaks made in the ingredients. You can always use lower-calorie options to make it a bit lighter!
Final Thoughts
And there you have it! The ultimate Chocolate Peanut Butter Milkshake that combines nostalgia, flavor, and just the right amount of indulgence. Whenever you whip this up, you’re not just making a drink; you’re creating memories, sharing joy, and bringing a piece of that wonderful diner magic right into your home.
So, next time you find yourself in need of a sweet escape, head to your kitchen and bring this recipe to life. Whether it’s a hot summer day, a cozy movie night, or just a treat for being you, this milkshake is sure to please!
Don’t forget to share your creations with me on social media — I’d love to see your delicious masterpieces! Until next time, keep cooking, keep sharing, and most importantly, keep enjoying those meals made with love. Cheers, my foodie friends! 🍫🥜🥤
Print
Decadent Chocolate Peanut Butter Milkshake
- Total Time: 25 minutes
- Yield: 2 servings 1x
- Diet: Vegetarian
Description
A lusciously creamy and satisfying chocolate peanut butter milkshake that brings back sweet childhood memories.
Ingredients
- 3 large scoops of chocolate ice cream
- 3 tbsp creamy peanut butter
- 1 cup peanut butter cups (chopped)
- ⅓ cup milk
- Whipped cream
- Maraschino cherry
- Chocolate fudge sauce (see recipe below)
- For the chocolate fudge sauce:
- 1 ½ cups dairy-free semi-sweet chocolate (roughly chopped)
- 12 ounces dairy-free evaporated milk
- 4 tbsp dairy-free butter (melted)
- 1 tsp vanilla extract
- 1 ½ cups powdered sugar
Instructions
- Create the Chocolate Fudge Sauce: In a medium saucepan over low heat, combine the chopped chocolate, dairy-free evaporated milk, melted dairy-free butter, and vanilla extract. Stir constantly until melted and combined. Gradually mix in the powdered sugar until achieving a smooth consistency. Set aside to cool slightly.
- Add the scoops of chocolate ice cream, creamy peanut butter, and milk into your blender. Start with the ⅓ cup of milk, adding more later if desired.
- Blend until everything is combined and creamy but thick. Avoid blending too long for a soupy texture.
- Add the chopped peanut butter cups and pulse a few times to incorporate.
- Drizzle fudge sauce on the inside of your glass before pouring in the milkshake mixture.
- Pour the milkshake into the glass using a spatula to scrape out all of the mixture.
- Top with whipped cream, a maraschino cherry, and a final drizzle of chocolate fudge sauce.
- Enjoy with a straw or spoon, savoring every delicious sip.
Notes
Feel free to experiment with different flavors of ice cream or toppings. This milkshake is a great way to create memories with friends and family.
- Prep Time: 15 minutes
- Cook Time: 10 minutes
- Category: Dessert
- Method: Blending
- Cuisine: American
Nutrition
- Serving Size: 1 serving
- Calories: 700
- Sugar: 60g
- Sodium: 200mg
- Fat: 30g
- Saturated Fat: 12g
- Unsaturated Fat: 18g
- Trans Fat: 0g
- Carbohydrates: 85g
- Fiber: 4g
- Protein: 12g
- Cholesterol: 15mg
Keywords: milkshake, chocolate, peanut butter, dessert, creamy, indulgent