
Minute High-Protein Breakfast Bowl: Meal-Prep Ready
High Protein Breakfast Bowl: Kick-Start Your Day with Energy!
Hey there, foodie friends! Beau Collier here, and today I’m super excited to share one of my absolute favorite dishes that’s perfect for those busy mornings when you need a breakfast that keeps you fueled and satisfied. We’re talking about the High Protein Breakfast Bowl! Now, I know what you might be thinking: a breakfast bowl? How exciting can that be? But trust me, this bowl is a flavor explosion waiting to happen!
Imagine starting your day with a warm, hearty blend of ground turkey, fluffy eggs, creamy cottage cheese, and crispy potatoes, all generously drizzled with a splash of olive oil and topped with your favorite fixings. Yum, right? What I love about this dish is that it’s not just about filling your belly; it’s about nourishing your body. Plus, it’s ridiculously easy to whip up! You don’t need a degree from culinary school to nail this one.
But beyond just being a fantastic dish, this breakfast bowl holds a special place in my heart. It’s a recipe that reminds me of lazy Sunday mornings spent with family, chatting over a strong cup of coffee and watching the sunlight dance through the kitchen windows. Food has this magical way of bringing us together, and that’s exactly what I aim to capture in every recipe I share with you. Alright, let’s get our cooking shoes on and dive into this high-protein delight!
A Nostalgic Culinary Journey
Growing up, Sunday mornings were a big deal in my house. My family had a special tradition where we would gather around the table for breakfast, sharing stories and laughter over steaming plates of food. My mom was known for her hearty breakfasts that could feed an army, and one of her go-to recipes was a breakfast bowl that looked very much like the one we’re preparing today.
I remember one particular Sunday when I was about eight years old. My mom was bustling around the kitchen, and the tantalizing smell of seasoned ground turkey wafted through the air, making my tummy rumble in anticipation. We all took part in assembling our breakfast bowls, creating our personalized masterpieces with eggs, creamy cheese, and whatever toppings we had on hand. As we ate, we recounted our wild dreams and silly kid stories, soaking in the warmth of family love.
Now, every time I make this breakfast bowl, those cherished memories flood back. It’s more than just a meal; it’s a connection to family, tradition, and the simple joys of life. So whether you’re cooking solo or shared with friends, let’s make this breakfast bowl a delicious canvas for your memories!
Ingredients
Here’s what you’ll need to create this scrumptious High Protein Breakfast Bowl:
-
2 tablespoons olive oil (divided)
- Chef’s Tip: This heart-healthy fat not only helps with cooking but also adds a rich flavor. You can also substitute with avocado oil for a different taste, or flavored oils for an extra kick.
-
1/2 lb ground turkey
- Substitution: Ground chicken or beef work great, too. Just remember, different meats can bring their own unique flavor to the dish.
-
1.5 tablespoons taco seasoning
- Insider Insight: Feel free to use store-bought seasoning or whip up your own mix! Cumin, paprika, and garlic powder create a perfect blend for that taco flair.
-
Salt and pepper (to taste)
- Don’t skip these! They’re essential for bringing out the flavors in each ingredient.
-
3-4 large eggs
- Quick Cook’s Tip: For a fluffier texture, whisk the eggs with a splash of milk before cooking. This small addition makes a world of difference!
-
1/4 cup cottage cheese (2%-4%)
- An excellent source of protein that adds creaminess and helps the bowl feel indulgent. You could swap this for Greek yogurt if you prefer!
-
1 tablespoon butter
- Flavor Boost: A touch of butter gives the dish an irresistible richness. If you’re watching your butter intake, feel free to omit it or use a dairy-free alternative.
-
1 cup shredded potatoes (like Simply Potatoes)
- Crisping up shredded potatoes adds a beautiful texture to the bowl. If you want to cut carbs, try substituting with riced cauliflower!
-
Optional toppings:
- Chopped fresh herbs like chives or parsley
- Avocado slices
- Mexican shredded cheese
- Chopped tomatoes or salsa
- Chef’s Note: These toppings add layers of flavor and visual appeal, so mix and match based on what you have or love!
Step-by-Step Instructions
Now, let’s get down to business! Here’s how to bring your High Protein Breakfast Bowl to life:
-
Prepare Your Ingredients:
- Before you start cooking, gather all your ingredients and have them ready. This makes for a seamless cooking experience where you’re not running around like a headless chicken. I always say, "Mise en place" is the secret to kitchen success!
-
Cook the Ground Turkey:
- In a large skillet, heat 1 tablespoon of olive oil over medium heat.
- Once hot, add the ground turkey, breaking it apart with a spatula.
- Sprinkle in the taco seasoning, along with a pinch of salt and pepper.
- Cook for about 6–8 minutes until it’s no longer pink and fully cooked.
- Chef Hack: Don’t forget to stir occasionally! You want that turkey to soak up all those wonderful taco spices evenly.
-
Crisp the Potatoes:
- In another skillet, or after removing the turkey, add the remaining 1 tablespoon of olive oil along with the butter.
- Once melted and bubbly, add the shredded potatoes.
- Spread them in an even layer and let them cook untouched for about 5 minutes for extra crispiness.
- Give them a gentle stir and let them cook for an additional 4–5 minutes until golden brown and crispy.
- Tip: If you like your potatoes spicier, toss in some chili powder or paprika while they cook!
-
Scramble the Eggs:
- In a separate bowl, whisk the eggs with a splash of milk (if using) until fully blended.
- Season with salt and pepper.
- In a non-stick skillet, melt a little butter (or use cooking spray) over medium-low heat.
- Pour in the eggs and let them sit for a few seconds.
- Gently stir with a spatula, folding the eggs until they’re scrambled to your desired doneness, about 4 minutes. They should be fluffy and soft—don’t overcook them!
-
Assemble the Bowl:
- It’s time to layer! Start with a generous scoop of crispy potatoes at the bottom of your bowl.
- Next, add the seasoned ground turkey and top it with scrambled eggs.
- Finally, dollop the cottage cheese on top. If you make it this far, you’re already killing it!
-
Add Toppings:
- Now for the fun part! Top your bowl with fresh herbs, slices of avocado, a sprinkle of cheese, and your favorite salsa or chopped tomatoes.
- Take a step back and admire your creation before diving in—a feast for the eyes!
Serving Suggestions
Serve this High Protein Breakfast Bowl warm, preferably with a side of fresh fruit or a slice of whole-grain toast to balance it out. If you’re feeling extra cozy, how about pairing it with a steaming cup of your favorite coffee? For a family brunch feel, consider setting up a breakfast bar where everyone can customize their own bowls with different toppings. This way, it becomes a shared experience filled with laughter and creativity!
Recipe Variations
Here are a few creative twists and variations to keep things fresh and exciting:
-
Mediterranean Bowl: Swap the taco seasoning for a dash of oregano and basil, then top with feta cheese, olives, and diced cucumbers for a Mediterranean flair.
-
Southwestern Style: Add black beans into the ground turkey mix and top with fresh corn, diced jalapeños, and spicy salsa.
-
Sweet & Savory: For a unique twist, replace cottage cheese with plain Greek yogurt and add some sliced peaches or berries.
-
Veggie-Packed: Sauté spinach, bell peppers, and onions with the turkey for an extra serving of veggies right from the get-go.
-
Egg White Bowl: If you’re looking to reduce the calories, use egg whites instead of whole eggs and increase the amount of turkey or cottage cheese for extra protein.
Chef’s Notes
This High Protein Breakfast Bowl continues to evolve every time I make it. I used to stick strictly to the traditional recipe, but as my cooking journey has unfolded, I’ve discovered that this dish is an incredible blank canvas! Sometimes, I find myself cranking up the spice level or switching up the cheeses based on what I have on hand. Each twist brings its own charm, keeping this bowl fun and versatile.
And let me tell you, there’s nothing like a bit of improvisation in the kitchen! I remember one time running low on turkey but having an abundance of mushrooms—so, I threw those in, along with some extra spices. What a delightful surprise that was! The key is to enjoy the process and get a little creative.
FAQs and Troubleshooting
1. Can I make this ahead of time?
Absolutely! You can prep the turkey, scramble the eggs, and even cook the potatoes in advance. Just store them separately in the fridge and reheat in the morning for a quick assembly.
2. What if my eggs turn out rubbery?
Oh no! This can happen if you cook them on too high of a temperature. Always keep your heat on medium-low and stir gently for soft, creamy eggs.
3. How do I ensure my potatoes are crispy?
The trick is to let them sit undisturbed for the initial frying time. Avoid overcrowding the pan and use enough oil to help them get golden and crispy!
4. Can I freeze any leftovers?
Yes, you can freeze leftover cooked turkey and potatoes. Just make sure to portion them out and store them in airtight containers. The eggs, however, are best enjoyed fresh, as they can become watery after freezing.
Nutritional Info
While I won’t get too bogged down in numbers—food is about enjoyment, after all—here’s a quick breakdown of the nutritional highlights of this High Protein Breakfast Bowl:
- Calories: Approximately 450 per serving (without toppings)
- Protein: A whopping 36-40 grams, thanks to the turkey, eggs, and cottage cheese
- Fat: Around 24 grams, predominantly from healthy olive oil
- Carbohydrates: Roughly 30 grams, mainly from the shredded potatoes
These values can vary depending on your specific ingredients and substitutions, but this bowl is a fantastic high-protein, well-rounded meal to kick-start your day or power you through your busy schedule!
Final Thoughts
There you have it, friends—a High Protein Breakfast Bowl that’s not only about great taste but also about creating memories around the kitchen table. It’s a dish perfect for sharing with loved ones or savoring during your quiet ‘me time’.
As you explore the various ingredients and toppings, remember that food is meant to be celebrated and enjoyed. So whether you like it spicy, cheesy, or packed with veggies, make this recipe your own. Now, who’s ready to whip up a bowl of happiness? Grab those forks or spoons, and let’s dig in!
Until next time, keep it flavorful and keep it real! 🥄❤️
Print
High Protein Breakfast Bowl
- Total Time: 45 minutes
- Yield: 4 servings 1x
- Diet: High Protein
Description
A hearty breakfast bowl filled with ground turkey, fluffy eggs, creamy cottage cheese, and crispy potatoes, topped with olive oil and your favorite fixings.
Ingredients
- 2 tablespoons olive oil (divided)
- 1/2 lb ground turkey
- 1.5 tablespoons taco seasoning
- Salt and pepper (to taste)
- 3–4 large eggs
- 1/4 cup cottage cheese (2%-4%)
- 1 tablespoon butter
- 1 cup shredded potatoes
- Optional toppings: chopped fresh herbs, avocado slices, Mexican shredded cheese, chopped tomatoes or salsa
Instructions
- Prepare your ingredients by gathering all the items you need.
- Cook the ground turkey in a skillet with olive oil, taco seasoning, salt, and pepper for about 6-8 minutes.
- Crisp the potatoes in another skillet with olive oil and butter until golden brown, about 9-10 minutes.
- Scramble the eggs in a non-stick skillet until fluffy and cooked to your liking.
- Assemble the bowl starting with crispy potatoes, followed by ground turkey, scrambled eggs, and cottage cheese.
- Add toppings like fresh herbs, avocado, cheese, and salsa as desired.
Notes
Prep ingredients in advance for a quicker cooking experience. Customize with your favorite toppings.
- Prep Time: 15 minutes
- Cook Time: 30 minutes
- Category: Breakfast
- Method: Skillet Cooking
- Cuisine: American
Nutrition
- Serving Size: 1 bowl
- Calories: 450
- Sugar: 4g
- Sodium: 600mg
- Fat: 24g
- Saturated Fat: 8g
- Unsaturated Fat: 10g
- Trans Fat: 0g
- Carbohydrates: 30g
- Fiber: 3g
- Protein: 36g
- Cholesterol: 300mg
Keywords: breakfast, high protein, healthy bowl, turkey, eggs, vegetarian option
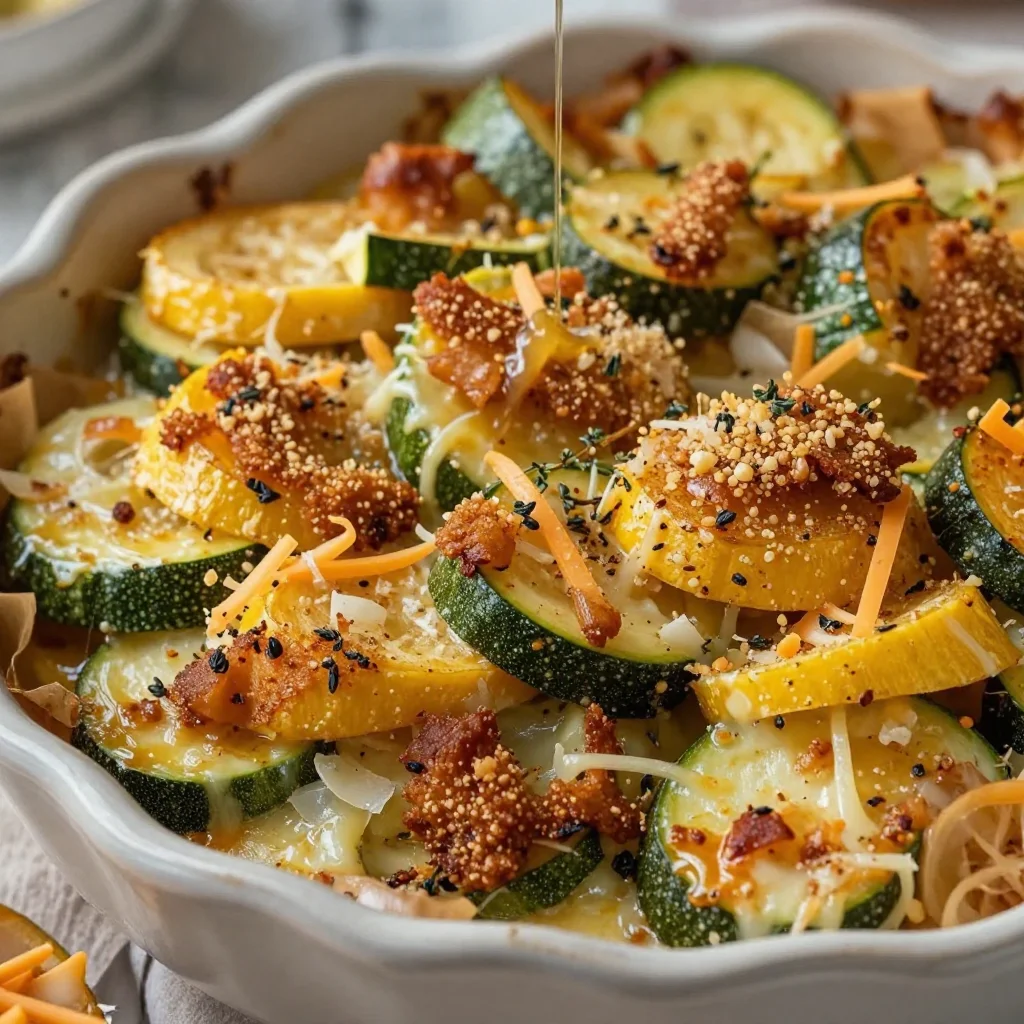
One-Pan Zucchini & Yellow Squash Casserole Weeknight Comfort
Zucchini and Yellow Squash Casserole: A Cozy Comfort Dish
Hey there, fellow foodies! If you’re looking for a comforting dish that wraps you in a warm hug and highlights some of the season’s best produce, then buckle up because I’m thrilled to share my delightful Zucchini and Yellow Squash Casserole with you today! This recipe is the epitome of feel-good food and a classic in my kitchen.
Introduction
Is there anything more satisfying than a bubbling casserole fresh out of the oven? I think not! Casseroles are the heroic saviors of weeknight dinners, and this Zucchini and Yellow Squash Casserole is no exception. Whether you’re hosting a family gathering, meal prepping for busy workdays, or just want to indulge in a delightful, cheesy dish, this recipe has got you covered.
When summer yields an abundance of zucchini and yellow squash from local farms and backyards, this dish steals the show. Bright, vibrant colors dance on your plate, and the melt-in-your-mouth texture will make you wonder why you ever considered roasting your veggies in dull, uninspiring ways. Plus, it’s incredibly easy to prepare, making it the perfect recipe for cooks of all levels—no fancy culinary skills required!
Zucchini and yellow squash are versatile vegetables that can easily be overlooked, often relegated to side dishes or relegated to soup. In this recipe, they take center stage and shine like the stars of a delicious show. Pair it with a crisp salad or some warm, crusty bread, and you’ve got a meal that will impress friends and family alike!
So, grab your favorite apron and let’s dive headfirst into cooking up a heartwarming Zucchini and Yellow Squash Casserole that’s sure to be a hit at your dinner table.
Personal Story
Whenever I think of zucchini and yellow squash, I’m reminded of my childhood summers spent at my grandma’s house. She had her own little vegetable garden that burst with greenery, and you better believe that zucchini and yellow squash were the stars of the show!
I remember being her eager little helper, running out to the garden to pick the biggest zucchinis and the plump yellow squashes. The excitement of watching her whip them into a creamy casserole filled the kitchen with smells that were nothing short of magical. Grandma would playfully say, "You know, Beau, when life gives you squash, you make the most delicious casserole!" Those moments, filled with laughter, love, and the clanging of pots and pans, are ingrained in my memory.
Now, every time I prepare this dish, I feel like I’m stepping into her kitchen once again, carrying on a legacy of love and warmth. It’s not just food; it’s a connection to family and tradition. And that’s what makes this casserole not only delicious but also deeply meaningful.
Ingredients
Let’s gather our ingredients! Here’s what you’ll need for the Zucchini and Yellow Squash Casserole:
-
2 medium zucchinis, sliced: These green beauties add a mild flavor and an excellent texture. If you don’t have zucchinis on hand, you can swap them with eggplant for a similar consistency.
-
2 medium yellow squashes, sliced: Their sunny color brightens up the dish. If you’re looking for a twist, try using pattypan squash if you can find them at your local farmer’s market.
-
1 cup shredded cheddar cheese: This is where the magic happens! Cheddar adds a rich, creamy flavor. Use sharp cheddar for a bolder taste, or substitute with mozzarella for a milder, gooey option.
-
1/2 cup grated Parmesan cheese: Adds a salty kick and deliciously crispy texture on top. If you’re feeling adventurous, chopped fresh herbs like thyme or basil can replace parmesan for more herbaceous flavor.
-
1 small onion, diced: Onion brings a beautiful sweetness when caramelized. Swap for shallots if you prefer a milder taste.
-
2 cloves garlic, minced: Because garlic makes everything better! If you’re not a fan of fresh garlic, you could use 1/2 teaspoon of garlic powder.
-
1 cup breadcrumbs: They give the casserole that crispy, crunchy topping we all love. For a healthier option, use whole wheat or gluten-free breadcrumbs.
-
2 tablespoons olive oil: This helps to enhance the flavors and gives the dish a bit of richness. Avocado oil is a great alternative if you want a slightly different flavor.
-
Salt and pepper to taste: Always essential for balancing the flavors. Feel free to add a pinch of red pepper flakes for some heat or experiment with different seasoning blends.
-
1 teaspoon dried thyme (optional): Fresh herbs are always a plus! If you’ve got fresh thyme, toss in a few sprigs for an aromatic boost.
Step-by-Step Instructions
Let’s dive into creating this mouthwatering casserole, shall we? Follow these simple steps for a successful dish:
-
Preheat Your Oven: Start by preheating your oven to 350°F (175°C). While it’s heating up, you can prep the rest of your ingredients casually!
-
Prep the Vegetables: Grab your zucchinis and yellow squashes, and slice them into thin rounds. Aim for about ¼ inch thick so they cook evenly. Toss them into a large mixing bowl along with the diced onion and minced garlic. Trust me, those aromatic flavors together are a match made in heaven!
-
Sauté the Veggies: In a large skillet, pour in your olive oil and heat it over medium heat. Once hot, add your zucchini, yellow squash, onion, and garlic mixture. Sauté them for about 5–7 minutes, just until they start to soften. This will help enhance all those lovely flavors. You’ll notice how your kitchen starts to smell amazing already!
-
Combine with Cheeses: Once your veggies are softened, remove them from heat and let them cool a bit. In a separate bowl, combine the shredded cheddar and grated Parmesan cheeses. Save a little of the cheddar for topping later! Mix the cheeses with the sautéed veggies and season with salt, pepper, and thyme if you’re using it. Ensure everything is distributed evenly—no lonely zucchinis here!
-
Prepare Your Baking Dish: Grease a 9×13 inch casserole dish with non-stick spray or a drizzle of olive oil. Then spread half of the breadcrumbs at the bottom of the dish. This little trick not only prevents the casserole from sticking but also helps create that glorious crunchy bottom layer!
-
Layer the Casserole: Pour the veggie and cheese mixture into the baking dish, leveling it out evenly. Sprinkle the remaining breadcrumbs on top, along with any extra cheddar cheese that you saved earlier. Seriously, can you imagine that bubbly, cheesy crunch?? It’s heavenly!
-
Bake It Up: Pop your casserole into the preheated oven and bake for about 25-30 minutes, or until the top is golden brown and bubbling. Bonus tip: If you want to get that gorgeous golden crust, switch the oven to broil for the last 2–3 minutes. Just keep a close eye on it so it doesn’t burn!
-
Let It Rest: Once it’s out of the oven, let it rest for about 5-10 minutes before serving. This gives the casserole time to firm up a bit, making it easier to slice into generous portions.
Serving Suggestions
Now that your beautiful casserole is out of the oven and smelling like heaven, it’s time to serve it up! Here are a few delightful ways to plate your creation:
-
On a Plate: Simply scoop out a generous portion onto a plate and garnish with a sprinkle of chopped parsley or fresh basil to add a pop of color. It truly enhances the dining experience!
-
Family Style: Leave it in the casserole dish and place it right in the center of the table for everyone to help themselves. Make it a communal experience where those good vibes run wild.
-
With a Side Salad: Serve it alongside a fresh green salad drizzled with a light vinaigrette. The brightness of the salad complements the heartiness of the casserole brilliantly!
-
Next to Crusty Bread: Pair your casserole with some warm, crusty bread for those who want to scoop up every last bite. Trust me, bread and casserole are the perfect dynamic duo!
Recipe Variations
Feeling adventurous? Here are a few fun variations to put your own spin on this Zucchini and Yellow Squash Casserole:
-
Mediterranean Twist: Add sun-dried tomatoes and feta cheese to the mix for a zesty flavor explosion. A few olives thrown in wouldn’t hurt either!
-
Protein Power: Stir in some cooked ground turkey or shredded chicken for a heartier casserole that packs a protein punch. This is great for busy families looking for a balanced meal.
-
Spicy Kick: If you’re a spice lover, add some diced jalapeños or sprinkle cayenne pepper in the mixture for a fiery twist.
-
Creamy Delight: For an extra creaminess, mix in a cup of sour cream or cream cheese into the cheese blend. It’s comfort food on a whole new level!
-
Veggie Extravaganza: Throw in other vegetables like bell peppers, mushrooms, or carrots. Experiment with seasonal produce and make this casserole your own!
Chef’s Notes
I can’t help but chuckle at how this humble casserole has evolved over the years. What started as Grandma’s quick fix for summer squash has turned into a beloved family recipe that I serve at gatherings and potlucks. No matter how many times I adjust the ingredients, it’s always a crowd-pleaser.
Oh, and here’s a funny story: One time, I accidentally mistook baking soda for baking powder. Let’s just say, we had a ‘squash eruption’ that left little bits of casserole splattered all over my kitchen. Lesson learned: always label your spices and pay attention! But I promise, this version will turn out perfectly every time.
FAQs and Troubleshooting
-
Q: My casserole isn’t firming up. What went wrong?
- A: It could be that there’s excess moisture from the veggies. Make sure to sauté them long enough to remove some water content. Let it rest before serving to allow it to set!
-
Q: Can I make this ahead of time?
- A: Absolutely! You can prepare the casserole a day in advance and keep it in the fridge. Just remember to adjust the cooking time as it may take a bit longer if it’s cold!
-
Q: How can I tell when it’s done baking?
- A: The top should be golden brown and bubbly. If it jiggles in the dish like Jell-O, it needs more time!
-
Q: Can I freeze leftovers?
- A: Yep! Just make sure it’s in an airtight container. It can last in the freezer for up to three months. To reheat, bake it from frozen at 350°F until heated through.
Nutritional Info
While I love indulging in this cozy casserole, I also want to make sure you know what you’re putting on your plate! This dish packs in some hearty veggies while delivering a comforting mix of flavors.
- Calories: Approximately 250 per serving (based on eight servings)
- Protein: 10g
- Carbohydrates: 21g
- Fat: 15g
- Fiber: 3g
Keep in mind that these values can vary depending on specific ingredients used, cooking methods, and added ingredients!
Final Thoughts
Cooking is truly a magical experience, transforming simple ingredients into something special. This Zucchini and Yellow Squash Casserole embodies not just comfort food but also shared memories, stories, and love. I hope you’re as excited to make this recipe as I am to share it!
So, gather your family or friends, and let’s make some delicious memories in the kitchen. I can’t wait to hear about your own stories connected to this dish. And remember, when it comes to cooking, there are no mistakes—only delicious discoveries waiting to happen! Let’s dig in!
Print
Zucchini and Yellow Squash Casserole
- Total Time: 45 minutes
- Yield: 4 servings 1x
- Diet: Vegetarian
Description
A cozy casserole that highlights fresh zucchini and yellow squash with a cheesy topping, perfect for family dinners.
Ingredients
- 2 medium zucchinis, sliced
- 2 medium yellow squashes, sliced
- 1 cup shredded cheddar cheese
- 1/2 cup grated Parmesan cheese
- 1 small onion, diced
- 2 cloves garlic, minced
- 1 cup breadcrumbs
- 2 tablespoons olive oil
- Salt and pepper to taste
- 1 teaspoon dried thyme (optional)
Instructions
- Preheat your oven to 350°F (175°C).
- Prep the zucchinis and yellow squashes by slicing them into thin rounds.
- Toss the veggies into a large mixing bowl along with diced onion and minced garlic.
- Sauté the mixture in olive oil over medium heat for about 5–7 minutes.
- Combine the softened veggies with shredded cheddar and grated Parmesan cheeses.
- Prepare a 9×13 inch casserole dish by greasing it and spreading half of the breadcrumbs at the bottom.
- Layer the veggie and cheese mixture evenly in the dish.
- Sprinkle the remaining breadcrumbs and any saved cheddar on top.
- Bake for about 25-30 minutes until golden brown and bubbling.
- Let it rest for 5-10 minutes before serving.
Notes
For a creamy version, mix in sour cream or cream cheese. Feel free to experiment with additional vegetables or spices.
- Prep Time: 15 minutes
- Cook Time: 30 minutes
- Category: Main Course
- Method: Baking
- Cuisine: American
Nutrition
- Serving Size: 1 serving
- Calories: 250
- Sugar: 4g
- Sodium: 300mg
- Fat: 15g
- Saturated Fat: 8g
- Unsaturated Fat: 5g
- Trans Fat: 0g
- Carbohydrates: 21g
- Fiber: 3g
- Protein: 10g
- Cholesterol: 30mg
Keywords: casserole, zucchini, yellow squash, comfort food, cheesy

Minute Copycat P.F. Chang’s Ground Chicken Lettuce Wraps
P.F. Chang’s Ground Chicken Lettuce Wraps: A Delicious Journey of Flavors
Hey there, fellow food enthusiasts! Today, I’m super excited to dive into a recipe that has been a hit not only at my kitchen table but also, thanks to P.F. Chang’s, in dining rooms around the globe – Ground Chicken Lettuce Wraps! If you’ve ever experienced the burst of flavors and textures in those little bundles of joy, then you know exactly why this dish is a must-try at home.
Lettuce wraps are fantastic for so many reasons: they’re fresh, light, and incredibly versatile. Plus, they’re perfect for that healthy, feel-good eating we all crave from time to time. Whether you’re hosting a cozy dinner with friends or simply indulging in a solo snack, these flavorful bites have a way of making any meal special. So, let’s roll up our sleeves, dive into this culinary adventure, and create some delicious memories together!
A Personal Touch: The Story Behind My Love for Lettuce Wraps
I’ll always remember the first time I experienced these delightful wraps. It was a beautiful summer evening, and my family decided to have dinner at a nearby P.F. Chang’s. The energy in the restaurant was vibrant, almost like the food itself was singing with stories just waiting to be told!
When the lettuce wraps arrived, I was captivated not just by their colorful presentation but by the intoxicating aroma wafting through the air. My first bite was a blend of tender ground chicken, the crunch of water chestnuts, and a hint of soy and sesame that transported me to flavor town. Everyone around the table smiled in unison, clearly relishing every moment of the meal. I knew right then that I needed to recreate this dish in my kitchen, so I began my journey to bring this deliciousness home.
Over the years, I’ve tweaked the recipe to fit my taste while keeping those essential, soul-warming flavors intact. This dish has become a staple for gatherings, and it’s often the highlight of my dinner parties. Each wrap tells a story, and I love sharing them with friends and family. Now, let’s jump into the delicious details so you can create your own magical meal!
Ingredients: What You’ll Need
Here’s a quick list of ingredients to gather before we start cooking. I’ll also share some handy tips and tricks for each ingredient!
-
1 lb ground chicken: The star of our dish! Ground chicken is lean and absorbs flavors beautifully. You can substitute it with ground turkey or even a plant-based alternative like lentils or chopped mushrooms for a vegetarian version.
-
1 tablespoon vegetable oil: This oil helps to sauté the ingredients without overpowering them. Alternatively, you can use sesame oil for a nuttier flavor.
-
1/2 cup onion, chopped: Adding a subtle sweetness and crunch. Yellow or white onions work wonders here – just avoid red onions as they can be too sharp.
-
1 cup mushrooms, chopped: These add an earthy flavor and a wonderful texture. Feel free to swap with bell peppers if you prefer a different kind of crunch.
-
2 cloves garlic, minced: Garlic is the secret to flavor town! If you’re short on garlic, garlic powder can work in a pinch (1/8 teaspoon per clove).
-
1/4 cup soy sauce: This brings the umami goodness! For a gluten-free option, use tamari or coconut aminos.
-
1 tablespoon rice vinegar: It adds a lovely tang. If you don’t have rice vinegar, apple cider vinegar works as a great substitute.
-
1 tablespoon hoisin sauce: This sweet and savory sauce is essential for that signature flavor. If you can’t find it, a mixture of soy sauce and a dash of honey can mimic the taste.
-
1 teaspoon sesame oil: This will enhance the overall flavor of the dish with a nutty aroma. Use it sparingly, as it’s potent!
-
1/4 cup water chestnuts, chopped: They give our wraps a satisfying crunch. If you don’t have them, try using diced jicama or cucumber for a similar effect.
-
1/4 cup green onions, chopped: These add a fresh bite at the end. You can also sprinkle some cilantro for a vibrant twist!
-
Salt and pepper to taste: Always season to suit your palate! Feel free to experiment with different types of salt (like garlic or smoked salt) for an added dimension.
-
Lettuce leaves (for wrapping): Butter lettuce or romaine works beautifully as it holds up well to the filling. You can also use collard greens or even thinly sliced cabbage for a unique twist!
Step-by-Step Instructions: Let’s Get Cooking!
Now that we’ve gathered our ingredients, it’s time to bring these flavors to life! Follow my step-by-step process, and I promise you’ll be serving up a plate of magic in no time.
-
Heat the Oil: Begin by heating your vegetable oil in a large skillet over medium-high heat. Lean into those sizzles – they’re announcing that deliciousness is on its way!
-
Sauté Onions: Once the oil is shimmering, toss in the chopped onions. Cook them for about 3-4 minutes, until they’re soft and translucent. Give them a stir every now and then, and inhale that heavenly aroma!
-
Add Garlic and Mushrooms: Next, add the minced garlic and chopped mushrooms to the skillet. Cook for another 3-5 minutes until the mushrooms release their moisture and begin to brown. This is where the magic happens – the flavors meld together beautifully!
-
Brown the Chicken: Push the onion and mushroom mixture to the side of the skillet and add your ground chicken. Break it up with a spatula and cook until it’s no longer pink, about 5-7 minutes. Keep stirring, letting those flavors dance together.
-
Season the Mix: Once the chicken is cooked, it’s time to season! Pour in the soy sauce, rice vinegar, hoisin sauce, and sesame oil. Stir everything together until well combined, ensuring that each morsel is coated in that glorious sauce.
-
Add Water Chestnuts: Toss in the chopped water chestnuts and mix to combine. These will add the crunch that elevates each bite into something truly satisfying.
-
Finish with Green Onions: Finally, stir in the chopped green onions and season with salt and pepper to taste. Give everything a final stir to ensure it’s all well incorporated.
-
Prepare Your Lettuce: While your filling is cooling slightly, rinse and dry your lettuce leaves. Arrange them on a platter, ready to be filled with that delicious chicken mixture!
Serving Suggestions: How to Plate These Little Delights
Presentation is key! To serve, simply scoop a generous amount of the chicken mixture into the center of a lettuce leaf, folding it up like a little burrito. You want to create a beautiful, edible package for your guests to enjoy.
Drizzle some additional hoisin or soy sauce on top for an extra burst of flavor and sprinkle some sesame seeds or chopped cilantro for a pop of color. Serve alongside lime wedges for a zesty kick, and you have a stunning appetizer or main course that’s bound to impress!
Recipe Variations: Get Creative in the Kitchen
Feeling adventurous? Here are a few fun twists to try with your lettuce wraps:
-
Thai Twist: Add a tablespoon of peanut butter or finely chopped peanuts for a Thai-inspired version. Pair it with a spicy chili sauce for some heat!
-
Asian Slaw: Mix in grated carrots and shredded cabbage into your chicken mixture for added crunch and color.
-
Spicy Kick: Add chopped fresh jalapeños or a splash of Sriracha to heat things up. The balance of heat and sweet from the hoisin will be divine!
-
Herb-Infused: Swap the green onions for fresh basil or mint for a refreshing herbaceous flavor that brightens the dish.
-
Vegetarian Delight: Substitute ground chicken with crumbled tofu and add extra veggies like bell peppers and zucchini. Season with the same sauce for an equally delicious meatless version.
Chef’s Notes: Reflections and Kitchen Memories
Over the years, my ground chicken lettuce wraps have grown from a simple recreation into a family-tested favorite that warms my heart every time I make it. It’s become a versatile dish that adapts to the seasons and my guests’ cravings.
One funny memory I have is the time I attempted to cook these for a dinner party without realizing I was out of lettuce! I raced to the store only to discover it was closed for a holiday. In a moment of desperation, I substituted tortillas. The results were surprisingly delicious and led to a new “wrap” tradition in our home!
These lettuce wraps are all about flexibility and creativity. They encourage an interactive dining experience where everyone can build their own, allowing each person to customize the flavor and crunch to their exact liking.
FAQs and Troubleshooting: Common Questions Answered
-
What if my chicken mixture is too dry?
If your filling turns out dry, try adding a splash more of soy sauce or hoisin sauce until you reach your desired consistency. -
How do I store leftovers?
Place the filling in an airtight container and refrigerate for up to 3 days. Keep the lettuce leaves separate to maintain their crispness. -
Can I make this in advance?
Absolutely! You can prepare the chicken mixture a day ahead and store it in the fridge. Just reheat it on the stovetop before serving. -
What can I use if I don’t have lettuce?
Use cabbage leaves, collard greens, or even large radishes for crispness and taste. They all serve as excellent wrappers with a unique crunch!
Nutritional Info
For those interested in the nutritional aspect, here’s a quick breakdown (per serving of wraps):
- Calories: 230
- Protein: 25g
- Carbs: 14g
- Fat: 9g
- Fiber: 2g
Please note these values may vary depending on the specific brands of ingredients used and how generously you fill your lettuce wraps!
Final Thoughts: Wrap It Up with Love!
There you have it – my take on P.F. Chang’s Ground Chicken Lettuce Wraps, filled with tasty bites and heartwarming stories. They’re the perfect blend of fresh, vibrant flavors, and trust me, they’ll leave your taste buds wanting more. Cooking is all about expressing love and creativity, and I hope this recipe inspires you to whip up your version of this delightful dish.
So gather your loved ones, roll up your sleeves, and enjoy wrapping up your own flavorful memories. Happy cooking, foodies! Let’s create delicious moments together and continue sharing the joy of cooking – one meal at a time!
Print
Ground Chicken Lettuce Wraps
- Total Time: 35 minutes
- Yield: 4 servings 1x
- Diet: Gluten-Free
Description
A delicious and versatile recipe for ground chicken lettuce wraps that are perfect for any occasion.
Ingredients
- 1 lb ground chicken
- 1 tablespoon vegetable oil
- 1/2 cup onion, chopped
- 1 cup mushrooms, chopped
- 2 cloves garlic, minced
- 1/4 cup soy sauce
- 1 tablespoon rice vinegar
- 1 tablespoon hoisin sauce
- 1 teaspoon sesame oil
- 1/4 cup water chestnuts, chopped
- 1/4 cup green onions, chopped
- Salt and pepper to taste
- Lettuce leaves (for wrapping)
Instructions
- Heat the vegetable oil in a large skillet over medium-high heat.
- Sauté the chopped onions for about 3-4 minutes until soft and translucent.
- Add the minced garlic and chopped mushrooms, cooking for another 3-5 minutes until the mushrooms are browned.
- Brown the ground chicken, breaking it up with a spatula, until it’s no longer pink, about 5-7 minutes.
- Season the mixture with soy sauce, rice vinegar, hoisin sauce, and sesame oil, stirring until well combined.
- Add the chopped water chestnuts and mix to combine.
- Finish with green onions, seasoning with salt and pepper to taste.
- Prepare your lettuce leaves by rinsing and drying them.
Notes
These wraps are great for a healthy meal. Feel free to customize the filling based on your preferences!
- Prep Time: 15 minutes
- Cook Time: 20 minutes
- Category: Appetizer
- Method: Sautéing
- Cuisine: Asian
Nutrition
- Serving Size: 2 wraps
- Calories: 230
- Sugar: 2g
- Sodium: 600mg
- Fat: 9g
- Saturated Fat: 1g
- Unsaturated Fat: 8g
- Trans Fat: 0g
- Carbohydrates: 14g
- Fiber: 2g
- Protein: 25g
- Cholesterol: 70mg
Keywords: chicken, lettuce wraps, healthy, Asian cuisine, easy appetizer, gluten-free
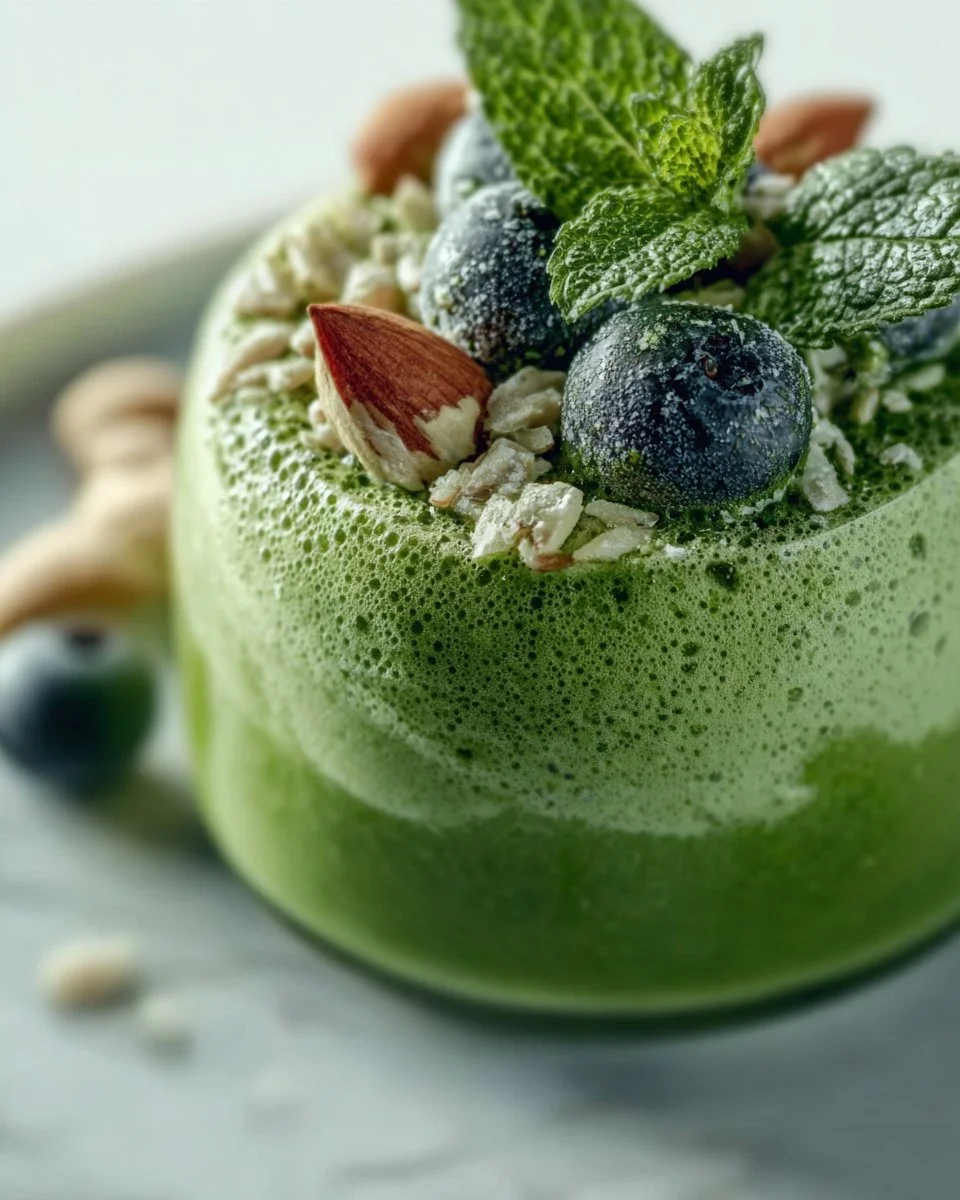
Green Detox Smoothie
Green Detox Smoothie: A Refreshing Burst of Goodness
Hey there, foodie friends! If you’re anything like me, you know that sometimes life in the kitchen can get a bit chaotic. From juggling family responsibilities to keeping up with work, it can be easy to let healthy eating fall by the wayside. That’s where my Green Detox Smoothie swoops in like a superhero, ready to save the day—and your taste buds!
Why the detox? Well, after a weekend filled with indulgence—think rich lasagnas, decadent desserts, and not-so-healthy snacks—it feels great to press the reset button. This vibrant, nutrient-packed smoothie is not just a pretty green drink; it’s a delicious way to give your body a little TLC. Besides, it only takes a few minutes to whip up, making it ideal for the busiest mornings or snack attacks.
Let’s get to the best part: this smoothie is foolproof! With a blend of fresh greens, hydrating coconut water, and naturally sweet bananas, you’ll not only treat your taste buds but also pack in those vitamins and minerals we all need. So, grab your blender and let’s embark on this journey of wholesome flavors and energizing goodness together!
A Smoothie with a Story
You know, while smoothies are often associated with fitness and health trends, for me, they carry a sense of nostalgia. I remember summer afternoons spent with my grandmother in her sun-drenched kitchen. She insisted that eating your greens would make you strong and healthy—a message that took root deep in my heart.
One day, she decided to surprise me with a green smoothie. At first, I was dubious. I mean, greens in a drink? But that first sip of her creation—spinach, banana, and a splash of something fruity—was a revelation. It was refreshing, creamy, and had that perfect touch of sweetness! Over the years, I’ve experimented with a plethora of greens and flavors to create this Green Detox Smoothie—each variation taking me back to those blissful afternoons with Grandma. Every time I whip it up, it’s like a warm hug from my past, reminding me that healthy eating can taste fabulous too.
Ingredients
Let’s gather our star players for this Green Detox Smoothie. Here’s what you’ll need:
-
2 cups of spinach (firmly packed)
Spinach is a powerhouse of nutrients, filled with iron and vitamins A, C, and K. Prefer kale? Go for it—just remember it has a stronger flavor! -
1 cup of coconut water (or plain chilled water)
Coconut water is naturally hydrating and comes with electrolytes, making it a fantastic choice. You can also use almond milk for a creamier texture! -
1 ripe frozen banana
Frozen bananas lend a creamy texture and natural sweetness. Don’t fret if you don’t have a frozen one; just use a fresh, ripe banana and add a few ice cubes. -
1 whole green apple (cored)
Green apples add a nice tartness that balances the smoothie perfectly. If you want something sweeter, opt for a Fuji or Honeycrisp apple! -
1/2 whole cucumber
Cucumbers are hydrating and ultra-refreshing. If you want to skip peeling, go right ahead! -
1/2 whole lemon (peel removed completely)
Lemon brightens everything up! Just ensure you remove the peel to avoid bitterness. If you want a milder citrus taste, use a lime instead. -
1/2 inch fresh ginger (optional)
Add a kick with fresh ginger! It’s great for digestion, but if you’re not a fan of spice, feel free to leave it out.
Step-by-Step Instructions
Now that we have our ingredients laid out, let’s blend this beauty together!
-
Prep Your Ingredients:
Wash your spinach and apple thoroughly. Core the apple and chop it into quarters for easier blending. Slice your cucumber (it doesn’t need to be perfect). Don’t worry about dicing too finely; your blender will do the work! -
Add to the Blender:
Start by placing the spinach in your blender. Follow it up with coconut water (or the alternative), the frozen banana, apple, cucumber, lemon, and ginger (if using). Pour in the coconut water first to create a smoother blend, as it helps the blades move freely. -
Blend Away:
Secure the lid on your blender and blend on high for about 30 seconds to a minute until all ingredients are smooth and creamy. You might need to pause and scrape down the sides of the blender with a spatula if things are sticking. Pro tip: If it appears too thick, add a splash more coconut water! -
Taste Test:
Here comes the fun part! Pour a little bit into a glass and give it a taste. If you prefer it sweeter, toss in a little honey or a splash of maple syrup. For added zest, a drizzle of agave syrup works wonders, too! -
Chill and Serve:
Once blended to perfection, pour the smoothie into a tall glass (or your favorite mug), garnish with a slice of cucumber or a sprinkle of chia seeds, and get ready to enjoy!
Serving Suggestions
The Green Detox Smoothie is all about simplicity, but here are a few cute serving ideas to make it even more special:
- Garnish: Sprinkle some chia seeds or a few slivers of almonds on top to add texture. You could even drop a fresh mint leaf for a pop of color!
- Mason Jar: Serve in a mason jar for a trendy touch—perfect for on-the-go sipping.
- Smoothie Bowl: For a refreshing twist, pour it into a bowl and top with sliced fruits, granola, or nuts for added crunch.
Now, who says smoothies can’t be stylish?
Recipe Variations
Let’s get creative! Here are some nifty twists and substitutions you can try for your Green Detox Smoothie:
- Berry Blast: Swap the green apple for a handful of mixed berries for a fruity zing—raspberries and blueberries are heavenly in this combo.
- Protein Power: Add a scoop of your favorite protein powder or a tablespoon of nut butter if you’re looking to amp up the protein content. Peanut butter and banana are a classic match!
- Citrus Sunshine: Replace the lemon with an orange for a sweeter, more tropical twist.
- Herbal Infusion: For a refreshing herbaceous note, add a few sprigs of fresh mint or basil. It’ll elevate your smoothie to gourmet territory!
- Dairy-Freedom: Use plant-based yogurt instead of coconut water for a thicker, creamy texture.
Chef’s Notes
This Green Detox Smoothie recipe has been a kitchen classic of mine for years. I can’t tell you how many variations I’ve tested and enjoyed. I’ve had friends rave about how they weren’t “green drink people,” only to find themselves guzzling it down and begging for the recipe! It’s amazing how a few simple ingredients can create something so vibrant.
During one of my smoothie-making escapades, my blender decided it was time for retirement mid-batch! You can imagine the mess that followed. But from that day, I learned to always have a backup blender or at least have a trusty hand-held milk frother to save the day! Now, I always keep a spare one handy.
FAQs and Troubleshooting
Q1: My smoothie is too thick; what can I do?
If your smoothie is thicker than you’d like, add a little more coconut water or plain chilled water, then blend again until smooth.
Q2: How can I make this ahead of time?
This smoothie is best enjoyed fresh, but you can prep your ingredients the night before. Just store them in the fridge, and then blend in the morning. Alternatively, you can freeze single-serving portions in an ice cube tray and blend one or two cubes each day.
Q3: Will the smoothie last in the fridge?
While it’s best fresh, you can store it in an airtight container for up to 24 hours. Give it a good shake before drinking, as it might separate a little.
Q4: Can I use different greens?
Absolutely! Mix it up with kale, Swiss chard, or even a handful of mixed greens. Just remember, the flavor will change based on what you use.
Nutritional Info
Let’s break down the nutrition of this vibrant Green Detox Smoothie! This recipe makes about two servings and brings you a well-rounded combination of vitamins and minerals. Each serving roughly contains:
- Calories: 150
- Protein: 3g
- Carbohydrates: 35g
- Fiber: 5g
- Sugars: 15g
- Fat: 1g
This smoothie is an excellent source of vitamin C, vitamin A, folate, and potassium, making it a fantastic pick-me-up any time of day!
Final Thoughts
Food doesn’t just nourish your body; it nurtures your spirit. The Green Detox Smoothie is more than a healthy drink; it’s a blend of memories and moments—something to help you reset and recharge. So next time life feels chaotic, take a moment to hit pause, blend it up, and enjoy the flavors of health that come pouring out.
I hope you give this recipe a whirl, and remember, it’s all about the love you put into the kitchen. If you’re curious, have questions, or want to share your own smoothie stories, drop a comment below! Happy blending, friends!
Print
Green Detox Smoothie
- Total Time: 5 minutes
- Yield: 2 servings 1x
- Diet: Vegan
Description
A refreshing and nutrient-packed Green Detox Smoothie perfect for resetting your body after indulgence.
Ingredients
- 2 cups of spinach (firmly packed)
- 1 cup of coconut water (or plain chilled water)
- 1 ripe frozen banana
- 1 whole green apple (cored)
- 1/2 whole cucumber
- 1/2 whole lemon (peel removed completely)
- 1/2 inch fresh ginger (optional)
Instructions
- Wash your spinach and apple thoroughly. Core the apple and chop it into quarters for easier blending. Slice your cucumber.
- Add the spinach in your blender followed by the coconut water, frozen banana, apple, cucumber, lemon, and ginger.
- Blend on high for about 30 seconds to a minute until all ingredients are smooth and creamy.
- Taste to check sweetness; you can add honey or maple syrup if desired.
- Pour the smoothie into a tall glass, garnish, and enjoy!
Notes
Add chia seeds or mint leaves for garnish. You can prep ingredients the night before for convenience!
- Prep Time: 5 minutes
- Cook Time: 0 minutes
- Category: Beverage
- Method: Blending
- Cuisine: Healthy
Nutrition
- Serving Size: 1 serving
- Calories: 150
- Sugar: 15g
- Sodium: 15mg
- Fat: 1g
- Saturated Fat: 0g
- Unsaturated Fat: 1g
- Trans Fat: 0g
- Carbohydrates: 35g
- Fiber: 5g
- Protein: 3g
- Cholesterol: 0mg
Keywords: smoothie, detox, healthy drink, vegan, quick recipe
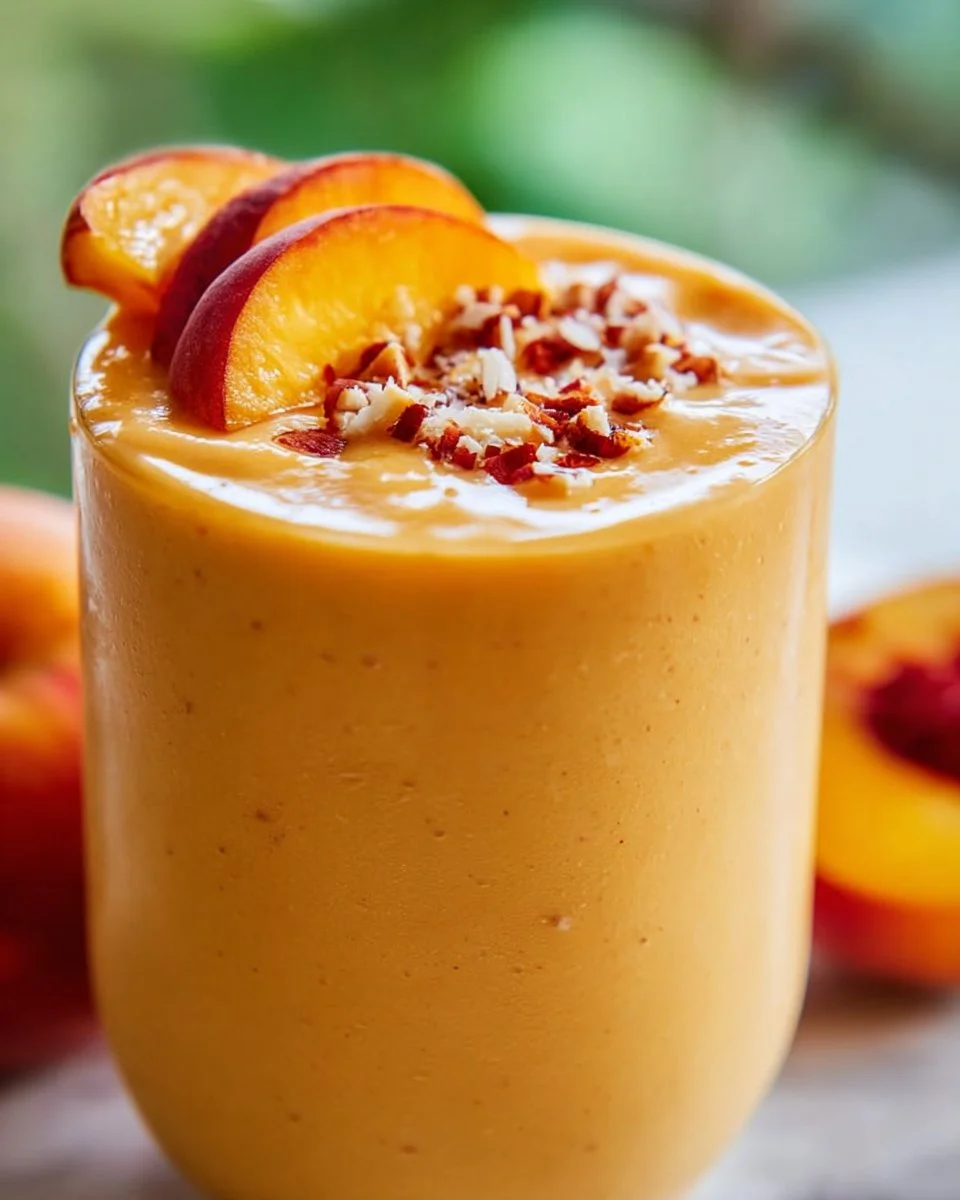
Peach Smoothie With Frozen Peaches
Refreshing Peach Smoothie with Frozen Peaches
Hey there, fellow food lovers! If you’re looking for a delicious, refreshing way to kick off your morning or recharge after a long day, you’ve landed in the right spot. Today, we’re whipping up my ultimate Peach Smoothie with Frozen Peaches. This vibrant smoothie doesn’t just taste amazing—it’s like sunshine in a glass! Packed with natural sweetness, this drink features luscious peaches, creamy Greek yogurt, and just a hint of honey. Plus, it’s super simple to make, which is always a win in my book!
Now, let’s get real. Smoothies are like the blank canvases of the culinary world. You can blend your way to a masterpiece by mixing in flavors you love, and there are endless possibilities to suit your mood! Whether you’re a peach enthusiast, a banana lover, or just someone who wants to sip something sweet and nutritious, this recipe has your back.
What I love about this Peach Smoothie is that it transports me back to my childhood summer days, picking ripe peaches straight from the orchard. The taste of freshly picked peaches always makes me smile. It reminds me of lazy afternoons spent on the porch, chatting with friends, sipping on something cool, and just soaking in the sun. There’s something magical about it—the way food connects us to memories, family, and good times.
So grab your blender and let’s dive in!
Personal Story: A Trip Down Memory Lane
Ah, the crisp, sweet aroma of summer! Growing up in a small town with a vibrant farming community meant that when summer rolled around, my friends and I would flock to the nearby peach orchards. It was like our secret playground!
I clearly remember those sunny days, laughter ringing through the air while we climbed and explored. The best part? Eating freshly picked peaches right there under the branches. The juicy fruit would drip down our chins, and we’d wipe our hands on our T-shirts, giggling and making a mess. Those peaches were so sweet, they tasted like pure happiness!
Fast forward to today, and I still relish those moments each time I whip up a peach dish or, you guessed it, a peach smoothie! This recipe embodies that nostalgic feeling of comfort and joy. It’s a simple pleasure—something I love sharing with friends and family. Every sip is a reminder of those carefree sunny afternoons, and it just feels right to keep the tradition alive. Now, let’s bring those sweet memories to life in your kitchen!
Ingredients
Here’s what you’ll need to create your delightful Peach Smoothie:
-
1 ripe banana: This adds creaminess and natural sweetness. If you’re short on bananas, you can replace it with a handful of spinach for a green twist!
-
1 cup frozen peaches: The stars of our show! If you don’t have frozen peaches, you can use fresh ones—just toss in some ice cubes for that frostiness!
-
1/2 cup Greek yogurt: For that protein boost and creamy texture. You can substitute with regular yogurt or a dairy-free option like coconut yogurt if you’re lactose intolerant.
-
1/2 cup milk or almond milk (optional): This is a personal choice. Use your favorite milk, or opt for almond milk for a nutty flavor.
-
1 tablespoon honey or maple syrup (optional): Sweeten to your liking! You can also use agave syrup or skip this altogether if your peaches are ripe enough.
-
Ice cubes (optional): For an extra chill! I often toss in a handful for a thicker texture, especially during summer months!
Step-by-Step Instructions
Alright, my budding chefs, let’s get blending! Follow these simple steps for a peachy smoothie experience:
-
Gather Your Ingredients: Gather everything on your kitchen counter. I always find that having everything within reach makes the process smoother—it’s like prepping for a mini cooking show!
-
Slice the Banana: Peel the ripe banana and slice it into chunks. This helps it blend more easily. Plus, it’s kind of fun to slice fruit—let out your inner chef!
-
Add the Peaches: Toss the frozen peaches right into the blender with the banana. If you’re using fresh peaches, throw in a handful of ice cubes to keep that frosty, smoothie goodness.
-
Scoop in the Greek Yogurt: Add the Greek yogurt next; this is where the magic happens! It adds creaminess that makes every sip feel luxurious!
-
Pour in the Milk: If you’re a smooth operator, add your milk or almond milk. This adjusts the consistency. Add a splash for a thicker smoothie or more for a lighter blend.
-
Sweeten the Deal: Drizzle your honey or maple syrup on top. Remember, you can always adjust sweetness later!
-
Blend It Up: Secure the blender lid and blend on high until everything is smooth and creamy. Start slow to avoid splatters, then ramp it up! Tip: If the smoothie is too thick, add a little more milk.
-
Taste Test: Give your smoothie a taste, and make adjustments as needed. Want it sweeter? Add some more honey! Too thick? Add a splash of milk.
-
Serve It Up: Pour this luscious smoothie into your favorite glass. Don’t forget to rock a straw for that ultimate sipping experience!
-
Garnish (Optional): If you’re feeling fancy, top with fresh peach slices, a dollop of yogurt, or a sprinkle of granola for crunch!
Serving Suggestions
When it comes to plating your smoothie, the world is your oyster (or peach, in our case!). Here are a few ideas to serve it up like a pro:
-
Chilled Glasses: Serve in chilled glasses; this keeps the smoothie cool and refreshing. You can even pre-chill the glasses in the freezer for a few minutes.
-
Garnishes: Fresh peach slices, a sprig of mint, or a sprinkle of chia seeds on top can take your smoothie to the next level. It makes it Instagram-worthy too!
-
Texture Contrast: If you love a bit of crunch, serve it with granola or a sprinkle of nuts on the side. This adds a delightful texture contrast to the smooth drink.
Recipe Variations
Feeling adventurous? Here are some fun twists on this Peach Smoothie recipe:
-
Tropical Twist: Substitute half the peaches with frozen mango or pineapple. It’s like a mini vacation in a glass!
-
Green Machine: Add a handful of spinach or kale for a nutrient boost without compromising the flavor. You can’t even taste the greens!
-
Nutty Delight: Toss in a tablespoon of almond butter for a dose of healthy fats and a hint of nuttiness. A match made in smoothie heaven!
-
Berry Good: Mix in a handful of frozen berries alongside the peaches for a berry-licious flavor explosion!
-
Choco-Peach: Add a tablespoon of cocoa powder for a chocolatey spin. Trust me—peach and chocolate are an underrated pair!
Chef’s Notes
Just between us, this Peach Smoothie recipe is one of my favorites because it’s so forgiving. I’ve messed around with ingredients countless times and it always turns out delicious! One time, I swapped out the Greek yogurt for cottage cheese (don’t judge!) because I was out of yogurt, and it surprisingly worked like a charm. The protein boost was an added bonus!
Another funny kitchen story: I once blended without screwing on the lid properly! Let’s just say the peach explosion was unforgettable. Smoothie fun—always keep the lid tight!
FAQs and Troubleshooting
Here are some common questions and potential hiccups to watch out for:
-
What if my smoothie is too thick?
Just add a bit more liquid (milk or water!), and blend again. It’s all about adjusting to your preferred consistency! -
Can I use fresh peaches instead of frozen?
Absolutely! Just add a handful of ice to keep it chill and refreshing. -
What if I don’t have Greek yogurt?
No worries! You can use regular yogurt, dairy-free yogurt options, or even silken tofu for a creamy texture! -
How can I store leftovers?
If you have extra smoothie, store it in an airtight container and consume within 24 hours to enjoy the best taste.
Nutritional Info
This Peach Smoothie is not only delicious but packed with health benefits, too! Here’s a quick breakdown (approximate values per serving):
- Calories: 250
- Protein: 9g from Greek yogurt
- Fat: 3g (varies with milk choice)
- Carbohydrates: 50g
- Fiber: 4g
With all those goodies, you’ll not only indulge your taste buds, but you’ll also nourish your body—win-win!
Final Thoughts
And there you have it, friends! A super easy, delicious Peach Smoothie that brings a taste of summer to your kitchen, no matter the season. This recipe is a celebration of simplicity and deliciousness. I hope this Peach Smoothie makes its way into your kitchen routines, just like it has in mine!
Don’t forget to put your own spin on it—get creative! I’d love to hear how your blender adventures go. Share your own twists and let’s keep this peach love going! Happy sipping, and, as always, remember that great food is best enjoyed with good company. Cheers to deliciousness! 🍑🥤
Print
Refreshing Peach Smoothie with Frozen Peaches
- Total Time: 10 minutes
- Yield: 2 servings 1x
- Diet: Vegetarian
Description
A delicious and refreshing peach smoothie, perfect for starting your day or recharging after a long one.
Ingredients
- 1 ripe banana
- 1 cup frozen peaches
- 1/2 cup Greek yogurt
- 1/2 cup milk or almond milk (optional)
- 1 tablespoon honey or maple syrup (optional)
- Ice cubes (optional)
Instructions
- Gather Your Ingredients: Gather everything on your kitchen counter.
- Slice the Banana: Peel the ripe banana and slice it into chunks.
- Add the Peaches: Toss the frozen peaches right into the blender with the banana.
- Scoop in the Greek Yogurt: Add the Greek yogurt next.
- Pour in the Milk: If you’re a smooth operator, add your milk or almond milk.
- Sweeten the Deal: Drizzle your honey or maple syrup on top.
- Blend It Up: Secure the blender lid and blend on high until everything is smooth and creamy.
- Taste Test: Give your smoothie a taste, and make adjustments as needed.
- Serve It Up: Pour this luscious smoothie into your favorite glass.
- Garnish (Optional): Top with fresh peach slices, a dollop of yogurt, or a sprinkle of granola.
Notes
This smoothie can be customized with various fruits, yogurts, and sweeteners to suit your personal taste.
- Prep Time: 10 minutes
- Cook Time: 0 minutes
- Category: Beverage
- Method: Blending
- Cuisine: American
Nutrition
- Serving Size: 1 serving
- Calories: 250
- Sugar: 20g
- Sodium: 80mg
- Fat: 3g
- Saturated Fat: 1g
- Unsaturated Fat: 2g
- Trans Fat: 0g
- Carbohydrates: 50g
- Fiber: 4g
- Protein: 9g
- Cholesterol: 5mg
Keywords: peach smoothie, healthy smoothie, breakfast drink, refreshing beverage, summer smoothie
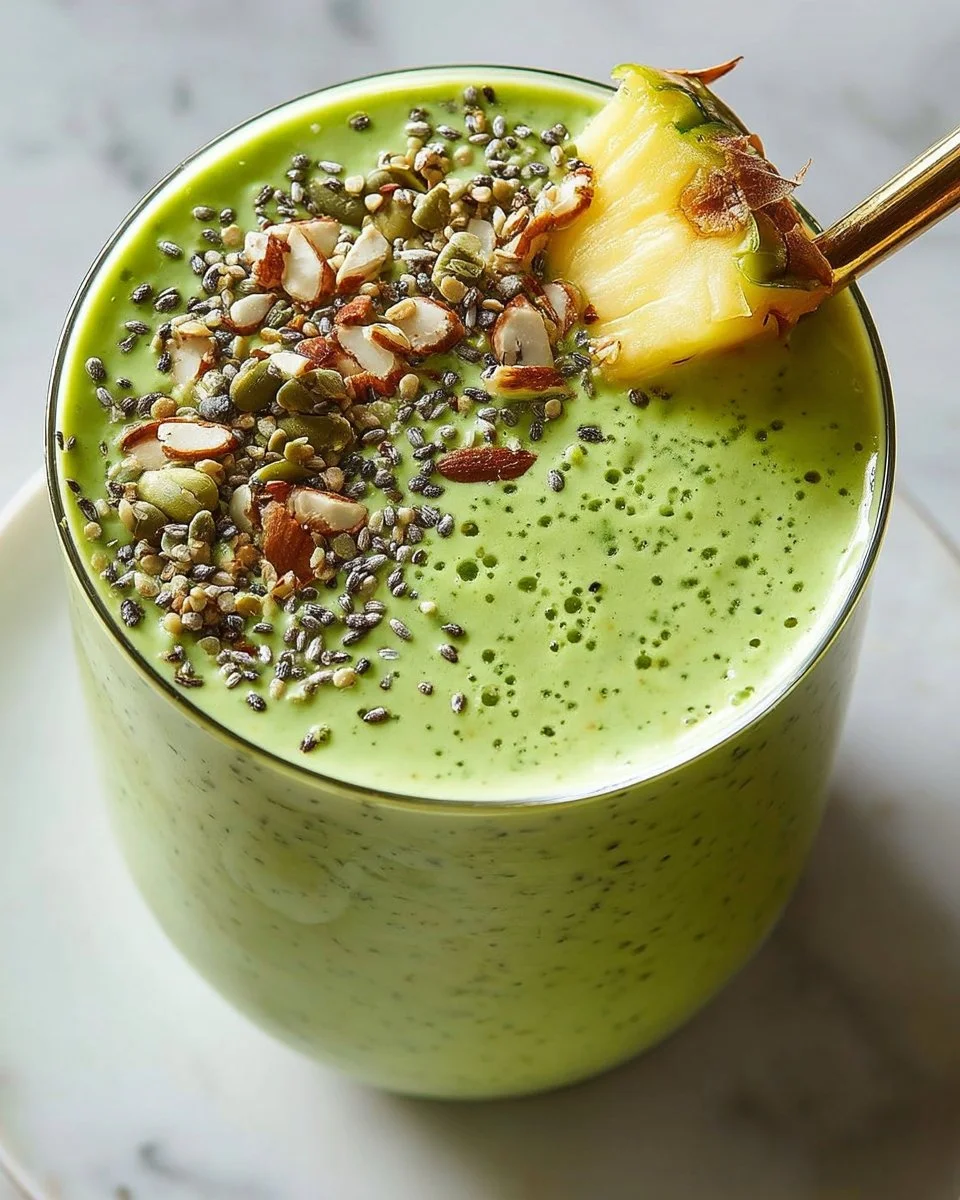
Creamy Spinach and Pineapple Detox Smoothie Recipe
Creamy Spinach and Pineapple Detox Smoothie Recipe
Welcome, food lovers! I’m Beau Collier, and I’m so excited to share a recipe that’s not only delicious but also packed with nutritional goodness. If you’re looking to rejuvenate your body and expand your palate, you’re in for a treat with my Creamy Spinach and Pineapple Detox Smoothie!
Imagine a sunny morning where you wake up and need something light yet satisfying. Maybe you’ve overindulged in desserts lately (who hasn’t?), and your body is gently asking for a little detox. This Creamy Spinach and Pineapple Detox Smoothie is your answer! It’s a delightful blend of fresh spinach, creamy avocado, zesty ginger, and refreshing pineapple that will not only recharge your energy but also have you feeling like a superstar. Plus, it’s so easy to whip up—throw it all in a blender, and voilà!
Let’s dive into the details of this smoothie that will have you feeling fabulous from the inside out!
A Personal Story: A Tropical Escape in a Glass
Growing up in the sun-kissed outskirts of San Diego, tropical fruits were a staple in my life. We had a little fruit stand, and I can still remember the first time I tasted fresh pineapple—its sweet, tangy flavor made me feel as if I was on a little adventure. But my fondness for fruit wasn’t limited to snacking; I loved experimenting with it in the kitchen.
One summer, I decided to host a “Smoothie Day” for my friends. Each one of us had to bring our favorite ingredients and blend them to create a refreshing drink. I was all about tropical flavors and especially loved how spinach could magically blend into a smoothie without overpowering it. My creation, which included the juicy, vibrant pineapple paired with fresh greens, had everyone coming back for more. That day, as laughter filled my kitchen, I realized that the best moments often happen around good food and great company.
Today, whenever I make this Creamy Spinach and Pineapple Detox Smoothie, I think back to that summer adventure. It reminds me of the importance of nourishment, joy, and connection, and of course, how a simple smoothie can bring people together!
Ingredients
Here’s what you’ll need for this invigorating smoothie:
-
2 cups packed fresh spinach
Spinach is your secret weapon for a dose of vitamins A, C, and K. Bonus? It blends incredibly well, so you don’t even taste it! If you can’t find fresh spinach, feel free to use frozen spinach—just make sure to thaw it before blending. -
1 medium avocado, pitted and peeled
Avocado adds that creamy texture that takes this smoothie to the next level. Plus, they are rich in healthy fats! If you don’t have one, you could substitute it with half a banana for a similar texture but a sweeter flavor. -
1 cup frozen pineapple chunks
Pineapple brings a sweet, tropical flavor that brightens your smoothie. Frozen chunks make it chillier and more refreshing. You can swap it for other frozen fruits like mango or even strawberries if you want to mix it up! -
1 ½ cups unsweetened coconut water
The hydrating goodness of coconut water adds a light sweetness without any added sugar. You could use regular water or almond milk if you want to switch it up. -
2 teaspoons freshly grated ginger
Ginger perks up your smoothie with a warm, spicy kick and provides great digestive benefits. If you don’t have fresh ginger, ground ginger works too—just halve the amount. -
2 teaspoons chia seeds (optional)
Chia seeds give your smoothie an extra nutritional boost, adding fiber and omega-3 fatty acids. You can leave them out or swap them for flaxseeds if that’s what you have!
Step-by-Step Instructions
Ready to blend? Let’s get this smoothie party started!
-
Prep the Ingredients
Before we dive in, make sure your spinach is thoroughly washed and roughly chopped. Preparing the ingredients ahead saves time and makes blending a breeze. -
Start with the Spinach
Add the packed spinach to your blender first. This helps create a smooth base for your smoothie. If you start with the spinach, you’re less likely to find leafy chunks later! -
Add the Avocado
Next, scoop in the avocado. The creaminess it brings balances the flavors wonderfully. Don’t stress if you can’t get all of it out—any little bits will blend in just fine! -
In come the Frozen Pineapple Chunks
Toss in the frozen pineapple chunks. They’ll keep the smoothie cold and refreshing, perfect for hot days! And who doesn’t love a bit of tropical sweetness? -
Pour in the Coconut Water
Next, add the 1 ½ cups of unsweetened coconut water. This is where the magic happens—the liquid helps everything blend smoothly. You can gauge the consistency by adjusting the amount of liquid you add. If you want it thicker, add less! -
Grate in the Ginger
Sprinkle in the freshly grated ginger. The aroma alone will awaken your senses. If you’re using ground ginger, sprinkle it in here instead! -
Chia Seeds Time
If you’re opting for chia seeds, now’s the time to toss them in! They’ll soak up some moisture during blending and thicken the smoothie just a bit. -
Blend Away
Secure the lid on your blender and blend on high for about 30 seconds or until everything is mixed well and creamy. If it’s too thick, add a splash more of coconut water. Blend until you reach your desired consistency. -
Taste Test!
Here’s where your taste buds come into play: take a small spoonful and see if it’s to your liking. If you want it sweeter, consider adding a touch of honey or a piece of ripe banana, then blend again! -
Serve and Enjoy
Pour your beautiful green smoothie into a glass, and if you’re feeling extra fancy, top it with a few chia seeds or a slice of pineapple. Grab your favorite straw and dig in!
Serving Suggestions
When it comes to serving this smoothie, presentation counts! I love using clear glasses to let that luscious green color shine through. You could also garnish your smoothie with a few extra chia seeds or a slice of pineapple on the rim of the glass for that extra pop.
For a sophisticated brunch or a cozy breakfast, serve it alongside a light breakfast spread—think whole grain toast with smashed avocado or fruit and nut granola. Even a handful of nuts for some added crunch would make an impression. The blend of flavors will have you feeling like you’re dining at a high-end café right in your kitchen.
Recipe Variations
Here are some fun twists and variations to keep your smoothie adventures exciting:
-
Superfood Boost: Add a tablespoon of spirulina powder or acai powder for an extra health kick.
-
Creamy Coconut: Throw in a tablespoon of coconut cream for an even richer texture. This will give a tropical flair to the smoothie!
-
Citrus Zing: Add some fresh lime or lemon juice to brighten the flavors. Adjust it according to your taste—you might end up making it your signature twist!
-
Nutty Flavor: Incorporate a tablespoon of almond butter or peanut butter to add healthy fats and a rich nutty flavor to your smoothie.
-
Sweet Treat: Add a handful of dates or a spoon of maple syrup for a natural sweetener if you prefer a sweeter finish.
Chef’s Notes
As with all recipes I create, this Creamy Spinach and Pineapple Detox Smoothie has been a work in progress over the years, with each blend getting a little closer to perfection. I remember the first time I tried spinach in a smoothie; I was skeptical. The idea of greens in something sweet felt like a culinary gamble! But let me tell you, it paid off big time!
And honestly, there’s something incredibly gratifying about sneaking in those greens without anyone noticing, especially when it comes to kids. I’ve served this smoothie at parties, and everyone’s been none the wiser about the spinach.
FAQs and Troubleshooting
Q: How can I make this smoothie thicker?
A: To achieve a thicker texture, try adding more avocado or some frozen banana. You can also use less coconut water if you like it denser.
Q: My smoothie is too sweet; how do I fix it?
A: If it’s on the sweet side, throw in a bit more spinach or a few extra chunks of avocado. This will help neutralize the sweetness without altering the overall flavor much.
Q: Can I prepare this smoothie ahead of time?
A: Absolutely! If you’re making it ahead, consider prepping the ingredients and storing them in the fridge. Just blend it when you’re ready to enjoy! However, I recommend consuming it fresh when possible for the best flavor and texture.
Q: What should I do if my blender isn’t mixing well?
A: Make sure to layer your ingredients correctly, with the leafier items at the bottom. You can always pause to stir things up or add a little more liquid if it’s struggling to blend.
Nutritional Info
Now, onto the good stuff! Here’s a rough breakdown of the nutritional info per serving of this delightful smoothie:
- Calories: Approximately 300
- Protein: 4g
- Carbohydrates: 40g
- Fiber: 10g
- Fat: 15g
- Vitamin A: 500% of your daily value
- Vitamin C: 120% of your daily value
- Iron: 15% of your daily value
This smoothie has a fantastic nutrient profile that keeps you satisfied without packing on the calories. It’s a perfect way to kickstart your day!
Final Thoughts
I hope you’re as excited as I am about integrating this Creamy Spinach and Pineapple Detox Smoothie into your routine! It’s not only a tasty treat but also an opportunity to nourish your body with wholesome ingredients, reminiscent of carefree summers with friends and fresh fruits.
Remember, cooking and blending should be about exploration and enjoyment, so don’t hesitate to tweak the recipe to match your preferences and make it your own. If you try this smoothie, I’d love to hear your thoughts! Share your smoothie stories or any twirls you put on this vibrant recipe right here in the comments below.
Stay hungry, stay healthy, and above all—keep having fun in the kitchen! Until next time, happy blending!
Print
Creamy Spinach and Pineapple Detox Smoothie
- Total Time: 10 minutes
- Yield: 2 servings 1x
- Diet: Vegetarian
Description
A refreshing and nutritious smoothie made with spinach, avocado, pineapple, and coconut water, perfect for detoxing and rejuvenating your body.
Ingredients
- 2 cups packed fresh spinach
- 1 medium avocado, pitted and peeled
- 1 cup frozen pineapple chunks
- 1 ½ cups unsweetened coconut water
- 2 teaspoons freshly grated ginger
- 2 teaspoons chia seeds (optional)
Instructions
- Prep the ingredients by washing and roughly chopping the spinach.
- Add the packed spinach to your blender first.
- Next, scoop in the avocado.
- Toss in the frozen pineapple chunks.
- Add the unsweetened coconut water.
- Sprinkle in the freshly grated ginger.
- If using, toss in the chia seeds.
- Secure the lid on your blender and blend on high for about 30 seconds or until smooth.
- Taste the smoothie and adjust sweetness if necessary.
- Pour into glasses and enjoy!
Notes
For added flavor, you can mix in spirulina or almond butter. Adjust coconut water for desired thickness.
- Prep Time: 10 minutes
- Cook Time: 0 minutes
- Category: Smoothie
- Method: Blending
- Cuisine: Healthy
Nutrition
- Serving Size: 1 serving
- Calories: 300
- Sugar: 20g
- Sodium: 60mg
- Fat: 15g
- Saturated Fat: 2g
- Unsaturated Fat: 10g
- Trans Fat: 0g
- Carbohydrates: 40g
- Fiber: 10g
- Protein: 4g
- Cholesterol: 0mg
Keywords: smoothie, detox, healthy, spinach, pineapple
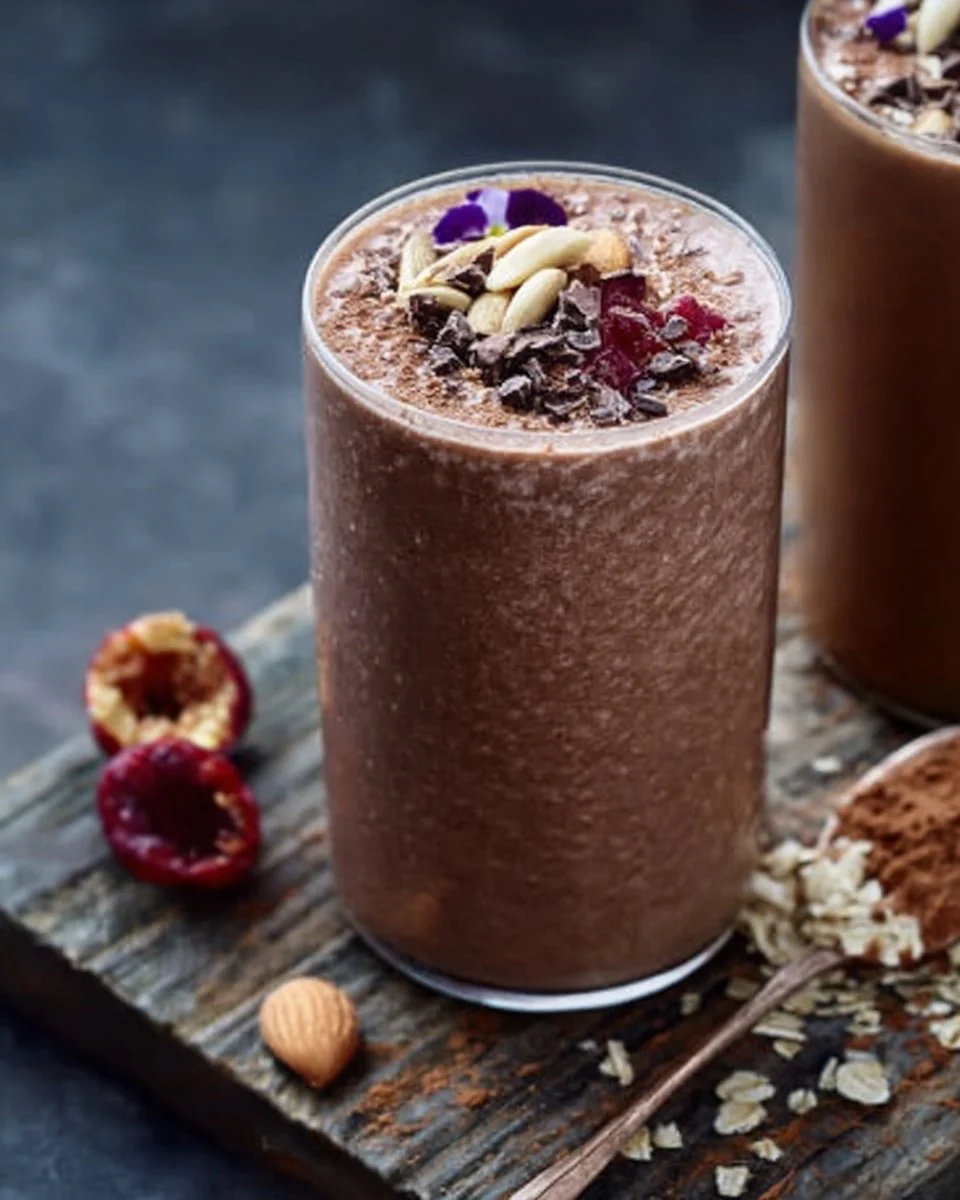
Healthy Chocolate Smoothie
Indulge Guilt-Free with a Healthy Chocolate Smoothie!
Hey there, everyone! Beau Collier here, and I’m thrilled to share one of my all-time favorite recipes—a Healthy Chocolate Smoothie that tastes as decadent as it sounds but is packed with nutrients and good-for-you ingredients. In a world where desserts often feel heavy and indulgent, this smoothie strikes the perfect balance between health and indulgence. It’s like sipping on a milky chocolate dream that gives you a solid nutrition boost!
A Little Backstory in the Kitchen
Let me take you back to a warm summer afternoon. I was at my childhood home, where the air was laden with delicious aromas wafting from the kitchen. Grandma was whipping up her famous smoothies—which, at the time, felt like a treat just for us kids. Her version was sugary but oh-so-tasty, and we would sip those chocolate delights while lounging in the sun, giggling about everything and nothing at all.
Years later, as I ventured into the world of healthy eating, I revisited that comforting memory and decided to create a version that wouldn’t leave me feeling guilty afterward. Thus, my Healthy Chocolate Smoothie was born! It’s now a staple in my kitchen, reminding me of those carefree summer afternoons while also fueling my days with nutrients. Plus, making this smoothie feels like a joyful ritual that carries me back to those fond memories!
Ingredients Galore
To whip up this deliciousness, you’ll need a few simple ingredients. Don’t worry; most of them are probably sitting in your kitchen right now!
-
1 cup unsweetened vanilla almond milk
A smooth, creamy base! You can swap it for any type of milk you prefer—oat, soy, or even dairy if you like. -
1 tablespoon unsweetened cocoa powder
This gives our smoothie that rich chocolate flavor without added sugar. If you’re feeling adventurous, try raw cacao for an extra health boost. -
1 frozen banana
This sweetens the smoothie naturally and lends a creamy texture. Not frozen? No worries; just use a fresh banana and add a bit more ice! -
1 pitted Medjool date
The natural sweetness from dates is incredible! Feel free to add more if you’d like a sweeter smoothie—just remember, a little goes a long way! -
1 tablespoon almond butter
A delightful source of protein and healthy fats—plus, it adds a rich, nutty flavor. If you’re nut-free, sunbutter works wonders too! -
1/8 teaspoon cinnamon
This adds warmth and complexity, but you can omit it if cinnamon isn’t your thing. -
1/2 cup ice cubes
If your banana is fresh, don’t skip this; it gives that chilly smoothie vibe! -
Optional add-ins:
- Ground flaxseed: for omega-3s and fiber
- Chia seeds: a little more protein and texture
- Protein powder: for extra protein, especially great post-workout!
Let’s dive into the fun part—the cooking (or blending) process!
Step-by-Step Instructions
-
Gather Your Ingredients
Before you start blending, arrange all your ingredients within arm’s reach. There’s a certain joy in having a clean, organized workspace. Plus, it makes the whole process smoother! -
Combine the Liquid First
Pour your 1 cup of almond milk into the blender. This helps everything blend harmoniously. If you’re using a personal blender, make sure it’s secure before you proceed! -
Add the Cocoa Powder
Sprinkle in 1 tablespoon of unsweetened cocoa powder right over the milk. This will ensure even blending and distribution. Plus, who doesn’t love a little chocolate cloud? -
Next Up is the Banana
Toss in your frozen banana. If you forgot to freeze it, just slice a fresh banana and add an extra couple of ice cubes to chill things down! -
Sweeten with the Date
Drop in the 1 pitted Medjool date. Blend it until you can see no chunks—this is essential for a smooth consistency. If you’re a date lover, slide in another for an extra dose of sweetness. -
Nutty Goodness
Add the 1 tablespoon of almond butter next. It helps in creating that creamy texture and brings a delicious nuttiness to the party. -
Spice It Up
Sprinkle in the 1/8 teaspoon of cinnamon. If you’ve got a bit of a free spirit spirit in you, a pinch more won’t hurt! -
Time for Some Ice
If your banana’s fresh, toss in your 1/2 cup of ice cubes. Blend everything on high speed. You want it super smooth and frothy! If it’s too thick, add a splash more almond milk—no judgment here! -
Taste Test
Here’s my favorite part: Pour a small amount into a cup, and give it a taste. Adjust sweetness or chocolate by adding another date or more cocoa! -
Pour and Enjoy
Finally, pour the smoothie into your favorite glass and enjoy the creamy goodness right away. Instant happiness in a cup!
How to Serve It Up
When you’re ready to serve, grab a tall glass, and don’t be shy about the presentation! I love to top my smoothie with a tiny sprinkle of cocoa powder or a few slices of banana for that professional touch. Pro tip: a dollop of almond butter on top doesn’t just look pretty—it adds more creaminess with every sip!
You can also serve this smoothie alongside a couple of whole-grain toast slices for a well-rounded breakfast or post-workout snack. Trust me, it’s heavenly!
Recipe Variations
Getting creative in the kitchen is where the fun’s at! Here are some simple twists to give this smoothie a spin:
-
Mint Chocolate Smoothie: Add a few fresh mint leaves or a drop of peppermint extract for a refreshing twist. It’s like a healthy version of a mint chocolate chip shake!
-
Mocha Delight: Mix in a little brewed coffee or espresso for that caffeine kick. It pairs beautifully with chocolate and will get your morning started right.
-
Berry Blast: Toss in a handful of frozen berries—think strawberries or raspberries. They pair wonderfully with chocolate and add an extra antioxidant punch.
-
Tropical Vibes: Add half a cup of frozen mango or pineapple for an exotic twist. A bit of coconut extract can enhance those island vibes, too!
-
Protein Power: For those looking to pack in extra protein, add a scoop of your favorite protein powder. This is perfect for post-workout recovery.
Chef’s Notes
Oh, I’ve made my fair share of chocolate smoothies over the years, and let me tell you—each one is a little homage to Grandma’s original concoction! This recipe has evolved as I’ve experimented with various nuts, fruits, and sweeteners. It’s fascinating how something so simple can have so many variations. But one thing’s for sure: this version, with its creamy texture and chocolatey goodness, always brings me back to feeling like a kid in the kitchen again.
FAQs and Troubleshooting
Q: My smoothie turned out too thick! What can I do?
A: Just add a splash more milk or water and blend again. You want it to have a drinkable consistency!
Q: It’s not sweet enough for my taste. How can I fix that?
A: If it needs more sweetness, consider adding another date or a drizzle of honey or maple syrup until it’s to your liking.
Q: Can I make this smoothie ahead of time?
A: For the best taste and texture, I recommend making it fresh. However, you can prep the ingredients and store them in the fridge or freezer in separate containers.
Q: Can I use a different sweetener?
A: Absolutely! Feel free to swap in honey or agave syrup if you prefer. Just remember, sweetness is subjective, so use what you love!
Nutritional Info
Now, let’s chat about what’s in this delicious smoothie. This Healthy Chocolate Smoothie is not just a treat but a powerhouse of nutrition. Each serving is typically around:
- Calories: 230-250
- Protein: Approximately 7-10g (depending on add-ins)
- Fiber: 5-7g from bananas and flaxseeds
- Healthy Fats: 8-10g from almond butter and flaxseeds
- Carbohydrates: 30-35g, mostly from the banana and date
It’s full of healthy fats, vitamins, and minerals—all while being gluten-free and dairy-free if you’re using plant-based milk!
Final Thoughts
So, there you have it! A Healthy Chocolate Smoothie that embodies both nostalgia and nutrition. Whether you’re whipping it up for breakfast, a post-workout snack, or a decadent dessert, this recipe fits the bill perfectly. Remember, cooking (and blending!) should be fun and celebratory!
So go ahead, grab those ingredients, and blend away! And of course, I’d love to hear your variations and experiences with this recipe. Share your fun stories over at Feastical.com, and let’s keep the deliciousness rolling! Cheers to tasty smiles and a whole lot of chocolate love, friends!
Print
Healthy Chocolate Smoothie
- Total Time: 10 minutes
- Yield: 1 serving 1x
- Diet: Vegan
Description
A deliciously indulgent yet healthy chocolate smoothie, packed with nutrients and flavor.
Ingredients
- 1 cup unsweetened vanilla almond milk
- 1 tablespoon unsweetened cocoa powder
- 1 frozen banana
- 1 pitted Medjool date
- 1 tablespoon almond butter
- 1/8 teaspoon cinnamon
- 1/2 cup ice cubes
- Optional: Ground flaxseed, chia seeds, protein powder
Instructions
- Gather your ingredients.
- Combine the liquid first by pouring the almond milk into the blender.
- Add the cocoa powder over the milk.
- Toss in your frozen banana.
- Drop in the pitted Medjool date.
- Add the almond butter next.
- Sprinkle in the cinnamon.
- Time for some ice, mix in the ice cubes.
- Taste test and adjust sweetness if needed.
- Pour the smoothie into your favorite glass and enjoy!
Notes
Top with a sprinkle of cocoa powder or banana slices for presentation. Pairs well with whole-grain toast.
- Prep Time: 10 minutes
- Cook Time: 0 minutes
- Category: Beverage
- Method: Blending
- Cuisine: American
Nutrition
- Serving Size: 1 serving
- Calories: 250
- Sugar: 20g
- Sodium: 180mg
- Fat: 10g
- Saturated Fat: 1g
- Unsaturated Fat: 9g
- Trans Fat: 0g
- Carbohydrates: 35g
- Fiber: 6g
- Protein: 8g
- Cholesterol: 0mg
Keywords: healthy smoothie, chocolate smoothie, vegan dessert, nutritious drink
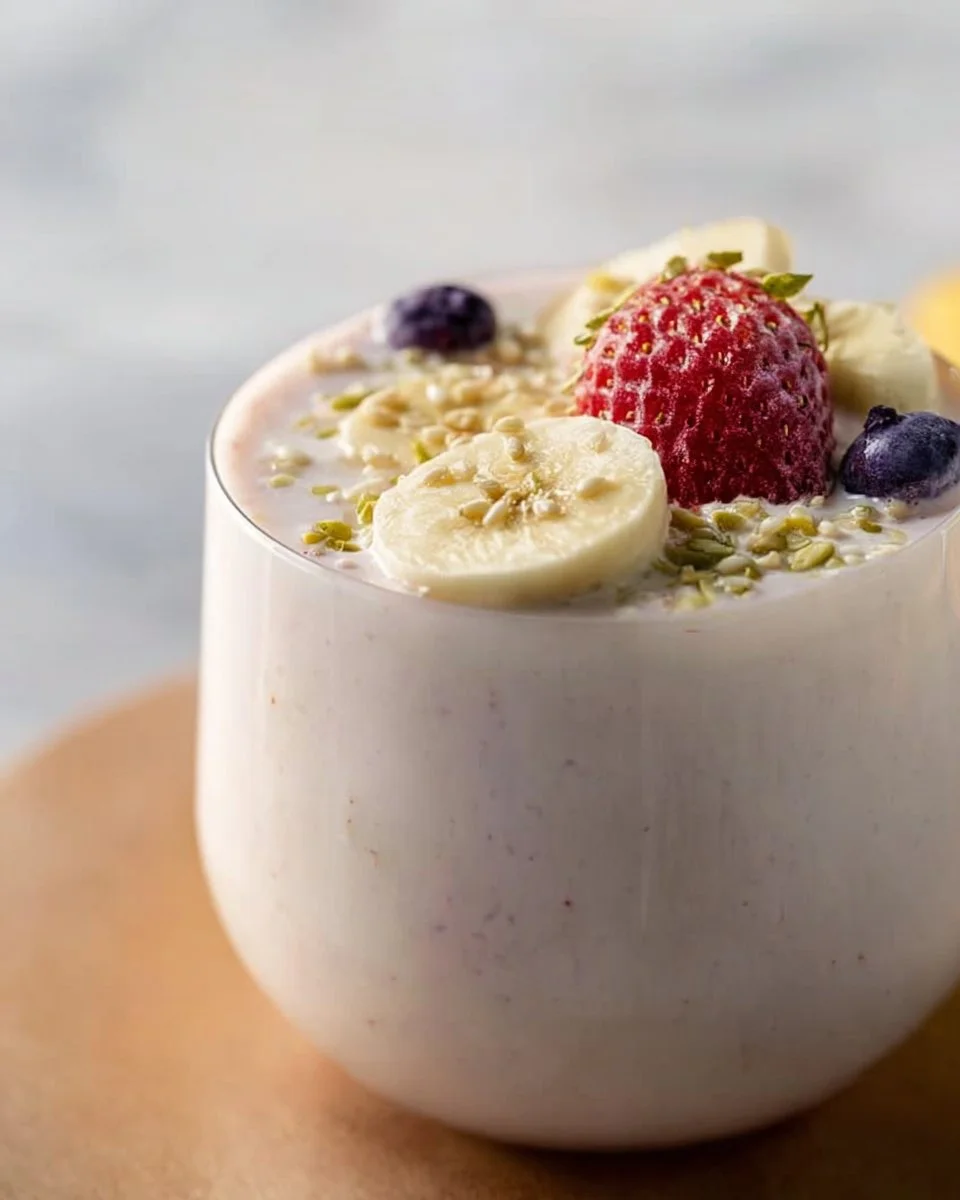
Homemade Protein Smoothie
Homemade Protein Smoothie: Your Go-To Energy Booster!
Hey there, fellow foodies! Have you ever found yourself dragging through the afternoon, staring longingly at the cookie jar, wishing there was a delicious, wholesome solution to perk you right up? Well, you’re in luck! Today we’re whipping up a Homemade Protein Smoothie that’s not only tasty but also brimming with nutrients that will give you the energy boost you need. This smoothie is the perfect blend of creamy, fruity, and oh-so-satisfying. With just a handful of ingredients, you can turn any dull routine into a vibrant and delicious experience!
Let’s be real: smoothies are like the culinary equivalent of a warm hug. They wrap you in a blanket of flavors and nutrients, making everything feel right again. I’m always experimenting with smoothies in my kitchen—it’s like a little adventure with each blend! The best part? You can customize them to fit your preferences or whatever you have on hand. Plus, they’re quick to make, which means you can enjoy that deliciousness even on the busiest of days!
Today’s recipe is super special for me. It reminds me of those lazy Sunday mornings when my family would gather in the kitchen. My mom would pull out the blender, and we would all chip in—each one of us had our own twist on what made the perfect smoothie. Sometimes we’d throw in fresh fruits, other times we’d sneak in some greens (shhh, don’t tell the kids!), but no matter the combination, the laughter and chats around the blender were what made each sip memories in our hearts. So, grab your blender, and let’s jump into this scrumptious adventure together!
Personal Story
Growing up in a bustling household where the kitchen was always the heart of our home meant there were countless moments filled with laughter, good food, and unforgettable flavors. I vividly remember one summer morning when my mom decided we’d make smoothies for breakfast. She lined up all of our favorite fruits and was ready to blend, but the catch was that we had to come up with our own unique flavors.
I mixed banana, almond milk, and a little bit of peanut butter, hoping for the best. My siblings, of course, were skeptical, but once they took a sip, their minds changed. “Wow! This tastes like a milkshake!” my younger brother shouted, eyes wide with surprise as he reached for another glass. It was such small moments that bonded us and filled our hearts with joy, and I knew then that I wanted to carry on my mom’s tradition of blending deliciousness.
Now, I whip up smoothies nearly every day—not just for myself but often for friends and family too. It’s a way to connect and share that homemade goodness. This protein smoothie is one of my all-time favorites and has become a staple in my kitchen. It’s the perfect way to kickstart any day or keep you going during the afternoon slump.
Ingredients
Before we dive into the blending magic, let’s gather our ingredients! Here’s what you’ll need:
-
1 Ripe Banana: A ripe banana adds natural sweetness and creaminess. If you don’t have one, you can substitute with half an avocado for a different creaminess and a healthy fat boost.
-
200 ml Almond Milk (or any plant-based milk): Almond milk provides a nutty flavor and creaminess. If you’re looking for a creamier texture, you can use coconut or oat milk, but if you want to keep it classic, go for cow’s milk!
-
2 tablespoons Oats: Oats not only add fiber but also help make the smoothie filling. If you are gluten-sensitive, you can use gluten-free oats instead.
-
1 tablespoon Chia Seeds: These tiny seeds are packed with omega-3 fatty acids and fiber. If you don’t have chia seeds, ground flaxseed works as a great substitute.
-
2 tablespoons Greek Yogurt: Adds protein and creaminess. For a dairy-free option, you could try coconut yogurt or a dairy-free probiotic yogurt.
-
½ teaspoon Turmeric (optional): A superfood known for its anti-inflammatory properties, turmeric gives a warm flavor. You can skip it if you’re not a fan but don’t forget to add a pinch of black pepper to help activate its benefits!
-
A pinch of Black Pepper: Not only enhances the flavor of the turmeric but also aids in digestion. This one is a must if you opt for turmeric.
Getting all your ingredients ready is part of the fun. Think of it as gathering the ingredients for an adventure!
Step-by-Step Instructions
Now that we’ve got all our ingredients, it’s time to blend them into pure bliss. Follow these steps, and I promise you’ll be sipping the best protein smoothie in no time!
-
Preparation: Start by peeling the banana and breaking it into chunks. This allows for quicker blending. If you love a bit of chill in your smoothie, freeze the banana beforehand. It gives your smoothie a delicious, creamy texture!
-
Add Almond Milk: Pour 200 ml of almond milk into your blender first. This step is crucial as it helps the blades easily break down all the ingredients. If you want a thicker smoothie, use less milk, and adjust to your liking!
-
Oats Galore: Next, add in your oats. For an extra boost, you can use rolled oats for more texture or quick oats for a smoother blend. They blend beautifully and keep you fuller for longer!
-
Chia Seeds: Toss those chia seeds in! They’ll quickly absorb some liquid which makes them plump up. If you have time, let them soak a bit in the almond milk before blending for an even creamier texture.
-
Greek Yogurt Happiness: Spoon in your Greek yogurt. This is what makes the smoothie super silky! For a plant-based option, stick with your favorite dairy-free yogurt and get ready for that creaminess!
-
Turmeric and Black Pepper: If you’re adding turmeric, now’s the time! Sprinkle in that dash of black pepper too. Trust me; it really brings the flavors together and activates the wonderful properties of the turmeric.
-
Blend It Up: Put the lid on your blender and start blending on medium speed. Gradually increase to high until everything is beautifully mixed and creamy. About 30 seconds should do the trick. Keep an eye on it; if it gets too thick, add a splash more almond milk until you reach your desired consistency.
-
Taste Test: Once blended, give your smoothie a quick taste. If you prefer it sweeter, feel free to add a dash of honey or maple syrup. If it’s too thick, a little more almond milk can loosen it up.
-
Pour and Enjoy: Once you’re happy with the flavor and consistency, pour your smoothie into a glass. Top it with some extra chia seeds or sliced bananas for a beautiful presentation!
Serving Suggestions
Serving your protein smoothie can be as fun as making it! Here are a few ways to make your presentation pop:
-
Smoothie Bowl: Pour the smoothie into a bowl and top with sliced fruit, granola, nuts, or seeds. This turns your smoothie into a delightful bowl of goodness that’s almost too pretty to eat!
-
Glassware: Serve it in a mason jar or a fancy glass. Adding a colorful straw or a simple garnish of fresh mint or a slice of banana on the rim brings a delightful touch.
-
Pair it Up: Accompany your smoothie with whole-grain toast topped with avocado or nut butter for a complete breakfast that’s filling and delicious!
Smoothies are versatile, and how you serve them can elevate your breakfast game!
Recipe Variations
Let’s get creative! Here are some fun twists on this protein smoothie that can spice things up based on your taste preferences or what you have handy:
-
Berry Bliss: Substitute the banana for a cup of mixed berries (strawberries, blueberries, and raspberries) for a fruity explosion. This option is perfect for summer!
-
Green Machine: Add a handful of spinach or kale for an added nutrient boost without sacrificing flavor. The banana and other ingredients will mask the greens perfectly!
-
Chocolate Delight: For all the chocolate lovers out there, add a tablespoon of cocoa powder or chocolate protein powder! Sweet, rich, and utterly satisfying.
-
Nutty Banana: Mix in a tablespoon of almond or peanut butter for an extra protein boost and an exceptional nutty flavor.
-
Tropical Twist: Swap the banana for pineapple or mango. You’ll feel like you’re sipping a smoothie on a beach with this refreshing option!
These variations allow you to adapt the recipe based on your cravings or what’s in season.
Chef’s Notes
As you can see, this homemade protein smoothie recipe is dear to my heart and has evolved over the years. I’ve tried countless variations, from tropical blends to dessert-like chocolate shakes. Each time, it brings me back to those sunny mornings, standing shoulder to shoulder with my family, blending laughter and love into every cup.
This recipe has even inspired me to experiment with different toppings and add-ins, making me realize that there are truly no limits to what you can create in your kitchen. The joy of blending these flavors—bringing together nutrition, taste, and nostalgia—is what keeps my passion for food alive.
So, if you ever feel lost in the kitchen or stuck thinking, "What do I even make?" just remember: grab your blender, your favorite fruits, and your sense of adventure, and let it guide you!
FAQs and Troubleshooting
Q: Why is my smoothie too thick?
If your smoothie comes out thicker than expected, try adding more liquid—almond milk, coconut water, or even some juice works wonders! Blend again until you reach the desired consistency.
Q: Can I prep the smoothie ahead of time?
Absolutely! You can pre-portion the ingredients in a freezer-safe bag and freeze them. When you’re ready to enjoy, just add your milk and yogurt and blend!
Q: Can I make this smoothie vegan?
Yes! All the ingredients here are already vegan-friendly (as long as you opt for plant-based yogurt). You can easily make it without any animal products.
Q: What if I don’t like bananas?
No worries! You can swap the banana for a quarter of an avocado for creaminess, or use frozen mango or peach for a tropical flair.
Nutritional Info
A homemade protein smoothie is not only delicious but incredibly nutritious! Here’s a rough breakdown of what this smoothie offers:
- Calories: Approx. 250-300 calories, depending on the almond milk and yogurt used.
- Protein: 10-15 grams, thanks to the Greek yogurt and chia seeds.
- Healthy Fats: You’ll get healthy omega-3 fatty acids from chia seeds.
- Fiber: This smoothie packs around 7-9 grams of fiber, courtesy of oats and banana.
Plus, with the added turmeric, you’re embracing anti-inflammatory benefits, making this smoothie a powerhouse in your daily routine!
Final Thoughts
In the fast-paced world we live in, taking a moment to connect with food is a beautiful act of self-love. This Homemade Protein Smoothie is not just a recipe; it’s a gateway to creativity, connection, and nourishment. Whether you sip it during a hurried breakfast or savor it as a mid-afternoon treat, know that you’re feeding your body something wonderful.
As you explore this recipe and its variations, I hope you’ll carry on the tradition of gathering in your kitchen, blending warmth and joy into each sip—just like my family did. So here’s to creating delicious memories and keeping that blender buzzing! Now go ahead, make your smoothie, and let the good vibes flow. Happy blending!
Print
Homemade Protein Smoothie
- Total Time: 5 minutes
- Yield: 2 servings 1x
- Diet: Vegan
Description
A delicious and nutritious protein smoothie that provides an energy boost with every sip.
Ingredients
- 1 Ripe Banana (or ½ avocado)
- 200 ml Almond Milk (or any plant-based milk)
- 2 tablespoons Oats
- 1 tablespoon Chia Seeds
- 2 tablespoons Greek Yogurt (or dairy-free yogurt)
- ½ teaspoon Turmeric (optional)
- A pinch of Black Pepper
Instructions
- Start by peeling the banana and breaking it into chunks.
- Pour 200 ml of almond milk into your blender first.
- Add in your oats.
- Toss those chia seeds in.
- Spoon in your Greek yogurt.
- Sprinkle in that dash of black pepper if adding turmeric.
- Put the lid on your blender and start blending.
- Once blended, give your smoothie a quick taste.
- Pour your smoothie into a glass and enjoy!
Notes
You can customize this smoothie with different fruits or add-ins like peanut butter or chocolate.
- Prep Time: 5 minutes
- Cook Time: 0 minutes
- Category: Breakfast
- Method: Blending
- Cuisine: American
Nutrition
- Serving Size: 1 serving
- Calories: 275
- Sugar: 12g
- Sodium: 150mg
- Fat: 10g
- Saturated Fat: 1g
- Unsaturated Fat: 9g
- Trans Fat: 0g
- Carbohydrates: 37g
- Fiber: 7g
- Protein: 10g
- Cholesterol: 0mg
Keywords: protein smoothie, healthy smoothie, vegan breakfast, energy booster, nutritious drink
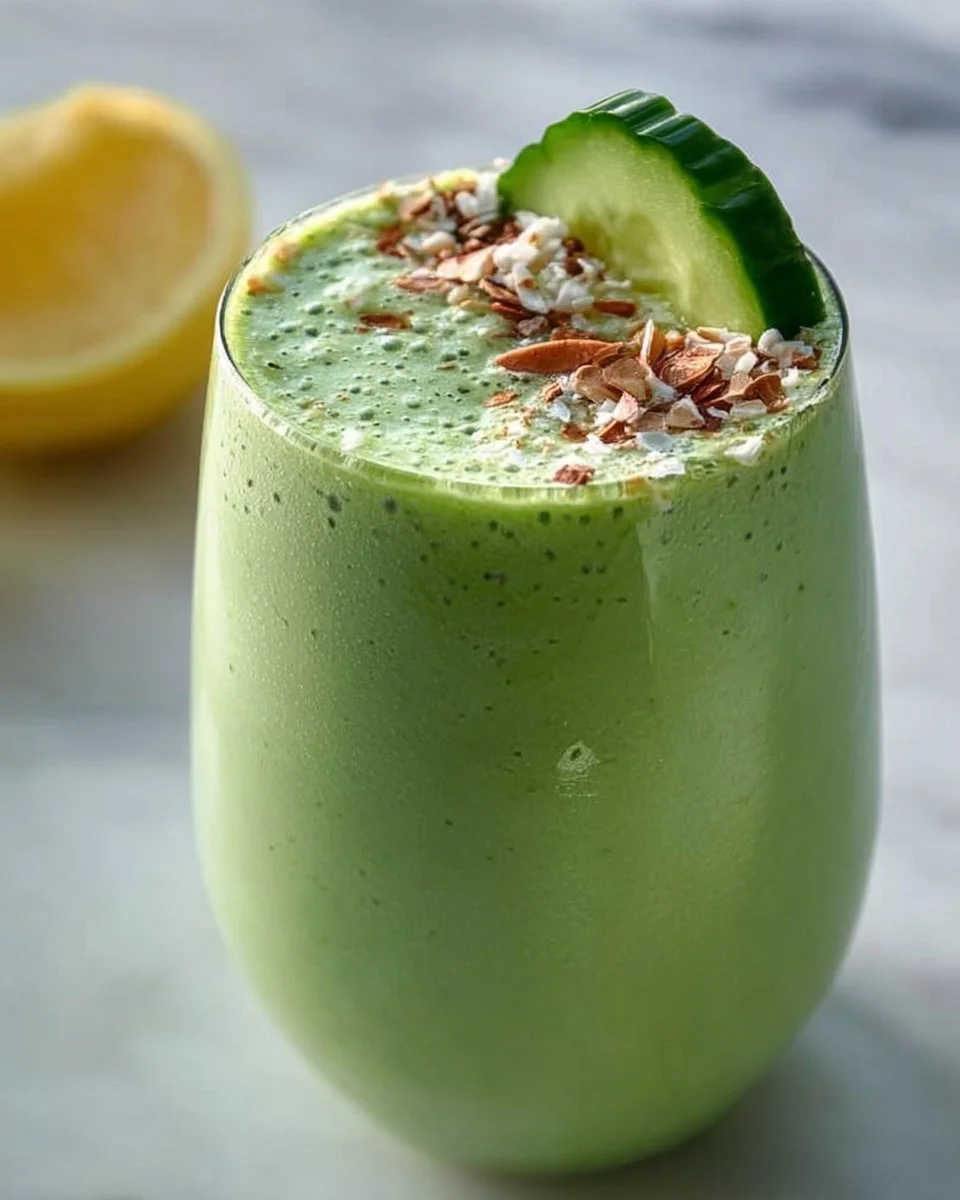
Detox Green Cucumber Smoothie
Detox Green Cucumber Smoothie: Refresh, Revitalize, Rejuvenate!
Hey there, food lovers! If you’re looking for a delicious, refreshing drink that’ll kickstart your day or give you a boost anytime you need it, you’ve come to the right place. Today, I’m thrilled to introduce you to my Detox Green Cucumber Smoothie—a vibrant blend of fresh ingredients that not only tastes incredible but also does wonders for your body.
Picture this: it’s a sun-drenched Saturday morning, the birds are chirping, and you’ve finally got the weekend to yourself. You stroll into the kitchen, and the first thing you want is something refreshing to sip on while you soak in the sunshine. That’s where this bright green beauty comes into play! With cucumbers, bananas, and a hint of lemon, this smoothie is like sipping on a poolside breeze, even if you’re just at home. Plus, it’s packed with nutrients, making it an ideal companion for your health journey.
But don’t just take my word for it! Let’s dive into the delightful world of this detox smoothie. I’ll share my childhood love for all things green, how to whip it up in no time, and some cool tips and tricks to make your kitchen adventure even more enjoyable. Whether you’re a kitchen newbie or a seasoned pro, there’s always something I can share to make your cooking experience a little brighter. So, grab your blender, and let’s get smoothie-making!
A Personal Story: The Green Machine
Growing up, I was always that kid who’d sneak vegetables into my meals in the hopes that it would earn me a spot at the dessert table. My mom would whip up these massive salads filled with vibrant colors, but my favorite part was always the cucumber. That crisp, refreshing bite was incredible, and I distinctly remember days when I’d munch on slices while pretending to be a chef in my make-believe kitchen.
Fast forward a few years, and I found myself in the world of smoothies. The joy my mom’s salads brought me transformed into a love for blending. One sunny afternoon, with fruits and greens sprawled out on my kitchen counter, I decided to create a smoothie that combined everything I loved about those childhood cucumber slices. The result? This Detox Green Cucumber Smoothie! It’s not just food—it’s a memory, a wave of nostalgia, and an explosion of flavor that transports me back to those sunny days.
Ingredients
Now, let’s talk about the star players of our smoothie! Here’s what you’ll need:
-
2 cups English cucumber or Persian cucumbers (chopped): These varieties are mild and crunchy, perfect for smoothies. You can substitute with any cucumber you have on hand, but if it’s bitter, peel the skin off before chopping.
-
1 whole banana: Adds natural sweetness and creamy texture. If you’re vegan or trying to avoid bananas, try substituting it with half an avocado for that creamy goodness!
-
1 cup pineapple chunks (frozen or fresh): Pineapple brings a tropical vibe and a natural sugar kick. If you can’t find pineapple, mango works beautifully too!
-
1 cup spinach: Loaded with nutrients and hardly noticeable in flavor, spinach is a superstar green for smoothies. You can switch this out for kale if you prefer a more robust green taste.
-
1 cup unsweetened soy milk: This adds creaminess without the dairy. You can swap it for almond milk or oat milk if that’s your jam.
-
2 tbsp lemon juice (freshly squeezed): Gives the smoothie a bright zing! For an alternative, lime juice would work just as well, adding a different layer of flavor.
Step-by-Step Instructions
Time to blend this beauty! Follow these simple steps for your Detox Green Cucumber Smoothie:
-
Prep Your Ingredients: Start by washing your cucumbers and spinach thoroughly to remove any dirt or pesticides. Grab the English or Persian cucumbers, slice them into manageable pieces, and toss them into your blender first. This helps with blending and avoids any chunks later on.
Chef’s Tip: Keeping cucumbers chilled before use adds an extra refreshing coolness to your smoothie!
-
Add the Banana: Peel the banana and pop it into the blender. It’s a fantastic natural sweetener that also provides creaminess. If you have overripe bananas, they’re perfect for this smoothie!
Insider Info: Frozen bananas work well too and make the smoothie even thicker and colder!
-
Throw in the Pineapple: Whether you’re using fresh or frozen pineapple, add it next! This tropical fruit is not just delicious; it’s also packed with vitamins and helps in digestion.
Quick Hack: When using fresh pineapple, freeze it beforehand for an ice-cold smoothie without needing extra ice!
-
Spinach Time: Add the cup of spinach. This is where the green magic happens. It adds nutrients without altering the taste significantly.
Pro Tip: For those who are a bit hesitant about greens, start with less and increase the amount as you get used to it!
-
Pour in the Soy Milk: Add your cup of unsweetened soy milk. This will help the blender do its job by providing a smooth base.
Recipe Note: If you want a creamier texture, use coconut milk instead!
-
Squeeze in the Lemon Juice: Finally, add the tangy lemon juice to brighten everything up. You can adjust the amount based on your taste preference.
Tip: Zest the lemon before juicing it for extra flavor!
-
Blend Away: Secure the blender lid and blend everything on high speed until you achieve a smooth and creamy texture. If it’s too thick, add a bit more soy milk to reach your desired consistency.
Chef’s Quirky Wisdom: Try blending for an additional 30 seconds to truly bring out the flavors!
-
Taste Test: Give your smoothie a quick taste. Need more brightness? Add another dash of lemon! Too thick? A splash of water or milk can work wonders.
-
Serve and Enjoy: Pour your vibrant green smoothie into a glass, add a straw, and enjoy the fruits of your labor!
Serving Suggestions
Presentation matters, even when it comes to smoothies! Here’s how to make your Detox Green Cucumber Smoothie look as good as it tastes. Serve it in a chilled glass or bowl to keep it cool and refreshing. You can garnish it with a slice of cucumber on the rim or sprinkle a few chia seeds on top for added texture and flair. Not to mention, a twist of lemon peel can really elevate that visual appeal!
Additionally, you can pair your smoothie with a light breakfast, like avocado toast or a healthy granola bowl, to make it a full meal. It’s a fantastic pick-me-up after a workout or just a delightful treat to sip on while lounging in the sun.
Recipe Variations
Now that you have the base of this smoothie, why not shake things up a bit? Here are a few fun variations to keep things exciting:
-
Minty Fresh: Add a handful of fresh mint leaves for a refreshing taste. It’ll give your smoothie a garden-fresh kick!
-
Green Protein Boost: Add a scoop of your favorite protein powder to give that extra boost. Vanilla or unflavored protein works best.
-
Detox Twist: Toss in half an avocado for some healthy fat and creaminess. This addition will amp up the smoothie’s silky texture!
-
Berry Bomb: Swap in some frozen mixed berries for a fruity combo. The tartness brings an exciting flavor twist.
-
Chia Power: Sprinkle some chia seeds into the mix for added fiber and omega-3 fatty acids. Let them soak for a few minutes for a thicker texture!
Chef’s Notes
In my journey of creating this smoothie, I’ve discovered it’s the little choices that make a huge difference! For instance, using different types of greens can really change the whole vibe. I once made it with kale and thought I’d made a huge mistake, but it turned out delicious! Plus, experimenting with various fruits has given rise to some of my favorite combinations—pineapple is a must-have, though!
Whether you’re whipping it up for yourself or impressing friends at a brunch, this detox smoothie never fails to get rave reviews. And who doesn’t want to feel like a smoothie connoisseur while adding a healthy boost to their day?
FAQs and Troubleshooting
Here are some common questions that folks have about the Detox Green Cucumber Smoothie, along with a bit of troubleshooting to ensure your smoothie adventure goes smoothly:
-
Why is my smoothie too thick?
If your smoothie ends up being thicker than you’d like, don’t fret! Just add a little more soy milk or water and blend again until smooth. -
Can I use pre-cut vegetables?
Absolutely! Pre-cut cucumbers can save time, but ensure they’re fresh for the best flavor—check the expiration date if they’re packaged. -
What if I don’t have frozen fruit?
You can always use fresh fruit, but throw in a handful of ice cubes to maintain that refreshing chilliness! -
Can I store the smoothie for later?
I recommend enjoying it fresh, but if you must store it, keep it in an airtight container in the fridge for up to 24 hours. Give it a good shake before drinking!
Nutritional Info
This detox smoothie is as nutritious as it is delicious! It’s rich in vitamins, minerals, and antioxidants. Here’s a breakdown of what you’re getting:
- Cucumbers: Packed with water to keep you hydrated while being low in calories.
- Bananas: A great source of potassium, vitamin C, and dietary fiber.
- Pineapples: Loaded with vitamin C and manganese, plus bromelain, which helps with digestion.
- Spinach: A powerhouse of vitamins A, C, K, and iron!
- Soy Milk: Provides protein, and is often fortified with vitamins like B12 and D.
All in all, this smoothie is not just a delicious treat; it’s a health enthusiast’s dream come true!
Final Thoughts
As we wrap up, remember that cooking, much like life, is all about experimenting, tasting, and having fun! This Detox Green Cucumber Smoothie is not just a recipe; it’s an invitation to explore flavors, reminisce about summer days, and foster new traditions in your kitchen.
So, pour yourself a glass of this refreshing concoction, share it with friends, or enjoy it solo while you bask in the happiness of creating something delicious. Always keep an open mind when it comes to cooking, and don’t be afraid to put your own spin on things. You never know what delicious new adventure awaits in your kitchen!
Thanks for joining me on this culinary journey. Now go out there, grab those ingredients, and get blending! You’re moments away from sipping a health-filled delight that’ll keep you coming back for more. Cheers to health, happiness, and a whole lot of deliciousness!
Print
Detox Green Cucumber Smoothie
- Total Time: 10 minutes
- Yield: 2 servings 1x
- Diet: Vegan
Description
A refreshing and vibrant smoothie packed with nutrients, perfect for kickstarting your day or enjoying anytime.
Ingredients
- 2 cups English cucumber or Persian cucumbers (chopped)
- 1 whole banana
- 1 cup pineapple chunks (frozen or fresh)
- 1 cup spinach
- 1 cup unsweetened soy milk
- 2 tbsp lemon juice (freshly squeezed)
Instructions
- Prep your ingredients by washing the cucumbers and spinach and chopping them into manageable pieces.
- Add the banana to the blender after peeling it.
- Throw in the pineapple chunks to add a tropical flavor.
- Spinach is next; add the cup of spinach to the mix.
- Pour in the soy milk to create a smooth base.
- Squeeze in the lemon juice for brightness.
- Blend everything on high speed until smooth and creamy.
- Taste the smoothie and adjust ingredients as desired.
- Serve and enjoy your vibrant smoothie!
Notes
Serve chilled and consider garnishing with cucumber slices or chia seeds.
- Prep Time: 10 minutes
- Cook Time: 0 minutes
- Category: Beverage
- Method: Blending
- Cuisine: Healthy
Nutrition
- Serving Size: 1 serving
- Calories: 150
- Sugar: 12g
- Sodium: 120mg
- Fat: 4g
- Saturated Fat: 0.5g
- Unsaturated Fat: 3g
- Trans Fat: 0g
- Carbohydrates: 28g
- Fiber: 4g
- Protein: 5g
- Cholesterol: 0mg
Keywords: smoothie, detox, cucumber, healthy drink, vegan beverage
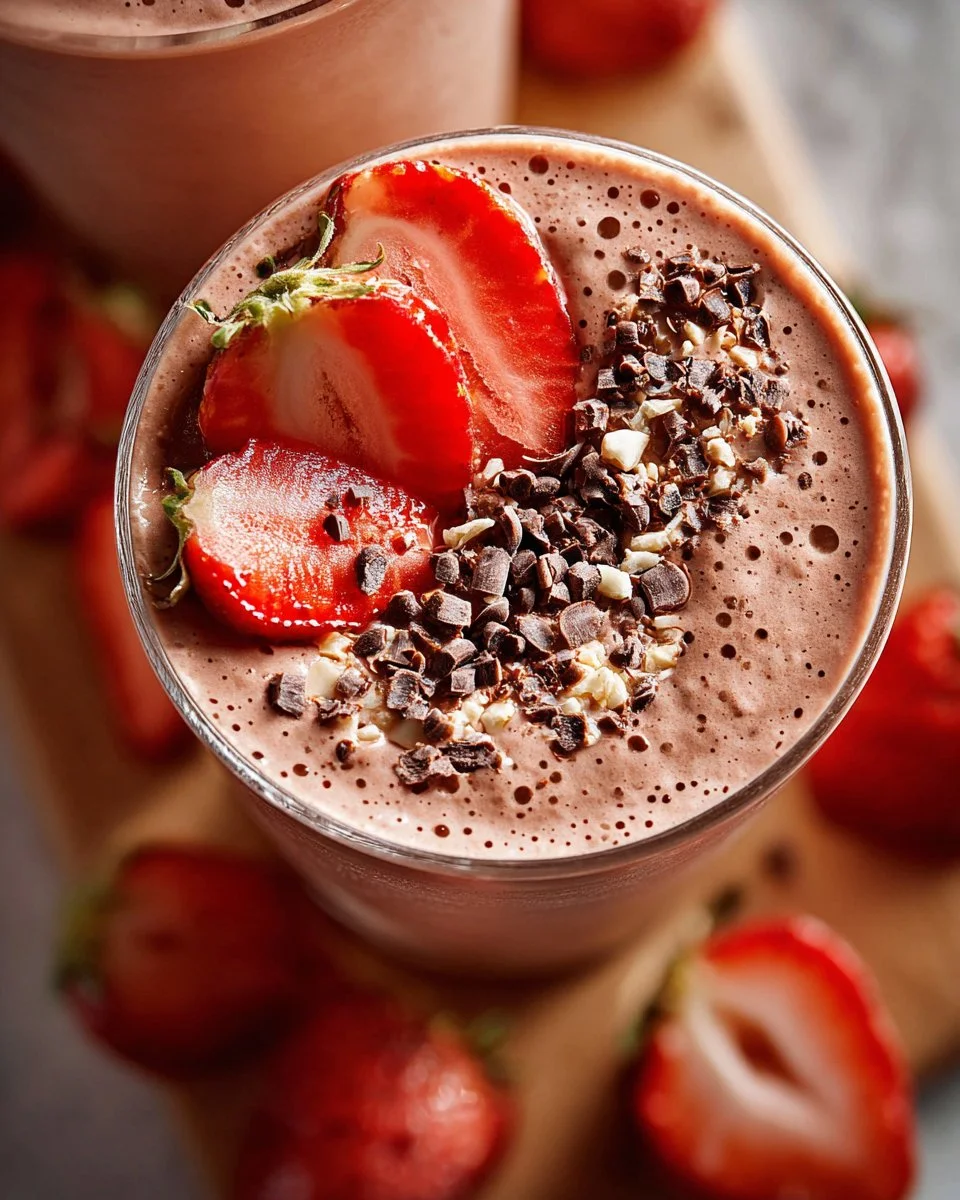
Creamy Chocolate Strawberry Smoothie Recipe
Creamy Chocolate Strawberry Smoothie Recipe
Hey there, fellow food lovers! Today, we’re diving into a smoothie that’s not just a treat for your taste buds but also a delightful way to kickstart your morning or refresh your afternoon. Welcome to the world of the Creamy Chocolate Strawberry Smoothie! With a luscious blend of sweet strawberries, rich chocolate, and a touch of creaminess, this drink feels like a dessert but packs a nutritious punch. Whether you’re scrambling to get out the door or craving a post-workout pick-me-up, this smoothie is quick, easy, and absolutely scrumptious!
But before we get blending, let me share a little backstory about this delightful creation. You see, smoothies have always held a special place in my heart. I remember my first encounter with one on a sunny Saturday morning at a vibrant local farmer’s market. The aroma of fresh fruits filled the air, and I watched in awe as a vendor whipped up a smoothie that shimmered with freshness. That moment sparked an obsession! I played around with various fruits, and one fateful day, I combined strawberries and chocolate. The result? A creamy concoction that danced on my taste buds—and I’ve been making it ever since.
So, grab your blender, and let’s get ready to whip up something delectable!
Ingredients
Here’s what you’ll need for that dreamy, creamy chocolate strawberry smoothie:
-
1.5 cups (355 ml) frozen strawberries
- These flavorful gems are the star of our show! Frozen strawberries give the smoothie a refreshing chill and natural sweetness. If you don’t have frozen ones on hand, fresh strawberries work too—just toss in a few ice cubes to keep things frosty.
-
1 frozen banana
- Bananas not only add creaminess to the smoothie but also a delightful sweetness. A ripe banana that’s past its prime is perfect. If bananas aren’t your thing, you can substitute with a splash of maple syrup or honey for sweetness.
-
0.75 cups (180 ml) almond milk
- Almond milk gives our smoothie a nutty flavor and a creamy texture. You can swap it with any milk of your choice—dairy, soy, or oat milk all work beautifully too.
-
0.5 cups (120 ml) plain Greek yogurt
- This ingredient adds that rich creaminess and a boost of protein to keep you energized. For a dairy-free version, opt for coconut yogurt or a non-dairy yogurt alternative.
-
1 tbsp Dutch processed cocoa powder
- This delightful addition brings in the chocolatey goodness. Make sure to use Dutch processed cocoa for a smooth, deep flavor. If you’re looking for a healthier alternative, try raw cacao powder—it’s packed with antioxidants.
-
1 tbsp almond butter
- This is my secret weapon for adding creaminess and rich flavor. However, peanut butter or even sunbutter (for those with nut allergies) can be used as a tasty substitute.
-
0.5 tsp vanilla extract
- A hint of vanilla elevates the entire smoothie, making it taste oh-so-brilliant! Feel free to use vanilla bean paste or scrapings from an actual vanilla bean for an extra-special twist.
Step-by-Step Instructions
-
Prepare your Ingredients
Start by gathering all your ingredients. Trust me; having everything ready on the counter makes the blending process smooth and efficient! Don’t forget to peel your frozen banana if you haven’t already—it’s essential for that creamy texture. -
Add the Frozen Strawberries
Toss the frozen strawberries into your blender first. This helps them get nicely blended without getting stuck! Plus, you’ll want them at the bottom to ensure everything blends evenly. -
Add the Frozen Banana
Next, slice up your frozen banana and add that delightful sweetness to the mix. It will help everything blend together, creating a thick, beautiful smoothie. -
Pour in the Almond Milk
Now, pour in your almond milk. This liquid gold is vital for helping your blender do its thing! Add more if you prefer a thinner consistency. -
Scoop in the Greek Yogurt
This is where the magic happens! Spoon in the Greek yogurt. The creaminess it adds is unbelievable. Don’t worry about making a mess—smoothies are supposed to be fun! -
Sprinkle in the Cocoa Powder
Time to bring in the chocolate! Sprinkle your Dutch processed cocoa powder over the mixture. At this stage, you can also add any sweeteners to taste if you like your smoothie a bit sweeter. -
Dollop in the Almond Butter
Add that tablespoon of almond butter, which will make your smoothie creamy and a bit nutty. It’s like the cherry on top but better! -
Finish with Vanilla Extract
Don’t forget your vanilla extract! Just a drop of it can make a world of difference. -
Blend Away!
Now, it’s time for the grand finale. Blend all of those luscious ingredients together until smooth and creamy. Depending on your blender, this may take 30 seconds or more. Stop and scrape down the sides if needed to ensure everything is mixed well. -
Taste Test!
Give your smoothie a quick taste. Need more sweetness? Just add a little honey or maple syrup. Too thick? Add a splash more almond milk and blend again. -
Serve and Enjoy
Once your smoothie reaches that perfect creamy consistency, pour it into your favorite glass or mug. Garnish with a drizzle of almond butter or a sprinkle of cocoa powder for that wow factor!
Serving Suggestions
When it comes to serving your Creamy Chocolate Strawberry Smoothie, you’ve got options! If you’re feeling fancy, pour it into a tall glass and add a sprinkle of granola on top for crunch. You could also garnish with a few fresh strawberries for an extra pop of color and freshness.
Another fun idea? Serve it in a bowl instead and create a smoothie bowl! Top it with sliced bananas, chopped nuts, coconut flakes, or even a few chocolate chips. The options are endless!
Recipe Variations
-
Berry Blast
Swap out some strawberries for other berries! Blueberries or raspberries would add a tangy twist that pairs wonderfully with the chocolate. -
Nutty Banana Cocoa
If you want a more pronounced banana flavor, swap in two bananas for the strawberries. Leave out the chocolate for a simple, creamy nutty smoothie. -
Vegan Delight
Make this smoothie entirely vegan by using non-dairy yogurt and milk. It’s just as delicious! -
Protein Power
For those post-workout smoothies, add a scoop of your favorite protein powder to give it that extra kick of energy. -
Coconut Chocolate
Replace half of the almond milk with coconut water for a tropical twist. It adds an exciting flavor that pairs with the chocolate beautifully!
Chef’s Notes
This recipe has certainly evolved over time—what began as a simple strawberry-banana concoction has transformed into a rich chocolate dream! I often share this smoothie with guests, and it never fails to impress. If you ever find yourself with leftover smoothie, they freeze beautifully in popsicle molds for a refreshing treat later on. Trust me—your future self will thank you!
FAQs and Troubleshooting
-
Why is my smoothie too thick?
Simply add a bit more almond milk or water, blending until you reach your desired consistency. -
Can I use fresh strawberries instead of frozen?
Yes, but make sure to add ice to achieve that cold, refreshing texture! -
What if I don’t have Greek yogurt?
You can easily substitute it with regular yogurt or a dairy-free alternative. -
Can I prep this smoothie ahead of time?
Absolutely! Pre-portion your ingredients in freezer bags, so in the morning, you just blend and go!
Nutritional Info
Now, you might be wondering how this delicious smoothie stacks up nutritionally. A typical serving (about 1 large glass) generally contains:
- Calories: Approximately 350
- Protein: 15g (depending on yogurt choice)
- Fat: 10g (mostly from almond butter)
- Carbohydrates: 55g (natural sugars from fruit)
- Fiber: 7g
This smoothie is not only delicious but also a balanced way to fuel your day, thanks to its blend of healthy fats, protein, and natural sugars.
Final Thoughts
And there you have it—the Creamy Chocolate Strawberry Smoothie! Whipping up this smoothie not only swirls culinary joy into your day but also wraps you in a warm hug of flavor and nostalgia. I hope you enjoy making it as much as I do. Don’t hesitate to put your personal spin on it and make it your own!
So, grab your blender, pour yourself a glass, and let the scrumptiousness begin! Remember, food is all about creativity, connection, and a little bit of fun. I’m thrilled to be on this culinary journey with you, so until next time, keep smiling and keep cooking! 🍓🥤✨
Print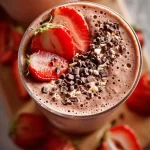
Creamy Chocolate Strawberry Smoothie
- Total Time: 5 minutes
- Yield: 1 serving 1x
- Diet: Vegetarian
Description
A delicious and creamy smoothie combining sweet strawberries and rich chocolate, perfect for a quick breakfast or post-workout refreshment.
Ingredients
- 1.5 cups (355 ml) frozen strawberries
- 1 frozen banana
- 0.75 cups (180 ml) almond milk
- 0.5 cups (120 ml) plain Greek yogurt
- 1 tbsp Dutch processed cocoa powder
- 1 tbsp almond butter
- 0.5 tsp vanilla extract
Instructions
- Prepare your ingredients by gathering all items and peeling the frozen banana.
- Add the frozen strawberries into your blender.
- Add the sliced frozen banana to the mix.
- Pour in the almond milk.
- Scoop in the Greek yogurt.
- Sprinkle in the cocoa powder.
- Dollop in the almond butter.
- Finish with vanilla extract.
- Blend until smooth and creamy.
- Taste and adjust sweetness or consistency as needed.
- Serve and enjoy with toppings if desired.
Notes
This smoothie can be customized with different fruits, nut butters, or sweeteners based on your preference.
- Prep Time: 5 minutes
- Cook Time: 0 minutes
- Category: Beverage
- Method: Blending
- Cuisine: American
Nutrition
- Serving Size: 1 smoothie
- Calories: 350
- Sugar: 25g
- Sodium: 150mg
- Fat: 10g
- Saturated Fat: 1g
- Unsaturated Fat: 9g
- Trans Fat: 0g
- Carbohydrates: 55g
- Fiber: 7g
- Protein: 15g
- Cholesterol: 5mg
Keywords: smoothie, chocolate, strawberry, healthy, breakfast