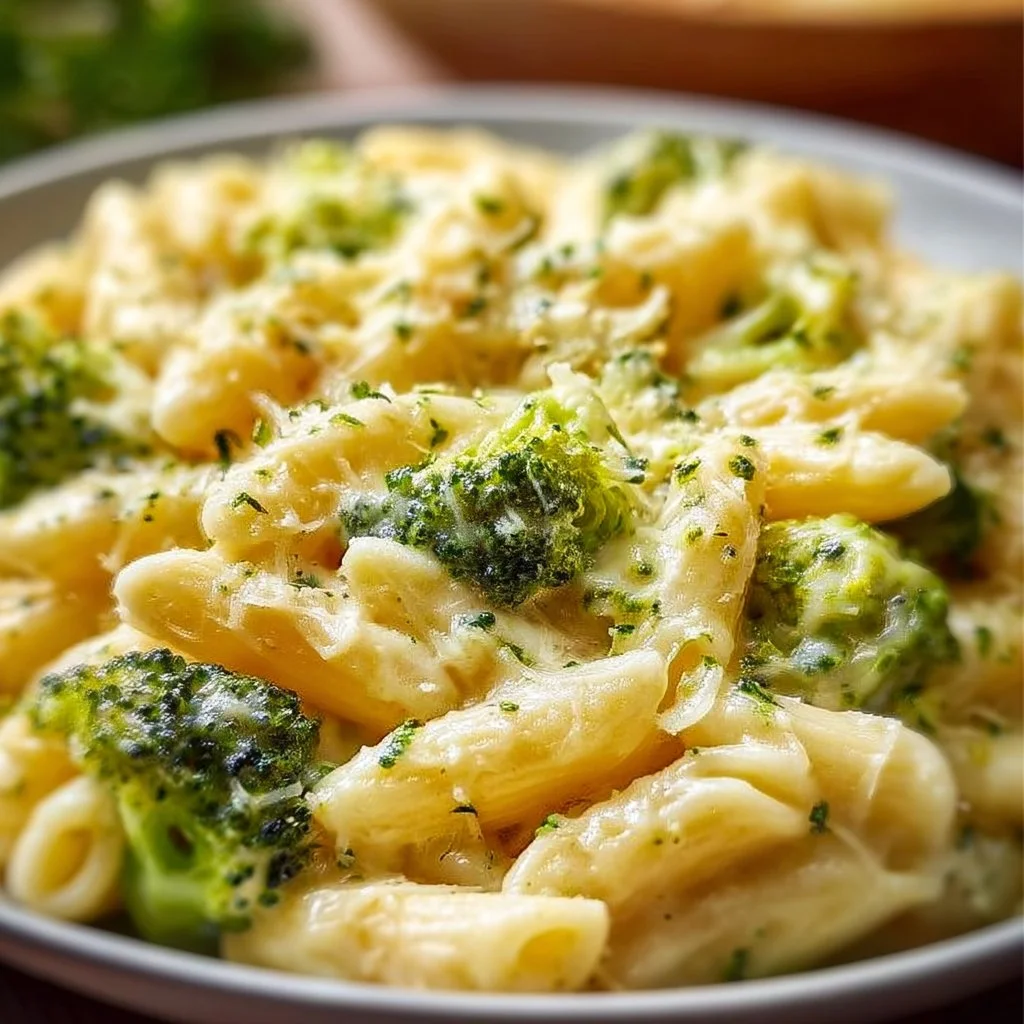
Creamy Cheesy Broccoli Pasta
Creamy Cheesy Broccoli Pasta: A Hug in a Bowl
Hey food lovers! Beau Collier here, and I’m thrilled to bring you one of my absolute favorite comfort dishes: Creamy Cheesy Broccoli Pasta. If you’re anything like me, sometimes you just need a dish that wraps around you like a warm hug after a long day. This dish embodies everything that’s cozy, creamy, and utterly satisfying—the perfect antidote to the chaos of life!
Picture this: the rich, velvety texture of cheese mingling effortlessly with perfectly cooked pasta, all while vibrant green broccoli florets peek through, adding a pop of color and crunch. It’s not just a meal; it’s an experience. The beauty of this recipe is that it’s not just simple to whip up—it’s also a wonderful way to sneak some veggies into your diet, especially for those picky eaters out there.
Whether you’re throwing together a quick weeknight dinner or planning a delightful weekend feast, this Creamy Cheesy Broccoli Pasta will have your family and friends leaning in for seconds. So, load up your spatula, invite your inner chef, and let’s embark on this cheesy adventure together!
Personal Story
Before we dive into the nitty-gritty of the recipe, let me share a fun kitchen memory that warms my heart every time I make this dish. I can vividly recall the very first time I attempted a version of this Creamy Cheesy Broccoli Pasta while living in a tiny apartment during my college days. My friends had planned a movie night, and I wanted to impress them with my not-so-unfounded culinary skills.
I remember rummaging through the fridge and pulling out just a few ingredients: some pasta, a bit of broccoli I’d forgotten about, and a pile of cheese that was definitely more than enough. With laughter filling the air and the comforting scent of broccoli and melting cheese wafting through the apartment, we gathered around my tiny kitchen table. Every bite earned cheers of delight and laughter, and by the end of the night, we had polished off the entire pot!
That experience taught me that food is not just about the ingredients but the memories we create around it. So let’s roll up our sleeves and make a dish that will not only nourish your belly but also your heart.
Ingredients
Okay, let’s break it down! Here’s what you’ll need for this delightful Creamy Cheesy Broccoli Pasta:
-
8 ounces pasta (e.g., penne or rotini)
This is your base! Penne and rotini work beautifully in this dish as they trap the cheese sauce perfectly in those little spirals and tubes. You can substitute with gluten-free pasta if you’re looking for a lighter option. -
2 cups fresh broccoli florets
Broccoli adds a wonderful crunch and a splash of color! Feel free to swap it for other veggies like cauliflower or spinach for a twist, or even cherry tomatoes for a burst of sweetness. -
2 cups milk
Whole milk gives the sauce its creaminess, but you can go for 2% or even non-dairy milk alternatives like almond or oat milk for a lighter version. -
1 cup shredded cheese (e.g., cheddar or mozzarella)
Cheddar provides that bold, cheesy punch, while mozzarella adds gooeyness. Mix it up! A blend of both can give you the best of both worlds. Vegan cheese works too, to keep it dairy-free! -
2 tablespoons butter
Butter is crucial for adding richness. If you’re avoiding dairy, you can use plant-based butter or olive oil. -
2 tablespoons all-purpose flour
This will help thicken your cheese sauce. If you need a gluten-free alternative, cornstarch or gluten-free flour works like a charm! -
Salt and pepper to taste
Never underestimate the power of seasoning! A little magic here enhances the overall flavor. Adjust to your palate. -
Optional: grated Parmesan and red pepper flakes for serving
Parmesan adds an extra savory kick—who can resist? And red pepper flakes bring a touch of heat for those who like it spicy!
Gather all these lovely ingredients, and we’ll be ready to light up the stovetop!
Step-by-Step Instructions
Let’s get cooking! Follow these simple steps, and you’ll whip up a delicious batch of Creamy Cheesy Broccoli Pasta in no time.
1. Cook the Pasta:
- Bring a large pot of salted water to a boil. Trust me, the salt makes a big difference! Add the pasta and cook according to package instructions until al dente—about 8 to 10 minutes.
- Chef tip: Reserve about half a cup of the pasta cooking water before draining! This starchy water can help adjust your sauce’s consistency later.
2. Blanch the Broccoli:
- In the last 2 minutes of the pasta cooking time, toss in the fresh broccoli florets. This will blanch them, giving that lovely vibrant color while keeping them crisp. Drain the pasta and broccoli together and set them aside.
- Hack: If you prefer your broccoli softer, you can steam it separately before adding, but I love the crunch it brings to the dish.
3. Make the Cheese Sauce:
- In a large skillet, melt 2 tablespoons of butter over medium heat. Once it’s bubbling, stir in the 2 tablespoons of flour, whisking continuously for about 1-2 minutes to create a roux. You want that slightly golden color—it’ll add depth to your sauce!
- Pro tip: Be patient! This step is crucial to eliminate any floury taste.
4. Add the Milk:
- Gradually pour in the 2 cups of milk while whisking constantly. Keep stirring until the mixture thickens—this will take about 3-5 minutes. It should coat the back of a spoon.
- Secret hack: If your sauce seems too thick, mix in a splash of that reserved pasta water to loosen it up.
5. Incorporate the Cheese:
- Reduce the heat to low; now it’s the fun part! Stir in 1 cup of shredded cheese until it’s completely melted and creamy. Feel free to add more cheese—who am I to stop you?
- Chef insight: Mixing in a splash of Dijon mustard adds a nifty sharpness that complements the cheesy goodness beautifully.
6. Combine with Pasta and Broccoli:
- Gently fold the drained pasta and broccoli into the cheese sauce, mixing to ensure everything is coated with that delightful, velvety goodness.
- Kicking it up a notch: If the pasta seems dry, add a touch more milk or pasta water until it’s just right!
7. Season It Up:
- Taste your creation and season with salt and pepper to your liking. I always say a pinch of love goes a long way!
- Final flair: If you love that little kick, sprinkle in some red pepper flakes right now!
8. Serve It Up:
- Spoon the pasta into bowls, and for that gourmet touch, sprinkle with grated Parmesan if you’re using it. Trust me; it takes the dish over the top!
Voilà! Your Creamy Cheesy Broccoli Pasta is ready.
Serving Suggestions
Presentation matters, folks! Here are some fun ideas on how to serve this bowl of joy:
- Family Style: Transfer the pasta and sauce to a large serving dish and let everyone dig in. It’s a communal experience that sparks joy and conversation!
- Individual Bowls: Serve in deep bowls garnished with a sprinkle of Parmesan and a few red pepper flakes for that pop of color. Add a drizzle of olive oil on top for a gourmet nod.
- Side Salads: Pair your pasta with a crisp side salad with a tangy vinaigrette to cut through the creaminess—balancing flavors is key!
Feel free to get creative and personalize each bowl according to everyone’s preferences!
Recipe Variations
Here’s where things get even more exciting! The beauty of Creamy Cheesy Broccoli Pasta lies in its versatility. Here are a few fun and flavorful variations you can try:
-
Chicken and Broccoli: For a heartier meal, add in some cooked chicken, maybe diced grilled chicken breast or rotisserie chicken. A great way to use up leftovers!
-
Pesto Delight: Mix in a couple of tablespoons of pesto for a fresh, herby twist. It’s like summery sunshine on a plate!
-
Sun-Dried Tomatoes: Add chopped sun-dried tomatoes in with the pasta for a tangy burst of flavor.
-
Mushroom Medley: For you fungi fans, sauté some mushrooms with the butter before adding the flour for an earthy flavor that pairs beautifully with the cheese.
-
Vegan Bliss: Swap dairy cheese with a non-dairy cheese blend and use nut milk or oat milk for a completely plant-based dish without losing the creamy goodness.
Feel free to get adventurous—there’s no wrong way to enjoy this pasta!
Chef’s Notes
You know, this recipe has been a continuous evolution in my kitchen. I remember when I used to throw in whatever cheese I had left in the fridge, and as a result, it became a staple in my home. It’s fascinating how kitchens can be laboratories of flavor!
And let me share a little secret with you. I once used a mix of ‘cheddar and whatever funky cheese I could find’ for a party, and it turned out to be a hit! My friends still reminisce about how creamy and comforting that one dish was, and they loved trying to identify all the cheese flavors.
By adapting it to what’s on hand, you can make it your own, each time a new chance to create memories!
FAQs and Troubleshooting
-
Why is my cheese sauce grainy?
- This usually happens if the cheese is added at a too-high temperature or if it’s overheated. Always lower the heat and choose high-quality cheese for the best results.
-
What if the pasta is too dry?
- Not to worry! Just stir in some of that reserved pasta water or a splash of milk to loosen it up and bring back that creamy texture.
-
Can I make this dish ahead of time?
- Absolutely! You can prepare it and store it in the fridge. Just reheat gently on the stovetop, adding a little milk to maintain that creamy consistency.
-
How can I make this dish spicier?
- If you’re daring, add sliced jalapeños or a dash of hot sauce to your cheese sauce for that extra kick! Some crushed red pepper flakes are a fantastic addition, too.
Nutritional Info
Now, for those keeping an eye on nutrition, here’s a quick breakdown! (Please note that values can vary based on brands and specific ingredients used).
- Calories: Approx. 400-500 per serving (depending on cheese and milk choices)
- Protein: 20g (thanks to the cheese and pasta!)
- Carbohydrates: 50g
- Fat: 20g (depending on the milk and butter used)
- Fiber: 3g
As always, moderation and balance make for a deliciously healthy lifestyle! Enjoying this meal occasionally is part of the joy of food!
Final Thoughts
And there you have it, my friends! Creamy Cheesy Broccoli Pasta—a delightful dish that’s as comforting as a warm embrace and as versatile as you want it to be. Each bite takes me back to those bustling college nights filled with laughter and good friends, and I hope it brings you just as much joy!
So, gather your loved ones, whip up this dish, and create new memories of your own. Food is about more than just feeding our bodies; it’s about nourishing our souls. Thank you for cooking along with me today. Until next time, keep exploring and enjoying every morsel. Happy cooking, foodies!
Print
Creamy Cheesy Broccoli Pasta
- Total Time: 45 minutes
- Yield: 4 servings 1x
- Diet: Vegetarian
Description
A comforting and creamy pasta dish featuring broccoli and cheese, perfect for weeknight dinners or weekend feasts.
Ingredients
- 8 ounces pasta (e.g., penne or rotini)
- 2 cups fresh broccoli florets
- 2 cups milk
- 1 cup shredded cheese (e.g., cheddar or mozzarella)
- 2 tablespoons butter
- 2 tablespoons all-purpose flour
- Salt and pepper to taste
- Optional: grated Parmesan and red pepper flakes for serving
Instructions
- Cook the Pasta: Bring a large pot of salted water to a boil. Add the pasta and cook according to package instructions until al dente—about 8 to 10 minutes.
- Blanch the Broccoli: In the last 2 minutes of cooking time, add broccoli florets. Drain pasta and broccoli together.
- Make the Cheese Sauce: In a skillet, melt butter over medium heat. Stir in flour and whisk for about 1-2 minutes to create a roux.
- Add the Milk: Gradually pour in milk while whisking until thickened, about 3-5 minutes.
- Incorporate the Cheese: Reduce heat and stir in shredded cheese until melted and creamy.
- Combine with Pasta and Broccoli: Fold in pasta and broccoli, ensuring everything is well coated.
- Season It Up: Taste and adjust seasoning with salt and pepper. Add red pepper flakes if desired.
- Serve It Up: Spoon the pasta into bowls and sprinkle with grated Parmesan if using.
Notes
Feel free to use gluten-free pasta or mix in other veggies like cauliflower or spinach. Add grilled chicken for a heartier meal or pesto for a fresh twist.
- Prep Time: 15 minutes
- Cook Time: 30 minutes
- Category: Main Course
- Method: Baking
- Cuisine: Italian
Nutrition
- Serving Size: 1 serving
- Calories: 450
- Sugar: 7g
- Sodium: 400mg
- Fat: 20g
- Saturated Fat: 10g
- Unsaturated Fat: 8g
- Trans Fat: 0g
- Carbohydrates: 50g
- Fiber: 3g
- Protein: 20g
- Cholesterol: 60mg
Keywords: Creamy Pasta, Cheesy Broccoli Pasta, Comfort Food
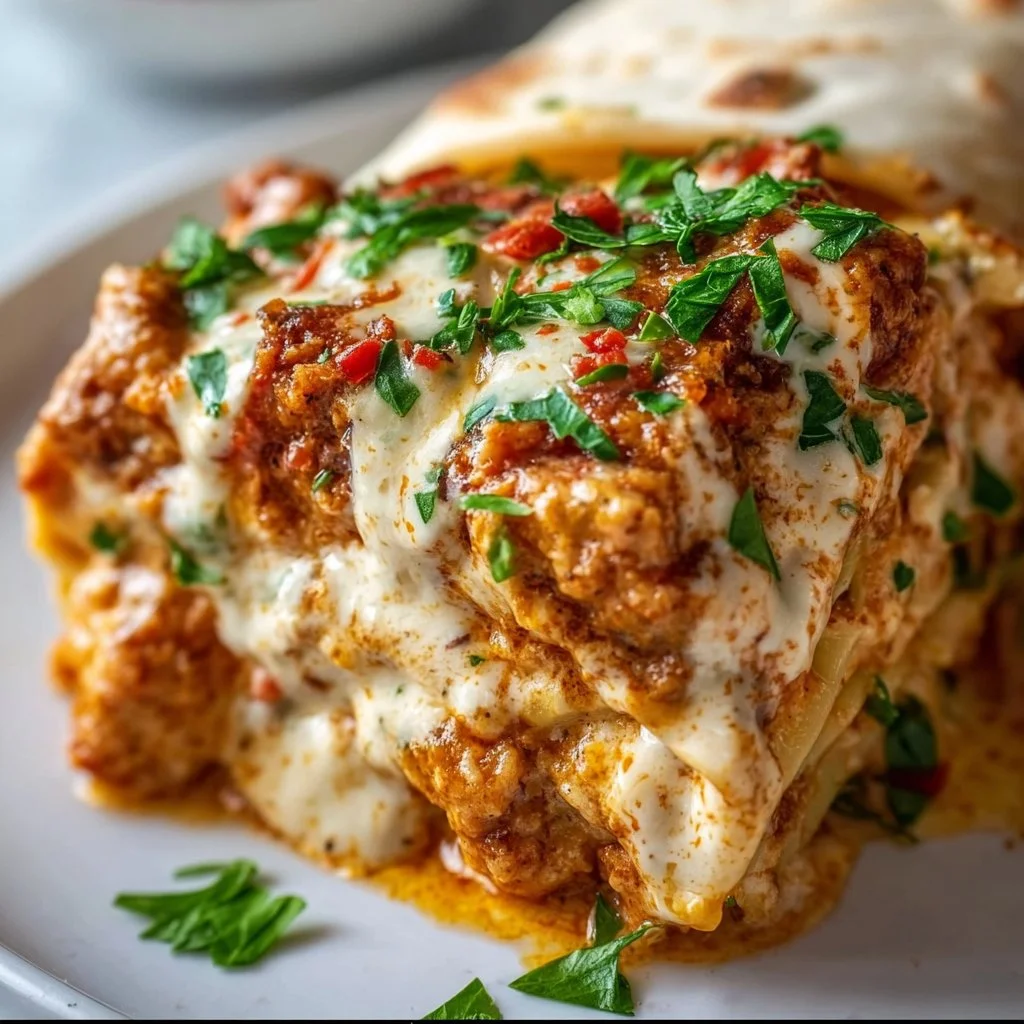
Slow Cooker Lasagna
Slow Cooker Lasagna: A Comfort Food Masterpiece
Introduction
Hey there, food lovers! Welcome back to Feastical, your go-to spot for scrumptious, soul-satisfying recipes that’ll make you feel right at home. Today, we’re diving into the wonderful world of lasagna—specifically, the slow cooker lasagna. Yes, you heard that right! We’re talking about a dish that has the power to turn any ordinary day into a special occasion with its layers of cheesy goodness and rich flavors.
Now, picture this: it’s been a long day at work. You get home, and the last thing you want to do is stand in the kitchen for hours, slaving over a hot stove. What if I told you that you could toss everything into a slow cooker and let it do the hard work for you while you kick back and relax? That’s the magic of slow cooker lasagna!
This dish is perfect for busy weeknights, lazy Sundays, or whenever you’re in the mood for a hearty meal that warms the soul. With its perfect balance of flavors and textures, slow cooker lasagna is great for feeding a crowd or simply satisfying your cravings. The best part? The slow cooker allows all the ingredients to meld beautifully together, creating a dish that’s both comforting and impressive.
So, grab your favorite spatula, and let’s get ready to whip up this crowd-pleaser that’s easier to prepare than you might think. I promise, you’ll want to have seconds (or thirds) once you taste the magic of slow-cooked lasagna! Are you ready to dive in?
Personal Story
Before I delve into the recipe, let me share a little story. Growing up, lasagna was a staple at family gatherings. My grandmother, an Italian culinary wizard, would gather the whole family in her tiny kitchen, her laughter ringing through the air like a sweet melody.
As we mixed the ricotta with fresh herbs and layered the noodles, it was less about just preparing a meal and more about bonding. I can still picture my younger self standing on a stool, trying to reach the high shelves for the marinara sauce while my cousins playfully argued over who made the best garlic bread. By the time grandma’s lasagna was pulled from the oven, the house would smell heavenly—a warm invitation for everyone to sit around the table.
Even after years of experimenting in my kitchen, I find myself returning to that recipe: the one filled with love and laughter. While this slow cooker lasagna is a bit different, it captures the essence of those joyous times, and now, I get to share it with you!
Ingredients
Let’s talk about what you’ll need to whip up this delicious slow cooker lasagna. Here’s the ingredient list, along with some tips:
- Lasagna Noodles: The backbone of your lasagna! You can use traditional or no-boil lasagna noodles. Just be sure to adjust cooking time if using no-boil.
- Ricotta Cheese: This creamy cheese adds richness and texture. If you want a lighter alternative, try cottage cheese or even Greek yogurt mixed with a bit of lemon zest for a tangy kick.
- Mozzarella Cheese: The stretchy, gooey stuff. Use fresh mozzarella if you can; it melts beautifully! For a lower-calorie option, try part-skim mozzarella.
- Parmesan Cheese: The finishing touch! Grated Parmesan adds salty, nutty notes. Pecorino Romano can be substituted for an extra kick.
- Marinara Sauce: Use your favorite jarred version for convenience, or make your own if you’re feeling adventurous! A homemade sauce can elevate this dish even further.
- Ground Beef (or Sausage): This adds protein and flavor. You can swap it out for ground turkey for a leaner option or leave it out entirely for a vegetarian version.
- Italian Seasoning: A blend of herbs that brings everything together—think basil, oregano, and thyme! Feel free to customize with fresh herbs if you have them on hand.
- Garlic: This adds a delightful aroma and flavor. You can use fresh, minced cloves or even garlic powder in a pinch.
- Onion: Adds depth to the sauce. Yellow onions are great, but red onions can also work if you prefer a sweeter flavor.
- Salt and Pepper: Essential for enhancing all the flavors. Adjust to taste.
Step-by-Step Instructions
Alright, my friends! It’s time to roll up your sleeves and get cooking. Don’t worry, I’m here with you every step of the way. Here’s how to create this amazing slow cooker lasagna:
-
Brown the Meat:
- In a skillet over medium heat, add a splash of olive oil and put in your ground beef or sausage.
- Cook it until browned, breaking it apart with a spatula as it cooks. Don’t forget to season with salt and pepper.
- This step not only adds flavor but helps render out the fat, which you can drain or keep for richness.
-
Add Aromatics:
- Toss in chopped onions and minced garlic to the meat.
- Sauté until the onions become translucent and the garlic smells amazing, about 3-5 minutes. Trust me, your kitchen will start to smell heavenly at this point!
-
Mix the Sauce:
- In a large bowl, combine the marinara sauce with Italian seasoning.
- Stir in the cooked meat mixture until it’s well incorporated.
-
Prepare the Cheese Mixture:
- In another bowl, mix the ricotta cheese with an egg (if using), a sprinkle of salt, and some Italian seasoning or herbs.
- This will help keep your ricotta fluffy and creamy and makes it much easier to layer.
-
Layer It Up:
- Now comes the fun part! Start layering in your slow cooker.
- Begin with a scoop of the meat sauce on the bottom.
- Add a layer of lasagna noodles. If you’re using traditional noodles, break them to fit the dish.
- Spread a layer of the ricotta mixture over the noodles, followed by a layer of mozzarella.
- Repeat these steps until your ingredients are used up, finishing with a layer of meat sauce on top (and maybe some extra cheese because who doesn’t love that?).
- Now comes the fun part! Start layering in your slow cooker.
-
Cook Low and Slow:
- Cover your slow cooker, set it on low for 4-6 hours, or high for about 2-3 hours.
- The slow cooking allows the flavors to meld beautifully, and the cheese gets all melty and delicious.
-
Final Touch:
- When it’s done, let the lasagna sit for about 15-20 minutes before digging in. This resting time helps it hold together when slicing.
Serving Suggestions
Alright, once your kitchen smells like an Italian trattoria, it’s time to serve! This lasagna is perfect for family dinners or gatherings. Here’s how to plate it:
-
Slice the lasagna into hearty squares or rectangles. A sharp knife works best—don’t rush this part!
-
Serve a slice on a warm plate, and for added flair, sprinkle some freshly chopped basil or parsley on top. It adds a beautiful pop of color and a fresh aroma.
-
Pair it with a simple green salad drizzled with balsamic vinaigrette to balance out the richness of the lasagna. And don’t forget a hunk of crusty bread on the side for mopping up any leftover sauce.
Recipe Variations
Feeling adventurous? Here are some fun twists and variations on this slow cooker lasagna:
- Vegetarian Lasagna: Swap the meat for layers of your favorite veggies! Spinach, zucchini, mushrooms, and bell peppers are all fantastic options.
- White Lasagna: Use alfredo sauce instead of marinara for a creamy, dreamy version. Layer in sautéed mushrooms and spinach for extra flavor.
- Spicy Kick: Add red pepper flakes to the meat sauce for some heat, or layer in jalapeños for an added spice factor!
- Cheesy Garlic Bread Lasagna: Mix garlic butter into your final mozzarella layer and top with breadcrumbs for a crunchy texture.
- Gluten-Free: Use gluten-free lasagna noodles or replace them with thinly sliced zucchini or eggplant for a low-carb option.
Chef’s Notes
As I’ve played around with this slow cooker lasagna recipe over the years, I’ve learned a few tricks to make it even better. For instance, I’ve discovered that a splash of red wine in the meat sauce can elevate the flavor dramatically. Also, don’t be shy about using different cheese blends—experimenting with a mix of cheeses can create delightful surprises.
And remember: kitchen messes are a badge of honor! One of my best memories was when I accidentally spilled a whole jar of marinara on the floor. Instead of being upset, my family and I started a massive lasagna food fight. It might not have been the most picturesque moment, but it was definitely one of the funniest!
FAQs and Troubleshooting
Here are some common questions and answers to ensure your slow cooker lasagna turns out perfectly:
-
Why is my lasagna watery?
- This could happen if your marinara sauce was too watery or if your vegetables weren’t drained properly. You can also try adding a layer of cheese to absorb some moisture.
-
Can I use fresh pasta?
- Yes! Fresh pasta can be a great alternative. Just keep in mind that it might cook faster, so adjust the time accordingly.
-
What if my noodles are sticking together?
- If using traditional noodles, try adding a touch of oil to the water when boiling or separating them as you layer them.
-
Can I cook this on high?
- Certainly! Just keep an eye on it; while cooking on high can save time, it may require a bit less cooking time than the low setting—aim for around 2-3 hours.
Nutritional Info
When it comes to comfort food like lasagna, it’s easy to let our hearts (and appetites) take the wheel. However, knowing the nutritional content can help us balance indulgence with health! Here’s a rough estimate of the nutritional values per serving (based on a standard recipe):
- Calories: Approximately 400-500 calories per serving, depending on cheese and meat choices.
- Protein: 25-30 grams (thanks to the beef and cheese!)
- Carbohydrates: About 45-50 grams, primarily from the noodles.
- Fat: 20-25 grams, influenced by the ricotta, mozzarella, and meat.
- Fiber: 2-5 grams, depending on added veggies.
Feel free to adjust ingredient amounts or substitute healthier options to lower calorie counts and increase nutritional value.
Final Thoughts
And there you have it, my lovely foodies! A delightful journey into making slow cooker lasagna that is not only satisfying but also brings back beautiful memories and creates new ones. Cooking should always be enjoyable, and this recipe is a perfect way to remind yourself that good food doesn’t have to be complicated or time-consuming.
Now that you have all the knowledge and insider tips to create this slow-cooked masterpiece, it’s time to savor the incredible flavors and share them with your loved ones. Whether you’re having a cozy night in or hosting some friends over, this slow cooker lasagna is sure to impress.
Thanks for hanging out with me in the kitchen today! Don’t forget to share your creation and tag me—I’d love to see your wonderful variations. Until next time, happy cooking, my friends! Let’s keep spreading the love, one delicious bite at a time! 🍽️
Print
Slow Cooker Lasagna
- Total Time: 255 minutes
- Yield: 8 servings
- Diet: Meat and Dairy
Description
A comforting slow cooker lasagna that’s easy to prepare and packed with cheesy goodness and rich flavors.
Ingredients
- Lasagna Noodles
- Ricotta Cheese
- Mozzarella Cheese
- Parmesan Cheese
- Marinara Sauce
- Ground Beef (or Sausage)
- Italian Seasoning
- Garlic
- Onion
- Salt and Pepper
Instructions
- Brown the meat: In a skillet over medium heat, add a splash of olive oil and put in your ground beef or sausage. Cook it until browned, breaking it apart with a spatula as it cooks. Don’t forget to season with salt and pepper.
- Add aromatics: Toss in chopped onions and minced garlic to the meat. Sauté until the onions become translucent and the garlic smells amazing, about 3-5 minutes.
- Mix the sauce: In a large bowl, combine the marinara sauce with Italian seasoning. Stir in the cooked meat mixture until it’s well incorporated.
- Prepare the cheese mixture: In another bowl, mix the ricotta cheese with an egg (if using), a sprinkle of salt, and some Italian seasoning.
- Layer it up: Start layering in your slow cooker with a scoop of the meat sauce, followed by lasagna noodles, ricotta mixture, and mozzarella. Repeat the layers, finishing with a layer of meat sauce on top.
- Cook low and slow: Cover your slow cooker, set it on low for 4-6 hours, or high for about 2-3 hours.
- Let it sit: After cooking, let the lasagna sit for about 15-20 minutes before slicing.
Notes
For different variations, consider adding vegetables for a vegetarian option or using alfredo sauce instead of marinara for a creamy version.
- Prep Time: 15 minutes
- Cook Time: 240 minutes
- Category: Main Course
- Method: Slow Cooking
- Cuisine: Italian
Nutrition
- Serving Size: 1 serving
- Calories: 450
- Sugar: 6g
- Sodium: 600mg
- Fat: 25g
- Saturated Fat: 12g
- Unsaturated Fat: 10g
- Trans Fat: 0g
- Carbohydrates: 50g
- Fiber: 3g
- Protein: 30g
- Cholesterol: 75mg
Keywords: slow cooker, lasagna, comfort food, easy recipe, Italian

Taco Stuffed Sweet Potatoes
Taco Stuffed Sweet Potatoes: A Soulful Twist on Taco Night
Hey there, food lovers! If you’re anything like me, there’s nothing quite as delightful as a taco night! Picture this: it’s the end of a long day, and you’re rounding everyone up at the dinner table for a feast of flavors. But wait—what if you could take that classic idea and give it a hearty, wholesome twist? Enter Taco Stuffed Sweet Potatoes! 🍠✨
These beauties are not only colorful and eye-catching but also pack a flavor punch that will make your taste buds dance with joy. You’re getting the heartiness of sweet potatoes combined with the zest of taco filling—oh boy, it’s a match made in culinary heaven!
I launched Feastical because I believe that cooking should be fun, and every bite should feel like a warm hug. This recipe is just that! It’s nourishing, satisfying, and—let’s be real—perfect for the whole family (even picky eaters)! Plus, it’s loaded with nutrients and provides the comfort we all crave without sacrificing flavor. What’s not to love? So let’s get our forks ready and whip up these Taco Stuffed Sweet Potatoes together!
Personal Story
Oh, the memories I have tied to tacos! One of my fondest memories is from my college days when my friends and I would have weekly taco nights. With laughter echoing off the walls and our plates piled high with traditional taco toppings, we’d share stories about our lives—dreams, fears, and everything in between.
I remember one particular night, we tried to create the ultimate taco concoction. Let’s just say it involved an extraordinary amount of cheese and some questionable topping choices. But it was all in good fun, and we ended up with a colorful taco buffet that would make any Instagram foodie proud.
Those nights forged friendships filled with laughter and love, and to me, that’s the magic of good food. Fast forward to now, I’ve made it my mission to recreate that feeling of togetherness with variations like these Taco Stuffed Sweet Potatoes—prepping and enjoying food that brings us closer, one bite at a time.
Ingredients
Let’s dive into the ingredients that will make your Taco Stuffed Sweet Potatoes sing! Each element has a special role to play, and I’ll share some pro tips along the way:
-
4 Sweet Potatoes: The star of our show! They’re naturally sweet, nutritious, and a fantastic source of fiber. If you need a quick substitution, try using mashed cauliflower or quinoa for a grain-free version.
-
1 Pound Ground Beef: Feel free to use ground turkey or chicken if you’re looking for leaner options. If you want it plant-based, go for lentils or crumbled firm tofu!
-
1 Taco Seasoning Packet: You can buy this premade or whip up your own with a mix of chili powder, cumin, garlic powder, onion powder, oregano, and a pinch of salt. Spicing things up yourself gives you more control over the flavor!
-
1 Can Black Beans (drained and rinsed): These add a protein punch and tons of fiber! If black beans aren’t your jam, kidney beans or pinto beans work great too.
-
1 Cup Corn: Fresh, frozen, or canned—you can use whichever you have on hand! Corn adds a lovely sweetness that complements the heat of the taco seasoning.
-
1 Cup Diced Tomatoes: Fresh tomatoes are fab, but canned diced tomatoes are my pantry saver. If you want a kick, go for fire-roasted tomatoes!
-
Shredded Cheese: Cheddar, Monterey Jack, or a dairy-free option—layer that cheesy goodness on top!
-
Sour Cream: This creamy goodness is perfect for topping. Greek yogurt is a great substitute for a healthier option or for those keeping it dairy-free.
-
Chopped Green Onions: They add a nice crunch and a fresh flavor. You can swap these for chives or omit if you’re not a big fan.
-
Sliced Jalapeños (optional): Spice it up if you dare! You can use fresh, pickled, or jarred jalapeños to elevate the heat.
-
Lettuce (optional): A lovely way to add some crunch! Use iceberg, romaine, or even leafy greens for a nice touch.
Step-by-Step Instructions
Alright, let’s get cooking! Here’s how to bring these Taco Stuffed Sweet Potatoes to life:
-
Preheat the Oven: Start by preheating your oven to 400°F (200°C). This step is important to ensure your sweet potatoes roast evenly and become tender.
-
Prepare the Sweet Potatoes: Wash your sweet potatoes thoroughly, and poke a few holes with a fork (this helps steam escape while they roast). Place them on a baking sheet lined with parchment paper for easy cleanup!
-
Roast the Sweet Potatoes: Pop those bad boys in the oven for about 45 minutes to an hour, or until they’re tender enough to poke a knife through. While they cook, you can dive into the taco filling!
-
Cook the Meat: In a skillet over medium heat, add the ground beef. Cook it until browned, breaking it up with a wooden spoon as it cooks. This gives you that irresistible texture.
-
Add the Taco Seasoning: Once the meat is cooked, sprinkle in that taco seasoning packet (or your homemade spice blend). Stir well to coat the beef, and pour in about ½ cup of water. Let it simmer for about 5-7 minutes until the liquid has largely evaporated, leaving you with that flavorful taco filling.
-
Mix in the Beans and Corn: Add the drained black beans and corn to the skillet. Mix everything together and let it all heat through for a couple of minutes. You want those flavors to meld!
-
Incorporate the Tomatoes: Stir in the diced tomatoes at the very end—this adds freshness to your filling. Let it cook for just a couple of minutes so the tomatoes warm up but retain some structure.
-
Check the Sweet Potatoes: By now, your sweet potatoes should be perfectly roasted! Remove them from the oven and carefully slice them down the center. Be cautious—those beauties will be hot!
-
Stuff the Potatoes: Fluff up the insides of each sweet potato a bit with a fork, then spoon in generous portions of the taco filling.
-
Top It Off: Sprinkle a handful of shredded cheese on top—feel free to be generous! Pop them back in the oven for about 5-10 minutes or until the cheese is melted to your liking.
Serving Suggestions
Let’s make these Taco Stuffed Sweet Potatoes look as inviting as they taste! Once they’re out of the oven, serve them on a colorful plate or a large platter for a family-style feast. I love to dollop some sour cream (or Greek yogurt) on top and finish with a sprinkle of chopped green onions and sliced jalapeños.
You can also serve these with a side of fresh lettuce—the cool crunch balances out the warmth of the stuffed potatoes perfectly. Add a wedge of lime for that extra zing, and let everyone customize their feast with additional toppings like salsa, guacamole, or even hot sauce. Talk about flavor fun!
Recipe Variations
Want to switch things up a little? Here are some creative twists you can explore with your Taco Stuffed Sweet Potatoes:
-
Buffalo Cauliflower Version: Swap out the ground beef for roasted cauliflower tossed in buffalo sauce for a spicy, vegetarian twist!
-
BBQ Chicken Stuffed Potatoes: Use leftover BBQ chicken instead of beef and add a touch of shredded coleslaw on top for a southern vibe!
-
Tex-Mex Vegetarian Delight: Replace meat with a mix of quinoa and black beans, and add diced bell peppers for extra crunch.
-
Cheesy Taco Bake: Instead of stuffing each sweet potato, mix everything in a baking dish, top with cheese, and bake until bubbly for a cozy casserole vibe.
-
Breakfast Style: Add scrambled eggs into the taco filling and top with avocado and salsa for a hearty breakfast version!
Chef’s Notes
Ah, Taco Stuffed Sweet Potatoes—this recipe has certainly evolved over time! I started with just plain baked potatoes and taco seasoning, and through trial and error, it transformed into this delight we have today. I remember the first time I served this at a potluck. I was nervous, but everyone gobbled them up—and they even asked for seconds! It’s amazing how simple adjustments can lead to family favorites. So don’t be afraid to experiment a bit; it’s all part of the fun in the kitchen!
FAQs and Troubleshooting
-
What if my sweet potatoes are hard after cooking?
- If they don’t feel tender after an hour, just pop them back in the oven and check every 5-10 minutes. You want them soft, so patience is key!
-
Can I prep these potatoes in advance?
- Absolutely! You can roast the sweet potatoes the day before and prepare the taco filling. Just assemble when you’re ready to eat!
-
Can I freeze leftovers?
- Yes, you can! Store them in an airtight container, and they’ll keep for up to 3 months. Just reheat in the oven or microwave when you’re ready to dig in!
-
What if I don’t have taco seasoning?
- No worries! Mix together chili powder, cumin, garlic powder, and a dash of salt for a makeshift blend. You can play around with the spices too!
Nutritional Info
Curious about what you’re enjoying? Here’s a rough breakdown of the nutritional perks of these Taco Stuffed Sweet Potatoes per serving (assuming two stuffed potatoes):
- Calories: 450
- Protein: 30g
- Carbohydrates: 50g
- Fiber: 12g
- Fat: 15g
Sweet potatoes are loaded with vitamins A and C, and by adding the beans and cheese, you also amp up your protein and calcium intake. It’s comfort food that loves you back!
Final Thoughts
There you have it—Taco Stuffed Sweet Potatoes, a deliciously creative way to shake up taco night! Not only do they combine comfort and nourishment, but they also invite fun and laughter around the dinner table. Remember, cooking is an adventure, and the kitchen is your playground.
So, the next time you gather friends or family, whip up these stuffed potatoes and watch the smiles grow as they savor every bite. Thank you for joining me in creating this delightful dish—may your kitchen always be filled with laughter, warmth, and, of course, great food!
Now go grab your spatula and dig in! Happy cooking! 🎉
Print
Taco Stuffed Sweet Potatoes
- Total Time: 75 minutes
- Yield: 4 servings 1x
- Diet: Beef
Description
A nutritious twist on traditional tacos featuring hearty sweet potatoes stuffed with a flavorful taco filling.
Ingredients
- 4 Sweet Potatoes
- 1 Pound Ground Beef
- 1 Taco Seasoning Packet
- 1 Can Black Beans (drained and rinsed)
- 1 Cup Corn
- 1 Cup Diced Tomatoes
- Shredded Cheese
- Sour Cream
- Chopped Green Onions
- Sliced Jalapeños (optional)
- Lettuce (optional)
Instructions
- Preheat the oven to 400°F (200°C).
- Prepare the sweet potatoes by washing and poking holes in them, then place on a lined baking sheet.
- Roast the sweet potatoes for about 45 minutes to an hour until tender.
- Cook the ground beef in a skillet over medium heat until browned.
- Add the taco seasoning and ½ cup of water, simmering until thickened for about 5-7 minutes.
- Mix in the black beans and corn, heating through for a couple of minutes.
- Incorporate the diced tomatoes and heat for just a few minutes.
- Check the sweet potatoes for tenderness and slice them open.
- Stuff each sweet potato with the taco filling.
- Top with shredded cheese and return to the oven for 5-10 minutes until melted.
Notes
Feel free to customize toppings and add sides like sour cream, salsa, or guacamole for extra flavor.
- Prep Time: 15 minutes
- Cook Time: 60 minutes
- Category: Main Course
- Method: Baking
- Cuisine: Mexican
Nutrition
- Serving Size: 1 sweet potato
- Calories: 450
- Sugar: 6g
- Sodium: 500mg
- Fat: 15g
- Saturated Fat: 6g
- Unsaturated Fat: 8g
- Trans Fat: 0g
- Carbohydrates: 50g
- Fiber: 12g
- Protein: 30g
- Cholesterol: 70mg
Keywords: taco, sweet potatoes, stuffed, family meal, healthy dinner

Crockpot Greek Chicken Pitas with Tzatziki
Crockpot Greek Chicken Pitas with Tzatziki
Hey there, food lovers! Welcome back to Feastical! I’m thrilled to dive into a delightful dish that’s not only easy to whip up but also packs a punch of flavor and nostalgia: Crockpot Greek Chicken Pitas with Tzatziki. If you’re like me, when you think of comfort food, images of warm, fluffy pitas filled with succulent, flavorful chicken drizzled with creamy tzatziki sauce come to mind. It’s the kind of meal that brings everyone to the table, sharing stories, and making memories.
Cooking in the slow cooker—oh, where do I begin? It’s like magic in a pot! You throw in fresh ingredients, set it, and forget it, letting the flavors meld into something absolutely heavenly. And trust me, this dish is perfect for those busy weeknights when you want a meal that feels like a feast but requires minimal effort. Picture this: you come home after a long day, and as soon as you walk through the door, that savory aroma envelops you like a warm hug. Sounds good, right?
Let’s not forget the vibrant flavors of Greek cuisine! From tangy lemon to fragrant oregano, each ingredient brings warmth and brightness, making this dish a joyful experience for the taste buds. And of course, topping it off with homemade tzatziki? That’s like putting a cherry on top of a sundae—it’s the finishing touch that takes your meal from good to downright extraordinary.
So, get your apron on, and let’s journey together into the wonderful world of Greek cuisine with these delectable Crockpot Greek Chicken Pitas. Get ready for a flavorful adventure that’s going to brighten your day and fill your belly!
Personal Story
I remember the first time I tried Greek food. It was a bustling summer evening at a friend’s backyard barbecue. The sun had just begun to set, casting a warm golden glow over everything. The aroma of grilled meats and spices wafted through the air, luring us all towards the feast laid out on the picnic tables.
Among the spread were chicken pitas filled to the brim with juicy, marinated chicken, fresh veggies, and that iconic tzatziki sauce. I still remember my first bite—the tender, seasoned chicken mingling with the cool, creamy sauce was nothing short of a revelation. I felt like I was transported to a sunny taverna overlooking the Aegean Sea! From that moment on, Greek food became a personal favorite of mine.
Fast forward a few years, and I found myself working in a café that specialized in Mediterranean cuisine. I was lucky enough to learn the secrets behind those dazzling flavors and the beauty of slow-cooking food that brings out the very best in every ingredient. That’s where this version of Crockpot Greek Chicken Pitas was born. It’s a dish that represents community, warmth, and, most importantly, deliciousness! Now, I can’t wait to share it with you!
Ingredients
Here’s what you’ll need to create this wonderful dish. Don’t worry if you don’t have everything—I’ll share some handy substitutes, too!
-
Boneless, Skinless Chicken Thighs (2 pounds)
Thighs are perfect for slow cooking due to their higher fat content, resulting in juicy, tender chicken. You can swap them out for breasts if you prefer, but keep in mind that they might dry out a bit more. -
Olive Oil (2 tablespoons)
A staple in Mediterranean cuisine, olive oil adds richness and helps the flavors meld together. Avocado oil or grapeseed oil can be good alternatives if you want something a bit lighter. -
Lemon Juice (from 1 large lemon)
The acidity of lemon juice elevates the dish and gives it that fresh zing. If you don’t have fresh lemons, bottled lemon juice will do, but fresh is always best for flavor! -
Garlic (4 cloves, minced)
Ah, garlic! The aromatic wonder that makes everything better. Don’t skimp on this! If you’re in a hurry, you can use pre-minced garlic from a jar, but fresh is always the best bet for that zingy kick. -
Dried Oregano (2 teaspoons)
This herb is quintessential in Greek cooking, bringing a comfy, earthy flavor. If you’re in a pinch, Italian seasoning can be a great substitute! -
Ground Cumin (1 teaspoon)
Cumin contributes a warm, earthy note that brings depth to the dish. If you’re not a fan, you can omit it or exchange it for coriander for a different flavor profile. -
Salt and Pepper (to taste)
Essential to enhance all the flavors; you know the drill! Feel free to season to your heart’s content. -
Red Onion (1, thinly sliced)
The sweet and slightly sharp flavor of red onion adds a great crunch and color. If you’re looking for a milder taste, white onion works, too. -
Tomatoes (2, diced)
Fresh, ripe tomatoes add juiciness and sweet flavor. Alternatively, canned diced tomatoes are an easy and practical swap. -
Cucumber (1, diced)
A great cool crunch! You could use bell peppers for a different crispy texture. -
Feta Cheese (1 cup, crumbled)
This tangy cheese is a classic Greek complement. For a dairy-free option, try crumbled tofu with a sprinkle of lemon juice. -
Pita Bread (for serving)
Soft, pillowy pita is perfect for scooping and wrapping your chicken. Whole wheat or gluten-free pitas are available if you want a healthier twist.
Quick Chef Insight
For a truly amazing flavor experience, let the chicken marinate in the spices and lemon juice for at least 30 minutes or ideally overnight! The longer it sits, the more the flavors deepen and enhance.
Step-by-Step Instructions
Let’s get cooking! Follow these detailed steps to create your irresistible Crockpot Greek Chicken Pitas.
Step 1: Prepare the Chicken
- Marinate Your Chicken
- In a large bowl, combine the chicken thighs with olive oil, lemon juice, minced garlic, oregano, cumin, salt, and pepper. I love rubbing the spices in to ensure every inch is covered! If you have the time, let this sit in the fridge for a minimum of 30 minutes—or overnight if you’re prepping for the next day. Your patience will pay off!
Step 2: Set Up Your Crockpot
- Layer in the Ingredients
- Once marinated, layer the sliced red onion and diced tomatoes on the bottom of the crockpot. It helps to create a bed for the chicken and lets all those juices flow. Then, add the marinated chicken thighs on top. The crockpot is where the magic truly happens, so don’t worry about stirring here; just lay them in gently!
Step 3: Let it Cook
- Cook Low and Slow
- Cover your crockpot and set it to low for 6-8 hours or high for 3-4 hours. The lower and slower, the better—it gives you that tender, shreddable chicken! Trust me; you’ll know it’s done when your house starts to smell absolutely heavenly.
Step 4: Shred the Chicken
- Shred and Mix it Up
- When the timer goes off, use two forks to shred the chicken straight in the pot. The chicken should be so tender it practically falls apart at the touch! Stir everything together and taste it—adjust the seasoning if you’d like.
Step 5: Prepare Tzatziki
- Make the Tzatziki Sauce
- While that deliciousness is cooking, let’s whip up some tzatziki! In a mixing bowl, combine the diced cucumber, Greek yogurt, minced garlic (yes, more garlic!), lemon juice, salt, and a hint of dill if you fancy it. Mix until combined and adjust the salt as needed. Slathering this on your pitas is going to be the highlight of your flavor journey!
Step 6: Assemble Your Pitas
- Fill Those Pitas
- Grab your pitas and slice them open gently. Fill them with the shredded chicken mix, top with fresh cucumber and any additional toppings—don’t forget that tzatziki sauce! A sprinkle of feta over the top takes it to the next level. Bam! You did it!
Serving Suggestions
Presentation matters, even in comfort food! For serving, I recommend laying your pitas on a colorful platter, drizzling additional tzatziki sauce over the top, and sprinkling with crumbled feta. Feel free to add a side of Greek salad—chopped cucumbers, tomatoes, and olives dress with a bit of herb vinaigrette give a perfect balance.
If you’re feeling fancy, you could also serve it with some roasted lemon wedges on the side for an extra zing; they’re a lovely touch! Maybe throw on some fresh parsley for a pop of color, and there you have it—a dish that looks as good as it tastes!
Recipe Variations
Let’s shake things up! Here are a few ideas to customize your Crockpot Greek Chicken Pitas:
-
BBQ Greek Twist: Use BBQ sauce in place of some of the olive oil and spice mix. You’ll get a smoky flavor that complements the sweetness of the chicken beautifully.
-
Veggie Loaded: Toss in some bell peppers, zucchini, or mushrooms in with the chicken to amp up the veggie content.
-
Spicy Kick: Stir in some diced jalapeños or a spoonful of harissa to the marinade if you love some heat!
-
Mediterranean Bowl: Want to skip the pitas? Serve the chicken over rice, quinoa, or a fresh green salad for a nourishing meal.
-
Herb Lovers Dream: Add in fresh herbs like parsley or mint at the end to give your dish an even fresher pop!
Chef’s Notes
You know, this recipe has evolved beautifully over the years. I initially started making it without tzatziki, but there was always something about the creamy sauce that made it—it just belonged! I also experimented with different spices and marinade times, learning that at the heart of every great dish is patience and a pinch of love.
It’s always a hit at gatherings as a shared dish. Plus, if you have leftovers (which you might), the chicken and tzatziki actually taste even better the next day. Just be careful—it may disappear before you know it!
FAQs and Troubleshooting
1. Why is my chicken tough?
If your chicken doesn’t turn out tender, it might be due to not cooking it long enough. Slow cooking is key here—allow it to go for longer if necessary!
2. Can I use frozen chicken?
You certainly can, but I recommend thawing it first for best results. Cooking from frozen can lead to uneven temperatures and tougher meat.
3. How do I store leftovers?
Leftovers can be stored in an airtight container in the fridge for up to 4 days. It’s also freezer-friendly—just make sure to separate the chicken from the pitas and tzatziki!
4. What can I do if the tzatziki is too watery?
If your tzatziki comes out too watery, it might be from the cucumber. Be sure to squeeze out excess water from the diced cucumber before adding it to the yogurt—this will help maintain that creamy consistency.
Nutritional Info
While the specific nutritional values can vary based on your exact ingredients, general serving estimates for Crockpot Greek Chicken Pitas per serving (one pita with chicken and tzatziki) are:
- Calories: Approximately 400-500
- Protein: 30g
- Carbohydrates: 40g
- Fat: 18g
- Fiber: 3g
This dish offers a great source of lean protein and fresh veggies, making it a nutritious choice for lunch or dinner!
Final Thoughts
There you have it, my friends! A delicious journey into the world of Crockpot Greek Chicken Pitas with Tzatziki! I hope you get to try this recipe in your own kitchen and, more importantly, that it brings the same joy and warmth to your table as it has to mine.
Cooking is about more than just the food; it’s about sharing moments, laughter, and love with those you cherish the most. So, gather around, dig into these flavorful pitas, and spread the love. Until next time at Feastical, happy cooking and enjoy every bite!
Print
Crockpot Greek Chicken Pitas with Tzatziki
- Total Time: 6 hours 30 minutes
- Yield: 4 servings 1x
- Diet: Mediterranean
Description
A flavorful and easy-to-make dish featuring slow-cooked chicken, fresh veggies, and creamy tzatziki sauce wrapped in warm pitas.
Ingredients
- 2 pounds Boneless, Skinless Chicken Thighs
- 2 tablespoons Olive Oil
- Juice from 1 large Lemon
- 4 cloves Garlic, minced
- 2 teaspoons Dried Oregano
- 1 teaspoon Ground Cumin
- Salt and Pepper to taste
- 1 Red Onion, thinly sliced
- 2 Tomatoes, diced
- 1 Cucumber, diced
- 1 cup Feta Cheese, crumbled
- Pita Bread, for serving
Instructions
- Marinate Your Chicken: In a large bowl, combine chicken thighs with olive oil, lemon juice, minced garlic, oregano, cumin, salt, and pepper. Let sit for at least 30 minutes or overnight.
- Layer in the Ingredients: Place sliced red onion and diced tomatoes at the bottom of the crockpot. Add marinated chicken thighs on top.
- Cook Low and Slow: Cover and cook on low for 6-8 hours or high for 3-4 hours.
- Shred the Chicken: Once cooked, shred the chicken directly in the pot using two forks and stir to combine.
- Make the Tzatziki Sauce: In a mixing bowl, stir together diced cucumber, Greek yogurt, minced garlic, lemon juice, salt, and dill.
- Fill Those Pitas: Slice open pitas, fill with chicken mix, top with fresh cucumber and tzatziki sauce, and sprinkle with feta.
Notes
For enhanced flavor, marinate the chicken overnight. You can also customize the recipe by adding more veggies or spices according to your taste.
- Prep Time: 30 minutes
- Cook Time: 6 hours
- Category: Main Course
- Method: Slow Cooking
- Cuisine: Greek
Nutrition
- Serving Size: 1 pita
- Calories: 450
- Sugar: 5g
- Sodium: 500mg
- Fat: 18g
- Saturated Fat: 6g
- Unsaturated Fat: 8g
- Trans Fat: 0g
- Carbohydrates: 40g
- Fiber: 3g
- Protein: 30g
- Cholesterol: 90mg
Keywords: Greek chicken, slow cooker, pitas, tzatziki, Mediterranean recipe, easy dinner
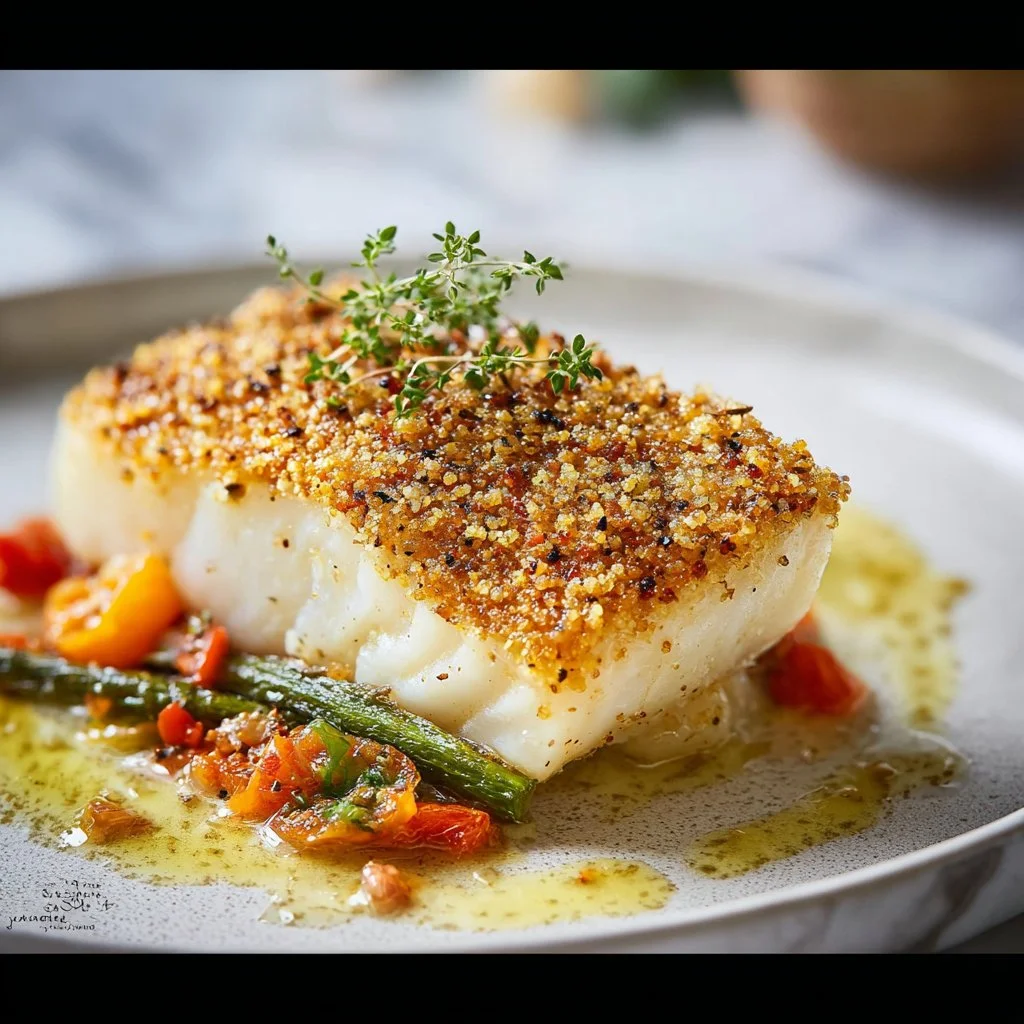
Parmesan-Crusted Sea Bass
Parmesan-Crusted Sea Bass: A Flavorful Catch You Can’t Miss!
Hey there, culinary explorers! It’s your pal Beau here, and today we’re diving into a dish that’s as delightful as it is elegant – Parmesan-Crusted Sea Bass! 🐟✨ If you’ve never tried this dish before, allow me to whisk you away on a flavorful journey that’ll have your taste buds dancing.
Picture this: it’s a cozy Friday evening, the kind where you want to impress without the fuss. Maybe a date night, a family gathering, or simply a treat for yourself after a long week. Well, with my Parmesan-Crusted Sea Bass, you’ll create an unforgettable meal that doesn’t involve hours in the kitchen or stressful prep work. This dish is hearty, beautiful, and brings that “wow” factor right to your dinner table!
But before we get into the nitty-gritty of the recipe, let me share a little backstory. Sea bass has long been a star on my family’s dinner table. From beachside trips to quaint little seaside restaurants, it was the go-to meal that would warm our hearts and our bellies. And with a crispy, cheesy crust and that rich, buttery lemon sauce, we took it to the next level of deliciousness! So, put on your apron, grab your spatula, and let’s get cooking!
Personal Story
I’ll never forget the first time I attempted to recreate my grandmother’s version of Parmesan-Crusted Sea Bass. It was a breezy summer evening, and our family had gathered at the beach for a reunion. As the sun dipped below the horizon, creating a canvas of pink and orange hues overhead, my grandmother took her spot by the grill, the incredible aroma of fish mingling with the salty sea air.
I watched closely as she seasoned the fillets with love, a sprinkle of salt here, a dash of pepper there, and then the pièce de résistance – a generous layer of crispy Parmesan. As she pulled those golden beauties off the grill, my heart raced with anticipation. That first bite was pure heaven! The fish melted in my mouth, the cheese adding a delightful crunch, and the buttery lemon sauce draped over it like a warm hug.
Ever since that magical evening, I’ve been on a mission to perfect this dish. Now, I’m sharing my version with you! So let’s roll up our sleeves and recreate that unforgettable moment together.
Ingredients
Here’s what you’ll need to whip up this delectable Parmesan-Crusted Sea Bass, along with a few tips to guide you:
-
2 sea bass fillets
Freshness is key! If you can get your hands on some wild-caught fillets, do it. They have a flavor that’s hard to beat. If sea bass isn’t available, you can substitute with snapper or tilapia. -
1/2 cup grated Parmesan cheese
Aging is everything! A fresh block of Parmesan, grated just before using, will provide a rich, nutty flavor that pre-grated cheese lacks. Go for the real deal here! -
1/4 cup breadcrumbs
These provide the crunch! Use panko for a lighter, flakier crust. If you’re gluten-free, feel free to switch to gluten-free breadcrumbs or crushed nuts for an extra crunch! -
2 tablespoons olive oil
A good-quality extra virgin olive oil not only enhances flavor but also helps in crisping the crust beautifully. If you’re feeling adventurous, swap it out for melted butter! -
Salt and pepper to taste
Seasoning is everything! Use sea salt and freshly cracked pepper for a pop of flavor that elevates the dish. -
1 lemon (for beurre blanc)
We’ll use both the zest and juice to infuse brightness! If you don’t have fresh lemons, a splash of white wine vinegar can work in a pinch but won’t pack the same punch! -
1/2 cup white wine
Use a dry white wine like Sauvignon Blanc or Pinot Grigio. What you cook with should be something you’d enjoy sipping too! -
1/2 cup heavy cream
This adds that rich, dreamy texture to our sauce! To lighten it up, use half-and-half or non-dairy alternatives, like coconut cream, but expect a flavor difference! -
1/4 cup (cold, cut into cubes) butter
Cold butter is crucial for our beurre blanc. It’ll create that creamy, velvety finish that makes you feel all the culinary feels! -
Roasted baby vegetables (such as carrots, zucchini, and bell peppers)
A rainbow of veggies provides color and loads of nutrients. Roasting brings out their natural sweetness! -
Basil oil (for drizzling)
A drizzle of basil oil adds a fragrant, herbaceous touch. You can easily make your own by blending basil with olive oil! -
Microgreens (for garnish)
These tiny greens pack a flavor punch and add a gourmet touch to your dish. Their peppery bite complements the richness beautifully! -
Parmesan tuile (for garnish)
This is purely for show! Making a tuile involves melting cheese into a crispy wafer, adding elegance to your plate!
Step-by-Step Instructions
Now that we have our ingredients ready, let’s roll up our sleeves and get cooking with this step-by-step breakdown!
-
Preheat the Oven
Preheat your oven to 400°F (200°C). This is important for achieving that perfect golden crust on your sea bass. Make sure to grab your trusty oven mitts – safety first! -
Prepare the Baking Sheet
Line a baking sheet with parchment paper. This helps with easy cleanup and prevents the fish from sticking. It’s a win-win situation! -
Season the Sea Bass
Pat your sea bass fillets dry with paper towels. This helps achieve that much-desired crispy exterior. Once dry, drizzle some olive oil on both sides, then sprinkle salt and pepper generously. Don’t be shy; this is where flavor starts! -
Mix the Crust
In a medium bowl, combine the grated Parmesan and breadcrumbs. This mixture will create the delightful crust we’re aiming for. Feel free to add a pinch of garlic powder or dried herbs if you want to amp up the flavor even more! -
Coat the Fillets
Take each fillet and press the Parmesan-breadcrumb mixture firmly onto the top side, creating a nice crust. Make sure it’s even, and don’t skimp – the more crust, the better! -
Bake the Fish
Place the prepared fillets on your baking sheet and pop them in the oven. Bake for about 15-20 minutes, or until the fish is opaque and the crust is golden brown. Keep an eye on it – every oven is a little different! -
Prepare the Beurre Blanc Sauce
While the fish is baking, let’s whip up that dreamy sauce. In a small saucepan over medium heat, combine the white wine and lemon juice. Allow it to simmer until it reduces by half. This intensifies the flavor! -
Add the Cream
Once reduced, stir in the heavy cream and let it simmer gently for another few minutes. Mix it well, and if you’re feeling fancy, add a dash of lemon zest for a brighter taste. -
Finish the Sauce
Reduce the heat to low, and start adding the cold butter cubes one at a time, whisking continuously until each piece is fully melted before adding the next. This creates that luscious, velvety texture we all crave in a beurre blanc sauce! -
Roast the Vegetables
In a separate baking dish, toss your baby vegetables with olive oil, salt, and pepper, and roast them in the oven for about 15 minutes or until they’re tender and have a bit of caramelization. Yum! -
Serve It Up
Once everything is ready, plate your beautiful sea bass on a bed of roasted veggies, and drizzle that silky beurre blanc sauce over the top. Garnish with a sprinkle of microgreens, a swirl of basil oil, and if you’re feeling adventurous, your homemade parmesan tuile!
Serving Suggestions
When it comes to plating, presentation is key! Aim to make your dish as eye-catching as it is delicious. Start with a generous spoonful of your beautifully roasted baby vegetables at the base of your plate. Place the Parmesan-crusted sea bass gently on top, ensuring that cheesy crust is visible for all to admire.
Once that’s done, take your luxurious beurre blanc sauce and drizzle it in a zig-zag pattern across the fish. This not only adds deliciousness but also an artistic touch! Finish with a delicate drizzle of basil oil and a scattering of microgreens for that fresh pop of color. The contrast of colors will make your dish a showstopper!
Pair your creation with a crisp salad or a side of fluffy quinoa if you desire something a bit lighter. And hey, don’t forget to pour yourself a glass of that white wine you used earlier – it’s the perfect accompaniment for this elegant meal!
Recipe Variations
Now, I know everyone has their own unique twist, right? Here are a few variations that you can try with this fabulous dish to cater to your taste and dietary preferences:
-
Herb-Crusted Variation:
Add finely chopped fresh herbs like parsley, dill, or thyme to your breadcrumb and Parmesan mixture for an herby kick! -
Spicy Twist:
If you want to spice things up, simply add some crushed red pepper flakes to the breadcrumb mixture. It’ll give your dish a lovely kick! -
Coconut-Crusted:
Substitute half the breadcrumbs with unsweetened coconut flakes for a tropical twist. This adds an unexpected flavor profile that’s simply divine! -
Vegetarian Option:
Try this same crust on sliced eggplant or zucchini for a vegetarian version! It’s just as satisfying and packed with flavor. -
Seafood Medley:
Want to go a bit more adventurous? Use a mix of sea bass, scallops, and shrimp with the Parmesan crust. The combination of flavors and textures will take your dish over the top!
Chef’s Notes
As I mentioned earlier, this recipe has a special place in my heart. Over the years, I’ve tweaked it every so often, with one major lesson learned: don’t rush the beurre blanc! It’s tempting to speed through that sauce, but it truly benefits from a little love and patience to achieve that rich, velvety texture.
And here’s a little chuckle for you – the first time I attempted this dish, I accidentally swapped vinegar for wine in the beurre blanc. Can you imagine my horror when I tasted the result? A total kitchen disaster, but hey – it taught me to double-check my ingredients!
FAQs and Troubleshooting
Q1: Why did my Parmesan crust not get crispy?
A: There are a few possibilities! Ensure your fillets are dry before applying the crust, and try broiling the dish for the last few minutes of cooking if it needs extra crispiness.
Q2: Can I make the beurre blanc sauce ahead of time?
A: Yes, but be careful! It’s best made fresh. If you need to make it ahead, keep it warm over low heat and whisk in a bit of water to re-emulsify before serving.
Q3: What do I do if the fish is overcooked?
A: Overcooked fish can dry out quickly. To salvage it, serve it over a creamy sauce or bed of mashed potatoes to help moisten it up!
Q4: What’s the best wine to use for cooking?
A: Choose a dry white wine with good acidity. It should be something you’d drink! Sauvignon Blanc or Chardonnay typically work wonderfully.
Nutritional Info
As we dive into the nutritional aspects of our glorious Parmesan-Crusted Sea Bass, here’s what you can look forward to:
- Calories: Approximately 450-550 per serving, depending on the portion size and how much sauce you use.
- Protein: Our sea bass is a fantastic source of lean protein. One serving typically boasts about 30 grams of protein!
- Fats: With the olive oil, butter, and cream, you’re looking at around 30 grams of fats, but many of these are healthy fats from the olive oil.
- Carbohydrates: With the breadcrumb crust and vegetables, you’ll get approximately 25 grams of carbs per serving.
- Vitamins and Minerals: Rich in Omega-3 fatty acids, vitamins A and C from the veggies, and calcium from that vibrant Parmesan.
And remember, with moderation, this dish can fit into a balanced diet – it’s all about enjoying the comfort food we love!
Final Thoughts
And there you have it, my friends: a stunning and scrumptious Parmesan-Crusted Sea Bass that’s sure to impress. Whether it’s a casual weeknight dinner or a special occasion, this dish brings soulfulness to the table. Cooking doesn’t need to be intimidating; it should reflect joy, love, and the art of sharing good food with good company.
So, what are you waiting for? Grab those ingredients, gather your friends or family, and experience the warmth and connection that comes with cooking and sharing a meal. Until next time, keep that fork ready and your spatula handy, and remember—every home can be a feast at any time! Happy cooking! 🍽️❤️
Print
Parmesan-Crusted Sea Bass
- Total Time: 45 minutes
- Yield: 2 servings 1x
- Diet: Paleo
Description
A delightful Parmesan-Crusted Sea Bass, perfect for impressing your guests and enjoying a cozy meal at home.
Ingredients
- 2 sea bass fillets
- 1/2 cup grated Parmesan cheese
- 1/4 cup breadcrumbs
- 2 tablespoons olive oil
- Salt and pepper to taste
- 1 lemon (for beurre blanc)
- 1/2 cup white wine
- 1/2 cup heavy cream
- 1/4 cup cold butter (cut into cubes)
- Roasted baby vegetables (such as carrots, zucchini, and bell peppers)
- Basil oil (for drizzling)
- Microgreens (for garnish)
- Parmesan tuile (for garnish)
Instructions
- Preheat your oven to 400°F (200°C).
- Prepare a baking sheet lined with parchment paper.
- Season the sea bass fillets by patting them dry, drizzling with olive oil, and sprinkling with salt and pepper.
- Mix the grated Parmesan and breadcrumbs in a medium bowl.
- Coat each fillet by pressing the Parmesan-breadcrumb mixture onto the top side.
- Bake the fish for 15-20 minutes until the fish is opaque and the crust is golden brown.
- Prepare the beurre blanc sauce by simmering white wine and lemon juice until reduced by half.
- Add heavy cream to the sauce and simmer gently.
- Finish the sauce by whisking in cold butter cubes until fully melted.
- Roast baby vegetables tossed in olive oil, salt, and pepper for about 15 minutes.
- Serve the sea bass on roasted veggies, drizzling with beurre blanc sauce and garnishing with microgreens and basil oil.
Notes
For added flavor, consider adding garlic powder or herbs to the breadcrumb mixture. Ensure the fish is dry for a crispier crust.
- Prep Time: 15 minutes
- Cook Time: 30 minutes
- Category: Main Course
- Method: Baking
- Cuisine: Seafood
Nutrition
- Serving Size: 1 fillet
- Calories: 500
- Sugar: 2g
- Sodium: 450mg
- Fat: 36g
- Saturated Fat: 18g
- Unsaturated Fat: 15g
- Trans Fat: 0g
- Carbohydrates: 25g
- Fiber: 3g
- Protein: 30g
- Cholesterol: 120mg
Keywords: sea bass, parmesan, seafood, baked fish, gourmet, elegant, dinner
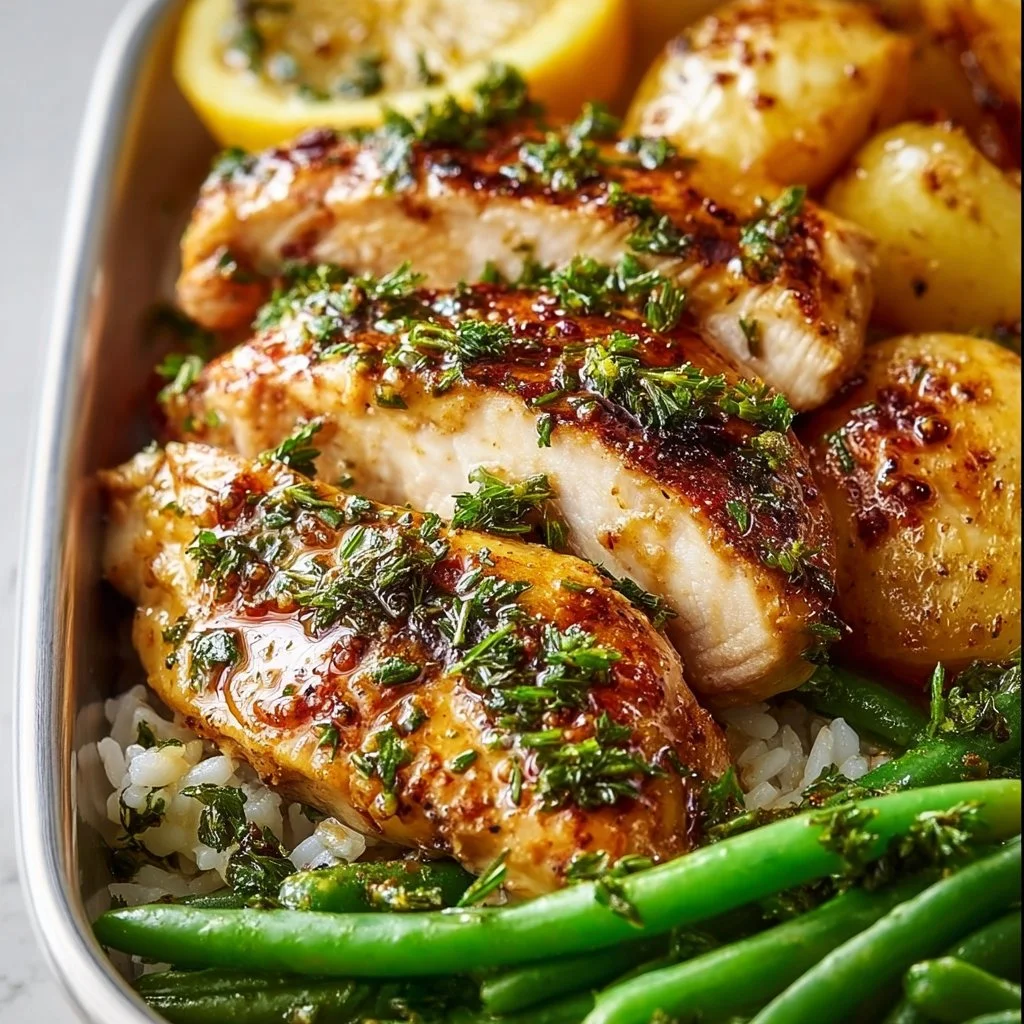
Lemon Garlic Chicken Bowl
# Lemon Garlic Chicken Bowl: A Fresh and Zesty Delight

## Introduction

Hey there, food lovers! Let’s talk about one of those dishes that embodies the spirit of comfort while being refreshingly light and zesty – the Lemon Garlic Chicken Bowl! If you’re anything like me, you love a meal that’s not only packed with flavor but also quick to whip up after a busy day. Think of this bowl as your go-to for a weeknight dinner that feels like a special occasion.

Imagine this: You walk through the door, and the tantalizing aroma of garlic and lemon greets you. It’s like a warm hug for your senses! This dish combines juicy, pan-seared chicken, vibrant vegetables, and nutty quinoa, all drizzled with a citrusy dressing that brightens up every bite. It’s also a forgiving recipe, so if you’re a budding chef still mastering that perfect sear, don’t worry – I’m here to guide you every step of the way!

In the spirit of sharing, I want to let you in on a little secret: this bowl isn’t just about feeding your hunger; it’s about bringing people together. I can’t count how many times I’ve gathered friends and family around my kitchen table, laughter echoing while we dig into generous portions of this colorful concoction. So, whether you’re looking to impress guests or simply treat yourself to something scrumptious, the Lemon Garlic Chicken Bowl is just the ticket!

Now, grab your spatula and let’s dive into this bright and flavorful creation that’s as easy to make as it is delightful to eat!

---

## Personal Story

Flashback to a sun-drenched Saturday afternoon at my grandmother’s house, where I had the privilege of witnessing the magic of home cooking. My grandma, with her apron tied snugly around her waist, would prepare simple yet flavorful meals. One dish stood out that day: her lemony garlic chicken.

As she sautéed the chicken, the kitchen instantly transformed into a haven filled with vibrant scents. I remember her saying, “Cooking is about love and sharing,” as she tossed in fresh herbs and zesty lemon slices. That day, we sat around a table, plates heaping with chicken and perfectly steamed veggies, and I felt a connection that only good food can create.

Years later, I channeled her warm, comforting vibes into this Lemon Garlic Chicken Bowl recipe. It’s not just a dish; it's a piece of nostalgia, a way for me to share those cherished moments with you, my fellow foodies. When you whip this up, I want you to feel that same warmth and togetherness, making memories of your own!

---

## Ingredients

Now that we're all warmed up, let’s gather the players for our Lemon Garlic Chicken Bowl. Here’s what you’ll need, along with some handy tips:

- **2 Chicken Breasts**
  - Fresh, boneless, and skinless is best. You can swap with thighs if you prefer dark meat for added flavor, or use tofu for a vegetarian option.

- **2 Tablespoons Olive Oil**
  - This versatile oil is what gives our chicken that beautiful golden crust. Feel free to use avocado oil if you like a higher smoke point or want a different flavor.

- **3 Cloves Garlic, Minced**
  - Fresh garlic is key! If you’re short on time, garlic powder works in a pinch (about 1 teaspoon for this recipe), but fresh is always the way to go for that intense flavor.

- **Juice of 1 Lemon**
  - Fresh lemon juice brightens every component of this dish. If you can’t find lemons, try lime juice for a fun twist!

- **Salt and Pepper to Taste**
  - Don’t skip this! Seasoning elevates your dish. I recommend using kosher salt and freshly cracked pepper for a punchier taste.

- **1 Cup Broccoli Florets**
  - Fresh or frozen works here. Broccoli gives a lovely crunch, but feel free to swap it for asparagus or snap peas for a different texture.

- **1 Bell Pepper, Sliced**
  - Use any color: red, yellow, or green! Bell peppers add sweetness and color. If you can’t find fresh, jarred roasted peppers can be a tasty alternative.

- **1 Cup Cooked Quinoa**
  - This super grain adds a delightful nuttiness and texture. If you’re looking for something different, brown rice or farro will work well too!

- **Fresh Parsley for Garnish**
  - A sprinkle of fresh herbs adds a beautiful finish. If you’re not into parsley, basil or cilantro would be fantastic alternatives!

---

## Step-by-Step Instructions

Let’s get cooking! Follow these steps for a delicious Lemon Garlic Chicken Bowl that’s sure to impress.

### Step 1: Prepare Your Ingredients
Before you start cooking, gather and prep everything. Dice your garlic, juice that lemon, chop the broccoli, slice the bell pepper, and cook your quinoa if you haven’t already. This makes the cooking process much smoother and way more enjoyable. Plus, you can dance around the kitchen while you prep—multitasking!

### Step 2: Season and Sear the Chicken
Heat the olive oil in a large skillet over medium-high heat. Once it's shimmering, season both sides of the chicken breasts liberally with salt and pepper (trust me, this makes a difference!). Place the chicken in the skillet, making sure not to crowd the pan. Sear for about 5–7 minutes on each side or until golden brown and cooked through (internal temperature should reach 165°F). Pro tip: Don’t flip too soon! Let it develop that delicious crust.

### Step 3: Add Garlic and Zest
When the chicken is almost done cooking, add minced garlic to the pan. Stir it around for about 30 seconds until fragrant, but keep an eye on it—garlic can burn quickly! Once the chicken is cooked, pour in the lemon juice, scraping up those tasty browned bits from the bottom of the pan. This adds more depth to your dish.

### Step 4: Toss in the Veggies
Remove the chicken from the skillet and let it rest on a plate. In the same skillet, toss in the prepared broccoli and bell pepper. Sauté for about 4–5 minutes until they’re tender-crisp and a vibrant color. You can add a splash of water to steam them if needed. Get those colors popping!

### Step 5: Assemble the Bowl
Now it’s time for the fun part! In a bowl, start with a generous serving of quinoa. Slice the seared chicken and arrange it on top. Add those beautiful sautéed veggies, then drizzle any remaining lemon-garlic juice from the pan over it all. Don’t skip this step; it’s what ties the entire dish together! Finish off with a sprinkle of fresh parsley.

---

## Serving Suggestions

When plating your Lemon Garlic Chicken Bowl, think about color and texture. Create a layered effect by first adding your quinoa, then the sliced chicken, followed by the bright veggies. A drizzle of extra olive oil and a few lemon wedges on the side make for a lovely presentation.

Consider serving this dish with a crisp green salad or a light, citrusy dressing to complement the flavors. It’s perfect for a quick lunch or dinner, and who doesn’t love a meal that looks as good as it tastes?

---

## Recipe Variations

Here are a few creative twists to bring new life to your Lemon Garlic Chicken Bowl:

1. **Mediterranean Flair**: Add kalamata olives and feta cheese for a Mediterranean vibe!

2. **Spicy Kick**: Toss in some red pepper flakes or sriracha to your chicken while it cooks for added heat.

3. **Citrus Mix**: Try using a mix of citrus juices – orange and lime alongside lemon for a tropical twist.

4. **Grain Swap**: Experiment with other grains like farro, couscous, or even brown rice for a different texture and flavor profile.

5. **Herb Infusion**: Ditch the parsley and use fresh dill or cilantro instead for a totally new flavor experience.

---

## Chef’s Notes

Throughout my journey in the culinary world, this Lemon Garlic Chicken Bowl has evolved into one of my all-time favorites. I used to make it in a hurry, often burning the garlic (oops!), but that just added to the charm of learning in the kitchen.

It’s a reminder that not every dish needs to be perfect; what matters is the joy it brings to those sharing it. Over time, I’ve tweaked the ingredients and tried various swaps, and I love that it accommodates everyone’s tastes.

So don’t be afraid to make this dish your own – it’s all about what makes you happy!

---

## FAQs and Troubleshooting

- **Q: My chicken is tough. What went wrong?**
  - A: Overcooking is likely the culprit! Make sure to use a meat thermometer to check for doneness without drying it out. Also, let the chicken rest afterward; it helps retain the juices.

- **Q: Can I make this ahead of time?**
  - A: Absolutely! You can cook the chicken and veggies and store them separately in the fridge. Just reheat when you’re ready to eat. Quinoa holds up well, too.

- **Q: What if I don’t have quinoa?**
  - A: No problem! You can use rice, couscous, farro, or even cauliflower rice for a low-carb option.

- **Q: How do I store leftovers?**
  - A: Store in an airtight container in the fridge for up to 3 days. Just note that the veggies may lose some crunch.

---

## Nutritional Info

One serving of this Lemon Garlic Chicken Bowl (approximately 1/4 of the recipe) provides a healthy balance of protein, vegetables, and wholesome grains. Here's a quick nutritional breakdown:

- **Calories**: Approximately 450
- **Protein**: 35g (from chicken and quinoa)
- **Carbohydrates**: 30g (primarily from quinoa and vegetables)
- **Fat**: 15g (mostly from olive oil)
- **Fiber**: 6g (thanks to broccoli and quinoa)

This dish is rich in vitamins, particularly from the veggies, and keeps you feeling full without weighing you down. Plus, it’s perfect for meal prep, keeping your nutrition on point throughout the week!

---

## Final Thoughts

Cooking is about exploration, sharing stories, and creating moments around the dinner table. I hope this Lemon Garlic Chicken Bowl not only fills your stomach but also warms your heart as you enjoy it with loved ones. Each bite is a fresh reminder of how food has the power to connect us.

So, gather your ingredients, put on your favorite tunes, and let your kitchen fill with laughter and the aroma of zesty goodness. Don’t forget to share your creations and stories, as I’d love to hear how your bowl turns out! Until next time, happy cooking, folks! Let’s dig in!

Lemon Garlic Chicken Bowl
- Total Time: 35 minutes
- Yield: 4 servings 1x
- Diet: Gluten-Free
Description
A fresh and zesty dish featuring pan-seared chicken, vibrant vegetables, and nutty quinoa, all drizzled with a citrusy lemon-garlic dressing.
Ingredients
- 2 Chicken Breasts, boneless and skinless
- 2 Tablespoons Olive Oil
- 3 Cloves Garlic, Minced
- Juice of 1 Lemon
- Salt and Pepper to Taste
- 1 Cup Broccoli Florets
- 1 Bell Pepper, Sliced
- 1 Cup Cooked Quinoa
- Fresh Parsley for Garnish
Instructions
- Prepare Your Ingredients: Gather and prep everything—dice garlic, juice lemon, chop broccoli, slice bell pepper, and cook quinoa.
- Season and Sear the Chicken: Heat olive oil in a skillet over medium-high heat, season chicken, and sear for 5–7 minutes on each side until cooked through.
- Add Garlic and Zest: When chicken is almost done, add minced garlic and sauté for 30 seconds, then add lemon juice.
- Toss in the Veggies: Remove chicken and sauté broccoli and bell pepper for 4–5 minutes.
- Assemble the Bowl: Start with quinoa, top with sliced chicken and sautéed veggies, and drizzle remaining lemon-garlic juice.
Notes
Feel free to swap chicken with tofu for a vegetarian option or experiment with different grains like brown rice or couscous.
- Prep Time: 15 minutes
- Cook Time: 20 minutes
- Category: Main Course
- Method: Pan-Seared
- Cuisine: American
Nutrition
- Serving Size: 1 serving
- Calories: 450
- Sugar: 2g
- Sodium: 350mg
- Fat: 15g
- Saturated Fat: 2g
- Unsaturated Fat: 10g
- Trans Fat: 0g
- Carbohydrates: 30g
- Fiber: 6g
- Protein: 35g
- Cholesterol: 75mg
Keywords: chicken, quinoa, lemon, garlic, healthy dinner, easy recipe
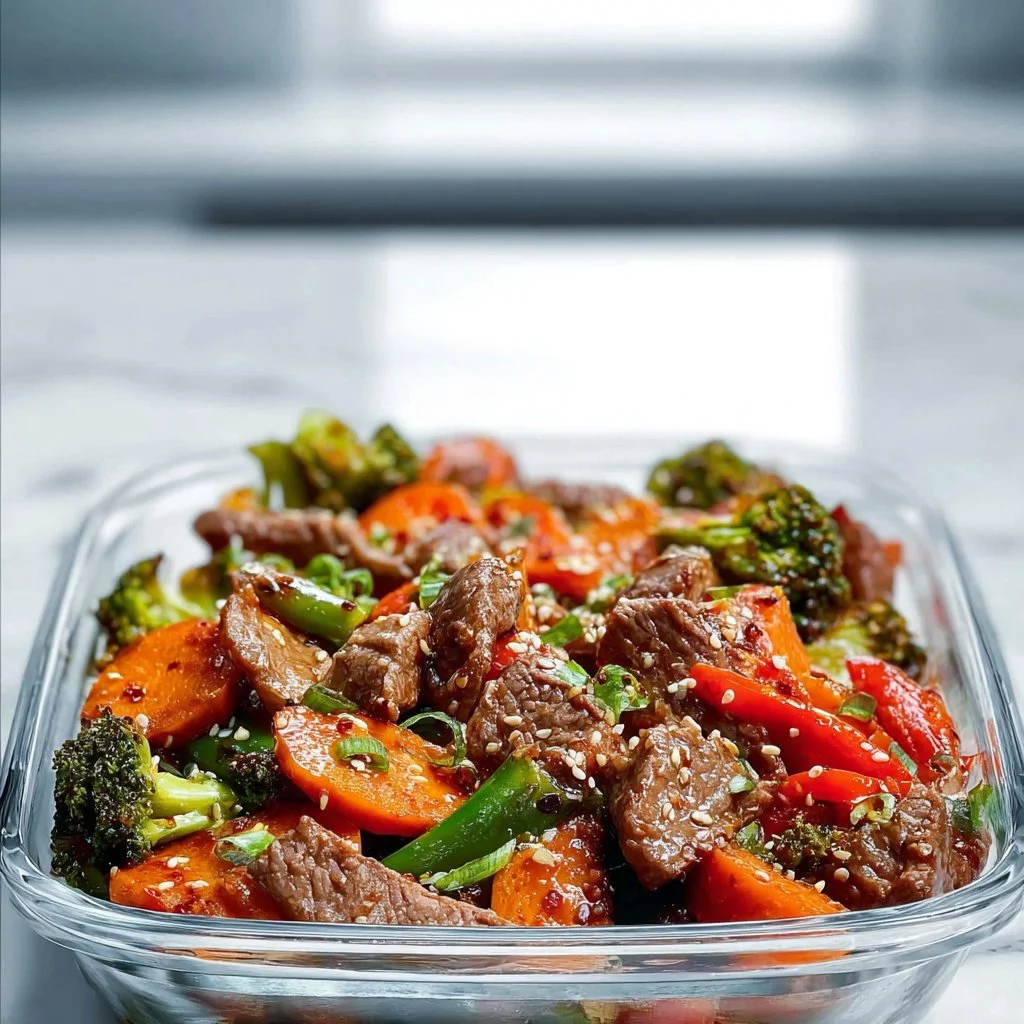
Super Easy Beef Stir Fry
Super Easy Beef Stir Fry: Your New Weeknight Wonder
Hey there, fellow food enthusiasts! It’s Beau Collier here, and I can’t wait to share a gem of a recipe that’s going to jazz up your weeknight dinners: Super Easy Beef Stir Fry. If you’re busy and looking for a dish that’s quick, delicious, and satisfies the soul, then this is it! There’s something about a sizzling stir fry that brings a burst of flavor and a sense of excitement to the dinner table, right? Let’s dive into this culinary adventure that’s not just easy on the eyes but also on your schedule.
Introduction: Sizzle and Pop in 30 Minutes or Less
Picture this: it’s a Wednesday night, and the clock is ticking. You’ve had a long day, and the last thing you want is to be in the kitchen for hours. Enter the stir fry—a magical way to transform a few fresh ingredients into a hearty meal in less than 30 minutes!
Stir frying is not only one of the quickest methods to whip up dinner, but it also allows you to play with flavors and textures to keep things interesting. That vivid, colorful plate can brighten even the gloomiest of days. Plus, with a couple of nifty tricks, anyone can master this technique—even if you think your cooking skills end at boiling water.
This recipe features tender beef sirloin paired with a medley of vibrant veggies, all coated in a savory sauce that will have your taste buds doing a happy dance. Yet, what I love most about stir fry is that it embodies comfort food without the guilt of hours spent slaving away in the kitchen. You can enjoy it from a bowl or plate, alone or with friends and family. Ready to get those chopping skills honed? Let’s do it!
Personal Story: The Family Kitchen Connection
Growing up, nothing screamed “family bonding” quite like our Sunday dinners. My mom had a magic touch with her wok, and her stir fry was legendary in our household. I remember standing on a stool beside her, eagerly watching as she tossed slices of marinated beef into that hot, sizzling pan. The aroma filled the kitchen, turning everything into a sensory playground.
We were a big family, so my mom always made a feast. The best part? Sibling rivalries over who could grab the most greens (because who doesn’t want to be a “veg champion,” right?) and the laughter that echoed as we caught up over each plate of colorful goodness. In hindsight, those meals taught me so much—about food, love, and how a simple dish could bring everyone together. It wasn’t just about eating; it was about enjoying that time together, and I hope this Super Easy Beef Stir Fry does the same for you and yours!
Ingredients: What You’ll Need and a Few Chef Tips
Here’s a sneak peek into my pantry for this stellar dish. Let’s chat through the ingredients so you know exactly what you need and some quick tips to keep in your back pocket:
-
1 lb beef sirloin, thinly sliced
Sirloin is lean and packs a great beefy flavor. If you’re looking for a budget-friendly option, flank steak or even chicken breast could be delicious substitutes. -
2 cups mixed vegetables (bell peppers, broccoli, carrots)
Mix it up! While bell peppers and broccoli are staples, feel free to add snap peas, zucchini, or bok choy for a pop of color and diversity. The more the merrier! -
2 tablespoons soy sauce
Soy sauce is your flavor king here, bringing that umami punch! Low-sodium soy sauce works great if you’re watching your salt intake; just keep an eye on the overall seasoning as you cook. -
1 tablespoon olive oil
This helps us get that sizzle going! You can always swap in sesame oil for an extra flavor kick, especially if you love that delightful nutty essence. -
1 clove garlic, minced
Garlic is the aromatic hero of many dishes. Fresh is best, but pre-minced garlic works in a pinch—just don’t tell my mom! -
1 teaspoon ginger, minced
Ginger adds a lovely zing! If you’re not a fan, you can skip it or use ginger paste as a time-saver. It’s packed with flavor and brings that refreshing warmth. -
Salt and pepper to taste
Keep it simple! You can tweak this duo to your liking, but I’d suggest starting light. You can always add more, but it’s hard to dial it back once it’s in there!
Step-by-Step Instructions: Let’s Get Cooking!
Alright, grab your favorite wok or large, sturdy skillet and let’s do this!
-
Prep Your Ingredients:
Start by slicing your beef into thin strips, about 1/4 inch thick. This will help it cook quickly and evenly. Chef tip: If your beef is slightly frozen, it will be easier to slice thinly. Just a quick 20 minutes in the freezer should do the trick! -
Heat the Wok:
Hit that burner to medium-high heat and let your wok or skillet become hot—this is key for a good stir fry. Add the olive oil, swirling it around to coat the pan. -
Cook the Beef:
Once the oil is shimmering, add the sliced beef in a single layer, and let it sear without stirring for about 1-2 minutes. This allows it to caramelize. After that, stir it every so often until it’s browned and cooked through, about 5 minutes. Chef hack: Doing this in batches can give your beef an even better texture, so if you have a lot, consider cooking it in two rounds. -
Add Aroma:
Toss in the minced garlic and ginger, stirring for about 30 seconds until fragrant (your kitchen will smell incredible!). This is the moment the dish really starts to come alive. -
Veggie Time:
Now it’s vegetable time! Add the mixed veggies to the pan, and stir them in. We want them to retain some crunch, so keep stirring for about 3-5 minutes until they’re bright and tender. -
The Sauce:
Drizzle the soy sauce over the beef and veggies, and toss everything together so each piece is coated in that yummy goodness. Cook for another minute to let the sauce glaze the ingredients. -
Taste & Adjust:
Here’s your chance! Give it a taste and see if it needs a pinch of salt or pepper. Maybe a splash more soy sauce? You’re the chef, so make it yours! -
Final Toss & Plate:
Once everything is sizzling and the colors are popping, it’s time to serve. Carefully plate your stir fry while it’s hot—let those vibrant colors shine!
Serving Suggestions: How to Present Your Creation
Plating is everything, my friends! Here are some ideas to make your stir fry look as good as it tastes:
- Rice Base: Serve your stir fry over fluffy white rice, brown rice, or even quinoa for a nutritious twist.
- Bowl It Up: Use a deep bowl if you’ll be enjoying dinner with a spoon. Garnish with sesame seeds for an elegant touch.
- Wrap It Up: Looking for a unique way to serve? Try using large lettuce leaves to create wraps. Fill ’em up with stir fry for a fun, low-carb option!
- Garnish: A sprinkle of green onions or a handful of crushed peanuts on top can elevate the dish and add extra flavor and crunch.
Recipe Variations: Switch It Up!
The beauty of stir fry is its versatility! Here are some twists to make this dish your own:
- Saucy Variation: Add a tablespoon of oyster sauce for a richer flavor profile.
- Sweet and Spicy: Toss in a teaspoon of chili paste or sriracha for a kick of heat! Balance it with a splash of honey to even things out.
- Vegetarian Delight: Swap the beef for tofu and add extra veggies like mushrooms and bok choy.
- Curry Twist: Add a splash of coconut milk and a tablespoon of curry powder for a deliciously aromatic spin on this stir fry.
- Herb Infusion: Fresh herbs like basil or cilantro can elevate the flavor profile. Add them just before serving for a refreshing touch!
Chef’s Notes: A Dish of Growth
One of the things I love most about cooking is how it allows us to grow and learn. This Super Easy Beef Stir Fry has evolved from those family dinners to being my go-to dish whenever I have hungry guests or need a quick meal fix. The method is so forgiving, and I get to play with flavors every time I make it.
Isn’t it amazing how food is more than just sustenance? It’s a way to connect, celebrate, and make memories. I still hear my mom’s laughter and feel her love every time I whip up a stir fry. Cooking is a beautiful journey, and I’m so grateful to share it with you.
FAQs and Troubleshooting
Here are some common questions I get about stir fry and a few tips on avoiding potential pitfalls:
-
Why is my stir fry watery?
Ensure you’re cooking on high heat and not overcrowding the pan! If it’s too crowded, the ingredients steam instead of sear. Consider cooking in batches. -
Can I prep this ahead of time?
Absolutely! You can slice your veggies and beef the night before. Just store them separately in the fridge to keep them fresh. -
What if my beef is tough?
When slicing, always cut against the grain. This will help keep it tender. Also, marinating your beef in soy sauce and a bit of cornstarch for 15 minutes before cooking can really help. -
How can I store leftovers?
Place any leftovers in an airtight container and refrigerate for up to 3 days. Reheat on the stove for the best texture.
Nutritional Info
While comfort food often comes laden with calories, this Super Easy Beef Stir Fry packs in the nutrition without compromising on flavor:
- Calories: Approximately 350-400 per serving (based on 4 servings)
- Protein: 30g (thanks to the beef!)
- Carbohydrates: 30g
- Fiber: 6g (varies with the type and amount of veggies)
- Fat: 15g (mostly from olive oil)
Feel free to customize to your dietary needs by swapping out proteins or adjusting the oil content!
Final Thoughts
So there you have it—a delightful journey into the world of stir fry! I hope this Super Easy Beef Stir Fry finds a special place in your kitchen and becomes your trusty weeknight go-to. Remember, cooking is all about joy, creativity, and, of course, a dash of love. Don’t shy away from experimenting, tweaking, and making this dish uniquely yours.
Now, get chopping, stir-frying, and make some memorable meals with the ones you love. I can’t wait to hear about your own culinary adventures! Until next time, happy cooking, friends! 🍽️✨
Print
Super Easy Beef Stir Fry
- Total Time: 30 minutes
- Yield: 4 servings 1x
- Diet: Low-Carb
Description
A quick and delightful beef stir fry featuring tender beef sirloin and a medley of vibrant veggies, all coated in a savory sauce.
Ingredients
- 1 lb beef sirloin, thinly sliced
- 2 cups mixed vegetables (bell peppers, broccoli, carrots)
- 2 tablespoons soy sauce
- 1 tablespoon olive oil
- 1 clove garlic, minced
- 1 teaspoon ginger, minced
- Salt and pepper to taste
Instructions
- Prep your ingredients by slicing the beef into thin strips, about 1/4 inch thick.
- Heat the wok over medium-high heat and add the olive oil.
- Cook the sliced beef in a single layer for about 1-2 minutes, then stir until browned, about 5 minutes.
- Add the minced garlic and ginger, stirring for about 30 seconds until fragrant.
- Veggie time! Add mixed veggies and stir for about 3-5 minutes until bright and tender.
- Drizzle the soy sauce over the beef and veggies, toss to coat, and cook for another minute.
- Taste the stir fry and adjust seasoning if needed before serving.
- Plate the stir fry while hot and enjoy!
Notes
Cooking in batches can improve the texture of the beef. You can personalize the stir fry with different veggies or proteins.
- Prep Time: 10 minutes
- Cook Time: 20 minutes
- Category: Main Course
- Method: Stir Fry
- Cuisine: Asian
Nutrition
- Serving Size: 1 serving
- Calories: 375
- Sugar: 5g
- Sodium: 600mg
- Fat: 15g
- Saturated Fat: 2g
- Unsaturated Fat: 10g
- Trans Fat: 0g
- Carbohydrates: 30g
- Fiber: 6g
- Protein: 30g
- Cholesterol: 70mg
Keywords: beef, stir fry, weeknight dinner, quick recipe, Asian cuisine

High Protein Honey BBQ Chicken Mac & Cheese Meal Prep
High Protein Honey BBQ Chicken Mac & Cheese Meal Prep: A Deliciously Cozy Dish
Hey there, food lovers! It’s your favorite kitchen companion, Beau Collier, and today we’re diving into a comfort food classic with a healthy twist—High Protein Honey BBQ Chicken Mac & Cheese! Now, if you’re like me, the thought of gooey cheese enveloping perfectly cooked pasta sparks joy like nothing else. Add in some savory chicken and a hint of sweetness from honey BBQ sauce, and you’ve got yourself a dish that not only ticks all the boxes for comfort and flavor but is also packed with protein to fuel your day.
As life gets busier and we find ourselves juggling work, family, and everything in between, meal prep has become our culinary secret weapon. This dish is not just a mouthwatering meal; it’s a smart and deliberate way to ensure that you’re eating right while making your life just a tad easier. With this recipe, you can whip up a week’s worth of lunches or dinners in one appliance—your trusty oven, stovetop, or slow cooker. So, grab your spatula and let’s get cooking!
And I promise you, this isn’t just any mac and cheese. This is a love letter to the classic family favorite, elevated with the goodness of chicken and delightful honey BBQ flavors. Whether you’re meal prepping for the week or just treating yourself after a long day, this dish is all about that warm hug you get from good food. Let’s dig in!
Personal Story
I’ll never forget the first time I made mac and cheese for my family. I was just a wide-eyed kid standing on a stool to reach the stove, decked out in my superhero apron. My mission? To recreate the cheesy magic my mom always had up her sleeve. I grabbed elbow macaroni, a couple of blocks of cheese, and way too much milk. You can guess how well that went!
Fast forward to my teenage years, and I started getting creative in the kitchen. One experimental week, I decided to add BBQ chicken, thinking, “Why not?” and it was a hit! My family devoured it, and I couldn’t believe how something as simple as mac and cheese could be so versatile. That day sparked a love for combining flavors that drove me to create the delightful, health-conscious version I’m sharing with you today. Fast forward to now, and here I am, ready to share this powerhouse dish that packs the nostalgia of childhood with the nutrition we crave as adults.
Ingredients
Here’s what you’ll need for this High Protein Honey BBQ Chicken Mac & Cheese:
-
2 cups macaroni
- Chef Insight: Macaroni is the classic choice, but feel free to swap it for whole grain or gluten-free pasta for a health boost or dietary needs.
-
1 pound chicken breast, cooked and shredded
- Substitution Tips: If you’re short on time, rotisserie chicken or canned chicken will work perfectly. Just make sure to shred it for that perfect blend with the macaroni.
-
1 cup low-fat cheese
- Quick Note: Cheddar cheese is my go-to for that classic flavor, but you can also mix it up with mozzarella or gouda for a unique twist!
-
1/2 cup BBQ sauce
- Chef’s Insight: I love a tangy sauce! If you’re looking for a different flavor profile, experiment with honey mustard or hot sauce for a kick!
-
1 tablespoon honey
- Substitution Tips: If you’re feeling adventurous, try maple syrup or agave for a different sweetness!
-
1 cup milk
- Quick Note: Almond milk or any milk alternative can replace dairy milk while maintaining creaminess.
-
Salt and pepper to taste
- Chef Insight: Always season your pasta water; it makes a world of difference in flavor!
-
Optional toppings:
- Green onions: For a fresh crunch and color.
- Extra cheese: Because who doesn’t love more cheese?
Step-by-Step Instructions
Step 1: Cook the Macaroni
Bring a large pot of salted water to a boil. Add your macaroni and cook until al dente, about 8 minutes. Chef Tip: Reserve a cup of pasta water before draining! This liquid will help create a beautiful sauce later on.
Step 2: Prepare the Chicken
While your pasta is cooking, shred your cooked chicken breast. You can do this easily with two forks or in a stand mixer—just make sure it’s all nicely shredded to mix well with the mac and cheese later. If you’re using a store-bought option, simply measure out your portion.
Step 3: Create the Sauce
In a medium saucepan over medium heat, combine the BBQ sauce, honey, and milk. Stir gently until everything is well combined and heated through. Little Chef Hack: If you want to thicken your sauce a bit, add a small cornstarch slurry (mix a tablespoon of cornstarch with a tablespoon of water) and stir until it thickens.
Step 4: Combine Everything
In a large mixing bowl, combine the drained macaroni, shredded chicken, and the luscious BBQ sauce mixture. Add in your cheese and mix everything until well coated. If your mixture seems a bit dry, don’t hesitate to add a splash of the reserved pasta water to achieve your desired creaminess.
Step 5: Bake (Optional)
Transfer your mixture to a baking dish, top with extra cheese, and bake at 350°F (175°C) for about 20 minutes, or until bubbly and golden brown. If you like a little crust, broil it for the last minute or two. Just keep an eye on it so it doesn’t burn!
Step 6: Serve and Enjoy!
Once your mac and cheese is out of the oven, let it sit for about 5 minutes. This will help the flavors meld together and make serving a breeze. Top with optional green onions or extra cheese for a delightful finishing touch before diving in!
Serving Suggestions
There are a million ways to enjoy this High Protein Honey BBQ Chicken Mac & Cheese! Serve it in a cozy bowl, garnished with green onions for a pop of color. Pair it with a fresh green salad to balance the richness, or why not throw in some steamed veggies on the side? For casual dinners, serving it in a deep dish with some crusty bread on the side makes for the perfect family feast.
If you’re meal prepping, portion it out in airtight containers for easy grab-and-go meals throughout the week. Just reheat in the microwave for a delightful lunch that makes your coworkers envious!
Recipe Variations
-
Buffalo Chicken Mac: Swap in buffalo sauce for the BBQ sauce for a spicy kick. Add a dollop of blue cheese dressing on top!
-
Vegetarian Delight: Replace chicken with roasted vegetables or protein-rich chickpeas for a vegetarian option without losing flavor.
-
Cheesy Broccoli Mac: Stir in steamed broccoli florets for an extra serving of greens, plus they add a nice crunch.
-
Tex-Mex Twist: Incorporate black beans, corn, and a sprinkle of taco seasoning for a southwest flair.
-
Pesto Bliss: Instead of BBQ sauce, mix in your favorite pesto for an Italian-inspired comfort dish.
Chef’s Notes
As with all my recipes, this one has evolved over time. I originally created it without any thought of the high protein aspect, focusing solely on comfort food. But as I started meal prepping for an active lifestyle, the need to include solid proteins became evident. It’s been a joy finding ways to enjoy classic favorites while staying true to nutritional goals. I still remember that first bite, sharing it with my family, and knowing we all found joy in the flavors. Cooking has a funny way of taking you back, doesn’t it?
FAQs and Troubleshooting
1. My mac and cheese turned out too dry. What happened?
If your dish is dry, it may be due to not enough liquid in your sauce mixture. Try adding a bit more milk or reserved pasta water next time.
2. Can I freeze leftovers?
Absolutely! This dish freezes well. Just store it in an airtight container and reheat thoroughly when you’re ready to enjoy it again.
3. How can I make it spicier?
For an added kick, toss in some diced jalapeños or a spicy BBQ sauce.
4. What if I don’t have BBQ sauce?
You can use any sauce of your choice, like teriyaki for a sweet Asian twist or even just plain tomato sauce in a pinch!
Nutritional Info
While I’m not a nutritionist, I like to think about how the ingredients come together for a wholesome meal. This High Protein Honey BBQ Chicken Mac & Cheese is loaded with lean chicken breast and a decent amount of cheese, giving you about 25g of protein per serving. Coupled with the fiber from macaroni and any veggies you throw in, this meal offers a satisfying blend of macronutrients to keep you full and energized.
Each serving generally contains:
- Calories: 450-500
- Protein: ~25g
- Carbohydrates: ~50g
- Fat: ~15-20g
Of course, numbers can vary based on ingredients and measurements, but isn’t the focus on balance rather than perfection?
Final Thoughts
Cooking is an adventure, and I hope this High Protein Honey BBQ Chicken Mac & Cheese becomes one of your go-to recipes! With its rich flavors and comforting nature, this dish embodies everything I love about food—family, togetherness, and that magical ability to make us feel at home, no matter where we are. I can’t wait for you to try it out and hear how it turns out! Whether you’re savoring it on a busy weekday, indulging in it during a cozy movie night, or prepping it for your week ahead, remember: good food should always bring a smile. So let’s keep cooking, experimenting, and sharing the love of food with one another. Happy eating!
Print
High Protein Honey BBQ Chicken Mac & Cheese
- Total Time: 45 minutes
- Yield: 4 servings 1x
- Diet: High Protein
Description
A comfort food classic elevated with protein-packed chicken and delicious honey BBQ flavors, perfect for meal prep.
Ingredients
- 2 cups macaroni
- 1 pound chicken breast, cooked and shredded
- 1 cup low-fat cheese
- 1/2 cup BBQ sauce
- 1 tablespoon honey
- 1 cup milk
- Salt and pepper to taste
- Optional toppings: Green onions, Extra cheese
Instructions
- Cook the macaroni by bringing a large pot of salted water to a boil, adding macaroni, and cooking until al dente, about 8 minutes.
- Prepare the chicken by shredding the cooked chicken breast with two forks or in a stand mixer.
- Create the sauce by combining the BBQ sauce, honey, and milk in a medium saucepan over medium heat, stirring until heated through.
- Combine everything by mixing the drained macaroni, shredded chicken, BBQ sauce mixture, and cheese in a large bowl until well coated.
- Transfer the mixture to a baking dish, top with extra cheese, and bake at 350°F (175°C) for about 20 minutes until bubbly.
- Serve and enjoy! Let it sit for about 5 minutes, then top with green onions or extra cheese if desired.
Notes
Feel free to swap the macaroni for whole grain or gluten-free pasta. For a spicy kick, substitute BBQ sauce with buffalo sauce.
- Prep Time: 15 minutes
- Cook Time: 30 minutes
- Category: Main Course
- Method: Baking
- Cuisine: American
Nutrition
- Serving Size: 1 serving
- Calories: 450
- Sugar: 10g
- Sodium: 600mg
- Fat: 18g
- Saturated Fat: 8g
- Unsaturated Fat: 8g
- Trans Fat: 0g
- Carbohydrates: 52g
- Fiber: 2g
- Protein: 25g
- Cholesterol: 60mg
Keywords: mac and cheese, meal prep, chicken, BBQ, comfort food

How to Meal Prep – Healthy Chicken Parmesan
How to Meal Prep: Healthy Chicken Parmesan
Hey there, fellow food lovers! I’m Beau Collier, and I’m thrilled to have you join me on this delicious journey towards mastering the art of meal prep with one of my all-time favorites: Healthy Chicken Parmesan.
Meal prepping can feel daunting, but it doesn’t have to be! Especially when you’re making a dish that’s not only nutritious but also unbelievably satisfying! Picture it: crispy, tender chicken coated in a golden crust, topped with fresh tomato sauce, and a sprinkle of cheese; it’s comfort food at its finest! And we’re doing it with a healthier twist that’s going to make your taste buds dance.
Whether you’re a busy parent trying to keep your family’s meals wholesome, a fitness enthusiast looking to stay on track, or simply someone who loves good food (who doesn’t?), this Healthy Chicken Parmesan meal prep is going to meet all your needs, and then some!
A Taste of Nostalgia
Let me take you back a bit. Growing up, Sundays at my grandmother’s house were a sacred tradition! The house would fill with simmering tomato sauce, and the aroma of cheesy goodness wafted through the air. My grandmother had a magic touch with her Chicken Parmesan. I remember standing on a stool next to her, watching those chicken breasts transform from plain to perfection as she coated them in breadcrumbs and herbs.
She always said, “Cooking is like love; it should be entered into with abandon or not at all.” And she poured every ounce of love—and garlic—into those meals. I’ve carried that spirit with me ever since. Today, we’re putting that nostalgic dish into a meal prep version, making it not just memory-worthy but also a friendlier fit for our health-conscious dinners.
Ingredients
Now let’s get into the mix. Here’s what you’re going to need for this blissful concoction:
-
4 boneless, skinless chicken breast halves
Chef Insight: Chicken breasts are lean sources of protein, perfect for meal prep. Feel free to swap in turkey cutlets if you prefer! -
1 cup almond meal
Tip: This gluten-free alternative to breadcrumbs adds a slightly nutty flavor and is a fantastic low-carb option. If you’re not gluten-sensitive, feel free to use whole wheat breadcrumbs! -
1/4 cup chickpea flour
Substitution Tip: Chickpea flour is great for adding a gluten-free crunch. You can replace it with your favorite flour or use an equal part of oat flour! -
1 tbsp dried oregano
Flavor Insight: Dried oregano brings a lovely Mediterranean touch. Fresh oregano can be substituted for a fresher taste if you have it on hand! -
1 tbsp dried basil
Fun Fact: If you throw in some fresh basil instead, you might just transport yourself back to Italy with every bite! -
1 tbsp dried thyme
Option: Feel free to swap this with Italian seasoning for an extra punch of flavor. -
2 tsp garlic powder
Chef’s Tip: Garlic powder is versatile; increase the amount if you’re like me and love that garlicky goodness! You can even use fresh minced garlic for a stronger kick. -
1 1/2 tsp sea salt
Cooking Hack: Salt enhances flavors, but don’t overdo it! It’s key when you’re coating your chicken. -
1 tsp ground black pepper
Pro Tip: Freshly ground black pepper takes the flavor to a whole new level! -
2-4 tbsp olive oil
Healthy Swap: Olive oil keeps things moist and adds a touch of healthy fat. Canola or avocado oil can work in a pinch. -
1 (25-oz) jar of tomato sauce
Advice: Choose a brand with no added sugars or make your own for a personalized touch! -
2 tbsp grated Parmesan cheese
Tip: You can use nutritional yeast for a cheesy flavor without the dairy if you’re vegan! -
4 medium zucchini
Why Zucchini? These can serve as a healthy pasta alternative, but feel free to use whole grain spaghetti if you’re not keen on zoodles! -
1 tbsp olive oil (for zoodles)
Tip: This will help roast and bring out the flavor of your zoodles! -
1/2 tsp sea salt
-
1/2 tsp black pepper
-
1/4 tsp garlic powder
And that’s the list! Gather your ingredients, and let’s turn them into something spectacular.
Step-by-Step Instructions
Ready to get cooking? Here’s how we’re going to pull this meal together!
1. Preheat Your Oven
Instructions: Preheat your oven to 400°F (200°C).
Chef Hack: This is essential! A hot oven guarantees that your chicken will cook evenly and get that perfect crispy coating we all crave.
2. Prepare the Chicken
Instructions: Place the chicken breasts between two sheets of plastic wrap and pound them gently with a meat mallet (or a rolling pin) until they’re about 1 inch thick.
Why Pound? This not only tenderizes the meat but allows for even cooking.
3. Create the Coating
Instructions: In a large bowl, mix together almond meal, chickpea flour, oregano, basil, thyme, garlic powder, salt, and black pepper.
Chef Note: You want a beautiful herb blend that sticks to your chicken and marks the beginning of its transformation.
4. Coat the Chicken
Instructions: Drag each chicken breast through the olive oil, making sure to coat it well before pressing it into the flour mixture on both sides.
Chef Tip: Don’t be shy with the coating! This is where all that flavor lies.
5. Arrange & Bake
Instructions: Place the coated chicken on a parchment-lined baking sheet and lightly drizzle with olive oil. Bake for about 20-25 minutes or until golden brown and the internal temperature reaches 165°F (75°C).
Cooking Insight: This method lets the chicken crisp up while keeping it juicy!
6. While the Chicken Bakes
Instructions: In the meantime, heat a skillet over medium heat, add more olive oil, and sauté your zucchini noodles (or whatever noodles you’re using) with salt, black pepper, and garlic powder for about 3-4 minutes or until tender.
Zucchini Hack: Don’t overcook—keep them al dente for a satisfying bite!
7. Assembly Time
Instructions: Once your chicken is perfectly baked, spread a generous layer of tomato sauce over each piece and top with Parmesan cheese. Return to the oven for an additional 5-10 minutes until the cheese is melted and bubbly.
Final Touch: You could even pop it under the broiler for a minute for that extra golden finish!
8. Serve It Up
Instructions: On a plate, serve your crispy chicken over the sautéed zucchini noodles, garnished with fresh basil if you have it.
Plating Hack: A drizzle of balsamic reduction over the top can make a fabulous, fancy presentation without much effort!
Serving Suggestions
Alright, my fellow foodies! When it comes to serving, presentation matters. You can make this meal absolutely swoon-inducing with just a few touches. Here’s how I like to serve it up:
- Color Splash: Garnish your plate with fresh basil leaves or even a sprinkle of microgreens. A pop of green brightens up the plate beautifully.
- Side Love: Serve with a side salad or some garlic bread (whole grain or gluten-free options are fantastic!) for an extra twist on the classic Italian meal.
- Meal Prep Container Tip: If you’re packing this for later, consider stacking the zoodles on the bottom, topped with the chicken parmesan. This way, the sauce adds moisture without making everything soggy.
Recipe Variations
I believe in versatility, and my kitchen is never one-note! Here are a few creative twists you might consider for your Healthy Chicken Parmesan:
-
Pesto Chicken Parmesan: Spread a layer of basil pesto over the chicken before adding the tomato sauce. It adds a fresh brightness that’s divine!
-
Spicy Variation: Toss some red pepper flakes into your almond meal mixture for an extra kick!
-
Cheesy Chicken Zucchini Bake: Instead of the layered plate, cube the chicken and mix everything in a baking dish with additional veggies like bell peppers or spinach and bake it all together.
-
No Frying, All Baking: If you’re looking to cut even more calories, omitting the almond meal coating will still yield flavorful, juicy chicken. Just roast it directly with the sauce on top!
-
Vegan Delight: For a completely plant-based twist, swap the chicken for chickpea patties or baked tofu sprinkled with nutritional yeast.
Chef’s Notes
Over the years, my recipe for Chicken Parmesan has undergone many playful transformations as my palate evolved. I’ve experimented with different coatings, vegetable pairings, and sauces. One time, I accidentally grabbed the cinnamon instead of garlic powder—it was an adventure in the kitchen, to say the least! But that’s the beauty of cooking; sometimes the “oops” moments can lead to authentic discoveries.
Why Meal Prep?
Meal prepping isn’t just about saving time; it’s about making healthier choices effortlessly. When you have a satisfying dish like this ready to go, it’s easier to skip the drive-thru. My grandmother’s Chicken Parmesan taught me that food isn’t just fuel; it’s something to be shared and celebrated, so let’s make it accessible every day.
FAQs and Troubleshooting
Let’s address a few common questions and potential hiccups you might run into while cooking up a storm:
1. Why is my chicken dry?
Cook times can vary based on the thickness of your chicken breasts. Be sure to check the internal temperature and remove it promptly from the oven when it hits 165°F (75°C). Also, let it rest for a few minutes before slicing to retain moisture!
2. Can I make this dish gluten-free?
Absolutely! With almond meal and chickpea flour, this recipe is already gluten-free. Just ensure your sauce doesn’t have any hidden gluten ingredients!
3. How long can I keep my meal prepped chicken?
Stored in an airtight container, your Chicken Parmesan will last 4-5 days in the fridge. Reheat in the oven or microwave and enjoy!
4. Can I freeze it?
Yes! You can freeze cooked chicken parmesan. It might lose a bit of its crunch upon reheating, but you’ll still have that wonderful flavor to savor later on.
Nutritional Information
Let’s talk numbers! Here’s what you’re looking at per serving for this Healthy Chicken Parmesan:
- Calories: ~350
- Protein: 38g
- Carbohydrates: 12g
- Fats: 18g
- Fiber: 3g
Keep in mind, nutrition may vary based on portion sizes and specific ingredients used!
Final Thoughts
And there you have it! A delightful, healthy twist on your beloved Chicken Parmesan—made easy for meal prep. The best part? Not only are you saving your time, but you’re also creating meals that nourish your body and warm your heart.
So, whether you’re indulging alone or sharing with loved ones, I hope this recipe brings a little joy to your table, just like my grandmother’s dishes did for me. Now, get out there, whip up some Chicken Parmesan, and let yourself bask in the warm flavors and beautiful memories that food can create!
Happy cooking, friends! Let’s feast! 🍽️
Print
Healthy Chicken Parmesan
- Total Time: 45 minutes
- Yield: 4 servings 1x
- Diet: Gluten-Free
Description
A nutritious and satisfying twist on classic Chicken Parmesan, perfect for meal prep.
Ingredients
- 4 boneless, skinless chicken breast halves
- 1 cup almond meal
- 1/4 cup chickpea flour
- 1 tbsp dried oregano
- 1 tbsp dried basil
- 1 tbsp dried thyme
- 2 tsp garlic powder
- 1 1/2 tsp sea salt
- 1 tsp ground black pepper
- 2–4 tbsp olive oil
- 1 (25-oz) jar of tomato sauce
- 2 tbsp grated Parmesan cheese
- 4 medium zucchini
- 1 tbsp olive oil (for zucchini)
- 1/2 tsp sea salt
- 1/2 tsp black pepper
- 1/4 tsp garlic powder
Instructions
- Preheat your oven to 400°F (200°C).
- Place the chicken breasts between two sheets of plastic wrap and pound them gently with a meat mallet until they’re about 1 inch thick.
- In a large bowl, mix together almond meal, chickpea flour, oregano, basil, thyme, garlic powder, salt, and black pepper.
- Drag each chicken breast through the olive oil, making sure to coat it well before pressing it into the flour mixture on both sides.
- Place the coated chicken on a parchment-lined baking sheet and lightly drizzle with olive oil. Bake for about 20-25 minutes or until golden brown and internal temperature reaches 165°F (75°C).
- In the meantime, heat a skillet over medium heat, add more olive oil, and sauté your zucchini noodles with salt, black pepper, and garlic powder for about 3-4 minutes or until tender.
- Once your chicken is perfectly baked, spread a generous layer of tomato sauce over each piece and top with Parmesan cheese. Return to the oven for an additional 5-10 minutes until the cheese is melted and bubbly.
- On a plate, serve your crispy chicken over the sautéed zucchini noodles, garnished with fresh basil if desired.
Notes
Meal prep in airtight containers can last 4-5 days in the fridge. Can also be frozen for later enjoyment.
- Prep Time: 15 minutes
- Cook Time: 30 minutes
- Category: Main Course
- Method: Baking
- Cuisine: Italian
Nutrition
- Serving Size: 1 serving
- Calories: 350
- Sugar: 4g
- Sodium: 800mg
- Fat: 18g
- Saturated Fat: 4g
- Unsaturated Fat: 10g
- Trans Fat: 0g
- Carbohydrates: 12g
- Fiber: 3g
- Protein: 38g
- Cholesterol: 70mg
Keywords: Chicken Parmesan, Meal Prep, Healthy Recipes, Italian Cuisine, Gluten-Free
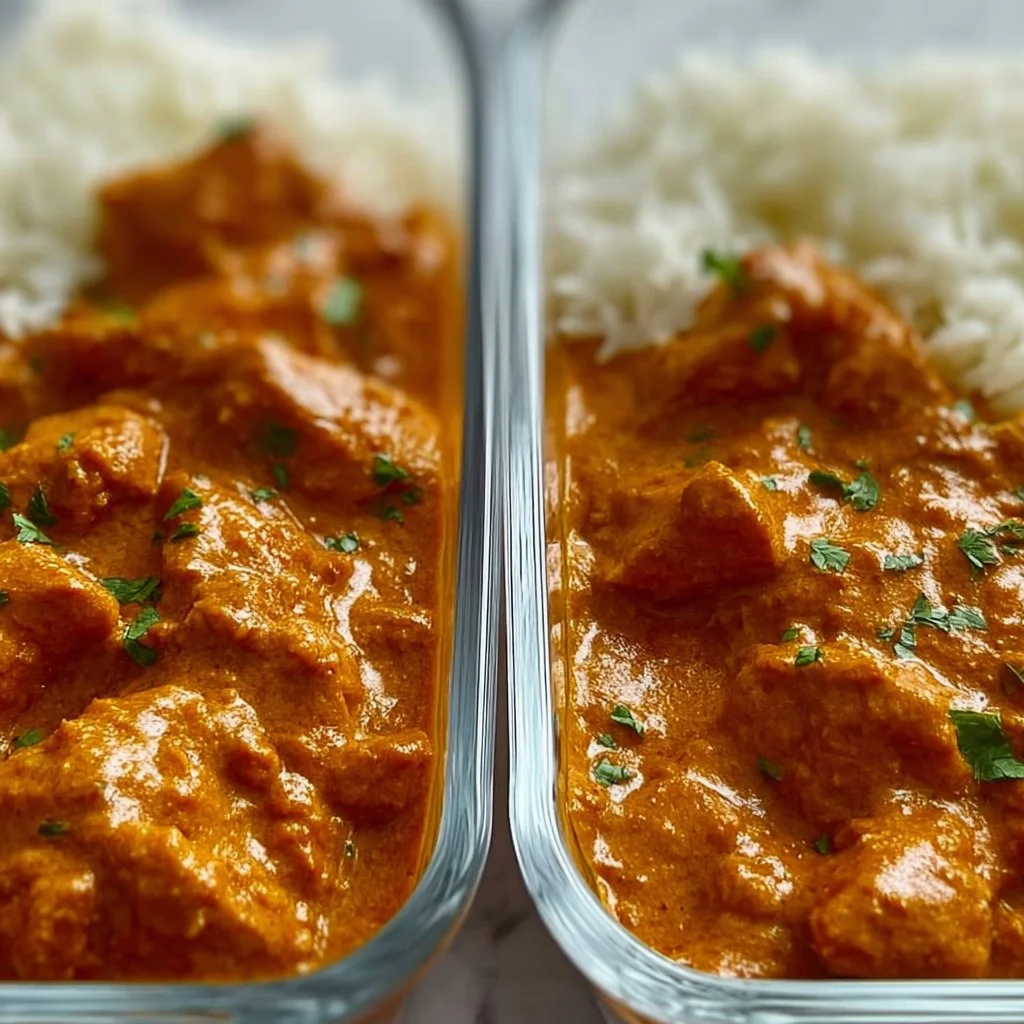
Butter Chicken
Butter Chicken: A Flavorful Journey to Comfort Food Heaven
Hey there, fellow food lovers! I’m Beau Collier, your friendly neighborhood chef, and today we’re diving into something that’s not just a meal but a heartfelt experience—Butter Chicken! If you’re looking for that quintessential recipe that will make your home smell like a cozy Indian kitchen, then you’ve hit the jackpot. Butter Chicken, or Murgh Makhani as the locals call it, is a dish that’s rich, creamy, and downright irresistible. Perfect for any occasion, from bustling weeknights to cozy Sunday dinners, this recipe is a real crowd-pleaser.
Introduction
I remember the first time I tasted Butter Chicken. I was at a friend’s house, and it was one of those chilly evenings where all you wanted to do was curl up under a blanket with a good meal. The aroma wafting through the kitchen was intoxicating—it was those spices that made my stomach rumble. There it was, a big pot of golden, creamy Butter Chicken simmering away, the enticing scent of garlic and ginger filling the air. My friend’s mom served it over fluffy jasmine rice, and honestly, I thought I’d died and gone to culinary heaven.
Fast forward to today—I’ve made it my mission to replicate that feeling, that flavor, right in my own kitchen and share it with you. Butter Chicken isn’t just a recipe; it’s a celebration of life and love, experienced through food. So, grab your spatula, a pinch of curiosity, and let’s create some magic together! You won’t just fill your belly; you’ll fill your heart, too.
Personal Story
Growing up, my family had a tradition of Sunday dinners—think laughter, stories, and, of course, lots of delicious food. One particular Sunday, my mom decided to mix things up with a new recipe: Butter Chicken. I can still picture us gathered around the table, my dad enthusiastically explaining his (questionable) take on Indian spices, while my sister pretended to be the next Gordon Ramsay, critiquing every bite.
As we dug in, my mom’s Butter Chicken turned into a game changer—one that sparked my lifelong love for cooking and trying new things in the kitchen. It was creamy, spicy, and savory, wrapping us up in a warm hug of flavors. That night, the joy of sharing food was palpable, and from then on, Butter Chicken became a staple at our Sunday dinners—an unofficial member of the family, if you will.
Ingredients
Here’s what you’ll need to whip up your own Butter Chicken masterpiece:
-
1 medium yellow onion (diced): Onions are the backbone of this dish, adding sweetness and depth. If you’re looking for a substitute, shallots work in a pinch but won’t quite give you the same robust flavor.
-
2 lbs raw chicken breast (cut into 1/2 inch cubes): Chicken breast is a classic choice, but thighs can add moisture and richness. Feel free to experiment!
-
1 tsp ginger (minced): Ginger adds a zesty dimension to your dish. If you’re fresh out, ground ginger is a great alternative—just use about 1/4 tsp.
-
6 cloves garlic: Garlic brings that savory essence that we all crave. Not a fan? Roasting the garlic can soften its flavor beautifully.
-
2 tbsp olive oil: This helps in browning the chicken. If you want a bit of extra flavor, try using ghee—it’s traditional and delicious!
-
6 oz tomato paste: This gives the dish its rich, velvety base. Tomato sauce or crushed tomatoes can work in a pinch but may yield a thinner texture.
-
1 cup heavy cream: This is where the magic happens! Heavy cream creates that luxurious texture. You can swap it for half and half if you’re looking for a lighter version—but trust me, the heavy cream is where the flavor party is at.
-
1 tbsp garam masala (heaping): This spice blend is the heart of Indian cooking. If you don’t have it, a mix of ground cumin, coriander, and cardamom can be used instead.
-
1 tsp chili powder: A little heat goes a long way! Adjust according to your spice tolerance—cayenne works well here too.
-
1 tsp fenugreek powder (optional but epic): This unique flavor will take your dish to another level. If you can’t find it, just skip it—not a recipe killer, but oh so tasty!
-
1 tsp cumin: This earthy spice round out the flavors. Ground coriander can serve as a substitute if needed.
-
1 tsp salt: Always taste as you go—salt can be adjusted based on preference!
-
1/2 tsp black pepper: Just enough to add a little kick. You can also use freshly cracked black pepper for a bolder taste.
-
1 cup jasmine rice: This is the perfect side to soak up all that fantastic sauce. If you’re after something different, basmati rice is a fantastic alternative!
Step-by-Step Instructions
Now, let’s get cooking! Follow these steps, and trust me, your kitchen will turn into a cozy Indian restaurant in no time.
-
Sauté the onion: In a large skillet, heat 2 tablespoons of olive oil over medium heat. Add the diced yellow onion and sauté until it becomes translucent, about 5 minutes. This is the first layer of flavor, so don’t rush!
-
Add garlic and ginger: Toss in the minced garlic and ginger, stirring constantly for about a minute until fragrant. Pro tip: keeping your heat low during this step prevents the garlic from burning and turning bitter.
-
Brown the chicken: Add in your cubed chicken breast. Cook for about 8-10 minutes, stirring occasionally, until it’s no longer pink. Remember, we’re not cooking it all the way through; it will continue to cook in the sauce later.
-
Introduce the tomato paste: Stir in the tomato paste and let it cook for about 2-3 minutes. This gives the tomatoes a chance to deep dive into the flavors—trust me on this one!
-
Spice it up: Now’s the time to sprinkle in that heaping tablespoon of garam masala, chili powder, fenugreek powder, cumin, salt, and black pepper. Mix it all up and let those spices toast for a minute, releasing all those beautiful aromas.
-
Creamy goodness: Pour in the heavy cream and mix everything until it’s beautifully combined. Bring to a simmer, then reduce the heat and let it cook uncovered for 15-20 minutes. This step is crucial—let it bubble gently, and don’t forget to stir occasionally to avoid any sticking.
-
Fluff that rice: While your Butter Chicken simmers, cook your jasmine rice according to the package instructions. Use a fork to fluff it up once it’s done!
-
Taste test: Give your Butter Chicken a little taste—need more salt? A dash of chili powder? This dish is all about balance, so adjust to your liking!
-
Serve it up: Time to plate! Serve your Butter Chicken over a generous helping of jasmine rice, and make sure to drizzle that luscious sauce generously.
Serving Suggestions
For an authentic dining experience, don’t forget to garnish your Butter Chicken with a sprinkle of fresh cilantro! You can also serve it with hot naan bread on the side for some extra dipping. To add a touch of elegance, serve with a lemon wedge for a zesty kick and perhaps a dollop of yogurt for cooling relief against the spices.
When plating, remember that presentation matters. Serve it in a wide bowl, allowing for a generous portion of sauce to pool around the rice. Your guests will be salivating before they even take the first bite!
Recipe Variations
-
Vegetarian Option: Swap chicken for paneer or tofu for a delightful vegetarian version. Both will absorb those gorgeous flavors and provide a wonderful texture.
-
Spice it Up: If you like it hot, add some diced green chilies or a pinch of cayenne pepper for an extra kick.
-
Coconut Cream Twist: Replace heavy cream with coconut cream for a tropical spin. It’ll give a unique flavor that’s also dairy-free!
-
Mushroom Lovers: For a hearty twist, add in mushrooms along with the chicken. They’ll take on the incredible flavors while adding a nice, meaty texture.
-
Lentil Butter Chicken: Add cooked lentils to the mix for added protein and fiber. It’s a hearty yet healthy option!
Chef’s Notes
This recipe has been a staple in my kitchen for years, and I’ve experimented a lot along the way. I’ve tried adding different spice blends and cooking methods.
One time, my oven went on the fritz right before a dinner party (talk about a nightmare!). I ended up making Butter Chicken entirely on the stovetop, and let me tell you—it turned out just as good, if not better! The key is to let the sauce simmer and develop that deep flavor, regardless of how you cook it.
FAQs and Troubleshooting
1. My sauce isn’t thickening! What should I do?
No worries! Just let it simmer longer. If you want to speed things up, add a cornstarch slurry (1 tbsp cornstarch mixed with 2 tbsp water) to thicken it.
2. Can I freeze Butter Chicken?
Absolutely! It freezes beautifully. Just let it cool completely before transferring to an airtight container. Reheat slowly on the stovetop when you’re ready to enjoy!
3. What do I do if it’s too spicy?
If it’s too spicy for your taste, try stirring in a bit of sugar or honey to balance the heat. Adding more cream can also help mellow it out.
4. I don’t have garam masala! Can I use anything else?
While garam masala is key, you can create a makeshift blend with ground cumin, coriander, and some cinnamon.
Nutritional Info
Now, let’s chat about the nutritional side of things. Butter Chicken, while rich and creamy, can be made to fit a range of dietary needs—just remember that moderation is key! This dish is packed with protein from the chicken and offers a delightful mix of vitamins and minerals from the spices and tomatoes. A serving typically contains:
- Calories: Approximately 490 (without rice)
- Protein: 40g
- Carbohydrates: 12g
- Fat: 30g
If you’re looking for lower-calorie options, consider using Greek yogurt instead of heavy cream, or serve over quinoa instead of rice!
Final Thoughts
So there you have it—my take on Butter Chicken, a dish that’s not just food, but a meal full of memories and love. Whether you’re whipping it up for family or meal prepping for your week, I’m certain this recipe will bring warmth to your home and smiles all around.
Cooking shouldn’t feel like a chore; it should be a joyful exploration—hence why I love sharing these stories and traditions with you. So, what are you waiting for? Grab those ingredients, put some music on, and let’s turn your kitchen into a flavorful paradise. Until next time, happy cooking! 🍽️
Print
Butter Chicken
- Total Time: 45 minutes
- Yield: 4 servings 1x
- Diet: Non-Vegetarian
Description
A rich and creamy Butter Chicken recipe that brings the comforting flavors of Indian cuisine right to your kitchen. Perfect for any occasion!
Ingredients
- 1 medium yellow onion, diced
- 2 lbs raw chicken breast, cut into 1/2 inch cubes
- 1 tsp ginger, minced
- 6 cloves garlic
- 2 tbsp olive oil
- 6 oz tomato paste
- 1 cup heavy cream
- 1 tbsp garam masala, heaping
- 1 tsp chili powder
- 1 tsp fenugreek powder (optional)
- 1 tsp cumin
- 1 tsp salt
- 1/2 tsp black pepper
- 1 cup jasmine rice
Instructions
- Sauté the onion: In a large skillet, heat 2 tablespoons of olive oil over medium heat. Add the diced yellow onion and sauté until it becomes translucent, about 5 minutes.
- Add garlic and ginger: Toss in the minced garlic and ginger, stirring constantly for about a minute until fragrant.
- Brown the chicken: Add in your cubed chicken breast. Cook for about 8-10 minutes, stirring occasionally, until it’s no longer pink.
- Introduce the tomato paste: Stir in the tomato paste and let it cook for about 2-3 minutes.
- Spice it up: Sprinkle in garam masala, chili powder, fenugreek powder, cumin, salt, and black pepper. Mix and let those spices toast for a minute.
- Creamy goodness: Pour in the heavy cream and mix everything until beautifully combined. Bring to a simmer, then reduce the heat and let it cook uncovered for 15-20 minutes.
- Fluff that rice: While simmering, cook your jasmine rice according to package instructions.
- Taste test: Adjust seasoning to your liking.
- Serve it up: Plate your Butter Chicken over jasmine rice, drizzling with the luscious sauce.
Notes
For an authentic dining experience, garnish with fresh cilantro and serve with naan or a lemon wedge.
- Prep Time: 15 minutes
- Cook Time: 30 minutes
- Category: Main Course
- Method: Stovetop
- Cuisine: Indian
Nutrition
- Serving Size: 1 serving
- Calories: 490
- Sugar: 5g
- Sodium: 600mg
- Fat: 30g
- Saturated Fat: 18g
- Unsaturated Fat: 8g
- Trans Fat: 0g
- Carbohydrates: 12g
- Fiber: 1g
- Protein: 40g
- Cholesterol: 120mg
Keywords: Butter Chicken, Indian Cuisine, Comfort Food