
Lemon Posset
Discovering the Delight of Lemon Posset: A Dreamy Dessert Experience
Hey there, food lovers! Welcome back to Feastical, where we whip up some kitchen magic that’ll make you feel like you’ve strolled straight into a sun-drenched lemon orchard. Today, we’re diving into a dessert that’s as light as a feather and bursting with zesty goodness—lemon posset!
Now, if you’ve never tasted lemon posset before, let me tell you, you’re in for a treat. Imagine a velvety, creamy dessert that’s both tangy and sweet, perfectly balancing flavors like an expert tightrope walker. It’s quick to make, requires no baking, and will impress your friends and family with its sophisticated flair.
But first, let’s chat about the origin of this glorious treat. Possets date back to the medieval times—how cool is that? It started off as a hot drink and eventually morphed into the creamy dessert we adore today. The beauty of lemon posset lies in its simplicity: just a handful of ingredients transformed into a silky delight that feels like sunshine in a bowl. Whether you’re serving it at a fancy dinner or a cozy weeknight treat, lemon posset always delivers a smile.
So, grab your apron, and let’s embark on this flavorful adventure together!
A Sweet Memory of Lemon Posset
One of my fondest memories in the kitchen stems from my grandmother, who had a way of brightening gloomy days with her culinary magic. Lemon posset was one of her ultimate recipes, and many summer afternoons were spent huddled together in her tiny kitchen, the air thick with the tangy aroma of fresh lemons.
I remember the first time she invited me to help her make it. She handed me a zester and a lemon, her eyes twinkling with mischief as I attempted to mimic her technique. Zest flying everywhere, we giggled like kids as we tasted the concoction, the tartness of the lemons making our faces pucker.
When we finally took our first spoonful of her finished posset, it felt like a burst of sunshine. The tartness wrapped around the creamy base created an explosion of flavor that stays with you long after the last bite. It was a moment of connection—not just to the food but to the love she poured into every dish. Now, every time I make lemon posset, I feel like she’s right there with me, guiding my hands.
Ingredients
Now that we’ve set the stage with a bit of nostalgia, let’s get into what you need to create this lemony delight! Here’s a simple list of ingredients for you:
-
3 Large Lemons: You’ll want these to be juicy and vibrant. Substitute with limes for a different flavor twist!
-
1 Cup Heavy Cream: This is where the magic happens! If you’re looking for a lighter option, consider full-fat coconut milk or almond milk, but the texture will change slightly.
-
⅓ Cup Sugar: Just a hint of sweetness! Feel free to use coconut sugar, or for a low-calorie version, try a sugar alternative like stevia.
-
¼ Teaspoon Kosher Salt: A pinch of salt enhances the flavors perfectly! Table salt works too but go lighter on the quantity.
-
½ Tablespoon Lemon Zest: This is the secret to bringing out that zingy lemon flavor. Don’t skip it! Dried lemon zest can be a substitute, but fresh is always best.
-
2½ Tablespoons Lemon Juice: Fresh juice is key! Bottled lemon juice won’t have the same brightness; if you’re in a pinch, you could use bottled, but it will lack some freshness.
-
1 Teaspoon Vanilla Extract: This adds a lovely depth! You can swap it with lemon extract for an extra punch of flavor if you’re feeling adventurous.
Step-by-Step Instructions
Let’s get into the heart of the matter! Here’s how to whip up your very own lemon posset. Don’t worry, I’m here with you every step of the way—kitchen disasters don’t stand a chance!
-
Zest and Juice the Lemons: Start by zesting your lemons using a microplane grater. Make sure to avoid the white pith, as it can be bitter. Once you have your zest, cut the lemons in half and juice them, straining out any seeds. Tip: Use a fork to help extract more juice!
-
Combine Cream, Sugar, Salt, and Zest: In a medium saucepan over low heat, combine the heavy cream, sugar, kosher salt, and lemon zest. Gently heat while stirring until the sugar dissolves (about 2–3 minutes). It’s crucial to keep the heat low to prevent scalding the cream!
-
Add Lemon Juice: Once the mixture is warm and the sugar has dissolved, remove it from the heat and stir in the lemon juice and vanilla extract. The mixture will start to thicken as it cools. If you’re feeling fancy, you can strain it through a fine-mesh sieve to remove the zest, but remember, that zest packs flavor!
-
Chill to Set: Pour the mixture into serving cups or ramekins and let them cool to room temperature. Then, pop them into the fridge for at least 4 hours or overnight. This is when the posset will firm up beautifully.
-
Serve and Garnish: When you’re ready to enjoy, you can garnish with more lemon zest, a sprinkle of sea salt, or even fresh berries for an extra pop of color and flavor. Chef hack: If your posset is too firm, you can stir in a splash of cream before serving!
Serving Suggestions
Presentation is everything! Here’s how to plate your lemon posset for maximum effect:
-
Classic Cups: Serve it in beautiful glass cups or ramekins to show off that creamy texture and enticing lemon hue. A dollop of whipped cream and a adash of lemon zest on top creates both visual appeal and extra flavor.
-
Berry Bliss: Layer fresh berries (like raspberries or blueberries) at the bottom of the cup before adding the posset. They add a pop of color and a burst of freshness!
-
Elegant Platters: If you’re entertaining a crowd, go for a serving platter. Arrange individual portions side by side, and garnish with a few mint leaves for a refreshing touch.
Recipe Variations
Feeling adventurous? Here are a few creative twists on the classic lemon posset:
-
Meyer Lemon Posset: Use Meyer lemons for a sweeter, less acidic flavor. It’s a game-changer if you can find them!
-
Ginger Lemon Posset: Add a tablespoon of finely grated ginger to the cream mix for a zingy, warm twist.
-
Herb-Infused Posset: Infuse the cream with fresh herbs, like basil or rosemary, by steeping them in for about 15 minutes before straining out.
-
Chocolate Lemon Posset: Mix in a couple of tablespoons of melted dark chocolate into the cream mixture. Rich and delightful!
-
Lavender Lemon Posset: For a floral flavor, steep culinary lavender in the cream. Just be sure to strain it out before adding the citrus.
Chef’s Notes
So, here’s a funny little insight—a few years back, I had a little “help” from my lovely cat, Daisy, while making lemon posset. As I turned my back for just a second, she decided that my lemon zest was her new favorite toy! Lemons zipping around the kitchen was quite the distraction! But that’s the beauty of cooking—embracing the chaos and laughter that comes with it.
Over the years, I’ve played with different flavor combinations, and it’s been an incredible journey. The basic recipe remains close to my heart, a tribute to those sunny afternoons spent with Grandma, but I love the endless possibilities to make it uniquely yours!
FAQs and Troubleshooting
Here are some common questions you might have while making your lemon posset, along with helpful answers:
-
Why isn’t my posset thickening? If it’s not thickening enough, ensure you’re using fresh lemon juice and allow it to chill for the full time. If it’s still too runny, try adding a bit more cream and gently heating it until combined.
-
Can I use bottled lemon juice? While fresh is best, in a pinch you can use bottled lemon juice; just expect a slightly different flavor profile.
-
How long does lemon posset last in the fridge? Typically, it should be good for about 3–4 days. Make sure to cover it tightly to keep it fresh!
-
Can I freeze lemon posset? Freezing is not the best option for posset, as it can change the creamy texture. If you must, try freezing it in small portions for a short time, but let thawing happen in the fridge slowly.
Nutritional Info
Now, let’s talk nutrition! Here’s a rough breakdown of the nutrition facts per serving (assuming 4 servings):
- Calories: 250
- Fat: 20g
- Carbohydrates: 17g
- Fiber: 0g
- Protein: 2g
- Sugar: 12g
Keep in mind, these values can vary based on ingredient brands or adjustments you make! It’s always a good idea to do a quick calculation if you’re keeping an eye on specific dietary needs.
Final Thoughts
And there you have it, friends! A delicious journey into the world of lemon posset. Whether you whip it up for a special occasion or just because, this dessert is sure to become a favorite in your household. Remember the joy of cooking is in the process—the laughter, the memories, and the flavors that all come together to create something delightful.
So, what are you waiting for? Grab those lemons and start stirring! Don’t forget to share your culinary creations with me; I’d love to see how your lemon posset turns out. Until next time, keep simmering, sizzling, and savoring every bite of life. Cheers! 🍋
Print
Lemon Posset
- Total Time: 240 minutes
- Yield: 4 servings 1x
- Diet: Vegetarian
Description
A creamy and zesty lemon dessert that’s easy to make and sure to impress.
Ingredients
- 3 Large Lemons (juicy and vibrant)
- 1 Cup Heavy Cream
- ⅓ Cup Sugar
- ¼ Teaspoon Kosher Salt
- ½ Tablespoon Lemon Zest
- 2½ Tablespoons Lemon Juice
- 1 Teaspoon Vanilla Extract
Instructions
- Zest and juice the lemons, straining out any seeds.
- Combine cream, sugar, salt, and zest in a medium saucepan over low heat until sugar dissolves.
- Add lemon juice and vanilla extract, then stir until the mixture thickens.
- Chill the mixture in serving cups for at least 4 hours or overnight.
- Serve garnished with additional lemon zest or fresh berries.
Notes
For a lighter option, you can use coconut milk or almond milk. Feel free to add flavor variations like ginger or chocolate.
- Prep Time: 15 minutes
- Cook Time: 5 minutes
- Category: Dessert
- Method: Chilling
- Cuisine: British
Nutrition
- Serving Size: 1 serving
- Calories: 250
- Sugar: 12g
- Sodium: 50mg
- Fat: 20g
- Saturated Fat: 12g
- Unsaturated Fat: 8g
- Trans Fat: 0g
- Carbohydrates: 17g
- Fiber: 0g
- Protein: 2g
- Cholesterol: 80mg
Keywords: lemon dessert, creamy posset, no-bake dessert, summer dessert
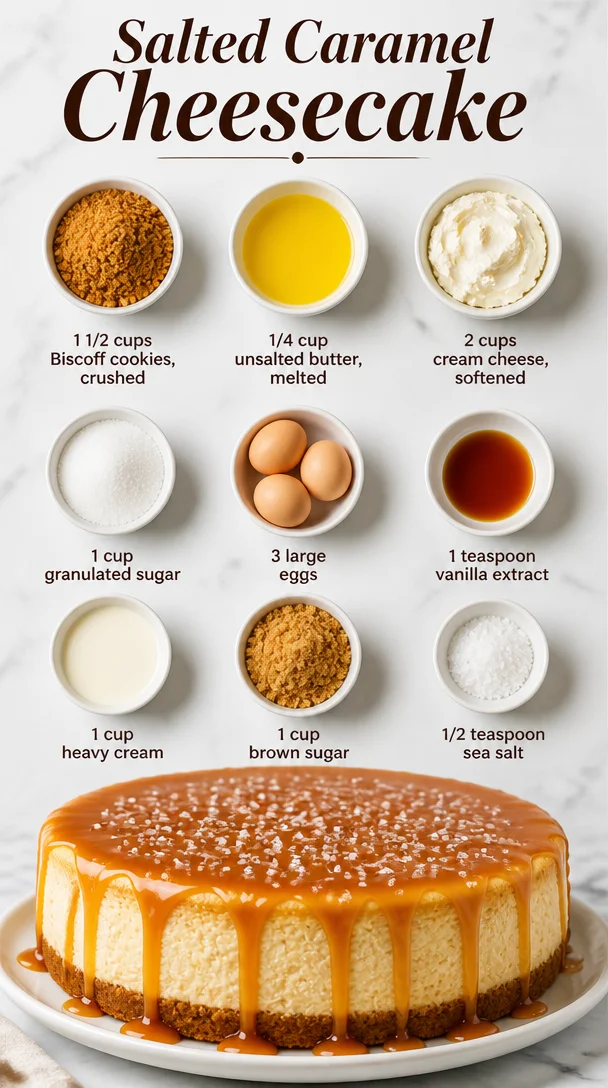
Salted Caramel Cheesecake
The Ultimate Salted Caramel Cheesecake Recipe
Hey there, fellow foodies! I’m Beau Collier, and today, we’re diving into a dessert that’s not just a feast for your taste buds, but also a memory-maker in the kitchen: Salted Caramel Cheesecake. Are you ready to embark on this buttery, creamy, and oh-so indulgent journey? Grab your apron, and let’s get cooking!
Introduction
There’s something utterly enchanting about a slice of cheesecake. Maybe it’s the dense, rich texture, or the creamy sweetness that dances on your palate, but for me, calling it “just dessert” doesn’t do it justice. Cheesecake has an emotional resonance; it’s a reminder of gatherings, celebrations, and sometimes even quiet evenings spent with a good book. When you add salted caramel to the mix? Well, get ready for a taste explosion that will have you dreaming of seconds.
Imagine this: a buttery crust made from Biscoff cookies—those deliciously spiced morsels that are so good you could eat them straight out of the package. Then, we layer a creamy cheesecake filling that’s smooth enough to make a jazz musician jealous, topped off with a warm, gooey homemade salted caramel sauce. Each bite is a little slice of heaven that whispers, “You’re in for a treat!”
In this post, I’ll guide you step-by-step through the process of making this decadent dessert from scratch. Whether you’re a cheesecake aficionado or a kitchen newbie on a culinary quest, my aim is to make this approachable and fun. So let’s roll up our sleeves and bring this gorgeous creation to life!
Personal Story
Ah, the first time I made a cheesecake! It was my sister’s birthday, and my mother had passed down her well-loved recipe, scribbled in her own handwriting on a well-worn index card. I remember the kitchen filled with the sweet aroma of cream cheese mixing with sugar and vanilla. The excitement was palpable as I poured the filling into the crust.
But here’s where the nostalgia really kicks in: halfway through baking, when I nervously opened the oven to check if it was setting properly, I accidentally let out a rush of steam that fogged up my glasses! My little sister burst out laughing, claiming I looked like a mad scientist. In that moment, I realized that cooking is not just about the food; it’s about the joy, laughter, and sometimes the minor disasters that turn into great stories. I was determined to make my cheesecake a showstopper, and I did! It went on to become a family favorite, a classic at every birthday celebration.
Since then, I’ve added my twists to the recipes—salted caramel being one of them. It’s become a family tradition, connecting the past to the present, one sweet slice at a time.
Ingredients
Let’s get into the nitty-gritty of this recipe! Here’s what you need to make your Salted Caramel Cheesecake shine.
-
1 1/2 cups Biscoff cookies, crushed: These delightful cookies lend an aromatic spiced flavor and a perfect crispy texture for the crust. In a pinch, you can substitute them with graham crackers or Oreos for a chocolate twist.
-
1/4 cup unsalted butter, melted: This binds the crumbs together and gives your crust that rich buttery goodness. If you’re in a dairy-free mood, coconut oil is a solid alternative.
-
2 cups cream cheese, softened: The star of your cheesecake! Make sure it’s room temperature (no one wants chunky cream cheese), or switch to mascarpone for a slightly different creamy feel.
-
1 cup granulated sugar: This provides the necessary sweetness that balances the tang of the cream cheese. If you want to cut back on refined sugar, try coconut sugar or even honey.
-
3 large eggs: They help the cheesecake set to perfection. You could use flaxseed or chia seed substitutes (1 tablespoon of ground flax or chia mixed with 2.5 tablespoons water per egg) if you need a vegan option!
-
1 teaspoon vanilla extract: This adds warmth and depth to your filling. Consider using fresh vanilla beans for an intense flavor!
-
1 cup heavy cream: The heavy cream gives you that luscious, velvety texture. For a lighter version, opt for light cream or even Greek yogurt, but be aware that it may alter the flavor slightly.
-
1 cup brown sugar: This goes into the caramel and brings a deeper, more complex sweetness. If you’re out, regular granulated sugar will work in a pinch.
-
1/2 teaspoon sea salt: Salt enhances the flavor of caramel and balances sweetness. You can play with different salts: Himalayan pink salt or smoked salt can add a surprising twist!
Step-by-Step Instructions
1. Prepare the Crust
- Preheat your oven to 350°F (175°C). A hot oven equals a perfectly baked crust.
- In a medium bowl, mix the crushed Biscoff cookies and melted butter until it resembles wet sand. This is one of my favorite parts; the aroma is divine!
- Press this mixture firmly into the bottom of a 9-inch springform pan. Use the bottom of a measuring cup to really pack it down! Bake for 10 minutes. This step ensures your crust is sturdy enough to hold all the delicious filling in.
2. Make the Cheesecake Filling
- While the crust is baking, grab a mixing bowl and beat the softened cream cheese with an electric mixer until it’s smooth and creamy—no lumps allowed here! Add in the granulated sugar and mix until combined.
- Next, add in the eggs one at a time, mixing well after each addition. This keeps your cheesecake from cracking later! Add in the vanilla extract and blend until fluffy. It should look like a dreamy cloud.
- Beat in the heavy cream until the mixture is thick and creamy. This gives your cheesecake that luxurious mouthfeel. Pour that luscious filling over the baked crust, smoothing it out.
3. Bake Your Cheesecake
- Place the springform pan in the oven. Here’s a little hack: to prevent cracks, place a pan filled with water on the rack below your cheesecake. The steam helps keep your cheesecake moist, just like a hot bath for your dessert!
- Bake for about 55 to 60 minutes. The edges should be set while the center will still have a light jiggle. Don’t worry; it’ll firm up as it cools.
4. Make the Salted Caramel
- Combine the brown sugar and heavy cream in a saucepan over medium heat. Stir constantly until it smooths out and begins to bubble, about 5–7 minutes.
- Reduce the heat to low and let it simmer for an additional 5 minutes without stirring. Then remove it from the heat and stir in the sea salt—this is where the magic happens! Let it cool for a bit before drizzling it over your cooled cheesecake.
5. Cool and Chill
- Once your cheesecake is out of the oven, let it cool for at least an hour on the counter before moving it to the refrigerator. Chill for at least 4 hours or overnight if you’re really planning ahead. I know, it’s patience-testing, but it’s worth every moment!
Serving Suggestions
When it’s time to serve your Salted Caramel Cheesecake, here are a few tips to make it extra special:
- Presentation: Remove the sides of the springform pan carefully. Place the cheesecake on a decorative cake stand or a sleek serving plate to showcase it!
- Drizzle: Warm your salted caramel slightly and drizzle it over the top in swooping motions for that professional touch. Don’t forget to add a sprinkle of flaky sea salt for a gorgeous contrast.
- Garnish: Top with a dollop of freshly whipped cream and maybe some caramel popcorn for texture, if you’re feeling fancy. You could also add a few chocolate shavings for an extra decadent flair!
Recipe Variations
Here are a few fun twists you can try with this Salted Caramel Cheesecake recipe:
-
Nutty Twist: Add crushed pecans or walnuts into the crust for an added crunch. You could also add a layer of nut butter to the filling for extra richness.
-
Chocolate Lovers: Pour in half a cup of melted dark chocolate into the cheesecake batter for a rich mocha flavor. You can top it with chocolate ganache for extra indulgence.
-
Fruit Flavor: Incorporate fresh fruit like raspberries or strawberries into the cheesecake filling. The tartness will cut through the richness beautifully.
-
Spiced Autumn Delight: Add a teaspoon of cinnamon and a dash of nutmeg to the filling for a cozy, spiced version that’s perfect for fall gatherings.
-
Vegan Option: Use cashews soaked overnight, blended with maple syrup and coconut cream instead of the cream cheese and heavy cream.
Chef’s Notes
Ah, what a journey! Since that fateful first cheesecake, I’ve become a self-proclaimed cheesecake enthusiast. Each experiment I’ve taken has taught me something new. One quirky tradition I have is to name every cheesecake I make; this one? I call it “Hug in a Slice.”
When you sit down with a generous slice, take a moment to savor the flavors and the memories they bring. And remember, every kitchen has its mishaps, like that time I forgot the sugar altogether—let’s just say, that was a very different kind of ‘cheesecake’!
FAQs and Troubleshooting
1. Why did my cheesecake crack?
Cracks can occur if the cheesecake is overbaked or if it was cooled too quickly. Ensure you use the water bath method and let it cool gradually in the oven with the door cracked.
2. Can I freeze the cheesecake?
Absolutely! Wrap it tightly in plastic wrap and then aluminum foil. It can last frozen for up to 2 months. Thaw it overnight in the fridge before serving.
3. It didn’t set properly; what went wrong?
This can be because the cream cheese wasn’t softened enough or it needed more time to bake. If the center is still wobbly after cooling, that’s okay! It’ll firm up after chilling in the fridge.
4. How do I make this gluten-free?
Swap the Biscoff cookies for gluten-free cookie options, or a ground nut and date crust works brilliantly too!
Nutritional Info
While it varies based on your specific ingredients, here’s an approximate nutritional breakdown per slice (assuming 12 servings):
- Calories: 450
- Fat: 30g
- Carbohydrates: 40g
- Protein: 6g
- Sugar: 28g
- Sodium: 220mg
Final Thoughts
There you have it, friends! A recipe that not only satisfies but resonates with nostalgia and the joy of togetherness. Each slice of Salted Caramel Cheesecake is an invitation to celebrate life’s sweet moments and create new memories in the kitchen. So whether it’s for a birthday, a dinner party, or just because you deserve a treat, this cheesecake is ready to impress.
I hope this article lights a fire in your kitchen and inspires you to whip up this delightful dessert. Remember, cooking is a blend of art, science, and a whole lot of love. So go ahead, make your Salted Caramel Cheesecake, and don’t forget to share your edible masterpieces with the world (or just your family—no judgment here!). Happy baking, and see you next time at Feastical!
Print
Ultimate Salted Caramel Cheesecake
- Total Time: 90 minutes
- Yield: 12 servings 1x
- Diet: Vegetarian
Description
A decadent salted caramel cheesecake with a buttery Biscoff crust, rich cream cheese filling, and a homemade caramel drizzle.
Ingredients
- 1 1/2 cups Biscoff cookies, crushed
- 1/4 cup unsalted butter, melted
- 2 cups cream cheese, softened
- 1 cup granulated sugar
- 3 large eggs
- 1 teaspoon vanilla extract
- 1 cup heavy cream
- 1 cup brown sugar
- 1/2 teaspoon sea salt
Instructions
- Preheat your oven to 350°F (175°C).
- Mix the crushed Biscoff cookies and melted butter until it resembles wet sand.
- Press this mixture firmly into the bottom of a 9-inch springform pan and bake for 10 minutes.
- Beat the softened cream cheese with an electric mixer until smooth, then add the granulated sugar and mix.
- Add the eggs one at a time, mixing well after each addition, followed by the vanilla extract.
- Beat in the heavy cream until thick and creamy, then pour the filling over the baked crust.
- Place the springform pan in the oven and bake for about 55-60 minutes.
- Combine the brown sugar and heavy cream in a saucepan over medium heat, stirring constantly until bubbly.
- Reduce heat and let it simmer for 5 minutes; then stir in the sea salt.
- Cool the cheesecake on the counter for at least an hour, then chill for at least 4 hours or overnight before serving.
Notes
Drizzle with warm salted caramel and top with whipped cream for extra indulgence.
- Prep Time: 30 minutes
- Cook Time: 60 minutes
- Category: Dessert
- Method: Baking
- Cuisine: American
Nutrition
- Serving Size: 1 slice
- Calories: 450
- Sugar: 28g
- Sodium: 220mg
- Fat: 30g
- Saturated Fat: 18g
- Unsaturated Fat: 12g
- Trans Fat: 0g
- Carbohydrates: 40g
- Fiber: 1g
- Protein: 6g
- Cholesterol: 150mg
Keywords: salted caramel, cheesecake, dessert, baking
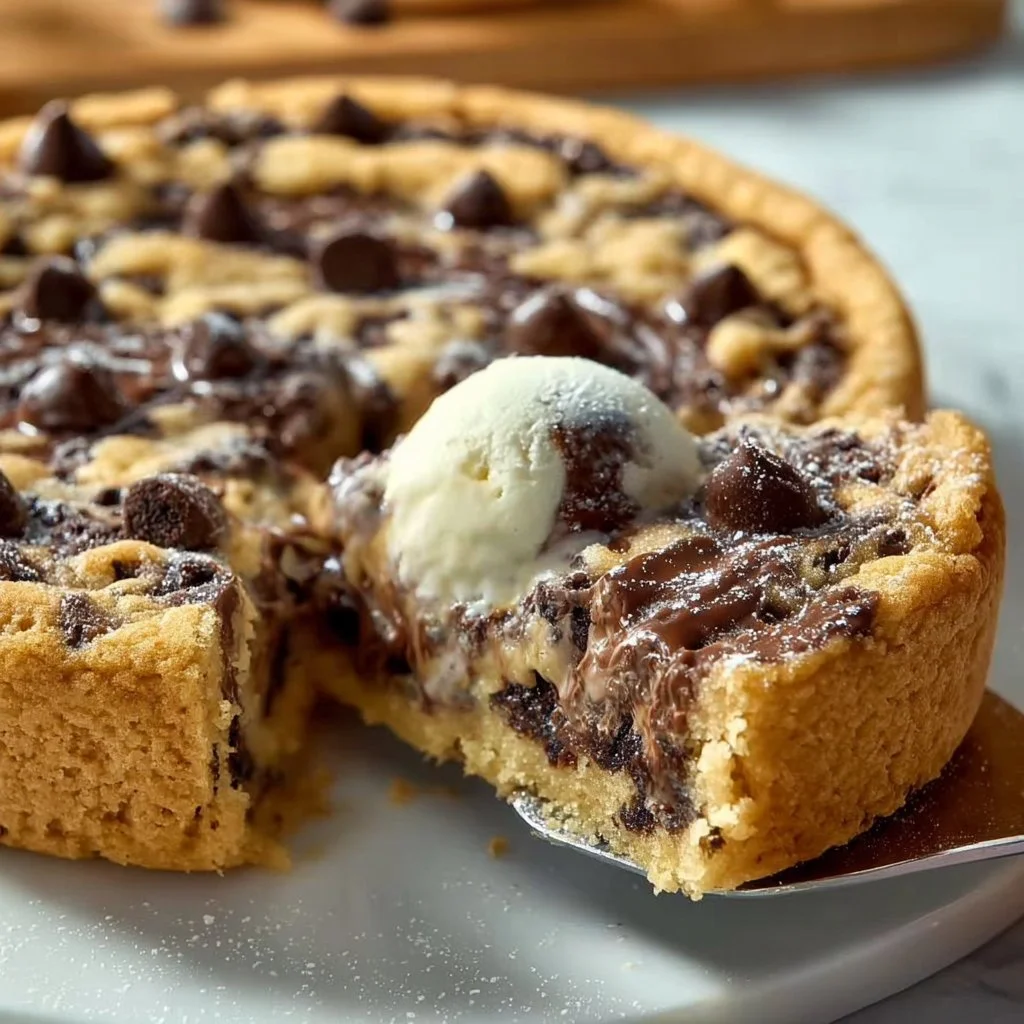
Deep dish Nutella Cookie Pie
Deep Dish Nutella Cookie Pie: A Sweet Slice of Nostalgia
Introduction
Hey there, fellow food lovers! I’m Beau Collier, and today we’re diving into a dessert that’s not just delicious but downright dreamy—the Deep Dish Nutella Cookie Pie! Now, I don’t want to brag, but this dessert has been known to cause spontaneous happy dances in the kitchen. You know what I’m talking about. When that oven timer dings, and you get a whiff of that sweet, gooey goodness—it’s hard not to bust a move!
Picture this: a thick, chewy cookie base that cradles a rich, molten center of Nutella, topped off with a sprinkle of chocolate chips. I mean, can it get any better? This dessert is like a warm hug from your favorite person, and it’s super simple to whip up, making it the perfect treat for any occasion.
Whether you’re gearing up for a fun family gathering, a cozy movie night, or simply need to impress that special someone, this Deep Dish Nutella Cookie Pie is your go-to! Baking it is a straightforward, joyous experience full of the kind of nostalgic warmth that only comes from a kitchen filled with sweet aromas and laughter. So, let’s dust off those mixing bowls and get cracking!
Personal Story
Ah, Nutella! Just saying the word brings back a flood of memories. I remember the first time I tasted Nutella—it was a pivotal moment in my young, curious foodie life. My mom would make these deliciously indulgent snacks after school, and there was always a jar of Nutella on the counter. We would take toasted slices of bread and slather them with the rich hazelnut spread, and while I stuffed my face, I would listen to her stories about how food can create lasting connections.
One rainy afternoon, we decided to switch things up. We mixed Nutella with a basic cookie recipe, and what emerged from our oven was a beautiful, gooey disaster. We didn’t quite follow the measurements (oops!), but we didn’t care; it was glorious! That first bite was a revelation. We had made magic—pure, delicious, chocolaty magic. Fast forward to today, and that spirit of adventure in the kitchen lives on with this Deep Dish Nutella Cookie Pie—each slice brimming with sweet memories and a whole lot of love.
Ingredients
Here’s what you will need to make your very own Deep Dish Nutella Cookie Pie:
-
1 cup all-purpose flour
This is the backbone of your cookie pie. For a gluten-free option, try almond flour or a gluten-free blend. -
1/2 teaspoon baking soda
This little powerhouse helps your cookie rise to perfection. You can substitute it with baking powder if that’s what you have on hand. -
1/4 teaspoon salt
A pinch of salt enhances the sweetness and balances the flavors beautifully. -
1/2 cup unsalted butter, softened
Butter adds richness and flavor. If you prefer a dairy-free option, feel free to use coconut oil or a vegan butter substitute. -
1/2 cup brown sugar
Brown sugar gives your cookie pie that wonderful chewiness and deep, caramel flavor. You can use white sugar if you’re in a pinch, but the flavor will be missing! -
1/4 cup granulated sugar
This helps to sweeten the pie further. You can swap it out with coconut sugar for a healthier alternative. -
1 large egg
This binds all the ingredients together. For a vegan option, try a flax egg (1 tablespoon of ground flaxseed + 2.5 tablespoons of water, mixed and allowed to sit for a few minutes). -
1 teaspoon vanilla extract
Vanilla is the secret sauce that ties everything together, adding warmth and depth of flavor. -
1/2 cup Nutella
The star of the show! If you’re feeling adventurous, try using another spread like cookie butter or peanut butter. -
1/2 cup chocolate chips
Because who doesn’t love more chocolate? You can use dark, milk, or even white chocolate chips depending on your preference.
Step-by-Step Instructions
Let’s get down to business! Here’s how to make your Deep Dish Nutella Cookie Pie—trust me, it’s simpler than it sounds!
-
Preheat your oven
Preheat your oven to 350°F (175°C). This is a crucial step that ensures an even bake from the get-go! -
Mix dry ingredients
In a bowl, whisk together the all-purpose flour, baking soda, and salt. This helps to evenly distribute the baking soda and salt throughout the flour. -
Cream the butter and sugars
In a separate bowl, cream together the softened butter, brown sugar, and granulated sugar using an electric mixer or a sturdy whisk until it’s smooth and fluffy—about 2-3 minutes. This process is vital because it incorporates air into the mixture, giving your cookie pie a light texture. -
Add the egg and vanilla
Beat the egg and vanilla extract into the butter-sugar mixture. Make sure everything is well combined; you want that delicious flavor to infiltrate every bite! -
Combine wet and dry ingredients
Gradually mix the dry ingredients into the wet ingredients—do this slowly to avoid flour clouds! Mix until just combined; be careful not to overmix, or you’ll end up with a tougher cookie. -
Fold in Nutella and chocolate chips
Now comes the fun part! Gently fold in the Nutella—you don’t want to fully mix it in; you’re looking for those delicious swirls of Nutella throughout the batter. Add the chocolate chips, folding them evenly through the mixture. -
Prepare your baking dish
Grease a deep dish pie pan with some butter or cooking spray. You really want to ensure it won’t stick, which makes serving so much easier! -
Scoop and spread
Pour the batter into the pan, and using a spatula, spread it evenly. You want it to look all nice and neat before it hits the oven. There’s something satisfying about that! -
Bake
Slide that beauty into the preheated oven and bake for about 25–30 minutes. The edges will turn golden brown, and the top will look set but still a little gooey in the center. That’s the magic you’re aiming for! -
Cool and serve
Let it cool for at least 10 minutes before slicing into it. This gives the inner Nutella time to thicken up slightly, making for perfect slices. Top with a scoop of vanilla ice cream or whipped cream for an added indulgence!
Serving Suggestions
There are so many fun ways to plate your Deep Dish Nutella Cookie Pie!
-
Classic Style: Simply cut a generous wedge and plate it next to a scoop of vanilla ice cream—what a classic combo!
-
Decadent Drizzle: Consider drizzling some extra melted Nutella over the top and sprinkling with crushed hazelnuts. This not only adds flavor but also a nice crunch!
-
Berry Burst: Serve it alongside fresh berries—strawberries, raspberries, or even a berry coulis—this adds a pop of color and a bit of acidity that complements the rich pie beautifully.
-
Cookie Crumbles: Sprinkle a handful of cookie crumbles atop the pie for added texture and presentation—who doesn’t love a good cookie on a cookie pie?
Recipe Variations
At Feastical, we believe in making recipes your own. Here are a few creative twists on your Deep Dish Nutella Cookie Pie:
-
Nutty Twist: Add 1/2 cup of chopped hazelnuts into the batter for an extra crunch!
-
Peanut Butter Perfection: Substitute half the Nutella with creamy peanut butter, creating a rich, nutty pie with a delightful flavor contrast.
-
Cocoa Lovers Unite: Add 1/4 cup of unsweetened cocoa powder to the dry ingredients for a brownie-like cookie texture and flavor.
-
S’mores Style: Fold in mini marshmallows and crumbled graham crackers for a nostalgic twist reminiscent of campfire s’mores.
-
Salted Caramel Delight: Drizzle some salted caramel over the top before serving for an indulgent finishing touch!
Chef’s Notes
You know, this recipe really evolved over time. The first few times I made it, I tried to make it more complicated, thinking more steps meant more flavor—but honestly, the magic is in its simplicity.
I’ll never forget the time I invited friends over for dinner. I planned an elaborate main course but ended up spending all my time refining this dessert instead. When it was time for dessert, I couldn’t even wait for it to cool before diving in, and the smiles around the table said it all. Food has that remarkable ability to create unforgettable moments, right?
One thing I’ve learned is that confidence is key in the kitchen. If you make a little mistake, own it, laugh, and carry on! That’s what cooking is all about—having fun and making sweet memories!
FAQs and Troubleshooting
1. Why is my cookie pie not rising?
If your cookie pie isn’t rising, it’s possible your baking soda is old and lost its power. Always check the expiry on your leavening agents, and store them properly!
2. Can I use a different spread instead of Nutella?
Absolutely! Feel free to use any chocolate spread, or even almond or cashew butter for a different flavor profile.
3. How do I store leftovers?
Store any leftover pie in an airtight container. It’ll stay fresh for about 3-4 days at room temperature, but I personally love it warm, so try popping it back in the microwave for a few seconds before enjoying!
4. My chocolate chips sank to the bottom! What happened?
This can happen if your batter is too thin. Make sure to not overmix the batter and to fold gently so the chocolate chips remain suspended in the mixture.
Nutritional Info
While I like to keep dessert indulgent and fun, it’s good to have an idea of what you’re munching on! Here’s a rough estimate for a single slice of Deep Dish Nutella Cookie Pie (based on 8 servings):
- Calories: 350
- Total Fat: 20g
- Saturated Fat: 10g
- Carbohydrates: 38g
- Sugars: 20g
- Protein: 4g
Keep in mind that nutritional values can vary based on specific brands and any alterations you make. Enjoy it in moderation—life is all about balance!
Final Thoughts
And there you have it—your guide to creating a delightful Deep Dish Nutella Cookie Pie that’s sure to put a smile on your face and warmth in your heart. Remember, the best recipes come from a place of love and joy not just in the ingredients to assemble but in the stories and people they are shared with.
So, grab your loved ones, roll up your sleeves, and make some magic happen in your kitchen. Whether it’s for a special occasion or just because you’ve had a long week, this deep dish cookie pie is always a winner.
Happy baking, and until next time, keep your spatulas ready and your bellies hungry! 🍽️
Print
Deep Dish Nutella Cookie Pie
- Total Time: 40 minutes
- Yield: 8 servings 1x
- Diet: Vegetarian
Description
A thick, chewy cookie pie filled with rich Nutella and topped with chocolate chips. Perfect for any occasion.
Ingredients
- 1 cup all-purpose flour
- 1/2 teaspoon baking soda
- 1/4 teaspoon salt
- 1/2 cup unsalted butter, softened
- 1/2 cup brown sugar
- 1/4 cup granulated sugar
- 1 large egg
- 1 teaspoon vanilla extract
- 1/2 cup Nutella
- 1/2 cup chocolate chips
Instructions
- Preheat your oven to 350°F (175°C).
- Mix dry ingredients in a bowl: whisk together flour, baking soda, and salt.
- Cream the softened butter, brown sugar, and granulated sugar until smooth and fluffy.
- Add the egg and vanilla extract to the butter-sugar mixture and beat until combined.
- Combine the dry ingredients with the wet ingredients, mixing gradually.
- Fold in the Nutella and chocolate chips gently to maintain swirls.
- Prepare a deep dish pie pan by greasing it.
- Scoop the batter into the pan and spread it evenly.
- Bake for about 25-30 minutes until golden brown.
- Cool for 10 minutes before slicing and serving.
Notes
Top with ice cream, drizzled Nutella, or fresh berries for added indulgence.
- Prep Time: 10 minutes
- Cook Time: 30 minutes
- Category: Dessert
- Method: Baking
- Cuisine: American
Nutrition
- Serving Size: 1 slice
- Calories: 350
- Sugar: 20g
- Sodium: 150mg
- Fat: 20g
- Saturated Fat: 10g
- Unsaturated Fat: 5g
- Trans Fat: 0g
- Carbohydrates: 38g
- Fiber: 1g
- Protein: 4g
- Cholesterol: 30mg
Keywords: Nutella cookie pie, dessert, baking, chocolate
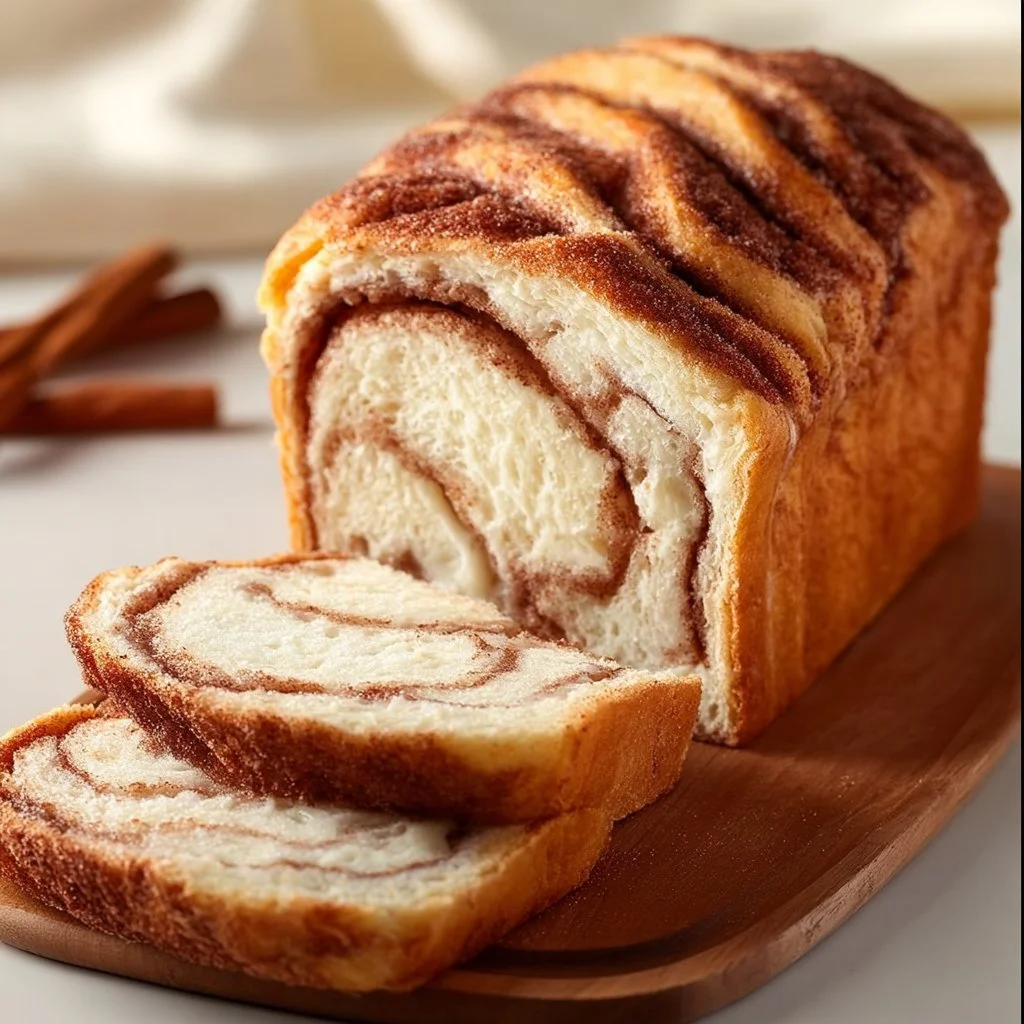
Cinnamon Roll Cottage Cheese Loaf
# The Ultimate Cinnamon Roll Cottage Cheese Loaf: A Comforting Treat to Savor!

## Introduction

Hey there, fellow foodies! Welcome back to Feastical, where delicious recipes meet heartfelt stories that make your kitchen feel just a bit cozier. Today, I’m thrilled to share with you one of my absolute favorite comfort food creations—a dish that embodies both nostalgia and innovation: the **Cinnamon Roll Cottage Cheese Loaf**. Imagine sinking your teeth into a sweet, tender loaf that combines the rich, creamy goodness of cottage cheese with the warm, inviting flavors of a classic cinnamon roll. It’s like a big hug from grandma but in loaf form!

Have you ever found yourself craving something sweet but comforting, something that feels just right with a cup of coffee in hand? This loaf hits all the right notes! It’s perfect for breakfast, an afternoon snack, or even a cheeky dessert after dinner. Plus, it’s simple to whip up and uses ingredients you probably have on hand, which makes it a go-to for any day of the week. So, whether you’re gearing up for a busy morning or looking for that end-of-the-day treat, this loaf is bound to be a crowd-pleaser—just like it is in my home!

But you know what? It’s not just about the flavors—it’s about sharing the love that goes into cooking. Nothing brings people together quite like a fresh-baked loaf that fills the air with cinnamon-spiced aromas and happy chatter. So why not roll up those sleeves, get your apron on, and let’s create something magical together in the kitchen? Ready to dive in? Let’s roll!

## Personal Story

This Cinnamon Roll Cottage Cheese Loaf holds a special place in my heart, and let me tell you why. Growing up, my grandmother had a knack for baking the most incredible cinnamon rolls. The entire house would come alive on those lazy Sunday mornings with the smell of cinnamon wafting through the air, mingling with the sounds of laughter and chatter. It was a ritual of sorts. We'd all gather around the kitchen table, relishing each gooey, warm bite of her creations.

As I became more passionate about cooking and sharing my love for food, I wanted to capture that nostalgia but with a twist. One morning, feeling inspired to mix things up while keeping that familiar cozy essence alive, I decided to throw cottage cheese into the mix—for moisture, protein, and a touch of tang. The result? A delightful loaf that not only nods to those cherished cinnamon rolls of my childhood but also makes it easy for anyone to whip up in their own kitchen. Now, whenever I bake this loaf, I’m taken back to those simple Sunday mornings, and I can’t help but smile. It’s more than just a recipe; it’s a slice of my past, ready to be enjoyed by each new generation!

## Ingredients

To whip up this Cinnamon Roll Cottage Cheese Loaf, you’ll need the following ingredients:

- **1 cup cottage cheese**
  *This creamy ingredient adds moisture and protein.* Look for a full-fat version for the richest flavor or a low-fat option if you’re watching calories.

- **2 cups all-purpose flour**
  *The backbone of any good loaf! A regular all-purpose flour does the trick, but you could substitute with whole wheat flour for a heartier version (just adjust the liquid slightly).*

- **1/2 cup granulated sugar**
  *This little sweetener balances the flavors. For a healthier option, you can swap it with coconut sugar or even honey (just adjust the liquid if needed).*

- **1/4 cup melted butter**
  *Adds richness and flavor. You can use coconut oil if you prefer a dairy-free option, or even applesauce for a lighter twist!*

- **2 large eggs**
  *They provide structure and moisture to the loaf. If you’re looking for an egg-free option, try using flax eggs (1 tablespoon of ground flaxseed mixed with 2.5 tablespoons of water per egg).*

- **1 tablespoon ground cinnamon**
  *The star of the show! Feel free to add a little more if you’re a cinnamon lover.*

- **2 teaspoons baking powder**
  *Essential for that perfect rise! If you only have baking soda, pair it with a bit of vinegar or lemon juice for leavening.*

- **1/2 teaspoon salt**
  *A pinch brings out the flavors and balances the sweetness. Always use the right amount so the loaf is truly scrumptious!*

- **1 teaspoon vanilla extract**
  *This elevates the flavor profile beautifully. You can use almond extract for an extra nutty twist if you’d like!*

## Step-by-Step Instructions

Now, let’s bring this delicious loaf to life! Here's how to do it step by step:

1. **Preheat Your Oven**
   Set your oven to 350°F (175°C). This step is crucial because a preheated oven ensures uniform cooking and a perfectly risen loaf. While it's warming up, you can prep your ingredients!

2. **Prepare Your Loaf Pan**
   Grease a 9x5-inch loaf pan with butter or spray it with non-stick cooking spray. This will make it easy to lift the loaf out after baking. For a little extra flavor and a rustic look, you might even consider dusting it with a bit of flour.

3. **Mix Dry Ingredients**
   In a large bowl, whisk together the flour, sugar, baking powder, cinnamon, and salt. This ensures even distribution of the leavening agents and spices throughout your loaf. Pro tip: sifting your flour before adding is a great way to enhance texture!

4. **Combine Wet Ingredients**
   In another bowl, mix the cottage cheese, melted butter, eggs, and vanilla extract until well combined. The cottage cheese may look lumpy, but don’t worry; that’s all part of its charm!

5. **Blend Wet and Dry Mixtures**
   Gradually pour the wet mixture into the dry ingredients. Stir gently with a spatula or wooden spoon until just combined. Be careful not to overmix—overmixing can lead to a dense loaf!

6. **Transfer to Pan**
   Pour the batter into your prepared loaf pan, using a spatula to smooth the top. Give it a little shake to level it out. This is your loaf starting to come together, and oh boy, it’s going to smell heavenly!

7. **Bake to Perfection**
   Place the loaf in your preheated oven and bake for 50-60 minutes. Start checking at the 50-minute mark by inserting a toothpick into the center—if it comes out clean or with a few moist crumbs, you’re all set!

8. **Cool Down**
   Once baked, welcome that golden loaf out of the oven and let it cool for about 15 minutes in the pan. After cooling, transfer it to a wire rack to cool completely. This helps maintain that lovely crust.

9. **Slice and Serve**
   Once the loaf is cool, grab a serrated knife and slice it up! Enjoy that first piece while it’s still warm, maybe with a pat of butter or a drizzle of honey.

## Serving Suggestions

Now that your Cinnamon Roll Cottage Cheese Loaf is baked and perfectly golden, let’s talk about how to serve it. You can keep it simple—just a slice on its own is enough to make anyone smile. Or, for an indulgent twist, toast a slice and slather it with cream cheese frosting or a warm glaze made from powdered sugar and milk!

Another fun idea? Serve it with fresh fruit on the side—think berries or sliced bananas—maybe even a dollop of yogurt for that extra creaminess to balance the sweetness. This loaf also makes for a wonderful breakfast option paired with a warm cup of coffee or tea. Trust me, that morning ritual will feel even more special with a slice of this loveable loaf!

## Recipe Variations

Now, let’s make things interesting! Here are some creative twists to take your loaf to the next level:

1. **Chocolate Chip Delight**
   Toss in a handful of chocolate chips right before transferring the batter to the loaf pan. It adds a rich surprise with each bite, perfect for the chocolate lovers in your life!

2. **Nutty Crunch**
   Chopped walnuts or pecans can add a delightful crunch. Just toss about half a cup into the batter for added texture and flavor.

3. **Fruity Infusion**
   Add a cup of fresh or frozen berries like blueberries or raspberries into the mix! They’ll add a tartness that perfectly balances the sweetness.

4. **Pumpkin Spice Dream**
   Looking for an autumnal twist? Substitute mashed pumpkin for half of the cottage cheese and increase the cinnamon to 2 teaspoons for a spicy pumpkin loaf.

5. **Gluten-Free Option**
   Swap out the all-purpose flour for a gluten-free all-purpose blend. Make sure it contains xanthan gum for that perfect loaf texture.

## Chef’s Notes

This Cinnamon Roll Cottage Cheese Loaf has quickly become a staple in my home, especially during cozy seasons when the weather cools down, and we crave warmth and comfort. It’s funny how a simple combination of ingredients can evolve into something so delightful!

When I first created this recipe, I was just looking for a way to utilize the cottage cheese that had been sitting in my fridge. What started as an experiment turned into a crowd favorite! I love to share it at potlucks, and you wouldn’t believe the smiles it brings. Trust me, once you share this loaf with your friends and family, you’ll be asked for the recipe in no time!

## FAQs and Troubleshooting

**1. Why is my loaf dense?**
If your loaf is dense, it may be due to overmixing the batter. Remember, mix just until combined, and you should be golden!

**2. How do I store leftovers?**
Store your loaf in an airtight container at room temperature for up to 3 days. For longer storage, slice it and freeze individual pieces for a quick treat later!

**3. Can I use different sized loaf pans?**
Absolutely! If you're using a smaller pan, keep an eye on the baking time as it may require less time. Pour in the batter until it’s about two-thirds full to avoid overflow.

**4. How do I know when my loaf is done?**
The toothpick test is your best friend! If it comes out clean or with a few moist crumbs (not wet batter), your loaf is ready to come out.

## Nutritional Info

While I believe in enjoying food that comes straight from the heart, it’s always good to have a peek at the nutritional side of things, especially if you're trying to be mindful about your diet! One slice (about 1/12 of the loaf) contains roughly:

- Calories: 180
- Protein: 6g
- Carbohydrates: 25g
- Fat: 7g
- Fiber: 1g

Of course, these numbers can vary depending on the ingredients you choose, but this loaf offers a balance of protein from the cottage cheese and some carbs to keep your energy up. Plus, it’s a fantastic way to treat yourself while incorporating cottage cheese's benefits!

## Final Thoughts

And there you have it, friends! A **Cinnamon Roll Cottage Cheese Loaf** that’s not only scrumptious but also brings a sense of nostalgia and warmth, perfect for any occasion. I truly hope you give this recipe a try because once you taste that first slice, you’ll understand why it’s become an instant favorite in my kitchen.

Remember, the magic of cooking lies in experimentation and love. So don’t be afraid to adapt the recipe, make it your own, and share your creations with loved ones. I can’t wait to hear how your Cinnamon Roll Cottage Cheese Loaf turns out, so be sure to pop back in and share your experiences! Until next time, keep cooking up those feel-good flavors, and let’s keep this delightful community growing. Happy baking!

Cinnamon Roll Cottage Cheese Loaf
- Total Time: 75 minutes
- Yield: 12 servings 1x
- Diet: Vegetarian
Description
A comforting loaf that combines the creamy goodness of cottage cheese with the warm flavors of cinnamon rolls.
Ingredients
- 1 cup cottage cheese
- 2 cups all-purpose flour
- 1/2 cup granulated sugar
- 1/4 cup melted butter
- 2 large eggs
- 1 tablespoon ground cinnamon
- 2 teaspoons baking powder
- 1/2 teaspoon salt
- 1 teaspoon vanilla extract
Instructions
- Preheat your oven to 350°F (175°C).
- Prepare a 9×5-inch loaf pan by greasing it with butter or non-stick spray.
- Mix the dry ingredients: whisk together flour, sugar, baking powder, cinnamon, and salt in a large bowl.
- Combine the wet ingredients: mix cottage cheese, melted butter, eggs, and vanilla in another bowl.
- Blend the wet mixture into the dry ingredients until just combined.
- Transfer the batter to the prepared loaf pan and smooth the top.
- Bake for 50-60 minutes, checking for doneness with a toothpick.
- Cool for 15 minutes in the pan, then transfer to a wire rack.
- Slice and serve warm, optionally with butter or honey.
Notes
This loaf can be customized with chocolate chips, nuts, or fruits for extra flavor.
- Prep Time: 15 minutes
- Cook Time: 60 minutes
- Category: Dessert
- Method: Baking
- Cuisine: American
Nutrition
- Serving Size: 1 slice
- Calories: 180
- Sugar: 6g
- Sodium: 200mg
- Fat: 7g
- Saturated Fat: 4g
- Unsaturated Fat: 3g
- Trans Fat: 0g
- Carbohydrates: 25g
- Fiber: 1g
- Protein: 6g
- Cholesterol: 50mg
Keywords: cinnamon roll, cottage cheese, loaf, comfort food, baking, dessert