
High Protein Greek Yogurt Bread
High Protein Greek Yogurt Bread: A Deliciously Simple Recipe
Hey there, fellow foodies! I’m Beau Collier, and I’m absolutely thrilled to welcome you to another delightful dish here at Feastical. Today, we’re diving into something warm, delicious, and packed with protein – High Protein Greek Yogurt Bread! If you love the aroma of freshly baked bread wafting through your kitchen while knowing you’re also indulging in a healthy option, then you’re in for a treat.
Baking can seem daunting, but trust me, this quick and hassle-free bread will change your mind. Greek yogurt not only gives this bread a unique moisture but also adds an incredible protein boost. Whether you slather it with butter, top it with avocado, or use it as a base for sandwiches, this bread is your new best friend in the kitchen. Plus, it’s perfect for breakfast or as an afternoon snack! So, grab your apron (or your comfiest kitchen attire), and let’s get started on this wholesome adventure!
Personal Story
I’ll never forget the first time I baked bread with my grandma. On rainy Sundays, we would cozy up in her kitchen, pouring flour and water together, hoping for some magical concoction. I remember the way her eyes lit up as the dough began to rise, and she’d whisper, “Just like us, Beau—I’ll rise too!” It took years for me to perfect my bread-making skills, but when I discovered the wonder of Greek yogurt, it felt like all my bread-baking dreams had come true!
This High Protein Greek Yogurt Bread has that nostalgic comfort baked right into it. It’s a bread that’s simple and full of love, just like those rainy Sundays with my grandma. Now, I can whip it up in no time, and the best part? I can share it with my friends and family. So, let’s roll up our sleeves, sprinkle some flour, and make this delicious bread together!
Ingredients
Here’s what you need to whip up this delightful High Protein Greek Yogurt Bread.
-
1 cup (approximately 225 grams) of unflavored, thick Greek yogurt (0–2% fat recommended):
- This creamy goodness is the star of the show! It adds moisture and a boost of protein. If you’re out of Greek yogurt, you can use regular yogurt, but keep in mind it might not hold the same thickness and flavor.
-
1 cup (around 120 grams) of self-rising flour:
- Self-rising flour is a blend of all-purpose flour, baking powder, and salt. It saves time and simplifies the process. If you don’t have self-rising flour on hand, don’t fret! You can make your own by combining 1 cup of all-purpose flour with 1.5 teaspoons of baking powder and a pinch of salt.
-
Optional: A pinch of salt and a dash of honey or sugar (for sweetness):
- While the yogurt brings its own lovely flavor, a pinch of salt can enhance the overall taste, and honey adds a hint of sweetness. Feel free to adjust these according to your palate.
With these simple ingredients, you’re well on your way to baking some incredible Greek yogurt bread that’ll have everyone saying, “More, please!”
Step-by-Step Instructions
Now let’s get to baking! Preheat that oven, and let’s make some magic happen. Here’s how to do it:
-
Preheat your oven to 350°F (175°C):
- Make sure it’s at the right temperature, so your bread starts rising as soon as it hits the oven.
-
Mix the yogurt and flour:
- In a mixing bowl, combine your Greek yogurt and self-rising flour. Use a spatula or a wooden spoon to mix until just combined.
Tip: Don’t overmix! A gentle stir should leave you with a slightly sticky dough.
- In a mixing bowl, combine your Greek yogurt and self-rising flour. Use a spatula or a wooden spoon to mix until just combined.
-
Add optional ingredients:
- If you’re opting for a pinch of salt and a dash of honey or sugar, now’s the time to add them in. This step amplifies the flavor of your bread!
Chef Insight: Taste the dough! If you feel it needs a little more sweetness or salt, don’t hesitate to adjust the seasoning to your taste.
- If you’re opting for a pinch of salt and a dash of honey or sugar, now’s the time to add them in. This step amplifies the flavor of your bread!
-
Shape the dough:
- Lightly flour your countertop and plop the dough out onto it. With floured hands, gently knead the dough for a minute or two until it holds together well.
Tip: If it’s too sticky, feel free to add a little extra flour – just don’t over-knead.
- Lightly flour your countertop and plop the dough out onto it. With floured hands, gently knead the dough for a minute or two until it holds together well.
-
Form into a loaf:
- Shape the dough into a rough loaf or ball shape, depending on your preference. You want it to be even and smooth, but no need for perfection here!
-
Transfer to a baking pan:
- Place your shaped dough onto a lined or greased baking dish. You can shape it into a round loaf or a rectangle based on your style.
Chef Hack: For a fun twist, try making small rolls instead! Just divide the dough into smaller portions before shaping.
- Place your shaped dough onto a lined or greased baking dish. You can shape it into a round loaf or a rectangle based on your style.
-
Bake:
- Slide it into the preheated oven and let it bake for 30-35 minutes, or until the top is golden brown and the bread sounds hollow when tapped.
Tip: If you’re a fan of a really crusty top, try brushing a little olive oil or melted butter on the surface before baking!
- Slide it into the preheated oven and let it bake for 30-35 minutes, or until the top is golden brown and the bread sounds hollow when tapped.
-
Cool the bread:
- Once baked, remove it from the oven and let it cool on a wire rack for at least 10-15 minutes. This allows the steam to escape and helps with the slicing.
Boom! You’ve just created a delicious High Protein Greek Yogurt Bread that’s inviting and oh-so-satisfying!
Serving Suggestions
Serving your lovely homemade bread is part of the fun! Here are some ideas that’ll make your bread a centerpiece:
-
Toast with Toppings: Slice yourself a thick piece and toast it lightly. Top it with creamy butter, a drizzle of honey, and a sprinkle of cinnamon. Divine!
-
Savory Pairing: Spread a layer of hummus, and top it with sliced cucumbers, radishes, and a sprinkle of feta cheese for a Mediterranean spin.
-
Perfect Sandwich Base: Use it as a base for sandwiches! Load it up with your favorite meats, fresh veggies, and a smear of spread.
-
Gather Around: Consider serving it warm at a family gathering or with friends paired alongside a bowl of soup or chili. Its heartiness complements such meals beautifully!
No matter how you choose to serve it, the moment it hits the table, the wow factor is guaranteed!
Recipe Variations
One of the best parts of cooking is that you can always make a recipe your own! Here are some twists for your High Protein Greek Yogurt Bread:
-
Herb-Infused Bread: Add a tablespoon of dried herbs like rosemary or thyme to the dough for an aromatic flavor boost.
-
Nutty Delight: Toss in some chopped walnuts or sunflower seeds for added crunch and healthy fats.
-
Cheese Lover’s Choice: Mix in shredded cheese like cheddar or feta for that gooey, cheesy goodness that’s hard to beat.
-
Berry Goodness: If you’re feeling adventurous, fold in some dried cranberries or blueberries into the dough for a touch of sweetness.
-
Gluten-Free Option: Swap the self-rising flour for a gluten-free blend, ensuring that it has a leavening agent included.
With these variations, every baking session can feel like a new adventure!
Chef’s Notes
As a chef, it’s all about those little stories and experiences that go along with each recipe. The High Protein Greek Yogurt Bread has definitely seen its fair share of twists in my kitchen. I still remember the first time I tried this recipe using flavored yogurt for a quirky spin. Boy, did that turn out to be an interesting experiment! The bread came out with hints of strawberry – not bad but certainly unexpected!
It’s all about having fun. Embrace those funny mishaps, and create stories you can tell while enjoying each bite of your bread.
FAQs and Troubleshooting
1. Why did my bread not rise?
- If your bread didn’t rise, it could be that your self-rising flour expired or that you didn’t mix it enough with the yogurt. Make sure to use fresh ingredients and mix them gently!
2. My bread is gummy on the inside; what went wrong?
- Gummier interiors often mean that the bread was underbaked. Ensure that your oven temperature is accurate, and if you suspect it’s baking too quickly on the outside, try lowering the temperature slightly and giving it a little more time.
3. Can I freeze this bread?
- Absolutely! Wrap your cooled bread in plastic wrap or foil and store it in the freezer. When it’s time to eat, just thaw it at room temperature or pop it in the toaster for a quick warm-up.
4. What can I do with leftovers?
- If you have leftover bread, turn it into croutons or even breadcrumbs! You can also make a delicious bread pudding with it as a fabulous dessert.
Nutritional Info
Let’s chat about how nutritious this High Protein Greek Yogurt Bread really is! Each slice packs in the goodness with:
-
Protein: One slice contains a good chunk of protein from the Greek yogurt, keeping you full and satisfied.
-
Low in Fat: With the right yogurt, you’ll find this bread to be lower in fat, making it a great option for many dietary needs.
-
Carbohydrates: The carbohydrates from the self-rising flour provide the necessary energy you need, especially if you’re active.
Note: Nutritional values may vary depending on the exact items you use, so make sure to check the labels on your ingredients for precise information!
Final Thoughts
There you have it, friends—your very own High Protein Greek Yogurt Bread! It’s not just a recipe; it’s an experience that brings warmth, love, and comfort into the kitchen. Whether you’re baking alone, with family, or for a gathering with friends, this bread is simple enough for everyone to embrace and enjoy.
So, the next time you’re feeling peckish or have a bit of time on your hands, I hope you remember this recipe and create your own memories in the kitchen. Let the smell of fresh-baked bread fill your home and your heart, and don’t forget to share it with those you love. Happy baking, and until next time, keep those spatulas and spoons at the ready—there’s always more deliciousness to come at Feastical! 🍞✨
Print
High Protein Greek Yogurt Bread
- Total Time: 45 minutes
- Yield: 8 servings 1x
- Diet: Vegetarian
Description
A deliciously simple Greek yogurt bread that is warm, healthy, and packed with protein.
Ingredients
- 1 cup (approximately 225 grams) of unflavored, thick Greek yogurt (0–2% fat recommended)
- 1 cup (around 120 grams) of self-rising flour
- Optional: A pinch of salt and a dash of honey or sugar
Instructions
- Preheat your oven to 350°F (175°C).
- Mix the yogurt and flour in a mixing bowl until just combined.
- Add optional ingredients like salt and honey or sugar to enhance flavor.
- Shape the dough on a floured countertop and knead gently.
- Form into a loaf or ball shape and transfer to a baking pan.
- Bake for 30-35 minutes or until golden brown.
- Cool on a wire rack for at least 10-15 minutes before slicing.
Notes
Try adding herbs, nuts, or cheese for variations. Perfect for breakfast or snacks!
- Prep Time: 10 minutes
- Cook Time: 35 minutes
- Category: Bread
- Method: Baking
- Cuisine: Mediterranean
Nutrition
- Serving Size: 1 slice
- Calories: 180
- Sugar: 3g
- Sodium: 150mg
- Fat: 3g
- Saturated Fat: 1g
- Unsaturated Fat: 2g
- Trans Fat: 0g
- Carbohydrates: 30g
- Fiber: 1g
- Protein: 8g
- Cholesterol: 10mg
Keywords: Greek yogurt bread, high protein bread, easy bread recipe, healthy bread
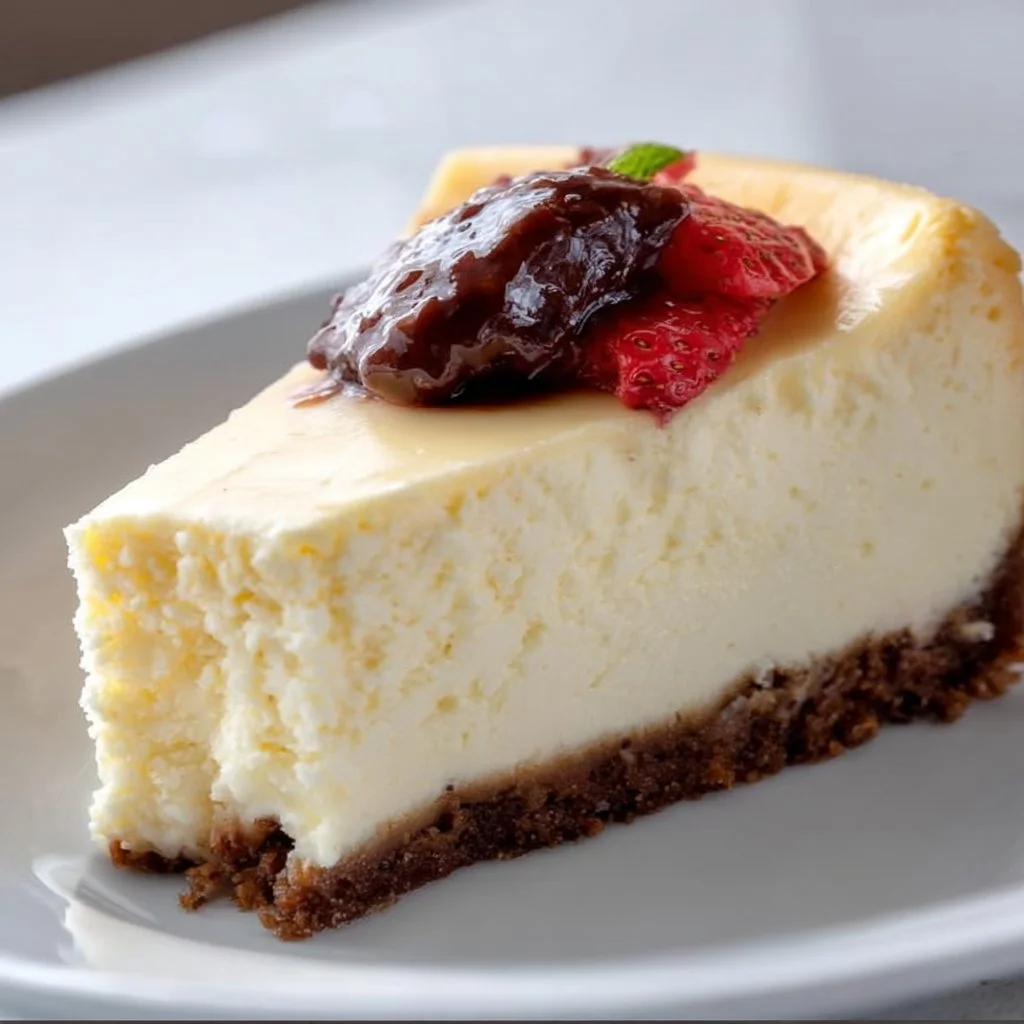
0 Point Cheesecake
The Light and Creamy 0 Point Cheesecake: A Guilt-Free Delight!
Hey there, fellow food lovers! I’m Beau Collier, and you’re in for a treat today because we’re diving into the silky, sweet world of cheesecake—but with a twist! Yes, you heard me right: I’m going to show you how to whip up a luscious 0 Point Cheesecake. That’s right, zero points! This dessert not only tastes heavenly but is also a guilt-free indulgence that makes your heart and taste buds sing.
Now, cheesecake has long been a beloved dessert, often associated with decadent dinners and occasions where you’re tempted to eat the whole pie by yourself (I’ve been there, trust me!). But with this super simple recipe, I promise you can have your cheesecake and eat it too—without straying from your healthy eating goals. Whether you’re whipping this up for a gathering or just for yourself (no judgment here, we all deserve a little “me time”), this recipe is your ticket to a lighter dessert that everyone will adore. So grab your spatula, and let’s get ready to create some cheesecake magic!
A Slice of Nostalgia
Let me take you back to one of my most cherished memories in the kitchen. It was a rainy Saturday afternoon, and I was around ten years old, cooking alongside my grandma. She was the master of dessert, and I was her eager apprentice. On that day, we were making her famous cheesecake from scratch, a family recipe that had been passed down through generations.
As the sweet aroma filled the kitchen, we shared stories about life, love, and everything in between. I remember the way she’d sneak in a bit of lemon juice and a dash of vanilla extract—ingredients that created a perfect balance in flavor. In those moments, I learned that cooking is more than just following a recipe; it’s about creating memories and bonding over something delicious.
Fast forward years later, I found myself wanting to recreate that rich, creamy cheesecake, but I knew my health goals needed to come first. This led me to experiment with lighter ingredients, eventually landing on this fabulous 0 Point Cheesecake. It’s a tribute to that cherished memory and all the joy that comes from cooking with loved ones.
Ingredients: The Building Blocks of Our Cheesecake
Ready to gather your ingredients? Here’s what you’ll need to make this scrumptious 0 Point Cheesecake:
-
1 cup non-fat Greek yogurt
Why it’s fab: This creamy base gives our cheesecake its richness without the calories of regular cream cheese. Plus, it packs in protein, helping you feel fuller for longer!
Substitution tip: If you’re feeling adventurous, try low-fat yogurt for a creamier consistency. -
1/2 cup unsweetened applesauce
Why it’s fab: This natural sweetener not only adds moisture but also complements the tanginess of the yogurt.
Substitution tip: Pureed banana or even pumpkin can work wonders if you’re after a different flavor. -
2 packets of sugar substitute (optional)
Why it’s fab: Want a sweeter cheesecake? These can help without the extra calories!
Substitution tip: Honey or maple syrup are great natural alternatives—just adjust the quantity! -
1 tsp vanilla extract
Why it’s fab: Vanilla adds warmth and depth. It’s the secret ingredient that rounds out the flavor perfectly! -
1/2 cup low-fat cream cheese
Why it’s fab: This adds that traditional cheesecake texture without all the fat!
Substitution tip: Neufchâtel cheese is a fantastic option for an even lighter alternative! -
1/4 cup lemon juice
Why it’s fab: The tartness balances the sweetness and adds brightness to the cheesecake.
Substitution tip: If you’re really not a lemon fan, try lime juice instead! -
1/2 tsp cornstarch (optional for thickening)
Why it’s fab: This helps the cheesecake set, especially if you’re looking for that extra firmness.
Substitution tip: Arrowroot powder can serve the same purpose if you prefer a gluten-free option!
Step-by-Step Instructions: Let’s Get Cooking
Alright, my friend, it’s time to get cooking! Here’s how to whip up this delicious cheesecake:
Step 1: Gather Your Ingredients
First thing’s first, ensure you have all your ingredients prepped and at your fingertips. Trust me, nothing dashes the excitement quite like running around searching for that elusive vanilla extract!
Step 2: Blend It Up
In a mixing bowl, combine the non-fat Greek yogurt, unsweetened applesauce, and low-fat cream cheese. Use a hand mixer or a stand mixer for a smooth and creamy texture. Start on a low speed (we don’t want a messy kitchen!) and gradually increase. Mix until everything is well blended and there are no lumps. Chef’s Note: Let your cream cheese soften at room temperature before mixing to avoid clumps!
Step 3: Sweeten the Deal
Add in the sugar substitute (if using) and vanilla extract to the mixture. Continue to blend until all ingredients are smoothly integrated. Tip: Tasting along the way is key! Adjust the sweetness to your liking—everyone has their own preference!
Step 4: Lemon-Lime Goodness
Now, pour in the lemon juice and mix again until everything is well combined. The fresh citrus is going to elevate the cheesecake to a whole new level! If you’re using cornstarch, add it in now and mix until it’s completely incorporated.
Step 5: Prepare Your Pan
Grab a springform pan (this makes for easy release later!) and spray it lightly with cooking spray. Pour your cheesecake mixture into the pan, smoothing the top with a spatula. Chef’s Hack: To avoid cracking as it bakes, tap the pan gently on the counter to release any air bubbles!
Step 6: Bake or Chill
Here’s where you can choose your destiny! You can bake it at 350°F (about 175°C) for about 25-30 minutes until it sets, or you can chill it in the fridge for about 4 hours if you prefer a no-bake approach. I personally love the no-bake route for how dreamy and lush the texture ends up!
Step 7: Cool and Serve
Once baked or chilled, let it cool completely before releasing from the springform pan. Trust me, the wait will be worth it! Top with fresh fruit, a drizzle of chocolate, or a sprinkle of nuts for added flair.
Serving Suggestions: How to Plate It Up
Now comes the fun part: serving your gorgeous cheesecake! For that Instagram-worthy look, take a slice and place it on a colorful plate. Add a dollop of fresh whipped cream (you can use light whipped cream for an even lighter option) and scatter fresh berries around—raspberries, blueberries, or strawberries all work beautifully.
Drizzle a bit of honey for that sweet touch, or if you’re feeling adventurous, a homemade berry compote brings a lovely burst of flavor. The contrasting colors and textures not only make it inviting but will also have your guests raving about your culinary skills!
Recipe Variations: Mix It Up!
This 0 Point Cheesecake is incredibly versatile, so let’s get creative! Here are some fun variations you can try:
1. Chocolate Delight
Mix in unsweetened cocoa powder with the base mixture for a rich chocolate cheesecake. Top with dark chocolate shavings or fresh raspberries for a decadent treat!
2. Tropical Twist
Add crushed pineapple and shredded coconut for a fruity island-inspired cheesecake. A bit of lime juice can elevate the tropical vibe!
3. Nutty Flavor
Swirl in a bit of almond butter for a nutty flair, giving your cheesecake a delightful taste. Top with sliced almonds or pecans for crunch!
4. Coffee Kick
For all the coffee lovers out there, add espresso powder or brewed coffee to the mixture for a delightful mocha cheesecake. A sprinkle of cocoa or chocolate-covered espresso beans on top would make it divine!
5. Seasonal Spice
Don’t forget about the holidays! Add cinnamon and nutmeg for a fall-inspired cheesecake, and maybe top it with a warm apple compote.
Chef’s Notes: A Journey of Flavors
As I developed this recipe, it has gone through quite a few iterations in my kitchen. I originally intended to create a cheesecake low in points, but I found myself sautéing in the whims of flavor. The key was always balancing that creamy texture with the zestiness of lemon. I remember when I accidentally added too much lemon juice one time—it turned into a delightful lemon curd instead of a cheesecake! A happy accident, indeed!
I also recall a time when I brought this cheesecake to a potluck dinner, nervously peeking around to see if anyone would pick it over the other rich desserts. To my surprise, it was one of the first to disappear! It warmed my heart to see how well-received it was, proving you can enjoy delicious desserts without the heaviness.
FAQs and Troubleshooting
Question 1: Why is my cheesecake cracked?
Cracking can happen for several reasons: oven temperature, rapid cooling, or even overmixing. Baking it at a lower temperature and allowing it to cool gradually can help prevent cracks.
Question 2: How can I make it sweeter?
Feel free to play around with sweeteners—taste as you go! Honey or maple syrup can give you that perfect sweetness level while keeping it natural.
Question 3: Can I freeze it?
Absolutely! This cheesecake freezes wonderfully. Just make sure to wrap it tightly in plastic wrap and foil to maintain its texture.
Question 4: What’s the best way to store leftovers?
Keep it covered in the fridge for up to a week, or freeze for longer storage. Just remember to let it come to room temperature before serving again for the best texture!
Nutritional Info
Let’s talk about the nutritional benefits of this delightful cheesecake! Each slice of this 0 Point Cheesecake is generally low in calories, high in protein from the Greek yogurt, and contains no added sugars if you skip the sweeteners.
This means you’re indulging in:
- Protein: Thanks to Greek yogurt, which will help you feel full.
- Calcium: Essential for maintaining healthy bones, plus it contributes to the creaminess of the cheesecake without the added fat.
- Vitamins and Minerals: From the fruit toppings, you’ll also be adding antioxidants and essential vitamins into the mix.
The best part? You can enjoy this dessert guilt-free, making it an ideal treat for any health-conscious dessert lover!
Final Thoughts
So there you have it—your road map to crafting a delicious 0 Point Cheesecake that promises to delight your taste buds without the guilt! I hope this recipe brings a little something special to your kitchen, just as it has for mine.
I can’t wait for you to try it and maybe even make your own memories while whipping it up. Remember, cooking isn’t just about the end product; it’s about the joy of creating, the laughter shared, and the delightful treats savored. So let’s keep the good vibes going and make every meal a feast!
Till next time, happy cooking, my fellow culinary adventurers! 🌟🍰
Print
0 Point Cheesecake
- Total Time: 45 minutes
- Yield: 8 servings 1x
- Diet: Low-Calorie
Description
A silky, sweet, and guilt-free cheesecake that’s perfect for healthy eating goals.
Ingredients
- 1 cup non-fat Greek yogurt
- 1/2 cup unsweetened applesauce
- 2 packets of sugar substitute (optional)
- 1 tsp vanilla extract
- 1/2 cup low-fat cream cheese
- 1/4 cup lemon juice
- 1/2 tsp cornstarch (optional for thickening)
Instructions
- Gather Your Ingredients: Ensure you have all your ingredients prepped.
- Blend It Up: Combine the Greek yogurt, applesauce, and cream cheese until smooth.
- Sweeten the Deal: Add in sugar substitute and vanilla, blending until well mixed.
- Lemon-Lime Goodness: Pour in lemon juice and mix again; add cornstarch if using.
- Prepare Your Pan: Spray a springform pan with cooking spray and pour in the mixture, smoothing the top.
- Bake or Chill: Bake at 350°F for 25-30 minutes or chill in the fridge for 4 hours for a no-bake option.
- Cool and Serve: Let it cool completely before serving, then top with fresh fruit or nuts.
Notes
For a variation, mix in cocoa for a chocolate cheesecake or add crushed pineapple for a tropical flavor.
- Prep Time: 15 minutes
- Cook Time: 30 minutes
- Category: Dessert
- Method: Baking
- Cuisine: American
Nutrition
- Serving Size: 1 slice
- Calories: 150
- Sugar: 4g
- Sodium: 80mg
- Fat: 5g
- Saturated Fat: 2g
- Unsaturated Fat: 3g
- Trans Fat: 0g
- Carbohydrates: 20g
- Fiber: 1g
- Protein: 7g
- Cholesterol: 15mg
Keywords: cheesecake, low calorie, guilt-free dessert, healthy cheesecake

Yogurt Cake
A Delightful Journey into Yogurt Cake: Your New Favorite Dessert
Hey friends! Beau here, and today we’re diving into something incredibly special—Yogurt Cake. If you’re searching for a dessert that’s not just sweet, but also a little tangy, super moist, and quite forgiving for us home cooks, you’ve stumbled into the right recipe! This cake isn’t just another dessert; it’s a nostalgic treasure that carries the essence of laid-back afternoons, laughter, and the warmth of home.
You might be wondering, why yogurt? Well, let me tell you: yogurt is a magical ingredient. Its natural moisture adds a luxurious softness to cakes, while that slight tanginess balances the sweetness perfectly. Plus, it brings a wealth of health benefits to our humble dessert, making it feel like a win-win in the kitchen.
Picture this: a thick slice of golden Yogurt Cake resting on your favorite plate, the fork gently sinking in, revealing a fluffy crumb that’s just begging for a cup of tea or coffee on the side. Trust me; this cake is more than just a snack; it’s a hug on a plate! So, tie on that apron, and let’s embark on this delicious adventure together.
Why is Yogurt Cake becoming a go-to for so many home chefs like us? It’s versatile, easy to customize, and doesn’t demand a lot of special equipment or time. Plus, it’s the perfect canvas for seasonal fruits, spices, or a drizzle of icing. So let’s roll up our sleeves and create something wonderful that’s going to impress not just your taste buds but also anyone you’ll share it with!
Personal Story
Ah, the memories tied to Yogurt Cake are some of my favorites. I remember standing on a stool in my grandmother’s kitchen, eyes wide with excitement, while she measured ingredients for her famous cake. The air was filled with the comforting aroma of vanilla and citrus zest. Every Sunday, like clockwork, we’d whip up a batch together, and I’d sneak spoonfuls of the yogurt mixture when she wasn’t looking (sorry, Grandma!).
One rainy afternoon stands out particularly in my mind. After a long day of exploring the neighborhood puddles, I came home soaked but bursting with energy. My grandmother greeted me with a warm slice of Yogurt Cake and a tall glass of milk. That moment felt like pure magic; with every bite, I felt comforted and content as we chatted about everything and nothing over the soft, fluffy cake.
As I grew up, I began to make this cake for friends and family alike, adding my twist while keeping my grandmother’s fundamental lessons alive. It’s funny how a dish can carry so much love and nostalgia, uniting us across generations. So let’s share that joy! If I can bring a bit of that warmth into your kitchen, my job here is done. Now, let’s get those ingredients ready!
Ingredients
Before we jump into the magical world of mixing and baking, let’s gather our ingredients. Here’s what we’ll need for our Yogurt Cake:
-
1 cup plain yogurt
Yogurt is the star of our show! A thicker yogurt (like Greek) will yield a denser cake, while regular will keep it lighter. If you’re looking for dairy-free options, try using coconut yogurt! -
3 large eggs
Eggs give the cake structure and moisture. For a vegan substitute, you can use flax eggs (1 tablespoon of ground flaxseed + 2.5 tablespoons of water, set aside for 5 minutes). -
1 cup granulated sugar
This sweetens our cake and helps create that beautiful crust as it bakes. If you prefer, you can replace white sugar with coconut sugar for a hint of caramel flavor. -
1/2 cup vegetable oil (or melted butter)
This fat keeps our cake moist. You can substitute with melted coconut oil for a delicious twist or use applesauce for a healthier option. -
1 teaspoon vanilla extract
A splash of vanilla enhances the flavor, but feel free to get creative with almond extract or citrus zest for a unique spin. -
2 cups all-purpose flour
The base of our cake, providing structure. If you want a gluten-free version, try a gluten-free flour blend. -
2 teaspoons baking powder
This is our rising agent, creating those fluffy textures. Always double-check your baking powder for freshness! -
1/2 teaspoon salt
A little salt balances the sweetness and enhances flavors across the board.
Using these ingredients, let’s create something truly comforting and delightful.
Step-by-Step Instructions
Now that we’ve got all of our ingredients ready, let’s get our hands dirty! Here’s how to make the perfect Yogurt Cake.
Step 1: Preheat and Prep
Start by preheating your oven to 350°F (175°C). While that’s warming up, grease a 9-inch round cake pan (or line it with parchment paper) to prevent any sticky situations later.
Chef Tip: I love using cooking spray for the corners of my cake pans—those pesky edges can be tricky!
Step 2: Mix Your Wet Ingredients
In a large bowl, whisk together your yogurt, eggs, sugar, and oil until smooth and creamy. This is the stage to really get that good arm workout in!
Chefs Insight: Whisking not only mixes but also incorporates air, helping our cake rise beautifully.
Step 3: Combine Dry Ingredients
In another bowl, sift together the flour, baking powder, and salt. Sifting helps eliminate lumps and creates a lighter texture.
Chefs Tip: You can whisk the dry ingredients to combine them well; no need for extra bowls if you’re like me and hate the dishes!
Step 4: Bring It Together
Now, gently fold your dry mixture into your wet mixture using a rubber spatula. Be careful not to overmix—this can lead to a dense cake. We want light and fluffy!
Chef Hack: If you see a few flour streaks, that’s okay! They will sort themselves out as you mix.
Step 5: Pour and Bake!
Pour the batter into your prepared cake pan, ensuring it’s evenly distributed. Pop it into that preheated oven and bake for about 30–35 minutes, or until a toothpick inserted in the center comes out clean.
Tip for Success: It’s always a good idea to start checking around the 25-minute mark if your oven runs hot!
Step 6: Cool Down
Once baked, remove the cake from the oven and let it cool in the pan for 10 minutes. Then, transfer it to a wire rack to cool completely.
Chef’s Note: This is the perfect moment to whip up some tea or coffee—trust me, you’re going to need it!
Serving Suggestions
Serving your Yogurt Cake can be as simple or as fancy as you like! Dust the cooled cake with powdered sugar for a classic look, or drizzle a simple glaze made of powdered sugar and lemon juice for a zesty kick.
For an elevated experience, consider topping it with fresh berries, mint leaves, or even a dollop of whipped cream for a touch of elegance. If you’re feeling adventurous, serve warm slices with a scoop of vanilla ice cream for dessert perfection.
Chef Tip: Plate it up on your favorite colorful dishware—it makes a world of difference in presentation!
Recipe Variations
The beauty of Yogurt Cake lies in its versatility. Here are some fun twists you can explore:
-
Lemon Yogurt Cake: Add the zest of one lemon to the batter and replace some of the yogurt with freshly squeezed lemon juice for a refreshing punch.
-
Berry Swirl Yogurt Cake: Gently fold in fresh berries like blueberries or raspberries right before you pour it into the baking pan. Think painterly swirls of fruit color throughout!
-
Chocolate Chip Yogurt Cake: Fold in 1/2 cup of semi-sweet or dark chocolate chips into the batter for a decadent treat.
-
Coconut Yogurt Cake: Add shredded coconut to the batter for a tropical twist. You can also top it with toasted coconut flakes for extra texture.
-
Spiced Yogurt Cake: Incorporate warm spices like cinnamon or nutmeg to elevate the flavor profile. A pinch goes a long way!
Chef’s Notes
It’s wild how one recipe can evolve over time, much like our taste preferences. I’ve made this Yogurt Cake countless times, and every version adds a new memory and twist to the original. I recall one lovely summer afternoon, a dear friend attempted to bake it alongside me, which promptly turned into a flour fight! But at the end of that chaotic day, we had the most delightful, albeit slightly uneven, Yogurt Cake. It turned out perfectly imperfect!
Each time I bake this, I remember those golden moments—laughter echoing through the kitchen, and the aroma wafting through the air feels like a warm hug from my grandmother, reminding me that cooking is about love and connection, not perfection.
FAQs and Troubleshooting
Let’s tackle some common questions that arise when trying to whip up the perfect Yogurt Cake.
Q1: My cake didn’t rise! What went wrong?
A: This could happen if your baking powder is expired or you overmixed the batter. Always check your leavening agents for freshness!
Q2: Can I use flavored yogurt?
Absolutely! However, be cautious with fruity or super sweet flavors as they can alter the overall balance of your cake.
Q3: Why is my cake too dry?
A: Overbaking is usually the culprit or possibly using too much flour. Remember to measure your flour accurately and check on that cake early!
Q4: Can I freeze this cake?
Yes! Just wrap it tightly in plastic wrap and then foil to prevent freezer burn. It will last for up to three months.
Nutritional Info
While it’s tempting to focus on the deliciousness of this recipe, it’s also good to know what we’re putting into our bodies. A typical slice of Yogurt Cake (about 1/12 of the cake) contains approximately:
- Calories: 220
- Total Fat: 8g
- Saturated Fat: 1.5g
- Cholesterol: 35mg
- Sodium: 150mg
- Carbohydrates: 34g
- Fiber: 1g
- Sugars: 14g
- Protein: 4g
This nutritional breakdown can fluctuate based on variations, so feel free to adjust based on your dietary needs. Just remember: moderation is key!
Final Thoughts
And there you have it, my kitchen companions—your very own, scrumptious Yogurt Cake ready to warm hearts and fill bellies! I hope you enjoy every slice as much as I do. Nothing compares to seeing family and friends gather around, smiles on their faces, indulging in something homemade with love.
Take these recipes and make them your own; that’s what cooking is all about! Explore flavors, experiment with toppings, and remember that every cake tells a story. I can’t wait to hear about your adventures in the kitchen and how this Yogurt Cake becomes a staple in your home!
So go on, cut yourself a slice, pour that drink, and relish the feeling of creating something beautiful. Until next time, happy cooking, and may your kitchen be filled with warmth, laughter, and lots of delicious memories! 🍰✨
Print
Yogurt Cake
- Total Time: 50 minutes
- Yield: 12 servings 1x
- Diet: Vegetarian
Description
A moist and tangy Yogurt Cake that is easy to make and perfect for any occasion.
Ingredients
- 1 cup plain yogurt
- 3 large eggs
- 1 cup granulated sugar
- 1/2 cup vegetable oil (or melted butter)
- 1 teaspoon vanilla extract
- 2 cups all-purpose flour
- 2 teaspoons baking powder
- 1/2 teaspoon salt
Instructions
- Preheat your oven to 350°F (175°C). Grease a 9-inch round cake pan.
- Whisk together your yogurt, eggs, sugar, and oil until smooth and creamy.
- Sift together the flour, baking powder, and salt in another bowl.
- Fold your dry mixture into your wet mixture gently with a rubber spatula.
- Pour the batter into the prepared cake pan and bake for about 30–35 minutes.
- Let cool in the pan for 10 minutes, then transfer to a wire rack to cool completely.
Notes
Serve with powdered sugar, fresh berries, or whipped cream for an enjoyable treat.
- Prep Time: 15 minutes
- Cook Time: 35 minutes
- Category: Dessert
- Method: Baking
- Cuisine: American
Nutrition
- Serving Size: 1 slice
- Calories: 220
- Sugar: 14g
- Sodium: 150mg
- Fat: 8g
- Saturated Fat: 1.5g
- Unsaturated Fat: 5.5g
- Trans Fat: 0g
- Carbohydrates: 34g
- Fiber: 1g
- Protein: 4g
- Cholesterol: 35mg
Keywords: cake, yogurt cake, dessert, easy dessert, baking
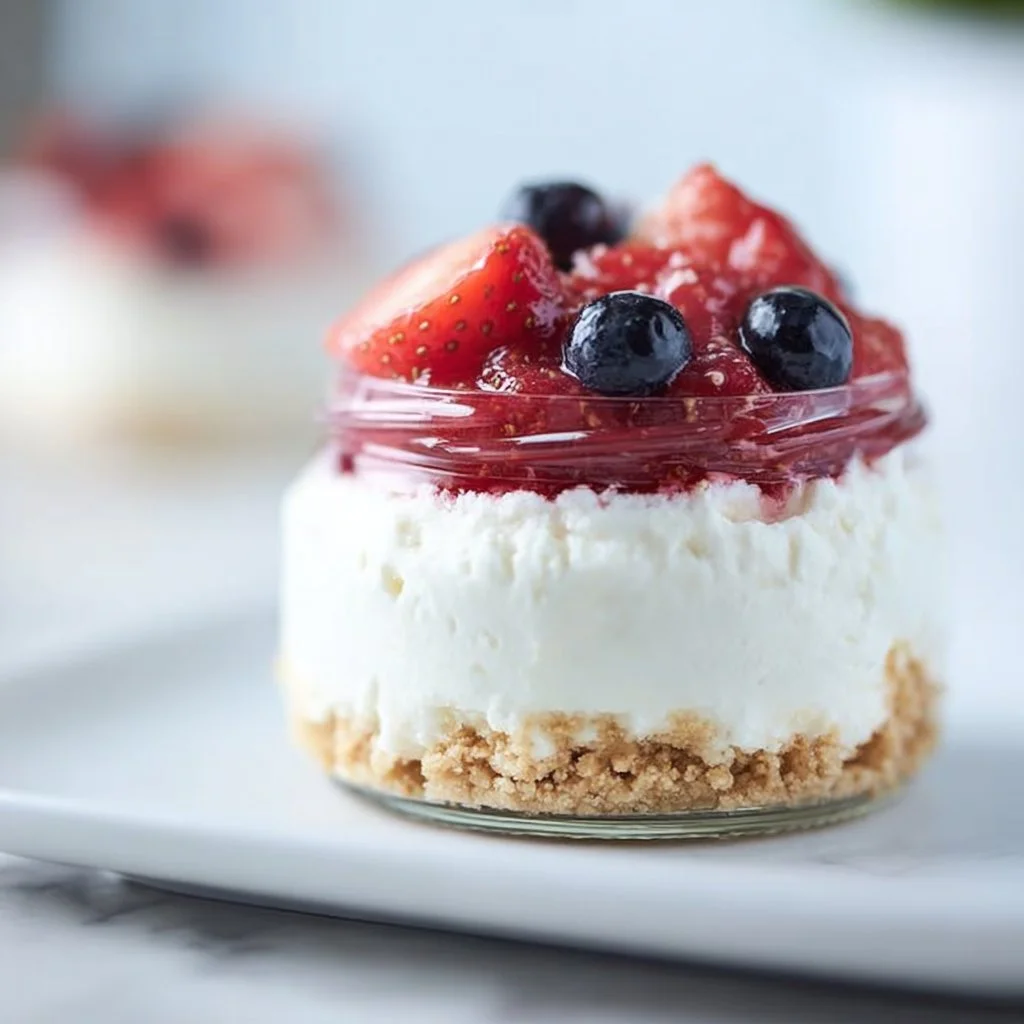
Low-Calorie No-Bake Cheesecake for One
How to Make a Delectable Low-Calorie No-Bake Cheesecake for One
Hey there, fellow foodies! Welcome back to Feastical, where we whip up feel-good recipes that warm the heart and satisfy the palate! Today, we’re diving into a delightful treat that’s perfect for those quiet evenings when you want something sweet but don’t want to go overboard—a Low-Calorie No-Bake Cheesecake for One. Yes, you heard that right! This recipe is simple, nutritious, and absolutely scrumptious, making it the perfect indulgence for anyone counting calories or just testing the waters of guilt-free dessert options.
Let me tell you why this recipe holds a special place in my heart. Back in my early cooking days, I discovered a love for cheesecakes while attempting to impress a date. You see, cheesecakes were often associated with elaborate dinner parties and sophisticated tastes. The idea of creating one myself was daunting, especially since I didn’t have the first clue about baking, beyond the occasional cookie. But my fascination with the creamy, dreamy texture led me to experiment in the kitchen. And after countless failed attempts—seriously, you have no idea how many times I’ve watched a cheesecake deflate or crack—I stumbled upon this no-bake gem.
This dessert isn’t just about the flavor; it embodies my philosophy of comfort food—easy, joyous, and deeply satisfying. Plus, it’s a great option for anyone looking to treat themselves without feeling weighed down. So, grab your favorite mixing bowl and let’s get started on this delightful journey toward crafting a lovely cheesecake for one!
Personal Story
Let me take you back to a summer evening years ago. I was hanging out with my best friend and her little sister, who had just returned from a baking camp. She was buzzing with excitement, flaunting her new skills—baking soufflés and pastries while whipping up batch after batch of cookies. Inspired by her youthful enthusiasm, we decided to create our version of a classic cheesecake.
Now, my friend wasn’t the most patient cook and ended up whisking the cream cheese like it owed her money! The batter flew everywhere—on the walls, the floor, and yes, even on the cat. However, the outcome was surprisingly delicious! We topped it with strawberries from the farmer’s market and managed to salvage what was supposed to be a simple dessert into a beautiful, albeit chaotic, culinary experience.
Years later, I look back with fondness at that moment—laughter surrounded by flour and sugar. It was that spirit that inspired this no-bake cheesecake. It’s not just a dessert; it’s a reminder that in the kitchen, mistakes often lead to the most cherished memories. Plus, this simplified version means no more anxiously babysitting a cheesecake in the oven!
Ingredients
To whip up this delightful low-calorie no-bake cheesecake, you’re going to need just a handful of ingredients. Here’s what you’ll be grabbing:
-
1/2 cup Greek yogurt: Thick, creamy, and packed with protein, Greek yogurt is the base of this cheesecake. It gives that creamy texture while staying light. If you’re dairy-free, you can swap this out with a plant-based yogurt, but it might affect the flavor slightly.
-
1 tablespoon honey or sweetener of choice: Honey adds natural sweetness along with a touch of earthiness. If you’re looking for zero-calorie options, feel free to use stevia or erythritol instead. Just adjust the amount to your taste!
-
1/4 teaspoon vanilla extract: The essence of cheesecake often lies in its flavorings, and vanilla is a classic. It adds warmth and depth. If you’re feeling adventurous, you could try almond extract for a unique twist.
-
1/2 teaspoon lemon juice: This little powerhouse brightens up the tartness of the yogurt and gives that signature cheesecake zing! If you’re out of fresh lemon, lemon juice from a bottle works fine too!
-
1 tablespoon graham cracker crumbs (optional for crust): This ingredient is for those of us who love that classic cheesecake crust. If you’re avoiding carbs, you can skip this altogether, or use almond flour for a gluten-free crust!
-
Fresh strawberries for topping: Not only do they look gorgeous, but they add a refreshing flavor to balance the creaminess. Any berries will work—blueberries, raspberries, or even a delightful fruit medley would do the trick!
Step-by-Step Instructions
Alright, foodies, let’s get cooking! Follow these steps, and soon you’ll be indulging in your very own low-calorie cheesecake.
Step 1: Gather Your Supplies
Before you start, make sure you’ve got everything you need: a mixing bowl, a whisk (or, if you’re feeling fancy, a hand mixer), and a small serving dish or jar to hold your cheesecake. A good setup makes all the difference!
Step 2: Mix the Greek Yogurt and Sweetener
In your mixing bowl, combine the 1/2 cup of Greek yogurt and 1 tablespoon of honey (or your sweetener of choice). Use a whisk to blend them until smooth. If you’re using a granular sweetener, make sure to whisk a bit longer so that it dissolves fully. This is the base of your cheesecake, so give it some love!
Step 3: Add Flavor
Next, add the 1/4 teaspoon of vanilla extract and 1/2 teaspoon of lemon juice to the yogurt mixture. Whisk it together. You should start to smell that delicious aroma, hinting at the creamy dreams to come. Taste it at this stage! If it lacks sweetness, add a bit more honey—everyone’s palate is different!
Step 4: Chill the Mixture
Once you’re satisfied with the flavor, place the bowl in the refrigerator for about 10–15 minutes. This allows the mixture to thicken up a tad, making it easier to scoop later. Plus, it’s nice to work with colder mixtures.
Step 5: Create the Crust (Optional)
If you’re using graham cracker crumbs, now is the time to prepare that crust. Lay down your graham crackers in a zip-lock bag and crush them with a rolling pin or use a food processor until you have fine crumbs. In a small bowl, mix the crumbs with just a hint of melted butter (about 1 teaspoon if you want a light crust) until they hold together a bit. Spoon this into the bottom of your serving dish if you desire a crust base.
Step 6: Assemble Your Cheesecake
Take your chilled yogurt mixture from the refrigerator and spoon it over the crust (if you’re using one). Level it off with a spatula or the back of a spoon. If you’re going crust-free, just spoon the mixture into your dish and spread it evenly.
Step 7: Top with Fresh Strawberries
Finally, wash and slice your fresh strawberries (or any other berries you fancy) and arrange them on top of your cheesecake. Feel free to be artistic about it! A little drizzle of honey over the top can elevate it—even though it’s already a star.
Step 8: Chill and Enjoy
Pop your cheesecake in the refrigerator for an additional 30 minutes to allow it to set a little more. Yeah, I know the waiting is tough, but think of the deliciousness that awaits! When you’re ready to dive in, just grab your spoon and dig right!
Serving Suggestions
This low-calorie no-bake cheesecake for one isn’t just amazing by itself; it can be dressed up beautifully too! Serve it in a cute mason jar for an adorable touch or in any adorable dish you have. A sprinkle of lemon zest over the top enhances both presentation and flavor, while a dollop of whipped cream could take it next level—though that will add calories, so you can save that for a treat day!
Pair it with a cup of herbal tea or a refreshing glass of sparkling water for a wonderfully balanced snack or dessert that’s good anytime! And, if you’re feeling generous, you can always make an extra serving for a friend—or keep it all to yourself!
Recipe Variations
Feeling adventurous? Here are some tasty suggestions to put a spin on your low-calorie cheesecake:
-
Chocolate Lover’s Delight: Stir in 1 tablespoon of cocoa powder or sugar-free chocolate syrup into the yogurt mixture for a chocolate cheesecake that’ll make your heart skip!
-
Nutty Addition: Mix 1 tablespoon of nut butter (like almond or peanut) into the yogurt for an incredibly flavorful and protein-packed treat!
-
Coffee Kick: For a coffee-flavored treat, add a teaspoon of instant coffee or espresso powder into the mixture. It’ll be a pick-me-up you can’t refuse!
-
Citrus Burst: Instead of lemon juice, try lime juice or even orange juice for a fresh citrus twist. These brighten the flavor beautifully!
-
Berry Fusion: Instead of strawberries, use pureed or mashed berries into the yogurt for an equally delicious fruity twist. Just remember to adjust sweetener if your chosen fruit is more tart!
Chef’s Notes
This recipe has evolved over the years as I’ve experimented with different flavors and toppings. Initially, I only made it with strawberries, keeping it simple. But as I brought in different fruits, nuts, and even spices (yes, cinnamon can be heavenly), I discovered just how versatile this little treat can be! And who knows, maybe I’ll end up with a whole series of single-serving cheesecakes—watch out world!
This low-calorie cheesecake serves as a reminder that indulgence doesn’t have to come with guilt, and I love pulling it together on those nights when I crave simple comfort.
FAQs and Troubleshooting
-
My cheesecake isn’t setting properly; what did I do wrong?
No worries—we all have those moments! If the mixture didn’t thicken, try chilling it for longer or using a thicker yogurt. Make sure you’re using full-fat Greek yogurt for the best results! -
Can I freeze this cheesecake?
Absolutely! Just remember to cover it tightly. If you freeze it, let it sit out for 10-15 minutes at room temperature to soften before digging in. -
How can I add more flavor to the crust?
Adding a pinch of cinnamon or even a couple of tablespoons of cocoa powder to your graham cracker crumbs can elevate the flavor! -
What if I don’t have Greek yogurt?
You can swap it out with any kind of creamy yogurt; just understand the texture and taste will change slightly. For a lactose-free option, go for coconut or almond yogurt!
Nutritional Info
This low-calorie no-bake cheesecake is not only delicious, but it’s also friendly on the waistline! Here’s a rough breakdown of the nutritional information per serving:
- Calories: Approximately 150 calories
- Protein: 10g
- Carbohydrates: 20g
- Fat: 2g (most coming from yogurt)
- Sugar: 7g (if using honey; check labels on sweeteners!)
These numbers are approximate and can vary based on specific ingredient brands and types you use. Always a good idea to double-check if you’re tracking your macros!
Final Thoughts
You’ve made it to the end of this delightful journey, and now it’s time to enjoy your creation! This Low-Calorie No-Bake Cheesecake for One is not just a recipe; it’s a little piece of joy you’ve crafted yourself. Whether you savor it on a quiet evening or share it with a friend, remember that dessert should always be a celebration.
As you indulge, think of the stories you’ll create in your kitchen—those cherished memories that come alive when you whip up something wonderful. Thanks for hanging out with me today at Feastical, and I can’t wait to see what creations you come up with in your own kitchen. Until next time, keep cooking with love!
Happy munching, foodies! 🍓🥳
Print
Low-Calorie No-Bake Cheesecake for One
- Total Time: 45 minutes
- Yield: 1 serving 1x
- Diet: Low-Calorie, Vegetarian
Description
A delightful low-calorie no-bake cheesecake that’s perfect for a guilt-free indulgence.
Ingredients
- 1/2 cup Greek yogurt
- 1 tablespoon honey or sweetener of choice
- 1/4 teaspoon vanilla extract
- 1/2 teaspoon lemon juice
- 1 tablespoon graham cracker crumbs (optional for crust)
- Fresh strawberries for topping
Instructions
- Gather Your Supplies: Have a mixing bowl, whisk, and a small serving dish ready.
- Mix the Greek yogurt and sweetener in the bowl until smooth.
- Add the vanilla extract and lemon juice, then whisk together.
- Chill the mixture in the refrigerator for about 10–15 minutes.
- Create the crust by crushing graham crackers and mixing with melted butter, if desired.
- Assemble your cheesecake by spooning the yogurt mixture over the crust.
- Top with sliced fresh strawberries.
- Chill for an additional 30 minutes before serving.
Notes
For added flavor, consider using almond extract or adding a drizzle of honey on top. You can also use different fruits for topping.
- Prep Time: 15 minutes
- Cook Time: 0 minutes
- Category: Dessert
- Method: No-Bake
- Cuisine: American
Nutrition
- Serving Size: 1 serving
- Calories: 150
- Sugar: 7g
- Sodium: 50mg
- Fat: 2g
- Saturated Fat: 1g
- Unsaturated Fat: 1g
- Trans Fat: 0g
- Carbohydrates: 20g
- Fiber: 1g
- Protein: 10g
- Cholesterol: 5mg
Keywords: cheesecake, no-bake, low-calorie, dessert, Greek yogurt

EASY YOGURT CAKE
The Ultimate Easy Yogurt Cake: A Slice of Joy
Hey there, food lovers! Beau Collier here, and I’m thrilled to dive into one of my all-time favorite recipes with you today: the Easy Yogurt Cake. Trust me, this delightful dessert is not just a recipe; it’s a journey through flavors, memories, and the simple joy of baking. Whether you’re having a lazy afternoon or planning a cozy gathering, this cake is your ticket to a sweet escape.
A Flavorful Journey: The Tale Behind My Yogurt Cake
Let me take you back a few years to a sun-drenched afternoon in my grandmother’s kitchen. The sweet aroma of vanilla and citrus wafted through the air as she prepared her famous yogurt cake. I was just a kid, draped in my favorite apron, eagerly assisting her, or, let’s be honest, sneaking spoonfuls of batter when she wasn’t looking!
As we mixed the ingredients, she talked about the magic of cooking—how each recipe holds a story and how flavors come alive when shared. It was in that moment I realized that food brings people together, and a simple cake made from yogurt could create lasting memories. Every bite of that cake tasted like sunshine, laughter, and love.
Today, I want to help you recreate that nostalgic experience with a super easy and unbelievably delicious yogurt cake that’s sure to be a hit at your gatherings—or just a tasty treat for yourself. So let’s get baking, shall we?
Gather Your Ingredients
Here’s what you’ll need for this delightful Easy Yogurt Cake. Gather these ingredients, and I promise you’ll be in for a treat:
-
1 cup (250g) plain yogurt
Yogurt is the star of the show! It keeps the cake moist and adds a subtle tang. You can use Greek yogurt for an even richer flavor. If you want to make it lactose-free, opt for coconut or almond yogurt. -
2 leveled cups (250g) all-purpose flour or light spelt flour (I mixed both)
All-purpose flour is perfect for a classic cake, while light spelt flour adds a nutty flavor and more nutrients. You can also try whole wheat flour for a heartier version. -
1/2 cup (100g) white or unrefined cane sugar
The sweetness of the cake! Unrefined cane sugar has a caramel-like flavor that amps up the cake’s depth. For a healthier alternative, you can swap it with coconut sugar or maple syrup, adjusting the amount accordingly. -
1/2 scant cup (approx 80g) vegetable oil (I used canola oil)
Oil keeps the cake moist and tender. Canola oil is neutral in flavor, but feel free to use melted coconut oil for a tropical twist or olive oil for a fruity essence. -
2 eggs, at room temperature
Eggs provide structure and richness. Ensure they’re at room temperature for better incorporation. If you’re looking for a vegan alternative, try using flax eggs or applesauce. -
2 tsp baking powder
A pinch of magic that helps the cake rise and become fluffy! If you’re gluten-free, look for a gluten-free baking powder. -
1/2 tsp vanilla essence
Vanilla is an essential flavor that elevates any dessert. For a natural hit, use vanilla extract or even the seeds from a vanilla bean. -
Zest of 1-2 lemons
This is where the zing comes in! Lemon zest adds brightness and balances the sweetness. You can substitute any citrus zest—like orange or lime—for a different flavor profile. -
1 pinch of salt
Salt enhances flavors. Just a pinch can make all the difference in bringing out the other ingredients. -
3 Tbsp apricot or orange jam
This is a fun finishing touch! The jam adds a glorious glaze on top, making it both pretty and flavorful. You could swap this for any jam you love—think raspberry or mixed berry for a fruity surprise.
Are you excited yet? Let’s get into the fun part—baking this gem!
Step-by-Step Instructions
1. Preheat Your Oven
Start by preheating your oven to 350°F (175°C). This is crucial to ensure your cake rises beautifully and bakes evenly. The smell of warmth will fill your kitchen soon!
2. Prepare Your Baking Pan
Grab an 8-inch round cake pan or a loaf pan (your choice!), and grease it with a little oil or cooking spray. You can also line the bottom with parchment paper for an easy release.
3. Mix the Wet Ingredients
In a large mixing bowl, combine the yogurt, sugar, and oil. Use a whisk to blend them together until smooth and creamy. Here’s a little pro tip: Whisking in one direction helps to incorporate air, making your cake lighter!
4. Beat in the Eggs and Vanilla
Add the eggs one at a time, incorporating each fully before adding the next. Then, drizzle in the vanilla essence. You want this mixture to be velvety smooth. If the batter looks a bit chunky, don’t stress; it’ll come together in the next steps.
5. Zest Those Lemons
Now, grab a microplane or zester and zest your lemons directly into the bowl. This citrus explosion is what will make your cake sing!
6. Combine the Dry Ingredients
In a separate bowl, whisk together the flour, baking powder, and salt. This ensures your leavening agent is evenly distributed. Gradually fold this dry mix into your wet ingredients using a spatula or wooden spoon.
The Folding Technique
Fold gently to keep that airiness in your batter. Don’t over-mix; just combine until you don’t see any more flour!
7. Pour into the Pan
Once fully combined, pour the batter into your prepared pan. Use a spatula to smooth out the top. You want it to look inviting because we eat with our eyes first!
8. Bake the Cake
Pop that pan into the oven and let it bake for 30-40 minutes. You’ll know it’s done when a toothpick inserted into the center comes out clean. Chef’s Tip: For the last 5-10 minutes, rotate the pan if you notice uneven baking.
9. Cool and Glaze
Once baked, let the cake cool in the pan for about 10 minutes. Then transfer it to a wire rack to cool completely. Once cooled, brush the top with your choice of apricot or orange jam for a shiny finish.
10. Slice and Enjoy
Now, the moment of truth—slice into your masterpiece and serve it fresh!
Serving Suggestions
This Easy Yogurt Cake is versatile! Serve it plain with a dusting of powdered sugar for an elegant touch, or pair it with fresh fruit and a dollop of whipped cream for a summery vibe. You could even have it for breakfast (because why not?) alongside a cup of coffee or tea.
For a more festive presentation, you could layer it with some yogurt and fresh berries in a trifle dish—it’s a lovely way to showcase those beautiful layers.
Recipe Variations
Feeling adventurous? Here are some creative twists to make this recipe your own:
-
Berry Burst: Mix in a cup of fresh or frozen berries (like blueberries or raspberries) into the batter for fruity bursts in every bite.
-
Chocolate Lover: Add 1/2 cup of cocoa powder to the dry ingredients for a chocolate yogurt cake. Top with chocolate ganache for extra indulgence.
-
Nutty Delight: Fold in chopped nuts or seeds, like pistachios or almonds, for a crunch that elevates the texture.
-
Spiced Up: Add a teaspoon of cinnamon or cardamom to the dry ingredients for a warm, aromatic flavor.
-
Dairy-Free: Swap out the yogurt for coconut or nut-based yogurt, and you’ve got yourself a dairy-free delight!
Chef’s Notes
One of the things I love about this recipe is its simplicity. You can play around with flavors based on what you have at home or what seasonal fruits are available. I once made a version with lime zest and coconut yogurt, and my friends still rave about it! Baking is a canvas for creativity—let your instinct guide you, and enjoy the process.
FAQs and Troubleshooting
1. Can I use flavored yogurt?
Absolutely! Just remember that the flavor will carry through in your cake. Fruity yogurts can add an interesting twist!
2. My cake didn’t rise—what happened?
There could be a few reasons. Make sure your baking powder isn’t expired, and remember that over-mixing can deflate the batter. Gentle folding is key!
3. How do I know when it’s done baking?
Perform the toothpick test! Insert a toothpick in the center—if it comes out clean or with just a few crumbs, it’s ready.
4. Can I freeze this cake?
You bet! This cake freezes well. Just wrap it tightly in plastic wrap and place it in an airtight container. When ready to enjoy, let it thaw at room temperature.
Nutritional Info
While enjoying your yogurt cake, it’s good to know what you’re indulging in! Here’s a rough estimate of the nutritional content per slice (assuming 10 slices per cake):
- Calories: 180
- Fat: 7g
- Carbohydrates: 24g
- Protein: 3g
- Sugar: 8g
Using whole ingredients makes this cake a wholesome delight. The yogurt contributes protein and probiotics, making every slice taste good and feel good!
Final Thoughts
And there you have it, my friend—the Easy Yogurt Cake, a simple recipe that opens doors to creativity in the kitchen. Whether it’s a casual weekday or a special occasion, this cake is sure to impress without stressing you out.
Remember, cooking is about the joy of sharing and experimenting—so don’t hesitate to make it your own, infusing it with your personality and love. I can’t wait to hear about your baking adventures with this recipe. A slice of this cake paired with laughter and good company? Now that’s what life’s all about.
So grab your apron, preheat that oven, and let’s create some delicious memories! Happy baking! 🍰
Print
The Ultimate Easy Yogurt Cake
- Total Time: 55 minutes
- Yield: 10 servings 1x
- Diet: Vegetarian
Description
A delightful and easy yogurt cake that promises to be a crowd-pleaser, perfect for any gathering or a sweet treat for yourself.
Ingredients
- 1 cup (250g) plain yogurt
- 2 leveled cups (250g) all-purpose flour or light spelt flour
- 1/2 cup (100g) white or unrefined cane sugar
- 1/2 scant cup (approx 80g) vegetable oil
- 2 eggs, at room temperature
- 2 tsp baking powder
- 1/2 tsp vanilla essence
- Zest of 1–2 lemons
- 1 pinch of salt
- 3 Tbsp apricot or orange jam
Instructions
- Preheat your oven to 350°F (175°C).
- Prepare your baking pan by greasing it with oil or cooking spray.
- Mix the yogurt, sugar, and oil in a large mixing bowl until smooth and creamy.
- Beat in the eggs one at a time and then drizzle in the vanilla essence.
- Zest your lemons directly into the bowl.
- Combine the flour, baking powder, and salt in a separate bowl and then gradually fold this into your wet ingredients.
- Pour the batter into your prepared pan and smooth out the top.
- Bake for 30-40 minutes until a toothpick comes out clean.
- Cool the cake in the pan for about 10 minutes, then transfer to a wire rack.
- Slice and enjoy your masterpiece!
Notes
This cake can be served plain or dressed up with fresh fruit and a dollop of whipped cream. Feel free to experiment with flavors!
- Prep Time: 15 minutes
- Cook Time: 40 minutes
- Category: Dessert
- Method: Baking
- Cuisine: French
Nutrition
- Serving Size: 1 slice
- Calories: 180
- Sugar: 8g
- Sodium: 200mg
- Fat: 7g
- Saturated Fat: 1g
- Unsaturated Fat: 4g
- Trans Fat: 0g
- Carbohydrates: 24g
- Fiber: 1g
- Protein: 3g
- Cholesterol: 30mg
Keywords: yogurt cake, easy dessert, baking recipe, simple cake, nostalgic dessert

Healthy Twix Cups
Healthy Twix Cups: A Sweet Treat with a Guilt-Free Twist!
Hey there, fellow foodies! It’s your buddy, Beau Collier, back at it with another delicious twist on a classic treat that’s bound to tickle your taste buds—Healthy Twix Cups! When that sweet tooth kicks in, there’s no need to sacrifice health for flavor. With these cute little cups, you can revel in that rich, buttery caramel, crunchy “cookie,” and smooth chocolate you crave, minus the guilty pangs after.
Now, I know what you might be thinking: “Healthy and Twix? Can they really exist in the same sentence?” Well, my friend, put on your apron and let’s dive into this guilt-free indulgence that will leave you feeling good inside and out.
A Sweet Memory That Inspired Me
Let me take you back to my childhood when evenings were often wrapped in the warm embrace of my family kitchen. My mom and I would make sweet treats together for movie nights, and our favorite concoction was the ever-popular Twix bar. I distinctly remember the sound of the chocolate lightly cracking as we dug in. We loved that perfect balance of crunchy cookie, silky caramel, and decadent chocolate… Ahh, pure bliss!
Fast forward to now, when I realized I wanted to recreate that nostalgic joy but with a healthy spin. I wanted something delightful, yet made with wholesome ingredients, so I could indulge without feeling like I needed to jog five miles afterward. And that’s how the concept of these Healthy Twix Cups was born! With every bite, they bring back that sweet nostalgia and laughter-filled nights spent with loved ones. So, let’s whip up this delightful recipe together!
Essential Ingredients for Your Healthy Twix Cups
To create these scrumptiously healthy Twix Cups, you’ll need the following ingredients:
-
1 cup almond flour: This gluten-free flour gives our cups a wonderful, nutty flavor while serving as a great binder. If you need a substitution, you can use oat flour or coconut flour, though be cautious with the ratios as they tend to absorb more moisture.
-
1/4 cup coconut oil, melted: This healthy fat helps to create that luscious, melt-in-your-mouth texture. If you’re not a fan of coconut oil, go ahead and use unsalted butter or ghee—your choice!
-
2 tablespoons honey or maple syrup: This is our natural sweetener! Honey is a bit thicker, while maple syrup is runnier. Feel free to adjust the sweetness to your liking or substitute with agave syrup for a vegan option.
-
1/4 teaspoon sea salt: Just a pinch will enhance the sweet flavors and elevate the taste of the chocolate.
-
1/2 cup natural peanut butter: Creamy peanut butter adds protein and that delicious nutty flavor we all crave. If you’re looking for a nut-free option, almond butter or sunflower seed butter can do the trick!
-
1/4 cup dark chocolate chips: Look for chocolate with at least 70% cocoa for a richer flavor and less sugar. You can also melt a dark chocolate bar if you prefer.
-
1 tablespoon coconut milk: This will thin out our chocolate a bit for smooth drizzling. Have a can handy and make sure to shake it well! Almond milk would also work if you have that on hand!
With these simple ingredients, we’re about to create a treat that not only satisfies your sweet tooth but is also kind to your body. Let’s get cooking!
Step-by-Step Instructions to Make Healthy Twix Cups
Now that we have our ingredients all lined up and ready to go, let’s walk through the steps for creating these Healthy Twix Cups together.
Step 1: Prepare Your Pan
Start by lining a muffin tin with paper liners. This will make it easy to pop out the cups once they’ve set, so you don’t have to worry about sticking.
Step 2: Create the Cookie Base
In a medium bowl, combine the almond flour and melted coconut oil. Stir until it’s well mixed. Add in the honey (or maple syrup) and a pinch of the sea salt.
Chef Hack: Use a fork to mix everything together—it helps ensure there are no lumps and makes the process a tad quicker!
Step 3: Form the Cookie Cups
Now, take about 1 tablespoon of the dough mixture and press it firmly into the bottom of each muffin liner. Aim for an even layer to create that lovely cookie-like crust. I like to use the back of a small measuring cup to really pack it in!
Step 4: Add the Peanut Butter Layer
Next up, take your peanut butter and scoop about 1 tablespoon onto each pressed cookie base. Gently smooth it out, spreading it so that we have a nice layer of that creamy goodness.
Tip: If your peanut butter is too firm, give it a quick zap in the microwave for about 15 seconds. This will make it easier to spread!
Step 5: Time for the Chocolate
In a small microwave-safe bowl, combine the dark chocolate chips and coconut milk. Microwave in 30-second intervals, stirring in between until the chocolate is completely melted and smooth.
Pro Tip: Be careful not to overheat the chocolate; it can seize up really quickly!
Drizzle that luscious melted chocolate generously over the peanut butter layer. Try to cover all the peanut butter, so it’s hidden under a beautiful chocolate shell!
Step 6: Chill Until Firm
Pop the muffin tin in the refrigerator for about 1-2 hours, or until the cups are firm. Waiting might be the hardest part, but I promise it’s worth it!
Step 7: Serve and Enjoy!
Once they’re set, remove the cups from the muffin tin by pulling out the paper liners. If any chocolate has overflowed, simply trim with a knife!
Now, plate these delightful cups up, maybe with a sprinkle of sea salt on top for aesthetic appeal. Gather your friends and family, and indulge in these bites of heaven!
Serving Suggestions for Healthy Twix Cups
These Healthy Twix Cups not only taste amazing, but they also look stunning on the plate! To serve, arrange them on a beautiful platter. You can even drizzle some extra melted chocolate around them for a fun presentation.
Hint: Pair these cups with fresh fruit like strawberries or bananas to add a simple, colorful touch. You can also sprinkle some chopped nuts or coconut flakes on top for an added crunch and extra flavor burst!
Recipe Variations: Mix It Up Your Way!
While the original recipe is already a winner, don’t hesitate to get creative! Here are some fun variations you can try:
-
Mocha Twix Cups: Add a teaspoon of instant coffee granules to the melted chocolate for that perfect pick-me-up with cocoa.
-
Coconut Crunch: Incorporate shredded coconut into the peanut butter layer for delightful texture and flavor.
-
Nut-Free Version: Substitute the peanut butter with sunflower seed butter for a nut-free option that’s also school-safe!
-
Vegan Delight: Simply swap the honey with maple syrup and use dairy-free chocolate to make it fully vegan.
-
Spiced Twix Cups: Add a sprinkle of cinnamon or nutmeg to the almond flour mixture for a warming, cozy flavor.
Feel free to mix and match to discover your favorite combination!
Chef’s Notes: A Little Chef Wisdom
As a home cook, I’ve seen how recipes evolve over time. What started as a simple attempt to make Healthy Twix Cups became a family favorite that brings joy to everyone who tries them. There’s something magical about taking a classic recipe, giving it a little TLC, and transforming it into something new and healthier.
And sometimes, when I’m feeling adventurous, I throw in different ingredients based on what I have in the pantry. That’s the beauty of cooking! Embrace the freedom and let your creativity shine in the kitchen!
FAQs and Troubleshooting: Your Questions Answered!
1. My cups are too crumbly! What did I do wrong?
If your cups are crumbly, it might be that you didn’t use enough binding ingredients like coconut oil or peanut butter. Add a touch more melted coconut oil next time, or ensure you’re packing the ingredients well.
2. Can I leave these out at room temperature?
While they can sit out for a short time, I recommend keeping them refrigerated to maintain their firmness. The coconut oil will soften at room temperature.
3. How can I sweeten these without honey or maple syrup?
You can use mashed bananas, unsweetened applesauce, or stevia to keep your cups sweet while keeping the sugars low. Just adjust the consistency as needed!
4. Help! My chocolate seized when melting! What now?
No biggie! Melt some more chocolate and add a splash of oil (coconut or vegetable) to bring it back to life. Just remember to keep the heat gentle next time!
Nutritional Info for Healthy Twix Cups
Let’s take a peek at what makes these Healthy Twix Cups a smart choice! Here’s the approximate nutritional info per cup:
- Calories: 120
- Protein: 4g
- Fat: 9g
- Carbohydrates: 9g
- Fiber: 2g
- Sugar: 3g
These stats may vary slightly based on your specific ingredients and serving sizes, but overall, you can feel great about indulging in these treats. Packed with wholesome fats, fiber, and natural sweetness, they’re the perfect mix of delicious and nutritious!
Final Thoughts: Your Sweet Adventure Awaits!
There you have it—your very own guide to creating mouthwatering Healthy Twix Cups. I hope you enjoyed this recipe as much as I cherished bringing it to life for you. Whether you’re satisfying a sweet craving, hosting a fun get-together, or simply treating yourself (you totally deserve it!), these cups will surely delight.
Remember, cooking should always be fun— a way to express yourself, share love, and create memories. So gather your friends, pop on your favorite playlist, and get ready to whip up a batch of these delightful cups.
Until next time, happy cooking and scrumptiously sweet adventures await you—all with a little love and a pinch of creativity!
Now who’s ready for a bite? 🍫✨
Print
Healthy Twix Cups
- Total Time: 120 minutes
- Yield: 12 servings 1x
- Diet: Gluten-Free, Vegetarian
Description
Indulge in these Healthy Twix Cups, a guilt-free twist on the classic treat featuring a buttery caramel, crunchy cookie, and smooth chocolate.
Ingredients
- 1 cup almond flour
- 1/4 cup coconut oil, melted
- 2 tablespoons honey or maple syrup
- 1/4 teaspoon sea salt
- 1/2 cup natural peanut butter
- 1/4 cup dark chocolate chips
- 1 tablespoon coconut milk
Instructions
- Prepare your pan by lining a muffin tin with paper liners.
- Create the cookie base by combining almond flour and melted coconut oil, then stirring in honey and sea salt.
- Form the cookie cups by pressing 1 tablespoon of the mixture into the bottom of each muffin liner.
- Add the peanut butter layer by scooping 1 tablespoon onto each cookie base and smoothing it out.
- Microwave the dark chocolate chips and coconut milk in 30-second intervals, stirring until smooth.
- Drizzle the melted chocolate over the peanut butter layer.
- Chill the muffin tin in the refrigerator for 1-2 hours until firm.
- Serve and enjoy once firm, optionally sprinkling with sea salt.
Notes
Feel free to substitute ingredients to suit dietary preferences, such as using sunflower seed butter for a nut-free option.
- Prep Time: 15 minutes
- Cook Time: 0 minutes
- Category: Dessert
- Method: Chilling
- Cuisine: American
Nutrition
- Serving Size: 1 cup
- Calories: 120
- Sugar: 3g
- Sodium: 60mg
- Fat: 9g
- Saturated Fat: 6g
- Unsaturated Fat: 3g
- Trans Fat: 0g
- Carbohydrates: 9g
- Fiber: 2g
- Protein: 4g
- Cholesterol: 0mg
Keywords: Healthy Twix Cups, dessert, gluten-free, sweet treats, healthy snacks, guilt-free dessert

Cranberry Almond Energy Bites
# Energize Your Day with Cranberry Almond Energy Bites!

## Introduction

Hey there, food lovers! If you’re anything like me, you’ve had those days when the afternoon slump hits, and all you want is a pick-me-up. That’s where the super-simple—and oh-so-delicious—Cranberry Almond Energy Bites come into play! These little nuggets of joy not only satisfy your sweet tooth but they also pack a powerful punch of nutrition to keep you fueled throughout the day.

I created this recipe because, well, I know how chaotic life can get. Between juggling work, social obligations, and family time, it's easy to overlook healthy snacking. And let’s be honest, sometimes you just want something that feels like a treat without the guilt! These energy bites are quick to prepare, requiring no baking and minimal cleanup. Anyone can whip them up—yes, even you, if you’ve just found your spatula hiding under the kitchen sink!

Plus, these bites are completely customizable. Love things a bit sweeter? Toss in a few chocolate chips. Want a protein boost? Add some hemp seeds! Wherever your flavor cravings lead you, these bites can follow. Each mouthful provides a delightful blend of chewy cranberries, crunchy almonds, and nutty richness that’ll make you feel like you’re on a mini-vacation, even if you’re just taking a break at your home office.

So, grab your apron and let’s get this party started! Together, we’ll make these delectable energy bites that will keep you energized and smiling all day long.

---

## Personal Story

You know, I still remember the first time I ever made a version of these energy bites. It was during my college years—a chaotic time filled with late-night study sessions powered more by coffee than common sense! One evening, I was burning the midnight oil, and my stomach started growling louder than my study playlist. I rummaged through my pantry and found a motley assortment of ingredients: old oats, a forgotten jar of almond butter, and a lonely bag of dried cranberries just begging to be used.

With my buddy Kirsten by my side, we had a mini kitchen party. We tossed everything in a bowl, mixed it up, and let me tell you—it was a culinary miracle! Those energy bites kept us going straight through the night. Each bite was a perfect blend of sweet and nutty, lifting our spirits as we tackled the never-ending textbook pages. I still giggle every time I think about it—talk about a late-night snack win! Since then, I've experimented with these bites countless times, and they’ve become a staple in my kitchen, perfect for busy days or just when I'm craving something sweet.

---

## Ingredients

Let’s take a stroll through the pantry and gather our ingredients. Here’s what you’ll need for these scrumptious energy bites:

- **1 cup Oatmeal**
  Rolled oats serve as a hearty base, providing fiber and a bit of chewiness. If you want to swap in gluten-free oats, they work beautifully too!

- **1/3 cup Almonds (chopped)**
  Almonds add crunch and nuttiness. Don't have almonds on hand? No worries! Try walnuts or pecans for a twist in flavor and texture.

- **1/3 cup Sweetened Shredded Coconut**
  It brings a tropical flair! If you’re not a coconut fan, you can simply leave it out or substitute with extra oats for the same texture.

- **1 tbsp Ground Flaxseed (optional)**
  This ingredient is a nutritional powerhouse, adding omega-3 fatty acids and fiber. Got chia seeds instead? They make a great alternative!

- **1/2 cup Nut Butter** (peanut or almond are both good)
  Nut butter binds everything and provides healthy fats. If you fancy sun butter or tahini, those can be delightful substitutes too!

- **1/4 cup Honey**
  Honey gives the bites sweetness and acts as a binder. For a vegan alternative, maple syrup does an excellent job!

- **1 tbsp Chia Seeds**
  Chia seeds are loaded with nutrients and add a delightful crunch. Not in the mood for chia? You can skip them without impacting the outcome.

- **1/3 cup Dried Cranberries (roughly chopped)**
  These are the stars of our energy bites, offering a burst of sweet-tart flavor. Feel free to substitute with raisins or chopped dried apricots for a different taste!

---

## Step-by-Step Instructions

Alright, it’s time to roll up those sleeves and get cooking. Here’s how you can make your Cranberry Almond Energy Bites:

1. **Gather Your Ingredients**: Start by assembling everything on your countertop. You’ll save time and keep your mind clear!

2. **Combine Dry Ingredients**: In a large mixing bowl, toss together the rolled oats, chopped almonds, shredded coconut, ground flaxseed (if using), chia seeds, and chopped cranberries. Make sure everything is well distributed; the more mixed, the better!

3. **Mix in the Nut Butter**: Add the nut butter to the dry mixture. Use a spatula to fold it in. If your nut butter is a bit stiff, zap it in the microwave for a few seconds—it’ll blend easier!

4. **Sweeten it Up**: Drizzle in the honey, making sure to scrape it all out of the measuring cup. Now, mix everything thoroughly until it forms a sticky dough. You might be tempted to dive straight in with your hands (and who could blame you!), but hold that thought!

5. **Chill it Out**: Pop the mixture into the refrigerator for about 30 minutes. This step isn't just for aesthetics; chilling helps the mixture firm up, making it easier to shape your bites.

6. **Form the Bites**: Once chilled, scoop out tablespoon-sized amounts and roll them into balls. You can use your palms to create perfect little spheres—if they’re not all identical, that just adds character!

7. **Store for Later**: Place your energy bites in an airtight container. They’ll last about a week in the fridge or can be stored in the freezer for longer. Just be sure to separate layers with parchment paper!

8. **Enjoy**: Grab one (or three) when you need a quick snack or an energy boost. They’re perfect for pre-gym fuel or a mid-afternoon treat!

---

## Serving Suggestions

Serve your energy bites on a cute platter or in a rustic bowl, and watch the smiles light up the room. If you’re into themed gatherings, why not create a little snack station? Include a variety of energy bites alongside fresh fruit, a bowl of mixed nuts, and some dark chocolate for a bit of indulgence. Placing small labels with the ingredients adds a personal touch and can spark curiosity among your guests.

For a grab-and-go option, toss these bites into snack-size bags, perfect for your busy lifestyle. They’re an ideal answer to pre-workout snacks or a quick breakfast on the way out the door. Just don’t forget to keep a stash in your purse or car!

---

## Recipe Variations

Now that you’ve got a solid base, let’s explore some delicious variations to keep your taste buds excited:

1. **Chocolate Chip Cranberry Energy Bites**: Add 1/4 cup of dark chocolate chips to the mix for an extra dose of sweetness.

2. **Nut-Free Option**: Substitute nut butters with sunflower seed butter and skip the nuts. It’s still rich and satisfying!

3. **Spiced Up Version**: Add a pinch of cinnamon or pumpkin spice for a warming flavor that'll remind you of cozy mornings.

4. **Tropical Twist**: Substitute cranberries with dried pineapple or mango and add a splash of lime zest for an exotic flair.

5. **Protein Packed**: Mix in a scoop of your favorite protein powder if you’d like to take these bites to the next level nutritionally.

---

## Chef’s Notes

You know, I often find that recipes evolve over time, and these energy bites are no exception. My original version just had oats, nut butter, and honey. But once I started experimenting with add-ins like seeds and dried fruits, they became a family favorite! One day, I even threw in some leftover pumpkin puree, and boy, did that create a delicious twist. Each time I make these, I remember those late nights in college and the wonderful kitchen messes that turned into great company and laughter.

So go ahead, make it your own! This is a judgment-free zone, and who doesn’t love a bit of kitchen creativity?

---

## FAQs and Troubleshooting

Here are some common questions and troubleshooting tips to help you navigate the energy-bite-making process:

1. **Why are my energy bites falling apart?**
   If your mixture is too crumbly, add a bit more nut butter or honey to help it bind together better. Make sure the mixture is sticky before chilling!

2. **Can I use rolled oats instead of instant oats?**
   Absolutely! Rolled oats work wonderfully, adding a bit more texture. Just avoid using instant oats; they won’t give the same result.

3. **How do I store these bites properly?**
   Keep them in an airtight container in the fridge for a week or in the freezer for a month. Just separate layers with parchment paper if you're stacking them.

4. **Can I spice up flavors without extra ingredients?**
   Absolutely! Just add a teaspoon of vanilla or almond extract to switch things up. It’s an easy way to elevate the flavor profile!

---

## Nutritional Info

Now, let’s chat about the nutrition in these delightful bites. They’re packed with wholesome goodness, offering a balance of carbs, protein, and healthy fats. Each bite is an excellent source of energy, around 100 calories, providing fiber from the oats and protein from the nut butter. The chia and flaxseeds boost omega-3 intake, making these bites not just a sweet treat but also a satisfying snack that supports overall health.

Feel free to adjust ingredient amounts tailored to your dietary needs—perhaps you want higher protein or lower sugar. This flexibility is why they become your go-to snack in no time!

---

## Final Thoughts

There you have it, folks—Cranberry Almond Energy Bites that not only fill your stomach but also warm your heart. This kitchen adventure is all about creating something delicious that brightens your day, nourishes your body, and fosters those meaningful moments around food.

So why not give these energy bites a go? Be the rockstar of your kitchen and whip up a batch today! Remember, the best part about cooking is making it your own, and I can’t wait to hear about the creative twists you come up with.

Leave a comment below with your own variations or any fun kitchen stories. Until next time, keep the oven warm and your spirit high—happy cooking, my fellow foodies!

Cranberry Almond Energy Bites
- Total Time: 30 minutes
- Yield: 12 bites 1x
- Diet: Vegetarian
Description
Delicious and nutritious energy bites made from oats, almonds, and cranberries, perfect for a quick pick-me-up.
Ingredients
- 1 cup Rolled Oats
- 1/3 cup Chopped Almonds
- 1/3 cup Sweetened Shredded Coconut
- 1 tbsp Ground Flaxseed (optional)
- 1/2 cup Nut Butter (peanut or almond)
- 1/4 cup Honey
- 1 tbsp Chia Seeds
- 1/3 cup Chopped Dried Cranberries
Instructions
- Gather your ingredients.
- Combine dry ingredients in a large mixing bowl.
- Mix in the nut butter.
- Sweeten it up with honey.
- Chill the mixture in the refrigerator for about 30 minutes.
- Form the mixture into tablespoon-sized balls.
- Store in an airtight container.
- Enjoy your energy bites!
Notes
These energy bites are customizable; feel free to add chocolate chips or substitute ingredients.
- Prep Time: 15 minutes
- Cook Time: 0 minutes
- Category: Snack
- Method: No-Bake
- Cuisine: American
Nutrition
- Serving Size: 1 bite
- Calories: 100
- Sugar: 8g
- Sodium: 5mg
- Fat: 5g
- Saturated Fat: 1g
- Unsaturated Fat: 4g
- Trans Fat: 0g
- Carbohydrates: 12g
- Fiber: 2g
- Protein: 3g
- Cholesterol: 0mg
Keywords: energy bites, snacks, healthy snack, no-bake, quick recipes
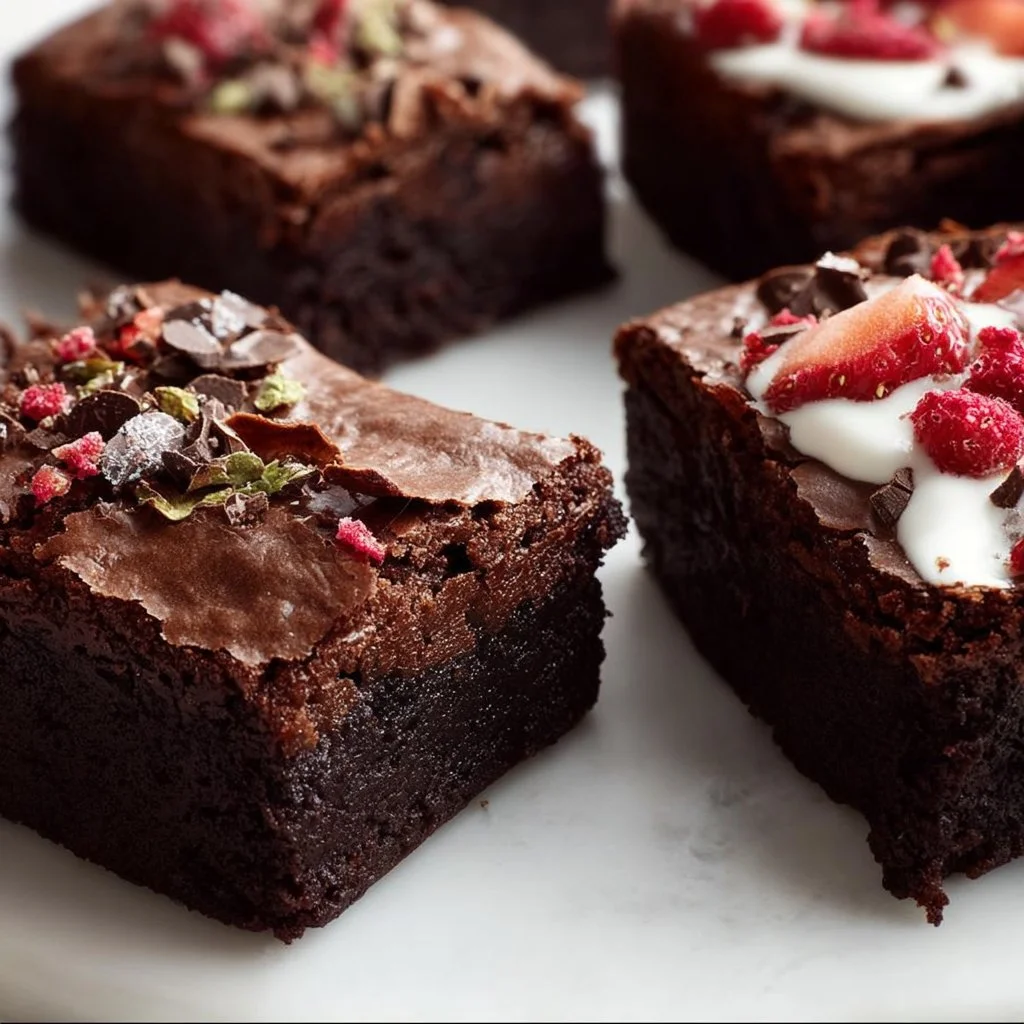
Greek Yogurt Brownies Recipe
Greek Yogurt Brownies: A Decadent Delight with a Light Twist
Hey there, fellow food lovers! If you’re like me, the thought of sinking your teeth into a rich, gooey brownie sends your taste buds dancing and your heart singing. Brownies are one of those magical desserts that can turn an ordinary day into something special; they have this incredible ability to evoke happy memories and cozy vibes. But what if I told you there’s a way to indulge in these chocolatey treats without the guilt? That’s right—we’re diving into a recipe for Greek Yogurt Brownies that’s delicious, fudgy, and oh-so-easy to whip up!
I first stumbled upon this gem a few years back during one of my late-night recipe scavenging sessions. I was craving brownies, but I was also staring down the barrel of the scale after holiday feasting. Perusing through the ever-creative world of healthy desserts, I found a recipe that substituted Greek yogurt for oil and added a splash more flavor. Intrigued? You should be!
These brownies have become a staple in my kitchen—perfect for a weekend treat, an after-dinner delight, or even a surprise post-work snack. Just imagine this: friends come over, and you serve them a dessert that packs the deliciousness of traditional brownies, but with an added boost of protein and a bit less sugar. Oh, and did I mention that the leftovers (if there are any!) are even better the next day? If that’s not worth celebrating, I don’t know what is!
So, let’s roll up our sleeves and get ready to bake these delicious Greek Yogurt Brownies. After all, nothing says love like a homemade treat, especially one with a healthy twist. Let’s grab our ingredients and get started on this delightful journey!
Personal Story
Growing up, my mom had this well-loved recipe for traditional brownies that was legendary among my friends and family. I remember her standing at the counter, the kitchen filled with warm chocolatey scents, effortlessly mixing in ingredients like it was a magic potion. Each time those brownies came out of the oven, they were a huge hit—and trust me, there wasn’t a crumb left behind.
Fast forward a decade, and I found myself struggling to live up to her baking legacy while trying to maintain a healthier lifestyle. The idea of a lighter brownie seemed daunting; how dare I mess with perfection? But when I discovered Greek yogurt brownies, it felt like I had found a way to honor my mom’s culinary magic without the heaviness that usually comes with it. The first bite was a revelation! These brownies were soft, rich, and every bit as satisfying as memories of my mom’s version, but with added nutritional benefits.
Now, whenever I whip up a batch, I envision bringing my friends together, just like my family used to do on cozy evenings. Those moments remind me that food truly brings people closer—it’s all about sharing joy, laughter, and a plate—or in this case, a pan—of irresistibly good Greek Yogurt Brownies!
Ingredients
Here’s what you’ll need to create these fudgy little delights, along with helpful insights:
-
1/2 cup (120g) plain Greek yogurt (preferably full-fat or 2%)
Adding Greek yogurt keeps these brownies moist and provides a protein boost. If you’re dairy-free, try coconut yogurt for a tropical twist. -
1/2 cup (115g) unsweetened applesauce
Applesauce acts as a natural sweetener and binder. Use homemade for extra flavor, or swap it out for mashed bananas if you like that flavor. -
1/2 cup (100g) granulated sugar or coconut sugar
Regular granulated sugar works great, but coconut sugar adds a hint of caramel flavor and is a bit less processed. -
2 large eggs
They give the brownies structure; if you’re looking for a vegan option, consider using ‘flax eggs’ (1 tablespoon flaxseed meal + 2.5 tablespoons water = 1 egg). -
1 teaspoon vanilla extract
Always use the good stuff—real vanilla extract adds a depth of flavor that artificial imitators just can’t compete with. -
1/2 cup (60g) all-purpose flour (or whole wheat flour for a healthier option)
Whole wheat flour will add a nuttier flavor and increase the fiber content while still being deliciously soft. -
1/2 cup (50g) unsweetened cocoa powder
The richer the cocoa, the more intense the chocolate flavor. Dutch-process cocoa gives a deeper taste if you’re feeling fancy. -
1/4 teaspoon baking powder
This little leavening agent keeps your brownies from getting too dense, ensuring a fudgy texture. -
1/4 teaspoon salt
A pinch of salt enhances all other flavors, making the chocolaty goodness pop. -
1/2 cup (90g) dark chocolate chips (optional for extra richness)
Who doesn’t love more chocolate? Opt for a dairy-free version if you want to keep it vegan.
Step-by-Step Instructions
Let’s get cooking! Follow these simple steps to whip up these Greek Yogurt Brownies—and don’t worry, I’ll share some helpful kitchen hacks along the way!
Step 1: Preheat and Prepare
Preheat your oven to 350°F (175°C). Grab an 8×8-inch baking pan and line it with parchment paper, leaving some overhang on the sides. This makes for easy removal later and prevents sticking—your future self will thank you!
Step 2: Mix the Wet Ingredients
In a large mixing bowl, combine ½ cup of Greek yogurt, ½ cup of applesauce, and ½ cup of granulated sugar. Whisk these ingredients together until smooth and well-combined. It’s like a creamy hug for your brownies! Pro tip: If your yogurt is fridge-cold, let it sit out for a few minutes to come to room temperature—it’ll mix in better.
Step 3: Add Eggs and Vanilla
Next, crack in those two large eggs and pour in the 1 teaspoon of vanilla extract. Whisk again until everything is combined. You want a luxurious mixture—trust me, this is the base for a heavenly brownie.
Step 4: Mix Dry Ingredients
In a separate bowl, sift together ½ cup of flour, ½ cup of cocoa powder, ¼ teaspoon of baking powder, and ¼ teaspoon of salt. This step is important because it helps ensure that there are no lumps in your brownie batter. Sifting is a great way to spread the cocoa evenly throughout the mix, and it’s a little workout all in one!
Step 5: Combine Blissfully
Fold the dry mixture into the wet ingredients. Use a spatula—or a wooden spoon if you prefer—and carefully mix until there are no dry streaks left. Be gentle! Overmixing can lead to tougher brownies, and we want them perfectly soft and fudgy, not dense and chewy.
Step 6: Chocolate Chips and Transfer
Gently fold in your optional ½ cup of dark chocolate chips until they’re evenly distributed. We all need those celebrated gooey pockets of chocolate, right? Pour the brownie batter into your prepared pan, using the spatula to spread it out evenly.
Step 7: Bake the Magic
Slide the pan into your preheated oven and let those brownies bake for about 20-25 minutes. Keep an eye on them around the 20-minute mark. You want to pull them out when a toothpick inserted in the center comes out with a few moist crumbs, not wet batter. Remember, they’ll firm up a little as they cool!
Step 8: Cooling Time
Once out of the oven, allow the brownies to cool in the pan for at least 10 minutes before transferring them to a wire rack. Patience is key here, my friends! Don’t rush them—they need time to settle and soak in all that chocolatey goodness.
Serving Suggestions
When it comes to serving these brownies, the options are endless! Here are a few ideas to elevate your dessert game:
- Classic Style: Cut them into squares and serve them warm, just as they are. The simplicity really allows the flavors to shine.
- À la Mode: Top with a scoop of vanilla ice cream or a dollop of whipped cream. The contrast between warm brownies and cold ice cream creates a delightful experience.
- Drizzle Delight: Drizzle some melted dark chocolate or caramel sauce over the brownies for an extra touch of indulgence.
- Berry Goodness: Add fresh raspberries or strawberries as a topping. The tartness of the berries complements the rich chocolate beautifully!
- Nutty Twist: Serve with a sprinkle of crushed nuts—walnuts or pecans work wonders—to add a crunchy texture offsetting the fudginess.
Recipe Variations
Feeling adventurous? Here are some fun variations to try out:
-
Minty Fresh: Add a teaspoon of peppermint extract to the wet ingredients for a refreshing mint brownie. Top with crushed Peppermint candies for a festive touch!
-
Espresso Infusion: Stir in a teaspoon of instant coffee granules to the batter. You won’t taste coffee; it just enhances the chocolate flavor!
-
Nutty Banana Swirl: Substitute ½ of the applesauce for a mashed banana, and stir in walnuts or pecans for added crunch.
-
Tropical Delight: Add shredded coconut for an island twist. Pair it with a drizzle of chocolate to keep it deliciously decadent.
-
Gluten-Free Option: Substituting the flour with almond flour or a gluten-free baking blend makes these brownies a gluten-free treat with rich flavor.
Chef’s Notes
As I’ve played around with this recipe, I have some little kitchen stories to share. One time, while experimenting with flavors, I absentmindedly grabbed salt instead of sugar (you know how those small containers can be tricky!). The result was interesting, to say the least! It added a salty-sweet vibe that surprised me, and a few friends remarked that the twist was unexpectedly good.
This brownie recipe has evolved from that original one, adapting a bit here and there until I found the perfect balance of flavors and textures. I love that it combines wholesome ingredients while still satisfying my chocolate cravings—and I’m sure it will do the same for you!
FAQs and Troubleshooting
Here are some common questions and troubleshooting tips to ensure your brownie-making experience is a hit:
Q1: My brownies are dry! What went wrong?
A1: Dry brownies can happen for a couple of reasons: they might have been baked for too long, or maybe you added too much flour. A good tip is to check for doneness at the 20-minute mark.
Q2: Can I make these brownies vegan?
A2: Absolutely! You can replace the eggs with flax or chia seeds mixed with water. Use plant-based yogurt and dairy-free chocolate chips, and you’re good to go!
Q3: What if I don’t have cocoa powder?
A3: You can experiment with carob powder as a cocoa substitute, but keep in mind the flavor will be slightly different. Adjust the sweetness since carob is sweeter than cocoa.
Q4: How do I store leftover brownies?
A4: Store leftover brownies in an airtight container at room temperature for 3-5 days. For longer storage, wrap them tightly and place in the freezer; they can last up to three months!
Nutritional Info
Now, I’m not one to get overly caught up in the numbers, but here’s a rough estimate of what’s in each delicious brownie (based on making 16 brownies):
- Calories per brownie: Approximately 120-140 calories
- Protein: About 3-4g (thanks, Greek yogurt!)
- Carbohydrates: Roughly 18-20g
- Fats: About 4-6g (depending on chocolate chips)
- Fiber: About 1-2g (more if using whole wheat flour)
And let’s not forget the glorious antioxidants from those dark chocolate chips!
Final Thoughts
There you have it, my delightful friends! A recipe for Greek Yogurt Brownies that delivers on taste without compromising texture or satisfaction. These fudgy bites are not just delectable but are a bit healthier, making them the perfect choice when that chocolate craving hits.
Whether you savor them solo with a cup of tea or share them with loved ones during a cozy gathering, these brownies are sure to impress. Don’t forget to experiment with the variations I’ve suggested, because with baking, there’s always room for creativity and personalization.
So, slide into your kitchen, spark up that oven, and let’s bake some joy into our lives! Happy baking, and I can’t wait to hear about your Greek Yogurt Brownie adventures! 🍫✨

Greek Yogurt Brownies
- Total Time: 40 minutes
- Yield: 16 brownies 1x
- Diet: Vegetarian
Description
A lightened-up version of traditional brownies, these Greek Yogurt Brownies are fudgy, delicious, and packed with protein.
Ingredients
- 1/2 cup (120g) plain Greek yogurt
- 1/2 cup (115g) unsweetened applesauce
- 1/2 cup (100g) granulated sugar or coconut sugar
- 2 large eggs
- 1 teaspoon vanilla extract
- 1/2 cup (60g) all-purpose flour
- 1/2 cup (50g) unsweetened cocoa powder
- 1/4 teaspoon baking powder
- 1/4 teaspoon salt
- 1/2 cup (90g) dark chocolate chips (optional)
Instructions
- Preheat your oven to 350°F (175°C) and line an 8×8-inch baking pan with parchment paper.
- Combine Greek yogurt, applesauce, and granulated sugar in a mixing bowl and whisk until smooth.
- Add the eggs and vanilla extract, and whisk until combined.
- Sift together flour, cocoa powder, baking powder, and salt in a separate bowl.
- Fold the dry ingredients into the wet ingredients until no dry streaks remain.
- Gently fold in the dark chocolate chips if using.
- Pour the brownie batter into the prepared pan and spread evenly.
- Bake for 20-25 minutes until a toothpick comes out with a few moist crumbs.
- Allow to cool in the pan for at least 10 minutes before transferring to a wire rack.
Notes
These brownies taste even better the next day! Serve warm or pair with vanilla ice cream for a delicious dessert experience.
- Prep Time: 15 minutes
- Cook Time: 25 minutes
- Category: Dessert
- Method: Baking
- Cuisine: American
Nutrition
- Serving Size: 1 brownie
- Calories: 130
- Sugar: 10g
- Sodium: 150mg
- Fat: 5g
- Saturated Fat: 2g
- Unsaturated Fat: 3g
- Trans Fat: 0g
- Carbohydrates: 20g
- Fiber: 2g
- Protein: 3g
- Cholesterol: 35mg
Keywords: brownies, dessert, healthy dessert, Greek yogurt, chocolate
Healthy Classic Carrot Cake
A Slice of Sunshine: Healthy Classic Carrot Cake Recipe
Hey there, food-loving friends! It’s Beau Collier, and I’m so glad to have you here at Feastical! If there’s one classic dessert that brings a smile to my face, it’s carrot cake. Seriously, friends, this isn’t just any sweet treat; it’s a delightful slice of nostalgia wrapped in a warm blanket of spices! I grew up savoring my grandma’s moist and fragrant carrot cake, which was always a staple during family gatherings and special events. The aroma wafting through the kitchen, followed by everyone fighting over the last piece—pure magic!
Today, I’m sharing my twist on this beloved classic: a Healthy Classic Carrot Cake that you can feel good about indulging in. Made with wholesome ingredients like grated carrots, whole wheat flour, and naturally sweetened with applesauce and honey, this carrot cake not only pleases the palate but also nourishes the body. Plus, it’s simple to whip up, making it perfect for both seasoned chefs and kitchen newbies alike.
With its cozy blend of cinnamon and nutmeg, this cake is like a warm hug on a plate. Grab your favorite mixing bowl, preheat that oven, and let’s jump into this delicious, guilt-free dessert that will impress all your friends and family!
Personal Story
Ah, the memories flood back! I vividly remember the day my grandma decided it was time for me to learn the art of baking. It was a sunny Saturday afternoon, and despite my toddler-sized attention span, the smell of her carrot cake pulling me into the kitchen was irresistible. As we grated carrots together, her laughter filled the air, and I marveled at how something so ordinary could turn into something extraordinary. I loved that she used to sneak extra spices into her recipes; her secret ingredient was always love, of course!
Fast forward a few decades, and I’ve created my take on her recipe! While I still cherish the flavors and warmth of my childhood memories, I wanted to make this carrot cake a healthier option, perfect for everyday enjoyment without sacrificing flavor. Each time I bake it, I find myself back in that sunlit kitchen, surrounded by laughter and the sweetest aroma of baked goodies. This Healthy Classic Carrot Cake is the essence of those times—simple, heartwarming, and filled with love.
Ingredients
Here’s what you’ll need to create your very own Healthy Classic Carrot Cake. Each ingredient brings unique flavor and purpose, so let’s break them down!
-
2 cups grated carrots
Fresh, grated carrots add moisture and natural sweetness. For a twist, try using a mix of carrots and sweet potatoes! -
1 cup whole wheat flour
This adds a hearty texture and nutty flavor. If you’re gluten-free, feel free to swap it with almond or oat flour! -
1/2 cup unsweetened applesauce
Applesauce helps to keep our cake moist and reduces the need for added fats. If you don’t have applesauce, try using mashed bananas instead! -
1/4 cup honey or maple syrup
Natural sweeteners that enhance the cake’s flavor. Maple syrup adds a lovely earthiness; however, for a sugar-free option, you could use stevia or Erythritol. -
1/4 cup almond milk
This keeps the batter easy to mix while adding creaminess. Substitute it with any milk you love—oat, soy, or regular dairy work just fine. -
1 teaspoon baking soda
Helps the cake rise and become wonderfully fluffy. Make sure it’s fresh! -
1 teaspoon baking powder
A little added lift for our cake. If you’re out, you can replace it with another teaspoon of baking soda but omit the salt in the recipe. -
1 teaspoon ground cinnamon
A must-have for that classic carrot cake flavor. Feel free to add more if you love spice! -
1/2 teaspoon nutmeg
This aromatic spice complements the cinnamon beautifully. If you’re not a fan, you can leave this out or swap it for allspice. -
1/4 teaspoon salt
A pinch of salt balances the sweetness! -
1/2 cup vanilla ricotta cheese
Ricotta gives a lovely creaminess to the cake. If you’d like to substitute, Greek yogurt works well for a tangy flavor! -
1 tablespoon vanilla extract
This adds an aromatic sweetness. For an extra kick, consider using vanilla bean paste!
Step-by-Step Instructions
Now that we have our ingredients lined up, let’s get cooking! Follow these steps, and soon you’ll have a delightful Healthy Classic Carrot Cake ready for sharing (or keeping all to yourself—no judgement here!).
Step 1: Preheat the Oven
Preheat your oven to 350°F (175°C). This is crucial! A warm oven ensures your cake rises beautifully, resulting in that classic fluffy texture we love in carrot cakes.
Step 2: Prep Your Baking Pan
Grease a 9-inch round cake pan with a little olive oil or non-stick spray. For easy removal later, consider lining the bottom with parchment paper!
Step 3: Mix Wet Ingredients
In a large mixing bowl, whisk together the grated carrots, unsweetened applesauce, honey or maple syrup, almond milk, ricotta cheese, and vanilla extract. Take a moment to enjoy the vibrant colors around you; cooking is all about engaging your senses, right?
Step 4: Combine Dry Ingredients
In another bowl, mix your whole wheat flour, baking soda, baking powder, ground cinnamon, nutmeg, and salt. I like to give my dry ingredients a good whisk to break up any lumps and ensure even distribution before combining them with the wet mix.
Step 5: Combine Wet and Dry Ingredients
Gradually fold the dry ingredients into the wet mixture. Be gentle! You don’t want to over-mix; just stir until combined. A few flour streaks are okay—this will keep your cake tender and moist!
Step 6: Pour and Bake
Pour your batter into the prepped cake pan. Give it a nice smoothing pat to ensure even distribution and pop that lovely creation in the oven. Bake for about 30-35 minutes, or until a toothpick inserted into the center comes out clean. The aroma wafting through your kitchen will be heavenly!
Step 7: Cool the Cake
Once baked, remove your cake from the oven and allow it to cool in the pan for about 10 minutes before transferring it to a wire rack to cool completely. Patience is key here, friends—let it cool!
Step 8: Frosting Time (Optional)
If you’re feeling a bit indulgent, top your cooled cake with a simple cream cheese frosting made from reduced-fat cream cheese or additional ricotta! I like mixing in a little honey or maple syrup and a splash of vanilla for a delightful finish.
Serving Suggestions
Serving this Healthy Classic Carrot Cake is just as satisfying as making it! Slice this beauty into generous wedges, placing each slice on a cute plate. If you’re feeling extra fancy, dust a bit of powdered sugar on top or drizzle some of that luscious frosting for added flair. Pair it with a dollop of Greek yogurt or a scoop of vanilla ice cream for a delightful dessert experience. Perfect for a cozy evening in, a friendly gathering, or even a solo indulgence while binge-watching your favorite shows.
Recipe Variations
Here are a few fun twists on our Healthy Classic Carrot Cake that’ll keep your friends guessing!
- Tropical Twist: Add 1/2 cup crushed pineapple and a handful of toasted coconut flakes to give a tropical flair.
- Nutty Delight: Fold in 1/2 cup chopped walnuts or pecans for an added crunch. If you’re feeling adventurous, try using pistachios!
- Spice It Up: Boost the warming spices by adding 1/4 teaspoon ground ginger or allspice for an added zing.
- Chocolate Lovers: Incorporate 1/2 cup cocoa powder for a chocolatey take on this classic cake. You can make it a chocolate carrot cake—incredible, right?
- Dairy-Free: Swap out ricotta for silken tofu, blended until smooth, for a vegan-friendly option!
Chef’s Notes
Over the years, this recipe has morphed beautifully, changing with my own culinary journey. I originally began with my grandma’s version, loaded with sugar and fat. As I experimented with healthier alternatives, I discovered so many delightful options. I still hold dear the nostalgia that this cake brings, yet I cherish how I can share a healthier version without losing any of those cherished flavors.
And who knew? Carrot cake can be the perfect backdrop for experimentation. While test-baking one afternoon, I accidentally spilled some cinnamon into the batter. I thought it was a huge mistake, but it turned out to be a happy accident, leading to a flavorful twist I still embrace today! Remember, the kitchen is all about creativity, so don’t be afraid to get a little messy!
FAQs and Troubleshooting
Q1: My cake didn’t rise. What went wrong?
A: Make sure your baking powder and baking soda are fresh! Old leavening agents won’t give your cake the rise it needs. Also, be careful not to over-mix your batter!
Q2: Can I use other types of flour?
A: Absolutely! You can use almond flour or gluten-free flour blends. Just remember that baking times may vary slightly, so keep an eye on it!
Q3: How do I store leftovers?
A: Store any leftover cake in an airtight container at room temperature for a day or so, or refrigerate it for longer freshness. It’s just as delicious cold!
Q4: Can I freeze this cake?
A: Yes! Wrap slices in plastic wrap and place them in a freezer-safe container. It can stay fresh for up to three months. Just thaw at room temperature when ready to enjoy!
Nutritional Info
This Healthy Classic Carrot Cake is not only delicious but also packed with nutrients! Each slice is a good source of fiber, vitamins, and minerals, thanks to the carrots and whole wheat flour. While the exact nutritional information can vary based on specific ingredients and serving sizes, here’s an estimated breakdown for one slice (assuming 12 servings):
- Calories: 150
- Protein: 3g
- Carbohydrates: 24g
- Fat: 4.5g
- Fiber: 2g
- Sugar: 6g
The beautiful medley of ingredients offers an array of health benefits, from improved digestion to maintaining steady energy levels. Without the guilt of traditional options, you can enjoy dessert without holding back!
Final Thoughts
And there you have it, folks! A delightful and healthier take on the classic carrot cake that embodies the joy and comfort of home cooking. No need for extra fuss; this cake can fit beautifully into busy lives, making it easy to share and enjoy good food with friends and family.
So, grab your favorite plate, serve a slice (or two!), and relish in the good vibes and flavors! Keep cooking, keep experimenting, and let the joy of food keep bringing us together—one recipe at a time. Until next time, happy eating!
Print
Healthy Classic Carrot Cake
- Total Time: 45 minutes
- Yield: 12 servings 1x
- Diet: Vegetarian
Description
A delightful and healthier twist on the classic carrot cake, made with wholesome ingredients like grated carrots and whole wheat flour.
Ingredients
- 2 cups grated carrots
- 1 cup whole wheat flour
- 1/2 cup unsweetened applesauce
- 1/4 cup honey or maple syrup
- 1/4 cup almond milk
- 1 teaspoon baking soda
- 1 teaspoon baking powder
- 1 teaspoon ground cinnamon
- 1/2 teaspoon nutmeg
- 1/4 teaspoon salt
- 1/2 cup vanilla ricotta cheese
- 1 tablespoon vanilla extract
Instructions
- Preheat the oven to 350°F (175°C).
- Grease a 9-inch round cake pan with olive oil or non-stick spray.
- Whisk together the grated carrots, applesauce, honey or maple syrup, almond milk, ricotta cheese, and vanilla extract.
- Mix the whole wheat flour, baking soda, baking powder, cinnamon, nutmeg, and salt in another bowl.
- Fold the dry ingredients into the wet mixture until combined.
- Pour the batter into the prepared cake pan and smooth the top.
- Bake for 30-35 minutes, or until a toothpick inserted comes out clean.
- Cool the cake in the pan for 10 minutes before transferring to a wire rack.
Notes
Optional frosting can be made with reduced-fat cream cheese or ricotta mixed with honey or maple syrup.
- Prep Time: 15 minutes
- Cook Time: 30 minutes
- Category: Dessert
- Method: Baking
- Cuisine: American
Nutrition
- Serving Size: 1 slice
- Calories: 150
- Sugar: 6g
- Sodium: 200mg
- Fat: 4.5g
- Saturated Fat: 2g
- Unsaturated Fat: 2g
- Trans Fat: 0g
- Carbohydrates: 24g
- Fiber: 2g
- Protein: 3g
- Cholesterol: 10mg
Keywords: carrot cake, healthy dessert, baking, classic dessert, comfort food
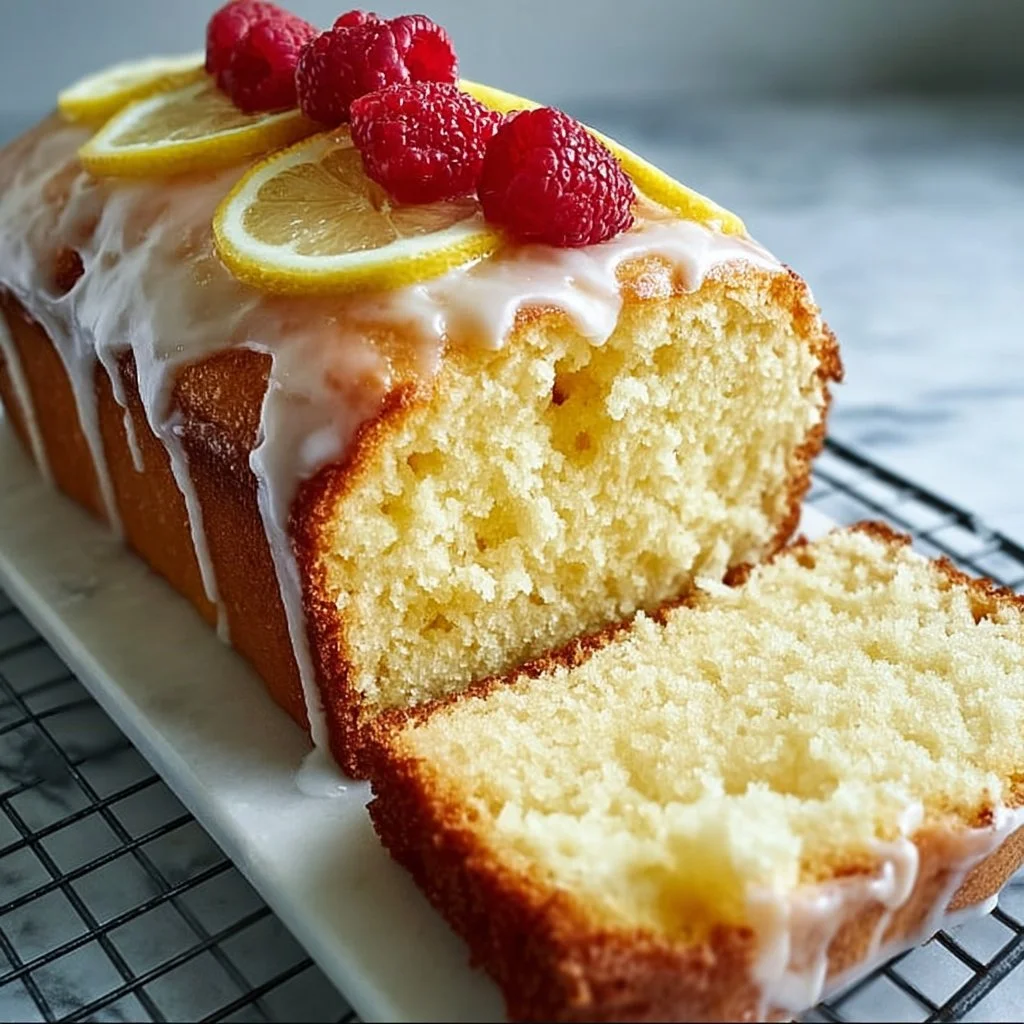
Healthy Greek Yogurt Lemon Loaf Cake
Healthy Greek Yogurt Lemon Loaf Cake: A Sunshine Delight
Introduction
Hey there, friends! If you’re anything like me, you find joy in the simple, everyday pleasures of life. And few things bring more contentment than the smell of a freshly baked cake wafting through the house. Today, I’m excited to share a recipe that has become a staple in my home: the Healthy Greek Yogurt Lemon Loaf Cake! This cake isn’t just a treat; it’s a slice of sunshine — perfect for breakfast, dessert, or an afternoon pick-me-up with your favorite cup of tea!
Baking this cake is like embracing a warm hug from the inside out. The kind of hug that tells you everything’s going to be okay, no matter what. I started making this lovely loaf on long Sunday afternoons, with the sun streaming through the kitchen window. I love the tanginess of the Greek yogurt, which adds moisture and depth to the flavor while reducing the need for excess sugar or oil. Paired with the vibrant zest and juice of fresh lemons, this cake is light, refreshing, and guilt-free — meaning, you can indulge without the heavy feeling afterward.
What I love most about this loaf is how versatile it is. You can enjoy it plain, slathered with a nut butter, or with a dollop of fresh fruit. And as a bonus, it’s super simple to make, even if you’re just figuring out where your spatula went (don’t worry; we’ve all been there!). So, grab that whisk, and let’s dive into this delightful journey of baking a Healthy Greek Yogurt Lemon Loaf Cake!
Personal Story
You know, some of my best childhood memories revolve around baking in my grandma’s kitchen. She had a knack for turning simple ingredients into something magical, and the way she would zest fresh lemons made my little chef heart skip a beat. I can still hear the soft scrapes of her zester against the fruit, filling the air with the most invigorating citrus aroma!
One particular rainy Saturday afternoon stands out in my memory. It was one of those days where the clouds seemed to hang low and the raindrops created a rhythmic melody against the windows. Grandma and I decided to bake a lemon loaf together, using a recipe passed down through generations. As we mixed, the tangy scent of lemon blended with the sweetness of honey made the dreary day feel positively joyous!
What started as an impromptu bake turned into a fun bonding experience filled with laughter, taste-testing, and a sprinkle of flour battles. No matter how messy things got, we would always end up with a delicious loaf that would make the house feel warm and inviting. Every bite took me back to those lovely moments, making me appreciate not just the cake but the memories created in the kitchen. Inspired by those wonderful times, I’ve created my own spin on that beloved lemon loaf, capturing that same delight while keeping it lighter and healthier. Let’s channel those cozy vibes and make our own!
Ingredients
Here’s a rundown of what you’ll need to whip up this amazing Healthy Greek Yogurt Lemon Loaf Cake. Each ingredient plays a crucial role, and I’ll sprinkle in some tips along the way!
-
1 ½ cups all-purpose flour: This is your foundation! If you’re looking for a gluten-free option, almond flour or a 1:1 gluten-free blend can work nicely. Just keep an eye on the moisture level since different flours can absorb liquid differently!
-
1 cup plain unsweetened Greek yogurt: This ingredient is a game-changer! It keeps the cake moist while delivering protein. You could use regular yogurt, but Greek gives you that lovely creaminess and tang.
-
½ cup honey or maple syrup: A natural sweetener to enhance the flavor without overwhelming sweetness. Honey brings a floral note, but feel free to switch it up with maple syrup for a vegan-friendly alternative or even agave nectar.
-
¼ cup freshly squeezed lemon juice: Fresh is key here! The bright acidity pairs perfectly with the sweetness and gives the cake its character. Bottled lemon juice just doesn’t cut it when you want that zesty flavor.
-
Zest of 2 lemons: Don’t skip this! Lemon zest adds a burst of aroma and taste that will marry beautifully with the juice. Make sure to zest carefully to avoid the bitter white pith beneath the bright yellow skin.
-
2 tsp baking powder: This is your leavening agent that helps the loaf rise to glorious heights!
-
½ tsp salt: A tiny pinch amplifies the sweetness and enhances the overall flavor of the cake. Always balance your sweet dishes with a dash of salt for that perfect flavor profile!
Step-by-Step Instructions
Now, let’s get our aprons on and dive into the delightful process of making this cake! Here’s how to do it step-by-step:
-
Preheat and Prepare: Preheat your oven to 350°F (175°C). While that’s heating up, grab your 9×5-inch loaf pan and grease it gently with non-stick spray or butter. You want this cake to slide right out!
-
Mix Dry Ingredients: In a medium-sized bowl, whisk together the all-purpose flour, baking powder, and salt. This helps distribute the leavening agent evenly, which is essential for a consistent rise. If you’re experimenting with gluten-free flour, remember to check the packaging for specific baking instructions since they can differ.
-
Combine Wet Ingredients: In a large mixing bowl, beat the Greek yogurt, honey (or maple syrup), lemon juice, and lemon zest together until smooth and well incorporated. I always recommend using a whisk for this; it makes everything fluffy and combines the ingredients beautifully!
-
Blend the Mixtures: Gradually add the dry ingredient mixture to the wet mixture, stirring gently with a spatula or spoon until just combined. Over-mixing can lead to a dense cake, so be gentle! It’s okay if there are some lumps — they’re part of the homemade charm.
-
Pour Into Pan: Transfer the batter into your prepared loaf pan, spreading it out evenly. Use the back of a spatula to smooth the top, ensuring it’s ready for an even bake.
-
Baking Time: Place the loaf in the preheated oven and bake for 45-55 minutes. You’ll know it’s done when a toothpick inserted into the center comes out clean or with just a few crumbs clinging to it. Pro tip: if you notice the top browning too quickly, cover it loosely with aluminum foil during the last few minutes!
-
Cool and Enjoy: Once baked to perfection, remove it from the oven and let it cool in the pan for about 10-15 minutes before transferring it to a wire rack to cool completely. This will ensure it doesn’t stick and retains its lovely shape.
-
Slice and Serve: Once cooled, slice and enjoy your delicious Greek Yogurt Lemon Loaf Cake! Trust me; you’ll want to take a moment to inhale that delightful citrus aroma.
Serving Suggestions
Now that your loaf is baked and cooled, let’s talk about serving ideas! This Greek Yogurt Lemon Loaf Cake is incredibly versatile! Here are a few creative ways to enjoy it:
-
Classic Slice: Enjoy it plain! The bright flavor is delightful on its own, perfect for breakfast or an afternoon snack with coffee or tea.
-
Spread the Love: Slather some almond butter or cashew cream on a slice for added creaminess and protein. The nutty flavor complements the citrus beautifully.
-
Berry Bliss: Top your cake with fresh berries — strawberries, blueberries, or raspberries work wonders! A dollop of whipped cream or a scoop of yogurt on the side elevates it to a dessert worthy of any celebration.
-
Lemon Drizzle: For a sweet touch, whip up a quick lemon glaze using powdered sugar and lemon juice. Drizzle it over the top for an extra burst of flavor!
-
Homemade Ice Cream: Slice the loaf and enjoy it alongside a scoop of homemade vanilla or coconut ice cream for a delightful dessert experience.
Recipe Variations
Let’s get creative! Here are some fun twists you can try with this recipe to shake things up:
-
Berry Lemon Loaf: Add 1 cup of fresh blueberries or raspberries to the batter for a burst of fruity goodness. Make sure to fold them in gently to avoid breaking the berries.
-
Herb Infusion: Incorporate fresh herbs like rosemary or thyme into the batter for a savory twist. A teaspoon of chopped rosemary can add an aromatic touch that contrasts wonderfully with the lemon.
-
Coconut Flavor: Mix in shredded coconut or a bit of coconut extract for a tropical flair. This gives the loaf a fun texture and makes it taste like summer.
-
Spiced Version: Add a teaspoon of cinnamon or cardamom to the dry ingredients for a warming spice that complements the citrus. Perfect for cozy fall evenings!
-
Vegan Option: Substitute the Greek yogurt with unsweetened applesauce or a plant-based yogurt, and swap the honey for maple syrup. Perfect for your vegan friends!
Chef’s Notes
Over the years, this recipe has gone through its own evolution! It started as a classic lemon cake, but I quickly realized the benefits of Greek yogurt. It made the cake lighter, fluffier, and packed with protein. I’ve experienced plenty of adventures in the kitchen, but this recipe holds a special place in my heart.
I recall one time when I decided to improvise with whatever I had in the pantry. I replaced the lemon with limes and used brown sugar instead of honey! An unexpected flavor explosion happened, and that green-tinted loaf became an instant hit at a family gathering. This is one recipe that has sparked creativity, and that’s what cooking is all about — experimenting, learning, and having fun!
FAQs and Troubleshooting
Have a few questions in mind? I’ve got you covered! Here are some common queries and potential hiccups you might encounter when making this delicious loaf:
-
Why is my cake dense?
- Overmixing can lead to a dense texture. Make sure to mix just until combined, and be gentle with folding in the dry ingredients.
-
How can I store leftovers?
- Wrap the cooled loaf in plastic wrap or store slices in an airtight container at room temperature for up to 3 days, or in the fridge for up to a week. You can also freeze slices for up to 3 months!
-
What if my loaf doesn’t rise?
- Ensure your baking powder is fresh! If it’s been sitting in the pantry for a while, it might have lost its potency. Don’t skip that taste test of the batter; it should have a light, airy texture before baking!
-
Can I substitute sugar?
- Absolutely! You can use coconut sugar or other natural sweeteners. Just keep in mind it might influence the flavor and texture slightly, so adjust accordingly!
Nutritional Info
Now, let’s chat about the health benefits of this delectable treat! Each slice of this Greek Yogurt Lemon Loaf is packed with nourishment, and it can be a great addition to your balanced diet:
-
Protein: Thanks to the Greek yogurt, each serving provides a good protein boost — essential for muscle repair and satiety.
-
Healthy Fats: If you choose to top it with nut butter or yogurt, you’re not only adding flavor but healthy fats that keep you feeling full and satisfied.
-
Lower Sugar: With honey or maple syrup as a natural sweetener, you’re avoiding the refined sugars found in many cakes, making it a guilt-free indulgence.
-
Vitamins and Minerals: The lemons contribute vitamin C, important for immune health, while the yogurt provides calcium and probiotics, supporting digestive health.
In summary, you can enjoy your cake without guilt while satiating your sweet tooth!
Final Thoughts
So there you have it! Your guide to making a delightful Healthy Greek Yogurt Lemon Loaf Cake that I hope brings sunshine to your day. Whether it’s shared with friends, enjoyed solo, or passed down to future generations, this recipe is meant to create smiles and memories.
Remember, cooking is as much about joy and connection as it is about the food itself. Embrace the messiness, the laughter, and the taste testing along the way! There’s no wrong way to enjoy this lemony delight. So roll up your sleeves, grab that spatula, and let’s make magic happen in the kitchen! Don’t forget to share your baking adventures with me — I’d love to hear how your cakes turn out!
Happy baking! 🍋✨
Print
Healthy Greek Yogurt Lemon Loaf Cake
- Total Time: 65 minutes
- Yield: 8 servings 1x
- Diet: Vegetarian
Description
A light and refreshing loaf cake made with Greek yogurt and fresh lemons, perfect for any occasion.
Ingredients
- 1 ½ cups all-purpose flour
- 1 cup plain unsweetened Greek yogurt
- ½ cup honey or maple syrup
- ¼ cup freshly squeezed lemon juice
- Zest of 2 lemons
- 2 tsp baking powder
- ½ tsp salt
Instructions
- Preheat your oven to 350°F (175°C) and grease a 9×5-inch loaf pan.
- Mix the all-purpose flour, baking powder, and salt together in a medium-sized bowl.
- Combine the Greek yogurt, honey (or maple syrup), lemon juice, and lemon zest in a large mixing bowl until smooth.
- Blend the dry ingredients into the wet mixture gently until just combined.
- Pour the batter into the prepared loaf pan and smooth the top.
- Bake for 45-55 minutes, until a toothpick comes out clean.
- Cool in the pan for 10-15 minutes before transferring to a wire rack.
- Slice and serve your delightful Greek Yogurt Lemon Loaf Cake.
Notes
Try adding berries or nuts for extra flavor. This loaf can also be enjoyed with nut butter or fresh fruit.
- Prep Time: 15 minutes
- Cook Time: 50 minutes
- Category: Dessert
- Method: Baking
- Cuisine: Greek
Nutrition
- Serving Size: 1 slice
- Calories: 210
- Sugar: 12g
- Sodium: 150mg
- Fat: 5g
- Saturated Fat: 2g
- Unsaturated Fat: 3g
- Trans Fat: 0g
- Carbohydrates: 33g
- Fiber: 1g
- Protein: 5g
- Cholesterol: 10mg
Keywords: cake, lemon, healthy dessert, Greek yogurt, loaf cake