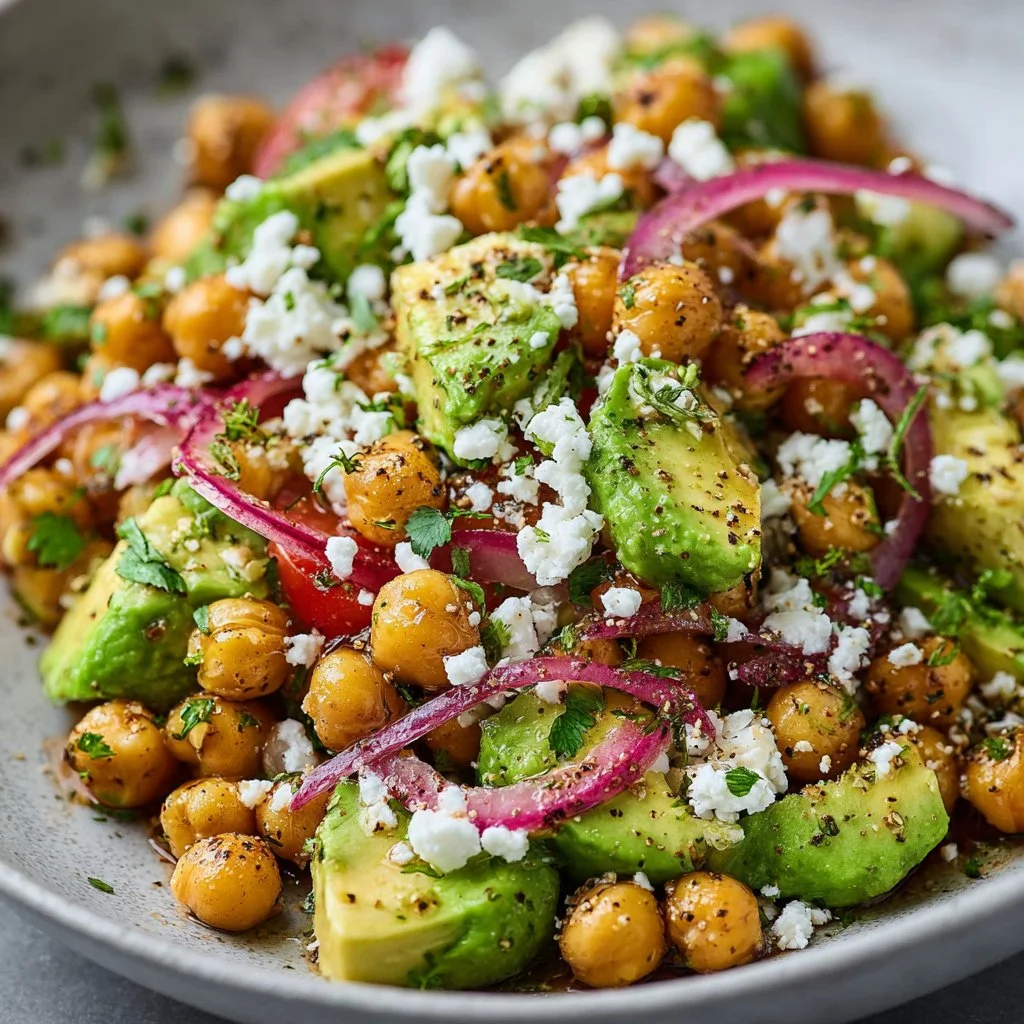
Chickpea Feta Avocado Salad
Chickpea Feta Avocado Salad: A Bright & Flavorful Delight
Hey there, food lovers! It’s Beau Collier from Feastical, and today, we’re diving into a dish that screams sunshine on your plate: the Chickpea Feta Avocado Salad. Seriously, is there anything better than a dish that captures the fresh flavors of summer while being oh-so-simple to whip up? This salad is not just a meal; it’s an experience! Picture this: bright green avocados and creamy feta nestled amongst hearty chickpeas, all drizzled with zesty olive oil and lemon juice. It’s like a Mediterranean getaway, right in your kitchen!
Now, let me tell you, I wasn’t always the culinary wizard I am today (wink). I remember the first time I encountered a chickpea salad. I was just a young foodie, roaming the vibrant farmer’s market, where the colors of the produce practically sing to you. A vendor had a bowl of this enchanting concoction, and I was immediately drawn in. One bite, and I knew I had to recreate it in my own kitchen. If you haven’t tried it yet, get ready to embrace a flurry of flavors that’ll dance on your palate!
This recipe is as flexible as your yoga instructor—perfect for summer picnics, easy weeknight dinners, or meal prep. It’s loaded with nutrients, flavor, and love, making it one of those go-to meals that’ll keep your tummy satisfied without feeling heavy. It’s vegan-friendly if you omit the feta, gluten-free, and packed with protein from the chickpeas. So grab your apron, and let’s get cooking together!
Personal Story
I can still recall that sun-soaked Saturday morning at the local farmer’s market, the air fragrant with herbs and grilled veggies. I must’ve looked like a kid in a candy store, eyes wide, overwhelmed by an abundance of colors. Inspiration struck when I saw a woman tossing together a salad that caught my eye, the glittering feta standing out like a lighthouse amidst waves of fresh greens and chickpeas.
After striking up a friendly conversation, she shared her wisdom about the importance of fresh ingredients—how they elevate any dish from ordinary to extraordinary. That moment planted the seeds of this Chickpea Feta Avocado Salad in my heart! I rushed home, armed with fresh produce, the essence of her words echoing in my ears. Ever since that day, each time I make this salad, I’m transported back to that sunny market day, reigniting my passion for cooking and sharing delicious meals with loved ones.
Ingredients
Let’s gather the goodies! Here’s what you’ll need:
-
1 (15-ounce/425g) can chickpeas, drained and rinsed
Chickpeas are the backbone of this salad, offering a hearty texture and a boost of protein. You could also opt for cooked dried chickpeas if you want to go the extra mile – just make sure they’re tender! -
1 avocado, pitted and diced
Avocados add creaminess and balance the dish. If you’re not an avocado aficionado, feel free to swap in diced cucumbers for a refreshing crunch! -
4 ounces/115g feta cheese, crumbled
Feta lends a salty tanginess. For a vegan twist, replace with a homemade cashew cheese or skip it altogether! -
1/2 cup/75g red onion, thinly sliced
Red onions contribute a zesty bite. If they’re too strong for your taste, soak them in cold water for a few minutes to mellow out the flavor. -
1/2 cup/50g fresh parsley, chopped
Fresh herbs lighten up any dish! You could swap parsley for basil or cilantro if you’re looking for a different flavor profile. -
1/4 cup/25g fresh mint, chopped
Mint imparts a refreshing twist. If mint isn’t your jam, try dill or even fresh oregano for a unique spin! -
3 tablespoons/45ml olive oil
Use a good quality extra virgin olive oil for a lovely richness. Avocado oil could also work if you want a more neutral flavor. -
2 tablespoons/30ml lemon juice, freshly squeezed
Nothing brightens a dish like fresh lemon juice! If you don’t have lemons, lime juice works just as beautifully. -
1 clove garlic, minced
Garlic adds depth – just like my culinary secrets! If you prefer milder flavors, try roasted garlic instead. -
1/2 teaspoon/2.5ml dried oregano
Dried oregano gives off a warm, Mediterranean vibe. You could also use Italian seasoning for a more complex taste. -
Salt and pepper to taste
Always taste before adding these! The seasoning elevates the freshness of the ingredients.
Step-by-Step Instructions
Now, let’s jump into the magic of cooking! Follow these steps, and you’re guaranteed a delightful dish:
-
Prep Your Ingredients: Start by draining and rinsing the chickpeas. This eliminates excess sodium and helps there be no grit in your salad. Grab a good strainer and let those chickpeas sit while you chop everything else!
-
Chop, Chop, Chop:
- Dice the avocado and toss it right into a large mixing bowl.
- Next, slice up your red onion as thinly as you can. Remember, the thinner they are, the less overpowering they’ll taste when combined with the others.
- Now, it’s time for herbs! Chop your parsley and mint, and add them to the bowl for some herby magic.
-
Add the Feta: Crumble your feta directly into the bowl. Don’t be shy—more feta, more flavor! Gently mix all your ingredients with a spatula or wooden spoon, being careful not to mash the avocado too much.
-
Eggiting Olive Oil and Lemon Juice Combo: In a small bowl, whisk together the olive oil, freshly squeezed lemon juice, minced garlic, oregano, salt, and pepper. This dressing is where the magic happens! It brings all your ingredients together like a warm hug.
-
The Grand Finale: Pour your dressing over the salad and fold it gently until everything is beautifully coated! If you notice that the chickpeas are trying to escape, employ a light hand so they don’t get mushy.
-
Taste Test Time!: Here comes the fun part—taste your creation! Adjust the seasoning if necessary. Maybe you want a bit more lemon or an extra sprinkle of oregano? Go for it! You’re the chef here.
-
Chill Out (Optional): This salad is perfect right away, but it also tastes incredible when allowed to chill in the fridge for about 30 minutes. This allows all those flavors to mingle and dance.
Serving Suggestions
Time to plate up! You can serve this Chickpea Feta Avocado Salad in various ways:
-
Bowl-style: Present it in a beautiful bowl and let everyone serve themselves. This family-style approach brings everyone together and makes for a fun meal!
-
In Pita Pockets: Spoon the salad into pita pockets, adding a leaf of lettuce for extra crunch. It’s a portable option that’s perfect for picnics or work lunches!
-
As a Side: Pair it with grilled chicken or fish to elevate your main dish. This salad complements proteins beautifully, giving a refreshing contrast.
-
On a Bed of Greens: Serve the salad over a bed of arugula or mixed greens for a more substantial meal. You can even drape it across whole grain toast for a divine breakfast or lunch option.
Recipe Variations
Feeling adventurous? Here are some flavor-packed variations to jazz up our Chickpea Feta Avocado Salad:
-
Mediterranean Twist: Add diced cucumber and Kalamata olives for an even more authentic Mediterranean vibe.
-
Spicy Kick: Throw in some finely chopped jalapeños or a sprinkle of red pepper flakes for a feisty heat!
-
Protein Boost: Toss in some diced rotisserie chicken or quinoa for extra substance.
-
Tropical Vibes: For a fruity twist, add diced mango or pineapple. The sweetness will create a beautiful balance with the salty feta!
-
Nutty Crunch: Add a handful of toasted sunflower seeds or slivered almonds for some extra crunch and nutrients.
Chef’s Notes
This salad has continuously evolved since I first whipped it up years ago! Initially, it was just a simple mix of chickpeas and feta, but as I explored different ingredients and flavors, it blossomed into the vibrant dish it is today. One of my favorite kitchen stories stems from a friends’ dinner party where I forgot the lemon juice! I scrambled and grabbed a jar of homemade pickle brine to give that tangy kick, and believe it or not, it was a hit! So don’t be afraid to improvise and let your creativity shine through.
FAQs and Troubleshooting
Q: What can I do if my avocado isn’t ripe?
A: Don’t worry! You can microwave your unripe avocado for about 30 seconds in its skin to soften it slightly. However, this trick won’t bring out the same creamy flavor, so always aim for ripe avocados when possible!
Q: How long does this salad last in the fridge?
A: Ideally, it’s best enjoyed fresh, but it’ll keep in the fridge for about 2-3 days. The avocado will darken, but adding a splash more lemon juice can help preserve its bright color!
Q: Can I make this salad in advance?
A: Absolutely! Just keep the avocado separate until you’re ready to serve. This helps prevent browning and keeps the salad fresh.
Q: What if I can’t find fresh herbs?
A: You can use dried herbs! A general rule is to use about one-third the amount of dried herbs as fresh.
Nutritional Info
Here’s the scoop on the nutritional benefits of our Chickpea Feta Avocado Salad:
- Chickpeas are a fantastic source of plant-based protein, fiber, and essential vitamins and minerals, making them a filling addition to any meal.
- Avocado adds healthy fats that are perfect for keeping your heart happy.
- Feta cheese provides calcium and protein; if you’re making a vegan version, using nuts or seeds can still provide those good fats.
- Fresh herbs and veggies are packed with antioxidants and vitamins, giving you a boost of freshness in every bite!
This salad can be a great option for a light lunch or a side dish that complements your main meal. Plus, it’s a vibrant way to sneak in a variety of nutrients while keeping things deliciously simple!
Final Thoughts
So there you have it—the Chickpea Feta Avocado Salad that’s sure to become one of your kitchen staples. Remember, cooking is all about creativity and joy; it’s about creating something to share not just with your palate but also with your loved ones. The memories we create in the kitchen are just as important as the meals we put on the table.
I hope this salad makes its way into your regular rotation and brings as much joy to your kitchen as it brings to mine! Feel free to experiment with flavors, make it your own, and share your variations with us. Happy cooking, and see you next time, foodies! 🍽️
Print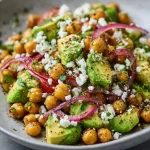
Chickpea Feta Avocado Salad
- Total Time: 15 minutes
- Yield: 4 servings 1x
- Diet: Vegan, Vegetarian, Gluten-Free
Description
A vibrant salad combining chickpeas, creamy avocado, tangy feta, and fresh herbs, perfect for summer days.
Ingredients
- 1 (15-ounce/425g) can chickpeas, drained and rinsed
- 1 avocado, pitted and diced
- 4 ounces/115g feta cheese, crumbled
- 1/2 cup/75g red onion, thinly sliced
- 1/2 cup/50g fresh parsley, chopped
- 1/4 cup/25g fresh mint, chopped
- 3 tablespoons/45ml olive oil
- 2 tablespoons/30ml lemon juice, freshly squeezed
- 1 clove garlic, minced
- 1/2 teaspoon/2.5ml dried oregano
- Salt and pepper to taste
Instructions
- Prep your ingredients: Start by draining and rinsing the chickpeas.
- Dice the avocado and toss it into a large mixing bowl.
- Slice the red onion thinly and add to the bowl.
- Chop your parsley and mint, and add them to the bowl.
- Crumble the feta into the bowl and mix gently.
- Whisk together olive oil, lemon juice, garlic, oregano, salt, and pepper in a small bowl.
- Pour the dressing over the salad and fold gently.
- Taste your creation and adjust seasoning if necessary.
- Chill in the fridge for 30 minutes, if desired.
Notes
For a vegan version, omit the feta or substitute with cashew cheese. This salad is best enjoyed fresh but can be stored in the fridge for up to 2-3 days.
- Prep Time: 15 minutes
- Cook Time: 0 minutes
- Category: Salad
- Method: Mixing
- Cuisine: Mediterranean
Nutrition
- Serving Size: 1 serving
- Calories: 300
- Sugar: 3g
- Sodium: 400mg
- Fat: 18g
- Saturated Fat: 4g
- Unsaturated Fat: 10g
- Trans Fat: 0g
- Carbohydrates: 30g
- Fiber: 9g
- Protein: 10g
- Cholesterol: 10mg
Keywords: chickpea salad, feta, avocado, Mediterranean, healthy salad

Tuna Lettuce Wraps
Tuna Lettuce Wraps: A Fresh and Flavorful Delight
Introduction:
Hey there, food lovers! It’s your pal Beau Collier from Feastical, and today we’re diving into something that’s not only delicious but also fresh and breezy—Tuna Lettuce Wraps! If you’re anything like me, you love a meal that feels light yet filling, and these wraps are just the ticket.
Imagine sinking your teeth into crisp, refreshing lettuce filled with savory, perfectly seasoned tuna—sounds inviting, right? Whether you need a quick lunch, a fancy appetizer for your next gathering, or a healthy snack, these delightful wraps have got your back. Plus, they’re oh-so-simple to whip up, making them a perfect fit for anyone, from the seasoned chef to those still searching for their spatula. So, grab your butter lettuce or Bibb lettuce, and let’s get cooking!
I remember the first time I stumbled upon the idea of lettuce wraps. I was spending a lazy summer afternoon at my quirky Aunt Louisa’s house. She was the queen of inventive snacks, and that day she had a platter of tuna lettuce wraps, just waiting to spark joy. As I took my first bite, the crunch of the lettuce contrasted beautifully with the creamy tuna filling. It was a match made in heaven!
Since then, I’ve made my own versions of these wonderful wraps, each time adding a personal touch. Trust me, you’ll not only enjoy making them but also sharing them. So, let’s roll up our sleeves and create a dish that’s filled with culinary love, good vibes, and a sprinkle of creativity!
Personal Story:
Ah, memories in the kitchen! One of my fondest moments was when my daughter, little Sophie, decided to help me make these Tuna Lettuce Wraps for her first-ever picnic with friends. She was about seven, armed with a chef’s hat that was three sizes too big and an adventurous spirit that could conquer the world.
We pulled out the ingredients and got to work. I showed her how to open the canned tuna, and she giddily squished the contents into a mixing bowl. Together, we diced the celery and red onion while giggling and sharing stories of adventures from her kindergarten class.
Lettuce wraps became a tradition for our summer picnics, and from that day, Sophie became my little sous-chef. It made my heart swell to see her enthusiasm for cooking and eating healthy. We’d fill those greens with her favorite tuna mixture, decorating each one with bright sprigs of parsley. They became our signature treat!
As time passed and Sophie grew, so did our wrap-making skills. Those cherished moments in the kitchen not only turned out delicious food but also fostered a love for cooking that she carries with her today. It’s funny how something as simple as a tuna salad can become a heartwarming memory, isn’t it?
Ingredients:
Here’s what you’ll need to create your delectable Tuna Lettuce Wraps:
-
Butter Lettuce or Bibb Lettuce: 1 head (or about 8-10 leaves)
- Chef Insight: These leafy greens are sturdy enough to hold your filling, yet soft enough to deliver that refreshing crunch. The leaves are cupped, making them perfect little boats for our delicious tuna mixture!
-
Canned Albacore Tuna: 10 oz (2 5oz cans)
- Substitution Tip: If you’re feeling adventurous, swap from albacore to yellowfin or even canned salmon for a twist on the classic flavor.
-
Mayonnaise: 1/3 cup
- Chef Insight: This adds creaminess to the mixture. For a lighter option, try Greek yogurt or a vegan mayo if you’re keeping it plant-based.
-
Finely Diced Celery: 2 tbsp
- Substitution Tip: This gives a delightful crunch! Feel free to add diced bell peppers or cucumbers for an extra refreshing bite.
-
Finely Diced Red Onion: 2 tbsp (rinsed in cold water)
- Why Rinse?: Rinsing the onions helps tone down their sharpness while keeping that lovely crunch. If raw onion isn’t your jam, try scallions or shallots!
-
Whole Grain Mustard: 1 tsp
- Chef Insight: This adds a nice tangy flavor that rounds out the richness of the tuna. If you prefer a spicier kick, swap it for Dijon mustard.
-
Chopped Fresh Parsley: 1 tsp
- Flavor Boost: This herb acts as a fantastic fresh note. You could also use dill or cilantro depending on your preference.
-
Salt and Pepper: To taste
- Chef Tip: Always season as you go for the best flavor! A sprinkle here and a pinch there can make all the difference.
Step-by-Step Instructions:
Now that we’ve gathered our ingredients, let’s jump into the cooking process! Follow along for some chef hacks that’ll ensure your Tuna Lettuce Wraps turn out perfectly every time.
-
Prep the Lettuce: Start by washing the butter or Bibb lettuce leaves gently under cool running water. Pat them dry with a paper towel or a clean kitchen cloth.
- Chefs Tip: If you’re short on time, wash and dry them ahead of time and store them in an airtight container with a damp paper towel to keep them crisp.
-
Open the Tuna: Grab your cans of albacore tuna and open them. Drain the liquid carefully! Transfer the tuna to a mixing bowl.
- Chef Insight: I like to fluff it with a fork to break up any big chunks. This way, every bite is well-distributed and delicious!
-
Mix it Up: Add the mayonnaise, diced celery, and diced red onion to the tuna. Season with salt and pepper to taste. Drizzle in the whole grain mustard and fold everything gently until well combined.
- Hack Alert: If you want to get a bit creative, add a dash of hot sauce or some chopped pickles for an extra flavor boost!
-
Taste Test: Before proceeding, take a tiny spoonful and taste! Adjust seasoning if necessary.
- Chef Rule: Always remember that delicious food happens in layers of flavor. If it’s not tasting vibrant enough, a little more of this or that can work wonders.
-
Assemble the Wraps: Now comes the fun part! Take your prepared lettuce leaves and spoon a generous amount of the tuna mixture into each leaf. Don’t be shy—fill those cups!
- Serving Tip: If you like it a bit saucy, drizzle a little extra mayo or a squeeze of lemon juice on top.
-
Garnish: Sprinkle a bit of fresh parsley on top for color and added flavor.
- Final Touch: A slice of avocado or some cherry tomato halves on the side can elevate this plate even more!
-
Serve Immediately: Enjoy your tuna lettuce wraps right away while the lettuce is crisp and the flavors lively!
Serving Suggestions:
When it comes to serving these bad boys, presentation is key! Here are some fun ideas to get your Tuna Lettuce Wraps looking as delicious as they taste:
-
Platter Style: Arrange the stuffed lettuce leaves on a beautiful serving platter. You can even add some lemon wedges and herbs for a pop of color.
-
Dipping Sauces: Serve with little bowls of your favorite dipping sauces like soy sauce, sriracha, or a creamy dip to enhance those flavors.
-
Kids’ Picnic: For a fun twist, let the kids add their own toppings—like shredded carrots, sliced cucumbers, or even a dollop of guacamole!
-
Garnished Plate: For a fancy touch, sprinkle some microgreens or edible flowers around the plate to impress your guests.
-
Lunch Boxes: Perfect for meal prep! These wraps pack beautifully into lunch boxes; just keep the tuna filling and lettuce leaves separate until it’s time to eat.
Recipe Variations:
Feeling adventurous? Here are some creative variations to this basic recipe that’ll excite your taste buds!
-
Mediterranean Tuna Wraps: Swap in chopped kalamata olives and feta cheese for a Mediterranean flair. Toss in a few sun-dried tomatoes for extra oomph!
-
Tropical Twist: Add diced pineapple or mango to your mixture. The sweetness will balance beautifully with the savory tuna!
-
Spicy Sriracha Tuna: Mix in some Sriracha for a kick! Perfect for those who crave a bit of heat in their meals.
-
Avocado Tuna Wraps: Mash in some ripe avocado instead of mayonnaise for a creamy, nutrient-rich alternative that adds healthy fats.
-
Vegetarian Version: Replace tuna with chickpeas! Mash them up and season with the same ingredients for a satisfying plant-based option.
Chef’s Notes:
Every recipe tells a story, right? Tuna Lettuce Wraps have evolved over time in my kitchen! Initially, I made them for quick lunches, but over the years, they’ve become staples at parties and gatherings.
I remember one memorable dinner with friends where I doubled the batch, excited to share, only to find out they were devoured before I could even grab one! Let’s say I learned the hard way that these wraps disappear quickly!
I also love experimenting with leftovers—using turkey or chicken instead of tuna works great. It’s all about flexibility and finding joy in cooking!
FAQs and Troubleshooting:
1. My lettuce leaves are tearing when I fill them. What should I do?
- A gentle hand goes a long way! Look for larger, sturdier leaves and make sure they’re dry to avoid tearing. This way, they’ll hold up better against the filling.
2. Why does my tuna salad taste bland?
- Ah, the age-old kitchen conundrum! Don’t forget to taste as you mix. Adding a dash of acid like lemon juice or a splash of hot sauce can brighten the flavor remarkably!
3. Can I prepare these wraps ahead of time?
- Absolutely! Just keep the filling and lettuce separate until you’re ready to serve. Fill them just before eating to maintain that delightful crunch!
4. What if I’m sensitive to onions?
- No problem! Simply skip the onions, or substitute them with diced bell peppers, which provide a nice crunch without the sharpness.
Nutritional Info:
These Tuna Lettuce Wraps not only taste divine but they are also packed with nutrients, making them a guilt-free choice. Here’s a quick breakdown of what you’ll get in one serving (2 wraps):
- Calories: Approximately 230 calories
- Protein: 24 grams (thanks to that mighty tuna!)
- Fat: 14 grams (mostly from healthy sources like mayonnaise or avocado!)
- Carbohydrates: 4 grams (almost negligible, and it’s healthier from the lettuce!)
- Fiber: 1 gram (with all those fresh veggies!)
You’re fueling your body with lean protein, healthy fats, vitamins, and minerals without sacrificing flavor. It’s a win-win!
Final Thoughts:
And there you have it—Proud Tuna Lettuce Wraps that’ll make your taste buds sing! Whether you’re making them for a picnic, a quick dinner, or simply a snack, it’s all about embracing that ease and comfort of good food.
I hope you’ll whip these up and find joy in every bite, just like I do! Cooking doesn’t have to be complicated; it’s about connecting, sharing, and enjoying flavors. So, gather your loved ones around, make some memories, and enjoy these delightful wraps!
Remember, here at Feastical, it’s all about feeling good while eating delicious food. I can’t wait to hear about your adventures in the kitchen. Share your twists on these wraps or tell me your stories—it’s these delicious moments that bring us all together. Happy cooking, friends! 🥗✨
Print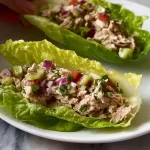
Tuna Lettuce Wraps
- Total Time: 25 minutes
- Yield: 4 servings 1x
- Diet: Low Carb
Description
Fresh and flavorful Tuna Lettuce Wraps perfect for a light meal or a healthy snack.
Ingredients
- 1 head Butter Lettuce or Bibb Lettuce (about 8–10 leaves)
- 10 oz Canned Albacore Tuna (2 5oz cans)
- 1/3 cup Mayonnaise
- 2 tbsp Finely Diced Celery
- 2 tbsp Finely Diced Red Onion (rinsed in cold water)
- 1 tsp Whole Grain Mustard
- 1 tsp Chopped Fresh Parsley
- Salt and Pepper to taste
Instructions
- Prep the Lettuce: Start by washing the butter or Bibb lettuce leaves gently under cool running water. Pat them dry with a paper towel or a clean kitchen cloth.
- Open the Tuna: Grab your cans of albacore tuna and open them. Drain the liquid carefully! Transfer the tuna to a mixing bowl.
- Mix it Up: Add the mayonnaise, diced celery, and diced red onion to the tuna. Season with salt and pepper to taste. Drizzle in the whole grain mustard and fold everything gently until well combined.
- Taste Test: Before proceeding, take a tiny spoonful and taste! Adjust seasoning if necessary.
- Assemble the Wraps: Now comes the fun part! Take your prepared lettuce leaves and spoon a generous amount of the tuna mixture into each leaf.
- Garnish: Sprinkle a bit of fresh parsley on top for color and added flavor.
- Serve Immediately: Enjoy your tuna lettuce wraps right away while the lettuce is crisp and the flavors lively!
Notes
These wraps are perfect for meal prep. Just keep the filling and lettuce leaves separate until you’re ready to eat.
- Prep Time: 15 minutes
- Cook Time: 10 minutes
- Category: Appetizer
- Method: No-Cook
- Cuisine: American
Nutrition
- Serving Size: 2 wraps
- Calories: 230
- Sugar: 1g
- Sodium: 500mg
- Fat: 14g
- Saturated Fat: 2g
- Unsaturated Fat: 10g
- Trans Fat: 0g
- Carbohydrates: 4g
- Fiber: 1g
- Protein: 24g
- Cholesterol: 30mg
Keywords: tuna, lettuce wraps, healthy snacks, meal prep, easy recipes

Southwestern Chicken Salad
Southwestern Chicken Salad: A Burst of Flavors to Brighten Your Day
Hey there, food lovers! Welcome to另一场Feastical! If you’re ready to embark on a taste adventure that’s as vibrant as a Southwest sunset, you’re in the right place. Today, I’m sharing one of my all-time favorite recipes: Southwestern Chicken Salad. This dish is like a fiesta in a bowl—fresh, zesty, and packed with ingredients that sing with flavor! Let’s dive in!
So, what makes this Southwestern Chicken Salad shine? For starters, it’s more than just a salad; it’s a celebration of colors, textures, and tastes that perfectly represent the spirit of the Southwest. Think of tender, shredded chicken mingling with creamy Greek yogurt, hearty black beans, sweet fire-roasted corn, and crunchy bell peppers, all dressed in a zesty lime juice and spice blend. It’s wholesome, nutritious, and oh-so-delicious!
You might wonder, “Why should I care about chicken salad?” Well, imagine a hot summer day where you want something light yet filling, or perhaps you’ve just had a long week and need an easy recipe that won’t take forever to whip up. This salad is the answer. Plus, it’s effortlessly customizable—swap or add your favorite ingredients without much thought.
But before we get into the nitty-gritty of ingredients and cooking steps, let me share a personal story that brings me back to the heart of this dish. Cooking is about connection, and the memories we share around the table often mean more than the meals themselves.
Personal Story
Years ago, I found myself in a tiny kitchen in Santa Fe, New Mexico, where the air was thick with the rich aroma of spices and the warmth of family. I remember it was a rainy afternoon, and my aunt was making her rendition of Southwestern Chicken Salad. She offered me a seat while she cooked and shared stories that made the ingredients come alive—like how her love for cooking spurred from her grandmother.
While she chopped bell peppers and stirred the bowl, she touched on how food brought the family together—celebrating birthdays, holidays, or simply the end of a long week with good conversation and lots of laughter. That’s when I realized: this salad isn’t just a meal. It’s a vessel for memories, connection, and love—just like a cozy hug. So let’s recreate that moment and instill it into your kitchen, shall we?
Ingredients
Now that I’ve hopefully sparked some hungry inspiration, here’s what you’ll need to make this Southwestern Chicken Salad.
-
2 cups cooked chicken, shredded
Using rotisserie chicken is my go-to hack for saving time! If you’re in the mood for a healthy twist, feel free to use grilled chicken or turkey. -
1 cup Greek yogurt
This creamy hero adds a tangy flavor and keeps the salad light. You can substitute it with sour cream or a dairy-free yogurt if you prefer. -
1 can black beans, rinsed and drained
These beans are a powerhouse of protein and fiber! Canned beans are super convenient, but if you want, you can cook dried beans—just plan ahead for soaking and cooking time. -
1 cup fire-roasted corn
Nothing elevates your dish like a bit of smoky sweetness! If fresh corn is in season, grill or roast it for a delightful touch. Frozen corn works fine too! -
1 bell pepper, diced (any color of your choice)
Bell peppers add crunch and vibrant color! Swap with jalapeños for a spicy kick or add multiple bell peppers for a rainbow effect. -
1 teaspoon chili powder
This spice will add depth and warmth to your salad; if you’re feeling adventurous, try chipotle powder for a smoky flavor! -
1 teaspoon cumin
Cumin brings an earthy, robust flavor. If you’re low on cumin, a dash of taco seasoning works great too! -
Salt and pepper to taste
Don’t skip seasoning—taste as you go; it’s the secret to making the flavors pop! -
Lime juice to taste
Fresh lime juice brightens the dish and brings all the flavors together. If you have lemons, they work too but will give a slightly different taste.
Step-by-Step Instructions
Ready to put your culinary skills to work? Let’s get into the nitty-gritty of making this Southwestern Chicken Salad!
Step 1: Shred the Chicken
If you’re using rotisserie chicken, skip ahead! If you’re cooking the chicken yourself, season your chicken breasts with salt and pepper, then grill or roast until fully cooked (about 165°F internal temperature). After resting, shred the chicken using two forks—don’t be shy! This is part of the fun!
Step 2: Combine the Base Ingredients
In a large mixing bowl, toss in your shredded chicken, rinsed black beans, and fire-roasted corn. This combination is already starting to look vibrant and inviting!
Chef Tip: Use a large bowl to give yourself enough room for mixing, which will help avoid spills!
Step 3: Prep the Vegetables
Dice your bell pepper into bite-sized pieces. Feel free to get creative and add more colors! Toss the diced bell peppers into the mixing bowl to add crunch and freshness.
Step 4: Mix the Dressing
In a smaller bowl, combine the Greek yogurt, lime juice, chili powder, and cumin. Fold it until it’s smooth and well-blended.
Chef Hack: Use a whisk for easier mixing! If you prefer a thinner dressing, add a splash of water or additional lime juice until it reaches your desired consistency.
Step 5: Combine Everything
Pour the yogurt dressing over the chicken mixture and gently fold it all together. Make sure everything is evenly coated—every bite should burst with flavor!
Taste Test: This is the moment to taste! Adjust the seasonings and lime juice according to your preference.
Step 6: Chill and Serve
Cover the salad and let it chill in the fridge for about 30 minutes—this allows all those wonderful flavors to meld together brilliantly!
Serving Cheat: You can serve this salad right away, but the flavors really deepen with a little chill time!
Serving Suggestions
Once your Southwestern Chicken Salad has chilled, it’s time to plate it up! Serve it family-style in a big bowl or portion it out in individual bowls for a more personal touch. Add a sprinkle of fresh cilantro on top for garnish—everyone loves that vibrant pop of green!
You can pair it with whole wheat tortillas, tortilla chips, or even over a bed of greens. Want an extra kick? Drizzle some hot sauce or pico de gallo on top for a delightful zing!
Recipe Variations
Who says you can’t have fun with recipes? Here are a few variations to keep your taste buds dancing:
-
Southwestern Chicken Salad Wrap: Take your salad and wrap it up in a whole wheat tortilla for a portable meal.
-
Quinoa & Chicken Salad: Replace half of the shredded chicken with cooked quinoa for a protein boost.
-
Mediterranean Twist: Swap black beans for chickpeas, Greek yogurt for a tahini dressing, and throw in some diced cucumbers and kalamata olives.
-
Add Some Heat: If you like it spicy, toss in diced jalapeños or a dash of hot sauce to the dressing.
-
Vegetarian Option: Omit the chicken and substitute with grilled vegetables or extra beans for a filling vegetarian dish.
Chef’s Notes
This Southwestern Chicken Salad has been a staple in my kitchen for years! It’s incredible how much joy a bowl of salad can bring. I often change it up based on what I have in the fridge or what’s fresh from the farmer’s market. It’s versatile, forgiving, and—let’s be honest—ridiculously easy to make!
Once, I was in a hurry preparing this salad for friends and accidentally grabbed cinnamon instead of cumin. (Who knew those jars could look so similar?) Well, my friends ended up loving it, and it turned into a hilarious kitchen story, but I wouldn’t recommend it!
FAQs and Troubleshooting
1. Can I make this salad ahead of time?
Absolutely! Just keep it in the fridge for up to 2 days. The flavors actually develop nicely, but avoid adding crunchy toppings until serving to keep everything fresh!
2. Why is my salad too dry?
There’s a simple fix! Just adjust by adding more Greek yogurt or lime juice until you reach your preferred creaminess.
3. How can I make this salad spicier?
You can add diced jalapeños, hot sauce, or extra chili powder to the mix. Your taste buds will thank you!
4. What can I do if I don’t have shredded chicken?
No problem! You can use any cooked protein like turkey or even a can of tuna if you’re in a pinch.
Nutritional Info
Now, let’s break down why this Southwestern Chicken Salad is not just delicious but also nutritious! It’s a protein powerhouse thanks to the chicken and black beans, providing essential amino acids and fiber. The Greek yogurt base is rich in probiotics supporting your gut health. Plus, the medley of colorful veggies delivers various vitamins and minerals, promoting overall well-being.
Approximate Nutrition per Serving (1 cup):
- Calories: 280
- Protein: 30g
- Fat: 9g (depends on the yogurt used)
- Carbohydrates: 30g
- Fiber: 10g
- Sugar: 4g
All good fuel to keep you feeling fabulous!
Final Thoughts
I hope you feel inspired to whip up this Southwestern Chicken Salad soon! Bring your family or friends into the kitchen—cooking is always better when shared. Remember, it’s not just about following the recipe; it’s about making it your own and enjoying every single bite.
As you enjoy this dish and perhaps share stories of your own, know that every meal is a chance to create cherished memories. So grab a fork or a sturdy tortilla and dig into this bowl of sunshine. Happy cooking, and until next time, keep cultivating those culinary vibes! 🌶️🥗
Print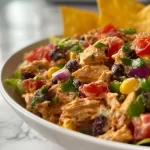
Southwestern Chicken Salad
- Total Time: 45 minutes
- Yield: 4 servings 1x
- Diet: Gluten-Free
Description
A vibrant and zesty salad packed with tender chicken, black beans, corn, and a creamy Greek yogurt dressing.
Ingredients
- 2 cups cooked chicken, shredded
- 1 cup Greek yogurt
- 1 can black beans, rinsed and drained
- 1 cup fire-roasted corn
- 1 bell pepper, diced (any color of your choice)
- 1 teaspoon chili powder
- 1 teaspoon cumin
- Salt and pepper to taste
- Lime juice to taste
Instructions
- Shred the chicken if not using rotisserie by seasoning and cooking until fully cooked, then shred.
- Combine the shredded chicken, rinsed black beans, and fire-roasted corn in a large mixing bowl.
- Prep your bell pepper by dicing it into bite-sized pieces and add to the bowl.
- Mix the dressing by combining Greek yogurt, lime juice, chili powder, and cumin in a smaller bowl until smooth.
- Combine everything by pouring the yogurt dressing over the chicken mixture and gently fold it all together.
- Chill the salad in the fridge for about 30 minutes before serving.
Notes
You can customize this salad with other vegetables or proteins according to your preference.
- Prep Time: 15 minutes
- Cook Time: 30 minutes
- Category: Salad
- Method: Mixing
- Cuisine: Southwestern
Nutrition
- Serving Size: 1 serving
- Calories: 280
- Sugar: 4g
- Sodium: 400mg
- Fat: 9g
- Saturated Fat: 2g
- Unsaturated Fat: 7g
- Trans Fat: 0g
- Carbohydrates: 30g
- Fiber: 10g
- Protein: 30g
- Cholesterol: 60mg
Keywords: chicken salad, southwestern salad, healthy salad, easy recipes, summer meals
Serbian Rice Dish with Chicken | One Pot Rice | Healthy Cooking | Low-Calorie Recipes
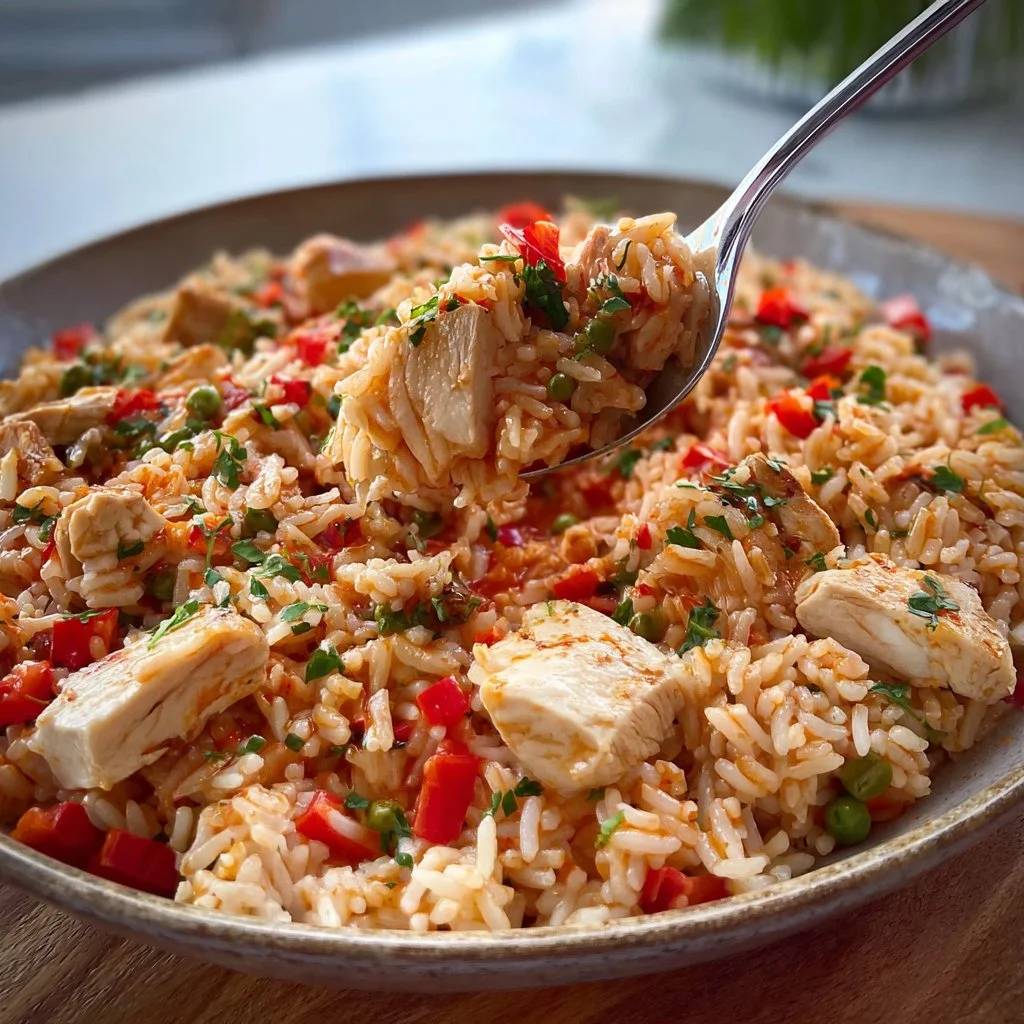
The Ultimate Serbian Rice Dish with Chicken: One-Pot Comfort Food
Hey there, food lovers! Welcome back to Feastical! Today, we’re diving into a dish that is not only mouth-wateringly delicious but also easy to whip up any day of the week: a comforting Serbian Rice Dish with Chicken. This one-pot wonder is a delightful combination of tender chicken, perfectly cooked rice, and a medley of spices that will transport your taste buds straight to the Balkans.
Let me tell you, there’s something special about cooking with love and tradition. As we gather around the kitchen, the aroma wafts through the air, making everyone feel at home. It’s all about sharing moments over food, and that’s what I cherish the most. This recipe is hearty yet healthy, striking the perfect balance for those who want to indulge without breaking the calorie bank. Spoiler alert: you can totally enjoy this dish guilt-free!
I also love how this dish is so versatile. Whether you’re cooking for a family gathering or just whipping up a quick weeknight meal, this recipe has your back! And because it’s all cooked in one pot, the cleanup is a breeze. So, grab your spatula, and let’s get cooking!
Personal Story
I’ll never forget the first time I tasted this savory Serbian Rice Dish. It was at a small family gathering, where my friend’s grandmother whipped up the most incredible spread. The moment I laid eyes on that pot of steaming rice topped with tender chunks of chicken, my stomach started to rumble. The symphony of spices and flavors made my taste buds dance with joy!
In that moment, I was swept into a wave of nostalgia, reminiscent of my own family dinners, where we’d feast on comforting dishes that brought us closer together. I remember how we passed bowls around, sharing not just food but laughter and stories. That first bite was a game-changer for me—not just because of the flavors but also for what it represented: love, tradition, and connection.
And now, I’m thrilled to share this culinary treasure with you. Let’s recreate those warm memories in your kitchen!
Ingredients
Here’s what you’ll need to make this delicious Serbian Rice Dish with Chicken:
-
1.5 cups long-grain rice
The backbone of this dish! Long-grain rice is great here as it cooks up fluffy and doesn’t get mushy. If you’re looking for a healthier swap, you can try brown rice, but keep in mind it may require a little more water and a longer cooking time. -
1 lb chicken thighs (boneless, skinless)
Juicy, tender, and packed with flavor. Chicken thighs are less dry than chicken breasts, making them perfect for this dish. If you prefer a leaner option, boneless chicken breast works too; just be sure to watch the cooking time! -
1 medium onion, diced
The aromatic foundation of your dish! Onions add depth and sweetness. If you’re not an onion fan, shallots or leeks make great substitutes. -
2 cloves garlic, minced
Because what’s a dish without garlic? It infuses everything with a delightful aroma. For a milder taste, feel free to use garlic powder instead. -
1 bell pepper (any color), diced
Bell peppers add color and a slight crunch. You can swap it with any veggies you have on hand—zucchini or carrots are both fantastic options! -
2 cups chicken broth
The flavorful liquid that brings the rice to life. Low-sodium chicken broth is a great choice if you’re watching your salt intake. You can also use vegetable broth for a vegetarian version! -
1 tsp paprika
This adds a beautiful color and a smoky flavor. For a kick, you can use smoked paprika instead! -
Salt and pepper to taste
Essential for bringing out the flavors; adjust to your liking. Remember, you can always add more, but you can’t take it out! -
Fresh parsley for garnish
A little sprinkle of color and freshness goes a long way! If you’re out of parsley, fresh cilantro works too.
Step-by-Step Instructions
Now that we’ve got our ingredients ready, let’s jump into the kitchen! Follow these detailed steps to create your own Serbian Rice Dish with Chicken.
-
Sauté the Chicken
In a large pot or Dutch oven, heat a drizzle of olive oil over medium heat. Season your chicken thighs with salt, pepper, and paprika. Once the oil is hot, add the chicken, searing until golden brown on each side (about 5-7 minutes total). Don’t over-crowd the pot; you want that nice browning! Once browned, remove the chicken and set it aside. -
Sauté the Aromatics
In the same pot, toss in your diced onions, and let them sweat for about 3-4 minutes. You want them to become translucent and aromatic. Then, add in the minced garlic and diced bell pepper, allowing them to mingle with the onions for another minute or so. Talk about a flavor party! -
Add the Rice
Here’s where it gets exciting! Pour in the long-grain rice, and give it a gentle stir, allowing it to coat with the oil and soak up those fragrant juices. Sauté for a couple more minutes; this step enhances the rice’s nutty flavor. -
Pour in the Liquid
Carefully pour the chicken broth into the pot. Give it a good stir, returning the browned chicken to the mixture. Make sure the rice is submerged in the broth. If it seems a bit dry, just add a splash more liquid; we want the rice to be perfectly cooked! -
Simmer
Bring the pot to a gentle boil, then cover and reduce the heat to low. Let it simmer for about 20-25 minutes, or until the rice is fluffy and the chicken is cooked through. Resist the urge to peek too often—trust the process! -
Fluff and Serve
Once cooked, remove the pot from heat, and let it sit, covered, for an extra 5 minutes. This helps the flavors meld together. Before serving, fluff the rice gently with a fork and garnish with freshly chopped parsley. Voilà! Your kitchen is about to smell heavenly.
Serving Suggestions
Presentation can elevate any dish! For this Serbian Rice Dish with Chicken, consider serving it directly from the pot for a cozy, rustic vibe. However, if you want to impress, gently scoop portions into warm bowls, and drizzle with a bit of extra virgin olive oil for a touch of elegance. Pair it with a simple side salad of mixed greens and a zesty vinaigrette for a well-rounded meal.
And don’t forget—you can also serve it with a side of crusty bread to soak up every last bit of that delicious broth!
Recipe Variations
Feeling adventurous? Here are a few creative twists you can try with this base recipe:
-
Veggie-packed Version: Toss in diced carrots and peas for an extra pop of color and nutrition! Just add them during the last 10 minutes of cooking to keep their crunch.
-
Spicy Kick: Add a pinch of red pepper flakes or diced jalapeños alongside the onions for a zesty heat.
-
Herbaceous Delight: Swap the parsley for fresh dill or basil for a unique twist—these herbs bring a fresh, vibrant flavor that complements the chicken beautifully.
-
Coconut Curry Chicken Rice: Add coconut milk instead of half the chicken broth, along with curry powder, for a tropical twist on this dish.
-
Lemon Herb Chicken: Squeeze fresh lemon juice and zest into the broth for a zesty brightness that livens up the dish.
Chef’s Notes
This recipe is one that has evolved over time in my own kitchen. The first time I tried making it, I was frazzled, juggling timing, and hoping for the best. Turns out, it can be quite forgiving! I’ve since learned that you can totally mix and match the vegetables and spices according to what you have on hand. Cooking should be fun, not stressful!
Also, a funny memory comes to mind: my first attempt ended in a minor rice explosion! I closed the lid too tightly, and let’s just say—a bit of steam escaped in the form of a rice volcano! Now, I always make sure to adjust the lid just right, allowing for some room for that bubbling goodness.
FAQs and Troubleshooting
Q1: What do I do if my rice is burning?
A: If you notice the rice sticking to the bottom, lower the heat immediately. Make sure your pot has a heavy bottom to distribute the heat evenly. Adding a splash of water may also help—you want to create steam to finish cooking.
Q2: Can I meal prep this dish?
A: Absolutely! This dish stores well in the fridge. Just keep it in an airtight container for up to 3-4 days. Reheat in the microwave or on the stove with a little added liquid.
Q3: What if I don’t have chicken on hand?
A: You can use pieces of turkey, or for a vegetarian option, substitute with chickpeas or lentils! Just be mindful to adjust the cooking time accordingly.
Nutritional Info
Here’s a quick breakdown of the nutrition for a serving of this delicious dish:
- Calories: Approximately 350 kcal
- Protein: 25g
- Carbohydrates: 40g
- Fat: 10g
- Fiber: 3g
- Sodium: 400mg (can be lower if using low-sodium broth)
This dish is not only packed with flavor but also provides a good balance of protein and carbs, making it a wholesome choice for a healthy meal!
Final Thoughts
So there you have it, my friends! A delightful Serbian Rice Dish with Chicken that’s bound to become a favorite in your household. Whether you’re cooking for family, friends, or simply treating yourself, this dish is an invitation to gather around the table and make memories.
Don’t forget to share your thoughts in the comments below! I’d love to hear how your creation turned out or any delicious twists you made. Until next time, keep those spatulas moving and those smiles wide! Happy cooking! 🥄❤️
Print
The Ultimate Serbian Rice Dish with Chicken
- Total Time: 40 minutes
- Yield: 4 servings 1x
- Diet: Gluten-Free
Description
A comforting one-pot Serbian rice dish featuring tender chicken, perfectly cooked rice, and a medley of spices.
Ingredients
- 1.5 cups long-grain rice
- 1 lb chicken thighs (boneless, skinless)
- 1 medium onion, diced
- 2 cloves garlic, minced
- 1 bell pepper (any color), diced
- 2 cups chicken broth
- 1 tsp paprika
- Salt and pepper to taste
- Fresh parsley for garnish
Instructions
- Sauté the chicken in a large pot with olive oil, seasoning with salt, pepper, and paprika until golden brown (about 5-7 minutes). Remove and set aside.
- Sauté the onions until translucent (3-4 minutes), then add garlic and bell pepper for another minute.
- Add the rice and stir to coat with oil and juices; sauté for a couple of minutes.
- Pour in the chicken broth and return the chicken to the pot, ensuring the rice is submerged.
- Simmer on low heat until the rice is fluffy and the chicken is cooked through (20-25 minutes).
- Fluff the rice with a fork, garnish with parsley, and serve.
Notes
Feel free to customize the vegetables and spices based on your preference. Cooking should be fun and flexible!
- Prep Time: 10 minutes
- Cook Time: 30 minutes
- Category: Main Course
- Method: Stovetop
- Cuisine: Serbian
Nutrition
- Serving Size: 1 serving
- Calories: 350
- Sugar: 2g
- Sodium: 400mg
- Fat: 10g
- Saturated Fat: 2g
- Unsaturated Fat: 8g
- Trans Fat: 0g
- Carbohydrates: 40g
- Fiber: 3g
- Protein: 25g
- Cholesterol: 60mg
Keywords: Serbian rice, chicken recipe, one-pot meals, comfort food, easy dinner
Tuna Melt Wrap
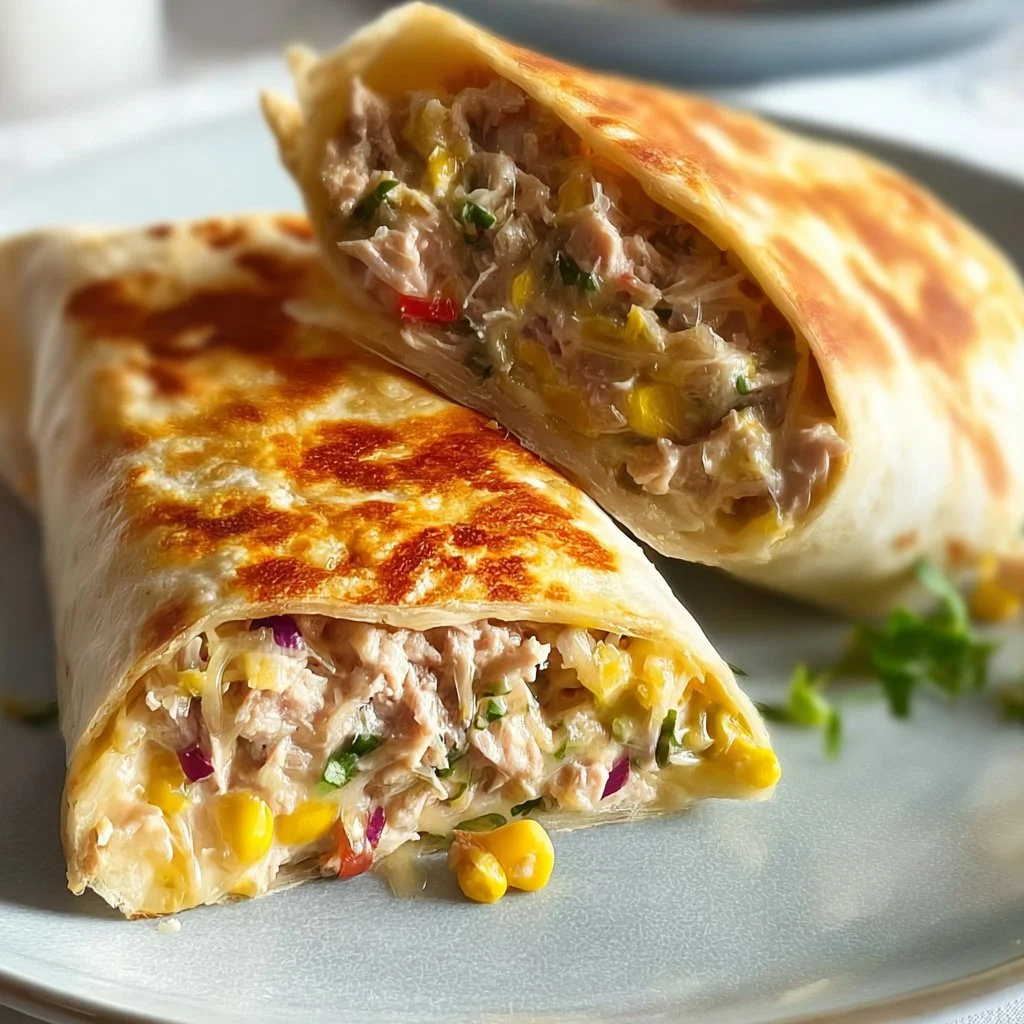
# The Ultimate Tuna Melt Wrap: A Solo Chef’s Favorite

## Introduction

Hey food lovers! I’m Beau Collier, and today we’re diving into one of my favorite comfy classics – the Tuna Melt Wrap. Yes, you heard it right! Imagine your traditional tuna melt but wrapped up nice and cozy, ready to fuel your day with just the right kind of flavor. Whether you’re looking for something simple to whip up on a busy weeknight or a fun dish to impress your friends, this wrap has your back!

Tuna melts have been around forever, and there’s something about that creamy, cheesy goodness stuffed into a warm wrap that just hits the spot. Plus, it’s a fantastic way to use pantry staples. Did someone say convenience? And guess what? You don’t have to slay over the stove for hours to make this happen. With just a few ingredients and about 20 minutes to spare, you’ll have a satisfying meal that tastes like you spent the entire day in the kitchen. Sounds good, right?

But before we roll up our sleeves and get cooking, let me take you on a tasty little journey down memory lane. Cooking has always been about connection for me—whether it’s shared meals with family, rekindling friendships over food, or the simple joy of creating something from scratch. This tuna melt wrap combines all those elements, delivering both nostalgia and deliciousness in every bite. So grab a fork (or your favorite mug), and let’s dig in!

---

## Personal Story: A Culinary Flashback

I vividly remember a Saturday afternoon when I was around twelve years old—my mom and I were in the kitchen, and the sun filtered through the window, bathing us in that warm golden light. My mom was rummaging through the pantry while I was busy daydreaming about the delicious feast we were going to create. Suddenly, she pulled out a can of tuna, and I can still hear her say, “How about tuna melts today?” I thought tuna was only for sandwiches, but boy, was I wrong!

She mixed tuna, mayo, and herbs, but the best part was when she added that layer of melted cheese on top. As it broiled in the oven, I couldn’t help but sneak a taste of the tuna mixture. I’ll never forget how simple ingredients came together to create something truly special. It was in that moment, watching the cheese bubble and golden, that my love for cooking began. While we’ve jazzed it up over the years, this wrap pays homage to those days. With this recipe, you’ll be channeling some serious retro vibes while crafting your own culinary masterpiece!

---

## Ingredients

Now that we’ve set the mood, let’s gather our ingredients. Here’s what you’ll need for making these mouthwatering Tuna Melt Wraps:

- **1 can of tuna, drained**
  *Look for tuna packed in water for a healthier option, or go for oil-packed if you prefer a richer flavor. Canned salmon or chicken can be great substitutes too!*

- **2 tablespoons mayonnaise**
  *Feel free to swap in Greek yogurt for a lighter version or even avocado for a creamy twist!*

- **1 tablespoon Dijon mustard**
  *This adds a tangy kick. If you’re not a fan, regular mustard or even some spicy sriracha can spice things up nicely!*

- **1/4 cup diced celery**
  *Celery gives that perfect crunch. If you don't have any, chopped bell peppers or pickles work well too!*

- **1/4 cup diced pickles**
  *Adding a bit of zesty flavor. Try using sweet or bread-and-butter pickles for extra sweetness, or omit if you prefer!*

- **Salt and pepper to taste**
  *Don’t be shy! A little seasoning will help bring all the flavors together.*

- **Whole wheat wraps**
  *These are my go-to for a healthier option. Feel free to use tortillas—flour or corn—just keep an eye on the size if you’re packing ‘em!*

- **1/2 cup shredded cheese (cheddar or your choice)**
  *Cheddar is classic, but try pepper jack for a little spice or mozzarella for that gooey stretchy goodness!*

- **Lettuce or spinach**
  *A handful of greens adds freshness. You can use any leafy greens, or even arugula for that peppery kick!*

---

## Step-by-Step Instructions

Alright, culinary adventurers! Let’s get cooking. Here’s how we bring this Tuna Melt Wrap to life in just a few simple steps.

### Step 1: Prepare the Tuna Salad Mixture
1. **In a mixing bowl**, combine your drained tuna, mayonnaise, and Dijon mustard.
   - *Tip: Use a fork to break up the tuna nicely—it helps mix everything uniformly!*

2. **Add in your diced celery and pickles**.
   - *Pro tip: You can chop the celery finely for more texture or leave it chunky for a hearty feel!*

3. **Season generously with salt and pepper**.
   - *Remember, taste as you go! A little sprinkle goes a long way... You want that flavor to sing!*

### Step 2: Prepare Your Wrap
1. **Lay your whole wheat wrap flat** on a clean surface or cutting board.
   - *Chef Insight: Warm your wrap slightly in a dry pan for a few seconds on each side before filling. It makes rolling easier and adds a nice touch!*

2. **Spoon a generous portion of the tuna mixture** onto the center of the wrap.
   - *Don’t be stingy—this is the star of the show!*

3. **Sprinkle on that shredded cheese.**
   - *Here’s where it gets cheesy—literally! Lay it on thick for melty goodness!*

### Step 3: Roll It Up
1. **Fold in the sides of the wrap**, then roll it up tightly from the bottom.
   - *A handy technique is to hold the sides while rolling with one hand and tucking in as you go. The key is to keep it snug without overstuffing!*

2. **Place the seam side down** on a preheated skillet (medium heat).
   - *Chef hack: If you have a panini press, use that for an even better crunch outside!*

### Step 4: Toast to Perfection
1. **Cook until golden brown** on one side (about 3-4 minutes), then carefully flip and cook the other side.
   - *Always keep an eye on it, as the cheese can melt quickly!*

2. **Once both sides are crispy and the cheese is melted**, remove it from the skillet and let it rest for a minute.
   - *Don’t skip this step! Cutting too soon can cause oozy cheese spills.*

### Step 5: Slice and Serve
1. **Cut the wrap in half**, and you’ll see that glorious melty cheese and tuna salad peeking out!
   - *For an extra touch, a diagonal cut showcases those layers beautifully!*

---

## Serving Suggestions

Now that you’ve got that irresistible Tuna Melt Wrap, presentation is key! Serve it up with a side of your favorite chips or a fresh salad for a colorful plate. Add a handful of baby greens or a dollop of sour cream for that gourmet vibe.

Feeling adventurous? Try a rainbow of sides: crispy carrot sticks, cucumber slices, or even a small bowl of homemade coleslaw! You can never go wrong with a side of freshness to balance the richness of the wrap.

---

## Recipe Variations

No two foodies are the same, and neither should their recipes be! Here are some delicious variations to try when you want to switch it up:

1. **Spicy Tuna Fling**: Add a tablespoon of sriracha or your favorite hot sauce to the tuna mixture for a spicy kick.
2. **Mediterranean Twist**: Swap mayo for tzatziki sauce and add chopped olives or sun-dried tomatoes for a zesty vibe.
3. **Herb Lovers’ Dream**: Mix in fresh herbs like dill, cilantro, or parsley to lift the tuna flavor to new heights.
4. **Vegan Marvel**: Replace tuna with chickpeas or canned jackfruit, and use vegan mayo for a plant-based alternative.
5. **Green Goddess**: Add mashed avocado for creaminess along with chopped spinach for a burst of nutrients.

---

## Chef’s Notes

As I’ve mastered this Tuna Melt Wrap over the years, I’ve learned one thing: simplicity is key! Elegant flavors often emerge from straightforward ingredients, and using whatever you have on hand can lead to delicious discoveries. This recipe has traveled with me through many culinary seasons, and seeing how the wrap has evolved keeps it fresh and exciting.

Oh, and let me share a little kitchen humor: the first time I made these wraps, I forgot the cheese. You better believe they still tasted good, but when I bit into the warm wrap and found that cheesy goodness on my next try—let’s just say it was the most satisfying ‘aha’ moment ever!

---

## FAQs and Troubleshooting

**Q: What can I do if the wrap falls apart while rolling?**
- *A: Try not to overfill! If it’s too stuffed, your wrap will become rebellious. Also, make sure your wrap is pliable; if it feels stiff, warming it helps!*

**Q: Can I make this ahead of time?**
- *A: Absolutely! Prepare the tuna salad mixture and wrap it tightly in cling film. Assemble on the day you plan to serve for the best freshness!*

**Q: How do I know when the cheese is melted?**
- *A: Just keep an eye on it; about 3–4 minutes per side usually does the trick. A little peek after flipping helps too!*

**Q: What if I'm not a big tuna fan?**
- *A: No worries! Soldier on with shredded chicken, shrimp, or even a hearty vegetable medley instead, the world is your oyster... or wrap!*

---

## Nutritional Info

Let’s talk nutrition! This Tuna Melt Wrap, if made with whole-wheat wraps and loaded with veggies, packs a punch:

- **Calories**: Approximately 400-500 per wrap (depending on cheese and condiments)
- **Protein**: Tuna alone brings about 20 grams!
- **Fiber**: Whole wheat wraps offer about 5 grams.
- **Vitamins and Minerals**: With the addition of greens and pickles, you’ll get a good dose of vitamins A, C, and K, not to mention great hydration!

**Nutritional Tip**: Amping up your greens and substituting whole ingredients can even turn this wrap into a powerhouse meal, full of the nutrients your body craves!

---

## Final Thoughts

And there you have it—the mouthwatering Tuna Melt Wrap, made with love and a sprinkle of creativity! It’s a fun dish that’s not only tasty but also tailors to your personal tastes and dietary needs. Whether you’re grabbing a quick lunch, hosting a casual dinner party, or just craving some comfort food, this wrap has got your back.

I hope you give this recipe a try, and don’t hesitate to share your twists and experiences down in the comments. Happy wrapping, and until next time, keep spreading that culinary joy in your kitchen! 🥙

Grab your loved ones, create those memories, and enjoy the delicious chaos that is cooking! Now, who’s hungry?
The Ultimate Tuna Melt Wrap
- Total Time: 20 minutes
- Yield: 1 serving 1x
- Diet: Pescatarian
Description
A cozy and satisfying twist on the classic tuna melt, wrapped up and ready to enjoy!
Ingredients
- 1 can of tuna, drained
- 2 tablespoons mayonnaise
- 1 tablespoon Dijon mustard
- 1/4 cup diced celery
- 1/4 cup diced pickles
- Salt and pepper to taste
- Whole wheat wraps
- 1/2 cup shredded cheese (cheddar or your choice)
- Lettuce or spinach
Instructions
- In a mixing bowl, combine your drained tuna, mayonnaise, and Dijon mustard.
- Add in your diced celery and pickles.
- Season generously with salt and pepper.
- Lay your whole wheat wrap flat on a clean surface or cutting board.
- Spoon a generous portion of the tuna mixture onto the center of the wrap.
- Sprinkle on that shredded cheese.
- Fold in the sides of the wrap, then roll it up tightly from the bottom.
- Place the seam side down on a preheated skillet (medium heat).
- Cook until golden brown on one side (about 3-4 minutes), then carefully flip and cook the other side.
- Once both sides are crispy and the cheese is melted, remove it from the skillet and let it rest for a minute.
- Cut the wrap in half, and you’ll see that glorious melty cheese and tuna salad peeking out!
Notes
Serve it with your favorite chips or a fresh salad. Feel free to modify the recipe with different ingredients or flavors.
- Prep Time: 10 minutes
- Cook Time: 10 minutes
- Category: Main Course
- Method: Grilling
- Cuisine: American
Nutrition
- Serving Size: 1 wrap
- Calories: 450
- Sugar: 4g
- Sodium: 600mg
- Fat: 25g
- Saturated Fat: 8g
- Unsaturated Fat: 12g
- Trans Fat: 0g
- Carbohydrates: 35g
- Fiber: 5g
- Protein: 25g
- Cholesterol: 40mg
Keywords: tuna melt, wrap, easy lunch, comfort food
Meal Prep Greek Bowls
# Meal Prep Greek Bowls: A Flavorful Adventure!
## Introduction
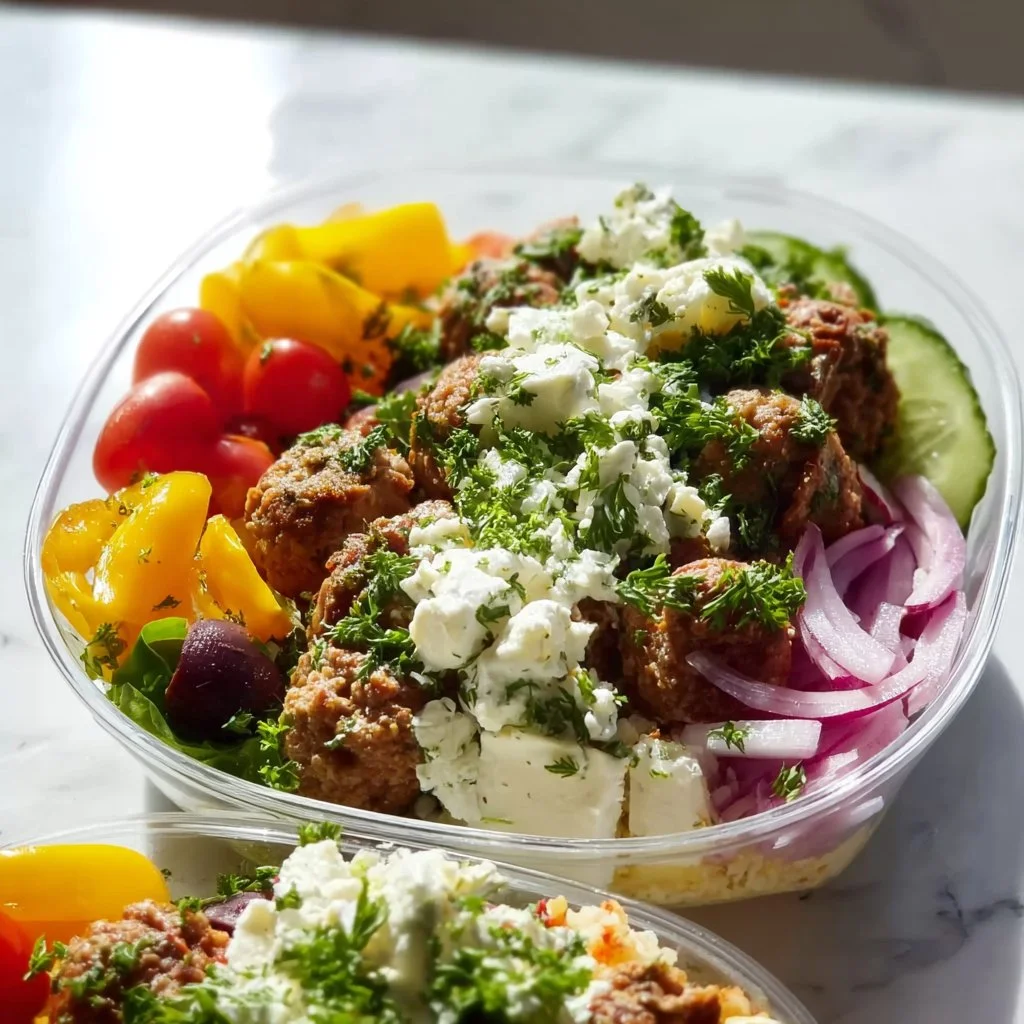
Hey there, food lovers! I’m Beau Collier, and I’m thrilled to have you here at Feastical, where we whip up joyous dishes that make your taste buds dance! Today, we’re diving into something that's not just a meal but a delightful experience—**Meal Prep Greek Bowls!** These bowls pack a punch of flavors and colors that’ll brighten your week.
These Greek bowls are not just a nod toward the sunny shores of Greece; they’re a celebration of meal prep elegance that brings together fresh ingredients, hearty proteins, and zesty dressings in a way that makes you feel like a culinary genius. What I love most about these bowls is their versatility! You can make a big batch, mix and match the ingredients throughout the week, and every day feels like a fresh Mediterranean getaway.
And let’s be honest, with our busy lives, meal prepping can feel like a chore, but it doesn't have to be! I’ve crafted this recipe to keep things simple and satisfying while ensuring you still get that feel-good food vibe—think cozy Mediterranean comfort meals that bring a smile to your face. So, grab your apron, invite your friends (or keep it all to yourself—no judgment here!), and let’s whip up some meal prep love!
## Personal Story
Growing up, my family had a big appreciation for Greek cuisine. My first vivid memory of a Greek meal was when my mom made this incredible spread for a family gathering—a table laden with dishes like moussaka, spanakopita, and, of course, a vibrant Greek salad drizzled in olive oil. It was there, amidst the laughter and delicious scent, that I first tasted that unmistakable flavor of tzatziki, and oh boy, it blew my mind!
Many summer evenings were spent with my family outside, plates piled high, as we enjoyed the warmth of the setting sun and each other’s company. Those moments shaped my love for cooking and gathering, instilling in me the belief that food brings people together. So, as we create these Meal Prep Greek Bowls today, I want you to think about the memories you can create or the friends you can gather around the table, just like I did back in the day. Let’s fill our bowls with love and laughter—because that is what food is all about!
## Ingredients
Alright, here’s where the magic happens! Let’s gather all the ingredients for our amazing Meal Prep Greek Bowls. You’ll find that these elements not only taste good together, but they also make your kitchen smell incredible. Here’s what you need:
- **3 tbsp olive oil**
*A staple in Mediterranean cooking, olive oil adds richness and helps sauté our veggies to perfection. Use extra virgin for the best flavor! Substitute with avocado oil if needed.*
- **1 small yellow onion, diced**
*A great base for flavor; onions bring sweetness when cooked. If you prefer a milder taste, try using a shallot!*
- **1 ½ tsp ground turmeric**
*For a pop of color and earthy flavor! It also boasts health benefits. Fresh ginger is a nice substitute if you're after a spicy kick!*
- **¾ tsp curry powder**
*An interesting twist in our Greek bowls; it enhances flavors beautifully! If you’re sensitive to spice, try using smoked paprika instead for that sweet smoky flavor.*
- **¾ tsp kosher salt**
*Essential for seasoning! Remember, start small and taste as you go!*
- **3 cups chicken or vegetable broth**
*Adds depth and richness to the rice. Use homemade broth for the best results, or go for low-sodium store-bought.*
- **1 ½ cups basmati or jasmine rice**
*Perfect for absorbing flavors and adding a fluffiness to the bowls. Quinoa is a great gluten-free substitute!*
- **700-800 g lean ground beef**
*Packed with protein and delicious juiciness! You can substitute with ground turkey or lentils if you want a veggie-chickpea experience.*
- **2 tsp salt**
*For flavoring meat; this is where we ensure it’s seasoned beautifully!*
- **½ tsp pepper**
*A little kick to balance the flavors; feel free to add more if you like it spicy!*
- **6 garlic cloves, pressed**
*A must-have for adding that aromatic essence. Fresh is key; jarred options are good in a pinch!*
- **2 tbsp dried oregano**
*Brings in that timeless Mediterranean aroma. Fresh oregano is fantastic if you have some on hand!*
- **1 egg**
*Helps bind our meat mixture; you can replace it with flaxseed meal combined with water for a vegan option!*
- **1 cup breadcrumbs**
*For added texture in the meat mix; gluten-free crumbs work just as great.*
- **1 yellow onion, grated**
*For extra moisture and flavor in the meat. You can also use shallots here!*
- **2 tbsp olive oil**
*For cooking the meat; you can use the same oil as before!*
- **1 cup crumbled feta cheese**
*A signature ingredient in Greek dishes; it brings a creamy, tangy flavor. For a dairy-free option, try almond-based feta!*
- **1 cup tzatziki**
*(Make our Tzatziki Recipe!)* That refreshing sauce is a must-have on top of the Greek bowls!
- **Pickled red onions**
*(Make our Pickled Red Onions!)* They add that zesty crunch—perfect for balancing flavors!
- **1 pint baby tomatoes, halved**
*Juicy and delightful; adds freshness! Use cherry tomatoes for extra sweetness!*
- **½ cup hummus**
*A creamy dip that complements everything. As a twist, why not try a roasted red pepper hummus for a delightful change?*
- **1 cup black olives**
*Adds briny notes; Kalamata are excellent! If you’re not an olive fan, feel free to skip 'em!*
- **1 green pepper, sliced thin**
*For crunch and vibrant color. You can switch it up with bell peppers of any color!*
- **Pitas**
*For scooping up all the goodness! You can use gluten-free pitas or even lettuce wraps if you’re going low-carb!*
- **6 lemon wedges**
*For a squeeze of brightness; fresh herbs can also brighten up the plate!*
- **Fresh herbs for garnish (dill, mint, and/or parsley)**
*Herbs elevate everything! Choose your favorite or mix ’em up for a medley!*
## Step-by-Step Instructions
Now, let’s roll up our sleeves and dive into the cooking process! Follow these steps, and don’t forget to sprinkle in a little love as you go!
### Step 1: Sauté the Onion
In a large skillet, drizzle 2 tablespoons of olive oil and heat over medium heat. Add the diced yellow onion and sauté it for about 5 minutes until it starts turning translucent. This is where the magic begins! The aroma of onions cooking is like music to any home cook’s ears. Stir occasionally, and let that golden goodness develop.
### Step 2: Flavor Infusion
Sprinkle in the turmeric and curry powder. You’ll notice the skillet filling with a vibrant yellow hue! Stir it all together for about a minute, allowing those spices to infuse and create a beautiful aroma. Pro tip: If you’re feeling adventurous, consider adding a pinch of cumin too for an extra layer of flavor!
### Step 3: Add the Rice
Toss in the basmati rice and stir for another minute. This step is super important—by toasting the rice, you’re enhancing its flavor! Next, pour in the broth and add ¾ teaspoon kosher salt. Bring it to a boil, then reduce the heat, cover, and let it simmer for about 15-20 minutes until the rice absorbs all the liquid and is fluffy. If you love a little more texture, mix in a handful of chopped parsley while it’s cooking!
### Step 4: Prepare the Meat Mixture
While the rice cooks, let’s prep the meat. In a mixing bowl, combine the lean ground beef, pressed garlic cloves, grated onion, 2 teaspoons salt, ½ teaspoon pepper, oregano, breadcrumbs, and the egg. Use your hands (they’re the best tools!) to mix everything thoroughly but gently. You don’t want to overwork the meat; keep it tender!
### Step 5: Shape and Cook the Meat
Shape the meat mixture into small meatballs or patties—whatever floats your boat! In a separate skillet, heat 1 tablespoon of olive oil over medium-high heat and cook the meatballs for about 6-8 minutes, turning frequently until they’re browned on all sides and cooked through. A little crispy outside is always a win!
### Step 6: Assembly Time
Whew! Now, you're almost there. Grab your container or bowl for meal prep, starting with a generous scoop of your fluffy rice as your base. Layer on those glorious meatballs, followed by a good dollop of tzatziki, a sprinkle of crumbled feta cheese, and a spirited handful of halved tomatoes. Don’t forget the pickled onions and sliced green peppers for that crunch and zing!
### Step 7: Add Garnishes
Add a scoop of hummus, a handful of black olives, and a sprinkle of fresh herbs to the top. Top it all off with a couple of lemon wedges for that zesty finish. Now, isn’t that a feast for the eyes?
## Serving Suggestions
When it comes to serving, think of this as an art—lay out your Greek bowls like a canvas! Serve each portion in a shallow bowl or a meal prep container.
For added flair, you can arrange your toppings beautifully! The tzatziki and hummus can be placed in small compartments or dolloped on top, with olives and feta sprinkled around. Add a side of toasted pita wedges for extra fun. And remember, fresh herbs make everything look (and taste) better—add a touch of dill, mint, or parsley before serving!
## Recipe Variations
Here are a few creative twists you can explore with your Greek bowls to keep things exciting:
1. **Vegetable Power:** Swap ground beef for a mix of lentils and finely chopped mushrooms for a hearty vegetarian option. Add in your favorite veggies, like zucchini or spinach, for an extra nutrient boost!
2. **Grilled Chicken Bowls:** Instead of meatballs, marinate chicken pieces in olive oil, lemon juice, garlic, and oregano, then grill them for that smoky flavor!
3. **Quinoa Bowls:** Use quinoa instead of rice for a gluten-free alternative and make it even more nutritious. It pairs perfectly with the other ingredients!
4. **Spicy Tahini Dressings:** Drizzle some spicy tahini sauce over your bowl for an Asian-Mediterranean fusion. It offers a creamy texture and a nutty flavor!
5. **Mediterranean Layered Salad:** Layer all the ingredients in a mason jar and shake it when ready to eat for a portable meal. Perfect for lunches on the go!
## Chef’s Notes
A little more than a mash-up of flavors, this recipe has evolved over time. The first time I made these Greek bowls, it was a hodgepodge of leftovers, just trying to clear out what was in my fridge—and boy, did it turn out to be a hit! Since that day, I’ve been doing spins on these bowls—sometimes adding roasted vegetables, sometimes going heavier on the herbs. Always remember, cooking is about experimenting!
## FAQs and Troubleshooting
Here are some Common Questions I often hear:
1. **What if my rice is overcooked?**
- No worries—use it as a creamy base for a delicious Greek porridge by adding more broth and mixing in some yogurt!
2. **How can I make this a meal prep for the week?**
- Store each ingredient separately in meal prep containers, and assemble the bowls fresh each day!
3. **What if I don’t have tzatziki?**
- You can make a quick substitute by mixing plain yogurt with lemon juice, garlic, and fresh herbs!
4. **Can I freeze these bowls?**
- Absolutely! Just store the components separately; the rice and meat freeze well, and the toppings can be added fresh!
## Nutritional Info
These Meal Prep Greek Bowls are a marvelous combination of flavors and nutrients in a single meal! Here’s a rough breakdown of what you’re getting in each serving:
- **Calories:** Approximately 550
- **Protein:** 30g
- **Carbohydrates:** 50g
- **Fat:** 25g
- **Fiber:** 5g
- **Sodium:** 800mg (can vary based on seasoning choices)
This meal is balanced—a fantastic source of protein, healthy fats, and whole grains. And remember, by customizing your bowls, you can make them even healthier!
## Final Thoughts
Cooking should always be a joyful exploration, and this Meal Prep Greek Bowls recipe is the epitome of that spirit. You can mix and match ingredients, play with flavors, and adjust to suit your taste—the possibilities are endless! The best part is sharing this feast with friends or family, or even savoring it solo while watching your favorite show, because life is too short not to enjoy the delicious things!
So, now that we’ve shared this culinary adventure, what are you waiting for? Head to the kitchen, put your apron on, and let’s get cookin’. Remember, every dish tells a story, and I'm thrilled to hear yours! Happy cooking, friends!
Meal Prep Greek Bowls
- Total Time: 60 minutes
- Yield: 4 servings 1x
- Diet: Gluten-Free
Description
Delight in these flavorful Meal Prep Greek Bowls packed with fresh ingredients, hearty proteins, and zesty dressings. A perfect weeknight meal that brings a taste of Greece to your table!
Ingredients
- 3 tbsp olive oil
- 1 small yellow onion, diced
- 1 ½ tsp ground turmeric
- ¾ tsp curry powder
- ¾ tsp kosher salt
- 3 cups chicken or vegetable broth
- 1 ½ cups basmati or jasmine rice
- 700–800 g lean ground beef
- 2 tsp salt
- ½ tsp pepper
- 6 garlic cloves, pressed
- 2 tbsp dried oregano
- 1 egg
- 1 cup breadcrumbs
- 1 yellow onion, grated
- 2 tbsp olive oil
- 1 cup crumbled feta cheese
- 1 cup tzatziki
- Pickled red onions
- 1 pint baby tomatoes, halved
- ½ cup hummus
- 1 cup black olives
- 1 green pepper, sliced thin
- Pitas
- 6 lemon wedges
- Fresh herbs for garnish (dill, mint, and/or parsley)
Instructions
- Sauté the onion: In a large skillet, drizzle 2 tablespoons of olive oil and heat over medium heat. Add the diced yellow onion and sauté it for about 5 minutes until it starts turning translucent.
- Sprinkle in the turmeric and curry powder. Stir it all together for about a minute to infuse the flavors.
- Toss in the basmati rice and stir for another minute. Add the broth and ¾ teaspoon kosher salt. Bring to a boil, then reduce heat, cover, and simmer for 15-20 minutes.
- Combine ground beef, pressed garlic, grated onion, 2 teaspoons salt, pepper, oregano, breadcrumbs, and egg in a mixing bowl. Mix thoroughly but gently.
- Shape the meat mixture into small patties. In a separate skillet, heat 1 tablespoon of olive oil over medium-high heat and cook the meatballs for 6-8 minutes until browned.
- Grab your meal prep container and start by adding a scoop of fluffy rice. Layer with meatballs, tzatziki, crumbled feta, and halved tomatoes.
- Add a scoop of hummus, a handful of black olives, and sprinkle with fresh herbs. Finish with lemon wedges.
Notes
Experiment with flavors and ingredients based on your preferences. These bowls can be customized easily to suit dietary needs.
- Prep Time: 20 minutes
- Cook Time: 40 minutes
- Category: Main Course
- Method: Baking
- Cuisine: Greek
Nutrition
- Serving Size: 1 serving
- Calories: 550
- Sugar: 4g
- Sodium: 800mg
- Fat: 25g
- Saturated Fat: 7g
- Unsaturated Fat: 15g
- Trans Fat: 0g
- Carbohydrates: 50g
- Fiber: 5g
- Protein: 30g
- Cholesterol: 70mg
Keywords: Greek, meal prep, healthy, bowls, Mediterranean
Meal Prep Teriyaki Chicken Bowls
# Meal Prep Teriyaki Chicken Bowls: A Flavorful Journey Awaits!
## Introduction
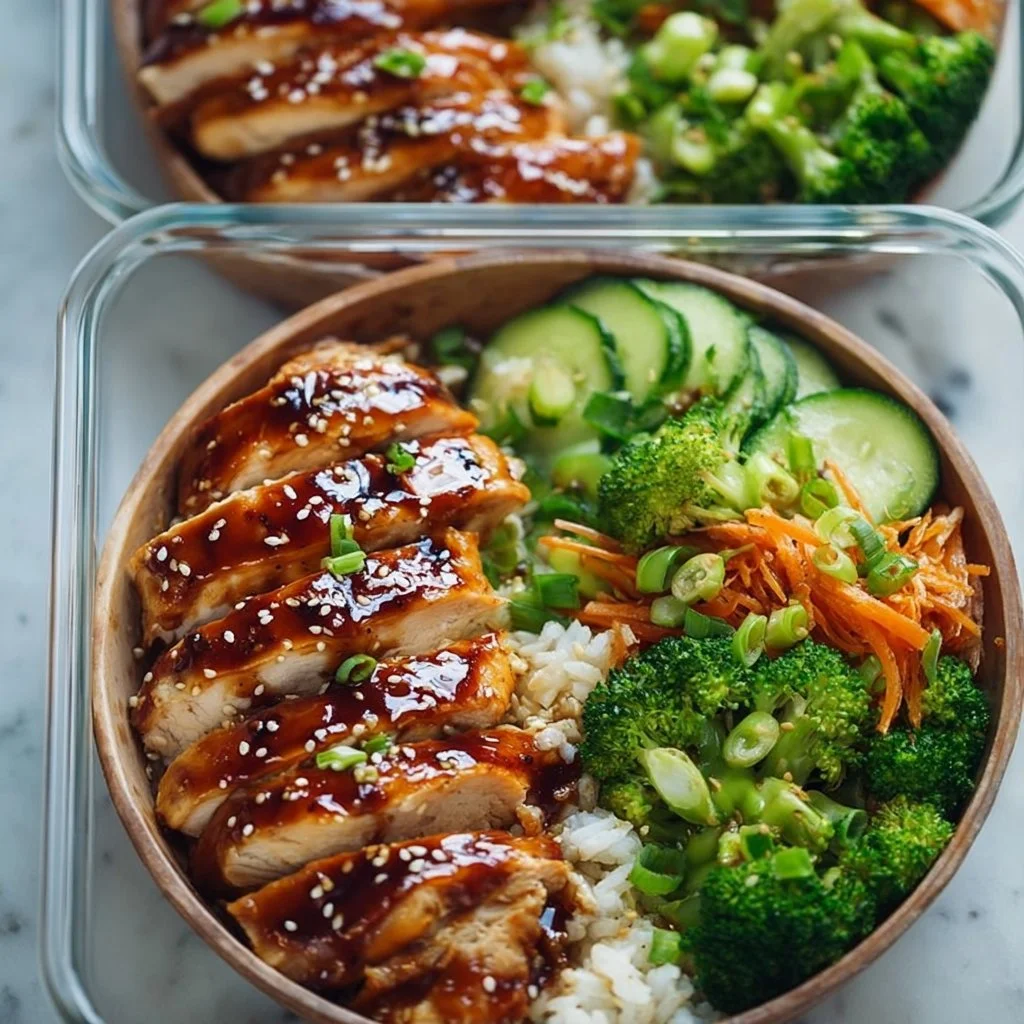
Hey there, food lovers! Welcome back to Feastical – where every meal is an opportunity to bring joy, flavor, and a little bit of love into our kitchens. Today, we're diving into the wonderful world of **Meal Prep Teriyaki Chicken Bowls**! If you’re looking for a dish that not only makes your taste buds dance but also simplifies your week, you’ve landed in just the right place.
Let’s face it: life gets busy. Between work, family commitments, and that ever-growing to-do list, cooking can quickly shift from being a joy to a chore. That’s where meal prep comes in! It’s like putting your healthy eating on autopilot—effortless and oh-so-rewarding. With a little prepping over the weekend, you can have healthy and delicious meals ready to go throughout the week.
But hold on, it’s not just about convenience; these Teriyaki Chicken Bowls are a mouthwatering blend of savory chicken, crisp veggies, and nutty flavors. Plus, with a homemade teriyaki sauce that’ll make your kitchen smell like Asian fusion heaven, you’ll be bringing the flavor without breaking a sweat.
So, whether you’re a seasoned chef or just learning to use your kitchen appliances (hey, we all start somewhere!), let’s embark on this culinary adventure together. Grab your apron, roll up those sleeves, and let’s cook up some magic with meal prep teriyaki chicken bowls that make feeding yourself and your family a breeze!
---
## Personal Story
One of my favorite memories in the kitchen comes from my college days, when I was just starting to figure out how to cook for myself. I recall the first time I attempted to make teriyaki chicken – a dish inspired by my love for Japanese cuisine. I spent the weekend at a friend’s house, and we decided to have a cooking night. Armed with some chicken, a bottle of store-bought teriyaki sauce, and a mishmash of vegetables, we threw together this colorful dish.
As we stirred and laughed, the aroma of garlic and ginger wafted through the air, instantly bringing us comfort. We plated our creation with a sprinkle of sesame seeds on top and dug in, feeling like culinary rock stars. That night taught me that transforming simple ingredients into something delightful is not just about the food; it’s a shared experience that connects us with friends and family. And ever since then, I’ve always wanted to make the sauce from scratch—a goal that has only grown sweeter over the years and brings me right back to that cozy kitchen filled with laughter.
---
## Ingredients
Let’s gather our ingredients for these fabulous **Meal Prep Teriyaki Chicken Bowls**! Here's what you'll need:
- **1.5 lbs chicken breasts, diced**
- *Tip:* Chicken thighs work beautifully too! They’re juicier and often provide a richer flavor, if that suits your taste.
- **1.5 tbsp sesame oil, divided**
- *Insight:* Sesame oil adds a nutty richness that elevates the dish. Divide it to use in the cooking process and for drizzling later.
- **4 cups frozen stir-fry vegetables**
- *Substitution:* Feel free to use fresh veggies if you’ve got them! Broccoli, bell peppers, and snap peas all work wonderfully in this dish.
- **2 cups cooked brown rice or quinoa**
- *Chef's Tip:* If you’re looking to switch things up, try cauliflower rice for a lower-carb option!
- **1 tbsp sesame seeds, for garnish**
- *Note:* Toast the sesame seeds in a dry pan for a minute or two for an even richer flavor!
### Homemade Teriyaki Sauce (yields 1 cup)
- **2 garlic cloves, minced**
- *Chef's Insight:* Fresh garlic brings a punch! Don’t skimp—this is where a lot of the flavor comes from.
- **2 tbsp fresh ginger, grated**
- *Tip:* Use a microplane for finely grating; it makes incorporating fresh ginger super easy and releases more of its juices!
- **1.5 tbsp raw honey**
- *Substitution:* Maple syrup or agave nectar works well if you’re vegan or sugar-cautious.
- **⅓ cup coconut aminos**
- *Chef’s Note:* This is a great soy sauce alternative, and it’s fantastic in dishes where you want a slightly sweeter flavor.
- **½ cup vegetable or chicken broth**
- *Tip:* Use low-sodium broth to control the saltiness of your dish while still keeping rich flavor.
- **½ tbsp gluten-free flour** *(optional for thickening)*
- *Substitution:* Cornstarch works seamlessly in thickening, too—just mix it with a little water first.
---
## Step-by-Step Instructions
Alright, let’s get cooking! Follow these steps, and before you know it, you'll have a fridge stocked with delicious Teriyaki Chicken Bowls that are just waiting to be devoured!
### Step 1: Prep the Ingredients
Start by gathering all your ingredients. Chop your chicken into bite-sized cubes and prepare your vegetables if you’re using fresh ones. Having everything prepped makes the cooking process smooth and fun. Seriously, it's like a cooking party in your kitchen!
### Step 2: Make the Teriyaki Sauce
Now, let’s throw together that fabulous homemade teriyaki sauce! In a medium saucepan, combine minced garlic, grated ginger, raw honey, coconut aminos, and broth. Heat over medium heat until everything starts to bubble gently. Now, if you want to thicken the sauce, mix the gluten-free flour with a bit of water to create a slurry, then whisk it into your sauce until it reaches your desired consistency. Cook for an additional couple of minutes until it thickens. It’s going to smell amazing; trust me!
### Step 3: Cook the Chicken
In a large skillet or wok, heat 1 tbsp of your sesame oil over medium-high heat. Add the diced chicken, making sure not to overcrowd the pan (this keeps it from steaming). Cook until the chicken is browned and cooked through, about 6-8 minutes. Once cooked, pour in half of your homemade teriyaki sauce and toss to coat thoroughly. Let it simmer for a minute for that saucy goodness to soak in.
### Step 4: Stir-Fry the Vegetables
In the same skillet, add the remaining sesame oil and toss in your stir-fry vegetables. Stir-fry them for about 3-5 minutes until they're bright and tender-crisp. If you’re using frozen veggies, they’ll need a little extra time to thaw and cook through. This is where you can sneak in a sprinkle of salt or a dash of soy sauce if you feel it needs a little extra pop!
### Step 5: Combine It All
Now, let’s bring it all together! In the skillet, combine your cooked chicken and vegetables and drizzle in a bit more teriyaki sauce. Give everything a good toss so that every piece is coated in deliciousness. This is the moment when your kitchen is about to smell irresistible, and it’s hard not to sneak a bite!
### Step 6: Assemble the Bowls
Grab your favorite meal prep containers! Start with a base of either cooked brown rice or quinoa, then add a generous scoop of your teriyaki chicken and veggie mix on top. Drizzle a bit of that leftover teriyaki sauce for flavor, and sprinkle with sesame seeds for that perfect finishing touch. What's great about this step is how customizable it is; make each bowl just the way you love!
---
## Serving Suggestions
When it comes to serving your Teriyaki Chicken Bowls, presentation matters. Grab a vibrant bowl (because who doesn’t love to eat with their eyes first?), and layer in your rice or quinoa in a curved fashion. Top it off with a generous scoop of your chicken and vegetable mix, making sure to let those colors shine through. A light sprinkle of sesame seeds will not only add a nutty crunch but also make your bowl Instagram-ready!
For a little extra flair, consider adding some fresh sliced green onions or a few sprigs of cilantro on top. For those of you who enjoy a bit of heat, a drizzle of sriracha or sprinkle of chili flakes can elevate the dish further. Enjoying these bowls fresh is fantastic, but you can also pop them into the microwave for a few minutes for a quick meal later in the week.
---
## Recipe Variations
Looking to shake things up? Here are a few fun variations to give your Teriyaki Chicken Bowls a new twist:
1. **Spicy Teriyaki Chicken:** Add a tablespoon of sriracha or chili paste to your teriyaki sauce for an exciting kick!
2. **Cauliflower Rice Bowls:** Swap the brown rice or quinoa for cauliflower rice to keep it low-carb and light.
3. **Pineapple Teriyaki Chicken:** Toss in some fresh pineapple chunks during the last few minutes of cooking for a sweet, juicy surprise.
4. **Tofu Swap:** Go meatless by substituting the chicken for firm tofu. Just ensure to press and cube it before frying for the best texture.
5. **Meal Prep Kits:** For a fun twist, pack separate containers for cooked rice, chicken, and veggies, and assemble your bowl right before mealtime to keep everything fresh and crispy!
---
## Chef’s Notes
You might be wondering if this recipe has evolved over the years, and let me tell you—it absolutely has! I started with those store-bought teriyaki sauces (for convenience), but once I learned how to make the sauce from scratch, my dishes became even more vibrant. And I must admit, I used to think cooking for the week ahead was a hassle, but now it feels like I’m inviting deliciousness to my table with minimal effort.
And here's a funny little tidbit: I once added too much honey to my teriyaki sauce and ended up with a "dessert" chicken experience that I won’t soon forget! It’s all about balance, my friends. Don’t be afraid to experiment—after all, the kitchen is our playground!
---
## FAQs and Troubleshooting
**1. Why is my teriyaki sauce too liquidy?**
- If your sauce isn’t thickening, it could be that it hasn’t been cooked long enough. Just allow it to simmer a little more, or make a cornstarch slurry to add in.
**2. Can I prepare this dish in advance?**
- Absolutely! These bowls are perfect for meal prep—store them in airtight containers in the fridge for up to 4 days.
**3. How do I reheat the meal prep bowls?**
- Simply pop them in the microwave for about 1-2 minutes, or until heated through. Stir halfway to ensure even heating.
**4. My chicken is dry! What happened?**
- If your chicken turns out dry, it may have cooked for too long. Keep an eye on it and aim for an internal temperature of 165°F.
---
## Nutritional Info
For those who like to be mindful of what they’re putting in their bodies, here’s a rough nutritional breakdown per serving (assuming 4 servings total):
- **Calories:** ~450
- **Protein:** ~35g
- **Carbohydrates:** ~50g
- **Fat:** ~15g
- **Fiber:** ~5g
Using brown rice will boost your fiber intake, while quinoa can add protein and healthy fats. Always adjust based on your portion sizes and specific ingredients.
---
## Final Thoughts
Cooking is an art, and every recipe tells a story—your story! These **Meal Prep Teriyaki Chicken Bowls** are not just a dish; they're a way to take control of your daily meals without sacrificing flavor or fun. As you create your signature bowl, let your personality shine through with toppings, side dishes, or variations.
So the next time you’re in the kitchen, relish each moment of chopping, sautéing, and tasting. Cooking is not just about filling our bellies; it’s about making memories. And with these teriyaki bowls, I’m sure you’ll be creating some delicious ones. Here’s to stress-free meals and plenty of happy bites!
Now, go gather your ingredients, and let’s make some magic happen in the kitchen! Happy cooking!

Meal Prep Teriyaki Chicken Bowls
- Total Time: 45 minutes
- Yield: 4 servings 1x
- Diet: High Protein
Description
A delicious and convenient meal prep option featuring savory chicken, crisp vegetables, and a homemade teriyaki sauce.
Ingredients
- 1.5 lbs chicken breasts, diced
- 1.5 tbsp sesame oil, divided
- 4 cups frozen stir-fry vegetables
- 2 cups cooked brown rice or quinoa
- 1 tbsp sesame seeds, for garnish
- 2 garlic cloves, minced
- 2 tbsp fresh ginger, grated
- 1.5 tbsp raw honey
- ⅓ cup coconut aminos
- ½ cup vegetable or chicken broth
- ½ tbsp gluten-free flour (optional for thickening)
Instructions
- Prep the ingredients by chopping the chicken and preparing the vegetables.
- Make the teriyaki sauce by combining garlic, ginger, honey, coconut aminos, and broth in a saucepan. Heat until bubbling and thicken optional.
- Cook the chicken in a skillet with sesame oil until browned and cooked through, then add half the teriyaki sauce.
- Stir-fry the vegetables in the same skillet with the remaining sesame oil until tender.
- Combine the chicken and vegetables with more teriyaki sauce.
- Assemble the bowls with brown rice or quinoa, chicken, vegetables, and garnish with sesame seeds.
Notes
Customize the bowls with additional toppings such as green onions or pineapple chunks for variety.
- Prep Time: 15 minutes
- Cook Time: 30 minutes
- Category: Main Course
- Method: Stir-frying
- Cuisine: Asian
Nutrition
- Serving Size: 1 bowl
- Calories: 450
- Sugar: 10g
- Sodium: 800mg
- Fat: 15g
- Saturated Fat: 2g
- Unsaturated Fat: 8g
- Trans Fat: 0g
- Carbohydrates: 50g
- Fiber: 5g
- Protein: 35g
- Cholesterol: 70mg
Keywords: teriyaki, meal prep, chicken bowls, healthy recipes, quick meals
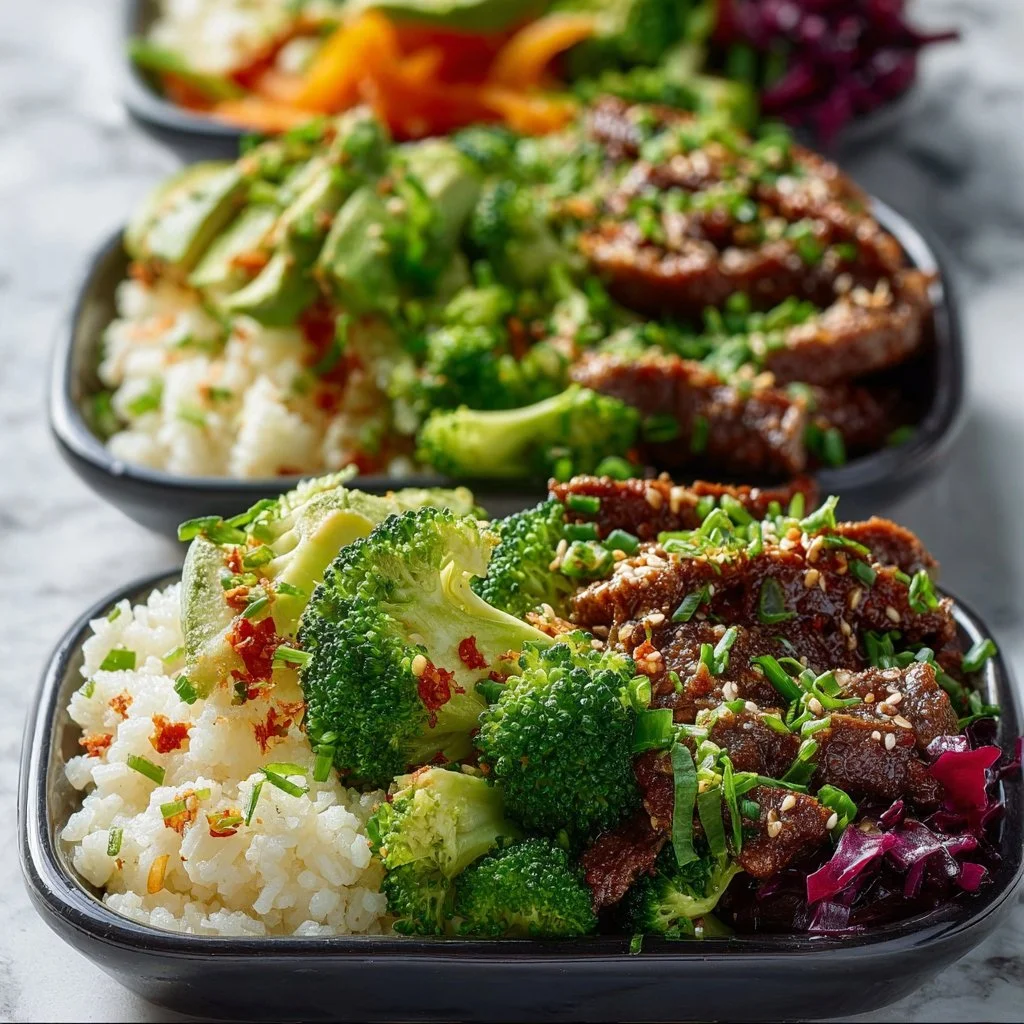
Meal Prepping for Weight Loss and Muscle Gain (30 Recipes)
Meal Prepping for Weight Loss and Muscle Gain: 30 Delicious Recipes
Hey there, food lovers! It’s your friend Beau Collier, and today, we’re diving into something that’s not just good for your taste buds but also fantastic for your waistline and your muscles: meal prepping! If you’re looking to find that sweet spot where delicious meets nutritious, then you’re in the right place. Meal prepping is like a secret weapon in the kitchen, and I’m here to share all my tricks and tips so you can set yourself up for culinary success.
Now, I know what you might be thinking: “Meal prep? Isn’t that just a bunch of boring, bland chicken and broccoli?” Oh, my friend, not on my watch! Meal prepping can be a flavor-packed adventure, with meals that feel like a cozy hug rather than a punishment. In fact, I believe that the right meal prep can help you crush your fitness goals while keeping your taste buds happy.
Think about it: when you have healthy meals ready to go, you avoid the dreaded drive-thru temptation, and you’re more likely to stick to your goals. Plus, meal prep saves time and money—who wouldn’t want that? With a little planning and some of my favorite recipes, you can enjoy variety and flavor while working towards those weight loss and muscle gain goals.
So grab your apron, your favorite cutting board, and let’s get cooking! We’re going on a journey through 30 amazing meal prep recipes that are both nutritious and delicious. Whether you’re a culinary novice or more experienced in the kitchen, I promise you’ll find something that inspires you.
Now, let’s get cooking with a little personal story about why meal prep is super close to my heart!
Personal Story
Let me take you back to when I first discovered the magic of meal prep. It was a bustling weeknight, and I found myself running around like a headless chicken—literally! Between juggling work, fitness classes, and social outings, I ended up skipping dinner too often. One fateful evening, when I rummaged through my kitchen, I noticed I had a fridge full of forgotten veggies and a couple of random protein sources. Instead of tossing them into the bin, I took a deep breath, threw on my apron, and got to work.
That night, I created a colorful veggie stir-fry paired with spiced grilled chicken, all in about 30 minutes. The combination was divine! It not only felt amazing to nourish my body, but the vibrant colors on my plate sparked joy and creativity—something that Saturday night takeout just could never match.
From then on, I was hooked! I started dedicating some time on Sundays to batch cook for the week ahead. It transformed my weekly routine, and more importantly, it made me fall in love with cooking all over again. I thought, “Hey, why not share this with others? Let’s spread the joy of meal prepping to all the fellow foodies out there!” So here we are, ready to explore 30 fantastic recipes that will help you hit your goals in style.
Let’s get to the good stuff— ingredients!
Ingredients
Here’s what you’ll need to kick off your meal prep journey! We’ll be diving into 30 unique recipes, so whether you’re making a crunchy, veggie-packed quinoa salad or a flavorful, protein-heavy chicken dish, there are some staples you won’t want to skip. Below is a comprehensive list of ingredients, along with some tips to help you along the way:
Proteins
- Chicken Breast: A lean source of protein, perfect for muscle recovery. Substitutions: turkey breast or tofu for a plant-based option.
- Ground Turkey: Versatile and easy to cook, great for chili or meatballs. Consider using lentils for a vegetarian twist!
- Canned Tuna: Simple and portable, packed with omega-3s. If you don’t like tuna, try canned chickpeas for a protein-rich alternative.
- Eggs: Superfood eggs can be boiled, scrambled, and incorporated into various dishes. Try egg whites for fewer calories but the same protein!
Grains & Carbs
- Brown Rice: A whole grain that provides fiber and energy. Swap in quinoa for a protein boost!
- Whole Wheat Pasta: Perfect for pasta salads. Try zoodles (zucchini noodles) for a lower-carb alternative.
- Quinoa: This mighty grain is a complete protein! It’s also gluten-free—yay!
- Sweet Potatoes: These beauties are packed with vitamins; you can switch them for regular potatoes if needed.
Vegetables
- Broccoli: High in fiber and vitamins, great for stirring or roasting. Cauliflower is a fun and versatile substitute!
- Spinach: Nutrient-packed and perfect for salads and smoothies. You can use kale instead for a heartier flavor.
- Bell Peppers: Crunchy, sweet, and colorful! Swap for roasted red peppers in recipes for a lovely smokiness.
- Carrots: Crunchy and satisfying! You can also use parsnips for a different flavor.
Healthy Fats
- Olive Oil: A heart-healthy fat that enhances flavor. Avocado oil works great too!
- Nuts & Seeds: Add these for crunch and health benefits. Try sunflower seeds for a nut-free alternative.
- Avocado: Packed with healthy fats and a creamy texture, perfect for salads or spreads. Try hummus as a spread for a different flavor profile.
Spices & Herbs
- Garlic: The funky flavor booster that we all love. Use garlic powder in a pinch!
- Chili Powder: Adds warmth and spice. Swap in paprika for a milder flavor.
- Cumin: Brings an earthy flavor to dishes, especially Mexican and Middle Eastern cuisines. Coriander can be a nice substitute.
- Fresh Basil: Bright and aromatic! Use dried basil if you don’t have fresh on hand.
I know that’s a lot to digest, but fear not! Each recipe will guide you with the specifics you need to create something delightful. Let’s jump into the cooking process and get your meal prep rolling!
Step-by-Step Instructions
Recipe 1: Chicken and Veggie Stir-Fry
-
Prep Your Ingredients: Start by chopping up your chicken breast into bite-sized pieces. Dice your bell peppers, slice the broccoli, and chop your garlic. Chef Tip: Use a sharp knife for clean cuts and quicker prep!
-
Marinate the Chicken: In a bowl, mix the chicken pieces with soy sauce, garlic, and a sprinkle of chili powder. Let it sit for 15-30 minutes. This adds depth of flavor—trust me!
-
Heat the Pan: In a large skillet or wok, add a splash of olive oil over medium heat. Once hot, toss in the marinated chicken. Sizzle is key!
-
Cook the Chicken: Stir-fry the chicken until it’s golden brown and cooked through, about 5-7 minutes. Don’t forget to keep it moving! This prevents any sticking. Fun fact: Cooking in batches can get a better sear!
-
Add Your Veggies: Toss in your bell peppers and broccoli. Stir everything together for another 5 minutes. If you like your veggies crisper, cook for less time! Feel free to add sesame seeds before serving. They add a delightful crunch!
-
Serve & Store: Once everything is cooked, serve it over the brown rice you prepped earlier. Portion into containers for the week. Tempted to add some sriracha? Go for it!
Recipe 2: Quinoa Salad with Spinach and Chickpeas
-
Cook Quinoa: Rinse 1 cup of quinoa, then add it to a pot with 2 cups of water. Bring to a boil, cover, and reduce to a simmer for 15 minutes. Chef’s tip: Fluff it with a fork once done!
-
Chop Veggies: Dice cucumbers, tomatoes, and red onion into small pieces while the quinoa cooks. Mind the knife skills—keeping everything similar in size makes for a pretty plate!
-
Mix Ingredients: In a large bowl, combine cooked quinoa, chickpeas, chopped veggies, and fresh spinach. Give it a gentle toss.
-
Whip Up the Dressing: In a small jar, mix olive oil, lemon juice, salt, and pepper. Shake it up and pour over your salad. Fresh herbs like parsley are perfect here too!
-
Serve & Store: Portion it out in containers for easy grab-and-go meals. This salad tastes better as it sits, so it’s perfect for meal prep!
Recipe 3: Roasted Sweet Potato Bowls
-
Preheat Your Oven: Set it to 400°F (200°C) so it’s nice and hot when you’re ready to roast.
-
Dice Sweet Potatoes: Peel and cube the sweet potatoes into 1-inch pieces. Place them into a bowl, drizzle with olive oil, salt, and smoked paprika. Save time by using pre-cut sweet potatoes if you can find them!
-
Roast: Spread out the sweet potatoes on a baking sheet in a single layer. Roast for about 25-30 minutes until tender and golden. Flip them halfway for even roasting!
-
Create Your Bowl: While they roast, cook your protein of choice (chicken, black beans, or tofu work great). Once done, assemble bowls with roasted sweet potatoes, your protein, and any toppings you desire—avocado, salsa, or cilantro.
-
Cool and Store: Allow them to cool completely before sealing your meal prep containers. They’ll keep well in the fridge for up to 5 days.
Recipe 4: Overnight Oats
-
Gather Your Jars: Any jar with a lid will do! Start with ½ cup rolled oats in each jar.
-
Add Liquid: Pour 1 cup almond milk (or your milk of choice) over the oats. Bonus tip: Use Greek yogurt for a protein boost!
-
Flavor It Up: Add a tablespoon of chia seeds, a dash of cinnamon, and a drizzle of honey or maple syrup. Switch up the toppings to keep it fresh—think peanut butter and banana!
-
Mix and Store: Stir the mixture well, cap it, and refrigerate overnight. In the morning, top with fresh fruit or nuts.
-
Grab and Go: These taste best cold, making them ideal for busy mornings!
Recipe 5: Turkey Chili
-
Brown the Turkey: In a large pot, brown 1 pound of ground turkey over medium heat. Lean protein alert!
-
Add Flavor: Once browned, add diced onions, garlic, and bell peppers. Cook until soft. Feel free to toss in a can of diced tomatoes for extra flavor—and it’s super easy!
-
Spices Galore: Add chili powder, cumin, salt, and pepper. Stir to coat everything well.
-
Simmer: Pour in 2 cups of chicken broth and bring to a boil. Reduce heat to low and simmer for at least 20-30 minutes. The longer it simmers, the deeper the flavors become!
-
Store: Let cool before portioning into containers. Perfect for quick lunches or cozy dinners!
Serving Suggestions
Now that your meal prep is complete, it’s essential to serve these dishes right! A well-presented meal not only tastes good but makes you feel good, too.
Chicken and Veggie Stir-Fry
Plate the stir-fry with a mound of brown rice underneath and garnished with sesame seeds or fresh herbs. Serve alongside lime wedges for a zesty kick!
Quinoa Salad
Fill a bowl with quinoa, then top with vibrant cucumber and tomato. A sprinkle of feta cheese can elevate the flavor—it’s like dressing your dish for a happy occasion!
Roasted Sweet Potato Bowls
Arrange the sweet potatoes in the center of a wide bowl, creating a colorful display. Top with a dollop of yogurt or a drizzle of tahini for added richness.
Overnight Oats
Serve the oats in a cute jar, topped with your favorite berries and nuts. Grab a spoon and enjoy—these are a great breakfast option to kickstart any day!
Turkey Chili
Serve the chili in a rustic bowl and top with avocado slices, shredded cheese, and a sprinkle of cilantro. Cornbread on the side? Yes, please!
Recipe Variations
Even though I’ve given you my top picks for meal prep, here are some creative twists you can make to keep things exciting:
-
Switch Up Your Proteins: Try using shrimp for a seafood twist in your stir-fry or tempeh for a vegetarian spin in your chili.
-
Diverse Grains: Swap brown rice with farro or barley for added texture and flavor.
-
Flavor Boosters: Add different sauces or marinades, like teriyaki for your chicken dishes or a ranch mix for your veggies.
-
Extra Crunch: Top salads with crispy chickpeas or introduce toasted nuts for an added crunch.
-
Global Inspirations: Adapt your spices! Make your chili more like a curry by introducing coconut milk and curry powder—it’s an effortless way to change cuisines.
Chef’s Notes
Meal prepping has come a long way in my kitchen. I used to think of it as just a chore, but with creative recipes and catchy flavors, I now look forward to planning my week ahead. It’s powerful how organization in the kitchen can translate to clarity in life.
And hey, if you mess up a recipe, embrace it! I once accidentally added too much cinnamon to my quinoa salad, which transformed it into an unexpected dessert instead of a side dish. Mistakes turn to laughs and creativity; that’s what kitchen fun is all about!
FAQs and Troubleshooting
1. What if I don’t have time to meal prep?
Start small! Even prepping just one or two meals for the week can make a difference. Gradually build up as you get comfortable.
2. My vegetables always turn soggy. How can I avoid this?
Ensure they’re thoroughly dried after washing, and avoid overcrowding when roasting. Using a higher heat and cooking things separately can help with crispness!
3. Can I freeze my meal prep?
Absolutely! Most dishes freeze well, just make sure to cool them before portioning them into freezer-safe containers.
4. How long do these meal preps last in the fridge?
Typically, properly stored, they can last about 4-5 days. Always trust your senses—if something smells off or looks weird, toss it!
Nutritional Info
Meal prepping doesn’t only help with convenience; it also enables you to keep track of your nutrition. Here’s a quick overview of what you can expect from these recipes:
- High Protein: Most meals can deliver upwards of 20 grams of protein, supporting muscle repair.
- Complex Carbs: With options like quinoa and sweet potatoes, you’ll get slow-releasing energy to keep you fueled through the day.
- Fiber-Rich: Packed with veggies and whole grains, these meals help with digestion and maintaining a healthy gut.
- Balanced Fats: With heart-healthy oils and avocados, you’re giving your body fats it loves without overdoing it.
Final Thoughts
Meal prepping isn’t just a fun idea; it’s a lifestyle choice that can genuinely improve your health while making your culinary experience so much richer and more delicious. You’ve got this!
I hope this guide filled your kitchen with excitement and inspired you to take those tantalizing steps towards a healthier, happier you. Remember, cooking is about love, fun, and exploration. Keep it creative, keep it delicious, and most importantly, keep it you!
Let’s chat in the comments about which recipe you’re excited to try first. Happy cooking, and until next time, keep spreading the flavor! 🍽️✨
Print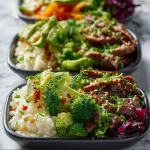
Meal Prepping for Weight Loss and Muscle Gain
- Total Time: 45 minutes
- Yield: 4 servings
- Diet: Healthy
Description
Delicious and nutritious meal prep recipes designed to help you lose weight and gain muscle.
Ingredients
- Chicken Breast
- Ground Turkey
- Canned Tuna
- Eggs
- Brown Rice
- Whole Wheat Pasta
- Quinoa
- Sweet Potatoes
- Broccoli
- Spinach
- Bell Peppers
- Carrots
- Olive Oil
- Nuts & Seeds
- Avocado
- Garlic
- Chili Powder
- Cumin
- Fresh Basil
Instructions
- Prep Your Ingredients: Chop chicken breast, dice bell peppers, slice broccoli, and chop garlic.
- Marinate the Chicken with soy sauce, garlic, and chili powder for 15-30 minutes.
- Heat the pan and add olive oil over medium heat, then toss in marinated chicken.
- Cook the chicken until golden brown (5-7 minutes).
- Add your veggies and stir together for another 5 minutes.
- Serve over prepped brown rice and portion into containers.
Notes
Feel free to customize the proteins and veggies to your liking. These meals can also be frozen for later enjoyment.
- Prep Time: 15 minutes
- Cook Time: 30 minutes
- Category: Meal Prep
- Method: Stir-frying, Roasting, Boiling
- Cuisine: Mixed
Nutrition
- Serving Size: 1 serving
- Calories: 450
- Sugar: 5g
- Sodium: 500mg
- Fat: 15g
- Saturated Fat: 2g
- Unsaturated Fat: 10g
- Trans Fat: 0g
- Carbohydrates: 55g
- Fiber: 8g
- Protein: 30g
- Cholesterol: 70mg
Keywords: meal prep, weight loss, muscle gain, healthy recipes, meal prep ideas
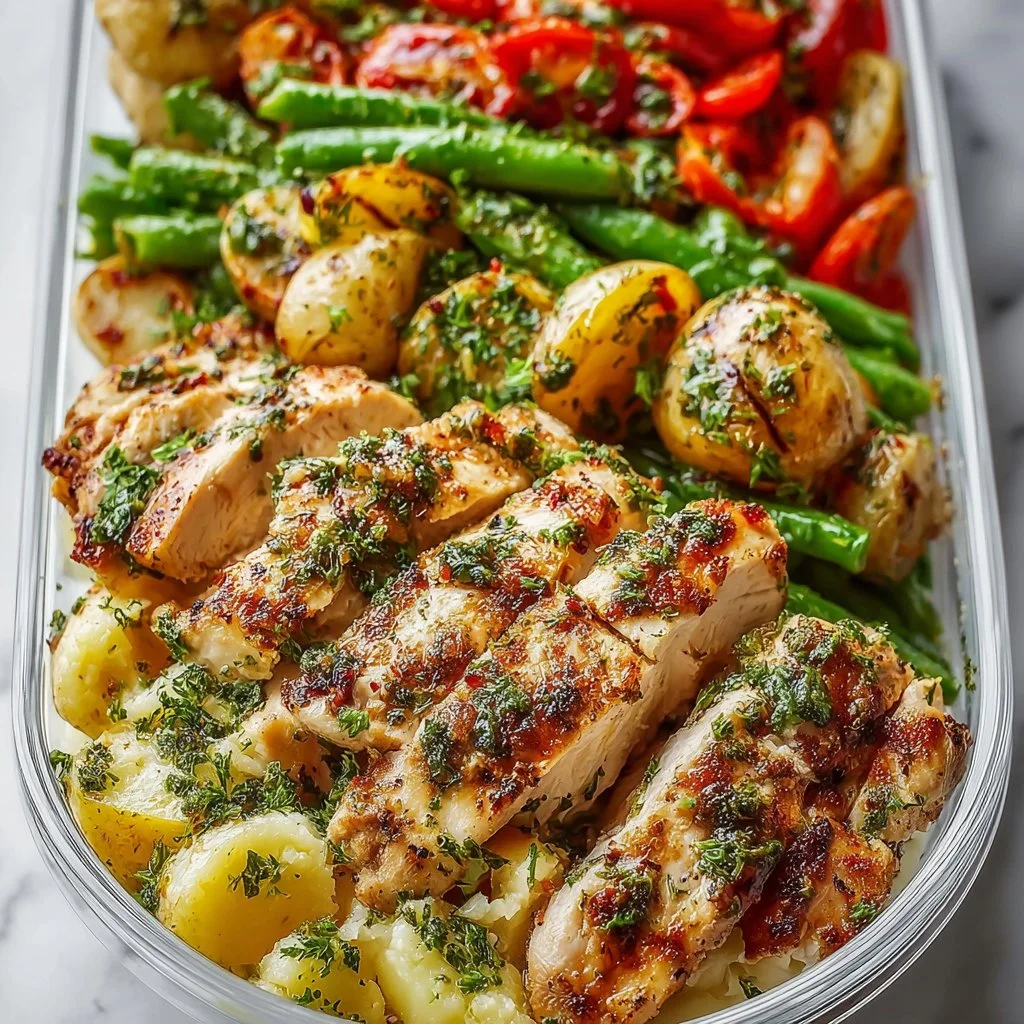
Healthy Lemon Garlic Chicken Meal Prep Bowls
Healthy Lemon Garlic Chicken Meal Prep Bowls: A Flavorful Journey!
Hey there, food enthusiasts! Welcome back to Feastical, your go-to spot for feel-good food that packs a punch. Today, I’m thrilled to share one of my absolute favorite recipes—Healthy Lemon Garlic Chicken Meal Prep Bowls! Whether you’re meal prepping for the week or just craving a delicious and nutritious dish, these bowls are not only loaded with flavor but are also super simple to whip up.
As busy as life can get, I believe that eating well shouldn’t feel like a chore. These meal prep bowls make sure you have something tasty and healthy waiting for you in the fridge at the end of a long day. Let’s dive right in, shall we? With such a zesty and fragrant combination of lemon and garlic, this dish is all about bringing joy (and nutrients) back to mealtime.
A Fun Memory with Lemon Garlic Chicken
Before we jump into the cooking bliss, let me take you on a little stroll down memory lane. A few summers ago, I found myself at my friend Jenna’s kitchen, where we decided to experiment with meal prepping—a relatively new concept to both of us at the time. She had her heart set on a lemon dish that could brighten up our week.
After some giggles and a few culinary hiccups (I still can’t believe we mistook salt for sugar in our first batch), we finally hit the jackpot with what we now affectionately call “The Lemon Garlic Chicken Saga.” As that mouth-watering aroma filled the kitchen, we knew we had something special. Jenna’s family joined us for dinner, and we all laughed, shared stories, and enjoyed the magic that can happen when food brings people together. That day, we learned that the right flavors and a sprinkle of love can turn any day into a feast.
And now, I’m sharing that same joy with you! So, let’s get started and recreate the magic in your own kitchen!
Ingredients
Here’s what you’ll need to make these mouth-watering meal prep bowls:
-
2 Chicken Breasts
A lean source of protein that’s versatile and absorbs flavors beautifully. If you’re looking for a shortcut, boneless thighs work great here too! -
2 Tablespoons Olive Oil
The heart-healthy fat that adds richness to your chicken. Avocado oil is a fantastic substitute if you prefer higher smoke points. -
4 Cloves Garlic, Minced
Garlic adds that aromatic punch we all love. If you’re in a hurry, jarred minced garlic can save you some time! -
Juice of 1 Lemon
Fresh is key here! The zesty brightness of lemon lifts all the flavors. If you’re out of lemons, a splash of vinegar can work too. -
Salt and Pepper to Taste
Essential for seasoning. I recommend sea salt and freshly cracked black pepper for the best results! -
2 Cups Cooked Quinoa
A fantastic gluten-free grain that’s high in protein. You can switch it up with brown rice or even cauliflower rice for a low-carb option. -
1 Cup Steamed Broccoli
Packed with vitamins! Fresh or frozen broccoli are both good choices. You can also add asparagus or green beans if you’re feeling adventurous! -
1 Cup Cherry Tomatoes, Halved
Their juicy sweetness makes every bite a delight. Sub with diced bell peppers for a colorful twist. -
1 Avocado, Sliced
Creamy, dreamy avocado adds a healthy fat element. If you can’t find ripe avocados, a dollop of Greek yogurt is a great alternative!
Step-by-Step Instructions
Let’s cook up some magic! Follow these detailed steps to bring your Lemon Garlic Chicken Meal Prep Bowls to life.
Step 1: Prep Your Chicken
Start by patting your chicken breasts dry with a paper towel. This helps them caramelize beautifully in the pan! Place them in a bowl and drizzle with olive oil. Add minced garlic, lemon juice, salt, and pepper. Give it a good mix! Let marinate for about 15-30 minutes if you’ve got time—trust me, the flavor will be worth it!
Step 2: Cook the Chicken
Heat a skillet over medium-high heat. When it’s hot, place your chicken breasts in the pan. Let them sear without moving them for about 6-7 minutes to get that delicious browned crust. Flip and cook for another 5 minutes until the internal temperature reaches 165°F (75°C). A handy trick—use a meat thermometer for precision!
Step 3: Quinoa Time
While your chicken is cooking, let’s get that quinoa going. Rinse the quinoa under cold water to remove any bitterness. Combine 1 cup of dry quinoa with 2 cups of water in a pot. Bring it to a boil, reduce the heat to low, cover, and let it simmer for 15 minutes. Fluff with a fork once it’s done!
Step 4: Steam the Broccoli
You can either steam broccoli in a pot or microwave it! For stovetop steaming, place a steamer basket over boiling water and let it cook for about 5-7 minutes until it’s tender but still bright green. If you’re using the microwave, place the florets in a bowl, add a splash of water, cover, and microwave for 3-4 minutes. Easy peasy!
Step 5: Slice the Chicken
Once your chicken is cooked through, remove it from the pan and let it rest for 5 minutes before slicing into strips. This resting step is crucial—it helps keep the juices sealed in, ensuring tenderness.
Step 6: Assemble Your Bowls
Alright, it’s the moment of truth—let’s assemble! In your meal prep containers, start with a base of quinoa, add steamed broccoli, and top it with those luscious slices of chicken. Finish up with halved cherry tomatoes and a few slices of avocado. You can drizzle another squeeze of lemon on top for that extra zing!
Serving Suggestions
Now that your bowls are assembled, you might be wondering how to serve them! These meal prep bowls are perfect as-is but here’s how you can get a bit fancy.
- Garnish: Add a sprinkle of fresh herbs like parsley or cilantro for a pop of color.
- Dress It Up: Drizzle a light vinaigrette or even a homemade tahini dressing for some extra flavor.
- Side Serving: Pair with whole-grain pita or a side of hummus for a little Mediterranean flair.
You can store these beauties in the fridge for up to five days—making your weeknight dinners a breeze!
Recipe Variations
Let’s get creative, shall we? Here are a few twists you can make to keep things exciting:
- Spicy Kick: Add a pinch of red pepper flakes to your marinade for some heat.
- Mediterranean Twist: Swap cherry tomatoes for diced cucumbers and sprinkle with feta cheese.
- Asian Infusion: Change up the seasoning with soy sauce and sesame oil instead of olive oil and lemon.
- Herbaceous Delight: Use fresh herbs like dill or basil in place of the lemon for a fresh flavor profile.
- Whole Grain Goodness: Try swapping quinoa for farro or barley for a heartier grain option.
Chef’s Notes
Cooking is all about experimenting and having fun! I can’t tell you how many times I’ve tried a recipe only to change it up on a whim—and that’s where the best flavors emerge. This Lemon Garlic Chicken Meal Prep Bowl has itself evolved over time, going from a simple dinner idea to a beloved staple in my kitchen.
One funny story comes to mind: I once forgot the most crucial ingredient—salt—while prepping for my family’s dinner. You can bet I learned my lesson (and a few laughs were had) when everyone sat down anticipating a flavor explosion and instead got “blah.” Lesson learned: always taste as you go!
FAQs and Troubleshooting
1. Can I use frozen chicken?
Absolutely! Just ensure to fully thaw it before marinating and cooking.
2. What can I use if I don’t have quinoa?
Brown rice, couscous, or even lentils are great substitutes!
3. My chicken is dry. What went wrong?
Overcooking can dry out chicken. Invest in a meat thermometer to cook it right to 165°F (75°C) or check for juices running clear.
4. How do I store leftovers?
Store in airtight containers in the fridge, and they should last up to five days!
Nutritional Info
This meal prep bowl is not just delicious; it’s nutritious too! Here’s a quick breakdown:
- Calories: Around 450 per serving
- Protein: Approx. 35g (thanks to the chicken and quinoa)
- Fat: Healthy fats from olive oil and avocado
- Carbohydrates: Whole grains and veggies ensure you get stable energy
- Fiber: With quinoa and veggies, you get a good dose of fiber for digestion
Each bowl is designed to keep you fueled and satisfied without sacrificing flavor!
Final Thoughts
I hope you enjoy making and eating these Healthy Lemon Garlic Chicken Meal Prep Bowls as much as I do! Cooking is a wonderful journey we can take together, and I am thrilled to share it with you. Remember, food is not just about nourishment—it’s an experience that brings joy, love, and comfort to our lives.
So grab your ingredients, put on your favorite playlist, and get ready to create a week’s worth of deliciousness. Stay inspired and keep that kitchen flowing with flavors! Until next time, happy cooking, my foodie friends! 🍽️✨
Print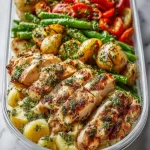
Healthy Lemon Garlic Chicken Meal Prep Bowls
- Total Time: 55 minutes
- Yield: 4 servings 1x
- Diet: Gluten-Free
Description
A flavorful and nutritious meal prep bowl featuring lemon garlic chicken, quinoa, and fresh vegetables.
Ingredients
- 2 Chicken Breasts
- 2 Tablespoons Olive Oil
- 4 Cloves Garlic, Minced
- Juice of 1 Lemon
- Salt and Pepper to Taste
- 2 Cups Cooked Quinoa
- 1 Cup Steamed Broccoli
- 1 Cup Cherry Tomatoes, Halved
- 1 Avocado, Sliced
Instructions
- Pat your chicken breasts dry with a paper towel. Place them in a bowl and drizzle with olive oil. Add minced garlic, lemon juice, salt, and pepper; let marinate for 15-30 minutes.
- Heat a skillet over medium-high heat. Add chicken breasts to the pan, sear for 6-7 minutes, then flip and cook for another 5 minutes until they reach an internal temperature of 165°F (75°C).
- Rinse the quinoa under cold water, combine 1 cup of dry quinoa with 2 cups of water in a pot. Bring to boil, reduce heat, cover, and simmer for 15 minutes.
- Steam the broccoli for 5-7 minutes until tender or microwave for 3-4 minutes.
- Remove the chicken from the pan, let it rest for 5 minutes before slicing.
- Assemble the meal prep bowls: start with quinoa, add steamed broccoli, topped with chicken slices, cherry tomatoes, and avocado.
Notes
Store in the fridge for up to five days. Add fresh herbs or a light vinaigrette for extra flavor.
- Prep Time: 30 minutes
- Cook Time: 25 minutes
- Category: Meal Prep
- Method: Baking, Steaming
- Cuisine: Mediterranean
Nutrition
- Serving Size: 1 bowl
- Calories: 450
- Sugar: 4g
- Sodium: 350mg
- Fat: 20g
- Saturated Fat: 3g
- Unsaturated Fat: 15g
- Trans Fat: 0g
- Carbohydrates: 45g
- Fiber: 7g
- Protein: 35g
- Cholesterol: 70mg
Keywords: meal prep, chicken, healthy recipe, lemon garlic, quinoa, nutrition

Korean Meatball Meal Prep
Korean Meatball Meal Prep: A Cozy Feast for the Busy Foodie
Hey there, foodies! 🌟 I’m Beau Collier, and I’m super excited to share a recipe that’s as vibrant and delicious as it is simple to whip up—Korean Meatball Meal Prep! If you’re anything like me, your weekdays can get a little hectic, but that doesn’t mean we have to sacrifice taste or comfort for convenience. That’s where this dish comes in!
Imagine this: juicy, flavor-packed meatballs that sneak a hint of sweetness and a kick of heat, all served up with fluffy rice and fresh broccoli. It’s a meal that not only makes your taste buds dance but also warms your heart and fills your home with delightful aromas. What’s more? Each bite of these meatballs is like a cozy hug, reminding you that good food brings people together—even if you’re just feeding your future self!
What I love about meal prepping is that you’re not just making one meal; you’re putting in a little bit of love into each container, creating a week’s worth of cozy comfort on the go. So grab your apron, make sure that kitchen playlist is bumped up, and let’s dive into this Korean Meatball adventure!
Personal Story
I remember the first time I tried a dish similar to these meatballs at a small Korean bistro in my hometown. I was a college student, utterly broke but rich in fast-food options. One chilly Friday night, my buddies and I decided to skip our usual burger joint, drawn instead by the intoxicating aroma wafting from that little bistro. As the steaming bowl of meatballs and rice was placed in front of me, my heart soared! They were perfectly seasoned, tender, and had that luscious umami flavor that just makes you want to cozy up and savor every last bite.
Fast forward to now, I’ve taken those incredible flavors and turned them into a meal-prep version that’s simple to prepare, so I can indulge in that same comforting feeling whenever the craving strikes. Plus, I love knowing that sharing recipes like these can bring you that same cozy joy, even amidst life’s chaos. So let’s channel those memories into something that’ll warm up your weekly meals!
Ingredients
Let’s gather our ingredients for this delectable meal prep! Here’s what you’ll need:
For the Meatballs
-
1 lb. Ground Pork: The star of our dish! Ground pork gives the meatballs a tender texture. If you prefer, you can substitute it with ground beef or turkey for a leaner option.
-
1 Large Egg: Acts as a binder to hold everything together. You can swap this with a flax egg (1 tbsp flaxseed meal + 2.5 tbsp water) for a vegan version!
-
1/2 Cup Cracker Crumbs or Bread Crumbs: Adds texture and helps absorb moisture. If you want to keep it gluten-free, use crushed gluten-free crackers or almond flour instead.
-
2 Tbsp. Gochujang Sauce: A sweet and spicy Korean chili paste that’s a flavor bomb! Use less for milder meatballs or try a different chili paste if you’re in a pinch.
-
1/2 tsp. Kosher Salt: Brings out the flavors in the meatballs. Don’t skimp on this one!
-
1/2 tsp. Garlic Powder: A must-have for that warm, aromatic flavor. Fresh minced garlic is even better if you have it on hand!
-
1/4 tsp. Ground Ginger: Adds a lovely zing. In case you don’t have ground ginger, fresh ginger works well too; just double the amount!
For the Side
-
1/2 lb. Fresh Broccoli Florets: The perfect veggie to balance the richness of the meatballs. You can also switch it up for green beans or snap peas if you prefer!
-
1 Tbsp. Olive Oil: For roasting the veggies. Feel free to use sesame oil for an extra layer of flavor!
-
1/2 tsp. Kosher Salt: To season the broccoli.
-
1/4 tsp. Black Pepper: A dash for added flavor.
For the Sauce
-
1 cup Uncooked Basmati Rice: Fluffy and fragrant, it’s the ideal complement to our meatballs. You can sub with brown rice or quinoa for a whole grain option.
-
2 cups Water: Just enough to cook that rice to perfection.
-
1/2 cup Gochujang Sauce: To create a spicy-sweet drizzling sauce that can double as a dipping sauce!
-
1/4 cup Soy Sauce: Introduces a savory depth. Use tamari for a gluten-free option!
-
2 tsp. Sesame Oil: Brings nuttiness to our sauce and rounds out the flavors.
-
1/2 tsp. Garlic Powder: Because garlic is the MVP, right?
-
1/4 tsp. Ground Ginger: Adds brightness to the sauce, enhancing the overall flavor profile.
-
1 1/2 Tbsp. Honey: Sweetness to balance out the spice!
Step-by-Step Instructions
Alright, my cooking friends, it’s time for the fun part—let’s cook it up! Follow these steps for the ultimate Korean meatball experience:
-
Preheat Your Oven: First things first, let’s get that oven preheated to 400°F (200°C). A hot oven means perfectly roasted veggies and meatballs.
-
Mix the Meatball Ingredients: In a large mixing bowl, combine the ground pork, egg, cracker crumbs, gochujang sauce, salt, garlic powder, and ginger. Use your hands (trust me, it’s way more fun!) to mix everything together until just combined. Don’t overmix; we want those meatballs to stay juicy!
-
Shape the Meatballs: Roll the mixture into golf ball-sized meatballs—about 1.5 inches in diameter. This step is fun and will leave you with about 20-24 meatballs. Place them evenly spaced on a baking sheet lined with parchment paper.
-
Prep the Broccoli: In a bowl, toss those fresh broccoli florets with olive oil, salt, and black pepper. Make sure they’re well-coated so they can roast up beautifully!
-
Bake the Meatballs and Broccoli: Once your oven is ready, place the meatballs and seasoned broccoli in there. Roast for about 20-25 minutes or until the meatballs are browned and cooked through. Don’t forget to give everything a little shake halfway through!
-
Cook the Rice: While everything is roasting, wash your basmati rice until the water runs clear. In a medium saucepan, add the rice and water, and bring it to a boil. Once boiling, reduce heat to low, cover, and let it simmer for 15-18 minutes until all the water is absorbed. After cooking, let it sit for 5 minutes before fluffing with a fork.
-
Whisk Up the Sauce: In a small bowl, whisk together the gochujang, soy sauce, sesame oil, garlic powder, ginger, and honey. You want it smooth and well combined—this sauce will add layers of flavor!
-
Assemble Your Meal Prep: Now it’s time to put everything together. In your meal prep containers, add a generous scoop of rice, a serving of those fabulous meatballs, and a hearty portion of roasted broccoli. Drizzle that luscious sauce over the top for added flavor.
Serving Suggestions
When it’s time to dig in, feel free to sprinkle some sesame seeds, chopped green onions, or even some crushed peanuts on top for added crunch and flavor. If you’re looking for something extra, a quick side of kimchi or pickled veggies can elevate this dish even further. Serve it hot, and I promise it’ll be a hit any day of the week!
Recipe Variations
Now, let’s get creative! Here are a few variations you can try to keep things exciting:
-
Meatballs with a Twist: Swap in beef, turkey, or even a plant-based ground meat alternative for a unique spin. Each option brings its own flavor and texture to the table!
-
Spicy Soy Glaze: For less heat, remove some gochujang and replace it with teriyaki sauce for a different flavor profile that’s still packed with umami.
-
Veggie-Packed Meatballs: Add grated zucchini or carrots into the meatball mixture for added nutrients and moisture.
-
Mediterranean Spin: Replace gochujang with harissa and serve with a tahini sauce instead of soy sauce for a Mediterranean flair.
-
Cauliflower Rice: If you’re watching carbs, try serving everything over cauliflower rice instead of basmati!
Chef’s Notes
This recipe has grown with me over the years. I remember experimenting with different spices and marinades until I struck gold with this combo! One fun story: the first time I made these for friends, I accidentally added way too much gochujang. Let’s just say they were definitely spicy! Lesson learned! Over time, I’ve perfected the balance of flavors, and now family and friends ask for them on repeat!
FAQs and Troubleshooting
1. Can I freeze these meatballs?
Absolutely! Both the meatballs and cooked rice freeze beautifully. Just store them in airtight containers. When you’re ready to enjoy, simply reheat in the oven or microwave!
2. What if my meatballs are dry?
If your meatballs turn out dry, it might be due to overcooking. Monitor their cooking time closely next time. Also, adding some moisture with extra sauce or a drizzle of olive oil during cooking can help!
3. Can I use frozen broccoli?
Yes! Just add the frozen broccoli to the baking sheet straight from the freezer. Keep in mind it may need a bit more cooking time to crisp up nicely.
4. How do I know when the meatballs are done?
Use a meat thermometer! Your meatballs are cooked through when they reach an internal temperature of 160°F (70°C). If you don’t have one, cut one open—the inside should be no longer pink!
Nutritional Info
Here’s a rough estimate of the nutritional content per serving (including meatballs, broccoli, and rice):
- Calories: 450–500
- Protein: 30g
- Carbohydrates: 50g
- Fat: 15g
- Fiber: 3g
These numbers can vary based on your specific ingredient choices, but you can easily adjust portions as necessary for your dietary needs!
Final Thoughts
And there you have it—delicious Korean Meatballs perfect for meal prepping and bringing joy to your busy week! This dish not only fills your belly but also feeds your soul. Each bite transports you to a world where comfort and flavor dance hand-in-hand, reminding you that delicious doesn’t have to be complex.
Next time life gets a bit too busy, just remember that with a little love, some quality ingredients, and a sprinkle of creativity, you can whip up meals that not only nourish but also bring a warm smile to your face. So, are you ready to take a culinary adventure? Let’s get cooking, my fellow food lover! 😊
Print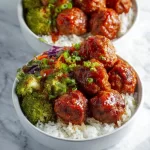
Korean Meatball Meal Prep
- Total Time: 45 minutes
- Yield: 4 servings 1x
- Diet: Paleo
Description
Juicy, flavor-packed Korean meatballs paired with fluffy rice and roasted broccoli—perfect for meal prep and busy weekdays!
Ingredients
- 1 lb. Ground Pork
- 1 Large Egg
- 1/2 Cup Cracker Crumbs or Bread Crumbs
- 2 Tbsp. Gochujang Sauce
- 1/2 tsp. Kosher Salt
- 1/2 tsp. Garlic Powder
- 1/4 tsp. Ground Ginger
- 1/2 lb. Fresh Broccoli Florets
- 1 Tbsp. Olive Oil
- 1/2 tsp. Kosher Salt
- 1/4 tsp. Black Pepper
- 1 cup Uncooked Basmati Rice
- 2 cups Water
- 1/2 cup Gochujang Sauce
- 1/4 cup Soy Sauce
- 2 tsp. Sesame Oil
- 1/2 tsp. Garlic Powder
- 1/4 tsp. Ground Ginger
- 1 1/2 Tbsp. Honey
Instructions
- Preheat your oven to 400°F (200°C).
- Mix the meatball ingredients in a large mixing bowl until just combined.
- Shape the mixture into golf ball-sized meatballs, about 1.5 inches in diameter.
- Prep the broccoli by tossing it with olive oil, salt, and black pepper.
- Bake the meatballs and broccoli for 20-25 minutes until browned and cooked through.
- Cook the basmati rice by boiling with water, then reducing to low and simmering until absorbed.
- Whisk together the sauce ingredients until smooth.
- Assemble your meal prep containers with rice, meatballs, roasted broccoli, and drizzle the sauce over the top.
Notes
You can freeze both the meatballs and cooked rice for convenient meals later.
- Prep Time: 15 minutes
- Cook Time: 30 minutes
- Category: Main Course
- Method: Baking
- Cuisine: Korean
Nutrition
- Serving Size: 1 serving
- Calories: 450
- Sugar: 10g
- Sodium: 600mg
- Fat: 15g
- Saturated Fat: 3g
- Unsaturated Fat: 8g
- Trans Fat: 0g
- Carbohydrates: 50g
- Fiber: 3g
- Protein: 30g
- Cholesterol: 70mg
Keywords: Korean Meatballs, Meal Prep, Easy Dinner, Comfort Food, Healthy Recipe