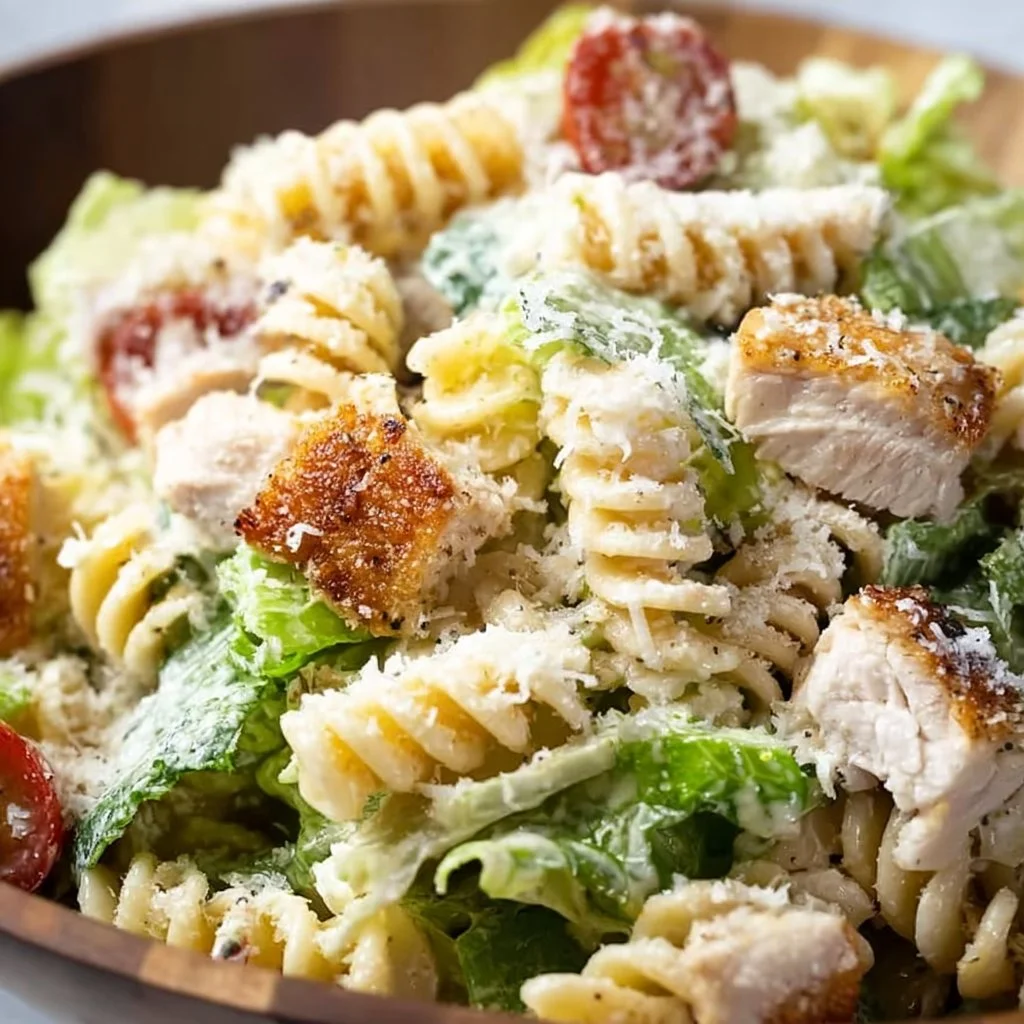
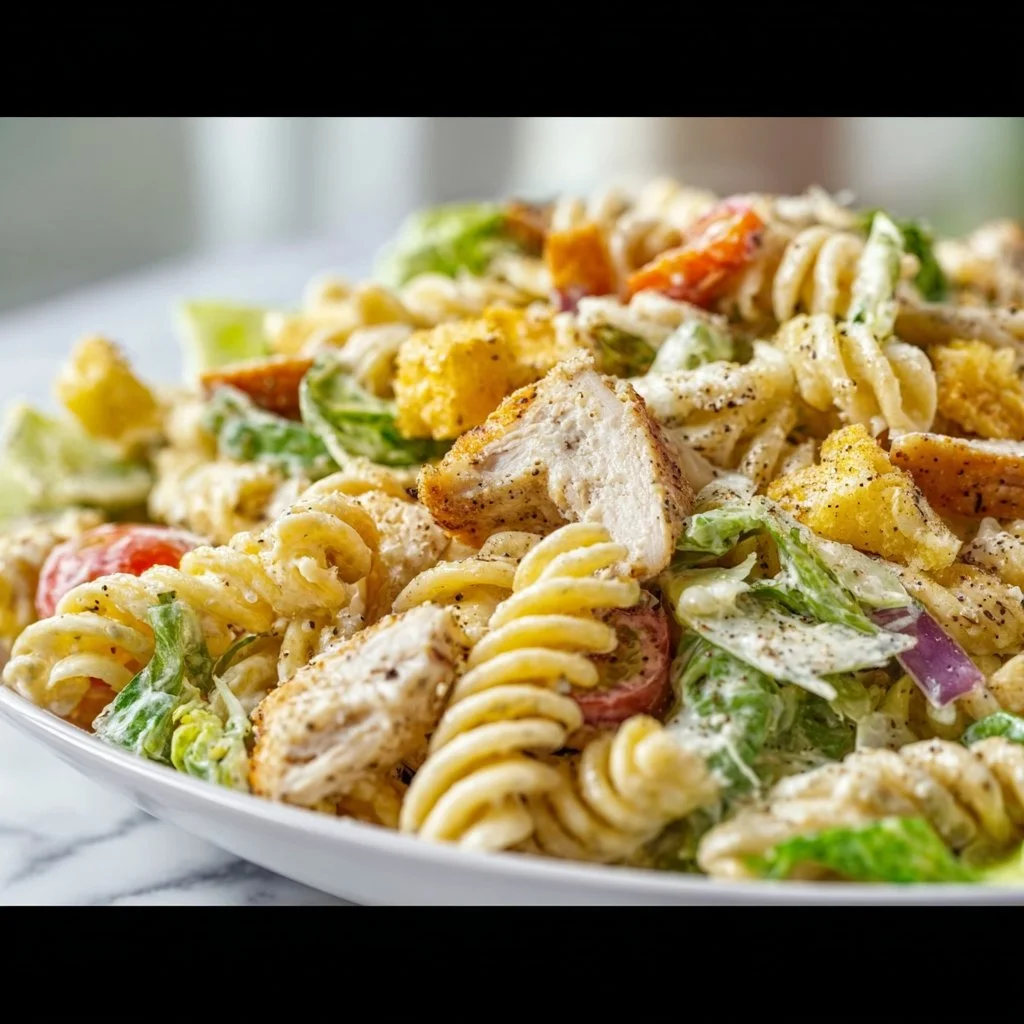
Chicken Caesar Salad with Pasta
# The Ultimate Chicken Caesar Salad with Pasta: A Comfort Food Classic!

Hey there, food lovers! I’m Beau Collier, and I cannot wait to dive into one of my all-time favorite dishes with you today: **Chicken Caesar Salad with Pasta**. If you’re anything like me, you know that salad doesn’t have to be all lettuce and bland. This beauty is packed with flavors, a delightful crunch, and a heartwarming history that’ll make your taste buds sing.

## Introduction

Picture this: a sun-kissed Sunday afternoon, the tantalizing aroma of grilled chicken filling the air, and laughter echoing from the backyard as friends and family gather for a shared meal. This is the backdrop of my early culinary adventures, which ultimately led me to create this delicious Chicken Caesar Salad with Pasta.

Not only does this dish embody everything I adore about cooking—simplicity, comfort, and a whole lot of love—it also strikes that perfect balance between a satisfying meal and a bright, refreshing salad. Who says you can’t have your pasta and salad too?

What I love most about this recipe is its versatility. Whether you’re looking for a quick weeknight dinner or a show-stopping centerpiece for your next gathering, this Chicken Caesar Salad with Pasta ticks all the boxes! Let’s get into the magic of this dish, shall we?

## Personal Story

One of my fondest memories associated with this dish goes way back to my college days. I was living in a tiny apartment with three roommates, all of whom were culinary novices, much like myself. We would rotate dinner duties, and let me tell you, when it was my turn, things got *interesting*. I decided to whip up a Chicken Caesar Salad with Pasta, thinking it would blend my love for the classic Caesar with a twist of pasta goodness.

As I tossed the ingredients together, laughter filled our cramped kitchen, and even the disasters—like a nearly burnt chicken and croutons that resembled miniature bricks—couldn’t dampen our spirits. That night, we savored every crunchy bite and creamy swirl, bonding over the delicious chaos. To this day, every time I make this dish, I’m transported back to that joyful, carefree time, and I can’t help but chuckle at our less-than-perfect initial attempts.

## Ingredients

Let’s gather up our ingredients, shall we? Here’s what you’ll need to create this mouthwatering dish:

- **2 cups cooked pasta (such as fusilli or penne)**: Choose your favorite pasta shape! Fusilli and penne are great for capturing the creamy dressing and adding texture.

- **2 cups romaine lettuce, chopped**: Freshness is key! Romaine adds that crunchy, crisp bite you want in any good salad. If you want to make it even healthier, try substituting kale or spinach.

- **1 cup cooked chicken breast, sliced**: Grilling or roasting the chicken adds fantastic flavor, but if you’re short on time, a store-bought rotisserie chicken works perfectly!

- **1/2 cup Caesar dressing**: Store-bought is fine for convenience, but homemade always hits differently. Just mix mayonnaise, garlic, lemon juice, anchovies (if you’re feeling adventurous), and Parmesan to make your own!

- **1/4 cup grated Parmesan cheese**: A sprinkle of Parmesan elevates the dish! For added flavor, try Pecorino Romano or nutritional yeast for a vegan alternative.

- **1/4 cup croutons**: Crunch, crunch! You can use store-bought or make your own by toasting cubed bread with olive oil and garlic.

- **Salt and pepper to taste**: Don’t forget to season! Simple salt and pepper will bring all the flavors together.

Each ingredient serves a purpose and contributes to that wholesome, hearty spirit of this salad. Keep in mind that you can easily customize based on your personal taste preferences.

## Step-by-Step Instructions

Alright, let's bring this delicious dish to life. Follow these steps, and I promise you’ll have yourself a vibrant Chicken Caesar Salad with Pasta that’ll have everyone asking for seconds!

### Step 1: Cook the Pasta
- **Bring a large pot of salted water to a boil.** Add in your pasta of choice and cook according to package instructions until al dente. Remember, it’s better to undercook it slightly since we’ll be mixing in the dressing and letting it sit.

**Tip**: Don’t forget to stir the pasta occasionally to prevent sticking.

### Step 2: Grill or Cook the Chicken
- While the pasta cooks, season the chicken breast with your favorite spices—salt, pepper, and maybe a pinch of garlic powder. Grill it over medium-high heat until it reaches an internal temperature of 165°F or until golden brown and cooked through.

**Chef Hack**: Leave the skin on during cooking to retain moisture! Just remove it later for a leaner meal.

### Step 3: Prepare the Dressing
- If you’re going the homemade route, mix your Caesar dressing ingredients in a bowl until smooth. You can combine the mayonnaise, a dash of Dijon mustard, minced garlic, Worcestershire sauce, lemon juice, and grated Parmesan for a zesty kick.

### Step 4: Chop the Romaine
- Rinse your romaine lettuce thoroughly and pat it dry. Roughly chop the lettuce into bite-sized pieces. The goal is to have tender, crispy leaves that will hold up to the dressing!

### Step 5: Combine Ingredients
- In a large bowl, combine the cooked pasta, sliced chicken, chopped romaine, and dressing. Toss everything together gently but thoroughly until every noodle and piece of lettuce is beautifully coated.

**Pro Tip**: If you'd like a creamy pasta dish, consider adding an extra splash of Caesar dressing or a dollop of crème fraîche.

### Step 6: Add Toppings
- Sprinkle the grated Parmesan cheese and croutons on top. Give the salad a final toss to mix in those crunchy goodies without smashing anything.

### Step 7: Taste Test
- Before serving, give it a taste! Adjust the salt, pepper, and dressing according to your liking. This salad is about creating a dish that speaks to your tastes, after all!

## Serving Suggestions

Now that you’ve created this delicious Chicken Caesar Salad with Pasta, it’s time to serve it up! Here are a few suggestions to fancy up your presentation:

- **Plate it Beautifully**: Use a large salad bowl for family-style sharing, or dish out individual servings on chilled plates. Layer the pasta and salad for a gorgeous layered look!

- **Garnish Wisely**: Add more fresh Parmesan on top and a sprinkle of freshly cracked black pepper for an eye-catching finish. A few lemon wedges on the side also provide a lovely color contrast!

- **Pair with Sides**: A rustic baguette or garlic bread on the side pairs wonderfully, making it a hearty meal.

Really, the aim is to create a visual feast that beckons everyone to come and indulge.

## Recipe Variations

Feeling adventurous? Here are a few creative twists you can try to switch up your Chicken Caesar Salad with Pasta:

- **Fruity Fusion**: Add in some diced fresh strawberries or mandarin oranges for a pop of sweetness that complements the creamy dressing.

- **Extra Protein**: Swap out chicken for grilled shrimp, or toss in some chickpeas for a plant-based protein burst.

- **Spicy Spin**: Add a kick by incorporating diced jalapeños or drizzling sriracha on top.

- **Herbaceous Zest**: Incorporate fresh herbs like basil or dill for a refreshing twist on the traditional flavor profile.

- **Veggie Boost**: Roast some broccoli or add cherry tomatoes for extra colour and nutrients.

Each variation brings a fresh spin on an already beloved classic!

## Chef’s Notes

This Chicken Caesar Salad with Pasta has been my trusty companion through many meals and gatherings. Over the years, I’ve tried countless variations—from incorporating grilled veggies to experimenting with different dressings. The best part? This recipe is as forgiving as it is scrumptious. Don’t fret over little mistakes; the heart of this dish is all about enjoying the process of cooking and sharing!

A funny mishap? There was that one time I accidentally swapped salt for sugar in my homemade dressing. Let’s just say the look on everyone’s faces was priceless!

## FAQs and Troubleshooting

**1. Can I use pre-cooked chicken?**
Absolutely! Rotisserie chicken is a fantastic shortcut that saves time. Just shred it and toss it in.

**2. How can I store leftovers?**
Keep the dressing separate to maintain the salad’s crunchiness. Store the components in airtight containers in the fridge, and they’ll last for about 2-3 days. Assemble fresh when ready to eat.

**3. What if my pasta is sticky?**
If you’ve overcooked your pasta or it’s sticky, rinse it under cold water immediately after draining. This stops the cooking process and helps separate the noodles.

**4. Can I make it vegan?**
Definitely! Use chickpeas for protein, a vegan Caesar dressing made with tahini, lemon, and nutritional yeast, and skip the cheese. It’s delicious!

## Nutritional Info

A serving of this Chicken Caesar Salad with Pasta is not only comforting but also packs a nutritional punch! Here’s an approximate breakdown per serving:

- **Calories**: 450
- **Protein**: 30g
- **Carbohydrates**: 35g
- **Fat**: 20g
- **Fiber**: 3g

Of course, these numbers vary based on specific brands and exact measurements, but you get the gist!

## Final Thoughts

So there you have it—my heartwarming Chicken Caesar Salad with Pasta recipe, complete with nostalgic memories, tasty options, and tips to help you create magic in your kitchen! Whether it's a rainy Tuesday night or a festive gathering, this dish brings everyone together with its array of flavors and textures.

I encourage you to embrace the fun, play with the ingredients, and let your creative culinary spirit shine. Nothing beats the joy of sharing a delicious meal with those you love. Now, grab your fork, pull up a chair, and let’s eat!
The Ultimate Chicken Caesar Salad with Pasta
- Total Time: 45 minutes
- Yield: 4 servings 1x
- Diet: Non-Vegetarian
Description
A delicious Chicken Caesar Salad with Pasta that combines flavors and textures for a comforting meal.
Ingredients
- 2 cups cooked pasta (such as fusilli or penne)
- 2 cups romaine lettuce, chopped
- 1 cup cooked chicken breast, sliced
- 1/2 cup Caesar dressing
- 1/4 cup grated Parmesan cheese
- 1/4 cup croutons
- Salt and pepper to taste
Instructions
- Cook the Pasta: Bring a large pot of salted water to a boil. Add in your pasta of choice and cook according to package instructions until al dente.
- Grill or Cook the Chicken: Season the chicken breast with your favorite spices and grill it until cooked through.
- Prepare the Dressing: Mix Caesar dressing ingredients in a bowl until smooth.
- Chop the Romaine: Rinse and pat dry, then chop into bite-sized pieces.
- Combine Ingredients: In a large bowl, combine the cooked pasta, sliced chicken, chopped romaine, and dressing. Toss gently.
- Add Toppings: Top with grated Parmesan cheese and croutons, then give it a final toss.
- Taste Test: Adjust salt, pepper, and dressing to your liking.
Notes
Feel free to customize with additional proteins or veggies based on your preferences.
- Prep Time: 15 minutes
- Cook Time: 30 minutes
- Category: Main Course
- Method: Grilling
- Cuisine: Italian
Nutrition
- Serving Size: 1 serving
- Calories: 450
- Sugar: 2g
- Sodium: 600mg
- Fat: 20g
- Saturated Fat: 5g
- Unsaturated Fat: 10g
- Trans Fat: 0g
- Carbohydrates: 35g
- Fiber: 3g
- Protein: 30g
- Cholesterol: 85mg
Keywords: Chicken Caesar Salad, Pasta Salad, Comfort Food, Easy Dinner, Healthy Salad
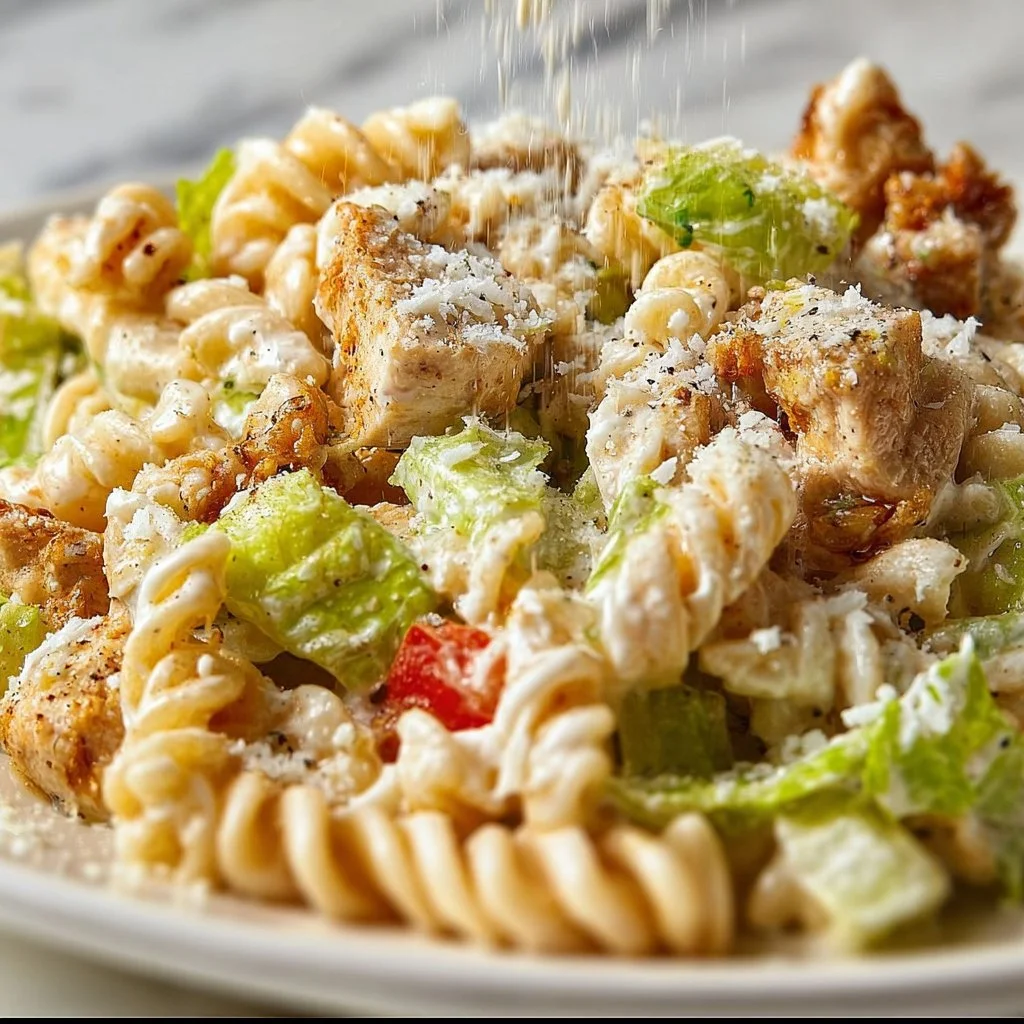
Chicken Caesar Pasta Salad
Chicken Caesar Pasta Salad: A Comforting Twirl of Flavor
Hey there, fellow food lovers! I’m Beau Collier, and today we’re diving into a dish that’s not just delicious but also a true crowd-pleaser: Chicken Caesar Pasta Salad. Whether you’re hosting a cozy family gathering or just looking for a hearty meal to enjoy on a lazy Sunday afternoon, this beauty is your go-to! It’s loaded with satisfying flavors, textures, and a little bit of everything we love about comfort food.
You know that feeling when you take a bite of something, and it instantly transports you back to a special moment? Food has this magical power to evoke memories, doesn’t it? Chicken Caesar Pasta Salad does just that for me. It’s the ultimate blend of comfort and joy, combining the heartiness of pasta, the zing of Caesar dressing, and the savory goodness of chicken and bacon. Plus, let’s not forget the crunch of fresh lettuce and croutons—it’s a symphony of textures!
One of the best things about this dish is its versatility. It’s perfect for warm summer evenings but cozy enough for winter nights. You can make it ahead of time for picnics, BBQs, or potlucks, and it tastes just as good (if not better!) the next day. It’s one of those recipes that makes everyone gather around the table, sharing stories, laughter, and of course, second helpings! Grab your apron, and let’s jump into a favorite of mine that blends nostalgia with downright scrumptiousness!
Personal Story
Let me take you back a few years. Picture this: a sun-soaked summer afternoon in my backyard with friends and family filling the air with laughter and a mouthwatering aroma. It was my little niece’s birthday bash, and I wanted to wow everybody with something delicious yet refreshing. That’s when I thought of Chicken Caesar Pasta Salad! I love how food brings people together, and this dish was the perfect centerpiece.
As I tossed the pasta with creamy dressing, juicy chicken, and crispy bacon, I could see the childlike excitement on everyone’s faces. The first bite was met with “oohs” and “aahs,” and from then on, it became a regular on our family menus. Since that day, I’ve added my own little tweaks, but the essence remains the same: comfort, joy, and a hint of nostalgia with every bite.
Ingredients
Here’s what you’ll need to whip up this delicious Chicken Caesar Pasta Salad, and a few quick tips to make it shine!
-
1.5 lbs chicken breasts or tenderloins, diced
Look for tenderloins for quick cooking and juicy bites! If you’re short on time or want an extra kick, rotisserie chicken is a great shortcut. -
2 tablespoons poultry seasoning (like Cajun, lemon pepper, etc.)
This adds a flavor pop! Feel free to experiment with your favorite spice blends for a personal touch. -
8 strips bacon (diced)
Because everything is better with bacon, am I right? Turkey bacon is a great substitution if you’re looking for a healthier option. -
1 lb. short pasta like rotini or fusilli
Those twists and turns hold onto sauces and dressings like nobody’s business! You can swap in whole grain or gluten-free pasta if needed. -
12 oz romaine lettuce (chopped)
Adds a crisp, refreshing crunch. Spinach or mixed greens work well too for a different flavor profile. -
1/2 cup parmesan (freshly shredded)
Fresh is best for that rich taste! Consider Pecorino Romano for a sharper tang. -
1/2 cup garlic butter croutons (partially crushed)
The crunch factor! You can make your own croutons or grab your favorite store-bought brand. -
1 teaspoon salad supreme seasoning or to taste (Perfect Pinch brand)
A touch of extra flavor magic! Feel free to adjust according to your taste preferences. -
1/2 cup Caesar dressing
You can use homemade or store-bought to save time. I recommend one that’s creamy and rich. -
1/3 cup ranch dressing
This adds a creaminess and a unique twist. Thick Greek yogurt works well as a lighter option. -
2 tablespoons olive oil
Helps blend the flavors together seamlessly. Substitute with avocado oil for a different taste. -
1 cup mayonnaise
The creamy hug this salad deserves! Light mayo can be used for fewer calories or an avocado mash for a fun twist. -
1 tablespoon Dijon mustard
Gives a lovely depth of flavor. Honey mustard can bring a sweet touch; just adjust the amount accordingly. -
1 teaspoon Worcestershire sauce
A little umami bomb! Soy sauce can serve as a suitable swap for a nice twist. -
3 small garlic cloves, chopped
Because we love garlic! Roasted garlic can bring a mellow flavor if you prefer. -
2 tablespoons fresh squeezed lemon juice
Brightens everything up! Lime juice can be used for a fun citrusy twist. -
3/4 cup freshly grated Parmigiano-Reggiano
The icing on the cake! Always go for freshly grated to elevate the dish. -
1/4 teaspoon salt
Remember to taste as you go! -
1/2 teaspoon freshly ground pepper
Freshly ground pepper really packs a flavor punch—don’t skip it!
Step-by-Step Instructions
Now, let’s get cooking! Here’s how to bring this delightful Chicken Caesar Pasta Salad to the table.
Step 1: Cook the Chicken
- Heat a skillet over medium heat: Drizzle in a tablespoon of olive oil. Toss in your chopped chicken and season it with your favorite poultry seasoning.
- Cook until golden brown: About 5-7 minutes, stirring occasionally. You want it cooked through, so the internal temperature should reach 165°F (75°C). Don’t forget to season with salt and pepper!
Chef Tip: Keep an eye on the pan; overcooking chicken can dry it out. If you’re worried, you can always cut a piece in half to check if it’s done!
Step 2: Cook the Pasta
- Boil water in a large pot: Salting the water is key! It flavors the pasta as it cooks.
- Add your rotini or fusilli: Cook according to the package instructions until al dente. Don’t forget to reserve a cup of pasta water!
Chef Hack: Rinsing the pasta briefly after draining helps to stop the cooking process and prevents it from sticking together.
Step 3: Prepare the Dressing
- In a large mixing bowl, whisk together the mayonnaise, Caesar dressing, ranch dressing, olive oil, lemon juice, Dijon mustard, Worcestershire sauce, chopped garlic, and salad supreme seasoning.
- Add a little pasta water: Just a couple of tablespoons to increase creaminess.
Personal Note: I usually taste the dressing and adjust the seasoning here. It’s all about finding that perfect balance!
Step 4: Combine Everything
- In your big bowl with dressing, add your cooked pasta, chicken, chopped romaine, croutons, and freshly grated Parmesan. Give everything a good toss to coat.
Chef Tip: Toss gently to keep those croutons intact!
Step 5: Serve and Enjoy!
- Plate your pasta salad: Top with extra croutons and a sprinkle of Parmesan for that lovely finish.
- Chill for a bit: While it’s delicious right away, letting it rest in the fridge for about 30 minutes really allows those flavors to mingle and develop!
Serving Suggestions
To serve up this Chicken Caesar Pasta Salad, fill a large serving bowl with the salad and garnish it with more freshly shredded Parmigiano-Reggiano and crushed croutons. Add a sprinkle of freshly ground pepper or a few slivers of lemon for a pop of color!
Consider pairing it with crusty garlic bread or a light caprese salad on the side for a complete feast. You could get fancy and serve it in individual bowls if you’re hosting a party—it adds a nice touch and makes each serving look like a masterpiece!
Recipe Variations
Let’s get creative! Here are a few ways to mix it up:
- Mediterranean Twist: Swap out the dressing for a lemon-olive oil vinaigrette and add kalamata olives, feta cheese, and cherry tomatoes.
- Spicy Kick: Add some chopped jalapeños or drizzle with spicy sriracha ranch for an extra kick.
- Vegan Version: Use chickpeas instead of chicken, vegan bacon, and cashew-based dressings for a hearty plant-based twist.
- Whole Grain Wonder: Use whole-grain pasta for a healthier version, and consider adding roasted veggies for extra color and nutrition.
- Asian Fusion: Swap in sesame dressing, and add edamame, chopped green onions, and shredded carrots.
Chef’s Notes
This recipe has evolved over time. Initially, I followed a more traditional pasta salad approach, but I found that adding the creamy dressing mixture cranked the flavor up to eleven! It’s become a staple in our household, and every time I make it, I think of that sunny birthday party.
I also experimented with different dressings—some were too tangy, while others missed the creamy balance. Trust me, finding the right blend can make all the difference, and this combination is perfect for sending people back for seconds!
FAQs and Troubleshooting
1. What can I do if my pasta is mushy?
Overcooking pasta can happen to the best of us! If it’s mushy, consider tossing it with a bit of oil and using it in a baked dish instead.
2. How can I store leftovers?
Place the Chicken Caesar Pasta Salad in an airtight container in the fridge for up to 3 days. It might thicken as it sits, so feel free to add a bit more dressing!
3. Can I make this ahead of time?
Absolutely! This pasta salad is perfect for meal prep. Just store the dressing separately until you’re ready to serve to keep things fresh and crunchy.
4. What if I don’t have Caesar dressing?
No worries! You can make your own with a blend of mayonnaise, garlic, lemon, Dijon, and anchovy paste. Mix it up to taste!
Nutritional Info (if applicable)
While I’m not one to count calories, I understand that many of you like to keep an eye on your nutritional intake! Here’s a rough estimate per serving for this Chicken Caesar Pasta Salad (makes about 6 servings):
- Calories: Approximately 450-500 depending on the quantities and brands used
- Protein: 30g
- Carbohydrates: 40g
- Fat: 25g
- Fiber: 3g
Of course, adjust according to ingredient variations, and remember this is comfort food meant to be enjoyed!
Final Thoughts
There you have it! A delightful Chicken Caesar Pasta Salad that’s perfect for any occasion. I hope you feel inspired to recreate this dish and add your own personal touches along the way. Remember, cooking is all about love, laughter, and a little creativity!
So gather your friends and family, serve up this comforting meal, and make some memories at the dinner table! Until next time, happy cooking, friends—grab your forks, and let’s dig in!
Let me know how your journey with this recipe goes. I can’t wait to hear your stories!
Print
Chicken Caesar Pasta Salad
- Total Time: 35 minutes
- Yield: 6 servings 1x
- Diet: Paleo
Description
A comforting blend of flavors combining pasta, chicken, bacon, and a creamy Caesar dressing, perfect for any occasion.
Ingredients
- 1.5 lbs chicken breasts or tenderloins, diced
- 2 tablespoons poultry seasoning
- 8 strips bacon, diced
- 1 lb. short pasta like rotini or fusilli
- 12 oz romaine lettuce, chopped
- 1/2 cup parmesan, freshly shredded
- 1/2 cup garlic butter croutons, partially crushed
- 1 teaspoon salad supreme seasoning or to taste
- 1/2 cup Caesar dressing
- 1/3 cup ranch dressing
- 2 tablespoons olive oil
- 1 cup mayonnaise
- 1 tablespoon Dijon mustard
- 1 teaspoon Worcestershire sauce
- 3 small garlic cloves, chopped
- 2 tablespoons fresh squeezed lemon juice
- 3/4 cup freshly grated Parmigiano-Reggiano
- 1/4 teaspoon salt
- 1/2 teaspoon freshly ground pepper
Instructions
- Heat a skillet over medium heat and drizzle in olive oil. Toss in chicken and poultry seasoning.
- Cook until golden brown, about 5-7 minutes, until internal temperature reaches 165°F (75°C).
- Boil water in a large pot and salt it. Add pasta and cook according to package instructions until al dente.
- Whisk together mayonnaise, Caesar dressing, ranch dressing, olive oil, lemon juice, Dijon mustard, Worcestershire sauce, chopped garlic, and salad supreme seasoning in a large bowl.
- Combine cooked pasta, chicken, chopped romaine, croutons, and freshly grated Parmesan in the bowl with dressing. Toss to coat.
- Plate and top with additional croutons and Parmesan, then chill for 30 minutes before serving.
Notes
For a twist, consider adding kalamata olives and feta cheese for a Mediterranean flair.
- Prep Time: 15 minutes
- Cook Time: 20 minutes
- Category: Salad
- Method: Mixing
- Cuisine: American
Nutrition
- Serving Size: 1 serving
- Calories: 475
- Sugar: 2g
- Sodium: 600mg
- Fat: 30g
- Saturated Fat: 9g
- Unsaturated Fat: 18g
- Trans Fat: 0g
- Carbohydrates: 40g
- Fiber: 3g
- Protein: 30g
- Cholesterol: 100mg
Keywords: Chicken Caesar Pasta Salad, comfort food, pasta recipes, salad recipes, BBQ, picnic

Pineapple Chicken Salad
# Pineapple Chicken Salad: A Tropical Delight

## Introduction

Hey food lover! Welcome to Feastical’s kitchen, where every recipe is a ticket to flavor town! Today, we’re diving into a dish that’s as bright and cheerful as a summer day: Pineapple Chicken Salad. Whether you're reminiscing about family picnics or hosting a sunny brunch, this salad is the perfect way to bring a splash of tropical vibes into your cooking.

Now, let's be real: chicken salad has a bit of a reputation for being bland and boring, right? But trust me, when you add in juicy pineapple and a hint of coconut, we're not just opening a can of nostalgia; we're redesigning the whole chicken salad narrative! With every mouthful, you're getting a delightful medley of textures and flavors that makes your taste buds dance. Picture tangy, sweet pineapple, tender chicken, and a creamy dressing that hugs each ingredient like a warm exclamation of “Yum!”

So, whether you're whipping this up for a picnic, serving it as a side dish for your cookout, or just indulging in a delicious lunch at home, this dish is sure to win hearts. Plus, it’s quick, easy, and full of feel-good vibes. Ready to take a culinary trip to the tropics? Let’s get cooking!

## Personal Story

Let me take you back to one of my favorite childhood memories—family reunions under the big oak tree in my grandma’s backyard. Every summer, we’d gather for a potluck feast where everyone would bring their A-game. My aunt Lisa always brought her famous pineapple chicken salad, and let me tell you, it was a showstopper! Whenever I’d see that bowl—the bright golden chunks of pineapple shimmering under the sunlight—I’d sprint toward it, hoping to snag the first generous scoop.

As we all sat on picnic blankets, surrounded by laughter and the sweet scent of BBQ, Aunt Lisa would regale us with stories, each spoonful of that salad filled with her love and joy. It was more than just a dish; it was the connection to family, the sweet and savory bites that brought everyone together. That’s why I’m so passionate about sharing this recipe—it’s not just about feeding the body; it’s about nurturing our souls with good-hearted cooking.

## Ingredients

Here’s what you’ll need to make this vibrant Pineapple Chicken Salad:

- **1 ½ pounds boneless, skinless chicken breasts**
  *Tip: If you're short on time, rotisserie chicken is a great shortcut. Just pull it apart and you're ready to go!*

- **½ of a sweet onion (finely chopped)**
  *Chef Insight: Sweet onions bring a mild flavor that won't overpower the dish. You can substitute them with green onions for freshness without the sharp bite.*

- **1 ½ cups diced fresh pineapple**
  *Substitution: Canned pineapple works in a pinch, but fresh pineapple is unbeatable in taste! Make sure to drain it well if using canned.*

- **3 tablespoons unsweetened coconut flakes**
  *Tip: Toast the coconut flakes in a dry skillet until golden for a deeper flavor and extra crunch.*

- **1 cup egg-free mayonnaise**
  *Substitution: If you're looking for a lighter option, try Greek yogurt. It adds creaminess and a tangy kick!*

- **Salt and pepper to taste**
  *Note: Always taste your dish at the end and adjust the seasoning as needed. It makes a world of difference!*

This ingredient lineup is not just flavorful; it’s a health-conscious choice featuring lean protein, tropical fruits, and heart-healthy fats. Now that you’re stocked up, let’s jump into making this delightful salad!

## Step-by-Step Instructions

1. **Cook the Chicken**
   Start by poaching the chicken breasts (or grilling them if you’re feeling adventurous!). Place the chicken in a pot of boiling water and let it simmer for about 15-20 minutes, or until fully cooked. You’ll know it’s done when it reaches an internal temperature of 165°F.
   *Chef Note: Poaching keeps the chicken moist and tender. If grilling, marinate the chicken in a little olive oil, salt, and pepper for added flavor!*

2. **Cool and Shred**
   Once your chicken is cooked, remove it from the heat and let it rest for about 5 minutes. This will cool it down a bit so you can handle it. Shred the chicken into bite-sized pieces using two forks.
   *Tip: You can also chop the chicken into cubes if you prefer a chunkier salad. And who doesn’t love the satisfaction of shredding chicken?*

3. **Prep the Pineapple and Onion**
   While the chicken cools, dice your fresh pineapple into chunks and finely chop the sweet onion. Combine them in a large mixing bowl.
   *Little Hack: If you want a sweeter touch, you can add a splash of lime juice over the pineapple—it’ll enhance that tropical flavor!*

4. **Mix the Sauce**
   In a separate bowl, whisk together the egg-free mayonnaise, salt, pepper, and coconut flakes. Make sure it’s mixed well. It should be creamy and flavorful—taste it for seasoning!
   *Best Tip: Add a teaspoon of honey or maple syrup if you like a touch of sweetness in your salad dressing!*

5. **Combine the Ingredients**
   Now, add the shredded chicken to the mixing bowl with the pineapple and onion mixture. Pour the dressing over it and gently fold everything together until well combined.
   *Note: Try not to overmix. We want a lovely, cohesive dish without turning it into mush!*

6. **Chill the Salad**
   Cover your bowl with plastic wrap and let it chill in the refrigerator for at least an hour (or longer if you can wait!). This allows all those flavors to meld beautifully together.
   *Patience pays off, my friend!*

## Serving Suggestions

Now that your Pineapple Chicken Salad is crafted to perfection, it’s time to plate it up! Here are a few fun ways to serve it:

- **On Fresh Greens**: Serve it atop a bed of crisp, mixed greens or baby spinach for a refreshing salad option. It adds crunch and a burst of color!

- **In Lettuce Wraps**: For a light and fun twist, scoop the chicken salad into large romaine leaves. Roll them up and take a bite of that tropical goodness!

- **On Toast**: Spread the salad onto toasted whole grain bread or croissants for a delicious sandwich option. It’s a quick and comforting lunch that takes your taste buds on a tour.

- **As a Dip**: Pair it with tortilla chips or crackers for a fun appetizer at your next get-together—it’s always a hit at parties!

## Recipe Variations

Ready to make this dish truly your own? Here are some creative twists you can try:

1. **Add Crunch**: Toss in some diced celery or bell peppers for an extra crunch. Nuts like cashews or almonds could also provide a delightful texture!

2. **Spice it Up**: If you’re craving a spicy kick, mix in some diced jalapeños or a dash of hot sauce. It transforms the salad into a tropical fiesta!

3. **Herb it Up**: Try adding chopped fresh herbs such as cilantro or mint for a refreshing twist that complements the tropical flavors beautifully.

4. **Fruit Explosion**: Amp up the fruitiness by including diced mango or grapes. The added sweetness works wonders!

5. **Coconut Lime Fusion**: Make a tropical dressing with coconut yogurt added to the mix instead of mayo, adding a squeeze of fresh lime juice.

## Chef’s Notes

This recipe has gone through quite a few iterations over the years! I started with just the basics, throwing in whatever my mom had in the fridge, and watched it evolve into this vibrant dish. One time, I decided to add a handful of grapes, and my friends raved about it. They begged for the recipe, which led me to refine and share it here.

And let me throw in a little kitchen giggle: The first time I made this for a potluck, I accidentally used sweet pickle relish instead of mayo. Let’s just say, it was… interesting! But cooking is all about having fun and learning—so don’t fret if something goes awry; it’s all a part of the adventure.

## FAQs and Troubleshooting

**Q: Can I make this salad ahead of time?**
Absolutely! This chicken salad actually tastes even better the next day as the flavors meld together. Just store it in an airtight container in the fridge.

**Q: What can I do if the salad is too dry?**
If you find your salad on the dry side, simply stir in a little extra mayo or yogurt until you achieve your desired consistency.

**Q: How do I prevent my chicken from being dry?**
Be sure to poach the chicken gently and monitor the cooking time. Letting it rest after cooking also allows the juices to redistribute for moisture.

**Q: Can I freeze this salad?**
It’s best to avoid freezing this salad, as the texture of the chicken and fresh ingredients can change once thawed. Enjoy it fresh or chill for a delicious, make-ahead option!

## Nutritional Info

This Pineapple Chicken Salad is not only delicious but also offers a range of nutrients! Here’s a quick breakdown per serving (based on 6 servings):

- **Calories**: Approximately 280
- **Protein**: 25g
- **Carbohydrates**: 15g (mostly from the pineapple)
- **Fat**: 15g (largely healthy fats from the mayo and chicken)
- **Fiber**: 2g

It’s a satisfying meal that’s packed with protein and contains the goodness of fresh fruit. You can feel good about serving it to your loved ones!

## Final Thoughts

There you have it! A vibrant, feel-good Pineapple Chicken Salad that's sure to become a staple at your gatherings. It's a beautiful reminder that cooking should be fun, creative, and deliciously simple. Whether you're celebrating life’s big events or just creating a cozy day at home, this dish makes it all the more special.

So grab that fork (or your favorite spoon), gather your ingredients, and make this salad your own. And don’t forget to top it off with a pinch of joy and a sprig of love! Happy cooking, friends, and I can’t wait to hear how your culinary adventure turns out!

Pineapple Chicken Salad
- Total Time: 40 minutes
- Yield: 6 servings 1x
- Diet: Gluten-Free
Description
A vibrant and tropical chicken salad featuring juicy pineapple, tender chicken, and a creamy dressing, perfect for picnics or brunch.
Ingredients
- 1 ½ pounds boneless, skinless chicken breasts
- ½ of a sweet onion (finely chopped)
- 1 ½ cups diced fresh pineapple
- 3 tablespoons unsweetened coconut flakes
- 1 cup egg-free mayonnaise
- Salt and pepper to taste
Instructions
- Cook the chicken by poaching it in boiling water for 15-20 minutes until fully cooked.
- Cool the cooked chicken for 5 minutes before shredding it into bite-sized pieces.
- Prep the pineapple and onion by dicing the pineapple and chopping the onion, then combine in a large mixing bowl.
- Mix the mayonnaise, salt, pepper, and coconut flakes in a separate bowl until creamy.
- Combine the shredded chicken with the pineapple and onion, then fold in the dressing until well mixed.
- Chill the salad in the refrigerator for at least an hour before serving.
Notes
Try adding nuts for crunch, or a splash of lime juice for a sweetness boost!
- Prep Time: 20 minutes
- Cook Time: 20 minutes
- Category: Salad
- Method: Mixing
- Cuisine: American
Nutrition
- Serving Size: 1 serving
- Calories: 280
- Sugar: 9g
- Sodium: 300mg
- Fat: 15g
- Saturated Fat: 3g
- Unsaturated Fat: 9g
- Trans Fat: 0g
- Carbohydrates: 15g
- Fiber: 2g
- Protein: 25g
- Cholesterol: 70mg
Keywords: salad, chicken salad, tropical salad, pineapple, healthy lunch, easy recipe
Chicken Caesar Pasta Salad
Chicken Caesar Pasta Salad: A Delicious Fusion of Flavors for Every Occasion
Hey there, food lovers! Beau Collier here, and today I’m super excited to share one of my all-time favorites: Chicken Caesar Pasta Salad! Now, if you haven’t had the pleasure of basking in the goodness of this dish, you’re in for a treat. Picture this: robust rotini pasta, crunchy romaine lettuce, tender shredded chicken, a sprinkling of Parmesan cheese, and croutons that add that perfect hug of crunch, all tossed in creamy Caesar dressing. Yum!
This recipe is not just a quick meal; it’s a delightful balance of textures and flavors that’s as satisfying on a hot summer day as it is comforting on a cozy evening. Whether you’re gearing up for a family gathering, a potluck with friends, or just want to whip up something delicious for yourself, this Chicken Caesar Pasta Salad is your go-to. Plus, there’s something so nostalgic about it, as it brings back memories of awesome gatherings with loved ones, good conversations, and, of course, good food!
So, gather your ingredients, roll up your sleeves, and let’s dive into this mouthwatering adventure together!
Personal Story
I remember the first time I decided to make a Chicken Caesar Pasta Salad. It was a warm Saturday afternoon, and my friends were coming over for our monthly get-together. I wanted to impress them—not just because of my culinary ambitions but because I wanted to bring back a dish that my grandma used to make. You see, grandma had this knack for creating meals that brought people together, and her Chicken Caesar Salad was always a crowd-pleaser. She’d whip it up for summer barbecues, pool parties, you name it.
That day, armed with memories of her laughter and the smell of fresh ingredients, I set off to recreate that magic. The result? A pasta salad that not only tasted amazing but also reminded me of those carefree, sun-soaked afternoons spent at her kitchen table. Serve it chilled or at room temperature, and every bite just radiates those nostalgic summer vibes. Now, every time I whip up this dish, it feels like I’m sharing a hug with my grandma. Can you feel the love already?
Ingredients
Here’s what you’ll need to bring this Chicken Caesar Pasta Salad to life:
-
2 stalks of romaine lettuce
Fresh, crispy, and packed with fiber! Substitute with kale for a heartier option. -
1 cup cooked chicken (shredded)
Perfect for using up leftovers! You can swap it for grilled shrimp or even chickpeas for a vegetarian option. -
1/2 cup shredded Parmesan cheese
It adds that salty punch! Grana Padano or Pecorino Romano make great substitutions if you’re feeling fancy. -
1 cup uncooked rotini (or your favorite pasta noodle)
Rotini captures the dressing beautifully! Use penne or fusilli if you prefer. -
1 cup croutons
Crunchy, buttery perfection! To amp up the flavor, try making your own using stale bread tossed with olive oil, garlic, and herbs. -
1 cup Caesar dressing
A creamy, tangy delight! For a lighter version, opt for Greek yogurt-based dressings or homemade vinaigrette. -
Ground black pepper (optional)
A dash can elevate flavors! Feel free to skip it if you’re keeping things kid-friendly.
Step-by-Step Instructions
Alright, let’s roll up those sleeves and get cookin’! Follow these detailed steps, and I promise you’ll have a plate full of deliciousness in no time.
-
Cook the Pasta:
Start by bringing a pot of salted water to a boil. Once it’s bubbling like a hot spring, add in your rotini (or chosen pasta). Cook according to the package instructions until al dente, which usually takes about 8-10 minutes. Make sure to stir occasionally—nobody likes sticky pasta! Once done, drain it into a colander and rinse with cold water to halt the cooking process. This not only cools it down but also prevents it from clumping together. -
Prepare the Chicken:
While the pasta is cooking, let’s talk chicken! If you’re using leftover chicken, grab it from the fridge and shred it with two forks. If you’re cooking fresh chicken, season it with salt and pepper, grill, or sauté until fully cooked, then shred. This is your protein power-up—the heart of our salad! -
Chop the Lettuce:
Don’t forget the greens! Rinse your romaine lettuce thoroughly under running water, then dry it in a salad spinner or with paper towels. Next, chop it into bite-sized pieces—this makes it easy to mix in with everything else and ensures no messy bites. -
Mix It All Together:
Now comes the fun part! In a big bowl, combine your cooked rotini, shredded chicken, chopped romaine, croutons, and shredded Parmesan cheese. Then, drizzle in that luscious Caesar dressing. The key here is to start with just a bit of dressing; you can always add more, but too much can make things soggy. -
Toss and Taste:
Using a large spoon or tongs, gently toss everything together until it’s beautifully combined. Give it a quick taste test. Need more dressing? Go for it! Want that peppery kick? Now’s your time to add ground black pepper. -
Chill Out:
Once everything is well mixed, cover your salad and pop it in the fridge for at least 30 minutes. This allows flavors to meld together, and it tastes even better chilled! Plus, it keeps the lettuce crisp.
Serving Suggestions
Ready to dig in? Here’s how to plate your culinary masterpiece. Grab your salad bowl (or individual plates for a touch of elegance) and fill it generously with the Chicken Caesar Pasta Salad. For a fancy finishing touch, feel free to sprinkle extra Parmesan on top, maybe even a few additional croutons for that desired crunch factor.
A light drizzle of olive oil and a dash of black pepper can really bring everything together, too! Serve it alongside a refreshing glass of iced tea or your favorite lemonade for a splash of summer vibes.
Recipe Variations
Want to jazz things up? Here are a few fun variations to help you get creative:
-
Add More Veggies: Toss in cherry tomatoes, sliced cucumbers, or bell peppers for an extra crunch and color.
-
Spicy Twist: Add sliced jalapeños or a dash of red pepper flakes for a spicy kick that’ll wake up your taste buds!
-
Protein Swap: Trade out the chicken for grilled shrimp, steak, or even tofu for a yummy vegetarian option.
-
Herb Infused: Mix in fresh herbs like basil, parsley, or cilantro to brighten the flavors and give your salad a fresh twist.
-
Whole Grain Variation: Swap the rotini for whole grain or gluten-free pasta for a healthier, nutritious option.
Chef’s Notes
Oh, the memories I’ve created around this dish! I’ve seen it evolve over time, too. Initially, it was just a simple recipe from my grandma’s kitchen, but over the years, it morphed into this vibrant, crowd-pleasing sensation. As I cooked it for various family gatherings and potlucks, I started experimenting with ingredients, which led me to discover new favorites.
And here’s a quirky story: one summer, I tried adding strawberries for a touch of sweetness, which surprisingly worked well! I learned that flavors could dance together in unexpected ways—proof that cooking is as much about joy and exploration as it is about following the rules.
FAQs and Troubleshooting
Here are a few common questions about this recipe, along with some troubleshooting tips:
-
Can I make this salad ahead of time?
Absolutely! You can prep everything the day before but keep the croutons and dressing separate until just before serving to maintain their crunch. -
What if my pasta is too soggy?
Overcooked pasta can be a bummer. Always remember to cook it al dente and rinse it cold immediately after cooking to stop the cooking process. -
What if I can’t find Caesar dressing?
You can easily whip up a homemade dressing with olive oil, garlic, lemon juice, mustard, and grated Parmesan. Just blend it all together, and you’re golden! -
How do I store leftovers?
Store any leftovers in an airtight container in the fridge for up to 3 days. Just know that the pasta will soak up the dressing, so it may dry out a bit—adding a little extra dressing before serving can help revive it.
Nutritional Info
Now, let’s breakdown some of the nutritional goodness packed in this dish. A serving of Chicken Caesar Pasta Salad (approximately 1 cup) typically contains:
- Calories: About 400-500, depending on the dressing and chicken used.
- Protein: A hearty 30g thanks to the chicken.
- Carbohydrates: Roughly 40g, giving you the energy boost you need.
- Fats: Healthy fats from olive oil and cheese, around 20g.
This dish has a great balance and can be tailored to your dietary needs. Swap out the pasta for a veggie alternative or load up on additional leafy greens if you’re looking to lighten it up!
Final Thoughts
There you have it, folks—my beloved Chicken Caesar Pasta Salad! A dish with a cozy heart that balances the delights of flavor, texture, and nostalgia. Whether you’re swinging by for a casual Saturday lunch or bringing a dish to share, this salad is more than a meal; it’s a celebration of good times and togetherness.
So give it a whirl, make it your own, and share the love! Remember, cooking is about having fun, experimenting, and creating memories with those around you. Until next time, happy cooking and share your delicious moments!
Grab your fork and dig in—it’s time for some feastical fun!
Print
Chicken Caesar Pasta Salad
- Total Time: 45 minutes
- Yield: 4 servings 1x
- Diet: None
Description
A delightful fusion of robust rotini pasta, crunchy romaine lettuce, tender shredded chicken, Parmesan cheese, and croutons, all tossed in creamy Caesar dressing.
Ingredients
- 2 stalks of romaine lettuce
- 1 cup cooked chicken (shredded)
- 1/2 cup shredded Parmesan cheese
- 1 cup uncooked rotini (or your favorite pasta noodle)
- 1 cup croutons
- 1 cup Caesar dressing
- Ground black pepper (optional)
Instructions
- Cook the Pasta: Start by bringing a pot of salted water to a boil. Add in your rotini (or chosen pasta) and cook according to the package instructions until al dente, about 8-10 minutes. Drain and rinse with cold water.
- Prepare the Chicken: If using leftover chicken, shred it with two forks. If cooking fresh chicken, season, grill, or sauté until fully cooked, then shred.
- Chop the Lettuce: Rinse your romaine lettuce, dry it, and chop it into bite-sized pieces.
- Mix It All Together: In a big bowl, combine cooked rotini, shredded chicken, chopped romaine, croutons, and Parmesan. Drizzle in the Caesar dressing.
- Toss and Taste: Gently toss everything together until combined. Adjust dressing and add ground black pepper if desired.
- Chill Out: Cover the salad and refrigerate for at least 30 minutes to allow flavors to meld and keep lettuce crisp.
Notes
Serve chilled or at room temperature. Feel free to add extra ingredients like cherry tomatoes or sliced cucumbers for variation.
- Prep Time: 15 minutes
- Cook Time: 10 minutes
- Category: Salad
- Method: Mixing
- Cuisine: American
Nutrition
- Serving Size: 1 cup
- Calories: 450
- Sugar: 2g
- Sodium: 800mg
- Fat: 27g
- Saturated Fat: 9g
- Unsaturated Fat: 12g
- Trans Fat: 0g
- Carbohydrates: 38g
- Fiber: 3g
- Protein: 30g
- Cholesterol: 75mg
Keywords: Chicken Caesar Pasta Salad, summer salad, easy pasta salad, healthy meal prep

Kale Caesar Pasta Salad
Kale Caesar Pasta Salad: A Delicious Twist on a Classic Favorite
Hey there, foodies! Today, I’m thrilled to share one of my all-time favorite recipes that is bound to become a staple in your kitchen—the Kale Caesar Pasta Salad! If you’re anything like me, there’s nothing more satisfying than a dish that strikes the perfect balance between comfort food and freshness. Think classic Caesar salad meets al dente pasta, and you’ve got this mouthwatering combination that’s not just a salad; it’s a full-on meal!
Now, I know what you might be thinking: “Can a salad really be a meal?” Absolutely! This Kale Caesar Pasta Salad packs all the flavor of a creamy Caesar dressing with that satisfying chew of pasta, complemented by the hearty goodness of kale. So whether you’re prepping for a family gathering, a light weeknight dinner, or just wanting to treat yourself to something special, you’re in for a real treat today.
Trust me, this recipe is the perfect way to incorporate a bit of green into your diet without sacrificing taste. Plus, with just a few simple ingredients, you can whip this up in no time. So, grab your favorite apron, and let’s dive into the culinary adventure of Kale Caesar Pasta Salad.
Personal Story
This recipe brings back fond memories of college days when my friends would gather around my tiny kitchen to whip up something delicious. We had a little ‘potluck’ tradition where we’d each bring our own spin on traditional dishes, and one day, I decided to take the humble Caesar salad and jazz it up with pasta and kale. The idea was met with skepticism at first—how could you mess with such a beloved classic? But after a few bites of this creamy, tangy, and satisfying salad, the tune changed!
Everyone was raving about it, asking for the recipe and taking home leftovers. It was heartwarming to see how food could bring a group of friends together, and this dish quickly became a highlight of those evenings. Ever since, I’ve been making this Kale Caesar Pasta Salad for gatherings and family meals, always hearing the same delightful response: “I didn’t know I needed this in my life!”
Ingredients
Let’s gather up our ingredients! Here’s what you’ll need to create this fabulous Kale Caesar Pasta Salad:
-
8 oz Pasta (like rotini or penne)
This forms the hearty base of your salad. Rotini’s spirals are great for holding onto that Caesar dressing, while penne gives a delightful chew. You can swap with whole wheat or gluten-free pasta if preferred. -
2 cups Chopped Kale
Kale is not just a trendy superfood; it adds a lovely crunch and nutritious kick to your salad. If kale isn’t your thing, feel free to substitute it with baby spinach or arugula. -
1/4 cup Caesar Salad Dressing
Go for your favorite brand, or whip up a homemade version if you’re feeling adventurous! For a lighter touch, consider low-fat dressing or a yogurt-based option. -
1/4 cup Grated Parmesan Cheese
Parmesan brings a salty, nutty flavor that elevates your pasta salad. Pecorino Romano is a great alternative for a sharper taste. -
1/4 cup Croutons
These are a must for that irresistible crunch! You can use store-bought croutons or make your own by toasting leftover bread with a bit of oil and seasonings. -
Salt and Pepper to Taste
Never underestimate the power of seasoning! A pinch of salt and pepper ties all the flavors together. -
Lemon Wedges for Serving (optional)
A squeeze of fresh lemon juice can brighten the entire dish, offering a zesty freshness against the creamy dressing.
Step-by-Step Instructions
Now that we have our ingredients ready, let’s dive into making the Kale Caesar Pasta Salad!
Step 1: Cook the Pasta
Start by bringing a large pot of salted water to a rolling boil. Off to a great start, right? Adding salt not only flavors the pasta but also ensures it doesn’t turn out bland. Toss in your 8 oz of pasta (rotini or penne works like a charm) and cook according to the package instructions until al dente. Typically, this will take about 8-10 minutes. Make sure to stir occasionally to keep the pasta from sticking together.
Chef’s Tip: Save a ladle of pasta water before draining. If your salad needs a bit of creaminess later, a splash of this starchy water can help loosen the dressing.
Step 2: Prepare the Kale
While your pasta is cooking, let’s give that kale some love. Rinse it under cold water, then chop it into bite-sized pieces. If you’ve got tougher stems, feel free to discard them.
Chef’s Tip: Massaging the kale with a splash of olive oil and a pinch of salt helps to soften it and reduce its bitterness. Just use your hands to work the leaves gently for a minute or so.
Step 3: Combine Ingredients
In a large mixing bowl, combine the cooked pasta (make sure you’ve drained and rinsed it under cold water to stop the cooking process) and your prepared kale. Pour in the 1/4 cup of Caesar dressing and mix until everything is well-coated.
If you used that pasta water we saved, this is where you might want to add just a splash. It can add additional creaminess and help everything marry beautifully.
Step 4: Add Cheese and Seasoning
Sprinkle in the 1/4 cup of grated Parmesan cheese. It’s time to add some flavor! Season with salt and pepper to taste. Give it a gentle toss to ensure everything is evenly combined.
Chef’s Tip: For extra flavor, consider adding in some fresh herbs like chopped parsley or basil at this stage.
Step 5: Crunch It Up!
Just before serving, toss in those crispy 1/4 cup of croutons. This will preserve their crunchiness, making each bite satisfying and delightful.
Step 6: Serve
Plate your delicious kale Caesar pasta salad and garnish with additional Parmesan if desired. A wedge of lemon on the side doesn’t hurt either—it’s a lovely touch to brighten everything up.
Serving Suggestions
When it comes to serving this Kale Caesar Pasta Salad, presentation is key to making your dish look as good as it tastes.
-
Family Style: Serve it in a large clear bowl to show off the vibrant greens and creamy dressing. Providing spoons or forks for everyone to serve themselves is a great communal way to share the love.
-
Individual Bowls: For more of a restaurant vibe, portion out the salad into individual bowls. Adding croutons just before serving ensures that they remain crispy; nobody enjoys soggy croutons!
-
Toppings and Extras: Feel free to sprinkle on extra cheese or add grilled chicken, shrimp, or chickpeas on top to elevate this into a more filling meal.
Recipe Variations
Here are some fun, creative twists to make this Kale Caesar Pasta Salad uniquely yours:
-
Protein Power-Up: Add diced grilled chicken, shrimp, or chickpeas to bump up the protein content. This makes for a heartier meal and is perfect for meal prep!
-
Tangy Twist: Why not spice things up a bit? Add a spoonful of Dijon mustard to your Caesar dressing for a zesty punch or drizzle in sriracha if you like it hot!
-
Pasta Swap: Try using whole grain pasta or a legume-based pasta for a fiber boost. Quinoa or farro can also be fantastic alternatives if you’re looking to experiment beyond traditional pasta.
-
Veggie Lovers: Add other vegetables like cherry tomatoes, cucumbers, or bell peppers. These not only add color but also crunch and freshness!
-
Dairy-Free Option: Replace traditional Caesar dressing with a vegan version made from cashews or tahini. Nutritional yeast can be a perfect substitute for the Parmesan cheese for that nutty kick!
Chef’s Notes
I’ve been making this Kale Caesar Pasta Salad for years, and it has truly evolved over time depending on what’s fresh and available. I’ve tossed in roasted veggies, grilled eggplant, and even various nuts for crunch. It’s become one of those “clean out the fridge” recipes, which I adore!
One time, I accidentally left out the cheese, thinking I was out. To my surprise, the salad was still a hit – my friends loved it! It goes to show that this recipe is flexible and can adapt to whatever you have on hand. But don’t worry; I still recommend the cheese for that classic Caesar flavor!
FAQs and Troubleshooting
1. What if my pasta is too mushy?
If the pasta is overcooked, it can lead to a mushy salad. Make sure you cook the pasta al dente; it should have a slight bite to it. Rinse under cold water after cooking to stop the cooking process.
2. Can I make this salad in advance?
Yes! You can prepare elements like the pasta and kale ahead of time. Just wait to add the dressing and croutons until you’re ready to serve to keep everything fresh.
3. Why is my dressing too thick?
If you find your Caesar dressing is a little thick, just add a tiny bit of olive oil, water, or some reserved pasta water until you reach your desired consistency.
4. How long does this salad last in the fridge?
This salad is best enjoyed fresh, but you can store leftovers in an airtight container for 1-2 days. Just keep in mind that the croutons will lose their crunch.
Nutritional Info
While the specific nutritional values will depend on the brands and quantities you use, here’s a general breakdown for a serving of Kale Caesar Pasta Salad:
- Calories: Approximately 350-400
- Protein: 12-15g
- Carbohydrates: 45g
- Fiber: 5-7g
- Fat: 18g
This recipe is rich in vitamins A and K from the kale, not to mention providing a good dose of calcium from the Parmesan cheese. The addition of protein can vary depending on what you choose, making it customizable according to your dietary needs!
Final Thoughts
And there you have it, friends—a delightful, satisfying Kale Caesar Pasta Salad that’s perfect for any occasion and packed with flavor and nourishment. By now, you can probably taste that creamy dressing and feel the crunch of those croutons—am I right?
I encourage you to make this recipe your own, adding your flair and experimenting with different ingredients. Cooking should always be fun and adventurous! So gather your loved ones, set the table, and let the good times roll. Here’s to bringing people together, one delicious meal at a time.
Happy cooking, and until next time, keep it simple, soulful, and always satisfying! Let me know in the comments how your version turned out. I can’t wait to hear from you!
Feel free to print this recipe out, put a Post-it note on it with any substitutions or tweaks you’ve made, and get ready to enjoy some tasty Kale Caesar Pasta Salad goodness! 🍽️
Print
Kale Caesar Pasta Salad
- Total Time: 20 minutes
- Yield: 4 servings 1x
- Diet: Vegetarian
Description
A delicious blend of classic Caesar salad flavors with al dente pasta and kale, making it a satisfying meal.
Ingredients
- 8 oz Pasta (like rotini or penne)
- 2 cups Chopped Kale
- 1/4 cup Caesar Salad Dressing
- 1/4 cup Grated Parmesan Cheese
- 1/4 cup Croutons
- Salt and Pepper to Taste
- Lemon Wedges for Serving (optional)
Instructions
- Cook the Pasta: Bring a large pot of salted water to a boil, and cook the pasta according to the package instructions until al dente (8-10 minutes). Stir occasionally to prevent sticking.
- Prepare the Kale: Rinse and chop the kale into bite-sized pieces. Massage with olive oil and salt to soften.
- Combine Ingredients: In a large bowl, combine the cooked pasta and kale, add Caesar dressing and mix well.
- Add Cheese and Seasoning: Sprinkle grated Parmesan cheese and season with salt and pepper to taste. Toss to combine.
- Crunch It Up: Just before serving, add croutons to preserve their crunch.
- Serve: Plate the salad and garnish with extra Parmesan and lemon wedges if desired.
Notes
You can enhance the salad by adding grilled chicken, shrimp, or chickpeas for extra protein.
- Prep Time: 10 minutes
- Cook Time: 10 minutes
- Category: Salad
- Method: Mixing
- Cuisine: American
Nutrition
- Serving Size: 1 serving
- Calories: 375
- Sugar: 2g
- Sodium: 350mg
- Fat: 18g
- Saturated Fat: 6g
- Unsaturated Fat: 10g
- Trans Fat: 0g
- Carbohydrates: 45g
- Fiber: 5g
- Protein: 12g
- Cholesterol: 20mg
Keywords: Kale, Pasta Salad, Caesar Dressing, Healthy Salad, Quick Meal

This sensational summer salad has baked coconut chicken tenders, fresh pineapple, macadamia nuts, and a cr…
Sensational Summer Salad: Baked Coconut Chicken Tenders with Pineapple and Macadamia Nuts
Hey there, food friends! 🌞 Welcome back to Feastical, your go-to spot for some mouthwatering feel-good food. Today, we’re diving into a delicious recipe that’s perfect for summertime: a vibrant salad featuring crispy baked coconut chicken tenders, juicy fresh pineapple, and crunchy macadamia nuts.
What’s not to love about this dish? It’s light, refreshing, and oh-so-fulfilling! The combination of tender chicken, tropical flavors, and nutty bites will take your taste buds on a mini-vacation. Whether you’re lounging by the pool, hosting a backyard barbecue, or looking for a no-fuss dinner to enjoy after a long day, this sensational summer salad will fit the bill.
As the weather warms up, we all want to celebrate the season with fresh ingredients that nourish both body and soul. And let me tell you, this salad does just that! Not to mention, it’s a great way to sneak in some extra veggies (and let’s face it, who doesn’t want an excuse to pile on the goodness?). So grab your favorite salad bowl and let’s get started on this culinary adventure that promises smiles, laughs, and flavors galore!
Personal Story
Let me take you back to a sun-soaked summer many years ago. I remember it like it was yesterday: family gatherings, laughter ringing through the air, and all of us huddled around the picnic table in our backyard. A distant tropical vibe filled the atmosphere as my aunt Lila set out her famous coconut chicken salad. Instantly, the smell of crispy chicken, fresh fruit, and the tropical scent of coconut took over.
I’ll never forget the first bite I took. The sweetness of the coconut paired with juicy bites of pineapple transported me straight to a beach in Hawaii, even though I was simply surrounded by my loved ones and our trusty grill. That salad became a staple at every family reunion; it brought us together as we swapped stories, teased each other, and created unforgettable memories.
Since then, I’ve put my own spin on that original dish, crafting it into the sensational salad I’m sharing with you today. It’s a reminder that food isn’t just about sustenance; it’s about connection, nostalgia, and creating those warm, fuzzy feelings that linger long after the meal is over. So let’s bring a slice of that memory into your kitchen!
Ingredients
Now, let’s bring this exciting dish to life! Here’s what you’ll need for your sensational summer salad:
-
Chicken tenders (1 lb): Go for boneless, skinless tenders for easy cooking. If you can’t find tenders, you can use chicken breasts cut into strips for a similar effect.
-
Unsweetened shredded coconut (1 cup): This is the star of the show! It’ll give your chicken some serious crunch and that lovely tropical flavor. If you’re looking for a healthier option, you can swap it for panko breadcrumbs.
-
Panko breadcrumbs (½ cup): They help give that extra crunch. If you’re aiming for gluten-free goodness, use gluten-free breadcrumbs.
-
Egg (1 large): This will help the coconut and panko stick to your chicken. Vegan? Use a flax or chia egg instead.
-
Fresh pineapple (1 cup, cubed): The juicy sweetness of fresh pineapple can’t be beaten. If fresh isn’t available, canned pineapple can work—just make sure it’s packed in juice and well-drained.
-
Macadamia nuts (½ cup, chopped): Their rich flavor will balance out the sweetness of the pineapple. Don’t have macadamia nuts on hand? Use cashews or even toasted almonds for a different flair.
-
Mixed greens (4 cups): A blend of baby spinach, arugula, and romaine makes a wonderful base. You can substitute with any greens you prefer, like kale or a simple spring mix.
-
Olive oil (2 tablespoons): This adds a subtle richness to the salad. You can swap it with avocado oil for a twist.
-
Honey (1 tablespoon): Just a touch of sweetness—feel free to substitute with agave syrup or maple syrup.
-
Lime juice (2 tablespoons): Freshly squeezed lime juice brings everything together. If you’re in a pinch, bottled lime juice will work but use fresh if you can!
-
Salt and pepper to taste: Always season to bring out the flavors!
Ingredient Insights
-
Chicken Tenders: Chicken tenders are juicier and cook faster than larger cuts. Plus, they’re easier to manage in salads!
-
Coconut: Make sure to use unsweetened shredded coconut, which won’t overpower the dish with sweetness.
-
Pineapple: Fresh pineapple adds vibrant flavor, but consider caramelizing it for an extra smokiness!
-
Nuts: Feel free to experiment with nuts. Toasting them beforehand can elevate flavors even further.
Step-by-Step Instructions
-
Preheat Your Oven: Start by preheating your oven to 400°F (200°C). This ensures those coconut chicken tenders will get nice and crispy!
-
Prepare the Chicken:
- In one bowl, beat the egg; in another bowl, mix the shredded coconut and panko breadcrumbs. Remember, the more coconut, the merrier!
- Dip each chicken tender into the egg, allowing any excess to drip off, and then coat it with the coconut-panko mixture. Press gently to ensure the coating sticks well. Place them on a baking sheet lined with parchment paper.
-
Bake the Chicken: Bake the chicken tenders for 15-20 minutes, flipping them halfway through. They should be golden brown and cooked through (internal temperature should be 165°F). If you want an extra crispy result, broil them for the last minute or so—but keep an eye on them to avoid burning!
-
Prep the Pineapple and Greens: While the chicken is baking, chop your fresh pineapple into bite-sized pieces. Toss your mixed greens into a large salad bowl.
-
Prepare the Dressing: In a small bowl, whisk together the olive oil, honey, lime juice, salt, and pepper. I love using a mason jar for this—just put the lid on and shake!
-
Assemble the Salad:
- Once the chicken is done baking, let it cool slightly. Then slice it into bite-sized pieces.
- Add the pineapple, chicken pieces, and macadamia nuts to the bowl of greens.
- Drizzle the dressing over the salad and toss gently to coat all the ingredients in that zesty goodness.
-
Plate It Up: Serve your salad in large bowls or share it on a platter for everyone to dig in! Garnish with a few extra macadamia nuts and a twist of lime for that eye-catching look.
Serving Suggestions
Presentation matters! Arrange the salad artistically to wow your family or friends. Place a generous scoop of the salad in the center of your plate and layer the chicken on top for height and color. You can also sprinkle some additional shredded coconut or a bit of chopped fresh cilantro over the salad for that visually appealing pop of color and freshness.
For an extra special touch, serve this salad with a side of warm, crusty bread or alongside a refreshing summer drink like iced tea or lemonade—it’ll be a meal to remember!
Recipe Variations
Get ready to unleash your creativity because the possibilities are endless with this salad!
- Spicy Twist: Add jalapeños or a drizzle of sriracha to the dressing for a kick!
- Asian Flair: Substitute the pineapple with mandarin oranges and toss in some sesame seeds.
- Herbed Chicken: Before coating the chicken, marinate it in a mixture of lime juice, cilantro, and garlic for added flavor depth.
- Fruit Fusion: Swap the pineapple for mango or both for a tropical medley!
- Vegan Delight: Use tofu or tempeh instead of chicken, and the rest remains the same—just ensure to use plant-based alternatives for honey.
Chef’s Notes
Food has a wonderful way of evolving over time, doesn’t it? I’ve turned this dish from a nostalgic family favorite into a versatile recipe that can flex to suit any occasion or palate. I’ve experimented with flavors, and I often find joy in inviting friends over for a cook-off, where we put our own spin on this salad.
One time, a friend tried adding grilled peaches instead of pineapple, and let me tell you—it blew my mind! Give it a shot, and don’t be afraid to make this recipe uniquely yours. Trust me; the kitchen is a playground, and it should be tons of fun!
FAQs and Troubleshooting
Q1: What if my chicken tenders don’t get crispy?
- A1: Make sure to coat them well in the coconut and panko mixture. Also, ensure your oven is fully preheated. If they still aren’t crispy, try broiling for the last minute, but keep a close eye!
Q2: Can I prep this salad ahead of time?
- A2: You can prepare the chicken in advance and store it in the fridge. Just assemble the salad right before serving to keep the greens fresh and crispy.
Q3: How can I store leftovers?
- A3: It’s best to store the chicken and salad separately to maintain texture. Keep the chicken in an airtight container for up to 3 days and the salad in another, but enjoy it within a day for freshness!
Q4: Can I make this entirely gluten-free?
- A4: Absolutely! Just make sure your breadcrumbs are gluten-free and use coconut flour if you want a crispy coating instead.
Nutritional Info
(Approximate per serving with 4 servings)
- Calories: 430
- Protein: 28g
- Fat: 25g
- Carbohydrates: 31g
- Fiber: 3g
- Sugar: 4g
This salad is not just a summer treat; it’s a balanced meal packed with protein, healthy fats, and vibrant fruits and veggies!
Final Thoughts
So there you have it, my friends! A sensational summer salad that’s bound to be a hit, whether you’re gathered with family or enjoying a quiet dinner at home. As we savor the flavors of summer, let’s also remember the joy of cooking and sharing meals. This salad speaks to everything I adore about good food: simplicity, flavor, and togetherness.
I hope you join me in making this dish and enjoy every bite together with the ones you love most. Stay tuned for more delicious recipes right here at Feastical, where every meal tells a story! Now, go whip this one up and make some spicy summer memories. 🍍🥗
Until next time, happy cooking!
Print
Sensational Summer Salad: Baked Coconut Chicken Tenders with Pineapple and Macadamia Nuts
- Total Time: 35 minutes
- Yield: 4 servings 1x
- Diet: Gluten-Free
Description
A vibrant salad featuring crispy baked coconut chicken tenders, juicy pineapple, and crunchy macadamia nuts, perfect for summer.
Ingredients
- 1 lb boneless, skinless chicken tenders
- 1 cup unsweetened shredded coconut
- ½ cup panko breadcrumbs
- 1 large egg
- 1 cup fresh pineapple, cubed
- ½ cup macadamia nuts, chopped
- 4 cups mixed greens
- 2 tablespoons olive oil
- 1 tablespoon honey
- 2 tablespoons lime juice
- Salt and pepper to taste
Instructions
- Preheat your oven to 400°F (200°C).
- Prepare the chicken: In one bowl, beat the egg; in another bowl, mix the shredded coconut and panko breadcrumbs. Dip each chicken tender into the egg, coat it with the coconut-panko mixture, and place on a baking sheet lined with parchment paper.
- Bake the chicken tenders for 15-20 minutes, flipping halfway through.
- Prep the pineapple by chopping it into bite-sized pieces, and toss the mixed greens into a large salad bowl.
- Prepare the dressing by whisking together olive oil, honey, lime juice, salt, and pepper.
- Assemble the salad by adding the pineapple, chicken, and macadamia nuts to the greens. Drizzle with dressing and toss gently.
- Plate the salad and garnish with extra macadamia nuts and a twist of lime.
Notes
For extra crunch, broil the chicken tenders for the last minute. You can substitute chicken with tofu or tempeh for a vegan version.
- Prep Time: 15 minutes
- Cook Time: 20 minutes
- Category: Salad
- Method: Baking
- Cuisine: Tropical
Nutrition
- Serving Size: 1 serving
- Calories: 430
- Sugar: 4g
- Sodium: 300mg
- Fat: 25g
- Saturated Fat: 5g
- Unsaturated Fat: 15g
- Trans Fat: 0g
- Carbohydrates: 31g
- Fiber: 3g
- Protein: 28g
- Cholesterol: 150mg
Keywords: summer salad, coconut chicken, tropical salad, light meal, healthy salad
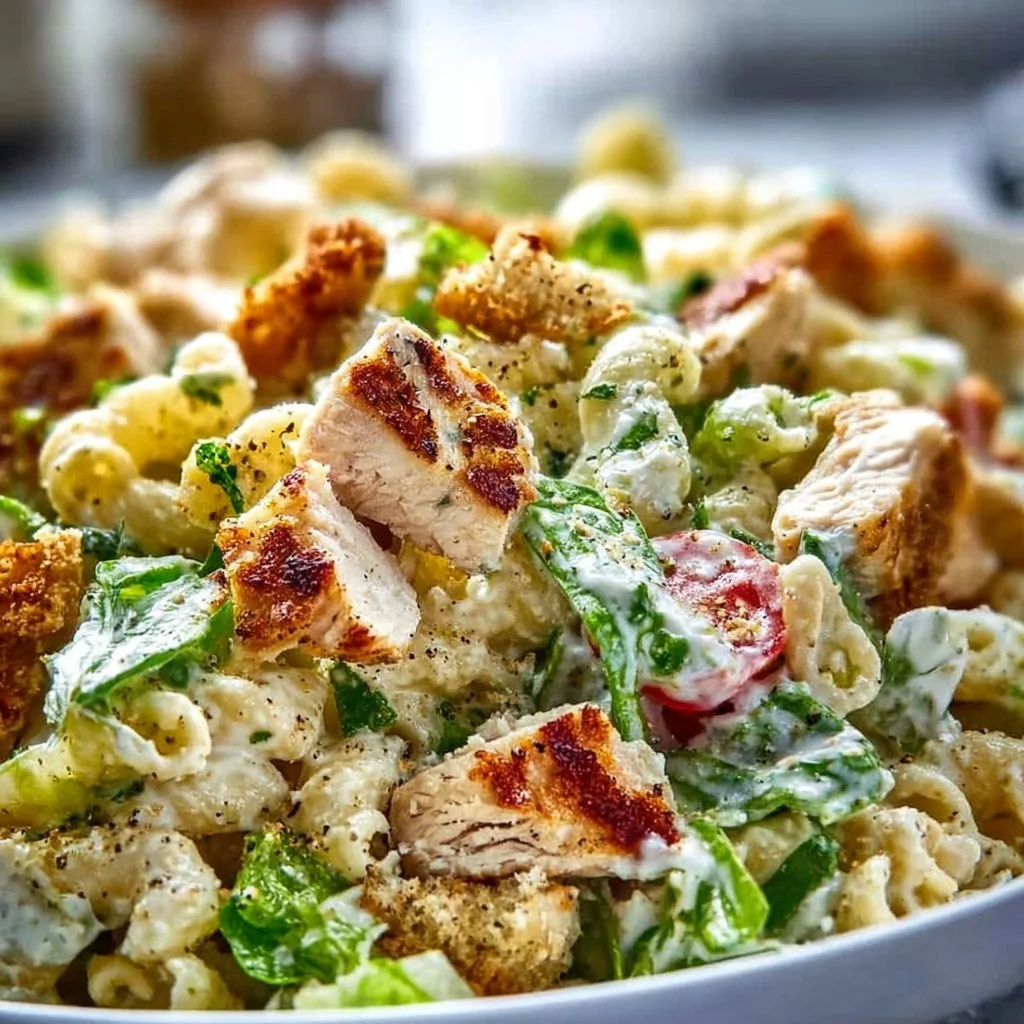
Chicken Caesar Pasta Salad
The Ultimate Chicken Caesar Pasta Salad: A Flavorful Toss of Comfort and Freshness
Hey there, food lovers! Welcome back to the virtual kitchen here at Feastical! Today, I’m thrilled to share one of my all-time favorite recipes: Chicken Caesar Pasta Salad. It’s easy to whip up, packed with flavor, and brings a delightful twist to the classic Caesar salad. Whether you’re hosting a summer cookout, packing lunch for work, or just craving a salad that feels like a meal, you’re in for a treat!
Imagine this: It’s a sunny Sunday afternoon, the kind of day that beckons you outside. The grill is sizzling with juicy chicken, the laughter of friends fills the air, and there’s a spread of vibrant dishes all around. We’re talking colorful salads, warm, crusty bread, and sweet treats—in short, a feast of epic proportions! It’s in moments like these that I find cooking, and sharing food, is not just a necessity but a way to connect with those we care about.
Today, I’m excited to combine two favorites—pasta and Caesar salad—into one irresistible dish. Chicken Caesar Pasta Salad perfectly marries the hearty fullness of pasta with the classic, creamy Caesar dressing and the crunch of fresh veggies. Whether you’re a kitchen pro or a newbie just figuring out the difference between a spatula and a ladle, this dish is approachable, fun to make, and delightful to devour. Plus, it’s a total crowd-pleaser!
So, grab your apron, let’s dive into this deliciously easy recipe, and create a bowl of Chicken Caesar Pasta Salad that’ll have everyone asking for seconds. Ready? Let’s dig in!
Personal Story
This recipe holds a special place in my heart. I remember the first time I made it for my family picnic— a hazy summer day filled with sunshine and laughter. It was my unofficial debut as a "chef," and I definitely had my fair share of kitchen mishaps leading up to that moment!
I learned by watching my grandmother whip up her famous Caesar salad with just the right amount of anchovies and lemon, making it burst with flavor. One day, I thought, “Why not take it up a notch and toss in some pasta?” I rushed to the kitchen, tossing ingredients together like I was preparing for a cooking competition. My excitement morphed into panic when I discovered I didn’t have anchovies in the fridge (oops!). But, thankfully, the Caesar dressing I had saved the day, and my Chicken Caesar Pasta Salad was born!
Everyone at the picnic couldn’t stop complimenting me (which was a huge confidence boost!), and I knew I had created something special. Every bite brought the nostalgic taste of summer gatherings and made memories that I cherish. This dish is not just a recipe; it’s a delicious memory that I love to re-create and share with friends, old and new!
Ingredients
Gathering ingredients for Chicken Caesar Pasta Salad is half the fun! Here’s what you’ll need:
-
8 oz of pasta (rotini or fusilli): These shapes hold the dressing well and give a delightful bite. Feel free to swap with gluten-free pasta or whole wheat for a healthier option!
-
2 cups cooked chicken breast, diced: A great way to use leftover chicken! For an exotic twist, try grilled or lemon pepper chicken.
-
1 cup romaine lettuce, chopped: Adds crunch and freshness. If you’re feeling adventurous, toss in some spinach or kale for added nutrients!
-
1/2 cup cherry tomatoes, halved: These little gems add a burst of sweetness. You can also use sun-dried tomatoes or roasted peppers if you prefer a different flavor profile.
-
1/4 cup Parmesan cheese, grated: The traditionally paired cheese with Caesar. For a dairy-free option, try nutritional yeast or leave it out entirely!
-
1/2 cup Caesar dressing: You can go store-bought or homemade. If you’re short on time, grab your favorite brand—just make sure it’s creamy!
-
Salt and pepper to taste: Essential seasonings! Always taste your dish as you go to find that perfect balance.
In my cookbook, I always note that choosing good ingredients can transform an ordinary dish into something extraordinary. So, don’t hesitate to seek fresh, high-quality products for the best results.
Step-by-Step Instructions
Let’s get cooking! Here’s how to make your Chicken Caesar Pasta Salad:
-
Cook the Pasta:
- Bring a large pot of salted water to a boil. Once boiling, add the rotini or fusilli pasta. Cook according to the package instructions, usually around 8-10 minutes for al dente.
- Chef Tip: The key here is to avoid overcooking. You want that perfect chewy bite! Once cooked, drain the pasta and rinse under cold water to halt the cooking process. This also helps prevent it from sticking together.
-
Prepare the Chicken:
- While the pasta is cooking, dice your cooked chicken breast into bite-sized pieces. If you’re using leftover chicken, be sure it’s thoroughly heated (but not dry!).
- Chef Hack: For an extra layer of flavor, toss the chicken with a splash of lemon juice or a sprinkle of garlic powder before adding it to the salad!
-
Chop the Veggies:
- Take your fresh romaine lettuce and chop it into bite-sized pieces. Slice your cherry tomatoes in half to release their juices and sweetness.
- Pro Tip: A sharp knife is your best friend in the kitchen—not only is it safer to use, but you’ll also create even bites.
-
Mix It All Together:
- In a large mixing bowl, combine the cooked pasta, diced chicken, chopped romaine, and halved cherry tomatoes.
- In a separate bowl, whisk together the Caesar dressing and a pinch of salt and pepper to taste. Don’t skip this step! This allows you to control the dressing’s flavor and consistency.
-
Toss and Garnish:
- Pour the creamy dressing over the pasta mixture and toss gently until everything is well-coated with that luscious, garlicky, tangy goodness.
- Finally, sprinkle the grated Parmesan cheese over the top and give one last gentle toss.
- Cooking Hack: If you like a cheesy bite, reserve a little Parmesan for garnishing before serving!
And there you have it! A colorful, hearty Chicken Caesar Pasta Salad ready to impress!
Serving Suggestions
Now, let’s talk about how to present this vibrant dish. Visual appeal is key, after all!
-
Plating: Transfer the salad to a large serving bowl and garnish with additional Parmesan cheese, fresh herbs (like parsley or basil), and if you’re fancy, a sprinkle of black pepper or a drizzle of olive oil for extra shine.
-
Individual Portions: Serve in clear mason jars for a fun, portable option! Layering the ingredients adds a pop of color and makes for a cute picnic or lunch presentation.
-
Sides: Pair your Chicken Caesar Pasta Salad with some crusty garlic bread or chips for a delightful crunch. A cold beverage like lemonade or iced tea rounds out the meal beautifully.
Recipe Variations
Feeling adventurous? Here are a few creative twists you can try for your Chicken Caesar Pasta Salad:
-
Spicy Kick: Add a pinch of red pepper flakes to your Caesar dressing or toss in some sliced jalapeños for a spicy twist!
-
Mediterranean Flair: Swap out the chicken for grilled shrimp and mix in Kalamata olives and feta cheese for a Mediterranean-inspired salad.
-
Veggie Delight: For a vegetarian version, replace chicken with roasted chickpeas and add bell peppers, cucumbers, and any of your favorite veggies!
-
Grain Swap: Use quinoa or farro instead of pasta for a healthful alternative that’s high in protein and fiber.
-
Dressing Switch-Up: Experiment with different dressings—how about ranch, blue cheese, or a zesty vinaigrette? The possibilities are endless!
Chef’s Notes
This Chicken Caesar Pasta Salad has evolved over the years in my kitchen. I started with the basic elements, but every time I make it, I’m inspired to add something fresh or seasonal. One of my funniest kitchen moments happened when I realized I’d forgotten to buy salad dressing! With a few pantry staples, I mixed up a quick homemade version, and it ended up becoming a staple in my house ever since.
It’s funny how cooking can lead to unexpected creations—sometimes, those happy accidents become your favorites! Now, I love to keep experimenting with flavors. Cooking should be fun, so don’t hesitate to embrace your inner chef and get creative!
FAQs and Troubleshooting
Q1: What if my pasta is too sticky?
A: Toss it with a drizzle of olive oil after draining and rinsing. This will help separate the pasta and add a nice flavor!
Q2: Can I make this salad ahead of time?
A: Absolutely! Prepare the ingredients separately, then combine them before serving. This keeps the lettuce crisp and prevents sogginess.
Q3: How can I make this gluten-free?
A: Simply use gluten-free pasta and ensure your dressing is also gluten-free. Many brands offer fantastic options that keep the flavor intact.
Q4: My dressing was too thick; how can I fix it?
A: You can thin out your dressing by whisking in a touch of water, lemon juice, or extra olive oil. This’ll give you that perfect pourable consistency!
Nutritional Info
While exact nutritional values can vary based on the specific ingredients and portion sizes you choose, here’s a general idea of what you’re getting with this Chicken Caesar Pasta Salad:
- Calories: Approximately 350 per serving (for a serving of about 1.5 cups)
- Protein: Around 30g, thanks primarily to the chicken
- Carbs: Roughly 40g—mainly from pasta and veggies
- Fat: About 15g, including the healthy fats from the dressing and cheese
- Vitamins & Minerals: A good source of vitamin A, vitamin C, calcium, and iron from fresh veggies and cheese.
Feel free to modify your ingredient choices to adjust this to your dietary preferences!
Final Thoughts
I hope you’re as excited to dive into this Chicken Caesar Pasta Salad as I am! It’s a versatile dish that embraces the heart of home cooking—comforting, flavorful, and always made with love. With every bite, you’ll taste the warmth of good times shared around the table.
If you try this recipe (and I hope you do!), be sure to take a picture and tag me on social media—I’d love to see your creations! Now get out there, gather your ingredients, channel your inner chef, and make your kitchen the heart of your home. Until next time, happy cooking, and remember: food tastes better when shared with the people you love. 🍽️💖
So, are you ready to share some tasty memories? Let’s get cooking! 🥗✨
Print
Chicken Caesar Pasta Salad
- Total Time: 25 minutes
- Yield: 4 servings 1x
- Diet: Balanced
Description
A delightful twist on the classic Caesar salad, this Chicken Caesar Pasta Salad combines hearty pasta with fresh veggies and creamy dressing, perfect for summer cookouts or lunch.
Ingredients
- 8 oz rotini or fusilli pasta
- 2 cups cooked chicken breast, diced
- 1 cup romaine lettuce, chopped
- 1/2 cup cherry tomatoes, halved
- 1/4 cup grated Parmesan cheese
- 1/2 cup Caesar dressing
- Salt and pepper to taste
Instructions
- Cook the pasta: Bring a large pot of salted water to a boil. Add the pasta and cook according to package instructions (8-10 minutes for al dente). Drain and rinse under cold water.
- Prepare the chicken: Dice cooked chicken breast into bite-sized pieces. If using leftover chicken, ensure it’s heated.
- Chop the veggies: Chop romaine lettuce and halve cherry tomatoes.
- Mix it all together: In a large bowl, combine cooked pasta, chicken, lettuce, and tomatoes. In a separate bowl, whisk Caesar dressing with a pinch of salt and pepper, then pour over the pasta mixture.
- Toss and garnish: Toss gently to coat, then sprinkle grated Parmesan on top and toss again.
Notes
For added flavor, toss the chicken with lemon juice or garlic powder before mixing. You can also add red pepper flakes for a spicy kick.
- Prep Time: 15 minutes
- Cook Time: 10 minutes
- Category: Salad
- Method: Mixing
- Cuisine: American
Nutrition
- Serving Size: 1 serving
- Calories: 350
- Sugar: 5g
- Sodium: 400mg
- Fat: 15g
- Saturated Fat: 5g
- Unsaturated Fat: 8g
- Trans Fat: 0g
- Carbohydrates: 40g
- Fiber: 3g
- Protein: 30g
- Cholesterol: 70mg
Keywords: pasta salad, chicken salad, Caesar salad, summer salad, easy recipe
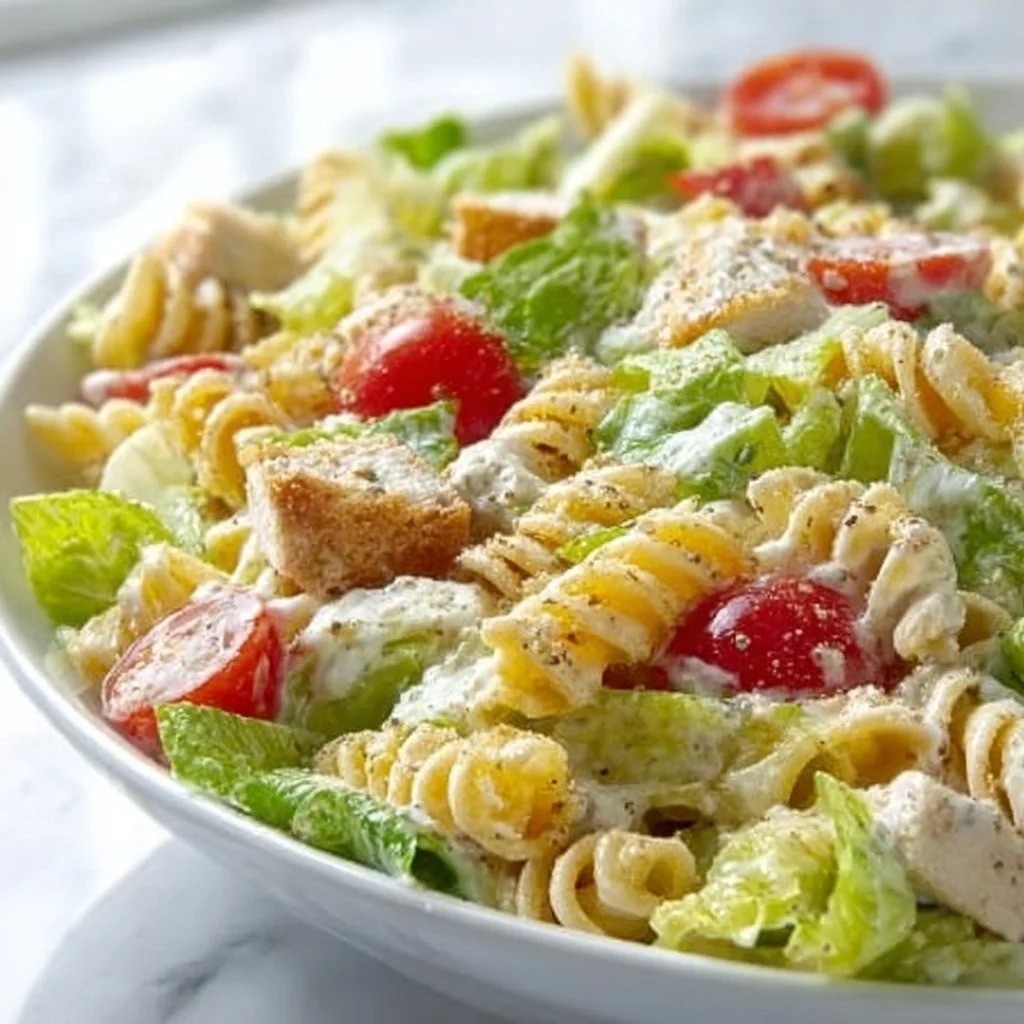
Caesar Pasta Salad
Caesar Pasta Salad: A Comforting, Crowd-Pleasing Delight
Hey there, food lovers! Welcome back to Feastical, where we whip up feel-good recipes that make you want to hug your plate! Today, I’m thrilled to share a dish that screams summer road trips, backyard barbecues, and laid-back potlucks with friends—Caesar Pasta Salad! This fabulous fusion of classic Caesar salad flavors and hearty pasta creates the perfect side dish or light meal that’s both satisfying and oh-so-delicious.
So, what’s the deal with Caesar Pasta Salad? It takes all the crispy romaine, creamy dressing, tangy parmesan, and crunchy croutons you know and love from traditional Caesar salad and pairs it with joyful, chewy pasta. It’s like your favorite restaurant dish, but with a personal twist right from your kitchen! Whether you’re hosting a gathering or just want a quick dinner recipe that’ll impress your friends, this pasta salad is surefire winner. Plus, it’s super easy to make! Seriously, if you can boil water, you can conquer this dish.
This recipe is all about flavor, simplicity, and that feel-good vibe we cherish at Feastical. So, strap on your apron and let’s journey together through this tasty adventure—because trust me, your taste buds will thank you!
Personal Story
Ah, the memories that food can evoke! I remember the first time I tasted a Caesar salad like it was yesterday. It was during a family reunion at my aunt’s house when I was a kid. The smell of grilled meats wafted through the air, and my stomach was already making plans for a feast! The table was laden with an array of dishes, but it was the bright, green, crunchy Caesar salad that caught my eye.
I scooped a big serving onto my plate, fully unaware that I was about to fall in love. The crispiness of the romaine, combined with the rich, creamy dressing and a sprinkle of parmesan, blew my little taste buds away! I was hooked! Fast forward a few years, and I began experimenting, tossing in pasta for added heartiness. And just like that, Caesar Pasta Salad was born—an ode to the memories of family gatherings, laughter, and the universal language of good food.
Now, every time I whip up this dish, it takes me back to that sunny afternoon filled with warmth and love. I hope this recipe brings you the same joy it brings me!
Ingredients
Let’s dive into the beautiful ingredients that make this Caesar Pasta Salad shine. Grab your shopping list and let’s make sure you have everything you need:
-
Pasta (Rotini or Fusilli): About 2 cups. I love using rotini because its spirals catch onto the dressing beautifully. If you’re gluten-free, feel free to swap in your favorite gluten-free pasta!
-
Romaine Lettuce: 2 cups, chopped. The crispy texture is essential for that classic Caesar salad vibe! You can also mix in spinach or kale for an extra nutrient boost.
-
Caesar Dressing: 1 cup. You can use store-bought (no judgement here!) or make your own. A homemade dressing gives you full control over flavor—just whisk together mayonnaise, garlic, lemon juice, and anchovy paste (if desired).
-
Parmesan Cheese: ½ cup, grated. The nutty flavor of parmesan is essential! If you want a vegan option, try nutritional yeast for a similar umami taste.
-
Croutons: 1 cup. These add crunch and texture! You can use store-bought croutons or toss some cubed bread in olive oil and toast them in the oven.
-
Cherry Tomatoes: 1 cup, halved. They provide a juicy burst of flavor! You can swap these for sun-dried tomatoes if you’re feeling adventurous.
-
Lemon Juice: 2 tablespoons. Freshly squeezed lemon really brightens up the flavors. Bottled juice works too in a pinch.
-
Black Pepper: To taste. A must for that peppery kick—freshly ground is best for flavor!
-
Olive Oil: 2 tablespoons for your dressing or pasta. Olive oil adds richness, but feel free to substitute with avocado oil or apple cider vinegar for a tangier option.
Step-by-Step Instructions
Alright, chef buddies, it’s time to roll up those sleeves and jump into a delightful cooking adventure! Here’s how to whip up this scrumptious Caesar Pasta Salad:
-
Cook the Pasta: Bring a big pot of salted water to a rolling boil. Toss in your pasta and cook according to the package instructions until al dente (about 8-10 minutes). Here’s a tip: add a little olive oil to the water to prevent sticking!
-
Prepare the Dressing: While your pasta is cooking, let’s make some magic! If you’re going homemade, combine mayonnaise, lemon juice, minced garlic, and anchovy paste (if using) in a bowl. Whisk until smooth and creamy. Don’t be shy to taste—adjust the seasoning if you’d like more tang or creaminess!
-
Chop the Romaine: Grab a sharp knife and chop your romaine lettuce into bite-sized pieces. Aim for a mix of leafy greens and crunchy stems for texture. This is where I like to say “taste the rainbow!” Feel free to mix in colorful veggies like bell peppers or cucumbers.
-
Combine Ingredients: Once the pasta is done cooking, drain it thoroughly and run it under cold water to cool it down. This prevents it from turning mushy. In a large bowl, combine the cooled pasta, chopped romaine, halved cherry tomatoes, and grated parmesan.
-
Dress the Salad: Pour your creamy Caesar dressing over the pasta and veggies. Toss everything gently but thoroughly until every nook and cranny is coated in that savory goodness. Oh-my-gosh, how heavenly does it look?
-
Finish with Croutons: Just before serving, sprinkle the croutons on top for that irresistible crunch. You don’t want them to get soggy, so adding them last is key. And trust me, it’s totally worth it!
-
Season: Give your salad a sprinkle of freshly cracked black pepper and a little more grated parmesan if you’re feeling extra cheesy. Take a moment to admire your masterpiece!
Serving Suggestions
Now that you’ve made this delightful Caesar Pasta Salad, let’s talk about how to serve it up! I love to plate it family-style in a large, colorful bowl at the center of the table. That way, everyone can dig in and scoop themselves a generous portion. Consider garnishing with extra cherry tomatoes and fresh herbs like parsley or basil for a burst of color and freshness.
If you want to up the ante, pair this salad with grilled shrimp or rotisserie chicken to turn it into a full meal. Or serve it alongside garlic bread or a warm focaccia for the ultimate comfort food experience. Seriously, don’t forget about that crunch—it’s everything!
Recipe Variations
One of the best things about cooking is the freedom to make it your own! Here are a few creative twists and variations you might enjoy:
-
Protein Boost: Add grilled chicken, shrimp, or chickpeas for extra protein. It makes for a filling meal in itself!
-
Herbaceous Kick: Toss in fresh herbs like basil, dill, or even cilantro to the mix. This introduces a delightful freshness every time.
-
Bacon Lovers: Crumbled crispy bacon can be a fun addition. It adds a savory, smoky flavor that elevates the salad to a whole new level.
-
Spicy Twist: Toss in some sliced jalapeños or red pepper flakes if you enjoy a little heat in your salad.
-
Vegan Delight: Make it plant-based by using vegan mayonnaise, nutritional yeast, and omitting the cheese and croutons. It’s still super tasty!
Chef’s Notes
As I whipped up this recipe, I couldn’t help but think about how my kitchen adventures always come with a little chaos. I remember one time trying to impress friends with a "fancy" homemade Caesar dressing, only to accidentally dump in way too much anchovy paste. Let’s just say my friends were polite, but there was no second serving!
Over the years, this Caesar Pasta Salad has evolved from a simple side dish to a star attraction at gatherings. I love seeing how everyone makes it their own! Cooking is about sharing, experimenting, and sometimes laughing (or crying) over our culinary flops. Embrace it, my friends!
FAQs and Troubleshooting
-
Q: My pasta is sticky! What did I do wrong?
- A: Make sure you’re using enough water and salt when boiling your pasta. Adding a bit of olive oil can help prevent stickiness, too. And rinse it under cold water right after draining to keep it separate!
-
Q: Can I make this salad ahead of time?
- A: Definitely! Just store the dressing separately until you’re ready to serve to keep everything fresh. This salad tastes even better after it’s had time to chill a bit in the fridge!
-
Q: What if I don’t have romaine lettuce?
- A: No problem! You can use any leafy green you love—spinach, kale, or even arugula work wonderfully and add a unique flavor twist.
-
Q: Can I make this gluten-free?
- A: Absolutely! Swap out the regular pasta for gluten-free or even veggie-based noodles, such as spiralized zucchini or chickpea pasta. The flavor remains on point!
Nutritional Info
This Caesar Pasta Salad is not only delicious but also offers a balance of nutrients! Here’s a quick breakdown of what you can expect per serving (approximately 1 cup):
- Calories: 320
- Protein: 10g
- Fat: 15g (mostly healthy fats from the olive oil and parmesan)
- Carbohydrates: 39g
- Fiber: 3g
- Sugars: 2g
Pairing the salad with grilled chicken or shrimp will give it added protein and keep you even fuller for longer!
Final Thoughts
And there you have it, friends! A comforting Caesar Pasta Salad recipe that’s as easy to make as it is enjoyable to eat. Whether you’re prepping for a summer barbecue, packing a picnic, or simply craving a cozy night in with comfort food, this dish is sure to please any crowd. Cooking is all about relishing the journey along the way, and I hope this recipe brings smiles, laughter, and warmth to your table.
Don’t forget to share your delectable creations with your family, friends, and fellow foodies! I absolutely love seeing how you add your own personal touches to this classic dish. Until next time, keep those forks flying and those spatulas stirring—happy cooking! 🍴❤️
Print
Caesar Pasta Salad
- Total Time: 25 minutes
- Yield: 4 servings 1x
- Diet: Vegetarian
Description
A delightful fusion of classic Caesar salad flavors and hearty pasta, perfect for summer gatherings and potlucks.
Ingredients
- 2 cups Pasta (Rotini or Fusilli)
- 2 cups Romaine Lettuce, chopped
- 1 cup Caesar Dressing
- ½ cup Parmesan Cheese, grated
- 1 cup Croutons
- 1 cup Cherry Tomatoes, halved
- 2 tablespoons Lemon Juice
- Black Pepper, to taste
- 2 tablespoons Olive Oil
Instructions
- Cook the Pasta: Bring a big pot of salted water to a rolling boil. Toss in your pasta and cook according to the package instructions until al dente (about 8-10 minutes).
- Prepare the Dressing: While your pasta is cooking, combine mayonnaise, lemon juice, minced garlic, and anchovy paste (if using) in a bowl. Whisk until smooth and creamy.
- Chop the Romaine: Chop your romaine lettuce into bite-sized pieces.
- Combine Ingredients: Once the pasta is done cooking, drain it and run it under cold water. In a large bowl, combine the cooled pasta, chopped romaine, halved cherry tomatoes, and grated parmesan.
- Dress the Salad: Pour your creamy Caesar dressing over the pasta and veggies and toss gently until coated.
- Finish with Croutons: Sprinkle the croutons on top just before serving to keep them crunchy.
- Season: Add freshly cracked black pepper and extra parmesan if desired.
Notes
Store dressing separately if making ahead of time for freshness. This salad tastes even better after chilling in the fridge.
- Prep Time: 15 minutes
- Cook Time: 10 minutes
- Category: Side Dish
- Method: Mixing
- Cuisine: Italian
Nutrition
- Serving Size: 1 serving
- Calories: 320
- Sugar: 2g
- Sodium: 500mg
- Fat: 15g
- Saturated Fat: 5g
- Unsaturated Fat: 8g
- Trans Fat: 0g
- Carbohydrates: 39g
- Fiber: 3g
- Protein: 10g
- Cholesterol: 30mg
Keywords: Caesar Pasta Salad, Easy Pasta Salad, Summer Salad
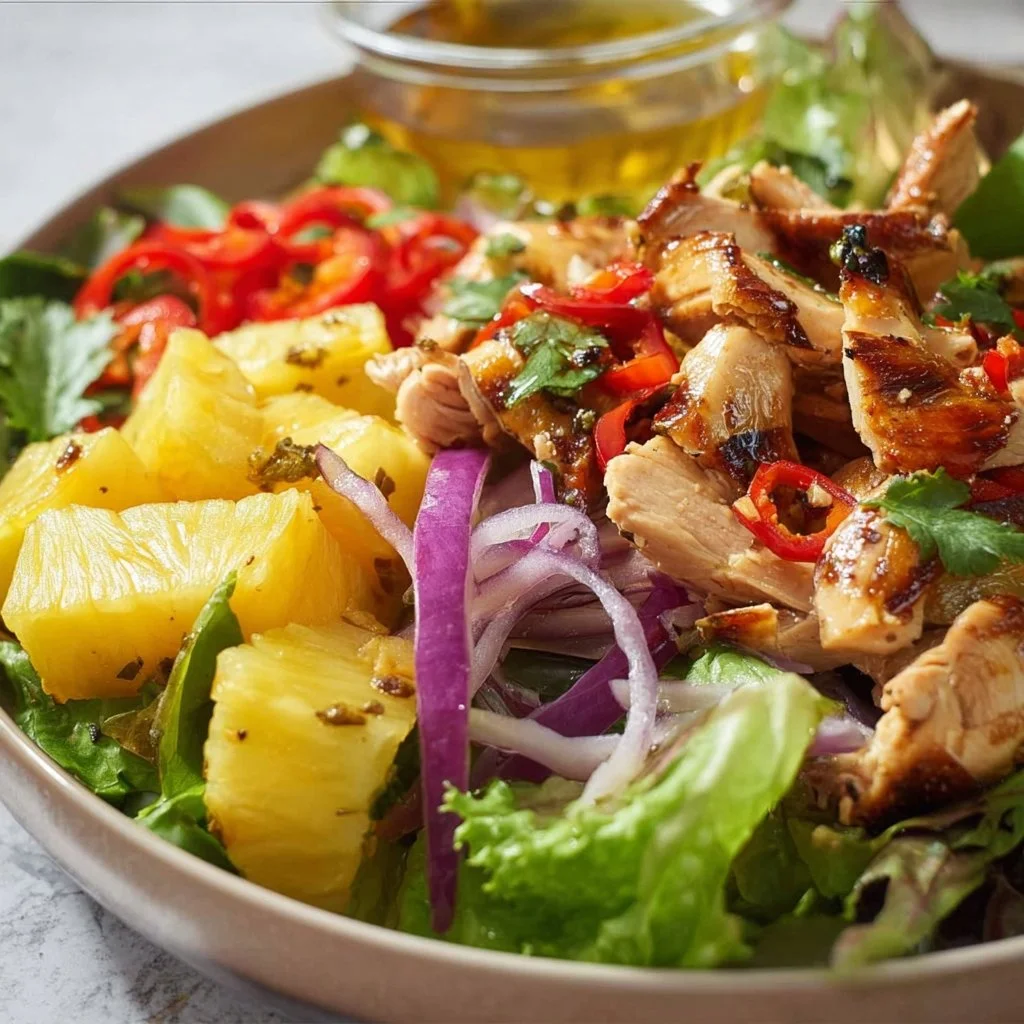
Chicken and Pineapple Salad
Chicken and Pineapple Salad: A Tropical Escape on Your Plate
Hey there! Welcome back to my kitchen here at Feastical, where we whip up good vibes served alongside delicious bites! 🌿 Are you ready to dive into a culinary adventure? Today, we’re making a refreshing Chicken and Pineapple Salad that’s not only vibrant and colorful but also bursting with flavors that’ll transport you straight to a sunny beachside. This dish is like summer in a bowl, and trust me, it’s perfect for any season!
Picture this: You’re basking in the golden sunshine, palm trees swaying gently in the breeze, and the tantalizing aroma of grilled chicken mingling with the sweet scent of fresh pineapple wafts through the air. That’s what this salad embodies—an explosion of toppings that celebrates the harmony of sweet and savory, all while keeping things light and oh-so-satisfying.
This Chicken and Pineapple Salad is not only a feast for the eyes but also a nutritious powerhouse that’s perfect for a quick lunch, a picnic, or a delightful dinner. Whether you’re meal prepping for the week or serving up something special for guests, this recipe’s your go-to solution.
So, why wait? Let’s gather our ingredients and wander down food memory lane, one tasty bite at a time. I promise you’re going to love making (and eating) this dish!
Personal Story
You know, some culinary creations stir up fond memories that take you right back in time. For me, it’s this Chicken and Pineapple Salad. It reminds me of those carefree summer days growing up when my family would host backyard barbecues. My mom would fire up the grill while I was entrusted with the salad-making duties—something that always ended up being an adventure!
One day, while assembling a simple green salad, I stumbled across a can of pineapple slices tucked away in the pantry. On a whim, I thought, “Why not add a touch of tropical sweetness?” So, I diced up the pineapple and added it to my mix of greens, grilled chicken, and whatever colorful veggies I could find in the fridge. It was an instant hit! Everyone raved about it. My dad said it was like eating a vacation, and I felt like a culinary genius.
Fast forward to today, and that childhood salad sensation has evolved into this heartwarming Chicken and Pineapple Salad that blends nostalgia with a feast of flavors. Every time I make it, I’m reminded of simpler times, laughter, and great company around the table. Now let’s get to the dish that started it all for me!
Ingredients
Here’s what you’ll need for our scrumptious Chicken and Pineapple Salad. Take a peek at each ingredient’s role in our culinary symphony:
-
2 cups cooked chicken, shredded
Choose rotisserie chicken for added convenience, or grilled chicken for that smoky flavor. If you’re vegetarian, feel free to swap with chickpeas or plant-based chicken. -
1 cup fresh pineapple, diced
Fresh is best for that juicy sweetness, but canned works, too—just keep an eye on added sugars! -
1 avocado, diced
Creamy and rich, it adds a layer of texture. If avocados aren’t your thing, switch it out for nuts like toasted almonds for extra crunch! -
4 cups mixed greens
This can be a blend of arugula, spinach, and romaine, or whatever greens you have on hand. Use kale for a heartier option; just be sure to massage it a bit before mixing! -
1/4 cup red onion, thinly sliced
For that sharp, zesty crunch. Soak them in ice water for 10 minutes if you prefer a milder flavor. -
1/4 cup cilantro, chopped
A burst of freshness! If you’re not a fan, try swapping it with fresh basil or mint for a different herbal twist. -
2 tablespoons olive oil
This will marry all the flavors together. Swap it with avocado oil for a fun alternative! -
1 tablespoon apple cider vinegar
The acidity is essential! White wine vinegar or lemon juice will also do the trick. -
1 tablespoon honey
Adds a hint of sweetness to balance the acidity. Maple syrup is a great vegan option! -
Salt and pepper to taste
Because every chef deserves a seasoned dish!
Step-by-Step Instructions
Now that we have all our ingredients laid out, let’s dive into the fun part—prepping and creating our masterpiece!
Step 1: Assemble the Chicken
Start by shredding your cooked chicken. If you’re using rotisserie, it’ll be super easy—just pull apart the juicy meat. For grilled chicken, a couple of forks will do the trick. Be sure to toss it in a little olive oil to keep it moist and flavorful!
Chef Hack: If you have leftover chicken from a previous meal, this salad is an amazing way to use it up!
Step 2: Chop Up the veggies
Dice your fresh pineapple and avocado. Aim for bite-sized pieces, as they’ll mix nicely with the greens. Slice your red onion thinly—if you want a more robust onion flavor, leave the slices larger!
Tip: I usually like to do the pineapple first to make sure my cutting board stays as clean as possible!
Step 3: Create the Dressing
In a small mixing bowl, whisk together olive oil, apple cider vinegar, and honey. Add a pinch of salt and pepper to taste. If you want an extra kick, a little garlic powder or crushed red pepper flakes will bring it to life!
Chef Insight: This dressing is versatile! Try adding fresh herbs or mustard to change it up every now and then!
Step 4: Combine Everything
In a large mixing bowl, add your mixed greens, cooked chicken, diced pineapple, avocado, cilantro, and red onion. Drizzle your freshly made dressing over the top.
Tip: If you’re prepping this for a gathering, you can keep the dressing separate until just before serving to avoid soggy greens!
Step 5: Toss!
Using tongs or two large forks, gently toss everything together. Be kind with the avocado—it’s delicate! You want everything coated with that tangy, sweet dressing.
Chef Hack: A good toss can elevate this salad from delicious to “git-in-my-belly-right-now!” Keep it light and fun.
Step 6: Serve and Enjoy!
Plate your salad on a large serving platter or into individual bowls for a beautiful presentation. Garnish with extra cilantro and a sprinkle of pepper for flair. It’s truly ready for its ‘Instagram moment’!
Serving Suggestions
Serve this Chicken and Pineapple Salad as a light lunch or dinner option all on its own! For an added kick, pair it with some warm, crusty bread or a tropical fruit smoothie on the side.
Creative Plating Ideas
- In a Wrap: Use large lettuce leaves to make a mouthwatering wrap, perfect for lunch on the go.
- In a Jar: Layer the salad in a mason jar for a creative lunch option—dress at the bottom, then add veggies, chicken, and greens on top.
Recipe Variations
While this Chicken and Pineapple Salad is fabulous as is, there’s always room for creativity! Here are some fun variations to give it your own twist:
- Tropical Twist: Add diced mango or papaya for a total tropical experience!
- Nuts About It: Sprinkle in chopped macadamia nuts or cashews for a delightful crunch.
- Spicy Kick: Create a spicy dressing by adding sriracha or chili flakes to the dressing mix.
- Seasonal Spin: Swap out the pineapple with seasonal fruits like peach or strawberries for a new flavor profile.
- Protein Swap: Swap the chicken for grilled shrimp or chickpeas for a meatless option that’s just as delightful.
Chef’s Notes
This Chicken and Pineapple Salad has been a staple in my kitchen for years! Over time, I’ve played around with various herbs and spices, adjusting it to fit my family’s evolving tastes. It’s one of those recipes that never gets old, and every time I make it, it has its own little twist.
The most hilarious moment? I once forgot to add the dressing before serving! Folks dug in expectantly only to find dry greens and chicken—whoops! Now, I triple-check that step before presenting my feast! 😅
FAQs and Troubleshooting
1. Can I use canned pineapple?
Yes, absolutely! Drain it well to keep the salad from getting watery, and look for the option packed in juice instead of syrup for fewer added sugars.
2. How can I make this salad more filling?
To make this salad more of a meal, try adding quinoa or brown rice for extra fiber and satisfaction!
3. What can I do if it’s too sweet?
If your salad ends up sweeter than desired, add a bit more salt, or introduce a splash more apple cider vinegar to balance it out.
4. How do I store leftovers?
Store any leftover salad in an airtight container in the fridge for up to two days. Keep the avocado separate if you can, to prevent browning!
Nutritional Info (approximate values per serving)
- Calories: 350
- Protein: 28g
- Fat: 18g
- Carbohydrates: 30g
- Fiber: 6g
- Sugar: 10g
This salad packs a great punch of nutrients, filling you up while keeping calories balanced—perfect for a healthy dish that still feels indulgent!
Final Thoughts
And there you have it, my friends! A vibrantly fresh and exciting Chicken and Pineapple Salad that speaks of sunshine, laughter, and delightful flavors. Whether you’re meal prepping, hosting a gathering, or simply treating yourself to something delicious, I hope this recipe finds a special place in your heart and kitchen.
Thanks for joining me in the Feastical kitchen today! I’d love to hear about your own twists and memories associated with this salad. Share your stories in the comments below, and as always, happy cooking! 🥗✨
Print
Chicken and Pineapple Salad
- Total Time: 25 minutes
- Yield: 4 servings 1x
- Diet: Gluten-Free
Description
A refreshing Chicken and Pineapple Salad that’s vibrant and bursting with flavors, perfect for any season.
Ingredients
- 2 cups cooked chicken, shredded
- 1 cup fresh pineapple, diced
- 1 avocado, diced
- 4 cups mixed greens
- 1/4 cup red onion, thinly sliced
- 1/4 cup cilantro, chopped
- 2 tablespoons olive oil
- 1 tablespoon apple cider vinegar
- 1 tablespoon honey
- Salt and pepper to taste
Instructions
- Assemble the Chicken: Start by shredding your cooked chicken.
- Chop Up the veggies: Dice your fresh pineapple and avocado.
- Create the Dressing: In a small mixing bowl, whisk together olive oil, apple cider vinegar, and honey.
- Combine Everything: In a large mixing bowl, add your mixed greens, cooked chicken, diced pineapple, avocado, cilantro, and red onion.
- Toss: Using tongs or two large forks, gently toss everything together.
- Serve and Enjoy: Plate your salad on a large serving platter or into individual bowls.
Notes
Great for meal prepping, picnics, or serving guests. Keep dressing separate until serving to avoid soggy greens.
- Prep Time: 15 minutes
- Cook Time: 10 minutes
- Category: Salad
- Method: Mixing
- Cuisine: Tropical
Nutrition
- Serving Size: 1 serving
- Calories: 350
- Sugar: 10g
- Sodium: 250mg
- Fat: 18g
- Saturated Fat: 3g
- Unsaturated Fat: 14g
- Trans Fat: 0g
- Carbohydrates: 30g
- Fiber: 6g
- Protein: 28g
- Cholesterol: 70mg
Keywords: chicken salad, pineapple salad, tropical salad, healthy salad, summer recipe
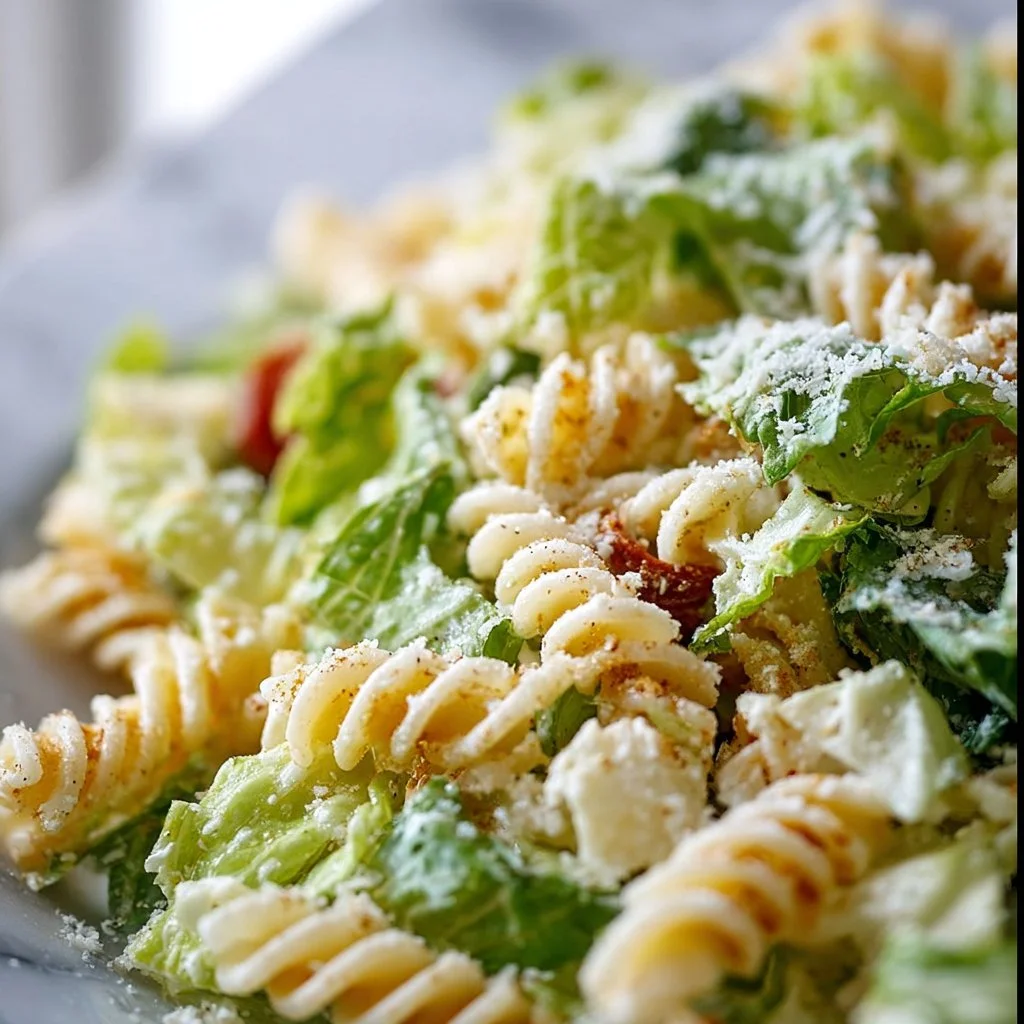
Fusilli Caesar Salad
The Delectable Delight of Fusilli Caesar Salad
Introduction
Hey food lovers! It’s a sunny day here, and you know what that means—it’s the perfect opportunity to whip up something fresh, delightful, and utterly satisfying. Today, we are diving into a beloved classic with a twist: Fusilli Caesar Salad! Now I know what you might be thinking: “Caesar salad? What’s so special about that?” But let me tell you, this isn’t just any Caesar salad. We’re taking the traditional flavors you know and love and marrying them with the fun, spiral shape of fusilli pasta. Trust me; it’s a match made in kitchen heaven!
Fusilli pasta, with its whimsical twists and turns, serves as the ideal base for all those classic Caesar flavors. Imagine sinking your fork into a spiraled piece of pasta, coated with creamy Caesar dressing, crispy romaine, and a sprinkle of nutty Parmesan, all topped with crunchy croutons. It’s not only delicious but also incredibly satisfying! Whether you’re preparing lunch for yourself, impressing friends at a dinner party, or just wanting to enjoy a big bowl of comfort food, this recipe is your golden ticket.
But hang tight! This isn’t just about tossing some ingredients together. There’s a little story behind this dish and plenty of tips to ensure it turns out perfectly every time. So, roll up those sleeves, grab your favorite apron, and let’s dive into the wonderful world of Fusilli Caesar Salad!
Personal Story
Before we get into the nitty-gritty of the recipe, I want to share a little something about where my love for Caesar salad began. Picture this: I was just a little kid, tagging along with my mom to our favorite Italian restaurant—Mama Mia’s—that was the spot in our neighborhood. The ambiance was always buzzing with laughter, clinking glasses, and the smell of homemade garlic bread wafting through the air.
Every visit, I would eye that glorious Caesar salad on the menu. Mom always ordered it as a starter, and sometimes—okay, most times—she would share a bit with me. I remember that crisp romaine, creamy dressing, and those crunchy croutons that would disappear in seconds! We’d joke that if I could bathe in Caesar dressing, I would.
Fast forward a few years, and I found myself experimenting in my own kitchen, trying to recreate that delicious memory. And guess what? I decided to add fusilli. The result? Pure magic! Now every time I make this salad, it takes me back to those fun lunches filled with laughter and love. Let me show you how to make this classic dish with my own little twist!
Ingredients
Here’s what you’ll need to create your delicious Fusilli Caesar Salad:
-
8 oz fusilli pasta
This corkscrew-shaped pasta is perfect for holding onto the creamy dressing. You can substitute it with any short pasta like rotini or farfalle, but I promise, fusilli is where the party’s at! -
2 cups romaine lettuce, chopped
Romaine adds that distinctive crunch and freshness. Feel free to use kale for a twist or baby spinach if you prefer a milder taste! -
1/2 cup cherry tomatoes, halved
These sweet little tomatoes add a pop of color and flavor. Instead, you can use diced cucumbers for a refreshing spin. -
1/4 cup grated Parmesan cheese
Parmesan brings a nutty depth of flavor. For a vegan option, nutritional yeast is a great cheese substitute! -
1/4 cup Caesar dressing
The heart and soul of this salad! You can go with store-bought or make your own. Preferences vary, but creamy or light dressings both work! -
Salt and pepper to taste
A pinch of salt and a dash of pepper elevate all the flavors. Experiment with seasoning to taste! -
Croutons for topping
The crunchy finish that makes everything better! You can buy them pre-made or easily make your own by toasting bread bits in the oven.
Step-by-Step Instructions
Now that you have all your ingredients lined up, let’s get cooking! Follow these simple steps, and I promise you’ll create a masterpiece.
-
Boil the Fusilli
Start by bringing a large pot of salted water to a rolling boil. Add your fusilli pasta and cook according to package instructions (usually around 8-10 minutes). Trust your instincts here—al dente is key! It should be firm yet tender. Chef’s tip: Reserve about a half-cup of pasta water before draining; you might need it later for that perfect creamy texture! -
Drain and Rinse
Once cooked, drain the pasta in a colander. This step is crucial—rinsing your pasta under cold water will stop the cooking process and keep it from sticking! Pro tip: Use this moment to make sure you shake out any excess water; otherwise, your salad may get a bit soggy. -
Prepare the Lettuce & Tomatoes
While your pasta cools, grab a large mixing bowl and chop your romaine lettuce. Add it to the bowl along with the halved cherry tomatoes. I love to toss the tomatoes in a light drizzle of olive oil and a sprinkle of salt to enhance their natural sweetness. Your taste buds will thank you! -
Mix in the Pasta
Once the fusilli is completely cooled, toss it into the bowl with the lettuce and tomatoes. Now for the fun part: drizzle your Caesar dressing over the mix! Make sure you stir it all together so every curly piece of pasta gets coated. This is the moment to add a little reserved pasta water if you want to thin out the dressing for better coverage. -
Cheesy Goodness
Now, sprinkle that grated Parmesan cheese over the top and give it another gentle toss. The cheese will meld beautifully with the dressing; it’s like a warm hug for your salad! -
Season It
Take a moment to taste your salad. Season with salt and pepper to your liking. It’s essential to adjust the seasoning, as this will elevate the other flavors, trust me! -
Top with Croutons
Just before serving, pile on those crispy croutons. They add that incredible crunch that every perfect salad needs. You can also toss in some extra Parmesan for good measure!
Serving Suggestions
Now that your Fusilli Caesar Salad is prepared, it’s time to serve! I love plating it in pretty bowls or on a large family-style platter. Drizzle a touch more dressing on top, and for a creative visual flair, you might sprinkle some additional Parmesan cheese around. If you’re feeling vibrant, chop some fresh herbs like parsley or basil and sprinkle them over the top for an aromatic touch! It’s not just about flavor; it’s about making a dish that looks inviting too.
Serve this salad as a main dish for a light lunch or alongside grilled chicken or fish for dinner— it’s perfect for gathering around the table with family and friends. Pair it with a chilled glass of white wine or sparkling water with lemon slices, and you have a culinary experience that feels like a special occasion!
Recipe Variations
In the spirit of creativity, let’s explore some fun variations for your Fusilli Caesar Salad! Here are a few ideas to get those culinary juices flowing:
-
Grilled Chicken Caesar Salad
Spice things up by adding slices of grilled chicken breast. Marinate the chicken in lemon juice, olive oil, and garlic before grilling for extra flavor! -
Shrimp Caesar Salad
Swap out chicken for grilled shrimp—just season them lightly and grill until they’re perfectly pink and juicy! -
Veggie-loaded Caesar
Add roasted veggies like bell peppers, zucchini, or asparagus for an earthy twist. It’s a perfect way to sneak in more nutrients! -
Spicy Caesar Salad
If you’re looking to kick it up a notch, add a hint of sriracha to your dressing or sprinkle chili flakes on top for that extra kick! -
Vegan Caesar Salad
Substitute the Caesar dressing with tahini-based dressing and replace the Parmesan with nutritional yeast for a tasty vegan alternative.
Chef’s Notes
Cooking is not just about following a recipe; it’s about personalizing it and making it your own. This Fusilli Caesar Salad has evolved over time in my kitchen. What started as a nostalgic reflection of days gone by is now a canvas for creativity. Every time I make it, I think back to my childhood, but I also explore new flavors and ingredients to keep things fresh!
A funny kitchen story? One time, I was trying to impress some friends by whipping up this salad for the first time using homemade croutons. In my excitement, I burned them! Instead of tossing them, I embraced the crunch, and to my surprise, it turned into a humorous conversation starter. Sometimes kitchen mishaps lead to the best memories!
FAQs and Troubleshooting
-
Why is my salad too soggy?
Dust that pasta off! If you don’t rinse your fusilli after cooking, residual heat and moisture can make everything mushy. Always rinse under cold water! -
My dressing is too thick. What can I do?
If your dressing is on the thicker side, add a splash of lemon juice or reserved pasta water. Stir well to loosen it up! -
Can I make this ahead of time?
You can prepare the ingredients ahead of time but toss everything together just before serving to keep that crispness! -
What if I don’t have croutons?
No problem! You can rough up some stale bread, season it, and toast it in the oven to create your own croutons in a pinch!
Nutritional Info
Now, let’s break down the nutritional side of this delicious dish!
- Calories: Approximately 350 calories per serving
- Protein: 12g
- Fat: 15g
- Carbohydrates: 42g
- Fiber: 3g
- Sugars: 2g
This salad is well-balanced with carbs from the pasta, healthy fats from the dressing and cheese, and the added benefits of fresh veggies. Plus, it’s customizable to meet dietary needs without sacrificing flavor!
Final Thoughts
Embrace the spirit of fun and creativity in the kitchen, because that’s where the real magic happens! Fusilli Caesar Salad is not just a dish; it’s a joyous blend of flavors and memories designed to bring people together.
I hope this recipe finds its way into your heart (and your recipe collection!). Let it inspire your own kitchen adventures, and feel free to play around with ingredients. Whether you’re hosting a gathering or enjoying a cozy night in, remember to savor each bite!
I can’t wait for you to share your own Fusilli Caesar Salad stories. Drop me a comment once you try it out, or better yet—snap a pic of your scrumptious creation and tag me on social media! Let’s keep feeding the love for food together.
Happy cooking, my friends! 🍽️💚
Print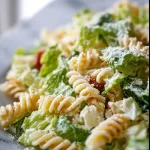
Fusilli Caesar Salad
- Total Time: 25 minutes
- Yield: 4 servings 1x
- Diet: Vegetarian
Description
A delightful twist on a classic Caesar salad, featuring fusilli pasta, crunchy romaine, and creamy dressing.
Ingredients
- 8 oz fusilli pasta
- 2 cups romaine lettuce, chopped
- 1/2 cup cherry tomatoes, halved
- 1/4 cup grated Parmesan cheese
- 1/4 cup Caesar dressing
- Salt and pepper to taste
- Croutons for topping
Instructions
- Boil the fusilli by bringing a large pot of salted water to a boil and cooking according to package instructions (around 8-10 minutes).
- Drain and rinse the pasta in cold water to stop the cooking process.
- Prepare the lettuce and tomatoes by chopping the romaine and adding it to a mixing bowl with the halved cherry tomatoes.
- Mix in the pasta, drizzle Caesar dressing, and toss to coat everything evenly.
- Cheesy goodness: sprinkle grated Parmesan cheese over the top and give it a gentle toss.
- Season with salt and pepper to taste.
- Top with croutons just before serving.
Notes
For a vegan option, substitute Parmesan with nutritional yeast and use a tahini-based dressing.
- Prep Time: 15 minutes
- Cook Time: 10 minutes
- Category: Salad
- Method: Mixing
- Cuisine: Italian
Nutrition
- Serving Size: 1 serving
- Calories: 350
- Sugar: 2g
- Sodium: 400mg
- Fat: 15g
- Saturated Fat: 6g
- Unsaturated Fat: 7g
- Trans Fat: 0g
- Carbohydrates: 42g
- Fiber: 3g
- Protein: 12g
- Cholesterol: 20mg
Keywords: Fusilli, Caesar Salad, Pasta Salad, Vegetarian Salad, Healthy Salad