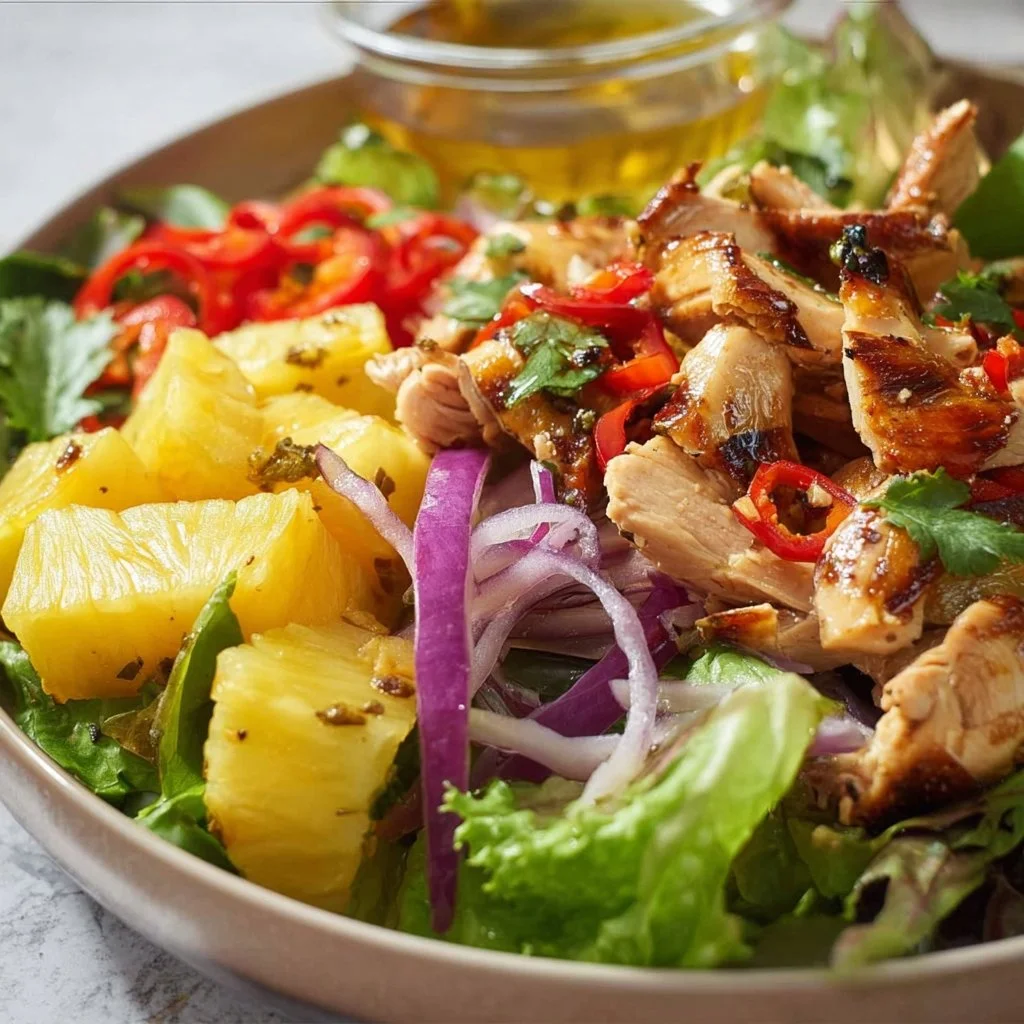
Chicken and Pineapple Salad
Chicken and Pineapple Salad: A Tropical Escape on Your Plate
Hey there! Welcome back to my kitchen here at Feastical, where we whip up good vibes served alongside delicious bites! 🌿 Are you ready to dive into a culinary adventure? Today, we’re making a refreshing Chicken and Pineapple Salad that’s not only vibrant and colorful but also bursting with flavors that’ll transport you straight to a sunny beachside. This dish is like summer in a bowl, and trust me, it’s perfect for any season!
Picture this: You’re basking in the golden sunshine, palm trees swaying gently in the breeze, and the tantalizing aroma of grilled chicken mingling with the sweet scent of fresh pineapple wafts through the air. That’s what this salad embodies—an explosion of toppings that celebrates the harmony of sweet and savory, all while keeping things light and oh-so-satisfying.
This Chicken and Pineapple Salad is not only a feast for the eyes but also a nutritious powerhouse that’s perfect for a quick lunch, a picnic, or a delightful dinner. Whether you’re meal prepping for the week or serving up something special for guests, this recipe’s your go-to solution.
So, why wait? Let’s gather our ingredients and wander down food memory lane, one tasty bite at a time. I promise you’re going to love making (and eating) this dish!
Personal Story
You know, some culinary creations stir up fond memories that take you right back in time. For me, it’s this Chicken and Pineapple Salad. It reminds me of those carefree summer days growing up when my family would host backyard barbecues. My mom would fire up the grill while I was entrusted with the salad-making duties—something that always ended up being an adventure!
One day, while assembling a simple green salad, I stumbled across a can of pineapple slices tucked away in the pantry. On a whim, I thought, “Why not add a touch of tropical sweetness?” So, I diced up the pineapple and added it to my mix of greens, grilled chicken, and whatever colorful veggies I could find in the fridge. It was an instant hit! Everyone raved about it. My dad said it was like eating a vacation, and I felt like a culinary genius.
Fast forward to today, and that childhood salad sensation has evolved into this heartwarming Chicken and Pineapple Salad that blends nostalgia with a feast of flavors. Every time I make it, I’m reminded of simpler times, laughter, and great company around the table. Now let’s get to the dish that started it all for me!
Ingredients
Here’s what you’ll need for our scrumptious Chicken and Pineapple Salad. Take a peek at each ingredient’s role in our culinary symphony:
-
2 cups cooked chicken, shredded
Choose rotisserie chicken for added convenience, or grilled chicken for that smoky flavor. If you’re vegetarian, feel free to swap with chickpeas or plant-based chicken. -
1 cup fresh pineapple, diced
Fresh is best for that juicy sweetness, but canned works, too—just keep an eye on added sugars! -
1 avocado, diced
Creamy and rich, it adds a layer of texture. If avocados aren’t your thing, switch it out for nuts like toasted almonds for extra crunch! -
4 cups mixed greens
This can be a blend of arugula, spinach, and romaine, or whatever greens you have on hand. Use kale for a heartier option; just be sure to massage it a bit before mixing! -
1/4 cup red onion, thinly sliced
For that sharp, zesty crunch. Soak them in ice water for 10 minutes if you prefer a milder flavor. -
1/4 cup cilantro, chopped
A burst of freshness! If you’re not a fan, try swapping it with fresh basil or mint for a different herbal twist. -
2 tablespoons olive oil
This will marry all the flavors together. Swap it with avocado oil for a fun alternative! -
1 tablespoon apple cider vinegar
The acidity is essential! White wine vinegar or lemon juice will also do the trick. -
1 tablespoon honey
Adds a hint of sweetness to balance the acidity. Maple syrup is a great vegan option! -
Salt and pepper to taste
Because every chef deserves a seasoned dish!
Step-by-Step Instructions
Now that we have all our ingredients laid out, let’s dive into the fun part—prepping and creating our masterpiece!
Step 1: Assemble the Chicken
Start by shredding your cooked chicken. If you’re using rotisserie, it’ll be super easy—just pull apart the juicy meat. For grilled chicken, a couple of forks will do the trick. Be sure to toss it in a little olive oil to keep it moist and flavorful!
Chef Hack: If you have leftover chicken from a previous meal, this salad is an amazing way to use it up!
Step 2: Chop Up the veggies
Dice your fresh pineapple and avocado. Aim for bite-sized pieces, as they’ll mix nicely with the greens. Slice your red onion thinly—if you want a more robust onion flavor, leave the slices larger!
Tip: I usually like to do the pineapple first to make sure my cutting board stays as clean as possible!
Step 3: Create the Dressing
In a small mixing bowl, whisk together olive oil, apple cider vinegar, and honey. Add a pinch of salt and pepper to taste. If you want an extra kick, a little garlic powder or crushed red pepper flakes will bring it to life!
Chef Insight: This dressing is versatile! Try adding fresh herbs or mustard to change it up every now and then!
Step 4: Combine Everything
In a large mixing bowl, add your mixed greens, cooked chicken, diced pineapple, avocado, cilantro, and red onion. Drizzle your freshly made dressing over the top.
Tip: If you’re prepping this for a gathering, you can keep the dressing separate until just before serving to avoid soggy greens!
Step 5: Toss!
Using tongs or two large forks, gently toss everything together. Be kind with the avocado—it’s delicate! You want everything coated with that tangy, sweet dressing.
Chef Hack: A good toss can elevate this salad from delicious to “git-in-my-belly-right-now!” Keep it light and fun.
Step 6: Serve and Enjoy!
Plate your salad on a large serving platter or into individual bowls for a beautiful presentation. Garnish with extra cilantro and a sprinkle of pepper for flair. It’s truly ready for its ‘Instagram moment’!
Serving Suggestions
Serve this Chicken and Pineapple Salad as a light lunch or dinner option all on its own! For an added kick, pair it with some warm, crusty bread or a tropical fruit smoothie on the side.
Creative Plating Ideas
- In a Wrap: Use large lettuce leaves to make a mouthwatering wrap, perfect for lunch on the go.
- In a Jar: Layer the salad in a mason jar for a creative lunch option—dress at the bottom, then add veggies, chicken, and greens on top.
Recipe Variations
While this Chicken and Pineapple Salad is fabulous as is, there’s always room for creativity! Here are some fun variations to give it your own twist:
- Tropical Twist: Add diced mango or papaya for a total tropical experience!
- Nuts About It: Sprinkle in chopped macadamia nuts or cashews for a delightful crunch.
- Spicy Kick: Create a spicy dressing by adding sriracha or chili flakes to the dressing mix.
- Seasonal Spin: Swap out the pineapple with seasonal fruits like peach or strawberries for a new flavor profile.
- Protein Swap: Swap the chicken for grilled shrimp or chickpeas for a meatless option that’s just as delightful.
Chef’s Notes
This Chicken and Pineapple Salad has been a staple in my kitchen for years! Over time, I’ve played around with various herbs and spices, adjusting it to fit my family’s evolving tastes. It’s one of those recipes that never gets old, and every time I make it, it has its own little twist.
The most hilarious moment? I once forgot to add the dressing before serving! Folks dug in expectantly only to find dry greens and chicken—whoops! Now, I triple-check that step before presenting my feast! 😅
FAQs and Troubleshooting
1. Can I use canned pineapple?
Yes, absolutely! Drain it well to keep the salad from getting watery, and look for the option packed in juice instead of syrup for fewer added sugars.
2. How can I make this salad more filling?
To make this salad more of a meal, try adding quinoa or brown rice for extra fiber and satisfaction!
3. What can I do if it’s too sweet?
If your salad ends up sweeter than desired, add a bit more salt, or introduce a splash more apple cider vinegar to balance it out.
4. How do I store leftovers?
Store any leftover salad in an airtight container in the fridge for up to two days. Keep the avocado separate if you can, to prevent browning!
Nutritional Info (approximate values per serving)
- Calories: 350
- Protein: 28g
- Fat: 18g
- Carbohydrates: 30g
- Fiber: 6g
- Sugar: 10g
This salad packs a great punch of nutrients, filling you up while keeping calories balanced—perfect for a healthy dish that still feels indulgent!
Final Thoughts
And there you have it, my friends! A vibrantly fresh and exciting Chicken and Pineapple Salad that speaks of sunshine, laughter, and delightful flavors. Whether you’re meal prepping, hosting a gathering, or simply treating yourself to something delicious, I hope this recipe finds a special place in your heart and kitchen.
Thanks for joining me in the Feastical kitchen today! I’d love to hear about your own twists and memories associated with this salad. Share your stories in the comments below, and as always, happy cooking! 🥗✨
Print
Chicken and Pineapple Salad
- Total Time: 25 minutes
- Yield: 4 servings 1x
- Diet: Gluten-Free
Description
A refreshing Chicken and Pineapple Salad that’s vibrant and bursting with flavors, perfect for any season.
Ingredients
- 2 cups cooked chicken, shredded
- 1 cup fresh pineapple, diced
- 1 avocado, diced
- 4 cups mixed greens
- 1/4 cup red onion, thinly sliced
- 1/4 cup cilantro, chopped
- 2 tablespoons olive oil
- 1 tablespoon apple cider vinegar
- 1 tablespoon honey
- Salt and pepper to taste
Instructions
- Assemble the Chicken: Start by shredding your cooked chicken.
- Chop Up the veggies: Dice your fresh pineapple and avocado.
- Create the Dressing: In a small mixing bowl, whisk together olive oil, apple cider vinegar, and honey.
- Combine Everything: In a large mixing bowl, add your mixed greens, cooked chicken, diced pineapple, avocado, cilantro, and red onion.
- Toss: Using tongs or two large forks, gently toss everything together.
- Serve and Enjoy: Plate your salad on a large serving platter or into individual bowls.
Notes
Great for meal prepping, picnics, or serving guests. Keep dressing separate until serving to avoid soggy greens.
- Prep Time: 15 minutes
- Cook Time: 10 minutes
- Category: Salad
- Method: Mixing
- Cuisine: Tropical
Nutrition
- Serving Size: 1 serving
- Calories: 350
- Sugar: 10g
- Sodium: 250mg
- Fat: 18g
- Saturated Fat: 3g
- Unsaturated Fat: 14g
- Trans Fat: 0g
- Carbohydrates: 30g
- Fiber: 6g
- Protein: 28g
- Cholesterol: 70mg
Keywords: chicken salad, pineapple salad, tropical salad, healthy salad, summer recipe
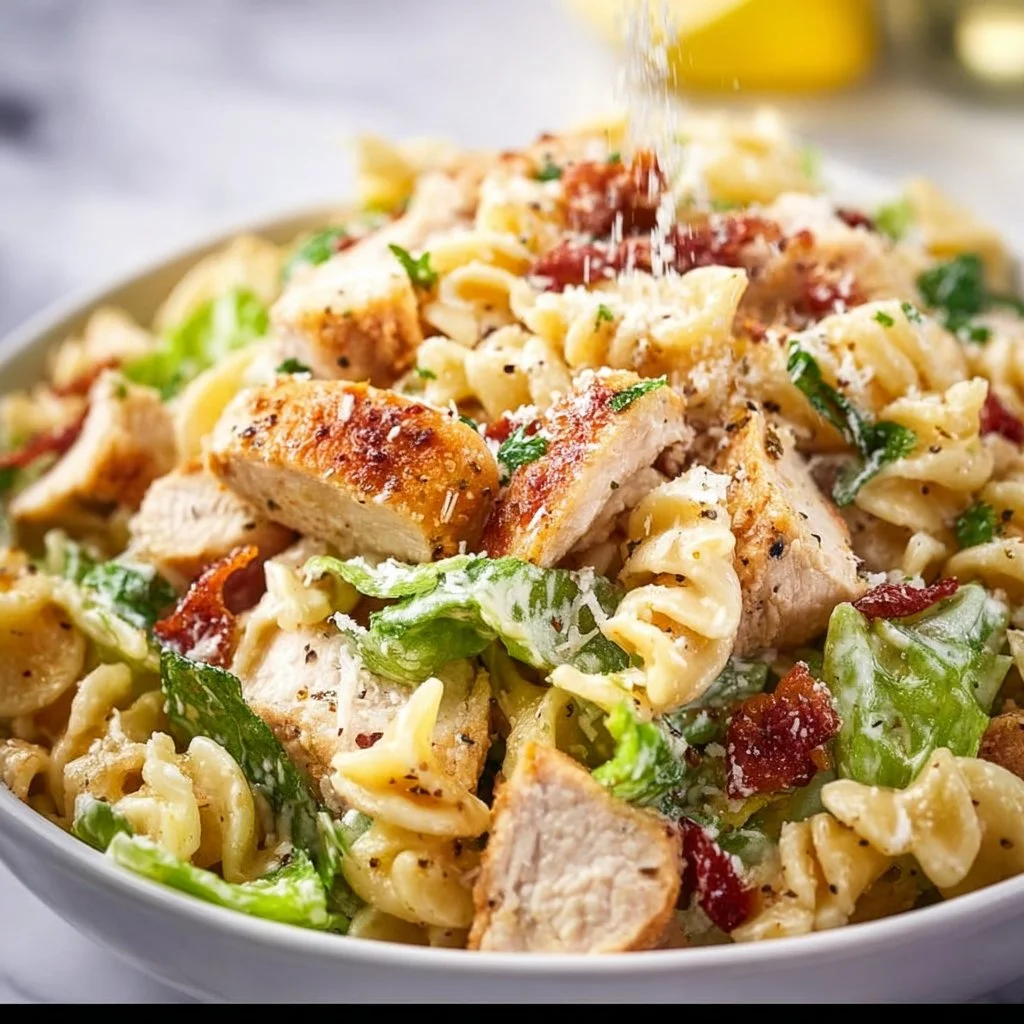
Chicken Caesar Pasta Salad
Chicken Caesar Pasta Salad: The Comfort Food You Didn’t Know You Needed
Hey there, fellow food lovers! It’s Beau Collier, your trusty guide through the whimsical world of comfort food, and today, we’re diving into something absolutely delightful: Chicken Caesar Pasta Salad! Picture this: a warm, sunny afternoon, you’re surrounded by friends, laughter fills the air, and all you need is a dish that brings those good vibes to the table. Enter the Chicken Caesar Pasta Salad—a perfect blend of juicy chicken, crispy bacon, fresh greens, and a tangy Caesar dressing that will have your taste buds doing a little happy dance!
I can still remember the first time I whipped up this fantastic dish in my cozy kitchen. It was a typical Saturday, and I was hosting a little get-together for my friends. I wanted something light yet filling—something that would keep the spirit high and the bellies satisfied. As I rummaged through my fridge, I found some leftover chicken from a previous dinner, and an idea sparked! From there, the Chicken Caesar Pasta Salad was born. It wasn’t just a meal; it became a memory, filled with laughter and compliments, and that’s what cooking is all about, isn’t it?
So, grab your apron and let’s unleash the magic of this Chicken Caesar Pasta Salad together! Whether you’re cooking for two or making a potluck dish that’ll steal the show, I promise this recipe will earn you high-fives all around.
Personal Story
Ah, the memories that food can evoke! There’s one specific night that pops into my mind whenever I think about Chicken Caesar Pasta Salad. It was one summer evening, and my friends and I decided to host an impromptu backyard barbecue. The sun was setting, and everything had that golden glow—perfect for a casual meal under the twinkling stars.
I had just returned from my weekly farmers’ market run, and the fresh ingredients practically begged to be turned into something special. Armed with my newfound bounty, I set out to create the Chicken Caesar Pasta Salad. Everyone was skeptical at first; after all, how does one combine a classic salad with pasta? But as soon as the aroma filled the air, and I served it in my grandmother’s old ceramic bowl—a treasured family heirloom—there was no turning back!
We ended up devouring the entire bowl, laughter echoing through the night, and before we knew it, everyone was standing around the table, fighting over the last few bites. That’s the magic of food—it connects us, sparks joy, and creates endless memories. Who knew a simple chicken salad could have such a powerful impact?
Ingredients
Now that we’ve stirred up some culinary nostalgia, let’s dive into the star players of our Chicken Caesar Pasta Salad. Here’s what you’ll need:
-
2 cups bowtie pasta: The fun, flirty shape holds sauce beautifully! You can swap it out with rotini or fusilli if you want something different, but bowties add a nice visual appeal.
-
1 cup cooked chicken, diced: Use leftover rotisserie chicken for a time-saver, or grill up some chicken breasts. For a vegetarian option, chickpeas work great!
-
1/2 cup crispy bacon, chopped: Crunchy bacon adds a savory kick! If you’re looking for a healthier twist, try turkey bacon or skip the bacon altogether for a vegetarian version.
-
1 cup Romaine lettuce, chopped: Fresh greens are essential! If you want to switch things up, consider using kale or spinach for a different flavor profile.
-
1/2 cup cherry tomatoes, halved: These sweet, juicy bites add a burst of flavor. You can also substitute with sun-dried tomatoes if you’re feeling adventurous!
-
1/2 cup Parmesan cheese, grated: The salty, nutty flavor is perfect for this dish. If you’re dairy-free, nutritional yeast is a fantastic substitute to add a cheesy flavor without the cheese!
-
1 cup Caesar dressing: A creamy dressing is what ties everything together; store-bought is fine, but homemade is oh-so-worth it! For a healthier option, try Greek yogurt as a base.
-
Salt and pepper to taste: Seasoning is key! Freshly cracked black pepper elevates the dish, while a pinch of salt enhances all the flavors.
Step-by-Step Instructions
Let’s get cooking! Follow these easy steps for a mouthwatering Chicken Caesar Pasta Salad that your friends and family won’t stop raving about.
-
Cook the Pasta:
- Start by bringing a large pot of salted water to a boil. Toss in the bowtie pasta and cook according to the package instructions, usually around 8-10 minutes.
- Chef’s Tip: About two minutes before the pasta is done, reserve a cup of the pasta cooking water. If your salad needs a little looseness later, this starchy water is a lifesaver!
-
Prep the Chicken:
- While the pasta is cooking, take your cooked chicken and dice it into bite-sized pieces. If you’re starting with raw chicken, grill or sauté them in a little olive oil and season with salt and pepper.
- Quick Hack: Season your chicken with garlic powder and Italian herbs for an extra burst of flavor.
-
Cook the Bacon:
- In a large skillet, cook your bacon over medium heat until crispy. Once done, remove and let it drain on a paper towel.
- Chef’s Insight: Save a teaspoon of bacon drippings to drizzle over the salad later—trust me, it’s worth it for the flavor!
-
Combine Tomatoes & Lettuce:
- In a large mixing bowl, add the chopped Romaine lettuce and halved cherry tomatoes. These fresh elements add crunch and color to your pasta salad!
-
Drain the Pasta:
- Once the pasta is ready, drain and rinse it under cold water to cool it down. You don’t want your lettuce wilting before you serve the salad!
- Secret Hack: Toss the pasta with a splash of olive oil to prevent it from sticking.
-
Mix It All Together:
- Add the cooled pasta, cooked chicken, crispy bacon, and Parmesan cheese to the bowl with the lettuce and tomatoes.
- Drizzle the Caesar dressing over the top. Go a little lighter at first; you can always add more!
-
Toss & Serve:
- Gently toss everything together until the pasta and salad ingredients are coated in that creamy dressing. If it appears a bit dry, just add a splash of reserved pasta water!
- Taste and adjust seasoning with salt and pepper as desired.
Serving Suggestions
You have your beautiful Chicken Caesar Pasta Salad all prepped and ready to go, now how to serve it? Here’s a little flourish to elevate your presentation:
-
Bowl It Up: Serve it family-style in a large serving bowl for a cozy, communal vibe. Make sure to have some extra dressing on the side for everyone to customize their salad!
-
Individual Servings: For a fancy touch, serve the salad in individual mason jars or clear cups. Layer the ingredients starting with the dressing at the bottom, followed by pasta, chicken, bacon, and a garnish of lettuce and tomatoes on top. This not only looks Instagram-worthy but makes for easy transport!
-
Garnish: Sprinkle a little more grated Parmesan and fresh cracked black pepper on top just before serving for that final touch.
Recipe Variations
Here are a few delightful twists you can add to your Chicken Caesar Pasta Salad to keep things fresh and exciting:
-
Mediterranean Vibe: Swap out the Caesar dressing for tzatziki sauce and add kalamata olives and feta cheese for a Mediterranean flair!
-
Spicy Kick: Add sliced jalapeños or a sprinkle of red pepper flakes for a spicy version. A drizzle of sriracha on top takes it to another level!
-
Fruit-Fusion: Toss in some diced avocado or seasonal fruits like diced peaches or strawberries for a sweet balance against the savory elements.
-
Vegan Version: Use chickpeas for protein, nutritional yeast for a cheese flavor, and a homemade dairy-free Caesar dressing to make it vegan-friendly.
-
Grilled Veggies: Add some grilled zucchini, bell peppers, or asparagus for an added crunch and robust flavor—perfect for making the salad seasonal and colorful!
Chef’s Notes
Ah, cooking truly is a journey, isn’t it? I’ve made this Chicken Caesar Pasta Salad countless times, and each version has been slightly different, depending on what ingredients I had on hand or who I was serving. Over the years, the salad has evolved into a versatile dish, and I love experimenting with it!
One funny memory I have is when I decided to go rogue and add a whole block of feta cheese instead of Parmesan—let’s just say, that salad turned into a creamy, tangy explosion that left everyone trying to guess the mystery ingredient! But that’s the beauty of cooking; it’s all about learning, laughing, and tweaking recipes to suit your taste.
FAQs and Troubleshooting
Let’s tackle some common questions and issues you may encounter while making this Chicken Caesar Pasta Salad:
Q1: Can I make this salad ahead of time?
Absolutely! You can prep the pasta and chop the veggies ahead of time. Just keep everything separate and mix together right before serving, or it can become mushy.
Q2: What if my dressing is too thick?
No worries! Just add a little bit of the reserved pasta water to loosen it up, or even some olive oil will help drench your salad beautifully.
Q3: How can I keep the salad fresh for leftovers?
Store any leftover salad in an airtight container in the refrigerator, but keep the dressing separate. Mix it in only when you’re ready to eat!
Q4: Is there a gluten-free option for this salad?
Sure! Use gluten-free pasta instead of traditional bowties, and you’re good to go!
Nutritional Info
While this Chicken Caesar Pasta Salad is undeniably delicious, it’s always good to know what’s going into your dish. Here’s a rough breakdown of the nutritional info for one serving (based on 6 servings total):
- Calories: 450
- Protein: 25g
- Carbohydrates: 45g
- Fat: 20g
- Fiber: 3g
- Sodium: 800mg
Keep in mind that these numbers may vary based on the ingredients you select, but you can access vital info that fits your dietary needs!
Final Thoughts
And there you have it—your very own Chicken Caesar Pasta Salad! It’s a dish that not only satisfies your cravings but creates lasting memories and brings people together. As you gather around the table, whether with family or friends, remember that food is more than just ingredients; it’s a love language, a storytelling medium, and a way to nourish the soul.
So, dive in, experiment with flavors, and make this recipe your own. I can’t wait for you to experience all the joy and warmth this dish brings to your kitchen! Until next time, happy cooking, and here’s to many more delicious meals together!
Stay flavorful,
Beau Collier

Chicken Caesar Pasta Salad
- Total Time: 30 minutes
- Yield: 6 servings 1x
- Diet: Non-Vegetarian
Description
A delightful blend of juicy chicken, crispy bacon, fresh greens, and tangy Caesar dressing, perfect for gatherings or a cozy meal.
Ingredients
- 2 cups bowtie pasta
- 1 cup cooked chicken, diced
- 1/2 cup crispy bacon, chopped
- 1 cup Romaine lettuce, chopped
- 1/2 cup cherry tomatoes, halved
- 1/2 cup Parmesan cheese, grated
- 1 cup Caesar dressing
- Salt and pepper to taste
Instructions
- Cook the pasta by bringing a large pot of salted water to a boil. Toss in the bowtie pasta and cook according to the package instructions, usually around 8-10 minutes.
- Prep the chicken by dicing it into bite-sized pieces.
- Cook the bacon in a large skillet over medium heat until crispy.
- Combine the chopped Romaine lettuce and halved cherry tomatoes in a large mixing bowl.
- Drain the pasta and rinse it under cold water to cool it down.
- Mix everything together by adding the cooled pasta, chicken, bacon, and Parmesan cheese to the bowl with the lettuce and tomatoes.
- Toss everything together until coated with Caesar dressing.
Notes
For a lighter version, substitute Greek yogurt for the dressing. Store any leftover salad in an airtight container in the refrigerator, keeping dressing separate.
- Prep Time: 15 minutes
- Cook Time: 15 minutes
- Category: Salad
- Method: Mixing
- Cuisine: American
Nutrition
- Serving Size: 1 serving
- Calories: 450
- Sugar: 3g
- Sodium: 800mg
- Fat: 20g
- Saturated Fat: 7g
- Unsaturated Fat: 13g
- Trans Fat: 0g
- Carbohydrates: 45g
- Fiber: 3g
- Protein: 25g
- Cholesterol: 70mg
Keywords: Chicken, Caesar, Pasta Salad, Comfort Food, Easy Recipes
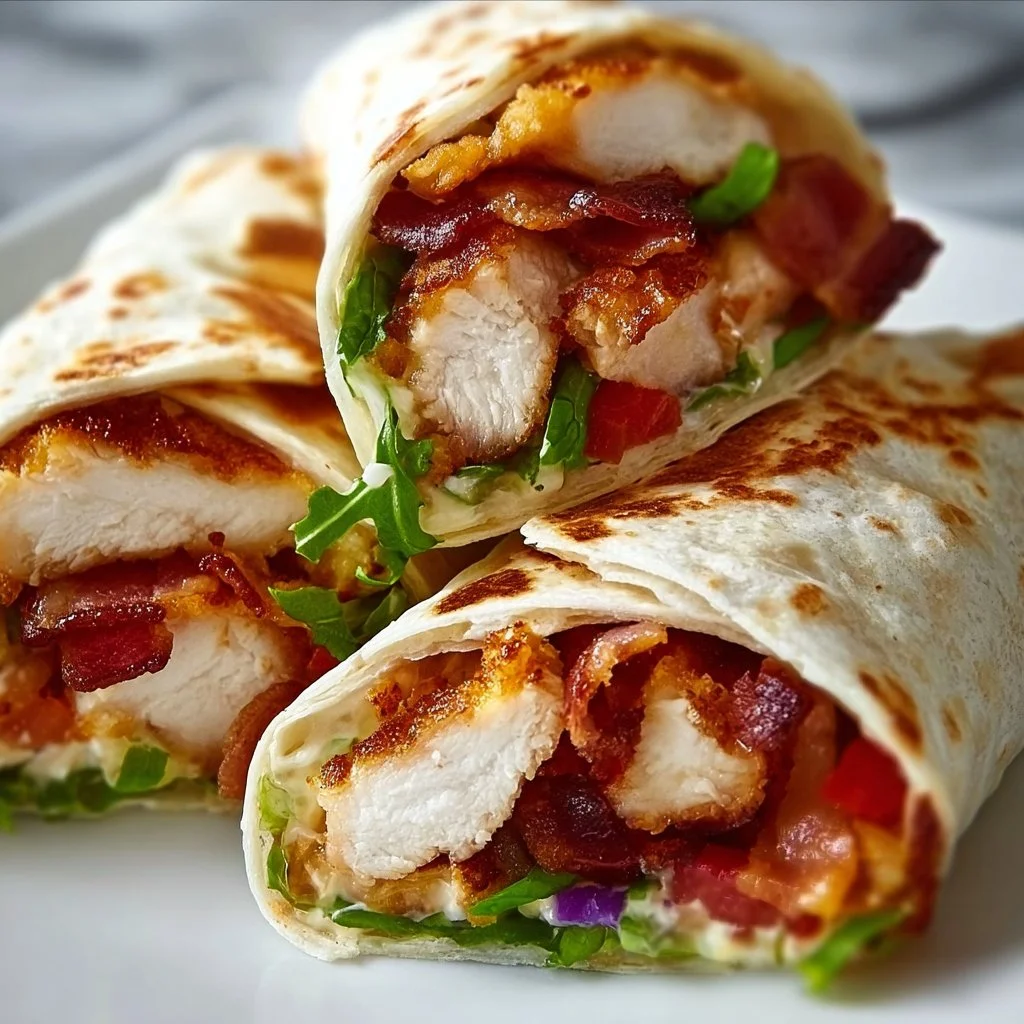
Chicken Bacon Wraps
Chicken Bacon Wraps: A Comfort Food Hero
Hey there, food lovers! Beau Collier here, and today we’re diving into a recipe that’s not only delicious but also a total crowd-pleaser: Chicken Bacon Wraps! If you’ve ever been caught in the kitchen wondering what to whip up that’s both easy and tantalizing, you’re in for a treat.
Picture this: the juicy, tender chicken breast wrapped in savory, crispy bacon, with a creamy, cheesy filling that just adds to the delight! It’s the kind of dish that brings your family together around the dinner table and keeps everyone coming back for seconds. Plus, it’s ridiculously easy to make, so even if you’ve recently discovered the location of your spatula, you can totally pull this off.
These Chicken Bacon Wraps are perfect for any occasion—weeknight dinners, game day appetizers, or even a cozy gathering with friends. They’re great for impressing guests while allowing you to enjoy the party without being stuck in the kitchen. So buckle up, my friends! Let’s roll up our sleeves and get cooking.
Personal Story
I’ll never forget the first time I experimented with Chicken Bacon Wraps. It was back in college, and I was throwing my first dinner party. You know, the kind where you invite friends over to showcase your “culinary skills” but really just hope they think you’re a total champ for cooking anything at all.
I decided to take a leap of faith and whip up these wraps. With only two burners and a toaster oven to my name, I remember wrapping those chicken breasts, liberally slathering on cream cheese, and sprinkling cheddar for good measure. The kitchen was a flurry of ingredients, and I had bacon draped over every available surface. My roommates walked in, unsure if they should be excited or worried.
When I pulled them out of the oven, the aroma filled the apartment, and I felt like a superstar. We sat together at the table, devouring the wraps, laughing, and sharing stories well into the evening. That night, I realized that food isn’t just about sustenance; it’s about connection and creating beautiful memories. Ever since then, Chicken Bacon Wraps have held a special place in my heart—and my recipe collection!
Ingredients
Let’s gather our stars of the show! Here’s what you’ll need to make these scrumptious wraps:
-
Chicken Breast: The main event! Look for boneless, skinless chicken breasts for easy handling. If you’re short on time, you can opt for pre-cooked chicken or even rotisserie chicken.
-
Bacon: The crispy, salty delight that ties everything together. Thick-cut bacon offers more flavor and crunch, but regular bacon works just as well. For a healthier twist, turkey bacon is a decent substitute.
-
Cream Cheese: This gives your wrap that luscious, creamy texture. You can mix it with herbs or spices for added flavor. If you’re dairy-free, try a plant-based cream cheese.
-
Cheddar Cheese: A classic choice that melts beautifully. Feel free to swap with pepper jack for a little kick or mozzarella for a milder flavor.
-
Black Pepper: A sprinkle of this provides a nice contrast to the richness of the cheeses. Freshly cracked is always best for maximum flavor.
-
Garlic Powder: A subtle nod to savory goodness. If you’re feeling fancy, use freshly minced garlic for a pop of zest.
-
Fresh Herbs (optional): A handful of fresh herbs like parsley or thyme can elevate your dish and add that chef-quality spin.
-
Toothpicks: These little guys help keep everything together while baking. Bamboo or wooden toothpicks work well!
With this lineup, get ready to create a masterpiece! Don’t forget, you can tweak ingredients based on what you have on hand or your dietary needs. A little improvisation just makes things more exciting, right?
Step-by-Step Instructions
Ready to roll? Let’s get cooking! Here’s how to make your Chicken Bacon Wraps, step by step:
-
Preheat the Oven: Preheat your oven to 400°F (200°C). A hot oven ensures that your wraps get nice and crispy.
-
Prepare the Chicken: Take your boneless chicken breasts and flatten them to about 1/2 inch thick. Use a meat mallet or rolling pin; this helps with even cooking. If you’re using pre-cooked chicken, skip this step!
-
Season the Chicken: Sprinkle both sides of the chicken with black pepper and garlic powder. Feel free to get creative here—add your favorite spices for a personal touch.
-
Spread the Cream Cheese: Take your cream cheese (remember to let it sit at room temperature for easier spreading) and slather a generous layer onto one side of the chicken breast. If desired, mix in some freshly chopped herbs for an extra pop of flavor.
-
Add the Cheddar: Sprinkle a handful of cheddar cheese over the cream cheese layer. Yes, you want plenty of cheesy goodness in there!
-
Wrap It Up: Now comes the fun part! Roll the chicken breast tightly, starting from the end with the cheese. The creamy filling should be nestled inside like a savory surprise.
-
Secure with Bacon: Take your bacon slices and wrap them around the chicken roll. Depending on the size of your chicken breast, 3-4 slices of bacon should do the trick. Secure each end with a toothpick to keep everything in place.
-
Prepare for Baking: Place the wrapped chicken on a baking sheet lined with parchment paper or foil (for easy cleanup!). If you’ve got any leftover bacon, feel free to drape it over the top for extra crispiness.
-
Bake: Pop the baking sheet in your preheated oven and bake for about 25-30 minutes, or until the chicken is cooked through and the bacon is crispy. Don’t be afraid to use a meat thermometer—165°F (75°C) is your magic number for chicken!
-
Rest and Serve: Once the wraps are out of the oven, let them rest for a few minutes before removing the toothpicks. This allows the juices to redistribute. Slice them into bite-sized pieces or serve them whole—totally your call!
And there you have it! Delicious Chicken Bacon Wraps, ready to impress!
Serving Suggestions
How should you present these delectable wraps? There’s nothing wrong with serving them straight off the baking sheet, but if you want to make it a bit fancier, try this:
-
Plate Them Up: Arrange the Chicken Bacon Wraps on a beautiful platter or large plate. You can drizzle some creamy ranch or spicy sriracha sauce artistically around the sides for dipping—that’ll have everyone oohing and aahing!
-
Garnish: A sprinkle of freshly chopped parsley or chives on top adds a pop of color and a hint of freshness. You could even serve them alongside a bright green salad or some crispy roasted veggies for balance.
-
Dips are Key: Consider pairing your wraps with various dips like barbecue sauce, garlic aioli, or a tangy honey mustard for guests to enjoy. It not only complements the flavors but also gives everyone something fun to interact with.
Trust me; when you plate it up with these little touches, everyone will feel like they’ve been transported to a gourmet restaurant!
Recipe Variations
Feeling adventurous? Let’s add some twists to our Chicken Bacon Wraps:
-
Spicy Southwest Bacon Wraps: Replace regular cheddar with pepper jack cheese and add a sprinkle of taco seasoning for a fiesta in every bite. Serve with guacamole for a South of the Border flare!
-
Herb & Garlic Explosion: Instead of cream cheese, use a mix of goat cheese and fresh herbs. Think basil, oregano, and a hint of lemon zest to brighten up the flavors.
-
BBQ Chicken Wraps: Before rolling the chicken, brush both sides with your favorite barbecue sauce. This gives you that smoky, sweet flavor that pairs perfectly with the crunchy bacon.
-
Mediterranean Delight: Swap in feta cheese and spinach, and drizzle with a bit of olive oil before wrapping. Serve with a side of tzatziki for a refreshing touch.
-
Breakfast Style: What’s better than savory bacon? Add some scrambled egg in the cream cheese spread for a breakfast twist! These would make for a hearty brunch or daytime gathering.
Experimenting with flavors is half the fun, so don’t hesitate to mix and match!
Chef’s Notes
One of my favorite things about these Chicken Bacon Wraps is how versatile they are. Over the years, I’ve adapted the recipe to suit various tastes, transitioning from your traditional comfort food to something with a modern twist. I once hosted a potluck where everyone brought an ingredient; let me tell you, we ended up with an outlandish mix of flavors, including some bizarre fruit toppings!
But honestly, every variation added a new dimension to the dish. It reminded me how food evolves and connects people, and how the kitchen is a great place for sharing ideas with both new and old friends—no matter what you bring to the table.
FAQs and Troubleshooting
Q: Why is my bacon not crispy?
A: If your bacon isn’t getting crispy, it might be because of the cooking temperature or time. Ensure you’re baking at 400°F, as a hotter oven helps bacon crisp up beautifully. If all else fails, you can give them a quick broil for the last few minutes, just keep an eye on them to avoid burning!
Q: Can I make these ahead of time?
A: Absolutely! You can prep the Chicken Bacon Wraps ahead of time, just store them in the fridge (unbaked) until you’re ready to pop them in the oven. Add a few extra minutes to the cooking time if they’re cold from the fridge.
Q: What sides go well with these wraps?
A: These wraps go great with a variety of sides! I recommend serving them with a fresh garden salad, roasted vegetables, or even some crispy potato wedges. They pair wonderfully with anything that adds freshness or crunch.
Q: I don’t have toothpicks; now what?
A: No toothpicks? No worries! You can just place the wraps seam-side down on your baking sheet. The bacon usually holds well through cooking, giving you a deliciously crispy result without needing any extra support.
Nutritional Info
These Chicken Bacon Wraps serve as a great protein-packed dish but are certainly indulgent with the bacon and cream cheese. Here’s a general breakdown of the nutrition per serving (one wrap):
- Calories: Approximately 320 kcal
- Protein: 30g
- Fat: 22g
- Carbohydrates: 3g
- Fiber: 0g
- Sugars: 0g
Of course, this can vary based on specific brands and ingredient choices, so adjust as needed!
Final Thoughts
There you have it—a full rundown for making Chicken Bacon Wraps that are sure to become a go-to recipe in your kitchen. I hope it inspires you to get creative, share those meals with family and friends, and build memories that will last a lifetime. Remember, whether you’re adding unexpected ingredients or sticking to the classics, the most important part is enjoying the journey of cooking and the happiness it brings.
So grab your apron, fire up that oven, and let’s get wrapping! Happy cooking, my foodie friends!
Print
Chicken Bacon Wraps
- Total Time: 45 minutes
- Yield: 4 servings 1x
- Diet: Non-Vegetarian
Description
Juicy chicken breasts wrapped in crispy bacon with a creamy cheese filling, perfect for any occasion.
Ingredients
- 4 boneless, skinless chicken breasts
- 12 slices thick-cut bacon (or turkey bacon)
- 8 oz cream cheese, softened
- 1 cup cheddar cheese, shredded
- 1 tsp black pepper
- 1 tsp garlic powder
- Fresh herbs (optional, e.g., parsley or thyme)
- Toothpicks for securing
Instructions
- Preheat your oven to 400°F (200°C).
- Prepare the chicken by flattening to 1/2 inch thick.
- Season both sides with black pepper and garlic powder.
- Spread cream cheese on one side of the chicken breast.
- Add cheddar cheese over the cream cheese layer.
- Wrap the chicken tightly, starting from the end with cheese.
- Secure with bacon slices and toothpicks.
- Prepare a baking sheet lined with parchment paper.
- Bake for 25-30 minutes until chicken is cooked through and bacon is crispy.
- Rest for a few minutes before serving.
Notes
Feel free to experiment with different cheese and herb combinations. These wraps can also be prepped in advance.
- Prep Time: 15 minutes
- Cook Time: 30 minutes
- Category: Appetizer
- Method: Baking
- Cuisine: American
Nutrition
- Serving Size: 1 wrap
- Calories: 320
- Sugar: 0g
- Sodium: 700mg
- Fat: 22g
- Saturated Fat: 9g
- Unsaturated Fat: 10g
- Trans Fat: 0g
- Carbohydrates: 3g
- Fiber: 0g
- Protein: 30g
- Cholesterol: 100mg
Keywords: Chicken Bacon Wraps, Appetizer, Easy Recipe, Comfort Food, Party Food
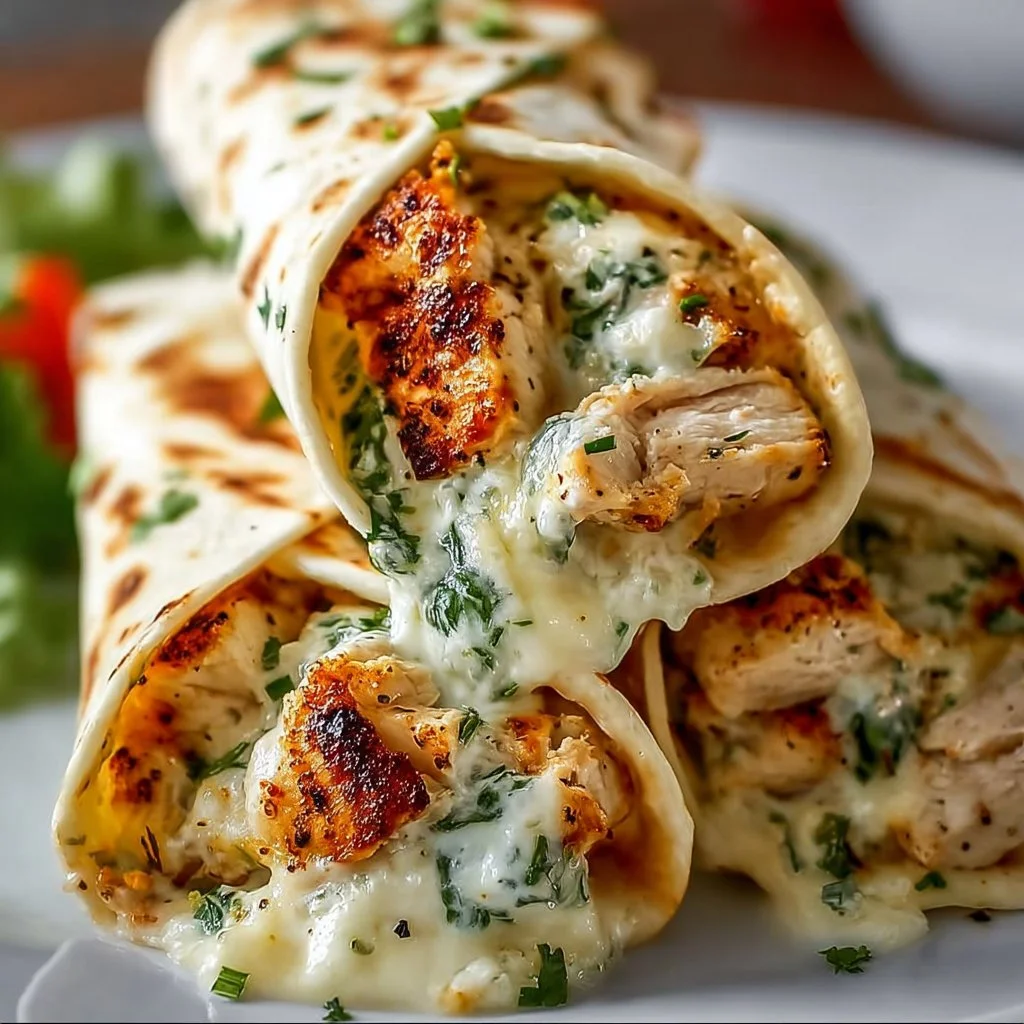
Cheesy Garlic Chicken Wraps
Cheesy Garlic Chicken Wraps: A Wholesome and Flavor-Packed Delight!
Hey there, food lovers! I’m Beau Collier — your friendly neighborhood chef. Today, we’re diving into a delicious creation that’s sure to lick all your culinary worries away: Cheesy Garlic Chicken Wraps! If you’re looking for a meal that’s not only easy to whip up but also bursting with flavor, you’re in for a treat. Grab your apron and let’s get started!
Picture this: It’s a calm weeknight, and the last thing you want to do is hover over the stove for hours. Sound familiar? We’ve all had those days when cooking feels more like a chore than a joy, and that’s why I created Feastical! Life is too short for boring food and endless clean-up. That’s where these Cheesy Garlic Chicken Wraps come in! They’re quick, scrumptious, and a delightful way to enjoy wholesome ingredients without the fuss.
These wraps are like a warm hug after a long day; they combine juicy shredded chicken, gooey melted cheese, and the aromatic allure of garlic — all enveloped in a clever lettuce leaf or wrap of your choice. The beauty of this dish is its flexibility; whether you’re low-carb, gluten-free, or just in the mood to be a bit creative in the kitchen, these wraps can fit the bill.
Let’s unleash your inner chef! I promise you this is a recipe that’s bound to become a family favorite. From meal prep to a spontaneous weeknight dinner, Cheesy Garlic Chicken Wraps are your new go-to. Now, let’s unravel the layers of flavor together!
Personal Story
Growing up, weekends meant family dinners around the table, filled with laughter, stories, and of course, delicious food. One of my fondest childhood memories revolves around my mom’s incredible chicken dishes. No matter how crazy the week had been, her cooking brought us back together. Often, she would whip up a sautéed chicken dish infused with garlic and cheese, which we would wrap in whatever we had – bread, tortillas, or even lettuce!
The smell of garlic sizzling in the pan still evokes warmth and nostalgia for me. Fast-forward to today, I’ve taken that comforting recipe and turned it into these easy, cheesy wraps. Each bite transports me back to those cherished moments — and I want you to feel that same joy when you make them!
Ingredients
-
2 cups cooked chicken, shredded
This is the star of the dish! Use rotisserie chicken for convenience, or roast your own. If you’re vegetarian, you can substitute with shredded jackfruit or tofu for a meaty texture. -
1 cup shredded cheese (cheddar or mozzarella)
Cheese adds that gooey goodness we’re all craving! Cheddar delivers rich flavor, while mozzarella gives you that stretch factor. Feel free to switch it up with pepper jack for a kick! -
4 large lettuce leaves or low carb wraps
Iceberg or romaine works perfectly for a fresh crunch. If you prefer wraps, look for whole grain or gluten-free options. Experiment with your favorite flatbreads, just make sure they’re sturdy enough to hold all that delicious filling. -
2 cloves garlic, minced
Garlic is my secret love. It elevates any dish! You can substitute with garlic powder if that’s all you have on hand—about 1 teaspoon should do the trick. -
1 tablespoon olive oil
This adds a bit of richness. If you’re keen on flavor, try infused oils, like garlic or chili oil. -
Salt and pepper to taste
These basics are essential! Adjust according to your taste — feel free to spice it up with paprika or cayenne for an extra zing! -
Optional: diced tomatoes, avocado, or your choice of veggies
Customize your wrap! Fresh veggies add crunch and color. Avocado gives that creamy texture, while diced tomatoes burst with freshness.
Remember, cooking isn’t a strict science; it’s about experimenting and making it your own!
Step-by-Step Instructions
Now, let’s bring all these glorious ingredients together! Here’s how to create your Cheesy Garlic Chicken Wraps:
Step 1: Prepare Your Chicken
If you’re using leftover cooked chicken or rotisserie chicken, shred it into bite-sized pieces. If you’re cooking from scratch, season chicken breasts with salt and pepper, then grill or bake until cooked through (about 20-30 minutes). Let it cool a bit before shredding—trust me, those fingertips will thank you!
Step 2: Sauté the Garlic
In a skillet, warm the olive oil over medium heat. Once it’s shimmering (but not smoking!), toss in the minced garlic. Cook for 1-2 minutes until it becomes fragrant—be careful not to burn it! This will create a wonderful base for the chicken.
Step 3: Add Chicken and Cheese
Now, add the shredded chicken to the skillet, stirring it to coat with that garlicky goodness. Sprinkle in half (or all!) of the shredded cheese at this point. You want it to melt and mingle well with the chicken. Cook for another 2-3 minutes — that’s right, let it ooze and combine!
Step 4: Prepare the Lettuce or Wraps
While the chicken and cheese are merging into pure bliss, prepare your lettuce or wrap. If using lettuce leaves, rinse and pat them dry. If you’re using low carb wraps, heat them slightly in a dry pan or microwave until they’re pliable.
Step 5: Assemble Your Wraps
Spoon the cheesy chicken mixture onto each lettuce leaf or wrap. Here’s the fun part: add any optional toppings like diced tomatoes, zesty avocado, or extra cheese. You want to create a festive explosion of color and flavor!
Step 6: Roll and Enjoy!
If you’ve opted for wraps, fold them up and secure with a toothpick or simply embrace the mess! If you’ve chosen lettuce leaves, fold them over and dive in. These wraps are best enjoyed fresh and warm!
Serving Suggestions
Now that you have your wraps ready, let’s talk presentation! Serve your Cheesy Garlic Chicken Wraps on a beautiful platter, garnished with fresh herbs like cilantro or parsley to add freshness. A squeeze of lemon or lime juice on top brightens the dish and adds a pop of acidity.
Pair these wraps with a crisp side salad, maybe a tangy vinaigrette dressing to complement the richness of the cheese and chicken. You could even set up a little wrap bar, allowing everyone to customize their own with their favorite toppings — how fun is that?
Recipe Variations
One of the best things about this recipe is its adaptability! Here are a few tasty twists you can try:
-
Buffalo Chicken Wraps: Add buffalo sauce to your chicken mixture for a fiery kick. Top with some crumbled blue cheese and celery sticks.
-
Mediterranean Style: Toss in some diced cucumbers, Kalamata olives, and feta cheese for a Mediterranean spin. You could also switch to pita wraps.
-
Veggie-Packed: Load it with additional veggies like bell peppers, corn, or spinach for a heartier, nutrient-focused wrap.
-
BBQ Twist: Instead of olive oil and garlic, use BBQ sauce with the chicken. Add pickles, too, for that classic BBQ chicken flavor.
-
Breakfast Wrap: Feel free to scramble some eggs and mix it into the chicken. It makes a versatile breakfast or brunch option!
Whatever your taste buds crave, these wraps are here for it!
Chef’s Notes
I’ve played around with this recipe over the years, and it’s developed into something I adore. It originally started as just a quick meal, but every time I make these wraps, I discover new ways to enjoy them. One time, I added caramelized onions, and boy, did that create a flavor explosion!
And hey, don’t sweat the small stuff in the kitchen! I once dropped an entire plate of wraps right before serving; instead of panicking, I grabbed a round casserole dish, piled everything in there, and called it a “deconstructed wrap.” It got rave reviews! Cooking is as much about creativity as it is about following a recipe.
FAQs and Troubleshooting
-
Q: What if my chicken is dry?
A: Moisture is key! If your chicken is a bit dry, try adding a splash of chicken broth or extra cheese when mixing to bring it back to life. -
Q: Can I make these ahead of time?
A: Absolutely! Just store each element in separate airtight containers in the fridge. Assemble just before serving to keep everything fresh. -
Q: What can I use instead of cheese?
A: If you’re looking to skip dairy, Daiya or other vegan cheeses work wonders. You can also opt for a creamy avocado spread. -
Q: How do I ensure my wraps don’t fall apart?
A: Here’s the chef’s secret: don’t overfill! Make sure to leave enough space to fold or roll without bursting at the seams.
Nutritional Info
Let’s break down the nutrition of these delightful wraps per serving (assuming basic ingredients):
- Calories: Approximately 320
- Protein: 30g
- Fat: 15g
- Carbohydrates: 20g (depending on the wrap used)
- Fiber: 4g
Of course, variations will change this, but you get a good pantry of protein and healthy fats. Pairing it with veggies also adds essential vitamins and minerals to the dish!
Final Thoughts
There you have it, my friends — a scrumptious, soul-satisfying recipe for Cheesy Garlic Chicken Wraps! Whether you opt for these as a solo meal or something to share with the fam, they are sure to leave you all wanting more.
Cooking doesn’t have to be complicated or time-consuming; it’s all about embracing fresh ingredients, experimenting, and ultimately enjoying the process. So, roll up your sleeves and dive into your own kitchen adventure.
I can’t wait to hear your thoughts and stories about these wraps. Remember, at Feastical, every bite should feel like a celebration! Until next time, keep cooking with love and laughter — let the culinary magic flow!
Happy cooking, and let’s keep this kitchen love rolling! 🍽️💖
Print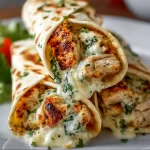
Cheesy Garlic Chicken Wraps
- Total Time: 25 minutes
- Yield: 4 servings 1x
- Diet: Gluten-Free
Description
Delicious and easy-to-make cheesy garlic chicken wraps, perfect for a quick weeknight meal.
Ingredients
- 2 cups cooked chicken, shredded
- 1 cup shredded cheese (cheddar or mozzarella)
- 4 large lettuce leaves or low carb wraps
- 2 cloves garlic, minced
- 1 tablespoon olive oil
- Salt and pepper to taste
- Optional: diced tomatoes, avocado, or your choice of veggies
Instructions
- Prepare your chicken by shredding it into bite-sized pieces.
- Sauté the garlic in olive oil over medium heat until fragrant.
- Add the shredded chicken and cheese to the skillet and cook until melted.
- Prepare the lettuce or wraps for assembling.
- Assemble your wraps by spooning the cheesy chicken mixture onto each leaf or wrap.
- Roll the wraps and enjoy fresh and warm!
Notes
Feel free to customize the wraps with your choice of additional toppings or variations.
- Prep Time: 10 minutes
- Cook Time: 15 minutes
- Category: Main Course
- Method: Sautéing
- Cuisine: American
Nutrition
- Serving Size: 1 wrap
- Calories: 320
- Sugar: 2g
- Sodium: 500mg
- Fat: 15g
- Saturated Fat: 6g
- Unsaturated Fat: 7g
- Trans Fat: 0g
- Carbohydrates: 20g
- Fiber: 4g
- Protein: 30g
- Cholesterol: 60mg
Keywords: cheesy wraps, garlic chicken, quick meal, easy dinner, family favorite
Meal Prep Greek Bowls
# Meal Prep Greek Bowls: A Flavorful Adventure!
## Introduction
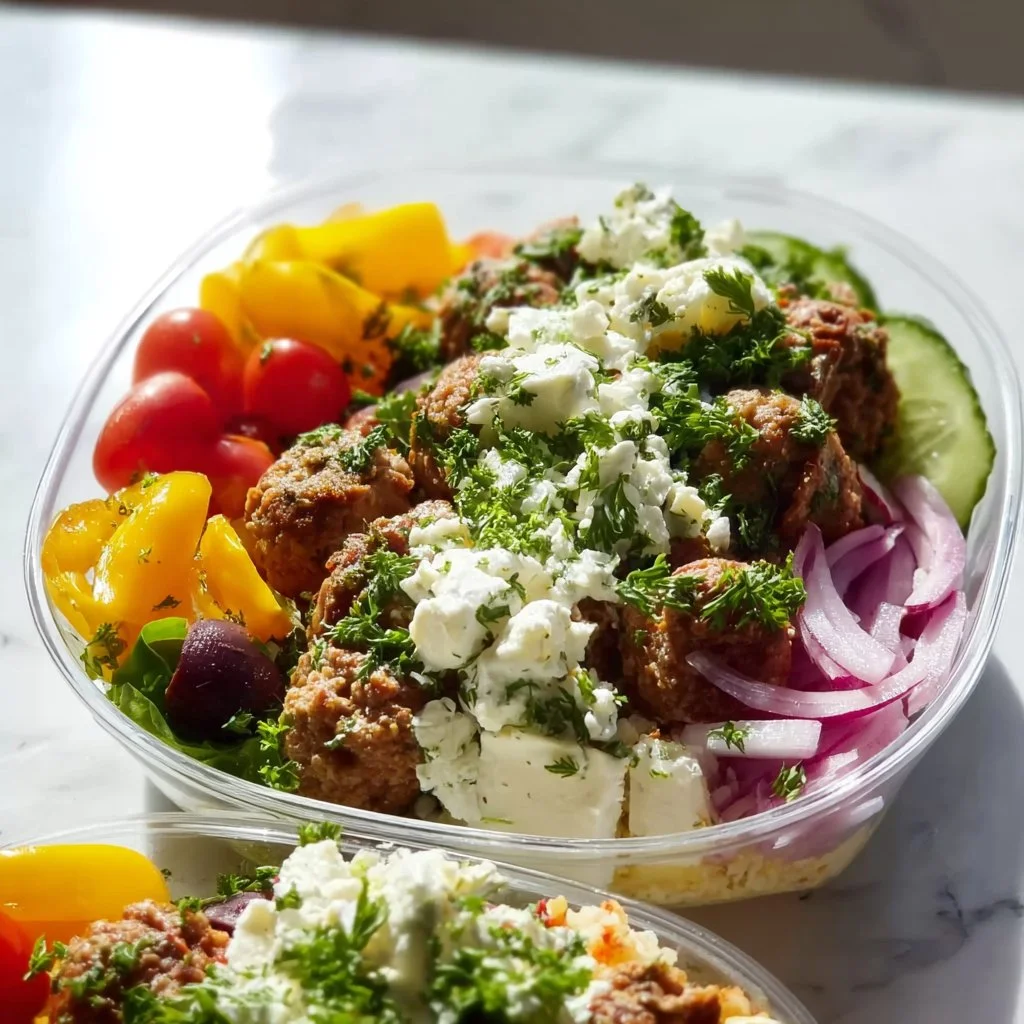
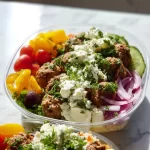
Hey there, food lovers! I’m Beau Collier, and I’m thrilled to have you here at Feastical, where we whip up joyous dishes that make your taste buds dance! Today, we’re diving into something that's not just a meal but a delightful experience—**Meal Prep Greek Bowls!** These bowls pack a punch of flavors and colors that’ll brighten your week.
These Greek bowls are not just a nod toward the sunny shores of Greece; they’re a celebration of meal prep elegance that brings together fresh ingredients, hearty proteins, and zesty dressings in a way that makes you feel like a culinary genius. What I love most about these bowls is their versatility! You can make a big batch, mix and match the ingredients throughout the week, and every day feels like a fresh Mediterranean getaway.
And let’s be honest, with our busy lives, meal prepping can feel like a chore, but it doesn't have to be! I’ve crafted this recipe to keep things simple and satisfying while ensuring you still get that feel-good food vibe—think cozy Mediterranean comfort meals that bring a smile to your face. So, grab your apron, invite your friends (or keep it all to yourself—no judgment here!), and let’s whip up some meal prep love!
## Personal Story
Growing up, my family had a big appreciation for Greek cuisine. My first vivid memory of a Greek meal was when my mom made this incredible spread for a family gathering—a table laden with dishes like moussaka, spanakopita, and, of course, a vibrant Greek salad drizzled in olive oil. It was there, amidst the laughter and delicious scent, that I first tasted that unmistakable flavor of tzatziki, and oh boy, it blew my mind!
Many summer evenings were spent with my family outside, plates piled high, as we enjoyed the warmth of the setting sun and each other’s company. Those moments shaped my love for cooking and gathering, instilling in me the belief that food brings people together. So, as we create these Meal Prep Greek Bowls today, I want you to think about the memories you can create or the friends you can gather around the table, just like I did back in the day. Let’s fill our bowls with love and laughter—because that is what food is all about!
## Ingredients
Alright, here’s where the magic happens! Let’s gather all the ingredients for our amazing Meal Prep Greek Bowls. You’ll find that these elements not only taste good together, but they also make your kitchen smell incredible. Here’s what you need:
- **3 tbsp olive oil**
*A staple in Mediterranean cooking, olive oil adds richness and helps sauté our veggies to perfection. Use extra virgin for the best flavor! Substitute with avocado oil if needed.*
- **1 small yellow onion, diced**
*A great base for flavor; onions bring sweetness when cooked. If you prefer a milder taste, try using a shallot!*
- **1 ½ tsp ground turmeric**
*For a pop of color and earthy flavor! It also boasts health benefits. Fresh ginger is a nice substitute if you're after a spicy kick!*
- **¾ tsp curry powder**
*An interesting twist in our Greek bowls; it enhances flavors beautifully! If you’re sensitive to spice, try using smoked paprika instead for that sweet smoky flavor.*
- **¾ tsp kosher salt**
*Essential for seasoning! Remember, start small and taste as you go!*
- **3 cups chicken or vegetable broth**
*Adds depth and richness to the rice. Use homemade broth for the best results, or go for low-sodium store-bought.*
- **1 ½ cups basmati or jasmine rice**
*Perfect for absorbing flavors and adding a fluffiness to the bowls. Quinoa is a great gluten-free substitute!*
- **700-800 g lean ground beef**
*Packed with protein and delicious juiciness! You can substitute with ground turkey or lentils if you want a veggie-chickpea experience.*
- **2 tsp salt**
*For flavoring meat; this is where we ensure it’s seasoned beautifully!*
- **½ tsp pepper**
*A little kick to balance the flavors; feel free to add more if you like it spicy!*
- **6 garlic cloves, pressed**
*A must-have for adding that aromatic essence. Fresh is key; jarred options are good in a pinch!*
- **2 tbsp dried oregano**
*Brings in that timeless Mediterranean aroma. Fresh oregano is fantastic if you have some on hand!*
- **1 egg**
*Helps bind our meat mixture; you can replace it with flaxseed meal combined with water for a vegan option!*
- **1 cup breadcrumbs**
*For added texture in the meat mix; gluten-free crumbs work just as great.*
- **1 yellow onion, grated**
*For extra moisture and flavor in the meat. You can also use shallots here!*
- **2 tbsp olive oil**
*For cooking the meat; you can use the same oil as before!*
- **1 cup crumbled feta cheese**
*A signature ingredient in Greek dishes; it brings a creamy, tangy flavor. For a dairy-free option, try almond-based feta!*
- **1 cup tzatziki**
*(Make our Tzatziki Recipe!)* That refreshing sauce is a must-have on top of the Greek bowls!
- **Pickled red onions**
*(Make our Pickled Red Onions!)* They add that zesty crunch—perfect for balancing flavors!
- **1 pint baby tomatoes, halved**
*Juicy and delightful; adds freshness! Use cherry tomatoes for extra sweetness!*
- **½ cup hummus**
*A creamy dip that complements everything. As a twist, why not try a roasted red pepper hummus for a delightful change?*
- **1 cup black olives**
*Adds briny notes; Kalamata are excellent! If you’re not an olive fan, feel free to skip 'em!*
- **1 green pepper, sliced thin**
*For crunch and vibrant color. You can switch it up with bell peppers of any color!*
- **Pitas**
*For scooping up all the goodness! You can use gluten-free pitas or even lettuce wraps if you’re going low-carb!*
- **6 lemon wedges**
*For a squeeze of brightness; fresh herbs can also brighten up the plate!*
- **Fresh herbs for garnish (dill, mint, and/or parsley)**
*Herbs elevate everything! Choose your favorite or mix ’em up for a medley!*
## Step-by-Step Instructions
Now, let’s roll up our sleeves and dive into the cooking process! Follow these steps, and don’t forget to sprinkle in a little love as you go!
### Step 1: Sauté the Onion
In a large skillet, drizzle 2 tablespoons of olive oil and heat over medium heat. Add the diced yellow onion and sauté it for about 5 minutes until it starts turning translucent. This is where the magic begins! The aroma of onions cooking is like music to any home cook’s ears. Stir occasionally, and let that golden goodness develop.
### Step 2: Flavor Infusion
Sprinkle in the turmeric and curry powder. You’ll notice the skillet filling with a vibrant yellow hue! Stir it all together for about a minute, allowing those spices to infuse and create a beautiful aroma. Pro tip: If you’re feeling adventurous, consider adding a pinch of cumin too for an extra layer of flavor!
### Step 3: Add the Rice
Toss in the basmati rice and stir for another minute. This step is super important—by toasting the rice, you’re enhancing its flavor! Next, pour in the broth and add ¾ teaspoon kosher salt. Bring it to a boil, then reduce the heat, cover, and let it simmer for about 15-20 minutes until the rice absorbs all the liquid and is fluffy. If you love a little more texture, mix in a handful of chopped parsley while it’s cooking!
### Step 4: Prepare the Meat Mixture
While the rice cooks, let’s prep the meat. In a mixing bowl, combine the lean ground beef, pressed garlic cloves, grated onion, 2 teaspoons salt, ½ teaspoon pepper, oregano, breadcrumbs, and the egg. Use your hands (they’re the best tools!) to mix everything thoroughly but gently. You don’t want to overwork the meat; keep it tender!
### Step 5: Shape and Cook the Meat
Shape the meat mixture into small meatballs or patties—whatever floats your boat! In a separate skillet, heat 1 tablespoon of olive oil over medium-high heat and cook the meatballs for about 6-8 minutes, turning frequently until they’re browned on all sides and cooked through. A little crispy outside is always a win!
### Step 6: Assembly Time
Whew! Now, you're almost there. Grab your container or bowl for meal prep, starting with a generous scoop of your fluffy rice as your base. Layer on those glorious meatballs, followed by a good dollop of tzatziki, a sprinkle of crumbled feta cheese, and a spirited handful of halved tomatoes. Don’t forget the pickled onions and sliced green peppers for that crunch and zing!
### Step 7: Add Garnishes
Add a scoop of hummus, a handful of black olives, and a sprinkle of fresh herbs to the top. Top it all off with a couple of lemon wedges for that zesty finish. Now, isn’t that a feast for the eyes?
## Serving Suggestions
When it comes to serving, think of this as an art—lay out your Greek bowls like a canvas! Serve each portion in a shallow bowl or a meal prep container.
For added flair, you can arrange your toppings beautifully! The tzatziki and hummus can be placed in small compartments or dolloped on top, with olives and feta sprinkled around. Add a side of toasted pita wedges for extra fun. And remember, fresh herbs make everything look (and taste) better—add a touch of dill, mint, or parsley before serving!
## Recipe Variations
Here are a few creative twists you can explore with your Greek bowls to keep things exciting:
1. **Vegetable Power:** Swap ground beef for a mix of lentils and finely chopped mushrooms for a hearty vegetarian option. Add in your favorite veggies, like zucchini or spinach, for an extra nutrient boost!
2. **Grilled Chicken Bowls:** Instead of meatballs, marinate chicken pieces in olive oil, lemon juice, garlic, and oregano, then grill them for that smoky flavor!
3. **Quinoa Bowls:** Use quinoa instead of rice for a gluten-free alternative and make it even more nutritious. It pairs perfectly with the other ingredients!
4. **Spicy Tahini Dressings:** Drizzle some spicy tahini sauce over your bowl for an Asian-Mediterranean fusion. It offers a creamy texture and a nutty flavor!
5. **Mediterranean Layered Salad:** Layer all the ingredients in a mason jar and shake it when ready to eat for a portable meal. Perfect for lunches on the go!
## Chef’s Notes
A little more than a mash-up of flavors, this recipe has evolved over time. The first time I made these Greek bowls, it was a hodgepodge of leftovers, just trying to clear out what was in my fridge—and boy, did it turn out to be a hit! Since that day, I’ve been doing spins on these bowls—sometimes adding roasted vegetables, sometimes going heavier on the herbs. Always remember, cooking is about experimenting!
## FAQs and Troubleshooting
Here are some Common Questions I often hear:
1. **What if my rice is overcooked?**
- No worries—use it as a creamy base for a delicious Greek porridge by adding more broth and mixing in some yogurt!
2. **How can I make this a meal prep for the week?**
- Store each ingredient separately in meal prep containers, and assemble the bowls fresh each day!
3. **What if I don’t have tzatziki?**
- You can make a quick substitute by mixing plain yogurt with lemon juice, garlic, and fresh herbs!
4. **Can I freeze these bowls?**
- Absolutely! Just store the components separately; the rice and meat freeze well, and the toppings can be added fresh!
## Nutritional Info
These Meal Prep Greek Bowls are a marvelous combination of flavors and nutrients in a single meal! Here’s a rough breakdown of what you’re getting in each serving:
- **Calories:** Approximately 550
- **Protein:** 30g
- **Carbohydrates:** 50g
- **Fat:** 25g
- **Fiber:** 5g
- **Sodium:** 800mg (can vary based on seasoning choices)
This meal is balanced—a fantastic source of protein, healthy fats, and whole grains. And remember, by customizing your bowls, you can make them even healthier!
## Final Thoughts
Cooking should always be a joyful exploration, and this Meal Prep Greek Bowls recipe is the epitome of that spirit. You can mix and match ingredients, play with flavors, and adjust to suit your taste—the possibilities are endless! The best part is sharing this feast with friends or family, or even savoring it solo while watching your favorite show, because life is too short not to enjoy the delicious things!
So, now that we’ve shared this culinary adventure, what are you waiting for? Head to the kitchen, put your apron on, and let’s get cookin’. Remember, every dish tells a story, and I'm thrilled to hear yours! Happy cooking, friends!
Meal Prep Greek Bowls
- Total Time: 60 minutes
- Yield: 4 servings 1x
- Diet: Gluten-Free
Description
Delight in these flavorful Meal Prep Greek Bowls packed with fresh ingredients, hearty proteins, and zesty dressings. A perfect weeknight meal that brings a taste of Greece to your table!
Ingredients
- 3 tbsp olive oil
- 1 small yellow onion, diced
- 1 ½ tsp ground turmeric
- ¾ tsp curry powder
- ¾ tsp kosher salt
- 3 cups chicken or vegetable broth
- 1 ½ cups basmati or jasmine rice
- 700–800 g lean ground beef
- 2 tsp salt
- ½ tsp pepper
- 6 garlic cloves, pressed
- 2 tbsp dried oregano
- 1 egg
- 1 cup breadcrumbs
- 1 yellow onion, grated
- 2 tbsp olive oil
- 1 cup crumbled feta cheese
- 1 cup tzatziki
- Pickled red onions
- 1 pint baby tomatoes, halved
- ½ cup hummus
- 1 cup black olives
- 1 green pepper, sliced thin
- Pitas
- 6 lemon wedges
- Fresh herbs for garnish (dill, mint, and/or parsley)
Instructions
- Sauté the onion: In a large skillet, drizzle 2 tablespoons of olive oil and heat over medium heat. Add the diced yellow onion and sauté it for about 5 minutes until it starts turning translucent.
- Sprinkle in the turmeric and curry powder. Stir it all together for about a minute to infuse the flavors.
- Toss in the basmati rice and stir for another minute. Add the broth and ¾ teaspoon kosher salt. Bring to a boil, then reduce heat, cover, and simmer for 15-20 minutes.
- Combine ground beef, pressed garlic, grated onion, 2 teaspoons salt, pepper, oregano, breadcrumbs, and egg in a mixing bowl. Mix thoroughly but gently.
- Shape the meat mixture into small patties. In a separate skillet, heat 1 tablespoon of olive oil over medium-high heat and cook the meatballs for 6-8 minutes until browned.
- Grab your meal prep container and start by adding a scoop of fluffy rice. Layer with meatballs, tzatziki, crumbled feta, and halved tomatoes.
- Add a scoop of hummus, a handful of black olives, and sprinkle with fresh herbs. Finish with lemon wedges.
Notes
Experiment with flavors and ingredients based on your preferences. These bowls can be customized easily to suit dietary needs.
- Prep Time: 20 minutes
- Cook Time: 40 minutes
- Category: Main Course
- Method: Baking
- Cuisine: Greek
Nutrition
- Serving Size: 1 serving
- Calories: 550
- Sugar: 4g
- Sodium: 800mg
- Fat: 25g
- Saturated Fat: 7g
- Unsaturated Fat: 15g
- Trans Fat: 0g
- Carbohydrates: 50g
- Fiber: 5g
- Protein: 30g
- Cholesterol: 70mg
Keywords: Greek, meal prep, healthy, bowls, Mediterranean
Sticky Chicken Bowls Recipe
Sticky Chicken Bowls Recipe
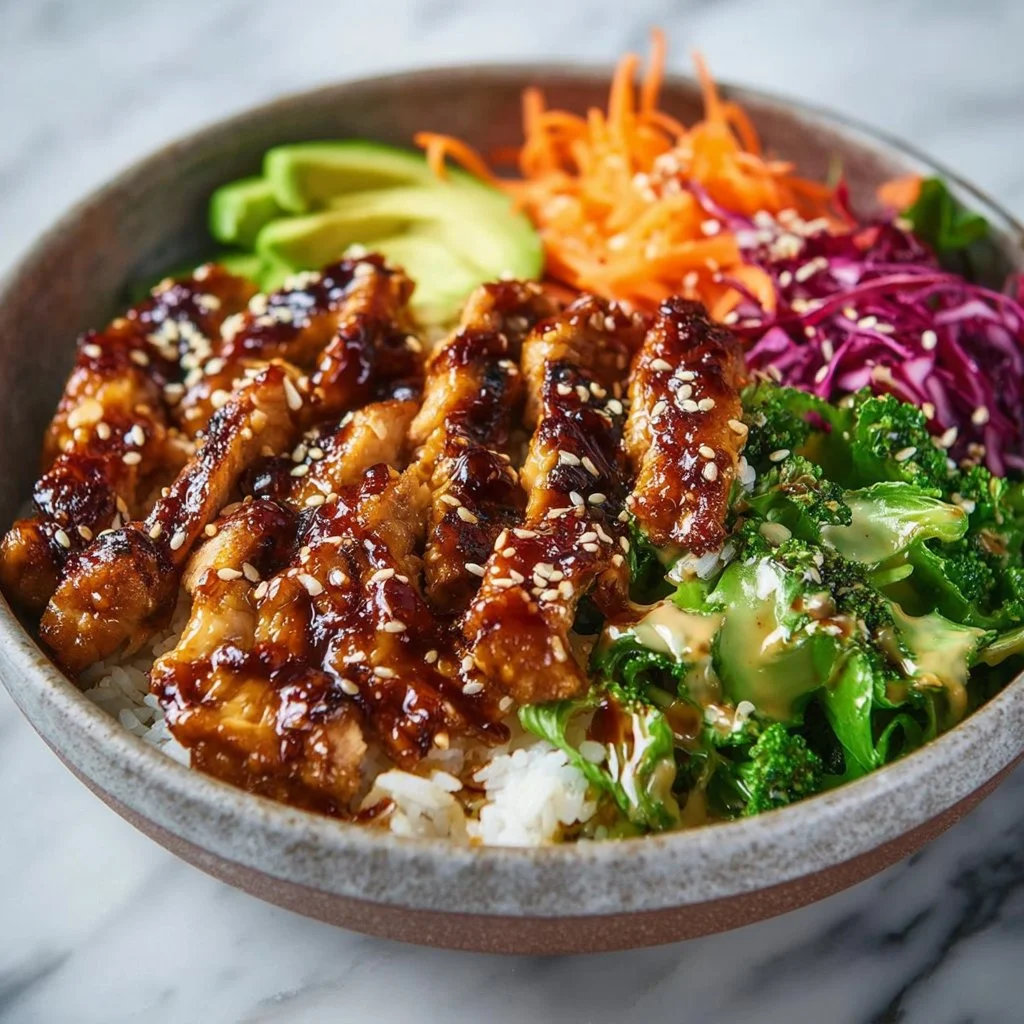
Hey there, food lovers! If you’re anything like me, you know that sometimes comfort food comes in a bowl—especially on those hectic weeknights when you’re craving something hearty but also crave a bit of fun in your kitchen life. That’s where my Sticky Chicken Bowls come into play! This dish is all about juicy, tender chicken coated in a tangy, sweet, and slightly spicy sauce served atop a bed of fluffy rice with vibrant broccoli. It’s not just a meal; it’s an experience that brings flavors and friends together, like a hug in a bowl!
I first stumbled upon this dish while rummaging through my grandmom’s old recipe box. I was looking for something special to make for a cozy dinner with friends. I remember finding her scribbled notes, filled with love and her classic twist on traditional Asian-inspired recipes. I decided to take that classic and put my own spin on it, making it easier and more flavorful for today’s busy kitchen warriors. Little did I know, it would become a staple that always garners oohs and aahs from my loved ones around the dinner table.
Whip out your spatula and get ready to embrace the magic that happens when juicy chicken meets a sticky sauce and delightful veggies. Don’t be surprised if you find yourself making this dish again and again—it’s simply that good!
Personal Story
Once upon a time, I had the best dinner party after I invited a group of friends over without much thought about what to serve. I went to my pantry, surveyed my fridge, and thought, "Alright, Beau, let’s make something out of nothing!" The neighbors’ aroma wafting through the air made me nostalgic for my grandmom’s kitchen—where every dish was loaded with flavor and warmth.
I decided to cook my version of a sticky chicken bowl based on the ingredients I had at hand, and let me tell you, it was a hit! My friends were eagerly waiting in the kitchen, licking their forks, and asking for the recipe before they even took a bite. That night, we showed each other our favorite music and devoured those sticky chicken bowls as if our souls depended on it—and in some ways, they did. Food is that powerful! The laughter, the flavors, and the memories made that night brought us all closer together. It was one of those “I could do this every week” kind of moments. So, if you’re looking to create your own beautiful memories, let’s get to cooking!
Ingredients
Here’s what you’re going to need to whip up these fantastic sticky chicken bowls:
-
2 cups uncooked rice
A fluffy base that soaks up all those tasty flavors! You can use jasmine rice for an aromatic touch or brown rice for a nuttier flavor and added nutrition. -
2 small heads broccoli, chopped
Fresh broccoli not only adds a beautiful pop of color but also a delightful crunch! If you don’t have broccoli handy, you can substitute it with steamed snap peas or bok choy for a different texture. -
3 large chicken breasts
The star of the dish! Choose boneless, skinless chicken for tenderness. For a twist, consider using tofu or seitan if you’re going plant-based. -
2 tbsp olive oil
For sautéing! You can substitute it with sesame oil for an extra layer of flavor, which is particularly tasty in this dish. -
1 tsp salt
Essential for enhancing flavors. Feel free to adjust based on your preference or dietary restrictions. -
1/2 tsp pepper
A staple spice! Don’t skip this to keep your dish from tasting flat. -
1 tsp chili powder
Adds a mild kick! If you’re extra spicy, switch it out for cayenne pepper. -
1 tsp smoked paprika
For that rich, smoky flavor and beautiful color. Sweet paprika works too, but you won’t get that smoky depth. -
1 tsp onion powder
A flavor powerhouse! If you have fresh onions, you could use 1 small onion instead—just sauté it until golden. -
1 tsp oregano
Gives a touch of herbaceousness. Dried thyme can make a fine substitute! -
1/2 cup soy sauce
The saltiness and umami boost hold the dish together. Use tamari sauce for a gluten-free option or coconut aminos for a sweeter profile. -
1/2 cup honey
The secret to the sticky vibe! Maple syrup or agave can be great swaps if you’re vegan. -
1/4 cup rice vinegar
Adds brightness! Apple cider vinegar is a good alternative if you don’t have rice vinegar on hand. -
3 cloves garlic, minced
Freshly minced garlic brings unforgettable aroma and flavor! Garlic powder will work too for an easier option. -
2 tbsp sriracha
To spice things up! You can reduce the quantity for a milder flavor or keep it spicy! -
2 tsp sesame oil
Drizzle this for that delicious nutty taste! Consider using a different high-heat oil if you can’t find it. -
1 tsp ground ginger
Fresh ginger would be stellar here; just grate it up finely! -
2 tsp arrowroot powder mixed with 2 tbsp water to make a slurry
This is our thickening agent! You can also use cornstarch with the same method if needed. -
1/2 cup mayo
For that creamy sauce! Swap out for Greek yogurt if you’re looking for a lighter option. -
1 tbsp sriracha
Extra kick for your mayonnaise sauce! Adjust based on your level of spice tolerance. -
2-3 tbsp water
To achieve the desired sauce consistency. -
Sesame seeds for topping
For a crunchy finish! You can roast them for an added depth of flavor.
Now that you’ve got your ingredients laid out, let’s dive into the cooking process!
Step-by-Step Instructions
Step 1: Cook the Rice
Start by rinsing your uncooked rice under cool water to remove excess starch. Toss it into a pot or rice cooker and add those magical proportions of water. The golden rule is usually a 1:1.5 rice-to-water ratio. Bring it to a gentle boil, then reduce to simmer until it’s fluffy and tender. If you’re using brown rice, it’ll take a tad longer, about 40-45 minutes. While that’s cooking, we can multitask!
Chef Tip: Give your rice an occasional stir to keep it from sticking, and fluff it with a fork at the end for that perfect loose texture.
Step 2: Prep the Chicken
While the rice is doing its magic, let’s get started on that chicken! Cut the chicken breasts into bite-sized pieces. This helps them to cook evenly and soak up the sticky sauce beautifully. Season the chicken with salt, pepper, chili powder, smoked paprika, onion powder, and oregano for that flavor-packed impact.
Step 3: Sauté the Chicken
In a sizable skillet, heat the olive oil over medium-high heat. Add your seasoned chicken and sauté, stirring occasionally, until it’s nice and golden brown (about 5-7 minutes). You want it cooked through but equally crispy on the outside. This is the moment where your kitchen will start to smell heavenly!
Chef Hack: Avoid overcrowding the skillet so that the chicken can brown properly. Cook in batches if necessary!
Step 4: Make the Sauce
In a separate bowl, whisk together the soy sauce, honey, rice vinegar, minced garlic, sriracha, sesame oil, and ground ginger. Pour this flavorful sauce over your sautéed chicken in the skillet. Let it simmer for about 5 minutes to allow those delicious flavors to meld together and thicken slightly.
Step 5: Thicken it Up
It’s time for the arrowroot slurry! Mix it in quickly to thicken up that sticky sauce, stirring for another 1-2 minutes until it coats the chicken beautifully.
Pro Tip: If you’re in a hurry, you can skip the thickening step — it’ll still be deliciously sticky sans the extra gooeyness!
Step 6: Steam the Broccoli
In the last few minutes of cooking, throw those beautiful, chopped broccoli heads into the same skillet, allowing them to steam in the leftover sauce for just a couple of minutes. They’ll become vibrantly bright green and perfectly tender-crisp!
Step 7: Assemble and Serve
It’s the moment of truth! Scoop that fluffy rice into bowls and top it generously with your sticky chicken and broccoli combo. Drizzle extra sauce over the top and finish with a sprinkle of sesame seeds for that satisfying crunch.
Serving Suggestions
For a visually appealing presentation, consider layering your sticky chicken and broccoli atop the rice in a generous mound. Play around with color; a side of pickled carrots or cucumber salad can add a refreshing touch. If you’re feeling extra, place the bowls on a rustic wooden board with colorful chopsticks and fresh herbs around for that Instagrammable moment!
Recipe Variations
- Spicy Pineapple Twist: Add chunks of fresh pineapple to the chicken during the last 5 minutes of cooking for a Hawaiian-inspired flavor.
- Mango Salsa Delight: Top your sticky chicken with a fresh mango salsa—combine diced mango, red onion, cilantro, lime juice, and a pinch of salt.
- Whole Grain Goodness: Swap out the white rice for quinoa or farro! Both options pack in extra nutrients and add a lovely chewy texture.
- Cauliflower Rice Option: For a low-carb option, try cauliflower rice instead of regular rice. Just sauté it lightly for a few minutes before serving.
- Sweet Potato Addition: Roasting some diced sweet potatoes alongside your broccoli adds a delightful sweetness that pairs well with the savory chicken.
Chef’s Notes
Food is always evolving, and this recipe is no exception. I remember the first few times I made this dish; I didn’t know a thing about balancing flavors. It took trial and error (and a few too many overly-salty mistakes!) to perfect my sauce. I’ve learned that simplicity often yields the best results. Today, I love keeping things practical, focusing on easy preparations that still make a lasting impression.
Oh, and here’s a fun kitchen story: Once, I was so busy chatting with friends while cooking, I mistook cayenne pepper for paprika (yikes!). Let’s just say that bowl of sticky chicken turned out to be a fire surprise! But hey, we all love a little unexpected twist, right?
FAQs and Troubleshooting
1. What if my sauce isn’t thickening?
If your sauce isn’t thickening as you want, ensure you’re using the correct proportions for the arrowroot slurry. Also, make sure to give it time to cook down properly; a little simmering will do wonders!
2. How do I store leftovers?
Store any leftovers in an airtight container, separated for up to 3 days in the fridge. Reheat in the microwave or in a skillet with a splash of water to keep everything moist.
3. How can I make this dish gluten-free?
Simply swap out the soy sauce for gluten-free tamari and choose rice vinegar as your acidic component. Most of the other ingredients on this list are naturally gluten-free.
4. What other veggies can I add?
You can get creative here! Bell peppers, snap peas, or even carrots would be lovely additions. Just be sure to cook them until they’re bright and tender but not mushy!
Nutritional Info
Here’s a breakdown of the nutrition you’ll get from one serving of these delicious sticky chicken bowls:
- Calories: Approximately 500 kcal
- Protein: Approximately 35 grams (thanks to the chicken!)
- Fat: 12 grams
- Carbohydrates: About 70 grams
- Fiber: 3 grams
Packed with protein and vibrant veggies, these bowls are both satisfying and nutritious!
Final Thoughts
There you have it, my friends! A delightful Sticky Chicken Bowl recipe that’s sure to have your taste buds singing and your friends craving seconds. Food is more than just nourishment; it brings joy, comfort, and connection. So next time you gather with loved ones, consider whipping up this dish and watch as smiles light up, stories flow, and laughter fills the air.
I encourage you not just to follow this recipe to the letter but to let it inspire your kitchen creativity. Who knows? Maybe you’ll create your own special twist that brings the same warm memories and happiness to your dinner table! Happy cooking, and as always, let’s dig in! 🍽️
Print
Sticky Chicken Bowls
- Total Time: 40 minutes
- Yield: 4 servings 1x
- Diet: Gluten-Free
Description
A comforting bowl of juicy chicken coated in a tangy, sweet, and slightly spicy sauce served atop rice with vibrant broccoli.
Ingredients
- 2 cups uncooked rice
- 2 small heads broccoli, chopped
- 3 large chicken breasts, cut into bite-sized pieces
- 2 tbsp olive oil
- 1 tsp salt
- 1/2 tsp pepper
- 1 tsp chili powder
- 1 tsp smoked paprika
- 1 tsp onion powder
- 1 tsp oregano
- 1/2 cup soy sauce
- 1/2 cup honey
- 1/4 cup rice vinegar
- 3 cloves garlic, minced
- 2 tbsp sriracha
- 2 tsp sesame oil
- 1 tsp ground ginger
- 2 tsp arrowroot powder mixed with 2 tbsp water to make a slurry
- 1/2 cup mayo
- 1 tbsp sriracha
- 2–3 tbsp water
- Sesame seeds for topping
Instructions
- Cook the rice by rinsing under cool water, then cook with a 1:1.5 ratio of water until fluffy.
- Prep the chicken by cutting it into bite-sized pieces and seasoning with the spices.
- Sauté the chicken in olive oil over medium-high heat until golden brown.
- Make the sauce by whisking together soy sauce, honey, rice vinegar, garlic, sriracha, sesame oil, and ginger.
- Thicken the sauce with the arrowroot slurry, stirring until it coats the chicken.
- Steam the broccoli in the skillet with the chicken for 2 minutes.
- Assemble the bowls with rice, chicken, broccoli, and drizzle with sauce, then top with sesame seeds.
Notes
For added flavor, consider different veggies or sauces based on preferences. Make sure to store leftovers properly.
- Prep Time: 10 minutes
- Cook Time: 30 minutes
- Category: Main Course
- Method: Sautéing
- Cuisine: Asian
Nutrition
- Serving Size: 1 serving
- Calories: 500
- Sugar: 30g
- Sodium: 800mg
- Fat: 12g
- Saturated Fat: 2g
- Unsaturated Fat: 7g
- Trans Fat: 0g
- Carbohydrates: 70g
- Fiber: 3g
- Protein: 35g
- Cholesterol: 90mg
Keywords: sticky chicken bowls, comfort food, weeknight dinner, Asian-inspired

Melt In Your Mouth Chicken Breast
Melt In Your Mouth Chicken Breast Recipe
Hey there, fellow foodies! I’m Beau Collier, and today we’re diving into a dish that’s not just a crowd-pleaser but also a personal favorite: Melt In Your Mouth Chicken Breast. If you’re on the hunt for a meal that’s both simple and spectacular, you’ve landed in just the right kitchen!
Allow me to set the scene. Picture this: it’s a cozy Sunday afternoon, and the sun is streaming through the kitchen window. The aromas of garlic and herbs waft through the air, wrapping their comforting embrace around you. You’re at the stove, apron tied tight, and the sizzle of chicken fills your ears. This isn’t just about nourishing your body; it’s about feeding the soul, sharing laughter, and creating memories.
I’ll never forget the first time I made this dish. It was during a family gathering, and, as usual, the kitchen was my happy place. I had some friends over, and we decided to whip up something delicious together. With my trusty recipe in hand, I guided them step by step, like a culinary conductor leading an orchestra. As I pulled the chicken out of the oven, the golden, bubbly topping was infectious; everyone gathered around, forks ready, eager to taste the magic.
And oh, that first bite? Pure bliss! The chicken was juicy, tender, and the flavors were a harmonious symphony. There’s something truly special about cooking for the people you love. It ignites a connection—a shared experience that turns an ordinary meal into something extraordinary. That’s the essence of what Feastical is all about: bringing people together through food, creating comfort in every bite.
So, let’s not wait any longer! Gather your ingredients and get ready to transform chicken breasts into a luscious meal that will have everyone singing your praises. Whether you’re whipping this up for a weeknight dinner or a special occasion, I promise—this recipe is one for the books!
Personal Story
I’ve always had a knack for finding joy in the kitchen, but this particular recipe holds a special place in my heart. Years ago, I was visiting my grandmother, who was practically a culinary wizard. She had a way of turning the simplest ingredients into gourmet delights. One rainy afternoon, I walked into her kitchen, where she was prepping for a family dinner. The aroma of something delicious hung in the air—garlic and cheese mingling into a tantalizing invitation.
When I asked her what she was making, she smiled and said, “Just a little something I’ll whip up.” As we cooked, she shared stories of her own childhood, filled with family gatherings and much laughter over a shared meal. She always emphasized that food is more than sustenance; it’s a canvas for memories, a way to tell stories and bond with one another.
Inspired by this moment, I decided to create my own version of her fleeting recipe. Over the years, I’ve refined it into what we have today: Melt In Your Mouth Chicken Breast. Each time I make it, I can almost hear my grandmother’s laughter echo in the kitchen. This dish has become a staple in my home, a go-to recipe that’s filled with love and nostalgia, and I can’t wait to share it with you!
Ingredients
Here’s a breakdown of the ingredients you’ll need for this delightful dish:
-
4 boneless, skinless chicken breasts
Juicy chicken breasts are the star of the show. Look for high-quality, organic chicken if possible for better flavor and tenderness. If you can’t find boneless, skinless, you can remove the skin and bones from the breasts yourself. -
1 cup mayonnaise (or Greek yogurt for a lighter version)
This is the secret weapon that keeps the chicken ultra moist. While I love the rich flavors of mayonnaise, Greek yogurt is a fantastic substitute if you’re looking to lighten things up without losing creaminess. -
1/2 cup grated Parmesan cheese
This cheesy goodness adds a savory kick and forms that beautiful crust. If you’re not a Parmesan fan, skip it or try Pecorino Romano for a sharper flavor! -
1 tsp garlic powder
A must for flavor—this enhances that mouthwatering aroma. Fresh minced garlic can work in place of garlic powder, but be careful; a little goes a long way! -
1 tsp onion powder
Just like garlic powder, this adds depth and complements the flavors beautifully. You can also use finely chopped onion if you prefer a fresh taste. -
1 tsp Italian seasoning
This is a blend of herbs that brings that cozy Italian comfort to the dish. You can make your own mix or even experiment with your favorite herb blend! -
1/2 tsp salt
Essential for enhancing flavor, but feel free to adjust it to your taste or dietary needs. If you’re watching your sodium intake, opt for a salt substitute. -
1/2 tsp black pepper
A pinch of black pepper completes the flavor profile. If you’re feeling adventurous, toss in a little cayenne pepper for a kick!
Step-by-Step Instructions
Alright, my fellow chefs, let’s get cooking! Here’s how to whip up this sublime chicken:
-
Preheat Your Oven
Set your oven to 375°F (190°C). This is the magic number that ensures your chicken will cook evenly, leading to that melt-in-your-mouth texture we’re after. -
Prepare the Baking Dish
Grab your favorite baking dish—9×13 works great! Lightly grease it with cooking spray or a drizzle of olive oil. You want the chicken to glide effortlessly out of the dish after baking. -
Mix the Creamy Coating
In a medium bowl, combine the mayonnaise (or Greek yogurt), Parmesan cheese, garlic powder, onion powder, Italian seasoning, salt, and black pepper. Mix until well blended. This is where the magic begins, so give it some love—getting those flavors to meld is key! -
Coat the Chicken
Take those chicken breasts and place them directly into the baking dish. If you’re feeling fancy, you can sear them in a skillet for 2-3 minutes on each side for an extra layer of flavor. Now, generously cover each chicken breast with the creamy mixture. Make sure every inch is coated—you want that flavor to penetrate! -
Bake to Perfection
Pop the dish into your preheated oven and bake for about 25-30 minutes. The goal here is to achieve a golden crust while keeping the center juicy and tender. If you have a meat thermometer, aim for an internal temperature of 165°F (74°C). -
Let It Rest and Serve
Once done, pull it out of the oven and let it rest for a few minutes before serving—this allows the juices to redistribute, keeping your chicken extra moist. Trust me, the wait will be worth it!
Serving Suggestions
Now, let’s talk presentation—because food isn’t just about taste; it’s also about how it looks! When serving your Melt In Your Mouth Chicken Breast, here are a few ideas to keep things appealing:
-
Garnish with Fresh Herbs
A sprinkle of chopped parsley or basil on top adds a pop of color and freshness that brightens up the dish beautifully. -
Serve with a Bed of Greens
Lay the chicken on a bed of sautéed spinach, arugula, or mixed greens. Drizzle a little balsamic glaze over it for a flavor boost. -
Pair with Comforting Sides
Think mashed potatoes, creamy risotto, or roasted veggies. The creamy coating on the chicken complements these sides perfectly, making for a well-rounded meal.
Recipe Variations
Getting creative in the kitchen is half the fun! Here are a few variations to explore:
-
Herb-Infused Chicken
Swap out Italian seasoning for a blend of fresh herbs like rosemary, thyme, and sage. This gives the dish a fragrant, garden-fresh feel. -
Spicy Kick
For those who crave heat, add a teaspoon of cayenne or crushed red pepper flakes to the creamy mixture. You’ll love the spicy contrast with the tender chicken! -
Savory Spinach and Cheese
Fold in some chopped, wilted spinach and a bit more cheese into the creamy coating for a colorful and nutritious twist. -
Barbecue Chicken Delight
Mix in some BBQ sauce with the mayonnaise for a tangy, smoky flavor profile that’s perfect for summer gatherings! -
Lemon Zest Brightness
Add the zest of one lemon to the creamy mixture for a refreshing tang that brightens every bite.
Chef’s Notes
As a chef, one of my greatest joys is watching a recipe evolve over time. This Melt In Your Mouth Chicken has been my trusty companion through countless dinners and gatherings. It’s gone from a quick weeknight dinner to a favorite dish that I share with friends and family during special occasions and holidays. I’ve experimented with it so much that I feel like it’s taken on a life of its own!
And let’s not forget the kitchen mishaps that often accompany cooking! I once accidentally used a full cup of salt instead of half. It was a lesson learned, and now I always double-check my measurements—a must for every chef out there!
FAQs and Troubleshooting
Let’s tackle some common questions you might have as you prepare this delicious dish:
-
What if my chicken is drying out?
If you’re worried about dryness, try using a meat thermometer. Also, ensure you don’t overbake; the beauty of this dish lies in its moisture! -
Can I make this ahead of time?
Absolutely! You can prepare the chicken and creamy mixture earlier in the day and pop it in the fridge until you’re ready to bake. Just adjust baking time, as it may need a bit longer if it’s straight from the fridge. -
How do I get a crispy topping?
For an extra crispy crust, broil the chicken for the last 2-3 minutes of cooking. Keep a close eye on it—things can go from golden to burnt in a blink! -
What if I have leftovers?
Store leftovers in an airtight container in the fridge for up to 3 days. Reheat gently in the oven or microwave, adding a splash of chicken broth to keep it moist.
Nutritional Info
Here’s a quick breakdown of the nutritional highlights you can expect per serving (1 chicken breast):
- Calories: Around 350
- Protein: 30 grams
- Fat: 23 grams (depending on mayonnaise or Greek yogurt used)
- Carbohydrates: 3 grams
- Fiber: 0 grams
- Sodium: Approximately 800 mg (can be adjusted by using less salt)
Remember, these numbers can fluctuate based on the exact ingredients used and portion sizes.
Final Thoughts
So there you have it—a delicious dish that truly lives up to its name: Melt In Your Mouth Chicken Breast. Food is more than just sustenance; it’s a way to connect with one another, share stories, and build memories. Each bite of this chicken is a reminder of love, laughter, and togetherness—an experience I hope you and your loved ones will cherish.
I’d love to hear how your version of this recipe turns out! Whether you’ve added your own flair or kept it classic, share your results and any fun kitchen stories along the way! So grab that fork (or your favorite mug), and let’s dig into a meal that wraps you in warmth and deliciousness. Happy cooking, friends!
Print
Melt In Your Mouth Chicken Breast
- Total Time: 45 minutes
- Yield: 4 servings 1x
- Diet: None
Description
A simple yet spectacular chicken dish that is juicy, tender, and bursting with flavor, perfect for any occasion.
Ingredients
- 4 boneless, skinless chicken breasts
- 1 cup mayonnaise (or Greek yogurt for a lighter version)
- 1/2 cup grated Parmesan cheese
- 1 tsp garlic powder
- 1 tsp onion powder
- 1 tsp Italian seasoning
- 1/2 tsp salt
- 1/2 tsp black pepper
Instructions
- Preheat your oven to 375°F (190°C).
- Prepare a 9×13 baking dish by lightly greasing it with cooking spray or olive oil.
- Mix together the mayonnaise (or Greek yogurt), Parmesan cheese, garlic powder, onion powder, Italian seasoning, salt, and black pepper in a medium bowl.
- Coat the chicken breasts with the creamy mixture, ensuring they are generously covered.
- Bake for about 25-30 minutes, or until the internal temperature reaches 165°F (74°C).
- Let the chicken rest for a few minutes before serving to allow the juices to redistribute.
Notes
For a crispy topping, broil the chicken for the last 2-3 minutes of cooking. Feel free to prepare in advance and refrigerate until ready to bake.
- Prep Time: 15 minutes
- Cook Time: 30 minutes
- Category: Main Course
- Method: Baking
- Cuisine: American
Nutrition
- Serving Size: 1 serving
- Calories: 350
- Sugar: 1g
- Sodium: 800mg
- Fat: 23g
- Saturated Fat: 5g
- Unsaturated Fat: 14g
- Trans Fat: 0g
- Carbohydrates: 3g
- Fiber: 0g
- Protein: 30g
- Cholesterol: 90mg
Keywords: chicken, easy recipe, comfort food, bake