
Cinnamon Sugar French Toast Roll-Ups
Indulgent Cinnamon Sugar French Toast Roll-Ups: A Hug in Every Bite!
Hey there, fellow foodies! I’m Beau Collier, and today we’re diving into a sweet and comforting world of flavors with a fun twist on a breakfast classic: Cinnamon Sugar French Toast Roll-Ups! If you’re like me, you cherish those moments when your kitchen transforms into a canvas of delightful aromas and nostalgic memories. There’s something incredibly satisfying about whipping up a dish that not only fills our bellies but also warms our hearts.
Imagine waking up to the gentle sound of birds chirping outside (or maybe just your neighbor’s dog), and as you stumble into the kitchen, the smell of cinnamon wafts through the air, wrapping you like a cozy blanket. That’s the magic we’re about to create with these roll-ups! Whether you’re making them for a special brunch, indulging in a lazy Saturday morning, or surprising your loved ones with a sweet treat, these little delights won’t disappoint.
This recipe combines the soft and fluffy goodness of bread, rolled up and filled with love, then transformed into a fluffy, golden breakfast delight. It’s simple enough for even the most beginner cooks and delightful enough to impress anyone at your brunch table. So, grab your spatula and let’s get to work – your taste buds are in for a treat!
A Slice of Nostalgia: The Story Behind My Love for French Toast Roll-Ups
Let me take you back to my childhood, where weekend mornings were synonymous with the smell of something delicious wafting through the house. My mom had a knack for making breakfast feel like a holiday. One of her signature dishes was French toast. She would craft these delightful, golden slices of soft bread, gently soaking them in a sweet mixture of eggs and milk before hitting the frying pan, and let me tell you, the busyness in our kitchen was a sight to behold!
But one Saturday, she decided to get a little adventurous and whipped up what she called “French Toast Roll-Ups.” The surprise and excitement in our house were palpable. She started by flattening the bread slices, filling them with cream cheese and berries, and rolling them up like little burritos of joy. The first bite was pure magic! The warm cinnamon sugar crunch combined with the smooth creaminess inside was an explosion of flavors that I still remember vividly.
So here I am, years later, bringing that essence back into my kitchen, but with a twist! These Cinnamon Sugar French Toast Roll-Ups are lighter, simpler, and just as scrumptious. They not only honor those warm memories but also allow me to create new ones with my family and friends. I can’t wait for you to try this recipe and create your own memories around the kitchen table!
Ingredients for Cinnamon Sugar French Toast Roll-Ups
Here’s what you’ll need to bring this sweet breakfast dream to life:
-
6 slices of bread (white or brioche): While any bread can work, I love using brioche for its rich, buttery flavor. White bread works its magic as well. Don’t be afraid to use day-old bread; it’s ideal for absorbing that custardy goodness!
-
2 large eggs: Eggs are the binding agent that transforms bread into French toast. Feel free to use egg substitutes if you’re avoiding eggs!
-
1/4 cup (60ml) milk: Whole milk provides creaminess, but almond milk, oat milk, or any milk alternative works just as well.
-
1/2 teaspoon vanilla extract: A splash of vanilla adds warmth and aroma, elevating your roll-ups to a whole new level. Grab that pure vanilla extract if you can!
-
2 tablespoons (25g) granulated sugar: This adds sweetness to our cinnamon sugar blend. You can substitute it with coconut sugar for a healthier option.
-
1 teaspoon ground cinnamon: The star of the show! Feel free to adjust the quantity depending on your love for cinnamon. You could also try adding a pinch of nutmeg for an additional warm spice.
-
2 tablespoons (28g) unsalted butter, melted: Butter is key to achieving that golden brown exterior. For a dairy-free option, coconut oil or non-dairy butter will shine just as brightly!
Each of these ingredients plays a role in creating the flavor and texture that makes these roll-ups irresistible. A little tip from my kitchen: while opting for fresh ingredients is fantastic, don’t hesitate to experiment with what you have on hand. Cooking is all about flexibility and having fun!
Step-by-Step Instructions for Cooking Cinnamon Sugar French Toast Roll-Ups
Alright, let’s roll up those sleeves and get to cooking! Here’s how you’re going to bring this dish from idea to reality.
Step 1: Prepare Your Workstation
Start by gathering all your ingredients and tools. You’ll need a cutting board, a rolling pin (or a sturdy glass), a large bowl, a skillet, and your favorite spatula. This will make your cooking process smoother and more enjoyable.
Step 2: Flatten the Bread
Take each slice of bread and flatten it using a rolling pin (or a sturdy glass works too). This step creates a canvas for our delicious filling. By flattening the bread, you make it easier to roll up without tearing. It’s all about getting light and fluffy roll-ups!
Tip: If you’re using fresh bread, you can give the slices a quick five-second microwave blast to soften them slightly before flattening.
Step 3: Make the Egg Mixture
In a large mixing bowl, whisk together the eggs, milk, vanilla extract, and half of the granulated sugar until well combined. This mixture is the magic that will soak into the bread and create that rich French toast flavor we crave.
Step 4: Prepare the Cinnamon Sugar Mixture
In a small bowl, combine the remaining granulated sugar with ground cinnamon. This sweet blend is what gives your roll-ups that delightful crunchy exterior. Trust me; it’s a game-changer!
Step 5: Roll ‘Em Up
Now comes the fun part! Take your flattened bread slices and dip them into the egg mixture, allowing them to soak for a few seconds. Make sure they’re coated but not falling apart. Then, place your desired filling (cream cheese, fruit, nut butter, or anything you like) into the center of each slice.
Tightly roll up the bread, tucking in the ends as you go. It’s like wrapping a delicious little gift! Secure it with a toothpick if you feel it may unroll during cooking.
Chef Hack: For extra flavor, sprinkle a tiny bit of the cinnamon sugar mixture inside the filling before rolling up – yum!
Step 6: Cook in the Skillet
Heat a skillet over medium heat and add the melted butter. Carefully place your roll-ups seam side down in the skillet. Cook for about 2-3 minutes, or until they’re golden brown. Then, flip them over and cook the other side until equally delicious.
Be gentle while flipping; you want to maintain that glorious roll-up shape!
Step 7: Dust with Cinnamon Sugar
Once they’re cooked to perfection, remove your roll-ups from the skillet, and immediately roll them in the warm cinnamon sugar mixture until they’re fully coated. This gives them that sweet crunch on the outside that’s oh-so-satisfying!
Step 8: Plate and Enjoy!
Serve your Cinnamon Sugar French Toast Roll-Ups warm, perhaps with a side of fresh fruits or a drizzle of maple syrup. Add a sprinkle of powdered sugar for that Instagram-worthy finish! Trust me, it’s going to be hard to resist devouring these beauties straight off the plate.
Serving Suggestions for Cinnamon Sugar French Toast Roll-Ups
Let’s be real; these roll-ups are divine all on their own, but they can be even more delightful with a few serving suggestions! Here are a couple of my favorite ways to present these delicious treats:
-
Fruit Medley: Serve with a colorful medley of fresh berries, sliced bananas, or caramelized apples to add a refreshing contrast to the richness of the roll-ups.
-
Dipping Sauces: A small bowl of warm maple syrup, chocolate sauce, or whipped cream will take your indulgence to the next level. You can never go wrong with a little extra sweetness on the side!
-
Fine Dining Flair: For those special occasions, a sprinkle of crushed nuts (like pecans or walnuts) and edible flowers will elevate your dish and leave your guests in awe of your culinary skills!
Recipe Variations: Spice It Up!
This recipe is a wonderful base that you can experiment with! Here are a few creative variations that you can try:
-
Chocolate Chip Stuffed Roll-Ups: Add a handful of mini chocolate chips inside each roll-up for those chocolate lovers in your life.
-
Savory Spin: Want to go savory? Swap the cinnamon for garlic powder, fill with a mixture of cream cheese, spinach, and cheese for a delicious savory roll-up that’s perfect for brunch.
-
Nutty Banana Delight: Add mashed bananas or nut butter for a filling that’s packed with flavor! A drizzle of honey on top finishes it off beautifully.
-
Pumpkin Spice Everything: During the fall, why not turn it up a notch? Add pumpkin puree and pumpkin spice to your egg mixture for a seasonal twist that embodies autumn.
-
Gluten-Free Version: Swap out regular bread for your favorite gluten-free bread and enjoy the same deliciousness that caters to your dietary preferences!
Chef’s Notes: A Little Extra Love from My Kitchen
Before we wrap things up, I want to share a couple of thoughts about my wonderful journey with this recipe. French toast roll-ups are one of those dishes that brings out my inner child, igniting those sweet morning memories in the homely kitchen from my youth.
Every time I whip these up, I’m reminded of the laughter shared over breakfast with family and friends. And hey, if a roll-up goes slightly awry, don’t worry! Mistakes can lead to delicious new creations in the kitchen, and sometimes, they become the best stories. So, embrace the messiness of cooking and remember that it’s all part of the fun!
FAQs and Troubleshooting: Sweet Success in the Kitchen
Here are a few common questions or potential mistakes that might come up in the process. Don’t fret; we’ve got you covered!
1. Why are my French toast roll-ups soggy?
If your roll-ups turn out soggy, they may have soaked in the egg mixture too long. Keep the soaking time to 5-10 seconds per slice to maintain the right consistency.
2. Can I make them ahead of time?
Absolutely! You can prepare the roll-ups in advance and store them in the refrigerator. Just reheat in a skillet when you’re ready to serve.
3. What if I don’t have any bread?
Not to worry! Any bread-like alternatives such as wraps or tortillas can work in place of traditional bread. Get creative and embrace what you have!
4. How do I prevent them from unrolling while cooking?
Make sure to roll them tightly and place them seam side down in the skillet. If needed, secure with a toothpick for extra reassurance!
Nutritional Info
While I usually encourage indulgence in the kitchen, it’s also helpful to be mindful of what we’re consuming. Here’s a quick breakdown of the nutritional info per serving:
- Calories: Approximately 220
- Protein: 6g
- Carbohydrates: 35g
- Dietary Fiber: 1g
- Sugars: 8g
- Fat: 8g
Keep in mind that these values will vary based on the exact ingredients you choose. It’s the joy of cooking that counts!
Final Thoughts: A Treat Worth Sharing
There you have it, my friends! Cinnamon Sugar French Toast Roll-Ups are not just a delicious recipe; they encapsulate the warmth of shared moments, nostalgic memories, and the joy of cooking. Whether you’re savoring them with a cup of coffee on a lazy morning or serving them at a gathering, these roll-ups are meant to be enjoyed.
So, put on your apron, turn on some of your favorite tunes, and let’s get cooking! Don’t forget to share your roll-up creations on social media and tag Feastical – I can’t wait to see the magic you create! Until next time, happy cooking and even happier eating! 🥞✨
Print
Cinnamon Sugar French Toast Roll-Ups
- Total Time: 20 minutes
- Yield: 4 servings 1x
- Diet: Vegetarian
Description
Delicious cinnamon sugar roll-ups that capture the essence of French toast, sweetened and rolled for a fun breakfast treat.
Ingredients
- 6 slices of bread (white or brioche)
- 2 large eggs
- 1/4 cup (60ml) milk
- 1/2 teaspoon vanilla extract
- 2 tablespoons (25g) granulated sugar
- 1 teaspoon ground cinnamon
- 2 tablespoons (28g) unsalted butter, melted
Instructions
- Prepare Your Workstation: Gather all ingredients and tools such as a cutting board, rolling pin, large bowl, skillet, and spatula.
- Flatten the Bread: Use a rolling pin to flatten each slice of bread.
- Make the Egg Mixture: Whisk together eggs, milk, vanilla extract, and half of the granulated sugar until well combined.
- Prepare the Cinnamon Sugar Mixture: Combine the remaining sugar with ground cinnamon in a small bowl.
- Roll ‘Em Up: Dip flattened bread slices in egg mixture, fill with desired filling, and tightly roll up.
- Cook in the Skillet: Heat a skillet over medium heat, add melted butter, and cook roll-ups seam side down until golden brown.
- Dust with Cinnamon Sugar: Roll cooked roll-ups in warm cinnamon sugar mixture.
- Plate and Enjoy: Serve warm, optionally with fresh fruits or syrup.
Notes
Experiment with fillings like cream cheese or fruit, and enjoy serving suggestions like fresh berries or dipping sauces.
- Prep Time: 10 minutes
- Cook Time: 10 minutes
- Category: Breakfast
- Method: Skillet Cooking
- Cuisine: American
Nutrition
- Serving Size: 1 roll-up
- Calories: 220
- Sugar: 8g
- Sodium: 200mg
- Fat: 8g
- Saturated Fat: 4g
- Unsaturated Fat: 2g
- Trans Fat: 0g
- Carbohydrates: 35g
- Fiber: 1g
- Protein: 6g
- Cholesterol: 150mg
Keywords: French toast, breakfast, cinnamon sugar, roll-ups, sweet treat

Air Fryer Chicken & Mozzarella Wraps
Air Fryer Chicken & Mozzarella Wraps: A Feast of Flavors
Hey there, fellow food lovers! I’m Beau Collier, and if you’re looking for a scrumptious meal that brings a little comfort and a whole lot of flavor to your kitchen, then boy, do I have a treat for you! Today, we’re diving into the delightful world of Air Fryer Chicken & Mozzarella Wraps. This dish is a definite crowd-pleaser—perfect for family dinners, casual get-togethers, or just a cozy night in.
You know those meals that just make you feel good? The ones that wrap you in a warm hug and remind you of good times? Well, this recipe is exactly that! These wraps are not only mouthwateringly delicious but also incredibly easy to whip up, especially with the magic of the air fryer. I love using the air fryer because it makes cooking quicker and gives your food that perfectly crispy texture—without drowning everything in oil. If you’re like me and prefer your meals to be satisfying but not overly complicated, you’re in for a real treat!
Now, let’s talk about these wraps! With juicy chicken breasts seasoned to perfection, melty mozzarella cheese, and a fresh crunch from spinach, all snugly tucked in a whole wheat tortilla, it’s a breeze to prepare. I’ll guide you through every step of the way, sharing tips, tricks, and my personal thoughts to make your cooking experience as enjoyable as the meal itself.
So grab your apron and let’s get cooking; we’re about to make some magic happen in the kitchen!
Personal Story
Okay, picture this: It was a chilly evening a few years back, and I was back home visiting my family. My niece had just finished her first week at school and was buzzing with excitement as she shared stories about her day. Inspired by my sister’s hectic schedule of working and managing family life, I decided to whip us up some quick and easy chicken wraps for dinner.
I took out some chicken breasts from the fridge, sprinkled them with a mix of spices—my trusty garlic powder and paprika (my flavor pals)—and popped them in the air fryer. The aroma wafted through the house, and my niece’s eyes lit up! As I assembled the wraps with gooey mozzarella and fresh spinach, laughter filled the kitchen. That night wasn’t just about the food; it was about bonding over good eats and making memories. Since then, Air Fryer Chicken & Mozzarella Wraps have become a staple in my house—a reminder of those lovely moments around the table.
Ingredients
Let’s break it down! Here’s everything you’ll need to make these scrumptious wraps. Each ingredient plays a key role in creating the flavor profile and texture of the dish!
-
2 large chicken breasts (about 1 pound total)
- The star of the show! Choose fresh, boneless chicken for juiciness. For a quicker option, you can use pre-cooked grilled chicken.
-
1 teaspoon garlic powder
- Adds a punch of flavor! Feel free to substitute with minced fresh garlic (1 clove = about 1/8 teaspoon powder) if you want a fresh kick.
-
1 teaspoon paprika
- This adds a warm color and smoky flavor. Smoked paprika can amp up the taste even more!
-
1/2 teaspoon salt
- Don’t skimp here! It enhances all the flavors, but if you’re on a low-sodium diet, you can cut this down or use a salt substitute.
-
1/2 teaspoon black pepper
- For a touch of heat and complexity. White pepper can be used if you want a milder flavor.
-
4 whole wheat tortillas
- Opt for whole wheat for added fiber and nutrients. You can also swap these for gluten-free tortillas if necessary.
-
1 cup shredded mozzarella cheese
- Melts beautifully! If you’re feeling adventurous, use a mix of mozzarella and cheddar for an extra zing.
-
1 cup fresh spinach leaves
- For a burst of color and nutrition. Kale or arugula could be a fun twist!
-
1/4 cup ranch dressing (optional, for serving)
- This creamy dressing is a great finishing touch, but feel free to swap it out for your favorite dressing, or even a dollop of Greek yogurt for a healthier spin!
Step-by-Step Instructions
Ready to get cooking? Here’s how to turn those simple ingredients into a mouthwatering feast!
-
Prep the Chicken:
Begin by trimming any excess fat from the chicken breasts. Rinse them under cold water, then pat them dry with paper towels. This step is crucial because it helps the seasoning to adhere better! -
Season the Chicken:
Rub the chicken with garlic powder, paprika, salt, and black pepper, making sure to cover every nook and cranny. This seasoning not only enhances flavor but also showcases that beautiful, golden color once cooked! -
Preheat the Air Fryer:
While you’re seasoning, preheat your air fryer to 375°F (190°C) for about 3-5 minutes. This step ensures that the chicken cooks evenly and gets that crispy exterior. -
Air Fry the Chicken:
Place the seasoned chicken breasts in the air fryer basket. Cook for 15-20 minutes, flipping halfway through. The internal temperature should reach 165°F (74°C). Pro tip: Use a meat thermometer to avoid overcooking! -
Shred the Chicken:
Once cooked, remove the chicken from the air fryer and let it rest for about 5 minutes—it helps retain moisture. Then, using two forks, shred the chicken. This is a great time to sneak a bite to check if it’s as tasty as it smells! -
Assemble the Wraps:
Lay a tortilla flat and sprinkle some shredded mozzarella in the center. Add a generous amount of shredded chicken on top, followed by a handful of fresh spinach. You can sprinkle a bit more cheese on top for extra stretchiness. -
Wrap It Up:
Roll the tortilla tightly from the bottom up, folding in the sides as you go to keep all that goodness inside. You want these wraps snug so you don’t lose any filling during cooking! -
Air Fry Again:
Place the wraps seam-side down in the air fryer basket. Air fry at 375°F (190°C) for another 5-7 minutes until the tortillas are golden and crispy. Keep an eye on them, as different air fryers can vary in cooking time! -
Serve:
Carefully remove the wraps from the air fryer and let them rest for a minute. Cut in half for that Instagram-ready pic, and serve with ranch dressing on the side for dipping. Voilà!
Serving Suggestions
There’s nothing like the way these wraps look on a plate! For an attractive presentation, serve them on a wooden board or a colorful platter. You could slice them in half to reveal the melting cheese and vibrant colors inside, or serve them whole for a rustic feel.
For an extra touch, drizzle some ranch dressing over the top or garnish with fresh herbs like cilantro or parsley. A side of crunchy carrot sticks or a light salad can really round out the meal, adding a refreshing element to each bite.
Recipe Variations
Feeling creative? Here are some fun variations you can try with these wraps!
-
Buffalo Chicken Wraps:
Swap in some spicy buffalo sauce for a kick! Just mix some sauce with the shredded chicken before assembling. Serve with blue cheese dressing on the side. -
Southwestern Style:
Add some black beans, corn, and a sprinkle of cumin to the chicken before wrapping. Top with jalapeños for an extra heat wave! -
Mediterranean Twist:
Mix in some chopped olives and sun-dried tomatoes with the spinach. Serve with tzatziki on the side for a refreshing dip. -
Veggie-Loaded:
For a vegetarian option, skip the chicken altogether and use roasted veggies like bell peppers, zucchini, and red onion, with added feta cheese. -
Breakfast Wraps:
Use scrambled eggs or egg whites instead of chicken, adding in some diced tomatoes and avocado slices for a breakfast twist.
Chef’s Notes
I’ve made these wraps countless times, and each time they seem to get better! A funny memory that comes to mind is when I forgot to flip the chicken halfway through cooking once. While they were still delicious, I had a bit of a crisis when one side was perfectly golden, and the other side looked like it needed a little TLC.
Over the years, I’ve played with spices and ingredients based on what I had in the fridge, and I realized that this recipe is so adaptable! If you ever find yourself with leftover roasted vegetables or that last bit of cheese at the bottom of the fridge, toss it in! It’s the perfect canvas for culinary creativity.
FAQs and Troubleshooting
Here are some common questions you might have—and my friendly solutions!
Q: What if I don’t have an air fryer?
A: No worries! You can bake these wraps in the oven at 400°F (200°C) for about 20-25 minutes or until the tortillas are golden brown. Just be sure to flip them halfway through!
Q: My wraps fell apart! What went wrong?
A: They may have been too stuffed or not rolled tightly enough. Just practice makes perfect! Use less filling if needed, and really tuck those sides in while rolling.
Q: Can I make these ahead of time?
A: You can! Just prepare the chicken and assemble the wraps, but store them in the refrigerator and air fry just before serving. They’re best eaten fresh!
Q: How do I know when the chicken is fully cooked?
A: Using a meat thermometer is the best way to check! Chicken should register 165°F (74°C) internally. If you don’t have one, ensuring the juices run clear when poked is a good indicator, too.
Nutritional Info
While I’m not one to obsess over numbers, I’ll share a rough idea of the nutrition in these wraps to keep your mind at ease:
- Calories: Approximately 400-500 per wrap (depending on additions and portion sizes)
- Protein: 35g (thanks to the chicken and cheese!)
- Carbohydrates: 40g (mostly from the whole wheat tortilla)
- Fat: 15g (mainly from cheese; consider using low-fat for a lighter option)
- Fiber: Around 5g (great job choosing whole wheat!)
Feel free to adjust ingredients to meet your dietary needs. Adding more veggies can boost fiber and nutrients while keeping those calories down!
Final Thoughts
And there you have it, my friends! Air Fryer Chicken & Mozzarella Wraps are a simple yet soul-satisfying meal that can easily become a favorite in your home. They’re great for any occasion, and I hope they become just as special to you as they have to me. Cooking should be fun, a little messy, and, most importantly, full of love.
Next time you find yourself feeling blue or just want to enjoy something delicious, reach for these wraps! Remember, life is short—make it delicious. Until next time, keep experimenting, keep smiling, and keep sharing those kitchen stories. Happy cooking!
Print
Air Fryer Chicken & Mozzarella Wraps
- Total Time: 30 minutes
- Yield: 4 servings 1x
- Diet: Gluten-Free, Dairy-Free options available
Description
Enjoy a scrumptious meal with Air Fryer Chicken & Mozzarella Wraps, featuring juicy chicken, melty cheese, and fresh spinach, all enveloped in whole wheat tortillas.
Ingredients
- 2 large chicken breasts (about 1 pound total)
- 1 teaspoon garlic powder
- 1 teaspoon paprika
- 1/2 teaspoon salt
- 1/2 teaspoon black pepper
- 4 whole wheat tortillas
- 1 cup shredded mozzarella cheese
- 1 cup fresh spinach leaves
- 1/4 cup ranch dressing (optional, for serving)
Instructions
- Prep the chicken: Trim any excess fat and rinse under cold water, then pat dry.
- Season the chicken: Rub with garlic powder, paprika, salt, and black pepper.
- Preheat the air fryer: Set to 375°F (190°C) for about 3-5 minutes.
- Air fry the chicken: Place in basket and cook for 15-20 minutes, flipping halfway through.
- Shred the chicken: Remove from air fryer, let rest, and then shred with two forks.
- Assemble the wraps: Lay a tortilla flat, add mozzarella, chicken, and spinach.
- Wrap it up: Roll tightly from the bottom and tuck in the sides.
- Air fry again: Place wraps seam-side down and cook at 375°F (190°C) for 5-7 minutes.
- Serve: Remove, let rest, and cut in half for serving with ranch dressing on the side.
Notes
Feel free to customize with different proteins or add more veggies for a unique twist.
- Prep Time: 10 minutes
- Cook Time: 20 minutes
- Category: Main Course
- Method: Air Frying
- Cuisine: American
Nutrition
- Serving Size: 1 wrap
- Calories: 450
- Sugar: 2g
- Sodium: 600mg
- Fat: 15g
- Saturated Fat: 8g
- Unsaturated Fat: 6g
- Trans Fat: 0g
- Carbohydrates: 40g
- Fiber: 5g
- Protein: 35g
- Cholesterol: 80mg
Keywords: air fryer, chicken wraps, mozzarella wraps, easy dinner, comfort food

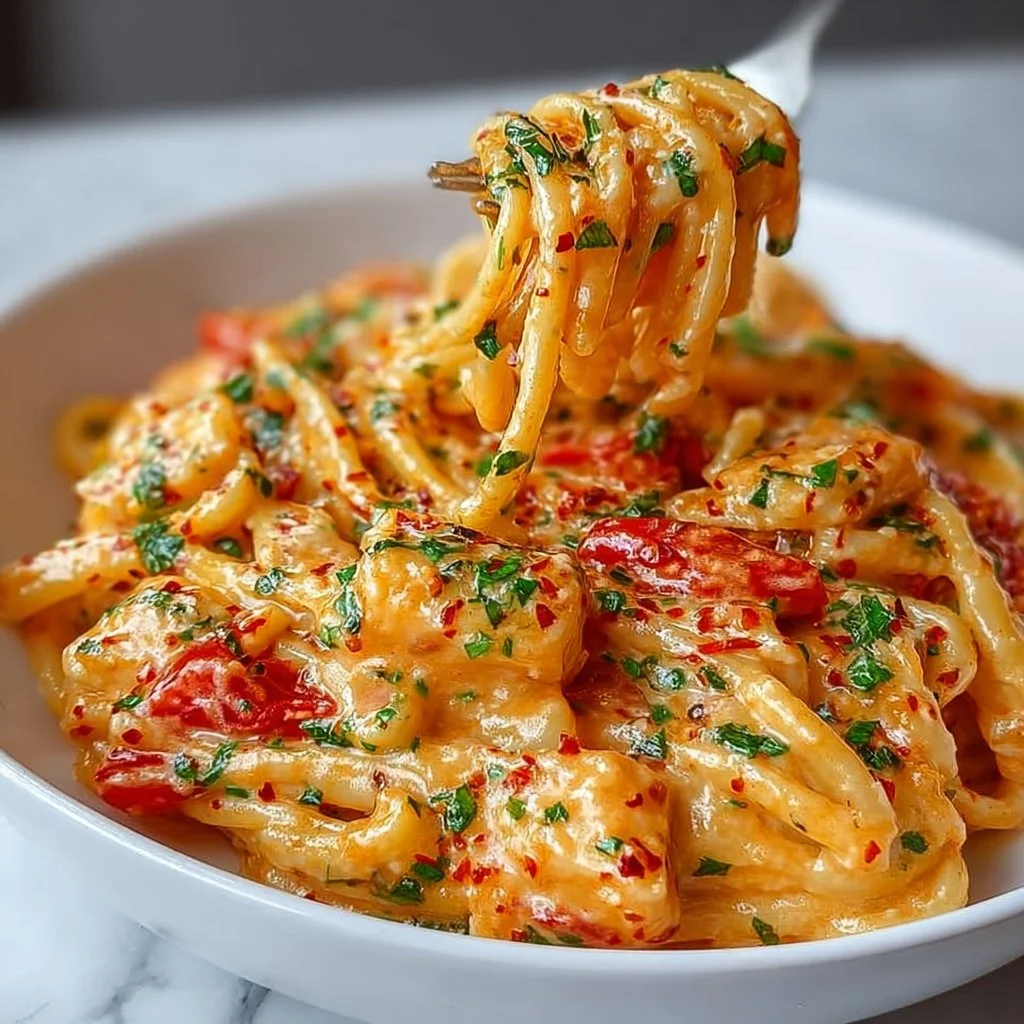
The Ultimate Creamy Garlic Parmesan Chicken Pasta You’ll Crave Every Week
The Ultimate Creamy Garlic Parmesan Chicken Pasta You’ll Crave Every Week
Hey there, food lovers! I’m super excited to share with you one of my all-time favorite recipes that will have your taste buds doing a happy dance—Creamy Garlic Parmesan Chicken Pasta. Imagine a bowl of twirly pasta enveloped in a luscious cream sauce, studded with tender chicken and punched up with the fresh zests of garlic and herbs. It’s comfort food at its finest and utterly satisfying!
Now, I don’t know about you, but there are days when all I want to do after a long day is curl up on the couch with something warm and cheesy—preferably in a giant bowl. This dish is perfect for those days. Plus, it’s easy to whip up, and the elegance of garlic and Parmesan makes it feel like a gourmet meal without the fuss. You could even impress your dinner guests with it!
So whether you’re cooking for family, friends, or just treating yourself to a special meal, you’ll want to hang around for the next couple of minutes. Grab that apron, pour yourself a glass of your favorite drink (coffee or wine, I don’t judge!), and let’s dive into this creamy goodness together.
Personal Story
Let me take you back to a chilly autumn evening when I first started experimenting in the kitchen. I had just moved out of my parents’ house, and although I was armed with a few family recipes, pasta was an uncharted territory for me. One night, I decided to cook for my then-girlfriend, hoping to impress her. I didn’t have much in the pantry, but I had some chicken, pasta, and the staple garlic and cheese—ah, the culinary dream team!
I threw everything together in a single pan, let the garlic become aromatic, and soon enough, a creamy concoction was bubbling away. The moment I plated it, the memory of my mom serving pasta at the family table came rushing back. That’s when magic happened! The combination was an instant hit, leading to a lovely dinner filled with laughter, shared stories, and my girlfriend’s delighted smiles—needless to say, the evening accelerated to all sorts of possibilities for us.
Here’s the good news: you, too, can create a moment just like that with this recipe. Trust me, this creamy garlic Parmesan chicken pasta will become a staple in your kitchen repertoire!
Ingredients
Here’s what you’ll need to craft this culinary delight:
-
Boneless, skinless chicken breast (2 large, cut into 1-inch cubes)
Chicken breast is super lean and absorbs flavor wonderfully. If you prefer something more flavorful, you can substitute it with thighs or even shrimp! -
Twisted pasta (fusilli) (1 lb / 450 g)
The twists and turns of fusilli capture the creamy sauce perfectly! If you can’t find it, penne or rotini work too—just choose your favorite! -
Unsalted butter (3 Tbsp, divided)
A must-have for sautéing the garlic and chicken. Unsalted gives you more control over the saltiness. You can swap for olive oil if you’re feeling a bit healthier! -
Fresh garlic, minced (4–5 cloves)
Garlic is the star of this dish! If you’re in a pinch, you can use garlic powder, but fresh adds an unmatched depth of flavor. -
Heavy cream (1 ½ cups)
The creaminess factor! For a lighter version, you might try using half-and-half or a non-dairy milk, although the texture may differ. -
Chicken broth (½ cup)
Use homemade if possible for more flavor! Vegetable broth can be a great substitute if you want a vegetarian twist. -
Grated Parmesan cheese (1 cup, freshly grated preferred)
Always go for fresh; it melts beautifully. If you’re in a pinch, pre-grated works too, but it won’t be as cheesy! -
Italian seasoning (1 tsp, divided)
This is a mix of herbs that brings depth to the dish. If you don’t have it, oregano, basil, and thyme alone would do just fine! -
Red pepper flakes (¼ tsp, optional)
If you like a little kick, toss this in! Otherwise, leave it out. -
Fine salt & black pepper (to taste)
Essential for bringing the flavors together. -
Fresh parsley, chopped (2 Tbsp, for garnish)
For that pop of freshness! Basil also works, and would add a lovely aroma.
Step-by-Step Instructions
Alright, let’s get cooking! Here’s how to bring this creamy pasta to life:
-
Prep Your Chicken
Start by cutting your chicken breast into bite-sized cubes (1-inch or so). This allows for even cooking and makes for easy eating. Season them generously with salt, black pepper, and half of your Italian seasoning. -
Heat the Pan
Grab a large skillet (or a deep frying pan if you have one) and place it over medium heat. Add 2 tablespoons of unsalted butter. Hear that sizzle? That’s the sound of flavor being born! -
Cook the Chicken
Once the butter is melted and bubbling, add the seasoned chicken pieces to the pan. Cook them for about 6-7 minutes until golden brown and cooked through, stirring occasionally. This is where you want to lock in that delicious, savory goodness. -
Add the Garlic
Now, here comes the miracle worker. Add your minced garlic and sauté for about 1-2 minutes until fragrant. Be careful not to burn it—the smell will be divine! -
The Creamy Base
Pour in the heavy cream and chicken broth, stirring to combine everything. Let it simmer for a few minutes until it starts to thicken—a magical transformation is happening! -
Add the Cheese
Sprinkle in your grated Parmesan cheese and stir until it melts into that beautiful creamy sauce. You should be able to see those lovely golden hues of cheese swirled throughout. -
Boil the Pasta
While the sauce is working its magic, cook your fusilli (or choice of pasta) in a large pot of boiling salted water according to package instructions, usually around 8-10 minutes for al dente. -
Combine
Drain the pasta (don’t rinse—those starchy bits help the sauce stick), and add it straight to your creamy chicken mixture. Toss everything together gently, ensuring each piece of pasta is coated. -
Final Seasoning
Taste and adjust your seasoning with more salt, black pepper, and the rest of the Italian seasoning. Remember, you can always add more but can’t take it away! -
Serve It Up
Scoop your creamy chicken pasta onto plates or in bowls. Sprinkle with freshly chopped parsley for that extra touch of color and freshness!
And just like that, you’ve created a comforting, delectable meal that’s sure to please anyone at your table.
Serving Suggestions
When serving, consider adding a simple side salad dressed with olive oil and vinegar to balance the richness of the pasta. Garlic bread is another classic pairing—what’s better than dipping a chunk of warm bread into that creamy sauce?
For a presentation that wows, you can twirl the pasta onto your plate using a fork (it looks fancy!) and garnish it with some extra grated Parmesan. Serve it family-style in a large bowl if you’re feeling communal—there’s something so warm and inviting about sharing a dish straight from the bowl, don’t you think?
Recipe Variations
Let’s talk a little about how you can play around with this recipe! Here are some creative twists:
-
Mushroom Magic: Swap in sautéed mushrooms for added earthiness. They pair beautifully with the garlic and cream!
-
Vegetable Delight: Add some steamed broccoli, spinach, or asparagus for a vibrant, nutritious boost. You might also find this makes for a great vegetarian option if you skip the chicken!
-
Spice It Up: For a Southwestern spin, toss in some diced bell peppers and a dash of taco seasoning instead of Italian herbs.
-
Lemon Burst: Add a splash of lemon juice and zest at the end for a fresh citrusy note that brightens everything up.
-
Bacon Bliss: For those who like a little indulgence, crispy bacon bits can be a delightful addition.
Chef’s Notes
Over the years, I’ve played around with this recipe a ton! In fact, the first time I made it, I used less cream and a bit of white wine. It was a happy accident that turned into a go-to dinner party dish!
Sometimes I’ll play with the textures by using different pastas; orecchiette has become a favorite because they cradle the sauce so well. Don’t forget—the best part of being in the kitchen is making the recipe your own, so have fun with it!
FAQs and Troubleshooting
-
Why did my sauce separate?
This can happen if it gets too hot too fast! Always keep a gentle simmer on the sauce. -
Can I make this ahead of time?
Absolutely! Just be aware that the pasta might absorb some sauce. You can reheat it and add a splash of cream or broth to loosen it up. -
What if my pasta is too sticky?
Stir it gently during cooking and add a touch of olive oil right after draining to help separate the noodles. -
How do I store leftovers?
Transfer to an airtight container and refrigerate for up to three days. Reheat over low heat on the stovetop, adding a little cream if needed.
Nutritional Info (if applicable)
Estimated Nutrition Info per Serving (based on 6 servings):
- Calories: 540
- Protein: 34g
- Fat: 30g
- Carbohydrates: 40g
- Fiber: 2g
- Sugar: 2g
These numbers can vary based on brands and ingredient variations, so adjust according to your specific choices!
Final Thoughts
Well, there you have it! Your kitchen is now armed with the ultimate creamy garlic Parmesan chicken pasta recipe. It’s comforting, delicious, and, most importantly, simple! Whether it’s a weeknight dinner or special occasion, this dish is sure to become a family favorite.
Don’t forget to take your own little culinary detours as you make it your own. Share your love for cooking with friends and family, keep experimenting, and remember that the best recipes come from the heart. Until next time, happy cooking, and may your plates always be full of flavor!
Cheers,
Beau

Creamy Garlic Parmesan Chicken Pasta
- Total Time: 45 minutes
- Yield: 4 servings 1x
- Diet: Non-Vegetarian
Description
A luscious, comforting pasta dish enveloped in creamy garlic sauce and tender chicken, perfect for any day of the week.
Ingredients
- 2 large Boneless, skinless chicken breasts, cut into 1-inch cubes
- 1 lb (450 g) Twisted pasta (fusilli)
- 3 Tbsp Unsalted butter, divided
- 4–5 cloves Fresh garlic, minced
- 1 ½ cups Heavy cream
- ½ cup Chicken broth
- 1 cup Grated Parmesan cheese, freshly grated preferred
- 1 tsp Italian seasoning, divided
- ¼ tsp Red pepper flakes, optional
- Fine salt & black pepper, to taste
- 2 Tbsp Fresh parsley, chopped, for garnish
Instructions
- Start by cutting your chicken breast into bite-sized cubes (1-inch or so). Season them generously with salt, black pepper, and half of your Italian seasoning.
- Grab a large skillet and place it over medium heat. Add 2 tablespoons of unsalted butter.
- Once the butter is melted and bubbling, add the seasoned chicken pieces to the pan. Cook for about 6-7 minutes until golden brown.
- Add your minced garlic and sauté for about 1-2 minutes until fragrant.
- Pour in the heavy cream and chicken broth, stirring to combine. Let it simmer for a few minutes until it starts to thicken.
- Sprinkle in your grated Parmesan cheese and stir until it melts into the creamy sauce.
- Cook your fusilli in a large pot of boiling salted water according to package instructions, usually around 8-10 minutes for al dente.
- Drain the pasta (don’t rinse) and add it straight to your creamy chicken mixture. Toss everything together gently.
- Taste and adjust seasoning with more salt, black pepper, and the rest of the Italian seasoning.
- Scoop your creamy chicken pasta onto plates or in bowls. Sprinkle with freshly chopped parsley.
Notes
For a lighter option, substitute heavy cream with half-and-half or non-dairy milk. Enhance with garlic bread or a simple side salad.
- Prep Time: 15 minutes
- Cook Time: 30 minutes
- Category: Main Course
- Method: Cooking
- Cuisine: Italian
Nutrition
- Serving Size: 1 serving
- Calories: 540
- Sugar: 2g
- Sodium: 750mg
- Fat: 30g
- Saturated Fat: 18g
- Unsaturated Fat: 10g
- Trans Fat: 0g
- Carbohydrates: 40g
- Fiber: 2g
- Protein: 34g
- Cholesterol: 120mg
Keywords: creamy pasta, garlic, chicken, quick dinner, comfort food

Amazing Sticky Honey Garlic Cauliflower in 5 Steps
# Amazing Sticky Honey Garlic Cauliflower in 5 Steps

## Introduction

Hey there, food lovers! It's Beau Collier, your friendly kitchen companion, and today we’re diving into one of my all-time favorite dishes: **Sticky Honey Garlic Cauliflower**! If you’re looking for a recipe that brings people together and leans into those warm, cozy vibes we crave, you’ve found it! This dish is everything you want and more—it’s savory, sweet, and ridiculously easy to whip up, making it perfect for a weeknight dinner or a vibrant addition to any gathering.

Let’s talk about comfort food for a moment. It’s that food that not only fills your belly but also warms your soul. Think of it as a hug from the inside out! What’s fantastic about this Sticky Honey Garlic Cauliflower is that it playfully straddles the line between comfort and a little flair. It's vegetarian, absolutely delicious, and makes a stunning centerpiece on your dining table. Plus, it’s a great way to sneak some extra veggies into your life or the lives of your loved ones—without them even knowing they’re eating their greens!

This dish is all about balance: the sweetness of honey mingling perfectly with the umami depth of soy sauce, topped off with a garlicky aroma that makes your kitchen smell like a five-star restaurant. And don’t worry—this isn't just a recipe for the pros! Whether you’re a seasoned chef or still trying to figure out the difference between baking soda and baking powder, I’ve got your back. So grab your apron, put on your most fabulous cooking playlist, and let’s get this culinary adventure started!

## Personal Story

I’ll never forget the first time I made a similar dish for my family. It was a chilly Friday evening, and I wanted to treat my parents to something comforting and vibrant. While flipping through an old family cookbook, I stumbled upon a recipe for honey garlic chicken. But as I flipped the page, I realized I had a large head of cauliflower staring back at me from the fridge. It was the solution to my conundrum: why not swap out the chicken for this beautiful veggie? I got to work, tossing it together with some fragrant garlic and sweet honey, and the rest is history!

My family took their first bite and erupted with delighted laughter. “This isn’t chicken, is it?!” my dad exclaimed. But you know what? They loved it even more! It turned into a tradition for us to make sticky cauliflower on those cozy Friday nights, and it became a staple dish at family gatherings ever since. Food has this magical ability to create memories and connections, don’t you agree? Now, every time I make this dish, it carries a little piece of that joyous moment along with it, reminding me of the love we share around the table.

## Ingredients

Before we get into the nitty-gritty of cooking, let’s gather our superstar ingredients:

- **1 large head cauliflower**: Cut into bite-sized florets. When shopping, look for fresh, firm cauliflower with no brown spots. If you're not a cauliflower fan, use broccoli or Brussels sprouts instead!

- **2 tablespoons olive oil**: This not only helps to roast the cauliflower but adds flavor too. If you're looking for a different taste, avocado oil works wonders here!

- **1/4 cup honey**: The sweet star of our dish! If you’re vegan, you can substitute maple syrup for a similarly sweet flavor.

- **1/4 cup soy sauce/tamari**: For that salty umami kick. Tamari is a great gluten-free option, while coconut aminos offer a soy-free alternative.

- **2 tablespoons rice vinegar**: It adds a tangy brightness to the sauce. If it’s not available, apple cider vinegar is a decent substitute.

- **1 tablespoon sesame oil**: This adds a nutty, rich depth. If you can’t find it, you can use more olive oil or even peanut oil for a different flavor profile!

- **3 cloves garlic, minced**: Fresh is always best! Garlic powder can work in a pinch, but the fresh stuff packs an unparalleled punch.

- **1 teaspoon fresh ginger, grated**: Ginger adds warmth and zest. Ground ginger can work too but use it sparingly!

- **Pinch of red pepper flakes (optional)**: For a touch of heat! If you're not into spicy, feel free to skip this step.

- **Sesame seeds, for garnish**: These little beauties add a crunch and beautiful visual appeal.

- **Green onions, chopped, for garnish**: They bring freshness and an extra layer of flavor. If you’re not a fan, fresh cilantro or parsley will do the trick!

## Step-by-Step Instructions

Now, let’s get cooking! Follow along with these easy steps, and don’t forget to sprinkle in a dash of fun!

### Step 1: Preheat and Prep
First things first—preheat your oven to **425°F (220°C)**. This is key for getting that wonderful caramelization on the cauliflower. While the oven is warming up, let’s get those cauliflower florets nice and clean! Rinse them under cold water and make sure to pat them dry. The dryer they are, the better they’ll roast!

### Step 2: Toss in Those Flavors
In a large mixing bowl, combine the **olive oil**, **honey**, **soy sauce**, **rice vinegar**, **sesame oil**, **minced garlic**, **grated ginger**, and a pinch of **red pepper flakes** (if using). Give this mixture a good stir until everything is well combined. And oh, the aroma that wafts up from that bowl is intoxicating—like a warm embrace from your favorite food memory!

### Step 3: Coat the Cauliflower
Now, toss the cauliflower florets into the bowl and gently coat them in your sticky honey garlic sauce. I recommend using your hands for this—it’s the best way to ensure every floret is thoroughly covered. Plus, it’s oddly satisfying! After they’re all coated, spread the cauliflower out on a baking sheet lined with parchment paper. Ensure they’re in a single layer for optimal roasting; nobody likes a soggy floret!

### Step 4: Roast, Don't Toast!
Slide that baking sheet into your preheated oven and roast for **25-30 minutes**, flipping the florets halfway through. This is the magic moment where the sugars in the honey start to caramelize, giving you that beautiful, sticky glaze. Keep an eye on them towards the end; you’re aiming for a lovely golden-brown color with crispy edges!

### Step 5: Garnish and Serve
Once the cauliflower is out of the oven, it’s time for the grand reveal! Sprinkle sesame seeds and green onions over the top for an added burst of flavor and visual appeal. And there you have it—your beautiful Sticky Honey Garlic Cauliflower is ready to be devoured! Serve it warm as a delightful side dish, over rice, or as a stunning appetizer for your next gathering.

## Serving Suggestions

This sticky goodness makes a fabulous centerpiece to any meal! Serve it alongside some fluffy jasmine rice or quinoa to soak up all that luscious sauce. If you’re feeling extra fancy, try it on top of a vibrant salad with fresh greens, avocado, and a zesty orange dressing. Want to level up your dinner game? Pair it with grilled chicken or fish for the carnivores at the table, or even some crispy tofu for a veggie twist. The possibilities are endless!

## Recipe Variations

You know I love getting creative in the kitchen! Here are a few fun variations to mix things up:

1. **Add More Veggies**: Try tossing in some chopped bell peppers or snap peas for a delightful crunch. Just adjust the cooking time accordingly!

2. **Spice It Up**: Add sliced jalapeños instead of red pepper flakes for a spicier kick.

3. **Curry Twist**: Mix in a teaspoon of curry powder for an exotic flavor profile. It’s a whole new world of deliciousness!

4. **Sweet and Savory**: Add some pineapple chunks to the mix before roasting. The tropical sweetness complements the dish beautifully!

5. **Nutty Goodness**: Throw in some chopped peanuts or cashews when plating for added crunch and richness.

## Chef’s Notes

Cooking is an adventure, my friends! This recipe has evolved over time. It started as a humble spin on a chicken dish and transformed into one of my go-to crowd-pleasers. The first time my niece tried it, she declared it “the best cauliflower ever!” I still chuckle at the memory of her tiny face covered in sticky sauce, giggling. Cooking should be fun—it’s all about experimentation and finding joy in every bite. So don’t hesitate to add your twist, and make this dish uniquely yours!

## FAQs and Troubleshooting

**1. Can I make this dish in advance?**
Absolutely! You can roast the cauliflower ahead of time, but I recommend enjoying it fresh for the best texture. If you must, just reheat gently in the oven.

**2. It burned! What went wrong?**
If your cauliflower is burning, it may be too close to the heating element or the oven temperature is too high. Just lower the heat slightly and keep an eye on it!

**3. Can I use frozen cauliflower?**
Yes, you can! Just remember to thaw and drain well before marinating, or else your sauce may turn out too watery.

**4. What's the best way to store leftovers?**
Transfer any leftovers to an airtight container and store them in the fridge for up to 3 days. Reheat in the oven to regain that crispy texture!

## Nutritional Info

Let’s talk a little about nutrition! A serving of this delightful Sticky Honey Garlic Cauliflower (about 1 cup) contains:

- **Calories**: Approximately 180
- **Protein**: 5g
- **Fat**: 8g
- **Carbohydrates**: 25g
- **Fiber**: 3g
- **Sugar**: 10g

It's a wholesome option packed with vitamins and minerals, and of course, lots of flavor! Just remember to adjust your portion sizes based on your dietary needs.

## Final Thoughts

There you have it! A delicious, satisfying, and easy-to-make recipe that will bring joy to your table. Sticky Honey Garlic Cauliflower is not just a dish; it’s an experience, a memory in the making, and a perfect way to elevate your home cooking. Whether you devour it solo or share it with friends and family, you’re bound to be hit with a wave of satisfaction.

So, what are you waiting for? Turn up that oven, get your ingredients prepped, and let’s make some magic happen in the kitchen! And don't forget to share your creations with me—I'd love to see how you put your unique spin on this marvelously sticky delight. Happy cooking, my friends!

Sticky Honey Garlic Cauliflower
- Total Time: 45 minutes
- Yield: 4 servings 1x
- Diet: Vegetarian
Description
A delicious and easy vegetarian dish featuring savory, sweet honey garlic cauliflower that’s perfect for any gathering.
Ingredients
- 1 large head cauliflower, cut into bite-sized florets
- 2 tablespoons olive oil
- 1/4 cup honey
- 1/4 cup soy sauce or tamari
- 2 tablespoons rice vinegar
- 1 tablespoon sesame oil
- 3 cloves garlic, minced
- 1 teaspoon fresh ginger, grated
- Pinch of red pepper flakes (optional)
- Sesame seeds, for garnish
- Green onions, chopped, for garnish
Instructions
- Preheat your oven to 425°F (220°C) and rinse the cauliflower florets under cold water, then pat them dry.
- Combine olive oil, honey, soy sauce, rice vinegar, sesame oil, minced garlic, grated ginger, and red pepper flakes in a large mixing bowl.
- Toss the cauliflower florets in the sauce until well coated, then spread them on a baking sheet lined with parchment paper.
- Roast in the oven for 25-30 minutes, flipping the florets halfway through, until golden brown and crispy.
- Garnish with sesame seeds and green onions before serving warm.
Notes
For a vegan option, substitute honey with maple syrup. Adjust cooking time if you add additional vegetables.
- Prep Time: 15 minutes
- Cook Time: 30 minutes
- Category: Side Dish
- Method: Roasting
- Cuisine: Asian
Nutrition
- Serving Size: 1 cup
- Calories: 180
- Sugar: 10g
- Sodium: 600mg
- Fat: 8g
- Saturated Fat: 1g
- Unsaturated Fat: 6g
- Trans Fat: 0g
- Carbohydrates: 25g
- Fiber: 3g
- Protein: 5g
- Cholesterol: 0mg
Keywords: cauliflower, honey garlic, vegetarian, side dish, easy recipe, roasting

Deep dish Nutella Cookie Pie
Deep Dish Nutella Cookie Pie: A Sweet Slice of Nostalgia
Introduction
Hey there, fellow food lovers! I’m Beau Collier, and today we’re diving into a dessert that’s not just delicious but downright dreamy—the Deep Dish Nutella Cookie Pie! Now, I don’t want to brag, but this dessert has been known to cause spontaneous happy dances in the kitchen. You know what I’m talking about. When that oven timer dings, and you get a whiff of that sweet, gooey goodness—it’s hard not to bust a move!
Picture this: a thick, chewy cookie base that cradles a rich, molten center of Nutella, topped off with a sprinkle of chocolate chips. I mean, can it get any better? This dessert is like a warm hug from your favorite person, and it’s super simple to whip up, making it the perfect treat for any occasion.
Whether you’re gearing up for a fun family gathering, a cozy movie night, or simply need to impress that special someone, this Deep Dish Nutella Cookie Pie is your go-to! Baking it is a straightforward, joyous experience full of the kind of nostalgic warmth that only comes from a kitchen filled with sweet aromas and laughter. So, let’s dust off those mixing bowls and get cracking!
Personal Story
Ah, Nutella! Just saying the word brings back a flood of memories. I remember the first time I tasted Nutella—it was a pivotal moment in my young, curious foodie life. My mom would make these deliciously indulgent snacks after school, and there was always a jar of Nutella on the counter. We would take toasted slices of bread and slather them with the rich hazelnut spread, and while I stuffed my face, I would listen to her stories about how food can create lasting connections.
One rainy afternoon, we decided to switch things up. We mixed Nutella with a basic cookie recipe, and what emerged from our oven was a beautiful, gooey disaster. We didn’t quite follow the measurements (oops!), but we didn’t care; it was glorious! That first bite was a revelation. We had made magic—pure, delicious, chocolaty magic. Fast forward to today, and that spirit of adventure in the kitchen lives on with this Deep Dish Nutella Cookie Pie—each slice brimming with sweet memories and a whole lot of love.
Ingredients
Here’s what you will need to make your very own Deep Dish Nutella Cookie Pie:
-
1 cup all-purpose flour
This is the backbone of your cookie pie. For a gluten-free option, try almond flour or a gluten-free blend. -
1/2 teaspoon baking soda
This little powerhouse helps your cookie rise to perfection. You can substitute it with baking powder if that’s what you have on hand. -
1/4 teaspoon salt
A pinch of salt enhances the sweetness and balances the flavors beautifully. -
1/2 cup unsalted butter, softened
Butter adds richness and flavor. If you prefer a dairy-free option, feel free to use coconut oil or a vegan butter substitute. -
1/2 cup brown sugar
Brown sugar gives your cookie pie that wonderful chewiness and deep, caramel flavor. You can use white sugar if you’re in a pinch, but the flavor will be missing! -
1/4 cup granulated sugar
This helps to sweeten the pie further. You can swap it out with coconut sugar for a healthier alternative. -
1 large egg
This binds all the ingredients together. For a vegan option, try a flax egg (1 tablespoon of ground flaxseed + 2.5 tablespoons of water, mixed and allowed to sit for a few minutes). -
1 teaspoon vanilla extract
Vanilla is the secret sauce that ties everything together, adding warmth and depth of flavor. -
1/2 cup Nutella
The star of the show! If you’re feeling adventurous, try using another spread like cookie butter or peanut butter. -
1/2 cup chocolate chips
Because who doesn’t love more chocolate? You can use dark, milk, or even white chocolate chips depending on your preference.
Step-by-Step Instructions
Let’s get down to business! Here’s how to make your Deep Dish Nutella Cookie Pie—trust me, it’s simpler than it sounds!
-
Preheat your oven
Preheat your oven to 350°F (175°C). This is a crucial step that ensures an even bake from the get-go! -
Mix dry ingredients
In a bowl, whisk together the all-purpose flour, baking soda, and salt. This helps to evenly distribute the baking soda and salt throughout the flour. -
Cream the butter and sugars
In a separate bowl, cream together the softened butter, brown sugar, and granulated sugar using an electric mixer or a sturdy whisk until it’s smooth and fluffy—about 2-3 minutes. This process is vital because it incorporates air into the mixture, giving your cookie pie a light texture. -
Add the egg and vanilla
Beat the egg and vanilla extract into the butter-sugar mixture. Make sure everything is well combined; you want that delicious flavor to infiltrate every bite! -
Combine wet and dry ingredients
Gradually mix the dry ingredients into the wet ingredients—do this slowly to avoid flour clouds! Mix until just combined; be careful not to overmix, or you’ll end up with a tougher cookie. -
Fold in Nutella and chocolate chips
Now comes the fun part! Gently fold in the Nutella—you don’t want to fully mix it in; you’re looking for those delicious swirls of Nutella throughout the batter. Add the chocolate chips, folding them evenly through the mixture. -
Prepare your baking dish
Grease a deep dish pie pan with some butter or cooking spray. You really want to ensure it won’t stick, which makes serving so much easier! -
Scoop and spread
Pour the batter into the pan, and using a spatula, spread it evenly. You want it to look all nice and neat before it hits the oven. There’s something satisfying about that! -
Bake
Slide that beauty into the preheated oven and bake for about 25–30 minutes. The edges will turn golden brown, and the top will look set but still a little gooey in the center. That’s the magic you’re aiming for! -
Cool and serve
Let it cool for at least 10 minutes before slicing into it. This gives the inner Nutella time to thicken up slightly, making for perfect slices. Top with a scoop of vanilla ice cream or whipped cream for an added indulgence!
Serving Suggestions
There are so many fun ways to plate your Deep Dish Nutella Cookie Pie!
-
Classic Style: Simply cut a generous wedge and plate it next to a scoop of vanilla ice cream—what a classic combo!
-
Decadent Drizzle: Consider drizzling some extra melted Nutella over the top and sprinkling with crushed hazelnuts. This not only adds flavor but also a nice crunch!
-
Berry Burst: Serve it alongside fresh berries—strawberries, raspberries, or even a berry coulis—this adds a pop of color and a bit of acidity that complements the rich pie beautifully.
-
Cookie Crumbles: Sprinkle a handful of cookie crumbles atop the pie for added texture and presentation—who doesn’t love a good cookie on a cookie pie?
Recipe Variations
At Feastical, we believe in making recipes your own. Here are a few creative twists on your Deep Dish Nutella Cookie Pie:
-
Nutty Twist: Add 1/2 cup of chopped hazelnuts into the batter for an extra crunch!
-
Peanut Butter Perfection: Substitute half the Nutella with creamy peanut butter, creating a rich, nutty pie with a delightful flavor contrast.
-
Cocoa Lovers Unite: Add 1/4 cup of unsweetened cocoa powder to the dry ingredients for a brownie-like cookie texture and flavor.
-
S’mores Style: Fold in mini marshmallows and crumbled graham crackers for a nostalgic twist reminiscent of campfire s’mores.
-
Salted Caramel Delight: Drizzle some salted caramel over the top before serving for an indulgent finishing touch!
Chef’s Notes
You know, this recipe really evolved over time. The first few times I made it, I tried to make it more complicated, thinking more steps meant more flavor—but honestly, the magic is in its simplicity.
I’ll never forget the time I invited friends over for dinner. I planned an elaborate main course but ended up spending all my time refining this dessert instead. When it was time for dessert, I couldn’t even wait for it to cool before diving in, and the smiles around the table said it all. Food has that remarkable ability to create unforgettable moments, right?
One thing I’ve learned is that confidence is key in the kitchen. If you make a little mistake, own it, laugh, and carry on! That’s what cooking is all about—having fun and making sweet memories!
FAQs and Troubleshooting
1. Why is my cookie pie not rising?
If your cookie pie isn’t rising, it’s possible your baking soda is old and lost its power. Always check the expiry on your leavening agents, and store them properly!
2. Can I use a different spread instead of Nutella?
Absolutely! Feel free to use any chocolate spread, or even almond or cashew butter for a different flavor profile.
3. How do I store leftovers?
Store any leftover pie in an airtight container. It’ll stay fresh for about 3-4 days at room temperature, but I personally love it warm, so try popping it back in the microwave for a few seconds before enjoying!
4. My chocolate chips sank to the bottom! What happened?
This can happen if your batter is too thin. Make sure to not overmix the batter and to fold gently so the chocolate chips remain suspended in the mixture.
Nutritional Info
While I like to keep dessert indulgent and fun, it’s good to have an idea of what you’re munching on! Here’s a rough estimate for a single slice of Deep Dish Nutella Cookie Pie (based on 8 servings):
- Calories: 350
- Total Fat: 20g
- Saturated Fat: 10g
- Carbohydrates: 38g
- Sugars: 20g
- Protein: 4g
Keep in mind that nutritional values can vary based on specific brands and any alterations you make. Enjoy it in moderation—life is all about balance!
Final Thoughts
And there you have it—your guide to creating a delightful Deep Dish Nutella Cookie Pie that’s sure to put a smile on your face and warmth in your heart. Remember, the best recipes come from a place of love and joy not just in the ingredients to assemble but in the stories and people they are shared with.
So, grab your loved ones, roll up your sleeves, and make some magic happen in your kitchen. Whether it’s for a special occasion or just because you’ve had a long week, this deep dish cookie pie is always a winner.
Happy baking, and until next time, keep your spatulas ready and your bellies hungry! 🍽️
Print
Deep Dish Nutella Cookie Pie
- Total Time: 40 minutes
- Yield: 8 servings 1x
- Diet: Vegetarian
Description
A thick, chewy cookie pie filled with rich Nutella and topped with chocolate chips. Perfect for any occasion.
Ingredients
- 1 cup all-purpose flour
- 1/2 teaspoon baking soda
- 1/4 teaspoon salt
- 1/2 cup unsalted butter, softened
- 1/2 cup brown sugar
- 1/4 cup granulated sugar
- 1 large egg
- 1 teaspoon vanilla extract
- 1/2 cup Nutella
- 1/2 cup chocolate chips
Instructions
- Preheat your oven to 350°F (175°C).
- Mix dry ingredients in a bowl: whisk together flour, baking soda, and salt.
- Cream the softened butter, brown sugar, and granulated sugar until smooth and fluffy.
- Add the egg and vanilla extract to the butter-sugar mixture and beat until combined.
- Combine the dry ingredients with the wet ingredients, mixing gradually.
- Fold in the Nutella and chocolate chips gently to maintain swirls.
- Prepare a deep dish pie pan by greasing it.
- Scoop the batter into the pan and spread it evenly.
- Bake for about 25-30 minutes until golden brown.
- Cool for 10 minutes before slicing and serving.
Notes
Top with ice cream, drizzled Nutella, or fresh berries for added indulgence.
- Prep Time: 10 minutes
- Cook Time: 30 minutes
- Category: Dessert
- Method: Baking
- Cuisine: American
Nutrition
- Serving Size: 1 slice
- Calories: 350
- Sugar: 20g
- Sodium: 150mg
- Fat: 20g
- Saturated Fat: 10g
- Unsaturated Fat: 5g
- Trans Fat: 0g
- Carbohydrates: 38g
- Fiber: 1g
- Protein: 4g
- Cholesterol: 30mg
Keywords: Nutella cookie pie, dessert, baking, chocolate
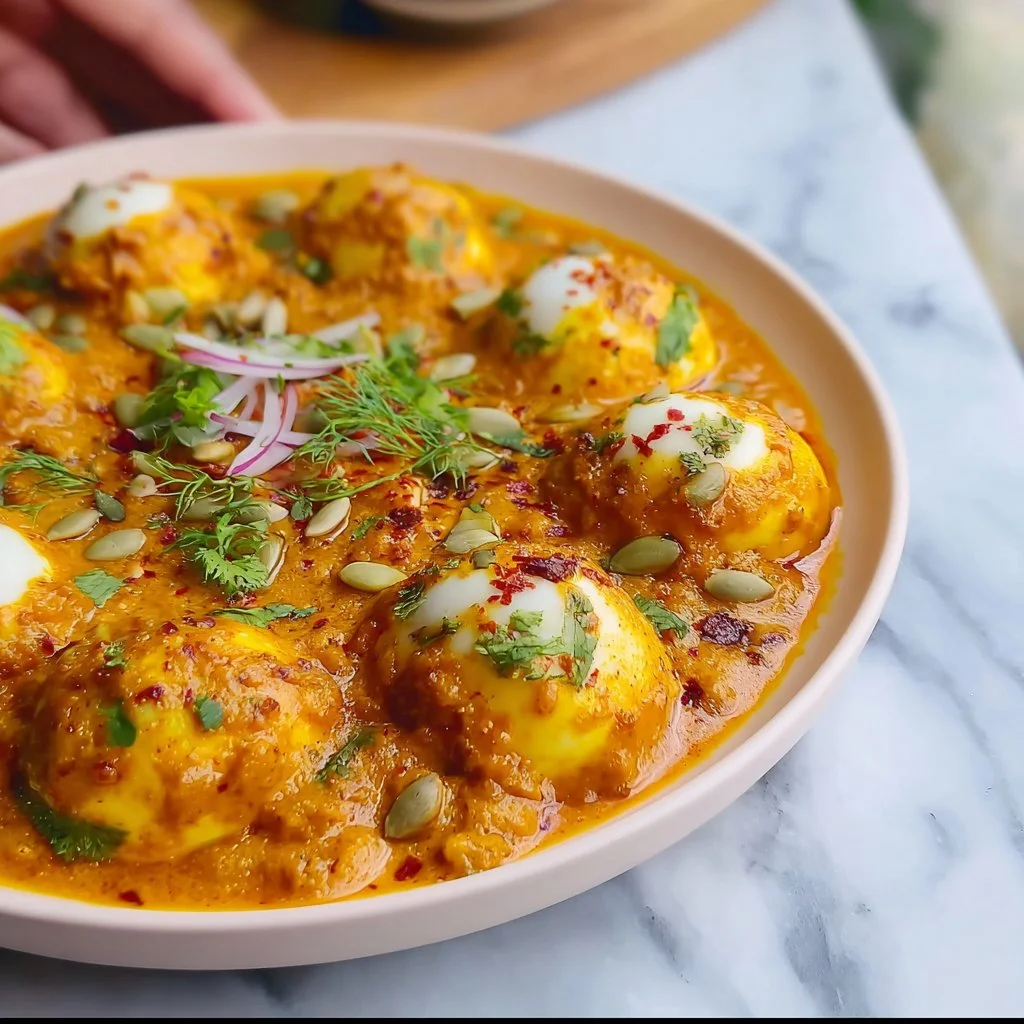
Royal Egg Curry
Royal Egg Curry: A Journey of Flavor and Comfort
Hey there, fellow food lovers! Today, we’re diving into a dish that effortlessly blends comfort and elegance—Royal Egg Curry. This delightful dish, with its rich and creamy sauce, will transport you to a world of tantalizing flavors and aromatic spices. Whether you’re gathering around the dinner table with loved ones or enjoying a cozy night in, this curry is an ultimate mood booster. So let’s lace up our aprons, roll up our sleeves, and make something truly special!
A Whisk of Nostalgia: My Personal Story
Growing up, my kitchen was my safe haven, filled with the scent of spices and the laughter of my family. One of my fondest memories is helping my grandmother prepare her famous egg curry for Sunday dinners. I remember standing on a stool, trying to reach the counter as she guided me through the process. The sizzle of onions hitting hot oil would send a wave of excitement through me, and as I stirred in the spices, I felt a connection to generations of cooks before me.
Egg curry was more than just dinner; it was love served on a plate. My grandmother always said that food is a celebration, and every meal is an opportunity to bring people together. Her take on egg curry was simply divine—each bite was a burst of flavor, and I could never get enough. Now, every time I whip up this dish, I’m reminded of those cherished moments, which makes me even more excited to share it with you!
Ingredients
Here’s what you’ll need to bring this Royal Egg Curry to life:
-
6 Hard-Boiled Eggs
A protein-packed star of the dish! You can substitute with tofu for a vegetarian option, or skip it altogether for a vegan version. -
1 Cup Plain Yogurt (Dahi)
This adds creaminess and tang; for a dairy-free version, try using coconut yogurt. Make sure to whisk it well to prevent curdling! -
2 Onions, Finely Sliced
Use sweet onions for a milder flavor, or red onions for a more robust taste. You can also caramelize them for extra sweetness! -
2 Tomatoes, Pureed
These contribute to the base of our gravy. Fresh tomatoes are great, but canned tomatoes in puree work just as well if you’re short on time! -
1/4 Cup Cashews, Ground
They add nuttiness and creaminess to the curry. Almonds can be a great alternative if you have a nut allergy. -
1/4 Cup Cream
For that luxurious finish! You can swap it with coconut cream or omit it entirely for a lighter dish. -
1 tsp Ginger-Garlic Paste
This is essential for flavor depth. If you’re in a pinch, fresh grated ginger and minced garlic both work perfectly! -
1 tsp Cumin Seeds
They add an earthy flavor! If they’re too strong for your taste, ground cumin can be used, but remember to adjust the quantity! -
1 tsp Coriander Powder
This balances the spices beautifully. If you’re feeling adventurous, you can also add fresh coriander stalks for extra zing! -
1/2 tsp Turmeric Powder
Besides its health benefits, it gives a warm color. Fresh turmeric can be used if you happen to have it on hand! -
1/2 tsp Garam Masala
A must for that aromatic finish! You can get creative and blend your own garam masala with your favorite spices. -
Salt to Taste
Essential for bringing all the flavors together! Remember to taste as you go for the best results! -
2 tbsp Cooking Oil or Ghee
Ghee adds a rich flavor but feel free to use any cooking oil of your choice—olive or canola work great too! -
Fresh Coriander Leaves for Garnish
They brighten up the dish! If you’re not a fan of coriander, fresh parsley can work nicely as a substitute!
Step-by-Step Instructions
Let’s get cooking! Here’s how we’ll bring this Royal Egg Curry to life:
Step 1: Prepare the Ingredients
Get everything ready before you start cooking. Chop the onions, puree the tomatoes, and grind the cashews. This will save you from frantic searching mid-cooking!
Step 2: Hard-Boil the Eggs
Place your eggs in a pot of cold water and bring them to a boil. Once boiling, lower the heat and let them simmer for about 9-12 minutes. Afterward, plunge them in ice water for a few minutes. This not only halts the cooking but also makes peeling easier. A little chef hack: tap the eggs gently on a hard surface to get a clean peel.
Step 3: Sauté the Onions
In a large skillet, heat up the oil or ghee over medium heat. Add the sliced onions and sauté them until golden brown and caramelized—about 10-12 minutes. Trust me; you want to take your time here. Those sweet, deep flavors are so worth it!
Step 4: Add Ginger-Garlic Paste
Mix in the ginger-garlic paste and sauté for another 2-3 minutes until fragrant. This will perfume your kitchen in the most delightful way!
Step 5: Incorporate the Spices
Sprinkle in the cumin seeds, coriander powder, turmeric, and salt. Stir them together, allowing the spices to toast slightly—this helps to enhance their flavors and aromas. Your kitchen is now officially in ‘heavenly scent’ territory!
Step 6: Pour in the Pureed Tomatoes
Next, add the pureed tomatoes to the skillet. Cook this mixture for about 5-7 minutes until the oil separates from the sauce—a great sign that your base is ready.
Step 7: Add Ground Cashews and Yogurt
Stir in the ground cashews, which will make the sauce rich and creamy. Then, reduce the heat and gently mix in the yogurt, stirring continuously to avoid curdling. You want a silky, smooth sauce that hugs the eggs beautifully.
Step 8: Finish with Cream and Garam Masala
Pour in the cream and sprinkle over the garam masala. Simmer the sauce for a few minutes to meld all those glorious flavors together. If you want a thinner sauce, feel free to add a bit of water or broth until you reach your preferred consistency.
Step 9: Place the Eggs
Carefully cut the hard-boiled eggs in half and place them, cut side up, into the sauce. Let them soak up those lovely flavors for a few minutes. You can optionally add a few sprigs of fresh coriander here for a fresh touch!
Step 10: Serve and Garnish
Remove the skillet from heat and transfer the curry to a beautiful serving dish. Garnish generously with fresh coriander leaves. Your Royal Egg Curry is ready to impress!
Serving Suggestions
For an authentic experience, serve your Royal Egg Curry alongside fluffy basmati rice or warm naan. You could even whip up a quick cucumber raita to cool down the spice and add a refreshing touch. Presentation makes a difference, so use your finest dishware and enjoy the vibrant colors of this delightful curry—your food loves a good spotlight, too!
Recipe Variations
Here are a few creative twists you can experiment with while making this Royal Egg Curry:
- Spicy Addition: For the heat lovers, toss in finely chopped green chilies when sautéing the onions to bring an extra zing.
- Vegetarian Delight: Substitute the hard-boiled eggs with paneer or potatoes for a vegetarian variation that holds its own!
- Herbal Twist: Add fresh mint along with the coriander for a refreshing herbal flavor. It’s unique and delightful!
- Coconut Curry: Swap the cream with coconut milk, giving the curry a tropical twist rich in flavor.
- Roasted Vegetables: Throw in some roasted veggies like bell peppers, eggplant, or zucchini for added texture and nutrition.
Chef’s Notes
This recipe has evolved over time—what started with simple eggs and spices in my grandmother’s kitchen has now transformed into this creamy, royal dish that feels festive. I remember a time when dinner guests raved about the curry, and I reluctantly had to share the recipe! And let’s not even mention the time I accidentally swapped sugar for salt—let’s just say it was a memorable meal.
FAQs and Troubleshooting
1. Why did my eggs crack when boiling?
Don’t worry; this can happen! Next time, try adding salt to the water; it can help prevent cracking. Also, use eggs at room temperature for better results!
2. What can I do if my curry is too thick?
If your curry is on the thicker side, simply add a splash of water or broth while simmering. Stir until you achieve your desired thickness.
3. My sauce curdled; how can I prevent that?
To prevent curdling, always reduce the heat when adding yogurt and stir continuously. Using room temperature yogurt instead of cold also helps!
4. Can I make this dish ahead of time?
Absolutely! In fact, the flavors deepen over time. Just reheat gently on the stove before serving, adding a splash of water if needed.
Nutritional Info
While the exact nutritional content can vary based on specific ingredients used, here’s a general breakdown per serving:
- Calories: 400-450
- Protein: 18-20g (depending on eggs)
- Fat: 25-28g
- Carbohydrates: 10-15g
- Fiber: 2-3g
This meal is rich in protein from the eggs and offers healthy fats from the cream and nuts. Adding vegetables can further enhance fiber content!
Final Thoughts
Cooking is a wonderful journey filled with stories, flavors, and cherished moments—and this Royal Egg Curry embodies all of that. As you replicate this dish in your kitchen, I hope it fills your home with delightful aromas and happy memories.
There’s something magical about a dish that feels both comforting and extravagant at the same time. So as you gather around the table to share your creation, remember that every bite carries the love and warmth that food brings us all closer.
Let’s keep the joy of cooking alive, friends! Don’t forget to share your own kitchen stories and variations in the comments below—let’s inspire each other. Until next time, happy cooking! 🍳✨
Print
Royal Egg Curry
- Total Time: 50 minutes
- Yield: 4 servings 1x
- Diet: Vegetarian
Description
A delightful dish of hard-boiled eggs in a rich and creamy sauce, blending comfort and elegance with aromatic spices.
Ingredients
- 6 Hard-Boiled Eggs
- 1 Cup Plain Yogurt (Dahi)
- 2 Onions, Finely Sliced
- 2 Tomatoes, Pureed
- 1/4 Cup Cashews, Ground
- 1/4 Cup Cream
- 1 tsp Ginger-Garlic Paste
- 1 tsp Cumin Seeds
- 1 tsp Coriander Powder
- 1/2 tsp Turmeric Powder
- 1/2 tsp Garam Masala
- Salt to Taste
- 2 tbsp Cooking Oil or Ghee
- Fresh Coriander Leaves for Garnish
Instructions
- Prepare the Ingredients: Get everything ready before you start cooking. Chop the onions, puree the tomatoes, and grind the cashews.
- Hard-Boil the Eggs: Place your eggs in a pot of cold water, bring to a boil, then simmer for 9-12 minutes. Submerge in ice water for easy peeling.
- Sauté the Onions: Heat oil or ghee and sauté onions until golden brown (10-12 minutes).
- Add Ginger-Garlic Paste: Mix and sauté for another 2-3 minutes until fragrant.
- Incorporate the Spices: Add cumin seeds, coriander powder, turmeric, and salt; stir to toast slightly.
- Pour in the Pureed Tomatoes: Cook this for 5-7 minutes until oil separates.
- Add Ground Cashews and Yogurt: Stir in cashews, reduce heat, then gently mix in yogurt.
- Finish with Cream and Garam Masala: Pour in cream and sprinkle garam masala, simmer to blend flavors.
- Place the Eggs: Cut boiled eggs in half and place them in the sauce.
- Serve and Garnish: Transfer to a serving dish and garnish with fresh coriander leaves.
Notes
For a vegetarian option, substitute hard-boiled eggs with paneer or potatoes. Serve with basmati rice or naan.
- Prep Time: 15 minutes
- Cook Time: 35 minutes
- Category: Main Course
- Method: Simmering
- Cuisine: Indian
Nutrition
- Serving Size: 1 serving
- Calories: 425
- Sugar: 6g
- Sodium: 500mg
- Fat: 28g
- Saturated Fat: 10g
- Unsaturated Fat: 12g
- Trans Fat: 0g
- Carbohydrates: 14g
- Fiber: 3g
- Protein: 20g
- Cholesterol: 300mg
Keywords: egg curry, Indian recipe, comfort food, vegetarian dish
Creamy Tomato Garlic Pasta
# Creamy Tomato Garlic Pasta: A Comfort Classic!

## Introduction

Hey there, food lovers! 💖 Welcome back to Feastical! Today, I’m super excited to share a fabulous recipe that’s as comforting as a warm hug on a chilly evening—Creamy Tomato Garlic Pasta. It’s that dish you whip up when you’re craving something hearty, delicious, and downright soul-soothing. You know those days when nothing seems to go right? Well, a plate of this pasta can turn your mood around faster than a quick spin on a dance floor!

This recipe is perfect for busy weeknights when you want a satisfying meal without spending hours hunched over the stove. With its creamy sauce mingling beautifully with the sharpness of garlic and bright acidity of tomatoes, it’s a dish that warms the heart and the belly. Plus, it only takes about 30 minutes to throw together, so you can spend less time cooking and more time enjoying your feast with family or friends!

One of the best things about pasta is that it’s incredibly versatile. You can switch it up based on what you have in your pantry or add your favorite ingredients to make it uniquely yours. 🍝 Whether you’re throwing a dinner party or just treating yourself to a cozy night in, this Creamy Tomato Garlic Pasta will have you covered!

So, roll up your sleeves and put on your favorite apron. I promise this tasty dish will quickly become a staple in your kitchen, and I can’t wait for you to dig in! Let’s dive into a bit of my history with this creamy delight.

## Personal Story

Speaking of pasta, I vividly recall the first time I made this Creamy Tomato Garlic Pasta. I was in college, and let me tell you—the struggle was real! My cooking skills were about as refined as a microwave burrito. One evening, after a long day of classes, I craved something comforting but didn't want to settle for takeout (again!). So, I rummaged through my fridge and pantry and found a few simple ingredients: pasta, some garlic, a can of tomatoes, and cream.

I’ll never forget the moment I mixed it all together. As the garlic hit the hot olive oil, my little kitchen filled with that heavenly aroma—the kind that makes your heart skip a beat. I checked to see if my housemates were around to share, but I was home alone! So naturally, I plated myself a generous portion and promptly dove in. With every bite, I felt like a gourmet chef! It was a transformative experience; a burst of flavor on a plater that felt polished and sophisticated, yet so easy to make.

Since then, this dish has remained a symbol of my culinary journey. It's not just food—it's a reminder that you don't need to be a master chef to create something incredible in your kitchen. Fast forward to today, and I’m thrilled to share this beloved dish with you, bringing that same joy and comfort to your table.

## Ingredients

Here's what you'll need for this creamy sensational dish:

- **8 oz of penne or fettuccine pasta**
  Whichever you prefer—penne is great for capturing that sauce, while fettuccine brings a smooth and light texture. Don’t have either? Any pasta shape will work—just adjust the cooking time based on the type!

- **4 cloves of fresh garlic, minced**
  Freshly minced garlic is the secret to a punch of flavor! But if you’re in a pinch, you can use garlic powder—just use about 1 teaspoon. However, nothing beats fresh!

- **1 can (14.5 oz) of diced tomatoes (no added sugar)**
  Opt for the no-sugar variety to keep it natural and healthy. If fresh tomatoes are in season, chop up about 2 cups—they’ll create a wonderfully vibrant sauce!

- **1 cup of heavy cream**
  This is where the creamy magic happens! You can substitute with half-and-half for a lighter option or even full-fat coconut milk for a dairy-free twist.

- **1/2 cup of grated Parmesan cheese**
  Freshly grated Parm adds a lovely nutty flavor. If you’re dairy-free, feel free to use nutritional yeast, or you can swap in a vegan cheese alternative.

- **2 tbsp of extra virgin olive oil**
  Opt for high-quality olive oil; it elevates the dish with its rich flavor. Don’t have it? Any neutral oil like canola or avocado oil will do, but you’ll lose some of that fantastic taste!

- **Salt and pepper, to taste**
  Seasoning is key! Always taste as you go to make sure it's just right.

## Step-by-Step Instructions

Alright, let’s get cooking! Follow these steps to create your creamy masterpiece.

1. **Cook Your Pasta**
   Bring a large pot of salted water to a boil. Add in your penne or fettuccine and cook according to package instructions until al dente. Remember, pasta will continue to cook in the sauce, so don’t overdo it! Stir it occasionally to prevent sticking. Once done, reserve about 1/2 cup of pasta water (trust me, this will help thin out the sauce if it gets too thick) and then drain the rest.

2. **Sauté the Garlic**
   In a large skillet over medium heat, add the olive oil. Once it’s shimmering, throw in the minced garlic and sauté for about 1-2 minutes until fragrant. Watch carefully—garlic burns quickly and nobody wants a bitter flavor in their dish!

3. **Add the Diced Tomatoes**
   Pour in the can of diced tomatoes (juice and all). Stir well, and let the mixture simmer for about 5-7 minutes until slightly thickened. This is where the magic happens—your kitchen will start smelling divine!

4. **Create the Creamy Sauce**
   Lower the heat and pour in the heavy cream. Stir until well combined. It will transform from a tomato base into a luscious cream sauce that wraps around the pasta like a warm blanket.

5. **Incorporate the Parmesan**
   Gradually add the grated Parmesan, stirring continuously until it melts into the sauce. If the sauce seems too thick, add some reserved pasta water little by little until you achieve your preferred consistency.

6. **Toss in the Pasta**
   Gently fold the cooked pasta into the sauce, ensuring every noodle is coated in that velvety goodness. Taste, and season with salt and pepper as needed.

7. **Plate It Up**
   Grab your favorite serving bowls and plate the creamy pasta! Top with additional Parmesan, a drizzle of olive oil, or even some freshly chopped parsley for a pop of color!

## Serving Suggestions

Dishing up this Creamy Tomato Garlic Pasta is where you can really let your creativity shine! Here are some serving ideas to elevate your dining experience:

- **Garnish with Fresh Herbs**
  Add a sprinkle of finely chopped basil or parsley right before serving for a burst of freshness.

- **Add a Side Salad**
  Pair it with a light arugula salad dressed with lemon vinaigrette to balance out the creaminess.

- **Serve with Garlic Bread**
  Nothing says “comfort food” like buttery garlic toast on the side! It’s perfect for mopping up any extra sauce.

- **A Splash of Chili Oil**
  For the spicy food lovers out there, drizzle a little chili oil over the top before serving for an exciting kick!

## Recipe Variations

Want to switch things up? Check out these creative variations:

- **Add Spinach and Cherry Tomatoes**
  Toss in a couple of handfuls of fresh spinach and halved cherry tomatoes just before adding the cream for added nutrients and flavor!

- **Add Protein**
  Drop in cooked chicken, shrimp, or even crispy bacon bits for a heartier meal. Veggie lovers can swap in grilled zucchini or mushrooms for some added depth.

- **Make It Spicy**
  Add red pepper flakes along with garlic for that fiery kick. You can also stir in some sliced jalapeños!

- **Try Different Cheeses**
  Experiment with other cheeses like goat cheese or mozzarella for a different flavor experience.

- **Vegan Twist**
  Substitute heavy cream for cashew cream and use nutritional yeast instead of Parmesan for a comforting vegan pasta dish!

## Chef’s Notes

As I've explored the world of pasta over the years, this recipe has easily become a favorite amongst friends and family. It's hard to believe how something so simple can create such joy around the dinner table! I vividly remember one Christmas Eve when I made this dish for a large gathering—my aunt raved about it for weeks! It’s funny to think how it has evolved from a college cookbook staple to a comforting classic in my kitchen.

Always feel free to play around with this recipe! It’s about making it your own and reflecting what flavors you love. And remember, if you ever feel like the sauce didn't quite turn out right, don't fret—grab a little more cheese! Cheese solves most culinary conundrums!

## FAQs and Troubleshooting

Here are some common questions and potential mistakes you might encounter:

- **Why is my sauce too thick?**
  No worries! Just add some of the reserved pasta water, a little at a time, to loosen the sauce until you reach your desired consistency.

- **My pasta is overcooked. What now?**
  If you realize it’s mushy, try tossing it in a hot sauce quickly to bring back some flavor! You can also add some fresh herbs or cheese to mask the texture.

- **Can I make this ahead of time?**
  Absolutely! Just store the cooked pasta and sauce separately in airtight containers. When you’re ready to eat, reheat gently on the stove, adding a splash of cream or pasta water to rehydrate.

- **What if I don’t have garlic?**
  While fresh garlic is best, you can use garlic powder instead. Just remember that the flavor won’t be as punchy—around 1 teaspoon should do.

## Nutritional Info

Let's break down the nutritional goodness of this comforting meal! For one generous serving of Creamy Tomato Garlic Pasta (based on the ingredients listed):

- **Calories**: Approximately 550 calories.
- **Total Fat**: About 30g
- **Saturated Fat**: 17g
- **Cholesterol**: 110mg
- **Sodium**: Moderate (varies based on added salt)
- **Carbohydrates**: 55g
- **Fiber**: 3g
- **Sugars**: 4g
- **Protein**: 16g

Bear in mind, actual nutritional values may vary based on brands and specific ingredients used!

## Final Thoughts

There you have it—a guide to one of the most heartwarming pasta dishes you’ll find! Creamy Tomato Garlic Pasta is not just something to eat; it’s a story—a journey through flavors that warms your heart and fills your belly with joy.

I hope this recipe brings as much comfort to you and your loved ones as it has to me over the years. Every meal is an opportunity to create memories, and with a recipe as inviting as this one, you're sure to gather round the table with smiles all around.

Thank you for joining me today on this culinary adventure! Remember, cooking is all about experimentation and having fun! So don’t be afraid to add your unique spin to any recipe. Until next time—grab a fork, dig in, and enjoy every bite!

Creamy Tomato Garlic Pasta
- Total Time: 30 minutes
- Yield: 4 servings 1x
- Diet: Vegetarian
Description
A comforting and creamy tomato garlic pasta dish that is easy to prepare and perfect for busy weeknights.
Ingredients
- 8 oz penne or fettuccine pasta
- 4 cloves fresh garlic, minced
- 1 can (14.5 oz) diced tomatoes (no added sugar)
- 1 cup heavy cream
- 1/2 cup grated Parmesan cheese
- 2 tbsp extra virgin olive oil
- Salt and pepper, to taste
Instructions
- Cook your pasta by bringing a large pot of salted water to a boil, adding in your pasta, and cooking according to package instructions until al dente.
- Sauté the garlic in olive oil over medium heat for about 1-2 minutes until fragrant.
- Add the diced tomatoes and let it simmer for 5-7 minutes until slightly thickened.
- Create the creamy sauce by pouring in the heavy cream and stirring until well combined.
- Incorporate the grated Parmesan, stirring continuously until it melts into the sauce.
- Toss the cooked pasta into the sauce, coating every noodle well and seasoning with salt and pepper as needed.
- Plate the creamy pasta and serve with additional Parmesan or fresh herbs if desired.
Notes
Feel free to add spinach, proteins, or spice to customize this pasta dish to your liking. Serve with garlic bread or a side salad for a complete meal!
- Prep Time: 10 minutes
- Cook Time: 20 minutes
- Category: Main Course
- Method: Baking
- Cuisine: Italian
Nutrition
- Serving Size: 1 serving
- Calories: 550
- Sugar: 4g
- Sodium: 400mg
- Fat: 30g
- Saturated Fat: 17g
- Unsaturated Fat: 10g
- Trans Fat: 0g
- Carbohydrates: 55g
- Fiber: 3g
- Protein: 16g
- Cholesterol: 110mg
Keywords: Creamy Pasta, Tomato Garlic Pasta, Comfort Food, Vegetarian Pasta, Easy Dinner

Easy Homemade Chicken Korma with Flatbread or Rice
Easy Homemade Chicken Korma with Flatbread or Rice
Hey there, food lovers! It’s Beau Collier here, and today we’re diving into the world of aromatic spices and creamy comfort with my favorite easy homemade Chicken Korma. If you’ve ever strolled down the aisle of your local Indian restaurant and found yourself captivated by the rich, colorful dishes on display, then my friends, you are in for a treat! This dish is not just a recipe; it’s a warm embrace that will transport you to culinary bliss with every delectable bite.
Now, let’s chat about korma. It’s a dish that hails from the royal kitchens of Mughal emperors, where flavors were celebrated and food was an art form. In my kitchen, I like to think of korma as a love letter to the rich tapestry of Indian cuisine. What makes this Chicken Korma special is the glorious blend of spices, the luxurious creaminess from the coconut and yogurt, and the ease of making it at home. Yes, you heard that right! This dish is not just for professional chefs or those with culinary degrees; even if you’re a newbie in the kitchen, this recipe will have you feeling like a star!
As I guide you through this mouthwatering journey, I guarantee you’ll find joy in every step—whether it’s chopping onions with a little tear in your eye or savoring the heavenly scent that fills your kitchen. So, grab your spatula, roll up your sleeves, and let’s navigate this delicious adventure together. Ready? Let’s cook up a storm and indulge in some soulful Chicken Korma!
Personal Story
Before we dive right into the cooking, let me share a little story that’s close to my heart. Growing up, my family had a tradition of hosting monthly potlucks. Each month, we’d pick a different cuisine, and everyone would bring their own special dish to share. One evening, my aunt surprised us all with her Chicken Korma, a recipe passed down through generations.
I still remember the magical aromas wafting through the air as we gathered around the dinner table. My aunt’s korma was creamy, spicy, and oh-so-comforting; it felt like a warm hug on a cold day. We devoured it with fluffy chapati and rice, laughing, reminiscing, and creating memories that would last a lifetime. That unforgettable meal inspired my own love for cooking and sharing food with friends and family, which ultimately led me to create Feastical.
Cooking this Chicken Korma today reminds me of those cherished family gatherings. It’s the kind of dish that brings people together, allows for laughter, and creates lasting memories. Join me as we make our own version of this delightful recipe and create new stories in our kitchens!
Ingredients
Let’s talk about the magic that goes into making our Chicken Korma! Here’s what you’ll need:
For the Chicken Korma:
-
2 tbsp ghee or sunflower oil
Ghee adds a rich flavor and is a traditional cooking fat in Indian cuisine. If you don’t have ghee on hand, sunflower oil will work just fine; it has a neutral flavor that won’t overpower the spices. -
1 onion, peeled and finely chopped
Onions serve as the aromatic base of many dishes. Finely chopping them helps release their natural sweetness as they sauté, creating a delicious foundation for flavor. -
3 chicken breasts (approx. 525g / 1.1 lbs), cut into bite-sized pieces
Chicken breasts are lean and cook quickly, making them perfect for this dish. Feel free to substitute with chicken thighs for a richer flavor! -
2 garlic cloves, peeled and minced
Garlic adds a hint of pungency that complements the spices beautifully. If you’re feeling adventurous, use roasted garlic for a sweeter, mellower flavor! -
2 tsp minced ginger
Ginger adds warmth and a touch of zest. Fresh ginger is best, but if you only have ground ginger, use about 1 tsp. -
1 tsp ground cumin
Cumin brings an earthy, nutty flavor to the dish. It’s a must-have in any spice cabinet! -
1½ tsp ground coriander
Coriander offers a citrusy note that balances the savory spices wonderfully. Substitute with ground fennel seeds for a different flavor profile! -
1½ tsp garam masala
This is a quintessential spice blend that adds complexity. A good quality garam masala will transform your dish! -
½ tsp mild chili powder (optional, for gentle warmth)
If you prefer a milder korma, feel free to omit this. A pinch of cayenne pepper can also be used for more heat! -
½ tsp ground turmeric
Turmeric lends a warm, golden hue and subtly earthy flavor. It’s known for its health benefits too! -
¼ tsp salt
Enhances all the natural flavors of the dish. Always taste before adding more at the end! -
¼ tsp white pepper
A gentle alternative to black pepper, it provides a mild heat without the visual speckles. Black pepper is also fine if that’s what you have! -
2 tbsp tomato purée (paste)
Contributes a rich color and tangy flavor. If you have fresh tomatoes, you could puree them as a great alternative! -
½ cup (120 ml) full-fat plain or natural yogurt
This adds creaminess and a slight tang. Greek yogurt works well here too for added thickness! -
½ cup (120 ml) coconut cream
For a luxurious texture! If you don’t have coconut cream, you can use heavy cream instead, though it will change the flavor profile slightly. -
2 tbsp ground almonds
These boost the nuttiness and help thicken the sauce. Swap with cashew nut powder if you prefer! -
1 tbsp sugar
Balances the flavors and adds depth. Feel free to use honey or maple syrup for a more natural sweetness. -
4 tbsp (60 ml) double (heavy) cream
This enhances the richness and smoothness of the korma. Light cream can be used, but keep in mind it won’t be as indulgent!
To Serve:
-
2 tbsp freshly chopped coriander (cilantro)
A refreshing herbal note! If cilantro isn’t your thing, fresh mint can also be delightful! -
Boiled rice and/or flatbread (such as chapati or naan)
Rice soaks up all those delicious flavors, while flatbread gives you a way to savor every last drop of korma. Make your own or buy fresh—either way, they’re the perfect accompaniment!
Step-by-Step Instructions
Let’s roll up our sleeves and get cooking! This Chicken Korma is straightforward and yields amazing results, so let’s do this step by step.
Step 1: Heat the Oil
Heat your ghee or sunflower oil in a large saucepan over medium heat. If you’re using ghee, let it melt completely for about a minute until it’s shimmering, but not smoking. Chef Tip: You can test if the oil is ready by adding a small piece of onion; if it sizzles right away, it’s go-time!
Step 2: Sauté the Onions
Add the finely chopped onion to the oil. Sauté for about 5–7 minutes or until the onions are soft and translucent. Stir occasionally to prevent burning. The key here is to let that onion get sweet and golden, as it forms the heart of our dish. Chef Hack: If you want to speed up the process, pinch of salt can help draw out the moisture and cook them faster!
Step 3: Add Garlic and Ginger
Once the onions are ready, add in the minced garlic and ginger. Cook for another 1–2 minutes until fragrant, stirring frequently. When you smell that heavenly aroma, you know you’re almost there!
Step 4: Spice It Up
Now it’s time to add your spices: cumin, coriander, garam masala, chili powder (if using), turmeric, salt, and white pepper. Stir everything together and cook for about 1 minute to toast the spices, which will help release their oils and intensify their flavors. Dancing around the kitchen to some upbeat tunes while you do this is highly encouraged!
Step 5: Chicken Time
Add in the chicken pieces, stirring them to coat with the fragrant spice mix. Cook for about 5 minutes, or until the chicken is browned on all sides. Remember, we’re not looking to fully cook the chicken just yet; we only want to develop some lovely color. Fun fact: If you’ve got leftover rotisserie chicken, you can skip this step and add it in at the next stage!
Step 6: Tomato and Yogurt
It’s time to enrich our korma! Stir in the tomato purée, yogurt, and coconut cream. Mix everything well, then reduce the heat to low. Awesome Tip: Adding the yogurt slowly while stirring can prevent it from curdling—nobody wants that! Let the mixture bubble gently for about 15 minutes, allowing the chicken to cook through while soaking up all those amazing flavors.
Step 7: Finish with Cream and Almonds
Once the chicken is cooked, it’s time to stir in the ground almonds and double cream. This will thicken the sauce and give it that dreamy consistency. Allow it to simmer for another 5–10 minutes on low heat until it’s velvety. Chef Secret: If you want an extra thick korma, use a potato masher to mash a few chicken pieces against the side of the pan—this can help thicken the sauce naturally!
Step 8: Taste and Adjust
Don’t forget to taste your korma! Here’s where you can adjust salt, sweetness, or spiciness depending on your palate. Need more heat? Add a sprinkle of chili powder. Want it sweeter? A touch more sugar should do the trick!
Step 9: Garnish and Serve
Finally, remove the korma from heat and plop it into a serving dish. Garnish with freshly chopped coriander, and you’re ready to serve! This is when you get to plate it up with a big bowl of fluffy rice or warm flatbreads.
Serving Suggestions
Presentation is key when it comes to ‘wow-ing’ your guests (or family!). Here’s how you can beautifully serve your Chicken Korma:
-
Plating: Use nice, shallow bowls to serve. A generous ladle of chicken korma in the center will catch the eye. Top it off with a sprinkle of coriander for that lovely green touch!
-
Accompaniments: Serve with a side of fluffy basmati rice. You can sprinkle a few toasted almonds over the rice for added crunch. For flatbreads, layer them in a basket lined with a warm and cozy kitchen towel to keep them fresh and soft!
-
Condiments: Don’t forget the extras—yogurt raita (yogurt with diced cucumber and spices) does wonders in cooling down the heat and adding another dimension of flavor. A few lime wedges on the side will bring a zesty brightness!
Recipe Variations
Now that we’ve mastered the classic Chicken Korma, let’s mix things up! Here are some creative twists to try:
-
Vegetarian Delight: Swap out the chicken for vegetables like cauliflower, potatoes, and carrots. Just ensure to adjust cooking times accordingly, allowing the veggies to tenderize nicely.
-
Paneer Korma: For a delightful vegetarian version, use cubed paneer (Indian cottage cheese) instead of chicken. It soaks up the flavors beautifully!
-
Fruit Fusion: Add dried fruits like raisins or apricots during the simmering process for a sweet touch. It’s a delightful contrast that will surprise and charm your taste buds!
-
Keto-Friendly: For a low-carb alternative, replace the coconut cream with unsweetened almond milk, and enjoy this dish with cauliflower rice. It’s keto-friendly yet still packed with flavor!
-
Extra Creamy: For an indulgent korma, swap out the double cream for crème fraiche; it will add an extra tanginess without compromising on the creaminess!
Chef’s Notes
As I’m sure you can tell by now, this Chicken Korma is very close to my heart—it’s a comforting classic that can adapt to almost any palate. A funny memory I have is when I first attempted this dish during a dinner party. I confidently thought I’d impress my friends with my culinary skills, only to realize I had confused my measurements, doubling the chili powder. Let’s just say the fire brigade wasn’t necessary, but there was a lot of ice cream served post-meal to calm the heat!
Over the years, my Chicken Korma has evolved. I’ve played with spice levels, experimented with different types of cream, and added vegetables to cater to various dietary needs. The beauty of korma is, it’s all about personalizing the experience. Every family has their own secret ingredient or special touch.
FAQs and Troubleshooting
1. Why did my korma turn out too thick?
If your korma is too thick, you can add a splash of water or chicken broth while simmering to reach your desired consistency. Just remember to taste before serving!
2. How can I make it spicier?
If you want to boost the heat, consider adding fresh chopped green chilies or an extra sprinkle of chili powder. Just be cautious and add a little at a time until it’s to your liking.
3. What if I don’t have ground almonds?
Not to worry! You can simply omit them, or blend some cashews into a fine flour as a substitute. Alternatively, crushed peanuts can also add a nice crunch!
4. Can I make this dish ahead of time?
Absolutely! This Chicken Korma actually tastes even better the next day as the flavors deepen. Store it in the refrigerator for up to three days, or freeze it for future enjoyment!
Nutritional Info
While everyone loves a delectable meal, it’s also great to be mindful of nutrition! Here’s a general breakdown of the nutritional info for one serving of Chicken Korma (excluding rice or flatbread):
- Calories: 450-500 (depending on using cream or coconut cream)
- Protein: 35g
- Carbohydrates: 15g
- Fat: 30g (mostly healthy fats from ghee and cream)
- Fiber: 2g
This is a hearty dish, but when served with a side of veggies or whole grains, it can fit nicely into a balanced meal plan!
Final Thoughts
And there you have it, my friends—your very own Easy Homemade Chicken Korma recipe! Cooking this dish isn’t just about following a set of instructions; it’s a celebration of flavors, memories, and love that you pour into each ingredient. As you prepare this comforting meal, don’t forget to enjoy the process, the smells, and the laughter that come with it. There’s truly something magical about sharing home-cooked meals with those we care about.
Now that you have this recipe in your arsenal, I invite you to experiment with your own variations or simply enjoy it as is, diving into a plateful of creamy goodness. After all, cooking is about exploration, and every dish is a chance to tell your story. So until next time, keep cooking, keep sharing, and keep living your culinary adventures! Grab a fork, and dig in!
Print
Easy Homemade Chicken Korma
- Total Time: 45 minutes
- Yield: 4 servings 1x
- Diet: Non-Vegetarian
Description
Aromatic Chicken Korma recipe featuring a rich blend of spices, creamy coconut and yogurt, perfect for any culinary enthusiast.
Ingredients
- 2 tbsp ghee or sunflower oil
- 1 onion, peeled and finely chopped
- 3 chicken breasts (approx. 525g), cut into bite-sized pieces
- 2 garlic cloves, peeled and minced
- 2 tsp minced ginger
- 1 tsp ground cumin
- 1½ tsp ground coriander
- 1½ tsp garam masala
- ½ tsp mild chili powder (optional)
- ½ tsp ground turmeric
- ¼ tsp salt
- ¼ tsp white pepper
- 2 tbsp tomato purée
- ½ cup full-fat plain yogurt
- ½ cup coconut cream
- 2 tbsp ground almonds
- 1 tbsp sugar
- 4 tbsp double cream
- 2 tbsp freshly chopped coriander (for garnish)
- Boiled rice and/or flatbread (such as chapati or naan) for serving
Instructions
- Heat the ghee or sunflower oil in a large saucepan over medium heat.
- Sauté the finely chopped onion for about 5–7 minutes until soft and translucent.
- Add the minced garlic and ginger and cook for another 1–2 minutes until fragrant.
- Add the spices: cumin, coriander, garam masala, chili powder, turmeric, salt, and white pepper. Cook for about 1 minute.
- Add the chicken pieces and cook for about 5 minutes until browned on all sides.
- Stir in the tomato purée, yogurt, and coconut cream, then reduce heat to low and simmer for about 15 minutes.
- Finish by stirring in the ground almonds and double cream, and simmer for another 5–10 minutes.
- Taste and adjust seasoning as needed.
- Garnish with freshly chopped coriander and serve with rice or flatbread.
Notes
For a vegetarian option, replace chicken with vegetables or paneer. Korma tastes even better the next day!
- Prep Time: 15 minutes
- Cook Time: 30 minutes
- Category: Main Course
- Method: Cooking
- Cuisine: Indian
Nutrition
- Serving Size: 1 serving
- Calories: 450
- Sugar: 7g
- Sodium: 500mg
- Fat: 30g
- Saturated Fat: 15g
- Unsaturated Fat: 10g
- Trans Fat: 0g
- Carbohydrates: 15g
- Fiber: 2g
- Protein: 35g
- Cholesterol: 80mg
Keywords: Chicken Korma, Indian Cuisine, Spicy Dinner, Comfort Food, Homemade Korma

1 Ingredient Chocolate Mousse
Indulge in Guilt-Free Indulgence: 1 Ingredient Chocolate Mousse
Hey there, fellow food lover! It’s your buddy Beau Collier here, and today I’ve got a dessert that’s guaranteed to satisfy your sweet tooth without any guilt—the iconic 1 Ingredient Chocolate Mousse! Now, before you raise an eyebrow at that title, let me assure you that this mousse is about to revolutionize your notion of dessert. Trust me; it’s not just delicious, it’s also a creamy, dreamy delight made with an unexpected superstar: the avocado!
The beauty of this mousse lies in its simplicity. With just a handful of ingredients, and one main player, you can whip up a dessert that feels luxurious yet is incredibly wholesome. This isn’t just about slapping some cocoa on an avocado; it’s about creating a dessert that speaks to the heart while being easy on the waistline. Mousse has often been the domain of heavy cream and sugar, but today, I’m inviting you to dive into a healthier version that’s just as rich, velvety, and satisfying.
Picture this: you get home after a long day and need something sweet to cap it off. Instead of reaching for store-bought goodies that are heavy on preservatives and sugar, you pop into your kitchen, grab an avocado, and turn it into a luscious chocolate treat that feels like a hug after a tough day. Sounds dreamy, right? So grab your favorite mixing bowl, and let’s get this sweet show on the road!
Personal Story
Let me take you back to one of my fondest kitchen memories. It was a rainy Sunday afternoon, and I was cozied up in my little apartment, listening to the sound of droplets dancing against my window. The kind of day that simply calls for chocolate! I was rummaging through my pantry, dreaming up a dessert while balancing my cat on my lap when I stumbled upon an avocado.
At first, I thought, “Avocado? In dessert? Nah!” But I decided to channel my inner chef and get creative. With a bit of cocoa powder and some sweetener to boot, I was on a mission. When I took my first bite of that mousse, I was in chocolate heaven! The creaminess of the avocado combined with the rich cocoa was nothing short of magical. I couldn’t believe how versatile and smooth it turned out!
Since that day, I’ve been a little obsessed with this mousse. I share it with friends during gatherings, and each time I do, the reactions are priceless. “Wait, there’s avocado in here?” always comes the shocked yet delighted voice! It’s a fun twist to the usual dessert narrative, and it proves that sometimes we just need to think outside the box. Or, in this case, outside the fruit bowl!
Ingredients
Here’s what you’ll need for this rich and velvety 1 Ingredient Chocolate Mousse:
-
1 ripe avocado
- This is the star of our show! Choose an avocado that’s ripe but not overripe—the flesh should be soft to the touch but not brown. Not only do they provide creaminess, but they also add healthy fats that pack a nutrient punch.
-
2 tablespoons cocoa powder
- Opt for unsweetened cocoa powder for that deep chocolate flavor—it’s intense and rich! If you’re a dark chocolate lover, go for Dutch process cocoa. Alternatively, if you want a milder flavor, use raw cacao powder.
-
Sweetener to taste (optional)
- Depending on your palate, you might want a little extra sweetness. Maple syrup, honey, agave, or even stevia work wonderfully. Sweeten to your liking; a little goes a long way!
-
1 teaspoon vanilla extract (optional)
- This is your secret weapon, adding depth and warmth to the mousse. If you’re feeling adventurous, try almond extract for a different flavor profile.
Step-by-Step Instructions
Now, let’s whip up this fabulous mousse! Follow these simple steps, and you’ll be savoring a heavenly dessert in no time.
-
Prepare the Avocado
- Start by slicing your ripe avocado in half. Use a spoon to scoop out the creamy flesh into a mixing bowl. If you’re new to avocados, here’s a little tip: use a knife to carefully remove the pit, making sure not to cut too deep.
-
Blend, Blend, Blend!
- Once you have the avocado in your bowl, grab your trusty blender or food processor. Blend the avocado on high speed until it’s completely smooth and creamy. This step is crucial! A smooth base results in a silky mousse, so take your time here. If you don’t have a blender, a fork can work in a pinch, but it’ll require some elbow grease!
-
Add Cocoa Powder
- Now comes the fun part—add your cocoa powder to the blended avocado. Blend again until it’s thoroughly mixed. You’ll want that gorgeous, chocolate hue to be consistent throughout. If you’re feeling sly, sneak a little taste at this point; it’s already divine!
-
Sweeten It Up
- Depending on your sweet tooth, drizzle in your sweetener of choice and the vanilla extract. Blend for a quick moment to combine. Remember, start with a little; you can always add more! It’s all about balance, darling.
-
Taste and Adjust
- Here’s where your chef instincts kick in! Give it a taste and see if it needs more cocoa powder, sweetness, or a splash more vanilla. Adjust to fit your taste buds—I promise, there’s no wrong answer!
-
Chill Your Mousse
- For the best texture, transfer your mousse into a serving bowl or individual cups and pop it in the fridge. Let it chill for at least 30 minutes to an hour—this helps it set up and intensify the flavors, making every spoonful even more heavenly.
Serving Suggestions
When it’s time to serve your dreamy mousse, the presentation can take it to next level! Here are some ideas:
-
Classic Presentation: Scoop the mousse into small dessert cups or ramekins. A light sprinkle of cocoa powder on top or a few chocolate shavings can add that gourmet touch!
-
Garnishes Galore: Get creative! Top with fresh berries, a dollop of whipped coconut cream, or a sprinkle of sea salt. The contrast of sweet and salty can take your mousse to new heights.
-
For the Adventurous: Why not serve it alongside a Banana Slices Pile? The creamy texture of the banana pairs beautifully with chocolate, creating a delightful contrast.
-
Endless Possibilities: The options are limitless! You can also drizzle some nut butter on top for an extra layer of flavor, or add a mint leaf for a fresh touch. Get whimsical, friends!
Recipe Variations
Want to switch things up a bit? Here are a few creative twists on this basic mousse recipe:
-
Peanut Butter Lover’s Delight: Add two tablespoons of natural peanut butter to the blend. It brings a nutty twist that’s simply irresistible.
-
Mint Chocolate Mousse: For a refreshing kick, mix in a few drops of peppermint extract. It’s like a sweet kiss of mint in every bite!
-
Spicy Chocolate: Feeling adventurous? Add a pinch of cayenne pepper or chili powder for a surprising heat that perfectly complements the chocolate.
-
Coconut Cream Dream: Substitute half of the avocado for canned coconut milk for a different creamy consistency and an indulgent tropical vibe.
-
Nutty Hazelnut: Swap in some hazelnut extract instead of vanilla for a different and delightful note.
Chef’s Notes
Oh, have I got stories for you! This recipe has evolved many times over the years. I’ve experimented with a myriad of ingredients as I’ve played in my kitchen. I’ll never forget the first time I tried adding a dash of cinnamon—it blew my mind!
I once had a friend who was skeptical about the avocado part, and I insisted they try it. The look on their face when they realized they had just devoured an avocado dessert was priceless! It reminded me how fun it can be to surprise people with unexpected flavors. It’s all about making delightful connections, right? Plus, this mousse is appropriate for any time of day—why not enjoy it as breakfast?
FAQs and Troubleshooting
-
Q: My mousse turned out grainy; what did I do wrong?
- A: Make sure your avocado is fully ripe; an under-ripe avocado can result in a chunky texture. Additionally, blending thoroughly helps achieve that smooth consistency!
-
Q: Can I make this mousse ahead of time?
- A: Absolutely! It stores well in the fridge for up to three days. Just make sure to cover it to prevent browning.
-
Q: How can I make this vegan?
- A: Good news! This recipe is already vegan. Just ensure the sweetener you choose is also plant-based.
-
Q: What if I don’t have cocoa powder?
- A: You can try using melted dark chocolate (just ensure it’s dairy-free if you’re vegan). Adjust the quantities since melted chocolate is denser than cocoa powder.
Nutritional Info
This 1 Ingredient Chocolate Mousse isn’t just delicious—it’s also packed with nutritional goodness! Here’s a quick breakdown:
- Calories: Approximately 180 per serving.
- Healthy Fats: The avocado offers a good dose of monounsaturated fats, which are great for heart health.
- Fiber: Avocados are loaded with fiber, which can aid digestion.
- Vitamins: This mousse is rich in vitamins C, E, and K. Plus, it’s a good source of potassium!
It’s the perfect blend of indulgence and nutrition—who knew dessert could be this good?
Final Thoughts
So, there you have it, my friends! A super simple, yet impressively decadent 1 Ingredient Chocolate Mousse that will leave your taste buds dancing. I hope you have as much fun making it as I have throughout my kitchen adventures.
Remember, the culinary world is all about experimenting and creating—don’t be afraid to get your hands a little messy! Feel free to make this mousse your own, involving loved ones in the process. After all, food is meant to be shared and enjoyed.
Until next time, keep exploring, keep cooking, and most importantly, keep loving what you create! Grab that fork (or just dig in with a spoon) and enjoy the indulgence of healthy chocolate goodness. Happy munching!
Print
1 Ingredient Chocolate Mousse
- Total Time: 40 minutes
- Yield: 2 servings 1x
- Diet: Vegan
Description
A rich and velvety chocolate mousse made with just one ingredient: ripe avocado. This guilt-free dessert is a creamy delight that’s both nutritious and indulgent.
Ingredients
- 1 ripe avocado
- 2 tablespoons cocoa powder
- Sweetener to taste (optional)
- 1 teaspoon vanilla extract (optional)
Instructions
- Prepare the avocado by slicing it in half and scooping the flesh into a mixing bowl.
- Blend the avocado on high speed until completely smooth and creamy.
- Add cocoa powder to the blended avocado and blend again until mixed.
- Sweeten the mixture with your choice of sweetener and vanilla extract, and blend briefly to combine.
- Taste and adjust the flavors as desired.
- Chill the mousse in the fridge for at least 30 minutes before serving.
Notes
For a unique twist, try adding a tablespoon of peanut butter or mint extract to enhance the flavor. Enjoy the mousse as a healthy dessert any time of day!
- Prep Time: 10 minutes
- Cook Time: 0 minutes
- Category: Dessert
- Method: Blending
- Cuisine: American
Nutrition
- Serving Size: 1 serving
- Calories: 180
- Sugar: 1g
- Sodium: 5mg
- Fat: 12g
- Saturated Fat: 2g
- Unsaturated Fat: 10g
- Trans Fat: 0g
- Carbohydrates: 15g
- Fiber: 7g
- Protein: 3g
- Cholesterol: 0mg
Keywords: chocolate mousse, vegan dessert, healthy recipe, avocado dessert, indulgent dessert

Cheesy Potato Burritos
Cheesy Potato Burritos: A Warm Hug in Every Bite
Hey there, food lovers! It’s Beau Collier here, and today I want to share a scrumptious recipe that’s close to my heart and will undoubtedly warm your soul—Cheesy Potato Burritos. Picture this: a blend of crispy tater tots, perfectly seasoned beef, and gooey melted cheddar cheese, all wrapped up in a warm, grilled tortilla. It’s a delightful medley of flavors and textures that screams comfort food, and I can’t wait for you to give it a try!
Life gets busy, and it’s easy to forget the simple joys of cooking. That’s why I started Feastical—to share recipes that are not just food but stories that you can recreate in your kitchen! These burritos are perfect for busy weeknights when you want something hearty without spending hours in the kitchen. So, whether you’re feeding a family or just treating yourself, let’s dive into this cheesy goodness together!
A Personal Story Behind the Dish
Let me take you back to a chilly autumn evening in my childhood home. My parents would often host cozy family dinners that were more than simply about food; they were about gathering around the table, laughter, and stories shared. One particular night, we decided to make a twist on traditional burritos.
Using leftover tater tots from our Sunday brunch, we layered them with seasoned ground beef and a generous sprinkle of cheddar cheese, all wrapped snugly in a tortilla. The moment our burritos hit the table, they became a hit! With each bite, we were having a blast of flavor, while the crispy tots added a unique twist. The cozy atmosphere and flavors made that sweet memory stick in my mind, and it inspired me to create this recipe for you all!
Ingredients
Let’s gather the stars of our show! Here’s what you need to whip up these delightful Cheesy Potato Burritos:
-
Crispy Tater Tots
These are the secret superstar of the burrito. You can use frozen tater tots or make your own from scratch! If you want a healthier twist, try swapping them with sweet potato tots for a bit of sweetness. -
Seasoned Beef
Ground beef is a classic choice for filling, but you can easily substitute it with turkey, chicken, or even black beans for a vegetarian version. Season it well with salt, pepper, and your favorite spices—think garlic powder and paprika for an extra kick! -
Melted Cheddar Cheese
The gooier, the better! Cheddar provides a rich flavor, but feel free to explore other cheese options like Monterey Jack or Pepper Jack for a spicy twist. You can also mix in some cream cheese for an ultra-creamy filling. -
Grilled Tortillas
Flour tortillas are my go-to for burritos because they roll up beautifully and hold everything in. However, whole wheat or corn tortillas can be excellent alternatives if you’re looking for something different.
Step-by-Step Instructions
Now that we’ve got our ingredients ready, let’s get cooking!
-
Prepare the Tater Tots
Start by baking your tater tots according to the package instructions or if you’re feeling adventurous, fry them in hot oil until golden brown. Pro tip: cooking them until they’re extra crispy will give your burrito that delightful crunch! -
Cook the Beef
In a large skillet over medium heat, add your seasoned beef. Use a wooden spoon to break it up and cook until it’s no longer pink—about 5-7 minutes. Don’t forget to season it liberally with salt, pepper, and any spices you fancy. Once cooked, drain excess fat and set it aside. -
Combine the Goodness
In a large bowl, combine the crispy tater tots and seasoned beef. Sprinkle in a generous handful of cheddar cheese while the mixture is still warm—this helps melt it just enough! -
Create the Burrito Filling
Lay your tortillas flat on a clean surface. Add a generous scoop of your cheesy beef and tater tot mixture into the center of each tortilla. Pro tip: don’t overfill! Aim for about ¾ of the way full to ensure a smooth folding process. -
Wrap It Up!
Fold the sides of the tortilla over the filling, then roll it up tightly from the bottom. Make sure it’s snug enough; you don’t want your deliciousness spilling out! Repeat with all your tortillas. -
Grill the Burritos
Heat a skillet over medium heat and add a little cooking oil or butter. Place the burritos seam-side down on the skillet. Grill for about 2-3 minutes on each side, or until golden brown and crispy. This step is key to getting that delightful crunch!
Serving Suggestions
Now, onto plating! When it comes to serving your Cheesy Potato Burritos, there’s a world of possibilities. My favorite way is to slice the burrito in half diagonally, which gives that beautiful cross-section of the crunchy filling peeking out at the world.
You can also serve them on a colorful plate garnished with fresh cilantro, lime wedges, and a small bowl of salsa on the side. The zesty salsa provides a refreshing contrast to the richness of the cheesy filling. If you’re feeling fancy, a dollop of sour cream or guacamole is always welcome!
Recipe Variations
Here are a few creative twists to take your burrito to the next level:
-
Buffalo Chicken Burritos: Substitute the seasoned beef with shredded buffalo chicken and toss in some blue cheese crumbles for an ultimate flavor explosion!
-
Breakfast Burrito: Swap the beef for breakfast sausage and add some scrambled eggs and a hint of salsa. Perfect for a morning treat!
-
Spicy Veggie Burritos: Replace the beef with sautéed bell peppers, onions, and black beans, and sprinkle in some jalapeños for a spicy kick.
-
Cheesy Taco Burritos: Mix taco seasoning into the beef and then pile on all your favorite toppings like lettuce, tomatoes, and avocado for a taco-inspired twist.
Chef’s Notes
As I’ve developed this recipe over the years, it’s become a family favorite! I can’t tell you how many times I’ve whipped these up for game nights, movie marathons, or those “I’m-too-tired-to-cook” evenings. It’s the perfect dish for any occasion.
Oh, and here’s a little kitchen confession—one time I accidentally added too much chili powder. Let’s just say the burritos had a kick that nobody forgot anytime soon! But hey, cooking is all about experimenting, right?
FAQs and Troubleshooting
1. What if my burritos fall apart?
Make sure you’re not overfilling them! A little less filling ensures they roll up snugly and securely. Also, sealing the edges with a bit of melted cheese can help hold everything together.
2. Can I make these ahead of time?
Absolutely! You can assemble your burritos, wrap them tightly in foil, and store them in the fridge. Just grill them when you’re ready to eat.
3. How do I store leftovers?
Place any uneaten burritos in an airtight container in the fridge for up to 3 days. You can reheat them in the oven or a skillet to keep that crispy texture intact.
4. What if my tater tots aren’t crispy?
If your tater tots aren’t crispy enough, give them a little extra time in the oven—they should be golden brown. Crispiness adds a lovely look and crucial texture to the burrito!
Nutritional Info
While exact nutritional values may vary, here’s a general idea of what you’ll find in a Cheesy Potato Burrito:
- Calories: Approx. 400-500 per burrito (depending on filling and toppings)
- Protein: 20-25 grams (thanks to the beef and cheese)
- Carbohydrates: 40-50 grams (mostly from the tater tots and tortillas)
- Fat: 20-30 grams (from the cheese and beef)
Feel free to adjust ingredients to suit your dietary needs!
Final Thoughts
There you have it, lovely people—a complete guide to making Cheesy Potato Burritos that will steal the show at your next meal! The beauty of this dish is its versatility, and it’s bound to become a favorite in your recipe collection.
Remember, cooking should never feel tedious. It’s about sharing moments with loved ones, embracing creativity, and enjoying the delicious meals we make. So, grab a fork—or maybe just your hands—and enjoy these burritos wrapped in love! Until next time, keep cooking with passion and joy!
Print
Cheesy Potato Burritos
- Total Time: 35 minutes
- Yield: 4 servings 1x
- Diet: Vegetarian (if using beans)
Description
A delightful medley of crispy tater tots, seasoned beef, and melted cheddar cheese, all wrapped in a warm tortilla. Perfect for busy weeknights!
Ingredients
- 2 cups crispy tater tots
- 1 lb ground beef
- 1 cup melted cheddar cheese
- 4 large flour tortillas
Instructions
- Prepare the tater tots by baking or frying until golden brown and crispy.
- Cook the seasoned beef in a skillet over medium heat for 5-7 minutes until no longer pink.
- Combine the crispy tater tots and seasoned beef in a large bowl, adding cheddar cheese while warm.
- Create the burrito filling by placing the mixture into the center of each tortilla.
- Wrap the tortillas snugly around the filling.
- Grill the burritos in a skillet for 2-3 minutes on each side until golden brown and crispy.
Notes
For a vegetarian version, substitute the beef with black beans. Pair with salsa or a dollop of sour cream.
- Prep Time: 15 minutes
- Cook Time: 20 minutes
- Category: Main Course
- Method: Grilling
- Cuisine: Mexican
Nutrition
- Serving Size: 1 burrito
- Calories: 450
- Sugar: 3g
- Sodium: 600mg
- Fat: 25g
- Saturated Fat: 10g
- Unsaturated Fat: 12g
- Trans Fat: 1g
- Carbohydrates: 43g
- Fiber: 3g
- Protein: 22g
- Cholesterol: 70mg
Keywords: burritos, cheesy, comfort food, easy recipe, family dinner