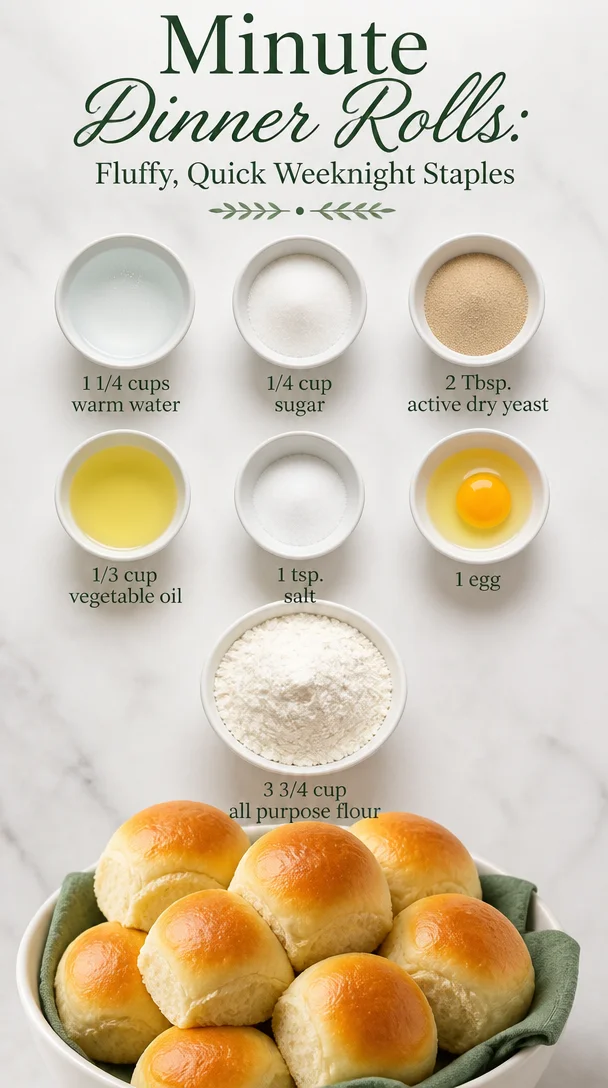
Minute Dinner Rolls: Fluffy, Quick Weeknight Staples
30-Minute Dinner Rolls: The Quickest Way to a Warm Hug on Your Table
Hey there, fellow foodies! Today, I’m sharing one of my absolute favorite recipes that’ll have you creating delightful, pillowy dinner rolls in just 30 minutes. Yes, you read that right—30 minutes! Get ready for an adventure in the kitchen that’s all about warmth, comfort, and a little magic from yeast.
A Memory to Rise
Let me take you back to a chilly Sunday afternoon when I was a kid. My mom would spontaneously decide to make dinner rolls, and the whole house would light up with the heavenly aroma of freshly baked bread. I would wander into the kitchen, drawn like a moth to a flame, and find her with flour dusting her apron, her hands busy kneading the dough. She would always make the process look so effortless while radiating joy, sharing stories as she shaped the perfect little buns.
She taught me that baking is more than just a task—it’s about love, connection, and creating memories. We’d tear into those warm rolls, slather them with butter, and feel an instant sense of comfort. So, when I tell you these 30-minute dinner rolls are a game-changer, you better believe they’ll bring back those cozy memories and uplift your dinner table just like they did for me as a kid!
Ingredients
Here’s what you’ll need to whip up these delightful rolls, along with a few chef insights:
-
1 1/4 cups warm water
Make sure it’s warm but not too hot—about 110°F. This encourages the yeast to activate without killing it! -
1/4 cup sugar
Sugar feeds the yeast and helps the rolls bloom beautifully. You can substitute with honey or maple syrup for a natural sweetness! -
2 Tbsp. active dry yeast
This is our magical ingredient that helps the dough rise. If you can only find instant yeast, you can use the same amount and skip the proofing step! -
1/3 cup vegetable oil
Oil keeps the rolls moist. You could also use melted butter for added richness or olive oil for a fruity twist! -
1 tsp. salt
Salt is essential for flavor and helps control yeast activity. Try using sea salt for a touch of elegance! -
1 egg
This adds richness and helps create a nice golden-brown crust. For an egg-free version, you can use a flax egg (1 Tbsp ground flaxseed mixed with 2.5 Tbsp water). -
3 3/4 cups all-purpose flour
All-purpose flour works perfectly, but you could substitute half with whole wheat flour for a healthier roll, or gluten-free flour if you’re avoiding gluten!
Step-by-Step Instructions
Let’s dive into the fun part—the making! Get your apron on and let’s bake some rolls.
-
Proof the Yeast:
In a bowl, mix warm water, sugar, and active dry yeast. Stir gently and let it sit for about 5-10 minutes until it gets foamy. This means your yeast is alive and kicking! (If it doesn’t foam, you might need to start over with a new batch of yeast.) -
Mix the Wet Ingredients:
Once your yeast is all frothy, whisk in the vegetable oil and the egg. This is when you can get creative—if you’re feeling adventurous, adding a splash of garlic oil or any herbs at this stage adds flavor! -
Combine Flour and Salt:
In a separate bowl, mix the flour and salt. Gradually add this to your wet mixture. I recommend using one hand to mix and the other to keep your bowl steady. You want a slightly sticky dough, so don’t worry if it’s a little messy at this point, embrace it! -
Knead the Dough:
Turn the dough out onto a floured surface and knead it for about 5 minutes. Here’s a chef hack: if it sticks to your hands, a little extra flour is your friend—but don’t overdo it. You want it to be soft and smooth. -
Let it Rise:
Shape your dough into a ball and place it in a greased bowl, covering it with a clean kitchen towel. Set it in a warm place for about 10 minutes. You’ll see it puff up nicely—what a sight! -
Shape the Rolls:
Once risen, punch the dough down, then divide it into 12 equal pieces (you can make them smaller or larger depending on your needs). Shape each piece into a round ball by rolling it gently between your palms. -
Final Rise:
Place the shaped rolls in a greased baking dish, leaving a little space between them, and cover for another 10 minutes. They’ll rise again, creating a fluffy texture. -
Bake ‘Em Up:
Preheat your oven to 375°F (190°C). Once your rolls have risen, pop them in the oven for 15-20 minutes, or until golden brown and fragrant. Brush with melted butter at the end for an irresistible shiny finish!
Serving Suggestions
When those rolls come out of the oven, they’ll be calling your name! For the perfect presentation, place them in a rustic basket lined with a charming cloth. You can serve them warm with an assortment of toppings—think honey butter, herb-infused oil, or a sprinkle of flaked sea salt. Pair them up with a hearty soup or your favorite roast, and watch how they disappear before your eyes!
Recipe Variations
Here are a few creative twists you can try with these dinner rolls:
-
Garlic-Parmesan Rolls:
Brush melted butter mixed with minced garlic on top before baking, then sprinkle with grated Parmesan cheese just before they finish baking. -
Herb-Infused Rolls:
Mix dried herbs like rosemary, thyme, or garlic powder into the flour! It adds fragrant flavor that elevates the rolls to your next dinner party! -
Cinnamon Rolls:
For sweet breakfast buns, add a sprinkle of cinnamon and sugar to the rolled pieces and enjoy them with cream cheese frosting! -
Cheesy Jalapeño Rolls:
Add a handful of shredded cheddar cheese and chopped jalapeños to the dough for a spicy kick! -
Chocolate Chip Rolls:
Fold in mini chocolate chips for a sweet treat, perfect as a dessert option!
Chef’s Notes
Baking is always a little wild, and my journey with these 30-minute dinner rolls has been no exception. I’ve had my share of experiments—from oversized rolls that turned into soft breadsticks (delicious nonetheless) to using leftover pizza dough for fun variations. Embrace the journey, folks! Each roll might be slightly different, but that’s part of the fun. And remember, the best recipes are not only about the ingredients, but the love you put into it!
FAQs and Troubleshooting
-
Why didn’t my rolls rise?
Double-check your yeast! If it’s not active (no foamy bubbles), the rolls won’t rise. Ensure water is warm—not hot! -
My dough is too sticky. What should I do?
A bit of extra flour while kneading should help. Just make sure to keep the stickiness since this will give you fluffy rolls. -
Can I make the dough ahead of time?
Yes! You can make the dough and place it in the fridge for up to 24 hours. Let it come to room temperature before shaping. -
How do I store leftovers?
Keep them in an airtight container at room temperature for about 2 days or in the fridge. You can reheat them in the microwave or the oven for a few minutes!
Nutritional Info
While I won’t bore you with a hard calorie count (because joy in cooking is all about savoring—right?), each dinner roll will give you that warm and happy feeling without too much guilt! As a rough estimate, each roll contains around 130 calories, depending on size and toppings.
These rolls are relatively low in sugar and fat, especially if you make swaps like Greek yogurt instead of oil or whole wheat flour. They also provide a good dose of carbohydrates for that quick energy boost!
Final Thoughts
So there you have it, my friend! Your guide to whipping up the most delicious, 30-minute dinner rolls that’ll have everyone around your table clamoring for another helping. Just remember—baking is an adventure, one that should be enjoyed and shared! Set aside your hesitations, roll up your sleeves, and don’t forget to enjoy every moment, especially when that first golden, soft roll comes out of the oven.
Let’s create more kitchen memories together! Happy baking, and bon appétit!
Print
30-Minute Dinner Rolls
- Total Time: 45 minutes
- Yield: 12 servings 1x
- Diet: Vegetarian
Description
Delightful, pillowy dinner rolls ready in just 30 minutes, bringing warmth and comfort to your table.
Ingredients
- 1 1/4 cups warm water
- 1/4 cup sugar
- 2 Tbsp. active dry yeast
- 1/3 cup vegetable oil
- 1 tsp. salt
- 1 egg
- 3 3/4 cups all-purpose flour
Instructions
- Proof the yeast: In a bowl, mix warm water, sugar, and active dry yeast. Stir gently and let it sit for about 5-10 minutes until it gets foamy.
- Mix the wet ingredients: Once your yeast is all frothy, whisk in the vegetable oil and the egg.
- Combine flour and salt: In a separate bowl, mix the flour and salt. Gradually add this to your wet mixture.
- Knead the dough: Turn the dough out onto a floured surface and knead it for about 5 minutes.
- Let it rise: Shape your dough into a ball and place it in a greased bowl, covering it with a clean kitchen towel. Set it in a warm place for about 10 minutes.
- Shape the rolls: Once risen, punch the dough down, then divide it into 12 equal pieces.
- Final rise: Place the shaped rolls in a greased baking dish, leaving a little space between them, and cover for another 10 minutes.
- Bake ‘em up: Preheat your oven to 375°F (190°C). Once your rolls have risen, pop them in the oven for 15-20 minutes.
Notes
You can substitute ingredients like honey instead of sugar or use melted butter for the oil. Store leftovers in an airtight container for up to 2 days.
- Prep Time: 15 minutes
- Cook Time: 30 minutes
- Category: Bread
- Method: Baking
- Cuisine: American
Nutrition
- Serving Size: 1 roll
- Calories: 130
- Sugar: 5g
- Sodium: 200mg
- Fat: 5g
- Saturated Fat: 1g
- Unsaturated Fat: 4g
- Trans Fat: 0g
- Carbohydrates: 20g
- Fiber: 1g
- Protein: 3g
- Cholesterol: 20mg
Keywords: dinner rolls, quick bread, baking, yeast rolls
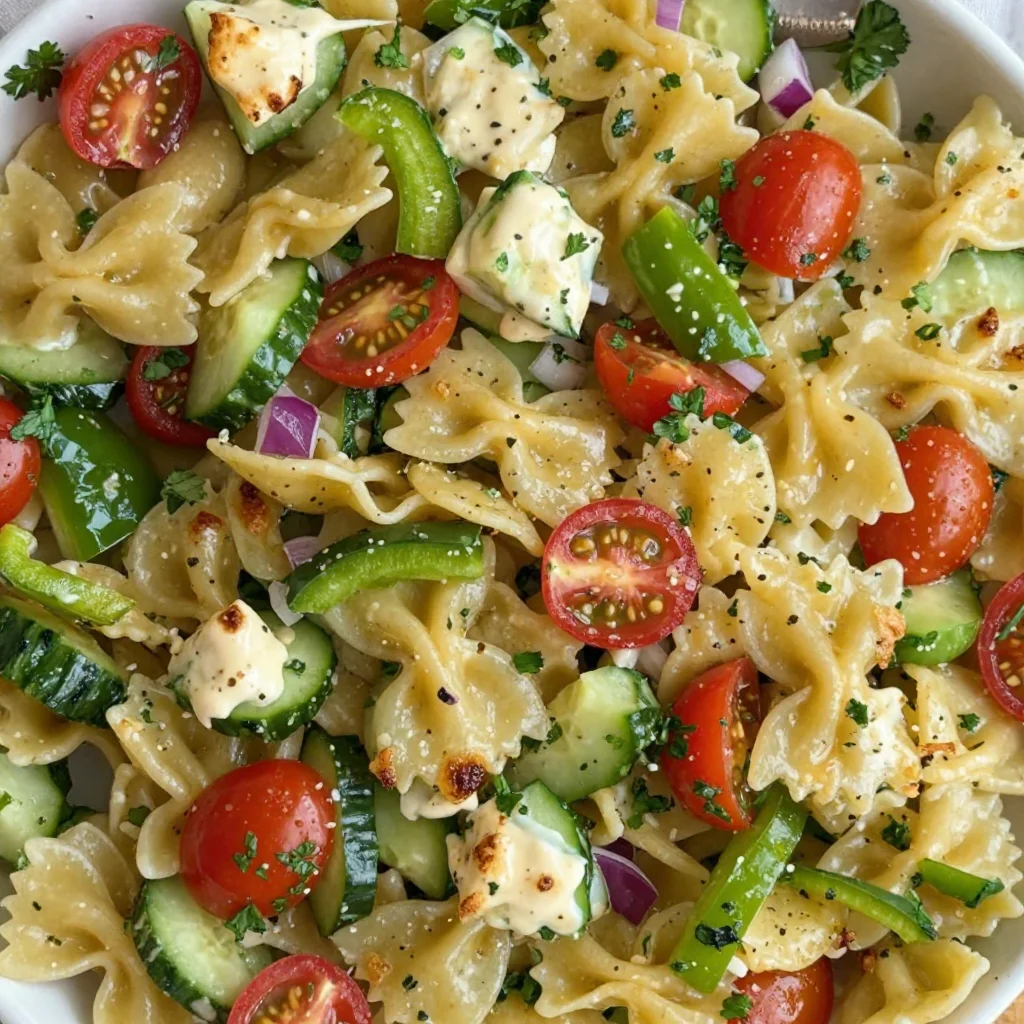
Minute Bow Tie Pasta Salad for Quick Weeknight Meal Prep
Colorful Bow Tie Pasta Salad: A Feast of Flavors!
Hey there, fellow food lovers! Welcome back to Feastical! Today, we’re diving into a dish that’s as delightful to make as it is to eat: the Colorful Bow Tie Pasta Salad. This vibrant pasta salad is perfect for those sunny picnic days, summer barbecues, or even a casual weeknight dinner when you want something quick yet satisfying.
This salad is not just visually appealing; it’s a burst of flavors and textures in every bite. The combination of fresh veggies, tangy Italian dressing, and bow tie pasta makes it a crowd-pleaser for both kids and adults alike. Plus, the best part? It’s so easy to whip up that even the most novice chef can tackle it with confidence. Whether you’re serving it as a side dish or as the star of your meal, you’re going to love how this salad brightens up your dining experience.
So, grab your apron, put on your favorite tunes, and let’s get started! I can already feel the joyful spirit of community that food brings us, and I can’t wait to share this incredible recipe with you.
A Personal Slice of Inspiration
Let me take you back to one of my favorite summer memories. It was a balmy afternoon at my grandmother’s house, and we were preparing for our annual family reunion. The smell of grilled burgers wafted through the air, mingling with the sweet aroma of my aunt’s homemade desserts. I was in the kitchen, my little hands busy with a mountain of ingredients, getting ready to make my very first pasta salad with a bit of help from Grandma.
Her hands, worn from years of lovingly creating meals for family, guided me through the steps. We tossed in rainbow bell peppers, juicy cherry tomatoes, and crunchy cucumbers, and I felt like a chef working on a masterpiece. The satisfaction that followed when we served it up—seeing my family’s eyes light up at the first taste—was something that sealed my love for cooking.
That childhood experience taught me that food really does have the power to bring people together. And every time I make this Colorful Bow Tie Pasta Salad, it takes me back to that sunny day, reminding me of those loved ones gathered around a table, sharing laughter and love over delicious food. It’s not just a recipe; it’s a tradition that connects loyalty to flavors and family!
Ingredients
Let’s talk ingredients! Here’s what you’ll need for our vibrant Colorful Bow Tie Pasta Salad:
-
8 oz bow tie pasta: The star of our dish! Bow tie pasta (or farfalle) adds a playful character, and its unique shape holds onto the dressing beautifully. You can swap it out for any small pasta you have on hand, like fusilli or rotini, but I personally find the bow ties so fun!
-
1 cup cherry tomatoes, halved: These little gems add sweetness and a pop of color. Feel free to use grape tomatoes for a different shape or even sun-dried tomatoes if you want a more robust flavor.
-
1 cup cucumber, diced: Crunchy and refreshing, cucumbers are a must! If you want a sweeter bite, consider using a diced bell pepper instead. You can use English cucumbers or even zucchini if you’re feeling adventurous.
-
1 bell pepper, diced: Any color works wonders—red, yellow, or green all contribute different sweetness levels. Switch it up with roasted red peppers for a smoky twist!
-
1/2 cup red onion, diced: It adds a zesty kick! If red onion feels too strong for you, try a milder onion or even green onions for a subtler flavor.
-
1 cup Italian dressing: This tangy dressing is like a party for your taste buds! You can make your own at home or reach for a store-bought option (just make sure it’s your favorite!). For a lighter version, go for vinaigrettes or yogurt-based dressings.
-
Salt and pepper to taste: Always a classic! Season to your heart’s desire, but remember that salty flavors can balance the salad’s natural sweetness.
-
Fresh parsley for garnish (optional): A sprinkle of parsley not only brightens the dish visually but also adds that fresh flavor. You can swap it with basil or even a squeeze of lemon if you’re feeling zesty!
Step-by-Step Instructions
Alright, my culinary comrades, let’s tackle this splendid pasta salad together! Follow these steps, and I promise you’ll whip up something incredible.
First Things First: Cook the Pasta
-
Bring a large pot of salted water to a boil. Use enough salt—about a tablespoon per pot of water—so the pasta can absorb that flavor while cooking. It’s like a secret flavor boost in every bite!
-
Add the bow tie pasta to the boiling water. Cook it according to the package instructions (usually around 8-10 minutes), stirring occasionally to keep those bow ties dancing in the pot. You want them al dente, which means they should still have a slight bite to them.
-
Drain the pasta and rinse it under cold water. This process stops the cooking and cools down the pasta so that it doesn’t turn mushy. Plus, it makes mixing it with the veggies later a breeze!
Chop Those Veggies
- While your pasta is cooking, get your chopping game on! Dice up your cucumber, bell pepper, and onion into bite-sized pieces. Cherry tomatoes should be halved—don’t worry; it’ll only take a minute!
Combine and Dress It Up
-
In a large bowl, combine the cooled pasta with the chopped veggies. Toss everything gently so that the veggies can mingle evenly with the pasta.
-
Pour in the Italian dressing. Start with about 3/4 of a cup—start slow; you can always add more! Stir everything gently to combine, ensuring each nook and cranny of pasta is coated in that delicious dressing.
Finish It Off
-
Taste the salad and season it with salt and pepper to your liking. I love to let mine marinate for a bit—chilling in the fridge for at least 30 minutes lets the flavors meld beautifully!
-
Serve it up! Just before serving, give it a final gentle stir and garnish with parsley (if using) to give it that fresh pop!
Ready to dive in? Oh, I can already hear the delightful crunch of fresh veggies and the melody of flavors coming together. You’ve just made a show-stopping dish that’s bound to impress!
Serving Suggestions
When it comes to plating, the presentation makes a big difference! Here are a few ideas to elevate your serving game:
-
Use a vibrant platter: Consider serving your colorful pasta salad in a big, colorful bowl or platter that complements the veggies’ hues. It creates an inviting visual presentation!
-
Layer beautifully: For a buffet, layer the pasta salad with some leafy greens like spinach or arugula underneath. It’s not just visually enticing but adds an extra nutritious punch too!
-
Add some protein: For a heartier meal, serve it alongside grilled chicken, shrimp, or even chickpeas to boost the protein content.
-
Caprese twist: Layer the salad with slices of mozzarella or sprinkle feta on top for an Italian flair that will leave your taste buds singing!
Recipe Variations
Time to get creative! Here are some fun variations you can try with your Colorful Bow Tie Pasta Salad:
-
Mediterranean Twist: Swap the Italian dressing for a homemade lemon-olive oil vinaigrette, and add in Kalamata olives, artichoke hearts, and crumbled feta cheese for a refreshing Mediterranean kick!
-
Beachy BBQ Style: Toss in grilled corn, black beans, and lime juice for a fiesta-inspired flavor. Perfect for those summer BBQs!
-
Pesto Perfection: Instead of Italian dressing, use pesto sauce for a basil-forward salad. Add sun-dried tomatoes for extra depth, and you’ll be transported straight to an Italian café.
-
Veggie Overload: Pack in even more nutrients by adding shredded carrots, snap peas, or even roasted vegetables for a colorful medley.
-
Protein-Packed: Add diced salami or pepperoni, or even some chickpeas for a vegetarian option that makes this salad even more filling.
Mix and match these ideas until you find your favorite combo! The beauty of cooking is experimentation, so don’t be afraid to follow your taste buds!
Chef’s Notes
As my culinary journey grew, so did my love for this pasta salad. I’ve made countless tweaks over the years, depending on what I had lurking in my fridge or the seasons. A little hint for you: during winter months, roasted vegetables can take this dish next level, giving it warmth and a cozy feel that contrasts beautifully with a chilled, refreshing salad.
Don’t forget—making mistakes in the kitchen is just another recipe for success! The most memorable meals sometimes come from trying new things and learning as we go. So, if one carrot finds its way into the mix or you’ve gone a bit heavy on the dressing, embrace it! Every kitchen experiment makes you a better cook.
FAQs and Troubleshooting
Q1: My pasta is too sticky! What did I do wrong?
A: No worries! This can happen if the pasta is overcooked or wasn’t rinsed properly. Always rinse under cold water after draining to stop the cooking process. If it does get sticky, a splash of olive oil can help break it apart.
Q2: Can I make this ahead of time?
A: Absolutely! This salad is great for meal prep. Just keep it in an airtight container in the fridge for up to three days. The flavors will develop even more!
Q3: How can I store leftovers?
A: Store any remaining salad in the fridge in a tightly sealed container. The pasta might soak up the dressing over time, so you may want to adjust the seasoning and add a little extra dressing before serving.
Q4: Can I use whole grain or gluten-free pasta?
A: Definitely! Whole grain pasta adds a nutty flavor, while gluten-free options will work just as well. Just make sure to adjust the cooking time based on the type of pasta you choose!
Nutritional Info
This Colorful Bow Tie Pasta Salad is not just a feast for the eyes; it’s a wholesome addition to your meal!
- Calories: Approximately 300 per serving (this can vary based on the dressing and additional proteins added).
- Carbohydrates: Around 40g (perfect for fueling those summer activities).
- Protein: About 7g if you stick to veggies; it can increase significantly with added proteins.
- Fats: Typically around 12g, depending on the dressing and any cheese you add.
- Fiber: Approximately 3g from all those wholesome veggies, helping keep your digestive system happy.
- Vitamins: A good source of Vitamin C and K, particularly from the bell peppers and parsley.
This salad packs a nutritional punch while remaining low in calories, making it a wonderful choice for a light lunch or side dish!
Final Thoughts
There you have it! The Colorful Bow Tie Pasta Salad isn’t just a salad; it’s a celebration of the flavors and feelings that food can evoke. Its versatility allows you to make it your own, customize it to your taste, and share it with your loved ones—just like I did many summers ago in my grandmother’s kitchen.
So, gather around that dining table, share those hearty laughs, and dig into the colorful creation you’ve just made! At the end of the day, it’s not just about the food itself; it’s about the people you meet and the memories you make along the way.
Happy cooking, my friends! Let’s dig in! 🥳✨
Print
Colorful Bow Tie Pasta Salad
- Total Time: 25 minutes
- Yield: 4 servings 1x
- Diet: Vegetarian
Description
A vibrant and delicious pasta salad perfect for picnics, barbecues, or casual dinners, featuring fresh veggies and tangy Italian dressing.
Ingredients
- 8 oz bow tie pasta
- 1 cup cherry tomatoes, halved
- 1 cup cucumber, diced
- 1 bell pepper, diced
- 1/2 cup red onion, diced
- 1 cup Italian dressing
- Salt and pepper to taste
- Fresh parsley for garnish (optional)
Instructions
- Bring a large pot of salted water to a boil.
- Add the bow tie pasta and cook according to package instructions (about 8-10 minutes) until al dente.
- Drain the pasta and rinse under cold water.
- Dice the cucumber, bell pepper, and onion into bite-sized pieces and halve the cherry tomatoes.
- Combine the cooled pasta with the chopped veggies in a large bowl.
- Pour in the Italian dressing and stir gently to combine.
- Taste and season with salt and pepper as desired.
- Chill in the fridge for at least 30 minutes before serving.
- Garnish with parsley just before serving.
Notes
This salad is great for meal prep and can be stored in an airtight container in the fridge for up to three days.
- Prep Time: 15 minutes
- Cook Time: 10 minutes
- Category: Salad
- Method: Mixing
- Cuisine: Italian
Nutrition
- Serving Size: 1 serving
- Calories: 300
- Sugar: 5g
- Sodium: 450mg
- Fat: 12g
- Saturated Fat: 1g
- Unsaturated Fat: 9g
- Trans Fat: 0g
- Carbohydrates: 40g
- Fiber: 3g
- Protein: 7g
- Cholesterol: 0mg
Keywords: pasta salad, colorful salad, vegetarian recipe, Italian dressing, summer meals
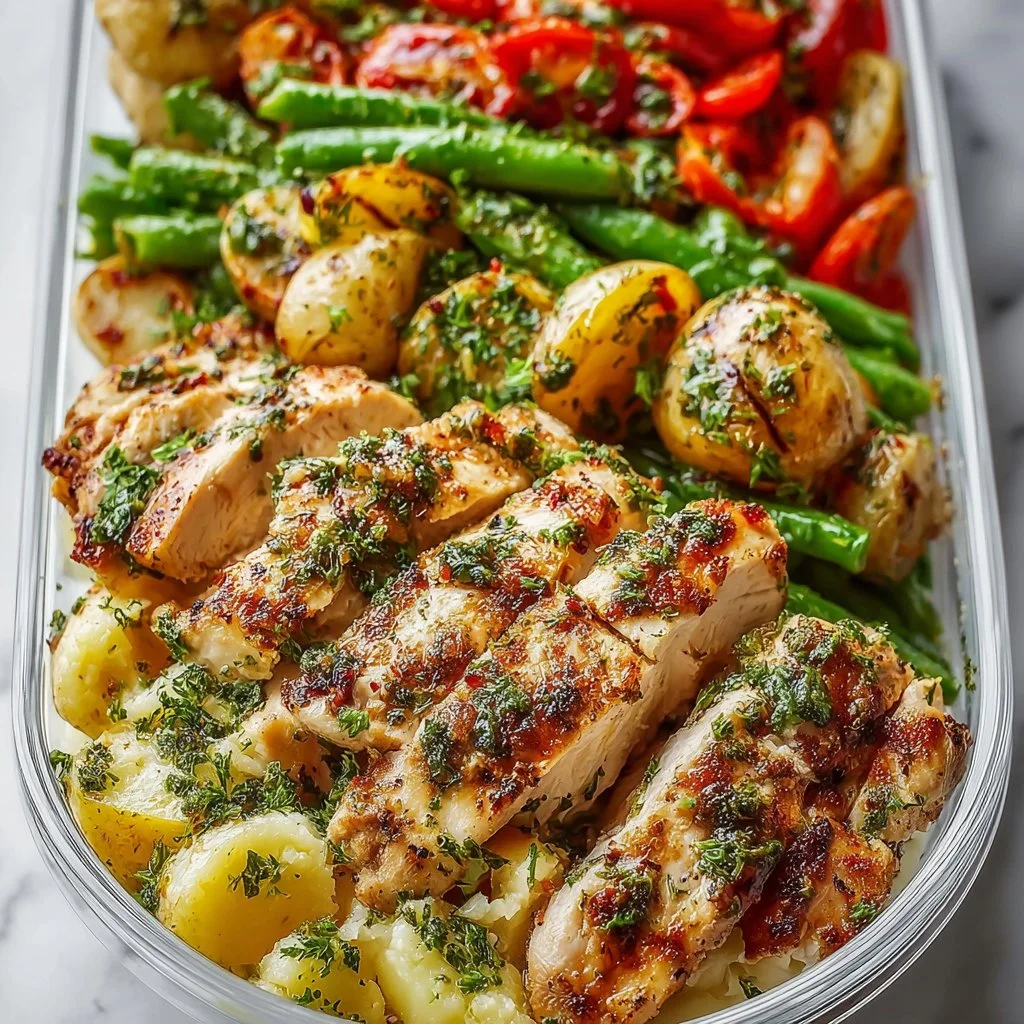
Healthy Lemon Garlic Chicken Meal Prep Bowls
Healthy Lemon Garlic Chicken Meal Prep Bowls: A Flavorful Journey!
Hey there, food enthusiasts! Welcome back to Feastical, your go-to spot for feel-good food that packs a punch. Today, I’m thrilled to share one of my absolute favorite recipes—Healthy Lemon Garlic Chicken Meal Prep Bowls! Whether you’re meal prepping for the week or just craving a delicious and nutritious dish, these bowls are not only loaded with flavor but are also super simple to whip up.
As busy as life can get, I believe that eating well shouldn’t feel like a chore. These meal prep bowls make sure you have something tasty and healthy waiting for you in the fridge at the end of a long day. Let’s dive right in, shall we? With such a zesty and fragrant combination of lemon and garlic, this dish is all about bringing joy (and nutrients) back to mealtime.
A Fun Memory with Lemon Garlic Chicken
Before we jump into the cooking bliss, let me take you on a little stroll down memory lane. A few summers ago, I found myself at my friend Jenna’s kitchen, where we decided to experiment with meal prepping—a relatively new concept to both of us at the time. She had her heart set on a lemon dish that could brighten up our week.
After some giggles and a few culinary hiccups (I still can’t believe we mistook salt for sugar in our first batch), we finally hit the jackpot with what we now affectionately call “The Lemon Garlic Chicken Saga.” As that mouth-watering aroma filled the kitchen, we knew we had something special. Jenna’s family joined us for dinner, and we all laughed, shared stories, and enjoyed the magic that can happen when food brings people together. That day, we learned that the right flavors and a sprinkle of love can turn any day into a feast.
And now, I’m sharing that same joy with you! So, let’s get started and recreate the magic in your own kitchen!
Ingredients
Here’s what you’ll need to make these mouth-watering meal prep bowls:
-
2 Chicken Breasts
A lean source of protein that’s versatile and absorbs flavors beautifully. If you’re looking for a shortcut, boneless thighs work great here too! -
2 Tablespoons Olive Oil
The heart-healthy fat that adds richness to your chicken. Avocado oil is a fantastic substitute if you prefer higher smoke points. -
4 Cloves Garlic, Minced
Garlic adds that aromatic punch we all love. If you’re in a hurry, jarred minced garlic can save you some time! -
Juice of 1 Lemon
Fresh is key here! The zesty brightness of lemon lifts all the flavors. If you’re out of lemons, a splash of vinegar can work too. -
Salt and Pepper to Taste
Essential for seasoning. I recommend sea salt and freshly cracked black pepper for the best results! -
2 Cups Cooked Quinoa
A fantastic gluten-free grain that’s high in protein. You can switch it up with brown rice or even cauliflower rice for a low-carb option. -
1 Cup Steamed Broccoli
Packed with vitamins! Fresh or frozen broccoli are both good choices. You can also add asparagus or green beans if you’re feeling adventurous! -
1 Cup Cherry Tomatoes, Halved
Their juicy sweetness makes every bite a delight. Sub with diced bell peppers for a colorful twist. -
1 Avocado, Sliced
Creamy, dreamy avocado adds a healthy fat element. If you can’t find ripe avocados, a dollop of Greek yogurt is a great alternative!
Step-by-Step Instructions
Let’s cook up some magic! Follow these detailed steps to bring your Lemon Garlic Chicken Meal Prep Bowls to life.
Step 1: Prep Your Chicken
Start by patting your chicken breasts dry with a paper towel. This helps them caramelize beautifully in the pan! Place them in a bowl and drizzle with olive oil. Add minced garlic, lemon juice, salt, and pepper. Give it a good mix! Let marinate for about 15-30 minutes if you’ve got time—trust me, the flavor will be worth it!
Step 2: Cook the Chicken
Heat a skillet over medium-high heat. When it’s hot, place your chicken breasts in the pan. Let them sear without moving them for about 6-7 minutes to get that delicious browned crust. Flip and cook for another 5 minutes until the internal temperature reaches 165°F (75°C). A handy trick—use a meat thermometer for precision!
Step 3: Quinoa Time
While your chicken is cooking, let’s get that quinoa going. Rinse the quinoa under cold water to remove any bitterness. Combine 1 cup of dry quinoa with 2 cups of water in a pot. Bring it to a boil, reduce the heat to low, cover, and let it simmer for 15 minutes. Fluff with a fork once it’s done!
Step 4: Steam the Broccoli
You can either steam broccoli in a pot or microwave it! For stovetop steaming, place a steamer basket over boiling water and let it cook for about 5-7 minutes until it’s tender but still bright green. If you’re using the microwave, place the florets in a bowl, add a splash of water, cover, and microwave for 3-4 minutes. Easy peasy!
Step 5: Slice the Chicken
Once your chicken is cooked through, remove it from the pan and let it rest for 5 minutes before slicing into strips. This resting step is crucial—it helps keep the juices sealed in, ensuring tenderness.
Step 6: Assemble Your Bowls
Alright, it’s the moment of truth—let’s assemble! In your meal prep containers, start with a base of quinoa, add steamed broccoli, and top it with those luscious slices of chicken. Finish up with halved cherry tomatoes and a few slices of avocado. You can drizzle another squeeze of lemon on top for that extra zing!
Serving Suggestions
Now that your bowls are assembled, you might be wondering how to serve them! These meal prep bowls are perfect as-is but here’s how you can get a bit fancy.
- Garnish: Add a sprinkle of fresh herbs like parsley or cilantro for a pop of color.
- Dress It Up: Drizzle a light vinaigrette or even a homemade tahini dressing for some extra flavor.
- Side Serving: Pair with whole-grain pita or a side of hummus for a little Mediterranean flair.
You can store these beauties in the fridge for up to five days—making your weeknight dinners a breeze!
Recipe Variations
Let’s get creative, shall we? Here are a few twists you can make to keep things exciting:
- Spicy Kick: Add a pinch of red pepper flakes to your marinade for some heat.
- Mediterranean Twist: Swap cherry tomatoes for diced cucumbers and sprinkle with feta cheese.
- Asian Infusion: Change up the seasoning with soy sauce and sesame oil instead of olive oil and lemon.
- Herbaceous Delight: Use fresh herbs like dill or basil in place of the lemon for a fresh flavor profile.
- Whole Grain Goodness: Try swapping quinoa for farro or barley for a heartier grain option.
Chef’s Notes
Cooking is all about experimenting and having fun! I can’t tell you how many times I’ve tried a recipe only to change it up on a whim—and that’s where the best flavors emerge. This Lemon Garlic Chicken Meal Prep Bowl has itself evolved over time, going from a simple dinner idea to a beloved staple in my kitchen.
One funny story comes to mind: I once forgot the most crucial ingredient—salt—while prepping for my family’s dinner. You can bet I learned my lesson (and a few laughs were had) when everyone sat down anticipating a flavor explosion and instead got “blah.” Lesson learned: always taste as you go!
FAQs and Troubleshooting
1. Can I use frozen chicken?
Absolutely! Just ensure to fully thaw it before marinating and cooking.
2. What can I use if I don’t have quinoa?
Brown rice, couscous, or even lentils are great substitutes!
3. My chicken is dry. What went wrong?
Overcooking can dry out chicken. Invest in a meat thermometer to cook it right to 165°F (75°C) or check for juices running clear.
4. How do I store leftovers?
Store in airtight containers in the fridge, and they should last up to five days!
Nutritional Info
This meal prep bowl is not just delicious; it’s nutritious too! Here’s a quick breakdown:
- Calories: Around 450 per serving
- Protein: Approx. 35g (thanks to the chicken and quinoa)
- Fat: Healthy fats from olive oil and avocado
- Carbohydrates: Whole grains and veggies ensure you get stable energy
- Fiber: With quinoa and veggies, you get a good dose of fiber for digestion
Each bowl is designed to keep you fueled and satisfied without sacrificing flavor!
Final Thoughts
I hope you enjoy making and eating these Healthy Lemon Garlic Chicken Meal Prep Bowls as much as I do! Cooking is a wonderful journey we can take together, and I am thrilled to share it with you. Remember, food is not just about nourishment—it’s an experience that brings joy, love, and comfort to our lives.
So grab your ingredients, put on your favorite playlist, and get ready to create a week’s worth of deliciousness. Stay inspired and keep that kitchen flowing with flavors! Until next time, happy cooking, my foodie friends! 🍽️✨
Print
Healthy Lemon Garlic Chicken Meal Prep Bowls
- Total Time: 55 minutes
- Yield: 4 servings 1x
- Diet: Gluten-Free
Description
A flavorful and nutritious meal prep bowl featuring lemon garlic chicken, quinoa, and fresh vegetables.
Ingredients
- 2 Chicken Breasts
- 2 Tablespoons Olive Oil
- 4 Cloves Garlic, Minced
- Juice of 1 Lemon
- Salt and Pepper to Taste
- 2 Cups Cooked Quinoa
- 1 Cup Steamed Broccoli
- 1 Cup Cherry Tomatoes, Halved
- 1 Avocado, Sliced
Instructions
- Pat your chicken breasts dry with a paper towel. Place them in a bowl and drizzle with olive oil. Add minced garlic, lemon juice, salt, and pepper; let marinate for 15-30 minutes.
- Heat a skillet over medium-high heat. Add chicken breasts to the pan, sear for 6-7 minutes, then flip and cook for another 5 minutes until they reach an internal temperature of 165°F (75°C).
- Rinse the quinoa under cold water, combine 1 cup of dry quinoa with 2 cups of water in a pot. Bring to boil, reduce heat, cover, and simmer for 15 minutes.
- Steam the broccoli for 5-7 minutes until tender or microwave for 3-4 minutes.
- Remove the chicken from the pan, let it rest for 5 minutes before slicing.
- Assemble the meal prep bowls: start with quinoa, add steamed broccoli, topped with chicken slices, cherry tomatoes, and avocado.
Notes
Store in the fridge for up to five days. Add fresh herbs or a light vinaigrette for extra flavor.
- Prep Time: 30 minutes
- Cook Time: 25 minutes
- Category: Meal Prep
- Method: Baking, Steaming
- Cuisine: Mediterranean
Nutrition
- Serving Size: 1 bowl
- Calories: 450
- Sugar: 4g
- Sodium: 350mg
- Fat: 20g
- Saturated Fat: 3g
- Unsaturated Fat: 15g
- Trans Fat: 0g
- Carbohydrates: 45g
- Fiber: 7g
- Protein: 35g
- Cholesterol: 70mg
Keywords: meal prep, chicken, healthy recipe, lemon garlic, quinoa, nutrition
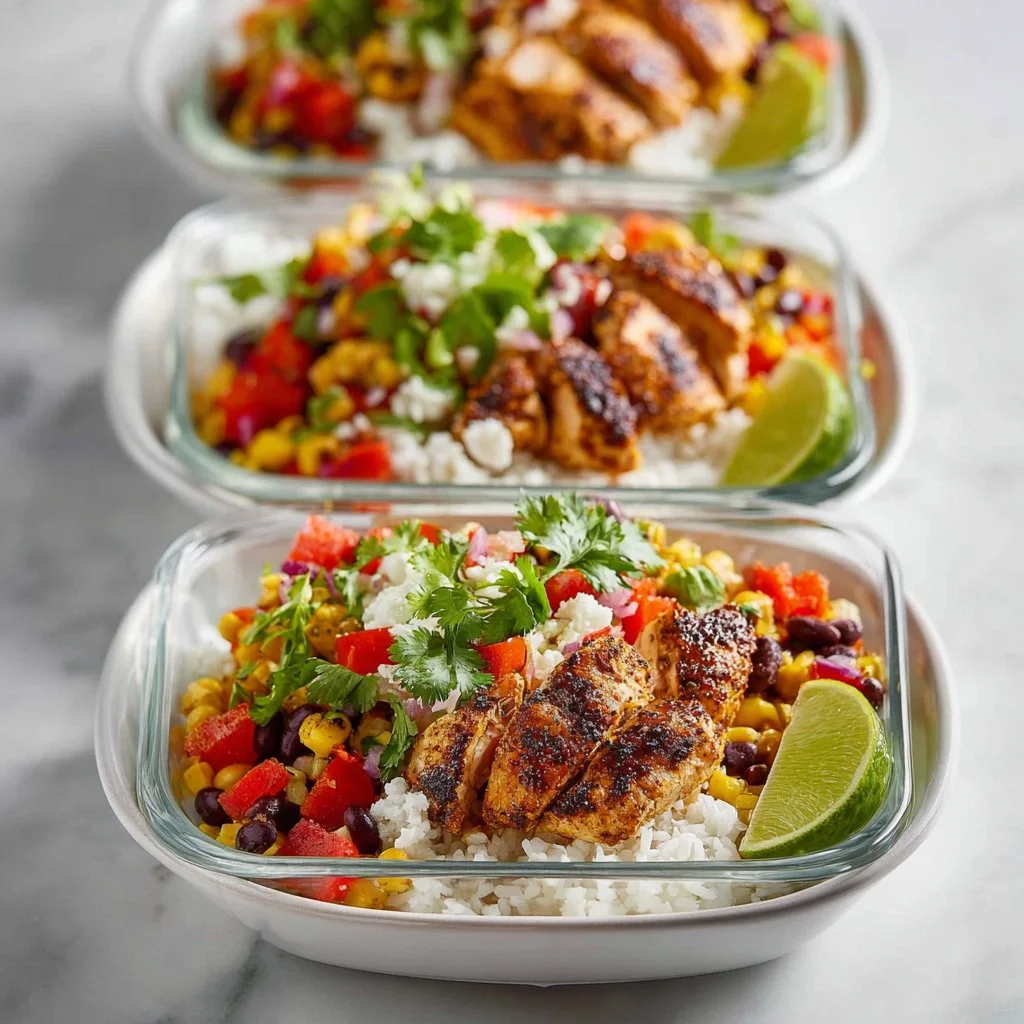
Southwest Chicken Meal Prep Bowls
Southwest Chicken Meal Prep Bowls
Hey there, food friends! If you’re craving something vibrant, filling, and super easy to make, you’ve landed in the right spot. Let’s dive into the world of Southwest Chicken Meal Prep Bowls—the perfect blend of wholesome ingredients that’ll keep your taste buds singing and your meal prep game strong. Whether you’re hustling through a busy week or just want to pack a healthy lunch without breaking a sweat, these bowls are your go-to solution.
Imagine a sunny afternoon, a little bump of Jimmy Buffett in the background, and the enticing aroma of seasoned chicken sizzling on the stove. That’s the vibe we’re going for with this dish. What I love about meal prep bowls is their incredible versatility—they’re not just a feast for your belly; they bring some color and sunshine to your week! With a mix of protein, carbs, and fresh veggies, you’ll feel nourished and energized, ready to tackle whatever life throws your way.
And the best part? You can customize these bowls to fit your taste preferences or those frantic demands of your busy schedule. Gather around because I’m about to share my secrets to building the ultimate Southwest bowl that’s as delicious as it is easy! Get ready, grab your apron, and let’s whip up something magical together!
Personal Story
Let me whisk you back to a summer day several years ago that holds a special place in my heart! It was a warm sunny weekend, and I was hosting a small get-together for my friends. You know, the kind of gathering where laughter floats in the air, and the smell of grilled food makes everyone’s stomach growl in excitement. I decided to showcase my new found love for southwest flavors by preparing my very first Southwest Chicken Meal Prep Bowls.
As I chopped up fresh veggies and marinated my chicken, I was surprised by how simple it all was. The vibrant colors of the ingredients dancing in my bowl made it hard not to smile. As I plated everything and called everyone to dig in, it felt like I was letting them in on a big, delicious secret! Watching them savor each bite, I realized this wasn’t just a dish; it was a memory in the making. That sunny afternoon became a tradition, and here I am, ready to share it with all of you!
Ingredients
Ready to get cooking? Here’s what you’ll need to whip up these delightful Southwest Chicken Meal Prep Bowls. Each ingredient packs a punch, so let’s break it down!
-
2 cups cooked rice
- Chef Insight: White, brown, or even cauliflower rice works great here. If you want those carbs to dance a little lighter, try quinoa for a protein boost!
-
1 lb seasoned chicken breast
- Substitution Tips: Grilled, roasted, or even shredded rotisserie chicken can shine in this dish. Season your usual chicken with taco or fajita spice blend for that authentic flair!
-
1 cup black beans, drained and rinsed
- Quick Chef Insight: If you’re in a pinch or avoid beans, try chickpeas or lentils—both will add fiber and a tasty twist.
-
1 cup corn, drained
- Substitution Tip: Frozen corn is a lifesaver; just toss it in and let it warm up! For a sweet kick, try using grilled corn.
-
1 red bell pepper, chopped
- Chef Insight: Feel free to mix in yellow or orange peppers for more colorful vibes!
-
1 avocado, diced
- Substitution Tip: If avocados aren’t ripe or available, try adding a dollop of Greek yogurt for creaminess or a spoonful of guacamole.
-
1/4 cup cilantro, chopped
- Chef Insight: A sprinkle of green onions or parsley can step in if cilantro is not your jam!
-
2 limes, juiced
- Quick Note: Fresh lime juice is a game-changer! It adds brightness. If you’re in a rush, bottled lime juice can suffice.
-
Salt and pepper to taste
- Chef Insight: Don’t skip the seasoning; a little pop of flavor makes a world of difference!
Step-by-Step Instructions
Alright, let’s get down to business! Here’s how to create these beautiful bowls step by step. And don’t worry—I’ve included some handy tips along the way to make your cooking experience even easier!
-
Cook the Rice:
- If you haven’t already, prepare your rice according to package instructions. This usually involves rinsing the rice and then bringing it to a boil in water or chicken broth for added flavor. Pro tip: cooking it in broth adds an extra layer of richness that your taste buds will thank you for!
-
Season and Cook the Chicken:
- While the rice is cooking, season your chicken breast with spices of your choice. I often grab some cumin, chili powder, garlic powder, and a pinch of salt—nothing too fancy, but it works wonders. Grill, pan-sear, or bake the chicken until the internal temperature reaches 165°F (75°C). Don’t forget to let it rest for at least 5 minutes before slicing; this keeps all those delicious juices locked in. Trust me; it’s worth the wait!
-
Prep the Veggies:
- While the chicken is resting, start chopping your bell pepper and dicing the avocado. A sharp knife helps here—safety first! Your goal is bite-sized pieces that are appealing and easy to eat. That red bell pepper adds not just color but also sweetness and crunch!
-
Rinse the Beans and Corn:
- Open your cans of black beans and corn, then drain and rinse them well to wash away any excess sodium. This is a simple way to get a cleaner flavor and keep your bowls from being too salty.
-
Assemble the Bowls:
- Now comes the fun part—assembling! In each meal prep container, start with a portion of rice at the bottom. Top it with layers of black beans, corn, diced bell pepper, and sliced chicken.
-
Garnish with Avocado and Cilantro:
- Add your diced avocado right before serving to keep it fresh. A squeeze of lime juice over everything not only gives it that zing but helps prevent the avocado from browning too quickly. Finish with a sprinkle of cilantro!
And voilà—you’ve created a beautiful bowl of goodness!
Serving Suggestions
Let’s make your Southwest Chicken Meal Prep Bowls look as incredible as they taste! For a picture-perfect presentation, use clear containers. This way, not only can you see the delightful layers, you’ll also make your friends a little envious when they see your Insta-worthy meal!
When it’s time to eat, simply grab a fork, give everything a gentle mix, and enjoy! Want to take it up a notch? Serve with a side of tortilla chips or homemade salsa for that extra crunch. Or, if you’re feeling especially indulgent, create a drizzle of creamy chipotle sauce on the top for an explosion of flavor!
Recipe Variations
Just because we love these bowls as-is doesn’t mean we can’t have fun with them! Here are some delightful twists you can consider:
-
Spicy Southwest Chicken Bowls:
- For a kick, mix some diced jalapeño into your black beans or sprinkle on some red pepper flakes for that heat!
-
Southwest Taco Salad:
- Swap the rice for a bed of fresh romaine lettuce, creating a refreshing salad version. Top with crushed tortilla chips for that satisfying crunch!
-
Vegan Option:
- Replace the chicken with marinated and grilled tofu or tempeh. Toss some avocado in for creaminess and watch your veggie friends swoon!
-
Quinoa Swap:
- Substitute rice with quinoa for an added protein boost, and sprinkle some nutritional yeast for a cheesy flavor without the dairy.
-
Mediterranean Fusion Bowl:
- Use feta cheese instead of avocado, toss in some olives, and season with oregano for a delightful Mediterranean twist!
Chef’s Notes
As with all recipes, feel free to make them your own. These bowls started as a simple summer meal but have since evolved into a staple in my cooking repertoire! I’ll never forget the first time I experimented with adding corn and black beans; the vibrant colors and flavors made it an instant crowd-pleaser.
A funny kitchen story: once, a friend mistook my spice rack for a game show. She thought, “Let’s try all the spices!” and threw in some cinnamon by accident. While we all laughed at the curious flavor, it was a reminder that cooking should always be fun and a little adventurous. Don’t shy away from experimentation—you never know what delightful accident might become your next favorite dish!
FAQs and Troubleshooting
1. What if my chicken is dry?
If your chicken turns out dry, it may have cooked too long. To prevent this, use a meat thermometer, and always let it rest before slicing. You can also add a little warm broth to the bowl to moisten it up!
2. Can I prep these bowls in advance?
Absolutely! These bowls keep well in the refrigerator for up to 4 days. Just hold off on adding the avocado until right before serving to keep it fresh and green.
3. How do I store leftovers?
Store each component in separate airtight containers to keep everything fresh. This way, you can mix and match as you desire throughout the week!
4. Can I freeze these bowls?
You can freeze the chicken and rice, but avoid freezing the fresh veggies and avocado. When reheating, let them thaw overnight in the fridge, then warm gently.
Nutritional Info
Here’s a peek into the nutritional breakdown of your Southwest Chicken Meal Prep Bowls (per serving):
- Calories: About 450
- Protein: 32g
- Carbohydrates: 54g
- Dietary Fiber: 12g
- Fat: 14g
Feel free to adjust the portion sizes according to your dietary needs or caloric goals. These bowls are packed with vitamins and nutrients, making them a wholesome choice for a meal prep-friendly week!
Final Thoughts
As we wrap up our journey through the vibrant world of Southwest Chicken Meal Prep Bowls, remember that cooking is all about joy! This colorful dish brings together flavors and ingredients that not only nourish the body but also warm the spirit. I hope you’ve found inspiration in these bowls and that each bite is a little reminder of good food, good friends, and good times.
So, are you ready to gather in the kitchen and whip up these stunning bowls? Share your creations on social media or with friends—I’d love to see how you make it your own. Here’s to delicious meals that feed the soul—happy cooking, and let’s make every day a Feastical day! 🌟
Print
Southwest Chicken Meal Prep Bowls
- Total Time: 45 minutes
- Yield: 4 servings 1x
- Diet: High Protein
Description
Vibrant and filling Southwest Chicken Meal Prep Bowls perfect for meal prep or a quick weeknight dinner.
Ingredients
- 2 cups cooked rice
- 1 lb seasoned chicken breast
- 1 cup black beans, drained and rinsed
- 1 cup corn, drained
- 1 red bell pepper, chopped
- 1 avocado, diced
- 1/4 cup cilantro, chopped
- 2 limes, juiced
- Salt and pepper to taste
Instructions
- Cook the rice according to package instructions.
- Season and cook the chicken breast until internal temperature reaches 165°F (75°C).
- Prep the veggies by chopping the bell pepper and dicing the avocado.
- Rinse the beans and corn to wash away excess sodium.
- Assemble the bowls with rice, beans, corn, bell pepper, and sliced chicken.
- Garnish with avocado and cilantro, and a squeeze of lime juice.
Notes
Enjoy with tortilla chips or homemade salsa for extra crunch!
- Prep Time: 15 minutes
- Cook Time: 30 minutes
- Category: Main Course
- Method: Assembling
- Cuisine: Southwestern
Nutrition
- Serving Size: 1 bowl
- Calories: 450
- Sugar: 3g
- Sodium: 500mg
- Fat: 14g
- Saturated Fat: 2g
- Unsaturated Fat: 11g
- Trans Fat: 0g
- Carbohydrates: 54g
- Fiber: 12g
- Protein: 32g
- Cholesterol: 70mg
Keywords: meal prep, chicken bowls, southwestern, healthy recipe, easy dinner