
Tuna Lettuce Wraps
Tuna Lettuce Wraps: A Fresh and Flavorful Delight
Introduction:
Hey there, food lovers! It’s your pal Beau Collier from Feastical, and today we’re diving into something that’s not only delicious but also fresh and breezy—Tuna Lettuce Wraps! If you’re anything like me, you love a meal that feels light yet filling, and these wraps are just the ticket.
Imagine sinking your teeth into crisp, refreshing lettuce filled with savory, perfectly seasoned tuna—sounds inviting, right? Whether you need a quick lunch, a fancy appetizer for your next gathering, or a healthy snack, these delightful wraps have got your back. Plus, they’re oh-so-simple to whip up, making them a perfect fit for anyone, from the seasoned chef to those still searching for their spatula. So, grab your butter lettuce or Bibb lettuce, and let’s get cooking!
I remember the first time I stumbled upon the idea of lettuce wraps. I was spending a lazy summer afternoon at my quirky Aunt Louisa’s house. She was the queen of inventive snacks, and that day she had a platter of tuna lettuce wraps, just waiting to spark joy. As I took my first bite, the crunch of the lettuce contrasted beautifully with the creamy tuna filling. It was a match made in heaven!
Since then, I’ve made my own versions of these wonderful wraps, each time adding a personal touch. Trust me, you’ll not only enjoy making them but also sharing them. So, let’s roll up our sleeves and create a dish that’s filled with culinary love, good vibes, and a sprinkle of creativity!
Personal Story:
Ah, memories in the kitchen! One of my fondest moments was when my daughter, little Sophie, decided to help me make these Tuna Lettuce Wraps for her first-ever picnic with friends. She was about seven, armed with a chef’s hat that was three sizes too big and an adventurous spirit that could conquer the world.
We pulled out the ingredients and got to work. I showed her how to open the canned tuna, and she giddily squished the contents into a mixing bowl. Together, we diced the celery and red onion while giggling and sharing stories of adventures from her kindergarten class.
Lettuce wraps became a tradition for our summer picnics, and from that day, Sophie became my little sous-chef. It made my heart swell to see her enthusiasm for cooking and eating healthy. We’d fill those greens with her favorite tuna mixture, decorating each one with bright sprigs of parsley. They became our signature treat!
As time passed and Sophie grew, so did our wrap-making skills. Those cherished moments in the kitchen not only turned out delicious food but also fostered a love for cooking that she carries with her today. It’s funny how something as simple as a tuna salad can become a heartwarming memory, isn’t it?
Ingredients:
Here’s what you’ll need to create your delectable Tuna Lettuce Wraps:
-
Butter Lettuce or Bibb Lettuce: 1 head (or about 8-10 leaves)
- Chef Insight: These leafy greens are sturdy enough to hold your filling, yet soft enough to deliver that refreshing crunch. The leaves are cupped, making them perfect little boats for our delicious tuna mixture!
-
Canned Albacore Tuna: 10 oz (2 5oz cans)
- Substitution Tip: If you’re feeling adventurous, swap from albacore to yellowfin or even canned salmon for a twist on the classic flavor.
-
Mayonnaise: 1/3 cup
- Chef Insight: This adds creaminess to the mixture. For a lighter option, try Greek yogurt or a vegan mayo if you’re keeping it plant-based.
-
Finely Diced Celery: 2 tbsp
- Substitution Tip: This gives a delightful crunch! Feel free to add diced bell peppers or cucumbers for an extra refreshing bite.
-
Finely Diced Red Onion: 2 tbsp (rinsed in cold water)
- Why Rinse?: Rinsing the onions helps tone down their sharpness while keeping that lovely crunch. If raw onion isn’t your jam, try scallions or shallots!
-
Whole Grain Mustard: 1 tsp
- Chef Insight: This adds a nice tangy flavor that rounds out the richness of the tuna. If you prefer a spicier kick, swap it for Dijon mustard.
-
Chopped Fresh Parsley: 1 tsp
- Flavor Boost: This herb acts as a fantastic fresh note. You could also use dill or cilantro depending on your preference.
-
Salt and Pepper: To taste
- Chef Tip: Always season as you go for the best flavor! A sprinkle here and a pinch there can make all the difference.
Step-by-Step Instructions:
Now that we’ve gathered our ingredients, let’s jump into the cooking process! Follow along for some chef hacks that’ll ensure your Tuna Lettuce Wraps turn out perfectly every time.
-
Prep the Lettuce: Start by washing the butter or Bibb lettuce leaves gently under cool running water. Pat them dry with a paper towel or a clean kitchen cloth.
- Chefs Tip: If you’re short on time, wash and dry them ahead of time and store them in an airtight container with a damp paper towel to keep them crisp.
-
Open the Tuna: Grab your cans of albacore tuna and open them. Drain the liquid carefully! Transfer the tuna to a mixing bowl.
- Chef Insight: I like to fluff it with a fork to break up any big chunks. This way, every bite is well-distributed and delicious!
-
Mix it Up: Add the mayonnaise, diced celery, and diced red onion to the tuna. Season with salt and pepper to taste. Drizzle in the whole grain mustard and fold everything gently until well combined.
- Hack Alert: If you want to get a bit creative, add a dash of hot sauce or some chopped pickles for an extra flavor boost!
-
Taste Test: Before proceeding, take a tiny spoonful and taste! Adjust seasoning if necessary.
- Chef Rule: Always remember that delicious food happens in layers of flavor. If it’s not tasting vibrant enough, a little more of this or that can work wonders.
-
Assemble the Wraps: Now comes the fun part! Take your prepared lettuce leaves and spoon a generous amount of the tuna mixture into each leaf. Don’t be shy—fill those cups!
- Serving Tip: If you like it a bit saucy, drizzle a little extra mayo or a squeeze of lemon juice on top.
-
Garnish: Sprinkle a bit of fresh parsley on top for color and added flavor.
- Final Touch: A slice of avocado or some cherry tomato halves on the side can elevate this plate even more!
-
Serve Immediately: Enjoy your tuna lettuce wraps right away while the lettuce is crisp and the flavors lively!
Serving Suggestions:
When it comes to serving these bad boys, presentation is key! Here are some fun ideas to get your Tuna Lettuce Wraps looking as delicious as they taste:
-
Platter Style: Arrange the stuffed lettuce leaves on a beautiful serving platter. You can even add some lemon wedges and herbs for a pop of color.
-
Dipping Sauces: Serve with little bowls of your favorite dipping sauces like soy sauce, sriracha, or a creamy dip to enhance those flavors.
-
Kids’ Picnic: For a fun twist, let the kids add their own toppings—like shredded carrots, sliced cucumbers, or even a dollop of guacamole!
-
Garnished Plate: For a fancy touch, sprinkle some microgreens or edible flowers around the plate to impress your guests.
-
Lunch Boxes: Perfect for meal prep! These wraps pack beautifully into lunch boxes; just keep the tuna filling and lettuce leaves separate until it’s time to eat.
Recipe Variations:
Feeling adventurous? Here are some creative variations to this basic recipe that’ll excite your taste buds!
-
Mediterranean Tuna Wraps: Swap in chopped kalamata olives and feta cheese for a Mediterranean flair. Toss in a few sun-dried tomatoes for extra oomph!
-
Tropical Twist: Add diced pineapple or mango to your mixture. The sweetness will balance beautifully with the savory tuna!
-
Spicy Sriracha Tuna: Mix in some Sriracha for a kick! Perfect for those who crave a bit of heat in their meals.
-
Avocado Tuna Wraps: Mash in some ripe avocado instead of mayonnaise for a creamy, nutrient-rich alternative that adds healthy fats.
-
Vegetarian Version: Replace tuna with chickpeas! Mash them up and season with the same ingredients for a satisfying plant-based option.
Chef’s Notes:
Every recipe tells a story, right? Tuna Lettuce Wraps have evolved over time in my kitchen! Initially, I made them for quick lunches, but over the years, they’ve become staples at parties and gatherings.
I remember one memorable dinner with friends where I doubled the batch, excited to share, only to find out they were devoured before I could even grab one! Let’s say I learned the hard way that these wraps disappear quickly!
I also love experimenting with leftovers—using turkey or chicken instead of tuna works great. It’s all about flexibility and finding joy in cooking!
FAQs and Troubleshooting:
1. My lettuce leaves are tearing when I fill them. What should I do?
- A gentle hand goes a long way! Look for larger, sturdier leaves and make sure they’re dry to avoid tearing. This way, they’ll hold up better against the filling.
2. Why does my tuna salad taste bland?
- Ah, the age-old kitchen conundrum! Don’t forget to taste as you mix. Adding a dash of acid like lemon juice or a splash of hot sauce can brighten the flavor remarkably!
3. Can I prepare these wraps ahead of time?
- Absolutely! Just keep the filling and lettuce separate until you’re ready to serve. Fill them just before eating to maintain that delightful crunch!
4. What if I’m sensitive to onions?
- No problem! Simply skip the onions, or substitute them with diced bell peppers, which provide a nice crunch without the sharpness.
Nutritional Info:
These Tuna Lettuce Wraps not only taste divine but they are also packed with nutrients, making them a guilt-free choice. Here’s a quick breakdown of what you’ll get in one serving (2 wraps):
- Calories: Approximately 230 calories
- Protein: 24 grams (thanks to that mighty tuna!)
- Fat: 14 grams (mostly from healthy sources like mayonnaise or avocado!)
- Carbohydrates: 4 grams (almost negligible, and it’s healthier from the lettuce!)
- Fiber: 1 gram (with all those fresh veggies!)
You’re fueling your body with lean protein, healthy fats, vitamins, and minerals without sacrificing flavor. It’s a win-win!
Final Thoughts:
And there you have it—Proud Tuna Lettuce Wraps that’ll make your taste buds sing! Whether you’re making them for a picnic, a quick dinner, or simply a snack, it’s all about embracing that ease and comfort of good food.
I hope you’ll whip these up and find joy in every bite, just like I do! Cooking doesn’t have to be complicated; it’s about connecting, sharing, and enjoying flavors. So, gather your loved ones around, make some memories, and enjoy these delightful wraps!
Remember, here at Feastical, it’s all about feeling good while eating delicious food. I can’t wait to hear about your adventures in the kitchen. Share your twists on these wraps or tell me your stories—it’s these delicious moments that bring us all together. Happy cooking, friends! 🥗✨
Print
Tuna Lettuce Wraps
- Total Time: 25 minutes
- Yield: 4 servings 1x
- Diet: Low Carb
Description
Fresh and flavorful Tuna Lettuce Wraps perfect for a light meal or a healthy snack.
Ingredients
- 1 head Butter Lettuce or Bibb Lettuce (about 8–10 leaves)
- 10 oz Canned Albacore Tuna (2 5oz cans)
- 1/3 cup Mayonnaise
- 2 tbsp Finely Diced Celery
- 2 tbsp Finely Diced Red Onion (rinsed in cold water)
- 1 tsp Whole Grain Mustard
- 1 tsp Chopped Fresh Parsley
- Salt and Pepper to taste
Instructions
- Prep the Lettuce: Start by washing the butter or Bibb lettuce leaves gently under cool running water. Pat them dry with a paper towel or a clean kitchen cloth.
- Open the Tuna: Grab your cans of albacore tuna and open them. Drain the liquid carefully! Transfer the tuna to a mixing bowl.
- Mix it Up: Add the mayonnaise, diced celery, and diced red onion to the tuna. Season with salt and pepper to taste. Drizzle in the whole grain mustard and fold everything gently until well combined.
- Taste Test: Before proceeding, take a tiny spoonful and taste! Adjust seasoning if necessary.
- Assemble the Wraps: Now comes the fun part! Take your prepared lettuce leaves and spoon a generous amount of the tuna mixture into each leaf.
- Garnish: Sprinkle a bit of fresh parsley on top for color and added flavor.
- Serve Immediately: Enjoy your tuna lettuce wraps right away while the lettuce is crisp and the flavors lively!
Notes
These wraps are perfect for meal prep. Just keep the filling and lettuce leaves separate until you’re ready to eat.
- Prep Time: 15 minutes
- Cook Time: 10 minutes
- Category: Appetizer
- Method: No-Cook
- Cuisine: American
Nutrition
- Serving Size: 2 wraps
- Calories: 230
- Sugar: 1g
- Sodium: 500mg
- Fat: 14g
- Saturated Fat: 2g
- Unsaturated Fat: 10g
- Trans Fat: 0g
- Carbohydrates: 4g
- Fiber: 1g
- Protein: 24g
- Cholesterol: 30mg
Keywords: tuna, lettuce wraps, healthy snacks, meal prep, easy recipes
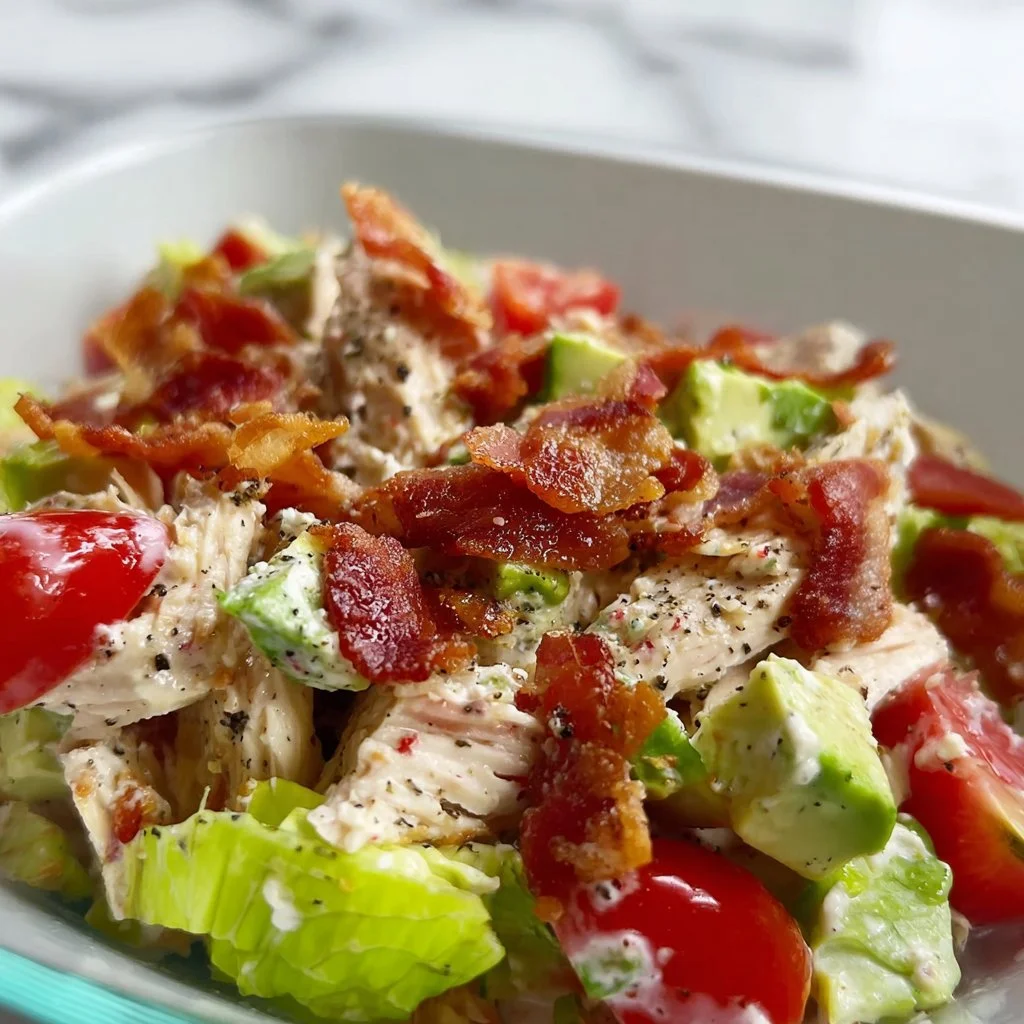
BLT Chicken Salad
BLT Chicken Salad: A Flavorful Twist on a Classic Favorite
Hey there, fellow food lovers! Today, we’re diving into a delightful dish that combines all the flavors of a classic BLT sandwich with the heartiness of a chicken salad. Yes, you guessed it—I’m talking about the scrumptious BLT Chicken Salad! This recipe is a total crowd-pleaser and is perfect for summer picnics, quick lunches, or even as a light family dinner. Trust me, it’s one of those dishes that makes everyone feel right at home.
What makes this salad so special is not just the classic combination of ingredients but the way each component comes together to create a medley of flavors that bring joy to every bite. Imagine the crunch of crispy bacon, the creaminess of avocados, and the freshness of ripe tomatoes, all enveloped in a luscious dressing. That’s pure comfort food bliss!
Now, I’ll admit—I wasn’t always this enthusiastic about chicken salad. Many years ago, I found it to be bland, uninspired, and just plain boring. That was until I decided to jazz it up with flavors reminiscent of my favorite sandwiches and, voila! A light bulb moment sparked this recipe into existence. It’s easy to make, incredibly customizable, and adds a twist to those boring lunches.
Plus, you’ll love how quickly you can whip it up—perfect for busy weeknights or spontaneous gatherings with friends. So, gather your ingredients and get ready to create something wonderfully delicious that’s bound to make your taste buds sing!
Personal Story
Let me take you back in time. Picture this: a warm summer afternoon spent in my grandmother’s cozy kitchen. The scent of bacon sizzling on the stove filled the air, and I could hardly contain my excitement. My grandma was renowned for her bacon, lettuce, and tomato sandwiches, crafted with love and a dash of magic. Each sandwich was undeniably a masterpiece, with crispy bacon, fresh romaine, and tomatoes from her garden.
As a kid, I used to sneak bites of her salad whenever she turned around. I remember one day, she showed me how to assemble her special dressing, and a light bulb went off—why not mix up the classic BLT flavors into a salad? The thought didn’t leave me, and fast forward a few years—it inspired this very recipe! So every time I whip up this BLT Chicken Salad, it takes me back to those cherished moments in the kitchen, sharing stories and laughter with my grandma.
Ingredients
Let’s break down this delicious BLT Chicken Salad. Here’s what you’ll need:
-
4 cups rotisserie chicken (shredded)
Using rotisserie chicken saves you time and adds tons of flavor. Feel free to use leftover chicken or even grilled chicken for a different twist! -
8 strips bacon (chopped, center-cut)
You can’t have a BLT without bacon! Center-cut bacon is leaner but still incredibly crispy. For a healthier option,Turkey bacon can be used instead. -
1/2 cup plain Greek yogurt
This creamy goodness adds a tangy flavor and protein. If you’re not a yogurt fan, you can skip this and use all mayonnaise! -
1/3 cup mayonnaise
A classic dressing ingredient that adds richness. For a lighter alternative, try avocado mayo or a vegan mayo. -
1 tablespoon ranch seasoning
This is where the magic happens! That ranch seasoning brings a zesty flavor kick. Store-bought is fine, or you can make your own for a fresher taste. -
1/2 tsp freshly cracked pepper
A sprinkle of freshly cracked pepper elevates the flavor profile. Adjust to taste if you prefer it spicier! -
1/3 cup green onions (diced)
Fresh and crispy green onions add a nice crunch and mild onion flavor. -
2/3 pint grape tomatoes (halved or quartered)
Sweet and juicy grape tomatoes bring freshness to every bite. Feel free to swap them with cherry tomatoes or even sun-dried tomatoes for a unique twist. -
1 avocado (diced)
Creamy avocado takes this salad to another level! If you’re not a fan, feel free to skip it or swap in diced cucumbers for some crunch.
Step-by-Step Instructions
Now, let’s get cooking! Follow these simple steps to whip up your BLT Chicken Salad:
-
Cook the Bacon:
Start by cooking the chopped bacon in a skillet over medium heat. Keep an eye on it—you want it perfectly crispy! This usually takes about 8-10 minutes. Once it’s done, transfer it to a plate lined with paper towels to soak up the grease. Don’t toss the bacon grease just yet; it can add flavor to your veggies later! -
Prepare the Chicken:
While the bacon is cooling, shred your rotisserie chicken in a large mixing bowl. It’s okay if it’s still warm; the warmth will help the flavors mix together nicely. -
Mix the Dressing:
In a medium bowl, combine your Greek yogurt, mayonnaise, and ranch seasoning. Mix until smooth, and season lightly with freshly cracked pepper. Trust me; this creamy sauce is the soul of the salad, and you’ll want every drop! -
Add the Ingredients:
Toss in the diced green onions, halved grape tomatoes, crispy bacon, and diced avocado to the shredded chicken. Drizzle your delicious dressing over the whole mixture to coat. -
Mix It Up:
Gently mix everything together with a spatula or spoon until the chicken and veggies are evenly coated in the dressing. This is where you can add more salt and pepper to taste. -
Chill (Optional):
If you have time, let the salad chill in the fridge for about 30 minutes. This allows the flavors to meld, and trust me, it’s worth the wait! -
Serve:
You’re all set to serve your BLT Chicken Salad! Plate it up or serve it in a bowl, maybe with some crispy lettuce leaves on the side or even in a wrap. Enjoy!
Serving Suggestions
Serving this BLT Chicken Salad is just as enjoyable as making it! Here are a few ideas on how to plate or serve:
-
In a Bowl:
Serve it chilled in a colorful bowl topped with a sprinkle of extra bacon bits and diced avocado. -
Lettuce Wraps:
For a low-carb option, serve the salad scooped into crisp lettuce leaves, making it easy to grab and eat! Iceberg or romaine works best for that satisfying crunch. -
On Toast:
Spread it over whole grain toast, add a slice of cheese, and pop it under the broiler for a tasty open-faced sandwich! -
On a Bed of Greens:
For a lighter lunch, serve the salad over a bed of mixed greens, topped with some additional grape tomatoes for color and flavor. -
In a Wrap:
Roll it all up in a tortilla for a delicious sandwich on the go that’s perfect for picnics or lunch boxes.
Recipe Variations
This BLT Chicken Salad is incredibly versatile—here are a few creative twists you can try:
-
Add Avocado Ranch:
Blend in some puréed avocado to the ranch dressing for a creamier texture and rich flavor. -
Spicy Kick:
Add some diced jalapeños or a few dashes of hot sauce to the mix for a spicy version that will wake up your taste buds! -
Herbinfusion:
Sprinkle in some fresh herbs, such as dill or cilantro, for an herbal flavor boost that complements the ranch dressing. -
Fruit Addition:
Toss in some sweet diced apples or berries for a fruity twist that pairs surprisingly well with the savory elements. -
Swap Out the Veggies:
Experiment with different veggies like bell peppers, corn, or cucumber for added texture and freshness.
Chef’s Notes
I’ve been cooking this BLT Chicken Salad for years, and it’s never failed to impress! One time, I put it together for a backyard BBQ, and it absolutely stole the show, leading to a flurry of requests for the recipe. It’s one of those dishes that evolves every time you make it—embrace the creativity and let your taste buds guide you!
Oh, and here’s a little secret: if you have leftovers (if you’re lucky enough to have them!), try using them as a filling for omelets or stuffing them in baked potatoes! It adds an unexpected, delightful surprise that diners won’t forget.
FAQs and Troubleshooting
-
Can I make this salad ahead of time?
Absolutely! The flavors meld beautifully, but to maintain avocado freshness, add that just before serving. -
What if I don’t have ranch seasoning?
No worries! You can make your own with a mix of dried herbs like dill, chives, garlic powder, and a touch of sea salt. -
What’s the best way to store leftovers?
Keep leftover salad in an airtight container in the fridge. It should last up to three days—though I doubt it’ll make it that long! -
Can I freeze this dish?
It’s not recommended to freeze chicken salad as the texture may be compromised after thawing. Stick to making it fresh when you can!
Nutritional Info
Per serving (approx. 1 cup):
- Calories: 355
- Protein: 27g
- Fat: 20g
- Carbohydrates: 10g
- Fiber: 3g
- Sugars: 2g
This is just a rough estimate, of course, and can vary based on specific ingredient brands. With all those healthy ingredients packed into each serving, you can enjoy this dish without any guilt!
Final Thoughts
So there you have it, my beloved foodies—an easy, delicious recipe for BLT Chicken Salad that’s perfect for any occasion. It’s creamy, crunchy, savory, and a little sweet—all the elements that make your taste buds dance!
I hope you try making this recipe for yourself—or even better, with someone you love—so you can create those happy kitchen memories just like I did with my grandma. Remember, the kitchen is all about exploring, creating, and sharing good vibes.
Now grab your apron, get cooking, and remember to share your kitchen adventures with us by tagging #Feastical! I can’t wait to see what delicious variations you come up with! Happy cooking!
Print
BLT Chicken Salad
- Total Time: 25 minutes
- Yield: 4 servings 1x
- Diet: Dairy
Description
A flavorful twist on the classic BLT sandwich transformed into a heartiness of a chicken salad, perfect for summer picnics or light dinners.
Ingredients
- 4 cups rotisserie chicken (shredded)
- 8 strips bacon (chopped, center-cut)
- 1/2 cup plain Greek yogurt
- 1/3 cup mayonnaise
- 1 tablespoon ranch seasoning
- 1/2 tsp freshly cracked pepper
- 1/3 cup green onions (diced)
- 2/3 pint grape tomatoes (halved or quartered)
- 1 avocado (diced)
Instructions
- Cook the bacon in a skillet over medium heat for 8-10 minutes until crispy.
- Transfer the cooked bacon to a plate lined with paper towels.
- Shred the rotisserie chicken in a large mixing bowl.
- Combine Greek yogurt, mayonnaise, and ranch seasoning in a medium bowl, mixing until smooth.
- Toss in diced green onions, halved grape tomatoes, crispy bacon, and diced avocado to the shredded chicken.
- Drizzle your dressing over the mixture to coat.
- Mix everything together gently.
- Chill in the fridge for about 30 minutes if time allows.
- Serve in bowls or lettuce wraps as desired.
Notes
For added flavor, use leftover chicken or grilled chicken. Customize with your favorite veggies or spices.
- Prep Time: 15 minutes
- Cook Time: 10 minutes
- Category: Salad
- Method: Mixing
- Cuisine: American
Nutrition
- Serving Size: 1 serving
- Calories: 355
- Sugar: 2g
- Sodium: 600mg
- Fat: 20g
- Saturated Fat: 6g
- Unsaturated Fat: 8g
- Trans Fat: 0g
- Carbohydrates: 10g
- Fiber: 3g
- Protein: 27g
- Cholesterol: 70mg
Keywords: BLT Chicken Salad, Chicken Salad, Summer Salad, Picnic Food, Easy Recipe
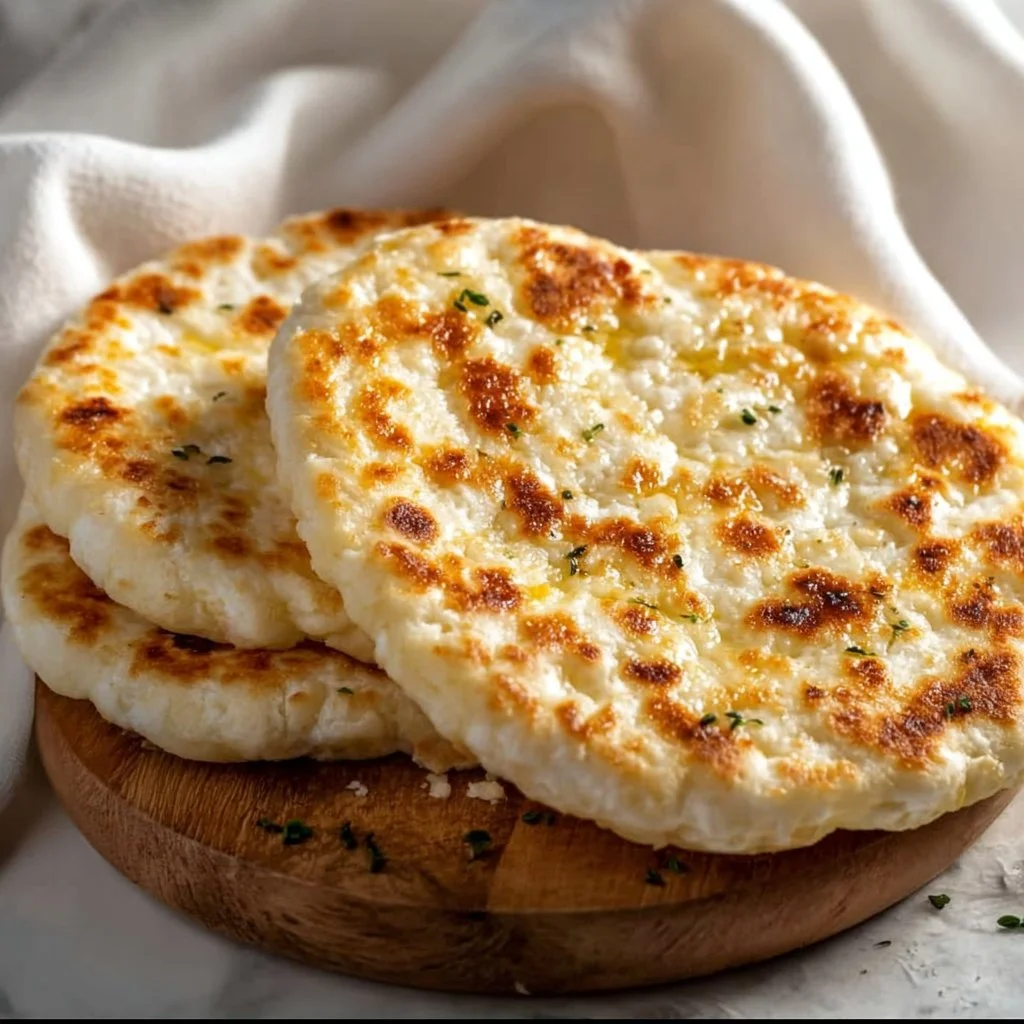
Cottage Cheese Flatbread
Cottage Cheese Flatbread: A Simple Culinary Delight
Hey there, food enthusiasts! Beau Collier here, ready to whisk you away on a culinary adventure. If your taste buds are craving something deliciously different, you’ve landed in the right spot. Today, we’re diving into the world of cottage cheese flatbread—a dish that’s not only easy to whip up but also offers a wonderful texture and flavor that will make your tummy do a happy dance.
Imagine sitting around the dining table with loved ones, the aroma of freshly baked flatbread wafting through the air, maybe slathered with a bit of olive oil or piled high with your favorite toppings. That’s what this simple recipe brings to the table: a chance to create memorable moments while celebrating delightful flavors. Whether you’re planning a cozy weeknight dinner, a get-together with friends, or simply seeking a snack that’s both satisfying and versatile, this flatbread is your go-to choice!
Now, a little secret: making flatbread doesn’t have to be complicated. With just a handful of ingredients and a few simple steps, you can create a scrumptious bread that’s great on its own or as a canvas for your fabulous toppings. Perfect for wraps, dipping, or enjoying with soup, this dish offers endless customization opportunities. So roll up your sleeves, and let’s get started on making this quick and easy cottage cheese flatbread!
Personal Story
Growing up, our family kitchen was the heart of our home. I fondly remember weekends spent with my grandmother, testing her culinary skills while she shared her cherished recipes. One of my favorite moments was when she introduced me to her homemade flatbread. We would spend hours kneading the dough, rolling it out, and cooking it on the stovetop until it was bubbly and golden brown.
I was mesmerized by how something so simple could bring everyone together. My grandma always believed in the magic of food—how a single dish could create laughter, warmth, and love around the table. As a child, I liked to think of our flatbread as a blank canvas; we could dress it up with whatever our hearts desired—from fresh herbs and garlic to tangy cheese or a blend of spices.
Years later, after embarking on my food journey, I began experimenting with different ingredients, and that’s when I stumbled upon the idea of cottage cheese flatbread. It brought me right back to those cherished moments in my grandma’s kitchen. The texture was just right, and it added a delightful flavor twist I couldn’t resist. So grab your apron, and let me take you on this cozy journey to recreate a dish that has warmed my heart through the years!
Ingredients
Let’s gather our ingredients! To whip up this delightful cottage cheese flatbread, you’ll need the following:
-
1 cup cottage cheese: This creamy ingredient is the star of our show! It adds moisture, flavor, and a lovely texture to the flatbread. For a healthier option, you can swap it out for low-fat cottage cheese or even Greek yogurt for added protein.
-
2 cups all-purpose flour: This is our base. It’s what gives our flatbread its structure. If you’re looking for a gluten-free alternative, feel free to use a gluten-free all-purpose flour blend. Just make sure it’s a good quality one!
-
1 teaspoon baking powder: This little leavening agent helps our flatbread rise slightly, giving it a great fluffy texture. If you’re out of baking powder, you can substitute with an equal amount of baking soda, but remember to add a splash of vinegar or lemon juice to activate it!
-
1/2 teaspoon salt: Salt enhances all the flavors in our flatbread. If you’re watching your sodium intake, you can reduce this to a pinch or consider using a salt substitute.
-
1 egg: The egg acts as a binding agent, helping everything stick together. If you want to make this dish vegan or egg-free, a flax egg (1 tablespoon ground flaxseed mixed with 3 tablespoons of water) works wonders here.
-
2 tablespoons olive oil: This adds richness and flavor while also keeping our flatbread moist. You can use melted butter or any cooking oil you prefer if olive oil isn’t your favorite.
-
Water as needed: Water helps bring our dough together. Start with a couple of tablespoons and gradually add more if needed, ensuring the dough is not too sticky.
Now that we’ve gathered our ingredients, let’s dive into the cooking process and create some magic!
Step-by-Step Instructions
-
Preheat Your Pan: Start by preheating a non-stick skillet or flat griddle over medium heat. You want it nice and hot for that perfect cooking surface, so don’t rush this step!
-
Combine the Dry Ingredients: In a large mixing bowl, whisk together the flour, baking powder, and salt. This will help distribute the leavening agent and ensure an even texture in our flatbread.
-
Mix the Wet Ingredients: In another bowl, combine the cottage cheese, egg, and olive oil. Give it a good stir until well mixed. This creamy mixture will make your flatbread light and fluffy.
-
Combine the Mixtures: Now, pour the wet ingredients into the bowl with the dry ingredients. Using a spatula or wooden spoon, gently fold them together until they just start to combine.
-
Knead to Perfection: Lightly flour your countertop and transfer the dough onto it. Knead it gently for about 2-3 minutes until it’s smooth and elastic. If you find the dough too sticky, sprinkle in a little extra flour as you knead. Don’t overwork it; we want it tender!
-
Divide the Dough: Once kneaded, divide the dough into four equal portions. Roll each portion into a ball and then flatten it into a disc about 1/4 inch thick. Don’t fret if they aren’t perfect circles; rustic is the name of the game!
-
Cook the Flatbreads: Lightly grease your preheated skillet with a drizzle of olive oil (or a cooking spray). Place one flatbread in the skillet and cook for about 2-3 minutes on one side until golden brown. Flip and cook for another 2-3 minutes on the other side. You should see those lovely browned spots forming.
-
Animate the Process: If you want, when you flip the flatbread, use a spatula to press down slightly; this helps to achieve a beautifully cooked texture and ensures even browning.
-
Keep Warm: As you finish cooking each flatbread, stack them on a plate, covering them with a kitchen towel to keep them warm and soft while you cook the rest.
-
Serve and Enjoy: Once all the flatbreads are cooked, they’re ready to be showcased! Share them warm with your favorite toppings or dips and enjoy the deliciousness you just created.
Serving Suggestions
Oh, the possibilities for serving your cottage cheese flatbread are endless! You can keep it simple or make it a star attraction:
-
As a Wrap or Sandwich: Use the flatbreads as a base for wraps. Stuff them with grilled veggies, chicken, or your choice of fillings. Add some fresh greens and a smear of hummus for an extra flavor kick!
-
With Dips: Serve the flatbread warm with a selection of dips—think creamy tzatziki, spicy salsa, or a rich avocado dip. It’s a fantastic way to bring people together at a gathering!
-
Flatbread Pizzas: Top the flatbreads with tomato sauce, cheese, and your favorite toppings, then pop them in the oven for a quick and easy pizza night!
-
Breakfast Delight: Spread some almond butter or cream cheese on a flatbread, then layer it with sliced banana or strawberries for a fab breakfast option.
When plating, feel free to get creative! Stack the flatbreads in a cozy pile, drizzle with olive oil, sprinkle with herbs, or even slice them into triangles for easy sharing.
Recipe Variations
This cottage cheese flatbread is wonderfully adaptable! Here are some creative twists to consider:
-
Herbed Flatbread: Mix in fresh herbs like chopped parsley, cilantro, or even crushed garlic into the dough for an aromatic treat. It adds a burst of flavor that pairs perfectly with soups or salads.
-
Whole Wheat Delight: Swap half of the all-purpose flour with whole wheat flour for extra fiber and a nuttier flavor profile.
-
Spicy Flatbread: Add a pinch of cayenne pepper or red pepper flakes into the dough for a kick! This gives your flatbread an exciting edge and is perfect for spice lovers.
-
Cheese Lovers’ Dream: Fold in shredded cheese—mozzarella, cheddar, or your favorite cheese—into the dough to create a cheesy version that melts beautifully when cooked.
-
Sweet Flatbread: For a unique twist, incorporate a bit of honey into the wet ingredients and some cinnamon into the dry. Top with fruits and yogurt for a sweet breakfast or dessert option.
Feel free to experiment and discover what flavor combinations you love the most!
Chef’s Notes
I’ve been making variations of this flatbread for years, and it honestly never gets old. It’s notably forgiving, allowing you to adjust the ingredients based on what you have in your pantry. One time, I had leftover ricotta cheese after preparing a lasagna, and I thought, “Why not?” The result was a super creamy flatbread that took my classic recipe to the next level!
Another fun kitchen blunder turned adventure was when I accidentally added too much salt during an experimental bake. Instead of tossing it, I decided to make mini pizzas with it! The saltiness mingled just right with the toppings, and my friends raved about them at our gathering. The best lessons in cooking come from those little moments—don’t be afraid to let creativity shine (plus, it often leads to delicious surprises)!
FAQs and Troubleshooting
1. Why are my flatbreads too thick?
- The thickness mainly depends on how thinly you roll the dough. Try to aim for 1/4 inch for the best balance between cooking through and remaining soft.
2. Why didn’t my flatbreads puff up?
- Puffing can be influenced by the heat of your pan and the leavening agent. Ensure your skillet is hot enough when you start cooking. Adjust the baking powder measurements if you think it’s past its expiration date.
3. How do I store leftover flatbread?
- To store, let the flatbreads cool completely, then wrap them in foil or place them in an airtight container in the fridge. They’ll keep well for about 3-4 days. Reheat on a skillet or in the microwave when you’re ready to enjoy!
4. Can I freeze them?
- Yes! Freeze the uncooked dough portions wrapped tightly, or freeze the cooked flatbreads separated by parchment paper. Just thaw and cook when ready to eat!
Nutritional Info
Here’s a quick overview of the nutritional information for one piece of cottage cheese flatbread:
- Calories: Approximately 150
- Protein: 6g
- Carbohydrates: 22g
- Fat: 5g
- Fiber: 1g
Cottage cheese provides a great source of protein, making this flatbread a filling option. Plus, using whole wheat flour adds more fiber to keep you feeling satisfied.
Remember that nutritional values can vary based on specific brands and ingredient choices, so always check your labels for accuracy!
Final Thoughts
As we wrap up our cottage cheese flatbread journey, I hope you feel inspired to bring this delightful recipe into your kitchen. Cooking is all about exploration, and I encourage you to make this recipe your own. Play with flavors, add your favorite toppings, and create those heartwarming moments around your dining table, just like I did with my grandmother.
So, grab your apron, gather your family or friends, and whip up some delicious cottage cheese flatbreads that are sure to impress! Remember, the joy of cooking lies not only in the food itself but in the stories and connections we create along the way. Until next time, happy cooking, and keep those tasty vibes rolling! 🍽️
Print
Cottage Cheese Flatbread
- Total Time: 25 minutes
- Yield: 4 servings 1x
- Diet: Vegetarian
Description
A simple yet delicious cottage cheese flatbread recipe that’s perfect for cozy dinners, wraps, or as a base for various toppings.
Ingredients
- 1 cup cottage cheese
- 2 cups all-purpose flour
- 1 teaspoon baking powder
- 1/2 teaspoon salt
- 1 egg
- 2 tablespoons olive oil
- Water as needed
Instructions
- Preheat your pan: Start by preheating a non-stick skillet over medium heat.
- Combine the dry ingredients: In a large mixing bowl, whisk together the flour, baking powder, and salt.
- Mix the wet ingredients: In another bowl, combine the cottage cheese, egg, and olive oil.
- Combine the mixtures: Pour the wet ingredients into the bowl with the dry ingredients.
- Knead to perfection: Lightly flour your countertop and knead the dough gently for about 2-3 minutes.
- Divide the dough: Divide the dough into four portions and flatten each into a disc.
- Cook the flatbreads: Cook each flatbread for about 2-3 minutes on each side until golden brown.
- Keep warm: Stack cooked flatbreads on a plate covered with a kitchen towel.
- Serve and enjoy: Share warm with your favorite toppings or dips.
Notes
Feel free to customize the flatbread with herbs, spices, or cheeses for extra flavor.
- Prep Time: 10 minutes
- Cook Time: 15 minutes
- Category: Bread
- Method: Cooking
- Cuisine: American
Nutrition
- Serving Size: 1 flatbread
- Calories: 150
- Sugar: 2g
- Sodium: 200mg
- Fat: 5g
- Saturated Fat: 1g
- Unsaturated Fat: 4g
- Trans Fat: 0g
- Carbohydrates: 22g
- Fiber: 1g
- Protein: 6g
- Cholesterol: 40mg
Keywords: flatbread, cottage cheese, easy recipes, vegetarian bread, cooking with kids