Minute Crispy Cheesy Roll-Ups for Busy Weeknights
Crispy Cheesy Roll Ups: A Comfort Food Classic with a Twist
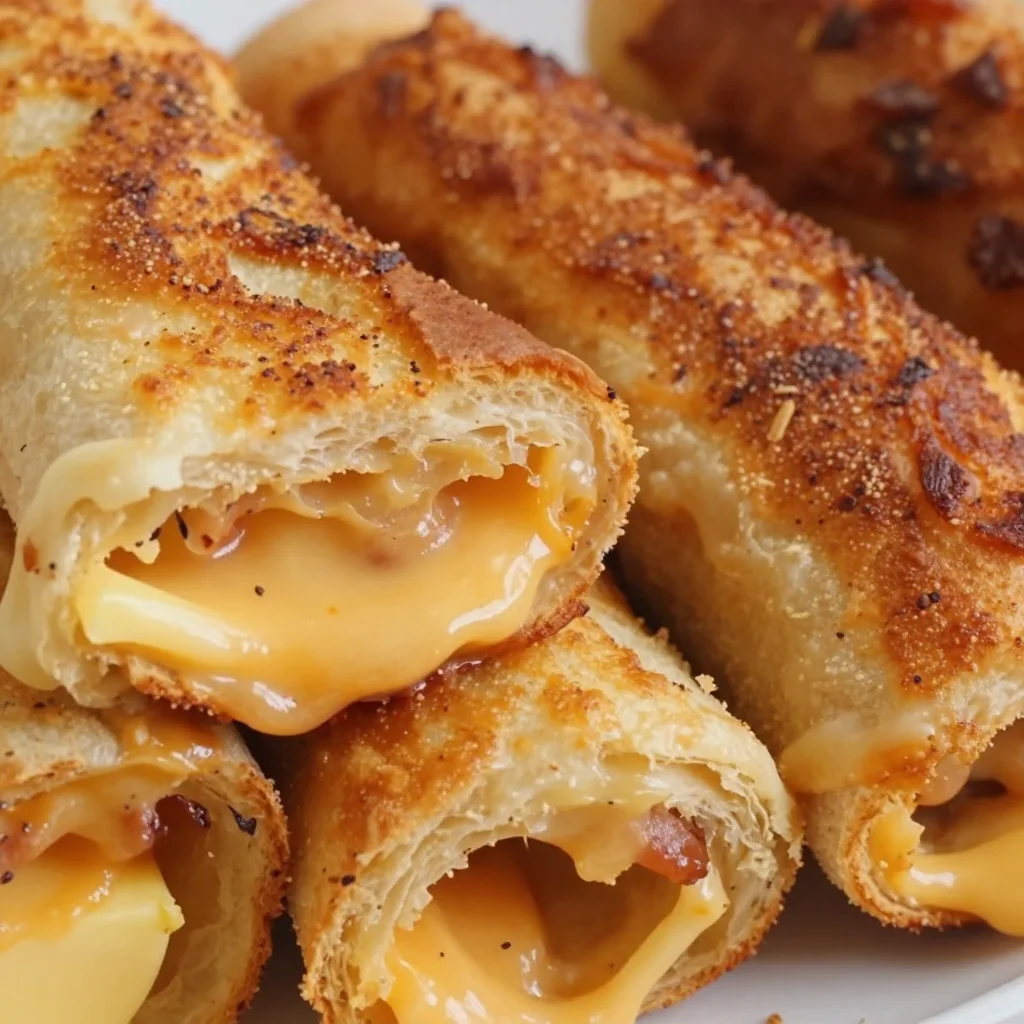
Hey there, food lovers! If you’re on a quest for the ultimate comfort food that’s crispy on the outside and ooey-gooey cheesy on the inside, then you’ve struck gold with my Crispy Cheesy Roll Ups. These delightful little bundles of joy not only hit the spot but also bring back sweet memories of childhood snacking and magic in the kitchen. Whether you’re whipping these up for a cozy night in or a gathering with friends, get ready to indulge in a dish that’s loved by both kids and adults alike!
A Cheesy Childhood Memory
Growing up, my kitchen was always a hub of bubbling pots and mouthwatering aromas. One of my fondest memories is of my grandmother, a culinary wizard, showing me how to make her cheesy roll-ups on a rainy Sunday afternoon. The rain tapped softly against the window as we huddled around the kitchen table, a pile of sliced bread, cheese, and a stick of butter in front of us. As my grandmother spread butter on every piece of bread with a dollop of love, I watched in awe as she transformed simple ingredients into something magical.
These roll-ups were our go-to snack, often eaten with a steaming bowl of tomato soup—a classic pairing that warmed our spirits. As we devoured these crispy delights, we shared stories, laughter, and the joy of good food. Fast forward to today, and I’m excited to share this treasured recipe with you all. So, let’s roll up our sleeves and dive in!
Ingredients
Here’s what you’ll need to create these crispy, cheesy morsels:
-
Sliced Bread
- Why: Any type of bread will work, but I love using white or whole grain for that soft, pillowy texture.
- Substitution Tip: If you want a gluten-free option, just grab a gluten-free bread that you love.
-
Cheese (cheddar, mozzarella, or your choice)
- Why: Cheese is the star of this dish! Cheddar brings sharpness while mozzarella adds that irresistible stretch.
- Substitution Tip: Feel free to mix and match your cheeses. Pepper jack for a spicy kick? Yes, please!
-
Butter (for spreading)
- Why: Butter adds a rich flavor and ensures that our roll-ups get that perfect crispness.
- Substitution Tip: You can use vegan butter or olive oil for a lighter option.
-
Tomato soup or marinara sauce (for dipping)
- Why: A warm bowl of tomato soup or zesty marinara brings a lovely acidity that complements the richness of the roll-ups.
- Substitution Tip: You can make a homemade dip by blending canned tomatoes, herbs, and spices or try basil pesto for something different!
Step-by-Step Instructions
-
Preheat Your Oven
- Start by preheating your oven to 400°F (200°C). This is crucial for getting that crispy texture we’re all after!
-
Prepare Your Bread
- Take your slices of bread and lay them flat on a clean countertop. If you’re feeling adventurous, use a rolling pin to flatten each slice slightly. This will allow you to roll up the bread easily, creating more surface area for that cheesy goodness!
-
Spread the Butter
- Generously spread a layer of butter on one side of each slice. Don’t be shy! A good butter coating is what gives you that golden crust when baking.
-
Add the Cheese
- Now, it’s time to layer on the cheese. Place a generous handful of shredded cheese on the unbuttered side of each slice. Remember, the more cheese, the merrier—so go wild!
-
Roll It Up
- Carefully roll each slice of bread starting from one end. Make sure to roll tightly to keep the cheese from spilling out during baking. If you have toothpicks on hand, go ahead and secure each roll with one.
-
Arrange on a Baking Sheet
- Place the roll-ups seam side down on a lightly greased baking sheet. Make sure they aren’t touching too much; we want them to crisp up nicely.
-
Bake
- Slide those cheesy rolls into the oven and bake for about 15-20 minutes or until they turn a lovely golden brown. Halfway through, you might want to flip them for a more even crisp.
-
Serve with Dipping Sauce
- Once they are crispy and delicious, serve them hot alongside your favorite dipping sauce. If you’re indulging in tomato soup, make sure it’s warm and comforting!
Serving Suggestions
When it comes to serving these crispy cheesy roll-ups, let your creativity shine! Arrange the roll-ups on a large platter, letting them cascade like a cheesy waterfall. Drizzle a little olive oil or sprinkle some fresh herbs on top for that burst of color.
You can present them with a cute little bowl of tomato soup or marinara for dipping, making it both functional and visually appealing. Want to jazz it up? Add some fresh basil leaves around the plate for a pop of green! And don’t forget—these roll-ups are delicious served with a side of crunchy veggies like carrot sticks or a fresh salad to balance that cheesiness.
Recipe Variations
Now that you’ve mastered the basics, let’s explore some fun twists you can make with these roll-ups!
- Spicy Kick: Add jalapeños or crushed red pepper flakes to the cheese before rolling for an extra spicy surprise!
- Herb Infusion: Mix fresh herbs like basil, cilantro, or thyme into your cheese filling for added flavor and freshness.
- Sweet and Savory: Swap traditional cheese for cream cheese with a touch of honey or jam, and serve with a fruity dipping sauce for a sweet treat.
- Veggie Delight: Sprinkle in some sautéed spinach, mushrooms, or bell peppers into the cheese before rolling for a delicious veggie-packed version.
- Savory Breakfast Roll-Up: Incorporate scrambled eggs and crispy bacon pieces for an indulgent breakfast twist!
Chef’s Notes
Here’s a little secret from my kitchen. I tend to make a bit more than I need because these roll-ups disappear faster than you can say "crispy." Friends and family absolutely love them, and every gathering turns into a mini feast with these crispy bites around. Plus, they’re super adaptable! Once, I made a mistake and added too much cheese. Instead of crying over spilled milk, I embraced the cheesy overflow and called it my "extra cheesy surprise." It turned out to be a crowd favorite!
FAQs and Troubleshooting
-
Why did my roll-ups not get crispy?
- Make sure you’re using enough butter and spacing them out on the baking sheet. If they’re too close together, they’ll steam instead of crisp!
-
Can I make these ahead of time?
- Absolutely! Assemble them ahead of time and keep them covered in the fridge until you’re ready to bake. Just add a few extra minutes to the baking time if they’re cold.
-
What if I don’t have an oven?
- No problem! You can cook them in a skillet over medium heat. Just keep an eye on them and flip them until they’re golden brown and crispy.
Nutritional Info
While these roll-ups are definitely a treat, if you’re counting calories, here’s a rough breakdown of nutritional information for one roll-up, making them a lovely guilty pleasure:
- Calories: Approximately 120
- Fat: 7g
- Carbohydrates: 10g
- Protein: 4g
The nutritional stats can vary based on the type of bread and cheese you choose, but they’re a hit when you’re looking for comfort and indulgence!
Final Thoughts
In the world of food, it’s all about what warms your heart and tickles your taste buds. My Crispy Cheesy Roll Ups may be simple, but they hold a wealth of memories and giggles—something every meal should have! Whether you savor them during a casual night with friends, celebrate a special occasion, or cozy up with a bowl of soup on a rainy day, each crunchy bite is full of love and nostalgia.
So, grab your ingredients, gather your friends or family, and let’s create something delightful together. The kitchen is more than just a place to cook; it’s where love is stirred, laughter is shared, and delicious memories are formed. Happy cooking, and may your roll-ups be forever crispy!
Print
Crispy Cheesy Roll Ups
- Total Time: 30 minutes
- Yield: 4 servings
- Diet: Vegetarian
Description
Delicious, crispy roll-ups filled with gooey cheese, perfect for a comfort food experience loved by all ages.
Ingredients
- Sliced Bread
- Cheese (cheddar, mozzarella, or your choice)
- Butter (for spreading)
- Tomato soup or marinara sauce (for dipping)
Instructions
- Preheat your oven to 400°F (200°C).
- Prepare your slices of bread and flatten them slightly if desired.
- Spread a generous layer of butter on one side of each slice.
- Add a generous handful of shredded cheese on the unbuttered side.
- Roll each slice tightly and secure with toothpicks if needed.
- Arrange on a greased baking sheet.
- Bake for about 15-20 minutes until golden brown, flipping halfway.
- Serve hot with your choice of dipping sauce.
Notes
You can make these roll-ups ahead of time and keep them in the fridge before baking. Perfect for gatherings!
- Prep Time: 10 minutes
- Cook Time: 20 minutes
- Category: Snack
- Method: Baking
- Cuisine: American
Nutrition
- Serving Size: 1 roll-up
- Calories: 120
- Sugar: 1g
- Sodium: 250mg
- Fat: 7g
- Saturated Fat: 4g
- Unsaturated Fat: 3g
- Trans Fat: 0g
- Carbohydrates: 10g
- Fiber: 1g
- Protein: 4g
- Cholesterol: 20mg
Keywords: crispy, cheesy, roll up, snack, comfort food, easy recipe
Min Tortellini Party Bites: Crispy & Flavorful Snacks
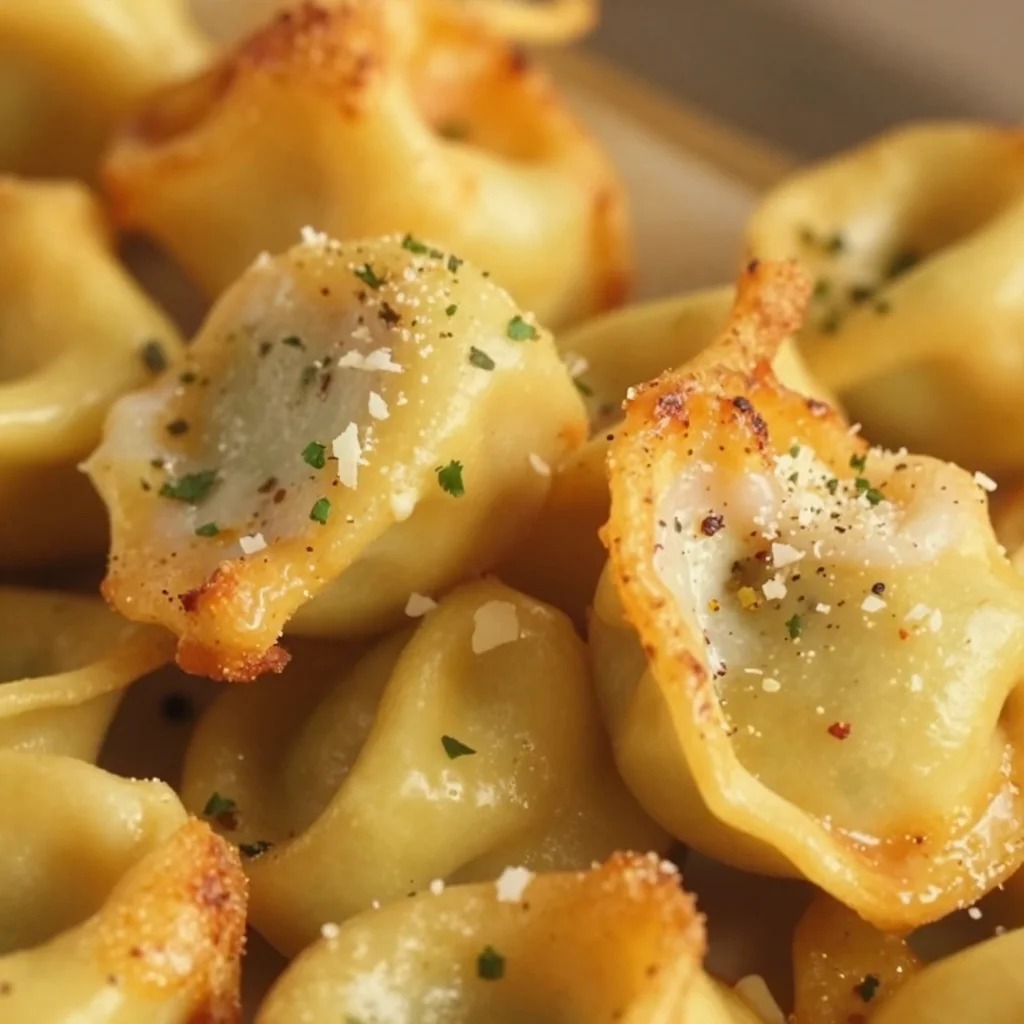
Delicious Tortellini Party Snacks Ready in 30 Minutes
Hey there, my fellow food lovers! I’m so glad you’re here with me today at Feastical, where we’re about to dive into a mouthwatering recipe that’s perfect for those impromptu gatherings, cozy movie nights, or just when you’re craving something delightful and fuss-free. Today, we’re whipping up some Delicious Tortellini Party Snacks that are ready to hit the table in just 30 minutes. Trust me, this is the kind of recipe that will make your taste buds dance and your friends rave for more!
Introduction
Picture this: It’s a Friday evening, and the weekend is finally here. You’ve invited some friends over for a casual hangout, but you’re not exactly in the mood to go all out in the kitchen. Does that sound familiar? Don’t worry — we’ve all been there!
That’s where these tortellini snacks come in. Not only are they incredibly easy to make, but they’re also versatile and packed with flavors that will make everyone feel at home. I can hear you ask: “But Beau, aren’t snacks supposed to be quick and easy?” Exactly! These tortellini treats are the epitome of fast, fun cooking, combining store-bought ingredients with a sprinkle of creativity. And let’s be honest, who doesn’t love a warm snack dipped in marinara sauce? Yes, please!
Whether you’ve chosen fresh or frozen tortellini, we’re going to jazz them up in a way that makes them the star of any gathering. So roll up your sleeves, embrace your inner chef, and let’s get down to business!
Personal Story
I’ll never forget the time I threw a last-minute get-together for my friends after a long week—one of those ‘we-have-to-celebrate-it’s-Friday’ moments. I had nothing planned and only a few items left in my pantry. There were half a pack of tortellini hanging around in the freezer, some marinara sauce, and honestly, I was ready to order takeout until inspiration hit! With a little creativity and a lot of heart, I managed to whip up a delicious tortellini snack that had my friends asking for the recipe before the first bite was even finished.
As we laughed, shared stories, and dipped those cheesy bites into the tangy marinara, I realized something magical: sometimes the simplest meals bring the most joy. That night became the highlight of our week, and the tortellini snacks became a staple for any friendly gathering. Fast forward to today, and I’m excited to share my tried-and-true method with you all.
Ingredients
Let’s kick things off by gathering our ingredients! Here’s what you’ll need:
-
1 package Tortellini
Choose between frozen for convenience or fresh for that delicious homemade touch. If you’re feeling adventurous, try other stuffed pasta types like ravioli. -
1 cup Marinara Sauce
Perfect for dipping! Feel free to use store-bought for speed or try making your own for a homemade touch. -
2 tablespoons Butter
Adds richness and depth; substitute with olive oil if you’re aiming for a healthier option. -
1 teaspoon Chili Flakes (Optional)
For a kick! If you’re serving those who prefer milder flavors, you can skip or reduce this. -
1/2 cup Parmesan Cheese
Grated parmesan melds beautifully with the tortellini. If you’re keeping things dairy-free, nutritional yeast works a treat as a savory alternative. -
2 tablespoons Minced Italian Parsley (Optional)
For garnish and a fresh touch. If fresh isn’t available, dried parsley can be used, just reduce the amount.
With these simple ingredients in hand, we’re ready to create something special!
Step-by-Step Instructions
Okay, let’s get cooking! Follow these steps, and you’ll have your tortellini party snacks ready faster than you can say “mouthwatering.”
-
Boil Water:
Start by filling a large pot with water and bring it to a boil. I always throw a pinch of salt into the water. It’s like giving the pasta a little flavor bath from the get-go. -
Cook the Tortellini:
Once your water is boiling, toss in your tortellini. If you’re using frozen tortellini, they usually take about 5-7 minutes; fresh is often quicker, about 3-5 minutes. Don’t forget to stir occasionally to keep them from sticking. When they float to the top, they’re typically done! -
Drain and Set Aside:
Using a colander, drain the tortellini, but save a cup of that pasta water. It’s liquid gold that will help bring everything together later! -
Sauté the Butter:
In the same pot or a separate pan, melt your butter (or heat the olive oil) over medium heat. As it melts, you can add chili flakes if you like that fiery punch. This step infuses the oil/butter with a hint of spice, making every tortellini bite pop. -
Combine the Tortellini and Butter:
Add the drained tortellini into the pan and give it a gentle toss to coat them with the butter. If you feel they need a little moisture, grab some of that reserved pasta water and splash a bit in. This will keep the tortellini silky and flavorful. -
Cheese it Up:
Sprinkle the grated parmesan cheese over the tortellini. Toss again until the cheese is melted and clinging to the pasta. If you’re using nutritional yeast, it’s equally delightful, providing that cheesy goodness without dairy. -
Garnish with Parsley:
Toss in the minced Italian parsley for a fresh flavor and aromatic touch. This isn’t just for looks – the freshness cuts through the richness of the cheese and pasta beautifully! -
Serve with Marinara:
Plating time! Grab a nice serving bowl or individual dishes. Pour your marinara sauce into a small bowl on the side for dipping, or warm it up and drizzle it on top for a saucy finish.
Serving Suggestions
When it comes to serving, I love to make it fun and interactive. Set the tortellini in a large bowl, surrounded by small cups of marinara. Guests can grab their own portion and dip away! Consider sprinkling some extra parmesan and parsley over the top before serving for a little visual appeal—who doesn’t love a dish that looks as good as it tastes?
If you want to elevate the experience, serve this alongside a fresh green salad or some crispy garlic bread. It becomes a feast that feels fancy without breaking a sweat in the kitchen. Plus, don’t forget to have some drinks on hand; a nice glass of red wine could complement the tortellini beautifully!
Recipe Variations
Ready for some creativity? Here are a few ideas to switch things up:
-
Veggie Loaded:
Sauté some chopped bell peppers, spinach, or mushrooms before adding the tortellini for a veggie-packed twist. -
Pesto Delight:
Swap the marinara for a vibrant basil pesto. The nutty flavor of the pesto combined with the cheese is absolutely divine. -
Creamy Alfredo:
For a luxurious feel, toss the tortellini with a homemade or store-bought Alfredo sauce instead of the marinara. -
Add Protein:
To make it a heartier dish, add grilled chicken, Italian sausage, or shrimp for a protein boost that makes every bite more satisfying. -
Herb Infusion:
Feel free to experiment with different herbs — try using fresh basil or dill to mix up the flavor profile completely.
Chef’s Notes
I find that recipes evolve over time as we tweak them to our liking. This tortellini snack has been a canvas for many flavors and spices in my kitchen. There was a time I made it with a sprinkle of truffle oil, and wow, did it take my friends by surprise! I love how snacking can lead to endless creativity; it’s one of the joys of being a chef.
And remember, cooking should be fun, and an occasional mishap is part of the adventure! One time, I almost set my kitchen on fire trying to sauté garlic too quickly—so keep an eye on your stove, friends!
FAQs and Troubleshooting
Let’s answer some common questions you might have:
Q: Can I make this recipe ahead of time?
A: You can prep the tortellini beforehand and keep them in the fridge (or freeze if using frozen), but cooking right before serving ensures they’re as fresh as possible.
Q: What if I don’t like marinara?
A: No problem! Just switch it out for any of the variations highlighted above. A good quality olive oil drizzled with balsamic vinegar also makes a simple dipping sauce!
Q: How do I store leftovers?
A: Store in an airtight container in the fridge for up to 3 days. You can reheat in a pan on the stove or in the microwave.
Q: Can I use different pasta shapes?
A: Absolutely! Any small pasta shape will do, but keep in mind cooking times may vary.
Nutritional Info
For those watching their nutritional intake, here’s a rough breakdown based on standard ingredients without modifications:
- Calories: Approximately 350-400 calories per serving
- Protein: 15-20g (depending on added cheese/proteins)
- Carbohydrates: 60-70g
- Fat: 12-15g
Feel free to adjust based on cheese, oil, or additional proteins used to fit your dietary needs.
Final Thoughts
So there you have it! A heavenly indulgence that whips up in just 30 minutes and keeps your spirit soaring. The next time you find yourself in need of a quick, comforting snack that yields maximum flavor with minimal effort, remember this tortellini recipe.
Let it bring out your creativity, and don’t be shy to share your variations or stories in the comments below! Cooking together creates connections, and I’m always excited to hear how you put your twist on my recipes. Until next time, keep the kitchen warm, and always remember: food is love. Let’s keep spreading that love one delicious bite at a time!
Print
Delicious Tortellini Party Snacks
- Total Time: 30 minutes
- Yield: 4 servings 1x
- Diet: Vegetarian
Description
Quick and easy Tortellini Party Snacks that are perfect for any casual gathering, ready in just 30 minutes.
Ingredients
- 1 package Tortellini (fresh or frozen)
- 1 cup Marinara Sauce
- 2 tablespoons Butter (or olive oil)
- 1 teaspoon Chili Flakes (Optional)
- 1/2 cup Parmesan Cheese (grated)
- 2 tablespoons Minced Italian Parsley (Optional)
Instructions
- Boil water in a large pot and add a pinch of salt.
- Cook the tortellini according to package instructions until they float to the top.
- Drain the tortellini using a colander, reserving a cup of pasta water.
- Sauté butter (or olive oil) in the same pot over medium heat, adding chili flakes if desired.
- Combine the drained tortellini with the butter, adding reserved pasta water if needed.
- Cheese the tortellini by sprinkling parmesan over and tossing until melted.
- Garnish with minced parsley for freshness.
- Serve with marinara sauce on the side for dipping.
Notes
For a heartier dish, consider adding grilled chicken or Italian sausage. Experiment with different pasta shapes and sauces.
- Prep Time: 10 minutes
- Cook Time: 20 minutes
- Category: Snacks
- Method: Boiling and Sautéing
- Cuisine: Italian
Nutrition
- Serving Size: 1 serving
- Calories: 350
- Sugar: 6g
- Sodium: 450mg
- Fat: 14g
- Saturated Fat: 7g
- Unsaturated Fat: 5g
- Trans Fat: 0g
- Carbohydrates: 45g
- Fiber: 3g
- Protein: 18g
- Cholesterol: 30mg
Keywords: Tortellini, Snacks, Quick Recipe, Italian Cuisine, Party Food, Easy Cooking

Minute Ham and Cheese Sticks: Crispy, Kid-Friendly Bite
Ham and Cheese Sticks: An Easy, Feel-Good Snack
Hey there, food lovers! Today, I’m thrilled to share one of my absolute favorite comfort food recipes with you—Ham and Cheese Sticks. These delightful bites are not only delicious but also incredibly simple to whip up. Picture this: crispy, flaky dough wrapping around savory ham and gooey cheddar cheese, bringing joy to every single bite. They’re perfect for a quick snack, a party appetizer, or even a cozy movie night treat.
You know, it’s funny how certain foods can take you back in time, isn’t it? These Ham and Cheese Sticks remind me of weekends spent in my grandma’s kitchen, where fresh-from-the-oven snacks would fill the air with mouthwatering aromas. Grandma would often make a similar version, but hers were a bit more elaborate. I remember sitting around the kitchen table, eagerly cutting into these gooey delights, almost burning my tongue because I couldn’t wait a second longer!
As I grew older, my love for food transformed into a passion for cooking, and I realized I didn’t need fancy techniques to create something extraordinary. My recipe for Ham and Cheese Sticks reflects that ethos—it’s about embracing simplicity while savoring every flavor.
So let’s put on our aprons and dive into this wonderful world of flaky, cheesy goodness!
Personal Story
Growing up, food was a central theme in my family—an abundant source of joy, comfort, and creativity. Every Friday night was pizza night at my house, but occasionally, my grandma would surprise us with her legendary Ham and Cheese Sticks. We’d practically race to the kitchen when we heard the oven timer ding, the allure of melted cheese and golden pastry filling the air was simply irresistible.
I can still hear her laughter ringing through the house as we devoured her creations. These snacks became a family tradition, a simple pleasure that strengthened our bonds. She always believed that the best recipes are rooted in love and the stories behind them. Her kitchen was infused with warmth and laughter, and now, I try to replicate that spirit with my own twist.
With each batch of Ham and Cheese Sticks, I feel connected to those beautiful memories. It’s not just about the food; it’s about the people we share it with. So grab your apron, a friend, or your family, and let’s create some more magic in the kitchen!
Ingredients
Now, let’s gather all the ingredients you’ll need for these Ham and Cheese Sticks:
-
1 can of flaky crescent dough
- This is the base of our sticks. You can find it in almost any grocery store. If you want to mix things up, you can use puff pastry instead, which will give you an even flakier texture.
-
8 slices of deli ham
- I love using black forest ham for its rich flavor, but feel free to switch it up! Honey ham or even turkey slices work wonderfully if you’re looking for a lighter option.
-
8 slices of cheddar cheese
- You can’t go wrong with classic cheddar here! For an extra flavor kick, try using pepper jack or gouda. Just remember, not all cheeses melt the same, so choose wisely!
-
2 tablespoons of butter
- Melted butter brushed on top gives your sticks that beautiful golden crust. You could also mix in a bit of olive oil if you want to lighten things up.
-
1 teaspoon of garlic powder
- Adds a delightful kick of flavor. If you’re feeling adventurous, you can use minced fresh garlic instead for a more robust taste.
-
Salt and pepper to taste
- Always adjust seasoning to your preference; a little sprinkle can elevate your dish to another level!
Step-by-Step Instructions
Let’s get cooking! Here’s how to turn these humble ingredients into your new favorite snack:
Step 1: Preheat Your Oven
Preheat your oven to 375°F (190°C). This ensures your Ham and Cheese Sticks will bake perfectly.
Step 2: Prepare Your Baking Sheet
Line a baking sheet with parchment paper. This will prevent sticking and make for easier cleanup—plus, who doesn’t love a clean kitchen?
Step 3: Roll Out the Crescent Dough
Open your can of flaky crescent dough and unroll it on a clean surface. Don’t be shy—this is the part where you can let your creativity shine! Pinch the seams together if they separate; we want each stick to hold its filling.
Step 4: Cut & Assemble
Using a pizza cutter or sharp knife, slice each dough triangle into two smaller triangles. Now, place a slice of ham and a slice of cheddar cheese on the wider part of the triangle. Don’t hold back—stack as much as your heart desires!
Step 5: Roll Them Up
Starting from the wider end, roll the dough triangle toward the point. As you roll, the ham and cheese will snuggle inside the dough. Place the rolled sticks seam-side down on your baking sheet, and repeat until you’ve used up all your dough.
Step 6: Butter Up!
Now it’s time to brush melted butter over each stick. This is where the magic happens; the butter will help turn your sticks a beautiful golden brown. Sprinkle garlic powder, salt, and pepper on top for extra flavor.
Step 7: Bake & Enjoy!
Slide your baking sheet into the preheated oven and bake for about 12-15 minutes, or until they’re golden brown and your kitchen smells amazing. The result is a warm kitchen filled with mouthwatering scents that will have everyone gathering around as you pull them out.
Step 8: Cool & Serve
Let your Ham and Cheese Sticks cool for a few minutes on a wire rack before digging in. This helps the cheese set a bit so you don’t burn your mouth! Trust me, patience is a virtue when cheesy goodness is involved.
Serving Suggestions
These Ham and Cheese Sticks are incredibly versatile when it comes to serving. Here are a few fun ideas:
-
Serve with Dipping Sauces: A side of spicy mustard, ranch dressing, or a tangy barbecue sauce can elevate your snacking experience. If you’re in the mood for something special, try making a simple garlic aioli.
-
Garnish with Fresh Herbs: A sprinkle of chopped parsley or chives on top adds a lovely burst of color and freshness.
-
Create a Snack Platter: Pair your sticks with an assortment of veggies and dips, or alongside a charcuterie board featuring various meats and cheeses.
-
Pack for Lunch: These tasty treats are perfect for lunchboxes! They’re easy to grab on the go and taste fantastic even when they’re not hot from the oven.
Recipe Variations
Feeling adventurous? Here are some creative twists to try out:
-
Spicy Ham and Cheese Sticks: Add jalapeño slices or red pepper flakes to give your sticks a fiery kick.
-
Herbed Cream Cheese Filling: Swap out the deli ham for a spread of herbed cream cheese and a slice of smoked salmon for a delightful brunch option.
-
Vegetarian Delight: Use roasted vegetables and mozzarella cheese for a veggie-packed version that even meat-lovers will enjoy!
-
Sweet and Savory: Spread some fig jam or peach preserves inside before adding the ham and cheese for a deliciously unique take.
-
Breakfast Version: Use scrambled eggs, breakfast sausage, and cheese to create a breakfast treat that’s perfect for lazy Sunday mornings.
Chef’s Notes
Ah, my dear friends, every recipe has a story, and this one is no exception. These Ham and Cheese Sticks have evolved over time. I remember experimenting with all sorts of fillings and doughs when I first made them and ultimately found that the classic version is still my favorite. The combination of rich cheese, savory ham, and flaky dough creates that comforting embrace we all crave.
There was a time when I was trying to impress my then-girlfriend (now wife) with my culinary skills, and I totally flubbed the first batch of these sticks. The dough split, the cheese oozed out everywhere—it was a disaster! But we had such a laugh about it, and we spent the evening in the kitchen together, creating something entirely new. And let’s be honest, sometimes the best memories come from those culinary flops.
FAQs and Troubleshooting
Let’s tackle some common questions and troubleshoot any potential hiccups you might encounter:
1. Why are my sticks not crispy?
If your Ham and Cheese Sticks come out soggy, it might be due to too much filling or not enough baking time. Make sure to roll the dough tightly and give them a good 12-15 minutes in the oven.
2. Can I prepare these in advance?
Absolutely! You can assemble them ahead of time and store them in the fridge. Just pop them in the oven when you’re ready for a delicious snack.
3. What should I do if my cheese isn’t melting?
Be sure to use a good melting cheese like cheddar or mozzarella. If you’re using alternatives, check that they’re suitable for melting to avoid disappointment!
4. Can I freeze these?
Yes, you can freeze the assembled sticks before baking! Just wrap them tightly in plastic wrap and store them in an airtight container. When you’re ready to enjoy them, bake from frozen—just add a few extra minutes to the baking time.
Nutritional Info
For those keeping an eye on nutritional content, here’s a general breakdown for one Ham and Cheese Stick (based on the recipe as is):
- Calories: Approx 130
- Protein: 6g
- Fat: 9g
- Carbohydrates: 8g
- Fiber: 0g
- Sodium: 300mg
Keep in mind that these values can vary based on the specific brands and ingredients you choose.
Final Thoughts
So, there you have it, my fellow foodies— a delightful dive into the world of Ham and Cheese Sticks! These easy, flavor-packed snacks embody the spirit of comfort food and are sure to bring smiles to the faces of everyone who tries them. Whether you whip them up for a casual get-together, a party, or just as a special treat for yourself, they are bound to be a hit.
Remember, cooking is about exploration, joy, and love. So don’t be afraid to add your own twist to this recipe, just like I did with that unforgettable batch in my grandma’s kitchen. Every morsel tells a story, and I can’t wait for you to share yours!
Happy cooking, my friends—now go forth and create some magic in your own kitchen!
Print
Ham and Cheese Sticks
- Total Time: 30 minutes
- Yield: 8 servings 1x
- Diet: None
Description
Crispy, flaky dough wrapped around savory ham and gooey cheddar cheese—perfect for a snack or appetizer.
Ingredients
- 1 can of flaky crescent dough
- 8 slices of deli ham
- 8 slices of cheddar cheese
- 2 tablespoons of butter
- 1 teaspoon of garlic powder
- Salt and pepper to taste
Instructions
- Preheat your oven to 375°F (190°C).
- Line a baking sheet with parchment paper.
- Open your can of flaky crescent dough and unroll it on a clean surface.
- Using a pizza cutter, slice each dough triangle into two smaller triangles.
- Place a slice of ham and a slice of cheddar cheese on the wider part of the triangle.
- Starting from the wider end, roll the dough triangle toward the point.
- Brush melted butter over each stick and sprinkle with garlic powder, salt, and pepper.
- Slide your baking sheet into the preheated oven and bake for 12-15 minutes.
- Let your Ham and Cheese Sticks cool for a few minutes on a wire rack.
Notes
For a twist, try using different types of cheese or adding spices to the filling.
- Prep Time: 15 minutes
- Cook Time: 15 minutes
- Category: Snack
- Method: Baking
- Cuisine: American
Nutrition
- Serving Size: 1 stick
- Calories: 130
- Sugar: 1g
- Sodium: 300mg
- Fat: 9g
- Saturated Fat: 4g
- Unsaturated Fat: 5g
- Trans Fat: 0g
- Carbohydrates: 8g
- Fiber: 0g
- Protein: 6g
- Cholesterol: 15mg
Keywords: ham, cheese, snack, appetizer, comfort food