
Mocha Crunch Coffee Milkshake Recipes
Mocha Crunch Coffee Milkshake: A Delectable Delight to Sip and Savor
Introduction: The Perfect Blend of Coffee and Indulgence (300–400 words)
Hey there, fellow food lovers! If you’re anything like me, you know that some of the best moments happen over a delicious treat. Picture this: a warm summer evening, the sun setting just right, and you’re at the perfect spot with your favorite people. What could make it better? Perhaps a cool, creamy Mocha Crunch Coffee Milkshake that blends rich coffee flavors with the indulgence of ice cream and a satisfying crunch. Mmm, I can almost taste it!
I’ve got to confess—my obsession with coffee milkshakes goes way back to my childhood. Growing up, my family would often hit up our local diner after school, and I’d always be torn between a classic sundae and a milkshake. One fateful day, I bravely ordered the "Mocha Crunch" on a whim. Oh my, the moment that creamy goodness hit my lips, I was hooked! It was like a comforting hug in a glass—coffee to fuel my spirit and ice cream to soothe my soul.
From that day on, I experimented in my own kitchen, and every twist brought back sweet memories of laughter and late-night chats. I can’t wait to share my version of this awesome treat with you! With just a handful of ingredients, this recipe is perfect when you need a little pick-me-up or want to impress guests at your next backyard BBQ. So, grab your blender, cozy up, and let’s blend up a little magic together. Trust me, you’ll want to make this milkshake more than once!
Personal Story: The Big Milkshake Adventure (200–250 words)
Ah, I remember that summer vacation like it was yesterday! My best friends and I decided to take a road trip to hit every diner known for their milkshakes. We had a hits list: the best vanilla shake here, the creamiest chocolate shake there. But when we stumbled upon Jo’s Diner, everything changed.
They had a special menu item called the “Mocha Crush,” and being true coffee aficionados, we had to order it. The whipped cream piled high, the drizzles of chocolate syrup, the crunch from the chocolate cookies—it was a masterpiece! We ended up sharing laughter, crazy stories, and countless shakes that night, and I realized how special it is to bond over good food and drinks. That idea stuck with me and blossomed into many more adventures in the kitchen, where I’ve recreated that beautiful mocha moment with my version of the Mocha Crunch Coffee Milkshake.
Every time I whip up this treat, it’s like taking a trip down memory lane, reminding me that the best recipes are those we share and enjoy together. So, now it’s your turn to create your own milkshake memories and perhaps pass them down to others!
Ingredients: What You’ll Need (250–300 words)
Here’s the fun part—the ingredients! These are easy to find and will transform your kitchen into a milkshake wonderland.
-
1 cup chilled brewed coffee: This gives the milkshake its coffee kick! Make sure to brew it strong for maximum flavor. Feel free to use decaf if you prefer less caffeine.
-
2 cups chocolate or vanilla ice cream: The star of the show! Both flavors work well, but chocolate adds that decadent richness while vanilla gives it a classic touch. For a dairy-free option, pick coconut or almond milk ice cream.
-
½ cup milk: Just a little bit will help combine the ingredients for that creamy texture. You can use whole milk, almond milk, or oat milk depending on your preference.
-
2 tbsp chocolate syrup: The perfect sweetener with a touch of rich chocolate flavor. You can use homemade syrup if you’re feeling ambitious or any store-bought variety.
-
¼ cup crushed chocolate cookies or chocolate chips: This adds that delightful crunch and a bit of extra chocolatey goodness! Oreos, chocolate wafers, or even granola can make an excellent substitute.
-
1 tbsp sugar (optional): If you’re craving an extra sweet milkshake, feel free to add sugar to taste. If you prefer less sweetness, skip it!
-
Whipped cream (optional topping): You can’t have a milkshake without a crown, right? Whipped cream adds a fluffy finish. Use store-bought or homemade for a treat that’s truly special.
Step-by-Step Instructions: Let’s Blend Up Some Happiness (400–500 words)
Are you ready to blend? Let’s get to it! Follow these simple steps:
-
Brew Your Coffee: Start by brewing your coffee, making sure to let it cool. Nobody wants a warm milkshake! Just chill it in the fridge for about 30 minutes, or you can speed that up by putting it in the freezer for about 10–15 minutes. You want it chilled, not frozen—unless you fancy a coffee slush!
-
Gather the Goods: Once your coffee is nice and cool, gather your ice cream, milk, chocolate syrup, crushed cookies, and any other flavorings you want to experiment with. It’s a good idea to let your ice cream sit out for a few minutes to soften. That makes blending a breeze!
-
Blend, Baby!: In a blender, combine the chilled coffee, ice cream, milk, and chocolate syrup. Start blending on low speed; slowly increase to high. Keep an eye on it—this isn’t the time to create a milkshake volcano. Blend until everything is smooth, creamy, and well combined.
-
Add the Crunch: Here’s where it gets fun! Once your base is blended, add in the crushed chocolate cookies (or chocolate chips) and pulse just a few times until they’re mixed in. This gives you that satisfying crunch, and you’ll still have some larger pieces of cookie for texture.
-
Taste Test: This is my favorite part! Give your milkshake a quick taste at this point. You can add more chocolate syrup or sugar if you’re feeling adventurous. Just remember, if it’s sweet enough for you, it’s good to go!
-
Serve It Up: Now for the fun part—pouring it into chilled glasses! Take your time; let it cascade into the glass like a fountain. Top generously with whipped cream, a drizzle of chocolate syrup, and a sprinkle of leftover crushed cookies for that Instagram-worthy touch.
-
Enjoy: Grab your favorite straw, sip, and enjoy every creamy, crunchy moment of this delightful treat. Don’t forget to let everyone know you’re the chef behind this masterpiece!
Serving Suggestions: Aesthetic Presentation (200–300 words)
When it comes to serving, let’s make it spectacular! I love pouring the milkshake into tall, frosty glasses for that classic diner feel. You can even chill the glasses ahead of time for an extra frosty treat!
Garnish it with a generous swirl of whipped cream on top and drizzle more chocolate syrup for that enticing look. You can then sprinkle some of the crushed cookies on top, giving it a fantastic contrast against the whipped cream.
For an added touch of flair, why not place a fun straw in there? A cute paper straw adds to the playful vibe, and if you want to take it up another notch, attach a little mint sprig or a chocolate-covered espresso bean on top for that sophisticated touch!
Serve with a plate of cookies or rich brownies on the side for an indulgent treat. Don’t be surprised when your friends and family keep coming back for more—they might just declare you the official milkshake master!
Recipe Variations: Mix It Up! (200–300 words)
Who says a milkshake can’t have a twist? Here are a few fabulous variations for your Mocha Crunch Coffee Milkshake:
-
Mint Mocha Crunch: Add a few drops of peppermint extract or use mint chocolate chip ice cream for a refreshing minty flavor. It’s like a celebration of flavors in your mouth!
-
Nutty Delight: Swap in hazelnut coffee instead of regular brewed coffee, and add crushed hazelnuts to the shake! You’ve got a nutty little friend in your glass.
-
Salted Caramel Mocha: Drizzle caramel syrup in with the chocolate syrup for a sweet-savory experience. Top it off with a sprinkle of sea salt for a gourmet finish!
-
Banana Mocha Crunch: Toss in a ripe banana before blending for a fruity spin. The banana adds creaminess and a natural sweetness that pairs perfectly with coffee.
-
Vegan Version: Use vegan ice cream, almond milk, and chocolate syrup for a fantastic dairy-free treat that everyone can enjoy.
Experiment, mix and match, or even come up with your own flavor combinations—the possibilities are endless!
Chef’s Notes: A Journey Through the Joy of Milkshakes (150–200 words)
As a self-proclaimed milkshake connoisseur, I’ve had my fair share of triumphs and kitchen mishaps. Once, I accidentally dumped a whole cup of sugar into my blender—talk about sweet chaos! It took me a lot of milk and ice cream to fix that one. But hey, that’s how you learn!
Throughout the years, I’ve seen my Mocha Crunch evolve from a quick idea into a beloved recipe passed around at summer BBQs and movie nights. It’s been amazing to share my love for this drink with my guests, turning simple ingredients into something that sparks memories and brings smiles. And remember, the best recipes are those cooked with joy and shared with love. So, don’t get caught in the details; just embrace the process and the delicious moments to come!
FAQs and Troubleshooting: Common Reader Questions (200–300 words)
Here are some questions you might be pondering as you whip up your mocha creation:
-
What if my milkshake is too thin?: If your milkshake is more of a drink than a shake, don’t worry! Just add more ice cream to thicken it up. A little blend, and you’re back in business!
-
Can I make it ahead of time?: Absolutely! Blend it and store it in the freezer. Just give it a few swirls to soften before serving.
-
My shake tastes too bitter; how can I fix it?: This can happen if the coffee is too strong. Try adding more milk or ice cream for balance. If you’re in a pinch, a little extra sugar can work wonders too.
-
Are there any fun toppings I can use?: You bet! Crushed nuts, chocolate shavings, or even some toasted coconut will make excellent toppings. Be creative—this is your milkshake!
Nutritional Info: A Tasty Treat to Savor (200–300 words)
While we all love indulging our taste buds, it’s also good to have a quick look at the nutrition of our beloved Mocha Crunch Milkshake! Here’s a rough estimate for one serving based on the classic recipe:
- Calories: Approximately 400-500 calories, depending on the ice cream used.
- Protein: 8-10 grams, thanks to the milk and ice cream.
- Carbohydrates: 60-70 grams primarily from the ice cream and syrups.
- Fat: About 20-25 grams, located in the ice cream and any added chocolate.
Of course, these values can change based on your ingredient choices—so feel free to make swaps for healthier options, like using low-fat chocolate ice cream or opting for a nut milk instead of regular milk.
Remember, moderation is key! Enjoying this incredible treat every once in a while is part of living life to the fullest.
Final Thoughts: Celebrate Every Sip and Bite (200–300 words)
Well, there you have it, my fabulous friends! Your very own Mocha Crunch Coffee Milkshake recipe, guaranteed to bring joy and a smile to your face. As you sip on this creamy, chocolatey goodness, remember the stories, the laughs, and the love that goes into creating memorable meals.
Whether you enjoy it solo on a quiet evening or share it with a bunch of friends, every milkshake moment is special. Cooking is about the journey we take and the moments we create—with flavors infused with our unique style and personalities!
So go ahead—grab your blender, conjure up the perfect milkshake, and let the good times roll! Be sure to reach out and share your milkshake adventures; I’d love to hear your stories and variations. Until next time, keep those forks ready and your taste buds adventurous. Cheers to delicious memories, one milkshake at a time!
Print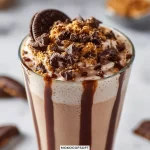
Mocha Crunch Coffee Milkshake
- Total Time: 15 minutes
- Yield: 2 servings 1x
- Diet: Vegetarian
Description
A delightful milkshake combining rich coffee flavors with ice cream and a satisfying crunch, perfect for a refreshing treat.
Ingredients
- 1 cup chilled brewed coffee
- 2 cups chocolate or vanilla ice cream
- ½ cup milk
- 2 tbsp chocolate syrup
- ¼ cup crushed chocolate cookies or chocolate chips
- 1 tbsp sugar (optional)
- Whipped cream (optional topping)
Instructions
- Brew your coffee and chill it for about 30 minutes.
- Gather ice cream, milk, chocolate syrup, and crushed cookies.
- Blend the chilled coffee, ice cream, milk, and chocolate syrup until smooth.
- Add the crushed cookies and pulse a few times to incorporate.
- Taste and adjust sweetness with more syrup or sugar if desired.
- Serve in chilled glasses topped with whipped cream and additional toppings.
- Enjoy your creamy, crunchy milkshake!
Notes
For vegan, substitute with plant-based ice cream and milk.
- Prep Time: 15 minutes
- Cook Time: 0 minutes
- Category: Dessert
- Method: Blending
- Cuisine: American
Nutrition
- Serving Size: 1 serving
- Calories: 450
- Sugar: 50g
- Sodium: 150mg
- Fat: 20g
- Saturated Fat: 10g
- Unsaturated Fat: 8g
- Trans Fat: 0g
- Carbohydrates: 60g
- Fiber: 2g
- Protein: 10g
- Cholesterol: 50mg
Keywords: mocha, coffee milkshake, dessert, ice cream, chocolate

Homemade Iced Coffee
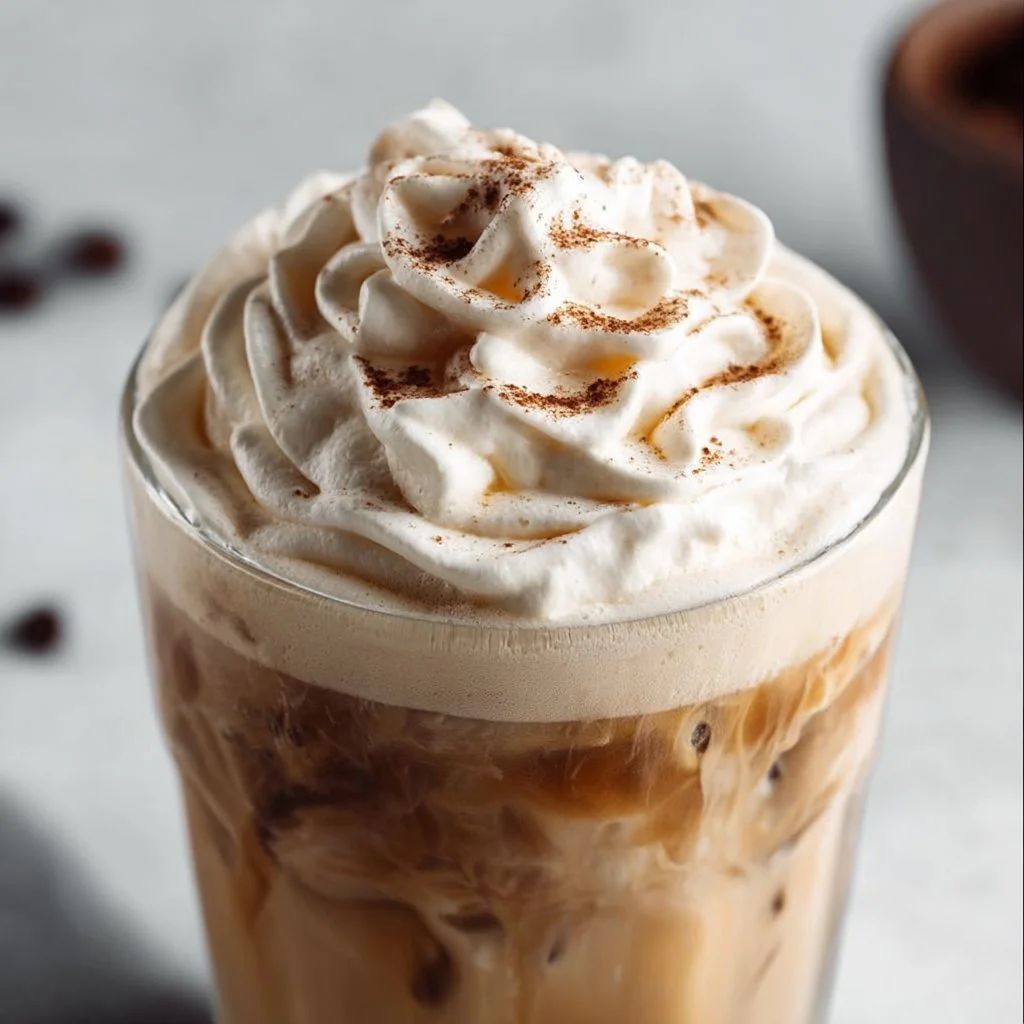
How to Make the Perfect Homemade Iced Coffee
Hey there, fellow coffee lovers! Welcome back to Feastical! Today, we’re diving into the world of iced coffee—a refreshing and invigorating treat that’s perfect for warm days or whenever you need a little pick-me-up. Trust me; there’s nothing like the first sip of a delicious iced coffee to kickstart your morning or perk up your afternoon!
Now, let’s be real for a second. As someone who has spent countless hours experimenting with coffee blends, brewing methods, and flavor combinations, I can tell you that the key to a great iced coffee lies in making it at home. Why, you ask? Because it’s not only cost-effective, but it’s also customizable to suit your taste buds perfectly. Plus, you can enjoy it from the comfort of your own kitchen, in your favorite mug or even a fancy glass.
Picture this: You wake up on a hot summer day, and as the sunlight spills into your kitchen, you decide to whip up an iced coffee that’s as satisfying as a day at the beach. It’s creamy, sweet, and bursting with flavor. And the best part? You control every ingredient! Whether you like it classic or with a twist, by the time we get to the end of this post, you’ll be a homemade iced coffee aficionado, ready to impress your friends and family at your next brunch gathering.
So, grab your favorite coffee beans, gather up those ice cubes, and let’s get brewing!
Personal Story
Let me take you back to a warm summer morning when I was just a young lad learning my way around the kitchen. It was a Saturday, which meant no school and plenty of time for culinary adventures. I decided it was time to unleash my inner barista. Armed with my mom’s old coffee maker and a little ingenuity, I crafted my very first iced coffee.
I vividly remember the excitement as I brewed a strong cup of coffee, the aromatic scent weaving through the air. After letting it cool, I added a generous helping of ice, a splash of milk, and a sprinkle of sugar. The moment I took my first sip, my eyes lit up—just like that, a tradition was born! I learned then and there that iced coffee wasn’t just a drink; it was an experience.
Fast forward to today, and iced coffee has become a staple in my kitchen. It’s my go-to drink when I need that perfect balance of flavor and refreshment. Armed with this nostalgic recipe and a few tricks up my sleeve, I’m excited to share how you can make your perfect iced coffee at home!
Ingredients
Let’s gather our ingredients! Here’s what you’ll need to whip up a delicious homemade iced coffee:
-
1 cup brewed coffee
Use your favorite coffee blend! A medium to dark roast tends to work best. If you want a smoother flavor, opt for cold brew coffee instead, which is less acidic and brewed with cold water over a longer period. -
Ice cubes
Use fresh, clean ice to chill your coffee. Need a tip? For a super cool treat, freeze some leftover coffee in ice cube trays—when these melt, they won’t dilute your drink! -
Milk or cream (to taste)
Whole milk adds richness, while almond or oat milk offers a dairy-free option. If you prefer a creamier texture, half-and-half is great! -
Sugar or sweetener (to taste)
Select your favorite sweetener. Don’t forget to experiment—you can try agave syrup for a more natural touch or vanilla syrup for extra flavor. -
Flavorings (such as vanilla or chocolate syrup, optional)
These add a personalized twist. You can also consider adding cinnamon or nutmeg for a warm hint!
Step-by-Step Instructions
Now that we’ve got our ingredients, let’s get to the fun part—brewing your iced coffee! Follow these steps for the perfect homemade concoction:
Step 1: Brew Your Coffee
Start with brewing your coffee using your preferred method—whether it’s a drip machine, a French press, or an espresso maker, just make sure it’s strong enough to hold its own against ice. Here’s a quick hack: if you know you’ll want iced coffee, brew a little extra so you can store it in the fridge for another day. A stronger coffee will ensure flavors remain intact once it’s chilled.
Step 2: Cool It Down
After brewing, allow your coffee to cool to room temperature to avoid melting your ice right away. This should only take about 10 minutes. It’s a great time to decide on your flavorings or check your ice supply.
Step 3: Build Your Base
Once your coffee is cooled, grab your favorite glass and fill it with plenty of ice. Pour in the cooled coffee until the glass is about two-thirds full—this will give you the perfect iced ratio.
Step 4: Add Milk
Here comes the creamy goodness! Pour in your milk or cream to taste. I always recommend starting with a splash and adjusting based on your preference.
Step 5: Sweeten Up
Next, add your chosen sweetener. If you’re using granulated sugar, remember to stir well to dissolve it completely. If you’re using syrup, just drizzle in as much as your heart desires.
Step 6: Make It Special
Here’s your moment to shine! Add any flavorings or extras you’d like. A drizzle of chocolate syrup can make it feel like a dessert, while vanilla syrup gives a delightful aromatic sweetness.
Step 7: Stir It Up
Give your iced coffee a gentle stir to combine all the flavors. This is also a great point to taste-test! A little tweak here and there can transform your drink.
Step 8: Enjoy!
Now, sit back, relax, and take that first sip. Feel the joy spread with each delightful taste! Invite friends over, or enjoy this moment of bliss alone—either way, you’ve just made something truly special.
Serving Suggestions
Let’s talk presentation, shall we? You don’t just want great flavor; you want an Instagram-worthy iced coffee, too! Here are some lovely ways to serve your iced coffee:
-
Glassware: Use a tall, clear glass to showcase the beautiful layers of your iced coffee. Add a fun straw for extra flair.
-
Toppings: Consider whipping up some cream to top your iced coffee for a café-style experience. You can even sprinkle in some cocoa powder or cinnamon for added aesthetics.
-
Side Treats: Serve your iced coffee with a buttery pastry or a piece of dark chocolate on the side for a little indulgence.
-
Garnish: A mint leaf or a thin slice of orange can add a pop of color and a hint of freshness to your drink.
Recipe Variations
Now that you’ve mastered the classic iced coffee, why not experiment with these fun flavor twists?
-
Mocha Iced Coffee: Add chocolate syrup or a spoonful of cocoa powder before stirring. Top with whipped cream and chocolate shavings.
-
Caramel Macchiato: Drizzle caramel syrup on top after pouring in milk for a sweet treat that’s oh-so-decadent.
-
Nutty Delight: Add a splash of hazelnut syrup for a nutty, comforting flavor that’s hard to resist.
-
Iced Vanilla Latte: Swap out regular milk for vanilla oat milk and add a little extra vanilla syrup for a naturally sweet treat.
-
Spiced Up Iced Coffee: Add a dash of nutmeg or pumpkin spice to your coffee before serving to bring warmth on colder days.
Chef’s Notes
Over the years, I’ve played around with many variations of iced coffee, and let me tell you, it’s evolved into a secret family favorite! From experimenting with different milk substitutes to discovering wonderful syrups, each try has been a delicious journey. Just the other day, I mixed in some lavender syrup on a whim after a herb garden stroll—absolute game changer!
And remember, the beauty of iced coffee is that you can tailor it entirely to your palate. Don’t shy away from trying out new flavors; you may just stumble upon the next big hit at your brunches!
FAQs and Troubleshooting
Why is my iced coffee too weak?
Make sure you’re brewing it stronger than usual, or try using cold brew coffee, which is less acidic and can withstand ice melting.
My ice melted too quickly. What should I do?
Consider freezing coffee into ice cubes! This way, your drink will stay flavorful as the cubes melt.
Can I make iced coffee ahead of time?
Absolutely! Brew, cool, and store your coffee in the fridge for up to a week. This is perfect for easy access, slow mornings, or busy days.
How can I control the sugar levels?
Experiment with different sweeteners—from natural options like honey to less sweet ones. Taste-testing is crucial here!
Nutritional Info
Here’s a quick rundown of the nutritional value for a standard serving when made with whole milk and one tablespoon of sugar:
- Calories: ~200 (excluding flavorings)
- Carbohydrates: ~21g
- Protein: ~5g
- Fat: ~8g
Note: Nutritional values can vary based on the choice of milk, sweeteners, and any added flavorings.
Final Thoughts
And there you have it, my fellow foodies! Your very own guide to creating ice-cold coffee bliss in the comfort of your home. Remember, iced coffee is all about enjoying the process just as much as the end result. So, don’t be afraid to try new combinations, and most importantly, let your creativity shine in the kitchen.
I can’t wait to hear about your homemade iced coffee adventures—drop your flavor combos and stories in the comments below! Until next time, keep sipping, experimenting, and enjoying good food—and coffee! Cheers to iced coffee magic!
Print
Perfect Homemade Iced Coffee
- Total Time: 25 minutes
- Yield: 1 serving 1x
- Diet: Vegetarian
Description
A refreshing and customizable iced coffee recipe that’s perfect for warm days or whenever you need a pick-me-up.
Ingredients
- 1 cup brewed coffee
- Ice cubes
- Milk or cream (to taste)
- Sugar or sweetener (to taste)
- Flavorings (such as vanilla or chocolate syrup, optional)
Instructions
- Brew your coffee using your preferred method.
- Cool it down to room temperature for about 10 minutes.
- Build your base by filling a glass with ice and pouring in the cooled coffee.
- Add milk or cream to taste.
- Sweeten up with your chosen sweetener.
- Make it special by adding any flavorings or extras.
- Stir it up gently to combine all flavors.
- Enjoy your delicious iced coffee!
Notes
Experiment with different milk substitutes and flavorings to find your perfect blend.
- Prep Time: 15 minutes
- Cook Time: 10 minutes
- Category: Beverage
- Method: Brewing
- Cuisine: American
Nutrition
- Serving Size: 1 serving
- Calories: 200
- Sugar: 12g
- Sodium: 100mg
- Fat: 9g
- Saturated Fat: 5g
- Unsaturated Fat: 3g
- Trans Fat: 0g
- Carbohydrates: 21g
- Fiber: 0g
- Protein: 5g
- Cholesterol: 30mg
Keywords: iced coffee, homemade coffee, refreshing drink, summer beverage, coffee recipes

Iced Vanilla Latte (Step-by-Step Recipe)
Iced Vanilla Latte: Your Perfect Summer Sip
Hey, food lovers! It’s Beau Collier here, and I am absolutely thrilled to welcome you to another delicious adventure on Feastical! Today, we’re diving into the world of cool, creamy, and indulgently sweet delights with a refreshing Iced Vanilla Latte. Whether you’re looking to elevate your breakfast game, perk up your afternoon, or just treat yourself to something special, this recipe is your ticket to café-level bliss right at home.
Let’s be real: summer is the season for iced coffee drinks, and nothing captures that vibe quite like a homemade Iced Vanilla Latte. It’s the perfect blend of smooth espresso, sweet vanilla syrup, and creamy milk, all topped over ice. Sound refreshing? It absolutely is! So, kick back, grab your favorite mug (or glass), and let’s create some magic in the kitchen together!
My Coffee-Sipping Story
I can still picture that summer afternoon when coffee transformed my world. I was twelve years old, lounging in my grandmother’s kitchen, surrounded by the warm aroma of freshly brewed coffee. She poured herself a steaming cup of her beloved brew and then—with a twinkle in her eye—added a splash of vanilla. It was as if a whole new flavor dimension exploded! That was my first taste of coffee, and while I didn’t quite appreciate it then, I knew I loved the way it filled the space with warmth.
Fast forward to my early twenties, armed with a newfound love for espresso and a penchant for experimenting in the kitchen, I decided to recreate that moment. I whipped up my first iced vanilla latte, made from the freshest espresso I could find, sweetened with a homemade vanilla syrup that would put store-bought versions to shame. It was bliss in a glass! Each sip took me back to that memory with Grandma, sounds of laughter swirling around us, and a delicious home-cooked meal—the ultimate cozy combination.
So, as we embark on this Iced Vanilla Latte journey together, remember that each drop is more than just a drink; it’s a reminder of the flavors we create and the memories we share.
Ingredients
Here’s what you’ll need to create your own dreamy Iced Vanilla Latte at home:
-
Freshly brewed espresso or very strong coffee
- Why? Espresso brings that robust flavor while magic happens as it cools down over ice. If you don’t have an espresso machine, just brew a robust pot of your favorite coffee to use instead!
-
Vanilla syrup (store-bought or homemade)
- Why? This is the star of our drink. If you’re feeling adventurous, crafting a homemade version with just sugar, water, and vanilla extract can kick the flavor up a notch.
-
Milk of choice (dairy, oat, almond, soy…)
- Why? Your latte, your rules! Almond milk adds nuttiness, oat milk provides creaminess, while whole milk delivers that classic, rich flavor.
-
Ice cubes
- Why? Essential for keeping it chill! Use large ice cubes to slow down melting and avoid a watered-down latte.
-
Optional ingredients: whipped cream, a dash of cinnamon, or a vanilla bean garnish
- Why? Fancy it up! A dollop of whipped cream or a sprinkle of cinnamon adds a touch of indulgence and flavor complexity. A cute vanilla bean makes it look profesh!
Step-by-Step Instructions
Now, let’s get to the good stuff—making our Iced Vanilla Latte! Grab your tools, and let’s do this!
-
Brew Your Espresso:
- Start by brewing 1-2 shots of fresh espresso using your espresso machine.
- Chef Tip: If you’re using coffee instead, aim for a darker roast! The bolder, the better, especially since we’re diluting it with milk and ice.
-
Sweeten It Up:
- While your espresso is still fresh and hot, slowly stir in 1-2 tablespoons of vanilla syrup. This way, it blends beautifully.
- Chef Hack: Adjust the sweetness to your taste. If you like it sweeter, add a little more syrup!
-
Prepare the Ice:
- Fill a tall glass with a generous amount of ice cubes—don’t skimp on this part! Large cubes are great because they melt slower.
- Tip: You can make coffee ice cubes in advance by freezing leftover coffee. No more soggy lattes!
-
Mix It All Together:
- Pour the espresso mixture over the ice, allowing it to chill and serve as the base of your latte.
- Little Pro Tip: For an even cooler drink, chill your glass beforehand!
-
Milk It Up:
- Now, gently pour your choice of milk over the espresso. About 1-½ cups usually works, but you can adjust for your desired creaminess.
- Fun Fact: Layer your milk to create a beautiful ombre effect for an Instagram-worthy shot!
-
Garnish Like a Pro:
- If you’re feeling fancy, top with a swirl of whipped cream, a dash of cinnamon, or a chic vanilla bean.
- Chef’s Choice: A sprinkle of cocoa or chocolate shavings is an irresistible option too!
-
Sip & Enjoy:
- Give it a good stir before diving in to blend the flavors. Then sit back, relax, and revel in your caffeinated creation!
Serving Suggestions
I love serving my Iced Vanilla Latte in a tall, clear glass to showcase that beautiful layered effect! Beyond looks, you can also pair this delight with a variety of treats. If you’re enjoying your latte for breakfast, consider a slice of warm banana bread or some homemade scones. For an afternoon pick-me-up, how about some buttery cookies or a slice of rich chocolate cake? The options are endless, and trust me, the flavor combo will have you dreaming of more!
Recipe Variations
Now that you’ve perfected the classic Iced Vanilla Latte, why not experiment a little? Here are some variations to shake up your routine:
-
Caramel Iced Latte: Swap the vanilla syrup with caramel syrup for a sweet twist that customers rave about at coffee shops!
-
Nutty Iced Latte: Add a tablespoon of hazelnut syrup into the mix for that dreamy nutty flavor—perfect for those coffee connoisseurs!
-
Chai Iced Latte: Replace espresso with strong brewed chai tea for a spiced sensation. Top with steamed milk and a sprinkle of cinnamon!
-
Dairy-Free Bliss: Use coconut milk for a tropical twist that adds both creaminess and a hint of sweetness.
-
Vegan Vanilla Latte: For a dairy-free, vegan option, combine whippable coconut cream with oat milk for a rich finish.
Chef’s Notes
Cooking (and drinking) coffee really goes beyond just following a recipe; it’s a way to connect and indulge. When I first invented this latte recipe, it quickly became a part of my morning routine. I remember inviting friends over during summer weekends, and we’d spend hours sharing stories, laughter, and sipping these beautifully creamy lattes on the porch. It’s amazing how a simple drink can bring people together!
Over time, I’ve learned that experimentation is key, and I’ve tried countless flavor combinations, enjoying every moment in the process. The memories made while sipping on these beverages remind me to appreciate the little moments in life—and let’s face it, they often come accompanied by the best company!
FAQs and Troubleshooting
Q1: My latte tastes weak. What did I do wrong?
A1: If your coffee is weak, it’s likely due to using a light coffee bean or too much milk in proportion to espresso. Opt for a stronger brew and balance the milk.
Q2: Can I make this ahead of time?
A2: Absolutely! You can brew your espresso and mix it with the syrup up to a day ahead, store it in the fridge, and simply add milk and ice before serving.
Q3: How can I make a sugar-free version?
A3: Use sugar-free vanilla syrup or make your own with sugar substitutes! You might want to adjust the ratios to ensure you still capture that sweet flavor.
Q4: Can I froth my milk?
A4: Definitely! Frothing your milk can give your latte a luxurious texture. If you like a frothy latte, consider using a milk frother or heat and froth on the stovetop.
Nutritional Info
Here’s a gentle reminder: your Iced Vanilla Latte can be tailored to fit your nutritional needs. A classic serving (2 shots of espresso, 1 cup of milk, and tbsp of vanilla syrup) contains roughly:
- Calories: 150-250 calories (depending on milk and additions)
- Carbohydrates: 22-32g
- Protein: 7-12g
- Fat: 3-9g (depending on milk choice)
Feel free to adapt the ingredients to make it lighter or richer, as you desire!
Final Thoughts
So, there you have it, my friends! Your very own homemade Iced Vanilla Latte recipe. Whether you’re sipping it solo while enjoying a book or sharing it with loved ones during a summer gathering, this drink is about more than just coffee; it’s about connection, creativity, and making memories.
Remember, the kitchen is where the magic happens. Every sip reflects your unique style, and I can’t wait for you to try this recipe out! So go ahead—get your espresso machine fired up, gather those ingredients, and let’s celebrate together with a delightful Iced Vanilla Latte. Cheers to great flavors and even better moments! Happy sipping!
Print
Iced Vanilla Latte
- Total Time: 10 minutes
- Yield: 1 serving 1x
- Diet: Vegetarian
Description
A refreshing Iced Vanilla Latte combining smooth espresso, sweet vanilla syrup, and creamy milk over ice—perfect for summer.
Ingredients
- 1–2 shots freshly brewed espresso or strong coffee
- 1–2 tablespoons vanilla syrup (store-bought or homemade)
- 1–½ cups milk of choice (dairy, oat, almond, soy, etc.)
- Ice cubes
- Optional: whipped cream, a dash of cinnamon, or a vanilla bean garnish
Instructions
- Brew your espresso by using your espresso machine.
- Sweeten it up by stirring in vanilla syrup while espresso is hot.
- Prepare a tall glass filled with ice cubes.
- Mix it all together by pouring the espresso over ice.
- Milk it up by gently adding your choice of milk.
- Garnish with whipped cream, cinnamon, or a vanilla bean if desired.
- Sip & enjoy your refreshing drink!
Notes
Feel free to experiment with different milk options and syrups for unique variations!
- Prep Time: 5 minutes
- Cook Time: 5 minutes
- Category: Beverage
- Method: Brewing
- Cuisine: American
Nutrition
- Serving Size: 1 serving
- Calories: 200
- Sugar: 20g
- Sodium: 100mg
- Fat: 7g
- Saturated Fat: 4g
- Unsaturated Fat: 2g
- Trans Fat: 0g
- Carbohydrates: 30g
- Fiber: 0g
- Protein: 6g
- Cholesterol: 20mg
Keywords: Iced Vanilla Latte, Coffee, Summer Drink, Refreshing Beverage, Homemade Coffee
Iced Vanilla Whipped Coffee Recipe
Iced Vanilla Whipped Coffee Recipe: Sip Your Way to a Cool Delight!
Hello, fellow food enthusiasts! It’s your buddy Beau Collier here, and today we’re diving into a delightful treat that’s taking social media by storm – that’s right, we’re making Iced Vanilla Whipped Coffee! If you’re like me, some days you just want a little pick-me-up without the fuss. This recipe is perfect for those lazy afternoons or busy mornings when you need a quick yet indulgent coffee experience.
Imagine a frothy cloud of creamy coffee goodness topped with a hint of vanilla that refreshes your spirit just like those sunny beach days. Sounds dreamy, right? Not only does this recipe pack a flavor punch, but it also gives you the satisfaction of sipping on something you crafted with your own hands! Plus, it’s a fantastic way to impress your friends during your next virtual hangout or brunch gathering.
I mean, who wouldn’t love the aesthetic of a frothy cup of coffee, perfectly Instagrammable, with just the right amount of sweet? So, grab your favorite mug and let’s get started on this delightful concoction that’s sure to become a staple in your coffee repertoire.
Personal Story
Let me take you down memory lane for a moment. Picture this: a cozy Sunday morning, the kind where the sun filters through the kitchen windows, casting a golden glow over everything. I was in my mom’s kitchen, the smell of freshly brewed coffee wafting through the air as she whisked together a legendary whipped coffee that had us all under her spell. Her secret ingredient? A splash of vanilla that seemed to dance through the air like magic.
It became our special weekend ritual. We would sit together with our mugs, chatting about life, dreams, and what we’d be whipping up for dinner that evening. I remember this one time she accidentally added too much sugar, and we both burst out laughing as we tried to swallow the overly sweet concoction. Oh, the chaos we created!
That simple moment, sipping on whipped coffee while laughing at our little kitchen mishaps, sparked my passion for cooking and making meaningful memories around food. Fast forward to today, and I want to create that same magic for you with this Iced Vanilla Whipped Coffee recipe. Trust me, it’s just as sweet (and much less messy) than those Sundays of my childhood, and it’ll make your mornings a little brighter.
Ingredients
Here’s what you’ll need to make this delightful beverage, along with some handy tips from your kitchen buddy:
-
Instant coffee powder (2 tablespoons)
Instant coffee is your best friend in this recipe because it dissolves quickly and whips up beautifully. If you prefer, you can use a strong brewed coffee instead, but the whipped texture won’t be the same. -
Cane sugar or coconut sugar (2 tablespoons)
This adds just the right amount of sweetness. Feel free to use your favorite sweetener, but remember that liquid sweeteners (like honey or agave) won’t whip as well. -
Hot water (2 tablespoons)
This helps dissolve the coffee and sugar for a smooth whip. The hotter, the better! -
Unsweetened oat milk, cold (300 ml)
Oat milk creates a creamy, buttery texture. Prefer another milk? Almond or soy works just as well! -
Vanilla extract (½ teaspoon)
This is what escalates our coffee from ordinary to fabulous! If you’re feeling adventurous, try using flavored syrups or even espresso powder for a twist. -
Ice cubes (1 cup)
This is essential for our iced coffee experience! Don’t skimp on the ice; it makes everything cold and refreshing.
Each ingredient plays a vital role in creating that delicious frothy magic you’ll be sipping on. Don’t hesitate to experiment with them to find the perfect balance for your taste buds!
Step-by-Step Instructions
Alright, let’s get to the fun part! Here’s how to whip up that Iced Vanilla Whipped Coffee in just a few easy steps:
-
Gather Your Ingredients: First things first, make sure you’ve got everything ready. You don’t want to be running around when it’s time to whip!
-
Mix Coffee, Sugar, and Hot Water: In a mixing bowl, combine 2 tablespoons of instant coffee powder, 2 tablespoons of cane or coconut sugar, and 2 tablespoons of hot water. Grab a whisk (or a hand mixer if you’re feeling fancy) and get ready to whisk away!
*Chef Tip: A hand mixer saves time and gives you that light frothy texture in just 2-5 minutes. If you’re whisking by hand, channel your inner arm workout. You’ll be surprised how cardio and coffee can go hand in hand!
-
Whip Until Light and Fluffy: Whisk the mixture vigorously until it turns a lovely light brown color and voluminous texture forms. Honestly, it should resemble a thick whipped cream! It should take around 3-5 minutes with a mixer and about 8-10 minutes by hand.
*Chef Hack: Make this a group project! Challenge your friends and family to a whisk-off—set a timer, see who can whip the fastest!
-
Prepare Your Glass: In a tall glass, fill it up with ice cubes (no skimping, okay?). Then, pout in the cold oat milk about three-quarters of the way up.
-
Add Vanilla Extract: Add the ½ teaspoon of vanilla extract into your cold oat milk. This adds dimension to your coffee and enhances that flavor profile.
-
Top with Whipped Coffee: Scoop the whipped coffee mixture on top of your glass filled with oat milk. Pile it high, friends! You want it to look lofty and indulgent.
*Chef Tip: For a fancy touch, you can drizzle some caramel or chocolate sauce on top. Feel free to get artsy with it—it’s a treat for the eyes too!
-
Mix and Serve: Before you sip, stir the whipped coffee and oat milk together for a luscious, creamy experience. Serve immediately and enjoy!
Serving Suggestions
Now you have your stunning Iced Vanilla Whipped Coffee ready to go! Here are a few serving suggestions to make it even more delightful:
-
Garnish: A sprinkle of cocoa powder or cinnamon on top can elevate the presentation and add an extra flavor boost. A dusting of nutmeg is perfect for a festive flair!
-
Mugs or Glassware: If you’re feeling fancy, serve your coffee in stylish glassware or mason jars for that rustic vibe. It adds a personal touch that’s sure to impress your guests.
-
Pairing: Enjoy it with a delicious pastry, like a buttery croissant or homemade cookie. The balance of sweet creamy coffee with baked goodness is a match made in heaven.
Recipe Variations
Let’s take this Iced Vanilla Whipped Coffee to the next level with some fun variations:
-
Mocha Magic: Mix in 1-2 tablespoons of cocoa powder into your whipped coffee for a chocolatey twist. Who doesn’t love chocolate and coffee?
-
Spicy Chai Delight: Swap out vanilla extract for chai spice or pumpkin pie spice. It’s perfect for chilly days or for adding a new dimension to your coffee experience.
-
Nutty Flavor: Blend in a tablespoon of hazelnut or almond extract for a nutty surprise.
-
Vegan Whipped Cream: For those looking for a whipped cream alternative, try coconut cream! Whip it up just the same and then drape it on top for a tropical twist.
-
Cold Brew Replacement: Have cold brew? Use it in place of oat milk for a richer, heartier cup. Just keep the ratio to avoid overpowering the whipped topping.
Chef’s Notes
I’ve played around with this recipe over the years, adapting it to fit different occasions, and let me tell you, it never disappoints! I even remember one summer when I tried to replicate this dish with cold brew, and it turned out to be a glorious accident! Sometimes, the kitchen can be as unpredictable as a thrift store on a Saturday morning — you never know what you’ll find!
I often make this iced coffee on lazy weekday mornings where I might still be in my pajamas, just flicking through my phone. It feels indulgent and gives me that recharge I need to tackle the day ahead.
FAQs and Troubleshooting
1. My whipped coffee isn’t fluffing up. What did I do wrong?
Make sure you’re using instant coffee. Regular ground coffee won’t whip up like instant, and always check your mixer time. If you whisk long enough, you’ll get there!
2. Can I make this ahead of time?
While it’s best enjoyed fresh, you can whip the coffee mixture ahead and store it in the fridge for a day. Just whip it again lightly before serving.
3. It’s too sweet for my taste. What now?
Adjust the sugar to your preference! You can always use less, and if it’s already mixed in, add a bit more oat milk to dilute it.
4. Can I use hot milk instead of cold?
You can, but you’ll end up with a hot drink. The true experience of this recipe is enjoyed when served cold!
Nutritional Info
While I’m all about enjoying good food, it’s also great to know what we’re putting into our bodies. Here’s a rough estimate of the nutritional info per serving (based on the ingredients listed):
- Calories: 270 kcal
- Protein: 3g
- Carbohydrates: 55g
- Fat: 5g
- Sugars: 40g
- Fiber: 1g
Remember, these numbers can vary based on the specific ingredients you choose, especially if you opt for different milk or sweeteners!
Final Thoughts
And there you have it, folks—your new go-to drink for that delightful burst of coffee goodness! This Iced Vanilla Whipped Coffee is not just a beverage; it’s an experience, a memory-making opportunity that brings joy and refreshment to your day.
Whenever you brew this recipe, may it take you back to those sunny mornings of laughter and warmth, just like it does for me. So, let’s whip up some coffee love and brighten up our days, one sip at a time. And if you try this recipe, tell me about your experience—I’d love to hear your kitchen stories!
Now go forth, sip happy, and spread that coffee cheer! You’ve got this!
Print
Iced Vanilla Whipped Coffee
- Total Time: 10 minutes
- Yield: 1 serving 1x
- Diet: Vegan
Description
A delightful treat that’s perfect for lazy afternoons or busy mornings, this Iced Vanilla Whipped Coffee offers a frothy cloud of creamy coffee goodness with a hint of vanilla.
Ingredients
- 2 tablespoons Instant coffee powder
- 2 tablespoons Cane sugar or coconut sugar
- 2 tablespoons Hot water
- 300 ml Unsweetened oat milk, cold
- ½ teaspoon Vanilla extract
- 1 cup Ice cubes
Instructions
- Gather your ingredients.
- Mix coffee, sugar, and hot water in a bowl.
- Whip the mixture until light and fluffy.
- Prepare your glass with ice cubes and pour in oat milk.
- Add vanilla extract to the oat milk.
- Top the glass with whipped coffee mixture.
- Mix and serve immediately.
Notes
For a fancy touch, drizzle some caramel or chocolate sauce on top. Garnish with cocoa powder or cinnamon for extra flavor.
- Prep Time: 10 minutes
- Cook Time: 0 minutes
- Category: Beverage
- Method: Whipping
- Cuisine: American
Nutrition
- Serving Size: 1 serving
- Calories: 270
- Sugar: 40g
- Sodium: 5mg
- Fat: 5g
- Saturated Fat: 0g
- Unsaturated Fat: 5g
- Trans Fat: 0g
- Carbohydrates: 55g
- Fiber: 1g
- Protein: 3g
- Cholesterol: 0mg
Keywords: whipped coffee, iced coffee, vanilla coffee